Chipotle Rice with Shrimp and Cilantro

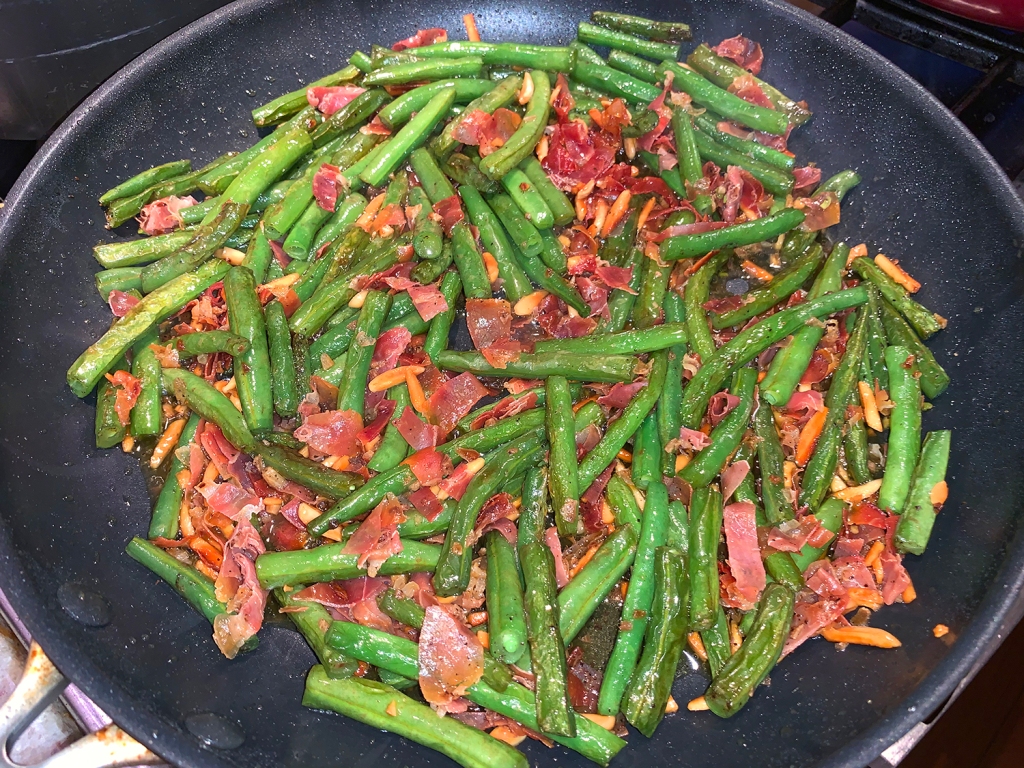
This recipe from Milk Street is an adaptation of one from “More Mexican Everyday” by Rick Bayless. Adding the shrimp at the end, after the rice has steamed, and allowing them to cook gently with residual heat ensures they are plump and tender and not overdone. Then layer in herbal notes by simmering minced cilantro stems with the rice, and folding in chopped cilantro leaves just before serving.

The entire bunch of cilantro goes into this one pot meal, so you’d better be committed. We happen to love the herb, but I know several folks who think it tastes like soap and/or have an issue digesting it. Parsley could be an option, but the flavor profile will be altogether different.

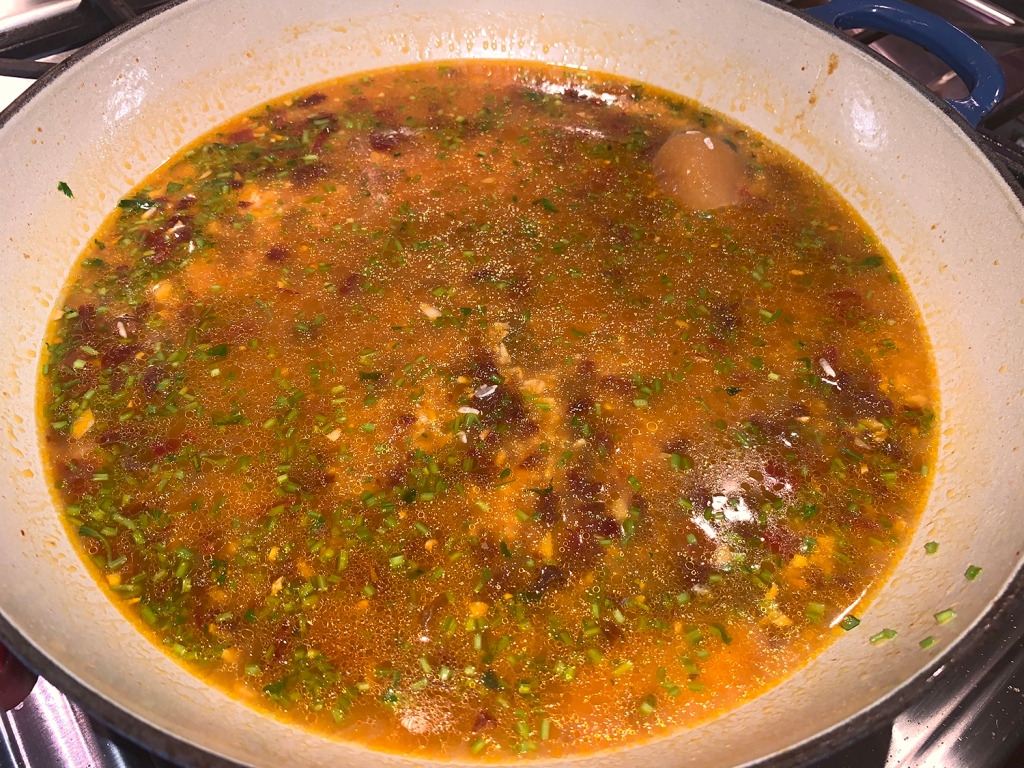
When looking at the ingredients, I thought why not use our homemade shellfish stock instead of chicken broth? Makes more sense when the star protein is shrimp. And speaking of the liquid component, do yourself a huge favor and read the amount necessary shown on the package of long grain rice that you are using.

The original recipe said to use two cups and that’s initially what we did. We checked the rice doneness after 15 minutes, again after 20 minutes and a final time at 25 minutes and the rice was STILL not done. Finally I checked the package which says to use 3 cups liquid per 1 1/2 cups rice, duh!

We had to remove the shrimp to a plate and cover with foil. Measure another cup of stock, heat it in the microwave, pour it back into the pan, cover and simmer for an additional 5 minutes. Then once again, remove the pan from the heat, add the shrimp back to the mixture, cover and let sit for a couple minutes more before adding the cilantro.

Just sayin’, read your rice package for the proper amount of liquid and save your self the headache… Then enjoy the feast, it was fabulous and the shrimp were tender and succulent.

Chipotle Rice with Shrimp and Cilantro

  • Servings: 4
  • Difficulty: easy
  • Print

Ingredients

  • 1 lb. extra-large (21/25 per pound) shrimp, peeled (tails left on), deveined and patted dry
  • Kosher salt and ground black pepper
  • 2 Tbsp. grapeseed or other neutral oil
  • 4 medium garlic cloves, finely chopped
  • 2 chipotle chilies in adobo sauce, minced
  • 1 bunch cilantro, stems minced, leaves chopped, reserved separately
  • 1½ cups long-grain rice, rinsed and drained
  • ½ cup golden raisins
  • 2-3 cups chicken or shellfish stock*

Directions

  1. Season the shrimp with ½ teaspoon each salt and pepper; set aside at room temperature.
  2. In a large saucepan over medium, cook the oil and garlic, stirring often, until the garlic is just barely golden, 2 to 3 minutes.
  3. Stir in the chipotle chilies, cilantro stems, rice and raisins, then add the broth and 1 teaspoon salt. Bring to a simmer over medium-high, then cover and reduce to low. Cook until the rice is tender and the liquid has been absorbed, 15 to 20 minutes.
  4. Uncover the pan and scatter the shrimp evenly over the rice. Re-cover, remove from the heat and let stand for 10 minutes.
  5. Gently fluff the rice with a fork, folding in the shrimp. Re-cover and let stand until the shrimp are opaque throughout, another 5 to 7 minutes.
  6. Stir in the cilantro leaves, then taste and season with salt and pepper.

*TIPS: Read your rice package label for the correct amount of liquid for 1 1/2 cups. Don’t lift the lid to peek at the shrimp after they’ve been added to the pan, except to stir them into the rice. Uncovering releases the residual heat needed for gently cooking the shrimp.

http://www.lynnandruss.com

Cheesesteak Meatloaf Paired with Ratatouille

Folks in much of the U.S. start to breathe a sigh of relief as the temps and humidity become more humane. With the welcome respite, we start craving comfort foods that haven’t made appearances on our dinner table since the early Spring. Meatloaf comes to mind as one of those cool-weather comfort foods, and here’s one with a local twist: Philly Cheesesteak Meatloaf.

I found this recipe on dinnerthendessert.com and decided it was worth a try, after all Philadelphia is our “mother” city, the place we refer to when on vacay and asked where we call home. It contains not only ground beef but green bell peppers, onions and mushrooms, and is topped and stuffed with provolone cheese. Not exactly haute cuisine, but certainly worth a try. And BTW, it is fantastic leftover!

Typically I like to serve mashed potatoes with meatloaf, but The Hubs suggested we pair it with a Farmers Market Ratatouille recipe found in our latest issue of Fine Cooking magazine. It is an example of simple food, prepared in a way to let humble ingredients shine that gets even tastier as it sits. You could even make it the day before, let the flavors meld in the refrigerator and reheat it when ready. A win-win in my book.

For a touch more depth of flavor, I included 1 teaspoon dried oregano, two dried bay leaves and a pinch of red pepper flakes. Keep in mind, the ratatouille is done in a slow cooker and takes over 6 hours total including the prep, so plan ahead. But you will love it because it’s rich in flavor, gluten-free, vegetarian, and absolutely delicious! If you have a non-meat eater in the household, they could make this their main course along with a hefty slice of crusty bread.

The directions instruct to employ a 6-quart slow cooker. We used our 7-quart model and it was filled to the brim initially, but everything cooked down to about half by the end. So you might want to start with a larger cooker if you have one. Oh, and feel free to throw in any errant veggies you may have lurking in the fridge. We had one cooked ear of corn, so I shaved off the kernels and threw them in for the last several minutes before the basil.

Philly Cheesesteak Meatloaf

  • Servings: 6-8
  • Difficulty: easy
  • Print

Ingredients

  • 2 Tbsp. butter
  • 1 small yellow onion, diced
  • 1 small green bell pepper, diced
  • 8 oz.s brown mushrooms, minced
  • 1/2 tsp. Kosher salt
  • 1/2 tsp. fresh ground black pepper
  • 2 lbs. lean ground beef, 85/15
  • 2 Tbsp. ketchup
  • 2 Tbsp. Worcestershire sauce
  • 2 eggs
  • 1 cup panko breadcrumbs
  • 8 oz. Provolone cheese slices

Directions

  1. Preheat the oven to 375 degrees and spray a large loaf pan with cooking spray.
  2. In a large skillet over medium high heat, add the butter and the onions and bell peppers, mushrooms, salt and pepper.
  3. Let brown for 3 minutes before stirring, then let brown for another 1-2 minutes before stirring again.
  4. Let cool for five minutes.
  5. In a large bowl add the ground beef, ketchup,Worcestershire sauce, eggs, panko breadcrumbs and the cooled vegetable mixture.
  6. Add half the mixture to your loaf pan then add half of the cheese, overlapping the slices.
  7. Cover with the rest of the meat and form into a flat-top loaf shape. Place your loaf pan on a rimmed baking sheet and put in the oven.
  8. Cook for 40 minutes, then pull out of the oven. Remove any excess grease from the corners with a baster. Cover with remaining cheese and put back in the oven.
  9. Cook for 15-20 minutes, then let rest for 10 minutes before cutting.

http://www.lynnandruss.com

Farmers Market Ratatouille

Farmers Market Ratatouille

  • Servings: 6-8
  • Difficulty: easy
  • Print

Ingredients

  • 1/3 cup extra-virgin olive oil
  • 4 large (at least) garlic cloves, finely chopped
  • 1, 6-oz. can tomato paste
  • 1 medium eggplant, trimmed and cut into 1/4-inch dice
  • 3 medium Roma tomatoes, seeded and chopped
  • 1 large red onion, coarsely chopped
  • 1 medium red bell pepper, cut into 3/4-inch pieces
  • 1 medium yellow bell pepper, cut into 3/4-inch pieces
  • 1 medium zucchini, trimmed and cut into 3/4-inch dice
  • 1 medium yellow summer squash, trimmed and cut into 3/4-inch dice
  • 2 dried bay leaves
  • 1 tsp. dried oregano
  • Pinch of red pepper flakes
  • Kosher salt and freshly ground black pepper
  • 1 lightly packed cup thinly sliced basil

Directions

  1. Heat the oil in a small skillet over medium heat until shimmering. Add the garlic, remove from the heat, and let cool 5 minutes
  2. Stir in the tomato paste until smooth.
  3. Combine all of the prepped veggies (except the basil) in a 6-qt. (or larger) slow cooker. Add the tomato paste mixture, bay leaves, dried oregano, red pepper flakes, 1 1/4 teaspoon salt and 1/4 teaspoon pepper; stir well.
  4. Cover and cook on low until the vegetables are tender, about 5 hours.
  5. Remove the lid, and continue cooking until some of the liquid evaporates, about 30-45 minutes.
  6. Stir in the basil, season to taste with salt and pepper, and serve or cool and refrigerate until ready to eat.
Uncover and continue cooking for 30-45 minutes to evaporate some of the liquid.

http://www.lynnandruss.com

Braised Red Cabbage With Apples

What do you do with a red cabbage leftover from a Farmers Market Arrangement made for your garden club? I know this is a dilemma for many of you…

Initially, my red cabbage was part of this arrangement.

Kidding aside, cooler October temps invite the braising season to commence. And this is one of those dishes that’s even better the following day, so go ahead and make it when you have time and then serve it on a weeknight with quick cooking chops of some sort.

Be sure to soak the shredded cabbage in cold water as suggested in Step 1. The cabbage absorbs water, which is then released in cooking, and helps to steam the cabbage for utmost tenderness.

We concur, this is probably THE BEST braised cabbage we’ve ever had, and no sugar!

Braised Red Cabbage with Apples

  • Servings: 8
  • Difficulty: easy
  • Print

Ingredients

  • 1 large red cabbage, 2 to 2 1/2 pounds, quartered, cored and cut crosswise in thin strips
  • 2 Tbsp. canola oil
  • 1 small onion, thinly sliced
  • 2 tart apples, such as Braeburn or granny smith, peeled, cored and sliced
  •  About 1/3 cup balsamic vinegar
  • ¼ teaspoon ground allspice
  •  Salt
  •  Freshly ground pepper to taste

Directions

  1. Prepare the cabbage, and cover with cold water while you prepare the remaining ingredients.
  2. Heat the oil over medium heat in a large, lidded skillet or casserole, and add the onion. Cook, stirring, until just about tender, about three minutes.
  3. Add 2 tablespoons of the balsamic vinegar and cook, stirring, until the mixture is golden, about three minutes, then add the apples and stir for two to three minutes.
  4. Drain the cabbage and add to the pot. Toss to coat thoroughly, then stir in the allspice, another 2 tablespoons balsamic vinegar, and salt to taste. Toss together.
  5. Cover the pot, and cook over low heat for one hour, stirring from time to time.
  6. Add freshly ground pepper, taste and adjust salt, and add another tablespoon or two of balsamic vinegar as desired.

http://www.lynnandruss.com

Recipe from Martha Rose Shulman for The NY Times

Pork Chops and Cabbage with Mustard Cream Sauce

Thin center-cut pork chops, quick-cooking cabbage and a simple sauce make this German-style dish a great option for busy weeknights. This one-skillet recipe is keto-friendly, too. BUT, we used two thick, bone-in chops and added some cooked egg noodles (thus eliminating the keto-friendly advantage).

In addition, we added sliced garlic and increased the amount of onion from 1/2 to a whole onion. Because our chops were bone-in and thicker, we did have to increase the cooking time slightly. Use an instant-read thermometer to check the temperature which should come to 150°. The temp will rise slightly while resting under foil.

In the end, the meal was fantastic and loved the fact that we had leftovers!

Pork Chops and Cabbage with Mustard Cream Sauce

  • Servings: 4
  • Difficulty: easy
  • Print

Ingredients

  • 4 thin center-cut boneless pork chops (about 1 pound total)
  • 1/2 tsp. kosher salt
  • 1/2 tsp. freshly ground black pepper
  • 2 Tbsp. extra-virgin olive oil, divided
  • 1 onion, finely diced
  • 4 garlic cloves, thinly sliced
  • 1/2 head green cabbage, roughly chopped (about 1 pound)
  • 1 Tbsp. butter
  • 3/4 cup heavy whipping cream
  • 2 Tbsp. Dijon mustard
  • 2 Tbsp. fresh lemon juice
  • 1/4 tsp. white pepper, or to taste
  • Chopped fresh parsley, for garnish

Directions

  1. Pat the pork chops dry and season with salt and pepper.
  2. In a large skillet over medium-high heat, heat the oil over until shimmering. Add the chops and cook until browned on one side, about 4 minutes. Turn the chops and cook until browned on the other side, about 3 minutes. (If the chops are browning too quickly, lower the heat.) Transfer the chops to a plate and cover with foil to keep warm.
  3. Add the onion to the skillet and stir, cooking until the onion is softened and nearly translucent, 6 to 8 minutes. Stir in the cabbage and cook until the cabbage is tender, 5 to 8 minutes. Add the butter, if using, and toss to coat the cabbage. (If the chops are lean, butter will enhance the flavor.) Transfer the cabbage mixture to a serving platter and cover to keep warm.
  4. Lower the heat to medium. Add the cream and mustard to the skillet and stir until the mustard is fully incorporated, about 1 minute. Add the lemon juice and white pepper; stir to combine.
  5. Add the chops back to the skillet. Lowe the heat to medium-low and simmer until the sauce thickens slightly, about 5 minutes, basting the chops with the sauce.
  6. Place the chops on top of the cabbage on the serving platter. Drizzle the chops and cabbage with the remaining sauce, garnish with the parsley and serve.

http://www.lynnandruss.com

Recipe compliments of Tom McCorkle for The Washington Post

Flap Steak and Tik Tok Taters

The sizzling arrival of cast-iron plates of marinated steakhouse steak tips is often the most exciting part about them, so says Cook’s Country. In this version of Grilled Steakhouse Steak Tips, they replace the typical sickly sweet marinade culprits—ketchup, barbeque sauce, and cola—with a mixture of soy sauce, oil, dark brown sugar, and tomato paste for enhanced meaty flavor and maximum char. WOW, great results!

Typically, if you can even find it (hello Costco), flap meat is sold as whole steaks, strips, and pieces. For even pieces, buy a whole steak of uniform size and cut it up yourself. We’ve only found it at Costco sold in thick strips, but that is perfect for this method. And instead of cutting it down into 2 1/2-inch pieces we kept them to about 5 inch lengths.

This is not your grandma’s steak and potatoes recipe. The marinade has a hint of sweetness from the brown sugar but otherwise is a great companion to beefy flap meat. If you get the opportunity, try to marinate for the total 24 hours, but a minimum of 2 hours will provide enough flavor. If, like us, you are medium-rare fans, take the steaks off when they reach 125-130° (they may have to come off at separate times). Cover with foil and let rest for 5-10 minutes.

As an accompaniment, we made these fabulous potatoes which The Hubs found in a video on Tik Tok, thus we named them “Tik Tok Taters”. We made a major alteration to the directions however because after initially boiling the potatoes for the 20-25 minutes as indicated, they were beyond fork tender and falling apart. So we shortened the boiling time in this phase to 12-15 minutes, which is shown in the directions below.

In this photo op, I inadvertently staged “light” brown sugar when the recipe calls for “dark” brown.

Grilled Steakhouse Steak Tips

  • Servings: 4-6
  • Difficulty: easy
  • Print

Ingredients

  • ⅓ cup soy sauce
  • ⅓ cup vegetable oil
  • 3 Tbsp. packed dark brown sugar
  • 5 garlic cloves, minced
  • 1 Tbsp. tomato paste
  • 1 Tbsp. paprika
  • ½ tsp. pepper
  • ¼ tsp. cayenne pepper
  • 1 (2 1/2-pound) beef flap meat

Directions

  1. Whisk soy sauce, oil, sugar, garlic, tomato paste, paprika, pepper, and cayenne together in bowl until sugar dissolves; transfer to zipper-lock bag.
  2. Pat beef dry with paper towels. Prick beef all over with fork and cut into 2 1/2-inch pieces. Add meat to bag with soy mixture and refrigerate for 2 to 24 hours, turning occasionally.
  3. For a gas grill, turn all burners to high, cover, and heat grill until hot, about 15 minutes.
  4. Clean and oil cooking grate. Cook beef (covered if using gas) until charred and registers 125 to 130 degrees (for medium-rare), 7 to 8 minutes.
  5. Transfer meat to platter, tent loosely with foil, and rest for 5 to 10 minutes. Serve.

http://www.lynnandruss.com

Tik Tok Taters

Tik Tok Taters

  • Servings: 4-6
  • Difficulty: easy
  • Print

Ingredients

  • 5 large russet potatoes, peeled and cut in half lengthwise, then cut each piece into 3 chunks
  • 1/4 cup Kosher salt + 1 Tbsp., divided
  • 1 tsp. baking soda
  • 1 Tbsp. fresh rosemary, minced
  • 1/4 cup + 2 Tbsp. Extra-virgin olive oil, divided

Directions

  1. Boil peeled russet potatoes in water with 1/4 cup salt and the baking soda for 12-15 minutes, until just barely fork tender on the outer edges.
  2. Drain potatoes and toss with 2 tablespoons olive oil, 1 tablespoon each salt and rosemary.
  3. Preheat oven to 400° convection (or 425° regular) with empty roasting pan inside.
  4. When hot, add more olive oil (about 1/4 cup) to coat the bottom, then add drained and seasoned potatoes.
  5. Return pan to oven and roast 35-40 minutes, carefully turning potatoes every 10-12 minutes.

http://www.lynnandruss.com

If you’re so inclined, you can check out the YouTube video here:

https://www.yahoo.com/amphtml/lifestyle/roast-potato-hack-tiktok-baking-soda-102805915.html

Meatless Pasta with Lemony Breadcrumbs

What to do for dinner in late-summer/early-fall with an abundance of grape tomatoes and fresh herbs? Well that would be Skillet Burst Grape Tomato Casarecce with Lemony Breadcrumbs. It’s a very simple pan roasted grape tomato pasta with white wine, garlic, fresh herbs, topped with the most crunchy lemony breadcrumbs, and finished with luscious burrata cheese.

Don’t forget to add that luscious dollop of fresh burrata.

This perfect late-summer dinner is ready in under 30 minutes using basic pantry staples and end-of-season garden bounty. If you’ve never used it, Casarecce pasta is a very narrow, twisted, and rolled tube, almost resembling a scroll. If you can’t find it, substitute a similar twisted, tubular pasta like cavatappi, cavatelli, gemelli, or fusilli.

If you have any leftovers, keep the bread crumbs and buratta separate. When ready to eat, reheat the pasta in a microwave for a few minutes, then top with crumbs and cheese.

Skillet Burst Grape Tomato Casarecce with Lemony Breadcrumbs

  • Servings: 6
  • Difficulty: easy
  • Print

Ingredients

  • 1 cup finely torn ciabatta bread
  • 1/4 cup extra virgin olive oil
  • Crushed red pepper flakes to taste
  • Zest of 1 lemon
  • 1 pound casarecce pasta, or other twisted tubular pasta
  • 1 1/4 lbs. red and yellow grape tomatoes
  • 6-8 cloves garlic, smashed
  • 2 Tbsp. fresh thyme leaves
  • 1 Tbsp. chopped fresh oregano
  • 1/3 cup dry white wine
  • 1/2 cup manchego cheese, grated
  • 2 cups fresh basil, roughly chopped
  • 2 balls fresh burrata cheese, each ball split in two

Directions

  1. In a large skillet set over medium heat, add 2 tablespoons olive oil. When the oil shimmers, add the bread, a pinch of red pepper flakes and pinch of kosher salt. Cook, stirring occasionally until golden and toasted all over, about 5 minutes.
  2. Remove from the heat and stir in the lemon zest. Slide bread crumbs onto a plate. Wipe the skillet clean. 
  3. Bring a large pot of salted water to a boil. Add the pasta and cook according to package directions until al dente. Just before draining, remove 1 cup of the pasta cooking water. Drain.
  4. Meanwhile, place the same skillet used for the bread over high heat and add the remaining olive oil. When the oil shimmers, add the tomatoes, garlic, thyme, and oregano, and a pinch each of salt, pepper, and red pepper flakes. Cook until the tomatoes begin to pop, about 4-5 minutes. Pour in the wine, cook 1 minute.
  5. Add the pasta and a splash of the pasta cooking water to the skillet, tossing to combine. Remove from the heat and add the manchego cheese and basil, toss to combine. If needed, thin the pasta sauce with a little of the reserved cooking water.
  6. Divide the pasta among shallow bowls, nestle in half a burrata ball, and top with bread crumbs.

http://www.lynnandruss.com

Loosely adapted from a recipe found on halfbakedharvest.com

Ancho Chile Pork Burgers

This was one of those days that we knew there wouldn’t be much time to prepare and cook dinner because we planned on spending all day at the beach, probably the last hurrah of the season in late September. I thought cheeseburgers would be an easy fix.

The day prior, I pulled a package of Trader Joe’s ground pork out of the freezer to thaw and noted we had brioche buns, plus lettuce, tomato and onion on hand for garnish. Perfect. Then, while standing in line at the local farmer’s market, I glanced at a display of Urban Accent seasoning mixes and saw one for Ancho Chile Pork Burgers. More Perfect!

I rarely tout product placement in my blog, but it seemed that this serendipitous combination was just meant to be, so I ran with it. The bold spice blend will pack your burger with the smoky flavors of ancho and chipotle chiles, paprika, coriander, allspice, and sweet brown sugar. But if you’re not into pork burgers, Urban Accents Ancho Chile Pork Burger blend also goes great with beef, turkey or even a veggie burger!

My brilliant solution to pull everything together was a mix of mayonnaise and adobo sauce (gotten from a can of smoked chipotle chiles). Mix and spread on both bun bottoms and tops. Along with a side of Bush’s Black Bean Fiesta—another timesaver which contained chipotle seasoning—we enjoyed a super flavorful meal in no time.

Of course you can use whatever toppings float your boat, but we decided Swiss cheese melted on top—in fact two slices per burger—plus the lettuce, tomato and onion trinity, added color, flavor and a skosh of healthy nutrients.

Ancho Chile Pork Burgers

  • Servings: 3-4
  • Difficulty: easy
  • Print

Ingredients

  • 1 lb.ground pork
  • 1 package Urban Accents Ancho Chile Pork Burger seasoning
  • 1 Tbsp. canola oil
  • Swiss cheese slices, at least 3
  • 3 Tbsp. mayo
  • 1 1/2 Tbsp. adobo sauce
  • 3-4 brioche buns
  • Tomato and onion, sliced thin for garnish
  • Bibb lettuce leaves for topping

Directions

  1. Break apart ground pork into a medium bowl. Sprinkle in Urban Accents seasoning and mix with hands until evenly distributed trying not to overwork it. Form into 3 (or 4) uniformed sized patties.
  2. Add oil to a large skillet over medium-high heat until oil is shimmering. Add patties to skillet and sear on one side until brown, about 5 minutes.
  3. Flip the patties and sear the other side, again until browned and internal temperature reaches 150°. During the last minute, add cheese slices, top with a lid until cheese melts, maybe 1 minute more.
  4. Meanwhile, mix the mayo and adobo sauce (add or subtract according to personal preference) until thoroughly mixed and spread on both sides of each bun.
  5. Place the burger on bottom of bun and top with remaining garnishes.

http://www.lynnandruss.com

Spiced Chicken with Corn, Mushrooms and Zucchini

Although summer produce season was nearing its end, we easily scored some fresh corn and zucchini to make this flavorful Spiced Chicken with Corn, Mushrooms and Zucchini. It’s a one pan meal that’s ready in a total of 45 minutes. Cooked in a skillet, the spiced chicken takes on a brick-red hue with a moderately spicy kick. (You can adjust the amount of heat by adding or eliminating the amount of cayenne.)

Here gochugaru—Korean red chile flakes—imbues this one-skillet chicken and vegetable supper with its deep, savory flavor, gentle heat and a hint of smokiness. But don’t fret if you can’t find gochugaru, just substitute ancho chile powder, regular chili powder or chipotle chile powder (or choice) for a delicious but different taste profile. Add more cayenne or eliminate it to adjust the level of heat, which is moderate as written. (Gochugaru can be found at Asian markets, well stocked supermarkets or online.)

I got carried away and pounded the chicken breasts down to a 1/4″ instead of the indicated 1/2″. Not a problem as long as the meat is not overcooked and dried out. Adjust the cooking time so that the poultry registers 160°, then move to a plate and cover with foil.

The amount of chicken we made was over 1 1/2 pounds, which when hammered down made 4 large cutlets, and therefore had to be cooked in 2 batches. Once the veggies are done, pour the accumulated chicken juices into the pan and stir to distribute.

Yes, you can make this meal with frozen corn, but you will suffer from a loss of flavor. This summer was THE BEST corn season we’ve experienced in a long time. And this last batch in particular was astoundingly sweet and juicy!

Spiced Chicken with Corn, Mushrooms and Zucchini

  • Servings: 4
  • Difficulty: easy
  • Print

Ingredients

  • 1 1/2 tsp. gochugaru (Korean chile flakes; may substitute ancho chile powder, regular chili powder or chipotle chile powder)
  • 3/4 tsp. kosher salt, divided
  • 1/2 tsp. granulated garlic
  • 1/8 tsp. cayenne pepper, or to taste
  • 1 1/4 lbs. boneless skinless chicken breast, pounded to 1/2-inch thick
  • 2 Tbsp. canola oil or another neutral oil, divided
  • 8 oz. fresh shiitake mushrooms or a mix of mushrooms such as shiitake, oyster and/or cremini, sliced
  • 2 to 3 Tbsp. water, plus more as needed
  • 1/4 cup thinly sliced scallions, white and light green parts, plus dark greens for garnish
  • 1 Tbsp. minced or finely grated fresh ginger
  • 1 medium zucchini (8 ounces), trimmed, quartered lengthwise and sliced 1/2-inch thick
  • 3-4 ears of corn, kernels sliced from cob

Directions

  1. In a small bowl, combine the gochugaru, 1/4 teaspoon salt, the granulated garlic and cayenne pepper. Sprinkle the spice mixture onto both sides of the chicken, rubbing it in a little with your fingers.
  2. In a large skillet over medium-high heat, heat 1 tablespoon oil until shimmering. Add the chicken to the pan, reduce the heat to medium and cook until cooked through, 4 to 5 minutes per side. Transfer the chicken to a plate.
  3. Add the remaining 1 tablespoon oil to the pan, followed by the mushrooms and 1/4 teaspoon salt. Add the water if the pan seems dry, and cook, stirring occasionally, until the mushrooms have released their liquid and begin to brown, about 5 minutes.
  4. Stir in the scallions and ginger and cook until they soften, about 1 minute.
  5. Add the zucchini, corn and the remaining 1/4 teaspoon salt and cook until the vegetables are tender, 3 to 5 minutes. If the pan seems dry, add more water as needed, a couple of tablespoons at a time.
  6. Pour any accumulated juices from the chicken into the pan with the vegetables, and then slice the chicken into strips.
  7. Serve the vegetables with the sliced chicken on top or on the side.

http://www.lynnandruss.com

Loosely adapted from a recipe by Laura Chase de Formigny for The Washington Post

When Baked Chicken is What You Crave.

On vacation in Hilton Head in mid-September, and with plans to check out as many restaurants as the schedule would allow, we also anticipated dining in, at least a few evenings. The Hubs and I drove down with good friend Merry Sue (owner of the time share) which sported a modern, fully-equipped kitchen. As her guests, we promised to make dinner a couple of nights, although we had no pre-planned menus. (But we did intentionally schlepp down a few good knives 🙂 )

Lots of Shallots

It was unanimous that chicken be the star of dinner this particular night, so The Hubs began his search on several of our recipe faves and found this perfect gem, Baked Chicken with Herbs, Garlic & Shallots, on FineCooking.com. Because it consisted of few ingredients, a good thing when on vacation, and was simple in employment, the recipe fit our criteria to a tee.

Merry Sue and Lynn on the condo balcony.

For some strange reason the local supermarket carried only four whole chickens, so I bought the smallest at just over 4 1/2 pounds—which in hind sight worked out well because we all ADORED the finished dish, plus had leftovers for a tasty chicken salad for lunch the next day! This recipe is so easy to modify to your liking with different herbs, extra garlic, small onions, etc. If you prefer white or dark meat only, you could also substitute bone-in, skin-on split breasts or thighs.

I believe this will easily become a staple of our weeknight dinner repertoire. Vary the herbs as you like, but stick to the hardy ones—thyme, rosemary, sage, and oregano. They’ll roast without burning and have a stronger flavor.

Without a lot of staples at our disposal, we opted to go for a packaged rice dish and a simple side salad (the grape tomatoes we transported from our garden at home) to complete the meal. When we make this delicious dish again, I think we’ll go ahead and make the pan sauce to pair with some garlicky mashed potatoes to accompany the baked chicken. Mmmm-mm good!

Baked Chicken with Herbs, Garlic and Shallots

  • Servings: 4
  • Difficulty: easy
  • Print

Ingredients

  • 1 chicken (3-1/2 to 4 lb.), cut into quarters
  • 3 Tbs. unsalted butter
  • 6 medium shallots, cut in half and peeled
  • 8 large garlic cloves, peeled
  • Leaves stripped from 10 sprigs fresh thyme
  • Leaves stripped from 8 sprigs fresh rosemary
  • 1-1/2 tsp. coarse salt
  • Freshly ground black pepper

Directions

  1. Heat the oven to 425°F. Rinse the chicken and pat it dry with paper towels. Cut away any excess fat and tuck the wings behind each breast.
  2. Put the butter into a large, shallow baking pan (a 10-1/2×15-1/2-inch Pyrex pan is ideal for this). Put the pan into the oven while it’s heating. When the butter is melted (about 10 minutes), remove the pan and set it on a heatproof surface or on a couple of potholders. Add the shallots, garlic, thyme, and rosemary, and swirl the pan to coat the ingredients in the butter.
  3. Dredge the chicken, skin side down, in the butter and herb mixture, and arrange, skin side up, in the pan. Sprinkle the chicken generously with the salt and pepper. Bake until the chicken is browned and cooked through, 50 to 60 minutes. Serve with the shallots and garlic along with a drizzle of the pan drippings.

http://www.lynnandruss.com

Adapted from a recipe by Abigail Johnson Dodge from Fine Cooking

Two Countries, One Meal

A rare cool, rainy Sunday afforded us the opportunity to cook a slow braised dish for a summer dinner. While thumbing through several favorite cookbooks, I happened upon this Roman Braised Beef with Tomatoes and Cloves in Milk Streets “The New Rules” by Courtney Hill.

The “new rule: don’t sear your meat” goes against something we typically do, brown our meat beforehand. But because you cook it uncovered for the last hour or so, the meat will brown at the end of the process.

Pot roast comes to mind with this meal, and in Rome, cloves are used to flavor the dish known as “Garofolato di Manzo alla Romana” because cloves are called chiodi di garofano. Here, the earthy, subtly smoky and slightly bitter flavor of cloves complements the natural sweetness of onion, fennel and tomatoes.

Milk Street advises not to use ground cloves that have gone stale, as they won’t add much flavor or fragrance to the braise. If your cloves have been in the pantry for more than a few months, uncap and take a whiff. The aroma should be sharp and strong. If not, pony up and get a new jar.

Unlike pot roast where you cook the large piece of meat whole, the beef is cut into chunks and simmered as a stew resulting in succulent meat throughout. Polenta is an excellent accompaniment for absorbing the flavorful sauce. In a unique pairing, we wedded the meat with another Milk Street recipe Spanish Green Beans with Ham, Almonds and Smoked Paprika.

This recipe is an adaptation of the remarkably delicious green beans from Extremadura, Spain, home of pimentón, aka Spanish smoked paprika. For perfectly crisp and tender beans, cooking techniques are combined. You start by searing the veggies in a hot pan to develop browning and flavor. Then add water and a tight fitting lid to steam them until tender. Voila!

Roman Braised Beef with Tomatoes and Cloves

  • Servings: 6
  • Difficulty: easy
  • Print

Ingredients

  • 6-7 lbs. boneless beef chuck roast, trimmed and cut into 2-inch chunks
  • ¾ tsp. ground cloves
  • kosher salt and ground black pepper
  • 4 oz. pancetta, roughly chopped
  • 6 med. garlic cloves, smashed and peeled
  • 1 med. yellow onion, halved and thinly sliced
  • 1 med. fennel bulb, trimmed, halved, cored and thinly sliced
  • 28 oz. can whole peeled tomatoes, crushed
  • 2 tsp. fresh thyme, minced

Directions

  1. Heat the oven to 325°F with a rack in the lower-middle position. Place the beef in a large bowl and season with the cloves, 1 tablespoon salt and 2 teaspoons pepper.
  2. In a large Dutch oven over low, cook the pancetta, stirring occasionally, until sizzling and the fat has begun to render, about 5 minutes.
  3. Increase the heat to medium-low and continue to cook, stirring occasionally, until the pieces begin to brown, another 7 minutes.
  4. Add the garlic, onion and fennel, then increase to medium. Cook, stirring occasionally, until the vegetables are softened and translucent, about 6 minutes.
  5. Stir in the tomatoes and bring to a simmer. Stir in the beef, then cover, transfer to the oven and cook for 2 hours.
  6. Remove the pot from the oven. Stir, then return to the oven uncovered. Cook until a skewer inserted into a piece of beef meets no resistance, another 1 to 1½ hours.
  7. Using a slotted spoon, transfer the meat to a medium bowl. With a wide spoon, skim off and discard the fat from the surface of the cooking liquid, then bring to a boil over medium-high, scraping up any browned bits. Cook until the liquid has thickened to the consistency of heavy cream, 10 to 12 minutes.
  8. Stir in the thyme, then return the beef to the pot. Reduce to medium and cook, stirring occasionally, until the meat is heated through, about 5 minutes.
  9. Taste and season with salt and pepper.

http://www.lynnandruss.com

Spanish Green Beans with Ham, Almonds and Smoked Paprika

First, the almonds. Begin by toasting them in olive oil to deepen their nutty flavor, then add the garlic and thinly sliced serrano ham, cooking the mixture until the meat crisps and the garlic is fragrant. Then remove that mixture from the pan and add the green beans and char them in the flavorful fond left behind. 

For the final flourish of smoked paprika, first deglaze the pan with another 1⁄4 cup water, scraping up any remaining flavorful bits, then remove the pan from the burner and stir the spice in off heat. This preserves the paprika’s smoky aroma, resulting in a pan sauce that is as quick as it is deeply smoky-savory.

Don’t stir the beans too often after adding them to the pan. Stirring only a few times allows the beans to take on some char that adds flavor the finished dish. If you’re entertaining more than four people with the braised beef dinner, you’ll want to double this bean recipe.

My mistake here was using a nonstick skillet so the beans didn’t get as good a sear as I wanted. But in the end since there were no browned bits left in the pan, there was no reason to perform Step 5. Instead, I just sprinkled the smoked paprika right onto the finished beans, stirred and served. OMG, so friggin’ good!!

Spanish Green Beans with Ham, Almonds and Smoked Paprika

  • Servings: 4
  • Difficulty: easy
  • Print

Ingredients

  • 4 Tbsp. extra-virgin olive oil, divided
  • ¼ cup slivered almonds
  • 2 oz. thinly sliced serrano ham or prosciutto, sliced into ¼-inch-wide ribbons
  • 2 med. garlic cloves, minced
  • 1 lb. green beans, trimmed and halved
  • Kosher salt and ground black pepper
  • ½ tsp. smoked paprika

Directions

  1. In a 12-inch skillet (don’t use nonstick) over medium, heat 2 tablespoons of oil until shimmering. Add the almonds and cook, stirring often, until lightly golden, about 2 minutes.
  2. Add the ham and garlic and cook, stirring, until the ham crisps and the garlic is fragrant, another 2 minutes. Transfer to a small bowl; set aside.
  3. To the same skillet over medium-high, add the remaining 2 tablespoons oil and heat until smoking. Add the beans and ½ teaspoon each salt and pepper. Cook, stirring only a few times, until the beans are lightly charred, about 4 minutes.
  4. Return the ham-almond mixture to the pan and add ¼ cup water. Cover, reduce to low and cook, occasionally shaking the pan, until the beans are tender-crisp, about 3 minutes. Taste and season with salt and pepper, then transfer to a serving dish.
  5. Set the skillet over medium-high and add ¼ cup water. Bring to a simmer and cook, scraping up the browned bits, until the liquid has reduced to about 2 tablespoons, about 2 minutes.
  6. Remove from the heat and stir in the paprika. Drizzle the sauce over the beans and serve.

http://www.lynnandruss.com

Gemelli with Fresh Tomato-Almond Pesto and Croutons

Make sure you get the freshest home grown cherry tomatoes for this fabulous pasta dish. Currently they are in season in our neck of the woods and, lucky for us, our Farmer’s Market was brimming with every type imaginable.

Pasta Extraordinaire!

When Milk Street (where we got this recipe) sampled this no-cook tomato sauce in Sicily, it was made the traditional way, with a large mortar and pestle. A food processor gets it done faster and more easily. But The Mr. wanted to do it the traditional way in his favorite gargantuan mortar and pestle. He felt the results would produce a better paste.

Topped with crisp, olive oil–infused croutons and toasted almonds, the dish is served warm or at room temperature after the pasta has had a few minutes to soak in the flavorful sauce. Instead of blanched, slivered almonds, we used sliced, but whole almonds roughly chopped are another option.

Please don’t over-process the second addition of tomatoes. The first half is pulsed to create a juicy sauce, but the rest are pulsed only until roughly chopped so that tomato chunks add bursts of bright color and texture, and boy did they!

I usually don’t combine bread with a pasta meal because of the heavy carb count, but those croutons are a must! Serve with a veggie-laden side salad to help compensate. It’s typical to grate some cheese over a pasta dish, but even though I served some on the side, we both felt it was not necessary and might even take away from the fresh taste. Will certainly make again!

Gemelli with Fresh Tomato-Almond Pesto and Croutons

  • Servings: 4
  • Difficulty: easy
  • Print

Ingredients

  • ¾ cup blanched slivered almonds
  • 12 oz. gemelli or other short pasta
  • Kosher salt and ground black pepper
  • 4 medium garlic cloves, smashed and peeled
  • ½ cup lightly packed fresh basil, torn if large
  • 2 pints cherry tomatoes, divided
  • 6 Tbsp. extra-virgin olive oil, divided, plus more to serve
  • 3 oz. crusty white bread, torn into rough ½-inch pieces (about 1¾ cups)

Directions

  1. In a 10-inch skillet over medium-high, toast the almonds, stirring frequently, until golden brown and fragrant, 3 to 5 minutes. Transfer to a small bowl and set aside; reserve the skillet.
  2. In a large pot, bring 4 quarts water to a boil. Add the pasta and 2 tablespoons salt, then cook, stirring occasionally, until al dente. Reserve about ½ cup of the cooking water, then drain the pasta.
  3. Meanwhile, in a food processor, process ½ cup of the almonds, the garlic and 2 teaspoons salt until finely chopped, about 30 seconds.
  4. Add the basil and half of the tomatoes, then pulse until chopped and well combined, 4 to 6 pulses.
  5. Add the remaining tomatoes and 2 tablespoons of oil, then pulse just until the whole tomatoes are broken up, about 3 pulses.
  6. Transfer to a serving bowl, add the pasta and ¼ cup of the reserved cooking water, then toss. Let stand, tossing once or twice, for 10 to 15 minutes to allow the pasta to absorb some of the sauce.
  7. While the pasta stands, in the same skillet used to toast the almonds, toss the bread, remaining 4 tablespoons oil, ½ teaspoon salt and ¼ teaspoon pepper. Cook over medium, stirring frequently, until the bread is crisp and golden brown, 5 to 7 minutes.
  8. Scatter the toasted bread and the remaining ¼ cup almonds over the pasta. Drizzle with additional oil and sprinkle with pepper.

http://www.lynnandruss.com

Adapted from a recipe by Courtney Hill from Milk Street

Moroccan Ginger-Lemon Chicken Skewers

Anytime is perfect to skewer around, don’t you agree? And when all it takes is a bit of prep and less than 30 minutes to cook, you will have plenty of extra time for anything else on your agenda, or just relax and enjoy a cool beverage.

Once again chicken is the star of the show. Specifically, boneless, skinless chicken thighs. Each one is cut crosswise into three strips and added to the marinade, tossed and set aside for 15 to 30 minutes. While they get happy, you can prepare whatever accompaniments you plan to serve. A prepackaged couscous and a zucchini-onion sauté completed our meal.

Grilled lemon halves, drizzled with honey and squeezed over the charred chicken skewers, adds a final note of sweet-tart acidity that helps balance all the bold, savory seasonings. Minced fresh cilantro, parsley or mint brings bright color and a herbal freshness to the dish. Use whichever you prefer, or any combination of the three.

The directions indicate to use metal skewers, but we were on vacation at a rental property in Cape Cod and all we had access to was wooden skewers, which we presoaked for an hour. They tend to run shorter in length than their metal counterparts, so it’s likely you’ll need more of them—in our case, 6 wooden skewers as opposed to 4 metal.

We paired our skewers with an Israeli mushroom couscous and sautéed zucchini and onions.

Keep in mind: Don’t marinate the chicken longer than 30 minutes. Any longer than that and the lemon juice and ginger will make it mushy.

Moroccan Ginger-Lemon Chicken Skewers

  • Servings: 4
  • Difficulty: easy
  • Print

Ingredients

  • 3 lemons
  • ¼ cup extra-virgin olive oil, plus extra to serve
  • ¼ cup extra-virgin olive oil, plus extra to serve
  • 2 garlic cloves, grated
  • 1 Tbsp. grated fresh ginger
  • 1 Tbsp. ground cumin
  • 1 Tbsp. ground coriander
  • 2 tsp. kosher salt
  • 1 tsp. ground black pepper
  • 3 Tbsp. honey, divided
  • 1½ lbs. boneless, skinless chicken thighs
  • ¼ cup minced fresh cilantro, flat-leaf parsley or mint

Directions

  1. With a wand-style grater, use 1 lemon to grate 1 tablespoon of zest and squeeze 2 tablespoons of juice.
  2. In a large bowl, stir together the zest, juice, oil, garlic, ginger, cumin, coriander, salt, pepper and 2 tablespoons of the honey.
  3. Cut each chicken thigh crosswise into 3 strips. Add the chicken to the marinade, toss and set aside for 15 to 30 minutes.
  4. Meanwhile, prepare a grill for direct cooking over medium-high heat. For a charcoal grill, spread a large chimney three-quarters full of hot coals evenly over the grill bed; open the bottom grill vents. For a gas grill, set all burners to high. Heat the grill, covered, for 10 to 15 minutes, then clean and oil the cooking grate. If using gas, reduce the burners to medium-high just before adding the chicken.
  5. Thread the chicken onto four 12-inch metal skewers, scrunching multiple pieces onto each skewer. (We used 6, presoaked wooden skewers.)
  6. Cut the remaining 2 lemons in half. Grill the chicken and lemon halves (cut side down) until the chicken is well charred all over, 10 to 12 minutes, turning halfway through. Remove the lemons once their cut sides are nicely charred.
  7. Transfer the skewers and lemon halves to a platter. Drizzle the remaining 1 tablespoon of honey over the cut sides of the lemons.
  8. Squeeze the juice from 1 lemon half over the chicken, drizzle with olive oil and sprinkle with cilantro. Serve with the remaining lemon halves on the side.

http://www.lynnandruss.com

Adapted from a recipe by Diane Unger from Milk Street

Pesto Alla Genovese and Italian Marinated Grilled Chicken

Genoa, Italy is the birthplace of this dish. It traditionally is made in a mortar and pestle of nothing more than basil, pine nuts, cheese, garlic, salt and olive oil, emphasis on the basil. And to follow that tradition, we did the same. This was perfect at summer’s end because we had a plethora of fresh basil in our herb garden.

Good quality cheese is essential for a rich, full-flavored pesto. Seek out true Italian Parmesan cheese. In place of pecorino sardo, don’t use pecorino Romano, which is too strong. The best substitute is Manchego, a Spanish sheep’s milk cheese, one we love and typically have on hand.

Pesto Pasta

While you may be tempted, don’t toast the pine nuts. In Italy, the pine nuts for pesto are used raw. And don’t add all the ingredients at once to the food processor (or mortar if using). Adding them in stages ensures the pesto has the correct consistency and texture, and that it won’t end up thin and watery, the result of over-processing.

Orecchiette is the perfect pasta choice because all of that creamy pesto nestles into the cupped areas.

Using a mortar and pestle creates a luxurious sauce with a rich, deep flavor and a beautiful, silky texture that’s superior to what a food processor can do. Yes, it takes a bit longer and gives your arms a workout, but the reward of the best pesto you’ve ever eaten is sooo worth it. (FYI, the cheeses will have to be ground in a small food processor beforehand.)

If for some reason you cannot locate, or happen to dislike pine nuts, you can replace them with macadamias, walnuts, almonds or pecans. To store pesto, press a piece of plastic wrap against its surface and refrigerate for up to three days. After that, leftovers can be frozen in a sealed container.

Pesto Alla Genovese

  • Servings: Yields 1 cup
  • Difficulty: easy
  • Print

Ingredients

  • 1¾ oz. parmesan cheese (without rind), chopped into rough 1-inch pieces
  • 1 oz. pecorino sardo cheese (without rind), chopped into rough 1-inch pieces
  • ¼ cup pine nuts
  • 2 medium garlic cloves, smashed and peeled
  • Kosher salt
  • ⅓ cup extra-virgin olive oil
  • 2½ oz. (about 5 cups lightly packed) fresh basil leaves
  • 12 oz. orecchiette pasta, cooked al dente

Directions

Food Processor

  1. In a food processor, process both cheeses until broken into rough marble-sized pieces, about 10 seconds, then pulse until they have the texture of coarse sand, 5 to 10 pulses, scraping the bowl as needed. Transfer to a small bowl.
  2. In the food processor (or with a mortar and pestle), combine the pine nuts, garlic and ¾ teaspoon salt. Process until a smooth, peanut butter–like paste forms, about 1 minute, scraping the bowl as needed.
  3. Add the cheeses and about ½ of the oil and process until mostly smooth, 10 to 20 seconds, scraping the bowl as needed; the mixture should hold together when pressed against the bowl with a rubber spatula.
  4. Using a chef’s knife, roughly chop the basil, then add to the food processor. Pulse about 10 times, scraping the bowl several times, until the basil is finely chopped and well combined with the cheese mixture.
  5. Add the remaining oil and pulse just until incorporated, about 2 pulses. The pesto should be thick, creamy and spreadable.
  6. Meanwhile cook the pasta as directed on the package for al dente. Reserve 1/2 cup cooking water then drain the pasta.
  7. Add a couple tablespoons of pesto to bottom of serving dish, top with pasta, stir. Continue adding pesto and cooking water, 1 tablespoon at a time, stir until dish is creamy. (You won’t need to use all of the reserved cooking water.)

Mortar and Pestle

  1. In a small food processor, grind the cheeses until the consistency of coarse sand, set aside.
  2. Crush the garlic, salt and pine nuts in a mortar with the pestle, smashing and grinding until a sticky, ever-so-slightly chunky, beige paste forms.
  3. Add basil leaves, a handful at a time, and pound and grind against the walls of the mortar. Continue until all basil leaves have been crushed to fine bits.
  4. Add both cheeses, then slowly drizzle in olive oil (it helps to have another person do this), working it into the pesto with the pestle until a fairly smooth, creamy, emulsified, sauce forms.
  5. Meanwhile cook the pasta as directed on the package for al dente. Reserve 1/2 cup cooking water then drain the pasta.
  6. Add a couple tablespoons of pesto to bottom of serving dish, top with pasta, stir. Continue adding pesto and cooking water, 1 tablespoon at a time, stir until dish is creamy. (You won’t need to use all of the reserved cooking water.)

http://www.lynnandruss.com

Adapted from recipe by Courtney Hill from Milk Street

Italian Marinated Grilled Chicken

In a pinch I have used bottled Italian dressing as the marinade for chicken, but nothing compares to homemade. If you can, use fresh herbs, however dried is also an option. Use a combination of both white and dark meat if you prefer. It’s best to cut your chicken breast halves in half again so that all pieces are similar in size, and will therefore finish cooking at about the same time.

I cut the marinade recipe in half since we were only grilling 4 pieces of chicken for the two of us.

Italian Marinated Grilled Chicken

  • Servings: 4
  • Difficulty: easy
  • Print

Ingredients

  • 1 cup extra-virgin olive oil
  • ¾ cup red wine vinegar
  • ¼ cup freshly squeezed lemon juice (about 2 lemons)
  • 4 cloves garlic, peeled, smashed and roughly chopped
  • 1 bay leaf
  • 1 Tbsp. thyme leaves
  • 1 Tbsp. oregano leaves
  • 2 Tbsp. basil leaves, rolled and chopped into chiffonade
  • 1 tsp. granulated sugar
  • 1 tsp. kosher salt
  • 1 tsp. freshly cracked black pepper
  • 1 tsp. red pepper flakes, or to taste
  • 3 lbs. chicken pieces, white and/or dark meat

Directions

  1. Whisk together all the ingredients in a medium bowl.
  2. Add chicken pieces (white and or dark meat) to a large re-sealable plastic bag. (Cut the breast halves, if using, in half again to be similar in size to the legs and thighs.)
  3. Pour in the marinade, seal and refrigerate for a minimum of 2, and up to 10 hours.
  4. When ready to cook, prepare a hot grill for the indirect method.
  5. Place the chicken on the hot side of the grill, turning them over after 5 minutes to sear the other side, for a total of 10 minutes. Baste occasionally.
  6. Move chicken to cooler side of grill, cover with lid and continue cooking for about another 20 minutes, no need to turn the chicken.
  7. Poultry is ready when the internal temperature reaches 165°-170°.
  8. If desired, serve with an additional drizzle of lemon juice and EVOO.

http://www.lynnandruss.com

Hot. Sweet. Sour.

Sound anything like your last relationship gone awry? Well this recipe should actually cheer you up instead, if tender, juicy, bone-sucking baby back ribs are your thing. You may recall last summer I posted a blog on Carolina-Style Barbecued Chicken that used a similar BBQ sauce—and it was slammin’ good!

Sweet and tangy, mustard tames the sweetness of the brown sugar—a nice reprieve from the traditional red BBQ sauces that many of us are more accustomed to. Surprised to find we were out of apple cider vinegar, we substituted white wine vinegar which shares a similar acidic level.

As for the Adobo Seco Seasoning, we always keep a container of homemade on hand (it has a long shelf life) but you can also buy it commercially made and use that. The most popular version is the dry seasoning mix, made from garlic powder, onion powder, oregano, salt, pepper, and sometimes dried citrus.

Carolina-style Grilled Baby Back Ribs

  • Servings: 4-6
  • Difficulty: easy
  • Print

Ingredients

  • 6-7 lbs. of baby back ribs (about 2 large racks)
  • 3 Tbsp. adobo seco seasoning (store-bought or homemade)
  • 2 cups water
  • 1 cup yellow or Dijon mustard
  • 1/2 cup apple cider vinegar
  • 1/2 cup packed light brown sugar
  • 3 Tbsp. mustard powder
  • 1 Tbsp. + 1 tsp. hot sauce, such as Frank’s
  • 1 tsp. Worcestershire sauce
  • Kosher salt and freshly ground pepper
  • 4 Tbsp. unsalted butter, melted
  • Oil for the grates

Directions

  1. Rub both racks of meat all over with the adobo seco seasoning. Position on a rack in a rimmed backing sheet. Place upright toothpicks in several areas of the meat and cover tightly with heavy-duty foil and refrigerate overnight.
  2. The next day, 2 1/2 to 3 hours before you plan to start grilling, preheat the oven to 325°.
  3. Remove a portion of the foil away so that you can pour 2 cups water into bottom of rimmed baking sheet and recover. Place into preheated oven for at least 2 hours.
  4. After 2 hours check the ribs to see if the meat pulls away from the bones easily. If not, continue cooking for another 1/2 hour.
  5. Meanwhile heat the grill to medium. Oil grates just before adding meat.
  6. Brush one side of each rack with room temperature BBQ sauce and lay the racks onto hot grates sauce side down. Brush sauce on top side.
  7. When bottoms of ribs are browned, flip and brush again with more sauce. Repeat several times over the course of 10-12 minutes until racks are well sauced and browned.
  8. Break racks apart into 3-4 ribs per section, place on platter and serve with any leftover sauce.

http://www.lynnandruss.com

Rigatoni with Artichokes, Basil and Pecorino

Fresh basil, I like that this pasta recipe uses a lot of it. At the time we made the entrée, our garden was brimming with the herb, one of my all-time faves. Freshly picked, the aroma alone titillates the senses.

This recipe is Milk Street’s weeknight adaptation of the pasta fresca con carciofi e pecorino. The flavors are bright and fresh, and the prep is a breeze (chopping the basil is as arduous as it gets here). In 30 minutes or so, you have a tasty and filling entrée that’s sure to please.

As per Milk Street’s instructions, be sure to purchase jarred marinated artichoke hearts—they offer much more flavor than canned or frozen. You will need three 12-ounce jars to get the 3 cups drained artichokes called for. The hearts usually are halved or quartered; there’s no need to chop them after draining, as they will break apart during cooking.

About those artichokes, if you happen to have jars marinating in mostly oil, go ahead and use that in place of the additional EVOO listed in the ingredients. Trader Joe’s fits that bill, while Cento for example has too much vinegar in the mix.

Our box of rigatoni was only 12 ounces as opposed to the 1 pound called for, which we thought made for a better pasta-to-artichoke ratio, and still provided 4 full servings.

Don’t forget to save 2 cups of the cooking water before draining the rigatoni. You will need the starchy seasoned water to create a sauce that lightly coats and marries the artichokes and pasta.

Rigatoni with Artichokes, Basil and Pecorino

  • Servings: 4-6
  • Difficulty: easy
  • Print

Ingredients

  • 1 lb. rigatoni (we only used 12 oz.)
  • Kosher salt and ground black pepper
  • ¼ cup extra-virgin olive oil (or use the oil from the jarred artichokes)
  • 3 cups drained oil-marinated artichoke hearts, patted dry
  • 4 medium garlic cloves, finely grated
  • ½ tsp. red pepper flakes
  • 2 oz. pecorino romano cheese, finely grated (1 cup)
  • 1 Tbsp. grated lemon zest, plus 2 tablespoons lemon juice
  • 1 cup lightly packed fresh basil, chopped
  • 3 Tbsp. salted butter, cut into 3 pieces

Directions

  1. In a large Dutch oven, bring 4 quarts water to a boil. Stir in the pasta and 1 tablespoon salt, then cook, stirring occasionally, until just shy of al dente. Reserve about 2 cups of the cooking water, then drain the pasta.
  2. Wipe out the pot, add the oil and heat over medium-high until shimmering. Add the artichokes and cook, stirring, until well browned, 5 to 7 minutes. (Ours took 9 minutes.)
  3. Add the garlic and pepper flakes, then cook, stirring, until fragrant, about 30 seconds. Return the pasta to the pot, along with 1½ cups of the reserved pasta water. Cook, uncovered and stirring often, until the pasta is al dente and little liquid remains, 3 to 5 minutes.
  4. Remove from the heat. Add the pecorino, lemon zest and juice, basil and butter, then stir until the butter is melted.
  5. Stir in additional pasta water 1 tablespoon at a time until slightly saucy. Taste and season with salt and pepper.

http://www.lynnandruss.com

Adapted from a recipe by Diane Unger from Milk Street