Monthly Archives: March 2018

A French BYO Revisited

For over thirty years the Spring Mill Café in Conshohocken, PA (consisting of two buildings located next to the Spring Mill Creek) has prepared dishes using the finest and freshest foods available, buying their ingredients from local farms and farmers. The dishes are designed around the availability of fresh and seasonal ingredients and are artfully plated and presented.

IMG_2387

Our last visit was two-and-a-half years ago with daughter Julia when she was in visiting from LA., and we were seated in the “general store” built in 1831 (above), the site of all our previous dining adventures at Spring Mill. This most recent visit however with the Oldhams, Maria Odilia (MO) and Steve, had us dining in the converted farmhouse (below) across the driveway from the main building. The farmhouse was built in the 1840s as storage and stables for the store and its presiding family; was converted into a living space in the 1950s; and it wasn’t until a few years ago that it also became part of the restaurant.

IMG_3636

We were lucky enough to have a choice of tables before everyone else arrived and we chose a cozy corner banquette that was flanked on two sides with pews and chairs on the outer edges. Thanks to our waiter Nate for taking our group photo.

IMG_3643

Their menu is not extensive but well thought out and includes vegetarian options, along with a few nightly specials. So for starters, both Steve and I settled on the soup du jour, a Creamed Asparagus topped with Crabmeat. It was silky and subtle with small chunks of tender asparagus and a decent dollop of tender sweet crabmeat.

IMG_3645

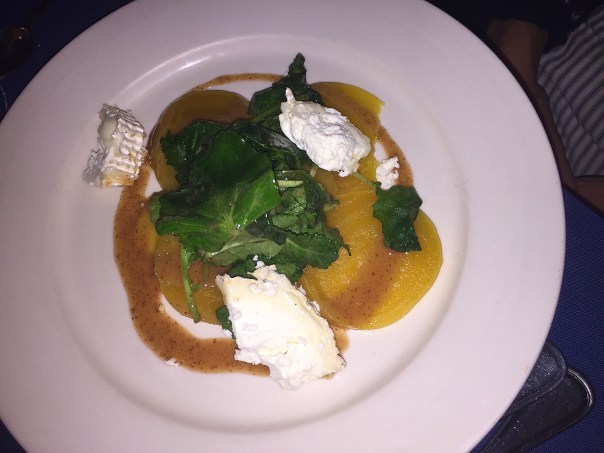
Russ knew ahead of time that he would be starting his meal off with one of their patés and chose the Truffled Chicken Liver Pâté with a crock of pureed chicken liver, baked with cream, black truffles and brandy, served with sliced baguette, cornichons and whole grain mustard. Maria Odilia decided on the Salade de Betteraves, plated with roasted golden beets with baby kale, Bucheron goat cheese, and a pomegranate vinaigrette. expecting red beets, you was pleased to see the golden variety on her plate.

IMG_3647

IMG_3646

By this time, the entire restaurant was filled and conversation scaled up a couple of notches. A topic of discussion became the circular stairway in the center of the room  leading to the second floor and the only bathroom—consisting of a very tiny sink, but large clawfoot blue bathtub—apparently a leftover from it’s days as someone’s living quarters. As the evening wore on, the traffic up and down those winding stairs became quite a side show.

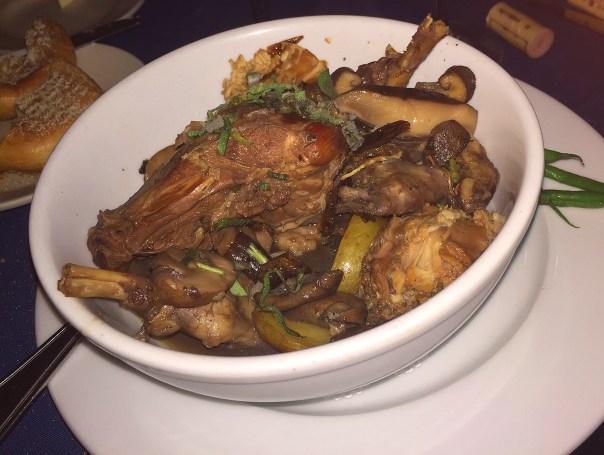
Steve’s initial entrée choice was the mushroom vegetarian option, but quickly made an about-face and chose the Lapin au Pruneaux, a Stony Hill Farm braised rabbit with red wine, mushrooms, and fingerling potatoes, garnished with a lardon and prune tapenade served in a large bowl.
IMG_3654

Both MO and myself were on the same wavelength and opted for the Espadon aux Capres, which was a grilled swordfish steak with a caper fennel butter, served over a winter root vegetable puree. Eating with your eyes first, each dish was a feast to behold, but MO complained loudly about the lack of color on our swordfish plates. Being a fellow artist I had to agree. Luckily, we had ordered a side of the vegetable du jour which happened to be haricot verts, so we quickly remedied that faux pas with the addition of some green. Otherwise, totally scrumptious!

IMG_3650

Well, no surprise that Mr. Russ got the Duck Breast Cassoulet, one of his top faves. The duck breast was seared with a pork and duck confit, and accompanied by white beans, sausage, and a tomato sofrito. Let’s just say, it’s still sits in a place of honor near the top of the list.

IMG_3652

Not a dessert eater myself, the others wanted to indulge in at least a “taste” so they decided to split one order of the Mousse au Chocolat, a traditional light and fluffy French chocolate mousse topped with fresh raspberries and whipped cream—which came with four spoons…

IMG_3656

All-in-all, a lovely evening that was nearly three hours long. After we finished dinner, we took MO and Steve over to the main building to check out the digs. Nearly 10 p.m., it was already set up for the next day and deserted of patrons (except for the manager who was tending the books). An interesting fact: they cook all of the meals in the main house and have to transport any orders for the farmhouse, outside across the driveway. We wondered aloud how dicey that must get during bad weather… Now time to finally bid each other adieu for our 30-minute, but easy ride home.

The Chicken Zen Zone

This riff on Roast Chicken with Rosemary and Orange is based on a recipe from famed Italian chef/author Lidia Bastianich. It’s infused with scents and flavors that I associate with comfort, family and joyous occasions. My mom used to make a Sunday supper of Orange-Juice Chicken that was my favorite meal growing up. Over the ensuing years, I’ve made many a roasted chicken with a similar flavor profile. Here’s yet one more with the surprising ingredient of orange liqueur.

IMG_3677

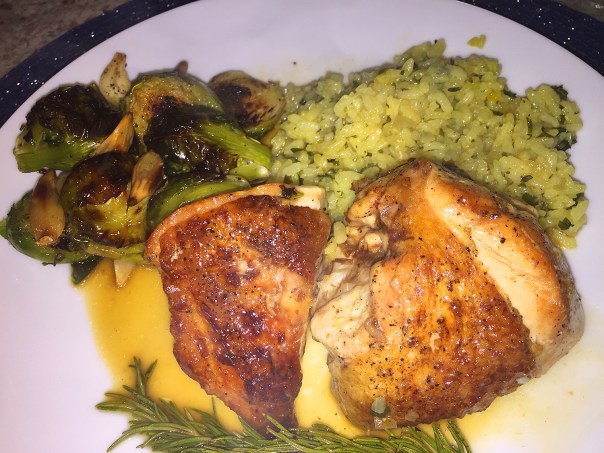
As it’s roasting, the fragrance wonderfully perfumes the air both indoors and out. Luckily, dinner is ready in about one hours time, so you won’t have to wait all afternoon to indulge in the memorable feast. Good God almighty, it was fantastic! The skin was sooo crispy, the meat soooo succulent, and the sauce soooo flavorful—you can’t help but enter the “Zen Zone” while savoring every morsel, seriously!

While this would be equally good with garlicky mashed potatoes or creamy polenta, we paired it with our favorite Baked Rice, recipe below. If you don’t have a double-oven, allowing you to cook both the chicken and the rice at the same time, lower the temp to 400° once you remove the chicken. Make sure to have completed steps 1 through 3 at this point. As the covered chicken rests on a platter and you make the sauce, the rice can cook for the allotted 15 minutes.

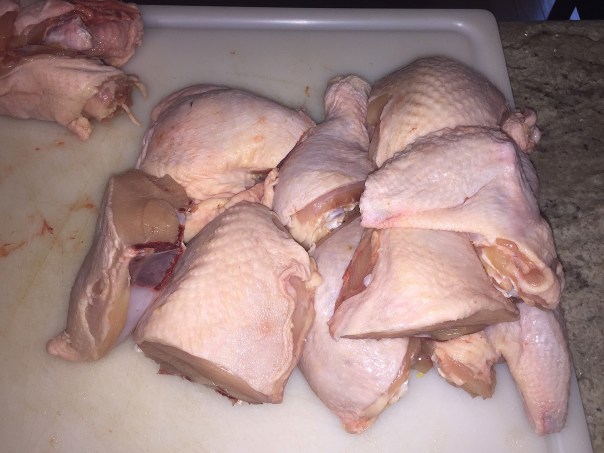
IMG_3659Using kitchen shears, cut out the back bone. Save it, the neck, and wing tips for the freezer body bag for the next time you make homemade chicken stock.
IMG_3661
End up with two wings (minus the tips), two thighs, two legs, and four breast quarters.

Roast Chicken with Rosemary and Orange

  • Servings: 4
  • Difficulty: relatively easy
  • Print

Ingredients

  • 4 1/2-pound chicken, (with neck, optional)
  • Kosher salt and freshly ground pepper
  • 2 tablespoons extra-virgin olive oil
  • 4-5 sprigs fresh rosemary
  • 1/4 cup + 2 tablespoons Grand Marnier (or other orange liqueur)
  • Juice of 1 small fresh orange
  • 2 tablespoons unsalted butter
  • 3/4 cup chicken Stock, preferably homemade

Directions

  1. Preheat the oven to 450 degrees. Put a roasting pan on the middle rack to heat up.
  2. Cut the chicken into pieces. Season the chicken all over with salt and some pepper.
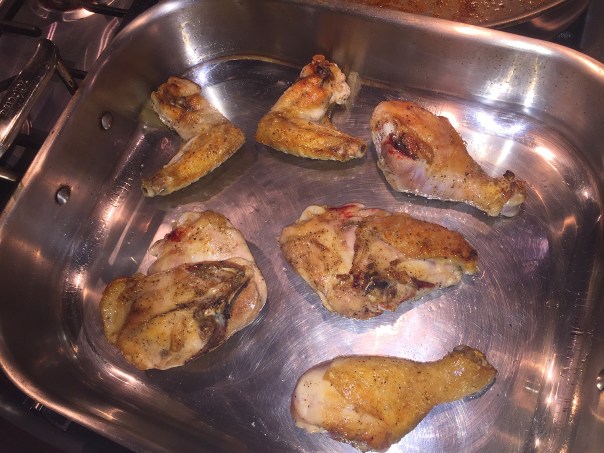
  3. Add the olive oil to a large skillet over medium-high heat. When the oil is very hot, brown the chicken pieces on both sides in batches, about 2-3 minutes per side, removing to a plate as they are done.
    IMG_3664
  4.  Put all of the dark  meat (not the breast pieces) in the roasting pan, skin side down, and roast 20 minutes.
    IMG_3665
  5. Turn the dark meat and add the breast pieces, skin side up, and roast until the skin is very brown and crisp, about 20 minutes. Turn the breast pieces skin side down and roast 10 minutes more.
    IMG_3668
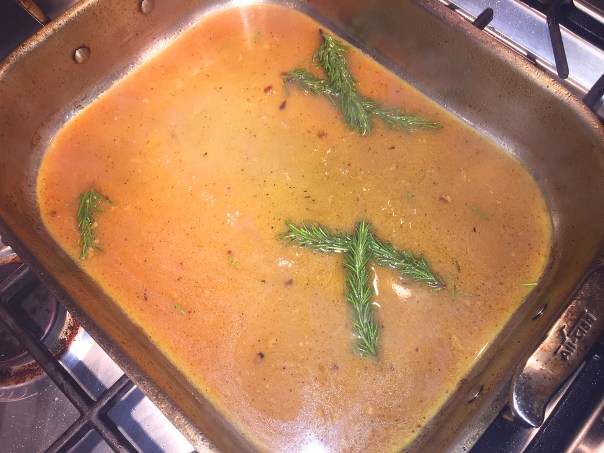
  6. Remove the chicken to a platter, cover and keep warm. Heat the roasting pan on the stove-top over medium-high heat; and add the butter to the pan juices. As soon as it melts, add the rosemary.
    IMG_3670
  7. Once the rosemary is sizzling, add the Grand Marnier and orange juice. Bring to a boil and add the chicken stock.
    IMG_3675
  8. Boil and whisk to bring the sauce together and thicken it slightly, about 2-3 minutes. Strain the sauce and spoon over the chicken and serve. (We didn’t bother to strain the sauce as it didn’t seem necessary.)

http://www.lynnandruss.com

IMG_3684

Baked Rice

  • Servings: 6
  • Difficulty: easy
  • Print

Baked Rice (Arroz al Horno)

Ingredients

  • 2 Tbsp olive oil or butter
  • 2 Tbsp minced onion
  • 1 cup Valencian (or Arborio) short-grain rice
  • 1 cup chicken broth
  • 2 Tbsp minced fresh parsley
  • 11/2 tsp fresh thyme
  • A few strands of saffron, crumbled
  • Kosher or sea salt

Directions

  1. Preheat the oven to 400 degrees.
  2. Heat the oil in a deep casserole, and then add the onion and cook until the onion is softened, about 5 minutes. Stir in the rice coating it with the oil.
  3. Pour in the chicken broth and 1 cup water, stir in the parsley, thyme, saffron, and salt to taste, and bring to a boil.
  4. Remove from the flame, cover, and transfer to the oven. Cook for 15 minutes, remove from the oven, and let sit, covered, for 5 to 10 minutes before serving.

http://www.lynnandruss.com

IMG_3682

Spicy Jerk Pork Chops

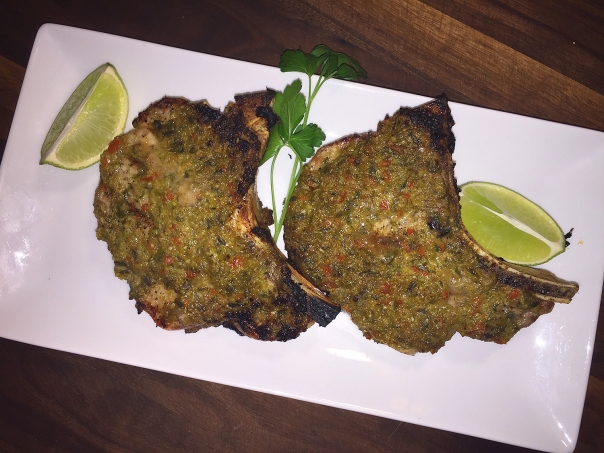
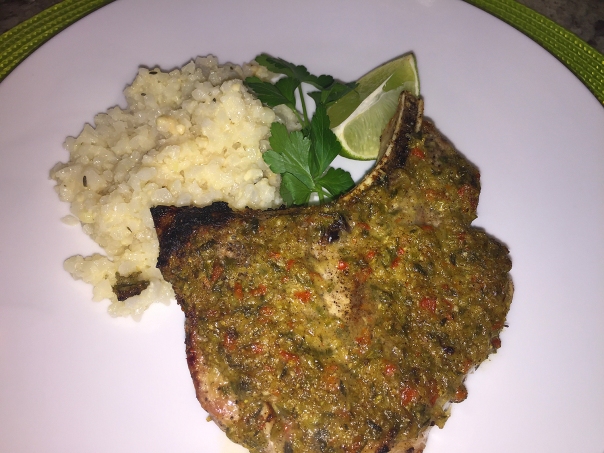
Want to spice things up? Add some heat to tonight’s pork chop dinner. This Spicy Jerk Pork Chops recipe is based on the fiery Jamaican seasoning known as jerk, made of Scotch bonnet chiles, ground spices, garlic, and herbs. Right up my alley…

IMG_2989

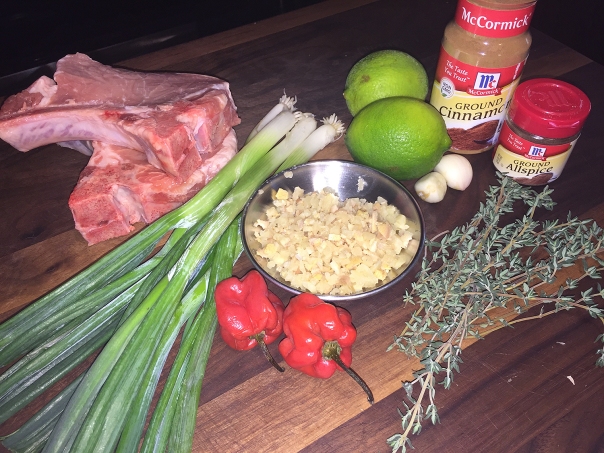
We like things on the spicy side so I included two habaneros. Of course you can adjust the heat by reducing the amount, and/or type, of chiles you add. And while I only cooked two chops, I still made the same amount of seasoning, saving any leftovers for a future use.

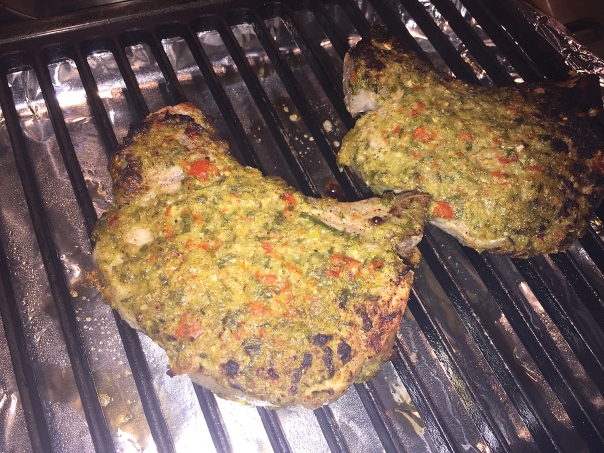
Our broiler, usually a bone of contention with me, worked fine for this dinner, go figure! Although I would have preferred the pork a bit less done and so you might want to broil for only 6 minutes each side and check the temp, adding an extra minute if needed.

NOTES: I lined our broiler pan with tinfoil for easy clean-up. Spread the jerk mixture only on the top side and place on preheated grill pan; then when you flip the chops, spread more seasoning on the second side. This helps insure a lot of the mixture doesn’t fall off.

IMG_2977

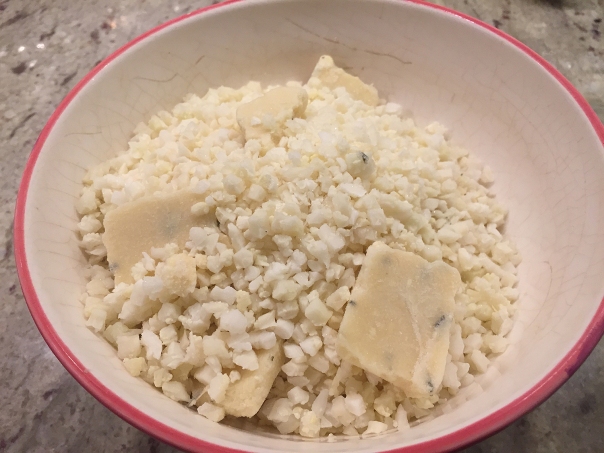
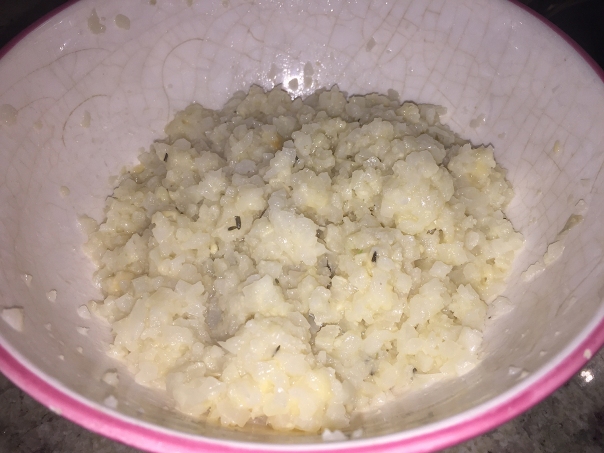
This dinner was so easy and so quick, and made even more so with the frozen side dish of all natural, Alexia Cauliflower Risotto seasoned with parmesan cheese and sea salt. You simply dump the contents of the bag into a microwave-safe bowl, cover and zap on high for 4 minutes, stir, and zap an additional 1 1/2 minutes. Can’t get more easy than that! Low in calories, fat and cholesterol, it was surprisingly good.

IMG_2987
The frozen cauliflower risotto is poured directly into a microwave safe bowl.
IMG_2992
Microwave on high for 4 minutes, stir, and heat for another 1 1/2 minutes, done!

IMG_2982

Spicy Jerk Pork Chops

  • Servings: 4
  • Difficulty: easy
  • Print

Ingredients

  • 2 Tbs. extra-virgin olive oil; more for the pan
  • 4 bone-in center-cut pork chops (3/4 inch thick, about 2-1/2 lb. total)
  • Kosher salt and freshly ground black pepper
  • 4 medium scallions (white and green parts), coarsely chopped
  • 2 small Scotch bonnet or habanero chiles, seeded and coarsely chopped (wear gloves)
  • 2 small limes, 1 juiced and 1 cut into 8 wedges
  • 2 large cloves garlic, coarsely chopped
  • 2 Tbs. coarsely chopped fresh ginger
  • 1 Tbs. coarsely chopped fresh thyme
  • 3/4 tsp. ground allspice
  • 1/8 tsp. ground cinnamon

Directions

  1. Position an oven rack about 4 inches from the broiler and heat the broiler to high. Lightly oil a broiler pan or a rack set over a large rimmed baking sheet.
  2. Season the pork all over with 1 tsp. salt and 3/4 tsp. pepper.
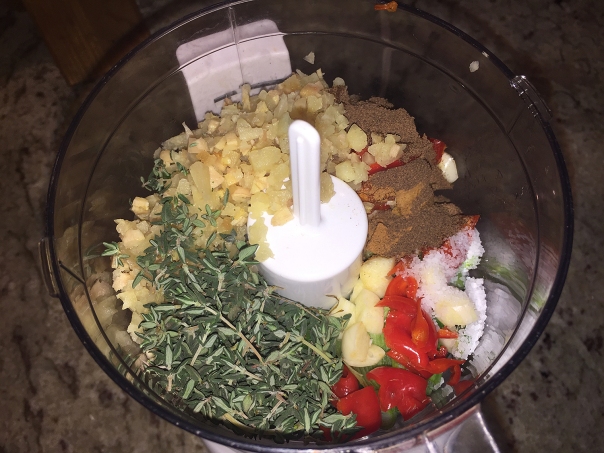
  3. In a food processor, purée the oil, scallions, chiles, lime juice, garlic, ginger, thyme, allspice, cinnamon, and 1 tsp. salt.
    IMG_2983
  4. Coat the chops on all sides with the mixture and set on the broiler pan or rack. Broil until the pork begins to brown, about 7 minutes.
    IMG_2988
  5. Flip and cook until browned, the meat is firm to the touch, and an instant-read thermometer inserted close to (but not touching) the bone registers 145°F, about 7 minutes more.
  6. Serve with the lime wedges.

http://www.lynnandruss.com

IMG_2993

Chicken Thighs in Tomato-Ginger Sauce

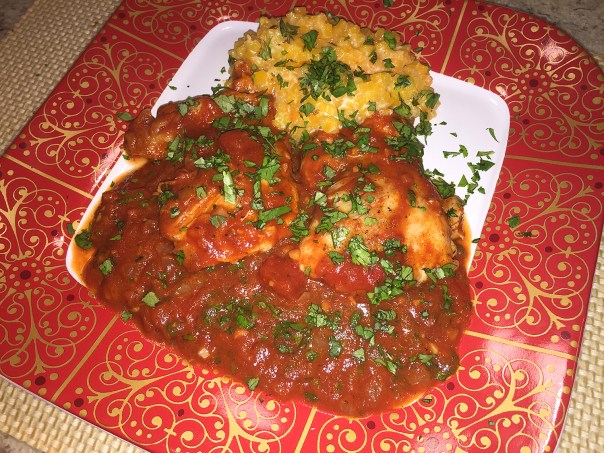
Another quick weeknight meal, Chicken Thighs in Tomato-Ginger Sauce brings a wonderful change of pace to the hum-drum monotony of getting something on the table quickly. Seasoned with warm spices, this Indian-inspired chicken dish is savory and comforting. The small amount of butter swirled into the sauce may seem like an unusual addition, but it adds richness and flavor, and softens the tomatoes’ acidity.

IMG_3127

While it is traditionally served with basmati rice or naan, we took a shortcut and tried Alexia’s brand of frozen Butternut Squash Risotto. Not usually into processed side dishes, it’s not a bad idea to stock pile a few good ones because they certainly come in handy when you’re in a hurry or don’t have any fresh produce around. A few weeks ago we tried the same brand of Cauliflower Risotto and prefer that over the butternut mix—perhaps because it visually more resembles real risotto.

IMG_3110

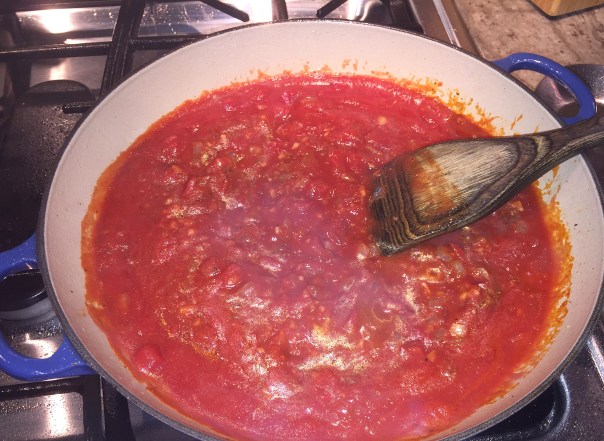
As far as the canned tomatoes, we had a 28-ounce crushed tomato in the pantry and figured that was a good enough substitute for a smaller quantity of thighs (we only cooked six) even though they weren’t “fire roasted.” Overall, we thought the flavors were very well-balanced and the garam masala and cayenne added just the right amount of heat.

IMG_3113

Chicken Thighs in Tomato-Ginger Sauce

  • Servings: 4
  • Difficulty: easy
  • Print

Ingredients

  • 8 small, boneless, skinless chicken thighs (about 1-1/2 lb.)
  • Kosher salt and freshly ground black pepper
  • 1-1/2 Tbs. canola or vegetable oil; more as needed
  • 1 medium yellow onion, finely diced
  • 2 large cloves garlic, minced
  • 2 Tbs. minced fresh ginger (from a 1-inch piece)
  • 1 tsp. garam masala
  • 1/4 tsp. ground cinnamon
  • 1/4 tsp. cayenne
  • 2 15-oz. cans fire-roasted crushed tomatoes
  • 1 oz. (2 Tbs.) cold unsalted butter, cut into 4 pieces
  • 1/4 cup coarsely chopped fresh cilantro

Directions

  1. Pat the chicken thighs dry and season with 1-1/2 tsp. salt and 1/4 tsp. pepper.
  2. Heat the oil in a heavy-duty 12-inch skillet over medium-high heat until shimmering hot. Brown half of the chicken, flipping once, 5 to 6 minutes total. Transfer the chicken to a plate. If necessary, repeat with the remaining chicken, adding more oil if the pan looks dry.
    IMG_3116
  3. Reduce the heat to medium. Add the onion and a pinch of salt, and cook, stirring frequently with a wooden spoon, until golden-brown on the edges, 3 to 5 minutes.
  4. Add the garlic, ginger, garam masala, cinnamon, and cayenne and stir constantly for about 30 seconds.
  5. Stir in the tomatoes, increase the heat to medium high, and simmer vigorously until slightly reduced, about 3 minutes.
    IMG_3118
  6. Add the chicken and any accumulated juice. Spoon the sauce over the chicken, reduce the heat, and simmer until just cooked through, 5 to 7 minutes.
    IMG_3120
  7. Transfer the chicken to plates or a platter. Stir the butter into the sauce until incorporated and season to taste with salt.
    IMG_3123
  8. Spoon the sauce over the chicken, garnish with the cilantro, and serve.

http://www.lynnandruss.com

IMG_3126

By Dabney Gough from Fine Cooking

Soups On!

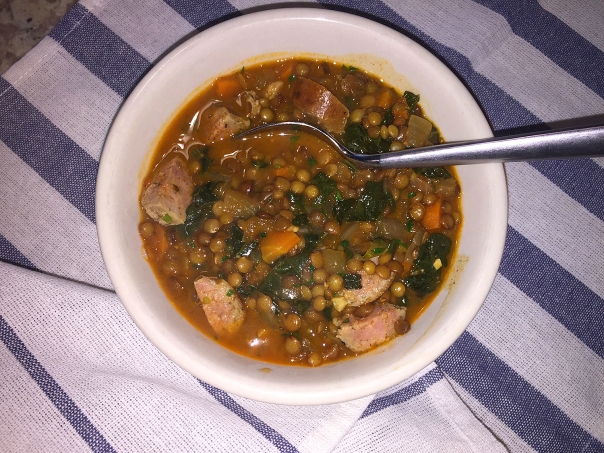
Sometimes a robust and nourishing soup is just what you need to soothe the soul and calm the day-to-day frenzy of modern life. Hearty Spanish-Style Lentil and Chorizo Soup with Kale might be just the ticket. And we know just how healthy lentils and kale are, so we can feel good about eating this soup.

IMG_3399

A long cooking develops a certain amount of sweetness in the chopped onion, carrot, and parsley, as well as removes any trace of unpleasant sulfuric compounds in the onion. These sweated aromatics offer a pure, sweet background taste that not only allows the soup’s primary ingredients (smoked paprika, chorizo, lentils, and sherry vinegar) to come to the fore but also seemed to fortify their individual flavors. Three quintessential ingredients provide this soup with authentic Spanish flavor.

SMOKED PAPRIKA: Pimentón, made by drying red peppers over an oak fire, offers a distinctive rich and smoky taste.

SHERRY VINEGAR: Lightly sweet sherry vinegar boasts assertive yet balanced acidity.

SPANISH CHORIZO: This heady sausage combines coarsely ground, dry-cured pork with a hit of pimentón.

French green lentils, or lentilles du Puy, are preferred, but it will work with any type of lentil except red or yellow. Grate the onion on the large holes of a box grater. If Spanish-style chorizo is not available, kielbasa sausage can be used. Since we already made this once with chorizo, we decided to switch things up and use kielbasa this time.

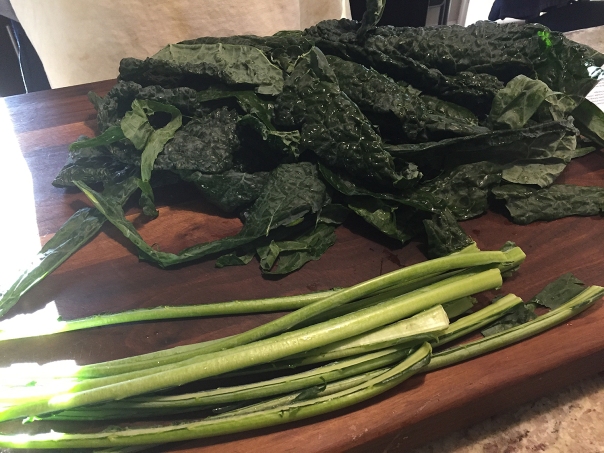
IMG_3383Rinse the kale, then de-stem the tough stalks and discard. Chop leaves into 1/2″ pieces.

Red wine vinegar can be substituted for the sherry vinegar. Smoked paprika comes in three varieties: sweet (dulce), bittersweet or medium hot (agridulce), and hot (picante). For this recipe, the sweet kind is best.

To ensure creamy, well-seasoned lentils with intact skins, soak them in a warm brine for 30 minutes before cooking. For a rich, vegetal flavor, sweat onion, carrot, and parsley in a covered pot to provide a background taste to the main ingredients: heady smoked paprika, meaty chorizo, earthy lentils, and tart sherry vinegar. To finish the soup, garnish it with an Indian preparation called a tarka, a mixture of spices and aromatics bloomed in oil, shown below.

IMG_3386

IMG_3391

Hearty Spanish-Style Lentil and Chorizo Soup with Kale

  • Servings: 6-8
  • Difficulty: moderate
  • Print

Ingredients

  • 1 pound (2 1/4 cups) lentils, picked over and rinsed
  • Salt and pepper
  • 1 large onion
  • 5 tablespoons extra-virgin olive oil
  • 1 ½ pounds Spanish-style chorizo sausage, pricked with fork several times
  • 3 carrots, peeled and cut into 1/4-inch pieces
  • 3 tablespoons minced fresh parsley
  • 7 cups water, plus extra as needed
  • 3 tablespoons sherry vinegar, plus extra for seasoning
  • 2 bay leaves
  • ⅛ teaspoon ground cloves
  • 12 ounces kale, stemmed and cut into 1/2-inch pieces
  • 2 tablespoons sweet smoked paprika
  • 3 garlic cloves, minced
  • 1 tablespoon all-purpose flour

Directions

  1. Place lentils and 2 teaspoons salt in heatproof container. Cover with 4 cups boiling water and let soak for 30 minutes. Drain well.
  2. Meanwhile, finely chop three-quarters of onion (you should have about 1 cup) and grate remaining quarter (you should have about 3 tablespoons).
  3. Heat 2 tablespoons oil in Dutch oven over medium heat until shimmering. Add chorizo and cook until browned on all sides, 6 to 8 minutes. Transfer chorizo to large plate.
  4. Reduce heat to low and add chopped onion, carrots, 1 tablespoon parsley, and 1 teaspoon salt. Cover and cook, stirring occasionally, until vegetables are very soft but not brown, 25 to 30 minutes. If vegetables begin to brown, add 1 tablespoon water to pot.
  5. Add lentils and sherry vinegar to vegetables; increase heat to medium-high; and cook, stirring frequently, until vinegar starts to evaporate, 3 to 4 minutes.
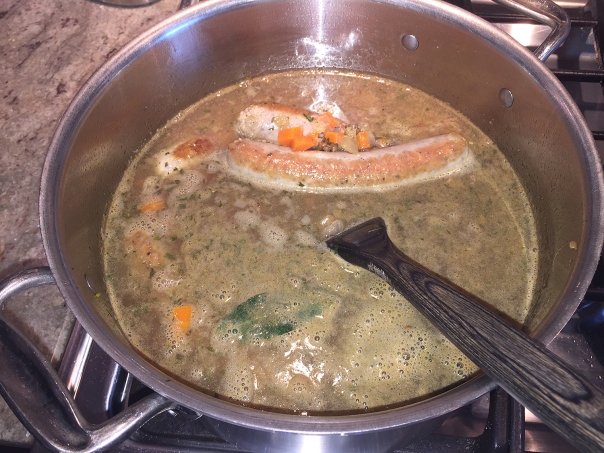
  6. Add 7 cups water, chorizo, bay leaves, and cloves; bring to simmer. Reduce heat to low, cover, and cook for 15 minutes.
    IMG_3385
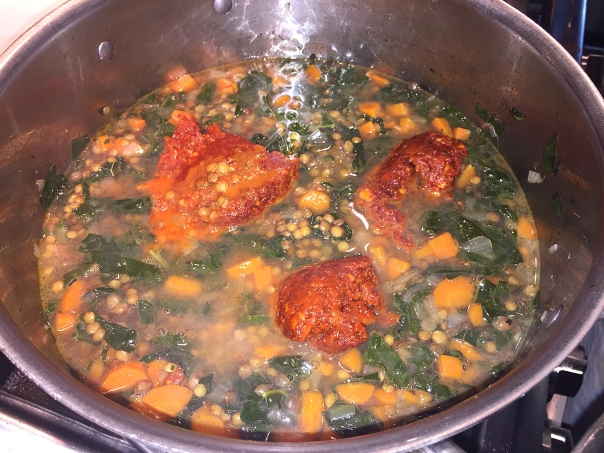
  7. Stir in kale, cover, and continue to cook until lentils are tender, about 15 minutes longer.
    IMG_3390
  8. Heat remaining 3 tablespoons oil in small saucepan over medium heat until shimmering. Add paprika, grated onion, garlic, and ½ teaspoon pepper; cook, stirring constantly, until fragrant, 2 minutes (tarka).
  9. Add flour and cook, stirring constantly, 1 minute longer.
  10. Remove chorizo and bay leaves from lentils. Stir paprika mixture (tarka) into lentils and continue to cook until flavors have blended and soup has thickened, 10 to 15 minutes.
    IMG_3393
  11. When chorizo is cool enough to handle, cut in half lengthwise, then cut each half into ¼-inch-thick slices. Return chorizo to soup along with remaining 2 tablespoons parsley and heat through, about 1 minute.
    IMG_3395
  12. Season with salt, pepper, and up to 2 teaspoons sherry vinegar to taste, and serve. (Soup can be made up to 3 days in advance.)

http://www.lynnandruss.com

IMG_3396

Bella Tori at the Mansion

This stately lady in Langhorne Borough, Bella Tori at the Mansion, dates back to 1898. Philadelphia entrepreneur, Howard Reifsnyder, built the Greenwood Mansion (as it was known then) as a summer home for his family until it was sold to Mollie Woods Hare in 1921. Then used as The Woods School for Handicapped Children and Adults, until it was purchased in 1999 by Paul Manes who took over 5 years restoring “Bella” to her original grandeur. In November 2005, the mansion reopened its doors as a beautiful victorian restaurant and catering facility featuring Italian fare.

exterior.shot

bella.tori.sign.wedding

A few short minutes from our home, Bella has been the site for many a memorable meal, including our wedding dinner reception in 2012, above. We also enjoyed a New Year’s Eve dinner (date forgotten); and an Easter Sunday brunch in 2014, below, after enduring a cross-atlantic flight from Italy when jet lag was so severe, we couldn’t even contemplate the thought of cooking—an unusual predicament for us to be in.

lynn.and.russ.brunch

Our most recent visit was on St. Patrick’s Day with our friends Rosanne and Gary Zarrilli. Granted, Bella’s menu is not even close to Irish, but that didn’t deter us because we started out at home with some decadent Reuben Dip and a bottle of Killian’s Irish Red to tide us over until dinnertime.

IMG_3547

The ride over is literally two minutes from home and we could have walked save the fact that it was blustery cold. Upon arriving at the 9,000-square-foot establishment, we were promptly seated in the main dining featuring a Mercer tile fireplace. The decor is lavish and very Victorian, and the noise level is pleasantly low key.

For starters, we agreed to split a bottle of Marques de Riscal, from one of our favorite wineries in Spain. Our waitress Keira (decidedly Irish) was a small bundle of pep and kept the evening going at a leisurely pace, and was kind enough to take our group photo.

IMG_3555

Even though we noshed on some of that Reuben Dip, we went all out and ordered a few more appetizers. Russ and Rosanne were fixated on the Oysters Bienville, and chose to split the selection. Four beautifully baked oysters with shrimp, bacon, ham and mushrooms were topped with sherry cream and Parmesan bread crumbs. Thoughtfully plated with two forks, they adored them!

IMG_3557

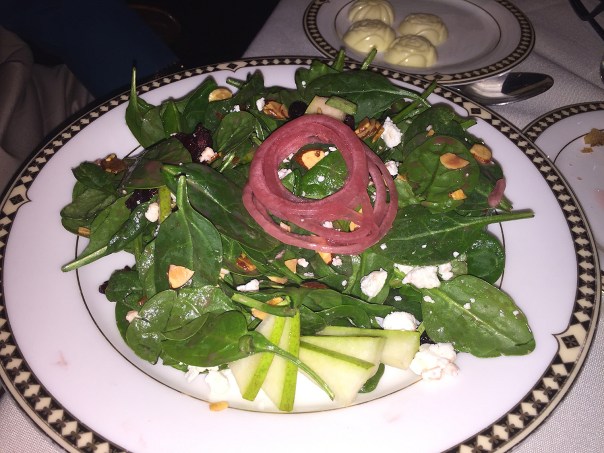
Gary chose the Winter Bella Salad comprised of baby spinach, Bartlett pear, dried cranberries, chévre, pickled red onion, toasted almonds and dressed with a pomegranate vinaigrette. I was torn between that and the Shrimp Le Jon, but with Russ’ persuasion, I opted for the shrimp (because he was going to eat some of it.) Three roasted shrimp were stuffed with horseradish grain mustard, wrapped in bacon and served atop a lemon sun-dried tomato aioli with a basil chiffonade, exquisite!

IMG_3559

IMG_3556

There were so many good options under the Entrées, that it was difficult at best to make up our minds. After some back and forth, Russ chose one of his favorites, the Chasseur Veal Osso Buco. Slow-braised in a hunter sauce, it came plated over roasted butternut squash with a side of spinach risotto topped with a citrus gremolata. He was very impressed that they served it with a spoon in the bone to scoop out the marrow—to him, a sign they know what they’re doing.

IMG_3567

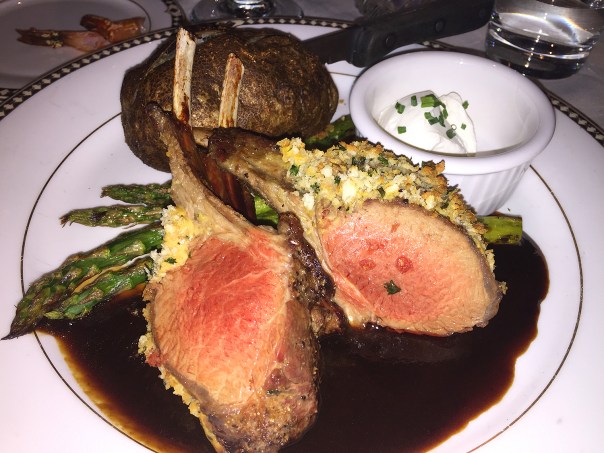
Again I was torn between the French Quarter Shrimp & Scallops, which Rosanne selected, and the Dijon Herb-Crusted Rack of Lamb. Choosing the latter, my four ribs (you could also order eight), were perfectly cooked, seasoned panko crusted New Zealand lamb chops which came accompanied by a red wine demi-glace, and paired with grilled asparagus and an overcooked baked potato (the only misstep of the entire experience.)

IMG_3563

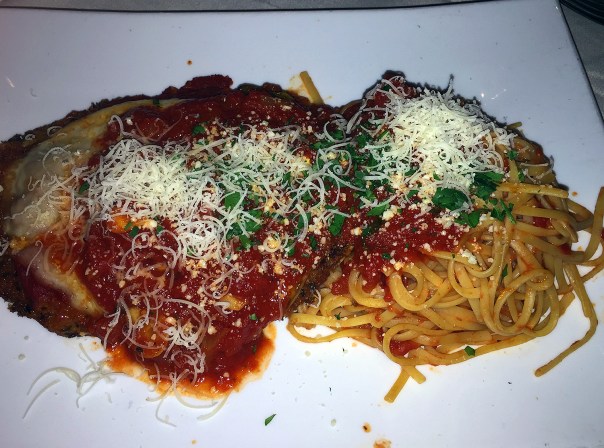
Rosanne’s seafood dish of grilled scallops and shrimp arrived in a Creole tasso sauce and were tossed with roasted trinity vegetables, cheese and scallion grits. While Gary didn’t surprise any of us with his choice of Veal Parmitori, a ginormous cutlet, lightly breaded and fried and topped with Pomodoro sauce and aged provolone cheese over a bed of linguine. Suffice it to say, we all denied dessert and took four doggie bags home.

IMG_3564

IMG_3565

We’re looking forward to patronizing Bella on a Friday when you can bring your own bottles of wine with no corkage fee (the DaVinci Bar is still open) and they feature a live classical guitarist in the house. It’s a fabulous place to celebrate any special occasion or just because you want a good meal. Below are some pics of that great Sunday brunch.

Sunday.brunch
Sunday.brunch2
sunday.brunch3

Whole-Grain Pasta e Fagioli with Butternut Squash and Sage Pesto

Whole-grain orecchiette or shells star in this makeover of a classic Italian pasta and bean soup. With butternut squash, borlotti beans, and a bright sage pesto, it’s perfect for a chilly evening. And unfortunately here in the Northeast, Winter continues her steady and determined grip on our area, refusing to let Spring usher forth. So we must find ways to counteract the cold…

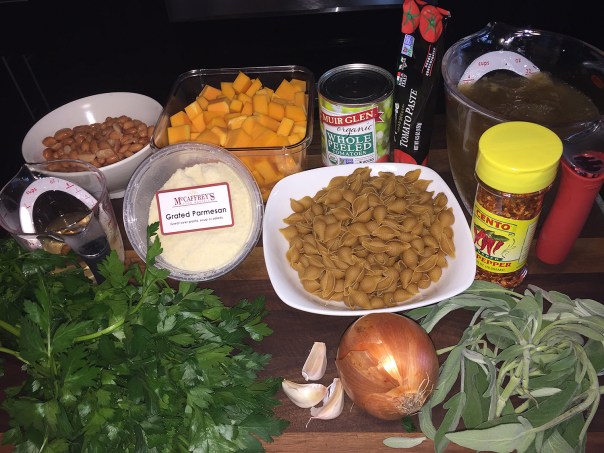
borlotti.bean

Borlotti beans, also commonly referred to as the cranberry bean, is a dappled white and red bean related to the kidney and pinto beans. This is a common bean in Italy where it is used for soups and with pasta. Depending on where you live you may have a tough time, like us, finding this bean at your neighborhood grocery store. You can check your local Walmart store which sometimes stocks these beans. What we didn’t know until after the fact was, you can buy them easily enough online at Amazon.com. In a pinch, we substituted it’s cousin, pinto beans.

IMG_3496

The sage pesto was the “bomb,” it was sooo good I could’ve eaten it with a spoon! Make sure to swirl a generous amount into your pasta e fagioli. While mine was purposely not as saucy as indicated in the directions, any leftover would be fabulous as a condiment, a sandwich spread, or as a topping for baguettes and crackers. That’s of course, if you have any leftover…

Let’s not overlook the health benefits of butternut squash. Low in fat, it delivers an ample dose of dietary fiber, making it an exceptionally heart-friendly choice. It provides significant amounts of potassium, important for bone health, and vitamin B6, essential for the proper functioning of both the nervous and immune systems. The folate content adds yet another boost to its heart-healthy reputation and helps guard against brain and spinal-cord-related birth defects such as spina bifida.

butternut.squash.isolated

The squash’s tangerine hue, however, indicates butternut’s most noteworthy health perk. The color signals an abundance of powerhouse nutrients known as carotenoids, shown to protect against heart disease. And, as if that weren’t enough, butternut squash may have anti-inflammatory effects because of its high antioxidant content. Incorporating more of this hearty winter staple into your diet could help reduce risk of inflammation-related disorders such as rheumatoid arthritis and asthma. Feeling better already…

Although I did it the old fashioned way—with a knife—the reason many folks don’t include Winter squashes in their recipes is because they’re a pain to peel, am I right? Yes, you can buy the pre-peeled and diced variety, which can run you upwards of $7 or more per pound at a local grocery store. Compare that to $1.49/lb for the whole squash variety, and you’ve got a very significant savings—the pre-cubed costs over four times more! Well here’s an easy method to peel a whole squash:

  1. Prick the skin of the squash all over with a fork.
  2. Slice off both ends of the squash.
  3. Microwave the squash for about 3½ minutes. This softens the skin considerably.
  4. Let the squash cool enough to handle, or use a towel to hold it, and simply peel away the skin.
That’s it! The skin falls off with very little pressure after a few minutes in the microwave. And don’t worry about overcooking the squash; those few minutes don’t really affect the flesh. Once you’ve peeled with ease, you can cook the squash however you’d like.

IMG_3493

Whole-Grain Pasta e Fagioli with Butternut Squash and Sage Pesto

  • Servings: 4-6
  • Difficulty: moderately easy
  • Print

Ingredients

For the soup

  • Fine sea salt
  • 6 oz. whole-grain orecchiette, small shells, or other small pasta
  • 2 Tbs. extra-virgin olive oil
  • 1 cup chopped yellow onion (about 1 small)
  • 2-1/2 cups diced (1/2 to 3/4 inch) butternut squash
  • 2 Tbs. chopped fresh flat-leaf parsley
  • 1 Tbs. chopped fresh sage
  • 2 medium cloves garlic, minced
  • 1/2 tsp. crushed red pepper flakes (optional)
  • 2 Tbs. tomato paste
  • 1/2 cup dry white wine
  • 4 cups chicken or vegetable broth, preferably homemade
  • 1 15-oz. can borlotti (or cranberry or Roman) beans, rinsed and drained (1-3/4 cups)
  • 1 14-oz. can whole peeled tomatoes with juice, crushed
  • Freshly ground black pepper

For the pesto

  • 1 packed cup fresh flat-leaf parsley leaves, coarsely chopped
  • 2 to 3 Tbs. coarsely chopped fresh sage
  • 1 medium clove garlic, chopped
  • 1 oz. Parmigiano-Reggiano or Grana Padano, coarsely grated on the large holes of box grater (1/2 cup); more, finely grated, for serving
  • Fine sea salt and freshly ground black pepper
  • 6 Tbs. extra-virgin olive oil; more as needed

Directions

Make the soup

  1. Bring a large pot of well-salted water to a boil, and cook the pasta according to package directions until not quite al dente.
  2. Meanwhile, heat the oil in a 5- to 6-quart Dutch oven or other heavy-duty pot over medium heat until shimmering.
  3. Add the onion and 1/4 tsp. salt; cook, stirring occasionally, until starting to brown, 3 to 5 minutes. Add the squash and stir to coat with the oil.
  4. Add the parsley, sage, garlic, and pepper flakes, if using, and cook, stirring, until fragrant, about 30 seconds.
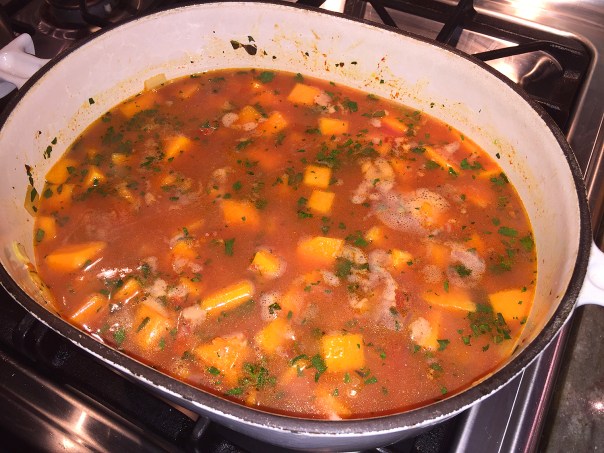
    IMG_3499
  5. Add the tomato paste and cook, stirring, until it is evenly distributed and looks slightly darker, 1 to 2 minutes.
    IMG_3500
  6. Add the wine and cook until almost evaporated, about 1 minute.
  7. Add the broth, beans, and tomatoes. Stir well, scraping the bottom of the pot, and simmer until the squash is barely tender, 13 to 15 minutes.
    IMG_3501
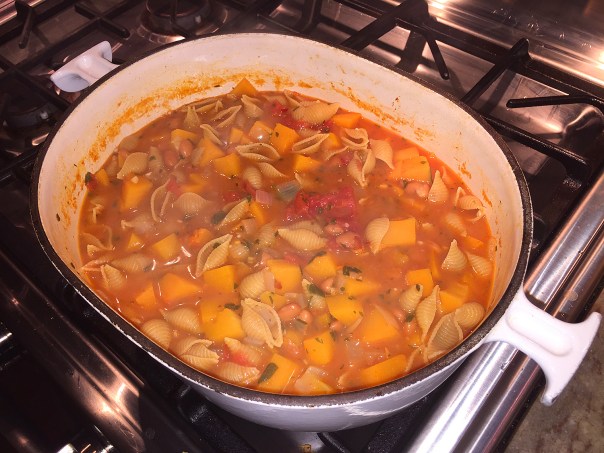
  8. Add the pasta and continue simmering until the squash and pasta are tender, 1 to 2 minutes. Remove from the heat.
    IMG_3503

Make the pesto and serve

  1. Put the parsley, sage, garlic, and coarsely grated cheese in a food processor. Sprinkle with 1/4 tsp. salt and 1/4 tsp. pepper and drizzle with the oil.
  2. Pulse until finely chopped, adding more oil if necessary to give it a saucy consistency. Season to taste with salt and pepper, and transfer to a bowl.
  3. Thin the soup with water if desired and add 1/4 tsp. pepper. Season to taste with more salt and pepper.
  4. Divide among soup bowls and spoon 1 to 2 Tbs. pesto on top of each serving. Pass the finely grated cheese at the table.

http://www.lynnandruss.com

IMG_3509

By Maria Speck from Fine Cooking

Gooey Goodness

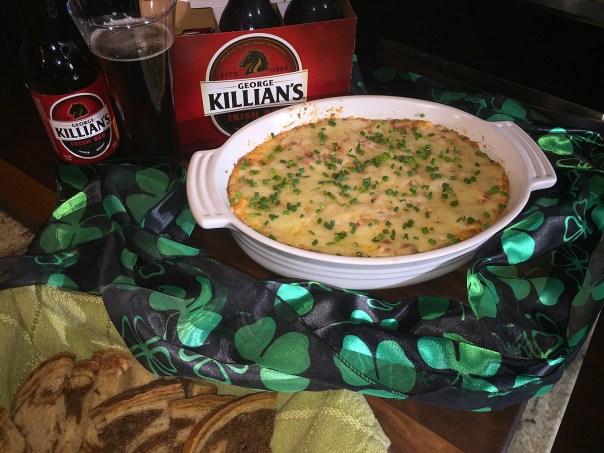
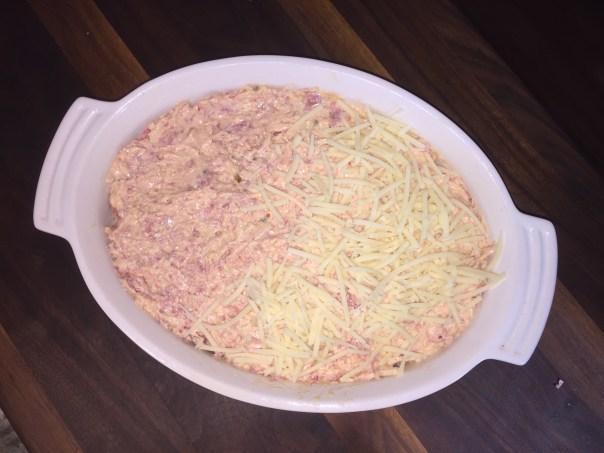
March 17 was upon us and we had company coming for appetizers and drinks before venturing out for dinner. I was hoping to serve some Harp lager, but the store had every, and I mean every, brand but Harp! So our next best choice was some Killian’s Irish Red, to pair with the Classic Reuben Dip. And to scoop up all the gooey goodness, we supplied slices of a chewy marbled rye—a perfect starter to kick off a St. Patty’s Day evening.

IMG_3547

Many folks eat corned beef and cabbage on St. Patrick’s Day (even if they’re not Irish.)  Well, the Reuben isn’t Irish at all, so it baffles me why it’s an “Irish” staple on this holiday. As one origin story tells it, Reuben Kulakofsky, a Jewish Lithuanian-born grocer residing in Omaha, Nebraska, was the inventor!

No matter, the corned beef, sauerkraut, and rye bread combination all make it feel like it was meant to be Irish. This dip combines all of those classic flavors and transforms them into a fabulously creamy dip. It’s amazing how so few ingredients can pack such an incredible gastronomic punch. Yes, this is a diet-buster, but a little goes a long way…

“Ithe agus taitneamh a bhaint as” (Eat and enjoy!)

IMG_3534

Classic Reuben Dip

  • Servings: 6-8
  • Difficulty: easy
  • Print

Ingredients

  •  4 oz. onion & chive flavored cream cheese, softened
  •  1 cup mayonnaise
  •  ⅔ cup prepared Thousand Island or Russian dressing
  • 1 cup sauerkraut, drained and rinsed
  • 8 oz. deli corned beef, chopped
  • 2 cups shredded Swiss cheese
  • 1 tsp. fresh chives, chopped
  • Dark bread, such as rye or pumpernickel

Directions

  1. Preheat the oven to 350°F.
  2. Spritz a 1-quart baking dish with cooking spray. Set aside.
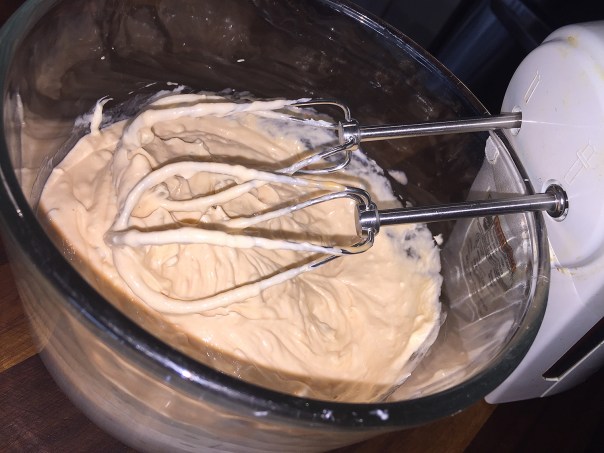
  3. In a medium-size mixing bowl, use a hand mixer to cream together the softened cream cheese, mayonnaise and salad dressing until thoroughly combined.
    IMG_3538
  4. Drain and rinse the sauerkraut then squeeze dry using paper towels to remove as much moisture as possible.
  5. To the creamed mixture add the sauerkraut, chopped corn beef, and 1 ½ cup shredded Swiss cheese. Mix together by hand.
  6. Spread the dip into the baking dish and top with the remaining cheese.
    IMG_3539
  7. Place into the preheated oven and bake for 30 minutes until bubbly and golden.
  8. Garnish with chopped chives. Serve with rye or pumpernickel bread for dipping, and a hearty Irish lager.

http://www.lynnandruss.com

IMG_3551

Nature’s Nibbles

Nothing like a little pressure to light a fire under one’s creativity. What prompted this culinary brainstorm was the end of my Master Gardner class where each student had to give a 5-minute presentation on a subject matter of their choice. I decided to talk about how gardening influences my creative pursuits and how that ties in with my social media venues (including this food blog).

IMG_8912At this point in the presentation I am describing the creation of concrete cast elephant ear bird baths. A step-by-step tutorial, is available on my blog.

IMG_3272For a little “bling” I dusted some of the cookies with colorful sparkly powders.

IMG_3265

What does that have to do with food you ask? Well, I do consider cooking and baking an art form. So my final slide in the presentation hinted at the edible snacks I provided the class later that evening. You know I design decorated sugar cookies for all sorts of occasions, so I thought flowers and butterflies would be an appropriate choice for Master Gardners.

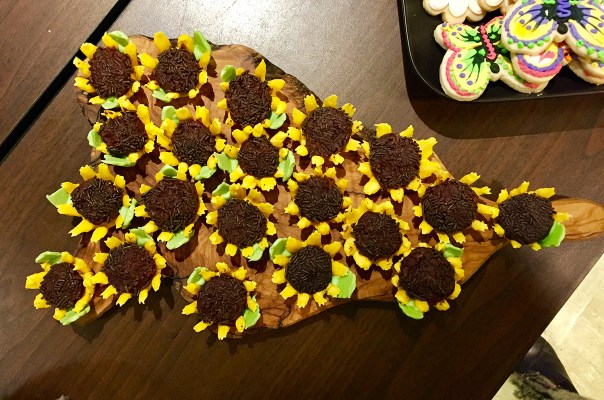
Plus, based on some Internet investigation, I concocted a new Sunflower Truffle candy (recipe below) for those who need their chocolate fix—and for a bit of whimsy on the table. The flowers harden up quite well, but if any of the petals break off, just place the bottom end in some real hot water for a few seconds and “glue” them back to the base.

IMG_8917

Now that took care of the sweet component, but I also wanted to provide a savory nibble or two. So after a little research on Pinterest, I found these wrapped cheese lilies and stuffed grape tomato bites that are just adorable. For stuffing purposes, you can basically use anything you want to. I filled the “tulips” with a roasted garlic and herb cheese spread, and the “calla lilies” with tuna salad and a carrot stick. Both were enhanced with some greens like scallions, parsley and dill.

IMG_3512

My final contribution was the cheese and cracker platter. I ordered extra thick cheddar and French gruyere cheese slices from the deli and cut out shapes using mini cookie cutter flower shapes. They were then topped with a hot cherry pepper circle and placed on Roasted Red Pepper Triscuits.

IMG_3352

Since it’s Springtime, these would be a great addition for any gathering you have coming up. Hint, hint…

Sunflower Truffle Candies

  • Servings: 20-24
  • Difficulty: moderate
  • Print

Ingredients

Ganache

  • 8 oz. dark chocolate (70-72% cocoa)
  • 4 oz. heavy cream

Sunflower Base

  • yellow chocolate melts (green melts optional for leaves)
  • mini cupcake liners
  • 2 piping bags
  • mini cookie scoop or fruit baller
  • chocolate jimmie sprinkles

Petal Directions

  1. Make a batch of ganache (recipe below) and set it in the fridge to firm up.
  2. Separate and slightly flatten the mini cupcake liners.
  3. Melt the yellow and green (if using) chocolates separately, and fill piping bags.
  4. Thinly pipe the bottom of the liners with yellow, filling in any gaps, then, while turning, pipe up the sides to create petals.
    IMG_3331
  5. Cool completely until set and peel off the liners.
  6. Scoop out the truffles with the mini scoop and roll them in the sprinkles. You may have to roll the ganache balls in your hands a bit to warm them up and soften the outside slightly.
  7. Place the truffles into the chocolate flower cups.
    IMG_3348

Truffle Directions

  1. Heat the cream: Pour the cream into a small saucepan and place it over medium-low heat for a few minutes. Keep an eye on the cream — it’s not necessary to boil or simmer it. It just needs to get hot. The cream is ready when you can place a finger in the cream and keep it there for 3 to 4 seconds. Turn off the flame and remove the cream from the stove.
  2. Chop the chocolate: While the cream is heating, chop the chocolate into fine pieces.
    IMG_3333
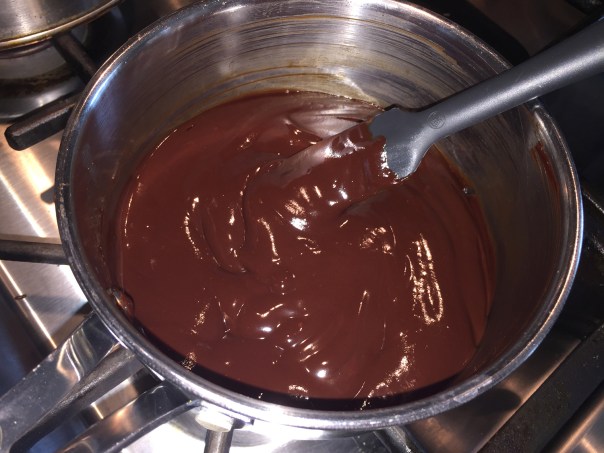
  3. Add the chocolate: Scoop the chocolate into the cream. Stir gently to distribute the chocolate through the cream and then let it sit for a few minutes to give the chocolate time to soften and melt.
  4. Stir the mixture: With a spatula or wooden spoon, stir the ganache. At first it might look spotty and broken but keep stirring until it comes together in a creamy mass.
    IMG_3337
  5. Cool the ganache: Set the pan in the refrigerator so the ganache cools. Remove the pan every 5 minutes or so and stir so that the ganache cools evenly. As the chocolate begins to stiffen, stir it more frequently — it will go from soft to very hard quite suddenly. (If this happens, soften the ganache over gently simmering water, stirring until you’ve reached the right consistency again.)

http://www.lynnandruss.com

IMG_3423.jpg
Optional:
Using a leaf tip, pipe green leaves. Then “glue” the hardened leaves to the petals with some of the melted green.

A chocolate with a higher cocoa percentage such as 70% will make a rich, not-too-sweet ganache. The chocolate jimmies will add some more sweetness.

IMG_3336

Don’t stop with creating yellow sunflowers only. Think “inside the flower bed” and make Purple Coneflowers, White Daisies, or colorful Osteospermums by swapping out the hue of the chocolate melts. The possibilities are endless, and you don’t even need a green thumb…

I have to give a shout out to fellow soon-to-be-Master Gardner Cindy for her beautiful biscotti basket!

IMG_3521

Some of the class sample the snacks during break time:

IMG_3524
IMG_3525
IMG_3522

Tre Fratelli

We recently dined at Tre Fratelli (three brothers in Italian-speak), a BYO behind an unassuming storefront in the Summit Square shopping center in Langhorne, right on the border with Newtown. Many years ago we patronized the restaurant with good friends Barb and Brad, but hadn’t given it another thought since then because of the plethora of great Italian restaurants within a ten mile radius.

Screen Shot 3

But it came back on my radar since I’ve been parking my auto nearby when I carpool with a few other ladies to my Master Gardner class. So I made a res for a Saturday night—again with Barb and Brad—and we were pleasantly surprised over the more modern and tasteful, yet muted grayscale decor. (The front of the house is more casual and caters to take-out and pizzas.)

IMG_3179

IMG_3175
Behind Barb and Brad was a large sliding barn door separating the other dining room for hosting private parties.

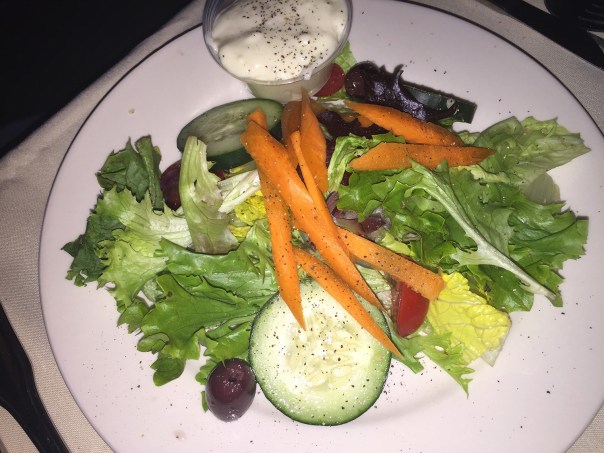
Tasty pizza and flavorful pasta are the restaurant’s big-ticket items, but we opted for three entrées and a hot sandwich. The main dishes were plentiful (more than enough for an ample doggie bag), and instead of sides of pasta, Russ and I chose their vegetable medley. (Gluten-free options available upon request.) With the entrées came a choice of a garden or Caesar salad, Russ’s favorite if he can get it topped with whole anchovies.

IMG_3182

IMG_3181

IMG_3187
Veal Parmigiana
, lightly fried and topped with tomato sauce, and baked with mozzarella and parmesan cheeses. (Russ)

IMG_3185
Bellagio:
Chicken sautéed with prosciutto in a light plum tomato sauce and baked with aged provolone. (Lynn)
IMG_3188
Domani:
chicken with roasted garlic chicken stock, romano cheese and fresh sautéed spinach. (Barb)
IMG_3184
Steak & Cheese Stromboli 
stuffed with mozzarella cheese and served with a side of sauce. Small and large sizes available. (Brad)
The overall consensus was good, and the sound level was very pleasant allowing for easy conversation. But with all of our other nearby choices, we wouldn’t make this our preferred Italian restaurant. However it’s nice to know it’s there in a pinch.

Sunday with a Chance of Meatballs

Very few foods seamlessly cross cultures, but meatballs are one of them. They can run the gamut from Lebanese kibbe, Syrian kafta, Japanese tsukune and Greek kephtedes to Vietnamese nem nuong. Granted, you may not be familiar with many of them, but I’m pretty sure you’ve tasted an Italian meatball or two in your lifetime. For this recipe Toronto-born and San Francisco-based Chef Christophe Hille raises the bar with his Italian Meatballs with Tomato & White Wine Braise.

IMG_3406

They’re familiar and, most importantly, they taste good—which ultimately translates into a food that never goes out of style. What varies are the other ingredients and how the meatballs are cooked—braised, sautéed, roasted, grilled, boiled or fried. In its most basic form, a meatball starts out with ground meat—pork, beef, veal, lamb or a combination thereof. For binding, a starch, usually bread or breadcrumbs (sometimes potato starch or rice) gets mixed in. Eggs or other liquid contribute moisture; while herbs, spices and cheese add flavor. Here, prosciutto scraps impart a deep flavor.

FYI, contrary to popular belief, in Italy you won’t likely find a dish on the menu called spaghetti and meatballs. While it’s largely known as an Italian dish, spaghetti and meatballs actually didn’t originate there. Sure, Italy has their own version of meatballs called polpettes, but they’re different than what you’ve likely had in the past and are primarily eaten sans spaghetti.

Frugal folk have always made use of the little scraps of meat that were left over from butchering, but weren’t big enough to serve on their own—but could be chopped and extended with a bit of day-​​old bread. The range of variations they’ve concocted could, and probably should, keep us in meatballs for a lifetime. But we’re talking just one meal (with probable leftovers) with this recipe.

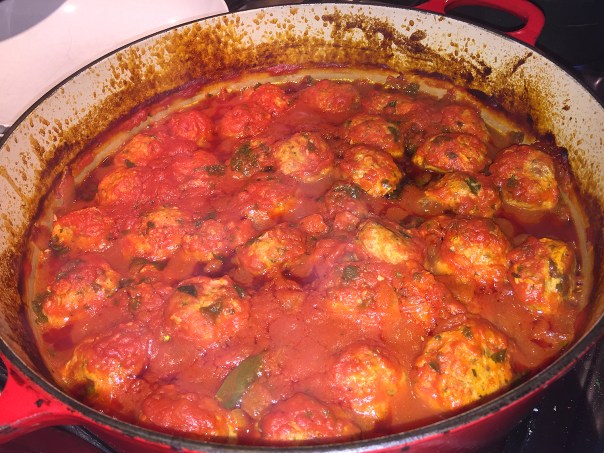
Since it takes up most of the afternoon to prep and braise, it’s best to make when you have a block of time, most likely a weekend. For us, it was a recent blustery Sunday. We found the recipe in an old copy of the San Francisco Chronicle insert “In the Kitchen,” gifted to us from our brother-in-law who resides in the Bay Area on the “Left” coast. Simply put, these meatballs were fantastic—a definite two thumbs up!

It’s not likely you’ll be able to purchase packages of ground meat in exactly 10-ounce portions. So do what I did and measure 10 ounces each of the pork and beef, mixing any leftover together and make patties out of them. Then vacuum-seal and put them in the freezer until it’s grilling weather.

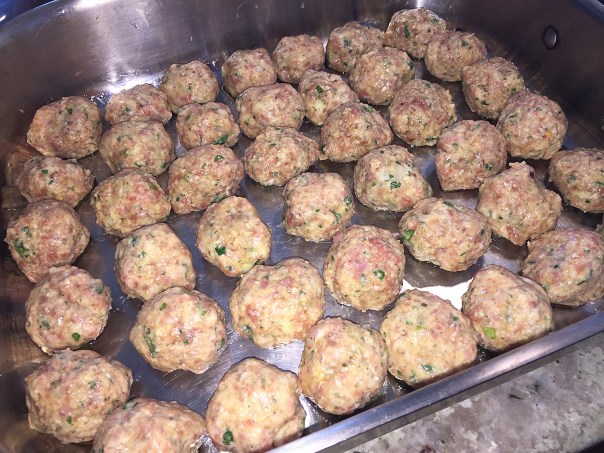
IMG_3372Following the original directions, we tried to brown the meatballs in a roasting pan in a 400 degree oven for 15 minutes. Even after adding 6 more minutes, they weren’t very browned, as shown below.
IMG_3377

The original directions have you roast the meatballs in a 400 degree oven for 15 minutes. Next time, we’re skipping that step and will only use one large dutch oven. We’ll brown the meatballs in it first, remove them and make the sauce, scraping up any precious browned bits. Then add the meatballs back into the pot and put in the oven for 2 1/2 hours. We thought it a waste of time to try and brown the meatballs in a separate roasting pan. In fact, I added an extra six minutes in the oven and they still weren’t very browned! Saves you from cleaning an additional pan too. The directions below reflect this time-saver.

Italian Meatballs with Tomato & White-Wine Braise

  • Servings: 40-45 meatballs
  • Difficulty: moderate
  • Print

Ingredients

IMG_3365

MEATBALLS:

  • 10 oz lean ground pork
  • 10 oz lean ground beef
  • 1/4 lb prosciutto, finely chopped in food processor
  • 3 oz parmesan cheese, freshly grated
  • 1 finely chopped small onion
  • 1 minced clove garlic
  • 1/4 cup finely chopped parsley
  • 1 tbsp dried oregano
  • 1-1/2 tsp kosher salt
  • 1 tsp fennel seeds
  • 1/2 tsp red pepper flakes
  • 1/2 lb Italian bread, crusts cut off and discarded, bread processed into crumbs
  • 6 oz ricotta cheese (about 2/3 cup)
  • 3 eggs, lightly beaten
  • 1/4 cup whole milk
  • Oil for greasing pan

IMG_3375

BRAISING SAUCE:

  • 2 Tbsp extra-virgin olive oil
  • 1 chopped onion
  • 1chopped carrot
  • 1 bay leaf
  • 3/4 cup dry Italian white wine
  • 4 cups puréed, canned tomatoes
  • 1 cup chicken stock
  • 2 Tbsp coarsely chopped basil
  • 2 Tbsp finely chopped oregano leaves
  • 1 tsp granulated sugar
  • 1/2 tsp kosher salt
  • Freshly ground pepper to taste

Directions

  1. For meatballs, add beef, pork and ground prosciutto to large mixing bowl.
  2. Add oregano, salt, fennel and red pepper flakes to bowl.
  3. Stir in onion, garlic, parsley and Parmesan cheese. Use hands to mix.
  4. Chop bread into fine crumbs in food processor.
    IMG_3368
  5. Add bread crumbs, ricotta and milk to bowl. Add the eggs, stirring until barely incorporated. Using hands, mix until ingredients are blended. (Do not overwork.)
    IMG_3369
  6. Roll into 1-1/2-inch meatballs. (Makes about 40-45.) Place meatballs in large dutch oven to lightly brown, turning as needed to brown on all sides. Remove to bowl and cover.
  7. Preheat oven to 300F. Meanwhile, for braising liquid, heat oil in braising pot on medium heat. Add onion, carrot and bay leaf. Cook until carrot is softened, about 6 minutes.
    IMG_3376
  8. Stir in wine, scraping bottom of pan. Stir in tomatoes, stock, basil, oregano, sugar, salt and pepper.
    IMG_3378
  9. Turn to medium-high and bring to boil. Reduce heat to medium-low and simmer 5 minutes.
  10. Pour tomato mixture over meatballs. Cover pot tightly and bake for 2-1/2 hours.
    IMG_3380
  11. Let sit 10 minutes before serving. Discard bay leaf.
    IMG_3400
  12. Serve over cooked pasta of choice.

http://www.lynnandruss.com

IMG_3362
This great bag of pasta shapes was part of a gift box from friends Barb and Brad.

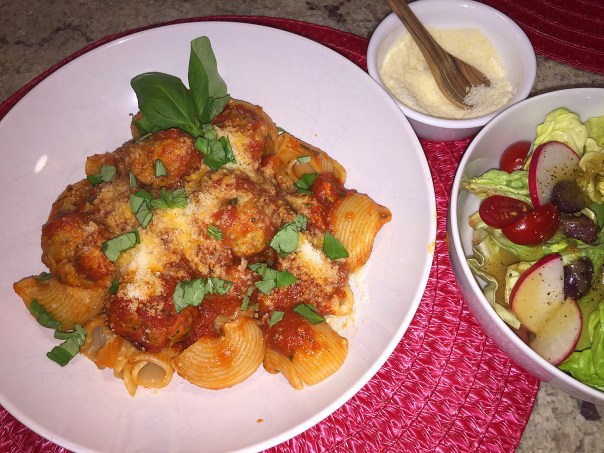
IMG_3408We served ours over garlic lumaconi pasta with a side salad and grated Parmesan cheese.

Gift Yourself

Here’s one for your Top Ten most impressive, braised, company-worthy dishes—but you’d rather keep to yourself. We’d been salivating over the Slow-Cooked Lamb Shanks in Pinot Noir recipe ever since Russ came across it on, of all places, All-Clad.com by John Shook and Vinny Dotolo.

It was several weeks before we got around to making it, but we did think ahead and put in an order for 4 lamb shanks with the butcher a week prior to braise day. And we were thrilled with the gorgeous shanks, each weighing about 1-pound and trimmed of excess fat.

IMG_3195

IMG_3202
It’s a good idea to prep everything before you start cooking.

While it’s not too complicated to prep, it is a time-intensive process because of the 3-hour braise. Whenever one of the kids is in town for a visit, we try to provide a culinary teaching moment, and this time son David was the lucky recipient of making riced garlic mashed potatoes as one of our sides.

IMG_3213David rices the potatoes while Dad tends to the sauce reduction.

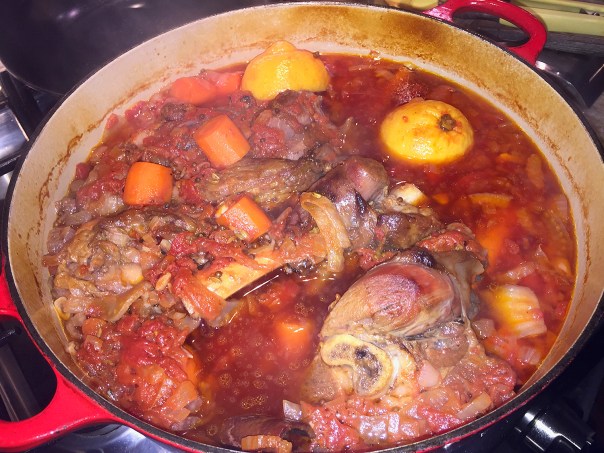
Do not skimp or omit any of the ingredients because all together they lend a wonderful depth of flavor that is brightened by the lemon. And the lamb, when done, is so fork tender the meat just falls off the bones. We paired ours with the mashed potatoes which made perfect vehicles for nesting more sauce.

IMG_3222

Directions indicate that the carrots are optional, but they absorbed all of the flavors and were perfect mouthfuls of yummy goodness, so I say, make sure to include them. And simple steamed asparagus rounded out the meal.

Unfortunately, except for a few potatoes, there were no leftovers. And I’m pretty sure, if we had cooked more shanks, David would have consumed a third! Our weather here in the Northeast is still pretty cold and windy, making a perfect backdrop for a long, slow braise. Don’t miss the opportunity to gift yourself and stretch your culinary know-how…

Slow-Cooked Lamb Shanks in Pinot Noir

  • Servings: 4
  • Difficulty: moderately easy
  • Print

Ingredients

  • 2 tablespoons olive oil
  • 4 lamb shanks, 3/4 to 1 pound each
  • 3 teaspoons kosher salt
  • 1 28-ounce can whole tomatoes with liquid
  • 1 yellow onion, finely chopped
  • 1 fennel bulb, fronds and stalks removed, halved, cored and thinly sliced
  • 2 carrots, peeled and chopped into 1 1/2 inch lengths (optional)
  • 4 garlic cloves, thinly sliced
  • 1 lemon, halved
  • 1 1/2 cups pinot noir
  • 1 1/2 teaspoons finely grated peeled fresh ginger
  • 2 cinnamon sticks
  • 1 teaspoon whole coriander seeds
  • 1 teaspoon fennel seeds
  • 3 tablespoons unsalted butter
  • 12 fresh mint leaves

Directions

  1. Preheat oven to 300 degrees F.
  2. Heat the olive oil in a Dutch oven over medium-high heat. Sprinkle the lamb with 2 teaspoons of the salt and brown in the hot oil on all sides.
    IMG_3203
  3. Remove the lamb to a plate and pour off any excess fat from the pan.
  4. Pour the tomatoes into a large bowl and, using your hands, shred them into small pieces. Set aside.
  5. Add the onions, fennel, carrots (if using), garlic, and the remaining 1 teaspoon of salt to the pot. Cook, stirring and scraping any browned bits off the bottom of the pot, until the garlic is lightly toasted, 3 to 4 minutes.
    IMG_3204
  6. Squeeze in the lemon juice from each half and toss the lemon rinds into the pot. Stir in the wine, tomatoes and ginger, scraping any browned bits up from the bottom of the pot, and bring to a simmer; cook for about 3 minutes.
    IMG_3205
  7. Stir in the cinnamon, coriander, fennel seeds and ¾ cup water, then add the lamb to the pot. Cover and bake in the oven until the lamb is fork-tender and falls easily off the bone, about 3 hours.
    IMG_3208
  8. Arrange the lamb shanks on a platter. Stir the butter into the pan juices and, once melted, add the mint. Pour the sauce over the lamb, discard the cinnamon sticks, and serve.
    IMG_3215
    IMG_3216

http://www.lynnandruss.com

In a Hurry for Healthy?

Most working folk I know don’t want to have to worry about spending too much after-work time in the kitchen prepping and cooking a healthy meal. Plus it gets mighty boring serving the same ol’ thang week after week, am I right? It pretty much floats my boat, even as a retiree, when I can assemble a nutrient-rich, colorful and flavorful meal and have it on the table in no more than 30 minutes.

IMG_3082

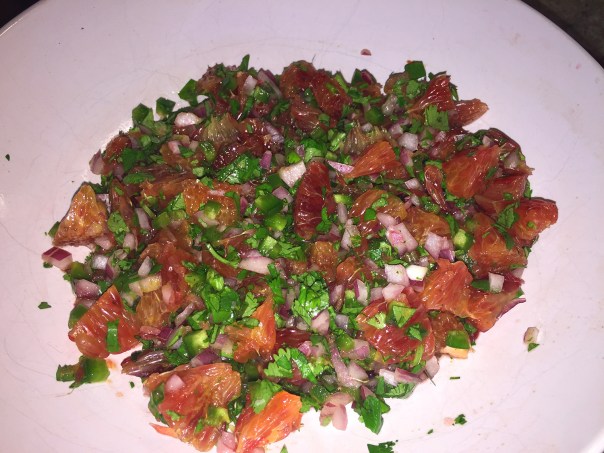
Enter Seared Tilapia with Spicy Orange Salsa. Don’t care for tilapia? This zippy salsa is delicious with just about any type of fish or shellfish, including halibut, shrimp, and scallops. Serendipitously, we had some tilapia fillets in the freezer so they fit the bill for a Meatless Monday menu. I only cooked two fish fillets but was going to make the entire batch of salsa. But once I prepped two of the oranges, I knew it would be plenty—plus any extra wouldn’t hold up well if I tried saving it.

If you don’t want too much spicy heat, don’t use the entire chile. The recipe indicates to use the chile seeds although I think for many people, that would be overpowering. Even though we prefer spicy food, I decided to remove the jalapeño seeds and the salsa was plenty spicy without overwhelming.

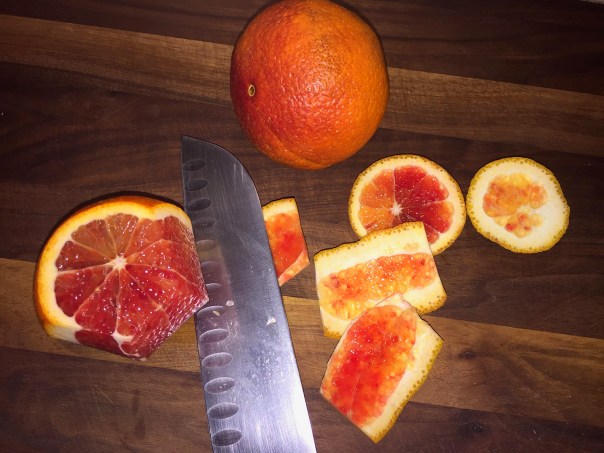
The most labor-intensive aspect of the recipe is prepping the oranges and getting the individual segments lose from the membranes. If you’re not too adept at that, it may throw you over the 30-minute mark. Another quick time-saver, our side of garlicky sautéed spinach was an auxiliary nutrient booster, taking but mere minutes to prepare.

NOTE: The salsa can be made up to 2 hours ahead. Cover and keep at room temperature.

Seared Tilapia with Spicy Orange Salsa

  • Servings: 4
  • Difficulty: easy
  • Print

Ingredients

  • 4 medium navel oranges (about 2 lb.)
  • 1/2 cup small-diced red onion
  • 1/2 cup coarsely chopped fresh cilantro
  • 2 Tbs. fresh lime juice
  • 1 tsp. ground cumin
  • Kosher salt
  • 1 fresh serrano or jalapeño chile, minced (seeds included)
  • 4 5-oz. tilapia fillets
  • Freshly ground black pepper
  • 2 Tbs. mild olive oil

Directions

  1. Using a sharp paring knife, cut off the ends of the oranges to expose a circle of flesh.
  2. Stand each orange on an end and pare off the rest of the peel, including all the white pith, in strips, following the curve of the orange.
    IMG_3074
  3. Working over a medium bowl, carefully cut on both sides of each orange segment to free it from the membranes. Then squeeze the membranes over the bowl to collect any remaining juice. Cut the segments crosswise into 4 pieces and return to the bowl.
  4. Add the onion, cilantro, lime juice, cumin, and 1 tsp. salt and gently stir to combine. Add enough of the chile to suit your taste and stir. Let stand at room temperature for at least 10 minutes to meld the flavors.
    IMG_3077
    IMG_3079
  5. Pat the fish dry and season with salt and pepper.
  6. Heat the oil in a 10-inch nonstick skillet over medium-high heat until shimmering hot. Cook 2 of the fillets, flipping once, until browned and just cooked through, 1-1/2 to 2 minutes per side.
    IMG_3080
  7. Transfer to dinner plates. Repeat with the remaining fillets. Using a slotted spoon to drain excess juice, top the fish with the salsa and serve.

http://www.lynnandruss.com

IMG_3085

By Shelley Wiseman from Fine Cooking

Make Seafood Stock in Mere Minutes

Making seafood stock is similar to making chicken stock; it takes time and attention, but the final result makes it well worth the effort. However, if you have a pressure cooker, the actual cooking time is only 5 minutes as compared to hours using the conventional stovetop method.

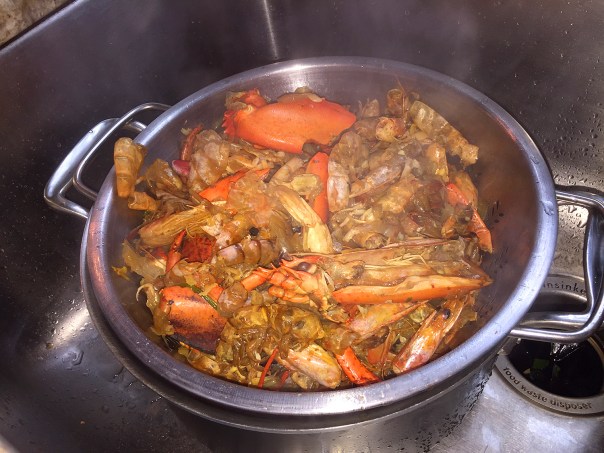
Here’s a quick way to make your own shellfish stock with the shells from crabs, shrimp, and lobster. Over the course of time, start stockpiling the shells in ziploc bags and freeze them until you have enough. It’s not above us to ask our waiters to bag up our crab and lobster shells when dining out for this very reason. You can also use mollusk shells, fish heads and bones.

Currently we have a stash of chicken, beef, ham, and now shellfish stock in our freezer. For storing purposes we reuse quart-size yogurt containers for 4-cup measures, and large ice cube trays for smaller amounts. These come in real handy when a recipe calls for lesser amounts such as a half cup or a few tablespoons of broth.

IMG_3156

IMG_3157

Seafood Stock in Pressure Cooker

  • Servings: 4 quarts
  • Difficulty: moderately easy
  • Print

Ingredients

  • 6 cups shellfish shells, from shrimp, lobster, and/or crab
  • 1/2 cup dry white wine
  • 16 oz. clam juice
  • 1 large yellow onion, coarsely chopped
  • 2 celery stalks, coarsely chopped
  • 2 Tbsp. tomato paste
  • 2 sprigs of thyme
  • Several sprigs parsley
  • 1 bay leaf
  • 10-15 whole peppercorns
  • 2 tsp. salt

Directions

  1. Place shells on a large rimmed baking sheet and roast at 400°F for 10 minutes.
    IMG_3143
  2. Sauté the onion, celery and garlic on medium-high heat in your pressure cooker until lightly caramelized, about 7 minutes.
    IMG_3149
  3. Add the wine and deglaze pan, cook until most of wine is evaporated.
  4. Add clam juice and tomato paste and stir together. Then add herbs, peppercorns and shells. If there is any frond on the baking sheet, mix with a little water and pour into pot. Fill pot with water to 1-inch above shells, (which will float to the top.)
    IMG_3145
  5. Cover your pressure cooker and cook on high for 5 minutes. Use the natural release method for about 15 minutes.
  6. Put a colander into a large bowl and pour the contents into it. Using a large spoon, press the solids to release as much of the liquid as possible.
    IMG_3147
    IMG_3148
  7. Ladle through a fine mesh hand strainer into 4-cup containers with lids, and/or into large ice cube trays for smaller servings.
    IMG_3152
  8. Cool, and freeze what you won’t be using in the next few days.

http://www.lynnandruss.com


Hearty, Meatless Meal

The combination of lentils, chickpeas, and pasta makes this a filling main-course soup. The robust spices, herbs, and lemon juice deliver big flavor despite the lack of meat in the dish. If you only know lentil soup as a plain and rather homogeneous dish, prepare to be wowed by the Moroccan version known as harira. We sure were!

IMG_3199

Found in our latest Cook’s Illustrated magazine, this Moroccan Lentil and Chickpea Soup is native to the Maghreb region of North Africa. It is full of warm spices and fresh herbs, which play more than just a supporting role, and tastes more like an Italian minestrone. Like countless other regional dishes, harira’s exact ingredients vary from region to region and even from family to family.

This recipe carefully streamlines the ingredient list and technique of this classic Moroccan soup to deliver all the bold North African flavors you’d expect from harira in just a fraction of the time. Using canned chickpeas rather than dried saves about 2 hours of cooking time, and paring down the number of spices to a key five make it a dish most people can prepare without a special trip to the market. Using large amounts of just two herbs makes for quicker prep and a more efficient use of fresh ingredients. Finishing the dish with fresh lemon juice helps focus all the flavors.

IMG_3189The Swiss chard was gorgeous, and even though the original recipe didn’t call for it, we chopped up the stems and included them int the soup.
IMG_3194

Based on several reviewer’s comments, Russ increased most of the spices by 50% and added salt when cooking the chopped onion, celery and Swiss chard stems. These are noted in the list of ingredients below. When it was done we both had to have a small bowl and we were impressed with how tasty it was!

IMG_3190We didn’t have enough brown lentils so we added French green lentils to equal one cup.

For a vegetarian version, substitute vegetable broth for the chicken broth and water. You can also garnish this soup with a small amount of harissa, a fiery North African chili paste, which is available at some supermarkets.

Moroccan Lentil and Chickpea Soup

  • Servings: 6-8
  • Difficulty: moderate
  • Print

Ingredients

  • ⅓ cup extra-virgin olive oil
  • 1 large onion, chopped fine
  • 2 celery ribs, chopped fine
  • 5 garlic cloves, minced
  • 1 tablespoon grated fresh ginger
  • 3 teaspoons ground coriander
  • 3 teaspoons smoked paprika
  • 2 teaspoons ground cumin
  • 1 teaspoon ground cinnamon
  • 1/4 teaspoon red pepper flakes
  • 3/4 cup minced fresh cilantro
  • 1/2 cup minced fresh parsley
  • 4 cups chicken broth
  • 4 cups water
  • 1 (15 ounce) can chickpeas, rinsed
  • 1 cup brown lentils, picked over and rinsed
  • 1 (28-ounce) can crushed tomatoes
  • 1/2 cup orzo
  • 4 ounces Swiss chard, stemmed and cut into ½-inch pieces
  • 2 tablespoons lemon juice
  • Salt and pepper
  • Lemon wedges

Directions

  1. Heat oil in large Dutch oven over medium-high heat until shimmering. Add onion, celery and Swiss chard stem pieces and cook, stirring frequently, until soft and starting to brown, 7 to 8 minutes.
  2. Reduce heat to medium, add garlic and ginger, and cook until fragrant, 1 minute. Stir in coriander, paprika, cumin, cinnamon, and pepper flakes and cook for 1 minute.
  3. Stir in ½ cup cilantro and ¼ cup parsley and cook for 1 minute.
  4. Add in broth, water, chickpeas, and lentils; increase heat to high and bring to simmer. Reduce heat to medium-low, partially cover, and gently simmer until lentils are just tender, about 20 minutes.
    IMG_3191
  5. Stir in tomatoes and pasta and simmer, partially covered, for 7 minutes, stirring occasionally.
  6. Add chard and continue to cook, partially covered, until pasta is tender, about 5 minutes longer.
  7. Off heat, stir in lemon juice, remaining ¼ cup cilantro, and remaining ¼ cup parsley. Season with salt and pepper to taste. Serve, passing lemon wedges separately.

http://www.lynnandruss.com

IMG_3198