Monthly Archives: February 2019

“Lynnie-ized” Pasta e Ceci

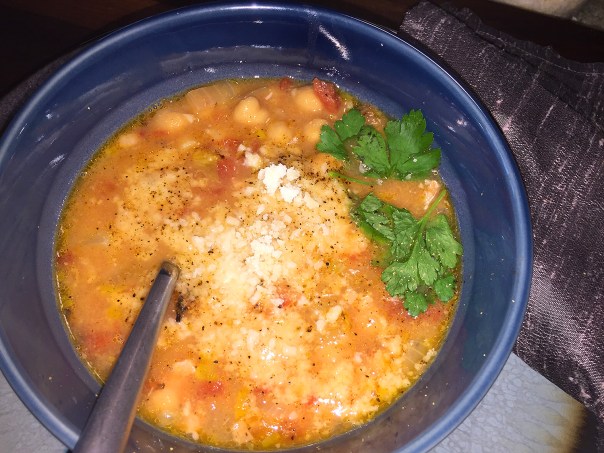
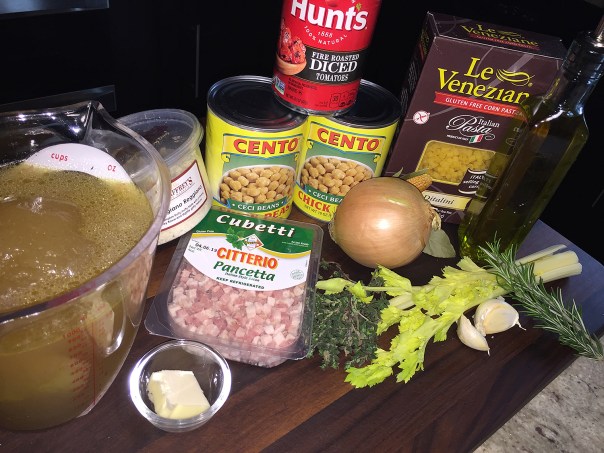
When you have 5 boxes of gluten-free ditalini (don’t ask, it was a hubby purchase from Amazon), Pasta e Ceci soup is a good way to start making a dent in that stockpile of pasta. This particular recipe has been “Lynnie-ized” meaning I took bits and pieces from similar recipes by Giada De Laurentiis, Jamie Oliver and another unknown to make my version.

It includes lots of herbs and other flavor boosters, especially if you use homemade stock as opposed to the bland boxed or canned varieties. The finish is nice and thick rendering it hefty enough to be a meal in itself, or include a small side salad if desired. If you prefer a more brothy texture, add in another 2 cups of chicken stock.
IMG_1472

Pasta e Ceci

  • Servings: 6
  • Difficulty: easy
  • Print

Ingredients

  • 1 large fresh rosemary spring
  • 4 fresh thyme sprigs
  • 1 bay leaf
  • 1 tablespoon olive oil
  • 1 tablespoon unsalted butter
  • 1 medium onion, chopped
  • Inner celery ribs with leaves, chopped
  • 4 ounces pancetta, chopped
  • 3 large garlic cloves, minced
  • 6 cups homemade chicken broth
  • 2 19-ounce cans garbanzo beans, drained and rinsed
  • 1 14.5-ounce can diced fire-roasted tomatoes, with juice
  • 1 cup ditalini or other small, tubular pasta
  • 1/2 teaspoon salt
  • 1/2 teaspoon freshly ground black pepper
  • 1/3 cup freshly grated Parmesan, for garnish
  • Extra-virgin olive oil, for drizzling

Directions

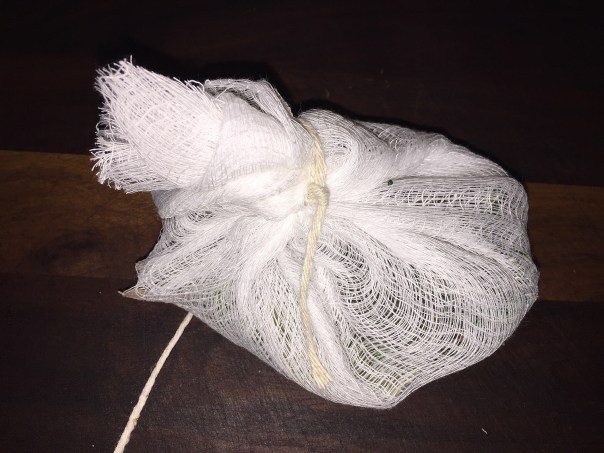
  1. Wrap the thyme, rosemary and bay leaf in a piece of cheesecloth and secure with kitchen twine to make a sachet.
    IMG_1473
  2. Heat the olive oil and butter in a large, heavy saucepan over medium heat. Add the onion, celery, pancetta and garlic and sauté until the onion is tender, about 3 minutes.
    IMG_1475
  3. Add the broth, beans, tomatoes and herb sachet. Cover and bring to a boil over medium-high heat, then decrease the heat to medium and simmer until the vegetables are very tender, about 10 minutes. Discard the sachet.
    IMG_1476
  4. Transfer 1 cup of the bean mixture to a blender and reserve.
    IMG_1478
  5. Add the ditalini to the soup pot, cover, and bring the liquid back to a boil. Boil gently until the pasta is tender but still firm to the bite, about 8 minutes.
  6. Puree the reserved bean mixture until smooth, then stir the puree into the boiling soup. Season with salt and freshly ground black pepper.
    IMG_1480
  7. Ladle the soup into bowls. Sprinkle each serving with some Parmesan and drizzle with extra-virgin olive oil.
    IMG_1483
    IMG_1492

http://www.lynnandruss.com

Love at First Bite, and Second, and…

This Sautéed Chicken Cutlets with Brandy, Cream and Chive Pan Sauce is a low-fat version of a classic French chicken with pan sauce which is accomplished by adding a teaspoon of flour to the aromatics as a thickener, allowing no butter. For a final blast of flavor, you add in an acidic ingredient of lemon juice to the chicken cutlet pan sauce.

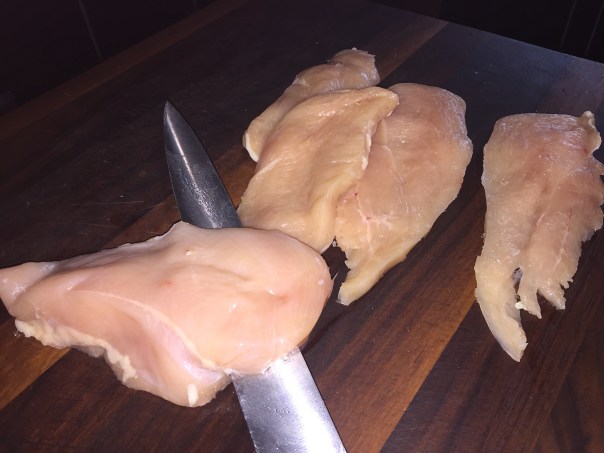
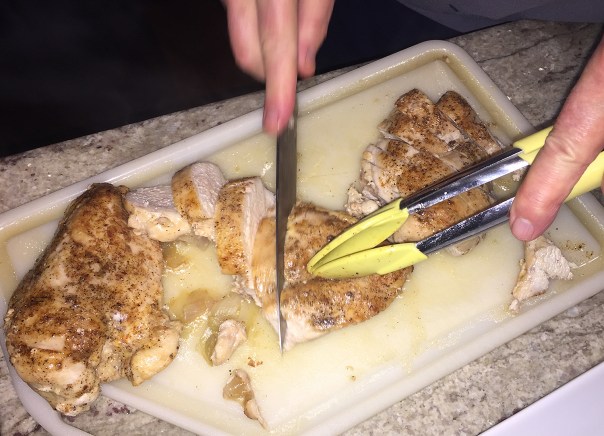
The chicken breasts will be easier to slice in half if you freeze them for 15 minutes. To slice in half, place one hand on top of the breast to secure it, hold a chef’s knife parallel to the cutting board, and slice through the middle of the breast horizontally.

IMG_1445

Now I totally omitted the next step of pounding the slices down (which I labeled optional below). Not one of my favorite tasks to begin with, I felt I could just sauté the second side for a longer period of time, 2 minutes instead of 20 seconds. It worked perfectly! If I had pounded them down, it’s very doubtful 4 slices would have fit into my extra-large nonstick skillet all at once, increasing prep time.

Speaking of nonstick, parts of the chicken did stick to the pan before I flipped them over, but that was OK because all of those browned bits got incorporated into the pan sauce—oh and what a delicious pan sauce it was! I didn’t even use heavy cream (I wasn’t about to run out and buy some for just 2 tablespoons) so I inserted half-and-half instead. Of course using homemade chicken stock was an immediate flavor-booster too.

IMG_1460

Served with a side of egg noodles, over which we drizzled some of that velvety sauce, steamed baby peas and a garnish of grape tomatoes and more chives, Hubby and I were very satisfied diners to say the least. And plenty of leftovers for lunches the next day…

IMG_1442

Sautéed Chicken Cutlets with Brandy, Cream and Chive Pan Sauce

  • Servings: 4
  • Difficulty: easy
  • Print

Ingredients

  • 4 boneless, skinless chicken breasts (6 to 8 ounces each), tenderloins removed, trimmed of excess fat, halved horizontally, and pounded 1/4-inch thick (optional)
  • Salt and ground black pepper
  • 4 teaspoons vegetable oil
  • Sauce
  • 2 teaspoons vegetable oil
  • 1 medium shallot, minced (about 3 tablespoons)
  • 1 teaspoon all-purpose flour
  • ¼ cup brandy, plus 1 additional tablespoon
  • ¾ cup chicken broth, preferably homemade
  • 2 tablespoons heavy cream
  • 1 teaspoon Dijon mustard
  • 2 tablespoons chopped chives
  • 2 teaspoons fresh lemon juice from 1 lemon
  • Salt and ground black pepper

Directions

For Chicken:

  1. Adjust oven rack to middle position and heat oven to 200 degrees. Season both sides of each cutlet with salt and pepper.
    IMG_1447
  2. Heat 2 teaspoons oil in 12-inch skillet over medium-high heat until smoking. Place 4 cutlets in skillet and cook without moving them until browned, about 2 minutes.
    IMG_1448
  3. Flip cutlets and continue to cook until second sides are opaque, 15 to 20 seconds. (If you didn’t pound them down, cook the second side for another 2 minutes.) Transfer to large oven-safe plate.
    IMG_1449
  4. Add remaining 2 teaspoons oil to now-empty skillet and repeat to cook remaining cutlets. Cover plate loosely with foil and transfer to oven to keep warm while making pan sauce.

For Sauce:

  1. Add oil to empty skillet used to cook chicken and return pan to low heat. Add shallot and cook, stirring frequently, until softened, 1 to 1 1/2 minutes.
  2. Add flour and cook, stirring constantly, 30 seconds.
    IMG_1450
  3. Add broth and 1/4 cup brandy (add broth before adding brandy); increase heat to medium-high and bring to simmer, scraping pan bottom to loosen browned bits. Simmer rapidly until reduced to 1/2 cup, 2 to 3 minutes.
    IMG_1451
  4. Stir in cream and any accumulated chicken juices; return to simmer and cook until thickened, 30 to 60 seconds.
    IMG_1452
  5. Off heat, whisk in mustard, chives, lemon juice, and remaining tablespoon brandy; season with salt and pepper. Spoon over cutlets and serve immediately.
    IMG_1455

http://www.lynnandruss.com

Recipe adapted from Cook’s Illustrated

Spicy Jerk Pork Chops

This Spicy Jerk Pork Chop recipe is easy, fast and a great way to add a note from the tropics to the dead of winter. I know I would rather have been lying on a beach in the Caribbean, but since that wasn’t an option at the time, a dinner reminiscent of the islands was the next best thing. Plus, the rub is easy and quick to put together and tastes absolutely amazing.

With only two of us—and no need for leftovers—I only cooked two pork chops but kept the remaining ingredients the same. Yes, it was a bit more than necessary, but we like to have “extra” sauce if needed. While we both thought the flavor profile was perfect, if you’re not as tolerant of spicy food, you could cut back on the hot peppers (I used habaneros).

IMG_1438

For sides I made roasted Brussels sprouts and acorn squash slices rubbed with a mix of olive oil, honey, sriracha and salt. Oooh, that succulent bite right next to the chop bone, it wasn’t the tropics, but it spread a little warmth into our evening…

IMG_1430

Spicy Jerk Pork Chops

  • Servings: 4
  • Difficulty: easy
  • Print

Ingredients

  • 2 Tbs. extra-virgin olive oil; more for the pan
  • 4 bone-in center-cut pork chops (3/4 inch thick, about 2-1/2 lb. total)
  • Kosher salt and freshly ground black pepper
  • 4 medium scallions (white and green parts), coarsely chopped
  • 2 small Scotch bonnet or habanero chiles, seeded and coarsely chopped (wear gloves)
  • 2 small limes, 1 juiced and 1 cut into 8 wedges
  • 2 large cloves garlic, coarsely chopped
  • 2 Tbs. coarsely chopped fresh ginger
  • 1 Tbs. coarsely chopped fresh thyme
  • 3/4 tsp. ground allspice
  • 1/8 tsp. ground cinnamon

Directions

  1. Position an oven rack about 4 inches from the broiler and heat the broiler to high.
  2. Lightly oil a broiler pan or a rack set over a large rimmed baking sheet. Season the pork all over with 1 tsp. salt and 3/4 tsp. pepper.
  3. In a food processor, purée the oil, scallions, chiles, lime juice, garlic, ginger, thyme, allspice, cinnamon, and 1 tsp. salt.
    IMG_1431
    IMG_1433
  4. Coat the chops on all sides with the mixture and set on the broiler pan or rack. Broil until the pork begins to brown, about 7 minutes.
    IMG_1435
  5. Flip and cook until browned, the meat is firm to the touch, and an instant-read thermometer inserted close to (but not touching) the bone registers 145°F, about 7 minutes more.
    IMG_1437
  6. Serve with the lime wedges.

http://www.lynnandruss.com

Recipe adapted from Tony Rosenfeld of Fine Cooking

Lamb and Pepper Ragu

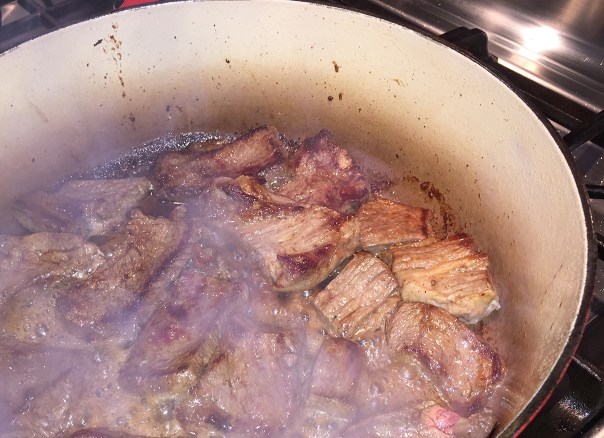
It promised to be a long lazy winter Sunday afternoon, just perfect for a braised lamb dish. Earlier that weekend, after scrolling through numerous cookbooks, we settled on this Lamb and Pepper Ragu from Lidia Bastianich’s Mastering the Art of Italian Cuisine cookbook.

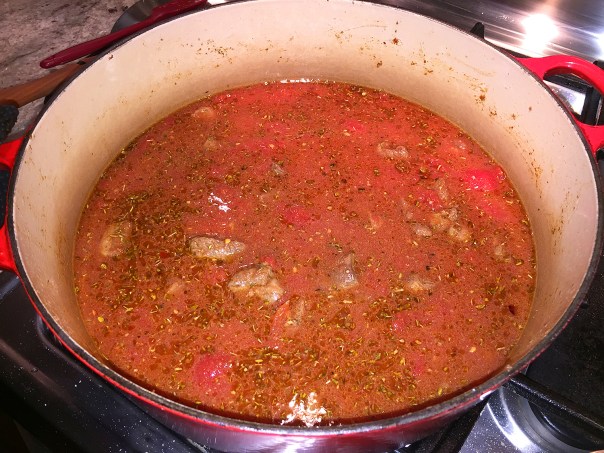
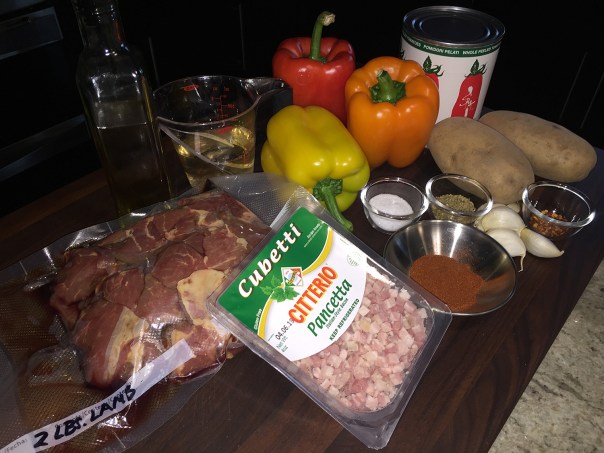
This dish starts with browning pieces of lamb shoulder (which a month prior we had cubed and frozen for future use), next creating a reduction of wine and meat juices as a base for a lovely slow-cooked tomato sauce. Halfway through, quartered potatoes and a variety of sweet bell peppers are added providing pops of lively color.

IMG_1378Directions called for the peppers to be quartered which were too large IMHO, so I cut each quarter in half producing eight chunks from each pepper.
After all of the allotted cooking time however, we felt that the sauce was too thin. To thicken we uncovered and kept up a vigorous simmer for almost another 30 minutes. Part way trough, Hubby broke apart the large potato chunks to release their starch and help thicken the sauce. Bingo, there was now enough body to ladle and cling to the wide egg noodles as the base.

IMG_1374

Lamb and Pepper Ragu

  • Servings: 4-5
  • Difficulty: easy
  • Print

Ingredients

  • 2 lb boneless lamb shoulder or lamb stew meat, cut into 1″ pieces
  • 2 oz pancetta, chopped
  • 4 garlic cloves, crushed and peeled
  • 2 Tbsp. extra-virgin olive oil
  • 2 tsp. kosher salt
  • 1/4 tsp. crushed red pepper flakes
  • 1/2 c dry white wine
  • 1 28-oz. can Italian tomatoes (preferably plum tomatoes, crushed by hand)
  • 2 tsp. dried oregano
  • 2 tsp. paprika, sweet
  • 2 russet potatoes, peeled and quartered
  • 3 bell peppers (red, yellow, orange preferred), seeded and quartered
  • 2 1/2 cups water

Directions

  1. First, make the pestata. Place the pancetta and garlic cloves into the food processor and grind until smooth.
    IMG_1379
  2. Heat a large Dutch oven or cast-iron pot over medium heat. Add olive oil. When oil shimmers, add the pestata and cook until the fat is rendered, 3-4 minutes.
  3. Season the lamb with 1 tsp of salt. Add to the hot pan with pestata. Cook over medium heat until the lamb releases its juices, stirring occasionally, about 6 minutes.
    IMG_1377
    IMG_1381
  4. Increase the heat to brown the meat all over, about 4 more minutes.
    IMG_1383
  5. Season with remaining salt and red pepper flakes. Add the wine, and cook until it is almost reduced away, approximately 4 minutes.
  6. Add the tomatoes, their juices, and slosh out the can with 1 1/2 cups water, adding that too.
  7. Sprinkle in the oregano and paprika. Bring to a simmer, cover, and cook 30 minutes.
    IMG_1384
  8. Add potatoes, peppers, and 1 cup water (although we don’t think this extra cup of water is necessary based on how thin the sauce ended up before we reduced it). Set lid ajar, and cook 45-60 minutes more, until lamb and vegetables are fork-tender.
    IMG_1386
  9. If the sauce is too watery, uncover, turn the heat to high and reduce to thicken and concentrate the flavors, and stir until desired thickness (which was an additional 30 minutes for us).
  10. Serve over pasta, risotto, rice, or egg noodles.
    IMG_1395

http://www.lynnandruss.com

Adapted from a recipe by Lidia Bastianich

Barley Minestrone

Try this cool riff on the classic Italian vegetable and bean soup using barley instead of pasta. Simmering a piece of the rind from Parmigiano-Reggiano in the soup is a traditional way of adding flavor—we always keep a stash of rinds in the freezer for moments such as this.

The list of ingredients may seem long, but the number of steps to make this wonderful soup are few. That said, I made numerous changes all of which are indicated below. Because we had just enough Napa cabbage on hand, I used that instead of Savoy. Then I doubled the pancetta, the garlic and the pearl barley; used fire-roasted diced tomatoes; omitted the last can of water; and finished with a tablespoon of red wine vinegar.

IMG_1421

Although barley may not be as popular as other whole grains like oats, wheat, or even the grain-of-the-moment quinoa, barley has some impressive health benefits. A very high fiber content, vitamins and minerals, antioxidants, heart health and diabetes protection are just some of the nutrition benefits that make barley one of the best whole grain choices.

BTW, pearl barley is the most common form of barley. It’s chewy and nutritious, but less so than hulled barley because the outer husk and bran layers have been removed. The polished grains are also softer and take less time to cook. A one-cup serving of cooked barley has less calories, but more fiber, than an equal serving of quinoa, brown rice, amaranth, sorghum, millet or wild rice.

IMG_1402

Barley Minestrone

  • Servings: Yields 3 quarts
  • Difficulty: easy
  • Print

Ingredients

  • 2 Tbs. extra-virgin olive oil
  • 1/2 cup finely diced pancetta (about 2 ounces)
  • 2 cups large diced Savoy (or Napa) cabbage
  • 1 cup medium diced yellow onion
  • 1 cup sliced carrot (1/4 inch thick)
  • 1/4 cup medium diced celery
  • 4 cloves garlic, minced
  • 2 quarts homemade or low-salt chicken broth
  • 1 14-1/2-ounce can fire-roasted diced tomatoes, with their juices
  • 1 cup pearl barley, rinsed
  • 2 large sprigs fresh rosemary
  • 2-inch square Parmigiano-Reggiano rind
  • Kosher salt
  • 1 cup rinsed and drained canned kidney beans
  • Freshly ground black pepper
  • 1 Tbsp. red wine vinegar
  • Freshly grated Parmigiano Reggiano for serving

Directions

  1. Heat the oil in a heavy 6-quart or larger pot over medium heat.
  2. Add the pancetta and cook, stirring frequently, until it becomes ever so slightly golden, 2 to 3 min.
    IMG_1405
  3. Add the cabbage, onion, carrot, celery, and garlic. Cook, stirring frequently, until the vegetables begin to soften, about 6 min.
    IMG_1406
  4. Add the broth, the tomatoes with their juices, the barley, rosemary, Parmigiano rind (if using), 1/2  tsp. salt, and 1 cup water (which I omitted). Bring to a boil over high heat, and then reduce the heat to a simmer and cook until the barley and vegetables are tender, about 20 minutes.
    IMG_1408
    IMG_1410
  5. Discard the rosemary sprigs and Parmigiano rind. Stir in the vinegar and beans and season to taste with salt and pepper. Serve sprinkled with the grated Parmigiano.
    IMG_1413

http://www.lynnandruss.com

Adapted from a recipe by Jennifer Armentrout from Fine Cooking


Very Easy. Very Impressive. VERY Tasty!

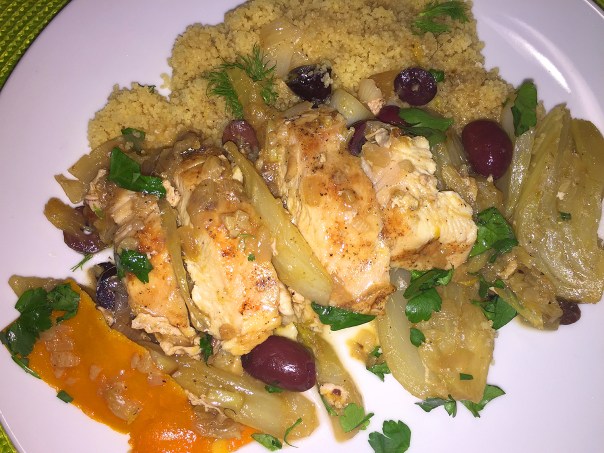
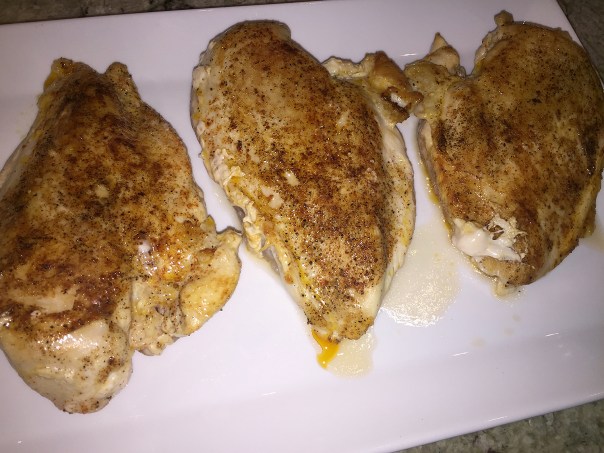
Stop the presses!! This Cook’s Country Pan-Seared Chicken Breasts with Braised Fennel, Olives, and Orange recipe is soooo tasty, you’d think someone spent hours making it. Quite the contrary—it takes only about 45 minutes total, including prep. So yes, it’s a great weeknight alternative to the same old boring chicken breast dinner.

IMG_1260

Now I know some folks who just can’t abide the taste of fennel. Me? I can eat it raw. But in this dish the flavor profile mellows from a sharp bite to a softly rendered juicy mouthful with only a delicate hint of its former self. All of the flavor components work so well together and provide a cohesive ensemble that’s worth raving about.

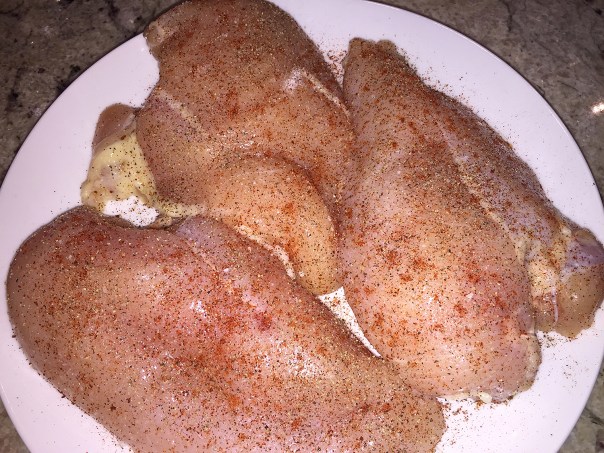
There were a few differences in the meal I prepared. First, because I had 3 ginormous chicken breasts on hand, I just used those instead of buying 4 smaller ones. And because of that, I slightly increased the orange peel, garlic, shallot and olive quantities. Finally, we shredded up the softened orange peel distributing into our plate of food which was served over a bed of couscous cooked with homemade chicken stock.

Definitely going onto our recommended weeknight rotation…

IMG_1239

Pan-Seared Chicken Breasts with Braised Fennel, Olives and Orange

  • Servings: 4
  • Difficulty: easy
  • Print

Ingredients

  • 4 (6- to 8-ounce) boneless, skinless chicken breasts, trimmed
  • Salt and pepper
  • ¼ teaspoon cayenne pepper
  • ¼ cup extra-virgin olive oil, plus extra for drizzling
  • 3 fennel bulbs, stalks discarded, bulbs halved, cored, and cut into ½-inch-thick wedges
  • 4 shallots, sliced into ½-inch-thick rings
  • 3 garlic cloves, minced
  • 3 (2-inch) strips orange zest plus ¼ cup juice
  • ½ cup water
  • ⅓ cup pitted kalamata olives sliced into ¼-inch-thick rounds
  • 2 tablespoons chopped fresh parsley
    IMG_1242

Directions

  1. Pat chicken dry with paper towels. Sprinkle with 1 teaspoon salt, ¼teaspoon pepper, and cayenne. Heat 1 tablespoon oil in 12-inch nonstick skillet over medium-high heat until just smoking.
    IMG_1240
  2. Add chicken to skillet, skinned side down, and cook until browned on first side, about 6minutes. Transfer chicken, browned side up, to large plate; set aside.
    IMG_1244
  3. Heat remaining 3 tablespoons oil in now-empty skillet over medium-high heat until shimmering. Add fennel, shallots, ¼ teaspoon salt, and ¼ teaspoon pepper and cook, covered, until softened and browned, about 8 minutes, stirring occasionally.
    IMG_1245
    IMG_1246
  4. Add garlic and orange zest and cook until fragrant, about 1 minute. Add water and reduce heat to medium-low.
    IMG_1247
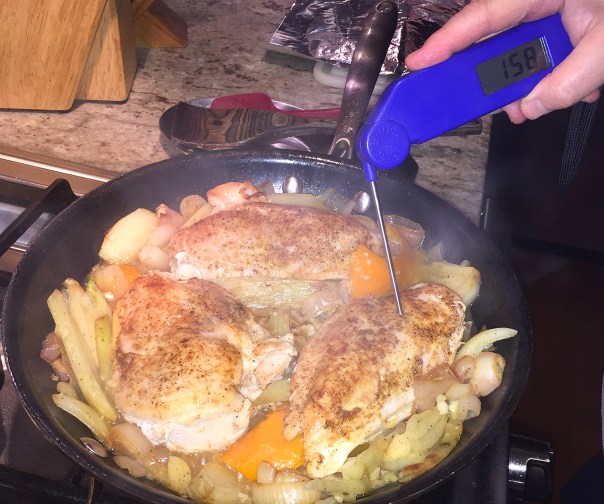
  5. Add chicken, browned side up; cover; and cook until registering 160 degrees, 10 to 14 minutes (or a few minutes longer if the breasts are bigger).
    IMG_1249
    IMG_1251
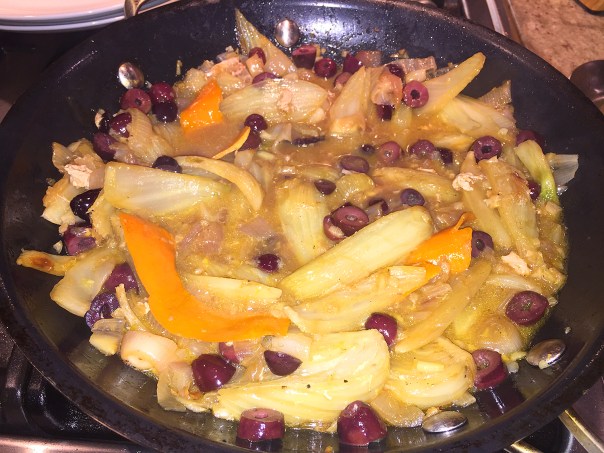
  6. Transfer chicken to cutting board and tent with foil. Stir olives and orange juice into fennel mixture in skillet. Slice chicken ½ inch thick.
    IMG_1256
    IMG_1255
  7. Serve chicken with fennel mixture and pan sauce, sprinkled with parsley and drizzled with extra oil.
  8. Serve with crusty bread, mashed potatoes, or as we did, with couscous.
    IMG_1261

http://www.lynnandruss.com

IMG_1264It was sooo good we finished half the platter in no time!

Angry Pasta, Happy Me

Sometimes simple is best. I’m a happy camper with an uncomplicated spicy sauce over pasta and a side salad. Dinner done. Here, the Penne Arrabbiata from Cook’s Illustrated delivers just the right amount of kick. The word arrabbiata literally means angry in Italian, a reference to the hot chili peppers used in this dish.

IMG_1311

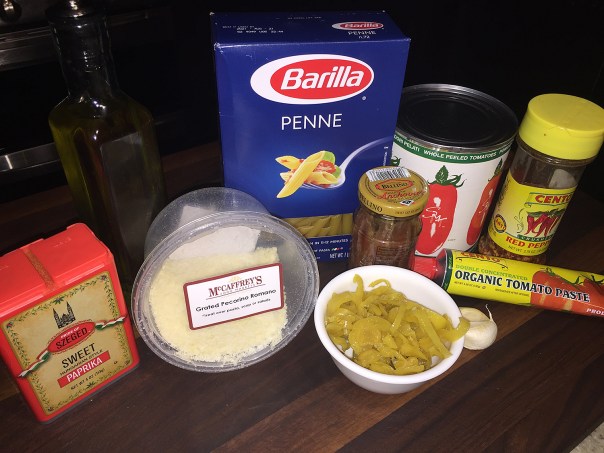
To deliver an arrabbiata with complex flavor and not just searing heat, CI looked beyond the tradition of using only red pepper flakes and crafted a recipe that included three different types of pepper. By supplementing pepper flakes with paprika and pickled pepperoncini, they built deep flavor while keeping the spiciness in check.

Pecorino Romano, tomato paste, and anchovies, while difficult to detect in the sauce, add umami notes and richness to this traditionally simple sauce. Finally, using processed canned tomatoes helps bring the sauce to the table quickly and allows you to enjoy it year-round. Woohoo, I’m a fan!

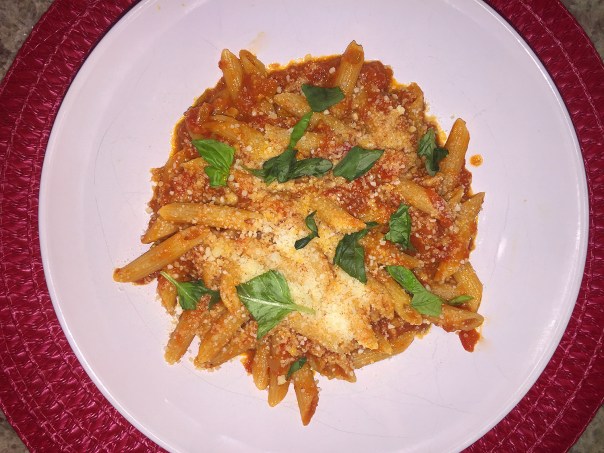
Because we are “saucy” people, we doubled the sauce ingredients, while maintaining the original amount of pasta. To finish, I added a sprinkle of coarsely chopped fresh basil for color and a hint of sweet.

IMG_1299

Penne Arrabbiata

  • Servings: 2
  • Difficulty: easy
  • Print

Ingredients

  • 1 (14.5-ounce) can whole peeled tomatoes
  • 2 tablespoons extra-virgin olive oil
  • 2 tablespoons stemmed, patted dry, and minced pepperoncini
  • 1 tablespoon tomato paste
  • ½ teaspoon minced garlic
  • ½ teaspoon red pepper flakes
  • 2 anchovy fillets, rinsed, patted dry, and minced to paste
  • ¼ teaspoon paprika
  • Salt and pepper
  • 2 tablespoons grated Pecorino Romano, plus extra for serving
  • 6 ounces penne

Directions

  1. Pulse tomatoes and their juice in food processor (or blender) until finely chopped, about 10 pulses.
    IMG_1304
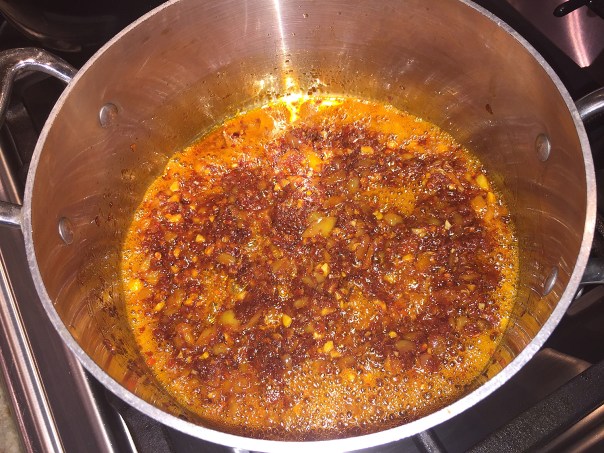
  2. Heat oil, pepperoncini, tomato paste, garlic, pepper flakes, anchovies, paprika, 1/4 teaspoon salt, and 1/4 teaspoon pepper in medium saucepan over medium-low heat, stirring occasionally, until deep red in color, 7 to 8 minutes.
    IMG_1302
    IMG_1305
  3. Add tomatoes and Pecorino and bring to simmer. Cook, stirring occasionally, until thickened, about 15 minutes.
    IMG_1306
    IMG_1307
  4. Bring 4 quarts water to boil in large pot. Add pasta and 1 tablespoon salt and cook, stirring often, until al dente. Reserve 1/2 cup cooking water, then drain pasta and return it to pot. Add sauce and toss to combine, adjusting consistency with reserved cooking water as needed. Season with salt and pepper to taste. Serve, passing extra Pecorino separately.
    IMG_1309

http://www.lynnandruss.com


Dark Chocolate Chip Banana Bread

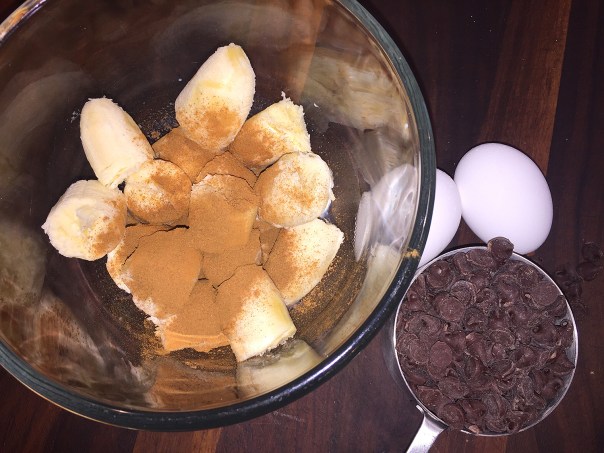
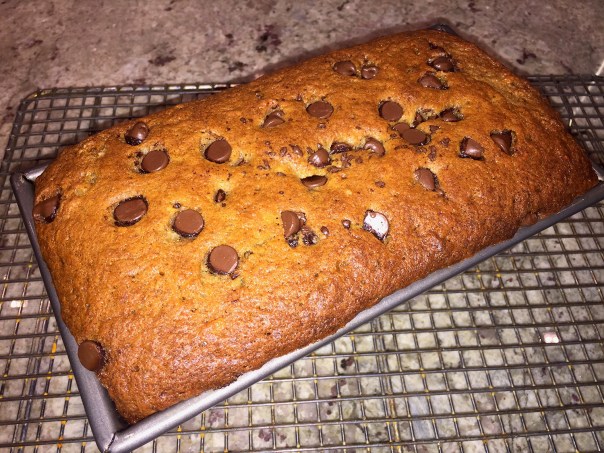
Do you ever end up with several overripe bananas? I prefer mine on the slightly greener side (I find the texture and taste off-putting as they ripen), but don’t throw them into the compost pile just yet. Give yourself some love, and make this Dark Chocolate Chip Banana Bread instead—then toss the skins into the compost pile 😉

You could use semi-sweet chips, but the dark provide more antioxidants making the treat a bit more heart-healthy. When preparing, don’t over mix because it could cause the finished bread to be dry instead of resulting in a soft interior with a slightly crisp crust.

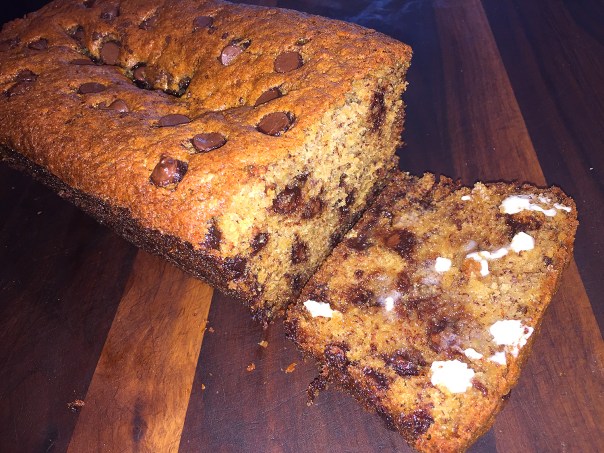
It’s like a bite of Heaven when you cut off a slice while it’s still slightly warm. Once it has cooled down however, you can always heat a slice in the microwave for about 1 minute then add a schmear of butter or honey. It’s a perfect treat for your family, a brunch, or even gifting.

Dark Chocolate Chip Banana Bread

  • Servings: 1 loaf
  • Difficulty: easy
  • Print

IMG_1265

Ingredients

  • 1 cup granulated sugar
  • 1 stick, (8 Tbsp)) unsalted butter, room temperature
  • 2 large eggs
  • 3 very ripe bananas
  • 1 tablespoon whole milk
  • 1 teaspoon ground cinnamon
  • 2 cups all-purpose flour
  • 1 teaspoon baking powder
  • 1 teaspoon baking soda
  • 1 teaspoon salt
  • 1 cup dark chocolate chips

Directions

  1. Preheat the oven to 325 degrees F.
  2. Butter a 9 x 5 x 3 inch loaf pan.
  3. Cream the butter and sugar in a large mixing bowl until light and fluffy.
  4. Add the eggs one at a time, beating well after each addition.
  5. In a small bowl, mash the bananas, milk and cinnamon with a fork.
    IMG_1267
  6. Add the banana mixture to the creamed mixture and stir until combined.
  7. Add flour, baking powder, baking soda and salt, mixing until flour disappears—don’t overmix.
    IMG_1269
  8. Fold in dark chocolate chips, reserving some to sprinkle on top of batter.
    IMG_1270
  9. Pour batter into prepared pan, add chips for topping, and bake 60-70 minutes, (check after one hour) until a toothpick inserted in the center comes out clean.
    IMG_1272
    IMG_1274
  10. Set aside to cool on a rack for 15 minutes. Remove bread from pan, invert onto rack and cool completely before slicing.
    IMG_1280
  11. Spread slices with schmear of butter or honey.
    IMG_1282
  12. Once cooled completely, wrap tightly in foil. The covered loaf can sit out at room temperature for a few days, after that, refrigerate it.

http://www.lynnandruss.com

Spicy Korean-Style Pork Medallions with Asian Slaw

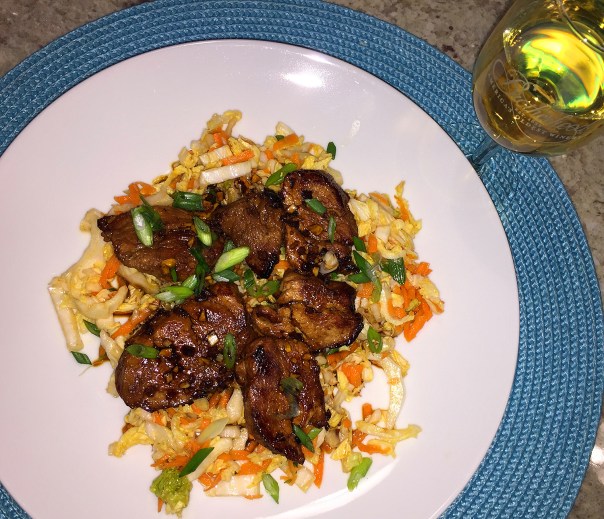
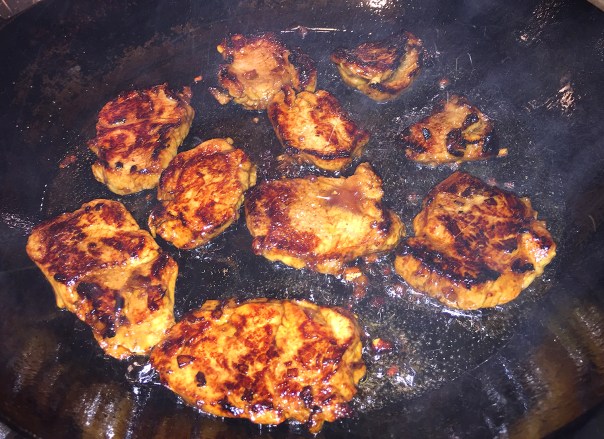
Another super easy, low-carb meal packed with flavor. While the actual cooking time is less than 10 minutes, you must be cognitive of the fact that the pork has to marinate anywhere from 25 minutes up to two hours. I marinated for the full length of time to ensure all of the spicy goodness really penetrated the pork medallions.

Once again I doubled the amount of carrots and increased the scallions by 50%, which actually could have been at least 6-8 scallions, IMHO. Other than that, we thought the dish was spot on.

Because we made Spicy Pan-Fried Noodles with Asian Slaw a few days ago, we had a 1/2 head of Napa cabbage on hand. Plus both meals incorporated many of the same ingredients, the combo of which which we adored, making it a no-brainer.

IMG_1175Russ enjoyed a glass of Sherry with his meal.

Spicy Pan-Fried Noodles with Tofu

  • Servings: 3-4
  • Difficulty: easy
  • Print

Ingredients

  • 1 large or 2 small pork tenderloins (about 1-1/4 lb.)
  • 1/3 cup soy sauce
  • 1/4 cup rice vinegar
  • 3 Tbs. light brown sugar
  • 2 medium cloves garlic, minced
  • 1-1/2 Tbs. minced fresh ginger
  • 1 Tbs. Asian sesame oil
  • 1 Tbs. Asian chile sauce (like Sriracha)
  • 1 lb. napa cabbage, thinly sliced (about 6 cups)
  • 1 cup grated carrot (about 2 medium carrots)
  • 4 scallions (both white and green parts), trimmed and thinly sliced
  • 5 Tbs. canola or peanut oil
  • Kosher salt

Directions

  1. Trim the pork of any silverskin and excess fat, and cut on the diagonal into 1/2-inch-thick medallions.
  2. In a small measuring cup, whisk together the soy sauce, 2 Tbs. of the rice vinegar, 2 Tbs. of the brown sugar, the garlic, ginger, 1/2 Tbs. of the sesame oil, and 2 tsp. of the chile sauce.
    IMG_1161
  3. Toss 1/2 cup of this mixture with the pork medallions in a large bowl (or ziploc bag); reserve the remaining mixture to use as a sauce. Let the pork sit at room temperature for 25 minutes or refrigerate for up to 2 hours.
    IMG_1163
  4. Meanwhile, in another large bowl, toss the cabbage and the carrot with half of the scallions, 1 Tbs. of the canola oil, 1 tsp. salt, and the remaining 2 Tbs. rice vinegar, 1 Tbs. brown sugar, 1/2 Tbs. sesame oil, and 1 tsp. chile sauce. Let sit for 15 minutes, toss again, and transfer to a large serving platter.
    IMG_1164
  5. Heat 2 Tbs. of the canola oil in a 12-inch, heavy-based skillet over medium-high heat until shimmering hot. Remove the pork from the marinade, shaking off the excess, and transfer the pork to a clean plate. Discard the marinade.
  6. Add half of the pork medallions to the skillet, spacing them evenly. Cook them without touching until well browned, about 2 minutes. Flip and cook until the pork is just cooked through (slice into a piece to check), about 2 more minutes. Set the pork on top of the slaw.
    IMG_1165
  7. Pour out the oil and wipe the pan with paper towels (if the drippings on the bottom of the pan look like they may burn, wash the pan). Return the pan to medium-high heat.
  8. Add the remaining 2 Tbs. canola oil, and cook the remaining medallions in the same manner. Top the slaw with the remaining pork, and pour the reserved soy-ginger sauce over the medallions. Serve immediately, sprinkled with the remaining scallions.
    IMG_1168

http://www.lynnandruss.com

Recipe by Tony Rosenfeld from Fine Cooking

Winner, Winner, Tofu Dinner

From Fine Cooking’s “Make It Tonight” series, this Spicy Pan-Fried Noodles with Tofu Asian dish is not only super simple, but tastes great too! Seared tofu is the perfect vehicle to carry the sweet, sour, and savory flavors of this recipe. Spot on for vegetarians, those adhering to “Meatless Monday,” or just trying to cut back on their meat consumption.

Whenever possible we try to up the veggie quotient, although the only increase I made here was the amount of carrot (OK, and garlic). However incorporating fresh, sliced shiitake mushrooms would make a nice addition. That’s our plan for the next time we make this, which I’m sure will be in the near future because we LOVED the dish!

Instead of a pound of noodles, we had an open package of Thai rice noodles weighing in at 8 ounces. We felt that the ratio of noodle to veggie was a better proportion using only half the amount.

Speaking of noodles, you could buy a cooked brand (look for them next to the tofu) to save a step; but if not, use uncooked and prepare them according to package directions. With only two of us dining, we had leftovers the next day for lunch. Alas, we both agreed, it wasn’t quite as good as when it’s first made.

IMG_1153

And how about a little Asian side salad of Cucumber, Basil and Peanut? It made a unique pairing for the stir-fry.

IMG_1126

Spicy Pan-Fried Noodles with Tofu

  • Servings: 4
  • Difficulty: easy
  • Print

Ingredients

  • 1/4 cup soy sauce
  • 3 Tbs. packed dark brown sugar
  • 2 Tbs. fresh lime juice, plus lime wedges for serving
  • 1-1/2 Tbs. Sriracha; more for serving
  • 2 large cloves garlic, minced
  • 3 Tbs. vegetable or peanut oil
  • 12 to 14 oz. extra-firm or pressed tofu, patted dry and cut into 3/4-inch cubes
  • Kosher salt and freshly ground white pepper
  • 2 medium carrots, halved lengthwise and thinly sliced on the diagonal
  • 1 lb. cooked Asian-style noodles, such as udon or yakisoba
  • 6 medium scallions, cut into 1-inch lengths, white and dark green parts separated
  • 2 cups thinly sliced green cabbage

Directions

  1. Whisk the soy sauce, sugar, lime juice, Sriracha, garlic, and 2 Tbs. water in a small bowl; set aside.
    IMG_1127
  2. Heat 1 Tbs. of the oil in a 14-inch wok or 12-inch nonstick skillet over medium-high heat until shimmering hot.
  3. Add the tofu, season generously with salt and pepper, and cook, stirring occasionally, until browned on all sides, 3 to 5 minutes. Transfer to a large bowl.
    IMG_1133
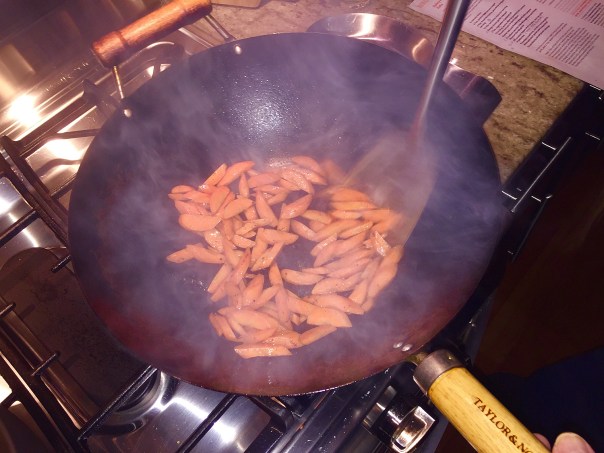
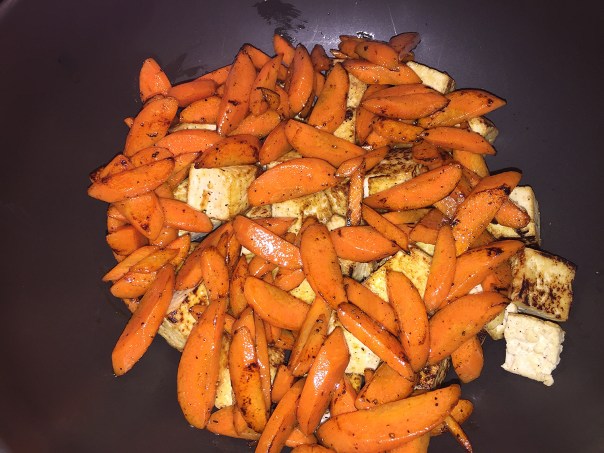
  4. Add another 1 Tbs. oil to the pan, and then add the carrots. Season with salt and pepper and cook, stirring occasionally, until crisp-tender and well browned in spots, 3 to 5 minutes. Transfer to the bowl with the tofu.
    IMG_1137
    IMG_1138
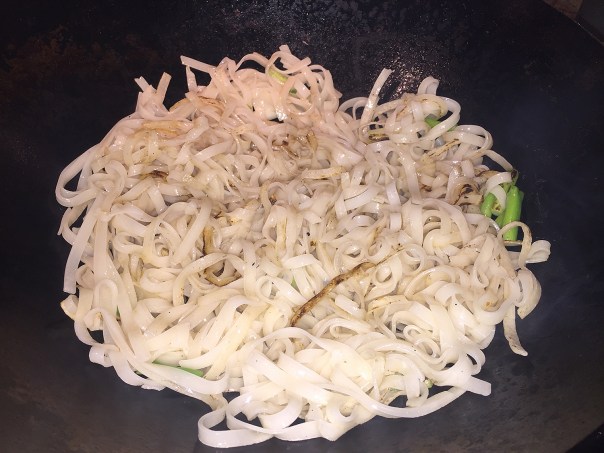
  5. Add the remaining 1 Tbs. oil, the cooked noodles, and the scallion whites to the skillet. Cook, stirring occasionally, until the noodles are browned in spots and the scallions are tender, 2 to 3 minutes.
    IMG_1141
  6. Stir the sauce and then carefully pour it over the noodles; the mixture will steam. Toss well to coat and cook, stirring, until the sauce is reduced to a sticky glaze, about 2 minutes.
    IMG_1144
  7. Return the tofu and carrots to the wok. Add the cabbage and the scallion greens and toss well.
    IMG_1147
    IMG_1148
  8. Serve with lime wedges and additional Sriracha if desired.
    IMG_1151

http://www.lynnandruss.com

Recipe by Matthew Card from Fine Cooking

Going Greek with Lemony Garlic Goodness

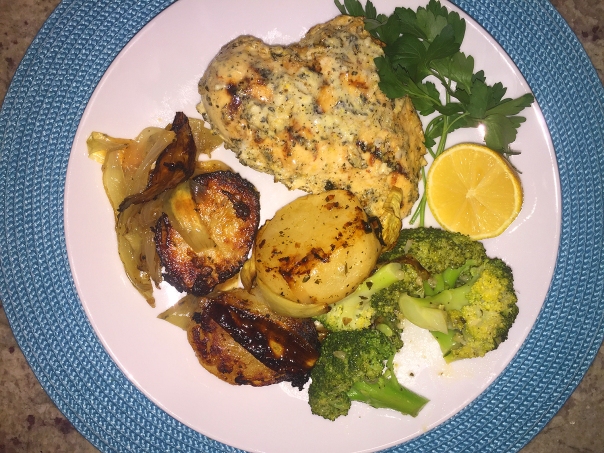
This Lemony Greek Chicken Breasts recipe is originally intended for the outside grill, but given the fact that it hadn’t been above 25 degrees in days, I decided to go ahead with it using “Grilliam” our large Staub enameled cast iron grill pan. Here, the easy marinade infuses chicken breasts with the classic Greek flavors of lemon, garlic and oregano plus Greek yogurt for a more tender bite.

And a classic Greek pairing is onions and potatoes, so I found a fitting “potato only” recipe online, then adapted it to suit our preferences—one being adding onions. (although it is more time consuming than the chicken, so be prepared). Ingredients for both the entrée and side dish include lemon, garlic and oregano, which can also be incorporated to finish your veggie, such as the steamed broccoli in our meal.

Marinate the meat in just half of the marinade, reserving the remainder for basting. The chicken is adequately flavored in just 30 minutes, but if possible, let it soak in all that Greek flavor for up to three hours in a ziploc gallon storage bag. (Don’t go longer than that to avoid the chicken from becoming mealy.)

The acid from the lemon in your marinade helps break down the connective tissue in the meat, adding flavor and creating a softer chew. But the real secret to tenderizing this chicken is adding yogurt to the mix. The dairy ingredient has a more mild acidic level than some other raw enzyme acids, making it perfect for chicken, reducing the chance it will get mushy.

Cook the chicken to an internal temperature of 160-165°F, and allow to rest for the juices to set.

img_0902

Lemony Greek Chicken Breasts

  • Servings: 2-4
  • Difficulty: easy
  • Print

Ingredients

  • 1 ½ lbs. boneless skinless chicken breasts (about 2 large breasts)
  •  cup plain Greek yogurt
  • ¼ cup extra virgin olive oil
  • 1 lemon, juiced and zested (more lemon wedges for garnish)
  • 6 garlic cloves, pressed or minced
  • 2 Tbsp. dried oregano
  • 1 tsp. kosher salt
  • ½ tsp. freshly ground black pepper

Directions

  1. Place the chicken pieces in a gallon-sized ziploc bag and set aside.
  2. Add the Greek yogurt and olive oil to a medium size bowl. Zest the lemon and add to the bowl then juice that lemon into the bowl.
  3. Add the minced garlic, oregano, kosher salt and black pepper and stir. Pour half of the marinade into the freezer bag with the chicken pieces and reserve the other half of the marinade for basting.
    img_0883
  4. Marinate the chicken for 30 minutes or up to 3 hours in the refrigerator.
  5. When ready to grill, prepare the grill, or grill pan, by lightly oiling the grates with vegetable oil or cooking spray and set to medium high heat.
  6. Remove chicken from ziploc and toss the bag with any remaining sauce.
  7. Grill the chicken, basting with the reserved marinade and turn often so each side browns and has light grill marks.
    img_0892
  8. Cook throughly, about 20-25 minutes or until the chicken juices run clear and the temperature reaches 160°. Let rest for about 5-10 minutes so the juices redistribute.
    img_0897
  9. Serve warm with the Greek Lemon Potatoes and Onions if desired.

http://www.lynnandruss.com

Greek Lemon Potatoes and Onions

The idea behind this recipe is that the potatoes suck up the amazing lemon-garlic-oregano flavored broth, then roast until golden along with onion wedges. Due to the cooking method, don’t expect super-crunchy, but they’ll have flavor unlike any other ordinary roasted potato. And what a perfect accompaniment for the Lemony Greek Chicken!

Greek Lemon Potatoes and Onions

  • Servings: 4-6
  • Difficulty: easy
  • Print

Ingredients

  • 2 1/2 lbs. starchy potatoes, peeled
  • 1 large yellow onion peeled, root intact, cut into wedges
  • 1 1/2 cups chicken stock/broth
  • 1/2 cup olive oil
  • 1/3 cup fresh lemon juice (from 1 large, or 2 smaller)
  • 5 garlic cloves, minced
  • 1 Tbsp dried oregano
  • 2 tsp. salt
  • Lemon wedges and fresh oregano leaves for garnish (optional)

Directions

  1. Preheat oven to 400°.
  2. Peel potatoes and cut into thick wedges or chunks about 1″ thick.
  3. Peel the onion, trim off roots but leave root end intact, cut into 3/4″ wedges.
  4. Place in a roasting pan with all the other ingredients. Toss well.
    img_0889
  5. Roast for 20 minutes.
  6. Turn potatoes, roast for a further 30 minutes until the liquid is mostly absorbed by potatoes/evaporated and you’re left with mainly oil in the pan.
  7. To crisp the potatoes, transfer potatoes and onions to a separate baking sheet lined with parchment. Tilt the original roasting pan and scoop off as much of the oil/juices as you can and drizzle over the potatoes.
  8. Return potatoes to oven and roast for another 20-25 minutes, turning once or twice, until potatoes and onions are golden and a bit crispy.
  9. Transfer potatoes and onions to a serving platter. Serve, garnished with lemon wedges and oregano if desired.
    img_0899

http://www.lynnandruss.com

Now That’s Italian!

Ravello by Toscano in Robbinsville, NJ is a fabulous Italian restaurant that deserves a top spot on our growing list of BYOs. After a recent visit with good friends Rosanne and Gary (Mr. & Mrs. Z), Russ and I were over-the-top impressed with our perfectly prepared and presented meals.

While the menu itself is not overwhelming in size, the portions certainly present a WOW factor! In addition to a half dozen nightly Chef Specialties, the menu contains six to eight options each under Appetizers, Salads, Pastas and Entrées, along with several Sides, and a few choice Desserts.

IMG_1097

While we did have a bit to nosh, nibble and sip at the Z’s prior to heading to the restaurant, we decided to go ahead and order a couple of appetizers anyway once we got there. Which probably wasn’t necessary, especially given the large hunk of crusty, garlicky bread and herbed olives that come gratis with dinner.

IMG_1100

IMG_1102

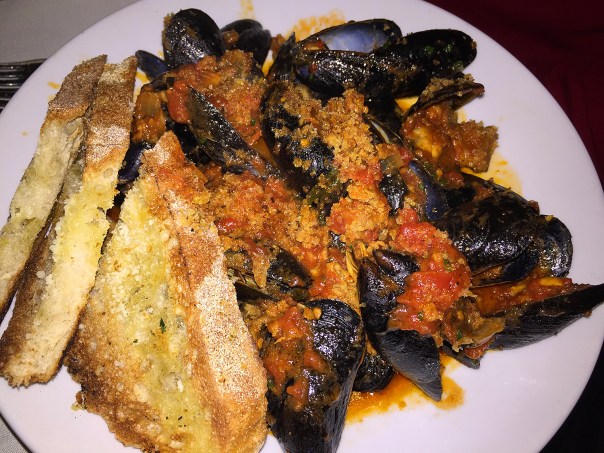
It seems Russ and I have been on a meatball kick lately, so we couldn’t pass up Emma’s Meatballs—a meal unto itself. And the Z’s zeroed in on Mussels Chorizo, which looked fabulous, and everyone but me (I don’t eat them) agreed they were exquisitely delectable.

IMG_1106
Emma’s Meatballs
—Pan-fried, topped with lots of Sunday gravy (read red sauce), whipped fresh ricotta accompanied by parmesan crostini

IMG_1108
Mussels Chorizo
—Chorizo, Calabrian pepper in a saffron tomato au jus

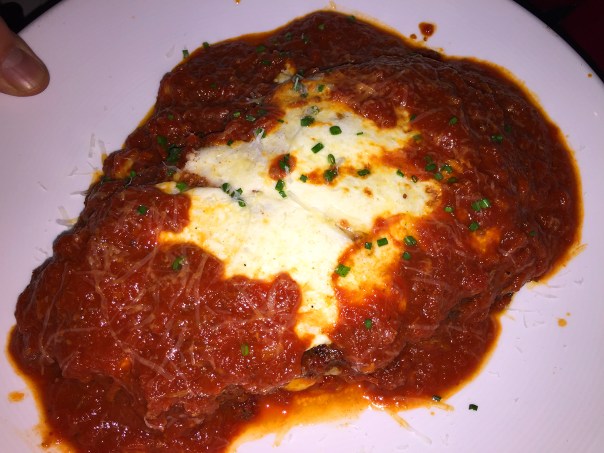
For entrées, Gary knew instantly that he wanted the Veal Parm; while Rosanne waffled between her usual Veal Ravello and the Shrimp & Clams Linguine, which won out in the end. But Russ ended up selecting the Veal, and I chose it’s counterpart, the Chicken & Shrimp Ravello.

IMG_1112
Veal Parmigiano
—Veal cutlet with house made fresh mozzarella, ricotta gnocchi and topped with their Sunday gravy

IMG_1113
Chicken & Shrimp Ravello
—contained chorizo sausage, cherry peppers, San Marzano tomatoes, with melted provolone over a bed of tagliatelle

IMG_1109
Veal Ravello
—Plated with wild mushrooms, wilted arugula, cavatelli, crispy prosciutto marsala porcini cream

IMG_1114
Shrimp and Clams Linguine
—Fresh shucked clams in a San Marzano tomato basil sauce

Even though some of us had a large portion of leftovers to take home, the guys were in a dessert mode. And if Crème Brûlée is on the menu, you can bet Russ is at least thinking of it. After experiencing the lip-smacking dinner, he knew he just had to try their version—and he was not disappointed.

IMG_1122
Crème Brûlée

Gary on the other hand went in a different direction with his Olive Oil Cake selection. It was artistically plated with vertical slices of moist cake served with fresh whipped creme and mint, then topped with a drizzle of honey and a sprinkle of confectioner’s sugar. Incredible!

IMG_1120
Olive Oil Cake

After all of that, it was time to roll ourselves back to the car…

Everything about the dinner and service was top notch, our only complaint was we were all a bit chilly. Perhaps it could’ve been our table situated next to a window with the frigid temps outside. But it is not enough though to keep us from going back.

Chinese Burmese Chili Chicken

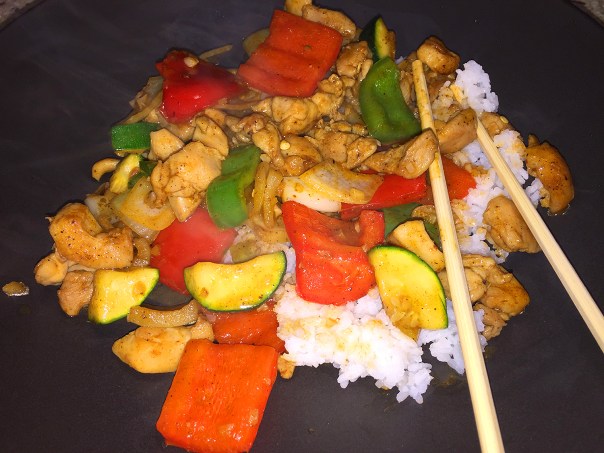
I just ❤ spicy stir-fries with lots of veggies, and one of our favorite stir-fry chefs is Grace Young. With an idea of what we hankered for in mind, we flipped through her Stir-Frying to Sky’s Edge cookbook, and stopped dead in our tracks with this Chinese Burmese Chili Chicken recipe. As the name implies, it reflects the fusion of Chinese and Burmese, plus Indian spices. Game on!

The paprika, cumin and chili powder are Indian spices that are incorporated into Burmese cooking, creating layers of lush flavor, and make a great counterpoint to the mild heat from the fresh Anaheim chili. At first bite the heat level is mild but it gradually builds up as you eat—although by no means overpowering.

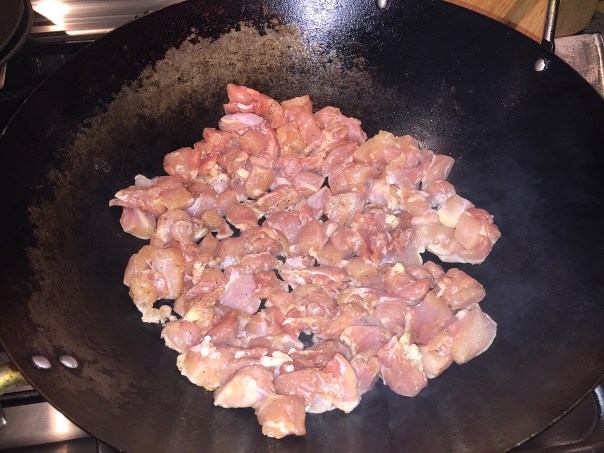
We used boneless chicken thighs for this (about 40% more than called for), but you can also use the breast meat if desired. In addition, we have a tendency to be heavy-handed with other ingredients such as the garlic and ginger, but just go with your instincts. An absolute keeper in our books!

img_1022

Chinese Burmese Chili Chicken

  • Servings: 3-4
  • Difficulty: easy
  • Print

Ingredients

  • 1 lb. boneless, skinless chicken thigh or breast, cut into 1-inch cubes
  • 2 Tbsp. peanut or vegetable oil, for cooking
  • 1 1/2 teaspoon cornstarch
  • 3/4 tsp. salt
  • 1/2 tsp. freshly ground black pepper
  • 2 tsp. paprika
  • 2 tsp. ground cumin
  • 1 medium yellow onion, cut into 3/4″ chunks
  • 2 tsp. minced ginger
  • 2 tsp. minced garlic
  • 1 medium red bell pepper, cut into 1-inch squares
  • 1 medium green bell pepper, cut into 1-inch squares
  • 1 medium Anaheim, cut into 1/2 slices with seeds
  • 1 medium zucchini, halved lengthwise and cut into 1/2 slices
  • 2 Tbsp. fish sauce
  • 1/2 tsp. chili powder

Directions

  1. In a medium bowl combine the chicken, 1 tablespoon of the oil, 1 teaspoon of the cornstarch, 1/2 teaspoon of the salt, and pepper. Stir to combine.
    img_1026
  2. In a small bowl combine the remaining ½ teaspoon cornstarch and 1/3 cup cold water. In a separate small bowl combine the paprika and cumin.
  3. Heat a 14-inch flat-bottomed wok over high heat until a bead of water vaporizes within 1 to 2 seconds of contact. Swirl in the remaining 1 tablespoon of oil, add the onion, then, using a metal spatula, stir-fry 30 seconds or until the onions begins to wilt. 
    img_1032
  4. Push the onions to the sides of the wok, (we actually remove the onions to another bowl, and return them to the wok toward the end to reheat), carefully add the chicken and spread it evenly in one layer in the wok. Cook undisturbed for 1 minute, letting the chicken begin to sear. Stir-fry 30 seconds or until the chicken is almost completely opaque.
    img_1034
    img_1035
  5. Add the ginger, garlic, and the paprika mixture, and stir-fry 1 minute or until the aromatics are fragrant and the chicken is well coated in the spices.
  6. Add the red and green bell peppers, reduce the heat to medium and stir-fry 2 minutes or until the peppers begin to soften. (Do not be alarmed if the spices stick a little to the bottom of the wok.)
    img_1040
  7. Add the fish sauce, chilies, zucchini, and the remaining 1/4 teaspoon salt, and stir-fry 1 minute or until almost all of the liquid has evaporated.
  8. Re-stir the cornstarch mixture, swirl it into the wok, increase the heat to high, and stir-fry 1 minute or until the chicken is just done and the vegetables are crisp-tender. Remove the wok from the heat and stir in the chili powder.
    img_1043
  9. Serves 3 as a main dish with rice or 4 as part of a multi-course meal.
    img_1046

http://www.lynnandruss.com

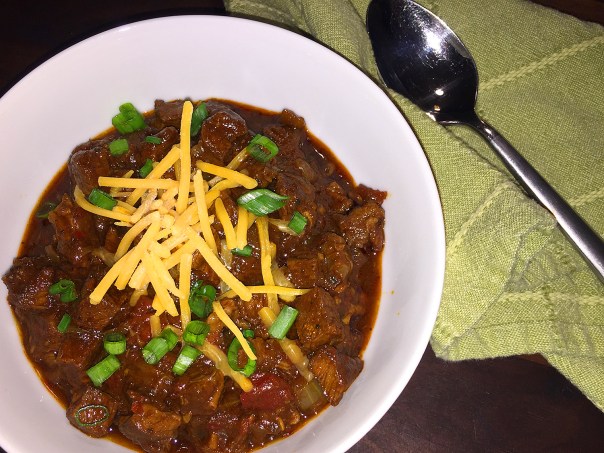
Amazing Beef Chili—No Beans About It (or in it)

Even though neither of our favorite football teams were in the Super Bowl this year, we still felt it was a necessary evil to pay homage to the annual NFL championship game with some good down-home chili. As coincidence would have it, there was a posting on my Facebook feed with a new Bon Appétit recipe that was built on browning 5-pounds of boneless beef chuck and a variety of dried chiles.

IMG_1093

Decades ago, I never put beans in my chili, but that changed over the years and I now love to include several different types of beans, but alas, this recipe doesn’t require any. I was initially tempted to throw some in anyway, but Hubby said to just go with the original ingredients the first time around.

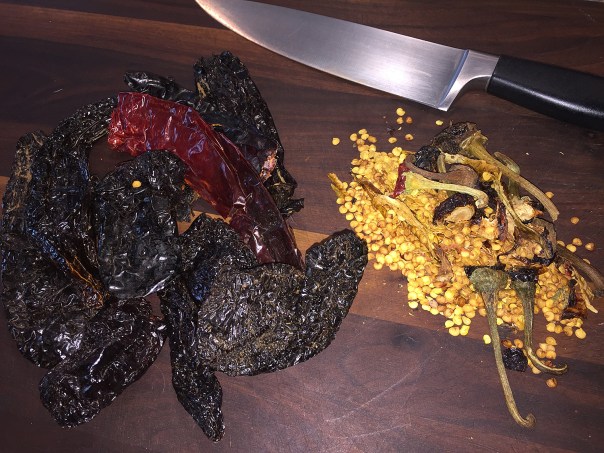
A case is made here for it being faster and easier to brown the meat in larger pieces first and chop them afterward—and I thought that made a lot of sense. Then incorporating intact dried chiles instead of jarred powders contributes a more complex flavor and a saturated color. Finally, adding lager imparts just the right amount of bitterness, rounding out the chiles.

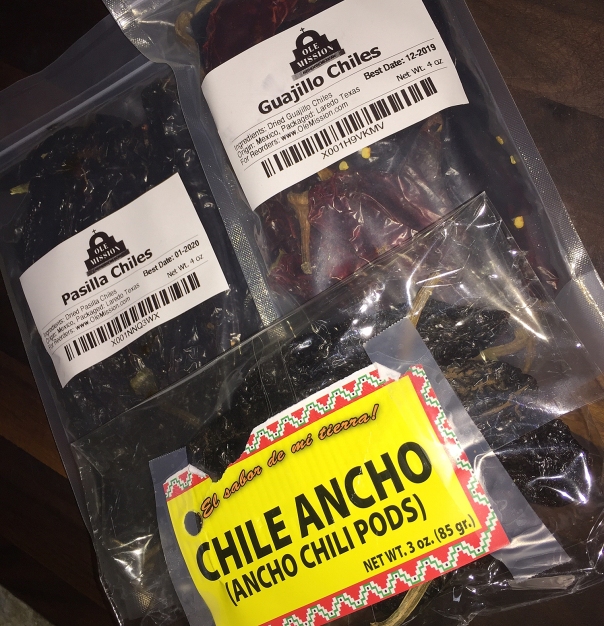
Dried ancho chiles are usually easy to find, but the other two, guajillo and pasilla, may have to be ordered online, where I finally got them from Amazon within two days. Since this takes a good chunk of time, and chilis taste better a day or so later, make it ahead of time if possible. I made it the Friday before Super Bowl allowing two days for all of the yumminess to meld.

IMG_1055

The cookware of choice for this culinary endeavor was “Big Red”, our large 9-qt. Le Creuset enameled cast iron pot. She’s a true work-horse and is the perfect vehicle for braises, stews, and chilis. After simmering for two hours, I let it cool down, then covered it and put the pot directly into the fridge for two days. An hour before we planned to feast on it, I slowly warmed the chili in the same pot over a low heat.

IMG_1091

Beef Chili—No Beans About It

  • Servings: 8-10
  • Difficulty: moderate
  • Print

Ingredients

  • 4 large or 6 medium dried ancho chiles
  • 2 dried guajillo chiles
  • 2 dried pasilla chiles
  • 3 tablespoons extra-virgin olive oil
  • 5 pounds boneless beef chuck, cut into½-inch slices
  • Kosher salt, freshly ground pepper
  • 2 large yellow onions, chopped
  • 6 garlic cloves, finely chopped
  • 1 tablespoon ground cumin
  • 2 teaspoons dried oregano
  • 1 14.5-ounce can fire-roasted crushed tomatoes
  • 3 tablespoons dark brown sugar
  • 1 12-ounce bottle lager
  • 2 teaspoons apple cider vinegar
Toppings suggestions: sour cream, grated cheddar, chopped red onion, lime wedges, cilantro, sliced avocado, pickled jalapeños, corn nuts, or even Fritos!
Directions
  1. Remove seeds from ancho, guajillo, and pasilla chiles and place in a medium bowl. Pour in 3 cups boiling water and cover bowl tightly with plastic wrap; let sit until chiles are softened, 20–25 minutes.
    IMG_1057
    IMG_1058
  2. Transfer chiles and soaking liquid to a blender and blend on high until smooth, about 1 minute; set aside.
    IMG_1070
  3. Heat oil in a large Dutch oven or other heavy pot over medium-high. Season beef slices all over with salt and pepper.
    IMG_1065
  4. Working in 2–3 batches, cook, turning pieces once, until browned, about 5 minutes per side. Transfer to a plate.
    IMG_1071
    IMG_1075
  5. Reduce heat to medium; add onions and garlic to pot. Cook, stirring often to loosen browned bits from bottom of pot, until onions are translucent and very soft, 6–8 minutes.
    IMG_1077
  6. Add cumin and oregano and cook, stirring, until spices start to stick to pot, about 1 minute.
    IMG_1079
  7. Add tomatoes and brown sugar and scrape bottom of pot to loosen spices, then add lager. Bring to a lively simmer and cook, stirring occasionally, until beer is almost completely evaporated, 10–15 minutes.
    IMG_1080
    IMG_1085
  8. Meanwhile, cut beef slices into ½” pieces, discarding any large bits of fat or gristle.
    IMG_1078
  9. Add beef, reserved chile purée, and 2 cups water to pot; season with salt and pepper. Bring to a boil, reduce heat, and simmer gently, uncovered, until liquid is thickened and meat is very tender, 1½–2 hours.
    IMG_1087
  10. Taste chili and season with more salt and pepper if needed. Remove from heat and stir in vinegar. Divide chili among bowls and top as desired.
    IMG_1091

Do Ahead: Chili can be made 4 days ahead. Let cool; cover and chill. Reheat gently over low, stirring occasionally, and adding a splash of water to loosen if needed.
IMG_1092

http://www.lynnandruss.com

Original recipe by Claire Saffitz from Bon Appétit