Monthly Archives: April 2022

Adaptable Taco Salad Bowl

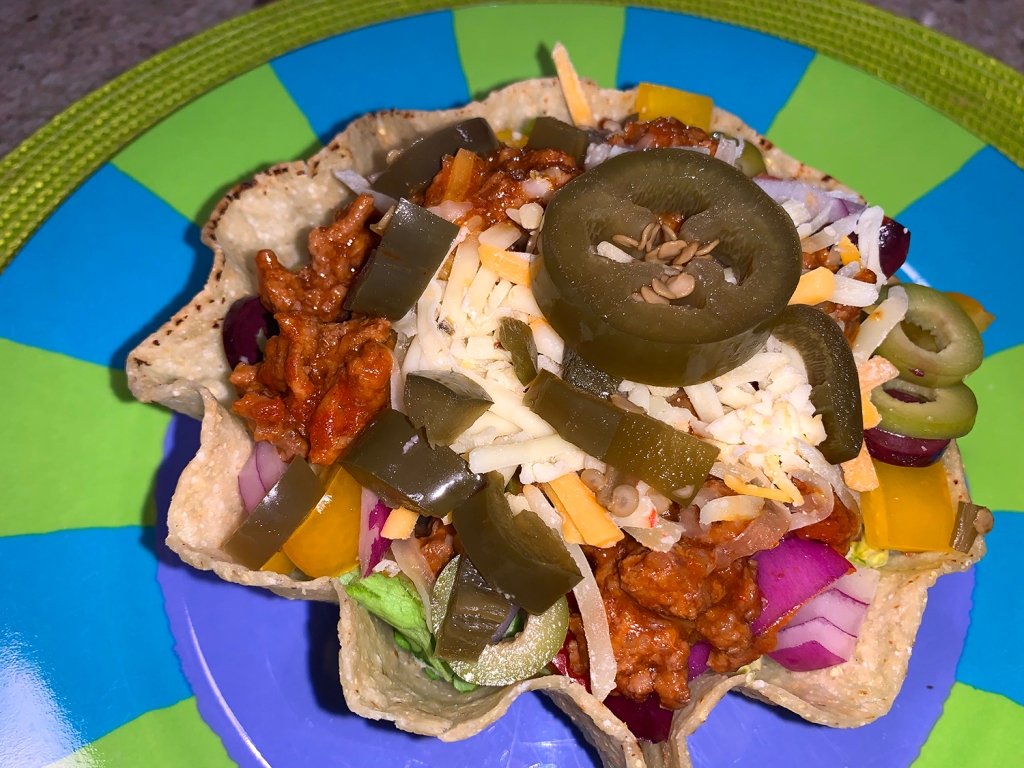
With Cinco De Mayo right around the corner, this quick riff on taco salad might just be the ticket for dinner. Having a small party? Then just double the recipe and you can feed up to eight. Let guests prepare their own, layering on just the right ingredients to suit their own preferences. This way it appeals to vegetarians and meat eaters alike.
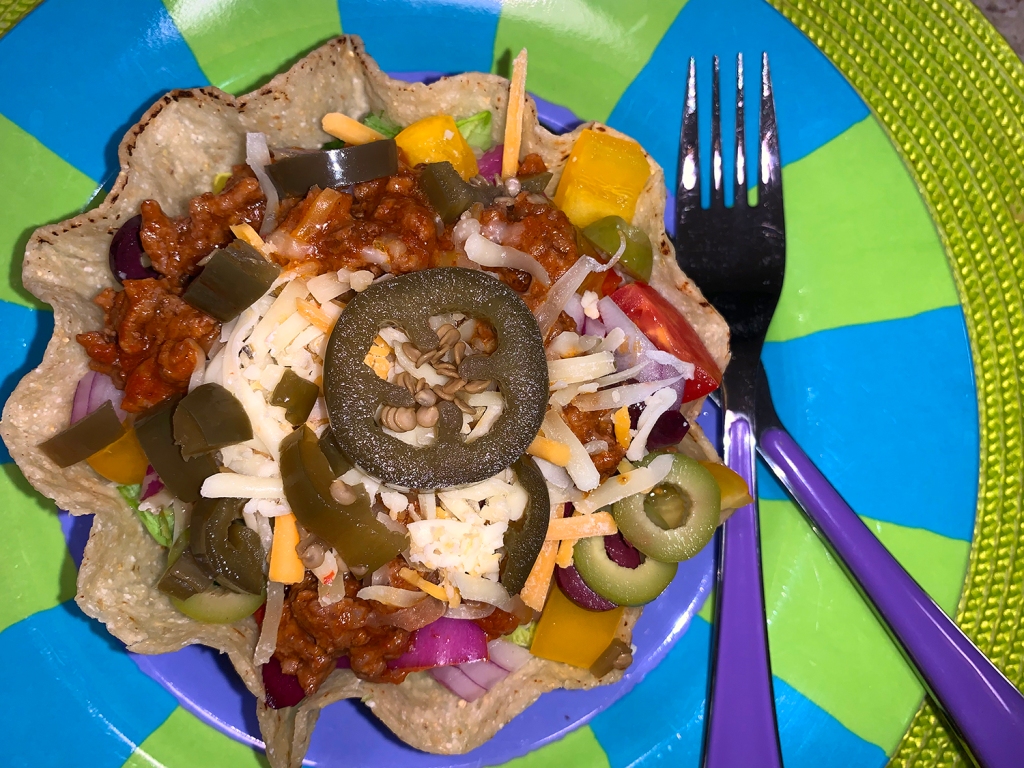
Don’t eat red meat? Substitute ground turkey. Follow a vegetarian lifestyle? Swap out the meat for refried beans. Not into hot and spicy? Omit the jalapeños, and use a mild taco seasoning and salsa. Can’t tolerate raw onion? Cook it with the ground meat to eliminate some of the pungency.

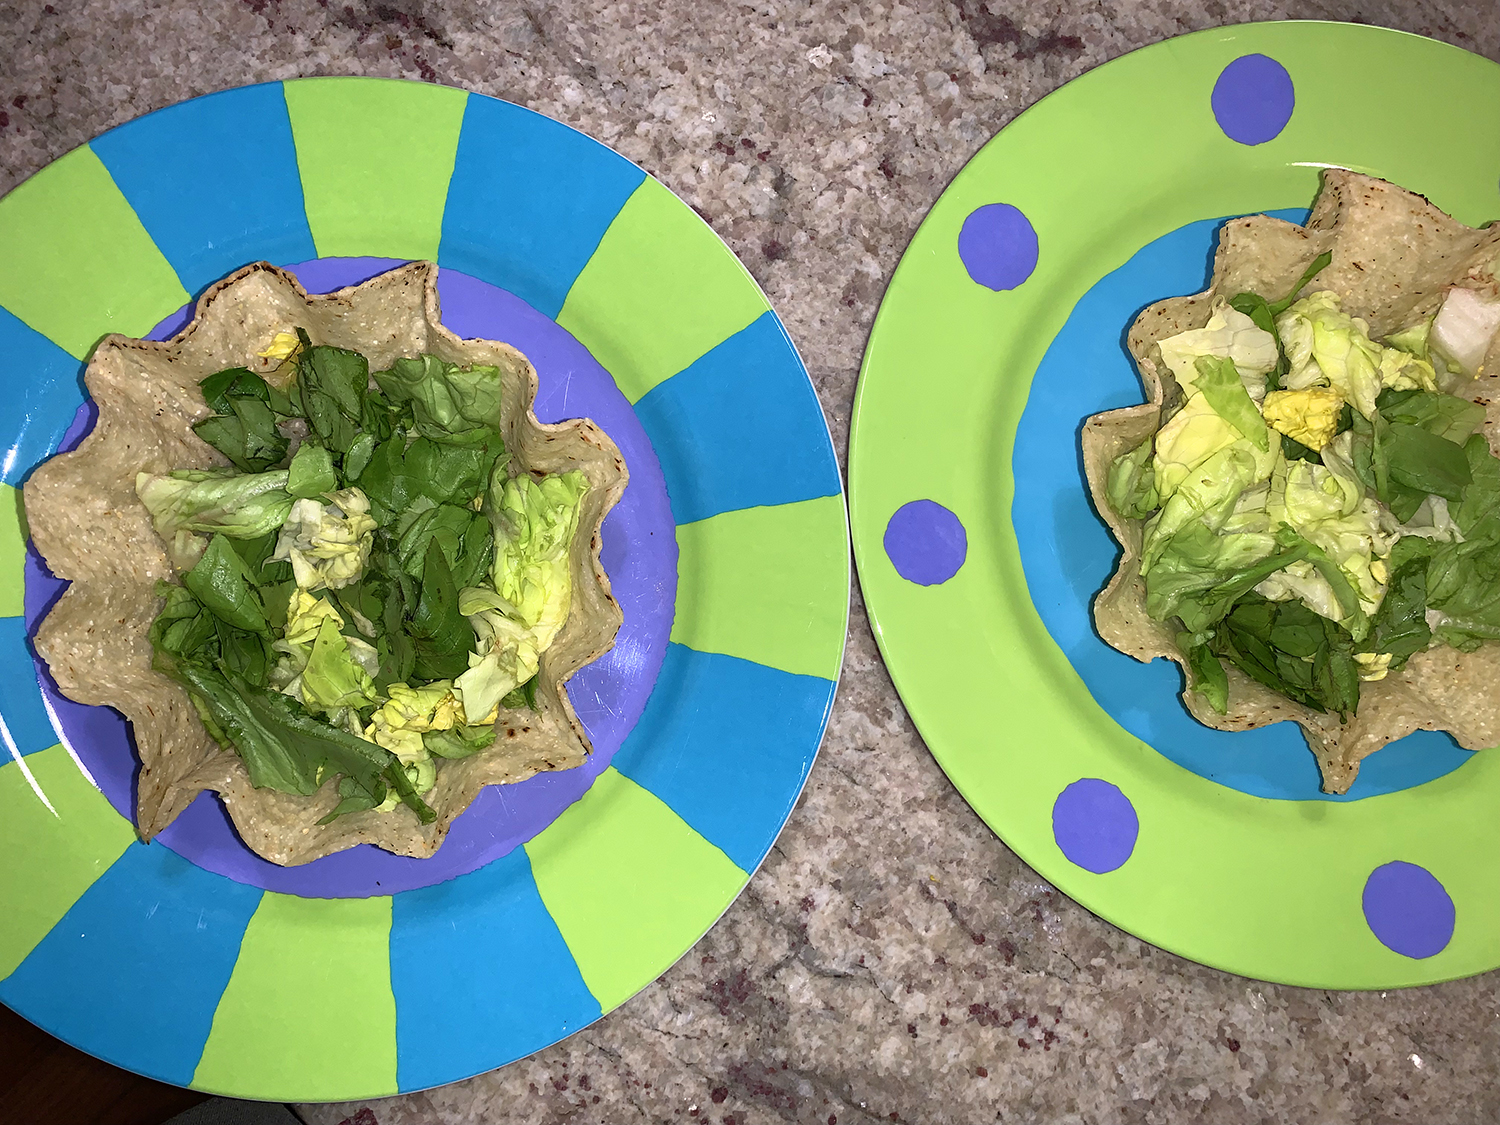
Another fun twist is using beer instead of water when you add the seasoning to the ground meat. As you can see, this salad is very adaptable. I like to start with a layer of lettuce, followed by the meat mixture and cheese, then the peppers, tomatoes, onion, and olives. To finish, add a bit more meat and cheese, and a final topping of jalapeños and sour cream, if using,

To up the party ambiance, plate it all on some fun and festive picnic ware!

Adaptable Taco Salad Bowl

  • Servings: 4
  • Difficulty: easy
  • Print

Ingredients

  • 4 tostada bowls
  • 1 1⁄4 lbs. ground beef or turkey (or refried beans if going vegetarian)
  • 3 Tbsp. homemade or packaged taco seasoning
  • 3⁄4 cup water, or beer
  • 1⁄2 cup salsa (your favorite brand)
  • 1 head iceberg or Bibb lettuce, torn into 2-3″ pieces
  • 8 oz. (2 cups) shredded Mexican cheese blend
  • 1⁄2 each large red and yellow bell pepper, cut into 1⁄4 dice
  • 1 cup grape tomatoes, quartered
  • 1⁄2 red onion, cut into 1⁄4 dice
  • 1⁄2 cup black and/or green pitted olives, sliced thin
  • 1⁄2 cup pickled jalapeños, 1⁄4 slices, then chopped
  • Sour cream for garnish, optional

Directions

  • Prep all ingredients.
  • In a large nonstick skillet, brown the ground meat until there is no more pink, making sure to break up any large chunks.
  • Add the taco seasoning and the water (or beer), and cook over medium heat for about 5 minutes until it thickens. Add the salsa to the meat mixture and heta through.
  • While the meat is thickening, prepare the tostada bowls starting with a layer of torn lettuce.
  • Next, top with some meat and cheese, then add any of the other ingredients you prefer. Finish with another layer of ground meat and cheese, and top with sour cream and jalapeños, if desired.

http://www.lynnandruss.com

Niçoise-Style Salad with Soft-Cooked Egg

We’ve all had a Niçoise salad at some point in our lives, right? This simplified version of the classic replaces the hard-boiled egg with a soft-cooked one, which means the yolk can mix easily—and deliciously—with the other ingredients. With practically no cooking at all (except the soft-boiled eggs), this quick meal leaves you all kinds of time leftover to devote to other needs. (Click here for a more involved version.)

By all means, make sure to buy the real good Italian tuna packed in oil and treat yourself to the royalty of gourmet jarred tuna. Yes, it’s an unabashed luxury and a lot more expensive than the canned, but makes a world of difference in taste and texture. Once you have a bite of a smooth, soft tuna strip, hand filleted from a small section of the tuna’s underbelly, you’ll replace your classic “mmm” with a resounding “Oooh lá lá!” 

IMG_1701

The first time I tried gourmet jarred tuna—which was only a few short years ago—Russ persuaded me to take the plunge, although I was skeptical that the price would be worth it. But after one bite, I quickly changed my mind. Save the canned tuna for quick meals and sandwiches.

IMG_1704

TASTE TEST: Fine Cooking was curious about which supermarket tuna tastes best, so they collected all the canned and jarred tuna they could find in local supermarkets and tried them side by side. Without knowing which came from a can or a jar, they overwhelmingly preferred the jarred tuna samples (specifically the Sclafani and Tonnino). The jarred tuna contained bigger pieces, was richer tasting, and had better texture.

This salad is touted as serving four. In MHO that would make for some pretty small rations. The only tweaks I made was soft boiling 3 eggs instead of four (Russ wanted two for himself), and because I inadvertently used up all of our shallots the previous night, I minced a scallion instead—after all they’re both from the allium family. As you can see from the photos, our portions aren’t overly large!

Instead of wasting the good olive oil when you drain the tuna, capture it in a small bowl and use the requisite amount when making the dressing, this way you won’t be wasting anything and will get an added bonus of tuna flavor. BTW, any leftover dressing will keep for a week in the fridge, and we did have some extra.

IMG_1695

Nicoise-Style Salad with Soft Cooked Eggs

  • Servings: 2-3
  • Difficulty: easy
  • Print

Ingredients

  • 4 large eggs
  • 1-1/2 Tbs. white wine vinegar
  • 1 Tbs. minced shallot
  • 1 Tbs. heavy cream
  • Kosher salt and freshly ground black pepper
  • 3 Tbs. olive oil
  • 1 Tbs. capers, drained
  • 4 oz. spring mix lettuces (4 lightly packed cups)
  • 2, 5-oz. jars or cans light tuna packed in olive oil, preferably Italian, drained and flaked
  • 2/3 cup jarred roasted red pepper strips, rinsed
  • 1/4 cup pitted Kalamata olives, halved

Directions

  1. Bring a 2-quart saucepan of water to a boil. Lower the eggs into the water, reduce the heat so the water is gently boiling, and then cover and cook for 5 minutes. Transfer the eggs to a bowl of ice water and let cool for at least 10 minutes.
  2. Meanwhile, combine the vinegar, shallot, cream, a pinch of salt, and a few grinds of pepper in a small bowl. Whisk in the oil in a slow stream until emulsified. Stir in the capers.
  3. Toss the lettuce with just enough dressing to coat, and then divide it between the (in our case two) dinner plates. Arrange the tuna, roasted red pepper, and olives on top of the greens.
  4. Carefully peel the eggs, place one on each salad, and gently cut in half.
  5. Rewhisk the remaining dressing, drizzle a little over the salad, and serve.

http://www.lynnandruss.com

By Debbie Schenkel from Fine Cooking

M&M Shortbread Cookies with Chocolate Drizzle

Shortbread is a celebration of simplicity—a combination of butter, sugar, and flour that adds up to so much more. Add M&Ms and a chocolate drizzle and you’ll knock it out of the park! And no eggs necessary.

Never made shortbread before? The “short” part refers to the lack of gluten development in this cookie. Liquid activates gluten, but because there’s no liquid in the recipe, the gluten doesn’t have a chance to develop protein that give other baked goods their chewy texture. Since the gluten is kept “short,” you get a tender, crumbly cookie that melts in the mouth.

Of course, you don’t need to know the science behind the dough to end up with tasty cookies!

M&M Shortbread Cookies with Chocolate Drizzle

  • Servings: Yields 4 dozen
  • Difficulty: easy
  • Print

Ingredients

  • 2 cups butter, softened
  • 1 cup sugar
  • 2 tsp. vanilla extract
  • 4 cups all-purpose flour
  • 1/2 cup corn starch
  • 1 1/2 cups M&M chocolate candies (240 pieces)
  • 1 cup semisweet chocolate chips, optional for drizzle
  • 2 tsp. shortening, optional for drizzle

Directions

  1. Preheat oven to 300 degrees. Line baking sheet with parchment paper and set aside.
  2. Mix butter, sugar and vanilla thoroughly using an electric mixer. Gradually blend in flour and corn starch.
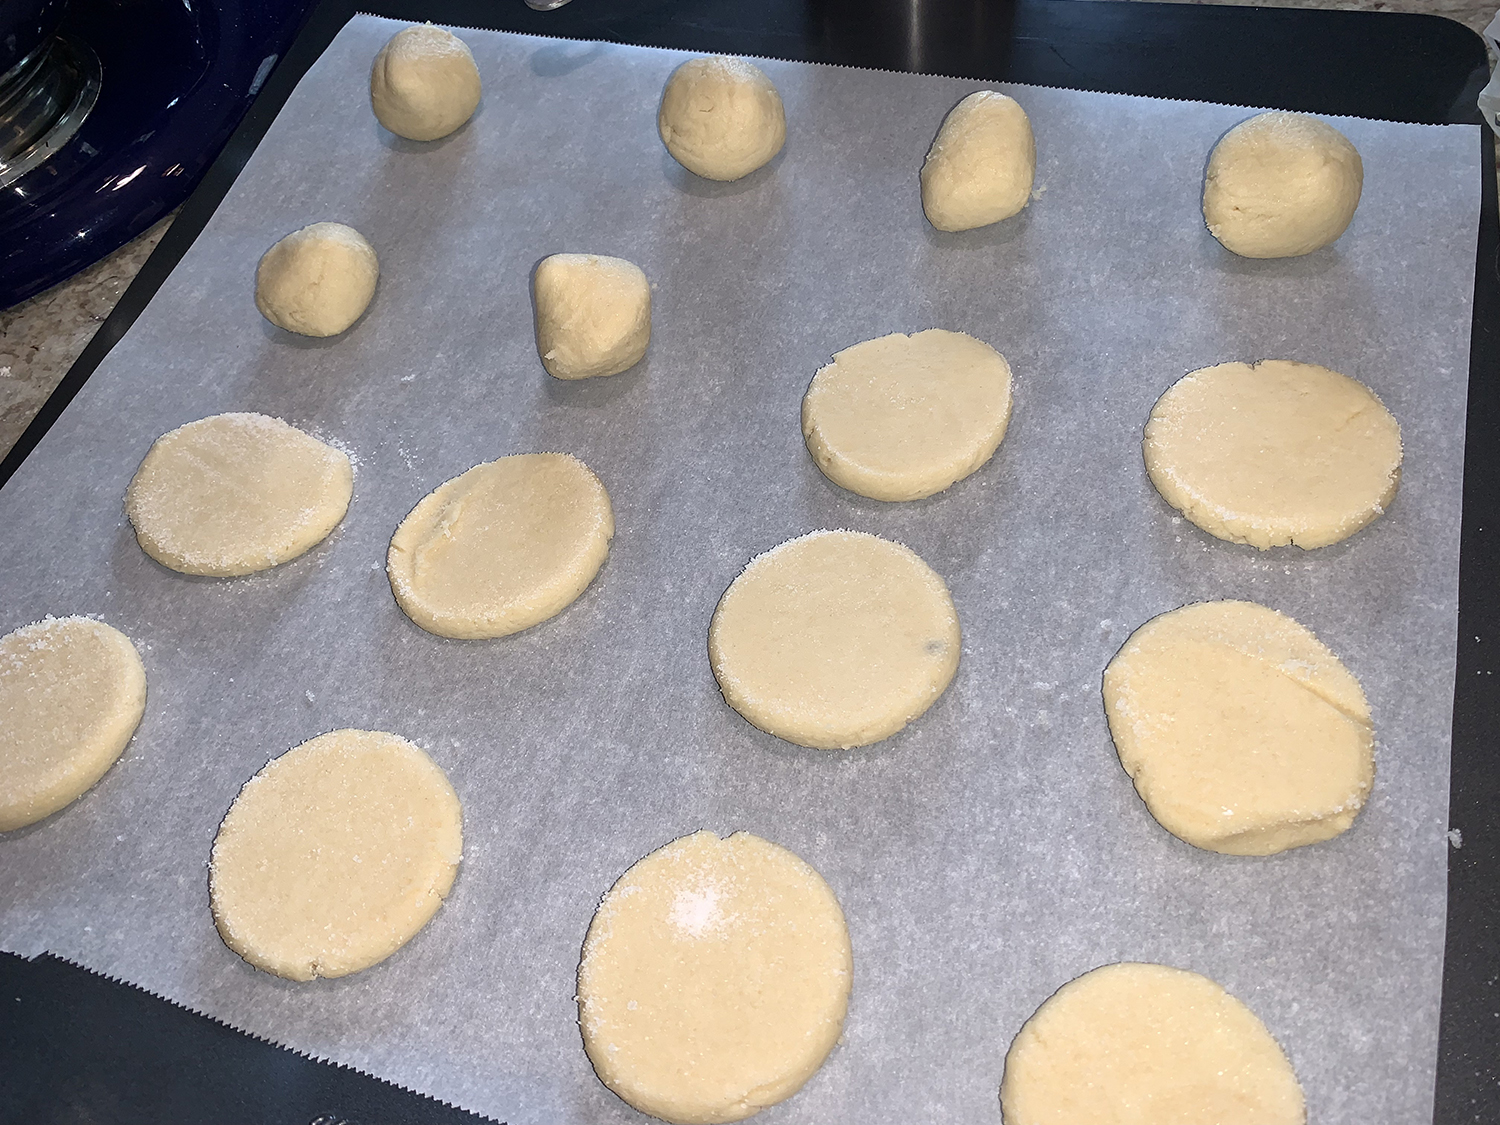
  3. Form into 1-inch balls and place on parchment-lined baking sheets. Gently flatten each cookie using a flat-bottomed drinking glass rubbed with softened butter and dipped in sugar to prevent sticking. Press M&M’s into top of cookies.
  4. Bake for 30 minutes or until bottoms begin to brown.
  5. Cool for 5 minutes on baking sheet, then remove to wire rack to cool completely.
  6. Drizzle melted chocolate* over the cooled cookies, if desired.

*Optional Chocolate Drizzle:

Place 1 cup of semisweet chocolate chips plus 2 teaspoons shortening in a small bowl. Microwave on high for 60 seconds, then stir thoroughly. (If necessary, microwave another 15-30 seconds.) Transfer melted chocolate to a small pastry bag or squeeze bottle and drizzle over cooled cookies. Let dry completely before storing.

http://www.lynnandruss.com

Salmon with Lemon Caper Sauce

This pescatarian-friendly twist on chicken piccata is an easy, go-to meal for anyone looking to save on time without sacrificing flavor. It’s such a quick and easy dinner to throw together, but the ingredients bring on BIG flavor.

Serve this with some simple pasta, risotto, polenta, or even just roasted vegetables. It goes with virtually anything and you can whip it up in under 30 minutes. We enjoyed it with steamed broccolini (which also benefited from the caper-lemon sauce), and a side salad.

With only two of us for dinner, we halved a one-pound piece of salmon providing each of us an eight ounce serving. It was sooo good, we cleaned our plates in no time!

Salmon with Lemon Caper Sauce

  • Servings: 4
  • Difficulty: easy
  • Print

Ingredients

  • Four 5- to 6-oz. skinless wild salmon fillets
  • 1 1/2 tsp. kosher salt
  • 2 Tbsp. olive oil, plus more if needed
  • 1 shallot, chopped
  • 1/3 cup chicken broth or clam juice
  • 3 Tbsp. freshly squeezed lemon juice, about 1 large lemon
  • 2 Tbsp. capers, drained
  • 1 tsp. lemon zest, about 1 large lemon
  • 2 Tbsp. unsalted butter
  • 1 Tbsp. Dijon mustard
  • 2 Tbsp. chopped Italian parsley

Directions

  1. Heat a large nonstick skillet over medium-high heat. Dry the salmon fillets well with paper towel and season evenly with 1 teaspoon salt.
  2. Add the oil to the pan and heat an additional 30 seconds. Add the fillets to the pan, flesh-side down, and cook undisturbed until deep golden brown, about 4 minutes. The fish should look cooked up the sides of the fillets.
  3. Carefully flip the fish and cook an additional minute or until a thin metal skewer inserted in the thickest part comes out warm when touched to your bottom lip. Using a slotted spatula, remove the fish to a plate to rest.
  4. Return the pan to medium heat and add the shallot and remaining 1/2 teaspoon salt, adding more oil if needed. Cook, stirring often, until fragrant and soft, about 1 minute.
  5. Add the vegetable/chicken broth, lemon juice, capers and lemon zest. Simmer for 2 minutes to reduce slightly. Whisk in the butter and mustard until smooth and combined.
  6. Stir in the parsley and spoon the sauce over the salmon.

http://www.lynnandruss.com

Adapted from a recipe by Giada DeLaurentiis

Ginger-Curry Pork and Green Beans

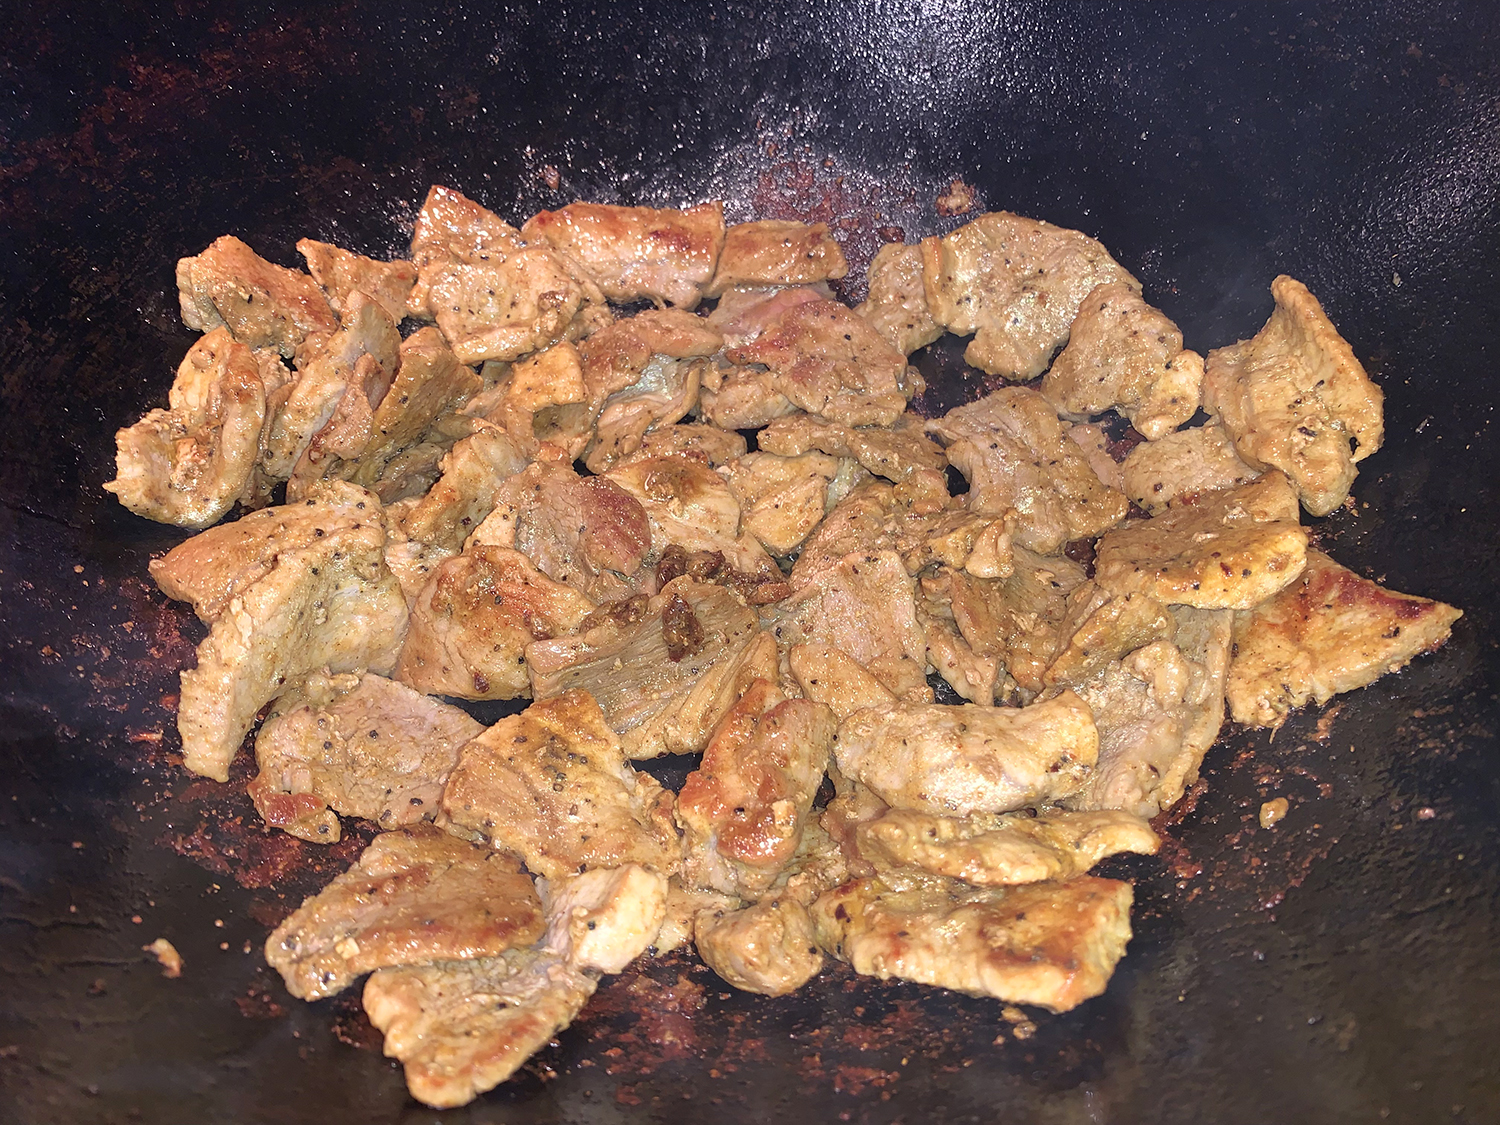
Identity crisis? This quick meat and vegetable curry starts as a stir-fry then finishes as a braise—but a quick braise. Usually pork shoulder takes hours to braise in the oven, but since the meat is cut into thin strips, the time dwindles considerably. Boneless pork shoulder has a rich, full flavor; plus slicing it thin before cooking counters its chewiness.

Green beans cook alongside, absorbing the spiced broth and providing a fresh, vegetal contrast. Curry powder is used as a flavor base, and whole spices amp up the intensity. Just remember to remove the cardamom pods before serving (if you can see them). The Hubs got quite a jolt when he accidentally bit into one!

In some cases you have choices on which spice to use. We incorporated as much of them as possible, i.e. both onion and garlic. And in the case of the noodles, you can always substitute steamed rice instead.

Ginger-Curry Pork and Green Beans

  • Servings: 3-4
  • Difficulty: easy
  • Print

Ingredients

  • 2 Tbsp. neutral oil
  • 1 lb. boneless pork shoulder, trimmed, cut into 2-inch strips and sliced ¼ to ⅛ inch thick
  • 2 tsp. curry powder
  • Kosher salt and ground black pepper
  • 1 medium yellow onion, finely chopped OR 8 medium garlic cloves, chopped OR both
  • 1 Tbsp. minced fresh ginger
  • 3 cardamom pods, crushed OR 1 cinnamon stick OR 8 curry leaves OR a combination
  • 8 oz. green beans, trimmed and halved on the diagonal
  • 1 1⁄2 cups water
  • Rice OR cellophane noodles, cooked according to package directions

Directions

  1. In a 12-inch skillet over medium-high, heat the oil until barely smoking. Add the pork, curry powder, 1½ teaspoons salt and ½ teaspoon pepper. Cook, stirring once or twice, until the pork is well browned, about 4 minutes.
  2. Add the onion, ginger and cardamom; cook, stirring, until the onion is browned, about 2 minutes.
  3. Add the beans and 1½ cups water; bring to a simmer, scraping up any browned bits. Cover partially and cook, stirring occasionally, until the beans are tender and the sauce clings to the meat, about 15 minutes.
  4. Meanwhile, prepare your rice or cellophane noodles according to package directions.
  5. Remove and discard the cardamom from the sir-fry, then taste and season with salt and pepper.
  6. Optional garnish: Chopped fresh cilantro OR toasted sesame seeds OR chopped chilies OR a combination

http://www.lynnandruss.com

Adapted from a recipe by Courtney Hill for Milk Street

Easy Mushroom Ragù

Mushrooms are widely known for their great taste and amazing health benefits. Packed with a ton of essential vitamins and minerals, they make for an excellent addition to your diet, adding flavor to many different recipes. Thank goodness we love them!

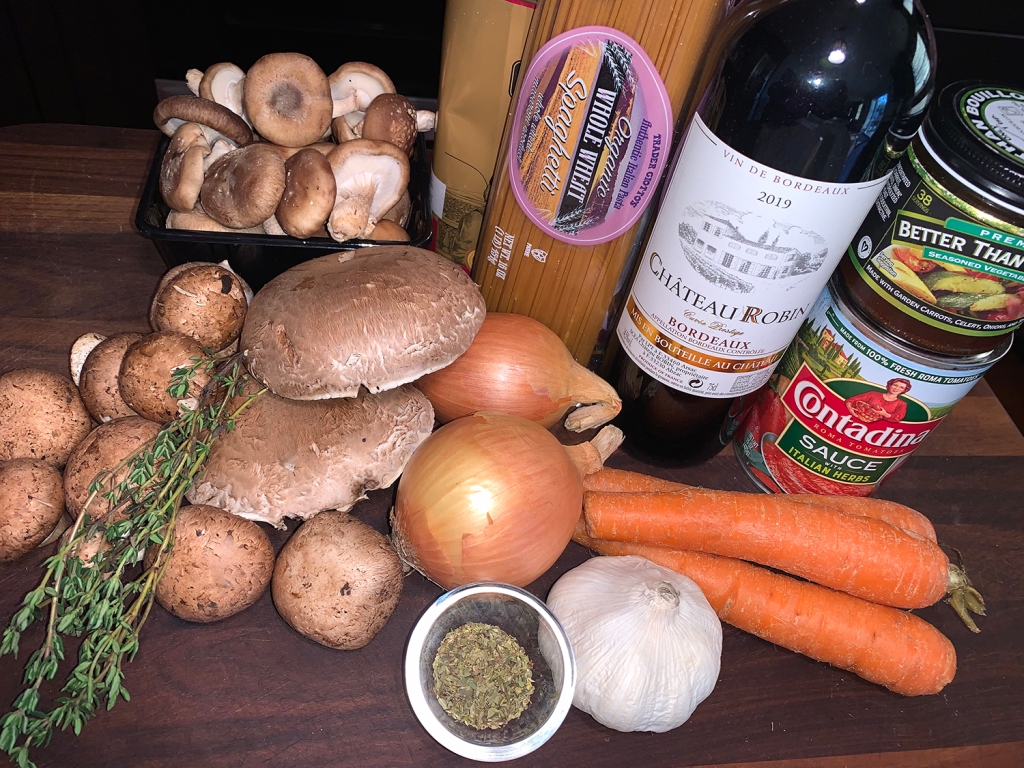
This hearty plant-based mushroom ragù consists of readily available fresh mushrooms and is ready in about an hour. Three types of the funghi are incorporated in this recipe, but feel free to use just one or two types to make the sauce even easier. Serve vegan ragù over polenta, pasta, couscous, or even as a topping for steak or chicken.

Classic or vegan mushroom ragù will keep in the refrigerator for up to 5 days in an airtight container; in the freezer for up to 6 months. To reheat, spoon the ragù sauce into a pot over medium heat until warmed through. If it has become too thick, add a little more liquid (water or vegetable broth) to loosen it a little.

Make it even a bit healthier by using a whole wheat pasta. Of course if you add grated cheese like we did, it is no longer vegan, but we were OK with that.

Easy Mushroom Ragù

  • Servings: 4-6
  • Difficulty: easy
  • Print

Ingredients

  • Extra virgin olive oil
  • 1 large yellow onion, chopped
  • 2 to 3 carrots, peeled and chopped
  • 4 to 5 garlic cloves, minced
  • Kosher salt
  • 6 oz. portobello mushrooms, chopped
  • 6 oz. shiitake mushrooms, sliced
  • 8 oz. cremini mushrooms, sliced
  • 1 cup vegetable broth
  • ½ Tbsp. fresh thyme leaves
  • 1 tsp. dried oregano
  • ½ cup chopped fresh parsley, more for later
  • Black pepper
  • 1 cup dry red wine
  • 1 15- oz. can tomato sauce
  • 2 to 3 Tbsp. chopped hazelnuts (optional)

Directions

  1. In a large pot, heat 3 tablespoons extra virgin olive oil over medium-high heat until shimmering but not smoking. Add the onions, carrots, and garlic. Season with a big pinch of kosher salt. Cook, stirring occasionally, until the vegetables have softened, about 5 minutes.
  2. Add the mushrooms and season with another dash of salt. Add a drizzle more of olive oil and a little bit of the broth. Cook the mushrooms for about 5 minutes until they begin to soften and cook down a little bit.
  3. Add the thyme, oregano, parsley, and a good dash of black pepper. Stir.
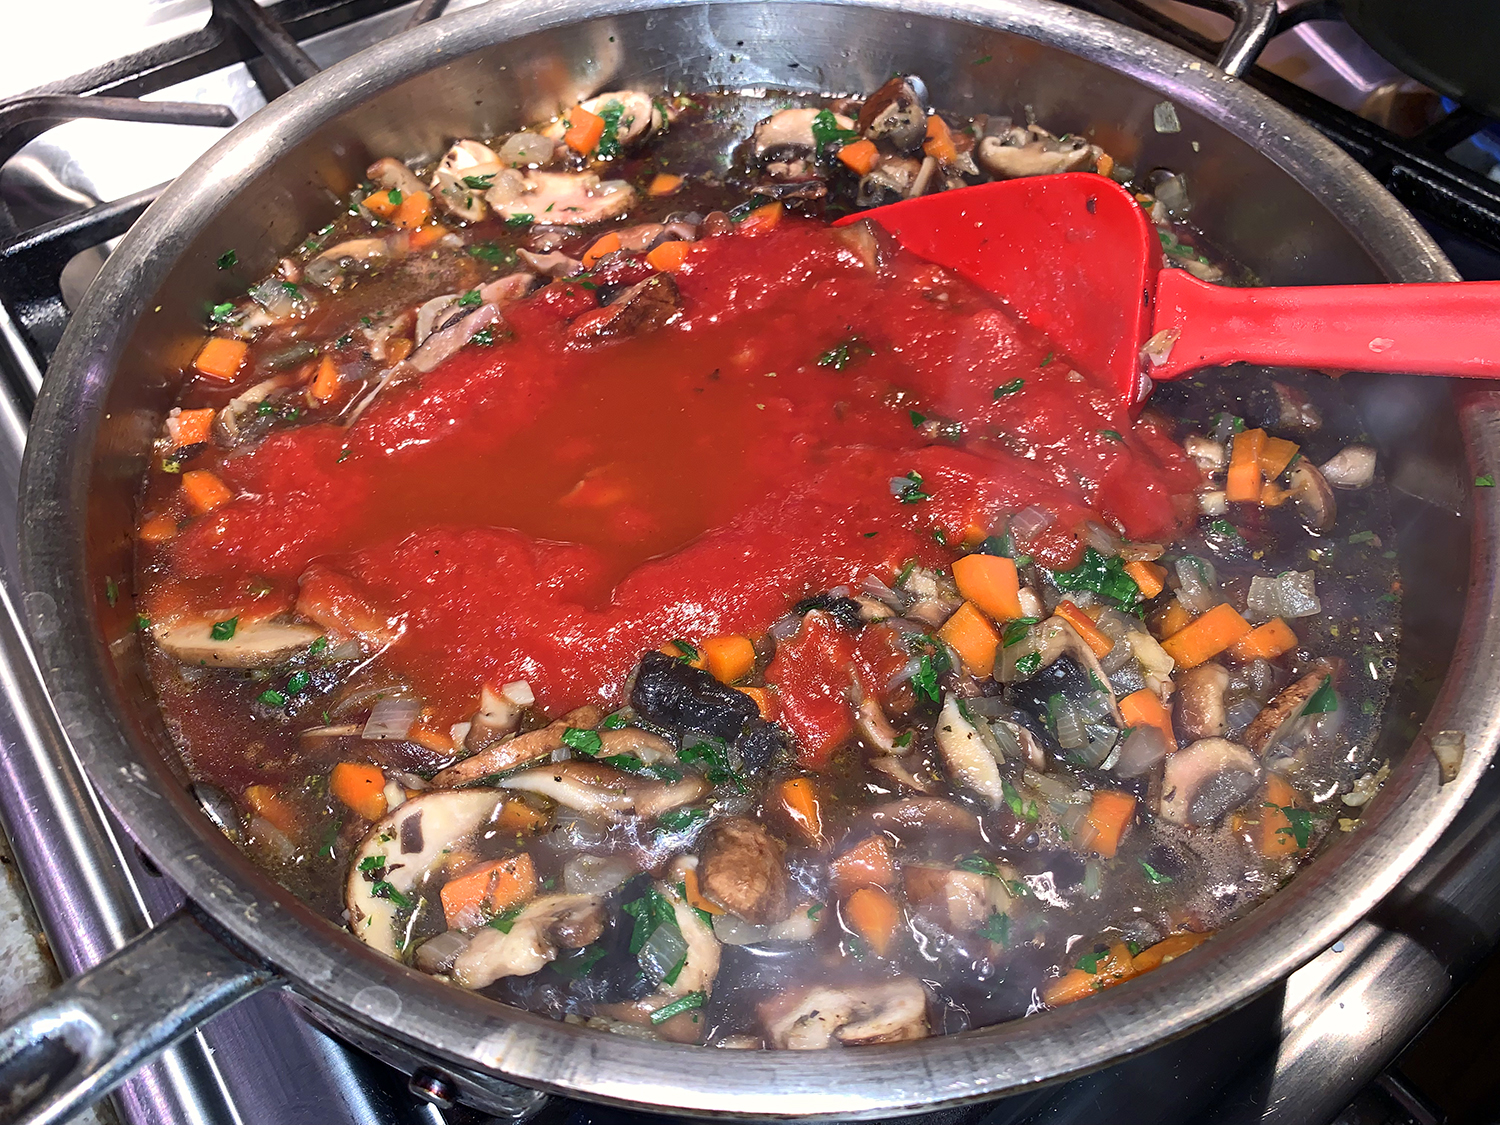
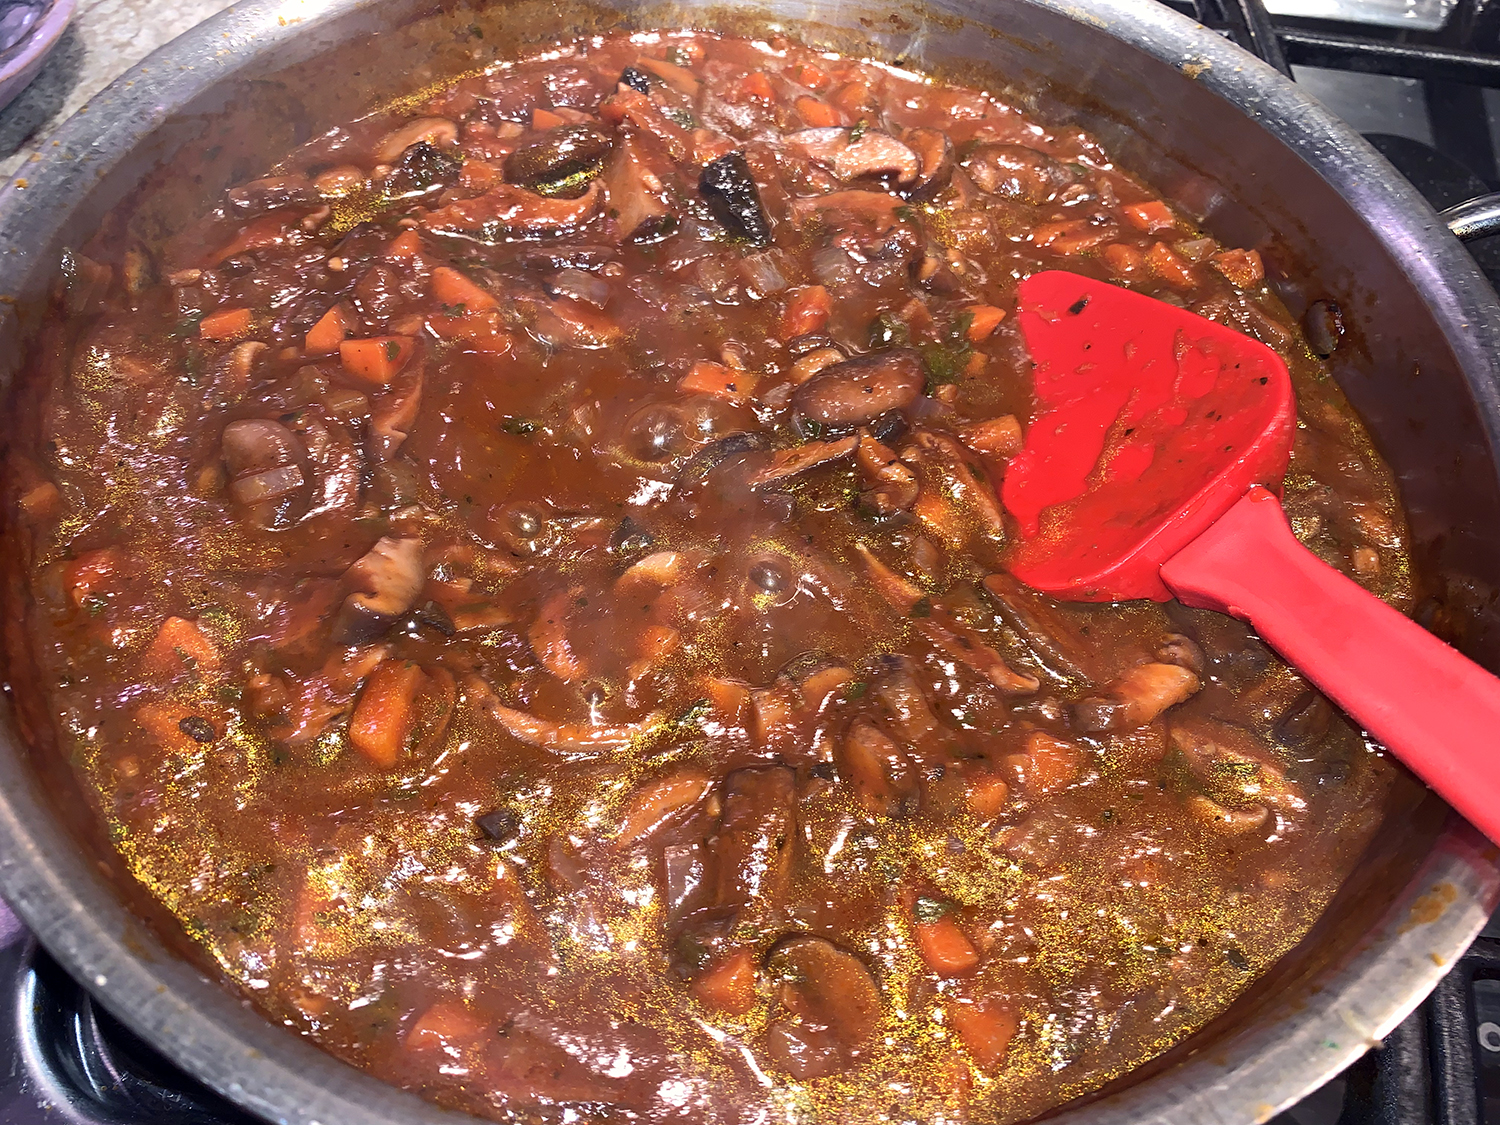
  4. Finally, add the red wine, tomato sauce, and the remainder of the broth. Bring to a boil for 5 minutes, then reduce the heat to low and cover. Cook for 20 minutes or so covered, then uncover and allow the mushrooms to cook some more (about 15 to 20 minutes) until the mixture thickens to a ragù.
  5. To finish, taste and adjust salt to your liking. Stir in a bit more fresh parsley. If you like, add in the chopped hazelnuts (optional).
  6. Serve with your favorite pasta, polenta, or even pearl couscous

http://www.lynnandruss.com

Adapted from a recipe by Suzy Karadesh

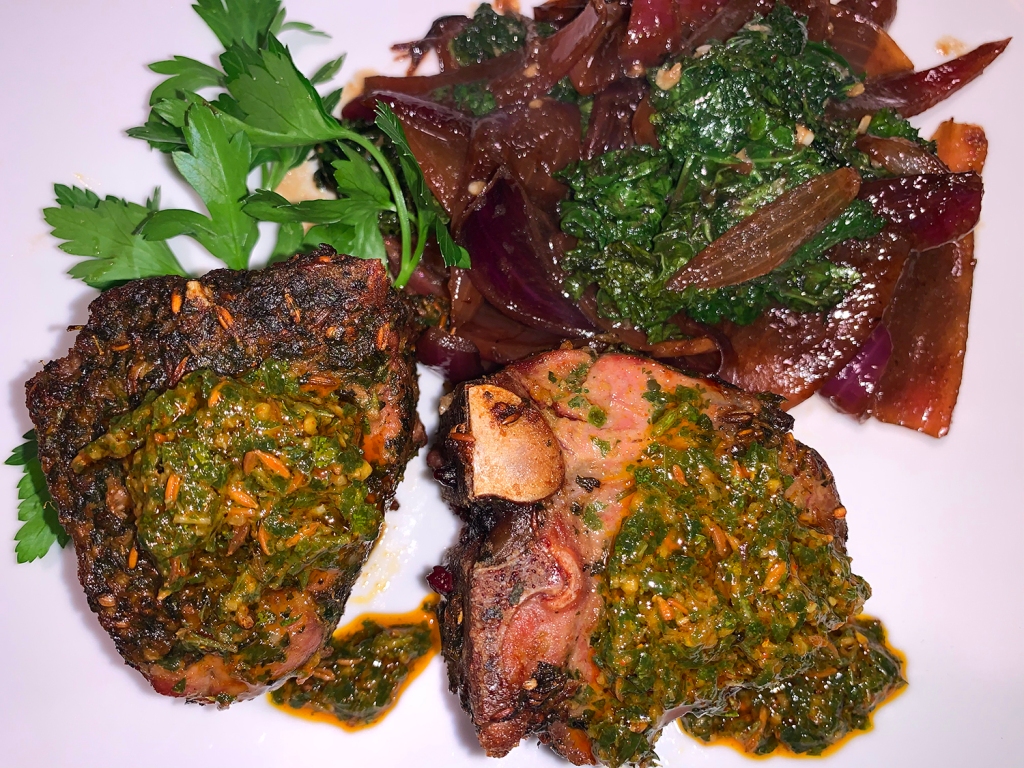
Roasted Lamb Loin Chops with Charmoula

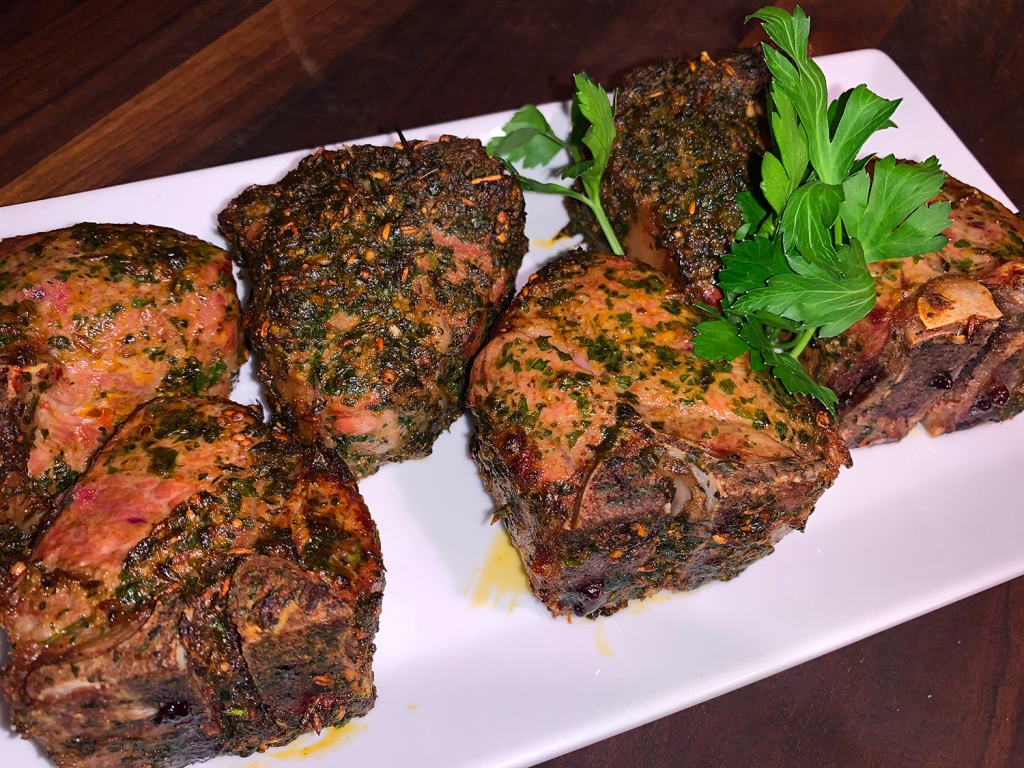
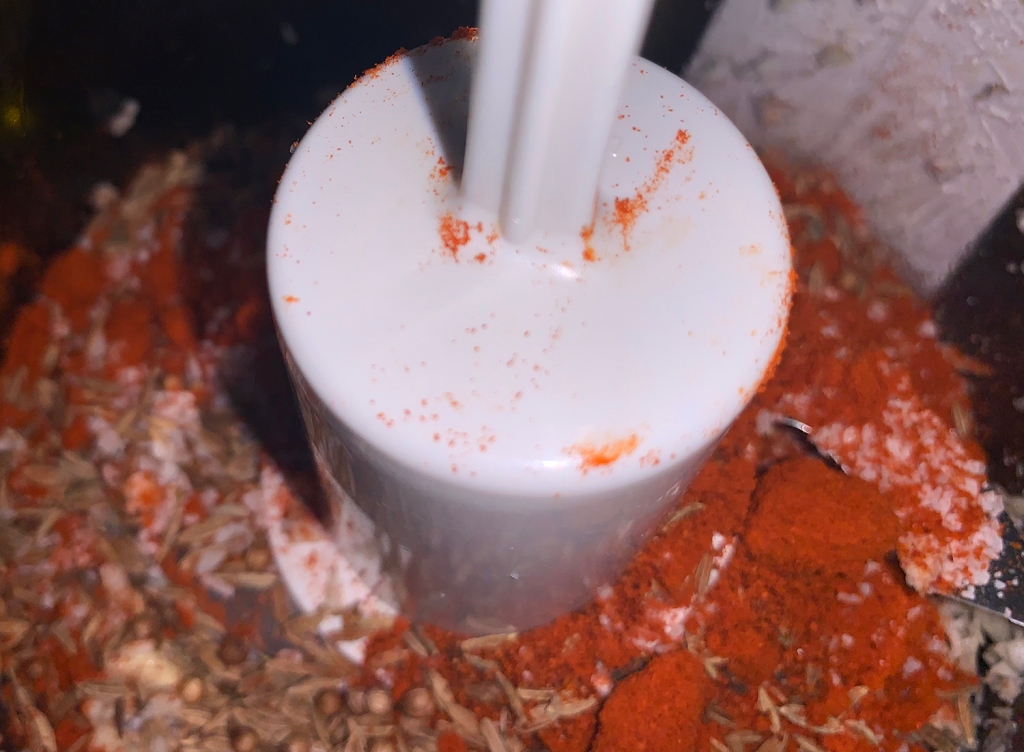
Charmoula may be best described as Middle Eastern pesto. Chef-author Molly Stevens version is packed with fresh herbs like parsley, mint and cilantro and enhanced with smoky paprika, toasted cumin, and plenty of garlic. Some of it is used to marinate the lamb, and the remainder is served at the table as a finishing sauce.

While the lamb chops cook in a high heated oven for only 11 minutes, they need to marinate in the charmoula for at least 4 hours (up to 24 hours) and sit at room temperature for an hour before roasting.

This recipe paired the lamb with asparagus and shallot, however we had kale and red onions on hand and therefore opted to make a roasted side dish out of them instead.

Roasted Lamb Loin Chops with Charmoula

  • Servings: 4-6
  • Difficulty: easy
  • Print

Ingredients

CHARMOULA

  • 1 Tbsp. cumin seeds
  • 1 1/2 cups (lightly packed) fresh Italian parsley leaves
  • 1/2 cup (lightly packed) fresh mint leaves
  • 1/2 cup (lightly packed) fresh cilantro leaves
  • 2 large garlic cloves
  • 3 sweet smoked paprika (pimentón dulce); or sweet Hungarian paprika
  • 1 tsp. coarse kosher salt
  • 1/4 tsp. cayenne pepper
  • 6 Tbsp. extra-virgin olive oil, divided
  • 1 Tbsp. fresh lemon juice

LAMB

  • 8 1 1/4- to 1 1/2-inch-thick lamb loin chops (about 2 2/3 lbs.)
  • 1 Tbsp. butter
  • 1 Tbsp. extra-virgin olive oil

Directions

FOR CHARMOULA

  1. Heat small skillet over medium heat. Add cumin seeds and toast until aromatic and slightly darker, stirring occasionally, about 2 minutes. Transfer to processor.
  2. Add parsley leaves and next 6 ingredients to processor. Using on/off turns, process until coarse paste forms. With machine running, gradually add 4 tablespoons oil.
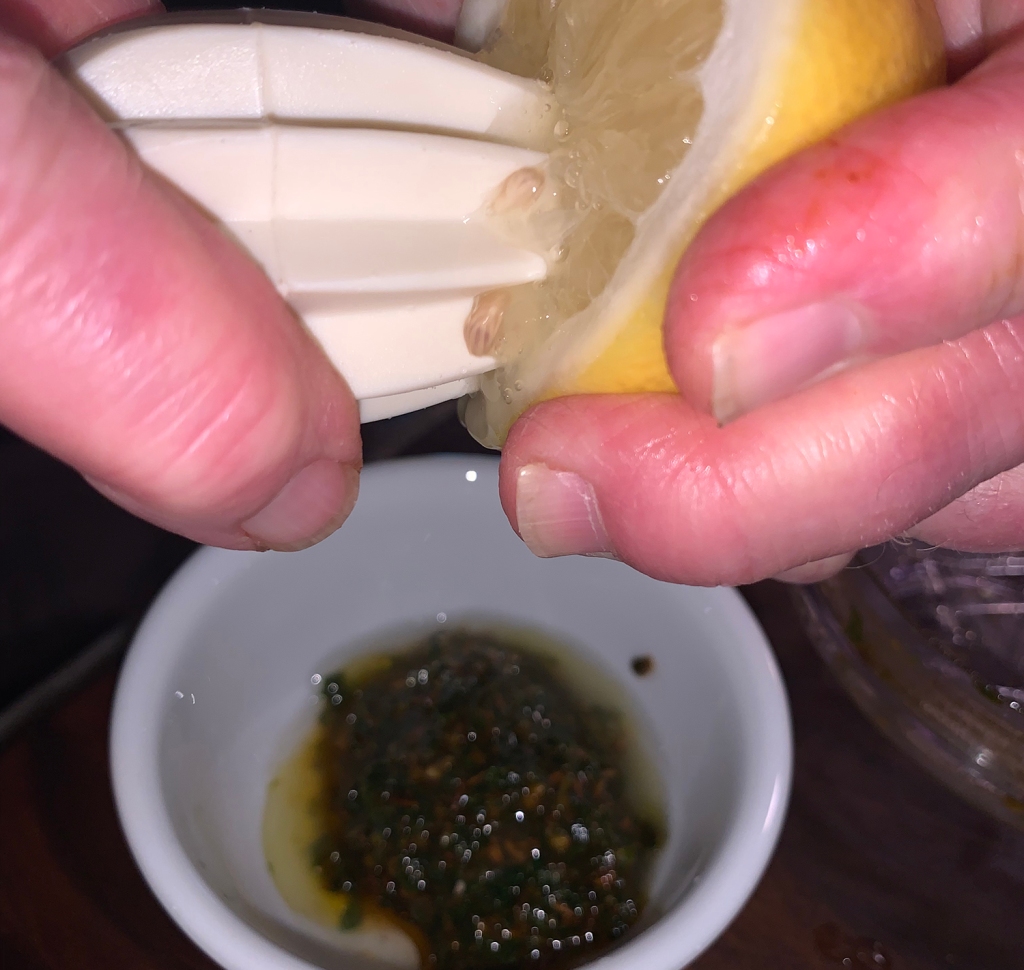
  3. Transfer 2 tablespoons charmoula to small bowl; whisk in lemon juice and remaining 2 tablespoons oil.
  4. Cover and chill to serve with lamb.

FOR LAMB

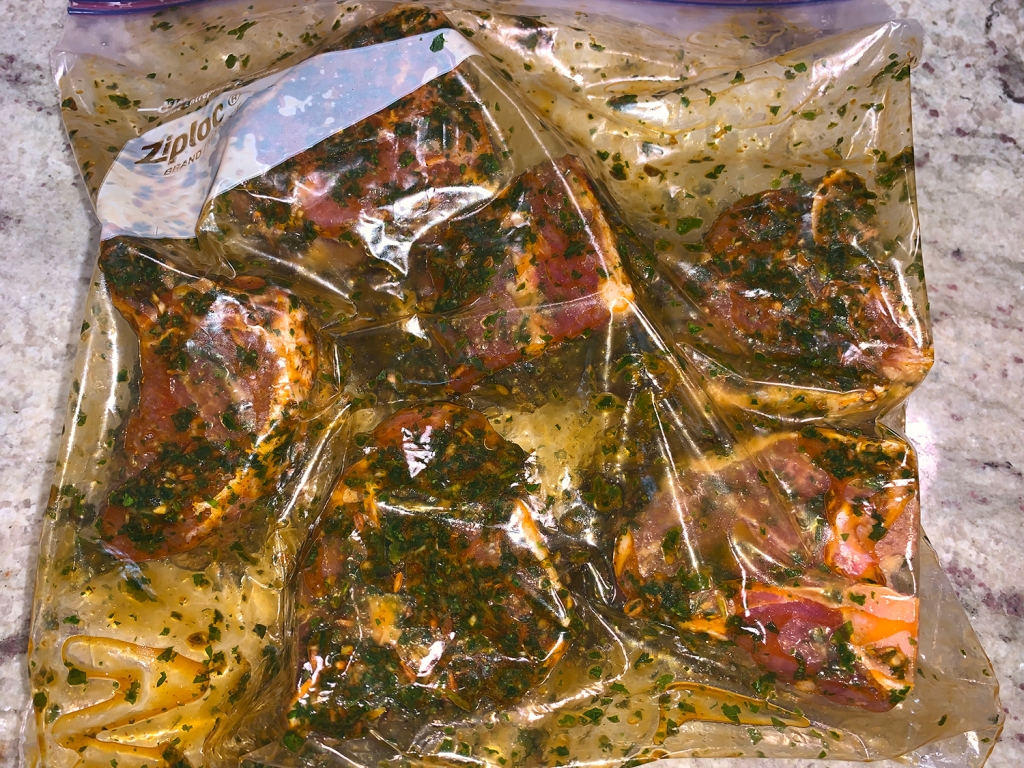
  1. Transfer remaining charmoula to large resealable plastic bag. Add lamb chops; seal bag and turn to coat well. Chill at least 4 hours and up to 24 hours.
  2. Let lamb and charmoula sauce in bowl stand at room temperature 1 hour.
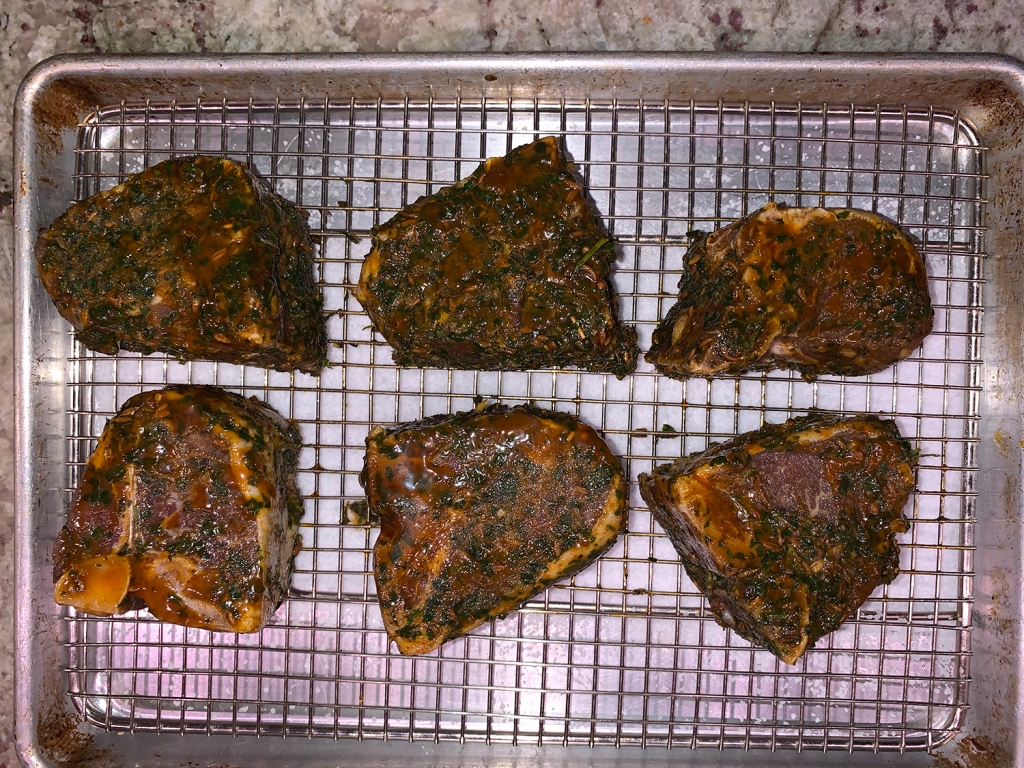
  3. Preheat oven to 500°F. Line rimmed baking sheet with foil. Place rack on prepared baking sheet. Place lamb on rack and sprinkle with salt and pepper. Roast until thermometer inserted into center registers 130°F for medium-rare, about 13 minutes. Transfer lamb to platter. Tent with foil and let rest 5 minutes.
  4. Place 2 lamb chops on each of 4 plates. Drizzle lamb with charmoula sauce, passing remaining sauce alongside.

http://www.lynnandruss.com

Original recipe from All About Roasting by Molly Stevens

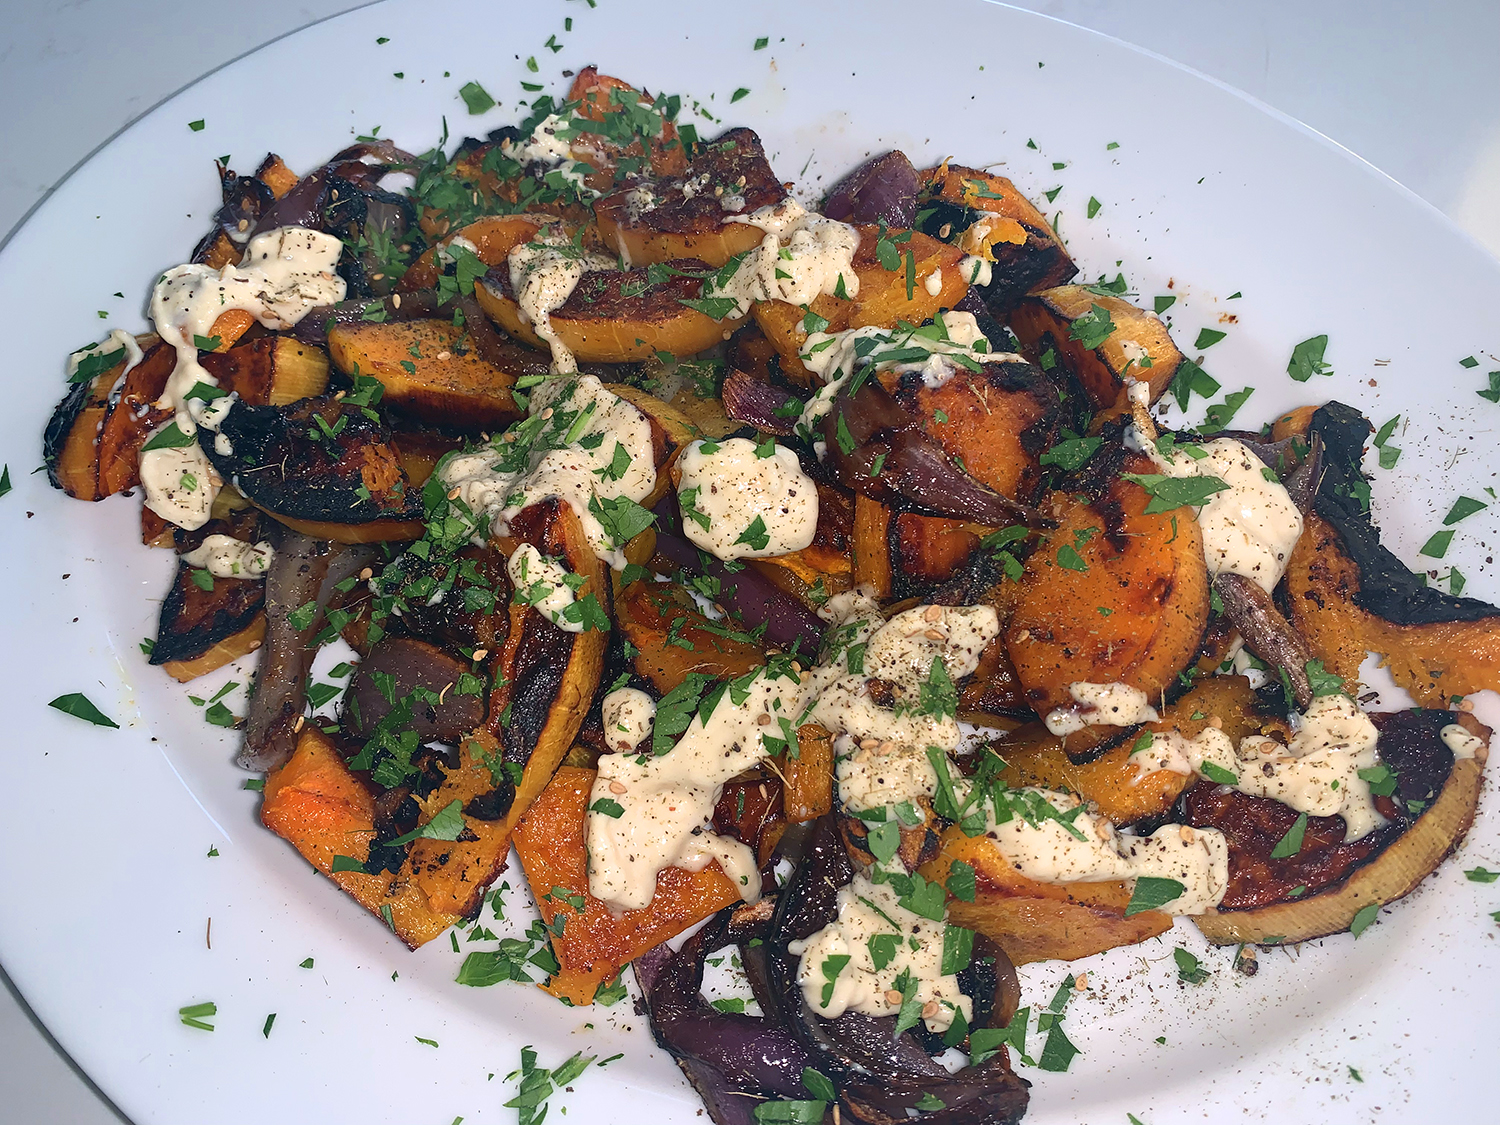
Roasted Butternut Squash with Tahini and Za’atar

This may be a new cool weather side dish favorite. A recipe from Milk Street, it combines roasted butternut squash and red onion, then finishes them with a tahini-lemon-garlic sauce and a dusting of za’atar—a Middle Eastern herb, spice and seed blend.

Before roasting, the squash and onion are tossed with olive oil and honey to encourage browning. After sprinkling on the za’atar, you scatter on chopped parsley or basil chiffonade for color and fresh, herbal notes.

Don’t worry if the pieces of squash are in different shapes; this is unavoidable. But when cutting the squash quarters crosswise, be sure they’re no thicker than ¾ inch and that the chunks don’t measure larger than 1½ inches in any dimension or they’ll take too long to roast.

We had less than half a red onion on hand, so we threw in a small shallot to help compensate. But the onion was so good roasted, that I want to make sure to have a large whole one when we make it again.

Roasted Butternut Squash with Tahini and Za'atar

  • Servings: 4
  • Difficulty: easy
  • Print

Ingredients

  • 2 Tbsp. plus 1 teaspoon extra-virgin olive oil
  • 1 Tbsp. honey
  • Kosher salt and ground black pepper
  • 2 lbs. butternut squash, peeled, quartered lengthwise, seeded and cut crosswise ¾-inch thick
  • 1 medium red onion, root end intact, cut into 1-inch wedges
  • 2 Tbsp. tahini
  • 4 tsp. lemon juice
  • 1 medium garlic clove, finely grated
  • 1 tsp. za’atar
  • ¼ cup lightly packed fresh flat-leaf parsley, roughly chopped, or lightly packed fresh basil, cut into thin ribbons

Directions

  1. Heat the oven to 475°F with a rack in the lower-middle position. In a large bowl, whisk together 2 tablespoons oil, the honey and ½ teaspoon salt. Add the squash and onion, then use your hands to rub the mixture over the vegetables until well coated.
  2. Distribute in an even layer on a rimmed baking sheet and roast for 15 minutes. Using a wide metal spatula, flip the vegetables, then roast until nicely browned and a skewer inserted into the squash meets no resistance, 12 to 15 minutes.
  3. Meanwhile, in a small bowl, whisk together the remaining 1 teaspoon oil, the tahini, lemon juice, garlic, ¼ teaspoon salt and 1 teaspoon water; the mixture should have the consistency of thin yogurt (if too thick, whisk in additional water 1 teaspoon at a time to thin). Set aside.
  4. When the vegetables are done, transfer them to a serving platter. Drizzle with the tahini-lemon mixture, then sprinkle with the za’atar and parsley.

http://www.lynnandruss.com

Adapted from a recipe from Milk Street

Thai Cashew Chicken Stir-Fry with Coconut Rice

Thai stir-fries are one of our favorite go-to’s; and this recipe rachetes it up a notch with the addition of Thai cashews (find them at Trader Joe’s). And if you like bold flavors, then this will end up on your short list.

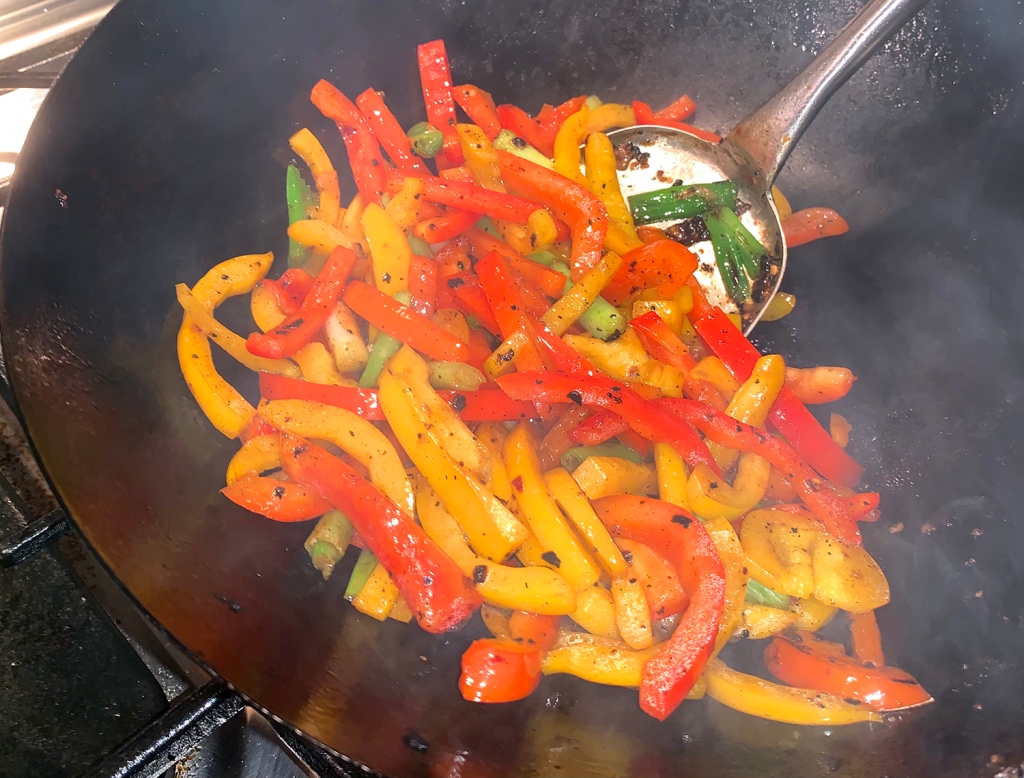
Originally from Milk Street, we scaled back on the chicken by 25%, but increased the bell pepper quotient by 100%, adding a yellow one along with the red pepper, making it more veggie-forward. Another change was doubling the sauce (except for the garlic). These alterations are noted in the recipe below.

And while you could pair it simply with steamed jasmine rice, you might want to try the Coconut Rice recipe below for even more depth of flavor.

I have to give a shout-out to these fabulous Trader Joe’s Thai cashews. Not only are they a fabulous snack right out of the bag, but they’re perfect for this dish. If you can get your hands on them, by all means do so.

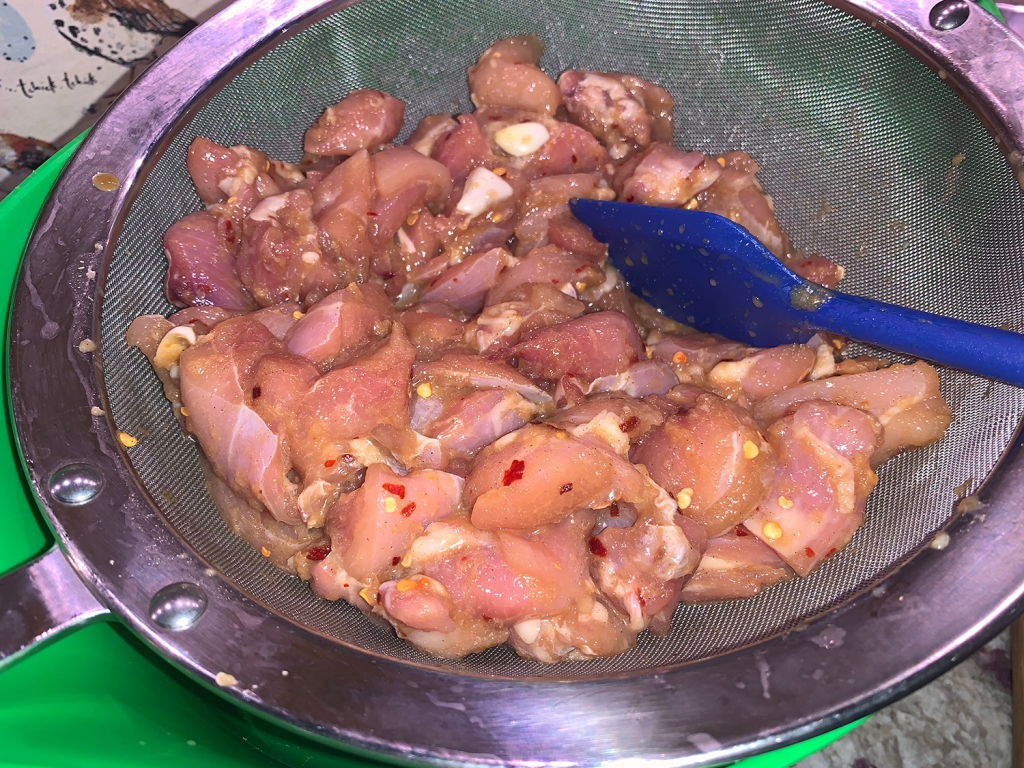
NOTE: Don’t discard the marinade after draining the chicken. It’s mixed with ¼ cup water and becomes a sauce that lightly coats the chicken and vegetables.

Thai Cashew Chicken Stir-Fry with Coconut Rice

  • Servings: 4
  • Difficulty: easy
  • Print

Ingredients

  • 5 medium garlic cloves, finely grated
  • 3 Tbsp. fish sauce
  • 6 Tbsp. soy sauce
  • 4 tsp. white sugar
  • 4 tsp. cornstarch
  • 1 teaspoon red pepper flakes
  • Ground white pepper
  • 1 1⁄2 lbs. boneless, skinless chicken thighs, trimmed and cut into 1-inch pieces
  • 2 Tbsp. peanut oil
  • 1 red bell pepper, stemmed, seeded and sliced into thin strips
  • 1 yellow bell pepper, stemmed, seeded and sliced into thin strips
  • 1 bunch scallions, cut into 1-inch lengths; save some of the dark green cut into smaller pieces for garnish
  • 1/2 cup roasted Thai cashews, roughly chopped

Directions

  1. Start coconut rice, directions below.
  2. For the Stir-fry: In a medium bowl, whisk together the garlic, fish sauce, soy sauce, sugar, cornstarch, pepper flakes and 3/4 teaspoon white pepper. Stir in the chicken, then marinate at room temperature for 15 minutes.
  3. Drain the chicken in a fine mesh strainer set over a medium bowl, pressing the chicken to remove excess marinade. Stir 1/2 cup water into the marinade and set aside.
  4. In a 12-inch skillet or wok over medium-high, heat the oil until barely smoking. Add the chicken in an even layer, then cook, stirring occasionally, until golden brown, 8 to 10 minutes. Remove chicken to a plate.
  5. Heat a bit more oil in the wok, stir in the bell peppers and scallions. Stir-fry for several minutes until just starting to brown. Add chicken back to the veggies.
  6. Stir the marinade mixture to recombine, add to the pan and bring to a simmer, scraping up any browned bits. Toss in the cashew pieces, cook, stirring often, until the liquid thickens and clings to the chicken, about 2 minutes.
  7. Taste and season with white pepper. Spoon over cooked coconut rice and garnish with scallion greens.

http://www.lynnandruss.com

Loosely adapted from a recipe by Courtney Hill for Milk Street

Coconut Rice

Coconut Rice

  • Servings: 8-10
  • Difficulty: easy
  • Print

Ingredients

  • 2 cups jasmine rice
  • 1 13.5 oz. can coconut milk
  • 1 1/2 cups coconut water or water
  • 1 tsp. salt
  • 1 tsp. sugar
  • 2 2-inch strips of lime zest

Directions

  1. Place jasmine rice in a fine mesh sieve and rinse under cold water until water runs clean. Drain well, it works best to tap base of sieve with your hand or against the sink.
  2. Heat coconut milk and coconut water in a medium non-stick saucepan set over medium-high heat. Bring to a boil, season with salt, sugar, lime zest strips add rice and bring to a simmer.
  3. Reduce heat to low, cover and simmer until liquid has been absorbed (you may find there’s a few small pools of liquid at the top and that’s fine), about 20 minutes.
  4. Uncover over low heat for 5 minutes. Fluff with a fork and serve warm.

http://www.lynnandruss.com

Adapted from a recipe by CookingClassy.com

Beef and Lamb Bolognese

This version of bolognese is half lamb and half ground beef, a mixture you’ll see a lot in northern Italy, and because the lamb is lean, this is a somewhat lighter sauce than all-beef or pork-based ragu.

The sauce needs a good long simmer, but it makes enough that you’ll likely get two meals. Giada claims the pasta shouldn’t be swimming in sauce; you only want it to stain the pasta, but we are “saucy” people and like to pile on a fair amount.

One of the ingredients is Calabrian chili paste, but a good substitute is Sriracha, and that’s what we used.

Beef and Lamb Bolognese

  • Servings: 4-6
  • Difficulty: easy
  • Print

Ingredients

  • 2 Tbsp. butter
  • 1/4 cup olive oil, divided
  • 1 onion, finely chopped
  • 1 carrot, peeled and finely chopped
  • 1 celery, finely chopped
  • 1 tsp. kosher salt divided
  • 3/4 lb. ground lamb
  • 3/4 lb. ground beef chuck
  • 1 clove garlic chopped
  • 1 tsp. Calabrian chili paste; or Sriracha
  • 1/2 tsp. red pepper flakes
  • 1/4 cup tomato paste
  • 1/2 cup whole milk
  • 1 cup dry red wine such as chianti
  • 1 can whole San Marzano tomatoes, (28 ounce) crushed by hand
  • 1 bay leaf
  • 1 piece parmesan rind, (3 inch)
  • 1 cup freshly grated parmesan cheese
  • 1 lb. fusilli, cooked to package instructions; or polenta

Directions

  1. Heat a medium dutch oven over medium heat. Add the butter and 2 tablespoons olive oil and warm until the butter is melted.
  2. Add the onions, carrots, celery and a 1/2 teaspoon salt. Cook stirring often for 6 minutes or until the vegetable are soft but have no color.
  3. Add the lamb and beef and cook breaking apart the meat with a wooden spoon for 5 minutes or until the meat is cooked through and no longer pink.
  4. Stir the garlic, chili paste, red pepper flakes, and tomato paste into the meat mixture. Cook the tomato paste stirring often for 2 minutes.
  5. Add the milk. Bring to a simmer and cook for 20 minutes, stirring occasionally until the milk is almost entirely evaporated.
  6. Add the wine, tomatoes, bay leaf, parmesan rind and remaining salt. Bring to a simmer and reduce the heat to low to just maintain a gentle simmer. Simmer the sauce for 1 ½ to 2 hours, stirring occasionally to prevent sticking. Use several folded paper towels to skim some of the oil from the surface.
  7. Discard the bay leaf and parm rind.
  8. Spoon the bolognese over fusilli or creamy polenta reserving any extra to serve on the side. Serve with additional parmesan and a drizzle of olive oil, if desired.
http://www.lynnandruss.com

Adapted from a recipe by Giada De Laurentiis