Monthly Archives: November 2022

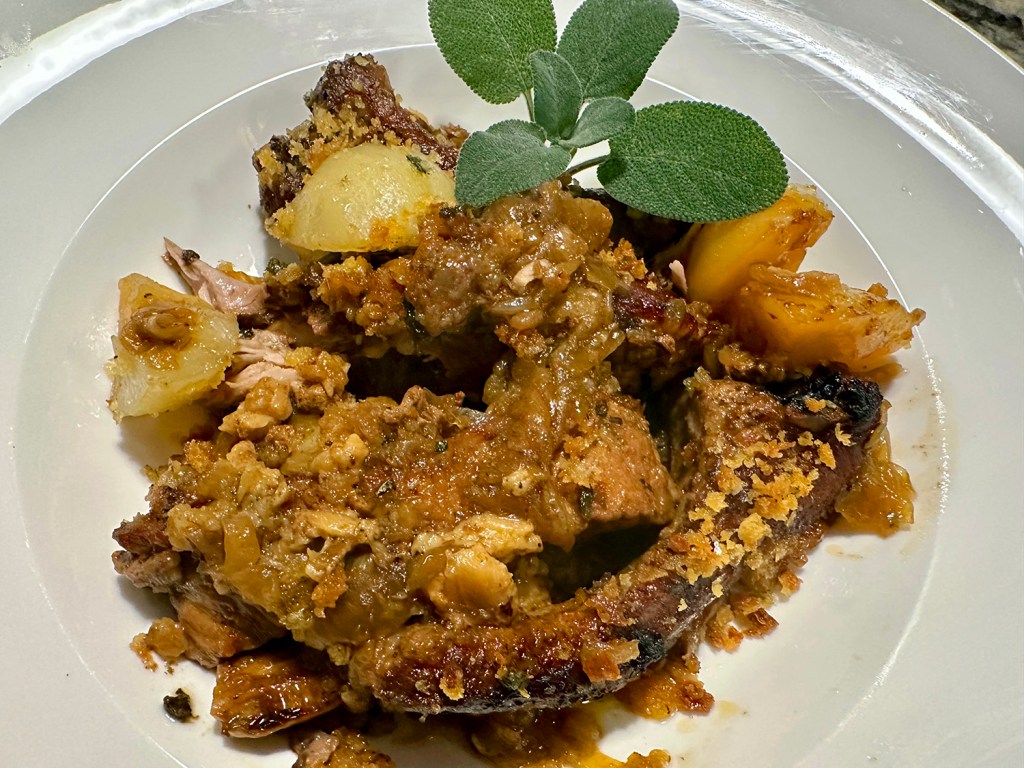
Braised Pork Ribs and Potatoes with Fried Herb Crumbs

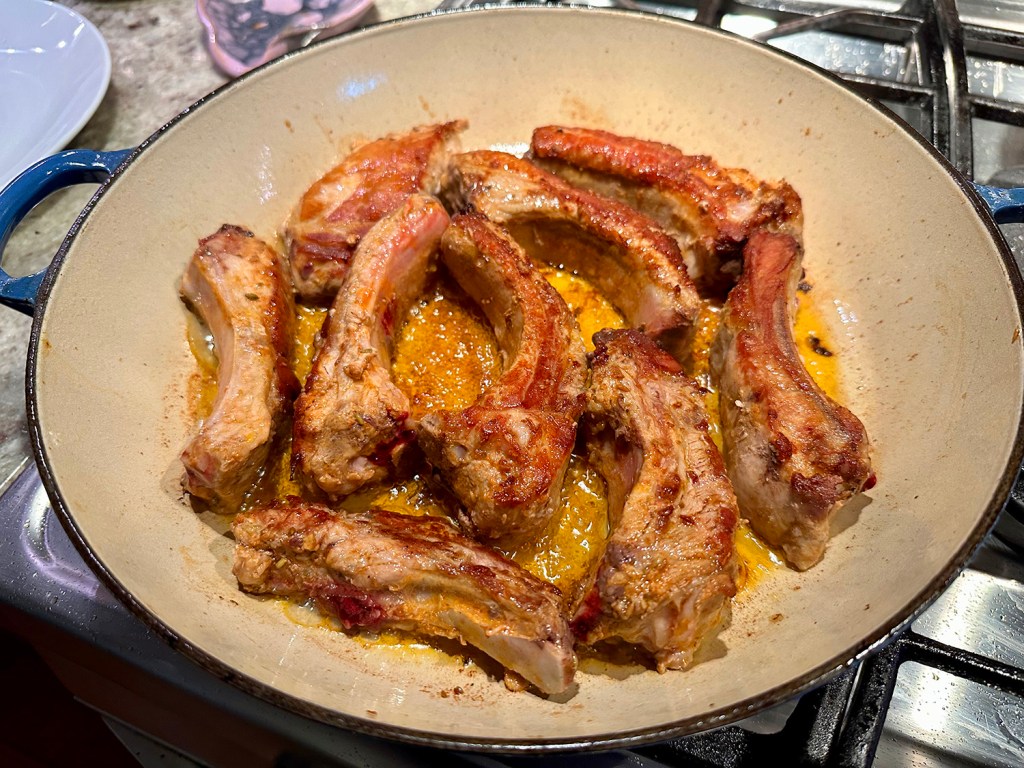
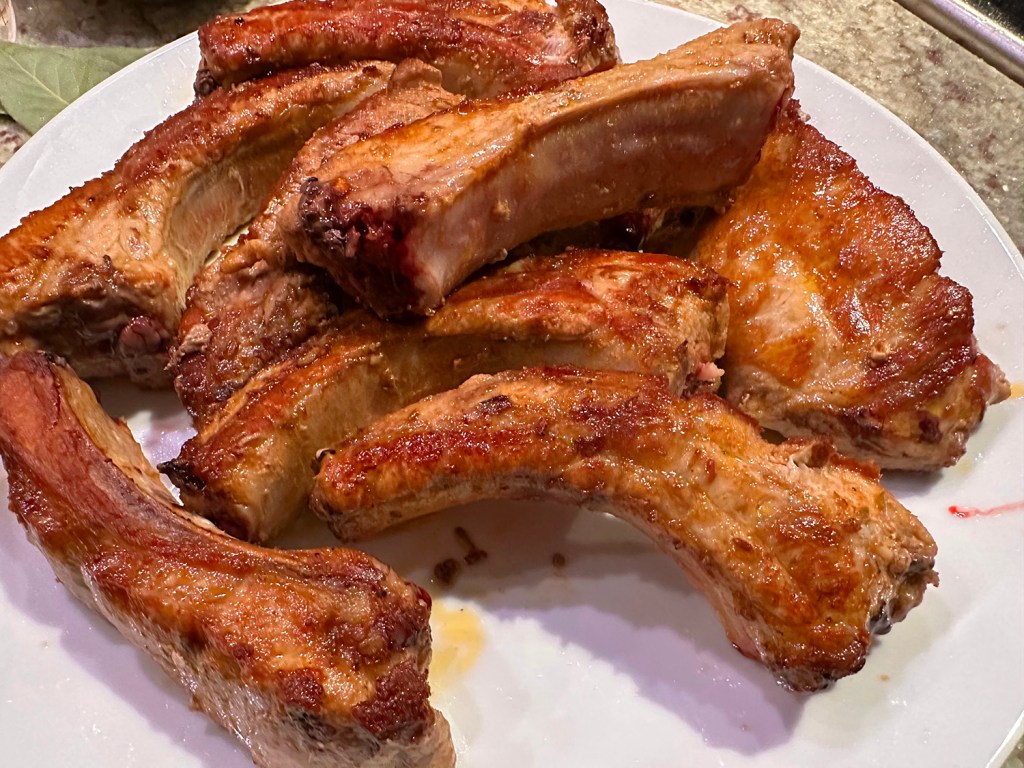
Here’s a lovely long braised dish perfect for a cool weather weekend afternoon into evening. Baby back ribs are braised till they fall off the bone, then garnished with an herby crumb topping. Plus a bonus recipe for Braised Leeks with Bacon and Cream.

Admittedly, we always think of baby back ribs as an outdoor barbecue kind of dinner. It has never dawned on us to showcase the ribs as a cool weather meal. Now that we have enjoyed the fruits of our labor, these ribs are sure to make a showing again in the near future.

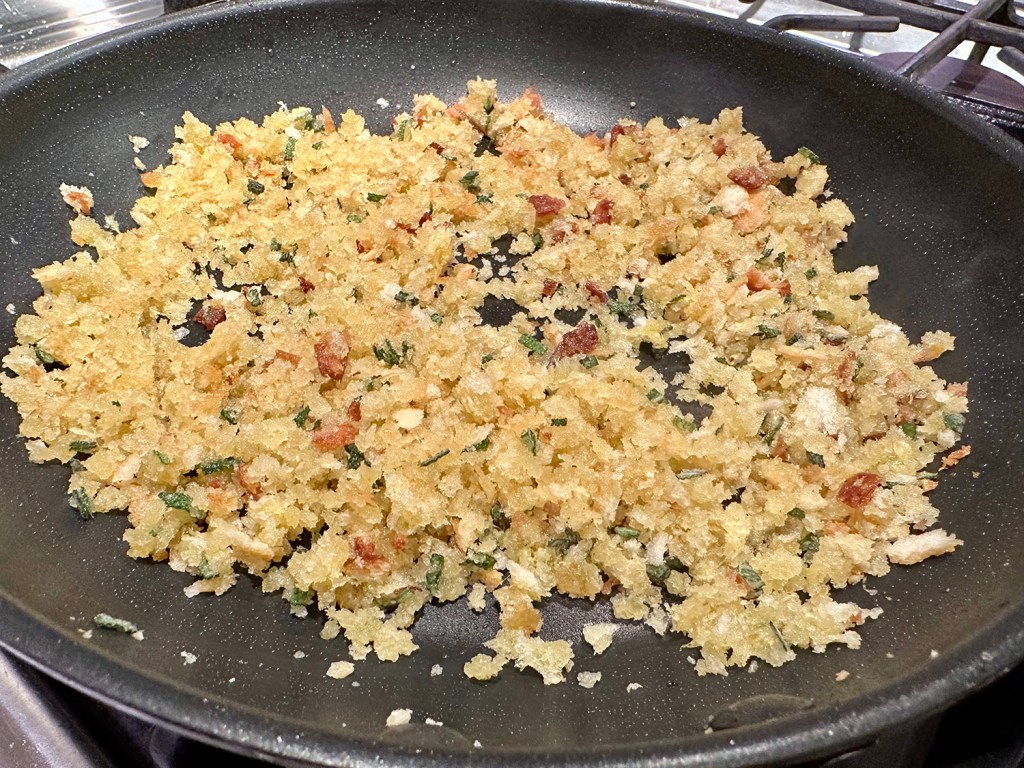
The bread crumb topping is optional, but adds a tremendous depth of flavor and a nice crunch factor. Cracking the new potatoes in half with the tip of a knife helps them to release their starch and therefore thicken the sauce a bit.

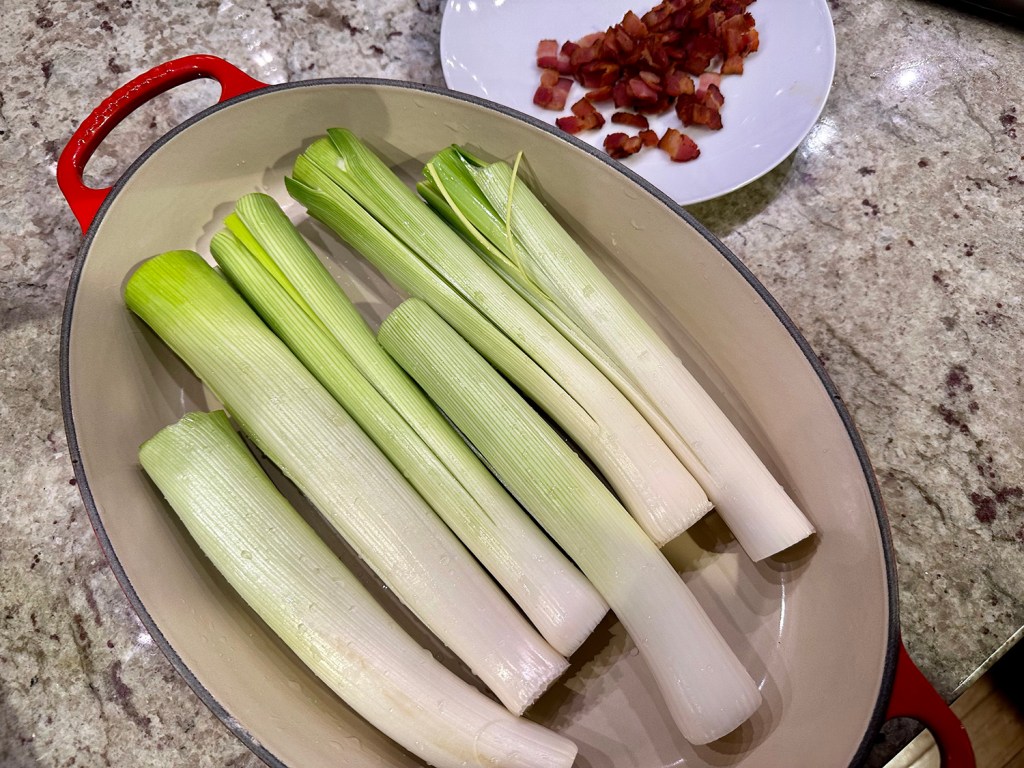
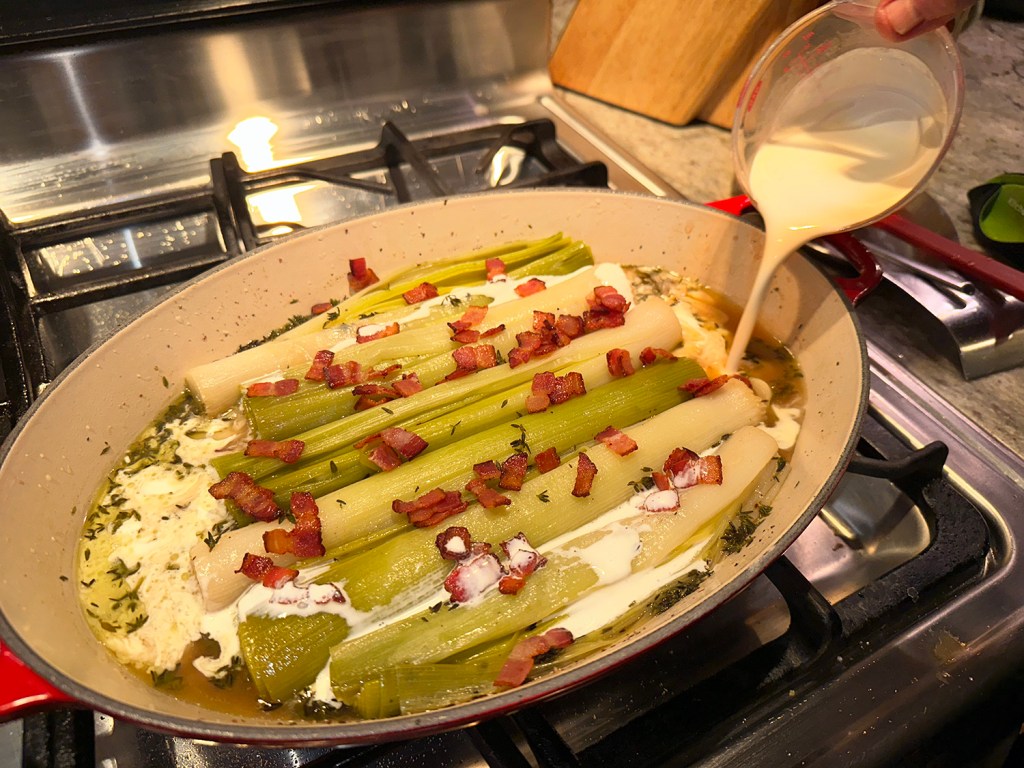
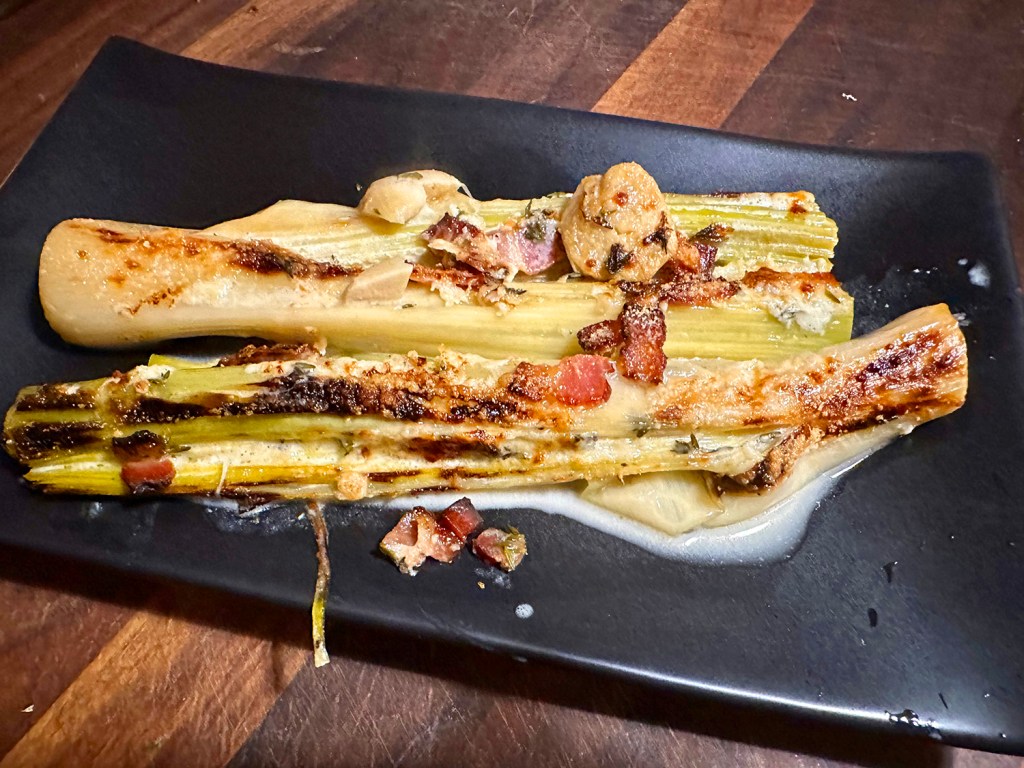
As an accompaniment, we prepared a side of Braised Leeks with Bacon and Cream (shown below), originally from Molly Stevens “All About Braising” cookbook. A while back, we enjoyed the same recipe using thyme, but minus the cream. Either option braises the leeks slowly in chicken broth until they collapse into blessed tenderness.
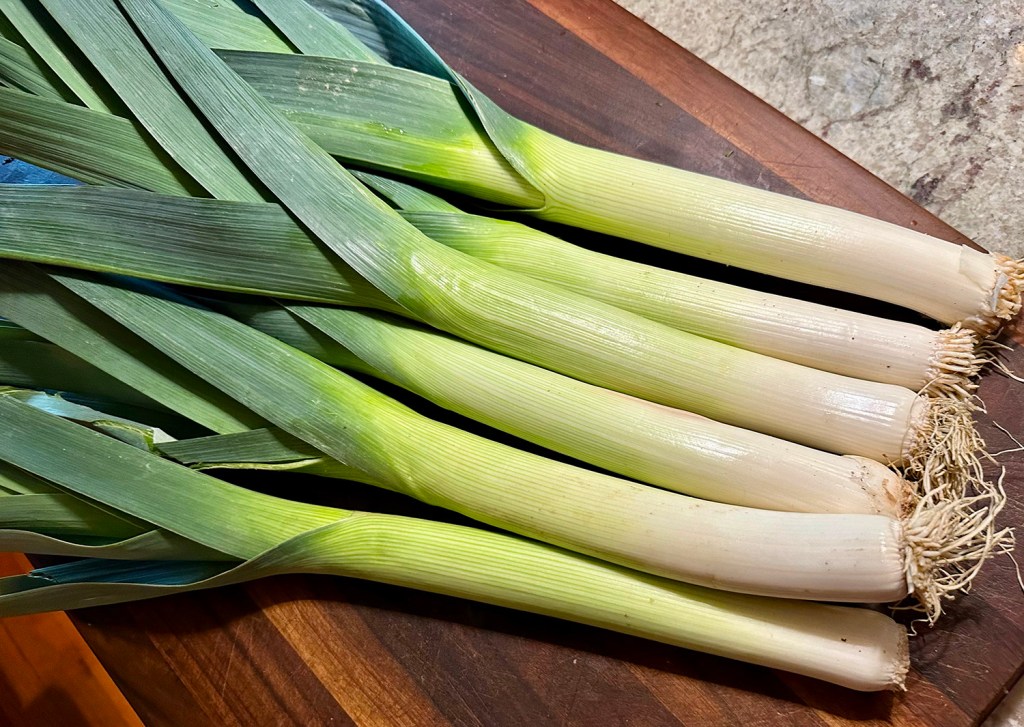
On our initial trip to the grocery store, there were only a few lousy looking leeks with hardly any white parts, so we rethought our scouting expedition and went to a local Asian Mart known to carry great produce. Their leeks were phenomenal, the best we’ve ever seen.

Try to coordinate the cooking times of both the ribs and the leeks so that they are done braising at about the same time.

Braised Pork Ribs and Potatoes with Fried Herb Crumbs

  • Servings: 4
  • Difficulty: easy
  • Print

Ingredients

  • 3-4 lbs. baby back ribs
  • 1 tsp. pimentón de la Vera
  • 4 garlic cloves, bashed and peeled
  • 4 Tbsp. olive oil
  • 1½ tsp. cumin seeds, lightly crushed
  • 5 oz. white wine
  • 1 large. onion, peeled and finely sliced
  • 2 bay leaves
  • 2 cups chicken stock, homemade, ideally
  • 3/4 lbs. new potatoes

For the Crumbs

  • 4 Tbsp. olive oil
  • 1 garlic clove, peeled and finely grated
  • 3 oz. fresh white breadcrumbs
  • Finely grated zest of 1 lemon
  • 6 sage leaves, shredded

Directions

  1. Arrange the ribs in a large dish, add the pimentón, two of the bashed garlic cloves, two tablespoons of the olive oil, a teaspoon of the crushed cumin seeds and 2 ounces of the white wine. Toss to coat the ribs, then cover and leave to marinate for at least three hours (or put in the fridge overnight).
  2. Heat the oven to 340F. Heat the remaining two tablespoons of olive oil in a deep casserole dish on a medium-high heat. Take the ribs out of their marinade (keep the marinade for later), and sear for four to five minutes on each side, until browned all over.
  3. Transfer the ribs to a plate, add the onion to the pan and sauté, stirring, for 10 minutes, until brown. Add the remaining garlic and cumin seeds, stir to combine, then return the ribs to the pan.
  4. Pour in the remaining 3 ounces of white wine, leave to bubble for a minute, then add the bay leaves, stock and reserved marinade. Season well and bring to a boil, then cover and transfer to the oven to cook for an hour to an hour and a half, until the meat is tender and beginning to pull away from the bones.
  5. Crack the new potatoes in half with the tip of a knife (this helps them to release their starch), then add to the casserole dish and cook for 30-40 minutes, until the potatoes are cooked through and starting to break apart a bit and thicken the sauce.
  6. Meanwhile, make the herby crumbs. Put the oil in a frying pan on a medium-high heat, fry the garlic for 10 seconds, then add the breadcrumbs, lemon zest and sage.
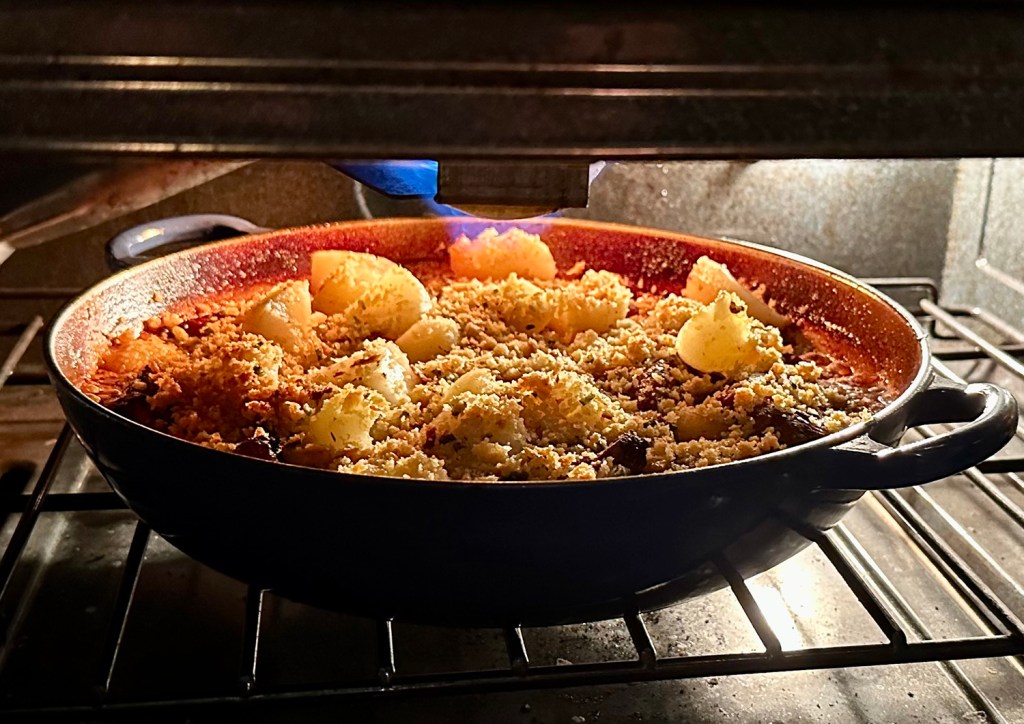
  7. Remove the lid from the casserole, sprinkle the crumb mix all over the top, then bake uncovered for a further 20 minutes.
  8. Then put under a broiler for a couple of minutes to crisp the top. Serve in shallow bowls with lots of the lovely sauce.

http://www.lynnandruss.com

Recipe from José Pizzaro

Turkey Barley Soup

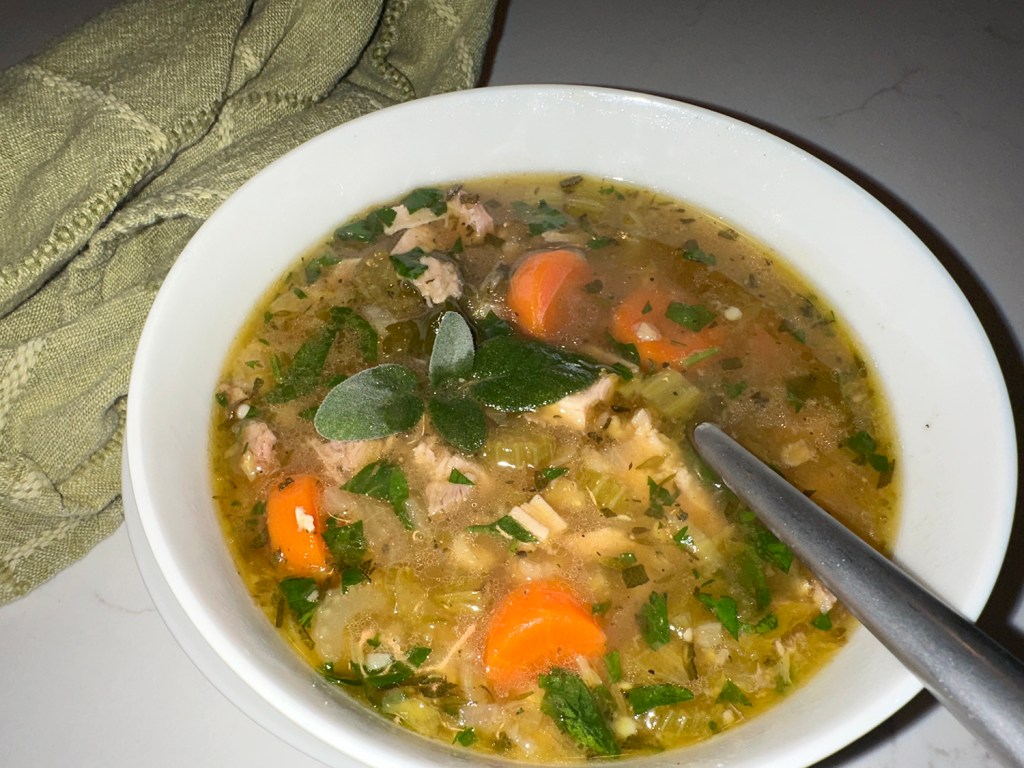
This mellow, velvety soup filled with barley and vegetables is a perfect place for your leftover Thanksgiving turkey. It’s savory, herby and very warming on a cold winter evening, makes you want to cozy up to the fireplace.

If you want to make your own stock from the turkey bones, please do, the soup will be even richer. But store-bought stock works, just not as flavorful, but it makes this straightforward recipe quicker to put together. Brown rice makes an excellent barley substitute, though you may have to add a few minutes to the cooking time.

In Step 3, The Hubs was afraid that the barley would suck up too much liquid, so he cooked them separately in water and then added to the soup pot with the turkey. I left the original directions as written, so it’s up to you what you want to do with the barley.

Turkey Barley Soup

  • Servings: 4-6
  • Difficulty: easy
  • Print

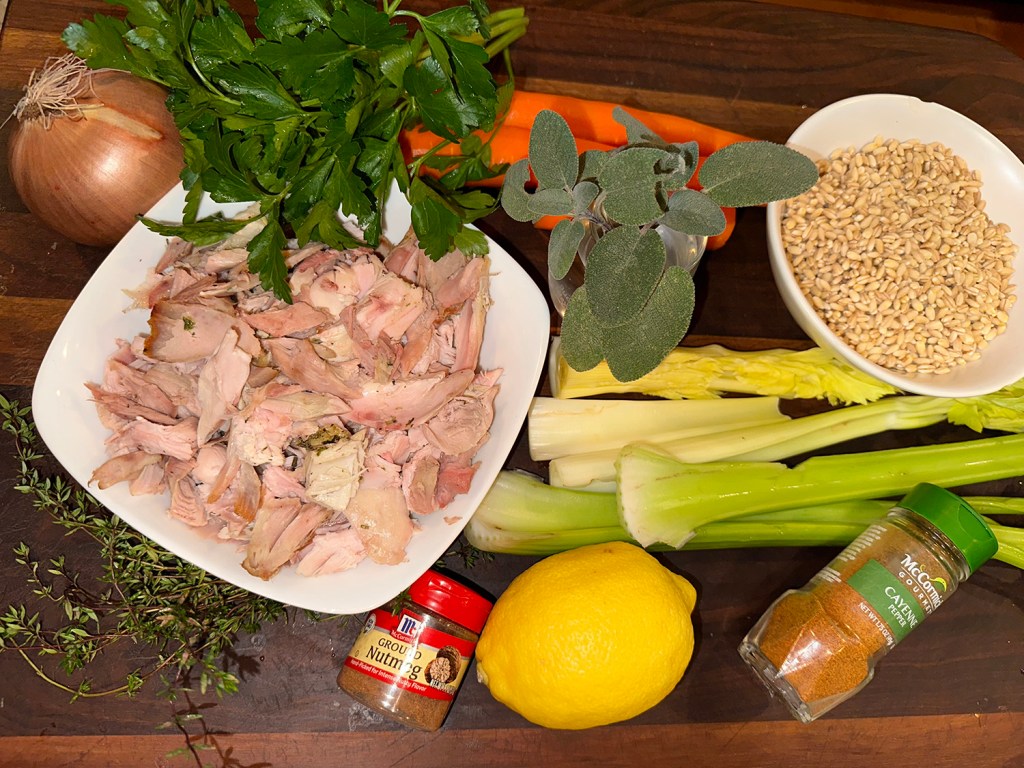
Ingredients

  • 3 Tbsp. unsalted butter or extra-virgin olive oil
  • 2 medium carrots, peeled and sliced into ½-inch coins
  • 2 celery stalks, thinly sliced
  • 1 medium yellow onion, finely diced
  • 3 garlic cloves, minced or finely grated
  • 2 tsp. finely chopped fresh sage leaves
  • 2 tsp. fine salt, plus more as needed
  • ½ tsp. freshly ground black pepper, plus more as needed
  • ¼ tsp. freshly grated nutmeg
  • Pinch of cayenne
  • 4 thyme sprigs
  • 4 parsley sprigs, plus 1 cup coarsely chopped parsley leaves and tender stems, plus more for garnish
  • 1 bay leaf
  • 2 qts. turkey or chicken stock, preferably homemade
  • ¾ cup pearled barley
  • 2 to 3 cups shredded or chopped leftover turkey
  • 1 lemon, halved

Directions

  1. In a large soup pot over medium-high, melt butter, or heat the oil until shimmering. Add carrot, celery and onion, and cook, stirring occasionally, until lightly browned at the edges, 7 to 10 minutes. Stir in garlic and sage, and sauté for a minute, until fragrant. Stir in salt, pepper, nutmeg and cayenne.
  2. Tie the thyme and parsley sprigs and the bay leaf together with a piece of kitchen twine to make a bouquet garni and add to the pot (or just throw the herbs directly into the pot; you’ll just have to fish them out later).
  3. Add stock and barley* (see above note) and bring to a boil. Reduce to a simmer and cook until barley is almost done, about 30 minutes. Add turkey and cook until barley is tender, about 10 to 15 minutes longer.
  4. Remove from heat and remove the bouquet garni or herbs. Squeeze the juice from half a lemon into the soup, and stir in chopped parsley. Taste and add more salt, pepper and lemon juice, if you like. Cut the remaining lemon half into wedges. Garnish soup with more parsley, and serve with lemon wedges.

http://www.lynnandruss.com

Adapted from a recipe by Melissa Clark for NYTimes Cooking

Leftover Turkey? How About with Pasta!

Besides soup and sandwiches, here’s another option for leftover turkey: Creamy Pasta with Turkey and Crispy Crumbs. This pasta recipe features an Alfredo-like sauce dressed up with leftover shredded (or cubed) turkey, crispy bread crumbs, and salty capers and is ready to eat in just over a half hour.

The original recipe, found in a past issue of Fine Cooking Magazine, used linguine as the pasta. We substituted whole wheat spaghetti since we already had it in our pantry. Any long pasta such as fettuccine, bucatini or linguine will work, just cook according to package directions for al dente.

Creamy Pasta with Turkey and Crispy Crumbs

  • Servings: 3-4
  • Difficulty: easy
  • Print

Ingredients

  • 2 Tbsp. unsalted butter
  • 3 garlic cloves, minced
  • ⅓ cup coarse fresh bread crumbs
  • Coarse salt and freshly ground pepper
  • 2 Tbsp. coarsely chopped fresh Italian parsley
  • ¾ cup chopped celery
  • 1 cup heavy cream
  • 3 cups cooked turkey, shredded
  • 1 Tbsp. chopped fresh thyme and/or sage leaves
  • 8 oz. whole wheat spaghetti (or other long stranded pasta)
  • ½ cup grated Parmesan cheese
  • 2 – 3 Tbsp. capers, drained

Directions

  1. In a large skillet heat 1 tablespoon butter over medium. Add half the garlic; cook 30 seconds. Add bread crumbs and a pinch of salt. Cook and stir 2 minutes or until bread crumbs are golden brown and aromatic. Transfer to a small bowl. Wipe out pan. Stir parsley into bread crumbs.
  2. Bring a large pot of salted water to boiling.
  3. Meanwhile, melt 1 tablespoon butter in the skillet. Add celery and remaining garlic; cook and stir over medium 5 minutes.
  4. Stir in cream; simmer, uncovered, 3 minutes. Add turkey and thyme; cook and stir until heated through.
  5. Cook spaghetti according to package directions. Drain, reserving 1/4 cup cooking liquid. Stir cooking liquid into turkey mixture then toss with pasta.
  6. Stir in cheese, capers, 1/2 teaspoon salt, and 1/4 teaspoon black pepper. Divide among 4 plates; top each with bread crumbs.

http://www.lynnandruss.com

Recipe compliments of Fine Cooking Magazine

Cocktail Time!

The holiday season is upon us which means enjoying a festive cocktail, or three. On an occasional Autumn/Winter Sunday evening it has been our custom the past few years to experiment making new libations. This Pear Gin Cocktail with Rosemary caught our attention recently, and so we had to give it a trial run to see if it was company-worthy.

The answer is a resounding yes! The combination of fresh fruit, infused simple syrup, and a touch of ginger liqueur creates an easy, elevated cocktail to sip as you enjoy some party-time hors d’oeuvres.

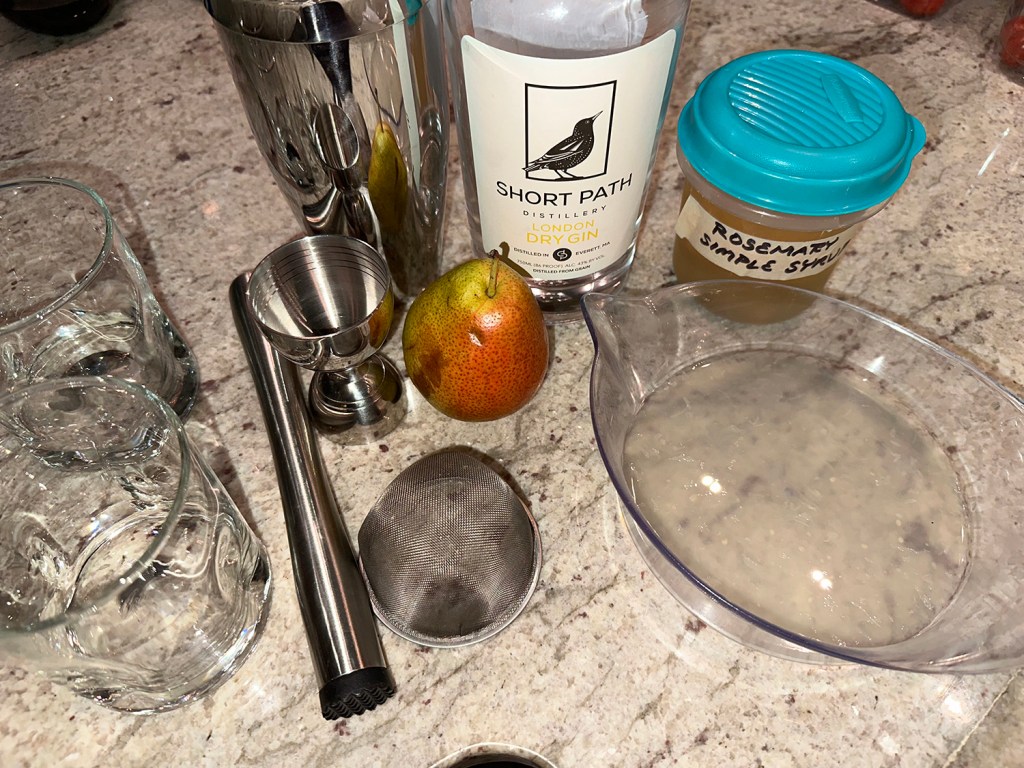
Just remember to make the rosemary simple syrup a day or so ahead of time. All you need to do is combine equal parts sugar, water and add fresh rosemary sprigs in a medium saucepan. You’ll also need a wooden spoon, a wire-mesh strainer or slotted spoon, and a jar or bottle to store it in.

Combine 1 cup each of water, sugar, and several sprigs of rosemary in a small saucepan. Bring to a boil, stirring until sugar dissolves. Simmer for 1 minute. Remove from heat and let syrup steep for 30 minutes. Pour syrup into a sterilized glass jar through a mesh strainer to remove rosemary leaves; let cool.

Pear Gin Cocktail with Rosemary

  • Servings: 2 drinks
  • Difficulty: easy
  • Print

Ingredients

  • 4 oz. good dry gin, such as Short Path
  • 2 oz. rosemary simple syrup, (made ahead)
  • 1 oz. ginger liqueur
  • 1 oz. fresh lemon juice
  • 4 slices of fresh ripened pear
  • Fresh rosemary sprigs for garnish

Directions

  1. Place two slices of pear and lemon juice in a cocktail shaker. Using a muddler, gently crush and break up the pear.
  2. Add ice to the shaker. Add gin, rosemary simple syrup and ginger liqueur, shake well.
  3. Double strain into 2 rocks glasses filled with ice.
  4. Garnish with a sprig of rosemary and a a slice of pear.
  5. Enjoy. Repeat 😉

http://www.lynnandruss.com

Libation courtesy of Katy McAvoy

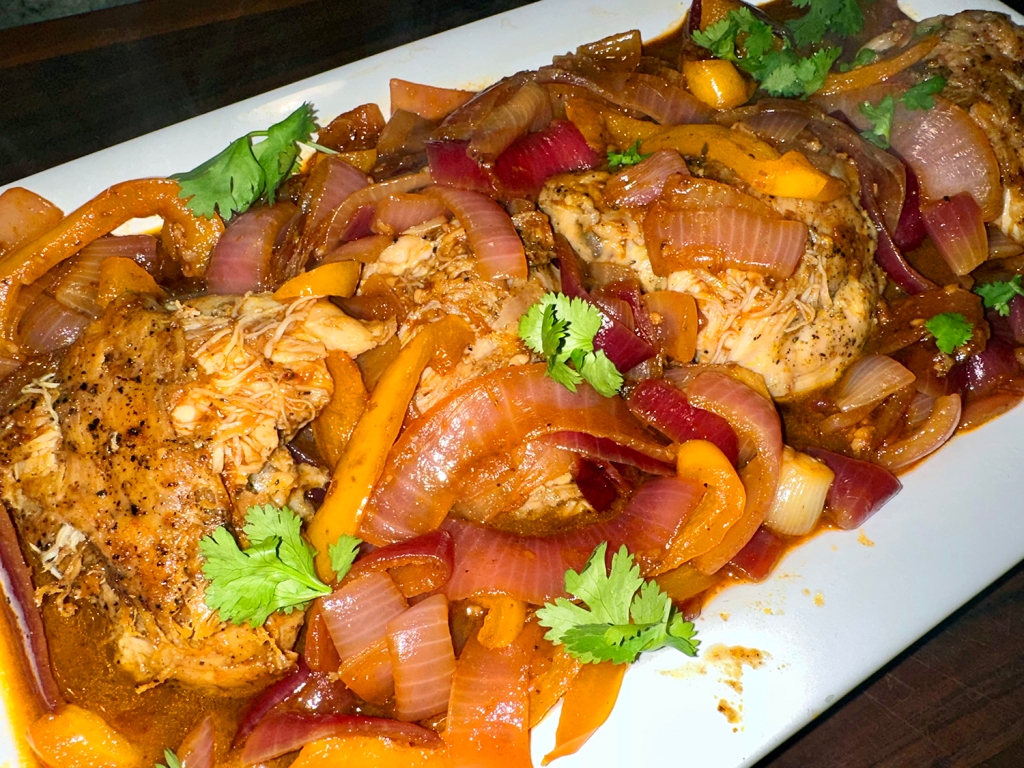
Chicken Escabeche

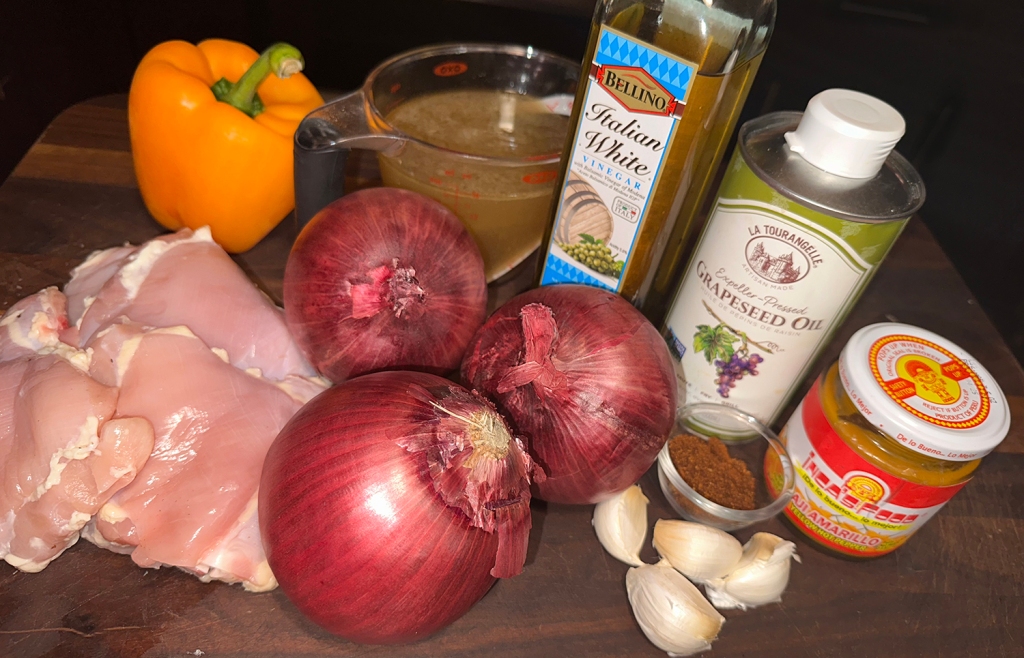
This Peruvian chicken escabeche is seasoned with aji amarillo, an orange-yellow chili ubiquitous to that country’s cuisine. In the U.S., the chilies are difficult to find fresh, but aji amarillo paste, sold in jars, is available in some well-stocked markets, specialty stores, or easily online. We purchased it online as a 3-pack with two other Peruvian pastes.

Escabeche is made by soaking meat or seafood in an acidic marinade after cooking, allowing the addition of bright flavors without altering the texture of the meat. The fruity, yet earthy flavor of aji amarillo is an important part of this dish, but if you cannot find the paste, use 1 or 2 seeded and finely minced jalapeños.

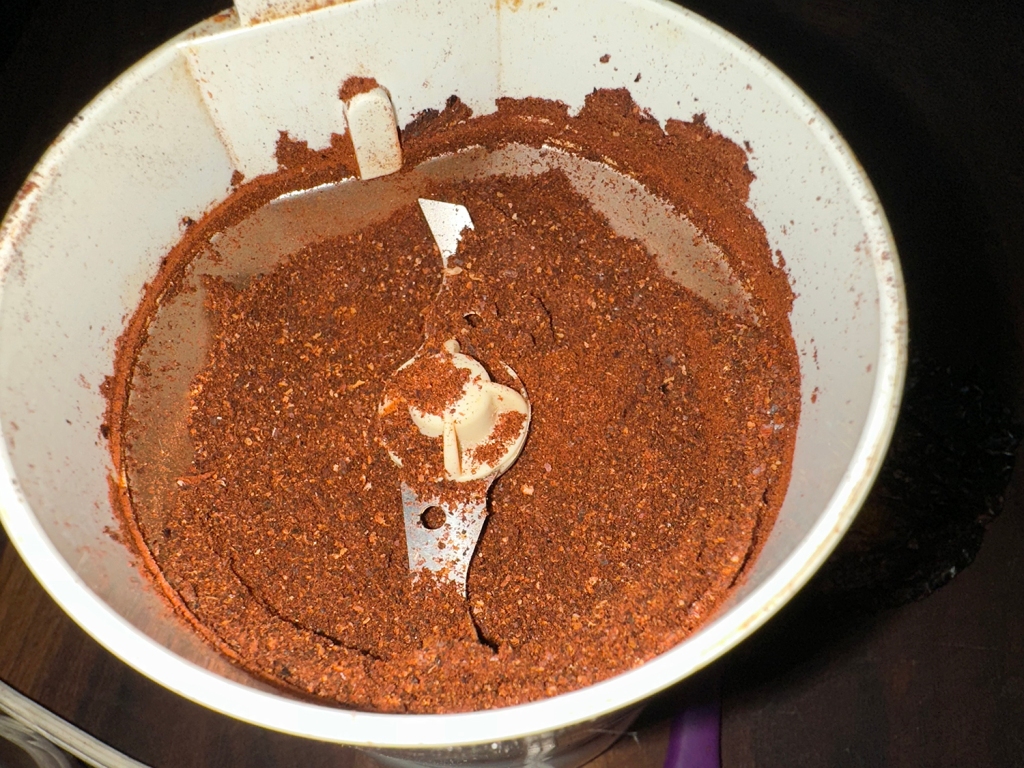
FYI–Don’t use regular chili powder instead of pure ancho chili powder. Regular chili powder is a spice blend, whereas ancho chili powder contains only ancho chilies. If you can’t find the powdered, grind some dried ancho chilies in a spice grinder, as shown above.

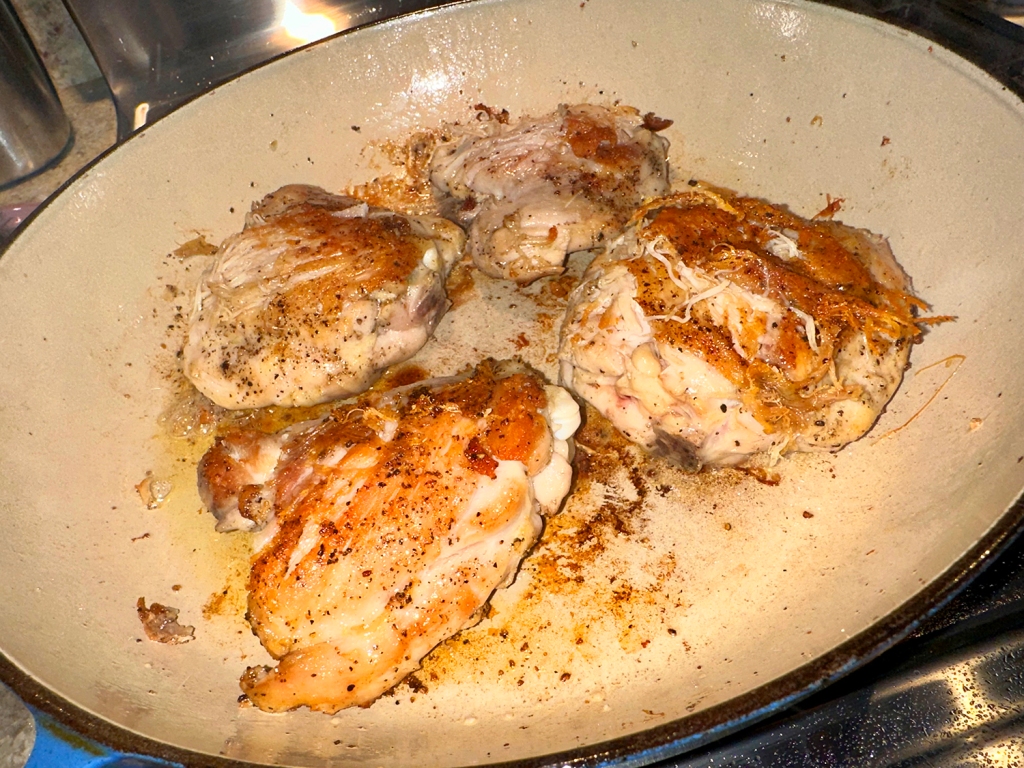
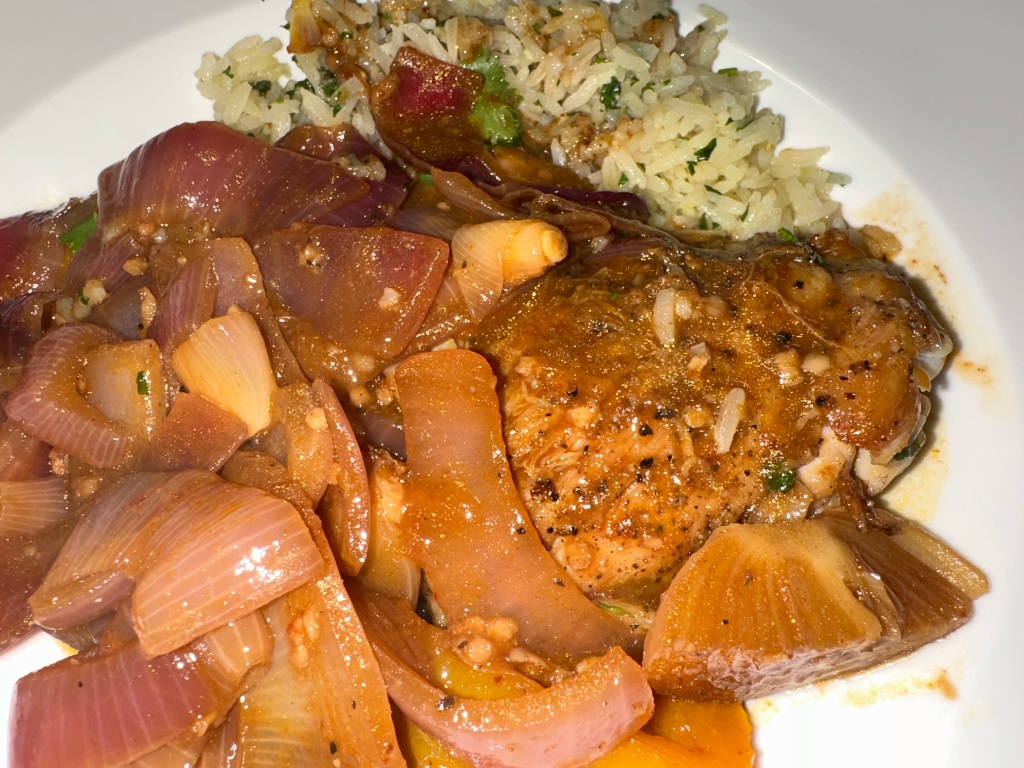
Because the skin was removed, you might encounter the chicken meat sticking to the pan. Try to pry most of it off the pan, but it is OK to leave some of the meat because it will make a nice fond and release itself once the liquids are added in. It was delicious served with the onion mixture on top of the thighs over a bed of garlic rice.

Chicken Escabeche

  • Servings: 2-4
  • Difficulty: easy
  • Print

Ingredients

  • 2 lbs. bone-in chicken thighs (4 thighs), skin removed, trimmed and patted dry
  • Kosher salt and ground black pepper
  • 2 Tbsp. grapeseed or other neutral oil, divided
  • 2 cups chicken broth, preferably homemade
  • 4 medium garlic cloves, minced (1 Tbsp.)
  • 2 Tbsp. aji amarillo paste
  • 1 Tbsp. ancho chili powder
  • 1/4 tsp. ground cumin
  • 3 medium red onions, halved and sliced ¾-inch thick
  • 1 large orange bell pepper, stemmed, seeded and sliced into ¼-inch strips
  • 1/3 cup white wine vinegar

Directions

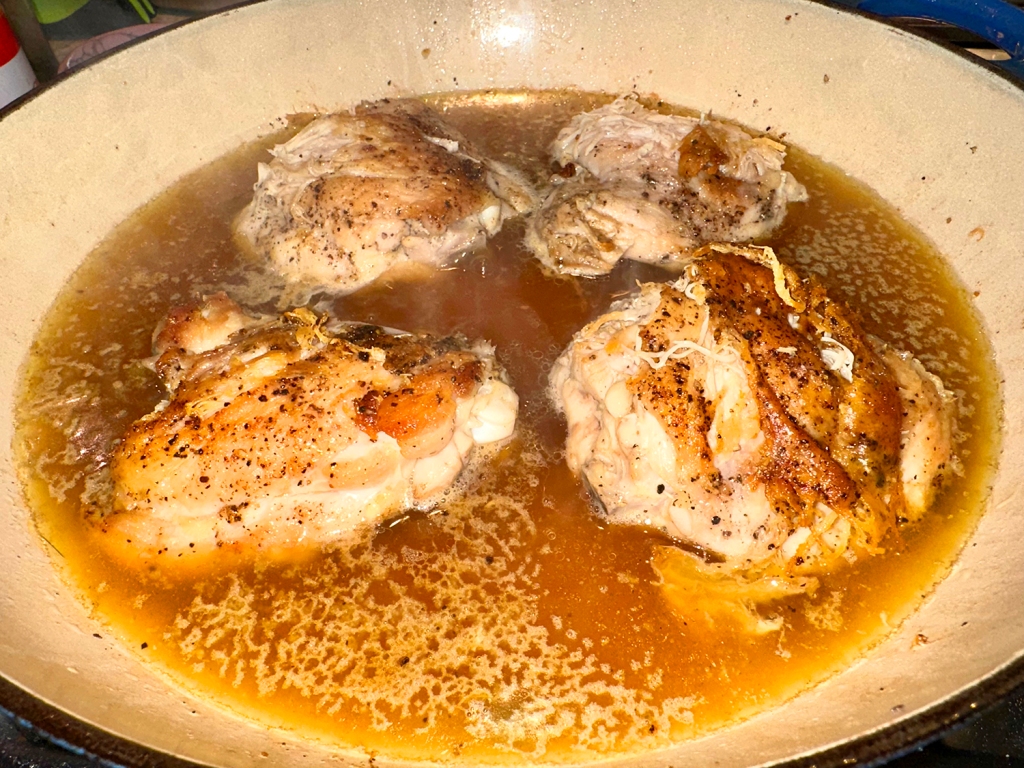
  1. Season the chicken all over with salt and pepper. In a large Dutch oven over medium-high, heat 1 tablespoon of oil until barely smoking. Add the chicken in a single layer and cook on each side, without disturbing, until deep golden brown, 3 to 5 minutes per side. Add the broth and bring to a boil. Cover, reduce to low and simmer until a skewer inserted into the largest thigh meets no resistance, 10 to 15 minutes.
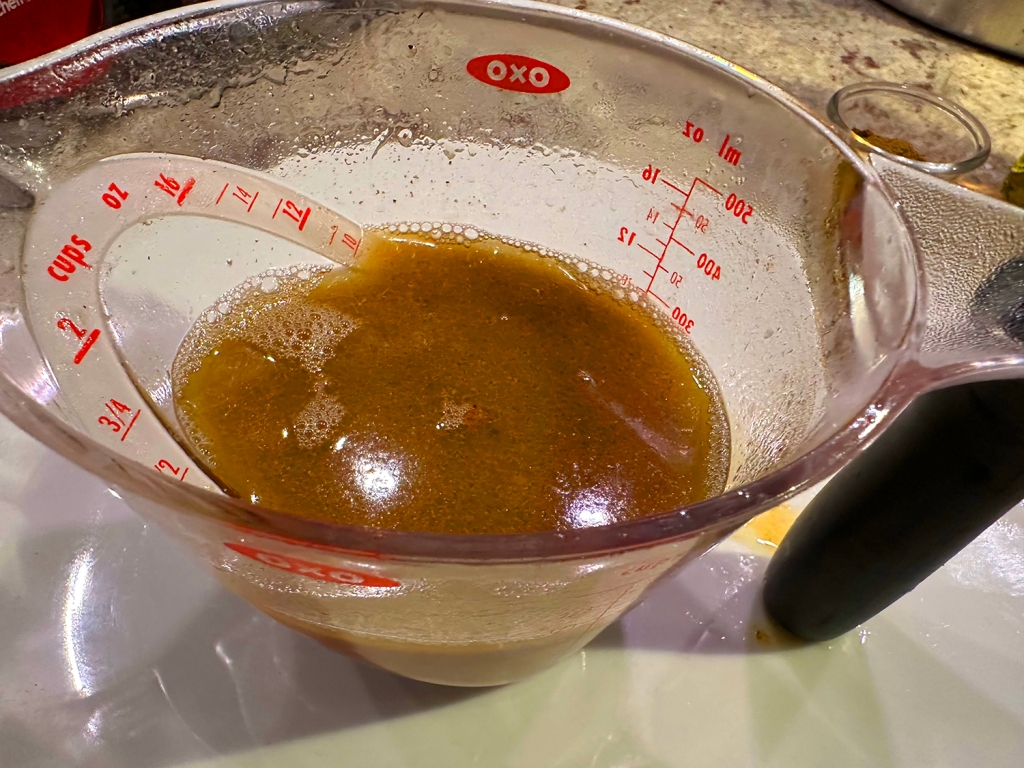
  2. Transfer the chicken to a serving dish and cover with foil. Bring the cooking liquid to a boil over high and cook until reduced to 1 cup, about 5 minutes. Transfer to a small bowl or measuring cup and set aside.
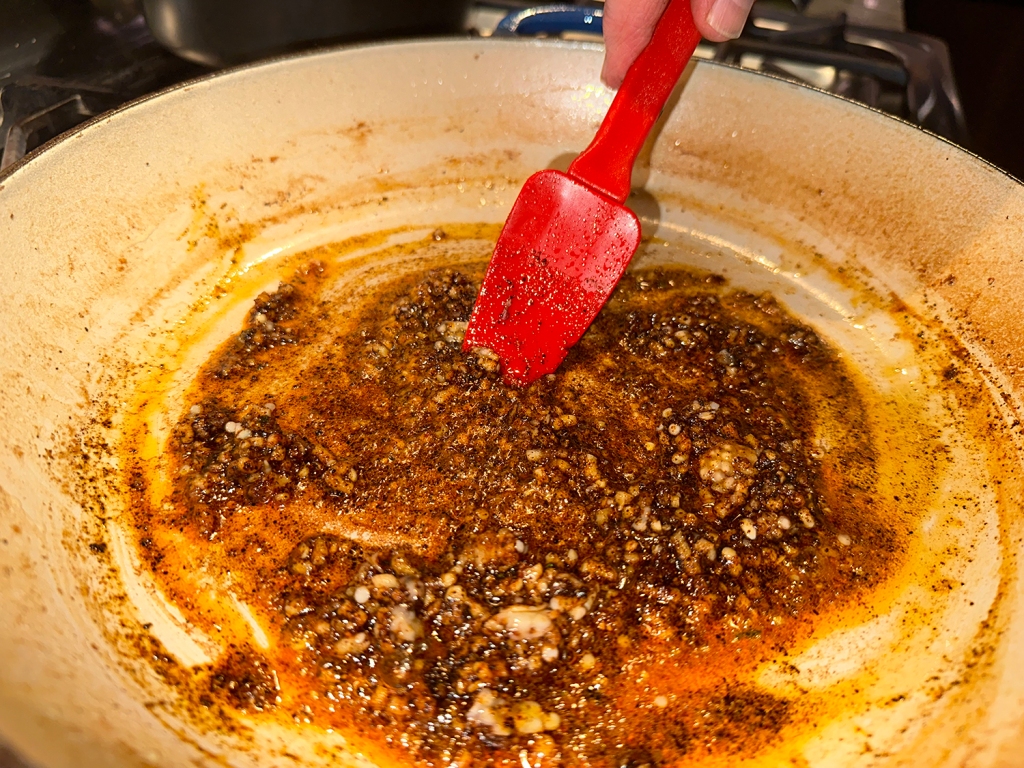
  3. In the same pot, heat the remaining 1 tablespoon oil over medium until shimmering. Add the garlic, aji amarillo paste, ancho chili and cumin, then cook, scraping the bottom, until browned and fragrant, about 1 minute. Stir in the onions, bell pepper, 2 teaspoons salt and ¼ teaspoon pepper, then add the vinegar. Cook, stirring, until the onions have begun to soften and the sauce is just thick enough to coat the vegetables, 2 to 3 minutes. Add the reduced broth, bring to a simmer over medium-high and cook, stirring, until thickened to a glaze, about 10 minutes.
  4. Pour the sauce and vegetables over the reserved chicken. Cover and let rest for 10 minutes, then serve.

http://www.lynnandruss.com

Adapted from a recipe by Julia Rackow for Milk Street

Pan-Seared Bone-In Pork Chops with Maple Agrodolce

To explain, agrodolce is an Italian sauce with a sticky consistency. Its name is Italian for “sour” (agro) and “sweet” (dolce). A classic agrodolce recipe contains reduced honey or sugar, vinegar, pine nuts, and a mixture of dried fruits and veggies, such as golden raisins, red onion, dried figs, or currants. The vinegar you use to make agrodolce impacts the flavor of the sauce. Here we used balsamic.

This simple sauce with limited ingredients is a quick agrodolce. Meats such as pork chops, chicken breasts, and steak benefit from a sauce with sweet-tart flavors post-grilling or pan-searing. And we paired our chops with a wonderful side of Roasted Winter Squash with Lime, Chili and Cilantro.

*If desired and you have the time, season the pork chops with salt and pepper, place them on a rack in a rimmed baking sheet and refrigerate, uncovered, for 8 to 24 hours.

Pan-Seared Bone-In Pork Chops with Maple Agrodolce

  • Servings: 4
  • Difficulty: easy
  • Print

Ingredients

  • (14- to 16-oz.) bone-in pork rib chops, 1½ inches thick, trimmed
  • 1 Tbsp. Kosher salt
  • ½ tsp. pepper

Directions

  1. *Season the pork chops with salt and pepper, place them on a rack in a rimmed baking sheet and refrigerate, uncovered, for 8 to 24 hours.
  2. Pat chops dry with paper towels and sprinkle both sides with pepper. Place chops 1 inch apart in cold 12-inch nonstick or carbon-steel skillet, arranging so narrow part of 1 chop is opposite wider part of second. Place skillet over high heat and cook chops for 2 minutes. Flip chops and cook on second side for 2 minutes. (Neither side of chops will be browned at this point.)
  3. Flip chops; reduce heat to medium; and continue to cook, flipping chops every 2 minutes, until exterior is well browned and meat registers 140 degrees, 10 to 15 minutes longer. (Chops should be sizzling; if not, increase heat slightly. Reduce heat if skillet starts to smoke.)
  4. Transfer chops to carving board and let rest for 5 minutes. If serving more than 2 people, carve the meat from the bone and make slices about 1⁄2″ thick. Season meat with coarse or flake sea salt to taste. Serve with bones, if desired.

Maple Agrodolce

This easy, elegant sauce from Cook’s Illustrated is the perfect accompaniment to cuts of pork, such as the above Pan-Seared Thick-Cut, Bone-In Pork Chops. Using maple syrup as a sweetener in place of sugar contributed viscosity, enhancing cling, and an attractive glossiness. Plump raisins, or dried figs add pleasing texture, and minced shallot and red pepper flakes amp up the savoriness, keeping the sauce from becoming cloying.

Ingredients

  • ¼ cup balsamic vinegar
  • 2 Tbsp. maple syrup
  • 2 Tbsp. minced shallot
  • 2 Tbsp. chopped golden raisins OR dried figs, chopped
  • Pinch red pepper flakes
  • Pinch table salt

Directions

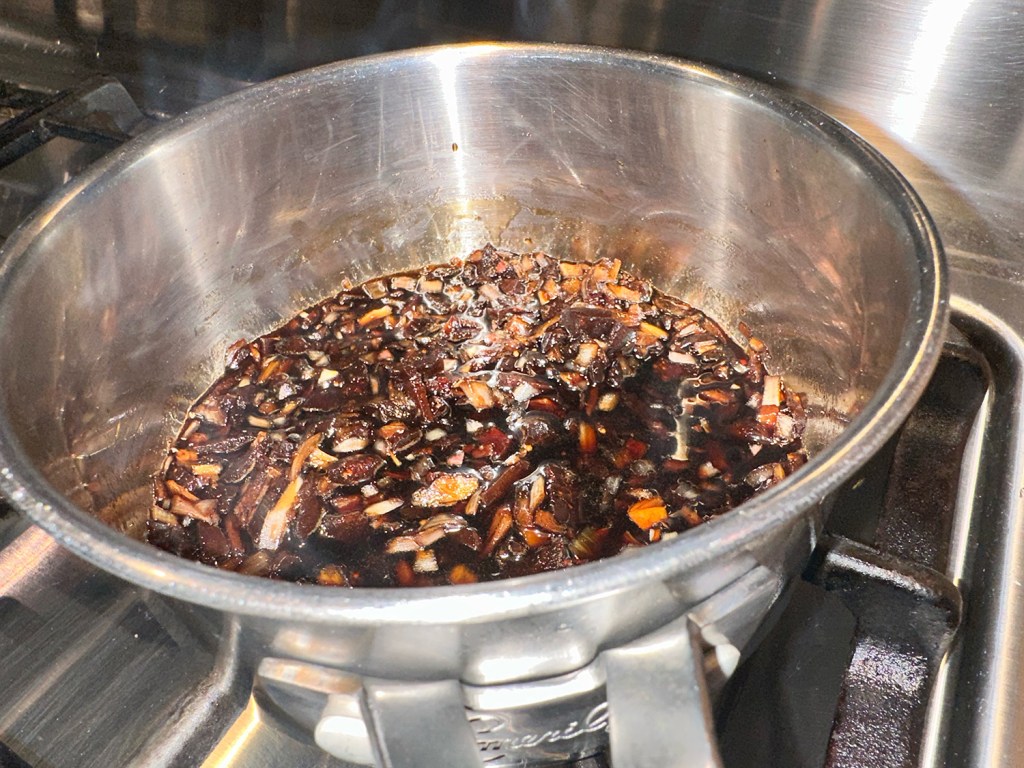
  1. Bring all ingredients to boil in small saucepan over medium heat. Reduce heat to low and simmer until reduced and slightly thickened, 8 to 10 minutes (sauce will continue to thicken as it cools).
  2. Serve. (If not using right away, cover to keep warm.)

http://www.lynnandruss.com

Parsnip Purée

Sometimes we desire something a bit more upscale than plain mashed potatoes (which I dearly love). So when I ran across this Parsnip Purée recipe from Ina Garten, I knew instantly that we had to make this side dish. And it is about as easy as a side dish gets, seriously (just take a look at the abbreviated ingredients list).

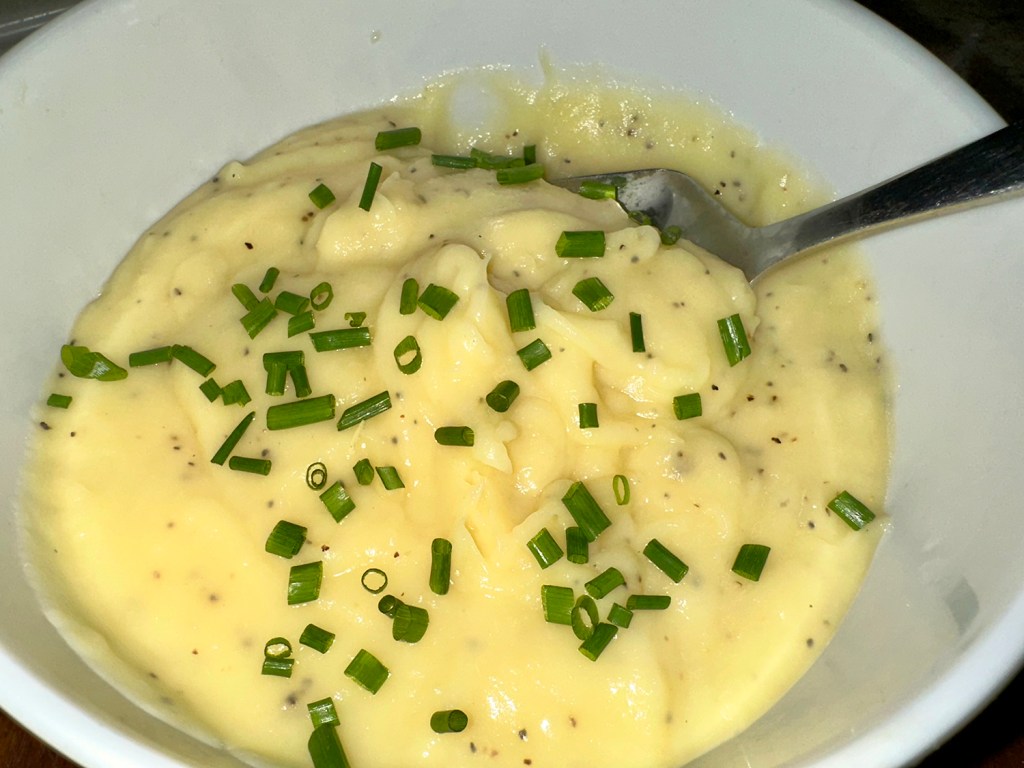
Parsnips are really delicious and so under-appreciated. The versatile veggie is the essence of parsnip-ness with just a little butter that generates that sigh of pure satisfaction. A sensational, silky-smooth, slightly assertive side that you’ll be pairing with any number of main dishes. The first time out of the gate, it accompanied a seared sirloin steak, but we are imaging all of the other possibilities such as roast chicken, pork loin, salmon, leg of lamb…

Make sure to put it on your short list!

Parsnip Purée

  • Servings: 4
  • Difficulty: easy
  • Print

Ingredients

  • 1½ lbs. parsnips, scrubbed, sliced ¾” thick
  • Kosher salt, freshly ground pepper
  • 2 Tbsp. unsalted butter, diced
  • Chopped fresh chives for garnish, optional

Directions

  1. Place 1½ pounds parsnips, scrubbed, sliced ¾” thick, in a medium pot, add 1 tablespoon kosher salt, and add enough water to cover the parsnips. Cover the pot, bring to a boil, then uncover, lower the heat, and simmer for 15–20 minutes, until the parsnips are very soft when tested with a small knife. Don’t drain the pot!
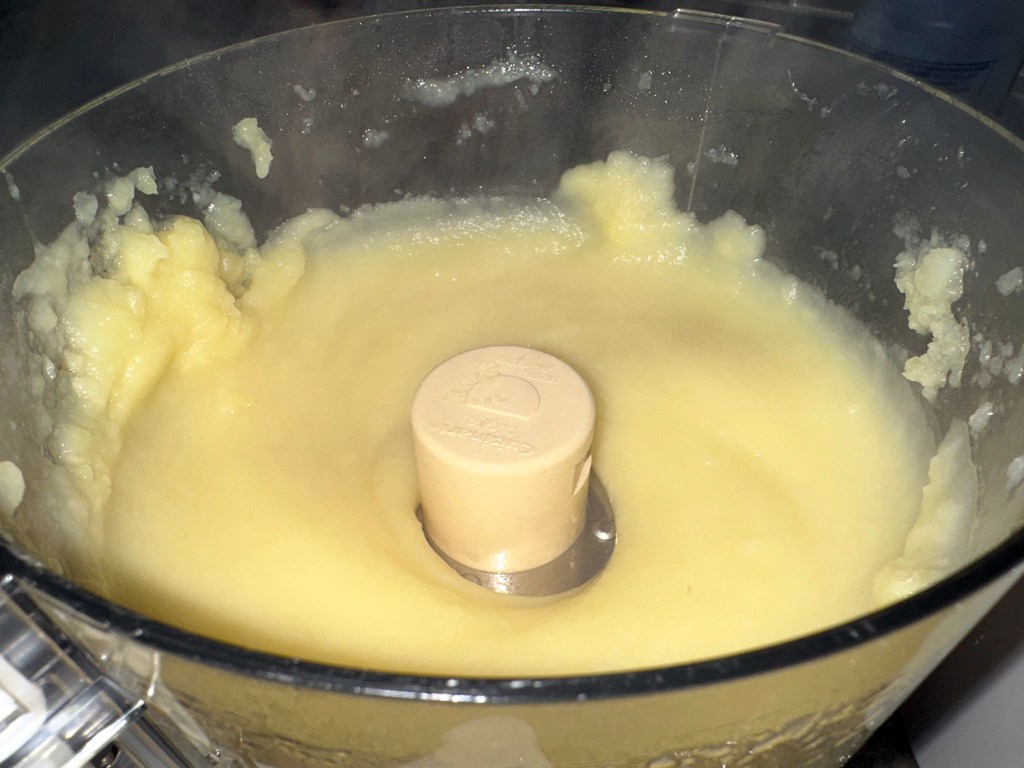
  2. With a slotted spoon or small strainer, transfer the parsnips to the bowl of a food processor fitted with the steel blade and pulse to chop the parsnips. Pour the cooking liquid into a glass measuring cup and pour ½ cup down the feed tube. Purée the parsnips, adding more cooking liquid (about 1 cup total) through the feed tube until the parsnips are creamy and almost smooth but still have some texture.
  3. Add 2 tablespoons unsalted butter, diced, and ½ teaspoon freshly ground black pepper and purée until combined. Taste for seasonings, sprinkle with fresh chives and serve hot.

http://www.lynnandruss.com

Recipe courtesy of Ina Garten

Sheet Pan Smoked Paprika Chicken with Chickpeas

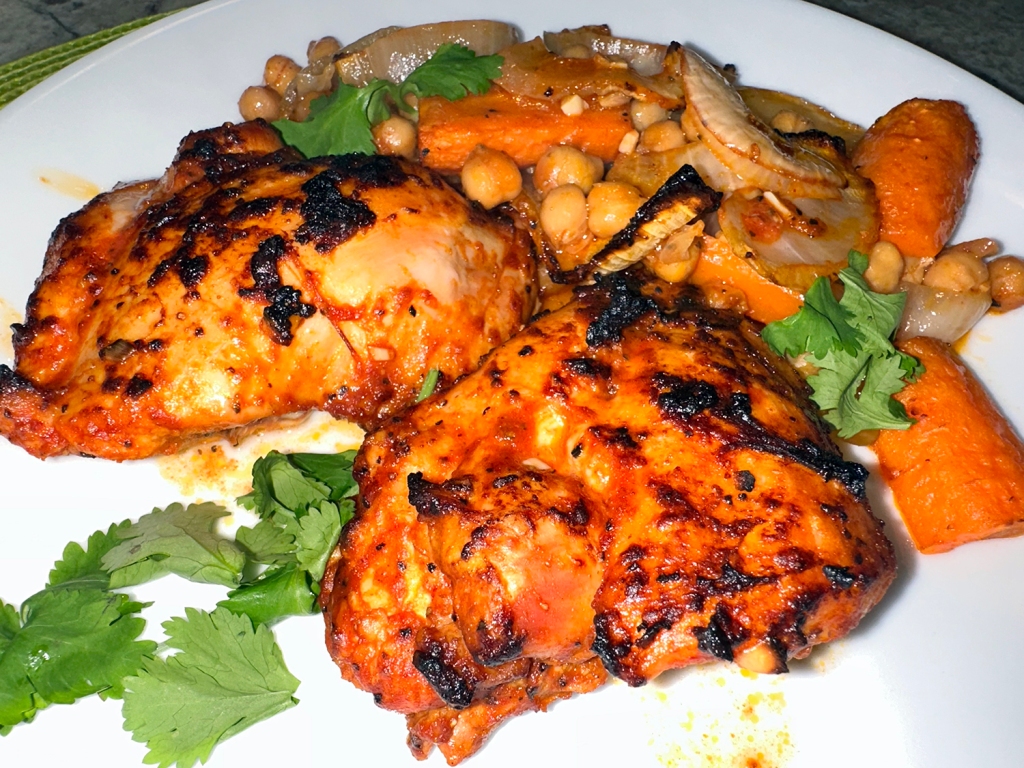
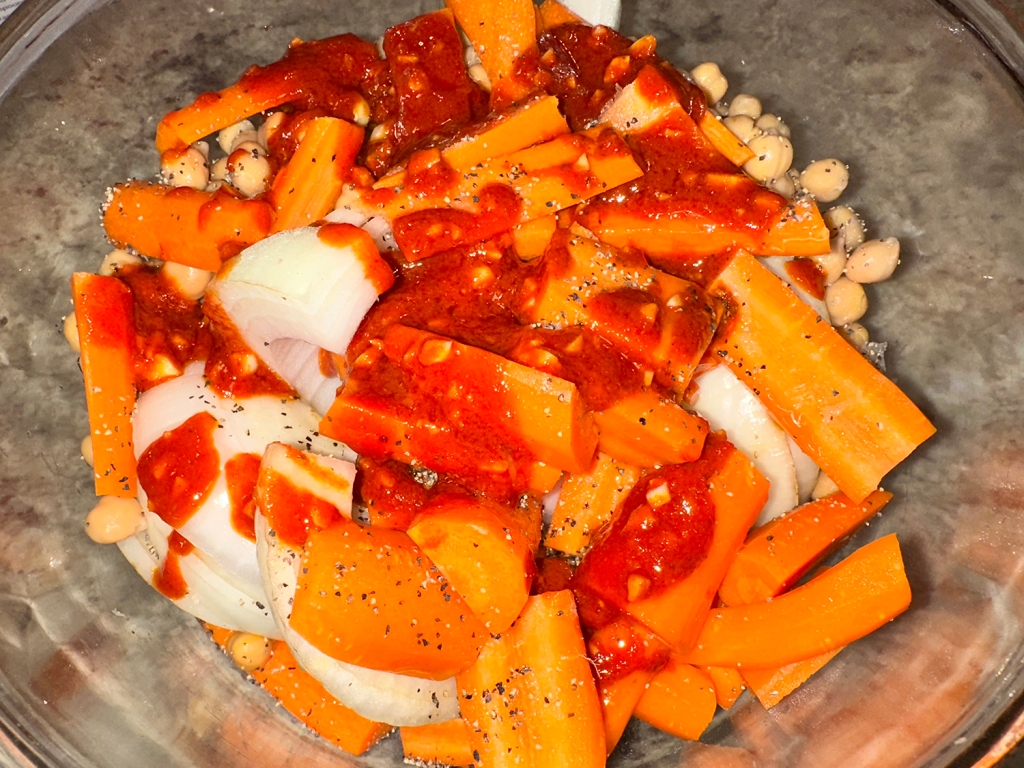
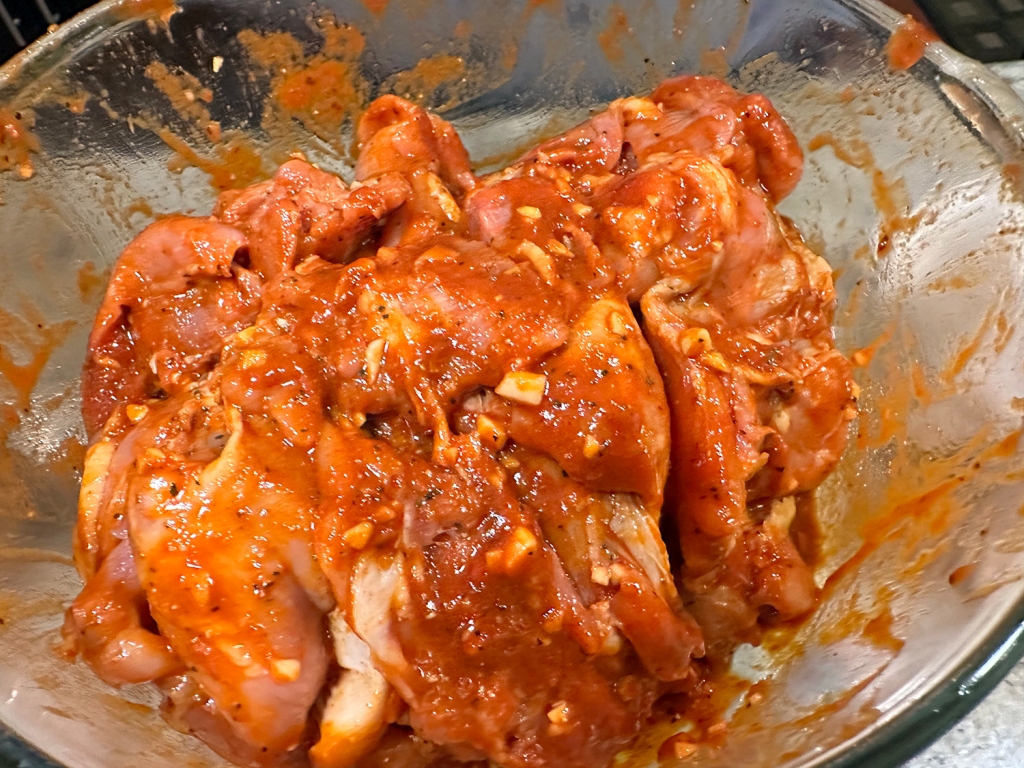
Juicy chicken thighs are coated in a bold tomato rub with lots of fresh garlic and warm, earthy spices including smoked paprika and cumin, and brightened with a hint of lemon juice. The whole thing comes together in a flash — simply chop some veggies and season everything with the tomato rub. Toss it into a sheet pan and roast.

There is nothing complicated about the ingredient list either. You just need some spices, chickpeas, vegetables, and chicken. For more heat, use hot smoked paprika instead. It lends itself well to customizations, so feel free to swap out carrots for other root veggies like beets or parsnips, or add potatoes or sweet potatoes for more heft.

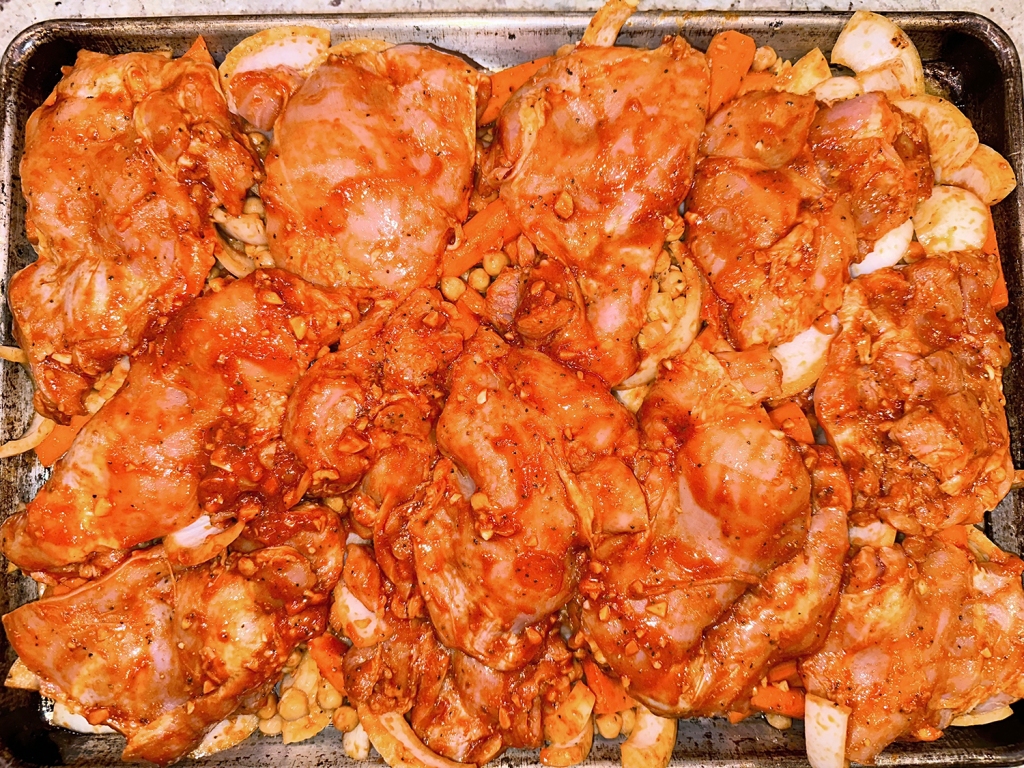
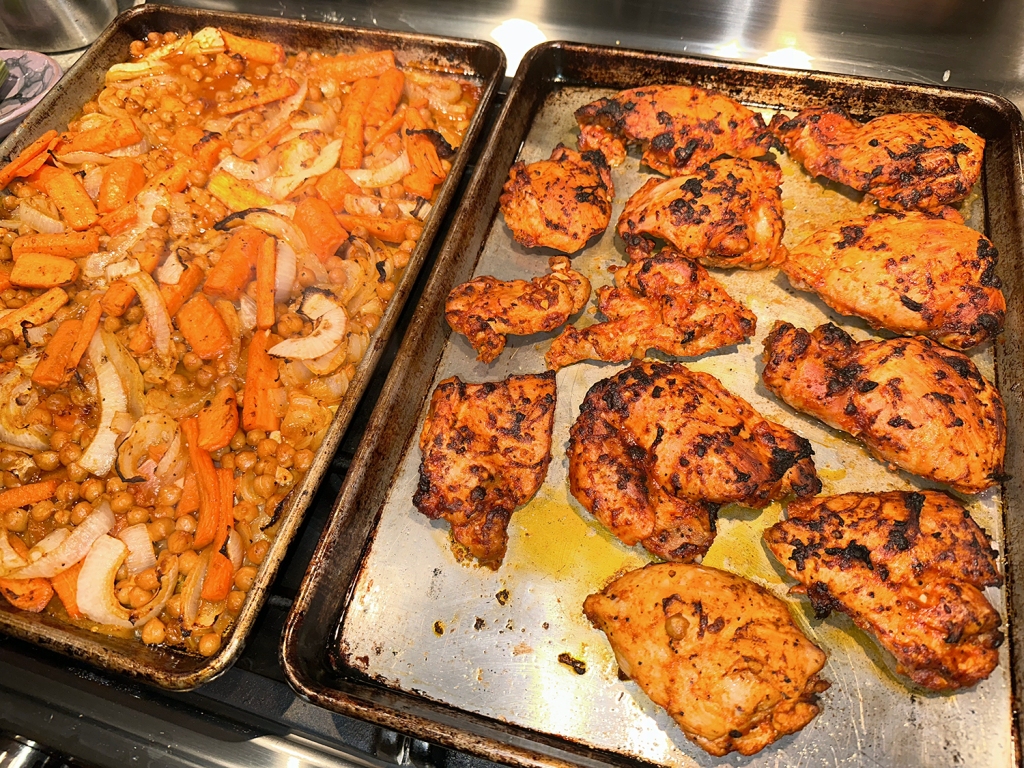
While we did start out piling everything on one sheet pan (against out better judgement), after 30 minutes in the oven, we transferred the chicken thighs on another prepared baking sheet and covered with foil. The reason being, the vegetables were steaming instead of roasting. The veggies went back into the oven to continue cooking until fork tender and beginning to brown slightly, another 10-15 minutes. As the vegetable tray was roasting, we then popped the thighs, uncovered, under the broiler (we have a 2-oven stove).

Next time, we may start with dividing everything between 2 sheet pans from the start. You may prep ahead by chopping the vegetables and making the sauce. Just refrigerate them until ready to begin cooking.

FYI, we are using boneless skinless chicken thighs here, but bone-in thighs or boneless skinless breasts would work as well. Since boneless, skinless chicken breasts cook in about 18 minutes in the oven, you will need to roast your vegetables for about 10 minutes first, then add the breasts. Otherwise, the carrots won’t cook in time.

Sheet Pan Smoked Paprika Chicken with Chickpeas

  • Servings: 5-6
  • Difficulty: easy
  • Print

Ingredients

Tomato Rub

  • ½ cup extra virgin olive oil
  • Juice of 2 large lemons, about ½ cup
  • 5 Tbsp. tomato paste
  • 5 large garlic cloves, minced
  • 1 ½ tsp. ground cumin
  • 1 ½ tsp. smoked paprika
  • 1 tsp. Aleppo pepper flakes or granules

Chicken And Vegetables

  • 1 tsp. extra virgin olive oil
  • 6 carrots, peeled, halved lengthwise, and cut into 2 inch pieces
  • 2 medium onions, halved and cut into ½ inch slices
  • 1 15-oz. can of chickpeas, drained
  • ½ tsp. kosher salt
  • ½ tsp. ground black pepper
  • 10 boneless skinless chicken thighs, trimmed of fat if necessary

Directions

  1. Position one rack in the center of the oven and another one 4 or 5 inches under the broiler. Preheat the oven to 425°F
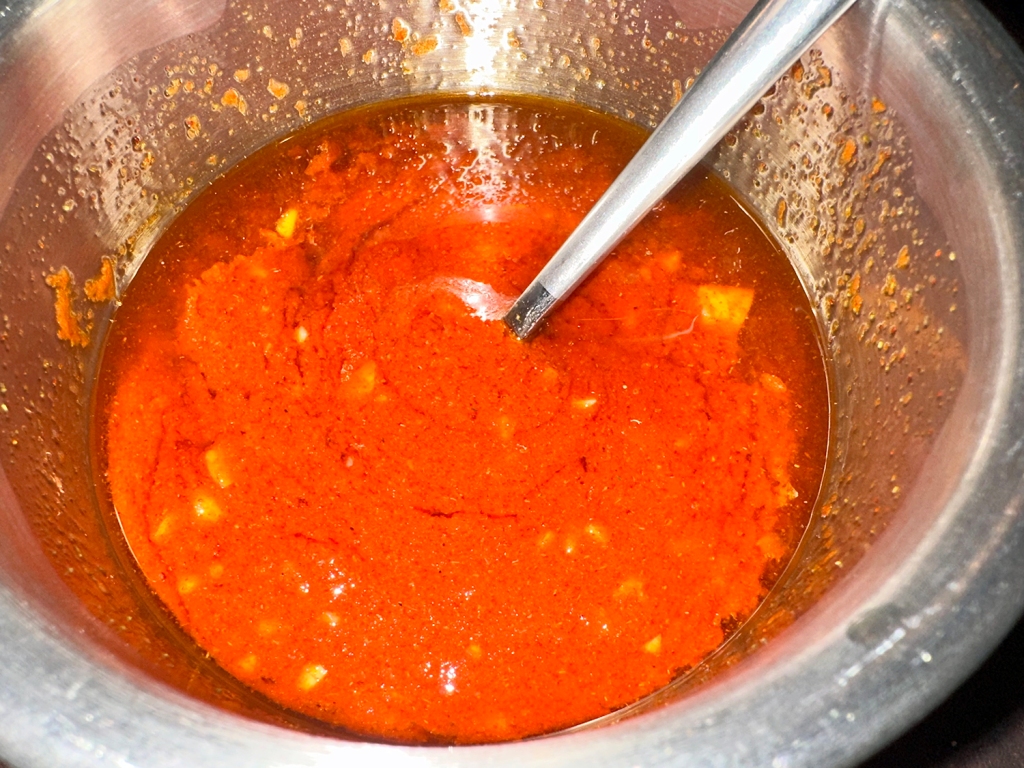
  2. Prepare the tomato rub: In a small bowl, combine the olive oil, lemon juice, tomato paste, garlic, cumin, paprika, and Aleppo pepper. Whisk well to combine.
  3. Prepare the chicken and vegetables: Lightly brush a large sheet pan with some of the olive oil. In a large bowl, combine the carrots, onions, and chickpeas. Season well with salt and black pepper (about ½ teaspoon each). Add 4 tablespoons of the tomato rub and a small drizzle of olive oil (about 1 teaspoon), and mix well to coat. Transfer the mixture to the sheet pan. Set bowl aside for chicken.
  4. Pat the chicken dry and season with salt and black pepper on both sides. Place the chicken in the reserved bowl and add the remaining tomato mixture, tossing until the chicken is well coated.
  5. Transfer the chicken to the sheet pan(s) along with the chickpeas and vegetables. Roast on the center rack until the chicken is cooked through, 25 to 30 minutes (ours took more like 45 minutes). Then move the sheet pan up to the top rack directly under the heat and broil until the chicken gains some color, 3 to 4 minutes, watching carefully. The onions and carrots may also gain some char.
  6. Serve with your favorite rustic bread, if desired.

http://www.lynnandruss.com

Adapted from a recipe by Suzy Karadsheh

Shrimp Pasta with Preserved Lemon

Here, preserved lemon is paired with seared shrimp in this easy weeknight pasta recipe. It also features garlic, chile flakes, plenty of Parmesan, and a touch of fresh lemon juice, bringing the full spectrum of lemon flavor to the table. Let me just put it out there, the dish was luxuriously fantastic!

It’s amazing that this silky sauce contains no cream. One of the main ingredients, preserved lemon, adds a wonderful base note and should not be omitted. Then, instead of using an entire pound of pasta, we scaled it back to half that amount for a better balance with the shrimp. Just keep in mind, it may not provide 4 entrée-sized portions (depending on hungry your diners are!).

Back to those preserved lemons. They are a versatile pantry staple with the power to level up the flavor of any dish it touches. Unlike the aggressively pungent and assertive flavor of fresh lemon rind, preserved lemons have softer, richer, and deeper flavors, mellowed by the salty bath that pickles them. While they lose some of their bracing acidity, citrusy aromas and gentle tanginess remain.

We keep a jar of preserved lemons in our auxiliary refrigerator at most times. Which BTW, take at least 3 weeks “hibernating” in a cool room, then a spin in the fridge before they are ready to use. The jar of preserved lemons, at left, was just made with kosher salt, lemons, black peppercorns and bay leaves.

TIP: If you don’t have, or can’t find preserved lemons, you can microwave four 2-inch strips lemon zest, minced, 1 teaspoon lemon juice, ½ teaspoon water, ¼ teaspoon sugar, and ¼ teaspoon salt at 50 percent power until the liquid evaporates, about 1½ minutes, stirring and mashing the lemon with the back of a spoon every 30 seconds.

Shrimp Pasta with Preserved Lemon

  • Servings: 3-4
  • Difficulty: easy
  • Print

Ingredients

  • 1 lb. medium tube-shaped pasta (such as rigatoni or penne)
  • Kosher salt
  • 1 lb. large shrimp, peeled, deveined
  • ¼ cup extra-virgin olive oil
  • 6 garlic cloves, finely chopped
  • ¼ cup finely chopped preserved lemon rinds
  • ½ tsp. crushed red pepper flakes
  • 4 Tbsp. chilled unsalted butter, cut into 4 pieces
  • 2 oz. Parmesan, finely grated (about 1 cup), plus more for serving
  • 1 Tbsp. fresh lemon juice
  • ⅓ cup finely chopped parsley, plus more for serving

Directions

  1. Cook 1 lb. medium tube-shaped pasta (such as rigatoni or penne) in a large pot of boiling salted water, stirring occasionally, until al dente. Drain, reserving 2 cups pasta cooking liquid.
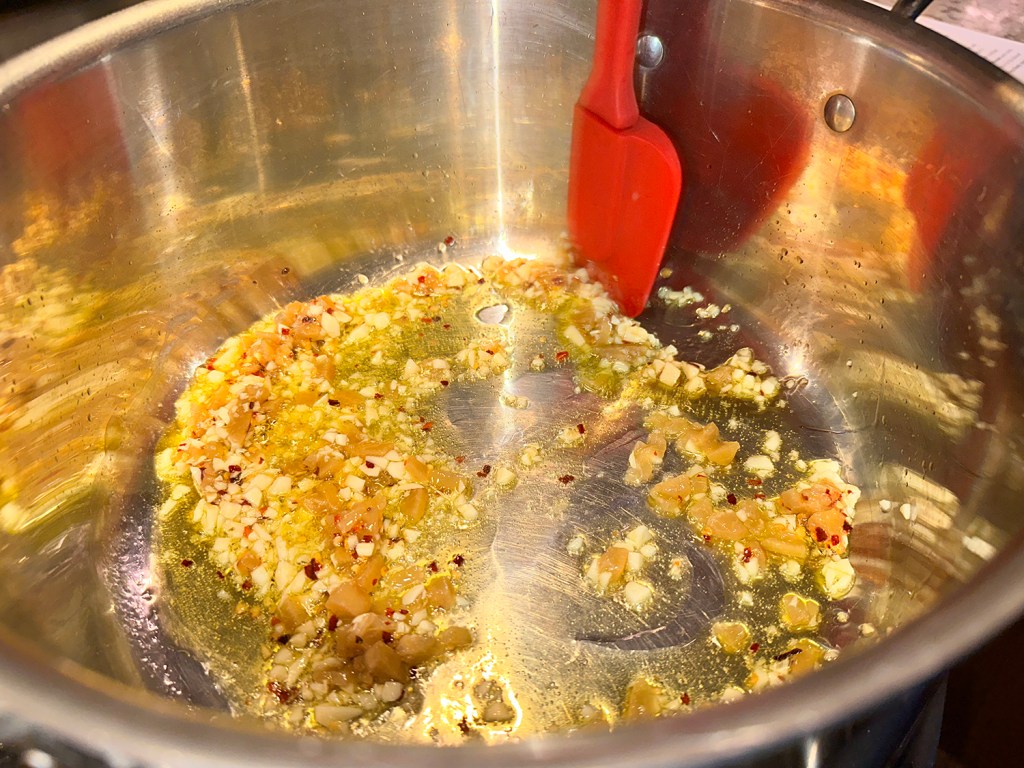
  2. Meanwhile, pat 1 lb. large shrimp, peeled, deveined, dry with paper towels; season lightly with kosher salt. Heat ¼ cup extra-virgin olive oil in a large Dutch oven or other heavy pot over medium. Add 6 garlic cloves, finely chopped, ¼ cup finely chopped preserved lemon, and ½ tsp. crushed red pepper flakes and cook, stirring often, until preserved lemon is softened, about 2 minutes.
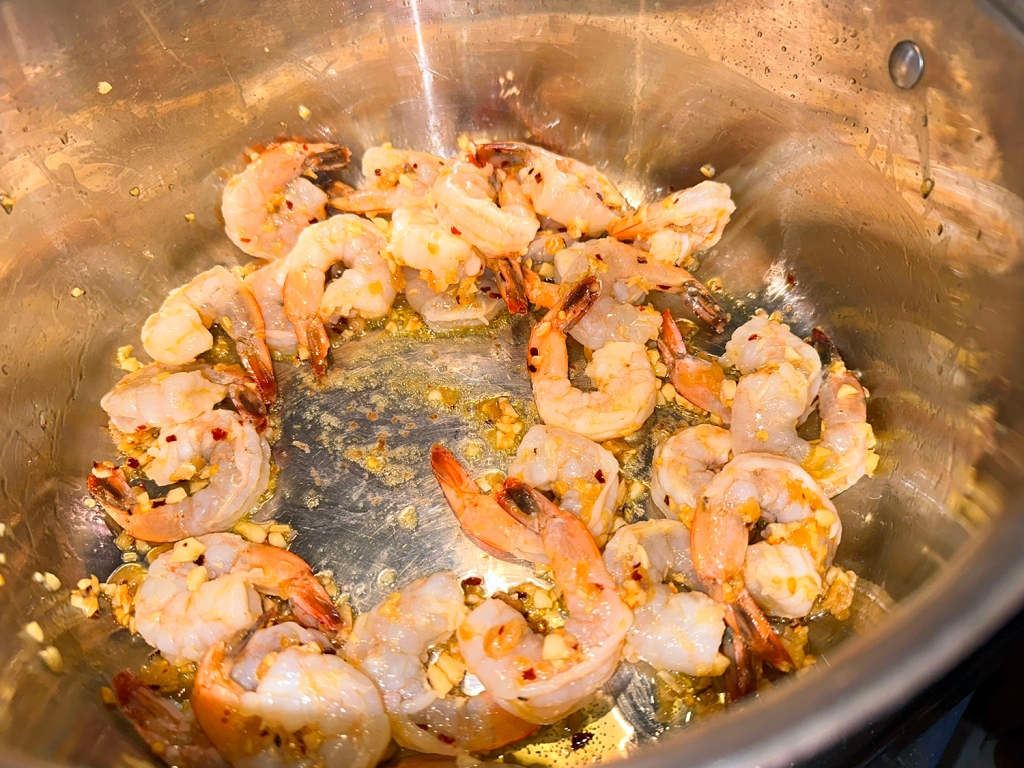
  3. Add shrimp and cook, stirring often, until just opaque, about 2 minutes.
  4. Add pasta, 2 Tbsp. unsalted butter, cut into 2 pieces, and 1 cup pasta cooking liquid and cook, tossing vigorously, until butter is melted and sauce is thickened slightly, about 2 minutes. Add ½ cup finely grated Parmesan; toss until melted.
  5. Add ½ cup pasta cooking liquid, 2 Tbsp. unsalted butter, cut into 2 pieces, and ½ cup finely grated Parmesan and cook, stirring vigorously and adding more pasta cooking liquid if needed, until sauce is thickened and coats pasta, about 1 minute. Mix in 1 Tbsp. fresh lemon juice and ⅓ cup finely chopped parsley.
  6. Divide pasta among shallow bowls. Top with more finely grated Parmesan and finely chopped parsley.

http://www.lynnandruss.com

Adapted from a recipe by Rachel Gurjar for Bon Appétit

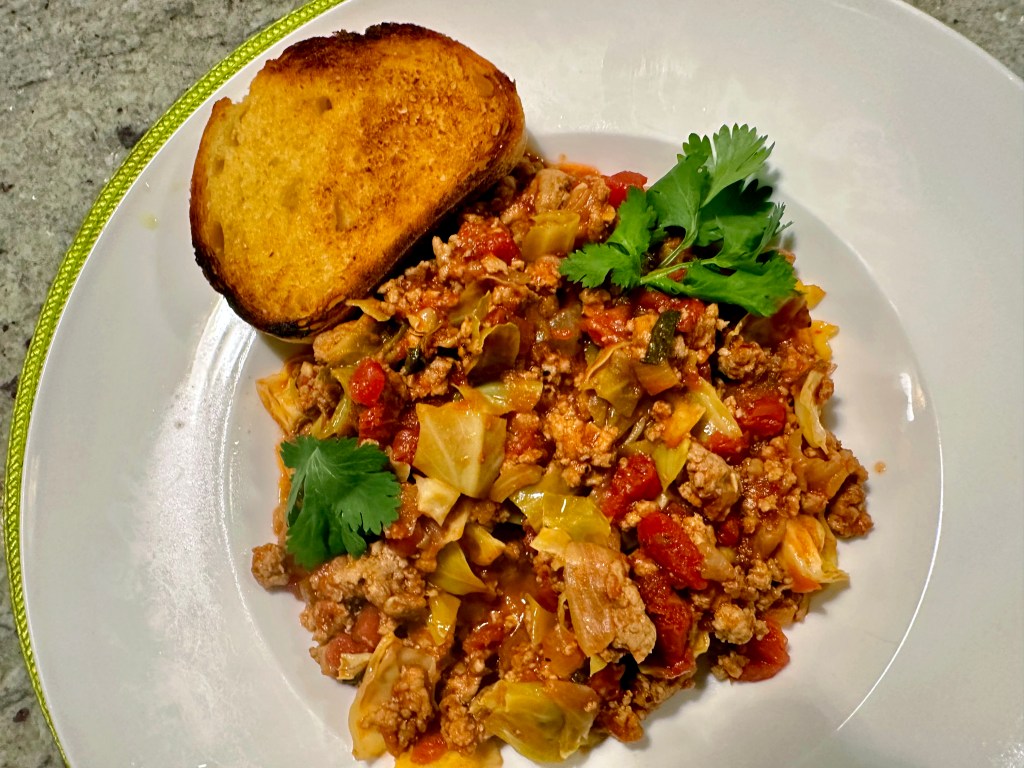
Ground Turkey Unstuffed Cabbage Roll Goulash

We try as often as possible to include super foods, and in this recipe it’s cabbage. In fact, according to Wiki studies, cabbage has protective effects against colon cancer amongst many other diseases. Cabbage is also an excellent source of vitamin C, vitamin K, dietary fiber, vitamin B6 and folate. That sounded like good enough reason to try this recipe.

It’s best to season the mixture with what you and your family prefer. I made the cumin and red pepper flakes as part of the ingredients and NOT optional. But if you feel on the adventurous side, you may want to consider including a little brown sugar, celery seed and/or add 1 tablespoon of Worcestershire sauce.

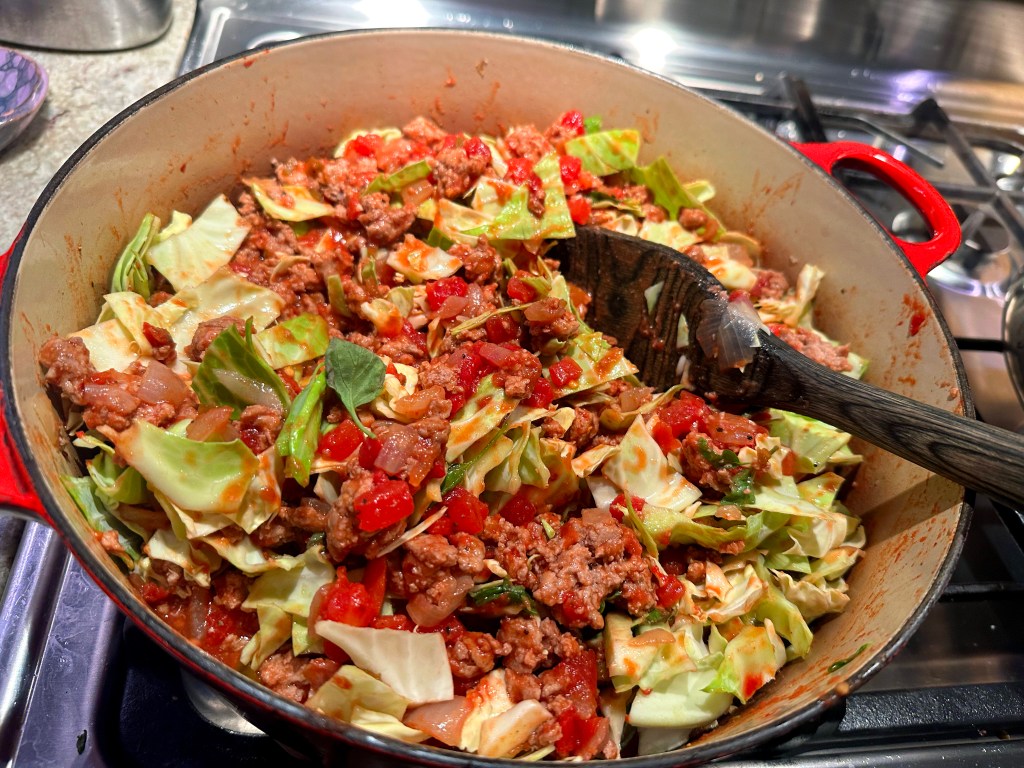
Another one-pot wonder… The original recipe called for a small head of cabbage, but after making it, we both felt it could use a large head for a better meat to veggie ratio. A slice of toasted crusty bread with a garlic-butter sauce was a perfect compliment to the goulash.

Note: It may seem like you don’t have enough liquid at first but when the cabbage cooks down it will be perfect.

Ground Turkey Unstuffed Cabbage Roll Goulash

  • Servings: 6
  • Difficulty: easy
  • Print

Ingredients

  • 2 lbs. ground turkey, (or pork, or lamb, or beef)
  • 1 large yellow onion, chopped
  • 1 head cabbage, chopped
  • 2 14.5 oz. cans diced fire roasted tomatoes
  • 1 6 oz. can tomato paste
  • 6 oz. vegetable or chicken broth, preferably homemade
  • 2 cloves garlic, minced
  • 2 tsp. salt
  • 1 tsp. ground black pepper
  • 1⁄2 to 1 tsp. crushed red pepper
  • 1 tsp. cumin
  • A few leaves of chopped fresh basil

Directions

  1. Heat a Dutch oven or extra large skillet over medium-high heat.
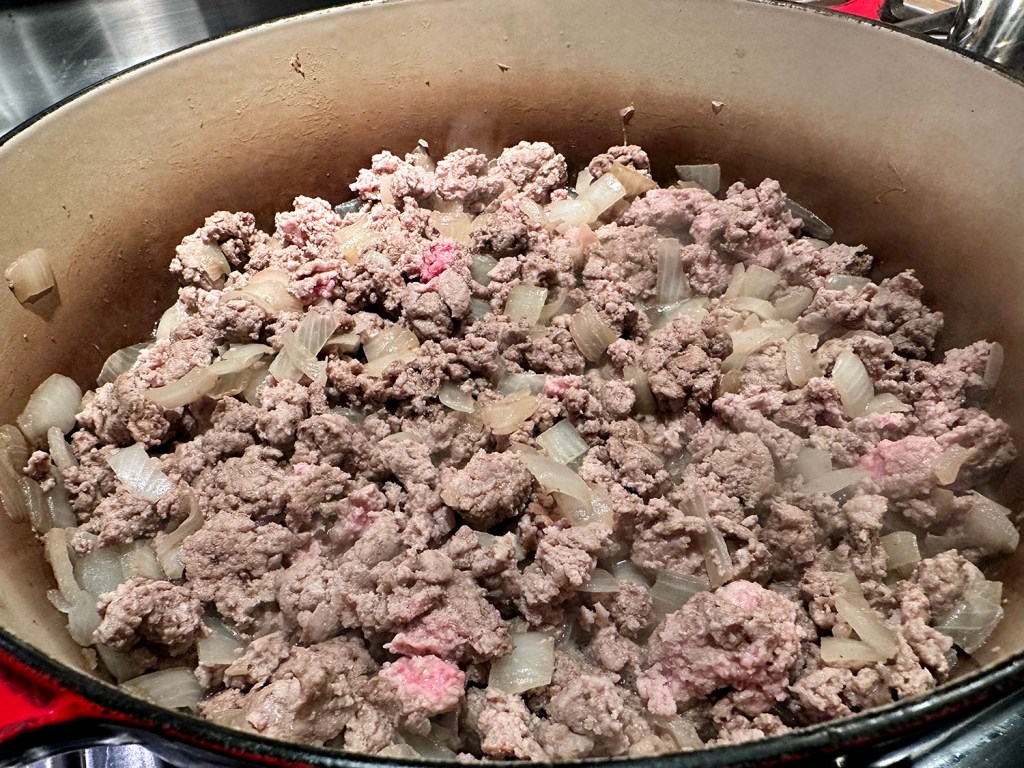
  2. Drizzle a teaspoon of olive oil and cook the onions until translucent. Cook beef or turkey meat and onion in the hot Dutch oven until browned.
  3. Drain and discard grease.
  4. Add the chopped cabbage, tomatoes, tomato paste, water, garlic, salt, pepper, crushed red pepper, cumin, and fresh basil. Use fire roasted or flavored diced tomatoes for more flavor.
  5. Bring the ingredients to a boil.
  6. Cover Dutch oven, reduce heat and simmer until cabbage is tender. This will take about 30 minutes.

http://www.lynnandruss.com

Loosely adapted from a recipe on isavea2z.com

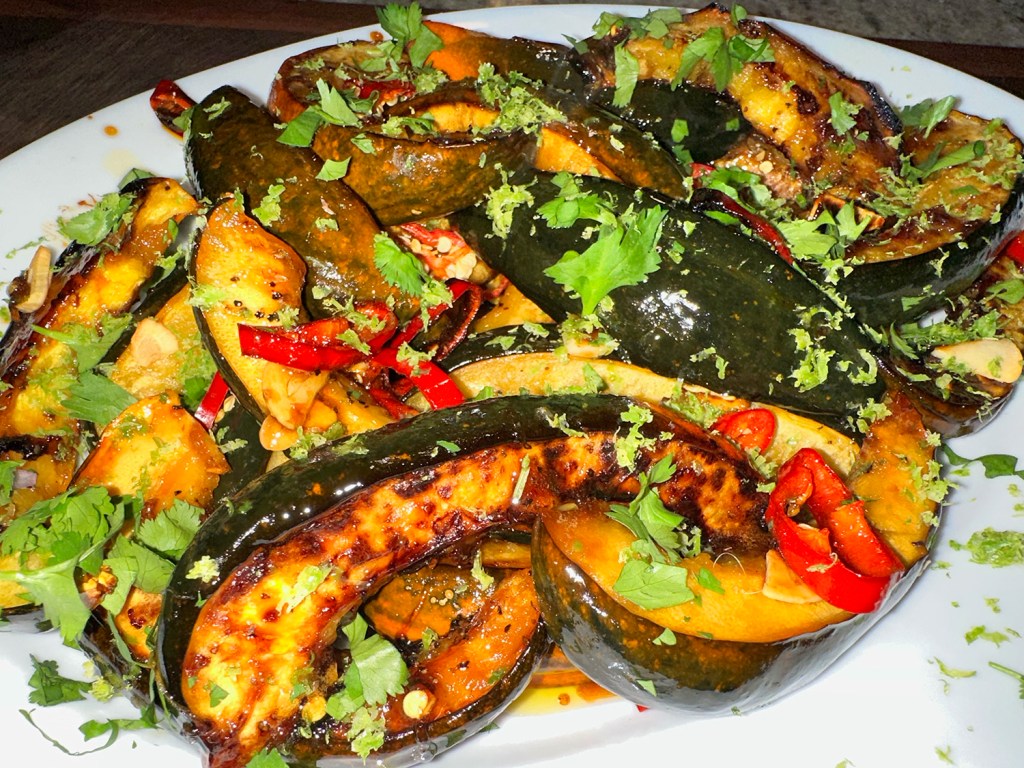
Roasted Winter Squash with Lime, Chili and Cilantro

This time of year, squashes have their moment(s) in the sun. Here, the roasted squash shines when using spicy, tangy ingredients to banish one-note flavors. Lime, garlic and chilies add kick; while brown sugar creates a glaze-like coating with molasses notes that enhance the earthy-sweet squash.

Kabocha is a Japanese pumpkin with mottled green edible skin and dense, slightly starchy orange flesh. Acorn squash, with thin skin that doesn’t require peeling, also is a terrific option. With no kabocha to choose from, we opted for the acorn squash.

This recipe would make for a nice side dish on your Thanksgiving table. Just sayin’… OR, pair it with Pan-Seared Bone-in Pork Chops, a fabulous cool weather meal.

Roasted Winter Squash with Lime, Chili and Cilantro
  • Servings: 4
  • Difficulty: easy
  • Print

Ingredients

  • 1/4 cup extra-virgin olive oil
  • 1 Tbsp. grated lime zest, plus ¼ cup lime juice, plus lime wedges, to serve
  • 1/4 cup packed brown sugar
  • 2 1/2 lb. kabocha squash OR two 1¼-lb. acorn squashes, halved lengthwise, seeded and sliced into 1-inch-thick wedges
  • Kosher salt and ground black pepper
  • 2 medium garlic cloves, thinly sliced
  • 1 or 2 serrano OR Fresno chilies, stemmed and sliced into thin rings
  • 1/3 cup lightly packed fresh cilantro

Directions

  1. Heat the oven to 400°F with a rack in the upper-middle position. In a small bowl, whisk together the oil, lime juice and sugar until the sugar dissolves.
  2. On a rimmed baking sheet, toss the squash with half of this mixture, 2 teaspoons salt and ½ teaspoon pepper. Arrange the pieces cut side down and roast until browned on the bottom, 25 to 30 minutes.
  3. Using a wide metal spatula, flip each piece, drizzle with the remaining oil mixture and sprinkle with the garlic and chili(es). Roast until the squash is deeply caramelized and a skewer inserted into the largest piece meets no resistance, 10 to 15 minutes.
  4. Transfer to a platter, pouring over any juices. Top with the lime zest and cilantro and serve with lime wedges.

http://www.lynnandruss.com

Recipe by Courtney Hill for Milk Street

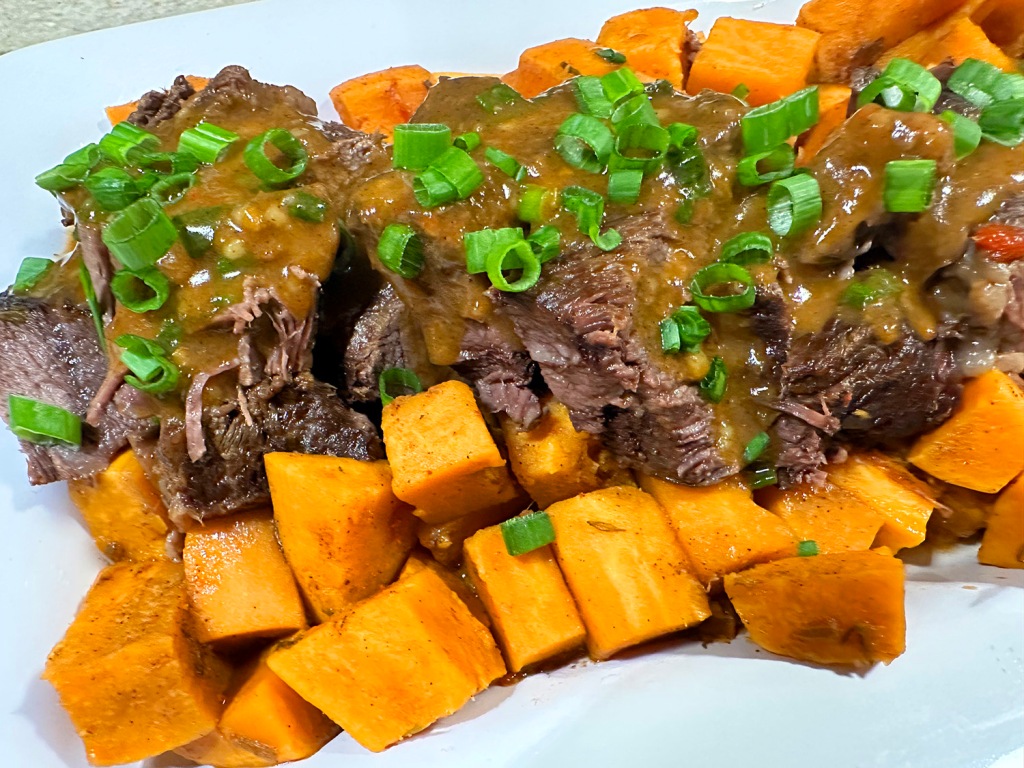
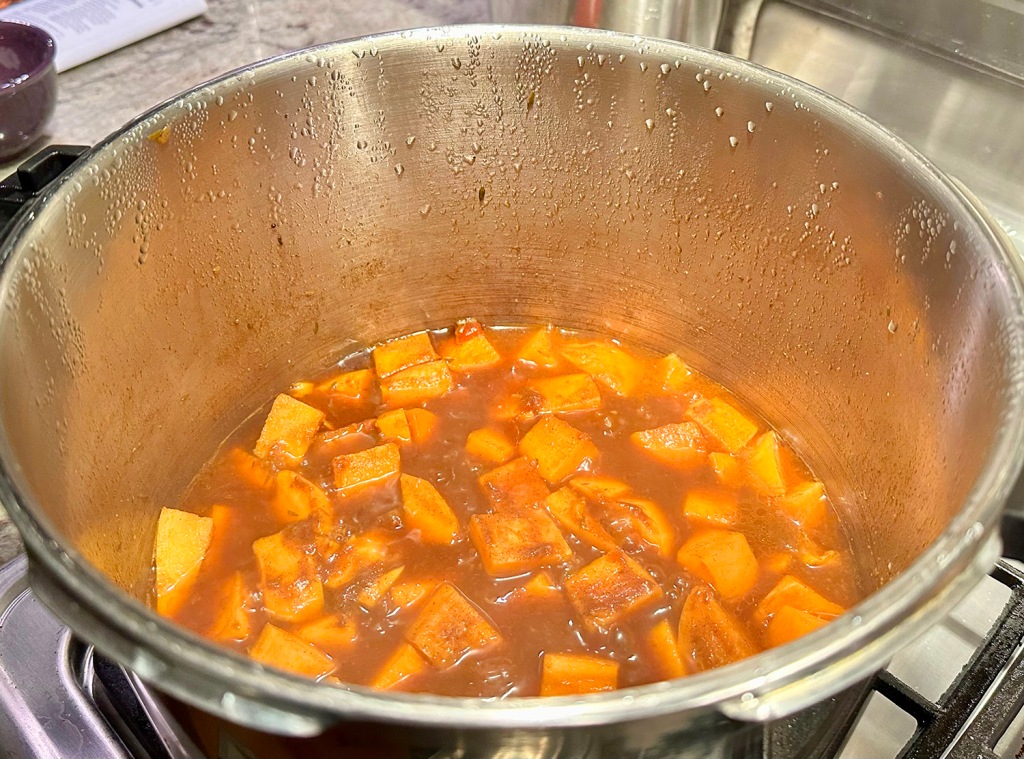
Jamaican-Style Ginger-Chili Pot Roast with Sweet Potatoes

This Instant Pot take on a Jamaican-style Sunday meal was in a recent issue of Milk Street Magazine. It is adapted from “Caribbean Cooking Made Easy” by British-Jamaican reggae musician and chef Levi Roots.

Changes that Milk Street made included swapping in flavor-packed beef chuck and orange-fleshed sweet potatoes, bolstered by bright chilies and ginger, savory scallions and earthy thyme. Then tomato paste and soy sauce added umami-rich depth, while brown sugar and warm allspice rounded everything out.

For faster, more even cooking, divide the chuck roast into two pieces by pulling it apart at its natural seams and trimming away excess fat. Tying both pieces with kitchen twine compacts the meat, allowing the roast to fit comfortably in the pot. You can pressure cook the beef quickly or slow cook it for a hands-off, all-day affair—regardless, it will emerge fragrant and fork tender. We did the fast method which took about 2 hours and 45 minutes, all said and done.

It’s difficult at best to find a 5-pound chuck roast, so if you have the same experience, just purchase two 2 1⁄2 pound roasts. Break each one down along the seam, remove large deposits of fat, then tie the two strips back together with kitchen twine.

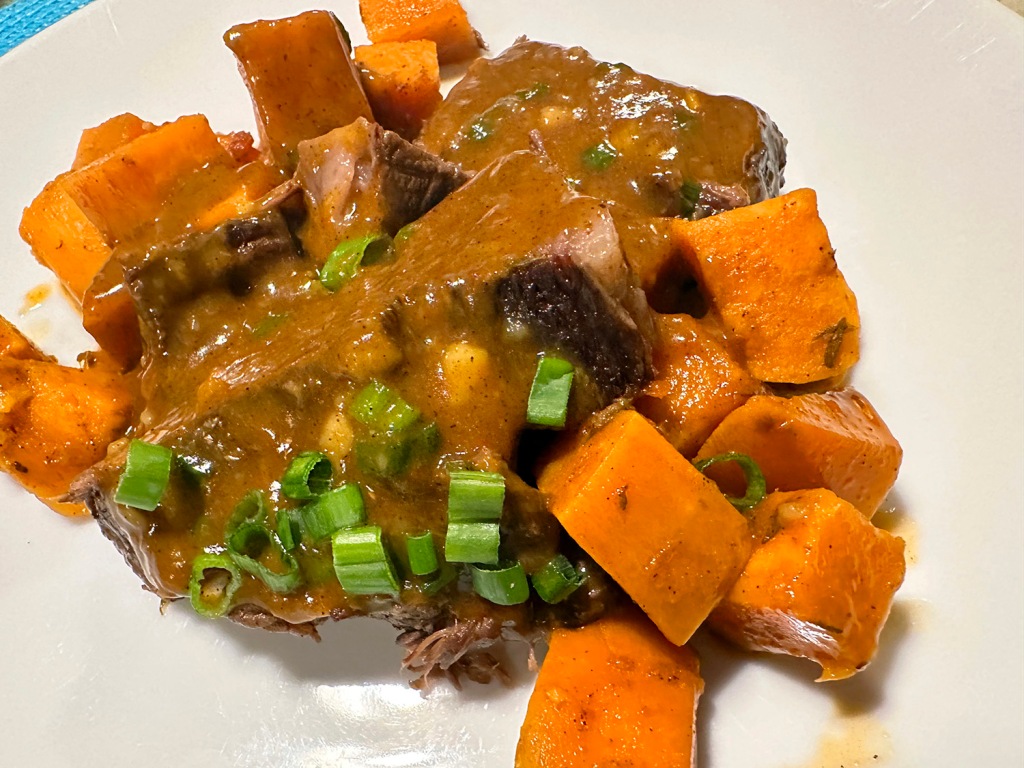
Our habaneros were on the large size and I was a bit concerned they might be overwhelming. However, when the meal was ready for plating and we tasted the stew, the chili kick was mild and added a perfect depth of flavor.

Probably one of the few people on earth who don’t own an Instant Pot, we used our large pressure cooker which worked just as well. We both agreed, this was one wonderful pot roast, and the tender sweet potato chunks and velvety sauce just enhanced the meal even more! Full of fruity, sweet and spicy notes, this roast is great garnished with scallion greens or cilantro and served with a crisp, green salad.

Jamaican-Style Ginger-Chili Pot Roast with Sweet Potatoes

  • Servings: 5-6
  • Difficulty: easy
  • Print

Ingredients

  • 3 Tbsp. neutral oil
  • 1 Tbsp. plus 1 teaspoon packed dark brown sugar
  • 2 Tbsp. tomato paste
  • 1 bunch scallions, thinly sliced, whites and greens reserved separately (reserve some greens as a garnish)
  • 2 Tbsp. minced fresh ginger
  • 2 habanero chilies, stemmed, seeded and thinly sliced
  • Kosher salt and ground black pepper
  • 2 Tbsp. soy sauce
  • 4 thyme sprigs
  • 1 1/2 tsp. ground allspice
  • 5 lb. boneless beef chuck roast, separated at the seams into 2 pieces, trimmed of fat, the 2 pieces tied with kitchen twine at intervals
  • 1 lb. sweet potatoes, peeled and cut into 1-inch chunks
  • 3 Tbsp. all-purpose flour
  • 1 Tbsp. lime juice

Directions

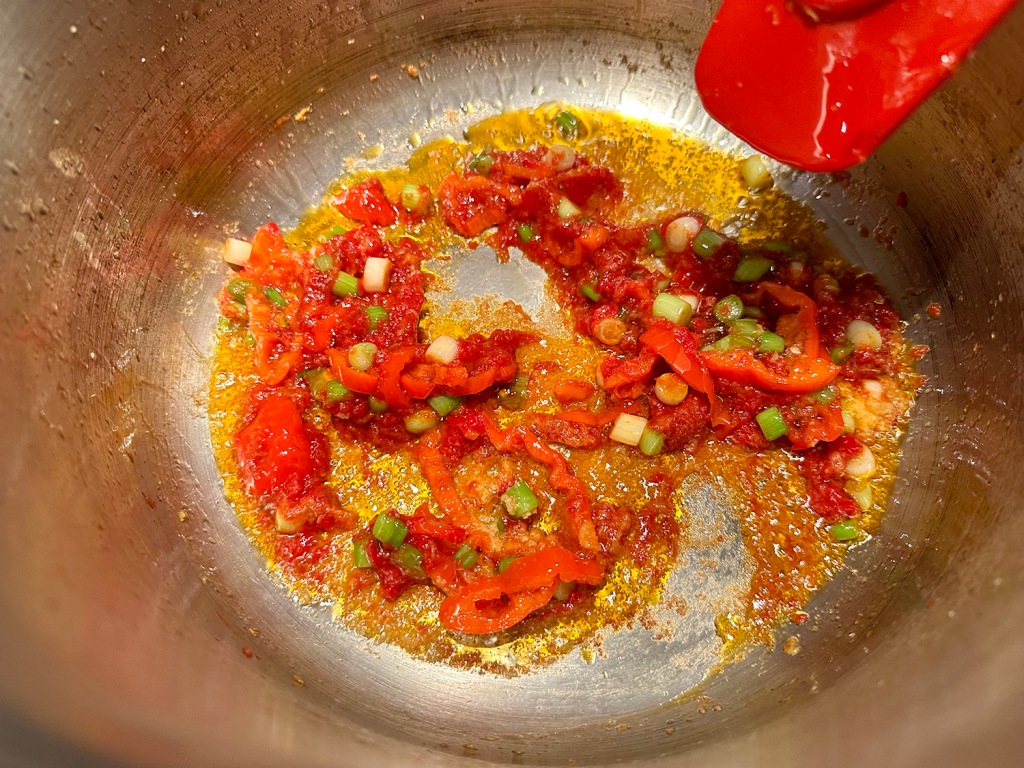
  1. On a 6-quart Instant Pot, select More/High Sauté. Heat the oil until shimmering, then add the sugar, tomato paste, scallion whites, ginger, chilies and ½ teaspoon salt. Cook, stirring, until lightly browned, about 3 minutes. Stir in the soy sauce, thyme, allspice and ½ cup water, then nestle in the beef.
  2. Lock the lid in place and move the pressure valve to Sealing. Press Cancel, then press Pressure Cook or Manual; make sure the pressure level is set to High. Set the cooking time for 1 hour.
  3. When pressure cooking is complete, allow the pressure to reduce naturally for 25 minutes, then release the remaining steam by moving the pressure valve to Venting. Press Cancel, then carefully open the pot.
  4. Transfer the beef to a cutting board and tent with foil.
  5. Skim off and discard the fat from the cooking liquid. Stir in the sweet potatoes and ¼ teaspoon salt. Select Normal/Medium Sauté and cook until the potatoes are tender, 10 to 15 minutes.
  6. Transfer the potatoes to a platter.
  7. In a small bowl, whisk the flour with 3 tablespoons water, then whisk the mixture into the cooking liquid. Add the scallion greens and simmer, stirring, until thickened, about 3 minutes. Press Cancel to turn off the pot.
  8. Remove and discard the thyme, then stir in the lime juice. Slice the beef and arrange on the platter, then pour on some sauce. Garnish the platter with some scallion greens or chopped cilantro, and serve the remaining sauce on the side.

http://www.lynnandruss.com

Recipe from Milk Street Magazine

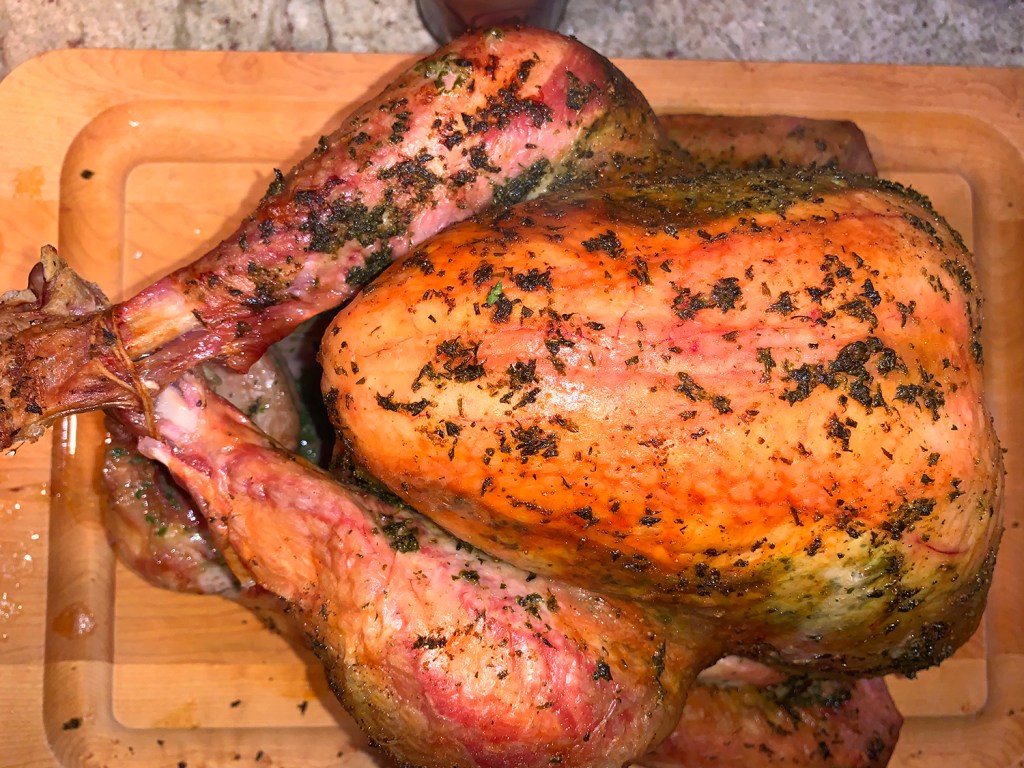
Herbed Roast Turkey with Gravy

Arguably, the most anticipated feasting day of the year in the U.S. is Thanksgiving. With just a few short weeks away, it’s time to start planning the meal(s). If turkey is at the bottom of your must-have meats because you think it is dry and tasteless, then you need to rethink your stance on the poultry subject with this recipe.

Not often (ever?) have we thought of serving a whole turkey with gravy on Super Bowl Sunday. But this recipe was under development and was intended for America’s Test Kitchen, Cook’s Illustrated and Cook’s Country recipe testers only. That’s us, and we were under a deadline to get it done.

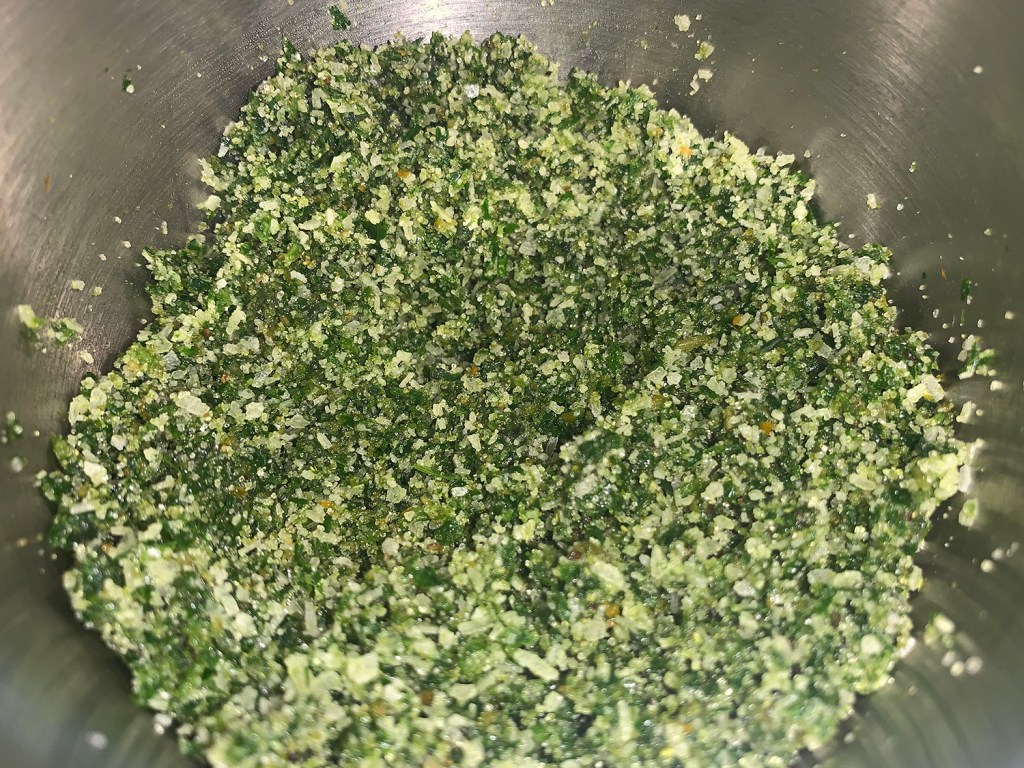
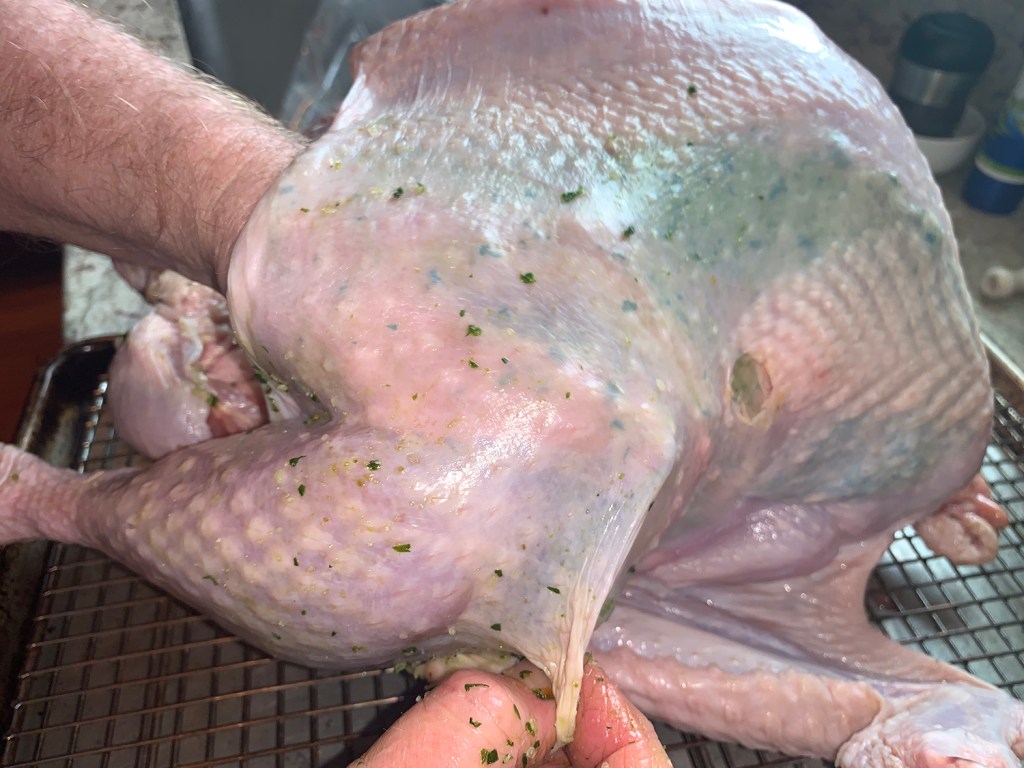
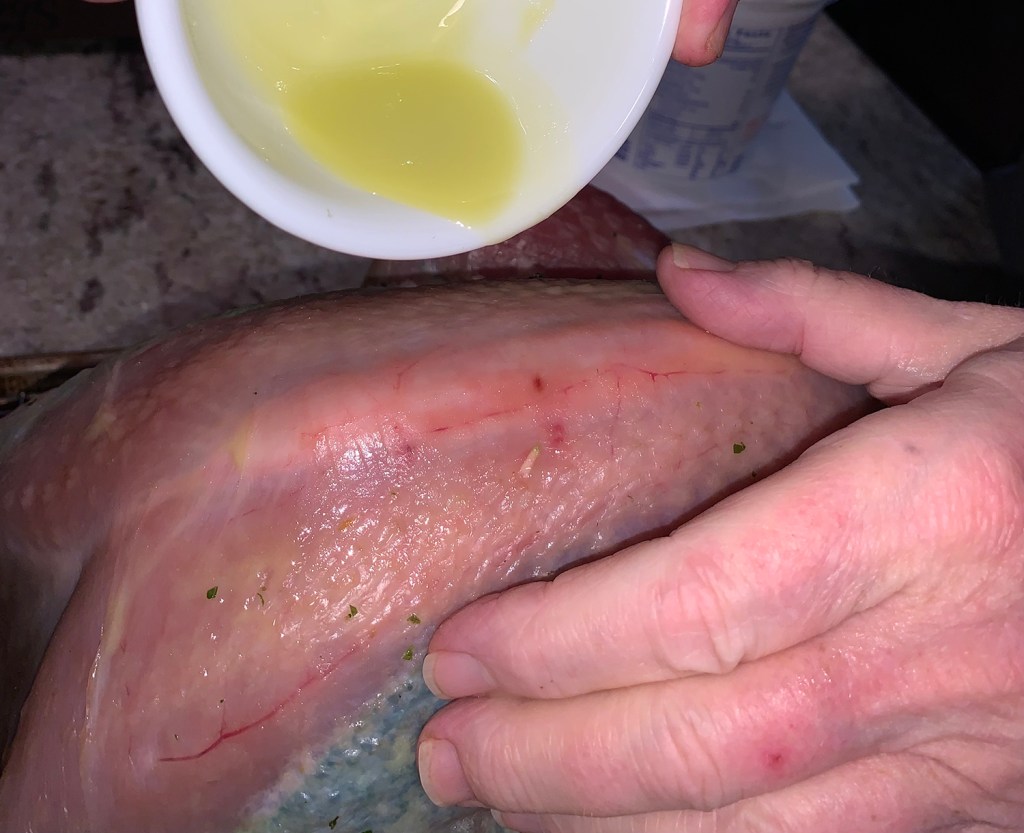
The meal was ready to eat just as half-time started… not bad timing… There are three options for the herb paste and we chose the Thyme-Fennel Paste. Keep in mind you need to make the paste and rub it under the skin of the turkey, and refrigerate the bird uncovered anywhere from 24 to 48 hours before you start cooking, so it takes a bit of planning on your end. We are debating which rub to make for this coming Thanksgiving. (List of rubs follows recipe.)

This process also requires a baking stone, and the success of the recipe is dependent on saturating the baking stone and roasting pan with heat. Luckily The Hubs received a rectangular one for Christmas a few months prior that fit perfectly under the roasting pan.

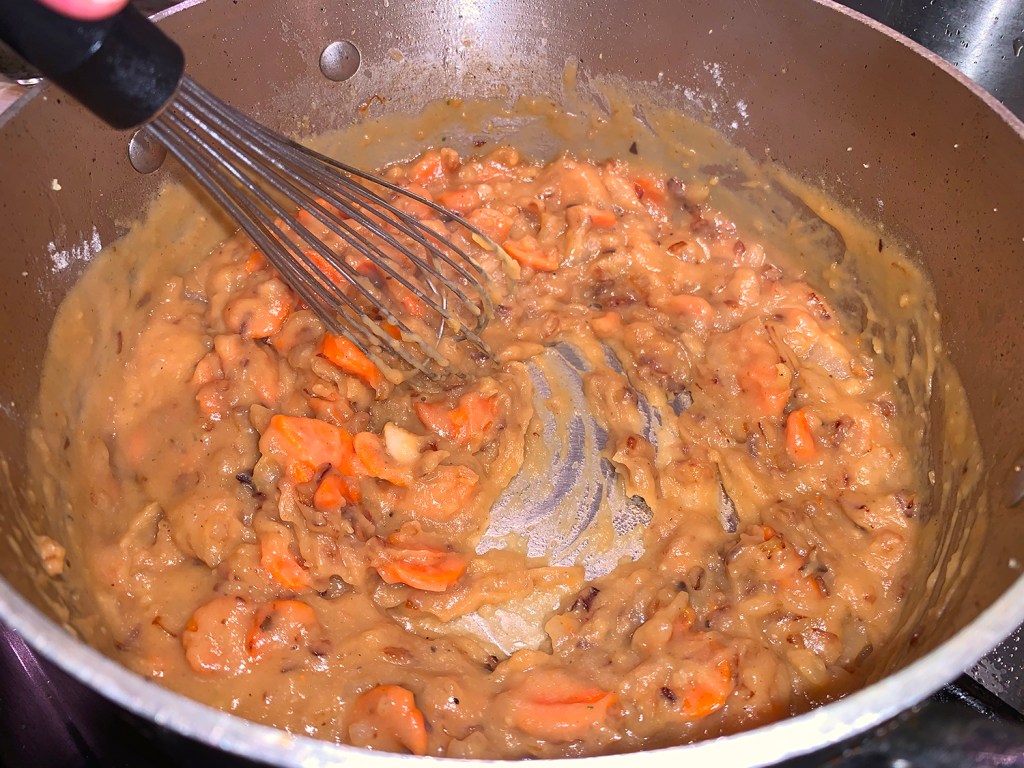
And don’t omit making the fabulous gravy, it brings everything on your plate altogether, and is so good you may be tempted to drink it…

Herbed Roast Turkey with Gravy

  • Servings: 10-12
  • Difficulty: moderate
  • Print

Ingredients

  • 1 recipe herb paste (recipes follow)
  • 4 Tbsp. kosher salt
  • 4 tsp. sugar
  • 1 (12- to 14-lb.) turkey, neck and giblets removed and reserved for gravy
  • 2½ Tbsp. vegetable oil, divided
  • 1 tsp. baking powder
  • 2 Tbsp. unsalted butter, melted
  • 1 small onion, chopped fine
  • 1 carrot, sliced thin
  • 5 Tbsp. all-purpose flour
  • 3 ¼ cups water
  • ¼ cup dry white wine
  • 5 sprigs fresh parsley
  • 2 bay leaves

Directions

  1. Combine ¼ cup herb paste, 4 tablespoons salt, and 4 teaspoons sugar in bowl. Place turkey, breast side up, on counter. Using your fingers, carefully loosen skin covering breast and legs. Rub 2 tablespoons herb mixture under skin of each breast, 4 teaspoons under skin of each leg, and remaining herb mixture inside cavity. Tuck wings behind back and tie legs together with kitchen twine. Place turkey on wire rack set in rimmed baking sheet and refrigerate, uncovered, for 24 to 48 hours.
  2. At least 30 minutes before roasting turkey, adjust oven rack to lowest position, set baking stone on rack, set roasting pan on baking stone, and heat oven to 500 degrees.
  3. Combine 1½ teaspoons oil and baking powder in small bowl. Pat turkey dry with paper towels. Rub oil mixture evenly over turkey. Cover turkey breast with double layer of aluminum foil.
  4. Remove roasting pan from oven. Drizzle remaining 2 tablespoons oil into roasting pan. Place turkey, breast side up, in pan and return pan to oven. Reduce oven temperature to 425 degrees and roast for 45 minutes.
  5. Stir 1 tablespoon herb paste into melted butter.
  6. Remove turkey from oven. Discard foil and brush herb butter evenly over turkey. Return turkey to oven, reduce oven temperature to 325 degrees, and continue to roast until breast registers 160 degrees and drumsticks/thighs register 175 degrees, 1 to 1½ hours longer.
  7. Using a spatula, loosen turkey from roasting pan; transfer to carving board and let rest, uncovered, for 45 minutes. While turkey rests, using wooden spoon, scrape up any browned bits from bottom of roasting pan. Strain mixture through fine-mesh strainer set over bowl. Transfer drippings to fat separator and let rest for 10 minutes. Reserve 3 tablespoons fat and defatted liquid (you should have 1 cup; add water if necessary). Discard remaining fat.
  8. Heat reserved fat in large saucepan over medium-high heat until shimmering. Add reserved neck and giblets and cook until well browned, 10 to 12 minutes. Transfer neck and giblets to large plate. Reduce heat to medium; add onion and carrot, and cook, stirring frequently, until vegetables are softened, 5 to 7 minutes. Add flour and cook, stirring constantly, until flour is well coated with fat, about 1 minute. Slowly whisk in reserved defatted liquid and cook until thickened, about 1 minute.
  9. Whisk in water, wine, parsley sprigs, and bay leaves. Return neck and giblets to pan and bring to simmer. Simmer for 10 minutes. Discard neck. Strain gravy through fine-mesh strainer, discarding solids. Stir in remaining herb paste and season with salt and pepper to taste. Transfer to serving bowl.
  10. Carve turkey and arrange on serving platter. Serve with gravy.

http://www.lynnandruss.com

Herb Paste Options

Herbes de Provence-Lemon Paste
Makes about 1/3 cup

  • ¾ cup chopped fresh parsley
  • ¼ cup herbes de Provence
  • 2 Tbsp. vegetable oil
  • 2 tsp. lemon zest
  • 2 tsp. garlic powder
  • ½ tsp. pepper

Process all ingredients in food processor, scraping down sides as necessary, until finely ground, about 30 seconds.

Thyme-Fennel Paste
Makes about 1/3 cup

  • 1 cup chopped fresh parsley
  • 2 Tbsp. minced fresh thyme
  • 2 Tbsp. vegetable oil
  • 1½ tablespoons ground fennel
  • 2 tsp. orange zest
  • 2 tsp. garlic powder
  • ½ tsp. pepper

Process all ingredients in food processor, scraping down sides as necessary, until finely ground, about 30 seconds.

Sage-Fenugreek Paste
Makes about 1/3 cup

→ Whole fenugreek seeds can be difficult to grind, it is strongly recommended to purchase the spice already ground.

  • 1 cup chopped fresh parsley
  • 2 Tbsp. minced fresh sage
  • 2 Tbsp. vegetable oil
  • 1½ tablespoons ground fenugreek
  • 2 tsp. garlic powder
  • ½ tsp. pepper

Process all ingredients in food processor, scraping down sides as necessary, until finely ground, about 30 seconds.

Hasselback Chicken Cordon Bleu

Simple is, as simple gets—and this recipe couldn’t be much simpler. With literally just a handful or so of ingredients, you end up with this pretty impressive dinner in less than an hour.

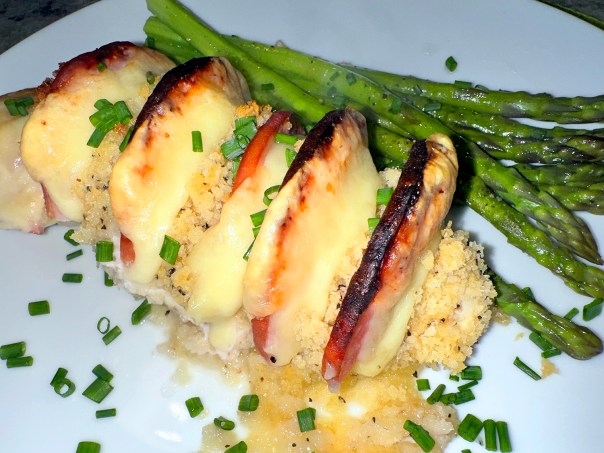
A fun play on hasselback potatoes, Ree Drummond’s chicken is stuffed with Canadian bacon, Swiss cheese and a crunchy breadcrumb topping. Bonus? You can make this dish in advance and freeze until you’re ready to eat.

Easily cut in half, or even for two, each breast is enough for one serving for most eaters. We used regular Dijon mustard as opposed to honey Dijon which is sweeter. The Swiss cheese slice quarters were taller than the bacon moons so the tops were folded down to equal the same height as the bacon halves.

Consider using a large enough parchment-lined baking sheet so that there is room around each breast for more crisping around the edges.

Hasselback Chicken Cordon Bleu

  • Servings: 8
  • Difficulty: easy
  • Print

Ingredients

  • 8 boneless, skinless chicken breasts
  • 1/2 cup honey, or regular Dijon mustard 
  • 2 cups panko breadcrumbs 
  • 6 Tbsp. salted butter, melted 
  • 1 Tbsp. kosher salt 
  • 1 tsp. freshly ground black pepper 
  • 12 slices Swiss cheese, cut into quarters 
  • 24 rounds Canadian bacon (about 1 lb.), cut into half-moons 

Directions

  1. Preheat the oven to 425°F.
  2. At a slight angle, cut 6 slits into each of the chicken breasts, making sure not to cut all the way through. You should leave roughly 1/4 inch unsliced. Transfer the slit chicken breasts to a parchment-lined baking sheet. Brush the top of each chicken breast with 1 tablespoon of the mustard.
  3. Mix together the breadcrumbs, melted butter, salt and pepper in a bowl. Sprinkle the breadcrumb mixture evenly over the chicken, using your hands to press the mixture into the mustard. Place a quarter piece of cheese and a half-moon piece of Canadian bacon into each of the slits in each chicken breast.
  4. Bake until the chicken is cooked through and the breadcrumbs are golden, 20 to 25 minutes (depending on the size of the breasts). Serve warm with your favorite sides.
  5. Freezing instructions: Once the uncooked chicken breasts are assembled, place 4 onto a wax paper-lined baking sheet; repeat with the remaining chicken breasts on a separate lined baking sheet. Transfer the baking sheets to the freezer until the chicken breasts are frozen through, at least 3 hours. Transfer the chicken breasts to 2 wax paper-lined foil pans. Label, date and freeze until ready to eat.
  6. When ready to eat, preheat the oven to 425°F. Bake the chicken breasts from frozen until the chicken is cooked through and the breadcrumbs are golden, about 40 minutes. Serve as directed above.

http://www.lynnandruss.com

Adapted from a recipe by Ree Drummond