Monthly Archives: December 2017

This Ain’t Your Typical American Pizzeria

Acqua e Farina brings truly “autentico” Neapolitan-style pizza to Newtown. Their pies are served from the bona fide, Naples-built brick oven, the kind you would find in Italy—transforming 12-inch pies with a crispy crust surrounding a hot, molten center with milky buffalo mozzarella, fresh tomato sauce and mouth-watering toppings.

The name of the eatery literally means water and flour, the two ingredients used in the making of the authentic pies. And just about everything inside the sit down and take out eatery on the Richboro Road is from Italy, from the decorative oven that cooks the pies in three minutes at temperatures hovering around 700 degrees, to the ingredients used to make the delectable pies.

IMG_1789
They also have bar seating (it’s a BYO) at the counter with a view of the Italian brick oven.

Acqua e Farina is owned by Pasquale and Anna Palino, who have already built a reputation in Newtown for authentic Italian cooking at their popular Vecchia Osteria, one of our local faves, a restaurant located just down the street. You can bet, it is an experience. There’s nothing pre-made here, it’s all made to order.

So when the three kids were in town for the holiday season, we decided it would be easiest to go out for pizza because we had cooked all day and would be cooking the following day on Christmas Eve. Russ happened to remember Veccia’s newish pizzeria and suggested we go there to check it out.

Since it was a Saturday night, I thought reservations would be in order. But when I called the hostess informed me they only take reservations for parties of 10 or more. Since our group was only half that size, I was a little disappointed. She must have heard the concern in my voice because she mentioned if I called just as we left the house, she’d put our name on the list. When we got there, sure enough they had a large corner table ready.

IMG_1807
David, Lynn, Russ, Julia and Daniel enjoy some wine while waiting for the food.

According to famed chef-author Lidia Bastianich, pizza in Naples should have a puffy, almost blistered rim or cornice, and a very thin center. The puffy cornice should be well roasted and have the taste of the wood oven. The mozzarella should be made from water-buffalo milk and should be in distinctive pieces (not one big oozing, stringy mess.) The tomato should be the uncooked pulp of San Marzano tomatoes, passed through a mill, and not too much of it on the pizza. A few pieces of fresh basil scattered on top and that’s it.

Well, this wasn’t just “a-couple-of-pies” kinda night. The large chalkboard behind us was touting some tempting appetizers so we had to order their Stuffed Meatballs and Gnocchi, which the gang mostly polished off before I remembered to take a couple of pics, but just goes to show you how good they were!

While devouring those, we ordered a pie-per-person (no, we did not finish them all!) All arrived but Dan’s, and when he inquired about his, the waitress told him they forgot to include it in the order, but it was just tossed in the oven. Had he known, we would have just told them to forget it because we had more than enough food. Then, as a consolation, they gave Dan a large order of their marinara-topped bread squares to go—like we needed that!

IMG_1809
One of the pies, the Quattro Formaggio, was no longer on the menu but since Russ had been given an older menu, they decided to honor it. I never understand why restaurants give you bread as an appetizer when you’re ordering a bunch of carb-loaded food?! Anyway, Dan got about a dozen more of these focaccia squares, above, on the house…

In no particular order, here are the pizzas:

IMG_1821
Margherita:
Fresh Tomato Sauce, Buffalo Mozzarella With Olive Oil & Basil

IMG_1812
Contadina: Fresh Tomato Sauce, Buffalo Mozzarella, Roasted Peppers, Kalamata Olives, Eggplant, Zucchini & Mushrooms With Oil & Basil

IMG_1829
Bufalina:
Grape Tomatoes, Buffalo Mozzarella, Arugula, Prosciutto Topped Shaved Parmigiano

IMG_1827
Boscaiola:
Mushrooms, Buffola Mozzarella & Sausage With Oil & Basil

IMG_1824
Quattro Formaggio: (Four Cheeses), Mozzarella, Ricotta, Gorgonzola, Parmesan & Basil

Holiday Riff on an Ice Cream Sundae

As promised, our dessert from Christmas Eve dinner with the adult “kids” was Profiteroles with Peppermint Ice Cream and Chocolate Sauce, a sure crowd pleaser, and one that Russ made many times over the course of their childhood years. Never heard of one? They are a filled French choux pastry ball with a typically sweet and moist filling.

This time though it started out a bit disastrous when he realized we were out of bittersweet chocolate. I did the HUGE food shopping the day before but it wasn’t on the “list,” and that morning Russ had just been to the super-crowded grocery store to pick up some overlooked items for our holiday dinner and he refused to go out again. Lynn to the rescue! I quickly Googled a substitute for bittersweet chocolate (knowing we had every other iteration of chocolate known to mankind on hand) and saved our marriage 😉

IMG_1746

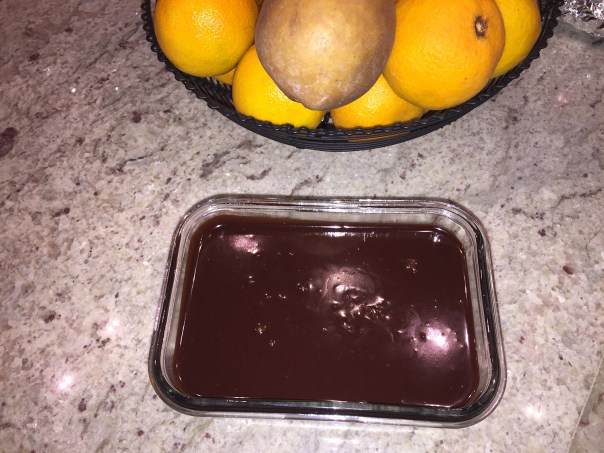
BTW, two possible replacements are: for 1 ounce of bittersweet chocolate substitute 2/3 ounce of unsweetened chocolate + 2 teaspoons of granulated sugar; OR 1 ounce semisweet chocolate + 1/4 teaspoon cocoa powder. We opted for the second combination and the sauce turned out velvety fabulous!

IMG_1756

Profiteroles are a classy way of creating an ice cream sundae. Hide the festive peppermint ice cream inside a crisp puff of pastry (the same dough that cream puffs are made from), then drizzle it with full-bodied chocolate sauce and a sprinkle of crushed candies. Voila, holiday on a plate!

IMG_1893

Now about that ice cream. Can you believe the supermarket was not carrying peppermint ice cream at Christmas time? Well, that’s where a little food ingenuity comes in handy. Russ knew it might be a possibility we wouldn’t find any (I was confident it wouldn’t be an issue—ha), so he coached me ahead of time to get vanilla and we’d make our own with a bit of peppermint extract and some crushed candy canes. Sounds simple enough, right?

However, there’s a BIG “but” coming—Russ added way too much peppermint extract to the point it was almost bitter tasting. His son Dan did a taste test for us and he concurred, not edible. Then a few hours later both Julia and David arrived and also sampled it and declared the dessert resembled a very strong breath mint—not the flavor profile we were aiming for…

So now Russ had to go back to the store anyway, and this time on Christmas Eve! I happened to notice a posting on Facebook that our local Shady Brook nursery farm stand (with a decent food store and holiday light show) was promoting peppermint ice cream. Why the H they couldn’t have posted that a day or so prior?!?

IMG_1837

Did he score? You betcha! Uncle Dave’s Handmade Peppermint Stick ice cream personally scooped for Russ by Uncle Dave himself. In fact, they got into a conversation about profiteroles with Uncle Dave’s favorite being pistachio, but once he heard about Russ’ peppermint concoction, he vowed that would be his next creation. Russ opened the container as soon as he got home and three of us sampled it immediately and declared it a winner! The Christmas Eve tradition was saved…

The directions tell you to make ice cream balls ahead of time, but we omitted that step and just scooped the frozen stuff right out of the container. (However, the instructions still contain making the balls if you so insist.)

Profiteroles with Peppermint Ice Cream and Chocolate Sauce

  • Servings: 4
  • Difficulty: easy
  • Print

Ingredients:

  • 1 quart peppermint ice cream (or make your own if you need to)
  • 6 tablespoons unsalted butter, cut into pieces
  • 3/4 cup water
  • 1/4 teaspoon salt
  • 3/4 cup all-purpose flour
  • 3 large eggs

For chocolate sauce:

  • 1/2 cup sugar
  • 1 cup heavy cream
  • 7 ounce fine-quality bittersweet chocolate (no more than 60% cacao if marked), finely chopped
  • 1/2 teaspoon pure vanilla extract
  • 1 tablespoon Cognac or brandy (optional)

Directions

Make profiteroles:

  1. Chill a small metal baking pan in freezer. Form 18 ice cream balls with scoop and freeze in chilled pan at least 1 hour (this will make serving faster).
  2. Preheat oven to 425°F with rack in middle. Butter a large baking sheet.
  3. Bring butter, water, and salt to a boil in a small heavy saucepan, stirring until butter is melted. Reduce heat to medium, then add flour all at once and cook, beating with a wooden spoon, until mixture pulls away from side of pan and forms a ball, about 30 seconds. Transfer mixture to a bowl and cool slightly, 2 to 3 minutes.
    IMG_1759
  4. Add eggs 1 at a time, beating well with an electric mixer after each addition.
    IMG_1760
  5. Transfer warm mixture to pastry bag and pipe 15-18 mounds (about 1 1/4 inches wide and 1 inch high) 1 inch apart on a buttered baking sheet.
    IMG_1766
    IMG_1767
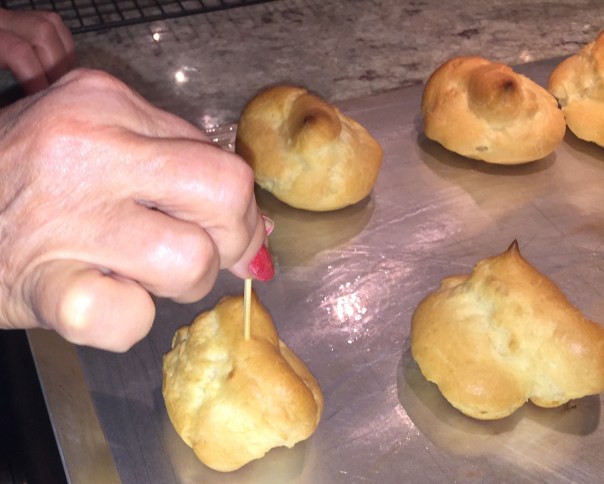
  6. Bake until puffed and golden brown, 20 to 25 minutes total. Prick each profiterole once with a skewer or toothpick, then return to oven to dry, propping oven door slightly ajar, 3 minutes. Cool on sheet on a rack.
    IMG_1769
    IMG_1774

Make chocolate sauce:

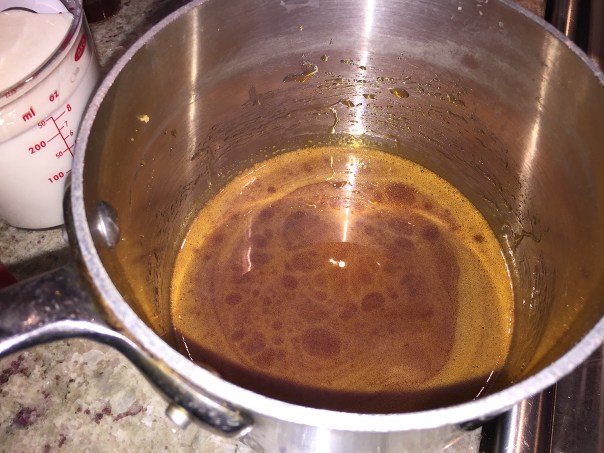
  1. Heat sugar in a 2-quart heavy saucepan over medium heat, stirring with a fork to heat sugar evenly, until it starts to melt, then stop stirring and cook, swirling pan occasionally so sugar melts evenly, until it is dark amber.
    IMG_1748
  2. Remove from heat, then add cream and a pinch of salt (mixture will bubble and steam). Return to heat and cook, stirring, until caramel has dissolved.
  3. Remove from heat and add chocolate, whisking until melted, then whisk in vanilla and Cognac (if using, and we did). Keep warm, covered.

Serve profiteroles:

  1. Halve profiteroles horizontally, then fill each with a ball (or scoop) of ice cream. Put three profiteroles on each plate and drizzle generously with warm chocolate sauce.

IMG_1889

IMG_1890

A couple of notes:

·Ice cream balls (if making) can be frozen up to 1 day (cover with plastic wrap after 1 hour).

·Profiteroles can be baked 1 day ahead and cooled completely, then kept in an airtight container at room temperature. Recrisp on a baking sheet in a 375°F oven 5 minutes. Cool before filling.

http://www.lynnandruss.com


A Sinfully Decadent Holiday Meal Extravaganza

Sometimes you have to throw caution (or more precisely, diets) to the wind and just go for the gusto. And Christmas Eve dinner this year was one of those times. What was on the menu? Well the star of the show was definitely the standing prime rib roast. Mind you, this was a near 9-pounder of well-marbled prime beef rib—and a pretty penny to boot. But all three kids (they’ll always be “the kids” no matter what their age!) were going to be joining us for the feast, and we wanted it to be special.

IMG_1876

The reasons why this roast works so perfectly is the low and slow start which delivers perfectly, evenly cooked, medium-rare doneness all the way from edge to center. Then blasting the prime rib with heat just before serving gives you a crackling-crisp, browned crust. By cooking it at a low temperature, you make sure to minimize the volume of beef that comes above the ideal final temperature and almost completely eliminate the gray band of overcooked meat.

IMG_1859
A few hours before dinner we all enjoyed some Gambas al Ajillo, sizzling garlic shrimp.

Whether you buy prime or select, fresh or dry-aged, corn-stuffed or grass-fed, if you don’t cook it right, it ain’t going to be good. Period. Here is chef/author Kenji’s definition of perfection, in three commandments:

Commandment I: The Perfect Prime Rib must have a deep brown, crisp, crackly, salty crust on its exterior.
Commandment II: In the Perfect Prime Rib, the gradient at the interface between the brown crust and the perfectly medium-rare interior must be absolutely minimized (as in, I don’t want a layer of overcooked meat around the edges).
Commandment III: The Perfect Prime Rib must retain as many juices as possible.

The best part? By cooking with this two stage method, there is a much larger window of time to serve the beef allowing you time to relax with your family/guests. Once you get past the initial low-temperature phase of cooking, so long as the roast is covered in foil, it stays warm for up to almost two hours. All you have to do is pop it back into its 550°F oven 8 minutes before guests are ready to eat, and the roast emerges hot, sizzling, and ready to carve—no need to rest it after that, since the only part that is being affected is the very exterior.

Slow-roasted prime rib with a rich red wine jus and a side of braised oxtail makes the perfect holiday centerpiece. Serves 3 to 12, depending on size of roast. We actually did make a “reverse sear” Prime Rib for Christmas a few years ago, and you can check out that blog here. The directions are somewhat different from this recipe, but the concept is the same.

From 2 to 6 ribs (3-12 pounds), this recipe works for roasts of almost any size. Plan on one pound of bone-in roast per guest (or more if you want leftovers 🙂 ) For best results use a dry-aged prime-grade or grass-fed roast. Cooking time is identical regardless of the size of the roast. To improve the crust, allow it to air-dry, uncovered, in the refrigerator overnight before roasting. Seasoning with salt up to a day in advance will help the seasoning penetrate the meat more deeply, which is an extra step that we made sure to follow.

IMG_1780

Totally sinful, but well worth it—every now and again. What are you waiting for? Here’s your preplanned menu for a New Year’s celebration…

Ingredients

  • 1 tablespoon vegetable oil
  • 2 pounds beef shins or oxtail
  • 1 pound beef or veal soup bones
  • 1 large carrot, peeled and roughly chopped (about 1 1/2 cups)
  • 2 ribs celery, roughly chopped (about 1 1/2 cups)
  • 1 large onion, peeled and roughly chopped (about 1 1/2 cups)
  • 1 (750ml) bottle dry red wine
  • 2 bay leaves
  • 4 sprigs fresh thyme
  • 4 parsley stems
  • 1 quart chicken stock, preferably homemade
  • 1 standing rib roast (prime rib)
  • Kosher salt and freshly ground black pepper
  • 4 tablespoons unsalted butter

Directions

  1. Adjust oven rack to lower position and preheat oven to 250°F. Heat oil in a large Dutch oven over high heat until lightly smoking. Add beef shins or oxtail and soup bones. Cook, flipping and stirring pieces occasionally, until well browned on all surfaces, about 15 minutes. Using tongs, transfer beef to a large plate and set aside.
    IMG_1844
    IMG_1845
  2. Add carrot, celery, and onion to pot and cook, stirring occasionally, until starting to lightly brown, about 8 minutes.
    IMG_1848
  3. Add wine, bay leaves, thyme, and parsley and cook, scraping up browned bits from bottom of pot. Bring to a boil and cook until reduced by half, about 10 minutes.
    IMG_1849
  4. Add chicken stock, bring to a boil, and cook until reduced by half, another 10 minutes.
    IMG_1850
  5. Arrange beef shins/oxtail and bones in the bottom of a large roasting pan. Pour entire contents of Dutch oven on top of bones and spread vegetables around into an even layer. Place a V-rack on top, arranging meat and vegetables so that rack rests on bottom of pan.
    IMG_1854
  6. Season rib roast generously with salt and pepper on all sides and place on rack with fat cap facing up. Place in oven and cook until center of roast registers 125°F on an
  7. Remove roast from oven, transfer to a large plate, and tent loosely with aluminum foil. Place in a warm spot in the kitchen and allow to rest while you finish the jus. Meanwhile, increase oven temperature to highest possible setting, 500 to 550°F.
    IMG_1857
  8. Using tongs, remove shins/oxtail from roasting pan and transfer to a medium saucepan. Pour remaining contents of pan through a fine-mesh strainer into saucepan. Discard strained vegetables and bones. (Reserve marrow, if you like, for spreading on bread or mixing back into jus.)
  9. Using a ladle, skim excess fat off top of liquid and discard. Bring liquid to a boil, reduce to a simmer, and cook until shins/oxtail are completely tender, about 20 minutes. Transfer shins/oxtail to a serving plate and tent with foil to keep warm. Season jus to taste with salt and pepper (you may not need any salt). Stir in butter off heat. Keep warm.
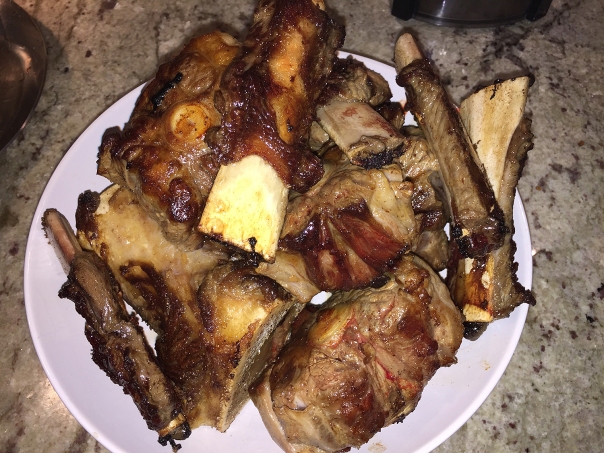
    IMG_1879A platter of the cooked oxtails, above.
  10. Wipe out roasting pan and replace V-rack. Remove foil from prime rib and place on top of rack with fat cap facing up. Ten minutes before guests are ready to be served, place roast back in hot oven and cook until well browned and crisp on the exterior, 6 to 10 minutes.
    IMG_1867
  11. Remove from oven, carve, and serve immediately, serving shin/oxtail meat on the side and passing hot jus around the table.
    IMG_1871

Prime Rib recipe from J. KENJI LÓPEZ-ALT

Our next dilemma was what to serve with the Prime Rib, a Potato Gratin or my famous Twice-Baked Potatoes? Then Russ threw in a curve ball with the Whipped Potatoes with Horseradish recipe by a favorite chef/author Molly Stevens (he didn’t even realize it was one of her recipes until I pointed out the fact.) Instant winner!

IMG_1788

Yes, they are a bit more involved, but after all ’tis the season—plus you can make a day ahead, see note below. While most reviewers were fine with the quantity of horseradish, both Russ and I thought it was too subtle, and next time we’re going to double the amount. And we will also add less milk, the consistency was just a bit too soupy for us.

IMG_1744 2

Ingredients

  • 2 tablespoons unsalted butter, melted, divided, plus 1/2 cup (1 stick), cut into 1″ cubes, room temperature
  • 2 1/2 pounds russet potatoes, peeled, cut into 2″ pieces
  • Kosher salt
  • 4 ounces cream cheese, cut into 1″ cubes, room temperature
  • 2 tablespoons prepared horseradish
  • 2/3 cup whole milk, warmed
  • Freshly ground black pepper
  • 1 bunch scallions, white and pale-green parts only, minced (about 2/3 cup loosely packed)
  • Hungarian sweet paprika

Directions

  1. Brush an 8x8x2″ or other 6-cup baking dish with 1 tablespoon melted butter. Place potatoes in a large pot and add cold water to cover by 1″. Add a large pinch of salt; bring to a boil, then reduce heat to medium-low. Cover with lid slightly ajar and gently simmer until potatoes are tender, about 20 minutes.
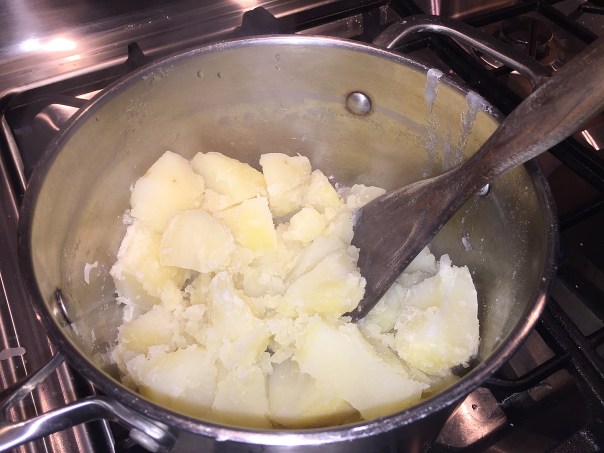
  2. Drain potatoes; return to same pot. Shake and stir with a wooden spoon over very low heat until dry.IMG_1781
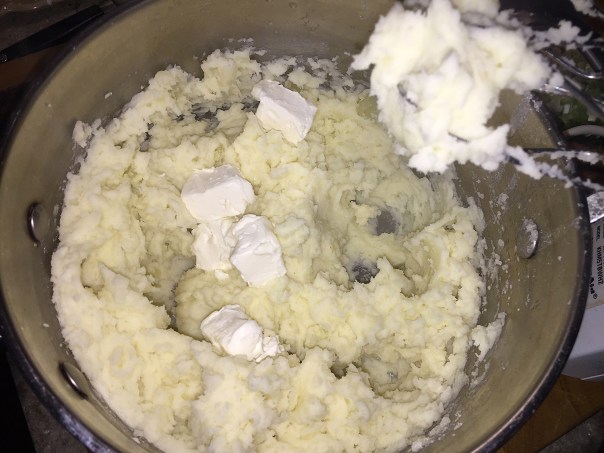
  3. Then, using a potato masher, mash coarsely. Using a hand mixer, beat 1/2 cup butter into potatoes, a few pieces at a time, until blended. Beat in cream cheese, adding a few pieces at a time, then horseradish.
    IMG_1783
  4. With motor running, gradually add milk, beating until potatoes are light and fluffy, 4-5 minutes. Season well with salt and pepper.
    IMG_1784
  5. Stir in scallions. Scrape potatoes into prepared dish.
    IMG_1786
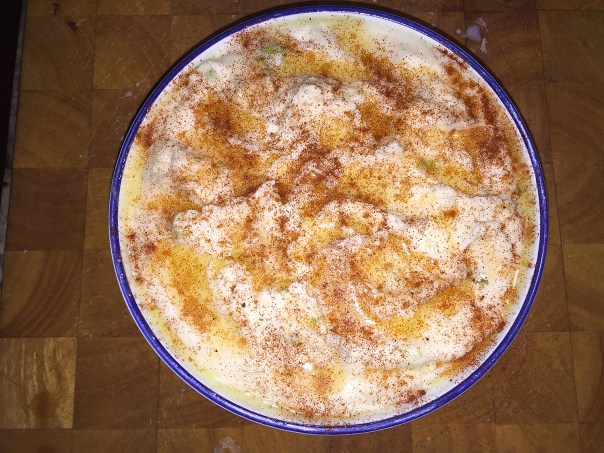
  6. Use a spatula to create peaks across the surface. Drizzle potatoes with remaining 1 tablespoon melted butter and sprinkle with paprika. DO AHEAD: Potatoes can be made 1 day ahead. Let stand at room temperature to cool. Cover and chill.
    IMG_1787
  7. Preheat oven to 350°F. Bake potatoes, uncovered, until they are heated through and top is golden, about 40 minutes (if chilled, add 10 minutes).

Of course, what’s a special meal without dessert? For this dinner the answer was Profiteroles with Peppermint Ice Cream. But you’ll have to wait until the next blog…

Christmas Quiche

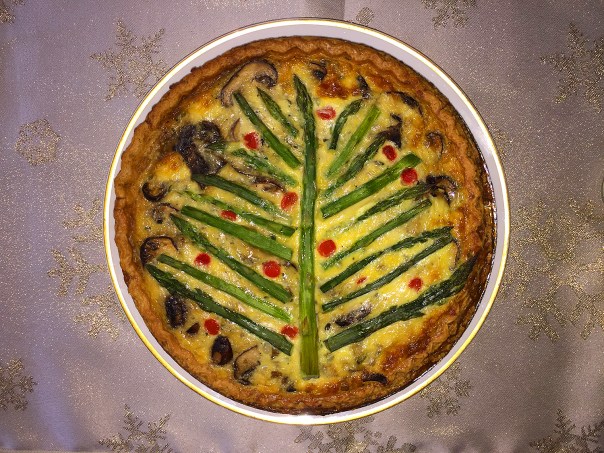
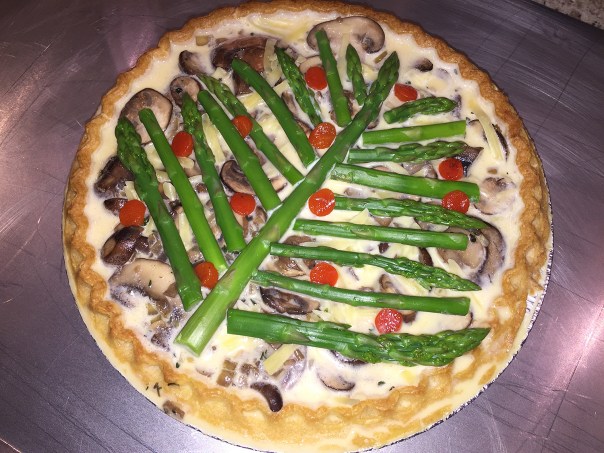
With Russ making Crème Brûlée French Toast and sausage links for the kids for Christmas Eve brunch (neither of which I eat), I wanted to indulge myself with a holiday treat that appealed to my culinary senses. I’ve always loved quiche, especially if it’s full of healthy veggies, so after a little online research, I concocted this festive looking Christmas Quiche using asparagus, mushrooms and shallots.

IMG_1741

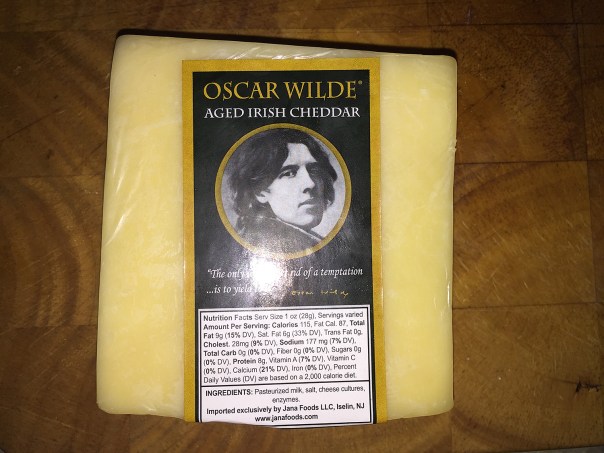
Of course, what’s a fabulous quiche without a great cheese? Here’s where you can zero in on what strikes your fancy, in my case it was Oscar Wilde Aged Irish Cheddar.

IMG_1725

It may be a bit tricky figuring out what lengths to cut the tree “branches” but just make sure to cut two of each size for both sides of the tree. I used both the asparagus tips and some of the cut stalks to assemble mine, but you could also use only tips. Any leftovers save for a salad or stir-fry.

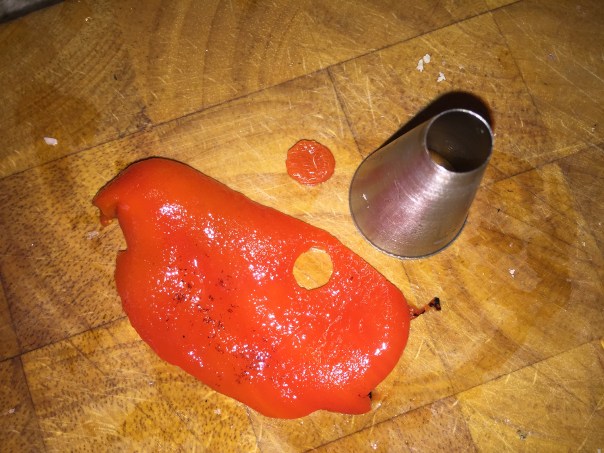
For ornamentation, I used the smaller end of my large circular pastry bag tip to cut out little circles from a roasted red pepper. Originally I planned on using a piquillo pepper but we were fresh out and the store wasn’t carrying any. (This is an item Russ often orders online from a Spanish supply company.)

IMG_1732

The name piquillo means “little beak.” Traditionally piquillo peppers are grown in Northern Spain and are hand picked then roasted over open fires. The peppers are then peeled, all by hand then packed in jars or tins. The roasting of the pepper gives it a rich, spicy-sweet flavor. Jarred roasted red peppers make a fine substitute.

Merry Christmas from our table to yours!!

Christmas Quiche

  • Servings: 6
  • Difficulty: easy
  • Print

Ingredients

  • 1 9″ deep dish Pie Crust, precooked
  • 1/2 bunch thin Asparagus
  • 1/2 cup sliced Mushrooms
  • 1 large Shallot, minced
  • 2 teaspoons fresh thyme, chopped
  • 1 Piquillo or Roasted Red pepper for ornamentation, cut into small circles
  • 1 tablespoon Butter
  • 1 1/2 cups shredded Cheddar
  • 5 Large Eggs
  • 1/2 cup Heavy Cream
  • 1/2 cup Whole Milk
  • 1/2 teaspoon Salt, divided
  • 1/4 of white Pepper, divided

Directions

  1. Precook your pie crust according to package directions and let cool.
    IMG_1722
  2. Heat the oven to 375 degrees.
  3. Precook the shallot, mushrooms and thyme in a medium-low sauté pan with the butter for about 5 minutes to soften—this helps bring out their flavors. Add 1/4 teaspoon salt and 1/8 teaspoon white pepper.
    IMG_1726
  4. While doing this, blanche the asparagus pieces in boiling water for 1 minute, then quickly cool under cold water, drain thoroughly. This will help preserve the bright green color.
    IMG_1718
    IMG_1721
  5. Layer the shredded cheese first, then add the mushroom mixture in the pie crust.
    IMG_1730
    IMG_1731
  6. Mix the eggs, cream, milk, and remaining salt, and pepper. Either beat them by hand for 2 minutes, or use a mixer for 1 minute. You want the eggs to be light and fluffy.
    IMG_1727
  7. Pour the egg mixture over the vegetables and cheese and into the pie crust. Fill the crust as much as possible, without letting the egg spill out; but saving a little room for the asparagus.
    IMG_1736
  8. Arrange the asparagus pieces into a tree formation and gently place the red pepper circles, slightly overlapping the branches, to resemble ornaments.
  9. Bake for 45-55 minutes, until the center of the quiche has firmed up. Check halfway through the cooking time and if the crust is starting to get too brown, cover very loosely with a sheet of tinfoil. My quiche took the entire 55 minutes.
    IMG_1738
  10. Cool for 20 minutes before serving; or cool completely then cover with plastic wrap to refrigerate.
  11. When you are ready to reheat the quiche, preheat your oven to 350 degrees F. Remove the plastic wrap and place the quiche in the oven in its original pan for about 15-20 minutes or until the center is warmed through.


http://www.lynnandruss.com

A Meatloaf for the Masses

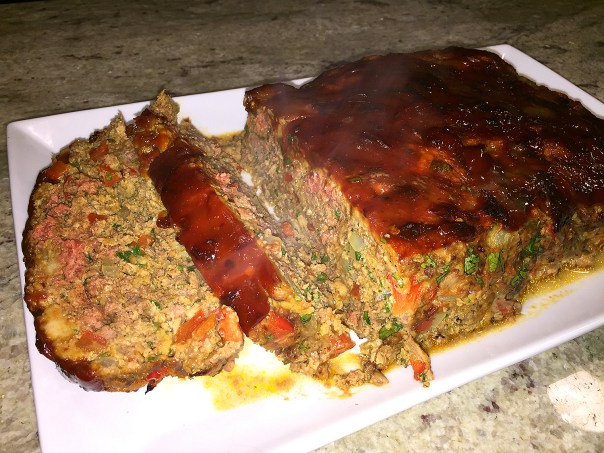
Feeding a crowd? This mammoth Spicy Southwestern Meatloaf should fit the bill. Of course I did use 50% more bison than called for because the meat was packaged in 3/4-pound parcels and I bought two. In fact, if you’ve never tried bison before, this may be a good introduction to try the lean protein. Considered by many to be healthier than even grass-fed beef and richer in flavor (despite being lower in saturated fat), bison meat might soon become your favorite protein source.

IMG_1513

Bison are actually the largest indigenous animals native to North America. Like all cuts of meat, bison meat—nicknamed “the other red meat”—is a top protein food and supplies a variety of other essential nutrients: B vitamins, zinc and iron, just to name a few. But it might also be a step above beef and poultry when it comes to sustainability, heart health and even taste.

Just like with beef, chicken or turkey, the exact amount of nutrients you find in buffalo depends a lot on the specific cut of bison meat you get. Leaner cuts like top sirloin and the equivalent to London broil are all lower in calories and fat compared to other fattier cuts of the animal. In fact, the highest-quality parts of the bison (and usually most expensive too) are very close to roasted, skinless chicken breast or even fish.

Bison ranching can be more sustainable and environmentally friendly than some forms of cattle ranching. But it’s also likely true that on the whole, a random sampling of bison meat is probably more sustainable than a random sampling of beef. The positive elements are that bison are generally acknowledged to be the hardier species, without requiring shelter even in winter.

Cattle have over time been genetically tampered with to be “meat wagons.” The result is an animal that’s largely dependent on ranchers for survival and general health. Bison, on the other hand, are native to North America and genetically unchanged from the herds that roamed the West and Great Plains until the end of the 19th century. Because they have naturally adapted to the environment, they’re a much heartier animal that thrives with little, if any, assistance.

But I digress. What about that recipe? This Spicy Southwestern Meatloaf is zesty but not hot—the ingredients compliment each other for flavor that is layered and complex. Three kinds of chiles make this pork and bison meatloaf zing all over: fresh jalapeños and ancho chile powder in the mix, and chipotle chiles in the ketchup glaze.

About that glaze. We tripled the amount, and it barely covered the top, let alone drip down the sides. Oh, in case you don’t have cilantro on hand (I had finished mine up the previous evening), or don’t like the herb, use parsley instead.

IMG_1501

Ingredients

  • 2 Tbs. canola or olive oil
  • 1 medium yellow onion, chopped
  • 1 cup small-diced red bell pepper
  • 2 large cloves garlic, finely chopped
  • 4 oz. medium-coarse white bread, such as Italian or French, cut into 2-inch pieces (about 2-1/2 cups)
  • 1 cup whole milk
  • 1 lb. ground pork
  • 1 lb. ground bison
  • 2 large eggs
  • 4 Tbs. chopped fresh cilantro
  • 1 Tbs. finely chopped jalapeño pepper (seeded if you like)
  • 1 Tbs. mild chile powder, such as ancho
  • 2 lightly packed tsp. finely grated lime zest
  • 2 tsp. ground cumin
  • 1 Tbs. Worcestershire sauce
  • Kosher Salt
  • Freshly ground black pepper
  • 2 Tbs. ketchup mixed with 1 Tbs. pureed canned chipotle in adobo (we more than tripled this amount)

Directions

  1. Heat 2 Tbs. of the oil in a 10- to 12-inch skillet over medium-low heat. Cook the onion, bell peppers, and garlic, stirring frequently, until softened and just beginning to brown, 6 to 8 minutes. Transfer to a large bowl and let cool until warm.
    IMG_1502
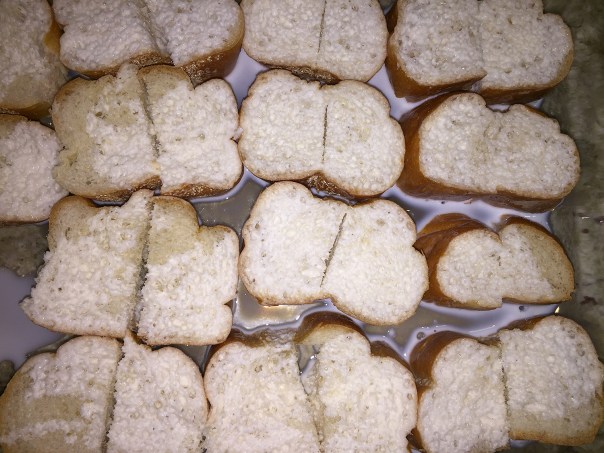
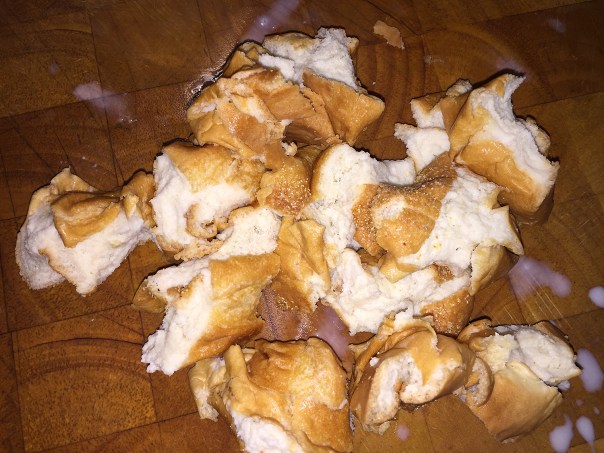
  2. In a shallow dish that holds it in a single layer, soak the bread in the milk, flipping once, until soggy but not falling apart, 5 to 10 minutes, depending on the coarseness and freshness of the bread. Lightly squeeze a handful of bread at a time to remove some of the milk (it should be wet but not drenched). Finely chop and add to the bowl with the onion mixture.
    IMG_1503
    IMG_1504
  3. Position a rack in the center of the oven and heat the oven to 375°F.
  4. Add the bison, pork and eggs to the onion mixture. Scatter the cilantro, jalapeño, chile powder, lime zest, and cumin over the meat, and then sprinkle with the Worcestershire, 2-1/4 tsp. salt, and 1/2 tsp. pepper. Use your hands to gently mix all the ingredients until just combined; try not to compact the mixture as you do this.
    IMG_1505
  5. Line a 9×13-inch baking pan with parchment. Transfer the meatloaf mixture to the baking pan and form into a 10×4-inch rectangular block (it becomes loaf-shaped as it cooks). Spread the chipotle ketchup over the top and lightly down the sides of the meatloaf to glaze it.
    IMG_1506
  6. Bake until an instant-read thermometer registers 160°F in the center of the meatloaf, 40 to 55 minutes.
  7. Let the meatloaf rest for 10 minutes. Lifting out using the sides of the parchment paper, transfer to a cutting board or serving platter and cut into 3/4- to 1-inch-thick slices.
    IMG_1514
    This baby fed us for numerous lunches and dinners…

By Allison Ehri Kreitler

Raising the Bar on Chicken Piccata

Chicken Piccata needs little introduction, for better or for worse. A truly good version—chicken breasts pounded thin, lightly dusted with flour, pan-seared, and bathed in a rich lemon-butter pan sauce, perhaps with scatterings of capers, garlic, shallot, and parsley—deserves nothing but mouth-watering praise. Yet piccata can also be excruciatingly bad, featuring dry, tough chicken drowning in a sauce that’s either boring or brash. Been there, right?

IMG_1674

A common approach is to flatten a whole breast with a meat pounder, which can tear the flesh. In the Cook’s Illustrated test kitchen, they take it to the next level. To mimic their success, halve each breast crosswise and then split the thick side horizontally to create three similar-size pieces that require only minimal pounding. Season the meat to help it retain moisture, toss the cutlets with salt and pepper and set them aside for 15 minutes.

At this point, the cutlets are normally dredged in flour and seared in batches. The flour helps with browning by absorbing surface moisture; the proteins and starch in the flour also brown. The problem is that in the short time the cutlets are in the pan, the flour doesn’t cook through, so the cutlets turn gummy on the surface once the sauce is poured on. Yeah, definitely not appealing.

So try this different approach—flour the cutlets (we used gluten-free), pan-sear them, and then transfer to a placeholder sauce to simmer. Problem solved, any uncooked flour sloughs off into the sauce, thickening it and leaving the coating thin and silky. Because the chicken is salted, the additional cooking doesn’t dry it out.

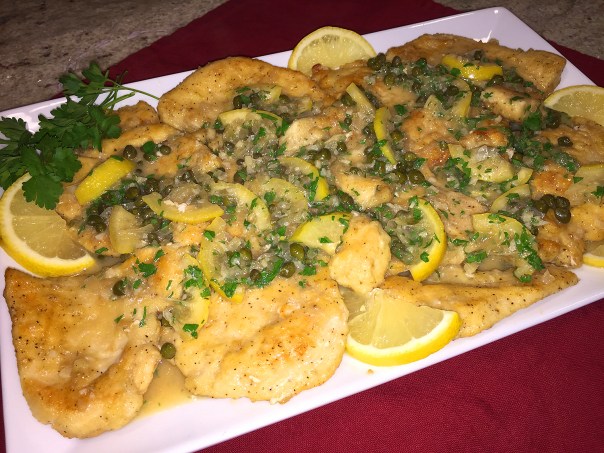
For the sauce, sauté garlic and shallot and then stir in chicken broth and a few tablespoons of lemon juice. After simmering the cutlets in the sauce, finish it with capers and butter. At this point, the sauce has nice body, but is still missing something; so what about adding whole lemon pieces to piccata? Brilliant! Quarter thin slices of lemon and simmer them in the sauce until they soften.

This company-worthy classic recipe resulted in a truly complex sauce featuring tartness from the juice, fruity aroma from the zest, and a subtle bitterness from the pith. BINGO! Ideally, serve with buttered pasta, white rice, potatoes, or crusty bread and a simple steamed vegetable.

IMG_1656

Ingredients

  • 4 (6- to 8-ounce) boneless, skinless chicken breasts, trimmed
  • Kosher salt and pepper
  • 2 large lemons
  • ¾ cup all-purpose flour
  • ¼ cup plus 1 teaspoon vegetable oil
  • 1 shallot, minced
  • 1 large garlic clove, minced
  • 1 cup chicken broth, preferably homemade
  • 3 tablespoons unsalted butter, cut into 6 pieces
  • 2 tablespoons caper, drained
  • 1 tablespoon minced fresh parsley

Directions

  1. Cut each chicken breast in half crosswise, then cut thick half in half again horizontally, creating 3 cutlets of similar thickness. Place cutlets between sheets of plastic wrap and gently pound to even ½-inch thickness.
    IMG_1649
    Our 3 breasts were large and produced 9 big cutlets.
    IMG_1653
  2. Place cutlets in bowl and toss with 2 teaspoons salt and ½ teaspoon pepper. Set aside for 15 minutes.
  3. Halve 1 lemon lengthwise. Trim ends from 1 half, halve lengthwise again, then cut crosswise ¼-inch-thick slices; set aside. Juice remaining half and whole lemon and set aside 3 tablespoons juice.
    IMG_1657
  4. Spread flour in shallow dish. Working with 1 cutlet at a time, dredge cutlets in flour, shaking gently to remove excess. Place on wire rack set in rimmed baking sheet.
    IMG_1660
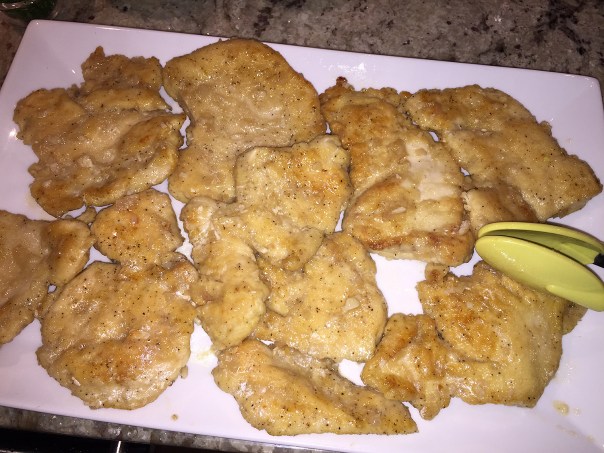
  5. Heat 2 tablespoons oil in 12-inch skillet over medium-high heat until smoking. Place 6 cutlets in skillet, reduce heat to medium, and cook until golden brown on 1 side, 2 to 3 minutes. Flip and cook until golden brown on second side, 2 to 3 minutes. Return cutlets to wire rack. Repeat with 2 tablespoons oil and remaining 6 cutlets.
    IMG_1663
    I could only do three cutlets at a time due to pan size and girth of chicken pieces.
  6. Add remaining 1 teaspoon oil and shallot to skillet and cook until softened, 1 minute. Add garlic and cook until fragrant, 30 seconds.
    IMG_1665
  7. Add broth, reserved lemon juice, and reserved lemon slices and bring to simmer, scraping up any browned bits.
    IMG_1667
  8. Add cutlets to sauce and simmer for 4 minutes, flipping halfway through simmering.
    IMG_1668
  9. Transfer cutlets to platter. Sauce should be thickened to consistency of heavy cream; if not, simmer 1 minute longer.
    IMG_1670
  10. Off heat, whisk in butter. Stir in capers and parsley. Season with salt and pepper to taste. Spoon sauce over chicken and serve.
    IMG_1672
    IMG_1676

IMG_1678
We served our delicious piccata with a side of steamed broccolini seasoned with a Tuscan-herbed olive oil, lemon zest and a squeeze of fresh lemon; and pasta hit with a little grated parm and butter.

By Annie Petito from Cook’s Illustrated

The Perfect Stress-Free Appetizer

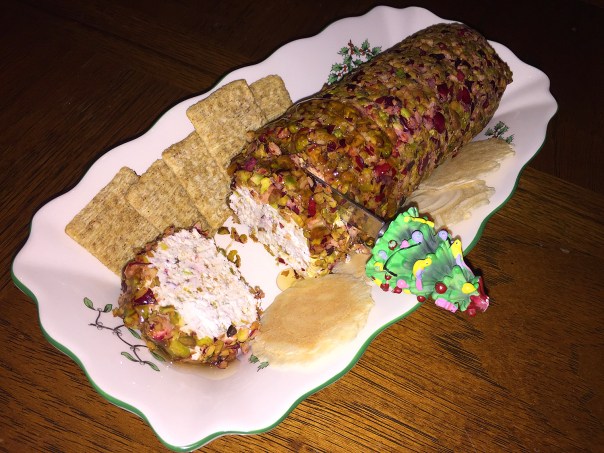
Not just another Winter holiday hors d’oeuvre, this Cranberry Pistachio Cheese Log should be on your go-to appetizer roadway to sanity and deliciousness all entertaining season long! It’s sophisticated and beautiful, yet almost absurdly simple to assemble. According to the website CarlsbadCravings.com where I found the recipe, “…it’s so crazy delicious everyone will crowd around until every last pistachio crumb has been licked off the plate.”

IMG_1617

And who doesn’t like pistachios?! “The Wonderful Nut” as they are known in the advertising world, are one of the lowest-fat, lowest-calorie nuts around. Yes indeed, this delicious, heart-healthy morsel is one lean, green protein machine. Not to mention the health benefits of cranberries which furnish high nutrient and antioxidant content, often referred to as a “super food.” Cranberries are high in vitamins A, C, and K, and contain only 25 calories in a half cup.

Here’s the kicker, the cheese log can be wrapped tightly in plastic wrap and refrigerated for several days until ready to serve—press that EASY button—because, when it comes to holidays, appetizers are all about simplicity, right?  When ready to serve, remove the Cranberry Cheese Log from the refrigerator about 15 minutes beforehand so it can soften and come to room temperature.

And that’s exactly what we did. I made the appetizer on a Friday, to take with us for a weekend trip to Nazareth, PA to visit long-time friend Merry Sue, who was born on Christmas Day in the little town of Bethlehem—kid you not! And, we were going to the annual Christkindlmarkt in Bethlehem for some holiday shopping. After which we enjoyed cocktails with the festive cheese log, before heading out to dinner.

Just before you are ready to nosh, don’t forget to drizzle generously with honey to compliment the tangy cranberries and goat cheese. If you can find them, serve with some Crunchmaster crackers (I couldn’t locate them), which are oven-baked, cholesterol- and gluten-free, and low in sodium and saturated fat. Now sit back and enjoy…

IMG_1588

Ingredients

Cranberry Pistachio Coating
  • 1 1/4 cups fresh cranberries
  • 1 cup shelled pistachios
Cheese Log
  • 7-8 oz. goat cheese log or tub
  • 4 oz. cream cheese, softened
  • 1 tablespoon sugar
  • 1 tablespoon honey
  • 1/4 tsp EACH ground ginger, ground cinnamon, salt, dried thyme, dried rosemary
  • 1/8 teaspoon pepper
  • 1/2 cup Cranberry Pistachio Coating mixture (see above)
Garnish
  • honey

Directions

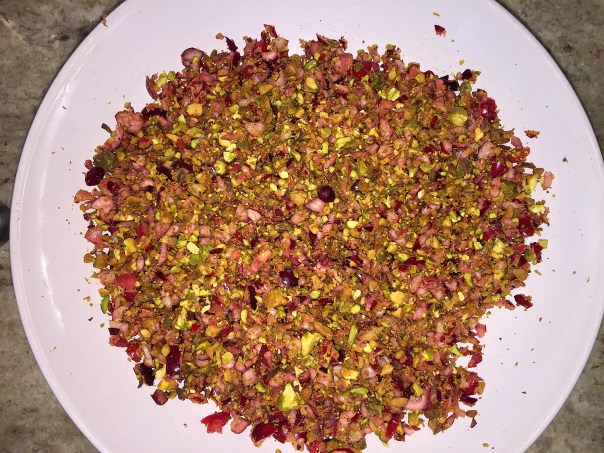
  1. Add cranberries and pistachios to your food processor and chop into small pieces.
    IMG_1592
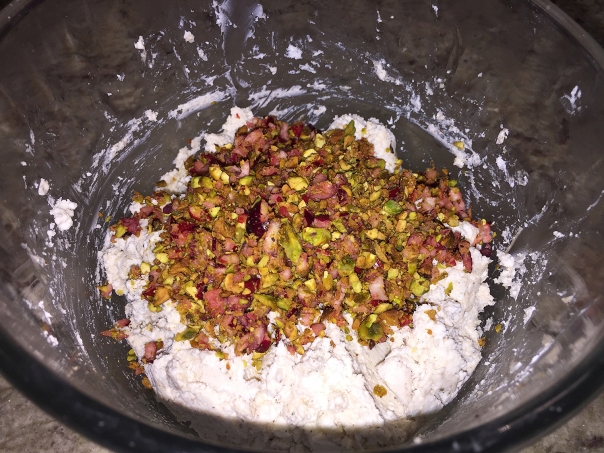
  2. Remove ½ cup and add it to a medium bowl. Add all remaining Goat Cheese Log ingredients to the bowl and stir to combine.
    IMG_1590
    I ground the dried thyme and rosemary with a mortar and pestle for a finer grain.
    IMG_1593
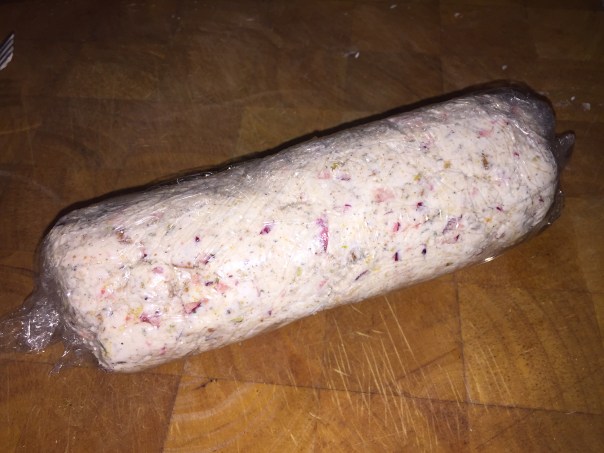
  3. Add this cheese mixture to a large piece of plastic wrap, and form into the shape of a log. Wrap in plastic wrap. Freeze for 20-30 minutes. You want the cheese log slightly firm so it holds its shape but is still soft enough for the coating to be pressed into it.
    IMG_1595
  4. Line counter with a large piece of parchment paper. Add remaining coating ingredients to parchment and spread into a single layer square a little larger than the length of the cheese log.
    IMG_1596
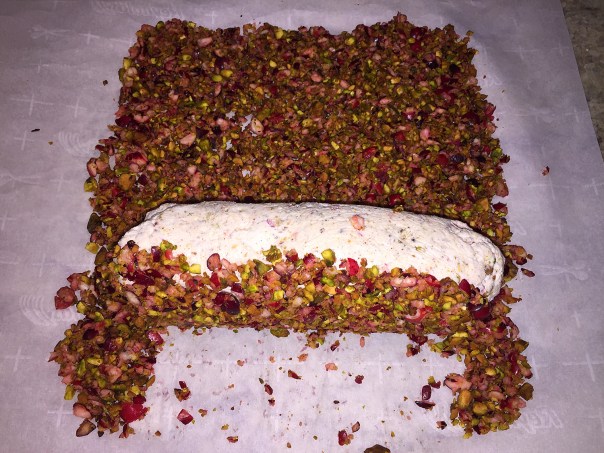
  5. Add cheese log to one long edge and roll in mixture until evenly coated, pressing coating into the cheese so it sticks. Make sure to cover both ends too. Serve immediately, or freeze until ready to serve.
    IMG_1597
  6. When ready to serve, remove from refrigerator 15 minutes beforehand so it can soften. Drizzle generously with honey just before serving with crackers.

IMG_1620
The three of us loved this cheese log, and I plan on making again for an upcoming party…
IMG_1599


Russ’ Pork Fried Rice

This Pork Fried Rice dinner takes just minutes to make and is a great go-to on a busy night. Over the years, Russ has tampered with the ingredients a bit, but the following recipe is pretty much the mainstay. He calls it his “Asian Slumgullion.”

IMG_1585

It’s the perfect antidote to the dilemma of what to do with leftover pork, or for that matter, ham or chicken. Because pork tenderloin often comes packaged with two fillets, it’s not uncommon for us to have leftovers. And even if you don’t plan on making this within a few days, freeze the leftover cooked pork until the opportunity presents itself.

IMG_1561
The fresh ginger is chopped into a fine dice.

IMG_1567
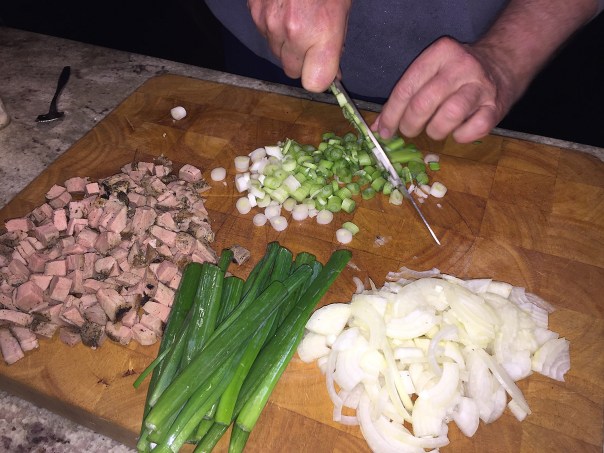
Russ preps all of the ingredients ahead of time.

The key is to remember to make the steamed rice ahead of time so that it can completely cool down—so we often make the rice the night before and refrigerate it. Ideally you’ll need a large wok, and you want to make sure the oil is super hot when adding elements. And do yourself a favor and prep all ingredients before you start cooking because you won’t have time to chop once you start flipping the spatula.

Ingredients

  • 12-16 ounces pork tenderloin, pre-cooked and cut into a 1/4″ dice
  • 1/3 cup vegetable oil
  • 4 eggs, lightly beaten
  • 1 small yellow onion, finely diced
  • 1 tablespoon finely diced fresh ginger
  • 2 tablespoons dark soy sauce, or oyster sauce
  • 3 tablespoons light soy sauce
  • 1 tablespoon sherry or rice vinegar
  • 1/2 teaspoon sesame oil
  • 4 cups steamed rice, precooked and cooled
  • 1 bunch finely sliced scallions, reserve some of the dark green parts for garnish

Directions

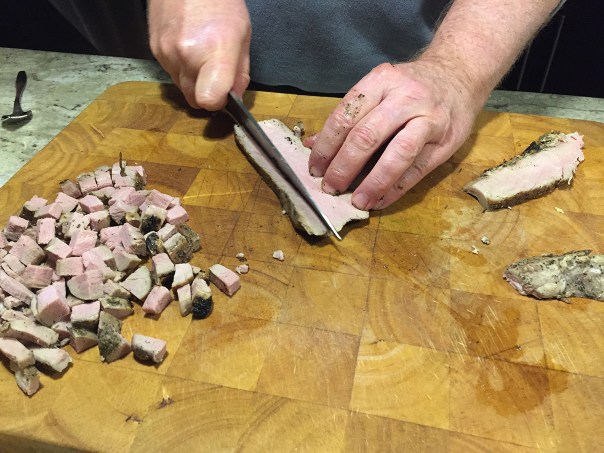
  1. Using a sharp knife, cut pork tenderloins into 1/4 inch cubes and set aside.
    IMG_1565
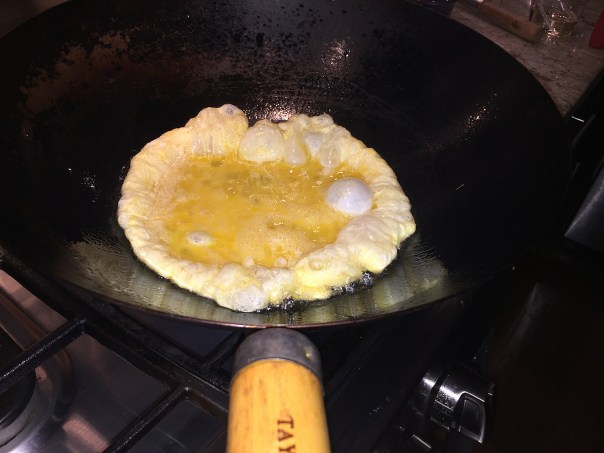
  2. Heat half the oil in a hot wok until surface seems to shimmer slightly. Pour beaten eggs into wok and leave to cook on the base of the wok for 10 seconds before folding egg mixture over onto itself with a spatula and lightly scrambling for about 1 minute or until almost cooked through.
    IMG_1569
    IMG_1571
  3. Carefully remove omelette from wok with a spatula. Slice up with two knives and set aside.
    IMG_1572
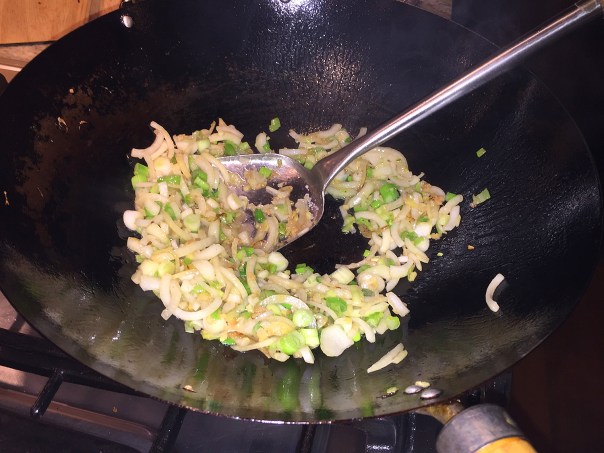
  4. Heat remaining oil in hot wok and stir-fry onion and ginger for 1 minute.
    IMG_1575
  5. Add pork and stir-fry for a further 30 seconds. Stir in soy sauces, sherry or rice vinegar, and sesame oil and cook, stirring, for 1 minute.
    IMG_1576
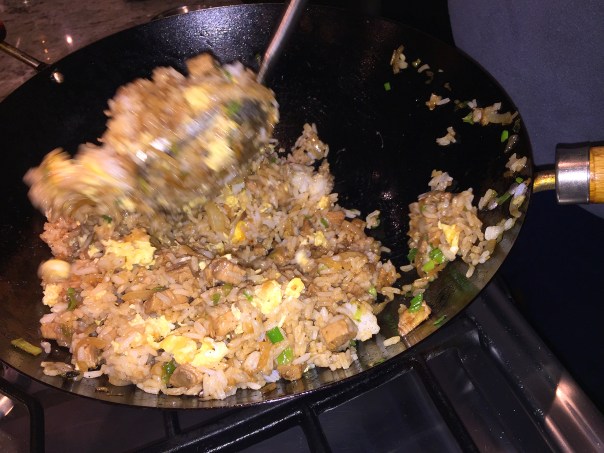
  6. Toss in rice and reserved eggs and stir-fry (use a spatula to break up the egg into smaller pieces if necessary) for 1 minute. Lastly, add scallions and stir-fry for a further 30 seconds or until well combined and rice is heated through.
    IMG_1578
    IMG_1580
  7. Transfer rice to a platter, garnish with scallion greens and serve.
    IMG_1582

Navarin Printanier

Banish those horrid memories of Dinty Moore Beef Stew from decades past, which in MHO was reminiscent of canned dog food—and we didn’t even have a dog when I was young! OK, now that we’ve cleansed our brains of the aversion, let’s reimagine stew as it should be: a classic, slowly braised dish that makes French cooking timelessly appealing.

IMG_1552

Adapted from (we increased some of the veggies) Dorie Greenspan’s recipe in “Around My French Table,” we spent a few hours one snowy Sunday afternoon concocting Navarin Printanier, a lovely lamb stew. The lamb is browned stovetop and then simmered gently with its vegetable medley companions: onions, turnips, small potatoes and carrots.

When the sauce is a burnished mahogany color and both the lamb and the vegetables are fork-tender, you finish the stew with a pop of color, throwing in green peas. You could make it without the peas, up to two days ahead, keeping it covered in the refrigerator. Just reheat the navarin in a 350-degree-oven for 30 minutes, then add the peas and let them cook a few minutes more.

It’s a complete meal in itself and needs nothing else, but perhaps a dusting of chopped parsley. Now you can replace the childhood memories of “Eew Stew” to a much more palatable “Ooooo Stew” and look forward to making it again…

IMG_1528
Since the supermarket wasn’t carrying boneless lamb shoulder, we had to get a large, bone-in leg of lamb and debone it. And because it was closer to 5-pounds, we sliced off a few steaks to freeze before cubing the meat.
IMG_1529

IMG_1532

Ingredients

  • 2 tablespoons olive oil
  • 3 pounds lamb shoulder trimmed of fat and cut into 1 1/2-inch cubes
  • 3 tablespoons flour
  • 4 cups beef broth
  • 3 tablespoons tomato paste
  • 4 garlic cloves chopped
  • 12 small white onions, not peeled
  • 3 carrots sliced into 3/4 inch pieces
  • 2 medium turnips, trimmed, peeled, cut into 1/2″-thick wedges, wedges cut crosswise in half
  • 1 pound small red-skin new potatoes, halved
  • 1 tablespoon sugar
  • 1 1/2 cups fresh or frozen peas
  • salt and pepper
  • 3 thyme sprigs
  • 3 parsley sprigs, more chopped leaves for garnish
  • 1 bay leave, cut in half
  • salt and pepper

Directions

  1. Pour 3 tablespoons of oil in a heavy dutch oven over moderate to high heat.
  2. When very hot add enough lamb pieces to brown them on all sides in a single layer. Turn to brown. You don’t want to crowd the meat so do this in two or three batches at about 5 minutes each.
    IMG_1535
  3. When the lamb is all brown transfer to a plate and start the next batch.
  4. When done, empty pan and return lamb to dutch over.
  5. Sprinkle with flour and a generous pinch of slat and pepper and continue cooking for 3 minutes.
    IMG_1537
  6. Add broth and tomato paste, garlic, thyme, parsley and bay leaf.
    IMG_1538
  7. Stir everything a few times and bring to a boil.
  8. When boiling turn down flame to low and cover the pot to let it simmer for 45 minutes.
  9. Meanwhile, bring a saucepan of water to a boil, drop in the onions, and cook for just a minute. Drain the onions, slice off the root ends, and slip off their skins.
    IMG_1540
  10. Set a large skillet over medium heat and melt the butter.
  11. When its hot and the carrots and turnips and cook for 2 minutes.
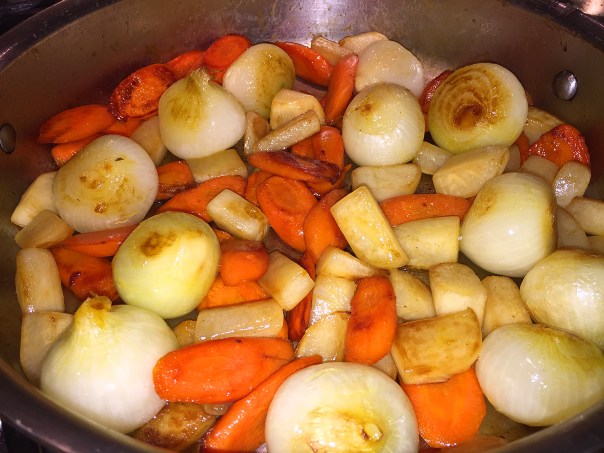
  12. Sprinkle sugar and continue cooking for 8 minutes or until root veggies are cooked and browned but not soft. (This step was closer to 20 minutes for us.)
    IMG_1545
  13. Add boiled onions and cook for another 2 minutes to brown onions slightly.
  14. Put rack in center of the oven and preheat to 400 degrees.
  15. Add sautéed veggies, potatoes, and simmer on stove for 15 minutes before putting dutch oven into the oven.
    IMG_1547
  16. Braise for 40-45 minutes until lamb is fork-tender.
  17. Remove from oven and discard bay leaf and parsley stems, if you can find them!
  18. Add frozen peas to stew and let cook on stove top over medium heat for 3-4 minutes.
    IMG_1549
  19. Check seasonings, ladle into bowls, sprinkle with chopped parsley and serve.

IMG_1551Russ swore this was probably the best stew he ever had, and I had to concur!

A New Addition to the Family

Making decorated sugar cookies has been an annual tradition since I was a young child, especially at Christmas time. This year I had lots of fun by using the simple circle shape to create snowmen (and women) heads, adding them to my growing sugar cookie repertoire. But you don’t even need the cookie cutter if you don’t have one, just roll the dough into a ball and smash it down to an even thickness of about 1/8″.

IMG_1497

For some reason my tried-and-true cookie dough recipe was not baking properly so I increased the amount of flour and they are now coming out perfectly. (Don’t ask me why, it worked for decades!) The following recipe reflects the increase—and it is doubled because one small batch just does not cut it. Once the dough is finished, refrigerate for at least 4 hours, preferably overnight. When ready to cut out shapes, it helps to dip the cutters into flour so the dough doesn’t stick.

IMG_1490
My kitchen island makes a perfect assembly line for icing cookies.

When it comes to decorating I use the Royal Icing recipe, both thicker for outline piping, and thinned down for flooding. Also, because I’m frosting with several colors at once, I find it’s easiest to use the disposal pastry bags (such as Wilton’s brand.) Mind you, the entire process takes a few days, so plan ahead.

IMG_1496
Not content to create just the snowmen, I also made Santa hats and Christmas trees.

Cookie Dough

  1. In a stand mixer, beat on medium 1 1/3 cups softened, unsalted butter (room temperature) and 1 1/3up granulated sugar until thoroughly mixed and fluffy.
  2. In a separate bowl, beat together 4 large eggs with 2 teaspoons of vanilla extract; then add to butter mixture until it all comes together.
  3. Meanwhile, sift flour to measure 5 cups and sift in 1 tablespoon of baking powder and 1 teaspoon salt.
  4. With the mixer on low speed, gradually add the sifted flour ingredients, once combined raise the speed to medium for several minutes.
  5. Divide dough in half; wrap in plastic wrap or wax paper; chill until firm—a minimum of 4 hours.
  6. When ready to bake, preheat oven to 400 degrees.
  7. On floured surface roll portions of the dough until an even 1/8″ thick; cut into shapes and transfer to ungreased baking sheet(s). You can mash together the leftover dough and repeat the process.
  8. Bake until just starting to get golden around the edges, about 10 minutes. (Some ovens bake quicker, so start checking the first batch at 8 and 9 minutes.) Let cool for 5 minutes before transferring to racks to finish cooling.
  9. Once completely cooled, decorate to your hearts content!

Royal Icing

  1. In a stand mixer, beat 3 tablespoons meringue powder with 1/2 cup warm water. On low, beat in 1 pound confectioner’s sugar, then turn up the speed to high, beating the contents until thick, 5-7 minutes.
  2. Divide icing into separate bowls depending on the number of colors you will be using. Tint with food coloring until you get the desired shades.
  3. Add small circle nozzles to your pastry bags then insert some of the icing, reserving portions of each color for flooding.
  4. For the reserved portions, add about 1 teaspoon water to each color to thin, and put the icing into plastic squeeze bottles with thicker openings for flooding/glazing purposes.
  5. Pipe an outline for the desired base colors. I do many cookies at once. Then add the same color using the thinner icing to flood inside the piping. To spread it into the corners, use a toothpick or similar tool.
  6. When adding decorative details, like the faces, wait until the base coat is completely dry. You can change the tip to make fluffy trim such as that on the Santa hats.
  7. Once you are finished decorating, make sure all of the icing is completely dry before you pack them into airtight containers.

You can store the icing in the refrigerator for up to a week, just bring it to room temperature before icing cookies. You can also freeze the cookies for several months, which, when we were kids was great because Mom would bring them out weeks after the holidays and we’d get a treat all over again!

Pumpkin Chocolate Cheesecake Bars

What’s a holiday meal without a fantastic dessert to finish? These appropriately seasonal Pumpkin Chocolate Cheesecake Bars were the perfect finale to Thanksgiving dinner. A few weeks prior to the holiday, I noticed the recipe in the American Lifestyle magazine provided by my real estate friend Fran; and I knew I just had to make them. Hubby Russ was on board with the idea too, after all, his 3 kids were joining us this year and we wanted something that would appeal to all of them. Chocolate pretty much does that…

After letting the chocolate ganache set up in the fridge, it was all but impossible to slice through the hard chocolate. Next time I will slice the bars first, move them slightly apart and pour the ganache over the slices letting the chocolate drizzle down the edges. Russ even suggested omitting the butter and adding a bit of heavy cream when making the ganache to give a slightly softer consistency. Makes sense to me…

IMG_1399

And if you’re really in a festive mood, add some chocolate shavings as a garnish…

IMG_1354

Ingredients

  • 1/2 cup plus 2 Tbsp. butter
  • cups chocolate crumbs (such as Famous Chocolate Wafers)
  • 2, 8-ounce packages cream cheese, full-fat
  • 1 large egg
  • 3/4 cup canned pumpkin
  • 1/4 cup granulated sugar
  • teaspoon ground ginger
  • teaspoon pumpkin pie spice
  • 1/2 teaspoon salt
  • 1 cup dark chocolate chips
  • Milk chocolate or semisweet chocolate curls, optional

Directions

  1. Preheat oven to 350 degrees F.
  2. In a small pot over medium heat, melt 1/2 cup (1 stick) of the butter. Pour it over the chocolate crumbs in a medium mixing bowl and use a wooden spoon or spatula to combine and evenly coat the crumbs.
    IMG_1357
    I ground up the chocolate wafers in a mini processor.
    IMG_1358
  3. Press the chocolate crumbs firmly into a buttered 9×9-inch baking pan, lined with parchment paper that hangs over two sides to create the base and handles for lifting. Bake for 10 minutes. Remove from the oven and set aside.
    IMG_1359
  4. In a stand mixer fitted with a paddle attachment, cream the cream cheese until light and fluffy. Scrape down the sides of the bowl and add the egg, pumpkin, sugar, spices and salt. Beat again to combine until smooth. Scrape down the bowl at least once during the process.
    IMG_1362
  5. Pour the batter over the cooled chocolate base and return it to the oven to bake another 30 minutes, or until the filling is firm to the touch.
    IMG_1363
  6. Remove the bars from the oven and allow to cool completely. Once cooled, use the parchment handles to carefully lift the slab from the pan in one piece, and place on a platter.
    IMG_1365
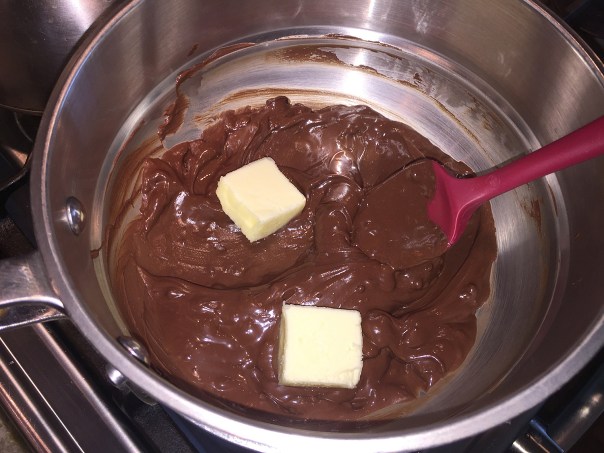
  7. Meanwhile, in a double boiler over medium heat, melt the chocolate chips and two tablespoons butter. (Here’s where I’ll omit the butter and add a bit of heavy cream next time.)
    IMG_1370
  8. Pour the chocolate over the top of the cooled pumpkin layer and use a small offset spatula to help spread evenly. OR, slice the slab into 16 bars and move slightly apart. Then pour the chocolate ganache over them, letting it drizzle over the edges.
    IMG_1371
  9. Place the platter in the refrigerator for about 30 minutes so the chocolate sets up. If not serving right away, wrap in plastic wrap, then cover with foil. Bring to room temperature before serving.
  10. OPTIONAL: To make small chocolate curls, carefully draw a vegetable peeler across the broad surface of a bar of semisweet or milk chocolate. This works best if the chocolate is at room temperature. For narrower curls, use the side of the bar.

To Make Ahead

Bake and chill cookies as directed; cut into bars. Place in a single layer in an airtight container; cover. Store in the refrigerator for up to 3 days. Do not freeze.


Soup to Soothe the Soul During Times of Much Excess

‘Tis the season for excessive overabundance, especially when it comes to all things food. Don’t get us wrong, we love all of the feasting around the holidays, but we also welcome the uncomplicated culinary moments such as the joy of a simple bowl of lentil soup.

IMG_1480

Healthy and hearty, spicy and straightforward, frugal and fragrant in equal measure, Curried Lentil, Tomato and Coconut Soup is the antidote to all of those rich meals and snacking in between. This is just the sort of soup that can be made without schlepping to the supermarket (unless of course you need coconut milk), or breaking the bank for pricey ingredients. Plus, when your capacity for preparing elaborate meals has lost it’s appeal, this soup even ticks off a lot of “free-from” boxes: meat-free, dairy-free, gluten-free, but most of all guilt-free.

Why not make a batch a few days before the parties begin again in earnest,? Then you’ll have some on hand to prepare for the upcoming indulgences or to soothe once you’ve reached the other side. Hint: it can be kept in the fridge for 3 days and can also be frozen. Nutty and earthy in flavor, lentils have a high nutritional value that anyone can benefit from by incorporating this healthy legume into their diet.

Of all legumes and nuts, lentils contain the third-highest levels of protein. Twenty-six percent of lentil’s calories are attributed to protein, which makes them a wonderful source of protein for vegetarians and vegans. Although lentils include numerous beneficial nutrients like fiber, protein, minerals and vitamins, they are still low in calories and contain virtually no fat.

We tend to keep brown lentils on hand because they don’t break down as readily as the yellow or red varieties. Just be aware, they need to cook longer—in this case 45-50 minutes as opposed to 20-25 minutes as the directions indicate. This recipe calls for medium curry powder, but it’s flexible. If the one you have is mild or very spicy, adjust the heat level with more, or less, red pepper flakes. It definitely has a kick which is tempered by the swirl of coconut milk as a garnish.

IMG_1467

Ingredients

  • 2 tablespoons virgin coconut oil or extra-virgin olive oil
  • 1 medium onion, finely chopped
  • 2 garlic cloves, finely chopped
  • 1 2½-inch piece ginger, peeled, finely grated
  • 1 tablespoon medium curry powder (such as S&B)
  • ¼ teaspoon crushed red pepper flakes
  • ¾ cup red lentils
  • 1 14.5-ounce can crushed tomatoes
  • ½ cup finely chopped cilantro, plus leaves with tender stems for serving
  • Kosher salt, freshly ground pepper
  • 1 13.5-ounce can unsweetened coconut milk, shaken well
  • Lime wedges (for serving)

Directions

  • Heat oil in a medium saucepan over medium. Cook onion, stirring often, until softened and golden brown, 8–10 minutes.
    IMG_1470
  • Add garlic, ginger, curry powder, and red pepper flakes and cook, stirring, until fragrant, about 2 minutes. Add lentils and cook, stirring, 1 minute.
    IMG_1472
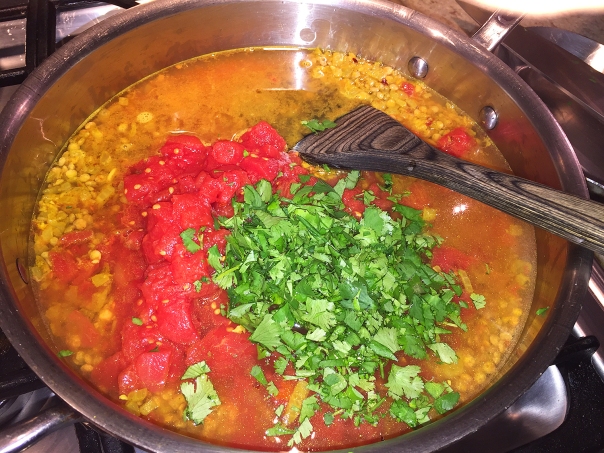
  • Add tomatoes, ½ cup cilantro, a generous pinch of salt, and 2½ cups water; season with pepper. Set aside ¼ cup coconut milk for serving and add remaining coconut milk to saucepan.
    IMG_1473
    IMG_1475
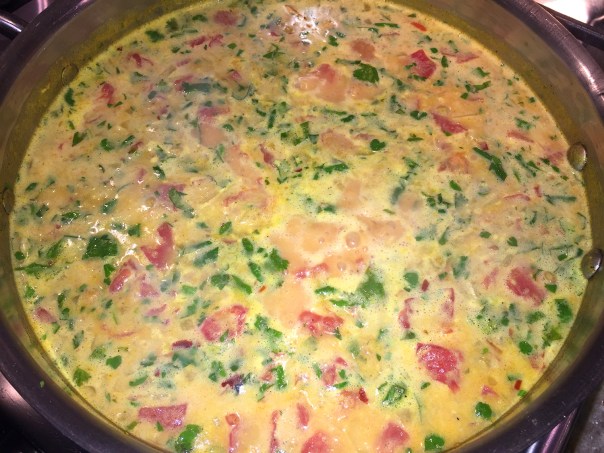
    IMG_1476
  • Bring mixture to a boil; reduce heat and simmer gently, stirring occasionally, until lentils are soft but not mushy, 20–25 minutes. Season soup with more salt and pepper if needed.
    IMG_1478
  • To serve, divide soup among bowls. Drizzle with reserved coconut milk and top with more cilantro. Serve with lime wedges.

Do Ahead: Soup (without toppings) can be made 3 days ahead. Let cool; cover and chill.

IMG_1484

Recipe by Yotam Ottolenghi, found in bon appétit magazine

Upping the Sizzle Factor

The holiday season was ramping up and we were hosting a couple for pre-dinner cocktails. Along with the libations, we wanted to munch on a festive appetizer before heading out for dinner. The day had been filled with a long to-do list which left us precious little time to get extravagant. Russ came to the rescue with a tried-and-true, simple yet elegant tapa, Sizzling Garlic Shrimp, or as the Spaniards would say “Gambas al Ajillo
.”

IMG_1464
Russ and house guests Francis and Jane Paixao enjoy the garlicky shrimp.

A miniscule, centuries-old dive tapas bar in Madrid, La Casa del Abuelo, serves sickly sweet jug wine and little else besides their house specialty—garlic shrimp. According to chef/author Anya von Bremzen, they slowly and patiently sizzle them in small earthenware cazuelas while customers watch. They are simmered so gently in olive oil that they come out just heated through rather than fried. Now we’re bringing this classic recipe to the other side of the Atlantic.

IMG_1453

It’s best to use an excellent quality olive oil because it is so suffused with garlic that you and your guests will huddle around the cazuela dunking fresh bread in what’s left long after the shrimp is gone. The problem was, our bread was gone too! So we’re saving the remaining oil to use with a future pasta dish.

IMG_1462

One of the beauties of this dish is the ability to adjust the spiciness—and knowing our guests had a much lower tolerance than us, we scaled back the hot chile aspect. So instead of incorporating the dried chile, Russ just added a few red pepper flakes to add a hint of heat.

IMG_1454Russ preps the garlic. 

One of Spain’s most popular tapas, this classic shrimp recipe is a total keeper. The shrimp are tender and flavorful, and mopping up the garlicky, herby oil with bread is a must.

Ingredients

  • 1 1/2 pounds shelled and deveined large shrimp, tails intact
  • Coarse salt
 (Kosher or sea)
  • 1/4 cup thinly sliced garlic
  • 1 1/4 cups extra-virgin olive oil
  • 1/2 small dried hot red chile, seeded and crumbled
  • 2 to 3 tablespoons minced fresh flat-leaf parsley
  • Crusty bread, for serving

Directions

  1. Pat the shrimp dry with paper towels. In a large bowl, toss the shrimp with 1 teaspoon of kosher salt and let stand for 10 minutes.
  2. Meanwhile, in a 10- to 11-inch earthenware cazuela or enameled cast-iron skillet, combine the garlic and olive oil and cook over moderately low heat, stirring occasionally, until the garlic is very fragrant but not colored, 2 to 
3 minutes.
    IMG_1456
  3. Add the chile and cook, stirring, until fragrant, 15 to 30 seconds.
  4. Add the shrimp to the skillet and cook over moderately low heat, stirring and turning the shrimp occasionally, until barely pink, about 3 minutes. (A bit longer for larger shrimp.)
    IMG_1460
  5. Stir in the parsley and a generous pinch of salt and cook for a few seconds longer.
  6. Serve in the skillet, passing crusty bread at the table.

IMG_1463

Originally we bought a small baguette, but in hindsite, we should have gotten the large to mop up all of the flavorful oil left behind.