Monthly Archives: May 2019

Roasted Salmon with Mustard and Tarragon

Attention all you salmon lovers. You simply can’t get much more simple than this recipe! Fresh tarragon pairs beautifully with salmon, and just a little goes a long way in this simple, yet flavorful meal.

Instead of six fillets, we only cooked four, but kept the portions of the remaining ingredients the same. We didn’t have much leftover, but what there was, was perfect as a dressing for the accompaniment of steamed asparagus.

IMG_2515

Roasted salmon with Mustard and Tarragon

  • Servings: 6
  • Difficulty: super easy
  • Print

Ingredients

  • 1/4 cup mayonnaise
  • 1 Tbs. plus 1 tsp. coarse-grained Dijon mustard
  • 2 tsp. fresh lime juice
  • 2 tsp. finely chopped fresh tarragon
  • 6 6-oz. center-cut, skin-on salmon fillets
  • Kosher salt

Directions

  1. Position a rack in the center of the oven and heat the oven to 400°F. Line a heavy-duty rimmed baking sheet with foil.
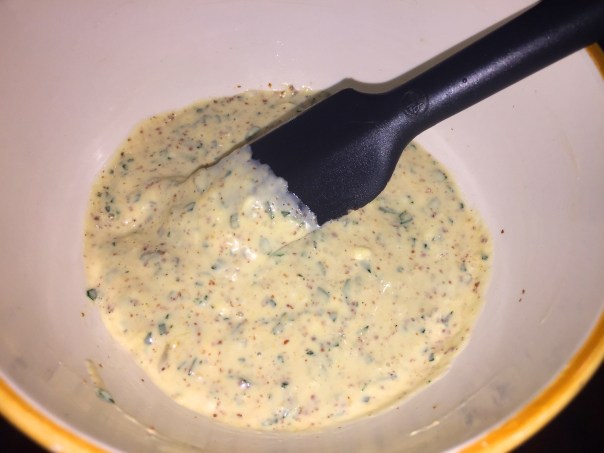
  2. In a small bowl, stir together the mayonnaise, mustard, lime juice, and tarragon.
    IMG_2516
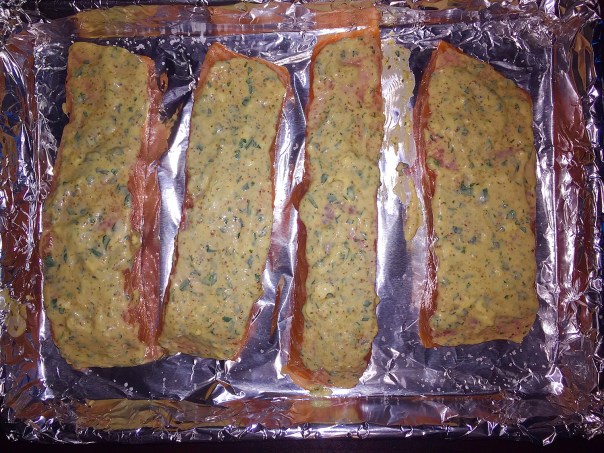
  3. Arrange the salmon skin side down on the baking sheet and sprinkle lightly with salt. Spread the mayonnaise mixture evenly over each fillet (there may be a little left over).
    IMG_2517
  4. Roast the salmon until just cooked through, 10 to 14 minutes. (To test for doneness, poke a paring knife all the way through the thickest part of one fillet and hold it there for 5 seconds. Then touch the flat side of the knife gently to your lower lip. If the knife feels warm, the fish is cooked through.)
    IMG_2521
  5. Using a spatula, lift the fillets off the baking sheet, leaving the skin behind, and transfer to plates.
    IMG_2522

Round out the meal with asparagus and/or some sort of potato.

http://www.lynnandruss.com

Adapted from a recipe by Laraine Perri 


Peruvian Pesto

In Peru, the pasta is partially boiled, then drained and added to the sauce, where it finishes cooking in the skillet. This technique effectively under-hydrates the pasta and allows it to absorb—rather than simply be coated by—the flavorful pesto found on the 177milkstreet.com cooking site.

Of course this is not spaghetti with pesto. It is tallarines verde. It is a Peruvian dish. It is a result of the mix of both cultures. — Gaston Acurio, Peruvian mega-chef and unabashed ambassador for his country’s cuisines

For more than two decades, Acurio has pushed the world to take notice of Peru’s vibrant cuisines, and to transform Lima into a culinary capital. In the process, he created a global empire of dozens of restaurants and opened a culinary school for children from impoverished areas.

For a bright color and fresh flavor, purée ¾ pound of spinach for this Peruvian Pesto. A quick simmer in a skillet takes the raw edge off the onion and spinach, giving a depth and complexity lacking in traditional raw pestos. Parmesan and a splash of cream enrich the dish, and a healthy squeeze of lime juice ties everything together.

In Peru, it is traditional to accompany the dish with potatoes and top it with fried steak or fish. Here, consider it an American take on the Peruvian variation of the Italian immigrants. Don’t be alarmed if the skillet seems very full after adding the pasta. Use tongs to gently lift and stir the noodles, and a rubber spatula to scrape the edges of the pan.

Typically we cut back on the amount of pasta in these recipes by about a third. However, I suggest using the full 12 ounces, if not a pound, because it makes a huge amount of pesto. For a finish, I squeezed the lime over the plated pasta, added a pinch of red pepper flakes and a sprinkle of finishing salt.

IMG_3028

Peruvian Pesto

  • Servings: 4
  • Difficulty: easy
  • Print

Ingredients

  • 12 ounces linguine or fettuccine
  • 1 cup chopped yellow onion (1 small)
  • ½ cup extra-virgin olive oil
  • ¼ cup water
  • 3 garlic cloves, peeled and smashed
  • Kosher salt and ground black pepper
  • 12 ounces baby spinach (about 12 cups)
  • ¼ cup heavy cream
  • 2 ounces parmesan cheese, grated (about 1 cup)
  • 4 ounces queso fresco, crumbled (about 1 cup)
  • Lime wedges, to serve

Directions

  1. Bring a large pot of well-salted water to a boil. Add the pasta and cook until just tender but not fully cooked, about 2 minutes less than package directions. Drain the pasta, reserving 1½ cups of the cooking water.
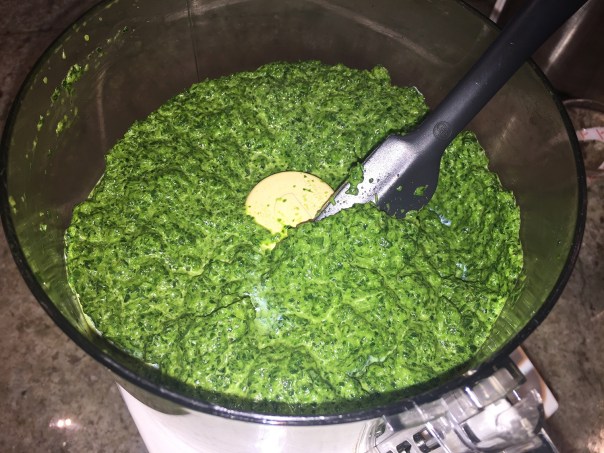
  2. Meanwhile, in a food processor, combine the onion, oil, ¼ cup water, garlic and 1 teaspoon each of salt and pepper. Add a third of the spinach and process until smooth, about 30 seconds. Add the remaining spinach in 2 batches, processing until smooth after each.
    IMG_3030
  3. Transfer the spinach mixture to a 12-inch nonstick skillet over medium-high heat. Bring to a boil and cook, stirring occasionally, until it begins to thicken, 3 to 5 minutes.
    IMG_3032
  4. Add the reserved pasta water and return to a simmer, then add the pasta and stir to coat. Simmer, stirring occasionally, until the pasta is al dente and the pesto no longer appears watery, 3 to 5 minutes.
    IMG_3033
  5. Stir in the heavy cream. Off the heat, stir in the Parmesan, then taste and season with salt and pepper.
    IMG_3037
  6. Transfer to a serving dish, sprinkle with the queso fresco and a garnish of lime wedges. Serve with a simple side salad for a complete meal.

http://www.lynnandruss.com

Grilled Tuna Steaks with an Asian Flair

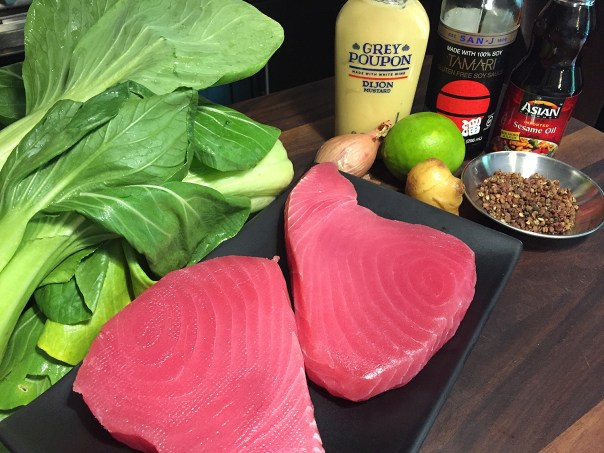
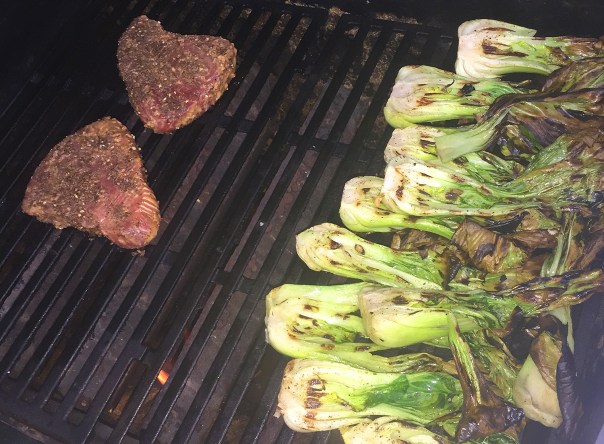
In just a handful of ingredients, this Grilled Tuna Steaks with Soy-Mustard Sauce recipe manages to convey a whole range of flavors and textures, especially combined with the grilled baby bok choy, this smaller variety is more tender than the mature version. And enough can’t be said about the health benefits of this veggie!

Bok choy is a type of Chinese cabbage that doesn’t look like the typical cabbage. Instead, it has dark green leaves connected to white stalks. One cup has just 9 calories and barely a trace of fat, yet delivers protein, dietary fiber and almost all the essential vitamins and minerals. It is in the top three on the Aggregate Nutrient Density Index, meaning it delivers one of the highest levels of nutrients per calorie compared to other foods.

And that’s not all. It’s also one of the top anti-inflammatory foods on the planet, making it a vital piece of the healthy lifestyle puzzle. Its mild, sweet flavor and crispy texture make it a great addition to any dish, as well as an alternative to other leafy greens. Think kale is too bitter? Can’t eat collard greens without adding salt? Bok choy may be your new go-to superfood.

IMG_5206

Keep in mind, it can often be gritty so I find slicing it half lengthwise and then placing it, cut side down, in a bath of cold water helps loosen and grit—your kitchen sink comes in handy for that. Dirt tends to collect toward the base of the stems.

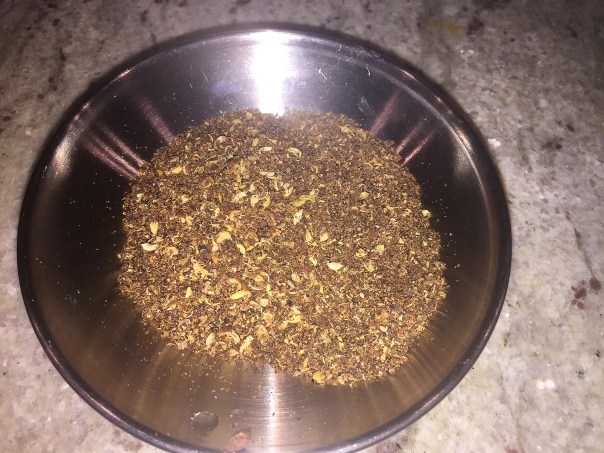
IMG_5202Usually Sichuan peppercorns come whole so you’ll need to grind them down in a spice blender or mortar and pestle.

IMG_5200

Grilled Tuna Steaks with an Asian Flair

  • Servings: 2-4
  • Difficulty: easy
  • Print

Ingredients

  • 2 Tbsp. Dijon mustard
  • 2 Tbsp. soy sauce
  • 1 Tbsp. fresh ginger, minced
  • 1 Tbsp. shallots, minced
  • 1 Tbsp. fresh lime juice
  • 1/2 tsp. sesame oil
  • 2 Tbsp. Sichuan peppercorns, finely ground
  • 1/2 tsp. salt
  • 6-8 baby bok choy, split in half lengthwise, rinsed well
  • 2 Tbsp. olive oil
  • 2 10-oz. tuna steaks, 1″ thick
  • Salt and pepper

Directions

  1. Combine the mustard, soy sauce, ginger, shallots, salt, sesame oil and the lime juice.
    IMG_5203
  2. Put the tuna steaks in a ziploc bag along with the 2/3 of the marinade, seal bag. Reserve remaining third for basting.
    IMG_5204
  3. Carefully massage the bag to avoid breaking up the fish and to make sure they are completely covered. Marinate in the refrigerator for at least 30 minutes or up to 2 hours.
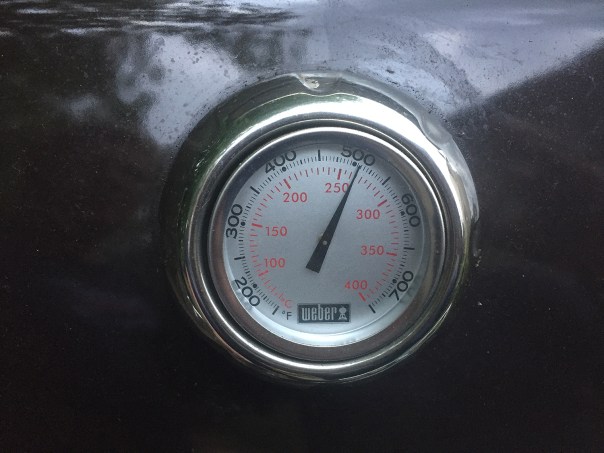
  4. Heat grill to medium high.
    IMG_5219
  5. Meanwhile, slice bok choy in half lengthwise, rinse the bok choy well and pat dry. Place on a rimmed baking sheet, drizzle with olive oil, salt and pepper on both sides.
    IMG_5208
  6. Remove fish from ziploc onto a platter and discard the marinade.
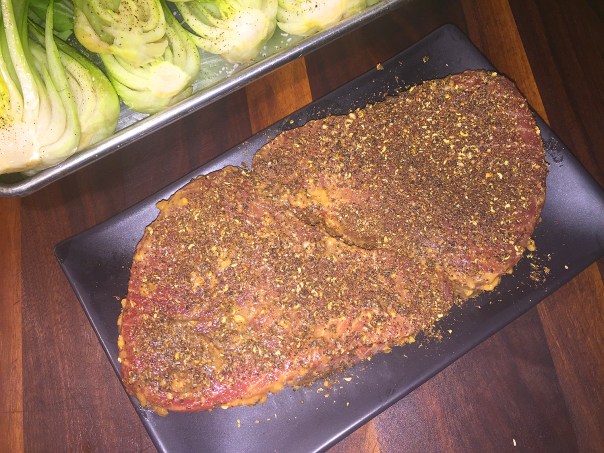
  7. Grind the Sichuan peppercorns in a spice grinder and sprinkle it both sides of the tuna.
    IMG_5209
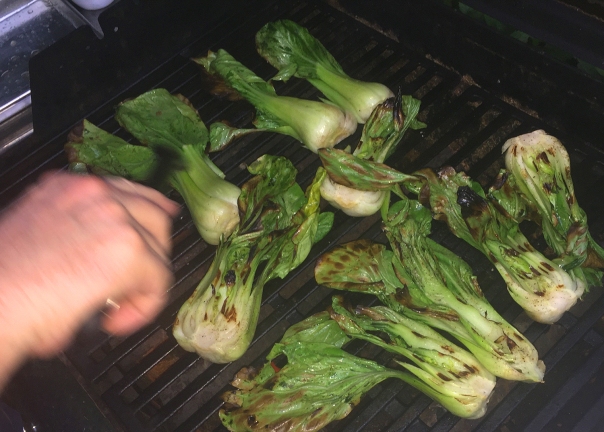
  8. Place the bok choy over direct heat for a couple of minutes on each side to char, then move over to indirect heat side of grill.
    IMG_5215
  9. Add the tuna steaks to the hot grill and cook over direct heat for about 4 minutes each side for medium rare, 125°.
    IMG_5217
  10. Remove the tuna and veggies from the grill onto individual plates and serve immediately. Place reserved marinade on table to spoon over fish, if desired.
    IMG_5223
    IMG_5224
    IMG_5225

http://www.lynnandruss.com

Appetizers: Simple Is, As Simple Gets

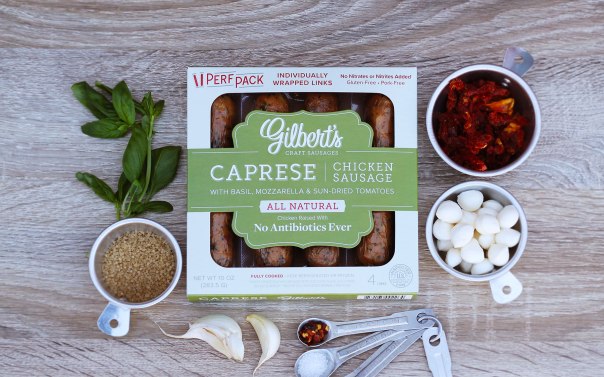
Here’s a real quick, yet tasty appetizer when you’re short on time. Start with Gilbert’s Caprese Chicken Sausage with mozzarella, basil and sun-dried tomatoes, available at Costco or online. They honestly burst with the fresh flavors of an Italian summer! They are all-natural, gluten-free sausages made from chickens that were not raised with antibiotics. Each link is individually wrapped so you can use as few, or as many, as you need.

Caprese_Vignette_1800.jpg

Even though they are pre-cooked, I did brown the diagonally sliced pieces for a few minutes on each side to enhance the flavors. Then simply build a small stack with the meat at the bottom, followed by a thin slice of Manchego cheese, a small grape tomato and then topped with a pitted kalamata olive half and speared with a decorative toothpick.

IMG_7222

Each sausage will cut down into five or six pieces. When I made these it was for only four people, so using three links I ended up with 15 small appetizers. Your welcome!

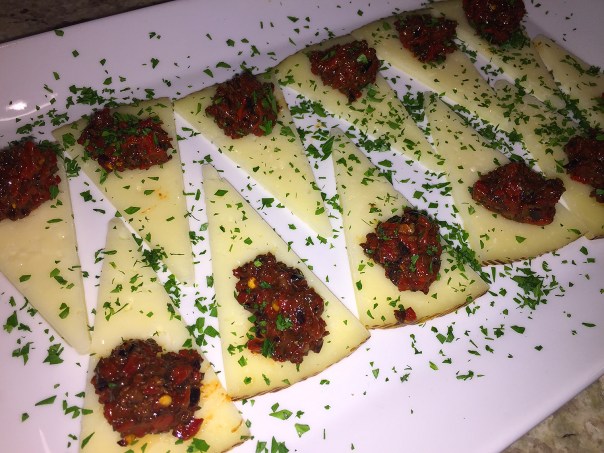
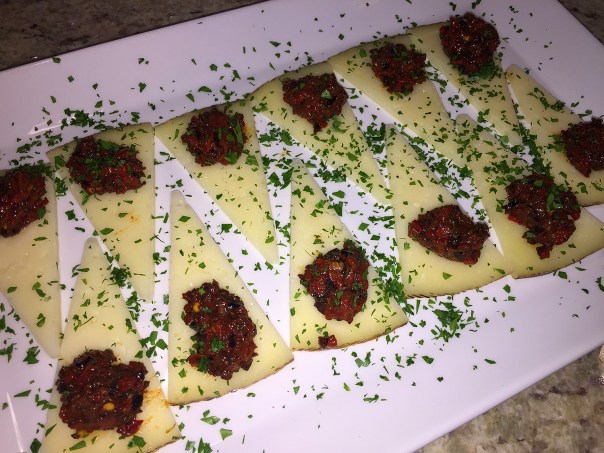
Manchego Cheese Canapés with Olives and Piquillo Peppers

Or as the Spanish say “QUESO MANCHEGO con ACEITUNAS y PIQUILLOS

Another tried and true appetizer we like to make, not only because everyone loves them, but because there is no cooking involved, they only take a few minutes to assemble, and they are easily transported.

IMG_8383

Manchego Cheese Canapés with Olives and Piquillo Peppers

  • Servings: 20-24 slices
  • Difficulty: easy
  • Print

IMG_8398

Ingredients

  • One 13/4-inch wedge (about 1/2 pound) Manchego cheese
  • 30 cured black olives, pitted and chopped
  • 3/4 cup chopped piquillo peppers (see Pantry, page 15), or pimientos
  • 6 anchovy fillets
  • 1 Tbsp. extra virgin olive oil
  • Minced fresh parsley

Directions

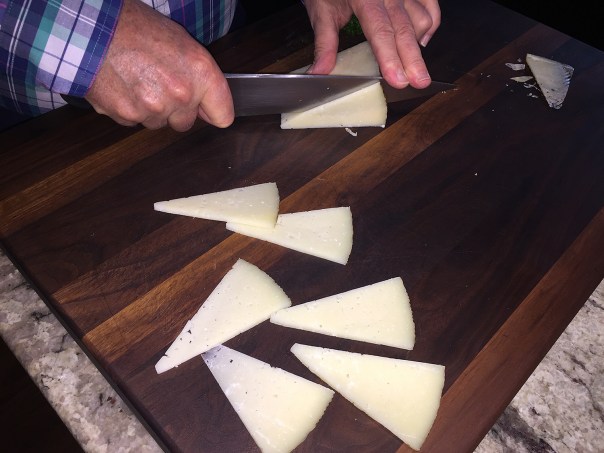
  1. Cut the wedge of cheese lengthwise into 1/8-inch slices to form triangular pieces.
    IMG_8393
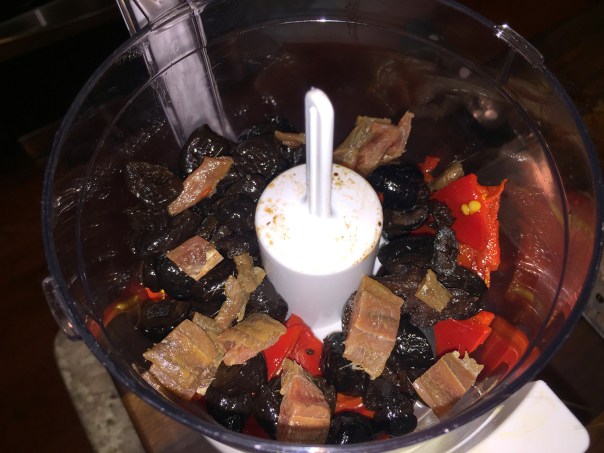
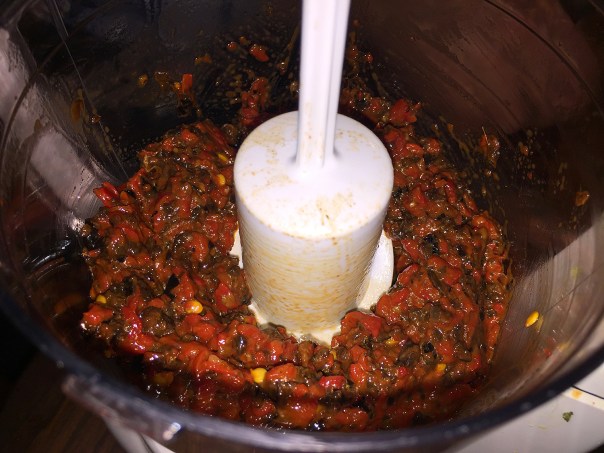
  2. In a mortar or mini processor, mash to a paste the olives, piquillos, anchovies, and oil.
    IMG_8386
    IMG_8388
    IMG_8392
  3. Spread about 3/4 teaspoon of the mixture on each cheese slice.
    IMG_8395
  4. Sprinkle with parsley and arrange attractively on a serving dish.

    IMG_8397

http://www.lynnandruss.com

Rhapsody in Rhubarb?

Seriously, when was the last (or only) time you’ve ever made something edible with rhubarb? I recall as a child pulling the stalks out of the ground from the rhubarb patch around my grandparents barn and eating it raw with sugar sprinkled on it, but can’t recollect a time of ever cooking with the stalks myself.

FYI, rhubarb is technically a vegetable, but is legally considered a fruit. Rhubarb is sold at farmers’ markets and grocery stores by the stalk, like celery. It’s harvested in the spring, with a short season that spans from April to June. The stalks are famous for their bright pink color, but they can also be light pink and even pale green. The color is not an indication of ripeness or sweetness, like it is with other fruits.

But be aware, the stalks are the only edible part of the plant; in fact, the leaves of rhubarb are poisonous! Rhubarb is naturally tart when it’s raw—and I mean jaw-achingly so—so be prepared if you indulge in it’s raw state, therefore it’s almost always cooked or baked with a generous serving of sugar.

I was on a garden tour recently and the proprietor happened to have a large patch growing next to her prized peonies and hydrangeas. She asked if any of us wanted some rhubarb stalks to take home, so I thought, why not? Rhubarb is famously paired with strawberries, spring’s other darling, but not being a pie eater, I wanted to make something both my husband and I would eat. Enter these Nut-Topped Strawberry Rhubarb Muffins found on TasteofHome.com.

When cooled, they provided just the right balance of savory and not-too-sweet. Consider using them as a great item for a brunch; as a grab-and-go breakfast; or for a real indulgent treat, why not pair with a generous scoop of vanilla ice cream for dessert? And I just heard at my garden club luncheon today, that one of the other gardeners on that hydrangea tour made Rhubarb Margaritas last night… Just sayin…

IMG_3211

Nut-Topped Strawberry Rhubarb Muffins

  • Servings: 18 muffins
  • Difficulty: easy
  • Print

Ingredients

  • 2-3/4 cups all-purpose flour
  • 1-1/3 cups packed brown sugar
  • 2-1/2 teaspoons baking powder
  • 1/2 teaspoon baking soda
  • 1/2 teaspoon ground cinnamon
  • 1/4 teaspoon salt
  • 1 large egg, room temperature
  • 1 cup buttermilk
  • 1/2 cup canola oil
  • 2 teaspoons vanilla extract
  • 1 cup chopped fresh strawberries
  • 3/4 cup diced fresh (about one large 15″stalk)

TOPPING:

  • 1/2 cup chopped pecans
  • 1/3 cup packed brown sugar
  • 1/2 teaspoon ground cinnamon
  • 1 tablespoon cold butter
Directions

  1. In a large bowl, combine the first six ingredients. In another bowl, whisk the egg, buttermilk, oil and vanilla.
  2. Stir into dry ingredients just until moistened.
    IMG_3213
  3. Fold in strawberries and rhubarb.
    IMG_3214
  4. Fill greased or paper-lined muffin cups two-thirds full.
    IMG_3216
  5. In a small bowl, combine the pecans, brown sugar and cinnamon. Cut in butter until mixture resembles coarse crumbs. Sprinkle over batter.
    IMG_3218
    IMG_3220
  6. Bake at 400° until a toothpick inserted in the center comes out clean, 20-25 minutes.
    IMG_3221
  7. Cool for 5 minutes before removing from pans to wire racks. Serve warm.
    IMG_3224

http://www.lynnandruss.com

NUTRITION FACTS: 1 muffin: 243 calories, 10g fat (2g saturated fat), 14mg cholesterol, 155mg sodium, 37g carbohydrate (21g sugars, 1g fiber), 3g protein

A Real Grind

Time to run with the BIG dogs and show your guests you Da Grill Master(ess). If there’s one way to instantly up your burger game and join the big leagues, it’s to grind your own meat, something we had yet to try. We instinctively knew, doing so would offer superior texture with more loosely packed patties and a more open, juice-trapping structure. So a recent opportunity presented itself to run with the pack…

All three kids were in town to celebrate The Hubs, and his middle son Dan’s, dual birthdays and we wanted a simple, yet special, outdoor BBQ. Remembering our KitchenAid meat grinder attachment (which we hadn’t used at all since we got it years ago) I suggested making our own burgers, and Russ was immediately on board. He got most of these tips from Serious Eats chef J. Kenji López-Alt.

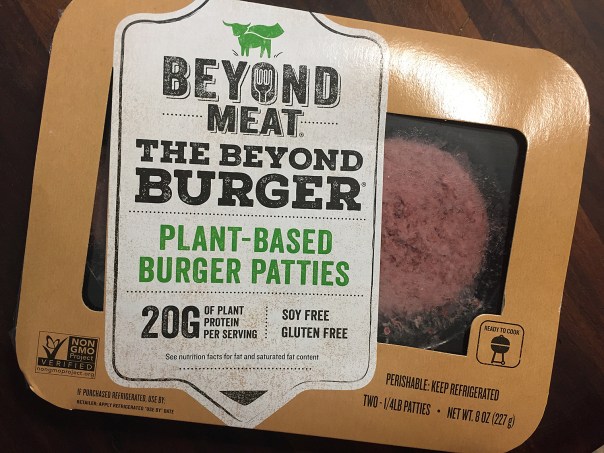
For starters, we bought a little over 4.5 pounds of chuck roast from the Farmer’s Market which made 9 healthy-sized patties. Even though one family member doesn’t eat red meat and chose a turkey burger, and another is vegan and had a “Beyond Meat” plant-based burger, all but one of the Thick and Juicy Home-Ground Grilled Cheeseburgers were consumed between the remaining five of us.

IMG_3118

Instead of seasoning with just salt and pepper, I added Adobo Seco, a savory, all-purpose spice mixture, into the meat as Russ was grinding it and before the second pass through the grinder. Why grind twice? According to J. Kenji, as fat and juices render out, they simply leak away and fall onto the hot coals (or grates) below, leaving the meat dry. With a finer grind, on the other hand, the fat is emulsified into the lean more thoroughly, ensuring that it stays trapped in place even as it begins to liquefy.


We kept the twice-ground meat chilled in a metal bowl until the grill was heating and then the patties were formed. In the end, while the burgers were delicious, we thought they were slightly too-well done for our preferences because they cooked faster than expected. Note-to-self for next time: check the burger temp sooner… Dessert was a homemade strawberry pie with graham cracker crust and homemade whipped cream topping, alas, no birthday candles…


Note: For even better flavor, use a combination of short rib, brisket, and sirloin in place of the ground chuck which we plan on doing real soon; the summer hasn’t even started!

IMG_3119

Home-Ground Grilled Cheeseburgers

  • Servings: 4-8
  • Difficulty: easy
  • Print

Ingredients

  • 4 pounds beef chuck, cut into 1-inch cubes (makes about 8 large patties)
  • Kosher salt and freshly ground black pepper
  • 8 slices of cheese
  • 8 hamburger buns
  • Toppings as desired

Directions

  1. To grind with a meat grinder: Place grinding shaft, feed tube, plate, die, and screw of a meat grinder into the freezer. Spread beef chunks evenly in a single layer on a large plate or rimmed baking sheet. Place in freezer and freeze until starting to get firm around edges but still malleable, about 20 minutes.
    IMG_3120
    IMG_3122
  2. Set up meat grinder with 3/8ths inch plate. Grind meat into a cold bowl. Working quickly, grind meat again using 1/4-inch plate. If grinder or meat begins to get too warm during grinding process, return to freezer for 10 minutes before continuing to grind.
    IMG_3128
  3. Form beef into eight patties about 1/2-inch wider than the burger buns with a slight depression in the center to account for bulging as they cook. Season generously with salt and pepper and refrigerate until ready to cook.
  4. Use your gas grill, or alternatively light one chimney full of charcoal. When all the charcoal is lit and covered with gray ash, spread evenly over one side of coal grate. Alternatively, set half the burners of a gas grill to high heat. Set cooking grate in place, cover grill and allow to preheat for 5 minutes. Clean and oil the grilling grate.
  5. Place burgers directly over hot coals, cover with vents open, and cook, turning once, until well charred and center of burgers register 110°F on an instant read thermometer, about 5 minutes.
    IMG_3141
    (Notice that little nib of a burger hanging out by itself? That was for The Mr. to try because he couldn’t wait for all of them to be done 😉 )
  6. Place cheese on top of burgers and continue to cook until cheese is melted and burgers register 125°F for medium rare or 135°F for medium, 1 to 2 minutes longer. Transfer burgers to a large plate.
    IMG_3143
  7. Toast buns over center of grill until golden brown and warmed through. Top burgers as desired, place in buns, and serve.
  8. Let your guests choose the burger of their choice and add their own toppings.
    IMG_3144
    IMG_3146

http://www.lynnandruss.com


Mustard Sauce Takes a Bow

Mustard is one of my favorite condiments and it is so versatile, with a large variety to choose from. As a kid, while all of my other siblings preferred ketchup on most things, I did a 180 and opted for mustard. To this day, it still brings back a childhood memory of being at our cabin on Lake Huron. We had two metal rocking chairs, one red and one yellow. While the other sibs fought over who could sit in the “ketchup” chair, no one bothered me when I claimed the “mustard” chair.

As described on foodrepublic.com, mustard is made by grinding mustard seeds and mixing them into liquid, which helps release the enzymes and oils that give mustard its bite. High-acid liquids, like vinegar, temper the resulting heat but help it keep its pungency, while using something low-acid, like cold water, results in a hotter mustard that can lose its potency relatively quickly.

Here are five of the most common types:

Yellow Mustard: Aka “American mustard,” this gets its characteristically bright yellow color from turmeric. One of the milder mustards, it’s hugely popular in the U.S. and can be found at most backyard cookouts involving hot dogs or burgers. It’s commonly referred to as just “mustard” by most Americans.

Dijon: The classic French mustard, nowadays is made with “white wine vinegar”. It has a smooth consistency like yellow but a more complex, sharp flavor.

Spicy Brown: This uses a slightly coarser grind than yellow or Dijon and includes some of the spicier brown mustard seeds in addition to the standard yellow/white seeds; and has more heat and deeper flavor than yellow mustard.

Whole Grain: These use whole mustard seeds. Sometimes they’ll use terms like “country” or “old style,” but if this is what you’re going for, you’ll be able to see the whole grains in the jar pretty easily—these have the most texture.

Sweet Mustards: These are mustards that have had something sweet added to them, like honey, but you’ll find all kinds of variations. Some are spicy, some are maple-y, some are thick, some are thin, but they’re all a wonderful mix of sweet and tangy.

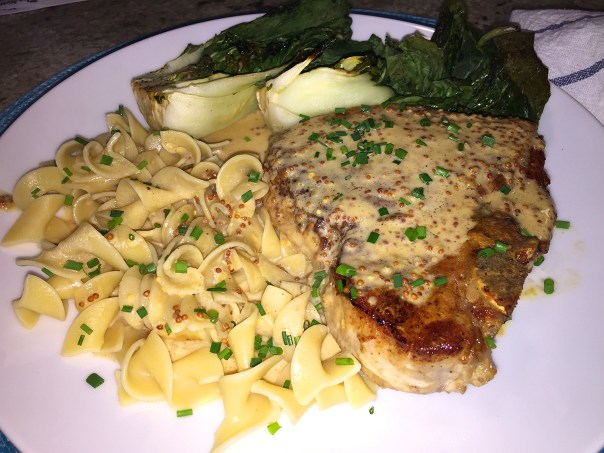
In this recipe, the whole grain variety becomes the highlight of Pork Chops with Mustard Sauce.

IMG_3045

Pork Chops with Mustard Sauce

  • Servings: 4
  • Difficulty: easy
  • Print

Ingredients

  • 4, 3/4 to 1-inch-thick bone-in pork chops (10-12 oz. each)
  • Kosher salt and freshly ground black pepper
  • 2 Tbs. all-purpose flour
  • 1 Tbs. unsalted butter
  • 1 Tbs. extra-virgin olive oil; more as needed
  • 1/2 cup dry white wine
  • 3/4 cup heavy cream
  • 1/2 cup homemade chicken broth
  • 1/4 cup stoneground mustard

Directions

  1. Season the chops lightly with salt and pepper and dredge in the flour, shaking off the excess.
  2. Put the butter and oil in a large cast iron skillet over medium heat. When hot, add the pork chops and cook, turning once, until golden on both sides and just cooked through, 11 to 14 minutes total, reaching an internal temperature of 140°. Transfer the pork to a serving platter and tent with foil.
    IMG_3047
  3. Add the wine, and scrape up the browned bits from the bottom of the pan with a wooden spoon. Increase the heat to medium high and boil until the wine is reduced to about 2 Tbs., 2 to 3 minutes.
  4. Stir in the cream, chicken broth, and mustard and boil until reduced to a saucy consistency, about 5 minutes. Season to taste with salt and pepper.
    IMG_3050
    IMG_3051
  5. Return the pork and any juices to the pan, turn to coat with the sauce, and let sit for about a minute to heat through, then transfer back to the serving platter.
    IMG_3053
  6. Drizzle any sauce remaining in the skillet over the chops and serve with a side of egg noodles.
    IMG_3057

http://www.lynnandruss.com

Adapted loosely from a recipe on Finecooking.com

Murgh Makhani, More Familiarly Known as Indian Butter Chicken

A few months back we were visiting daughter Julia in Nashville and she mentioned making an Indian Butter Chicken recipe that was to die for. Upon returning home, seems everyone and their brother were posting online accolades about this Indian meal otherwise known as Murgh Makhani—a mildly spiced chicken dish. So I figured it was time for us to join the party…

According to Cook’s Illustrated where I got this particular recipe, Butter Chicken should taste rich and creamy but also vibrant and complex. To that end, they instruct to start by softening lots of onion, garlic, ginger, and chile in butter followed by aromatic spices such as garam masala, coriander, cumin, and black pepper.

Instead of chopped or crushed tomatoes, they opt for a hefty portion of tomato paste and water, which lends the sauce bright acidity, punch, and deep color without making it too liquidy. A full cup of cream gives the sauce lush, velvety body, and it is finished by whisking in a couple more tablespoons of solid butter for extra richness. (Although I think the name Butter Chicken is a bit of a misnomer because in reality, not all that much butter goes into it compared to how many servings it produces.)

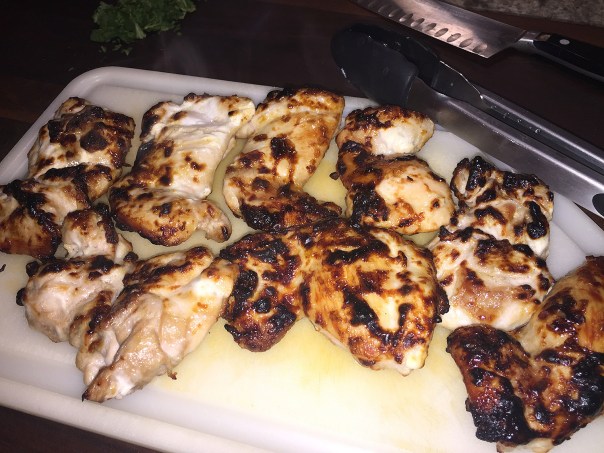
To imitate the deep charring produced by a tandoor oven, you broil chicken thighs coated in yogurt (its milk proteins and lactose brown quickly and deeply) before cutting them into chunks and stirring them into the sauce.

Traditionally, butter chicken is mildly spiced. If you prefer a spicier dish, reserve, mince, and add the ribs and seeds from the chile. And you know us, we DO prefer spicy so I threw in an extra serrano, but in the end, we could have tolerated even more chile spice. Serve with basmati rice and/or warm naan for a full meal.

IMG_2907

Indian Butter Chicken

  • Servings: 4
  • Difficulty: easy
  • Print

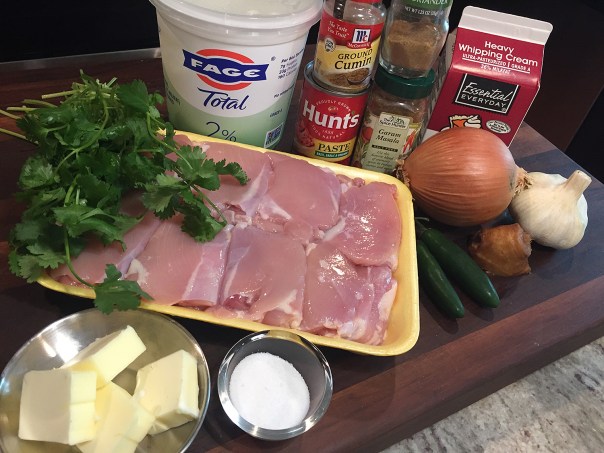
Ingredients

  • 2 pounds boneless, skinless chicken thighs, trimmed
  • ½ cup plain Greek yogurt
  • 2 tsp. table salt, divided
  • 4 Tbsp. unsalted butter, cut into 4 pieces and chilled, divided
  • 1 onion, chopped fine
  • 5 garlic cloves, minced
  • 4 tsp. grated fresh ginger
  • 1 serrano chile, stemmed, seeded, and minced
  • 1 Tbsp. garam masala
  • 1 tsp. ground coriander
  • ½ tsp. ground cumin
  • ½ tsp. pepper
  • 1 ½ cups water
  • ½ cup tomato paste
  • 1 Tbsp. sugar
  • 1 cup heavy cream
  • 3 Tbsp. chopped fresh cilantro, divided

Directions

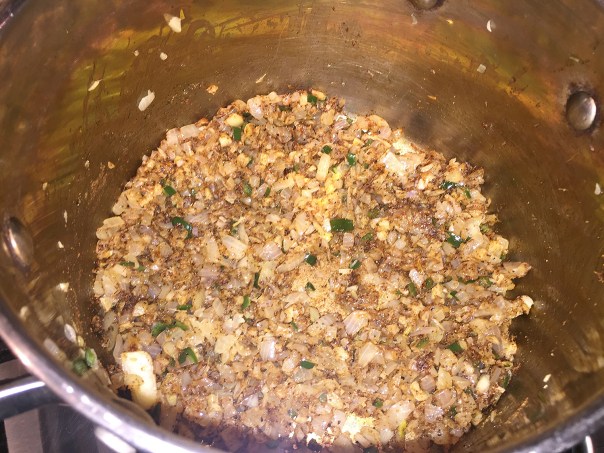
  1. Melt 2 tablespoons butter in large saucepan over medium heat. Add onion, garlic, ginger, and serrano and cook, stirring frequently, until mixture is softened and onion begins to brown, 8 to 10 minutes.
    IMG_2911
  2. Add garam masala, coriander, cumin, and pepper and cook, stirring frequently, until fragrant, about 3 minutes.
    IMG_2912
  3. Add water and tomato paste and whisk until no lumps of tomato paste remain.
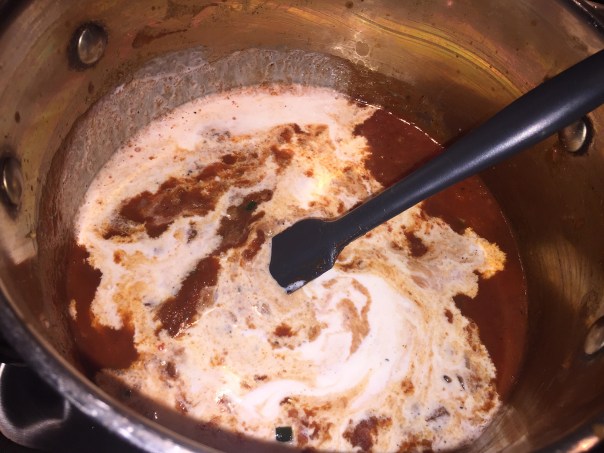
  4. Add sugar and 1 teaspoon salt and bring to boil. Off heat, stir in cream.
    IMG_2913
    IMG_2914
  5. Using immersion blender or blender, process until smooth, 30 to 60 seconds.
    IMG_2916
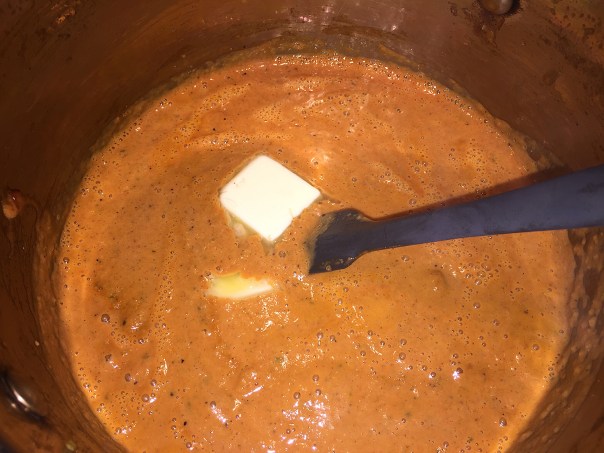
  6. Return sauce to simmer over medium heat and whisk in remaining 2 tablespoons butter. Remove saucepan from heat and cover to keep warm. (Sauce can be refrigerated for up to 4 days; gently reheat sauce before adding hot chicken.)
    IMG_2917
  7. Adjust oven rack 6 inches from broiler element and heat broiler.
  8. Combine chicken, yogurt, and remaining 1 teaspoon salt in bowl and toss well to coat. Using tongs, transfer chicken to wire rack set in aluminum foil—lined rimmed baking sheet.
    IMG_2910
    IMG_2920
  9. Broil until chicken is evenly charred on both sides and registers 175 degrees, 16 to 20 minutes, flipping chicken halfway through broiling.
    IMG_2923
  10. Let chicken rest for 5 minutes. While chicken rests, warm sauce over medium-low heat. Cut chicken into ¾-inch chunks and stir into sauce. Stir in 2 tablespoons cilantro and season with salt to taste.
    IMG_2925
  11. Transfer to serving dish, sprinkle with remaining 1 tablespoon cilantro, and serve.
    IMG_2928

http://www.lynnandruss.com

A Painting On A Plate

No wonder Milk Street Tuesday Nights recently won a James Beard Award. Seared Salmon with Avocado Sauce and Tomato-Cilantro Salsa is our fourth recipe from this cookbook, and just like the past three, the flavors are incredible! We both love salmon, but this takes it to another level. Fresh, bright, and with a side of steamed asparagus, healthy to boot… A painting on a plate!

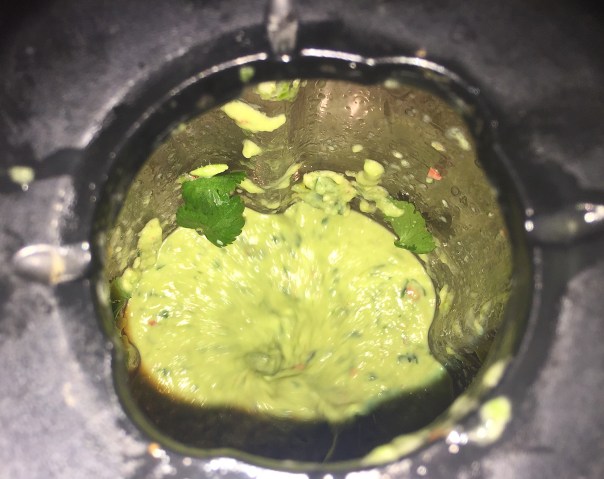
The recipe borrows from Colombia’s take on guacamole—spiked with both lime juice and vinegar as well as fresh chilies—to create an easy, no-cook sauce (extra points for that) for salmon fillets. A fresh tomato-cilantro salsa finishes the dish, adding a bright, acidic note to balance the rich, savory fish.

A note about the salmon. Our supermarket often sells precut 6-ounce fillets as well as large fillets that can be sliced down to preferred size. I initially ordered four 6-ounce sections, but them quickly realized at $8.99 per piece, it was going to cost $36! Instead, I asked for a 1-pound piece, at $14.99, which I broke down into 3 fillets, perfect for the two of us—and our wallet.

Please don’t shy away from using the habañero chili. Its fruity flavor pairs perfectly with the avocado. It does give bold spiciness to the sauce, but the richness of the salmon keeps the heat in check. And if you, or some other family members have a more delicate palate, just use a smidgen of the sauce. We tend to prefer bold flavors, so a hefty dollop was administered in our case.

It makes quite a bit of sauce, so we had leftovers which we then used on some grilled hamburgers the following evening. With still more leftover, it made for a perfect dipping sauce for nacho chips later in the week—waste not, want not…

IMG_2877

Singapore Chile Shrimp

  • Servings: 4
  • Difficulty: easy
  • Print

Ingredients

  • 1½ Cups cherry or grape tomatoes, roughly chopped
  • 5 Tablespoons lime juice, divided, plus lime wedges, to serve
  • Kosher salt
  • 2 Scallions, cut into 1-inch lengths
  • 1 Anaheim chili, stemmed, seeded, cut into rough 1-inch pieces
  • 1 Habañero chili, stemmed and seeded
  • 2 Tablespoons white vinegar
  • 1½ Cups fresh cilantro leaves and tender stems, divided
  • 1 Ripe avocado, halved, pitted, peeled and chopped
  • 4 6-ounce center-cut salmon fillets (each 1 to 1¼ inches thick), patted dry
  • 1 Tablespoon grapeseed or other neutral oil
  • 2 Tablespoons salted butter

Directions

  1. In a medium bowl, toss the tomatoes with 1 tablespoon of the lime juice and ¼ teaspoon salt. Set aside.
    IMG_2880
  2. In a blender, combine the scallions, both chilies, vinegar, remaining 2 tablespoons lime juice and ¾ teaspoon salt. Blend until smooth, about 30 seconds.
  3. Add ¾ cup of the cilantro and the avocado. With the blender running, stream in 3 tablespoons water and blend until smooth and creamy, about 1 minute, scraping the blender jar as needed; if needed, add up to 1 tablespoon more water to achieve the correct consistency. Set aside.
    IMG_2881
    IMG_2882
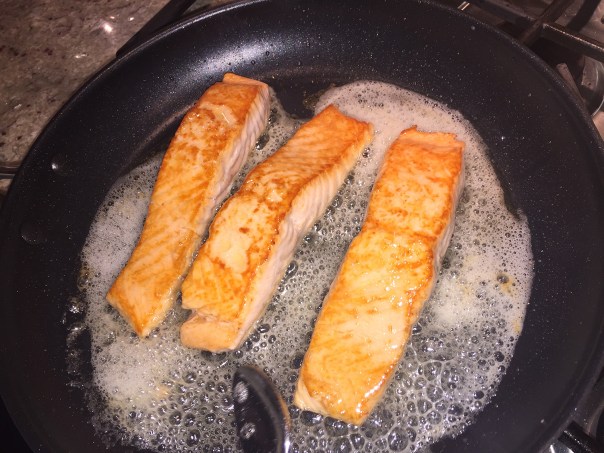
  4. Season the salmon on both sides with salt. In a 12-inch nonstick skillet over medium-high, heat the oil until shimmering. Add the fillets flesh side down, reduce to medium and cook until golden, about 4 minutes.
  5. Using a wide metal spatula, flip the fillets, add the butter and increase to medium-high. Once the butter stops foaming, spoon it over the fillets, adjusting the heat to prevent the butter from burning. Cook and baste the fish until the thickest parts reach 115°F to 120°F, or are nearly opaque when cut into, 2 to 3 minutes.
    IMG_2887
  6. Pour the remaining 2 tablespoons lime juice into the pan and baste the fillets once or twice more.
    IMG_2892
  7. With a wide metal spatula, transfer the fillets to individual plates. Spoon about 2 tablespoons avocado sauce over each fillet.
  8. Add the remaining ¾ cup cilantro to the tomatoes and toss, then spoon over the salmon.
    IMG_2888
  9. Serve the remaining avocado sauce on the side, along with lime wedges.
    IMG_2895

http://www.lynnandruss.com

Recipe from Milk Street Tuesday Nights

Orecchiette with Leeks, Spinach, Sausage and Peas

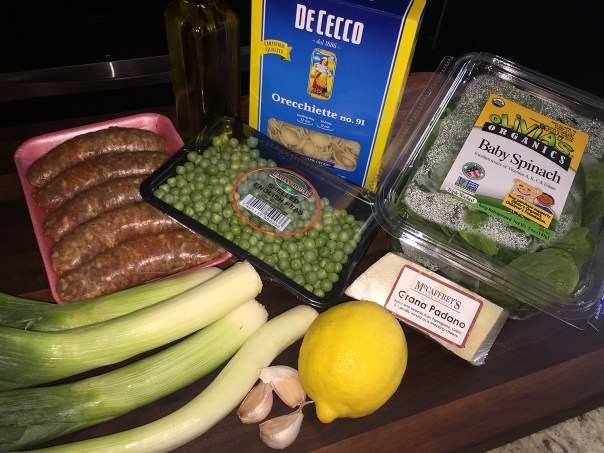
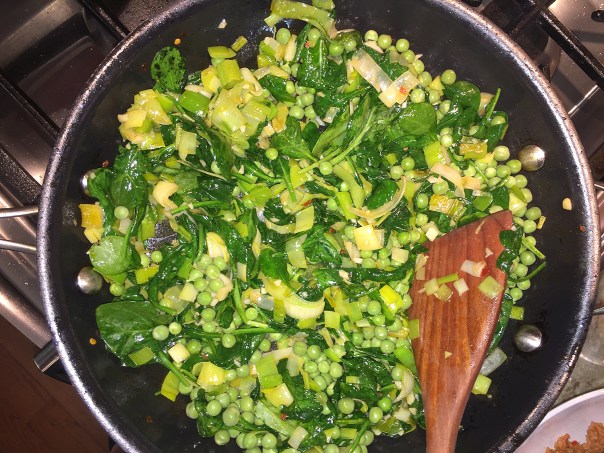
You’ll delight in this very tasty, and very quick, easy to put together weeknight meal that’s a nod to Spring with greens such as the leeks which pair well with the other ingredients like spinach and peas, that nestle ever-so-adoringly into the pasta.

The heat from the spicy Italian sausage balances the vegetables’ sweetness. The veggies make it taste so healthy, and the mint really brings a zing of brightness to the dish. We tend to reduce the amount of pasta in these recipes to highlight the other items, as we did so in this case using only 8 ounces of orecchiette.

As another reviewer wrote, the pasta water is definitely needed. Alas, we did not have access to pea shoots, but I don’t think the recipe suffered from a lack of them. In less than a half hour you have an all-inclusive, tasty meal!

IMG_2558

Orecchiette with Leeks, Spinach, Sausage and Peas

  • Servings: 4-6
  • Difficulty: easy
  • Print

Ingredients

  • Kosher salt
  • 3 lb. leeks (3 to 4 large)
  • 2 tsp. extra-virgin olive oil; more as needed
  • 1 lb. hot Italian sausage, casings removed
  • 1 large clove garlic, finely chopped
  • 5 oz. baby spinach (about 5 packed cups)
  • 1-1/2 cups fresh (preferably) or frozen peas
  • 12 oz. orecchiette, farfalle, or other short pasta
  • 2 oz. Parmigiano-Reggiano or Grana Padano, finely grated (about 1-1/2 cups); more for serving
  • 1/3 cup finely chopped fresh mint
  • Freshly ground black pepper
  • Fresh lemon juice, to taste
  • Pea shoots, for garnish (optional)
  • Lemon wedges, for serving

Directions

  1. Bring a large pot of well-salted water to a boil.
  2. Trim the leeks, leaving the white and light-green parts. Slice in half lengthwise, then crosswise into 1/2-inch-thick half-moon slices to yield about 8 cups. Rinse well, then pat dry.
  3. Heat the oil in a large skillet over medium heat. Add the sausage and cook, stirring occasionally, breaking up the meat into small bits, and adding more oil if needed, until cooked through, 5 to 7 minutes.
    IMG_2560
  4. Use a slotted spoon to transfer the sausage to a bowl, leaving about 2 Tbs. of fat in the pan. Add the leeks and 1/4 tsp. salt, and cook, stirring occasionally and adding more oil if the pan seems dry, until tender, 7 to 10 minutes.
  5. Add the garlic and cook, stirring occasionally, until fragrant, about 1 minute.
    IMG_2562
  6. Stir in the spinach and peas. Cook, stirring occasionally, until the spinach is wilted, 1 to 2 minutes more. Return the sausage to the skillet, and keep warm.
    IMG_2564
  7. Cook the pasta according to package directions until al dente. Reserve 1 cup of the pasta cooking water, drain the pasta, and return the pasta to the pot.
  8. Add the sausage-leek mixture, the reserved cooking water, cheese, mint, and a generous pinch of pepper. Toss to combine.
  9. Season to taste with salt, pepper, and lemon juice. Serve topped with additional cheese and pea shoots, if you like, and lemon wedges on the side.
    IMG_2568

http://www.lynnandruss.com

Recipe by Mindy Fox

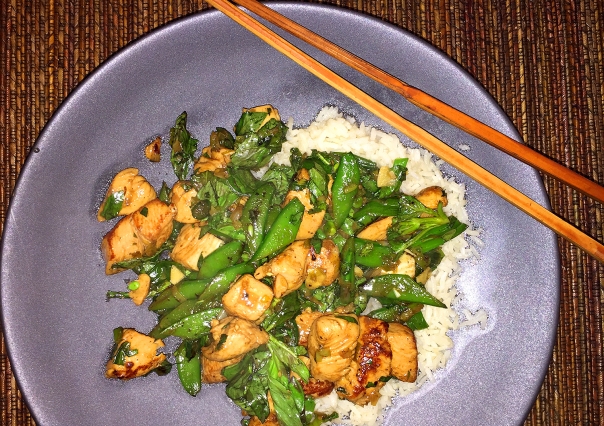
Stir-Fried Chicken with Snap Peas and Basil—LOTS of It!

BTW, the Tuesday evening I was making this dish, my husband came home and told me he just heard Milk Street Tuesday Nights (which this recipe hails from) won the The 2019 James Beard Foundation Book Award in the General category for cookbooks and other non-fiction food- or beverage-related books published in the U.S. in 2018. Woohoo! This was our third meal from this tome and we loved everyone of them. (The other two were Singapore Chile Shrimp and Spicy Pork with Leeks and Roasted Red Peppers.)

IMG_2841

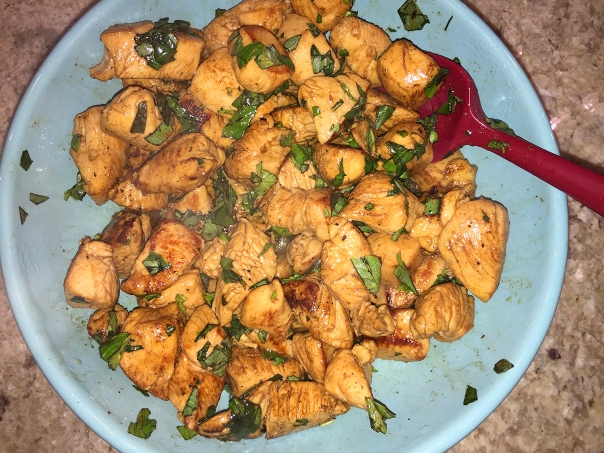
To prepare the chicken, cut each breast lengthwise into ½-inch strips, then cut the strips crosswise into 1-inch pieces. Using both chopped basil (mixed with the cooked chicken) and whole basil leaves (stirred in at the end) provided the full herbal flavor and fragrance we were looking for. We steamed jasmine rice in homemade chicken stock for another boost of flavor and a hint of color.

A double dose of basil adds herbal flavor and fragrance to this yummy stir-fry; while snap peas bring crunch and sweetness. We were literally swooning while eating it. A word to the wise for those with a delicate palate: The Serrano chiles add a lot of heat and we incorporated three of them, so you may want to pull back on the quantity with only one or two.

IMG_2825

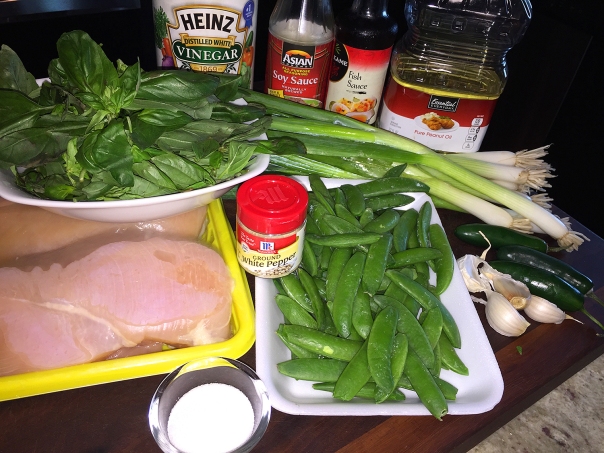
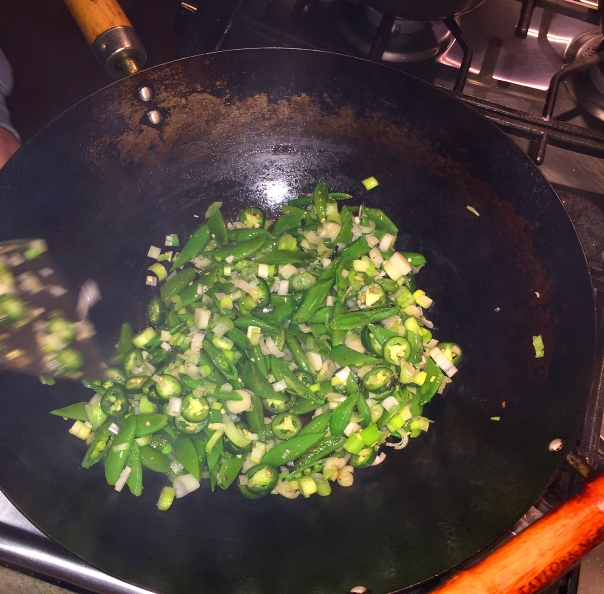
Use a wok for even faster cooking, but don’t begin until all ingredients are prepared. The stir-fry comes together quickly, so make sure everything is ready and close at hand.

IMG_2824

Stir-Fried Chicken with Snap Peas and Basil

  • Servings: 4
  • Difficulty: easy
  • Print

Ingredients

  • 1 Pound boneless, skinless chicken breasts, cut into 1-inch pieces
  • 3 Tablespoons fish sauce, divided
  • 1 Tablespoon soy sauce
  • Ground white pepper
  • 3 Tablespoons peanut oil, divided
  • ¼ Cup chopped fresh basil leaves, plus 3 cups torn and lightly packed
  • 2 Tablespoons white vinegar
  • 4 Ounces sugar snap peas, strings removed, halved on the bias
  • 8 Scallions, white and light green parts finely chopped, dark green tops cut into 1-inch pieces
  • 2-3 Serrano chilies, stemmed and thinly sliced
  • 4 Garlic cloves, thinly sliced
  • 1 Tablespoon white sugar

Directions

  1. In a medium bowl, stir together the chicken, soy sauce, 1 tablespoon of the fish sauce and ½ teaspoon white pepper. Let sit for 15 minutes, then drain and pat dry with paper towels.
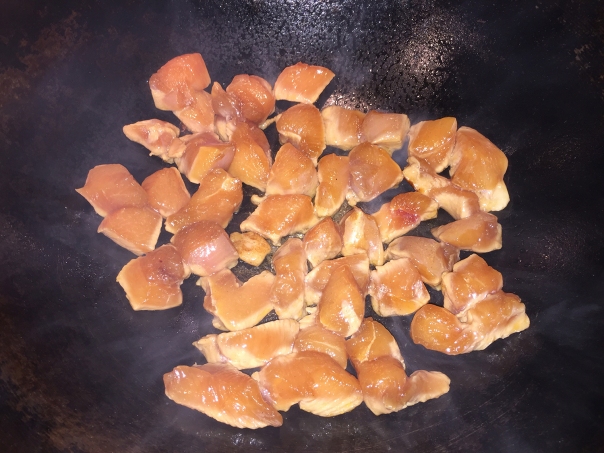
  2. In a 12-inch nonstick skillet (or a wok), heat 1 tablespoon of the oil over medium-high until just smoking. Add the chicken, distributing it in an even layer. Cook, stirring occasionally, until well browned and cooked through, 5 to 7 minutes.
    IMG_2826
  3. Transfer to a clean bowl, then stir in the chopped basil and vinegar. Set aside.
    IMG_2829
  4. Add the remaining 2 tablespoons oil to the skillet (wok) and heat over medium-high until just smoking. Add the snap peas, scallion whites and chilies. Cook, stirring occasionally, until the peas are lightly browned, about 3 minutes.
    IMG_2830
  5. Add the garlic and cook, stirring, until fragrant, about 30 seconds. Stir in the sugar.
    IMG_2832
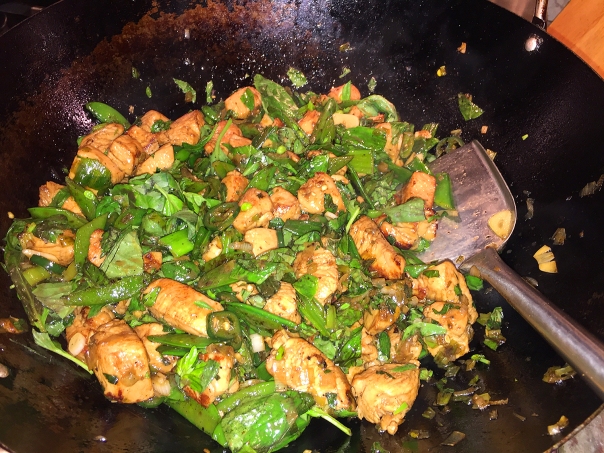
  6. Add the scallion tops and the chicken with the accumulated juices and cook, stirring, until most of the juices have evaporated, about 1 minute.
  7. Off heat, add the remaining 2 tablespoons fish sauce and the torn basil. Stir until the basil is wilted. Taste and season with white pepper.
    IMG_2839

http://www.lynnandruss.com

Honey-Chipotle Glazed Flank Steak Revisited

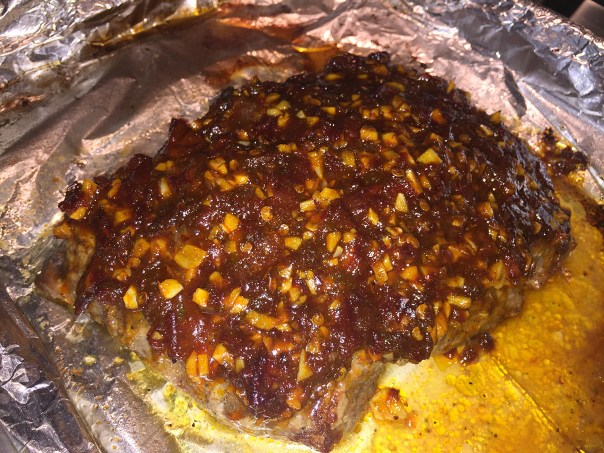
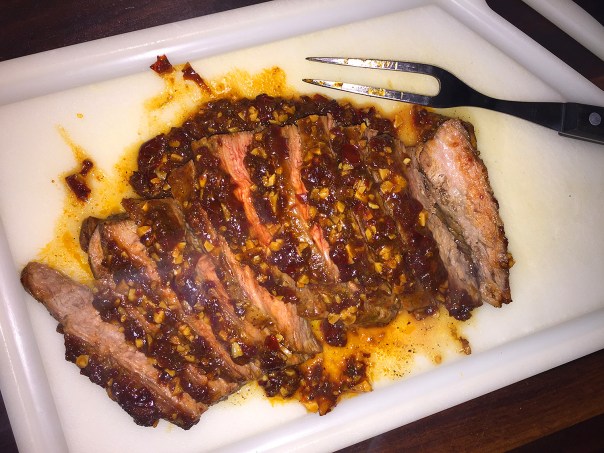
I blogged on this recipe over four years ago, and can’t believe we haven’t made it since. It’s extremely tasty, very quick and decently healthy—and with a relatively inexpensive cut of steak!

Broiling is the cooking method for this recipe. As I’ve bellyached many times, while I love our double-oven gas stove, I detest the broiler, in a word, it “sucks”. But I went ahead anyway adjusting the length of time, knowing it would take several minutes longer per side. I even thought of grilling it, but the problem with that comes at the end when the glaze has to be broiled.

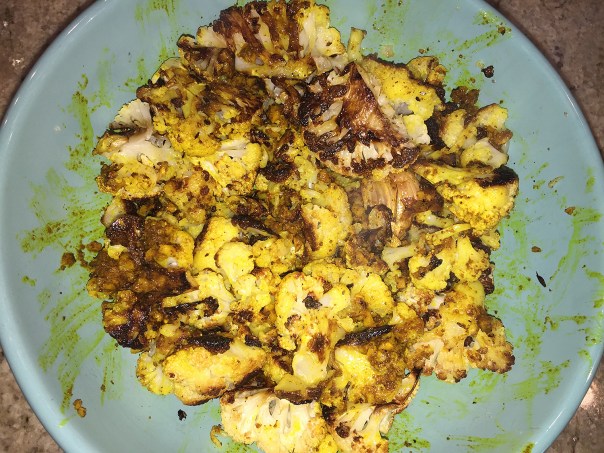
Well, it came out perfectly medium-rare, just the way we wanted it. For an accompaniment we paired the steak with a side of Steam-Roasted Indian Spiced Cauliflower. The sauces for both use garlic, cumin and citrus so they made great plate mates. This veggie dish takes much longer to cook then the steak, so if you’re short on time, just steam some asparagus or broccoli.

IMG_2852

Honey-Chipotle Glazed Flank Steak

  • Servings: 3-4
  • Difficulty: easy-peasy
  • Print

Ingredients

  • 2 tsp. olive oil
  • 2 tsp. minced garlic
  • 1/2 tsp. ground cumin
  • Kosher salt
  • 1-1/2 Tbs. minced canned chipotle in adobo sauce
  • 1 Tbs. honey
  • 1 Tbs. fresh lime juice
  • 1 tsp. finely grated lime zest
  • 1 lb. flank steak

Directions

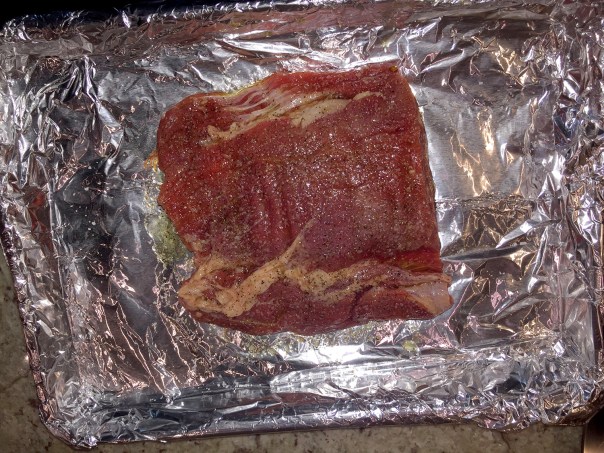
  1. Position an oven rack 6 inches below the broiler and heat the broiler on high. Line a large rimmed baking sheet with foil.
  2. Combine 1 tsp. of the oil, the garlic, cumin, and 1/2 tsp. salt in a 1-quart saucepan over medium-low heat; cook, stirring occasionally, until the garlic is golden, about 2 minutes. Add the chipotle and honey and stir until heated through, about 1 minute. Remove from the heat and stir in the lime juice and zest.
    IMG_2856
  3. Rub the flank steak with the remaining 1 tsp. oil and season generously with salt.
    IMG_2857
  4. Transfer to the prepared baking sheet and broil, turning once, until slightly browned and cooked to your liking, about 3 minutes per side for medium rare.
  5. Spread the glaze over the top of the steak and broil until it begins to bubble and darken in places, 1 to 2 minutes.
    IMG_2863
  6. Transfer to a cutting board and let rest for 5 minutes. Slice against the grain and serve.
    IMG_2866

http://www.lynnandruss.com

Recipe by Julissa Roberts from Fine Cooking

Steam-Roasted Indian Spiced Cauliflower

IMG_2860

When roasted, cauliflower becomes sweeter and more mellow. Cutting the florets so they have a flat side encourages more browning, which adds roasty notes, too. Toss the cauliflower at the last minute with spices, fresh ginger, and a handful of torn cilantro for a quick passage to India.

IMG_2850

Steam-Roasted Indian Spiced Cauliflower

  • Servings: 3-4
  • Difficulty: easy
  • Print

Ingredients

  • 1 large head cauliflower (2-1/2 to 3 lb.), cut into very large florets, florets halved lengthwise to make flat surfaces
  • 3 large cloves garlic, unpeeled and lightly smashed
  • 5 Tbs. vegetable oil
  • Kosher salt and freshly ground black pepper
  • 1 Tbs. coriander seeds
  • 1 tsp. cumin seeds
  • 2 Tbs. minced fresh ginger
  • 1 tsp. ground turmeric
  • Generous pinch cayenne
  • 1 Tbs. fresh lemon juice
  • 1/4 cup torn fresh cilantro leaves, for serving (optional)

Directions

  1. Position a rack in the center of the oven and heat the oven to 450°F.
  2. On a large rimmed baking sheet, toss the cauliflower and garlic with 3 Tbs. of the oil, 3/4 tsp. salt, and a few grinds of black pepper. Arrange the florets flat side down in a single layer. Cover tightly with foil and transfer to the oven to steam for 10 minutes.
    IMG_2853
  3. Carefully remove the foil, rotate the baking sheet, and roast until the bottom side is nicely browned, 10 to 15 minutes. Flip the cauliflower and continue roasting until just tender and deeply browned, 10 to 12 minutes more.
  4. Meanwhile, heat the coriander and cumin in a small heavy-duty skillet over medium heat, shaking the pan, until the seeds are just fragrant and lightly toasted, 1 to 2 minutes. Cool completely. Transfer to a spice grinder, and grind medium fine.
  5. Heat the remaining 2 Tbs. oil in the same skillet over medium-low heat. Add the ginger and cook, stirring, until fragrant, about 1 minute. Remove from the heat and stir in the cumin, coriander, turmeric, and cayenne. Swirl in the lemon juice.
    IMG_2855
  6. Discard the garlic and transfer the cauliflower to a serving bowl. Add the spice mixture, and toss gently. Season to taste with salt, garnish with the cilantro, if using, and serve.
    IMG_2870

http://www.lynnandruss.com

Recipe by Laraine Perri from Fine Cooking

Singapore Chile Shrimp

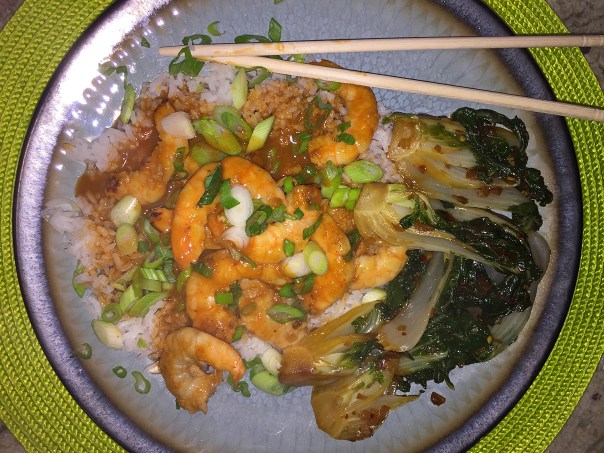
Another “Fastest” (I use the term loosely) recipe from Milk Street Tuesday Nights, and with ingredients that speak to me, this Singapore Chili Shrimp recipe was calling my name. Psyched to be complete in 20 minutes from start to finish as per the book notation, I was totally dismayed however when it took more than an hour! Now part of that is our fault for buying jumbo shrimp with heads and shells intact (which I had to take the time and remove); but that was intentional for making future homemade shellfish stock.

Anywho, after all of the chopping and processing of most of the ingredients, I was none-too-thrilled when I realized after the liquid was drained from both batches, the rest was thrown away. This meant the dinner would consist of merely shrimp and sauce over rice with a garnish of sliced scallions—which seemed pretty paltry for 4 servings. I was convinced I wouldn’t be making this recipe again. But then I tasted it…

IMG_2821

OMG, the flavors! This shrimp dish features a perfect balance of sweet, savory and spicy. I was surprised by the ketchup, but apparently it’s a standard ingredient in Singapore Chili Shrimp. To achieve a shrimp flavor that suffuses the dish, a few raw crustaceans get puréed into the sauce; giving it a rich, full-bodied consistency. Serve with steamed rice.

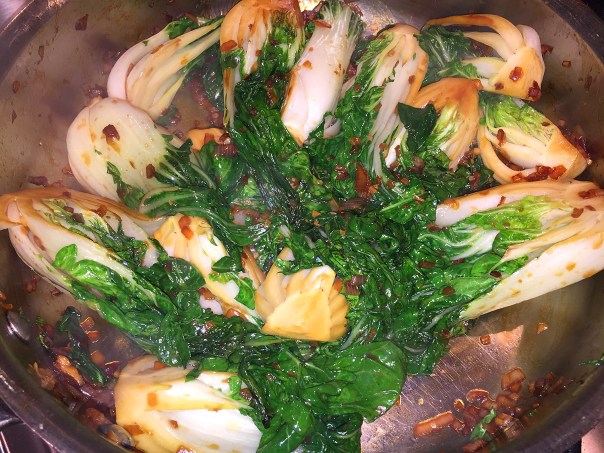
For a more complete meal I added a side of baby bok choy seared with shallots, garlic, soy sauce and a hint of red pepper flakes.

IMG_2804
IMG_2811

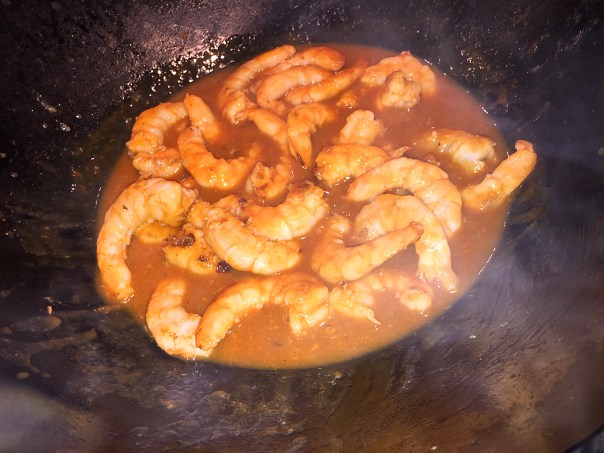
Don’t overcook the shrimp. Remove them from skillet as soon as they turn opaque. Even better with extra-jumbo shrimp; if you use smaller, they’ll require a shorter cooking time. (Below, I changed the number of servings and time factor to reflect our experience in making this dish.)

IMG_2793

Singapore Chile Shrimp

  • Servings: 3
  • Difficulty: moderate
  • Print

Ingredients

  • 4 Large shallots, peeled and quartered
  • 2-Inch piece fresh ginger, peeled and sliced ½-inch thick
  • 1 Stalk lemon grass, trimmed to the lower 5 to 6 inches, dry outer layers discarded, chopped
  • 6 Large garlic cloves
  • 6 Tablespoons ketchup
  • 3 Tablespoons fish sauce
  • 3 Tablespoons chili-garlic sauce
  • 6 Tablespoons unseasoned rice vinegar
  • 1¾ Pounds extra-jumbo shrimp, peeled, deveined, tails removed and patted dry
  • 3 Tablespoons grapeseed or other neutral oil, divided
  • 3 Scallions, thinly sliced on bias

Directions

  1. In a food processor, finely chop the shallots, ginger, lemon grass and garlic, about 15 seconds, scraping the sides as needed. Set aside in a small bowl.
  2. Rinse out and dry the workbowl, then add the ketchup, fish sauce, chili-garlic sauce, vinegar, 6 tablespoons water and 6 of the shrimp (4 ounces). Process until smooth, about 20 seconds, then set aside.
    IMG_2796
  3. In a 12-inch nonstick skillet over medium-high, heat 1 tablespoon of the oil until beginning to smoke. Add half the remaining shrimp in an even layer and cook without disturbing until deep golden brown on the bottoms, 1 to 2 minutes.
  4. Stir and cook until opaque on both sides, another 20 to 30 seconds. Transfer to a medium bowl. Repeat with 1 tablespoon of the remaining oil and the remaining shrimp, adding them to the first batch.
    IMG_2800
  5. In the same skillet over medium-high, heat the remaining 1 tablespoon oil until shimmering. Add the pureed shallot mixture and cook, stirring constantly, until fragrant, about 2 minutes.
    IMG_2806
  6. Pour in the ketchup mixture and cook, stirring and scraping up any browned bits, until slightly reduced, 2 to 3 minutes.
    IMG_2812
  7. Pour through a fine mesh strainer over a medium bowl, pressing on the solids; you should have about 1¼ cups liquid. Discard the solids.
     

  8. Return the liquid to the skillet, pour in any accumulated shrimp juices and set the pan over medium-high. Cook, stirring, until slightly thickened, about 1 minute.
    IMG_2815
  9. Remove from heat, add the shrimp and stir until heated through, 30 to 60 seconds.
    IMG_2817
  10. Transfer to a platter and sprinkle with scallions.
    IMG_2822

http://www.lynnandruss.com

Recipe from Milk Street Tuesday Nights

A Little Daube Will Do Ya

Really craving the Spring warmth to stick around for the long spell, it was shaping up to be probably one of the last cold Sundays of the season so we took “Big Red,” our large enamel coated cast-iron Le Creuset pot, for a final braising spin. And to that end, I selected a couple of recipes from Dorie Greenspan’s Around My French Table cookbook. Specifically, Dorie’s Go-To Beef Daube and Go-With-Everyting Celery Root Purée.

“We all need a great beef stew in our cooking back pocket, and this one’s mine. It’s fairly classic in its preparation — the meat is browned, then piled into a sturdy pot and slow-roasted with a lot of red wine, a splash of brandy, and some onions, garlic, carrots, and a little herb bouquet to keep it company. It finishes spoon-tender, sweet and winey through and through, and burnished the color of great-grandma’s armoire.” — Dorie Greenspan

Dorie suggests buying a whole chuck roast and cut it yourself into 2-3″ pieces so they hold their shape better than the precut stew meat. The only addition I made to the daube, was add a 14.5 oz. can of whole peeled tomatoes, that I crushed by hand and added to the pot in Step 5. Just make sure to clear your calendar for the better part of an afternoon before serving this exquisite dinner because you’ll need at least three and half hours; but Lordy, is it worth it!

If you’ve never seen a celery root before, visually they are a bit off-putting. Roughly the size of a grapefruit, they are round with a pale-yellowish brown, dense, gnarly outer skin. Celery and celery root—also known as celeriac—are basically the same plant (Apium graveolens) with celeriac being a variety cultivated for its root rather than for its stalks. They both have the taste of celery, although many people find celeriac to be earthier and more intense. Both can be used either cooked or raw, but in either case, their texture is widely different, so they are not interchangeable in most recipes.

celery root

Here, the root veggie simmers in a milk bath with a potato and onion, then gets whirred in a food processor, resulting in a smooth ivory purée with a soft, subtle, complex, and just a little surprisingly sweet flavor. It is a great substitute for mashed potatoes with more nutrients, two-thirds less calories, lower carbs and more flavor.

For serving the meal, use wide shallow bowls or small cast-iron cocottes for this stew. Spoon the daube out into the little casseroles with a generous dollop of the purée. Like all stews, this can be kept in the refrigerator for about 3 days or frozen for up to 2 months. You’ll be thrilled if there are leftovers!

Dorie's Go-To Beef Daube

  • Servings: 6
  • Difficulty: moderate
  • Print

Ingredients

  • 4 slices thick-cut bacon, cut crosswise into 1-inch-wide pieces
  • 3 1/2-pound beef chuck roast, fat and any sinews removed, cut into 2- to 3-inch cubes
  • 2 tablespoons mild oil (such as grapeseed or canola)
  • Salt and freshly ground pepper
  • 2 yellow onions or 1 Spanish onion, quartered and thinly sliced
  • 6 shallots, thinly sliced
  • garlic head, halved horizontally, only loose papery peel removed
  • 1 1/2 pounds carrots, trimmed, peeled, halved crosswise, and halved or quartered lengthwise, depending on thickness
  • 1/2 pound parsnips, trimmed, peeled, halved crosswise, and quartered lengthwise (optional)
  • 1/2 cup Cognac or other brandy
  • 1 750-ml bottle fruity red wine
  • A bouquetgarni — 2 thyme sprigs, 2 parsley sprigs, 1 rosemary sprig, and the leaves from 1 celery stalk, tied together in a dampened piece of cheesecloth

Directions

  1. Center a rack in the oven and preheat the oven to 350 degrees F.
  2. Put a Dutch oven over medium heat and toss in the bacon. Cook, stirring, just until the bacon browns, then transfer to a bowl.
    IMG_2768
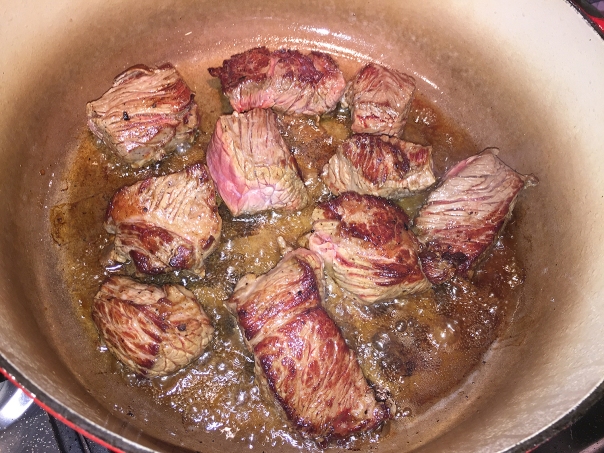
  3. Dry the beef between sheets of paper towels. Add 1 tablespoon of the oil to the bacon fat in the pot and warm it over medium-high heat, then brown the beef, in batches, on all sides. Don’t crowd the pot — if you try to cook too many pieces at once, you’ll steam the meat rather than brown it — and make sure that each piece gets good color. Transfer the browned meat to the bowl with the bacon and season lightly with salt and pepper.
    IMG_2769
    IMG_2771
  4. Pour off the oil in the pot (don’t remove any browned bits stuck to the bottom), add the remaining tablespoon of oil, and warm it over medium heat. Add the onions and shallots, season lightly with salt and pepper, and cook, stirring, until the onions soften, about 8 minutes.
    IMG_2774
  5. Toss in the garlic, carrots, and parsnips, if you’re using them, and give everything a few good turns to cover all the ingredients with a little oil. Pour in the brandy, turn up the heat, and stir well to loosen whatever may be clinging to the bottom of the pot.
    IMG_2776
  6. Let the brandy boil for a minute, then return the beef and bacon to the pot, pour in the wine, add the tomatoes if using, and toss in the bouquet garni. Once again, give everything a good stir.
    IMG_2779
  7. When the wine comes to a boil, cover the pot tightly with a piece of aluminum foil and the lid. Slide the daube into the oven and allow it to braise undisturbed for 1 hour.
    IMG_2781
  8. Pull the pot out of the oven, remove the lid and foil, and stir everything up once. If it looks as if the liquid is reducing by a great deal (unlikely), add just enough water to cover the ingredients. Re-cover the pot with the foil and lid, slip it back into the oven, and cook for another 1 1/2 hours (total time is 2 1/2 hours). At this point, the meat should be fork-tender — if it’s not, give it another 30 minutes or so in the oven.
    IMG_2785
  9. Taste the sauce. If you’d like it a little more concentrated, pour it into a saucepan, put it over high heat, and boil it down until it’s just the way you like it. When the sauce meets your approval, taste it for salt and pepper. (If you’re going to reduce the sauce, make certain not to salt it until it’s reduced.) Fish out the bouquet garni and garlic and, using a large serving spoon, skim off the surface fat.
  10. Serve the beef and vegetables moistened with the sauce.
    IMG_2789
    Heaven in a bowl! 

http://www.lynnandruss.com

Go-With Everything Celery Root Purée

Simmering in milk coaxes the very best out of celery root, giving this silky purée a flavor that’s both mellow and full.

celery poot puree

Go-With-Everything Celery Root Purée

  • Servings: 6
  • Difficulty: easy
  • Print

Ingredients

    • 3 cups whole milk
    • 3 cups water
    • 1 tablespoon salt
    • 2 large celery roots (about 2 1/2 pounds total), peeled, cut into 2-inch cubes
    • 1 medium russet potato (about 10 ounces), peeled, cut into 2-inch cubes
    • 1 small onion, peeled, quartered
    • 5 tablespoons butter, cut into 5 pieces
    • Ground white pepper
    • Chopped fresh chives

Directions

  1. Bring milk, water, and salt just to boil in heavy large saucepan over high heat. Add celery root cubes, potato cubes, and onion quarters; bring to boil. Reduce heat to medium and simmer until vegetables are tender, about 30 minutes. Drain thoroughly, removing as much moisture as possible.
  2. Combine vegetables and butter in processor and puree until smooth. Season to taste with salt and white pepper.
  3. Transfer celery root puree to bowl. Sprinkle with chopped fresh chives and serve.

Do ahead: Celery root puree can be made 1 day ahead. Cover and chill. Rewarm in microwave before serving.

http://www.lynnandruss.com