Monthly Archives: June 2019

Taking Sides

Let’s face it, walking around the same old block every day can get a bit boring. Maybe it’s time to try a different side street, or in this case, a new side dish to serve with your entrée. It’s time to let your BBQ go VGQ, and to that end, here are three grilling options that should spice up your dinner repertoire.

You already know how the grill performs a smoke-and-char magic act on fish and meats, so give the same treatment to vegetables and reap the benefits. The grill’s dry heat concentrates everything that tastes good while adding the unmistakeable smoky essence of summer.

IMG_3675A recent dinner consisted of grilled lamb loin chops, accompanied by the grilled onions and asparagus sides. The lamb benefited from the balsamic vinaigrette and gremolata.

Grilled Onions with Balsamic Vinaigrette

If you’re an allium fan, you’ll adore these onions (recipe adapted from Cooks Illustrated). Keep in mind, the size will affect the cooking time, so it’s important to choose onions that weigh between 7 and 8 ounces each and measure about 3 inches in diameter.

In step 3, be sure to err on the side of achieving darker charring, as the steaming step will soften the char’s appearance and flavor. The onions can be served hot, warm, or at room temperature which alleviates some stress when throwing a meal together.

Grilled Onions with Balsamic Vinaigrette

  • Servings: 4
  • Difficulty: easy
  • Print

Ingredients

  • ½ Cup extra-virgin olive oil
  • 3 Tbsp. balsamic vinegar
  • Kosher salt and pepper
  • 4 Onions
  • 1 (13 Bx 9″) disposable aluminum roasting pan
  • 1 Tbsp. minced fresh chives

Directions

  1. Whisk 6 tablespoons oil, vinegar, 1 teaspoon salt, and ¼ teaspoon pepper together in bowl; set aside.
    IMG_3658
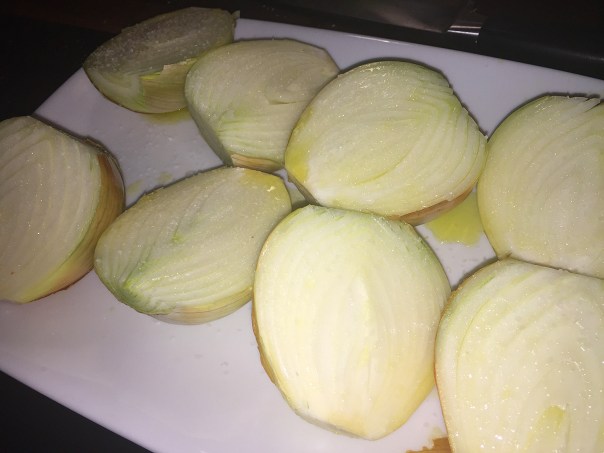
  2. Trim stem end of onions and halve onions from root end to stem end, leaving skin intact. (Root end can be trimmed, but don’t remove it.) Brush cut sides of onions with remaining 2 tablespoons oil and sprinkle each half with 1/8 teaspoon salt.
    IMG_3660
  3. Arrange onions cut side down on grill over medium heat and cook (covered if using gas) until well charred, 10 to 15 minutes, moving onions as needed to ensure even cooking. Flip onions and cook cut side up until light charring develops on skin side, about 5 minutes.
    IMG_3661
    IMG_3662
  4. Transfer onions cut side up to disposable pan and cover tightly with aluminum foil. Return disposable pan to grill and cook over medium heat (covered if using gas) until onions are tender and easily pierced with paring knife, 10 to 15 minutes.
    IMG_3664
  5. When onions are cool enough to handle, remove and discard charred outer skin; arrange onions cut side up on large platter. Rewhisk vinaigrette and drizzle evenly over onions. Sprinkle with chives, season with salt and pepper to taste, and serve.IMG_3665IMG_3673

http://www.lynnandruss.com

Grilled Summer Squash with Lemon, Mint and Pine Nuts

Here, a fresh vinaigrette lends a bright contrast to the sweetness of summer squash (which gets extra caramelized from the heat of the grill).

IMG_3625

Of course Mother Nature can throw you a curve ball as she did the night we made our dinner. Thunderstorms had been raging through the area for days and more was on the way. Luckily, our Plan B was “Grilliam” our cast-iron Staub grill pan. In fact, it was even quicker than a grill because it took less time to heat up, while providing the caramelized char in under 15 minutes—a Win, Win! The downside of course, was having to cook the main entrée in another skillet.

Grilled Summer Squash with Mint Vinaigrette and Pine Nuts

  • Servings: 4
  • Difficulty: easy
  • Print

Ingredients

  • 2 to 3 lb. zucchini and yellow squash, trimmed and sliced lengthwise about 1/4 inch thick
  • Kosher salt and freshly ground black pepper
  • Vegetable oil, for the grill
  • 2 cloves garlic
  • 1 Tbs. finely grated lemon zest
  • 2 Tbs. fresh lemon juice
  • 5 Tbs. extra-virgin olive oil
  • 1/4 cup finely chopped fresh mint, more for garnish
  • 2 Tbs. toasted pine nuts

Directions

  1. Prepare a hot gas or charcoal grill fire. Or in the case of inclement weather, a grill pan.
  2. Lightly brush both sides of the squash strips and season with 1 tsp. salt and 1/2 tsp. pepper. Oil the grill, then grill the squash, turning once, until tender and grill marks appear on both sides, about 15 minutes total. Transfer to a medium bowl.
    IMG_3619
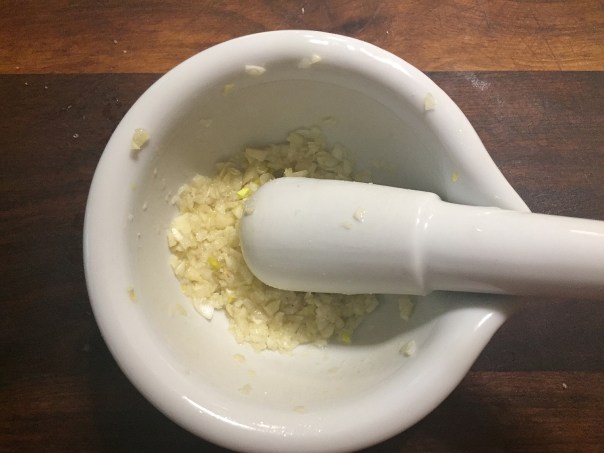
  3. Meanwhile, smash the garlic with 1/4 tsp. salt to make a paste.
    IMG_3616
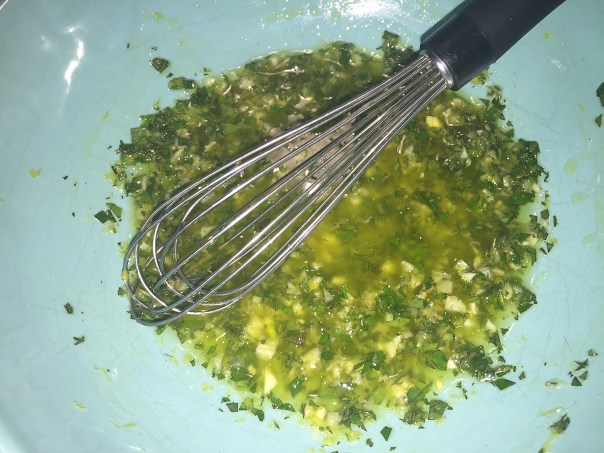
  4. Transfer to a small bowl, and add the lemon zest and 1/4 tsp. salt. Whisk in the lemon juice, and then slowly add the  oil, whisking until blended. Stir in the mint.
    IMG_3618
  5. Toss the squash with enough of the vinaigrette to coat well. Season to taste with salt and pepper, and arrange on a serving platter. Sprinkle with the pine nuts and additional chopped mint.
    IMG_3623

http://www.lynnandruss.com

Grilled Asparagus with Cilantro-Lime Gremolata

Not moving the spears during cooking allows them to get a rich sear on one side and remain vibrant green on the other, which helps them retain their freshness and tender snap. This riff on gremolata enhances the stalks’ vibrancy. And you seriously can’t get much easier than this 3-ingredient topping.

IMG_3668

Grilled Asparagus with Cilantro-Lime Vinaigrette

  • Servings: 3-4
  • Difficulty: easy
  • Print

Ingredients

  • 1 bunch asparagus, trim the base of the spears with a knife and peeled away their tough skin.
  • 4 Tbsp. minced fresh cilantro
  • 2 tsp. grated lime zest
  • 1 large clove garlic, minced

Directions

  1. Combine all ingredients in bowl.
    IMG_3667To avoid harsh garlic flavor, don’t mince the garlic until you’re ready to mix the gremolata.
  2. Brush asparagus with olive oil and sprinkle with salt. Heat on a hot grill without moving until the spears achieve a nice char on the underside.
    IMG_3666
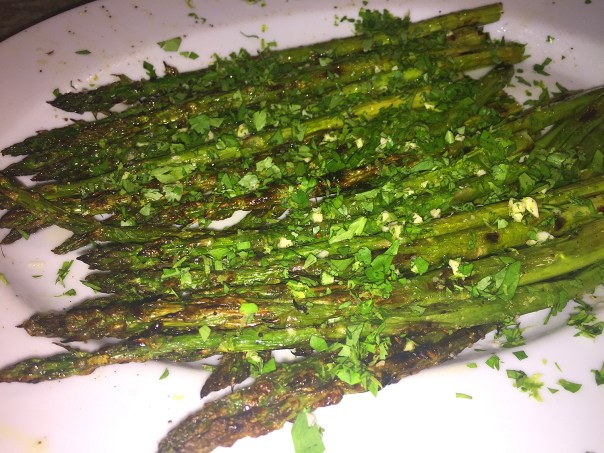
  3. Remove to a platter and sprinkle with gremolata. Serve hot or warm.
    IMG_3669

http://www.lynnandruss.com

Grilled Gochujang Shrimp with Scallions

As you are aware, there are so many hot sauces on the market that it might be tough to wrap your head around another one, but stay with me here because this classic Korean condiment, gochujang, is having a moment in the sun for good reason. How to describe this fermented chili, garlic, and rice-based sauce that is enormously popular in Korea? Garlicky. Spicy. Fermented. Thick. Savory. Funky. Sweet. Umami. It’ll definitely appeal to those who like Sriracha, like us.

IMG_3483

In this recipe found on 177Milkstreet.com, Grilled Gochujang Shrimp with Scallions gets just the right amount of spicy flavor and a healthy dose of umami from gochujang. If you’ve never purchased it, it’s often sold in plastic tubs in Asian grocery stores or in red squeeze bottles in the Asian aisle of many supermarkets.

Simply serve the shrimp with steamed rice (preferably steamed in shellfish stock instead of water) and kimchi, use as a filling for lettuce wraps, or add them to a salad along with a sesame-soy vinaigrette.

IMG_3463

Grilled Gochujang Shrimp with Scallions

  • Servings: 4
  • Difficulty: easy
  • Print

Ingredients

  • 5 Tbsp. gochujang, divided
  • 2 Tbsp. soy sauce
  • 1 Tbsp. toasted sesame oil
  • 1 Tbsp. grapeseed or other neutral oil
  • 1½ Lbs. jumbo shrimp, peeled and deveined, tails left on
  • 2 Tbsp. unseasoned rice vinegar
  • 2 Tbsp. salted butter, cut into small pieces
  • Kosher salt and ground black pepper
  • 3 Scallions, thinly sliced on diagonal

Directions

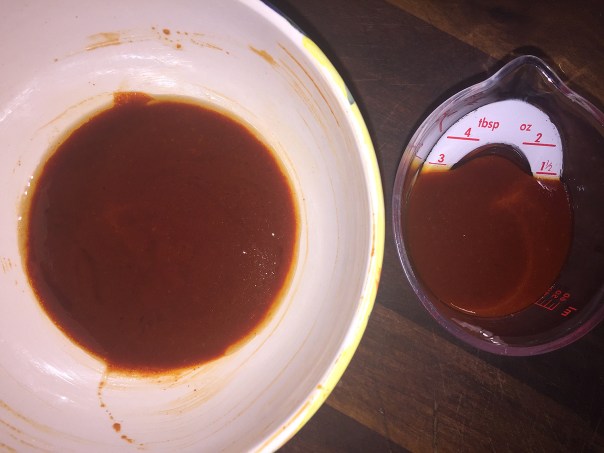
  1. In a medium bowl, whisk together 4 tablespoons of gochujang, the soy sauce, sesame oil and grapeseed oil.
  2. Measure 2 tablespoons of the mixture into another medium bowl and set aside.
    IMG_3465
  3. Add the shrimp to the remaining mixture and toss to coat, then cover (or put in a ziploc bag) and refrigerate for at least 30 minutes or up to 1 hour.
    IMG_3469
  4. To the reserved 2 tablespoons gochujang mixture, whisk in the remaining 1 tablespoon gochujang and the rice vinegar, then toss in the butter; set aside.
    IMG_3466
  5. Prepare a charcoal or gas grill for high-heat cooking. For a charcoal grill, ignite a large chimney of coals, let burn until lightly ashed over, then distribute the coals evenly over one side of the grill bed; open the bottom grill vents. For a gas grill, turn all burners to high. Heat the grill, covered, for 5 to 10 minutes; clean and oil the grate.
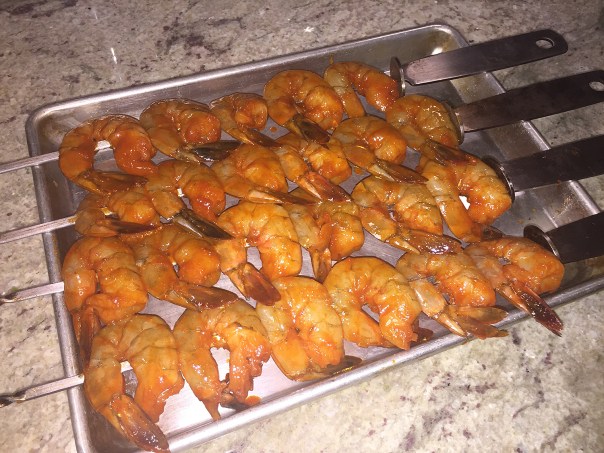
  6. While the grill heats, thread the shrimp onto four or five 12-inch skewers, dividing them evenly; skewer each shrimp in a C shape, piercing through two points.
    IMG_3471
  7. Place the skewers on the hot side of the grill and cook until they begin to char and the tails begin to blister, 2 to 3 minutes. Flip and continue to cook until the shrimp are just opaque, another 1 to 2 minutes.
    IMG_3478
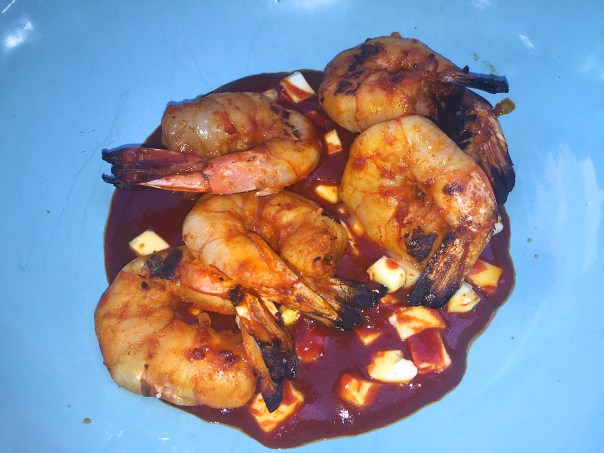
  8. Slide the shrimp off the skewers into the bowl containing the gochujang-butter mixture and toss until the butter has melted and the shrimp are well coated.
    IMG_3480
  9. Add the scallions and toss again, then taste and season with salt and pepper.
    IMG_3481

NOTE: Don’t over-marinate the shrimp. If left for longer than 1 hour in the marinade, the shrimp may become too salty.

http://www.lynnandruss.com

Coriander-Orange Skirt Steak with Arugula

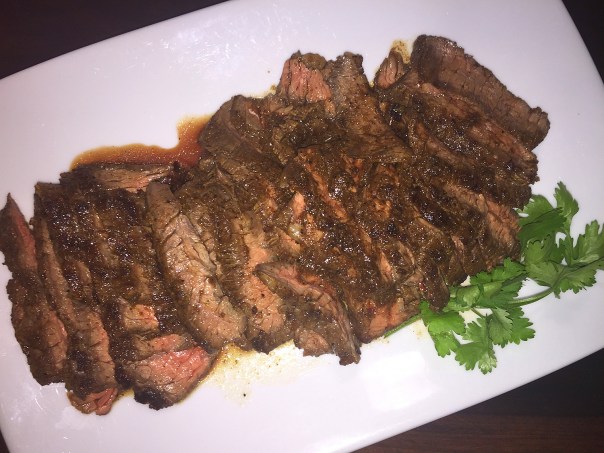
This dish, inspired by a recipe in “Season” by Nik Sharma, delivers a flavorful steak plus salad using just a handful of ingredients. A simple spice mix spiked with orange zest seasons both the steak and the vinaigrette that dresses the arugula; while the peppery bite of the baby arugula complements the bold flavors of the meat.

IMG_3609

Don’t use extra-virgin olive oil, as its smoke point is too low for searing the steak (which we increased to 1 1/2pounds); regular olive oil is the better choice. Alternatively, use 1 tablespoon grapeseed or other neutral oil for cooking the steak and 2 tablespoons extra-virgin olive oil in the dressing.

IMG_3605
IMG_3614

With few ingredients, this meal comes together quickly. As a speedy side that is also low-carb, we paired it with a Caprese salad of heirloom tomatoes, sliced mozzarella, fresh-picked green and purple basil chiffonade and a lite balsamic dressing.

IMG_3595

Coriander-Orange Skirt Steak with Arugula

  • Servings: 4
  • Difficulty: easy
  • Print

Ingredients

  • 2 Tbsp. finely grated orange zest, plus 1 tablespoon orange juice
  • 1 Tbsp. ground coriander
  • 1 Tbsp. garam masala
  • Kosher salt and ground black pepper
  • 1-lb. (or larger) skirt steak, trimmed and cut crosswise into 5- to 6-inch sections, patted dry
  • 3 Tbsp. olive oil, divided
  • 1 Tbsp. sherry vinegar
  • 5-ounce container baby arugula

Directions

  1. In a small bowl, stir together the orange zest, coriander, garam masala, 2½ teaspoons salt and ½ teaspoon pepper.
    IMG_3598
  2. Measure 1 tablespoon of the mixture into a large bowl; set aside. Rub the remaining mixture onto both sides of each piece of steak, massaging it into the meat. Let stand for about 15 minutes.
    IMG_3601
  3. In a nonstick 12-inch skillet over medium-high, heat 1 tablespoon of oil until shimmering. Add the steak in a single layer and cook without disturbing until well browned, 3 to 4 minutes.
  4. Flip and cook until the second sides are well browned and the center of the thickest piece reaches 125°F for medium-rare or 130°F for medium, another 3 to 4 minutes. Transfer to a platter, tent with foil and let rest for 10 minutes.
    IMG_3603
  5. To the reserved spice mixture, whisk in the orange juice, sherry vinegar, ¼ teaspoon salt and the remaining 2 tablespoons oil.
    IMG_3599
  6. Add the arugula, toss, then transfer to a platter. Slice the steak thinly against the grain and place on top of the arugula.
    IMG_3608

http://www.lynnandruss.com

Bookmark This Quick Weeknight Dinner

Sheet Pan Salmon With Potatoes and Broccolini is another “Easy Dinner” from the Real Simple Magazine (RS), December 2018 issue. In the name of convenience, less dishes to wash, and healthy ingredients, I figured this was a must-try for a weeknight meal. Not only does this simple salmon and veggie dinner come together on one sheet pan, it keeps your shopping list short—a double win!

However, my main concern was with how the broccolini was treated. There was no way it was going to be anywhere near done in only two minutes under our broiler. (Gas ovens tend to have lousy broilers.) By steaming it in the microwave until crisp tender, the broccolini was at least partially cooked before I added it to the sheet pan.

IMG_9547

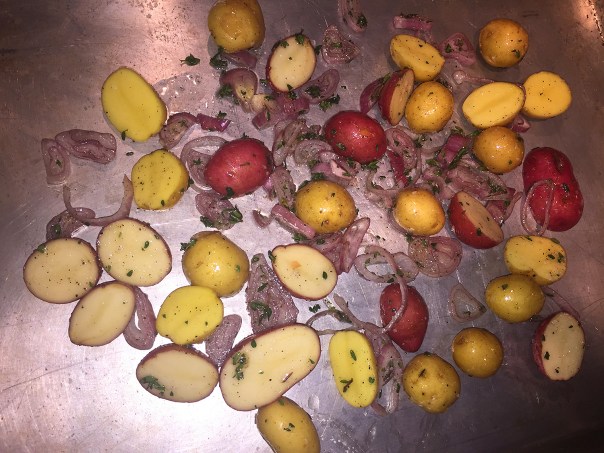
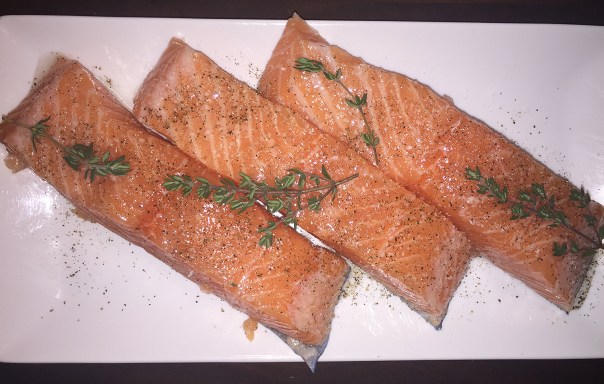
I cut our 1 1/2-pound salmon fillet into three portions as opposed to four, weighing in at 8 ounces a piece. Therefore I reworked the cooking time table so that after the potatoes roasted (which were pretty small) for only 12 minutes, I added the salmon (on top of some sliced shallots), and cooked everything another 7 minutes before adding the broccolini. Then I broiled it all another 5 minutes total, turning the sheet as necessary for even browning.

The key to making this recipe work is the timing—and getting the broccolini just right. Starting the potatoes off first allows them to get a head start, instead of overcooking the salmon or fussy steps. The sauce is tangy and mahvelous, and brings everything together. Two thumbs up!

Sheet Pan Salmon with Potatoes and Broccolini

  • Servings: 3-4
  • Difficulty: easy
  • Print

Ingredients

  • 1 pound small Yukon Gold potatoes, halved
  • ½ cup olive oil, divided
  • 1¼ teaspoon kosher salt, divided
  • ¾ teaspoon black pepper, divided
  • 4 6-oz. salmon fillets
  • 1 pound Broccolini, trimmed
  • 2 tablespoons fresh lemon juice (from 1 lemon)
  • 1 shallot, finely chopped
  • 1 shallot thinly sliced, (optional for salmon bed)
  • 1½ teaspoon Dijon mustard

Direction

  1. Preheat oven to 450°F. Toss potatoes with 2 tablespoons oil, ½ teaspoon salt, and ¼ teaspoon pepper on a rimmed baking sheet. Roast for 15 minutes.
    IMG_9535
  2. Meanwhile, rub salmon with 1 tablespoon oil and season with ½ teaspoon each salt and pepper.
    IMG_9538
  3. Add salmon to sheet (over a bed of shallots slicing if using) and roast until potatoes are tender, 5 more minutes.
    IMG_9541
  4. Turn potatoes, add Broccolini to sheet, and drizzle with 1 tablespoon oil. Heat broiler and broil all until salmon and Broccolini are browned, 2 to 3 minutes.
    IMG_9545
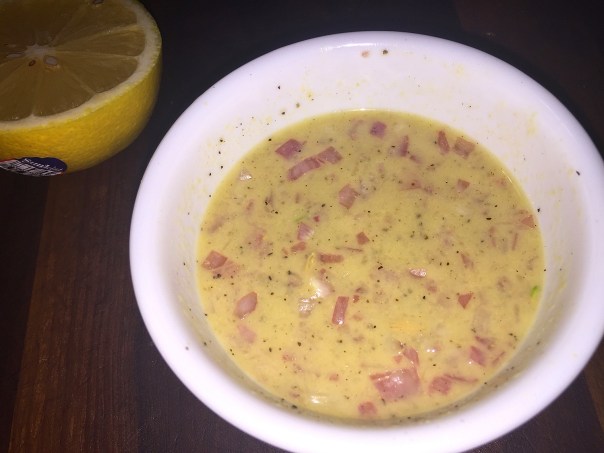
  5. Whisk lemon juice, minced shallot, and mustard with remaining ¼ cup oil and ¼ teaspoon salt and drizzle over salmon and vegetables.
    IMG_9537
    IMG_9549

http://www.lynnandruss.com

Lean, Light & Bright Burgers

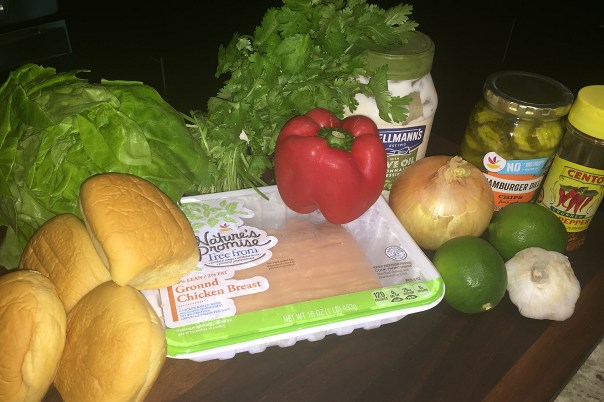
Chicken Burgers with Lime, Pepper and PickleWho knew a lean burger could taste so light and bright? Lime zest and juice as well as fresh cilantro and red bell pepper brighten these babies beautifully. And the addition of dijon mustard with the mayonnaise raises the level of tang just a smidge more.

Every now and again it’s nice to change things up. And even though a grilled beef burger is an all-American favorite, especially during the warm weather months, these chicken patties are sure to make you raise an eyebrow or two. 

Because the meat is so lean, they are best cooked in a cast-iron skillet as opposed to on the grill. You’ll still get a nice crisp char on the outside, but the meat will remain juicy on the interior.

IMG_3565

Don’t leave off the pickle; that little bit of tang and crunch makes a big difference.

IMG_3548

Chicken Burgers with Lime, Pepper and Pickles

  • Servings: 4
  • Difficulty: easy
  • Print

Ingredients

  • 1 lb. 98% lean ground chicken
  • 1/2 cup finely chopped yellow onion
  • 1/3 cup finely chopped red bell pepper
  • 1/4 cup finely chopped fresh cilantro
  • 3 medium cloves garlic, minced or grated
  • 2 tsp. finely grated lime zest
  • 2 Tbs. fresh lime juice
  • 1/2 tsp. crushed red pepper flakes
  • Kosher salt
  • 1 Tbs. canola oil
  • 4 provolone cheese slices
  • 8 butter lettuce leaves
  • Freshly ground black pepper
  • 1/4 cup mayonnaise
  • 1 Tbsp. dijon mustard
  • 4 hamburger buns, toasted if you like
  • Sliced dill pickle chips

Directions

  1. Heat oil over medium-high in a large cast-iron skillet until shimmering.
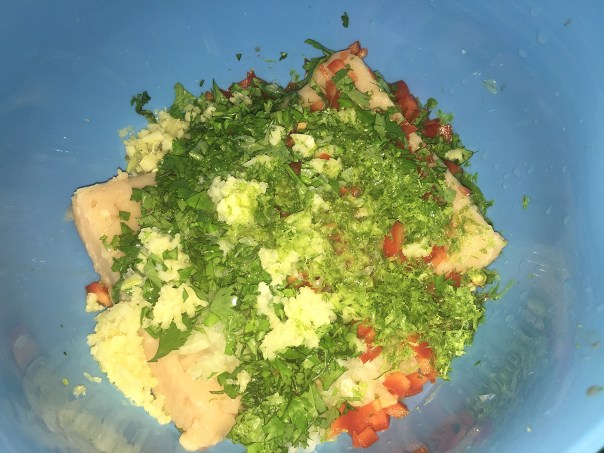
  2. Put the chicken, onion, bell pepper, cilantro, garlic, lime zest and juice, pepper flakes, and 1-1/2 tsp. salt in a medium bowl, and use your hands to mix well (the mixture will be very moist).
    IMG_3551
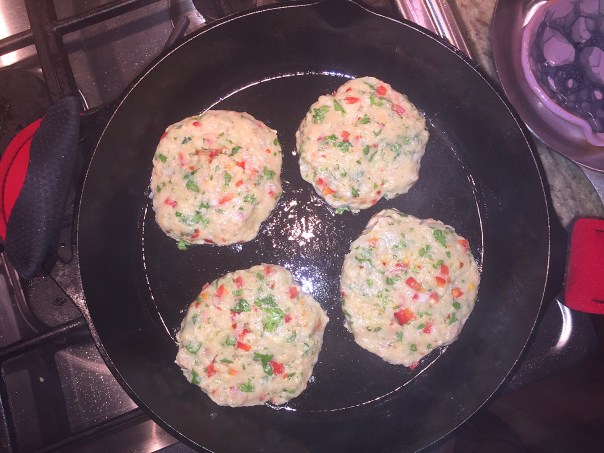
  3. Divide evenly to make four patties. Put the burgers in the hot skillet.
    IMG_3554
  4. Sear, flipping once halfway through until the burgers are cooked to 160°F, about 7 minutes each side.
    IMG_3557
  5. Flip one last time and top each burger with a slice of cheese. Let melt about one minute more. Temperature should now be 165°F.
  6. Meanwhile, mix the mayonnaise with the dijon mustard in a small bowl until well combined.
  7. Spread the mayonnaise/mustard sauce on each of the bottom buns. Top with the burgers, lettuce, pickles, and top bun, and serve with chips or fries.
    IMG_3562

http://www.lynnandruss.com

Adapted from a recipe by Diana Andrews

Steak, Snap Pea and Asparagus Stir-Fry

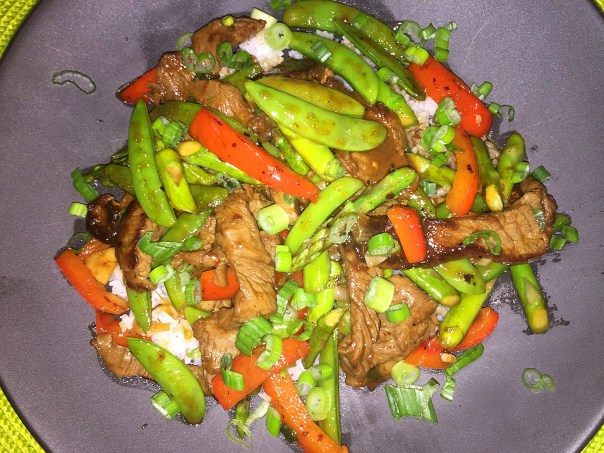
We love stir-fries with lots of veggies and this one was everything it claimed to be—easy, fast and incredibly good. And is par for the course, we often make a few tweaks based on our own preferences or comments from other reviewers. In this case, we reduced the mirin (by half) which lends a sweet taste; instead we added chili garlic sauce for a more spicy note.

Several other alterations included increasing the amount of sirloin steak to 1.75 pounds (we wanted leftovers), adding a red bell pepper (great way to add a pop of color and more nutrients), increasing the snap peas to 12 ounces, and using a wok instead of a skillet. However, the recipe below is the Bon Appétit original.

You bet this was a keeper, and we totally enjoyed leftovers for lunch the next couple of days.

IMG_2644

Steak, Snap Pea and Asparagus Stir-Fry

  • Servings: 4
  • Difficulty: easy
  • Print

Ingredients

  • 1 lb. sirloin steak
  • 1 Tbsp. cornstarch
  • 2 Tbsp. soy sauce, divided
  • 4 Tbsp. vegetable oil, divided
  • 8 oz. sugar snap peas
  • 1 bunch asparagus
  • 6 scallions
  • 1 2″ piece ginger
  • 3 Tbsp. mirin (Japanese rice wine); or 50-50 mix of mirin and chili garlic sauce
  • ¼ cup oyster sauce
  • 2 Tbsp. unseasoned rice vinegar
  • Kos

Directions

  1. Place 1 lb. sirloin steak on a cutting board and pat dry with paper towels. Slice meat crosswise as thinly as possible.
  2. Transfer steak to a medium bowl and add 1 Tbsp. cornstarch1 Tbsp. soy sauce, and 1 Tbsp. vegetable oil. Toss with tongs until meat is evenly coated.
    IMG_2647
  3. Prep the rest of your ingredients: Trim ends of 8 oz. snap peas and remove any strings; transfer to another medium bowl. Snap woody ends off of 1 bunch asparagus and discard. Cut asparagus crosswise into 1″ pieces; transfer to bowl with snap peas.
  4. Trim both ends of 6 scallions and set aside 2 scallions for serving. Cut 4 remaining scallions crosswise into 1″ pieces and add to bowl with asparagus and snap peas.
  5. Scrub 2″ piece ginger under running water, then slice crosswise as thinly as possible; add to bowl with the other veggies.
  6. Combine 3 Tbsp. mirin, ¼ cup oyster sauce, 2 Tbsp. rice vinegar, and remaining 1 Tbsp. soy sauce in a glass measuring cup and stir with a spoon to incorporate.
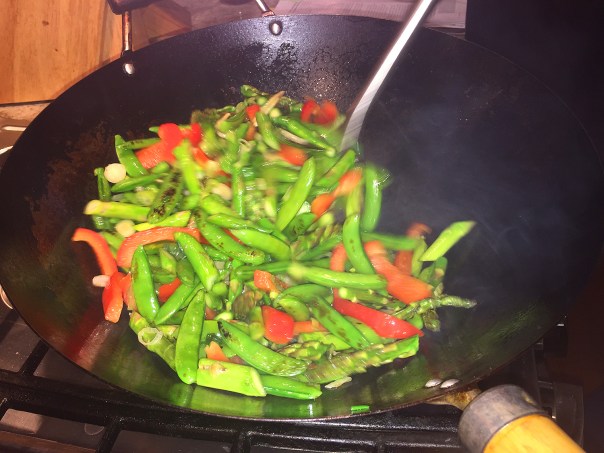
  7. Heat 2 Tbsp. vegetable oil in a large skillet, preferably stainless steel, over medium-high. When oil shimmers across surface of skillet, add vegetable mixture. Cook, shaking skillet often, just until asparagus are tender but still retain a hint of crunch, about 3 minutes. Return vegetables to original bowl.
    IMG_2651
    IMG_2652
  8. Heat remaining 1 Tbsp. vegetable oil in skillet over medium-high. Add steak, arranging slices in a single layer. Cook, undisturbed, until juices start to pool on surface of meat and underside is browned, about 3 minutes. Using a thin metal spatula, scrape bottom of skillet and loosen meat.
    IMG_2653
    We had to sear the meat in two batches, putting the first batch in with the bowl with the cooked veggies.
    IMG_2655
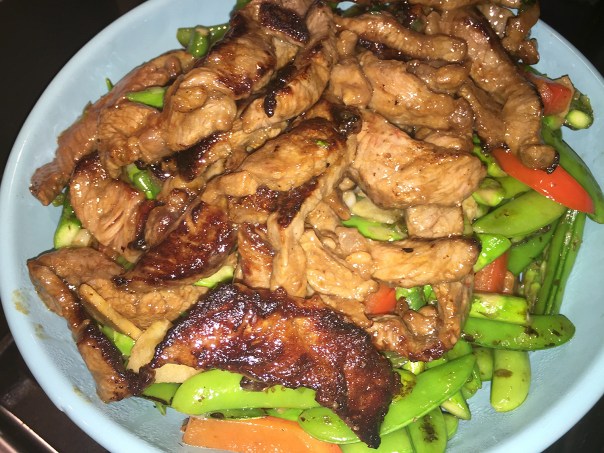
  9. Immediately add cooked vegetables and sauce to skillet and cook, tossing constantly, until meat is fully cooked and sauce is thick and bubbling, 1–2 minutes more.
    IMG_2657
  10. Remove from heat and let cool for a minute or two. Season stir-fry lightly with salt. Divide 2 cups cooked rice among plates. Spoon stir-fry over. Thinly slice reserved 2 scallions and scatter over.
    IMG_2663

http://www.lynnandruss.com

Adapted from a recipe by Claire Saffitz from Bon Appétit

Easy Appetizer from The Basque Book

It’s been six years since our visit to lovely San Sebastian, a coastal town firmly ensconced in the Basque Country of Spain. A relatively new cookbook for Russ, The Basque Book (by Alexandra Raij with Eder Montero) made us fall in love with the cuisine all over again—although we’ve been pretty regular Spanish chefs in the interim.
We were heading to a small house party at the home of friends Paula and Mike and wanted to contribute a couple of appetizers. One of them, Marinated Mushrooms with Vermouth and Garlic, was a simple recipe from The Basque Book. Snappy to make, they can be popped into your mouth right away (or at least once they’ve cooled), but if for some odd reason you have any left over, they are even better a day or two later—so you might want to make an extra batch—just sayin’.

The final step is to thread the ‘shrooms onto little skewers, but we didn’t bother. Simply plating them in a serving dish with a large spoon and a side of crusty baguette to mop up the tasty sauce was party-friendly enough. Vegetarian- and vegan-approved.

IMG_0533

Marinated Mushrooms with Vermouth and Garlic

  • Servings: 6-8
  • Difficulty: easy
  • Print

Ingredients

  • 1 tsp minced garlic (OK, I used 1 Tbsp.)
  • 1//2 cup extra-virgin olive oil
  • 1 1/2 pounds small, white button mushrooms
  • Kosher salt
  • 1 tsp red pepper flakes
  • 1 bunch flat-leaf parsley, chopped
  • 3 Tbsp dry vermouth
  • Juice of 1 lemon

Directions

  1. In a large saucepan, warm the garlic and oil over medium heat for about 30 seconds. Be careful not to burn the garlic.
  2. Add the mushrooms and 1 tsp salt. Cook, stirring often, for about 5 minutes, until the mushrooms begin to release their juices and shrink just a little.
    IMG_0530
  3. Add the pepper flakes and parsley, and cook for about 2 minutes longer.
  4. Add the vermouth and deglaze the pan, stirring to dislodge any browned bit. Cook for about 6 more minutes, until the remaining liquid has a syrupy consistency.
  5. Remove from the heat, add a pinch of salt, and stir in the lemon juice. Transfer the mushrooms and their liquid to a dish, let cool, cover, and refrigerate for at least 1 hour.
    IMG_0531
  6. Thread the mushrooms on bamboo skewers, arrange on a platter, pour the liquid from the dish over the mushrooms, and serve at room temperature.

http://www.lynnandruss.com

Meet Your Mojo

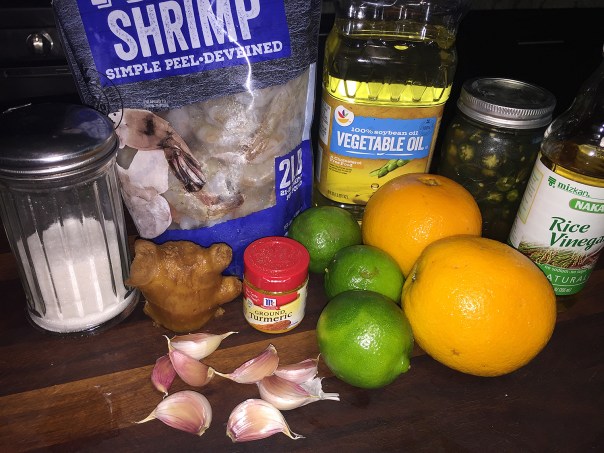
Grilled Shrimp with Turmeric Mojo Sauce is like a tropical curry sauce with a kick and it’s a great recipe for a last-minute grilling idea that’s sure to impress guests. If you make the mojo ahead of time it will literally only take 15 minutes to marinate the shrimp and 2 or 3 more to grill. That’s barely enough time to pop open a cold one!

Shrimp, unlike chicken or steak, can take on the flavors of a bright, acidic marinade in minutes, making it a good choice for last-minute grilling. You actually don’t want to let shrimp sit in the marinade for too long because the acid in the citrus will start to firm up and cook the flesh. Even though the original recipe didn’t say how long to marinate, we did for 15 minutes, which I noted below.

IMG_3399

Because we had a two-pound bag of extra large shrimp in the freezer, we thawed the entire amount. The supermarket wasn’t carrying habaneros, but I always keep jars of pickled chiles on hand and substituted serranos with their seeds, which added plenty of heat. You can determine how much to include based on your own tolerance for spiciness.

We both concur, turning the shrimp would be much easier if threaded onto metal (or soaked wooden) skewers instead of flipping each crustacean individually… next time. Rice, or couscous steamed with shellfish stock makes a nice base on which to lay the shrimp and soak up some of the extra marinade. And a grilled veggie like asparagus, rounds out the meal without using additional cookware.

IMG_3388

Grilled Shrimp with Turmeric Mojo Sauce

  • Servings: 4
  • Difficulty: easy
  • Print

Ingredients

  • 6 garlic cloves, smashed
  • 2 habanero chiles, seeds removed, chopped
  • 1 3″ piece ginger, peeled, thinly sliced
  • ⅓ cup fresh lime juice (about 2 limes)
  • ⅓ cup fresh orange juice (about 1 large)
  • 1 Tbsp. sugar
  • 2 tsp. unseasoned rice vinegar
  • ½ tsp. ground turmeric
  • ⅓ cup vegetable oil, plus more for grill
  • Kosher salt
  • 1½ lb. large shrimp, peeled, deveined
  • Cooked short-grain white rice or couscous (for serving; optional)
  • Flaky sea salt

Directions

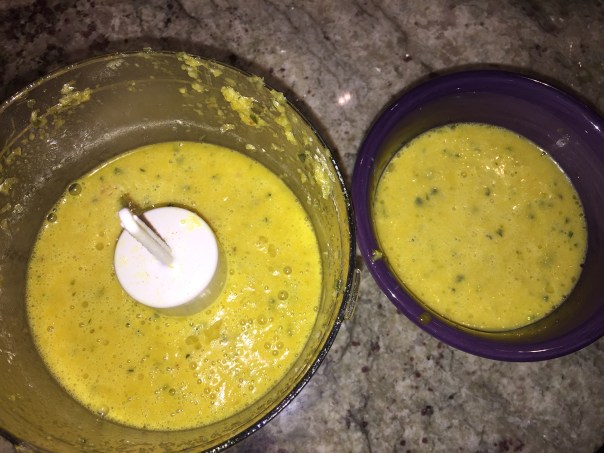
  1. Prepare a grill for medium-high heat. Pulse garlic, chiles, ginger, lime juice, orange juice, sugar, vinegar, and turmeric in a food processor until combined and almost smooth. With the motor running, gradually stream in ⅓ cup oil and process until emulsified.
  2. Pour half of the sauce into a small bowl; season with kosher salt. Set aside for serving.
    IMG_3390
  3. Transfer remaining sauce to a medium bowl and add shrimp. Season with kosher salt and toss to coat. Marinate about 15 minutes.
  4. Clean and oil grate, then immediately arrange shrimp on grill. Grill until bright pink and lightly charred, about 1 minute per side.
    IMG_3393
    IMG_3396
  5. Divide shrimp among bowls. Spoon reserved sauce over; sprinkle with sea salt. Serve with rice or couscous if desired.
    IMG_3400

http://www.lynnandruss.com

Recipe found in the June/July Grilling Issue of Bon Appétit


Grilled Veggies: Stars of the Show

One of the easiest, most satisfying, quick and pan-less ways to prepare vegetables is grilling them. There’s no question that vegetables are good for you because they’re filled with vitamins and nutrients that we need to stay healthy. But sometimes, even for many adults, they just aren’t appealing enough to eat. Grilling them is another matter. Why?

Because the flavor is enhanced naturally. While marinades are definitely delicious—and some of the recipe links below bare that out—they aren’t a necessity when grilling vegetables. Because of the smoke from the grill, the vegetables are infused with a subtle barbecue flavor that appeals to everyone. But that’s not all.

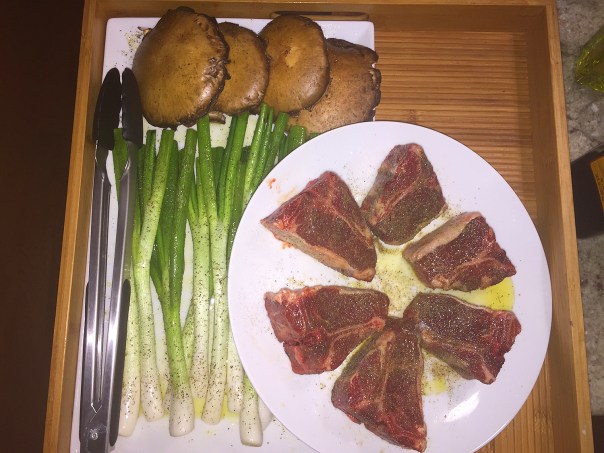
The heat from the grill caramelizes the natural sugars inside the vegetables, causing them to taste sweeter and more flavorful, as in the spring onions and portobellos that we recently grilled. Simply tossed or brushed with a good extra-virgin olive oil and sprinkled with salt and pepper, then arranged on a hot grill for 3-5 minutes per side, perfection!

IMG_3414
Loin lamb chops, spring onions and portobellos were the perfect grilling trio as they all took less than 10 minutes to cook. They were all simply brushed with a good extra-virgin olive oil and seasoned with salt and pepper prior to grilling.
IMG_3417
IMG_3423

Found a veggie you’ve never tried? Give it a ride on the ole barby. You’ll find that when you’re unsure about how to cook a vegetable, grilling is the simplest answer. It’s also the easiest—no prep time involved if you’re too lazy to do any slicing or chopping, and we’ve all been there, right? You will get the best results using vegetables with a low water content. Examples include mushrooms, onions, cabbage, asparagus, and bell peppers; although we’ve been known to grill eggplant, zucchini, tomatoes and bok choy too.

An added bonus for when you host both plant-based diet followers and die-hard meat eaters. Grilled vegetables can be the centerpiece of a vegetarian meal or an accompaniment to a main dish.

So go for it! Heat up your grill. When it is medium hot, either place your vegetables on the grill, in a foil pouch or on skewers. If you are using dense vegetables, such as carrots and potatoes, these take longer to cook, so add them first. Turn the vegetables when they need it and brush on more marinade or oil when required. If you can pierce the vegetables easily with a sharp knife, they are ready to eat.

Some past postings of vegetables we grilled:

Mixed Medley in a Basket:
medley in a basket

Eggplant and Tomato Skewers:
IMG_6784
IMG_6788

Baby Bok Choy:
IMG_5223

Lime-Miso Marinated Asparagus:
IMG_4873

Deconstructed Veggie Kebabs:
IMG_4398

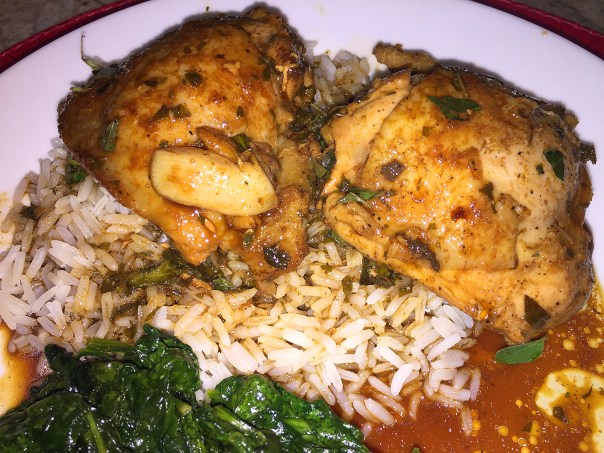
Filipino Adobo Chicken—Our Way

Just as there are umpteen versions of Italian Spaghetti Sauce and Mexican Salsa Roja, you can also find a plethora of recipes for Filipino Adobo Chicken. To clarify, “adobo” refers to a method of marinating and stewing for any cut of meat or fish in a briny mixture of vinegar, soy sauce, and spices. However, don’t confuse Filipino adobo with the spicy Spanish adobo sauce. Although they both share the Spanish name, they are vastly different in flavor and ingredients.

IMG_3374

There are basic adobo ingredients, yet often a variety of others are included. Vinegar and soy sauce are the heart of adobo, but over the centuries, other liquids have occasionally been added to the brine. Some combos include coconut milk, which mellows the strong flavors of the vinegar and soy sauce. Others include sugar or honey to add a touch of sweetness and an almost teriyaki-like characteristic. The flavor of adobo can also be varied depending on the type of vinegar used. In the Philippines, coconut vinegar, rice vinegar, or cane vinegar are the most common.

Over the past Winter holiday season, Hubby attended a work function where one of his coworkers contributed a crockpot full of her mother’s version of this dish. He was so impressed, he asked the officemate to email him the recipe, which she did—but we didn’t get around to making it until late Spring. Anyway, the recipe below reflects my changes, which Mr. Hubs also loved.

IMG_3382

If using bone-in chicken breasts, cut the split breasts into quarters so that they are a more uniform in size to the dark pieces to ensure even cooking, plus the marinade will penetrate more of the meat. BTW, for additional flavor, swap out unsweetened pineapple juice for the 1 cup of water. If you serve it over rice (best steamed with homemade chicken stock instead of water), spoon the extra sauce over.

Trust me, you’re gonna hope there are leftovers!

IMG_3362

Filipino Adobo Chicken

  • Servings: 6
  • Difficulty: easy
  • Print

Ingredients

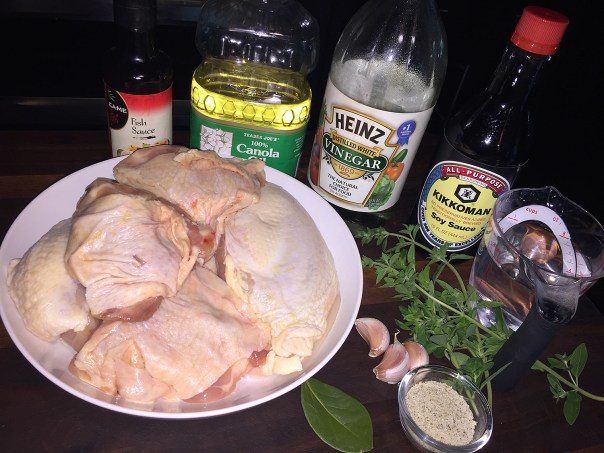
  • 1 Cup white vinegar
  • 1/4 Cup soy sauce
  • 3 Whole garlic bulbs, smashed and peeled
  • 1 Tsp. fish sauce
  • 1 Tbsp. + 1 tsp. adobo seco seasoning
  • 1 Bay leaf
  • 1 Tbsp. fresh oregano, chopped; plus more for garnish
  • 3 Lbs. bone-in chicken thighs, drumsticks, breasts; or a combination thereof
  • 2 Tbsp. canola oil
  • 1 Cup water (or unsweetened pineapple juice)

Directions

  1. Combine the first seven ingredients in a small bowl. Add with chicken to a ziploc bag; refrigerate for 30-60 minutes.
    IMG_3364
  2. Drain, reserving marinade. Pat chicken dry.
    IMG_3366
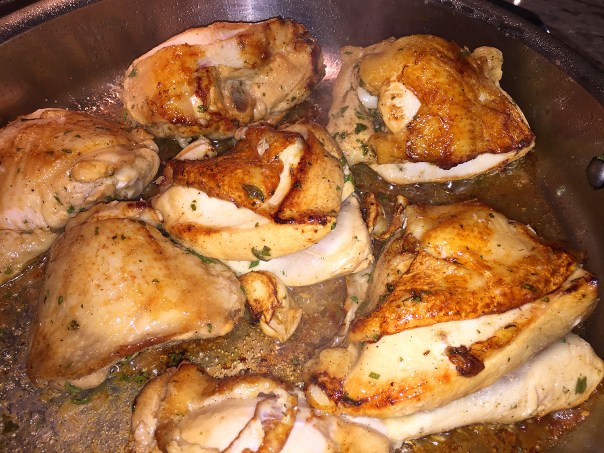
  3. In a large skillet, heat oil over medium-high heat; brown chicken on both sides for about 4 minutes per side.
    IMG_3369
  4. Stir in water (or pineapple juice) and reserved marinade. Bring to a boil. Reduce heat; simmer, uncovered, until chicken is no longer pink and sauce is slightly reduced, 20-25 minutes. The meat is done when an instant-read registers 165°. If some pieces are done before others, move them to a platter and cover with foil.
    IMG_3372
    NOTE: If you want to reduce the sauce further (which is what I did), move all of the chicken to a platter when it reaches 150° and cover with foil. The meat temperature will rise as it rests. When the sauce is to your liking, add the chicken back to the skillet for a minute or two while spooning the marinade over the meat.
  5. Serve chicken immediately over steamed rice with cooking sauce.
    IMG_3379

http://www.lynnandruss.com


Linguine with Cauliflower and Prosciutto

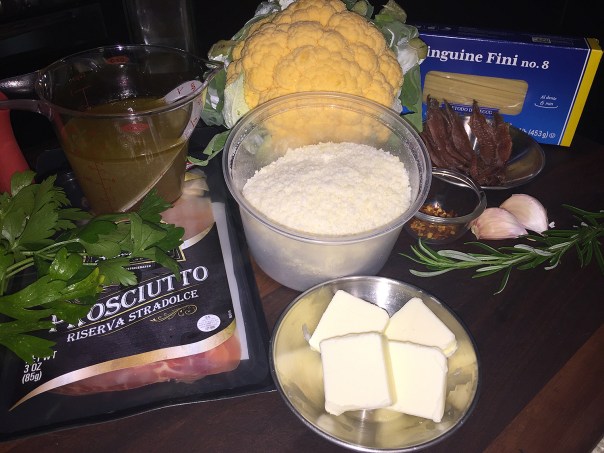
Anchovies and cauliflower are a classic Italian pairing; the anchovies instill a deep, savory (not fishy) flavor that’s made even better here with the addition of garlic, fresh rosemary, and red pepper flakes. All that, plus a little cured pork, guarantees excitement in every bite.

Often in recipes such as this, we reduce the pasta by 50%, so here we used only 8 ounces as opposed to 12. In addition, we increased the prosciutto by 50%, incorporated orange cauliflower for a pop of color, and added extra red pepper flakes. Then for an extra boost of flavor we used homemade chicken stock instead of boxed or canned, and threw in some extra grated cheese.

The end result was really good. The only other change we’d make is next time we’ll crisp the prosciutto before adding the cauliflower to lessen the chance of it clumping and infuse some of the taste into the veggie. I noted this step into the directions below.

IMG_3296

Linguine with Cauliflower and Prosciutto

  • Servings: 4
  • Difficulty: easy
  • Print

Ingredients

  • Kosher salt
  • 4 Tbs. unsalted butter
  • 2 Tbs. extra-virgin olive oil
  • 1 small head cauliflower (about 1-1/2 lb.), cut into 1-1/2-inch florets and halved lengthwise
  • 12 oz. linguine
  • 6 anchovy fillets, rinsed well, patted dry, and finely chopped (about 1 Tbs.)
  • 1 Tbs. finely chopped fresh rosemary
  • 2 medium cloves garlic, finely chopped
  • 1/4 tsp. crushed red pepper flakes
  • 2/3 cup lower-salt chicken broth
  • 6 thin slices prosciutto or speck, cut crosswise into 1/4-inch strips
  • 1/2 oz. finely grated Parmigiano-Reggiano (1/2 cup)
  • 1 Tbs. chopped fresh flat-leaf parsley

Directions

  1. Bring a large pot of well-salted water to a boil.
  2. Meanwhile, heat 1 Tbs. of the butter and 1 Tbs. of the oil in a 12-inch skillet over medium heat. Add the prosciutto and cook until crisp, stirring occasionally, about 2 minutes; remove from pan to a side dish.
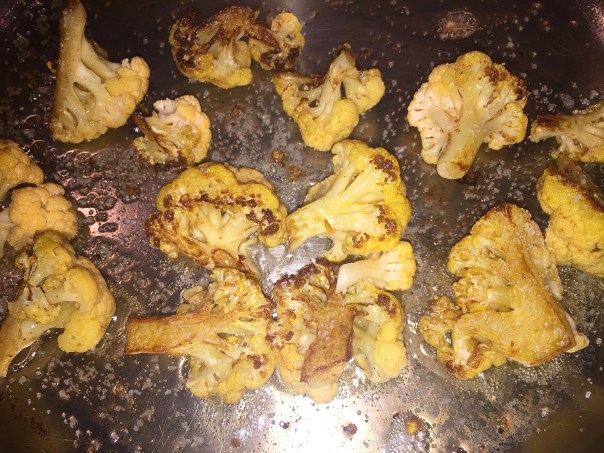
  3. Add half of the cauliflower, flat side down in a single layer, and season lightly with salt. Cook until golden brown on one side, about 2 minutes.
    IMG_3298
  4. Flip and cook until the cauliflower is tender, about 3 minutes more. Transfer to a plate. Repeat with the remaining cauliflower, 1 Tbs. butter, and 1 Tbs. oil; set aside.
    IMG_3300
  5. Boil the pasta according to package directions until al dente.
  6. Meanwhile, melt 1 Tbs. of the butter in the skillet over medium heat. Add the anchovies, rosemary, garlic, and pepper flakes. Cook, stirring, until the garlic is softened, about 2 minutes.
    IMG_3302
  7. Add the broth, and cook until reduced by half, 2 to 3 minutes more.
    IMG_3303
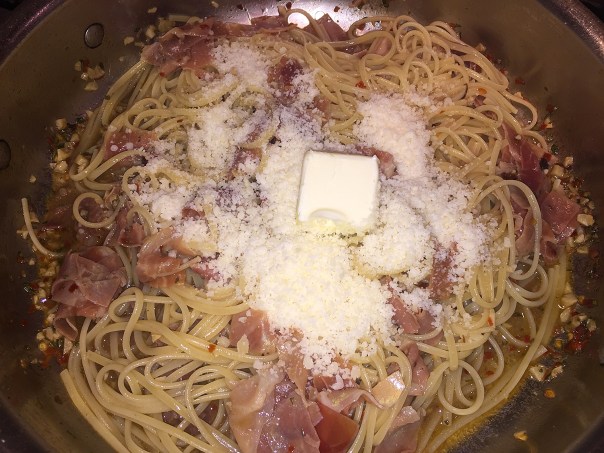
  8. Reserve 1/2 cup of the pasta water, and then drain the pasta. Add the pasta to the skillet along with the cooked prosciutto, half of the cheese, and the remaining 1 Tbs. butter; toss until the butter is melted.
    IMG_3304
  9. Add the cauliflower, toss to combine, and season to taste with salt. Add some pasta water to loosen the sauce, if necessary.
    IMG_3307
  10. Serve topped with the remaining cheese and the parsley.
    IMG_3311

http://www.lynnandruss.com

Recipe adapted from one by Arlene Jacobs of Fine Cooking

Adults Only Dessert

Belly up to the bar—the ice cream bar, that is. Häagen-Dazs  has risen to fill a void of boozy frozen desserts with the release of its new Spirits Collection. Each pint features a different variety of popular liquor, paired alongside indulgent mix-ins, and Häagen-Dazs’ famously rich ice cream. After eyeballing a full-page ad in a recent cooking magazine, something compelled me to purchase the Bourbon Vanilla Bean Truffle variety, and I almost never eat ice cream or dessert, but the Husbster wasn’t about to dissuade me…

Although the bourbon one may not sound too exciting compared to the line’s other offerings, this flavor goes to show that ice cream doesn’t have to be complicated to win you over. With a dense, sweet, vanilla bean-flecked base, we found it a pleasure to appreciate this variety’s superb consistency and creamy mouthfeel, and the tiny truffles speckled throughout provided just enough intermittent bursts of crunch and texture.

IMG_3334To up the decadent ante, serve with a Dark Chocolate Godiva heart…

Rather than finding recognizable streams of bourbon swirled throughout, we tasted hints of booze in each spoonful and found the alcohol’s slight edge helped to make this flavor seem like an “adult’s only” version of vanilla bean ice cream (which as a kid was one of my faves). And don’t worry about getting schnockered over dessert, it only contains less than 0.5% alcohol by volume.

Rounding out the collection are three more flavors: Rum Tres Leche, Irish Cream Brownie and Stout Chocolate Pretzel Crunch. Apparently you can also find nondairy amaretto black cherry almond toffee and Irish cream cookie squares in your freezer aisle. The summer just started, so you have all season to indulge…