Monthly Archives: April 2024

Chinese Shredded Cabbage Stir-Fry

This recipe from the “Woks of Life” is an example of easy, tasty, healthy and cheap. Now we don’t consider “cheap” to necessarily be a top descriptor of our culinary approach, but this cabbage stir-fry is savory, tangy, very quick to prepare—and the overall ingredients are not costly. Cabbage is so inexpensive, filling, and healthy, but people don’t always know how to prepare it in a way that actually tastes, well…good.

All you need is very high heat, a couple of dried chilies, a few splashes of Chinese pantry staples—and a wok—to make all the difference. Just eating this cabbage dish over rice is a satisfying meal in and of itself.
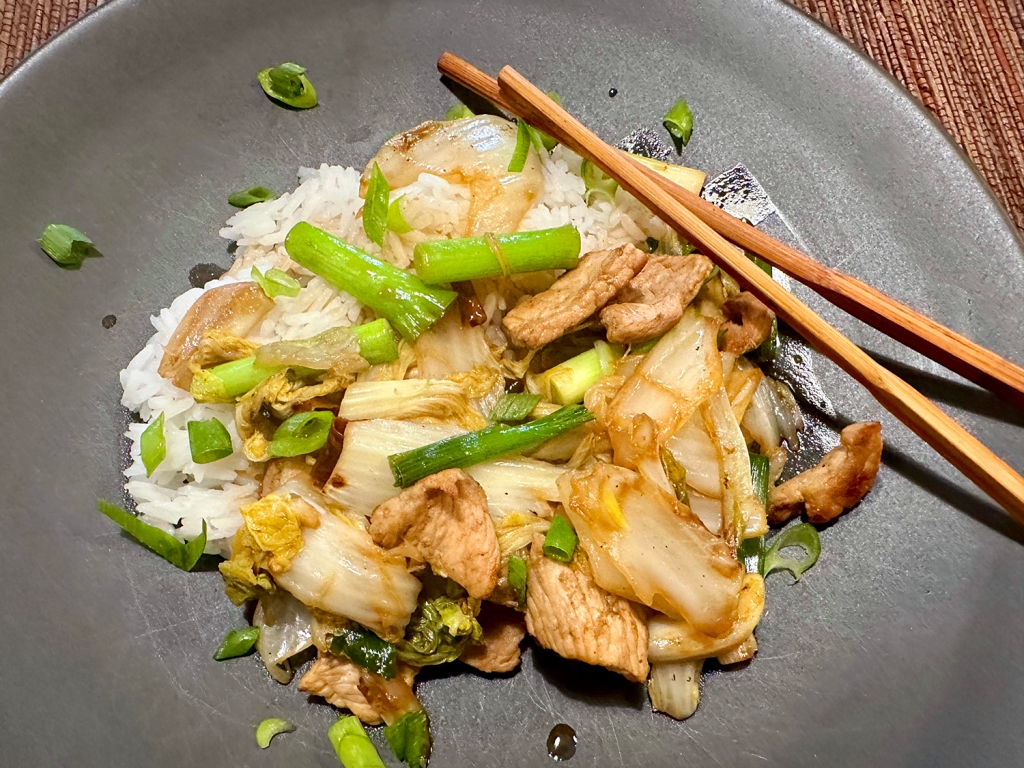
In Chinese, the name of this dish can be translated as “hand-shredded cabbage.” The real reason is unknown, but a guess is that the rough, haphazardly torn pieces of cabbage offer textural variety, and do a great job of soaking up more sauce and flavor. OK, we’re down with that…

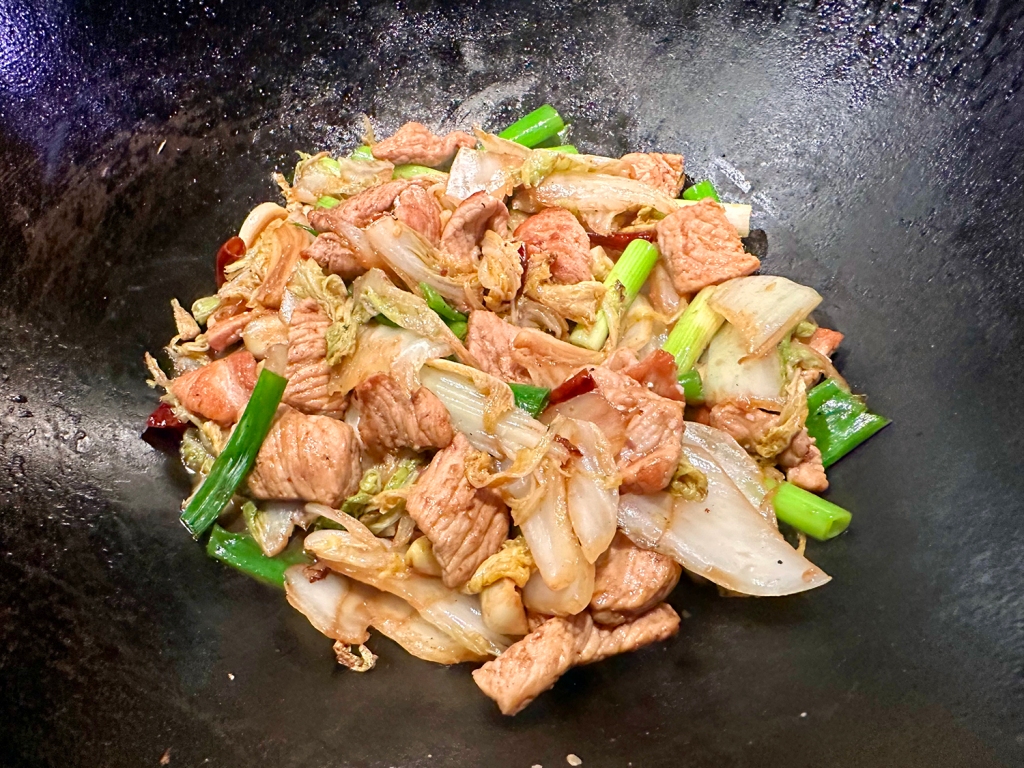
On another note, even though it was a truly delicious dish, our preference lies toward saucy when it comes to stir-fries, and this was decidedly not. So if you prefer a more saucy finish, just double the liquids (wine though vinegar).

While The Hubs likes pork belly, The Missus does not, so we compromised and used a small pork loin. We had a half head of cabbage on hand weighing about 50% less than called for, so we doubled the number of scallions from 2 to 4. The recipe says it feeds 4, well the two of us almost polished it off; therefore more realistically serves 2 to 3 people.
Chinese Shredded Cabbage Stir-Fry

  • Servings: 4
  • Difficulty: easy
  • Print

Ingredients

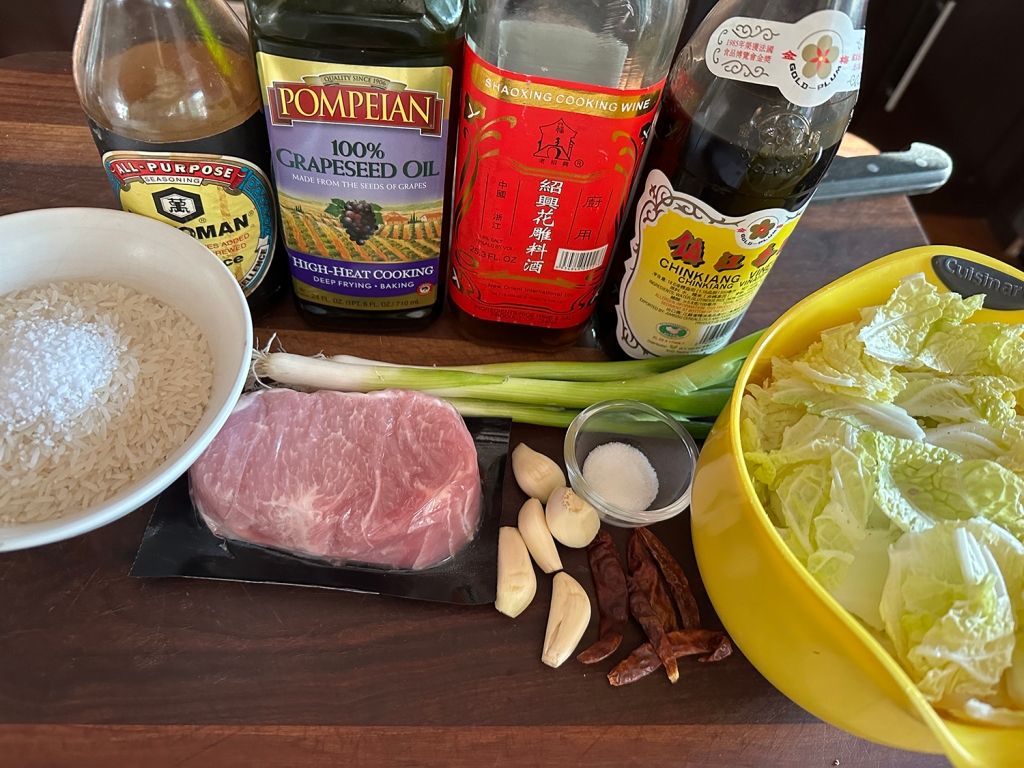
  • 2 Tbsp. oil
  • 6 oz. pork belly (pork loin, or chicken, thinly sliced)
  • 5 cloves garlic (smashed and cut in half)
  • 5 dried red chilies (deseeded and roughly chopped)
  • 1 1/2 lb. cabbage (hand-shredded into bite sized pieces, washed, and thoroughly dried)
  • 2 tsp. Shaoxing wine
  • 1 Tbsp. soy sauce
  • 1/2 tsp. sugar
  • 1 Tbsp. water
  • 1/2 tsp. Chinese black vinegar
  • 2 scallions (cut into 2-inch lengths)

Directions

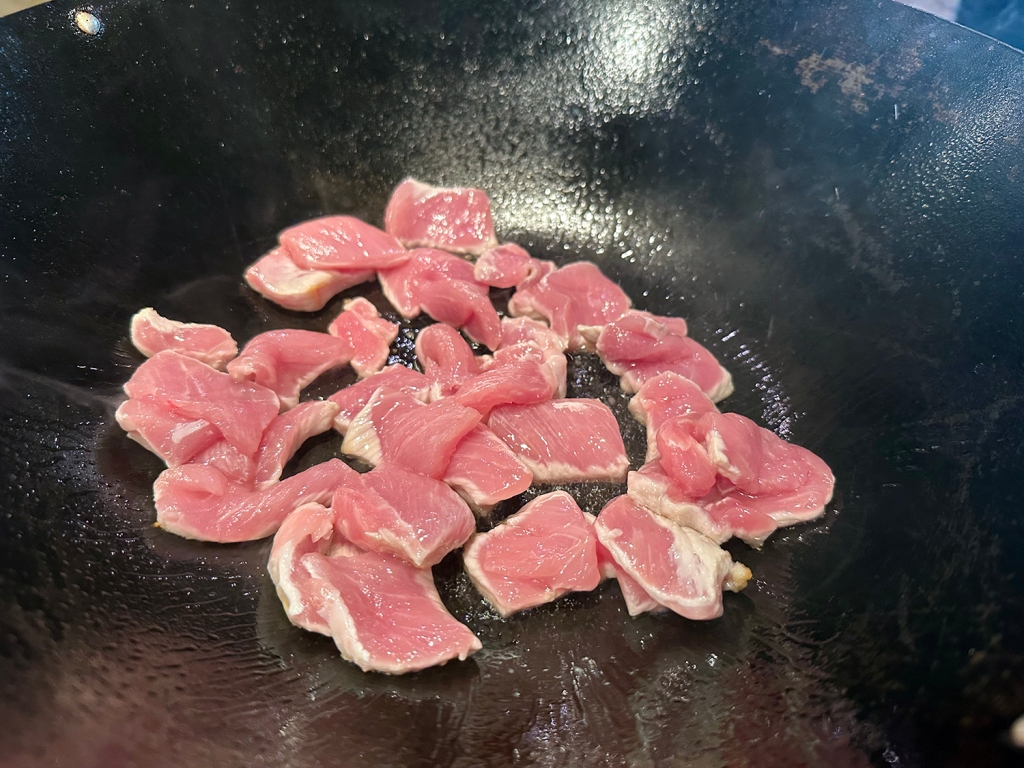
  1. In a wok over high heat, add the oil. Sear the meat until caramelized. Add the garlic and chili, turn down the heat to medium, and stir-fry for a minute, taking care not to burn the garlic.
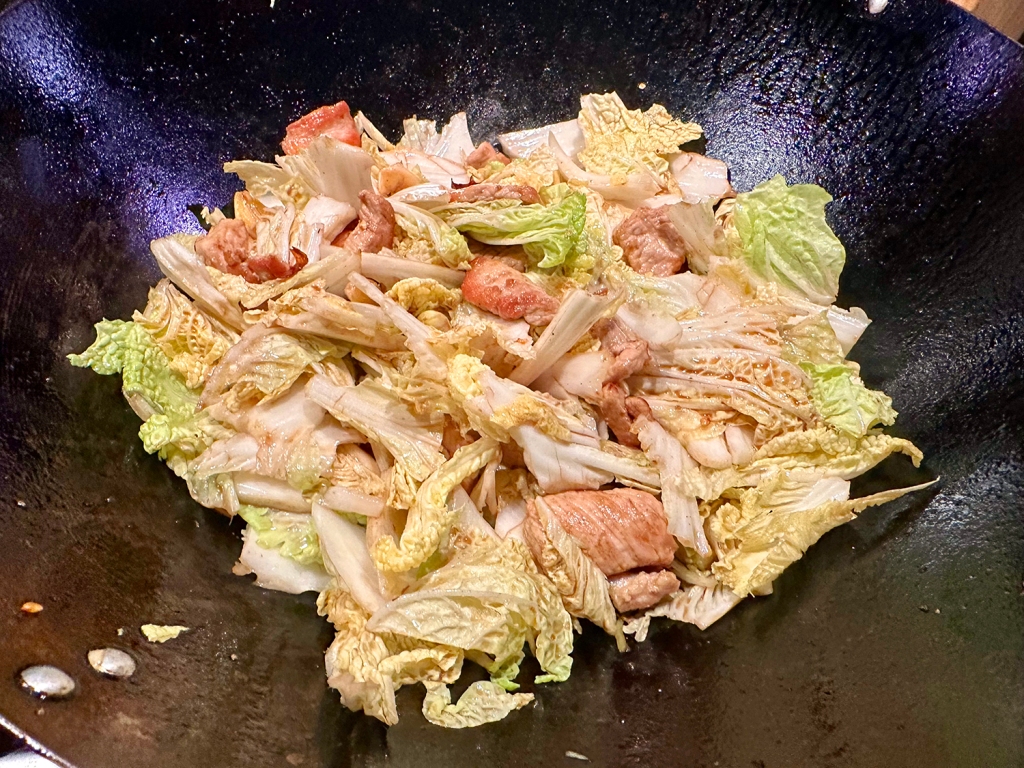
  2. Add the cabbage, wine, soy sauce, sugar, and water. Turn up the heat to high, cover the lid and let the cabbage cook for 1-2 minutes.
  3. Uncover the lid, and stir in the black vinegar, scallions, and salt to taste. The cabbage should be wilted, but still slightly crunchy and caramelized. Serve hot!

http://www.lynnandruss.com

Recipe from “The Woks of Life”

One-Pan Creamy Artichokes and Peas

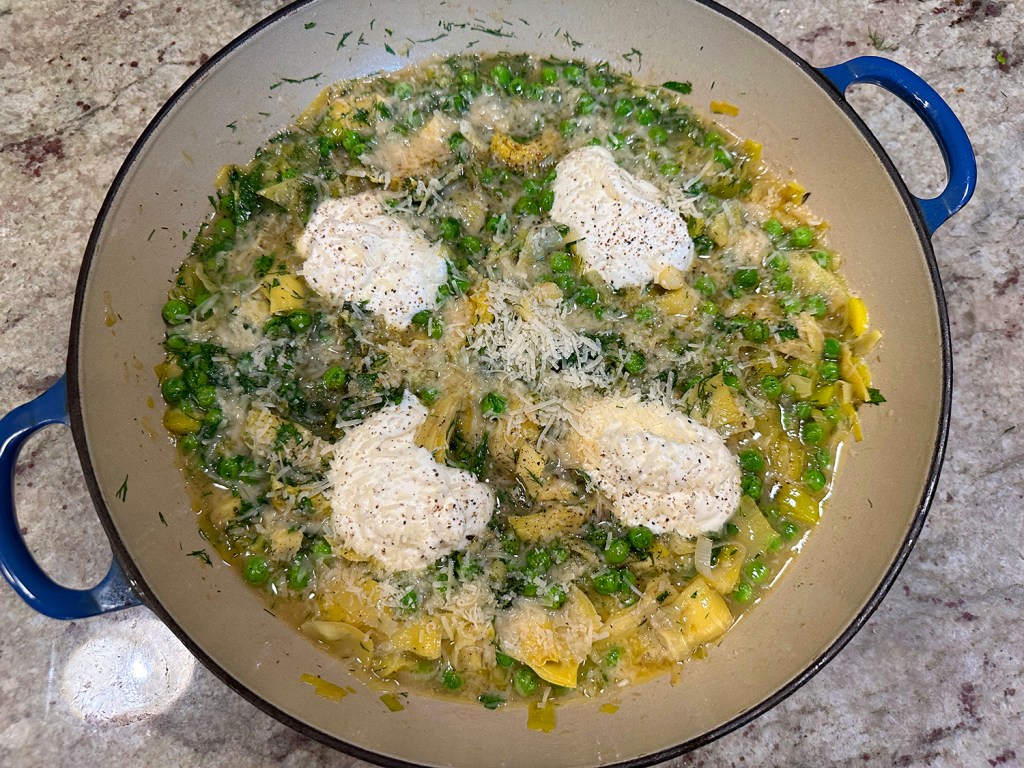
One-Pot dishes certainly streamline dinnertime, especially if it all comes together in only 30 minutes. And this spring-themed pasta dish combines lots of spring greens such as peas, leeks, and dill, among other herbs.

The creamy stew, full of seasoned sweet leeks, lemon zest and Parmesan, is a celebration of spring that you can make all year long, thanks to the canned artichokes and frozen peas. The creaminess comes from dolloping fresh ricotta over the top, then swirling it into the warm stew as you eat so it melts a little.

Food & Wine suggests to serve this with crusty bread or over pasta, gnocchi or rice to soak up the fragrant, herby pan sauce. Our choice was 8 ounces of orecchiette so the peas could nestle themselves into the the nooks of the pasta.

NOTE: *We suggest doubling the grated Parmesan to a half cup which will help thicken the sauce somewhat.

One-Pan Creamy Artichokes and Peas

  • Servings: 4-6
  • Difficulty: easy
  • Print

Ingredients

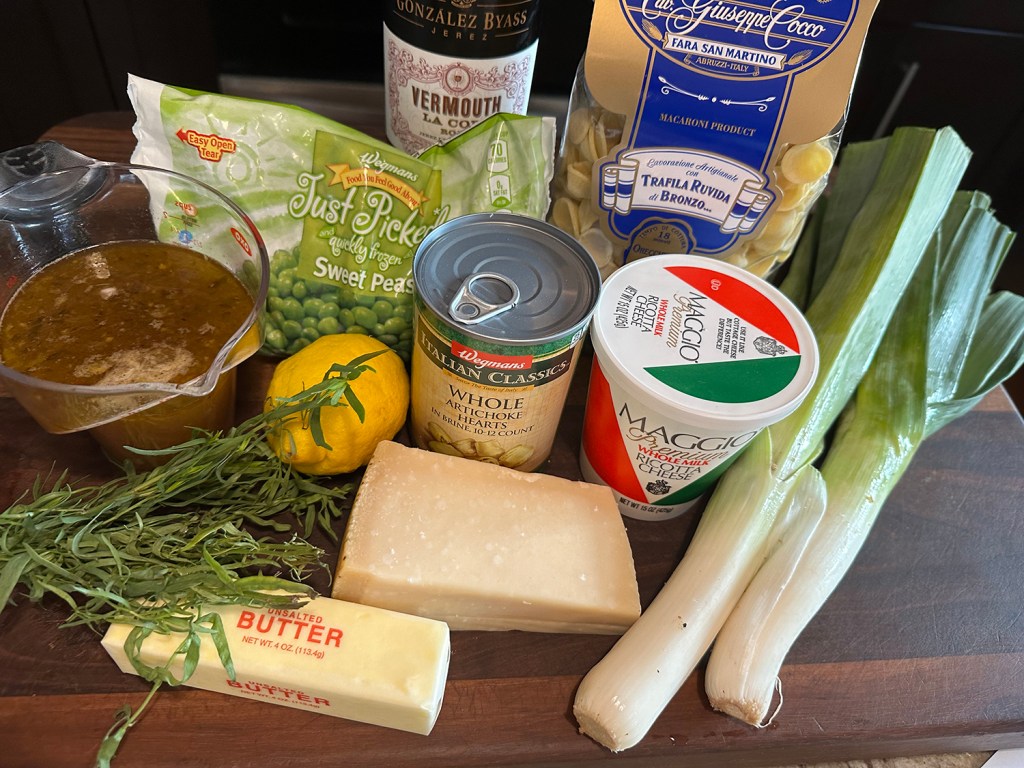
  • 3 Tbsp. unsalted butter
  • 2 leeks, white and light green parts, thinly sliced, or 1 bunch scallions, trimmed and sliced
  • 2 fresh tarragon sprigs, more for serving
  • ¾ tsp. fine sea or table salt, more to taste
  • 2 Tbsp. dry white wine or dry (white) vermouth
  • 1 14-oz. can halved or quartered artichokes packed in water, drained
  • 1½ cups vegetable or chicken broth
  • ¼ cup grated Parmesan*, more for serving
  • 2 cups peas (10 oz.), fresh or frozen (no need to defrost)
  • 1 tsp. finely grated lemon zest
  • 1 cup chopped combination fresh herbs (mint, dill, tarragon, parsley, cilantro)
  • ½ cup whole-milk ricotta
  • ½ tsp. freshly ground black pepper
  • Cooked pasta or rice, of your choice

Directions

  1. In a large skillet over medium heat, melt the butter. Stir in the leeks, tarragon and salt. Cook leeks until tender and golden brown at the edges, 4 to 6 minutes. Pour in the white wine and cook until evaporated, 2 to 3 minutes.
  2. Stir in the artichokes, broth and Parmesan, and bring to a vigorous simmer. Cook until the leeks and artichokes are tender, about 5 minutes. Stir in the peas and cook until just tender and bright green, 1 to 3 minutes.
  3. Stir in the lemon zest and fresh herbs. Taste and add more salt if needed. Top the skillet with dollops of ricotta, black pepper and more Parmesan. Serve warm.

http://www.lynnandruss.com

Recipe by Liz Mervosh for Food and Wine

Orange-Scented Mediterranean Shrimp Braise

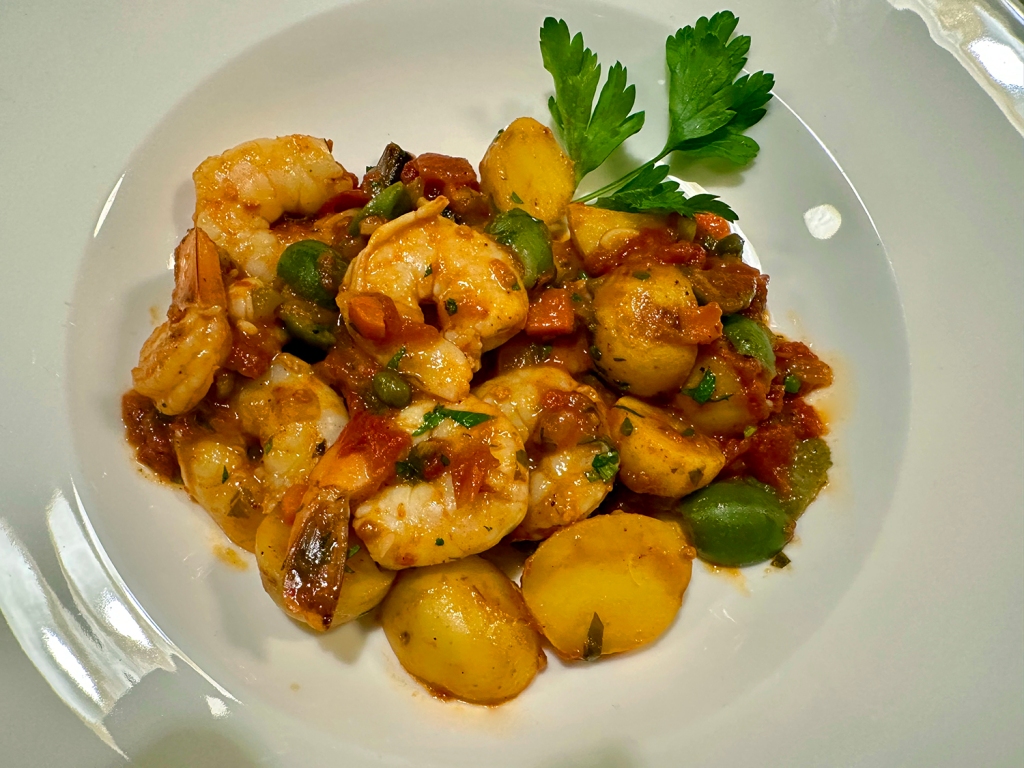
It’s been over 6 years since we made this lovely braise, and thought it high time to create it again. It’s from Molly Steven’s “All About Braising” cookbook, and we adjusted the recipe slightly.

“The shrimp get tossed in just a few minutes before serving, making the finished dish a real cornucopia of seafood and vegetables.”

Molly Stevens

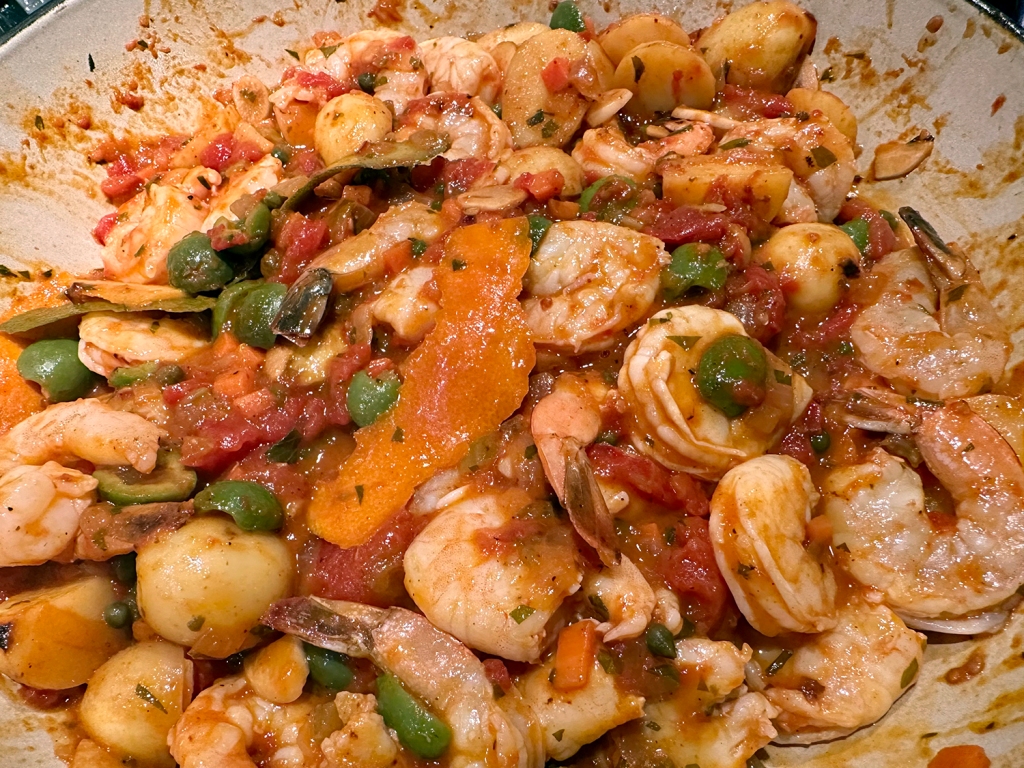
The braising liquid for this dish consists of a colorful mix of tomatoes, garlic, onion, carrots, and celery that is brightened with the zests and juice of orange and lime. Also included are small potatoes turning it into a satisfying one-dish meal. 

*However, even though I halved or quartered the baby potatoes, they still were on the hard side after 45 minutes! We suggest either microwave, or steam the potatoes before adding them to the pan, or omit them altogether and serve over a bed of orzo. Both times we made this dish, we used a 28-ounce can of whole tomatoes instead of the smaller 14.5-ounce size; and that is reflected in the list of ingredients below.

Then there’s the age old controversy about leaving the olives pitted, which can be annoying when trying to eat civilly in the presence of company. But when you cook olives whole, it’s almost like an anchovy. The salt comes out of the olives, and the olive becomes more like a vegetable, and the salt from the olive flavors the dish really wonderfully. Pits, or no pits, we’ll leave that dilemma up to you…

Orange-Scented Mediterranean Shrimp Braise

  • Servings: 4
  • Difficulty: easy
  • Print

Ingredients

  • 3 Tbsp. extra-virgin olive oil
  • 3 to 4 garlic cloves, thinly sliced
  • ½ cup finely chopped yellow onion (about ½ small onion)
  • 1 small carrot, finely chopped
  • 1 stalk celery, finely chopped
  • Coarse salt and freshly ground black pepper
  • ½ cup dry white wine or dry white vermouth
  • 2 strips orange zest, removed with a vegetable peeler (each about 3 inches by ¾ inch)
  • 1 strip lime zest, removed with a vegetable peeler (about 2 inches by ½ inch)
  • ¼ cup freshly squeezed orange juice
  • ¼ cup freshly squeezed lime juice
  • One 28-oz. can whole peeled tomatoes, drained and chopped
  • Pinch of crushed red pepper flakes
  • ¼ cup chopped flat-leaf parsley
  • ¾ lb. small potatoes*, preferably fingerlings or white creamers (omit altogether and serve over orzo)
  • ¼ cup small green olives, such as Picholine, (pitted or not, that’s up to you)
  • 2 Tbsp. capers, rinsed and drained
  • ¾ lb. large shrimp (30 to 35 count per pound), peeled and deveined
  • 1 Tbsp. unsalted butter, cut into 4 pieces (optional)

Directions

  1. The aromatics and braising liquid: Heat the oil in a large deep lidded skillet (13-inch works well) over medium-high heat until shimmering. Add the onion, carrot, and celery. Season with salt and pepper, stir, and sauté until just beginning to soften, about 5 minutes. Add the garlic, sauté another minute more. Add the white wine, orange and lime zests, and orange and lime juices, and let the liquid simmer vigorously until reduced by half, 5 to 8 minutes. Stir in the tomatoes, crushed red pepper, and 2 tablespoons of the parsley. Return to a simmer.
  2. The braise: Turn the heat to very low, cover, and simmer gently for 5 minutes. Then add the potatoes, olives, and capers. Stir so the potatoes are evenly distributed, replace the cover, and continue to simmer until the potatoes are easily pierced with the tip of a knife, another 30 to 40 minutes.
  3. The finish: Add the shrimp, leave the pan uncovered, and adjust the heat so the liquid simmers gently. Simmer just until the shrimp are cooked through, 4 to 5 minutes. Stir in the remaining 2 tablespoons parsley, and taste. If the sauce tastes too acidic or too sharp, stir in the butter. The small bit of butter will soften the acidity nicely. Taste again for salt and pepper. Remove the zests if you like, and serve in shallow bowls.

http://www.lynnandruss.com

Recipe adapted from Molly Stevens “All About Braising”

Braised Chicken with Endive

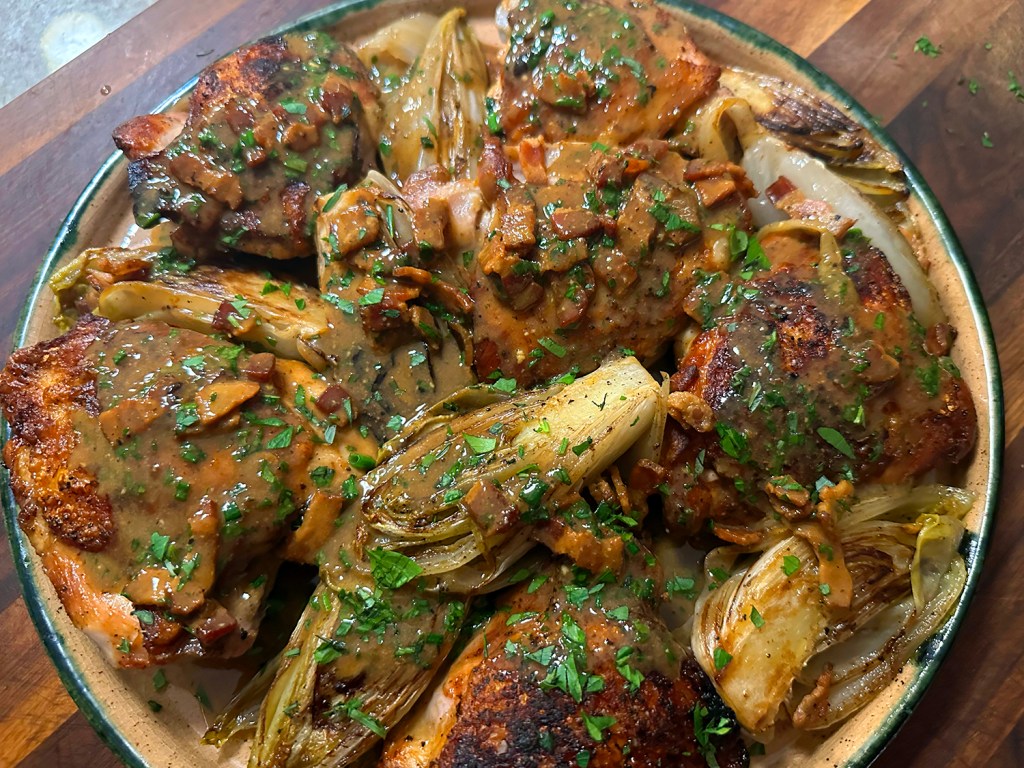
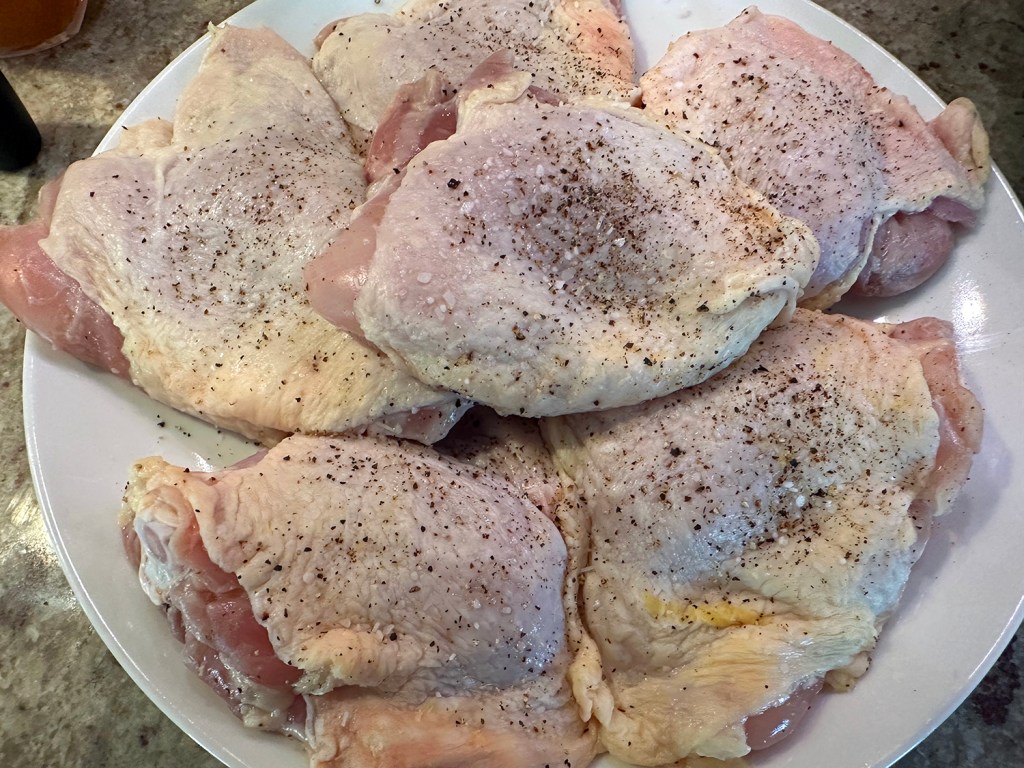
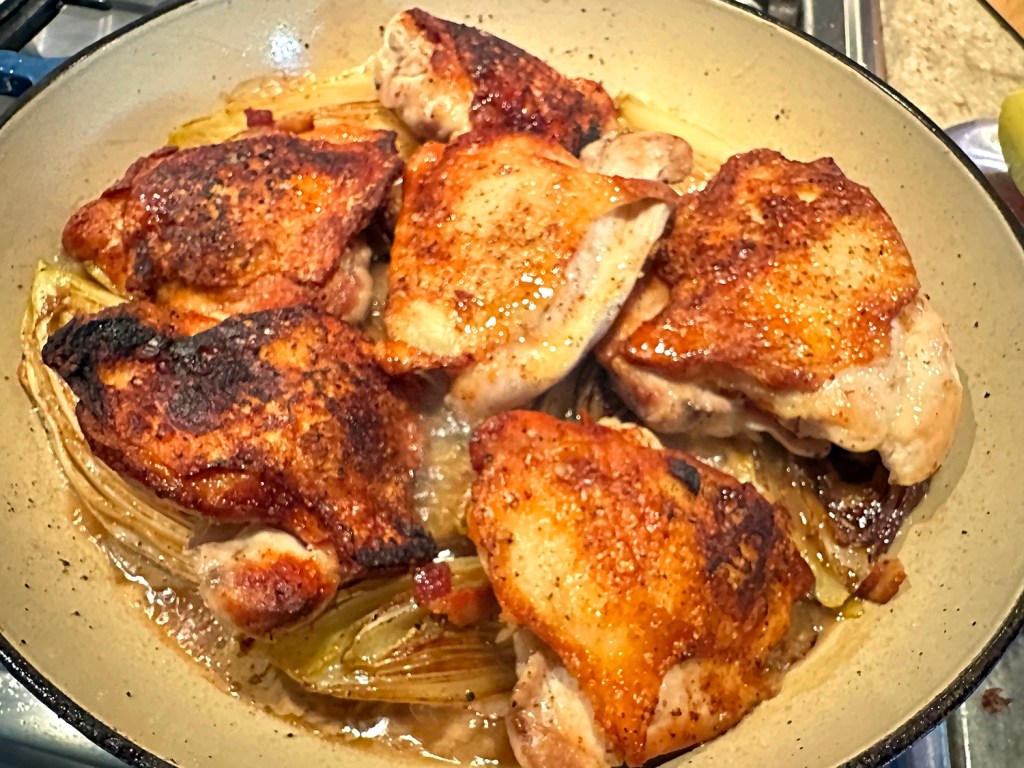
This Braised Chicken with Endive is a reinterpretation of coq au vin. This Food & Wine recipe features white wine-marinated chicken thighs and caramelized endive in a gorgeous pan sauce. So yes, we fell in love with yet another braised chicken dish. The flavors are just amazing, and amped up by using homemade chicken stock which bursts with depth of flavor.

You may have to brown the chicken in two batches (we did), so as not to crowd them in the pan which would steam the thighs causing flaccid skin. Not the result you are looking for.

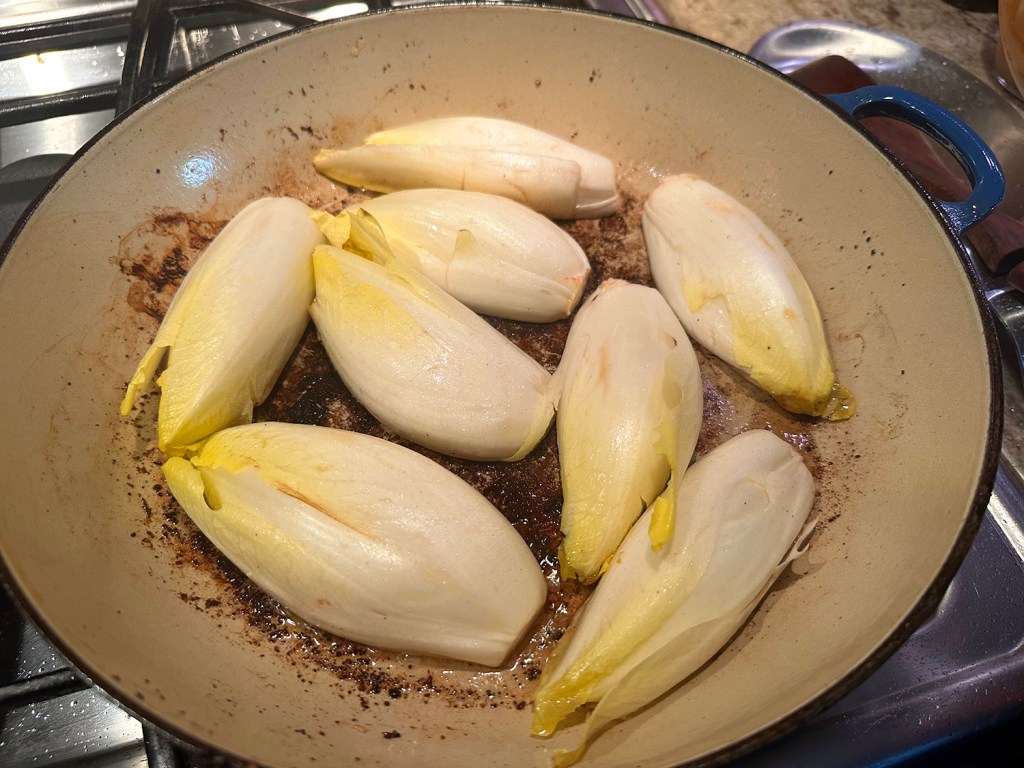
If you’ve never had braised endive, you are in for a treat! Mske sure to get Belgian endive, which is shaped like a torpedo and grows to about six inches in length. It has tender white leaves with either yellow or red-colored leaf edges. The leaves offer a soft texture and delicate crunch with a pleasantly bitter flavor.

And our potato side dish also used homemade chicken stock and were the creamiest little spuds ever!

Braised Chicken with Endive

  • Servings: 4
  • Difficulty: easy
  • Print

Ingredients

  • 2 1/2 lbs. bone-in, skin-on chicken thighs, fat trimmed
  • 2 tsp. kosher salt, divided, plus more to taste
  • 1 cup dry white wine
  • 1/2 tsp. black ppper
  • 3 thick-cut bacon slices, cut crosswise into 1/4 inch pieces
  • 4 Belgian endive heads, trimmed and halved lengthwise
  • 1/2 cup chicken stock
  • 2 Tbsp. unsalted butter, chilled and cut into pieces
  • 1 tsp. Dijon mustard
  • 2 Tbsp. finely chopped mixed tender herbs (such as chives, parsley and tarragon)
  • Crusty bread for serving

Directions

  1. Sprinkle chicken evenly with 1 1/2 teaspoons of salt; place in large bowl. Add wine, and turn chicken to coat. Cover with plastic wrap, and marinate in refrigerator at least 8 hours or up to 24 hours.
  2. Preheat oven to 400°F. Remove chicken from bowl; reserve 1/2 cup of the wine liquid. Pat chicken dry with paper towels, and sprinkle evenly with pepper and remaining 1/2 teaspoon of salt; set aside.
  3. Cook bacon in a large nonreactive skillet over medium, stirring often until crisp and fat has rendered, about 8 minutes. Using a slotted spoon, transfer bacon to a small bowl; set aside. Reserve rendered fat in skillet. Place chicken thighs skin side down in skillet. Cook over medium-high, undisturbed until skin is deeply browned, about 8-10 minutes. Transfer chicken skin side up to a large plate, set aside. Reserve 2 tablespoons drippings in skillet, discard the remaining drippings.
  4. Return skillet to heat over medium-high. Add endive halves, cut sides down. Cook, undisturbed until browned, about 3 minutes. Flip endive cut sides up, and add stock, cooked bacon, and reserved 1/2 cup of white wine. Nestle chicken skin side up, in skillet. Bring to a boil over high.
  5. Transfer skillet to preheated oven. Roast until endive is tender and a meat thermometer inserted in thickest portion of chicken registers at least 170°F, about 15 minutes. Transfer chicken and endive to a large platter, reserving sauce in skillet.
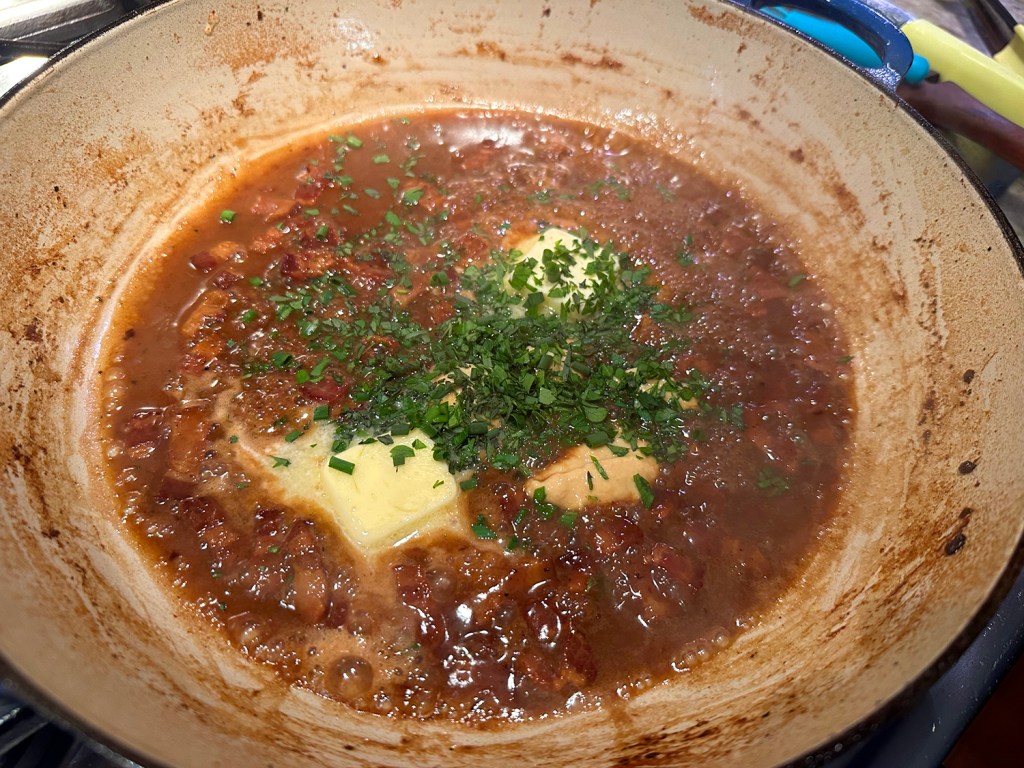
  6. Bring sauce in skillet to a simmer over medium-high. Simmer, undisturbed, until slightly reduced, about 4 minutes.
  7. Remove from heat, and stir in butter, mustard and herbs. Spoon sauce over chicken, and sprinkle with slat to taste. Serve with crusty bread if desired.

http://www.lynnandruss.com

Recipe by Liz Mervosh for Food and Wine

Pork and Tofu Soup with Miso and Cabbage

White miso is already packed with umami, but browning it like it is done to make this soup builds even more flavor. Just a small amount of pork is enough to create a rich, porky broth; firm tofu gives the dish substance without making it heavy.

Make sure to use napa cabbage, not regular green cabbage; the frilly leaves of napa are more delicate and become tender and silky after just a few minutes of simmering, but the stems will remain crisp-tender. The cabbage, tofu and scallions aren’t needed until near the end of cooking, so prep these ingredients while the soup cooks.

If you like, garnish with toasted sesame seeds and serve with Japanese short-grain rice. We chose to serve it with just the sliced scallions and sesame oil as toppings.

Pork and Tofu Soup with Miso and Cabbage

  • Servings: 4
  • Difficulty: easy
  • Print

Ingredients

  • 1/2 cup white miso
  • 6 medium garlic cloves, smashed and peeled
  • 1 3-inch piece fresh ginger, peeled and thinly sliced
  • 2 Tbsp. grapeseed or other neutral oil
  • 2/3 cup sake
  • 1 lb. boneless pork shoulder, trimmed and cut across the grain into 1/2-inch slabs
  • Kosher salt and ground white pepper
  • 1/2 medium head napa cabbage (1 to 1 1/2 lbs.), halved lengthwise, then cut crosswise into 1-inch pieces
  • 1 container firm tofu, (14 oz.) drained and cut into 1-inch cubes
  • 3 Tbsp. soy sauce
  • 4 scallions, thinly sliced on the diagonal
  • Toasted sesame oil, to serve

Directions

  1. On a 6-quart Instant Pot, select Normal/Medium Sauté. Add the miso, garlic, ginger and oil. Cook, stirring constantly, until the miso sticks to the bottom of the pot and browns evenly, 3 to 4 minutes. Add the sake and 4 cups water, scraping up the browned bits. Add the pork and 1 teaspoon white pepper; stir, then distribute in an even layer.
  2. Press Cancel, lock the lid in place and move the pressure valve to Sealing. Select Pressure Cook or Manual; make sure the pressure level is set to High. Set the cooking time for 27 minutes. When pressure cooking is complete, let the pressure reduce naturally for 15 minutes, then quick-release the remaining steam by moving the pressure valve to Venting. Press Cancel, then carefully open the pot.
  3. Using a large spoon, skim off and discard the fat from the surface. Select Normal/Medium Sauté and bring to a simmer. Add the cabbage and tofu, then cook, stirring gently, until the leaves are wilted and the stems are crisp-tender, 2 to 4 minutes. Press Cancel to turn off the pot. Stir in the soy sauce, then taste and season with salt and pepper. Serve sprinkled with the scallions and drizzled with sesame oil.

http://www.lynnandruss.com

Recipe by Courtney Hill for Milk Street

Chicken and Wild Rice Soup

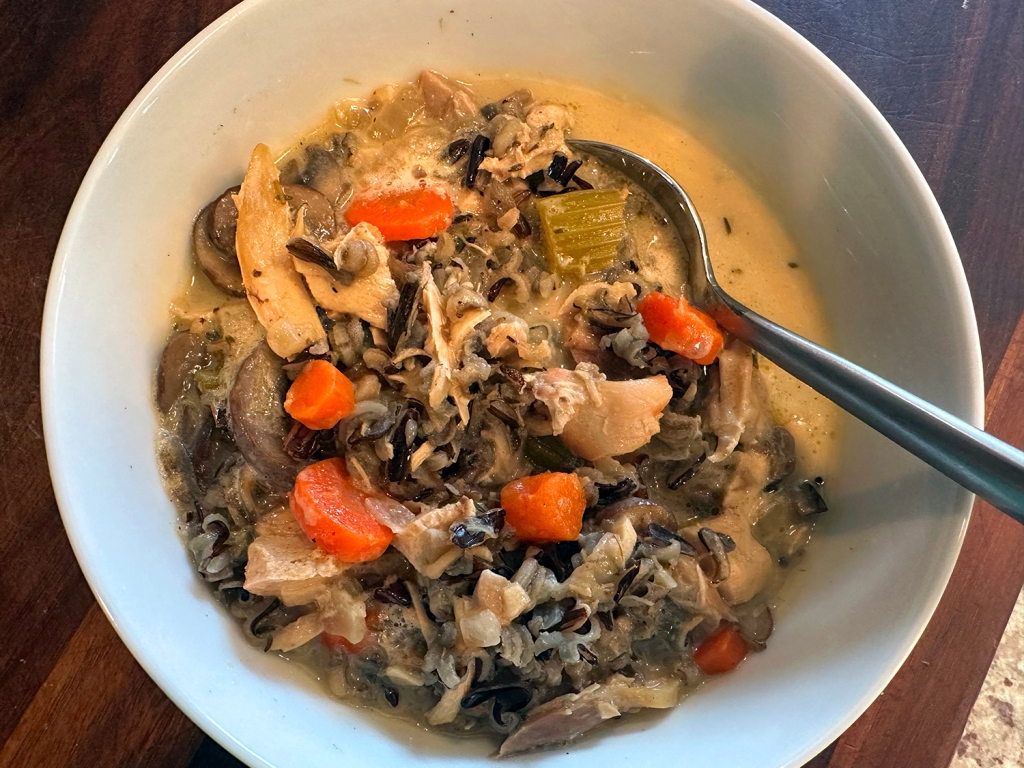
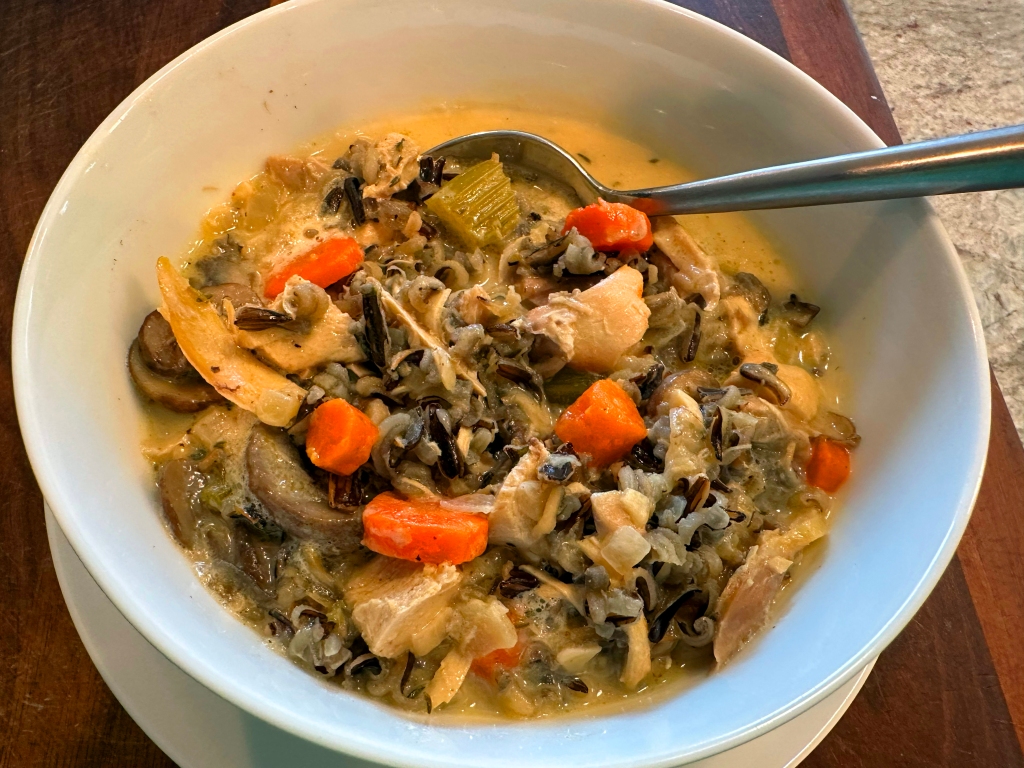
On Sundays, during the cooler months, The Hubs will make a pot of soup for our lunches during the week. They are often chosen by the healthy ingredients that make up the backbone of the soup. Here, baker Amanda Johnson uses leftover chicken or turkey and wild rice harvested nearby her North Dakota home to make this lovely chicken and rice soup.

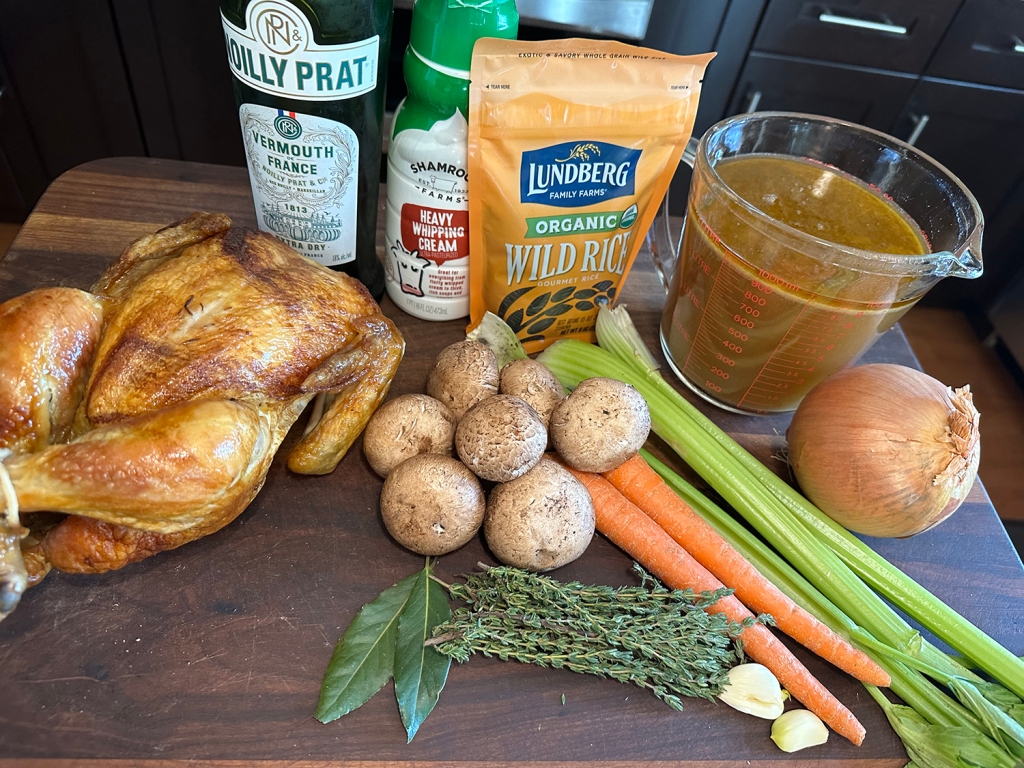
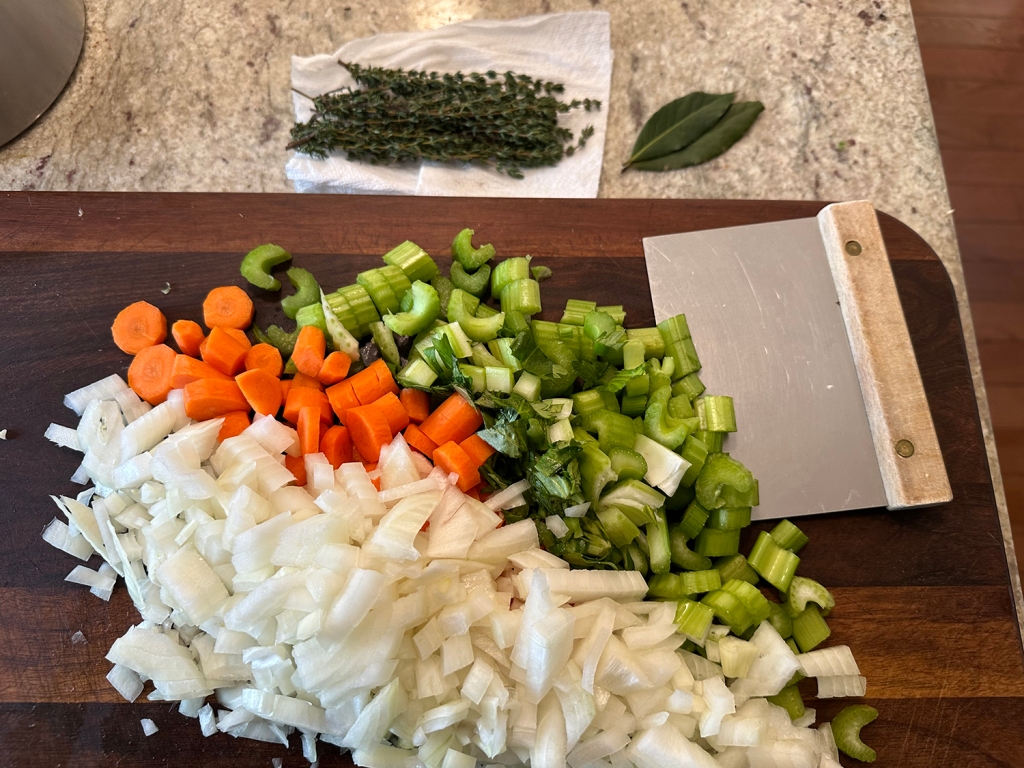
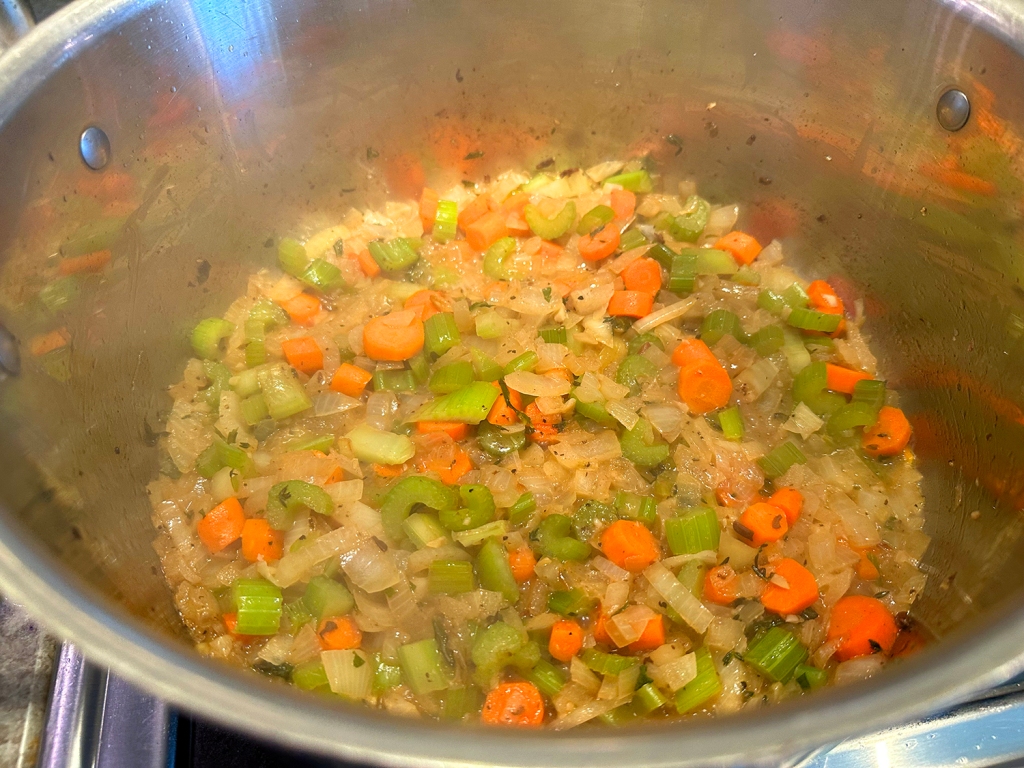
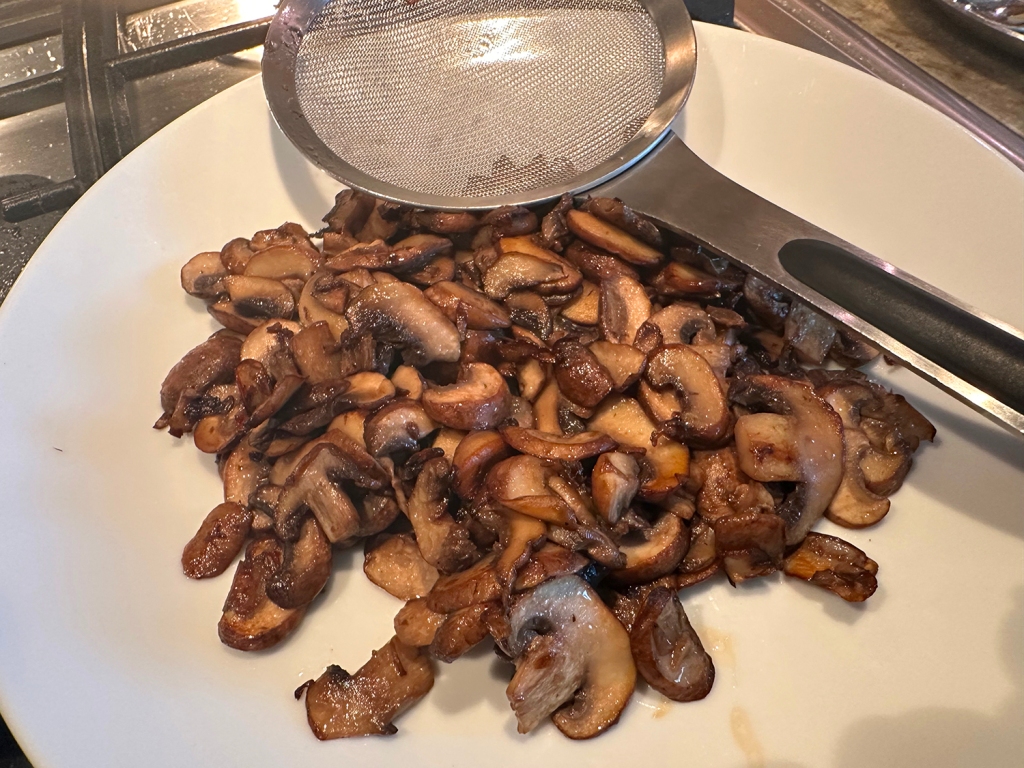
Thyme, garlic, and the classic base of onions, carrots, and celery add aromatic depth. The Hubs went a step further and added a good portion of cremini mushrooms and added some dry vermouth. After it simmers, finish the soup with a drizzle of cream to add a touch of richness and sophistication.

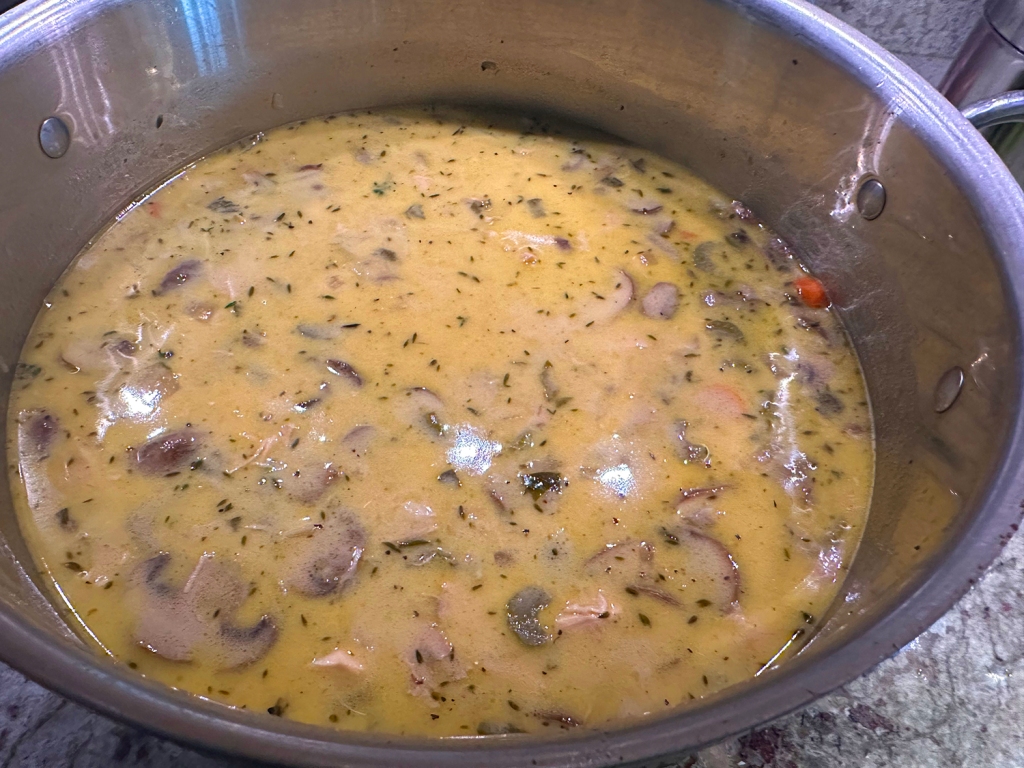
Stored airtight in a cool area, wild rice has a nearly indefinite shelf life, so it’s a great pantry staple to keep on hand. In fact, it isn’t actually rice at all, but rather a semi-aquatic grass that grows naturally around the Great Lakes. Because it’s not starchy like true rice, the recipe includes a small amount of flour to thicken up the base. With its nutty flavor and hearty texture, wild rice adds interest here to the bite-sized bits of chicken and vegetables suspended in the soup’s creamy broth.

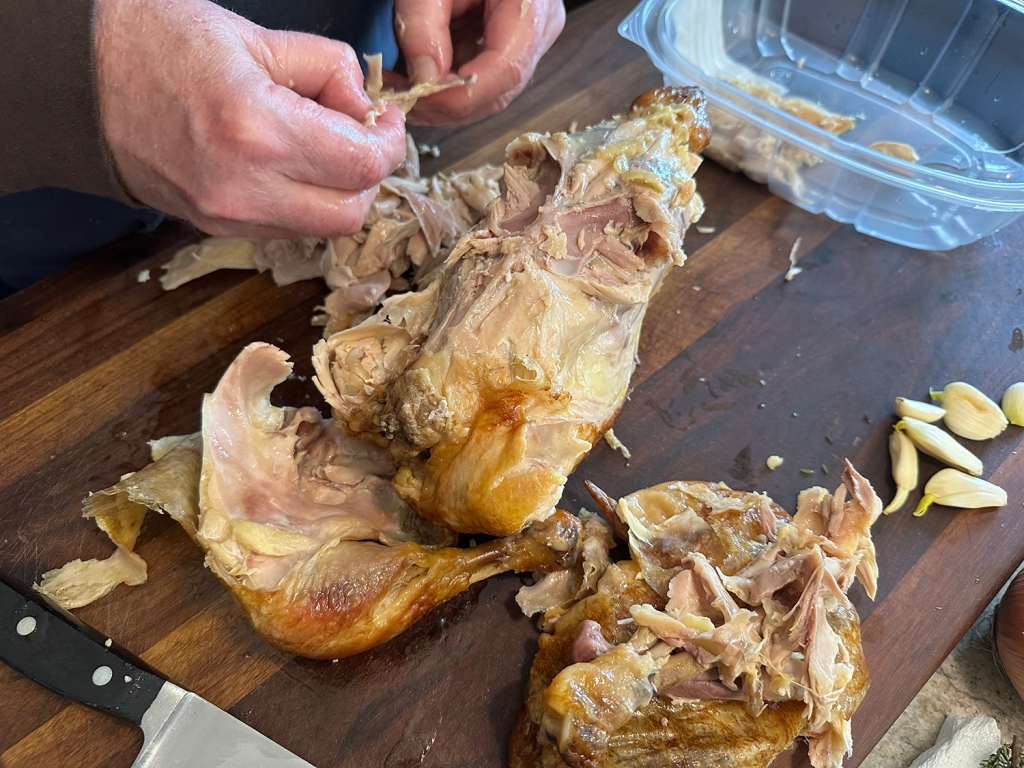
If you do not have leftover cooked chicken or turkey for this dish, use all of the meat from a 3-pound rotisserie chicken and cut it into bite-sized pieces. The chicken soup can be refrigerated for up to 2 days. Reheat gently before serving so as not to break the cream.

Chicken and Wild Rice Soup

  • Servings: 6
  • Difficulty: easy
  • Print

Ingredients

  • 3 celery ribs, cut into 1/2-inch pieces
  • 2 medium carrots, cut into 1/2-inch pieces
  • 1 large onion, chopped
  • 4 cloves garlic, minced
  • 2 1/2 tsp. finely chopped thyme, divided
  • Kosher salt
  • Freshly ground black pepper
  • 1/4 cup all-purpose flour
  • 8 oz. wild rice, thoroughly rinsed and drained
  • 2 quarts chicken stock
  • 2 cups water
  • 4 cups roasted chicken or turkey, cut into bite-size pieces
  • 1 cup heavy cream
  • 6 Tbsp. unsalted butter, divided
  • 1 lb. cremini mushrooms, cleaned, trimmed, and sliced
  • 2 bay leaves, preferably fresh

Directions

  1. In a large saucepan or Dutch oven, melt 2 tablespoons of the butter over medium-high. Add the mushrooms and cook, stirring frequently until all of the liquid has evaporated and the mushrooms are beginning to brown. Remove them from the pan to a plate and set aside. Reduce the heat to medium.
  2. Add the remaining 4 tablespoons of butter to the pan. When melted, add the celery, carrots, onion, garlic, 1 1/2 teaspoons of thyme, and a generous pinch each of salt and pepper. Cook over moderate heat, stirring occasionally, until the vegetables just start to soften, about 10 minutes. Sprinkle the flour over the vegetables and cook, stirring, until evenly coated and lightly browned, about 3 minutes.
  3. Add the wild rice to the saucepan and gradually stir in the stock and water. Add the bay leaves. Bring to a boil, then simmer over moderately low heat, uncovered, stirring occasionally, until the vegetables are tender, about 40 minutes.
  4. Add the chicken and mushrooms and continue to simmer, uncovered, stirring occasionally until the wild rice is tender, about 20-25 minutes longer.
  5. Remove the pan from the stove. Stir in the cream, add the remaining 1 teaspoon of thyme, and season to taste with salt and pepper. Ladle the soup into bowls and serve.

http://www.lynnandruss.com

Recipe from Amanda Johnson for Food & Wine Magazine

Chicken En Cocotte

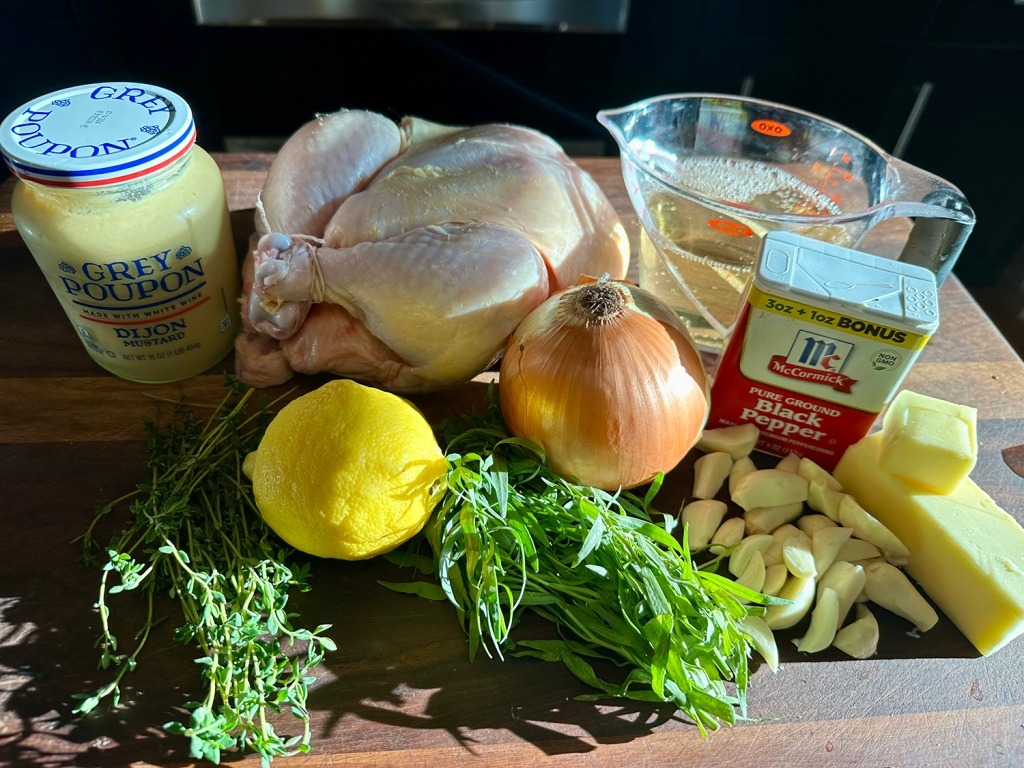
With very little prep involved in this Chicken En Cocotte—or in a pot—and most of the cooking being hands-off, you should get this tasty recipe on your short list. You will not get crispy skin from this method, in fact it gets discarded, but you will end up with super-moist poultry meat. We oooohed and aaaahhhed all the way through dinner.

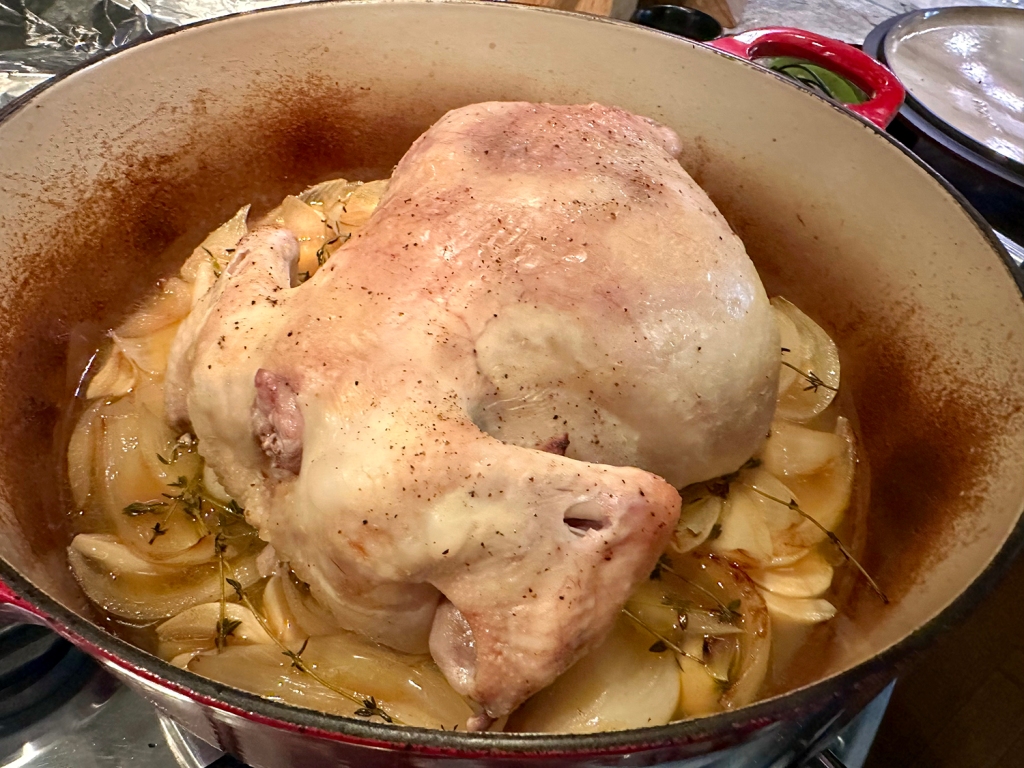
Cooking the chicken breast side down allows the delicate white meat to gently poach in the wine while the legs bake up above, a technique that helps equalize the cooking of the white meat (done at 160°F) and dark meat (done between 175°F to 180°F). Allowing the chicken to rest breast side up after prevents the white meat from overcooking.

The sauce was just amazing, we even spooned it over our side dish of Spanish Potatoes in Olive Oil, a perfect companion to the chicken because they both share several ingredients: white wine, garlic, onion and thyme.

NOTE: Don’t use a Dutch oven smaller than 7 quarts or a chicken larger than 4½ pounds. If the bird fits too snugly, there won’t be enough space for heat to circulate, hindering even cooking.

Chicken En Cocotte

  • Servings: 4
  • Difficulty: easy
  • Print

Ingredients

  • 5 Tbsp. salted butter, divided
  • 1 large yellow onion, cut into 8 wedges
  • 8 medium garlic cloves, peeled and halved
  • 1 1/2 cups dry white wine
  • 10 thyme sprigs
  • 1 4- to 4½-lb. whole chicken, wings tucked and legs tied
  • Kosher salt and ground black pepper
  • 3 Tbsp. lemon juice
  • 2 Tbsp. dijon mustard
  • 1/2 cup finely chopped fresh tarragon leaves

Directions

  1. Heat the oven to 400°F with a rack in the lower-middle position. In a large Dutch oven over medium, melt 1 tablespoon of the butter. When the foaming subsides, add the onion and garlic and cook until lightly browned, about 5 minutes. Pour in the wine and bring to a simmer. Lay the thyme sprigs on the onion mixture.
  2. Using paper towels, pat the chicken dry then season with salt and pepper. Set the chicken breast side down over the thyme and onions. Cover and bake until the thickest part of the breast reaches 160°F and the thighs reach 175°F to 180°F, 55 to 65 minutes. Using tongs inserted into the cavity of the chicken, carefully transfer it to a large baking dish, turning it breast side up. Let rest for at least 15 minutes.
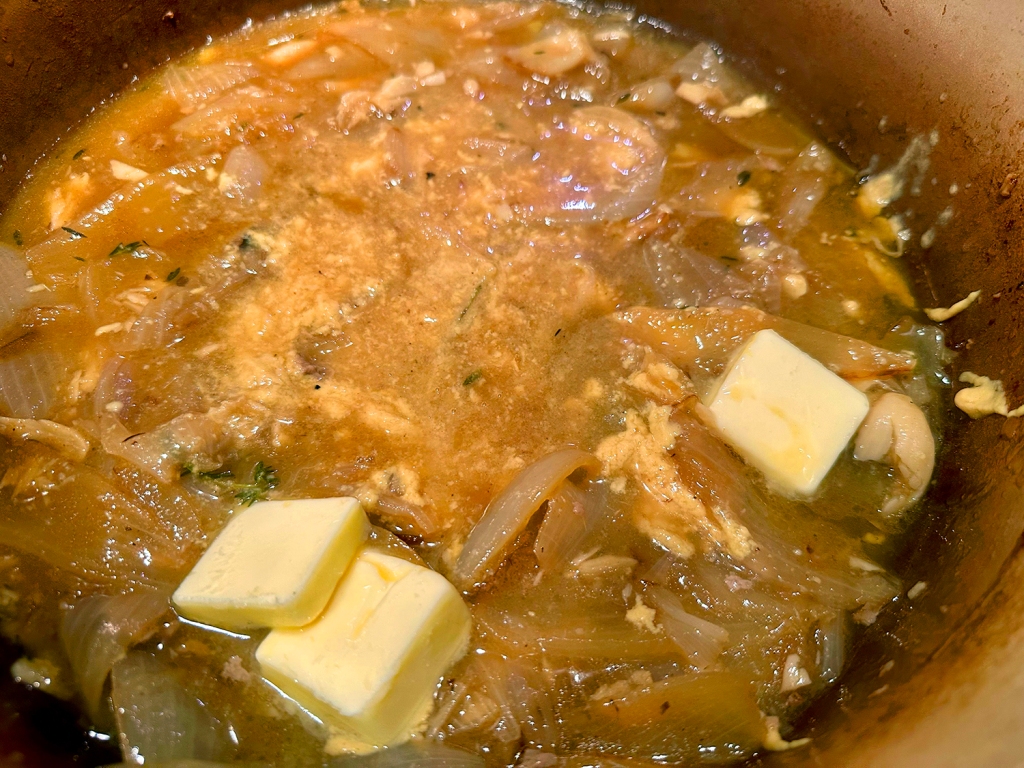
  3. Meanwhile, remove and discard the thyme sprigs. Tilt the pot to pool the liquid to one side and use a wide spoon to skim and discard the fat. Bring to a simmer over medium and cook until thickened and reduced to about 1 cup (with solids), about 5 minutes. Off heat, whisk in the remaining 4 tablespoons butter, the lemon juice and mustard. Taste and season with salt and pepper.
  4. Remove the legs from the chicken by cutting through the hip joints. Remove and discard the skin from the legs, then separate the thighs from the drumsticks. Remove the breast meat from the bone, remove and discard the skin, then cut each crosswise into thin slices. Arrange the chicken on a platter. Transfer the sauce to a bowl, stir in the tarragon and serve with the chicken.

http://www.lynnandruss.com

Recipe from Milk Street

One-Pot Tortellini With Meat Sauce

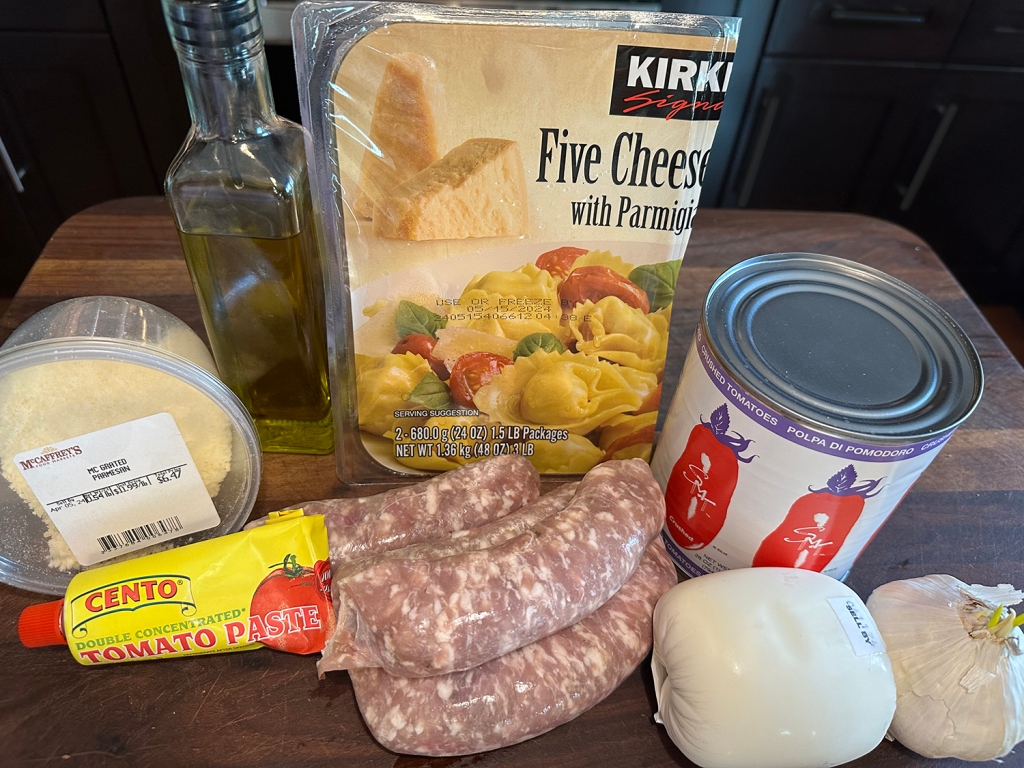
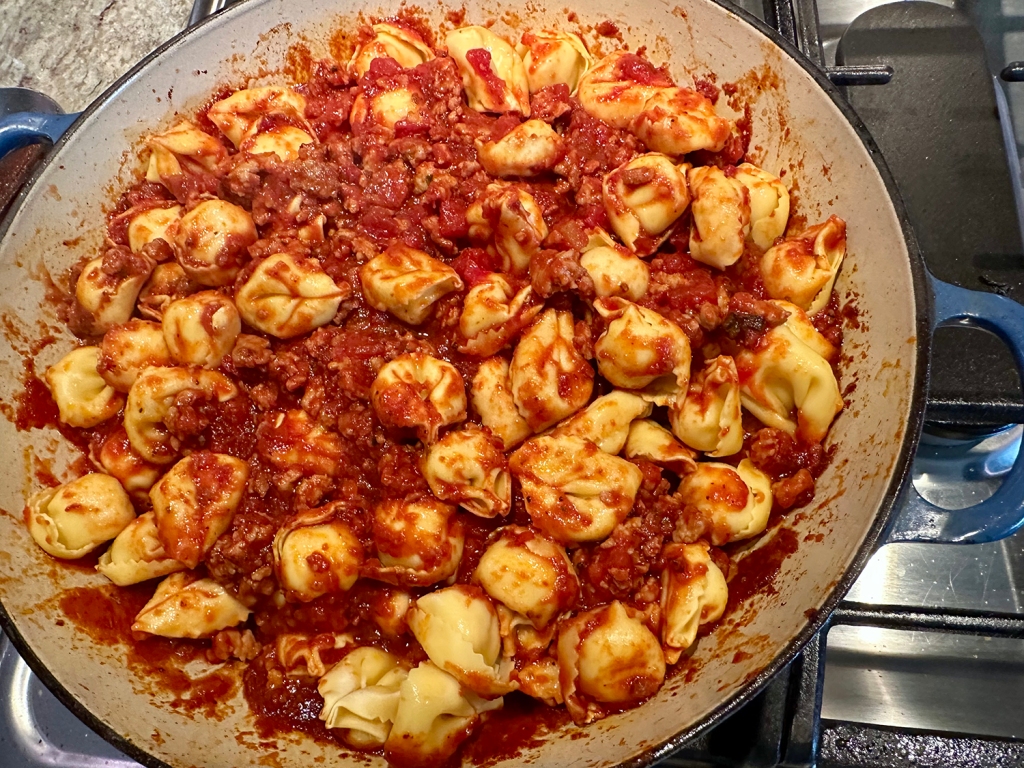
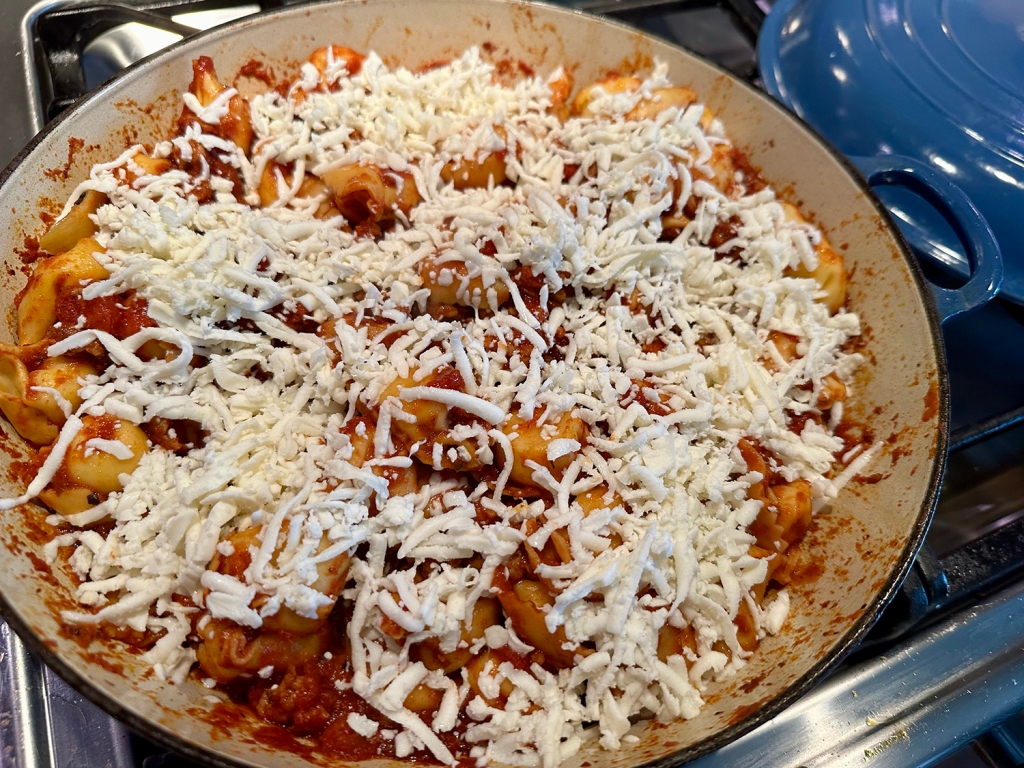
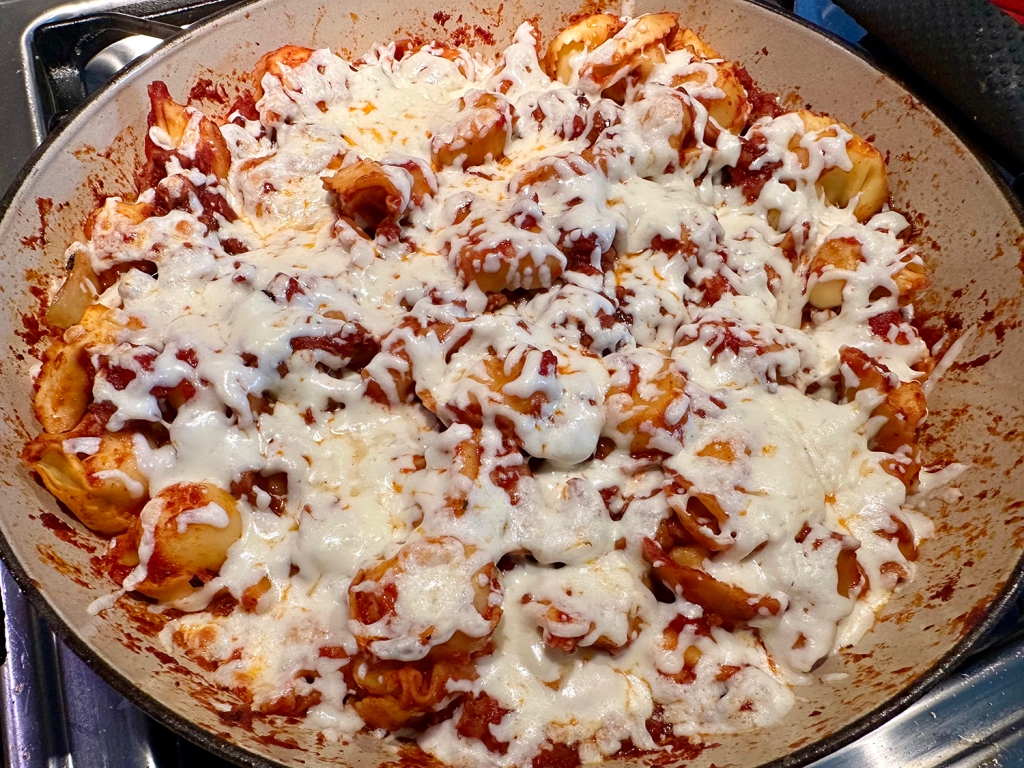
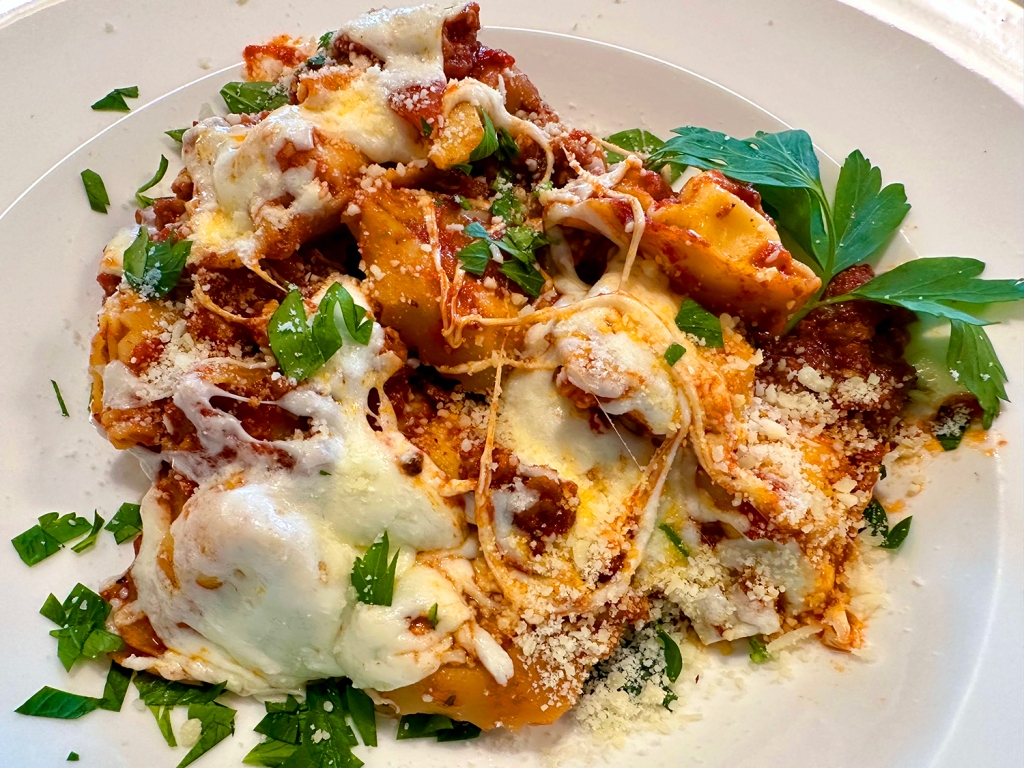
What a great weeknight meal! This no-chop, one-pot wonder comes together in 45 minutes with just a handful of pantry staples. Refrigerated or frozen tortellini plump in a meat sauce that’s brawny with hot or sweet Italian sausage and garlic. Top with a blanket of melted mozzarella, for more of a baked pasta result, and finish the dish with a grating of Parmesan.

Our frozen package of tortellini from Costco weighed in at one-and-a-half pounds instead of the 1 pound listed under ingredients, and we used it all. Sweet Italian sausage was our preference, although we added a 1/4 teaspoon of red pepper flakes and one teaspoon of dried oregano to punch up the flavor.

And the amount of shredded mozzarella was a tad over 4 ounces, but who doesn’t love more gooey cheese?!

One-Pot Tortellini With Meat Sauce

  • Servings: 4
  • Difficulty: easy
  • Print

Ingredients

  • 4 garlic cloves, peeled
  • 2 Tbsp. extra-virgin olive oil
  • 2 Tbsp. tomato paste
  • 1 lb. hot or sweet Italian sausage, casings removed
  • 1 (28-oz.) can whole or crushed tomatoes
  • Salt and pepper
  • About 1 lb. fresh or frozen cheese tortellini (no need to thaw)
  • Finely grated Parmesan, for serving
  • ½ cup/4 oz. grated mozzarella

Directions

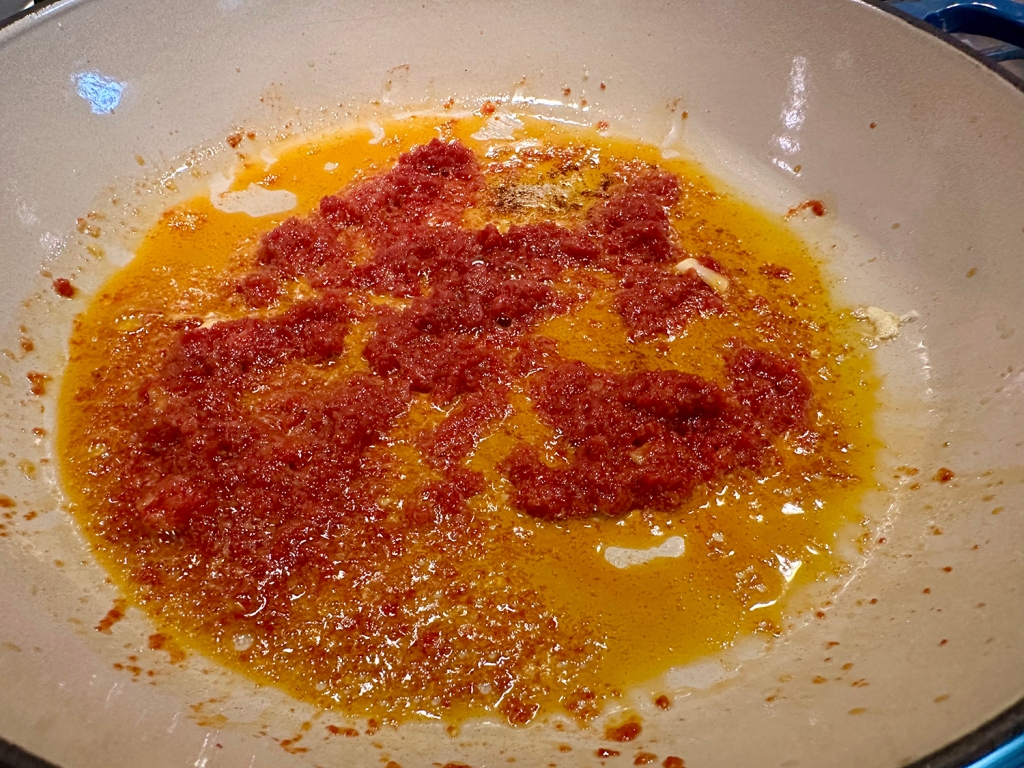
  1. Finely grate the garlic into a large Dutch oven or skillet. Add the olive oil and tomato paste and set over medium-high heat. When it sizzles, stir until the oil is a rusty red, 1 to 2 minutes. Add the sausage, breaking it into small pieces. Cook, stirring occasionally, until the sausage is starting to crisp, 8 to 10 minutes.
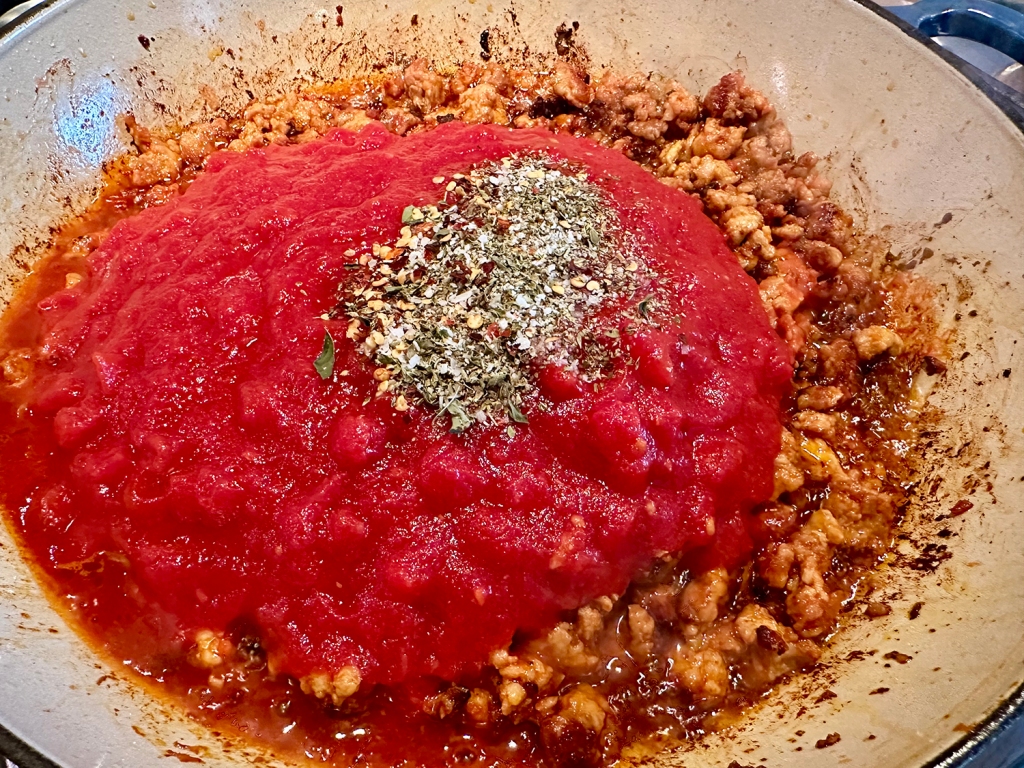
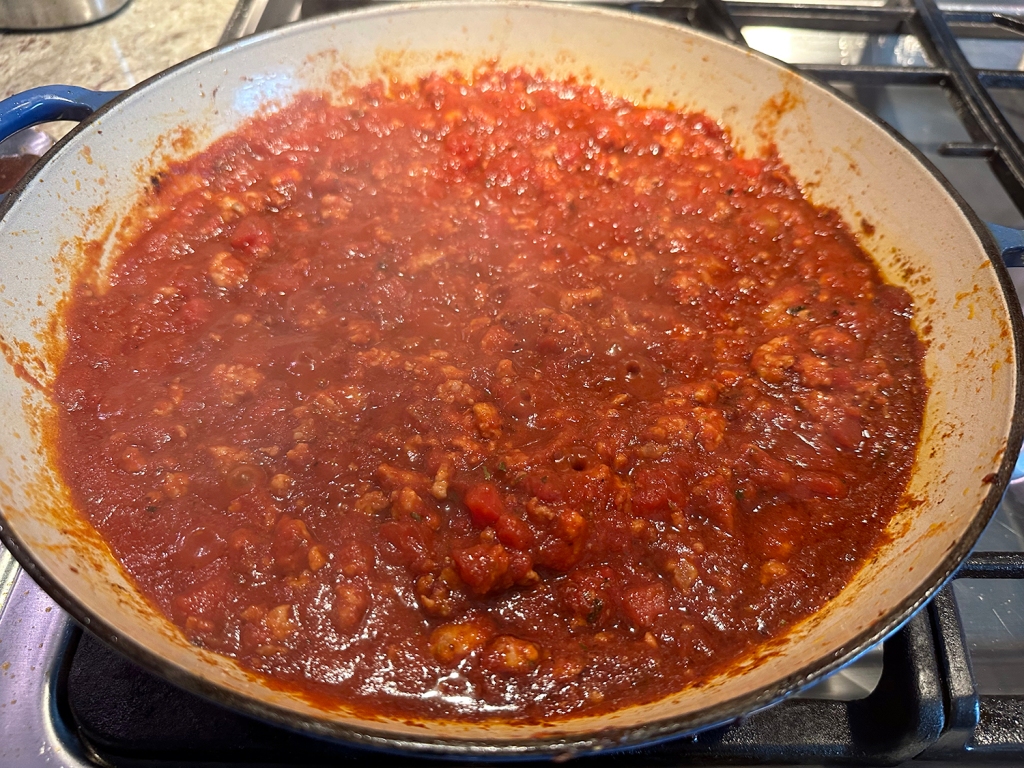
  2. Stir in the tomatoes. (If using whole tomatoes, break them up with your spoon.) Season with dried oregano, crushed red pepper flakes (optional), and salt and pepper. Scrape up the browned bits from the bottom of the pot. Simmer over medium until thickened, 10 to 15 minutes.
  3. Stir in the tortellini, cover and cook until tender, 7 to 10 minutes, stirring halfway through and scraping any that might be stuck to the bottom of the pot. If the sauce looks dry, add ¼ cup water (which was needed due to the fact we were cooking 50% more pasta).
  4. For the melted-cheese top like a baked pasta, heat the broiler with a rack in the upper third of the oven. Sprinkle the tortellini with the mozzarella. Broil until melted and browned in spots, 2 to 4 minutes.
  5. Season to taste with salt and pepper and serve topped with Parmesan.

http://www.lynnandruss.com

Recipe from Lidia Bastianich

Baked Mushroom Crostini

In Italian, this appetizer is known as Crostini di Funghi al Forno. Our first time making this lovely dish was for a small dinner party. Everyone loved it, so a few days later when attending another dinner party, we were tasked with bringing an appetizer and made the same thing. No disappointments.

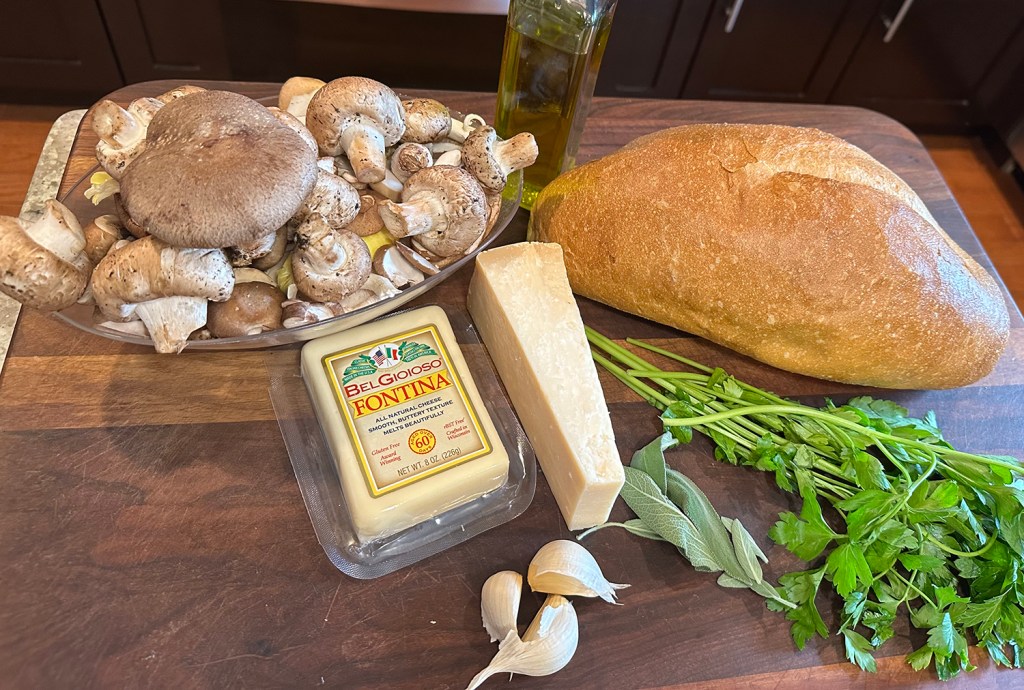
One of my favorite melting cheeses is fontina. Incredibly rich and creamy, the flavors of this cheese are sweet and pungent, unveiling tones of butter and roasted nuts as it lingers on your palate. Traditionally made from unpasteurized milk, the texture is semi-hard, smooth and adorned with small holes in the body.

Fontina is not just limited to Italy, there are versions of Danish and Swedish characterized by their waxed rinds and sweet savory flavor. A suitable substitute is Gruyère which produces a rich and creamy sauce similar to that of Fontina.

Baked Mushroom Crostini

  • Servings: 4
  • Difficulty: easy
  • Print

Ingredients

  • ¼ cup extra-virgin olive oil
  • 3 garlic cloves, crushed and peeled
  • 1 lb. mixed fresh mushrooms, sliced (cremini, button, shiitake, oyster, chanterelle)
  • 4 fresh sage leaves, chopped
  • ½ tsp. kosher salt
  • 2 Tbsp. chopped fresh Italian parsley
  • 8 slices country bread, very lightly toasted
  • 1 cup grated Italian fontina
  • ½ cup freshly grated Grana Padano

Direction

  1. Preheat the oven to 400 degrees.
  2. To a large skillet over medium-high heat, add 2 tablespoons of the olive oil. When the oil is hot, add the garlic cloves. Once the garlic is sizzling, add the mushrooms and sage, and cook, without stirring, until browned on one side, about 2 to 3 minutes. Stir, and brown the other side. Season with the salt, cover, and cook until tender, about 5 minutes. Uncover, remove the garlic, stir in the parsley, and set aside.
  3. On a baking sheet, brush the lightly toasted bread on both sides with the remaining 2 tablespoons olive oil. In a medium bowl, toss together the grated cheeses. Stir half of the cheese mixture into the mushrooms.
  4. Spread the mushroom mixture on the toasts, and sprinkle with the remaining grated-cheese mixture. Bake until the tops are browned and the cheese is bubbly, about 10 to 12 minutes. Serve hot.

http://www.lynnandruss.com

Recipe from Lidia Bastianich

Slow-Roasted Boneless Leg of Lamb

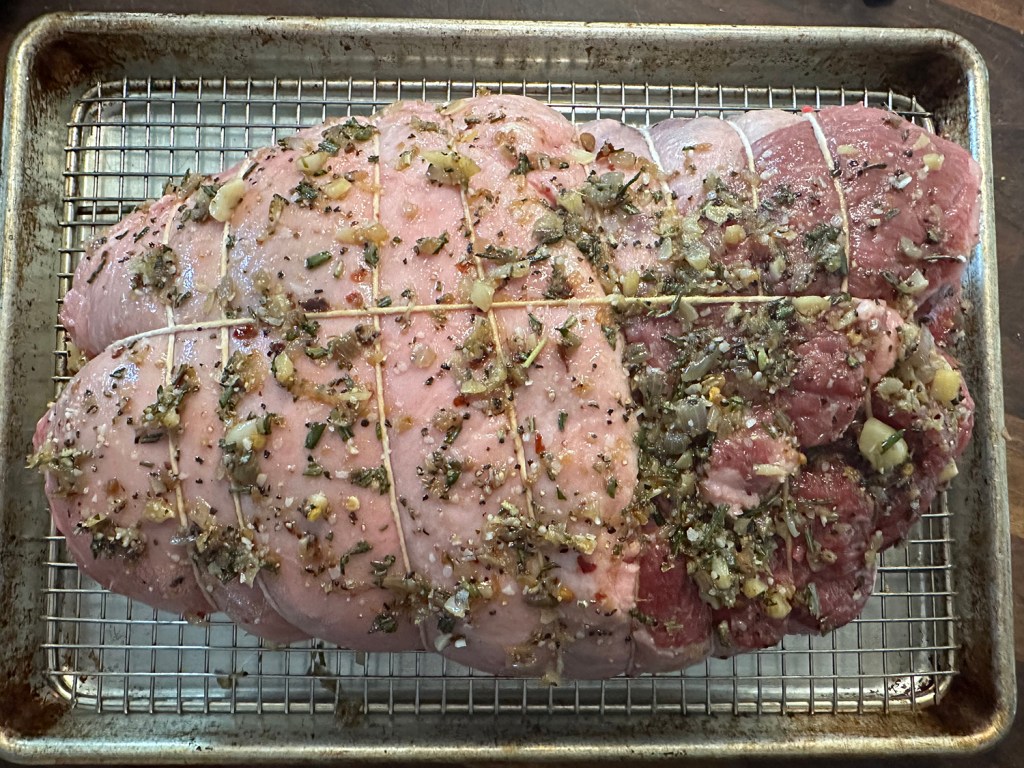
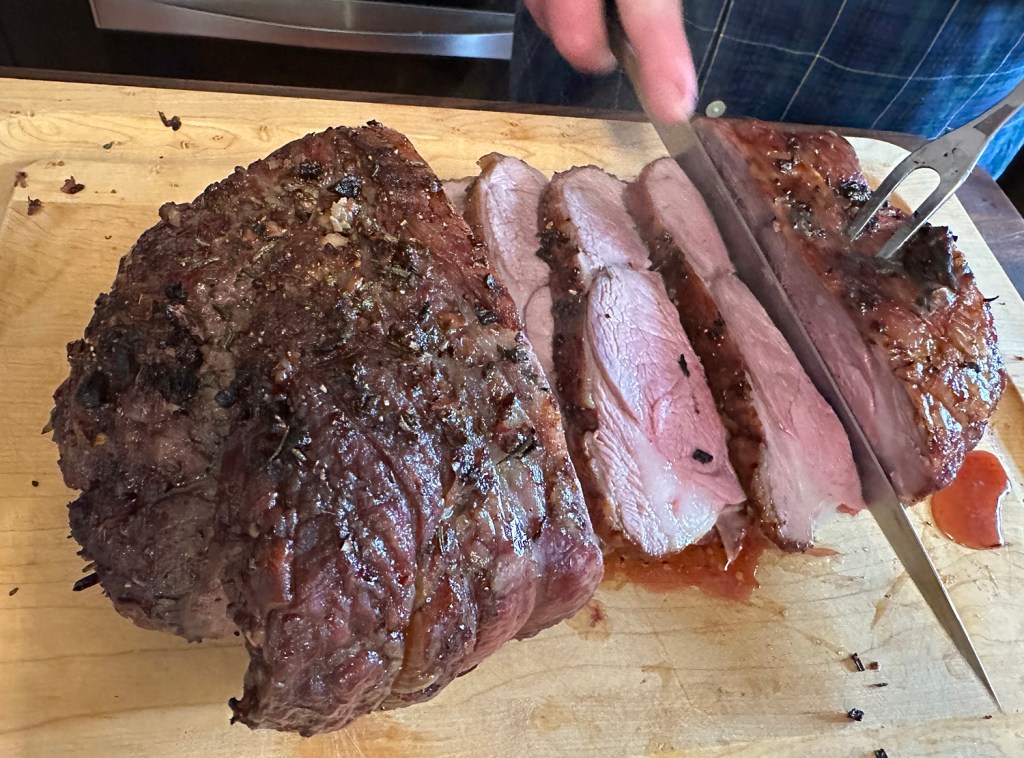
For you seasoned lamb lovers and recent converts, this slow-roasted method delivers mild, flavorful meat with a tender texture and a perfectly rosy medium-rare hue all the way from edge to center, surrounded in a crisp layer of browned, crackly fat. Got your attention now?

Here, we are going with the classic combination of garlic, rosemary, lemon zest, and some shallots, which bring their milder allium sweetness to the mix. These aromatics are cooked down in olive oil, with a pinch of red pepper flakes for heat, and a few minced anchovy fillets (another classic lamb pairing). And don’t worry, those fillets won’t taste fishy in the final roast.

When applying a rub to the meat, it’s important to really work the salt deep into as many cracks and crevices as possible. Ideally, you want to let the mixture sit on the lamb for at least a day.

There’s a difference between edible and fantastic. That difference usually comes down to how crisp the fat is. After the lamb has rested for half an hour or so (which gives ample time for temperature differentials inside to even out), pop it back into a 500°F oven for about 15 minutes to fully crisp. The lamb fat crackles and those bits of garlic and shallot brown, lending a rich sweetness to the salty crust.

Your meat should be gloriously juicy, crispy on the outside, and because of its low, slow cooking, perfectly evenly cooked and extra-tender. Mmmm good!

Slow-Roasted Boneless Leg of Lamb

  • Servings: 8-10
  • Difficulty: easy
  • Print

Ingredients

  • 2 Tbsp. extra-virgin olive oil
  • 3 medium cloves garlic minced (about 1 Tbsp.)
  • 1 medium shallot, minced (about 1/2 cup)
  • 6 anchovy filets, minced (about 1 1/2 Tbsp.)
  • 2 Tbsp. finely chopped fresh rosemary leaves
  • 1 Tbsp. finely grated lemon zest (from 1 lemon)
  • 1/2 tsp. red pepper flakes
  • 2 Tbsp. Diamond Crystal kosher salt; for table salt, use half as much by volume or the same weight
  • Freshly ground black pepper
  • One 6- to 8-lbs. boneless leg of lamb, butterflied to even 1-inch thickness and trimmed of excess fat

Directions

  1. Adjust oven rack to lower-third position and preheat oven to 275°F. In a small saucepan set over medium heat, heat olive oil until shimmering, about 3 minutes. Add garlic, shallot, anchovies, rosemary, lemon zest, and red pepper flakes. Cook, stirring occasionally, until shallots and garlic are softened, 3 to 5 minutes. Transfer to a small heatproof  bowl. Stir in salt and pepper.
  2. Rub half of the mixture inside butterflied lamb leg. Roll leg and, using butcher’s twine, tie securely at 1-inch intervals. Rub remaining mixture over exterior of lamb. Cook immediately or let rest uncovered in the refrigerator for up to 12 hours for best flavor and texture.
  3. When ready to cook, place lamb, fat side up, on a wire rack set in a foil-lined rimmed baking sheet. Transfer to oven and roast until an instant-read thermometer inserted into thickest section of lamb registers 125°F to 130°F for medium-rare, or 130°F to 135°F for medium, 2 1/2  to 3 hours. Remove from oven and let rest, uncovered, for 40 minutes.
  4. While lamb is resting, increase oven temperature to 500°F. Return lamb to oven and roast until exterior is deep brown and crisp, about 15 minutes. Remove from oven and let rest 5 minutes. Remove twine with kitchen shears, transfer lamb to cutting board, slice into 1/4 inch slices, and serve.

http://www.lynnandruss.com

Recipe by J. Kenji López-Alt for Serious Eats

Coriander Braised Pork with Oregano and Feta

Utterly delicious; wonderfully tender and rich, and easy to make as well. This simple, rustic braise is based on the pork stew called afelia from the Mediterranean island-country of Cyprus. The red wine, reduced to concentrate its flavor, lends depth, but the citrusy notes of ground coriander and a spoonful of lemon juice added at the end, balance the richness of the pork.

The oregano and parsley aren’t needed until it’s time to finish the sauce, so you can prep the herbs while the pork cooks. Serve the stew with crusty bread, simply prepared potatoes or a hearty grain such as bulgur, steamed rice or egg noodles would work nicely as well.

Don’t use coriander that has gone stale. This dish relies on the spice for its unique flavor, so it’s important to use coriander that is fresh and fragrant.

Coriander Braised Pork with Oregano and Feta

  • Servings: 6
  • Difficulty: easy
  • Print

Ingredients

  • 3 Tbsp. extra-virgin olive oil, plus more to serve
  • 1 medium yellow onion, halved and thinly sliced
  • 3 Tbsp. ground coriander
  • 1 cup dry red wine
  • 3 lbs. boneless pork shoulder, trimmed and cut into 1-inch chunks
  • Kosher salt and ground black pepper
  • 6 bay leaves
  • 1 Tbsp. cornstarch
  • 3 Tbsp. minced fresh oregano
  • 1 Tbsp. lemon juice
  • 2 oz. feta cheese, crumbled (½ cup)
  • ¼ cup finely chopped fresh flat-leaf parsley

Directions

  1. On a 6-quart Instant Pot, select More/High Sauté. Add the oil and heat until shimmering. Add the onion and cook, stirring occasionally, until beginning to brown, about 7 minutes. Add the coriander and cook, stirring, until fragrant, about 1 minute.
  2. Add the wine and cook, stirring occasionally, until most of the moisture has evaporated, 2 to 3 minutes. Add the pork, 1 teaspoon salt, ½ teaspoon pepper and the bay; stir, then distribute in an even layer.
  3. Press Cancel, lock the lid in place and move the pressure valve to Sealing. Select Pressure Cook or Manual; make sure the pressure level is set to High. Set the cooking time for 25 minutes. When pressure cooking is complete, allow the pressure to reduce naturally for 15 minutes, then release the remaining steam by moving the pressure valve to Venting. Press Cancel, then carefully open the pot.
  4. Using a slotted spoon, transfer the pork to a medium bowl. Using a large spoon, skim off and discard the fat from the surface of the cooking liquid. Remove and discard the bay leaves. Select More/High Sauté and bring to a boil. Cook, stirring occasionally, until the liquid is reduced to about 1 cup, about 10 minutes.
  5. In a small bowl, stir together the cornstarch and 2 tablespoons water, then stir into the pot. Cook, stirring constantly, until thickened, about 1 minute. Press Cancel to turn off the pot. Stir in the pork, oregano and lemon juice. Taste and season with salt and pepper. Transfer to a serving dish, sprinkle with feta and parsley, then drizzle with additional oil.

http://www.lynnandruss.com

Recipe from Milk Street’s cookbook “Fast and Slow”

Skillet Chicken with Tomatoes, Pancetta and Mozzarella

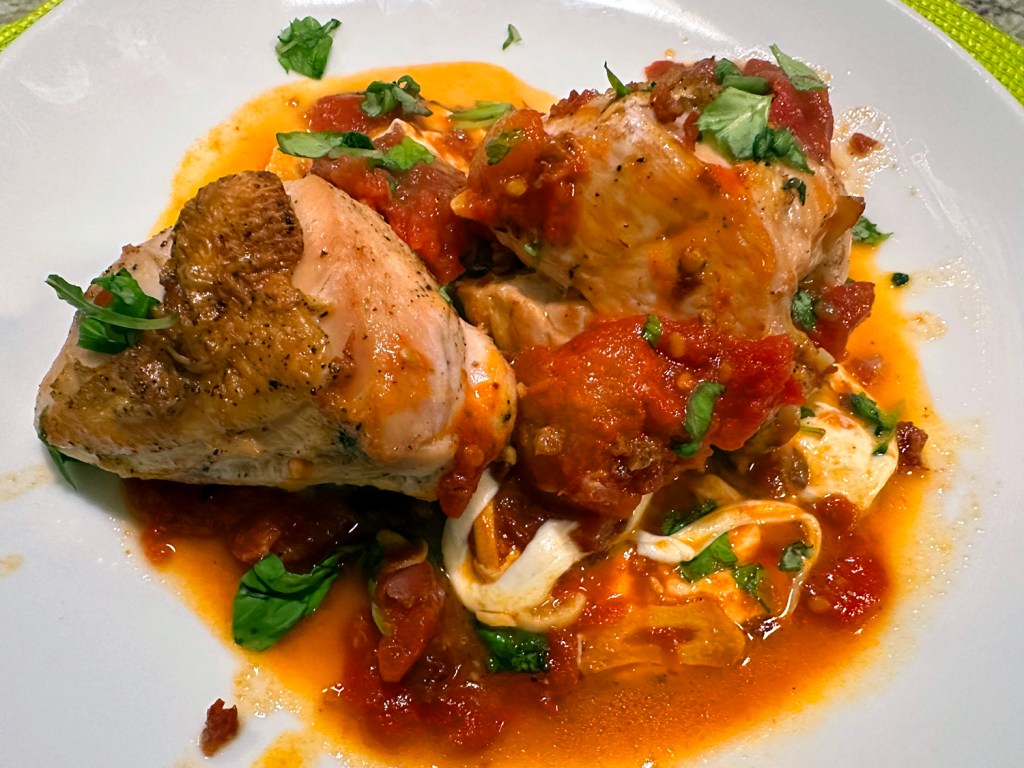
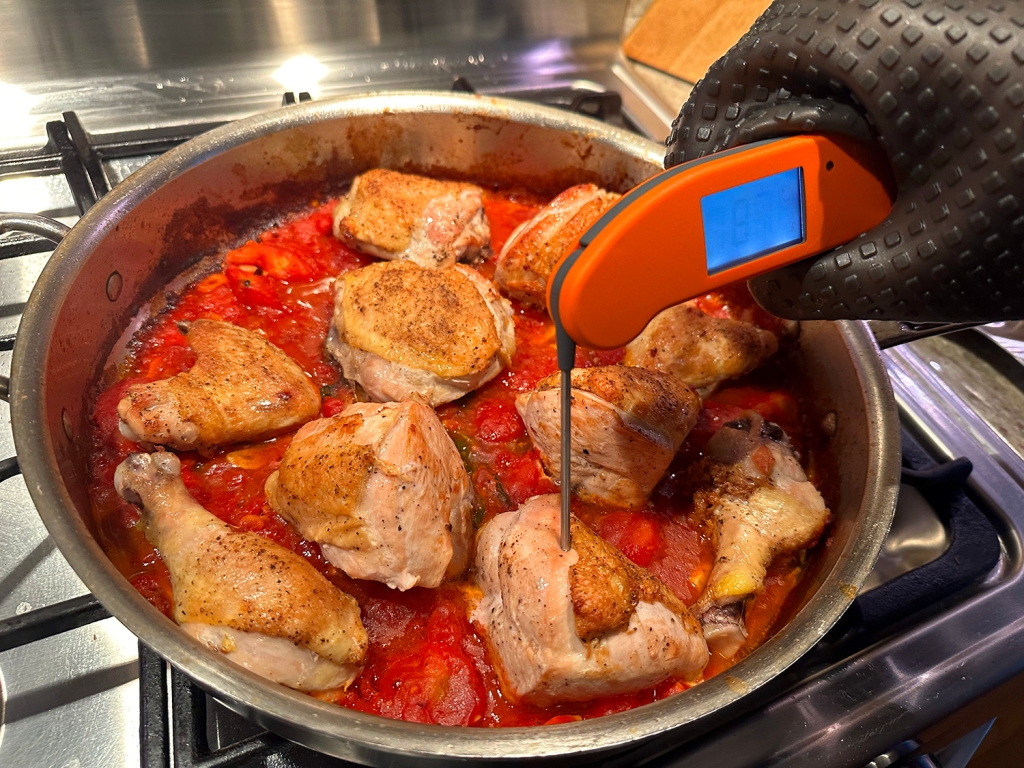
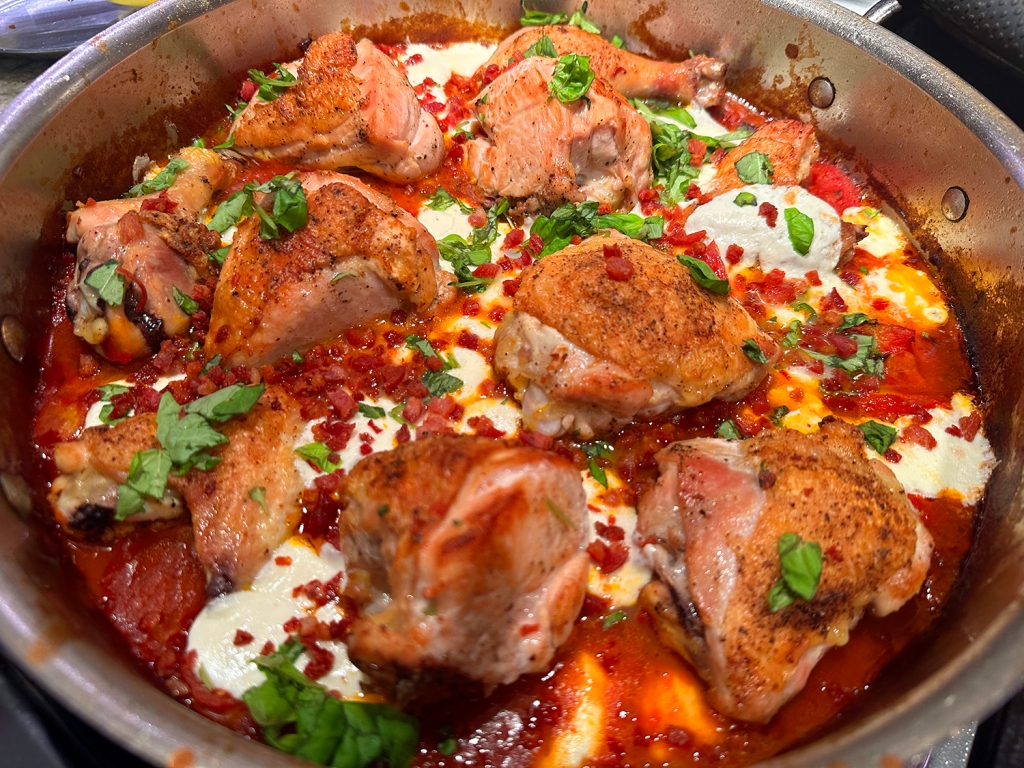
Make dinner fun again. With a topping of tomato sauce and fresh mozzarella, it’s easy to think of this skillet dish as “pizza chicken.” It’s a tangy, milky, gooey, lovable meal that’s somewhat reminiscent of chicken Parmesan, but with succulent bone-in chicken pieces instead of breaded and fried cutlets. Even better, it has pancetta and anchovies for complexity of flavor, and the whole thing comes together in under an hour.

And at the very end, fresh bits of mozzarella get melted over everything. Imagine pizza toppings on a pan full of succulent, browned, bone-in chicken, with anchovies in the sauce for depth (it won’t taste fishy) and a crunchy pancetta garnish. As a final touch, add chunks of fresh mozzarella right at the end, broiling everything until the edges are singed ever so slightly and the cheese oozes in milky puddles.

“Those wonderfully distinct puddles are the reason for chunks of fresh mozzarella rather than grated, which would have melted into a more even blanket of cheese, but without the pockets of intensity. That said, if you’d rather use grated mozzarella, go right ahead. This is the kind of dish that welcomes variations. Add olives or capers instead of anchovies, substitute onion for garlic, swap rosemary for basil, or use all dark- or all white-meat pieces instead of a whole bird.”

Skillet Chicken with Tomatoes, Pancetta and Mozzarella

  • Servings: 4
  • Difficulty: easy
  • Print

Ingredients

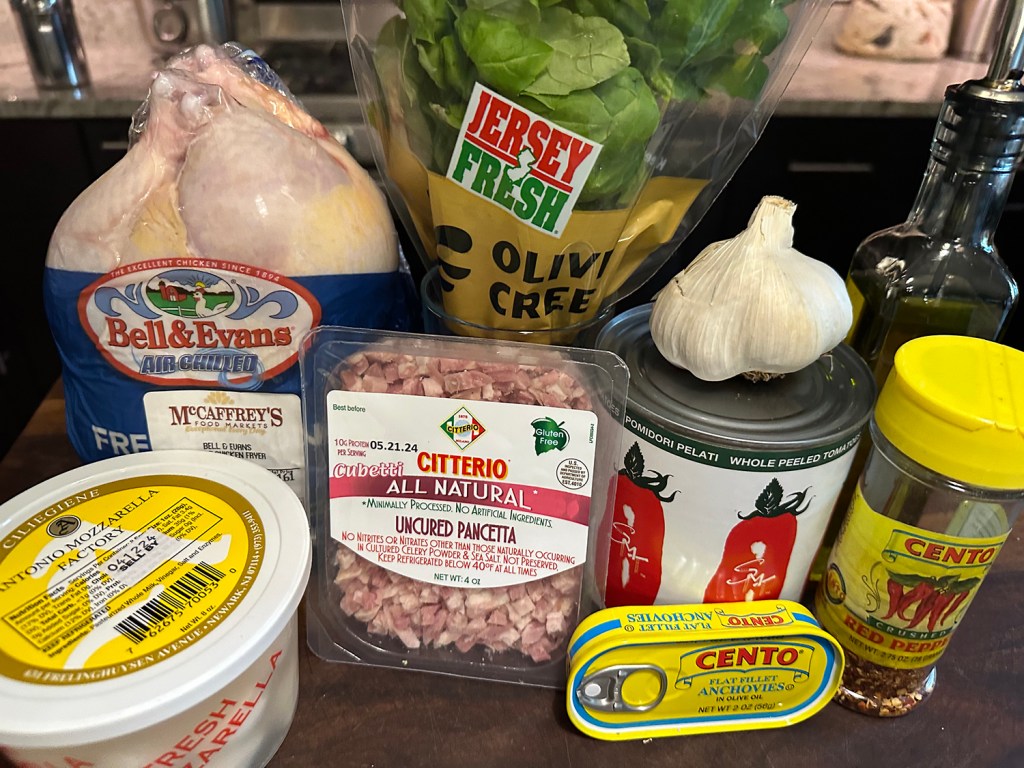
  • 3½ lbs. bone-in chicken pieces (or use a 3½ lb. chicken cut into 8 pieces)
  • 2 tsp. kosher salt
  • 1 tsp. black pepper
  • 1 Tbsp. extra-virgin olive oil
  • 5 oz. pancetta, diced
  • 3 garlic cloves, thinly sliced
  • 2 anchovy fillets
  • ¼ tsp. red pepper flakes
  • 1 (28-oz.) can whole plum tomatoes
  • 1 large basil sprig, plus more chopped basil for serving
  • 8 oz. bocconcini, halved (or use mozzarella cut into ¾-inch pieces)

Directions

  1. Heat oven to 400 degrees. Pat chicken dry and season with salt and pepper.
  2. In a large oven-proof skillet, warm oil over medium-high heat. Add pancetta and cook, stirring frequently, until browned. Use a slotted spoon to transfer pancetta to a paper-towel-lined plate.
  3. Add chicken to skillet. Sear, turning only occasionally, until well browned on all sides, about 10 minutes. Transfer to a large plate. Pour off all but 1 tablespoon oil.
  4. Add garlic, anchovy and red pepper flakes to skillet; fry 1 minute. Stir in tomatoes and basil. Cook, breaking up tomatoes with a spatula, until sauce thickens somewhat, about 10 minutes.
  5. Return chicken to skillet. Transfer skillet to oven and cook, uncovered, until chicken is no longer pink, about 30 minutes.
  6. Scatter bocconcini or mozzarella pieces over skillet. Adjust oven temperature to broil. Return skillet to oven and broil until cheese is melted and bubbling, 2 to 3 minutes (watch carefully to see that it does not burn). Garnish with pancetta and chopped basil before serving.

http://www.lynnandruss.com

Recipe by Melissa Clark for NYTimes Cooking

Artichoke-Parmesan Soup

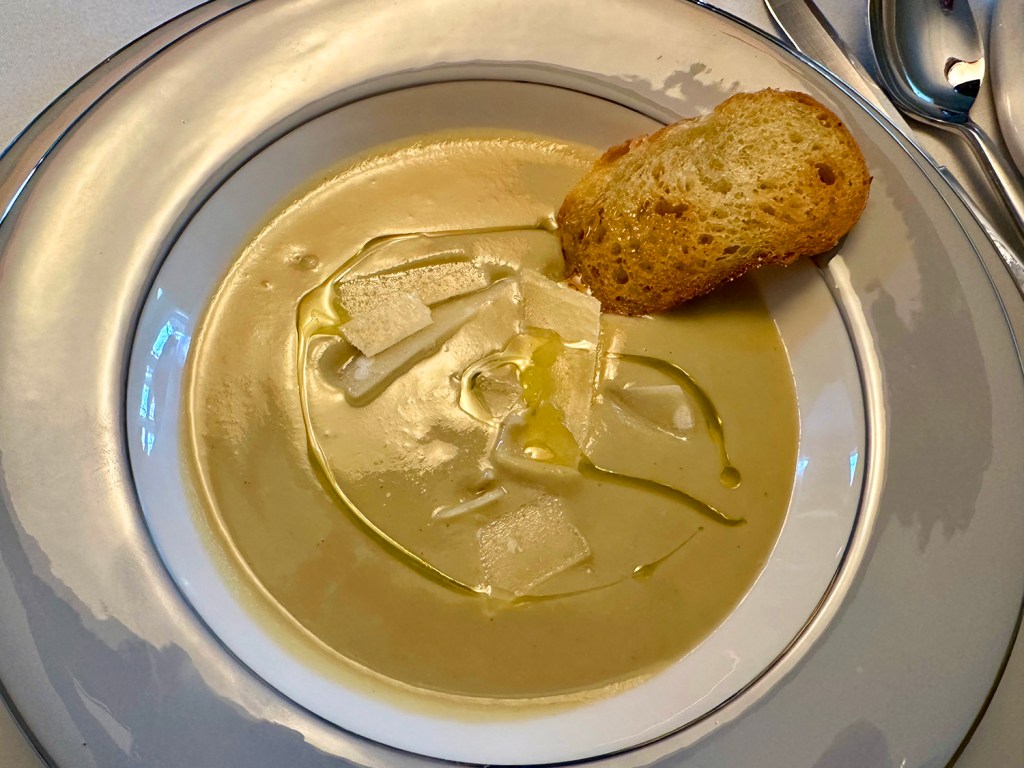
This sublime soup combines the nutty flavor of artichokes and the richness of Parmesan. Although fresh artichokes are preferred many home cooks may not have the patience for turning artichoke bottoms. Frozen artichokes—usually sold in nine-ounce packages labeled artichoke hearts—are a worthy substitute. The wine here works its magic, adding just enough acid to lighten the soup. 

Homemade chicken stock adds oodles of flavor, so if you have some use it instead of the boxed or canned varieties. For a finishing touch, add a shower of shaved Parmesan, a swirl of good extra-virgin olive oil and serve with toasted brioche for dipping.

*If using frozen artichoke hearts, omit lemon and water and start at Step 2. The soup can be refrigerated overnight. Rewarm gently over moderately low heat.

Artichoke-Parmesan Soup

  • Servings: 4
  • Difficulty: easy
  • Print

Ingredients

  • One 2-oz. chunk of Parmigiano-Reggiano cheese, shaved into strips with a vegetable peeler
  • 1 lemon, halved
  • 4 large globe artichokes (about 3 1/2 lbs.); OR 4 cups frozen artichoke hearts*, thawed
  • 1/4 cup extra-virgin olive oil
  • 2 medium shallots, minced
  • Sea salt
  • 1 cup white wine, preferably Chardonnay
  • 3 cups chicken stock or canned low-sodium broth
  • 1 Tbsp. unsalted butter

Directions

  1. If using fresh artichokes: Squeeze the lemon juice into a large bowl of cold water and add the lemon halves. Break off or cut the stem from the base of the artichokes. Using your hands, snap off the tough outer leaves near the base. Continue snapping off leaves until only the central cone of yellow leaves with pale green tips remain. Using a large sharp knife, trim the top cone of leaves to just below the green tips. Trip any tough, dark green areas from the base with a small knife. Cut the artichoke hearts in half. Using a small spoon or a melon baller, scrape out and discard the hairy chokes. Cut each half lengthwise into 4 even slices. Place the artichoke slices in the acidulated water.
  2. In a large nonreactive saucepan, combine 2 tablespoons of the oil with the shallots and a pinch of sea salt and cook over moderate heat, stirring often, until softened but not brown.
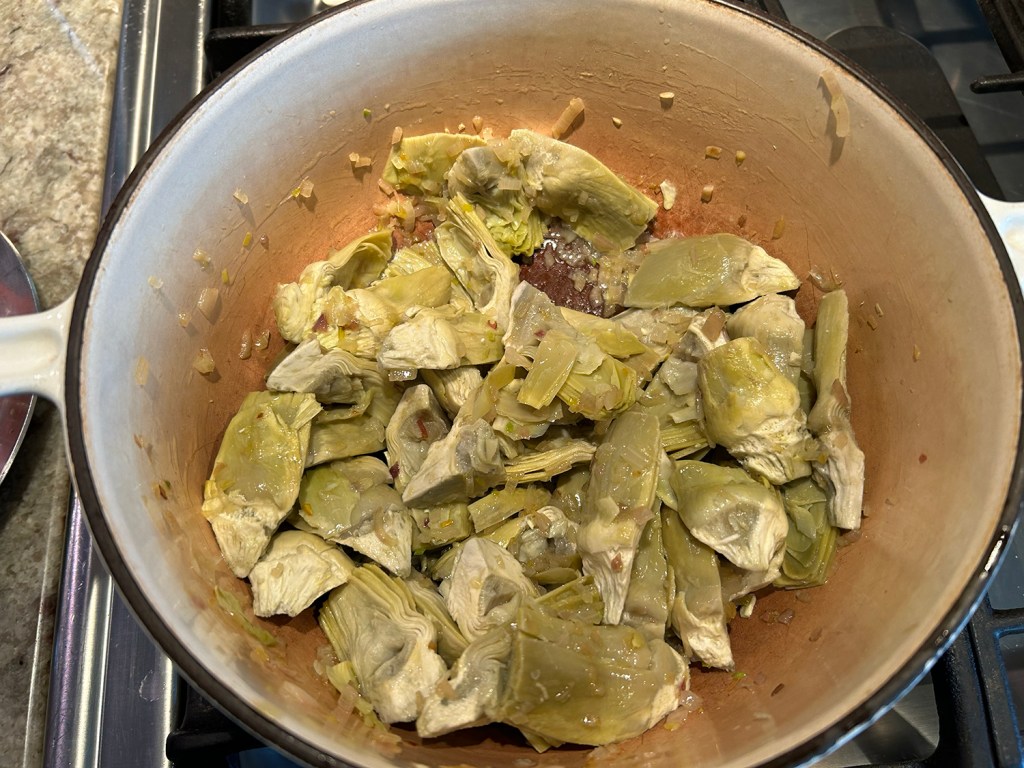
  3. Stir in the remaining 2 tablespoons oil. Drain and add the artichoke slices and cook until slightly softened, about 2 minutes. Pour the wine all over the artichokes, increase the heat to moderately high and simmer until almost evaporated, about 7 minutes.
  4. Add the chicken stock and reduce the heat. Cover and simmer gently until the flavors have mingled, about 20 minutes.
  5. Transfer the soup to a food mill with a fine disk and puree. Discard any fibrous artichoke pieces that remain in the food mill. Return the soup to the pan; you should have about 3 cups. If the soup is too thin, return it to the saucepan and boil until reduced and thickened.
  6. Just before serving, whisk the butter into the hot soup over moderate heat until melted and incorporated. Pour the soup into heated soup plates or bowls and scatter the cheese strips on top. Serve immediately.

http://www.lynnandruss.com

Recipe by Patricia Wells for Food & Wine