Monthly Archives: February 2018

Chicken and Sparerib Stew Redux

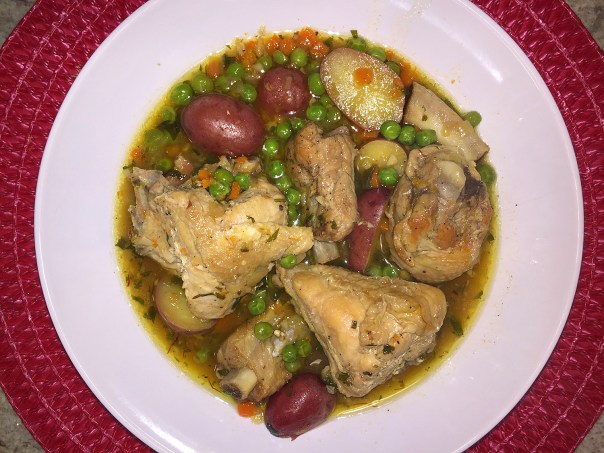
Nearly 2 1/2 years ago we made Chicken and Sparerib Stew from one of our most admired Spanish chefs, Penelope Casas, and we were both a bit disappointed. What we realized—after the fact—was that the spareribs had freezer burn and thus produced the off-putting taste. (Of course, not sure why we didn’t realize that before cooking?!)
IMG_2343

It took us this long to get the courage to try the recipe again, even though everything else we’ve ever cooked from her cookbook, La Cocina de Mamá, was more than memorable. Sometimes you just have to get back on the horse, you know what I mean?
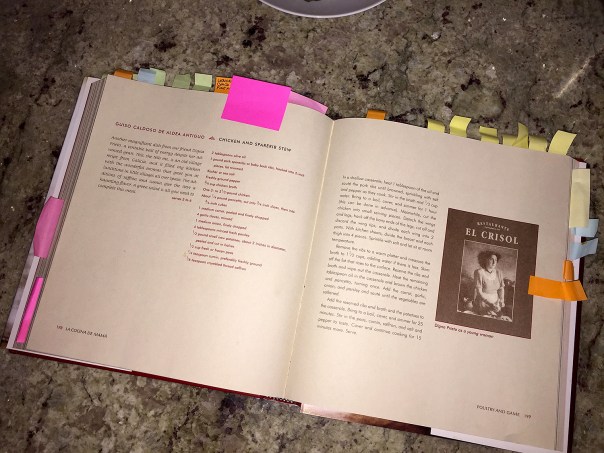
IMG_2319It’s obvious that we like Penelope’s recipes as half the cookbook is tagged!

Penelope’s cookbook often directs you to cut up meat and poultry into many small pieces because the marrow is locked deep within the bones and can’t be extracted efficiently unless the bones are cracked or sawed in half. Russ also theorizes that they use to do so as a means to expand the meal to feed more people. Historically, Spain was a poor country and as Penelope collected her recipes from family, friends, acquaintances and centuries-old cookbooks, she was amazed how home cooks so brilliantly coaxed flavor from the simplest foods.

IMG_2313
Russ begins hacking the whole chicken into pieces.

IMG_2314
After setting aside the edible pieces, the unused chicken parts are added to our “body Bag” in the freezer for later use in making stock.
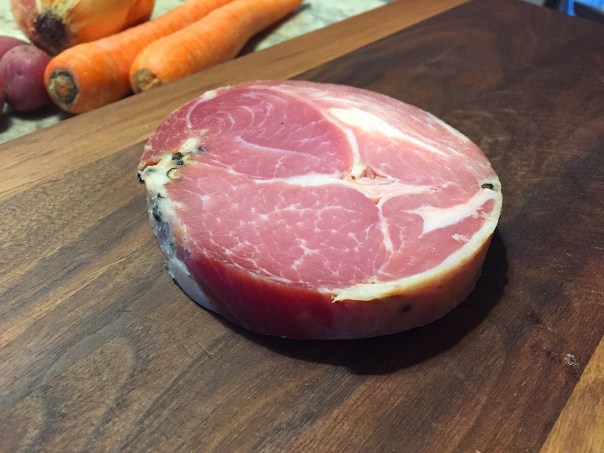
IMG_2327If possible, buy the 4-ounce piece of pancetta in one thick slab to cut down into 3/4″ chunks.

As before, the quota of carrots, peas and potatoes didn’t seem generous enough so we increased the amount of each by 50%. And the small additions of saffron and cumin give the Guiso Caldoso de Aldea Antiguo stew a haunting flavor.

Chicken and Sparerib Stew

  • Servings: 5-6
  • Difficulty: moderate
  • Print

Ingredients

  • 2 Tbsp. olive oil
  • 1 lb. pork spareribs or baby back ribs, hacked into 2″ pieces, fat trimmed
  • Kosher or sea salt
  • Freshly ground pepper
  • 3/4 cup chicken broth
  • One 3-4 lb. chicken
  • 1/4 lb. pancetta, cut into 3/4″ slices, then into 3/4″ cubes
  • 1 med. carrot, peeled and finely chopped
  • 4 Tbsp. minced parsely
  • 1/2-lb. small new potatoes, about 2″ in diameter, halved
  • 1/2 cup fresh or frozen peas
  • 1/4 tsp. cumin, preferably fresh ground
  • 1/8 tsp. crumbled saffron threads

Directions

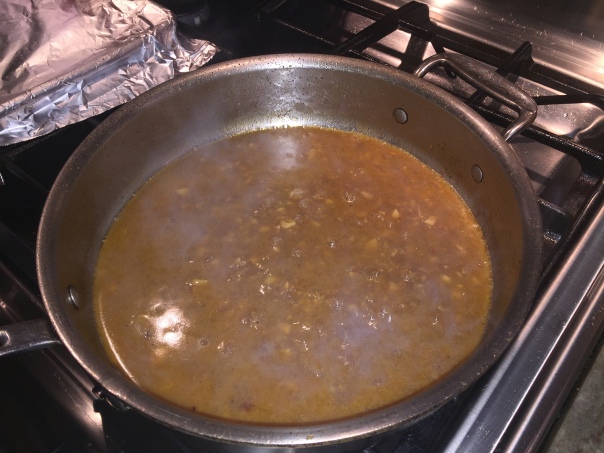
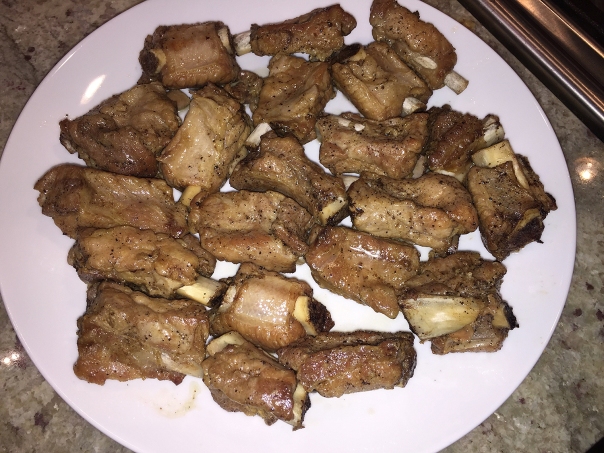
  1. In a shallow casserole, heat 1 tablespoon of the oil and sauté the pork ribs until browned, sprinkling with salt and pepper as they cook. Stir in the broth and 1/3 cup water. Bring to a boil, cover, and simmer for 1 hour (this can be done in advance.)
    IMG_2330
  2. Meanwhile cut the chicken into small serving pieces. Detach the wings and legs, and divide each wing into two parts.
  3. With kitchen shears, divide the breast and each thigh into four pieces. Sprinkle with salt and let sit at room temperature.
  4. Remove the ribs to a warm platter and measure the broth to 1 1/2 cups, adding water if there is less. Skim off the fat that rises to the surface. Reserve the ribs and broth and wipe out the casserole.
    IMG_2333
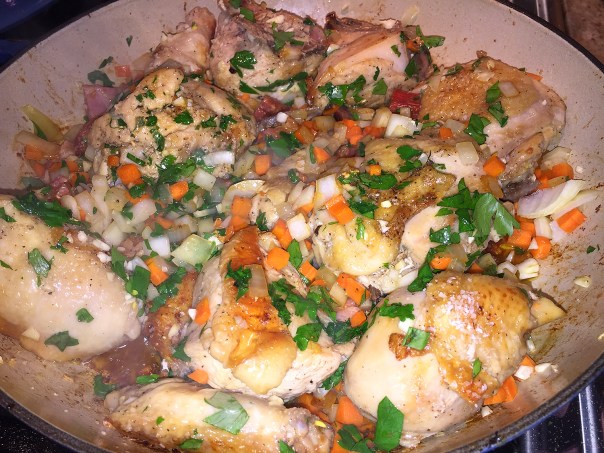
  5. Heat the remaining tablespoon of oil in the casserole and brown the chicken and pancetta, turning once.
    IMG_2334
  6. Add the carrot, garlic, onion, and parsley and sauté until the vegetables are softened.
    IMG_2337
  7. Add the reserved ribs and broth and the potatoes to the casserole. Bring to a boil, cover, and simmer for 25 minutes.
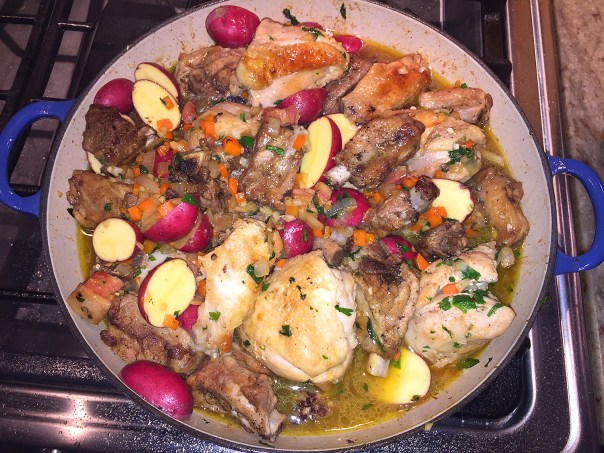
    IMG_2338
  8. Stir in the peas, cumin, saffron, and salt and pepper to taste. Cover and continue cooking for 15 minutes more. Serve.
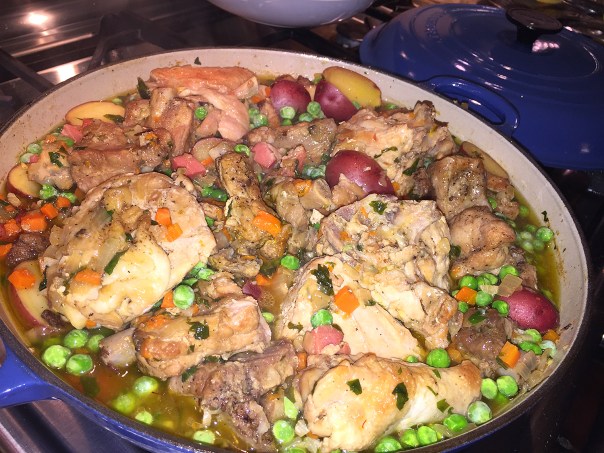
    IMG_2341
    IMG_2344

http://www.lynnandruss.com

Diane with her 24-Carrot-Gold

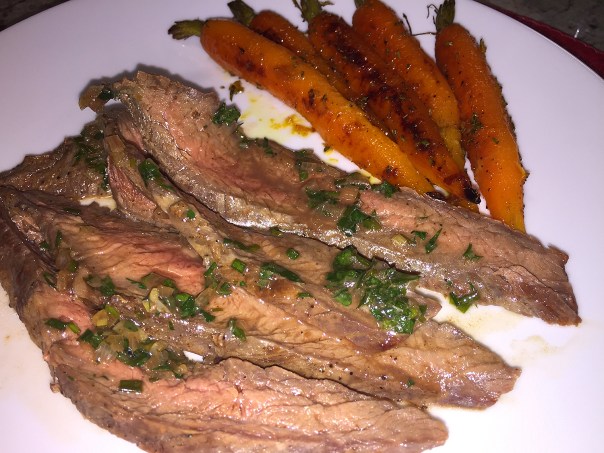
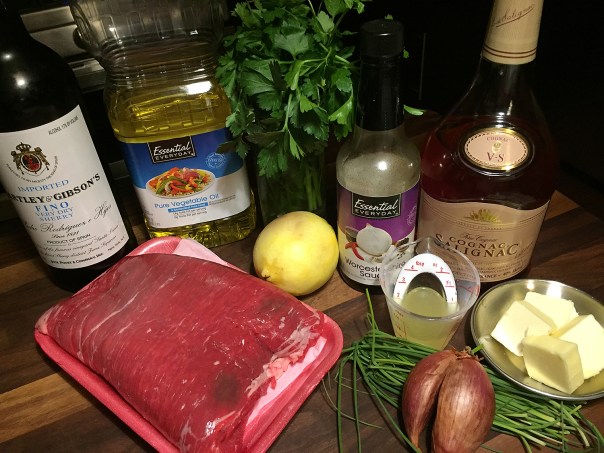
It was a dead heat as to whether the main entrée, Steak Diane, or our accompaniment, Roasted Carrots with Blood Orange and Rosemary, should take top billing. This version of Steak Diane, classically made with filet mignon, uses a more reasonably-priced flank steak. The beefier profile of the cut holds its own against a daring sauce that highlights cognac, sherry, Worcestershire sauce, and flavorful herbs—no complaints here!

IMG_2619

IMG_2613

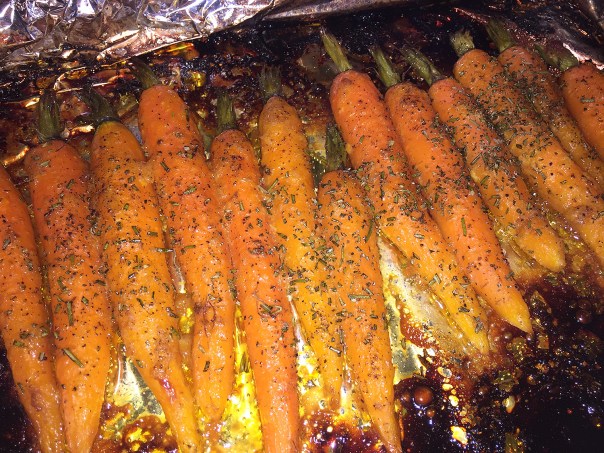
Our “24-Carrot-Gold” side dish, were a perfect “10”. Roasting the slender veggies whole gives this easy sidekick a dressy feel—as does using blood oranges (regular ones work too, but lack the pizazz.) And that final embellishment of a maple syrup drizzle halfway through roasting, renders a wonderful caramelization to the underside that takes the root veggies to a higher level, guaranteeing a spot in your top ten accompaniments of all time. (Make sure to buy the young tender carrots with the greens still intact.)

As far as the instructions, we did not change a thing for either dish, nor did we a year ago when we made the steak and carrots the first time, so it’s a safe bet to follow the recipes as written—an ideal dinner for two: romantically luxurious and indulgent. I mentioned back then, that Valentines was around the corner, it already came and went this year, but doesn’t mean you have to wait until next year to treat yourself…

IMG_2574

Steak Diane

  • Servings: 4
  • Difficulty: easy
  • Print

Ingredients

  • 1 1-1/2-lb. flank steak
  • Kosher salt and freshly ground black pepper
  • 2 tsp. peanut or vegetable oil
  • 3 Tbs. finely chopped shallot
  • 3 Tbs. medium sherry, such as amontillado
  • 2 Tbs. Cognac
  • 2 tsp. Worcestershire sauce
  • 2 Tbs. lower-salt chicken broth
  • 2 oz. (4 Tbs.) cold unsalted butter, cut into 4 pieces
  • 3 Tbs. thinly sliced fresh chives
  • 2 Tbs. finely chopped flat-leaf parsley
  • 1/2 tsp. fresh lemon juice, more to taste

Directions

  1. Position a rack in the center of the oven and heat the oven to 400°F.
  2. Pat the steak dry and season generously with salt and pepper. In an ovenproof heavy-duty 12-inch skillet (preferably cast iron), heat the oil over high heat until shimmering hot, about 2 minutes. Brown the steak on both sides, about 4 minutes total.
    IMG_2592
  3. Transfer the skillet to the oven and continue to cook until an instant-read thermometer inserted in the thickest part of the meat reads 135°F, about 5 minutes.
  4. Transfer the steak to a platter, cover loosely with foil, and let rest for 5 to 10 minutes.
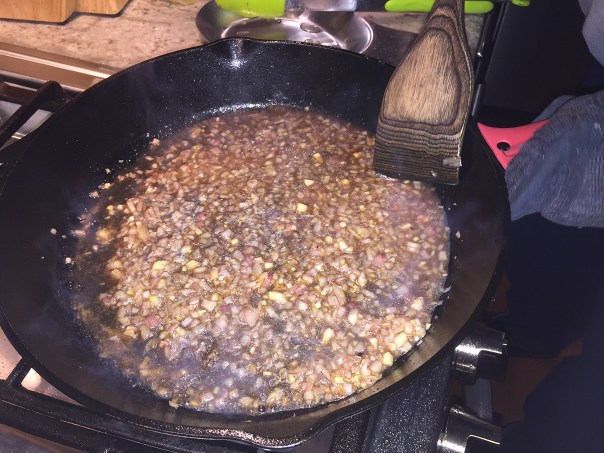
  5. Meanwhile, pour off the fat in the skillet (be careful of the hot handle). Set the skillet over medium heat, add the shallot, sherry, Cognac, and Worcestershire sauce. Simmer, stirring and scraping the bottom of the pan with a wooden spatula to release any browned bits, until the sauce is reduced by half, 2 to 3 minutes.
    IMG_2594
    IMG_2596
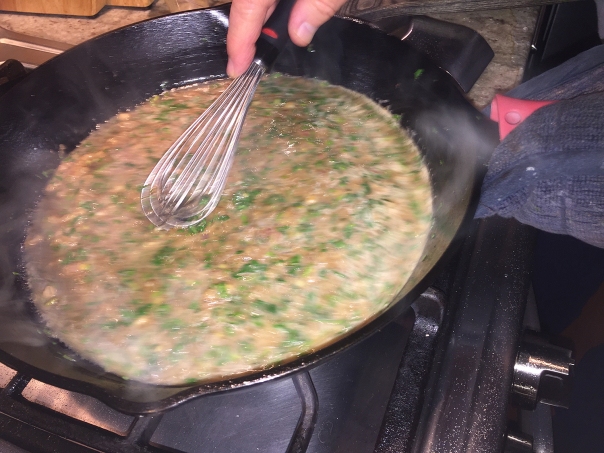
  6. Lower the heat to low, add the chicken broth, butter, chives, and parsley and whisk, swirling the pan occasionally, to emulsify the butter; the sauce should look creamy. Remove from the heat, whisk in the lemon juice and season to taste with salt, pepper, and more lemon juice.
    IMG_2597
    IMG_2599
  7. Cut the steak in half with the grain, then slice the meat on the diagonal across the grain into 1/8-inch slices. Serve with the sauce.

http://www.lynnandruss.com


IMG_2604
IMG_2606

Roasted Carrots with Blood Orange and Rosemary

IMG_2580

Roasted Carrots with Blood Orange and Rosemary

  • Servings: 4
  • Difficulty: easy
  • Print

Ingredients

  • 1-1/2 lb. slender carrots, peeled and trimmed, leaving an inch of greens at the top if possible
  • 3 Tbs. extra-virgin olive oil
  • 1 tsp. Dijon mustard
  • 1 medium blood orange or regular orange; zest finely grated and juice squeezed
  • Kosher salt and freshly ground black pepper
  • 1/2 Tbs. fresh rosemary leaves
  • 1 Tbs. pure maple syrup

Directions

  1. Heat the oven to 425°F.
  2. Arrange the carrots in a single layer on a foil-lined rimmed baking sheet. In a small bowl, whisk together the olive oil, mustard, and orange zest. Pour over the carrots and toss to coat. Season generously with salt and pepper.
    IMG_2583
  3. Pour the orange juice around the carrots. Top with the rosemary. Cover tightly with foil and roast until the carrots are nearly tender, 15 to 20 minutes.
    IMG_2585
  4. Uncover, drizzle with the maple syrup, and roast, uncovered, until tender and beginning to brown, 15 to 20 minutes more. Gently toss, season to taste with salt, and serve.

http://www.lynnandruss.com


IMG_2610

Steak recipe by Arlene Jacobs; carrot recipe by Laraine Perri, both from the Fine Cooking “Make It Tonight” series. 

Makin’ a Moqueca

A new one on me, a Brazilian moqueca (pronounced “mo-KEH-kah”) is a fish stew made with firm white fish, onions, garlic, bell peppers, tomatoes, cilantro, and coconut milk. While thumbing through our latest edition of Cook’s Illustrated, the moqueca recipe for Brazilian Shrimp and Fish Stew drew my attention. Doesn’t it seem like every culture with a coastline has their own version of a seafood stew? The French have bouillabaise, the Portuguese bacalhoada (haven’t tried this one either), New England chowder, Southern gumbo and San Francisco cioppino.

IMG_2968

As exotic as it sounds, it’s easy and you probably have most of the ingredients already in your pantry—although you’ll want to get fresh fish. Including prep, the total time involved is less than an hour, so you could even consider making it on a weekday. The combination of rich coconut milk, briny seafood, bright citrus, and savory vegetables produces a broth that’s full-bodied, lush, and vibrant—a particularly complex concoction compared with stews based solely on dairy, tomatoes, or broth.

Well we were ready for a bright, fresh, and filling version of a traditional Brazilian seafood stew. Here, cod and shrimp make for a nice balance of flavor and texture, and both are easy to find. To balance the richness and sweetness of the coconut milk with the bright, fresh flavor of the aromatics, blend the onion, the tomatoes, and a portion of the cilantro in the food processor until you have the texture of a slightly chunky salsa, which adds body to the stew.

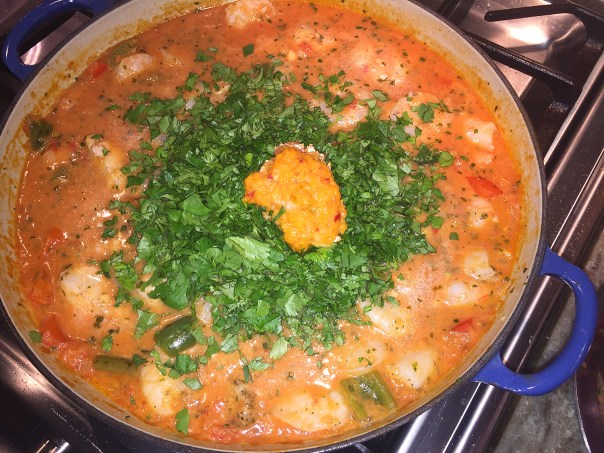
The key here is to gently and evenly cook the delicate fish and shrimp by bringing the stew to a full boil, and then add the seafood and remove the pot from the heat. Letting food cook in residual heat provides insurance against overcooking. To finish our moqueca, we added more cilantro and a couple of tablespoons of homemade pepper sauce, which elevated the stew with its bright, vinegary tang.

An enameled cast iron pot such as a braiser works best because they are fabulous for retaining heat, a critical factor when cooking the seafood—which BTW, came out perfectly. A braiser is a wide, heavy bottomed pan with a tight fitting lid. It has shallow sides that are usually sloped, and the domed lid continuously circulates steam to lock in moisture and flavor.

Serve with rice or with crusty bread.

IMG_2950

Brazilian Shrimp and Fish Stew

  • Servings: 6
  • Difficulty: moderate
  • Print

Ingredients

Pepper Sauce

  • 4 pickled hot cherry pepper (3 ounces)
  • ½ onion, chopped coarse
  • ¼ cup extra-virgin olive oil
  • ⅛ teaspoon sugar
  • Salt

Stew

  • 1 pound large shrimp (26 to 30 per pound), peeled, deveined, and tails removed
  • 1 pound skinless cod fillets (¾ to 1 inch thick), cut into 1½-inch pieces
  • 3 garlic cloves, minced
  • Salt and pepper
  • 1 onion, chopped coarse
  • 1 (14.5-ounce) can whole peeled tomatoes
  • ¾ cup chopped fresh cilantro
  • 2 tablespoons extra-virgin olive oil
  • 1 red bell pepper, stemmed, seeded, and cut into ½-inch pieces
  • 1 green bell pepper, stemmed, seeded, and cut into ½-inch pieces
  • 1 (14-ounce) can coconut milk
  • 2 tablespoons lime juice

Directions

IMG_2952FOR THE PEPPER SAUCE: 

  1. Process all ingredients in a food processor until smooth, about 30 seconds, scraping down sides of bowl as needed. Season with salt to taste and transfer to separate bowl. Rinse out processor bowl.

FOR THE STEW: 

  1. Toss shrimp and cod with garlic, ½ teaspoon salt, and ¼ teaspoon pepper in bowl. Set aside.
    IMG_2957
  2. Process onion, tomatoes and their juice, and ¼ cup cilantro in food processor until finely chopped and mixture has texture of pureed salsa, about 30 seconds.
    IMG_2955
  3. Heat oil in large Dutch oven over medium-high heat until shimmering. Add red and green bell peppers and ½ teaspoon salt and cook, stirring frequently, until softened, 5 to 7 minutes.
    IMG_2959
  4. Add onion-tomato mixture and ½ teaspoon salt. Reduce heat to medium and cook, stirring frequently, until puree has reduced and thickened slightly, 3 to 5 minutes (pot should not be dry).
    IMG_2960
  5. Increase heat to high, stir in coconut milk, and bring to boil (mixture should be bubbling across entire surface).
    IMG_2962
  6. Add seafood mixture and lime juice and stir to evenly distribute seafood, making sure all pieces are submerged in liquid. Cover pot and remove from heat. Let stand until shrimp and cod are opaque and just cooked through, 15 minutes.
    IMG_2964
  7. Gently stir in 2 tablespoons pepper sauce and remaining ½ cup cilantro, being careful not to break up cod too much. Season with salt and pepper to taste. Serve, passing remaining pepper sauce separately.
    IMG_2966

http://www.lynnandruss.com

IMG_2973

Chicken Scarpariello

Impressed with our first chicken recipe Pollo alla Birra, from Lidia Bastianich’s cookbook Mastering the Art of Italian Cuisine, we looked forward to spending another Sunday afternoon with the little lady. And the recipe preceding the beer chicken caught our attention: Pollo alla Scarpariello. The name scarpariello is “shoemaker” in Italian. Here, “shoemaker’s” chicken may refer to Neapolitan shoemakers making delicious food in the little time they had at the end of the day.

IMG_2930

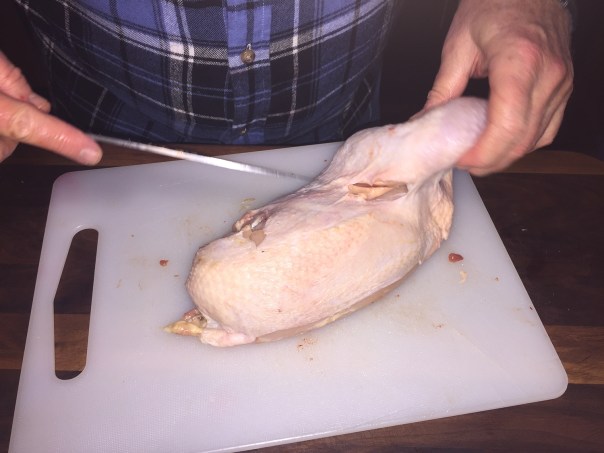
Lidia mentions that young chickens, poussins that weigh about one pound each are great for this dish, and you would make a lot less cuts. But they are not easy to find so we went with our intuition and purchased a 4-pounder. Yes, it had to be cut down into many pieces, but we like having the leftover parts for our freezer “body bag” where we stash poultry parts until we need to make another batch of homemade stock. Another option is to use bone-in thighs, little-to-no chopping necessary.

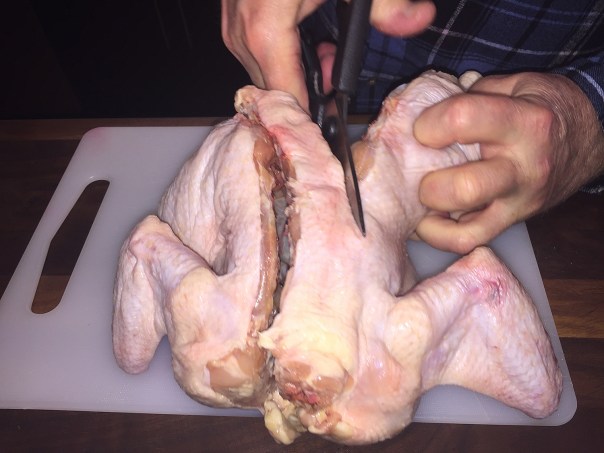
Russ cuts down the chicken, first removing the backbone:
IMG_2892
IMG_2895
IMG_2898
IMG_2901

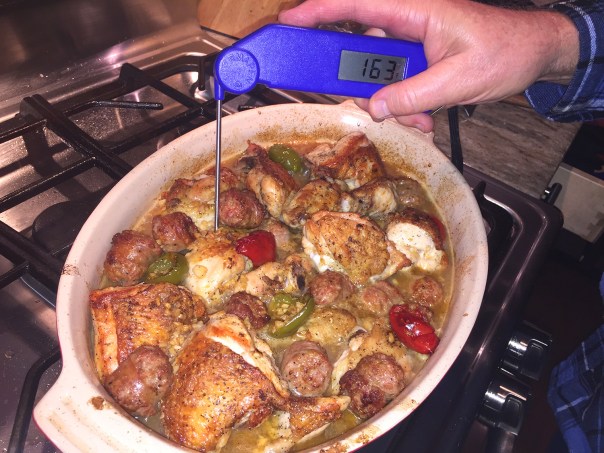
A few things concerned us in Lidia’s recipe. First, in Step 8 she says to place the roasting pan in the oven for 10 minutes. That did not seem anywhere long enough to us, and sure enough, the chicken wasn’t done until 18 minutes had passed. Second, there was no way the sauce was getting thick and sticky. We reduced it for a while, but it was still quite thin, although extremely tasty.

And finally, who in heck is going to pick out 10 cloves of finely chopped garlic from the sauce?? And why would you even want to?? So I just simply removed that instruction from the directions below. Be forewarned that the cherry peppers add a nice kick but you don’t want to overdo it. The amount of sweet sausage we incorporated was closer to a full pound because that’s how it came packaged.

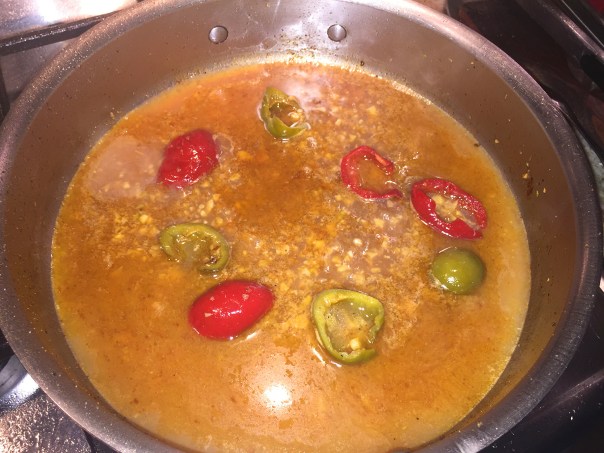
IMG_2904Four hot cherry peppers are cut in half, stemmed and seeded.
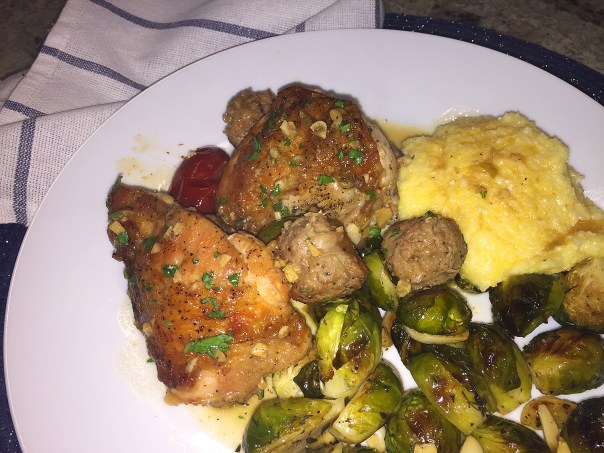
All-in-all we loved the dish and thought our pairings of creamy polenta and roasted Brussels sprouts with garlic made for perfect accompaniments. You definitely want to serve with something to help sop up the flavorful sauce such as polenta, mashed potatoes or rice.

IMG_2938

Chicken Scarpariello

  • Servings: 6-8
  • Difficulty: moderate
  • Print

Ingredients

  • 2 small broiler chickens (about 2½ pounds each, preferably free-range) OR 1, 4-pound roaster cut into pieces
  • Salt
  • Freshly ground black pepper
  • ¼ cup olive oil, or as needed
  • ½ pound sweet Italian sausage (preferably without fennel seeds), cut into 1-inch pieces
  • 10 cloves garlic, peeled and chopped fine
  • 4 pickled hot cherry peppers, cut in half, stemmed and seeded
  • ¼ cup red-wine vinegar
  • ½ cup dry white wine
  • 1 cup chicken stock, preferably homemade
  • ¼ cup chopped fresh Italian parsley

Directions

  1. Cut (each) chicken into twelve pieces. Wash and pat the chicken pieces dry, then season them generously with salt and pepper.
  2. Preheat oven to 475F degrees.
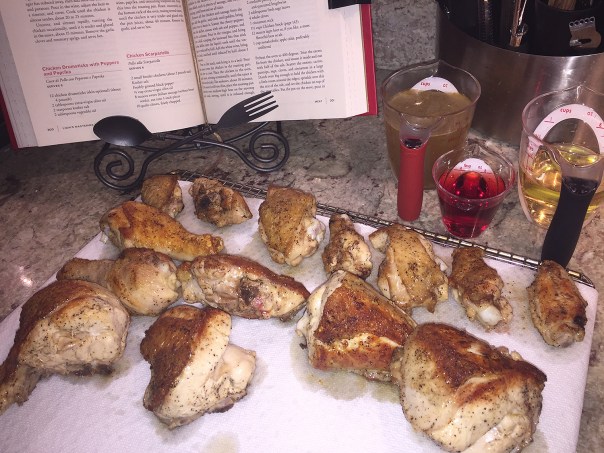
  3. Heat 2 tablespoons of the olive oil in a large skillet. Add to the skillet as many pieces of chicken-skin side down, and starting with the leg, thigh and wing pieces-as fit without touching. Cook the chicken, turning as necessary, until golden brown on all sides, about 8 minutes.
    IMG_2906
  4. Remove the chicken pieces as they brown, and drain them briefly on paper towels. Place the drained chicken pieces in a roasting pan large enough to hold all of them in a single layer.
    IMG_2908
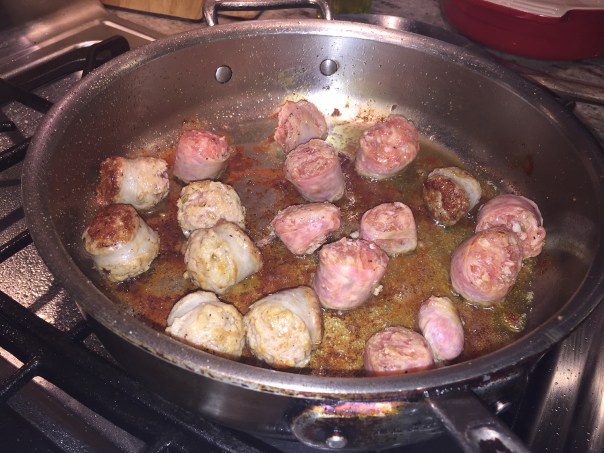
  5. Repeat with remaining chicken, adding more oil to the pan as necessary and adjusting the heat to prevent the bits that stick to the pan from over browning. As room becomes available in the skillet after all the chicken has been added, tuck in pieces of sausage and cook, turning until browned on all sides.
    IMG_2909
    IMG_2910
  6. Remove all chicken and sausage from the pan, add the garlic, and cook until golden, being careful not to burn it.
    IMG_2912
  7. Scatter the cherry peppers in the skillet, season with salt and pepper, and stir for a minute. Pour in the vinegar and bring to a boil, scraping into the liquid the browned bits that stick to the skillet, and cook until the vinegar is reduced by half, about 3 minutes.
    IMG_2914
  8. Pour in the stock and bring to a boil. Pour the sauce over the chicken in the roasting pan and stir to coat. Place the chicken in the oven and roast, stirring occasionally, until the sauce is thick and sticky, like molasses, about 10 minutes. (Our sauce did not get thick or sticky, plus we had to cooke the chicken 18 minutes in the oven.)
    IMG_2917
  9. If the sauce is still too thin, place the roasting pan directly over medium-high heat on the stovetop and cook, stirring, until it is reduced, about a minute or two. Once the sauce is thickened, toss in parsley and serve.
    IMG_2926
    We reduced the sauce down for about 12-15 minutes.
    IMG_2929

http://www.lynnandruss.com

A Whiter Shade of Pale

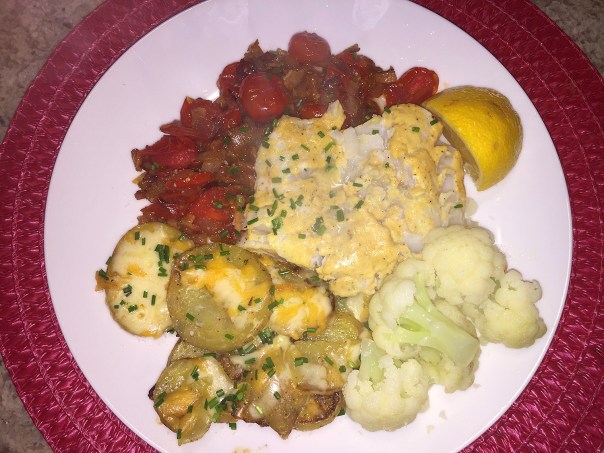
Not exactly “meatless” due to a few strips of bacon, we decided to make Baked Cod with Tomato-Bacon Jam anyway for a Meatless Monday dinner. It was easy, quick, had a limited list of ingredients, and just sounded good—and it was!

IMG_2802

Problem was buying the cod, something you’d think would be a cinch. Unaware that our usual supermarket ran a sale on cod over the weekend, by the time we got to the store on Sunday afternoon, they were completely sold out. Making our way back home, Russ suggested stopping at another nearby grocery store, and we lucked out, they had a slew of it—although not on sale 😦

In this recipe, sweet tomatoes get cooked until they break down, creating a jammy sweet-and-sour sauce that’s made even better with bacon. Brushing the fish with a lemon-mustard mixture before cooking was an easy way to boost its flavor.

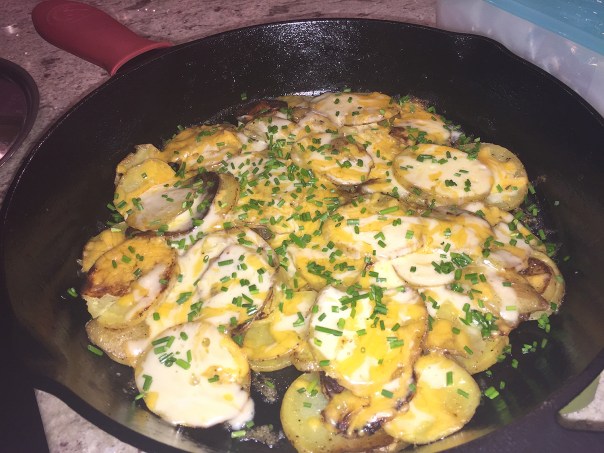
Now for the sides. A quick and indulgent answer to potato gratin, these Cheesy Skillet Potatoes were delicious with our baked cod. I saw no need to peel the spuds which actually adds a bit of fiber. And even though it was yet another “white ingredient,” we paired the meal with steamed cauliflower because, well, because we had some leftover and wanted use it up. Sometimes it’s no more complicated than that.

White-on-white is usually not a desired color scheme for a dinner entrée, as we eat with our eyes first. However, the pearly palette was enlivened with some color from red tomatoes, green chives and yellow lemon wedges.

…And so it was that later
As the miller told his tale
That the cod, though cooked perfectly
Turned a whiter shade of pale…

IMG_2774

Baked Cod with Tomato Bacon Jam

  • Servings: 4
  • Difficulty: easy
  • Print

Ingredients

  • 4 slices thick-cut bacon, chopped
  • 1/2 large red onion, chopped (about 5 oz.)
  • 1 pint cherry or grape tomatoes, halved
  • 1 Tbs. apple cider vinegar
  • 1 Tbs. light brown sugar
  • 2 Tbs. Dijon mustard
  • 1 Tbs. lemon juice
  • 4 6-oz. skinless cod or haddock fillets, at least 1 inch thick
  • Kosher salt and freshly ground black pepper

Directions

  • Position a rack in the center of the oven and heat the oven to 425°f. Line a large rimmed baking sheet with foil.
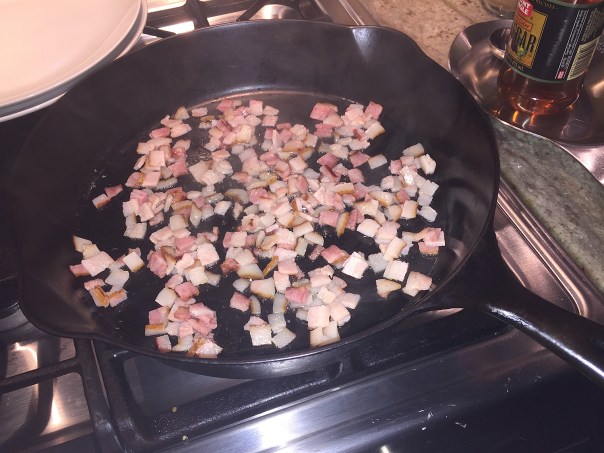
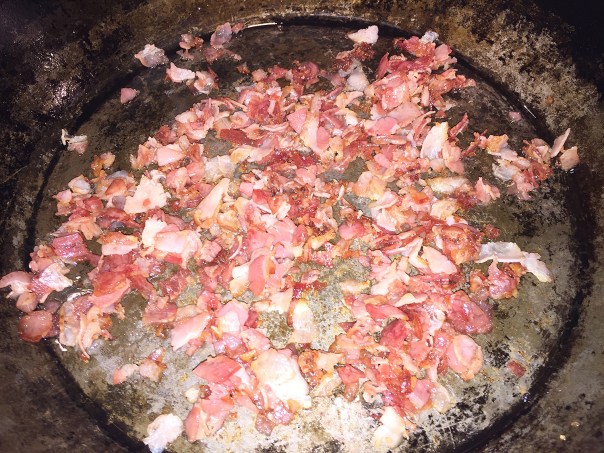
  • Cook the bacon in a 12-inch skillet over medium heat until crisp, 10 to 12 minutes. Using a slotted spoon, transfer the bacon to a paper-towel-lined plate.
    IMG_2777
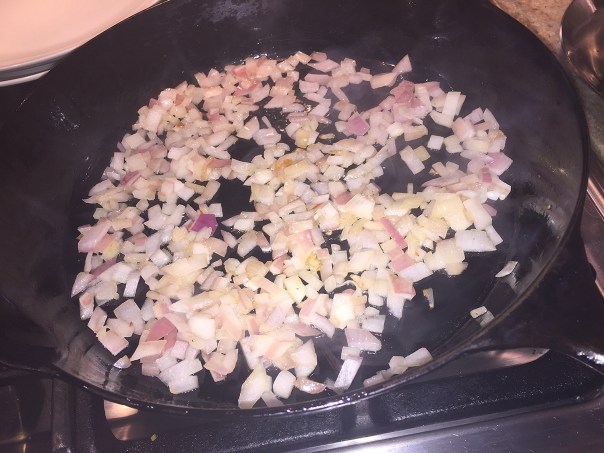
  • Pour off all but 2 Tbs. of the bacon fat from the skillet. Add the onion to the skillet, and cook over medium heat, stirring occasionally, until starting to soften, about 3 minutes.
    IMG_2781
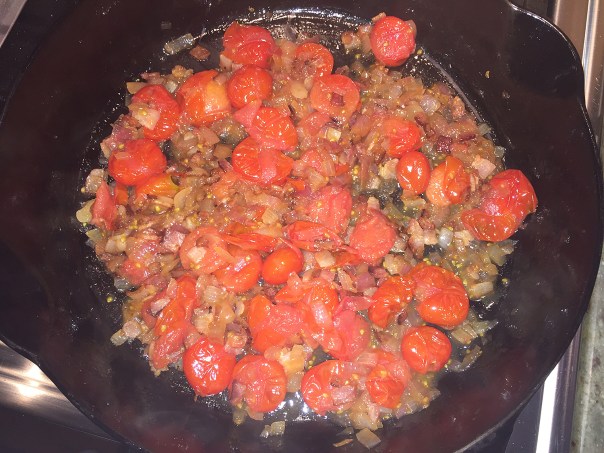
  • Add the tomatoes, vinegar, and sugar, and cook, stirring occasionally, until the tomatoes break down, about 10 minutes. Stir in the cooked bacon.
    IMG_2783
    IMG_2790
  • Meanwhile, whisk the mustard and lemon juice in a small bowl. Pat the fish dry with paper towels and arrange on the prepared baking sheet. Brush with the mustard-lemon mixture, and season lightly with salt and pepper.
    IMG_2779
  • Bake the fish until just opaque in the center, 10 to 12 minutes. Spoon some of the tomato-bacon jam onto each plate, top with the fish, and serve.

http://www.lynnandruss.com

IMG_2799

Recipe by Erica Clark from Fine Cooking’s “Make It Tonight” series

Cheesy Skillet Potatoes

IMG_2793

Ingredients

IMG_2770

Cheesy Skillet Potatoes

  • Servings: 6
  • Difficulty: easy
  • Print

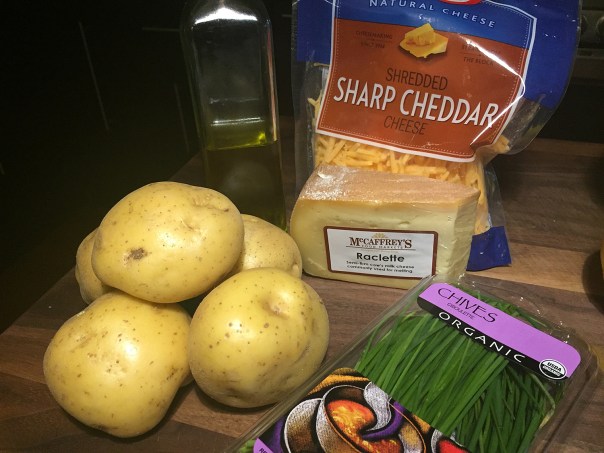
  • 1-1/2 lb. Yukon Gold potatoes, peeled and thinly sliced
  • Kosher salt and freshly ground black pepper
  • 1-1/2 Tbs. olive oil
  • 2 oz. coarsely grated sharp Cheddar
  • 2 oz. coarsely grated Raclette (our choice) or Emmentaler
  • 1 Tbs. thinly sliced fresh chives

Directions

  • Season the potatoes with 1/2 tsp. salt and 1/4 tsp. pepper. Heat the olive oil in a 12-inch cast-iron skillet over medium-high heat.
    IMG_2778
  • Add the potatoes and cook, undisturbed, until just starting to brown, about 5 minutes.
    IMG_2780
  • Lower the heat to medium and gently flip the potatoes every 2 minutes until about half of the slices are crisped and browned, another 8 to 10 minutes.
    IMG_2784
  • Top with the Cheddar and Raclette. Cover, remove from the heat, and let sit until the cheese melts, 2 to 2-1/2  minutes. Sprinkle with chives, and season to  taste with salt and pepper.

Recipe by Ronne Day also from Fine Cooking

Crabmeat Carbonara Anyone?

Jumbo lump crabmeat is one of my faves, so I was immediately drawn to this quick and easy pasta dish. While the Pasta with Crabmeat and Pancetta recipe calls for 12 ounces of crabmeat, the store had only a choice of half-pound or full-pound containers, so I purchased the latter. My surprise came after grocery shopping when I got home and took a look at the receipt. The price for the 16-ounces was $35.99, usually way more than we would spend for a weeknight dinner!

IMG_2421
The costly jumbo lump crabmeat was beautiful and contained no filler and basically very little moisture—all pure succulent crab!

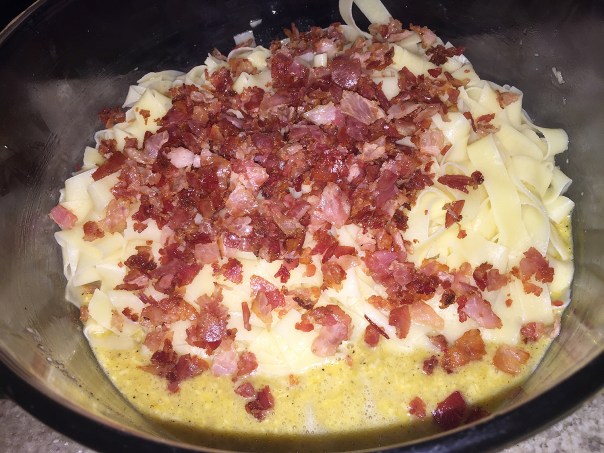
Oh well, I certainly wasn’t going to take it back, and I was determined to use the entire 16 ounces, culminating in a weeknight treat. In the spirit of such extravagance, Russ decided to forgo his gluten-free pasta (the wrong shapes on hand) and “suffer” through using the newly-purchased dried-egg tagliarelle. In the end, it reminded us of carbonara, but with sweet crab and the bright zing of lemon.

IMG_2434

But the menu needed fiber and a pop of color, and we met that desire with an Orange, Avocado & Mâche Salad. Unfortunately for us, the supermarket didn’t have mâche, so we used baby mixed greens instead.

mache

What is mâche, also called “corn lettuce” or “lamb’s lettuce”? It’s a European salad green that grows in small, rosette-shaped bunches. It has dark green leaves on short stems, and has a distinct sweet taste—making it known as the “mayonnaise of salad greens.” This little lettuce is sweet, soft, velvety and nutty. All the goodness of other mesclun mixes without any bitterness or peppery bites—so it works well with many ingredients.

With our pasta weighing in at 8.8 ounces as opposed to 12, and our crabmeat a hefty one-pound, we liked the carb-to-protein ratio much better. When you shop, hopefully you’ll get a better deal on jumbo lump crabmeat, but if not, perhaps indulging yourself with a candlelit weekend feast is the way to go…

Pasta Recipe

IMG_2423

Pasta with Crabmeat and Pancetta

  • Servings: 4
  • Difficulty: easy
  • Print

Ingredients

  • Kosher salt
  • 4 oz. diced pancetta (about 1 cup)
  • 4 large eggs
  • 2-1/2 oz. grated pecorino romano (about 1 cup); more for serving
  • 2 medium cloves garlic, minced
  • Finely grated zest of 2 lemons (about 4 tsp.)
  • Freshly ground black pepper
  • 10 oz. dried egg fettuccine, or similar pasta shape
  • 12 oz. cooked lump crabmeat, picked over

Directions

  1. Bring a large pot of well-salted water to a boil.
  2. Meanwhile, in a 12-inch skillet over medium heat, cook the pancetta, stirring occasionally, until crisp, 6 to 8 minutes. Using a slotted spoon, transfer to small bowl.
    IMG_2425
  3. In a large bowl, whisk the eggs, cheese, garlic, half of the zest, and 1 tsp. pepper.
  4. Cook the pasta according to package directions for al dente. Reserve 1/2 cup of the pasta cooking water, then drain.
  5. Immediately add the pasta, pancetta, and 1/4 cup cooking water to the egg mixture, tossing to combine; gently toss in about two-thirds of the crabmeat and additional cooking water as needed. Season to taste with salt and pepper.
    IMG_2427
  6. Serve topped with the remaining crabmeat and zest. Pass additional cheese at the table.

http://www.lynnandruss.com


IMG_2432

Salad Recipe

IMG_2420

Ingredients

  • 4 medium navel or Valencia oranges
  • 3 Tbs. extra-virgin olive oil
  • 1 Tbs. minced red onion
  • 1 Tbs. red-wine vinegar
  • Kosher salt and freshly ground black pepper
  • 1 medium ripe avocado, thinly sliced
  • 5 oz. mâche (about 6 loosely packed cups)

Directions

  1. Finely grate 1 teaspoon zest from one of the oranges and put in a large bowl. Using a sharp knife, trim off the peel and white pith from the oranges and cut crosswise 1/4 inch thick slices.
    IMG_2416
  2. Squeeze two or three orange slices over a small bowl to yield 1 tablespoon juice; add the juice to the zest along with the olive oil, onion, and vinegar. Whisk to blend and season to taste with salt and pepper.
    IMG_2428
  3. Arrange the remaining orange slices and the avocado slices to one side of 6 salad plates.
  4. Toss the mâche with the dressing, season to taste with salt and pepper, and mound next to the oranges and avocados.
    IMG_2430


Basque Sheepherders Lamb Stew

We are enamored of the Basque Country in Spain and adore lamb, so when we realized we had a few pounds of lamb stew meat in the freezer, Russ immediately went about researching possible recipes. After reviewing oodles of them, we settled on this Basque Sheepherders Lamb Stew from our copy of The Complete Meat Cookbook by Bruce Aidells and Denis Kelly.

IMG_2760To round out the meal we added rosemary roasted baby potatoes and a green salad.

It was, in a word, DELISH! The seasoning combination is just incredible. It didn’t take a lot of effort to create, but you do need to set aside a block of time because the meat must marinate in seasonings for up to 2 hours before you cook, or overnight. Thank goodness I noticed that direction, because dear-old-husband thought he had plenty of time on hand before he needed to start dinner, and busied himself making a homemade soup (which of course I didn’t complain about.)

But after you brown the meat and sauté the aromatics, the stew pretty much takes care of itself as it simmers slowly over the cooktop for a couple of hours. The liquid will still be a bit soupy at the end, so make sure to reduce it down and thicken before adding the meat back to the pot to warm through. Garnish with chopped parsley for a pop of color.

History of Basque Sheepherders in the U.S:

For more than a century in Northern Nevada and other parts of the Western United States, Basque immigrants were closely tied to the sheep business. The first Basque sheepmen in Northern Nevada came for the gold rush in the mid-1800s, usually by way of South America. Some Basques who were experienced with livestock found that they could make a better living providing the mining camps with meat and wool than they could by mining. As their operations grew, they began hiring herders from the Basque Country, and Basque sheepherders gained a reputation for dependability.

Population pressures and the political and economic environment in the Basque Country made sheepherding an attractive option for young, single men with a sense of adventure. Some of them were not fully informed about the solitary and difficult conditions that awaited them in the mountains and deserts of the West, and most of them did not stay with the job more than a few years. Most of them returned to their homeland located in the western Pyrenees, straddling the border between France and Spain on the coast of the Bay of Biscay.

Some Basque sheepherders took their wages in sheep instead of cash, and built their own sheep empires. Others found success in other occupations. In 1966 1,200 Basque sheepherders were employed in the United States, but 10 years later there were 106. It no longer made economic sense to go to America to herd sheep. Basque immigrant communities strive to keep their cultural traditions alive, and Basques in Northern Nevada celebrate their sheepherding heritage.

Basque Sheepherders Lamb Stew

  • Servings: 6-8
  • Difficulty: moderate
  • Print

Ingredients

  • 1 tsp chile powder
  • 1 Tbsp paprika, (preferably sweet Hungarian)
  • 1 tsp dried oregano or thyme
  • 2 tsp salt
  • 1/4 tsp freshly ground black pepper
  • 3 – 4 lbs lamb stew meat from the neck, shoulder or leg, with or without bones, cut into 2-inch pieces
  • 1 fire-roasted red bell pepper OR 2 canned or bottled red peppers or pimentos
  • 2 tbsp red wine vinegar
  • 2 tbsp olive oil
  • 1 medium onion, chopped
  • 6 garlic cloves, chopped
  • 1 fire-roasted mild green chile, such as Anaheim, chopped or 1/4 cup chopped canned green chiles
  • 2 bay leaves
  • 1 cup red wine
  • 1 cup beef stock
  • Salt
  • Freshly ground black pepper
Directions
  1. Flavor Step – Mix the rub ingredients in a small bowl. Put the meat in a zipper-lock bag or a bowl, add the rub, and toss to coat thoroughly. Marinate the meat for up to 2 hours at room temperature or overnight, covered if necessary, in the refrigerator. If the meat has been refrigerated, bring it to room temperature before cooking.
    IMG_2748
  2. In a blender or food processor, blend the red pepper and vinegar to a puree. Set aside.
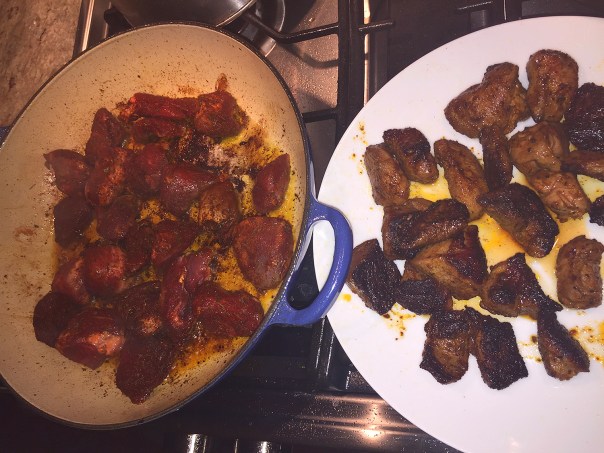
  3. In a large skillet or heavy pot, heat the olive oil over medium-high heat. Brown the lamb on all sides, stirring often, about 10 minutes. Remove the lamb and pour off all but about 2 tablespoons of the fat from the pan. (You will probably need to do this in two or three batches.)
    IMG_2752
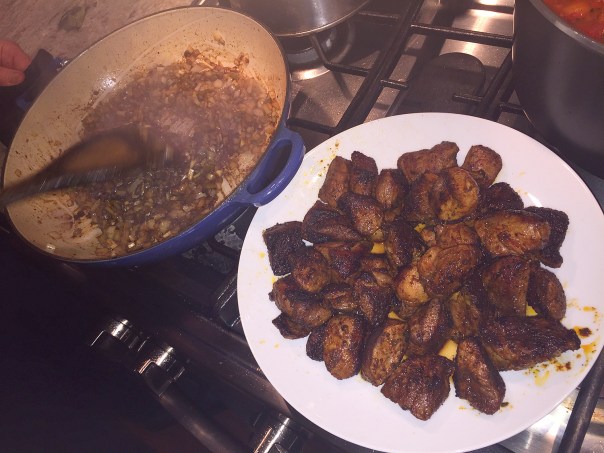
  4. Reduce the heat to medium and sauté the onion, garlic, and green chile, stirring often, for about 5 minutes.
    IMG_2753
  5. Add the lamb, the pureed red peppers, the bay leaves, wine, and stock, reduce the heat to a simmer, and cook, uncovered, for about 1-1/2 hours, or until the meat is tender. Stir once in a while and add more wine or stock if necessary; the liquid should barely cover the meat.
    IMG_2755
  6. Remove the meat with a slotted spoon and set aside. Degrease the sauce and reduce it over high heat to thicken slightly. Remove and discard the bay leaves. Taste for salt and pepper. Return the meat to the pan to warm through, and serve.
    IMG_2757

An A-PEEL-ing Shrimp Braise

Usually the term “braise” denotes a long, slow cooking procedure, which this Beer-Braised Shrimp is definitely not. The Wikipedia definition: Braising is a combination-cooking method that uses both wet and dry heats: typically, the food is first seared at a high temperature, then finished in a covered pot at a lower temperature while sitting in some amount of liquid.

IMG_2302

So yes, the recipe does meet some of the criteria. The seafood is not seared in a pan first, but rather added to the simmering beer broth, then cooked covered—but only for a few minutes as opposed to hours; making this dish a great weeknight addition to your fast-and-easy recipe repertoire.

Bread is usually not a staple in our abode, so if you don’t have a crusty baguette to mop up those tasty juices you may want to ladle the shrimp over some steamed rice as a vehicle to capture the flavors. Speaking of flavor, the bitter and spicy notes of the colorful radicchio (of the endive family) and parsley salad is a perfect accompaniment to the main dish.

IMG_2306

My bad? I bought already-peeled shrimp by mistake, although the tails were still intact. The most flavorful part of the shrimp is the shells. Left on for the cooking process, shrimp shells contribute a depth of flavor that’s somewhere between toasty and briny. Cooking unpeeled shrimp is the thing that will really make that shrimp flavor pop, and to reap the benefits, the only thing you need to do is…nothing. But I can’t say my peeled crustaceans were detrimental to the dinner because it was so much easier only having to remove the tails as opposed to the entire shell.

People in many parts of the world eat shrimp with the shells on, and it’s not considered a big deal—in fact, my brother is one of those people—I’ve seen him do it on several occasions. The “crunch” factor is supposedly the appeal, but I keep thinking how difficult that would be going down the gullet, yikes! Whether it’s best to leave the shells on or off is like so many things: it depends.

Shrimp cooked in their shells have a plumper texture, and they don’t seem to go from perfectly cooked to overcooked as quickly. However, in the presence of company, pulling the shell off at the table is messy, a lot of work, and creates an unsightly garbage heap on your plate or in the discard bowl. But, I have yet to meet a person who does not despise the prep task of peeling raw shrimp, although I’m sure they are out there.

So you peeled the shrimp before cooking them. No sweat. But for heaven’s sake, don’t just throw the shells in the trash! The shells of crustaceans (that means shrimp as well as lobster, crayfish and crab) are loaded with flavor. So much so that an entire cooking technique, for making bisque, was invented for the purpose of extracting it.

We almost always buy shrimp with their shells, and even their heads, because we make a mighty-fine seafood stock from our leftover shells that can be incorporated into so many yummy dishes. This time however, I must have had my mind otherwise occupied because I bought already-peeled shrimp…

On another note, there’ll be a 1/3 of a bottle of lager leftover, so have a nip while you cook…

IMG_2288

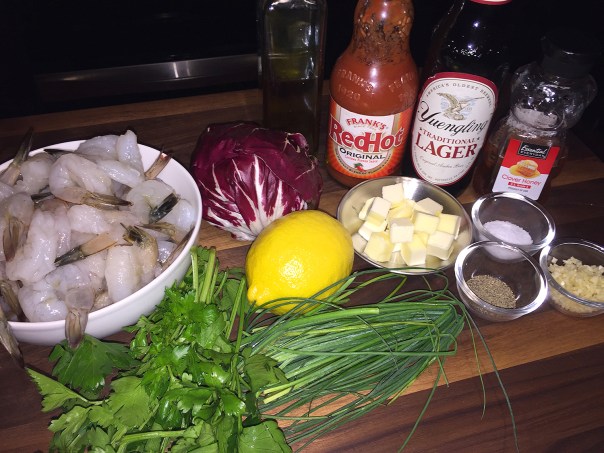
Ingredients-Shrimp

  • 1 cup lager beer
  • 4 Tbsp. unsalted butter, cut into cubes
  • 1 tsp. finely chopped garlic
  • 1 1/4 tsp. kosher salt, divided
  • 1 1/2 lbs. unpeeled medium shrimp
  • 1/4 cup chopped chives
  • Hot sauce for serving

Ingredients-Salad

  • 3 Tbsp. extra-virgin olive oil
  • 1 Tbsp. fresh lemon juice
  • 1 1/2 tsp. honey
  • 1 large head of radicchio, leaves separated, torn if large
  • 1/4 cup firmly packed flat leaf parsley leaves

Directions

  1. Whisk together oil, lemon juice, honey and remaining 1/4 teaspoon each salt and pepper in a large bowl.
    IMG_2289
  2. Add radicchio and parsley and toss to coat.
    IMG_2295
  3. Meanwhile, bring beer to a simmer in a large skillet over medium heat. Add butter, garlic, 1 teaspoon salt and 1/2 teaspoon pepper. Stir until butter melts.
    IMG_2299
  4. Add shrimp, stir to coat, cover skillet. Cook until shrimp are pink and cooked through, about 3 minutes. Remove from heat, and uncover.
    IMG_2300
  5. Garnish shrimp with chives and serve with salad and hot sauce. If so desired, include a crusty baguette, or a side of steamed rice.
    IMG_2309
    A dash of hot sauce adds a slight zing!

Recipe found in Real Simple magazine.


Staying In Shape

For the last several years, I’ve been disappointed with my cut-out sugar cookies because of the “spread” factor. It seemed lately, that no matter when I baked them, the designs would not hold their shape. Until I came across the recipe for the recent football cookies that I made for our Super Bowl party, shown below. Nice crisp edges and no spread whatsoever!

IMG_2542

Russ claimed they were the best simple chocolate cookie he ever ate. That’s the problem though, they were chocolate and I wanted a plain vanilla recipe for decorating purposes. So I thought there must be a white dough that won’t spread and engaged in an online mission to find one. It seems that I have…

IMG_2741

Valentine’s Day was a few short days away, so BINGO, perfect timing to try out the new process. I was a little skeptical at first when I saw one of the ingredients was lemon zest because I didn’t want a tart cookie. And I was intrigued by the fact that you didn’t have to refrigerate the dough before rolling it out. What a great time saver! In my old recipe, it required refrigeration for at least 4 hours, but usually overnight—and the dough was still difficult to handle.

Yeah, these babies held their shape! It seems the major trick here is that after you put the cookies on a baking sheet, you put them in the freezer for 10 minutes, then straight into the oven from there. I’m half-tempted next time to skip the freezer trick, and slide them into the oven as soon as I cut them out—at least a few for testing purposes.

The dough was such a dream to work with. In fact, I not only made the dough, but also cut out the shapes, baked AND frosted the hearts all in one day (a long day, but still, it used to be a 3-day process.) And of course if you don’t get as detailed with the icing designs, you can frost them simply and save more time.

They were perfect, and the bit of lemon zest added a nice perkiness without overpowering the subtle sweetness of the cookie. Now I have both chocolate AND vanilla cut-out cookie recipes that hold their shape—although you have to be careful how many you eat, or you won’t be holding your shape…

Staying-in-Shape Sugar Cookies

  • Servings: 3 dozen
  • Difficulty: very easy
  • Print

Ingredients

  • 2 sticks (1 cup), room temperature
  • 1 cup sugar
  • 1 egg
  • Zest from ½ the lemon (about 1 teaspoon)
  • 1 tsp baking powder
  • 1 tsp vanilla extract
  • 3 cups unsifted flour (plus more for rolling cookies out)
  • ½ tsp salt

Directions

  1. Preheat oven to 350 degrees.
  2. Add the butter sticks and the sugar and cream together in a stand mixer, about 3 minutes.
  3. Scrape down the sides of the bowl and add the egg, lemon zest, baking powder and vanilla extract, then beat again for 2 minutes until a creamy.
  4. Add 3 cups flour and ½ teaspoon salt and mix on low speed to combine about 2 minutes.
  5. When done, form the dough into a ball.
  6. On a floured surface or pastry cloth, roll out the cookie dough ball to desired thickness level, about an 1/8″ or a little thicker. Cut out shapes and place on an unrimmed baking sheet.
    IMG_2733
  7. Reform any leftover dough into another ball and repeat the process.
  8. Put baking sheet(s) in the freezer for 10 minutes.
  9. After 10 minutes take the baking sheet out of the freezer and bake for 10-12 minutes, or until edges just start to turn a light brown. (Mine took the full 12 minutes.)
    IMG_2738

Remove cookies from oven, allow to cool for a few minutes, then transfer them to a wire rack to cool completely before frosting. Decorate—or not—with Royal Icing.
IMG_2745

http://www.lynnandruss.com

Additional cookies from this recipe made about one month later during a late-Winter Nor”easter while I was thinking of Spring:

IMG_3265
IMG_3272

Some of the latest batch for the 2019 Holiday Season:

snowmen best

Get Your Creole On

Need some culinary Mardi Gras inspiration? What’s a more authentic way to feast than a Jambalaya? This recipe is from Muhammad Ali’s boxing daughter, Laila (the article appeared in a recent Parade Sunday supplement.) She has been a real foodie since her wonder years and has competed on Chopped, hosted the FYI show Late Nite Chef Fight, and cooked on TV with everybody from Paula Deen to Steve Harvey, but the new Food for Life, released January 23, is her first cookbook—and just to be clear, not a diet book.

Unfortunately, we won’t be going down to New Orleans for Mardi Gras and chances are most of you won’t be either. But that doesn’t have to stop us all from enjoying some great Mardi Gras food. There are two general kinds of jambalaya: Creole and Cajun.

IMG_2564

The main difference is that Creole jambalaya, which we are making here, also called “red jambalaya” uses tomatoes, Cajun jambalaya does not. You might say Cajun jambalaya is the love child of risotto and paella. But both styles utilize what’s referred to as the “holy trinity”—onion, celery, and bell pepper (usually green). BTW, a good andouille sausage is D’Artagnan, all-natural smoked heritage breed pork. It contains no antibiotics, no added hormones, or nitrates/nitrites.

“It’s not about eating one style of food; it’s about eating whole foods, incorporating a lot of vegetables and natural foods into your lifestyle. And I do also have a chapter that’s like the next-level stuff for people who want to take that next step into things like bone broth and making your own fermented foods to keep your gut healthy and things like that.”
~Laila Ali, Food For Life

This was a job for “Big Red” our trusty Le Creuset cast-iron enameled pot. She’s been a stalwart of our culinary arsenal for many years now and we can always count on her to to get the job done. Don’t get freaked by the number of ingredients or the complexity of the name, Laila’s Jambalaya is pretty easy to make. So get your Creole on, get cooking, and let the good times roll…

IMG_2548

Laila's Jambalaya

  • Servings: 6
  • Difficulty: easy
  • Print

Ingredients

  • 1 lb skinless boneless chicken thighs, cut into 1-inch pieces
  • 2 tsp sea salt, divided
  • ¾ tsp smoked paprika ½ tsp freshly ground black pepper
  • 2 Tbsp extra-virgin olive oil, divided
  • 1 medium onion, chopped
  • 2 medium shallots, chopped
  • 2 celery stalks, chopped
  • 1 medium green bell pepper, chopped
  • 1½ tsp garlic powder
  • Cayenne pepper (optional)
  • ½ cup low-sodium chicken broth or water, plus more as needed
  • 1 ⁄3 cup canned tomato puree
  • 8 oz smoked andouille sausage, cut crosswise into ½-inch slices
  • 1 lb large shrimp, peeled and deveined
  • 3 cups cooked brown rice
  • ¼ cup chopped flat-leaf parsley, plus more for garnish

Directions

  1. Place chicken in a large bowl; season with ½ tsp salt, paprika and pepper. Let stand 30 minutes while prepping other ingredients.
    IMG_2551
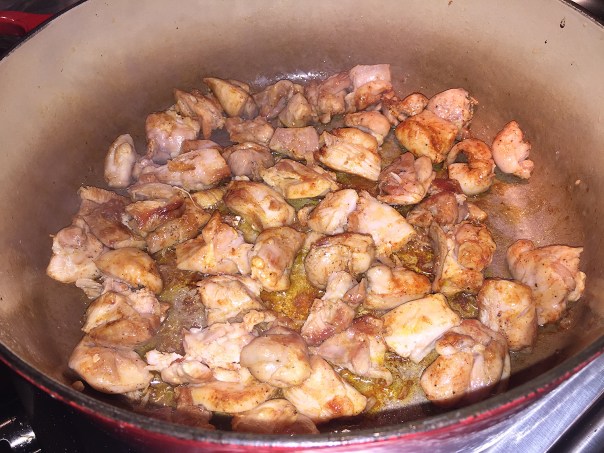
  2. In a large, heavy saucepan or Dutch oven, heat 1 Tbsp oil over medium. Add chicken; cook, undisturbed, 5 minutes. Stir; cook 5 minutes or until lightly browned on second side. Transfer chicken to a bowl.
    IMG_2554
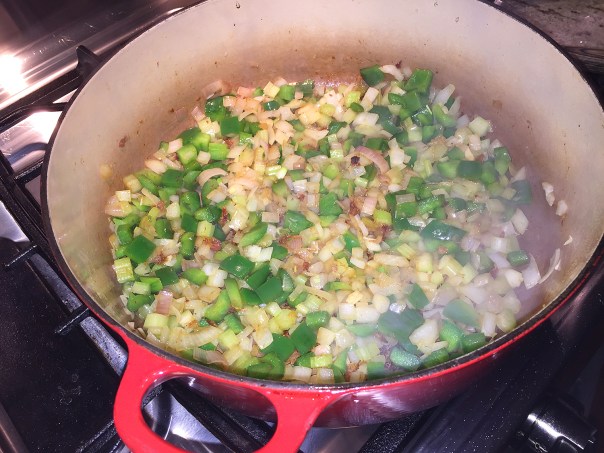
  3. Add remaining 1 Tbsp oil to pan. Add onion, shallots, celery and bell pepper. Cook 10 minutes or until tender and starting to brown, stirring occasionally.
    IMG_2556
  4. Stir in garlic powder and a pinch of cayenne, if desired. Cook 1 minute, scraping bottom of pan to prevent spices from sticking. Add broth.
  5. Increase heat and scrape up any browned bits stuck to bottom of pan. Add chicken and juices, tomato puree and 1 tsp salt. Bring to a simmer. Cover, reduce heat to low and cook 15 minutes, stirring once or twice.
    IMG_2559
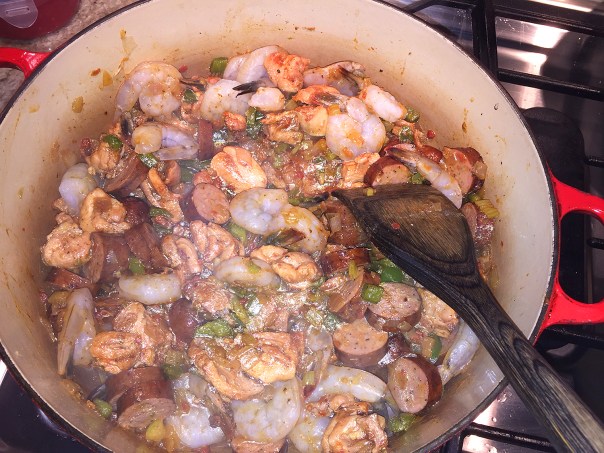
  6. Add sausage, shrimp and remaining ½ tsp salt. Increase heat to medium-high. Bring to a simmer, reduce heat to medium-low and cook 5 minutes or until shrimp are nearly done (when they’re pink and opaque) and sausage is warmed through.
    IMG_2561
  7. Slowly stir in rice. Add a little more broth if jambalaya looks dry (it should be saucy, not soupy). Remove from heat, cover and let stand 10 minutes. Stir in parsley. Serve garnished with extra parsley.


IMG_2567


Hey—Surah, Surah

On a Saturday night in early February, we were excited to be meeting several friends at the Korean BBQ joint, SURAH, located on Bethlehem Pike in Spring House, PA. But before we even got started and for reasons unknown, Russ couldn’t enter the address into his car’s navigation system, but I had it in my phone so we thought, no problem. Wrong!

The directions told us to go south after getting off the turnpike, yet the address was for North Bethlehem Pike, so against our better judgement, we went where instructed only to find our final destination point had no commercial restaurants in sight! After I made a recalculate on the phone, and a quick text to our comrades that we’d be late, we were back in the saddle.

Once there, we could tell by the full parking lot that it was packed, so we were thrilled we had reservations. Without hesitation, we were immediately shown to the rest of our party already gathered at a table in a private room with two BBQ grills. Those who had experienced the routine from previous visits provided us newbies with a tutorial, then told the waitstaff our selections from the all-you-can-eat menu and the fun began!

IMG_2653From left, Paula, Lynn, Kim and Denise.

We were particularly pumped up because our beloved Eagles football team was playing in Super Bowl VII the following day (and in case you’ve been living off the grid—they won!) For flow of conversation, the ladies chose to sit together as a group so we could dish on female whims, while the men could let their testosterone proliferate unabashed at their end of the table.

IMG_2650
The guys from left are Russ, Mike, Jeff and Dan.

Before the searing commenced, Dan wowed all of us, including the waiters, with his cool 360-degree camera. You can check out the pic at https://kuula.co/post/7l6p0, just hold your mouse down on the image to move it around. Very “Kuula!”

Paula instructed us all ahead of time to arrive hungry because the food doesn’t stop coming, and she wasn’t kidding! Each place setting received two dipping sauces, plus we shared an array of veggies that included lettuce (for wraps, if so desired), a spicy chopped salad, jalapeños, eggplant and kimchi. Lucky for me and Kim, both Paula and Denise were old pros at cooking over the hot grills, so we let them go to it after the waiter started us out.

IMG_2648

IMG_2656Our waiter adds the first slices of meat to the hot grill.

The first round—of what was going to be many—was a platter of thinly sliced slabs of beef and pork, with a few sliced onions and mushrooms thrown in. (My only complaint was that I would have preferred more of those.)

IMG_2654The gang’s all here and ready to eat!

Another “kuula” apparatus was the unique cutting shears to slice the larger pieces of meat down to manageable sizes. I wish I had taken a pic of them in use (oh well, we’ll be back.) Keeping things sanitary, in between platter servings the grill tops are exchanged for clean versions so that you don’t have to worry about charred build-up.

After more rounds of beef, pork and much laughter, we also feasted on chicken, shrimp and pork belly (although I drew the limit at that.) True to their “all-you-can-eat” marketing, they would have kept bringing more, but we all finally surrendered. Now it was time to head home and prepare for the BIG DAY tomorrow…

Surah also serves a whole host of other dishes including, sushi, sashimi, noodle dishes, specialty rolls and vegetarian options.

Pork, Lemongrass, and Noodle Stir-Fry

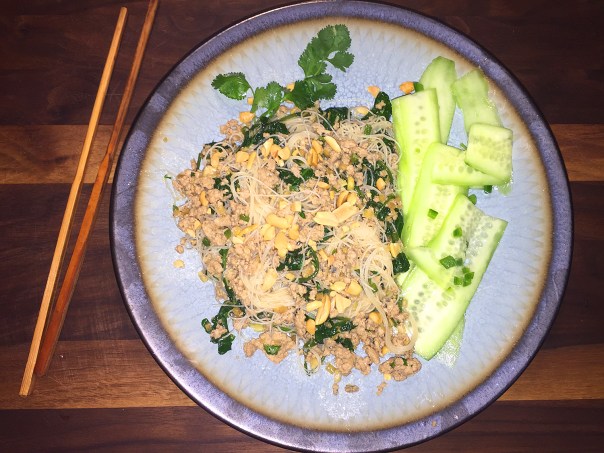
This slightly spicy Thai-inspired Pork, Lemongrass, and Noodle Stir-Fry makes a satisfying one-dish meal and is perfectly paired with a bright, crisp, and refreshing Shaved Cucumber Salad.

IMG_2017

For some reason I can never find any Fresno peppers, a “darling” among us foodies for their very eatable medium heat and, when red, subtle smokiness. More recipes than ever are calling for this chili. But say you can’t locate any, like me, what options do you have? It begs the question, what’s the best Fresno chile substitute to save your culinary masterpiece?

The answer—the ubiquitous jalapeño is your go-to here. In fact, these chilies look so much alike that grocers often mislabel the two in stores. In terms of taste, when they are young and green, the Fresno and the jalapeño have a comparable bright crisp taste and medium heat. The differences come with aging. Fresno peppers tend to become a little hotter, fruitier, and smokier as they turn red. And BTW, they are one of Bobby Flay’s favorite ingredients.

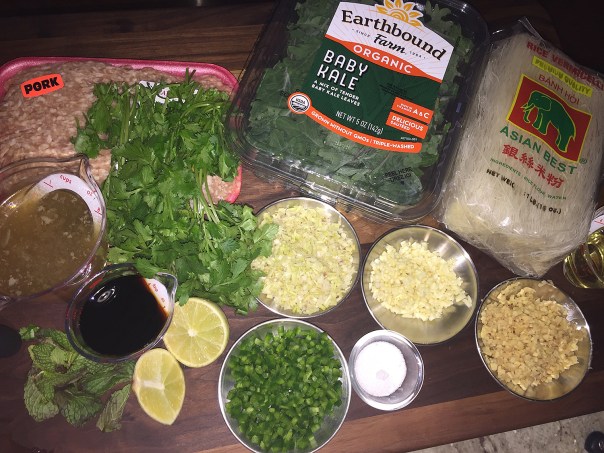
Another ingredient, the aromatic, intense herbal and lemony flavor of lemongrass is found throughout Southeast Asian cuisine, and there isn’t really a decent substitute for lemongrass so if your supermarket is not carrying it, try to find a local Asian mart. The flavor of lemongrass is not one that you can omit and still expect to have an authentic tasting dish.

IMG_1993
Make sure to remove several of the tough outer leaves until just the tender stalk remains.

IMG_1994
To make an easier job of mincing the lemongrass, use a mini food processor.

However, if you’re stuck, your best bet as a lemongrass substitute is lemon zest mainly because lemons are easy to find. Simply grating some lemon zest into your dish is an easy way to re-create the citrus tang that lemongrass would provide. The zest from one lemon is equal to two stalks of lemongrass. You can also use lemon zest along with something else that can replicate lemongrass’s herbal notes. For example, you can use arugula to provide this aspect of the lemongrass flavor. When using arugula, you would combine 1 teaspoon of lemon zest with a single arugula leaf and use that in place of one stalk of lemongrass.

In a pinch, Kaffir lime leaves can be used to add a citrus aroma that it is very close to that of lemongrass. When using this substitute for lemongrass, make sure to tear the leaves to remove the midrib before adding them to your dish. You can also combine Kaffir leaves with lime juice and lime zest in order to enhance the citrus flavor; this option is particularly well suited for curries and soups. Note that the leaf itself is rarely eaten so you may want to remove it before serving the dish just as you would remove a bay leaf.

Lastly, you can try adding plain lemon juice to your dish as a stand-in for lemongrass. You should measure it carefully as too much could throw off the other flavors in your dish by making it overly tart.

To our recipe we made one other tweak and that was topping the stir-fry with some chopped peanuts which added a nice crunch.

IMG_1996

Ingredients

  • 1/4 cup soy sauce
  • 3 Tbs. minced lemongrass (from about 3 stalks)
  • 3 Tbs. grated or minced fresh ginger
  • 2 Tbs. finely chopped Fresno chile (or substitute a fresh jalapeño)
  • 3 large cloves garlic, minced
  • 1 Tbs. fresh lime juice; more to taste
  • 1 lb. ground pork
  • 6 oz. vermicelli rice noodles
  • 2 Tbs. vegetable oil
  • 1 cup unsalted chicken stock
  • 2 tsp. granulated sugar
  • 5 oz. baby kale, tough stems removed (about 5 cups)
  • 3 Tbs. coarsely chopped fresh mint
  • 3 Tbs. coarsely chopped fresh cilantro

Directions

  1. In a small bowl, combine the soy sauce, lemongrass, ginger, chile, garlic, and lime juice.
    IMG_1998
  2. In a medium bowl, combine the pork and half of the lemongrass mixture. Let sit for 10 minutes.
  3. Prepare the noodles according to package directions until tender. Drain, pat dry, transfer to a large bowl, and toss with 1 Tbs. of the oil.
  4. In a large skillet or wok, heat the remaining 1 Tbs. oil over high heat. Add the remaining lemongrass mixture and stir-fry until fragrant, about 30 seconds.
    IMG_2005
  5. Add the pork and stir-fry, breaking it into small pieces, until cooked through and browned in places, about 5 minutes.
    IMG_2007
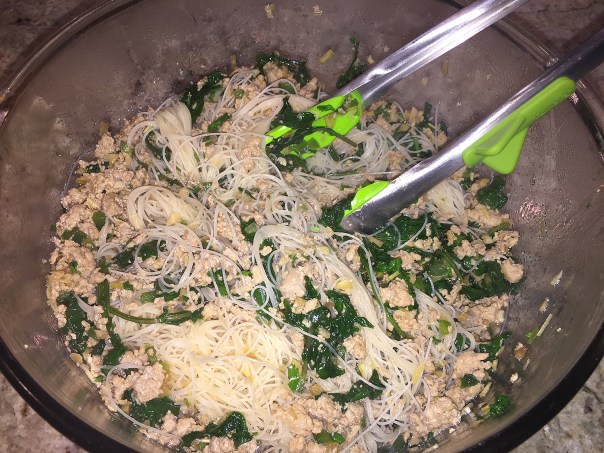
  6. Add the chicken stock and sugar. Stir in the kale, and simmer until the kale wilts, 1 to 2 minutes. transfer to the noodle bowl, add the herbs, and toss. Season to taste with lime juice and serve.
    IMG_2009IMG_2011
    IMG_2013

By Christine Burns Rudalevige

Shaved Cucumber Salad

IMG_2003

Ingredients

  • 1/4 cup rice vinegar
  • 2 Tbs. seeded and minced Fresno chile (or jalapeño)
  • 4 tsp. granulated sugar
  • 4 medium cucumbers, trimmed and peeled

Directions

  1. In a medium bowl, combine the vinegar, chile, and sugar.
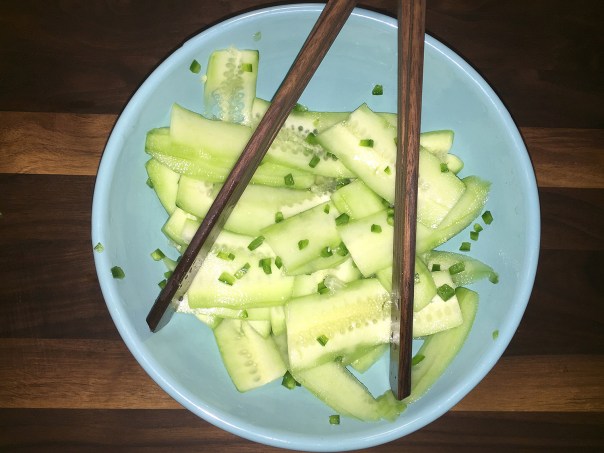
  2. With a vegetable peeler or mandoline, shave the cucumbers into the bowl in long, wide strips.
    IMG_2002
  3. Toss and let sit briefly before serving.
    IMG_2016

Double Whammy

Both the entrée, Sear-Roasted Chicken with Orange-Tarragon Sauce, and the side dish, Millet and Chickpea Salad, knocked it out of the park, both in flavor and ease of preparation. A fragrant sauce boosts the flavor of chicken breast in this single-skillet dish. And accompanied by a Millet and Chickpea Salad, the Mediterranean-inflected grain salad is quick enough to make on a weeknight, thanks to quick-cooking millet.

IMG_2411

Because both dishes contained a few of the same ingredients, they were a marriage made in heaven; the flavor combinations won our hearts! It reminded us that we should include millet more often in our diets because of the numerous health benefits. These include its ability to protect the heart, prevent diabetes, improve the digestive system, lower the risk of cancer, detoxify the body, improve respiratory health, boost the immune system, increase energy levels, and improve the muscle and nerve health.

Although millet is most often associated as the main ingredient in bird seed, it is not just “for the birds.” Millet is also gluten-free, a plus for Russ who deals with a wheat insensitivity. And 1 cup of millet contains 17 grams of dietary fiber—WOW, that’s pretty impressive! Finally, millet’s high protein content (15 percent) makes it a substantial addition to a vegetarian diet.

And we can’t say enough of the sauce. Russ is going to add it to his online recipe bank under “sauces” because we think it would also be fabulous on pork and fish…

Ingredients

  • 4 boneless, skinless chicken breast halves (around 2 lbs.)
  • Kosher salt and freshly ground black pepper
  • 2 Tbs. olive oil
  • 2 large shallots, peeled and thinly sliced
  • 1/2 cup fresh orange juice
  • 1/2 cup chicken broth, preferably homemade
  • 2 Tbs. coarsely chopped fresh tarragon
  • 1 Tbs. honey
  • 1 tsp. finely grated orange zest

Directions

  1. Position a rack in the center of the oven and heat the oven to 450°F. Pat the chicken dry and sprinkle with 1 tsp. salt and 3/4 tsp. pepper.
    IMG_2394
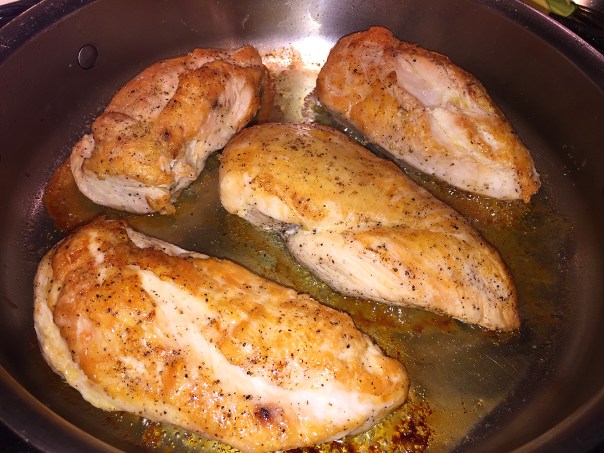
  2. Heat the oil in a 12-inch ovenproof skillet over medium-high heat until shimmering hot. Cook the chicken breasts, undisturbed, until browned (they should easily release when you lift a corner), 5 to 6 minutes.
  3. Flip and transfer the skillet to the oven. Roast until just cooked through (165°F), about 15 minutes. Transfer the chicken to a plate, cover loosely with foil, and keep warm.
    IMG_2396
  4. Put the skillet over medium heat (be careful of the hot handle), add the shallots and 1/2 tsp. salt, and cook, stirring and scraping up any browned bits, until softened, about 2 minutes.
    IMG_2398
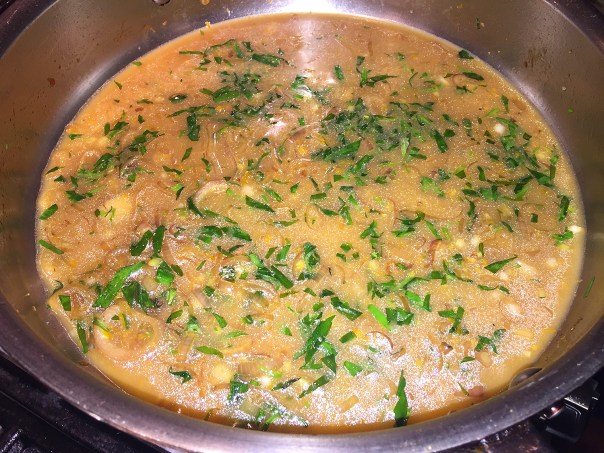
  5. Add the orange juice, broth, tarragon, honey, and zest, and cook until the mixture is reduced by half, about 6 minutes.
    IMG_2399
    IMG_2401
  6. Transfer the chicken to serving plates. Pour any juices that collected on the plate into the sauce and serve the sauce with the chicken.
    IMG_2407

Recipe by Tony Rosenfeld from Fine Cooking

Millet and Chickpea Salad

IMG_2392

Ingredients

  • 3 Tbs. plus 1 tsp. olive oil
  • 1/2 cup millet
  • Kosher salt
  • 1/4 tsp. crumbled saffron threads
  • 1 large orange, peeled and segmented, segments cut into thirds
  • 1 jarred roasted red pepper, chopped
  • 1/2 cup canned chickpeas, drained and rinsed
  • 2 Tbs. finely chopped red onion
  • 2 Tbs. sherry vinegar
  • 1 tsp. honey
  • 1/2 tsp. dried oregano

Directions

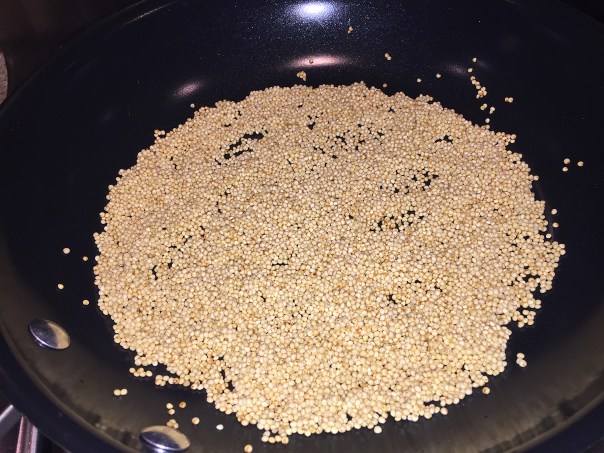
  1. Heat 1 tsp. of the oil in a 10-inch skillet over medium heat. Add the millet and toast, shaking the pan, until one shade darker, about 1 minute.
    IMG_2395
  2. In a 1-quart saucepan, bring 1 cup water, 1/2 tsp. salt, and the saffron to a boil. Add the millet, cover, reduce the heat to low, and cook until tender, about 18 minutes.
  3. Scrape into a large bowl. Stir the orange segments, peppers, chickpeas, onion, the remaining 3 Tbs. oil, vinegar, honey, and oregano into the millet. Season to taste and serve.
    IMG_2402

Recipe by Mark Scarbrough, Bruce Weinstein from Fine Cooking