With the end of summer holiday on the horizon, a grilled steak is always a fan favorite. While there are some steaks that need nothing more than a little salt and pepper to bring out their beefy goodness, flank steak is not one of them.
This bold marinade is just the sort of seasoning the brawny cut begs for: lime juice and zest add brightness, brown sugar sweetness, and jalapeño and sriracha a complex heat. Just whiz it all together in a food processor and slather it on the meat.
Marinate overnight preferably, or a minimum of 2 hours, before tossing it on the grill. Lastly, always make more flank steak that you think you want. Leftovers are the best part—we used ours as part of a steak salad. For an extra boost of flavor, try adding 1/4 cup of bourbon and a little Worcestershire.
In a food processor, pulse together scallions, ginger, jalapeno, garlic, sugar, lime zest and juice, and sriracha. With the motor running, pour in oil until smooth
Season steak with salt. Place in a large bowl and pour marinade over meat. Turn to coat well with the mixture. Cover tightly and refrigerate for at least 2 hours or overnight.
When ready to cook the steak, heat the grill to medium-high heat. Transfer the meat to the grill and cook, covered, until it reaches the desired doneness (about 5 minutes per side for medium-rare). Let rest on a cutting board for 5 minutes, then slice thinly.
Soup isn’t typically a dish that comes to mind during hot weather spells. But I couldn’t help myself when I saw this fiber-rich recipe from America’s Test Kitchen (ATK). So on a rare cool, cloudy day in mid-summer, I spent some afternoon time preparing this Butternut Squash and White Bean Soup with Sage Pesto, with the intentions of having it for dinner on the following night.
Instead of the usual creamy, rich, puréed style of butternut squash soup, this heartier version can stand on its own as a meal. It features chunks of squash paired with creamy cannellini beans to give the soup some heft.
Because the bulb portion of the squash is difficult to cut into cubes that will cook evenly, and because it naturally cooks faster than the dense neck portion, ATK suggests cutting the bulb into wedges, cook them in the broth until soft, and then mash them to make a “squash stock”—giving the soup base body and flavor.
A swirl of freshly-made sage pesto made in a mini food processor, lends the right bright, fresh finish. The pesto is so good, you may be tempted to eat it directly from the bowl. If you have any leftover, use it as a condiment on any number of other edibles; or stir into pasta.
Since The Hubs detests walnuts, I opted to use pine nuts—a common ingredient in pesto. If you are intent on keeping it vegetarian, use vegetable broth. Keep in mind, whatever stock you use, a homemade version is always a better bet because of the depth of flavor it offers.
Purchasing precut chunks of squash allows for ease of preparation although you may have to dice some of those chunks into 1⁄2-inch pieces for Step 5. To bulk up the meal further, serve with a slice of toasted crusty rosemary olive oil loaf.
Butternut Squash and White Bean Soup with Sage Pesto
1 oz. (1/2 cup) Parmesan cheese, grated, plus extra for serving
Salt and pepper
Soup
1 2- to 2 1/2 lb. butternut squash
4 cups chicken broth, preferably homemade; or vegetable stock
3 cups water
4 Tbsp. unsalted butter
1 Tbsp. soy sauce
1 Tbsp. extra-virgin olive oil
1 lb. leeks, white and light green parts only, halved lengthwise, sliced thin, and washed thoroughly
1 Tbsp. tomato paste
2 garlic cloves, minced
Salt and pepper
3 15-oz. cans cannellini beans
1 tsp. white wine vinegar
Grated Parm for serving
Directions
FOR THE PESTO: Pulse pine nuts and garlic in food processor until coarsely chopped, about 5 pulses. Add parsley and sage; with processor running, slowly add oil and process until smooth, about 1 minute. Transfer to bowl, stir in Parmesan, and season with salt and pepper to taste. Set aside.
FOR THE SOUP: Using sharp vegetable peeler or chef’s knife, remove skin and fibrous threads just below skin from squash (peel until squash is completely orange with no white flesh remaining, roughly 1/8 inch deep). Cut round bulb section off squash and cut in half lengthwise. Scoop out and discard seeds; cut each half into 4 wedges.
Bring squash wedges, broth, water, and soy sauce to boil in medium saucepan over high heat. Reduce heat to medium, partially cover, and simmer vigorously until squash is very tender and starting to fall apart, about 20 minutes.
Using potato masher, mash squash, still in broth, until completely broken down. Cover to keep warm; set aside. (For a creamier base, you may want to use an immersion blender.)
While broth cooks, cut neck of squash into 1/2-inch pieces. Heat oil in large Dutch oven over medium heat until shimmering. Add leeks and tomato paste and cook, stirring occasionally, until leeks have softened and tomato paste has darkened, about 5 minutes. Add garlic and cook until fragrant, about 30 seconds.
Add squash pieces, 3/4 teaspoon salt, and 1/4 teaspoon pepper and cook, stirring occasionally, for 5 minutes. Add squash broth and bring to simmer. Partially cover and cook for 10 minutes.
Add beans and their liquid, partially cover, and cook, stirring occasionally, until squash is just tender, 15 to 20 minutes.
Stir in vinegar and season with salt and pepper to taste. Serve, passing pesto and extra Parmesan separately.
In my mind, blueberries are synonymous with late summer. Growing up in Michigan, August was the best time to harvest the sweet blue globes, gobbling them up as we picked the fruit from the bushes. Then of course, whatever was left by the time we got home, Mom would add them to muffins, bread, fruit salad, and an array of desserts. If by chance there were still leftovers, they were frozen for another time.
This classic Blueberry Galette is the perfect easy treat to whip up using all those fresh blueberries. This rustic version is basically a lazy girl’s blueberry pie, way easier to make than a homemade pie and every bit as tasty. All you have to do is place the blueberries on top of the dough, and fold the dough however you want. Serve à la mode with a dollop of good French vanilla ice cream for the ultimate summer dessert!
Top the crust with sugar — This is a nonnegotiable step. Topping the crust with sugar will give your pie crust a beautiful golden brown, sweet, crunchy finish that is both beautiful and delicious!
Place the flour, sugar, and salt in a food processor. Add the cold butter to the food processor and pulse until the mixture resembles wet sand and no large chunks of butter remain.
Add in the vodka (or water), one tablespoon at a time. If your dough has come together, don’t add any more vodka. You want just enough to bind the dough into a ball.
Turn the dough out of the food processor and form into a flat oval disk and wrap in plastic wrap. Place in fridge for at least 30 minutes, but up to 3 days.
Once your dough has chilled, preheat the oven to 375°F and line a cookie sheet with parchment paper. Set aside.
Sprinkle a work surface with flour. Roll your dough out into a 12-inch circle. Place dough onto prepared baking tray. Place a 9-inch cake pan in the center of the circle and press down ever so slightly. This will create an indentation to show exactly how far out to place your filling!
In a large bowl combine the blueberries, sugar, lemon juice, salt and cornstarch. Stir to coat the berries evenly.
Place the blueberry mixture in the center of the pie crust into an even layer. Lift the edges of the pie dough in towards the center, folding every 3-4 inches as you go around.
Mix egg with 1 tablespoon water and brush over crust. Top with coarse sugar if desired. Bake for 30-40 minutes, until the blueberry filling is bubbling and the crust is golden brown. Serve with vanilla ice cream!
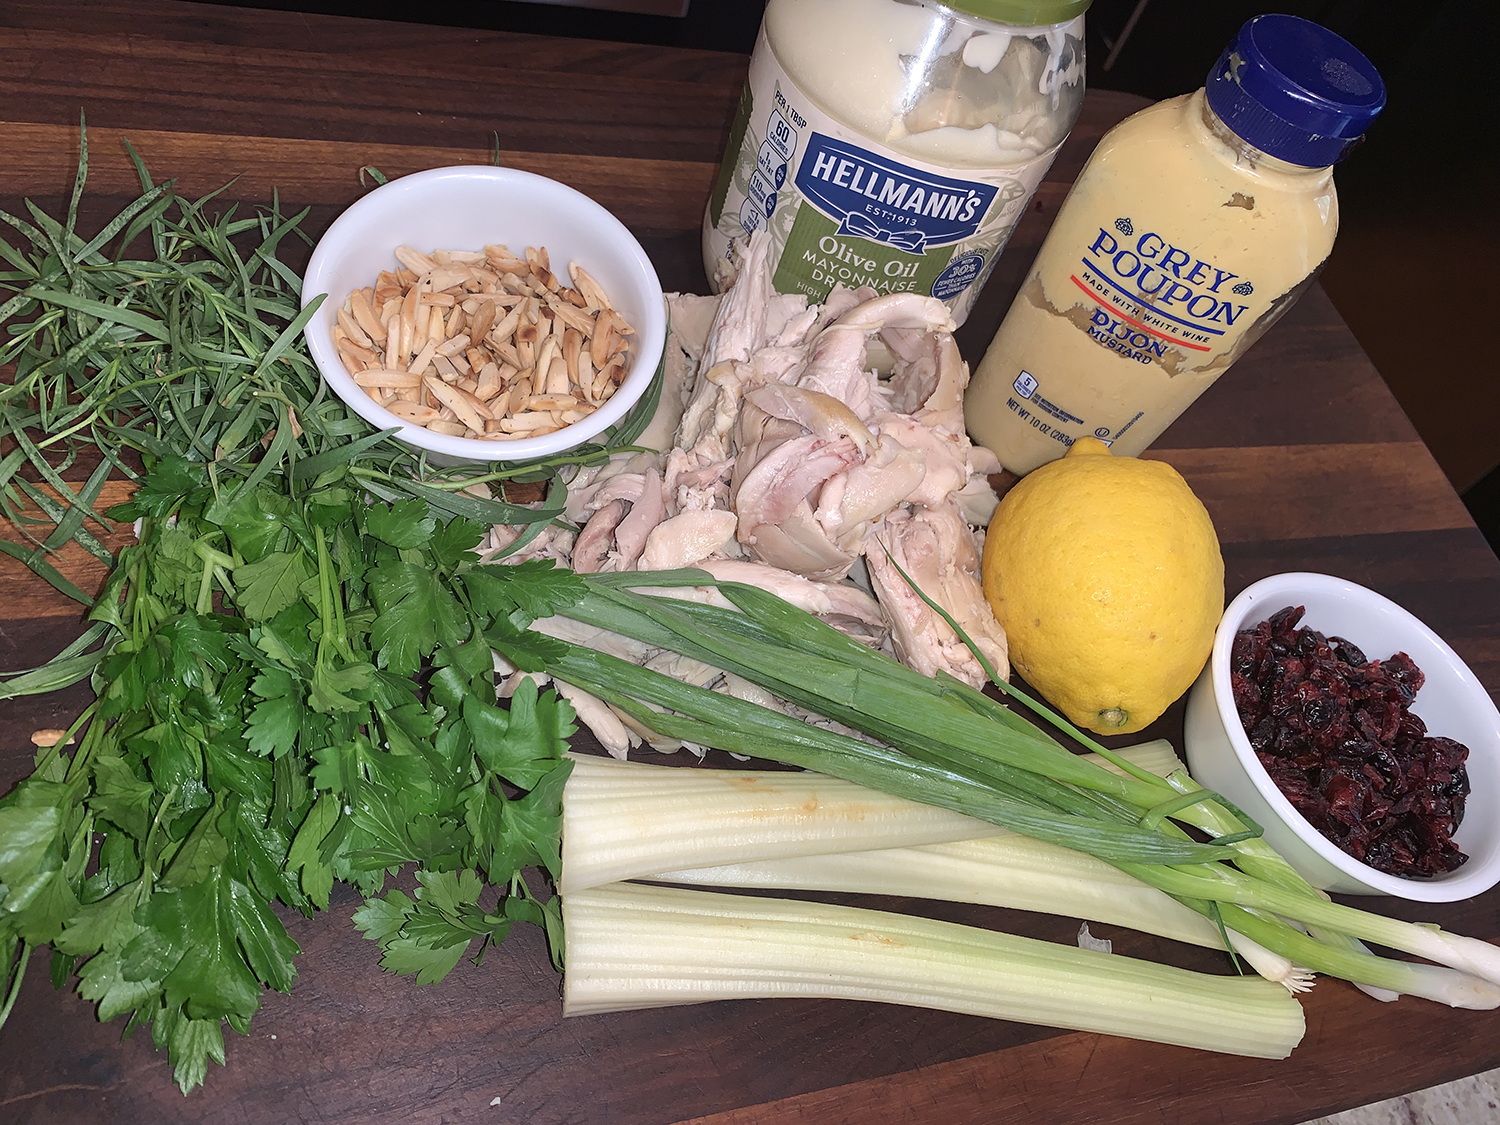
Two rotisserie chickens on sale for $10, a bargain I couldn’t pass up. I had gone to the store for one bird to make Enchiladas Verdes, but when I saw the sale, it was a no-brainer. When I got home and the poultry cooled off, I stripped off the skin then harvested all of the white and dark meat. The skin and bones I bagged for the freezer for The Hubs to make his delicious stock.
This couldn’t be any easier. If you happen to have some leftover cooked chicken on hand, you could certainly use that and save yourself a trip to the grocer.
When rotisserie chicken is cool enough to handle, pull off the chicken, then strip all white and dark meat from the bones. Discard skin and bones, or save to make stock at a later date.
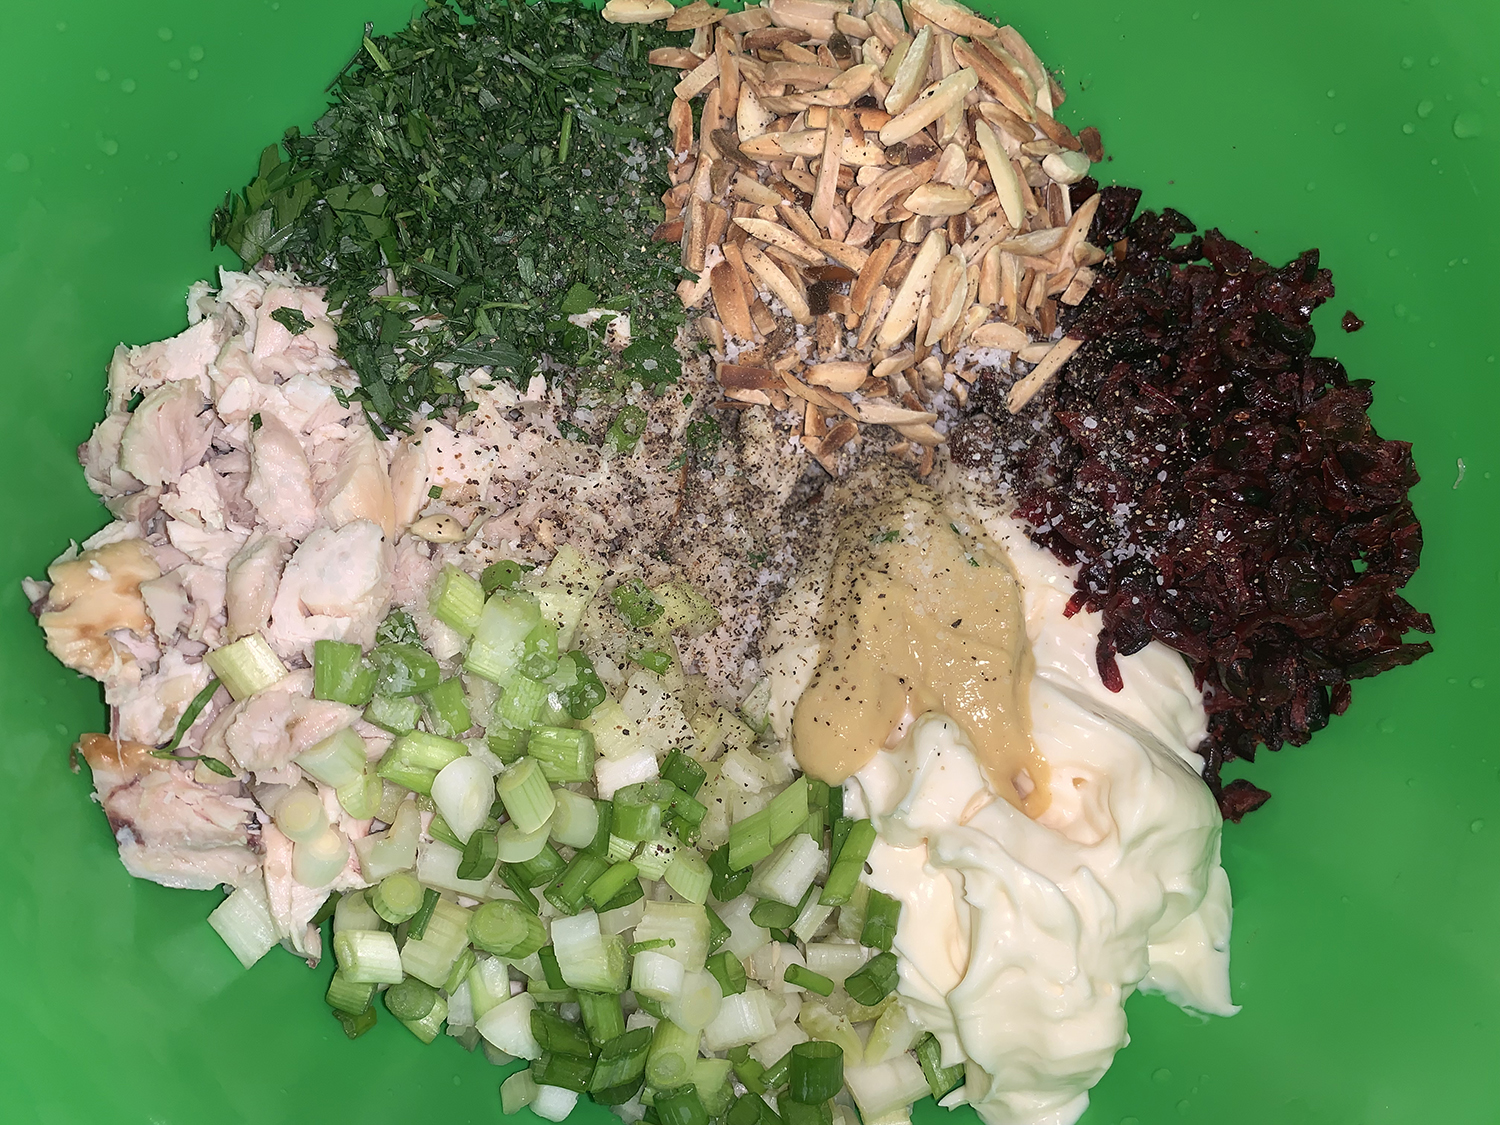
Chop the chicken meat into about a 1/2-inch dice. Place into a large bowl.
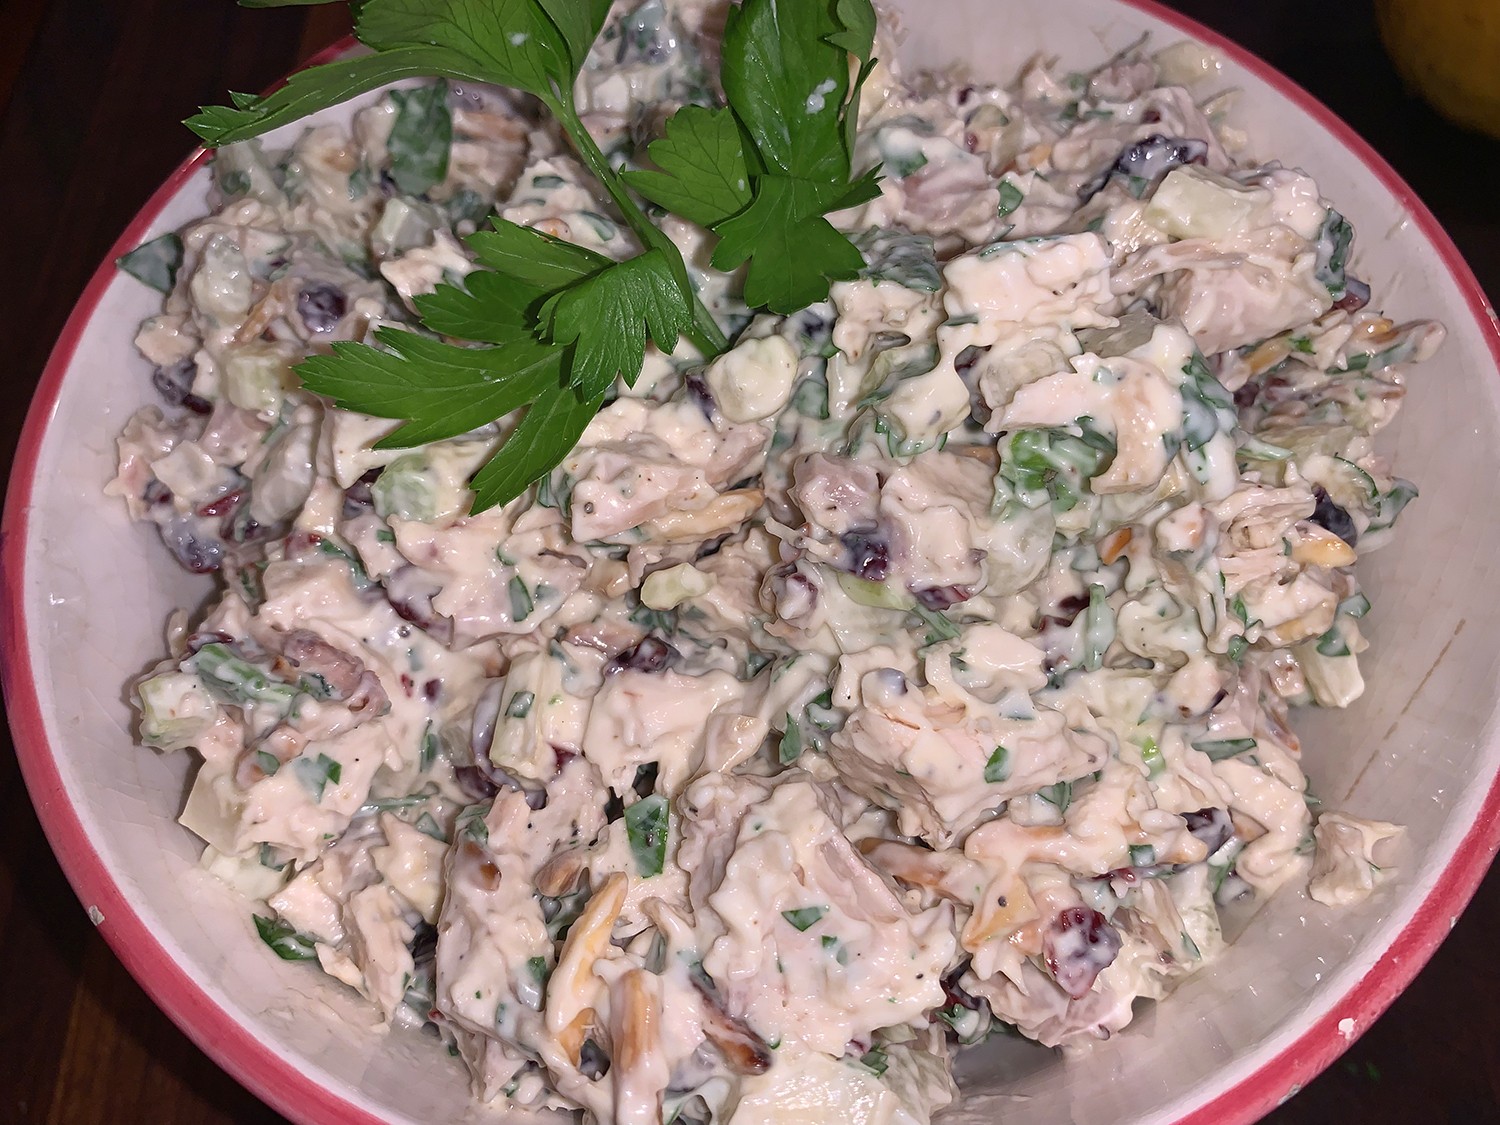
Slice and dice the celery, green onion, grapes, parsley and tarragon. Add those ingredients to the mixing bowl along with the mayonnaise, Dijon mustard, and lemon juice. Season with salt and pepper.
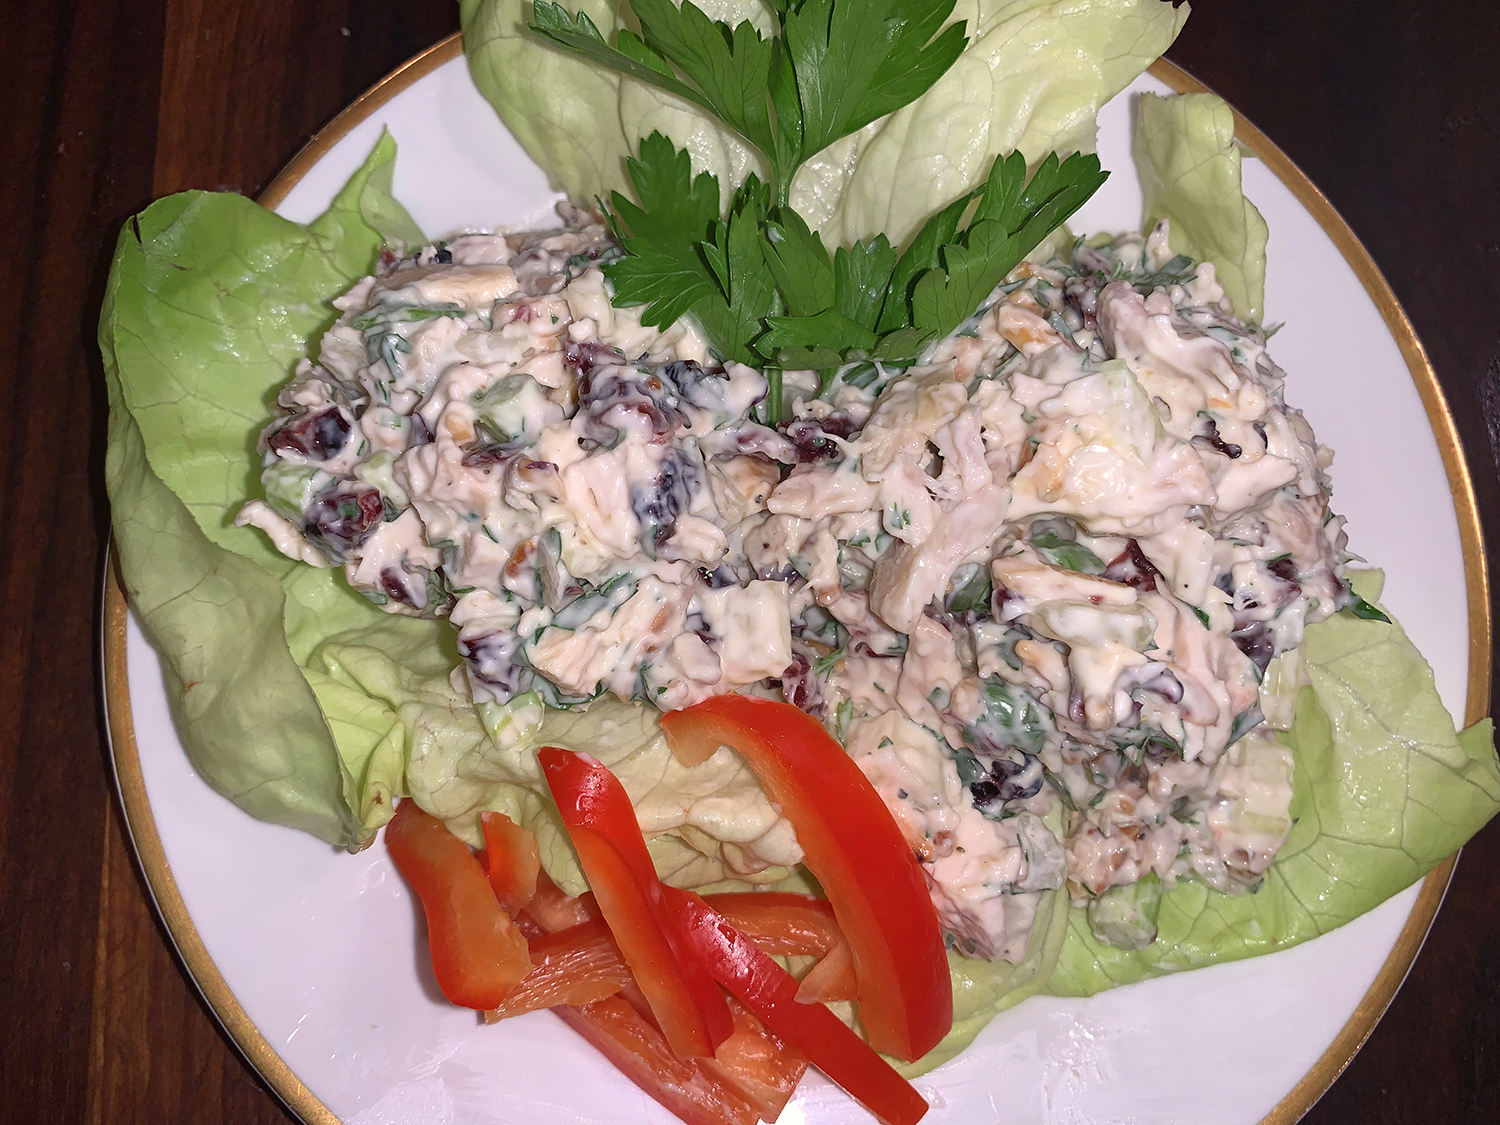
Serve on a couple of Bibb lettuce leaves and garnish with bell pepper strips, if using.
Cherry and grape tomatoes are in abundance by late August, as is fresh corn and herbs. So this “clean-out-the-larder” approach helps you use up some of the excess staples and fresh produce in a tasty way.
It starts with a roasted cherry-tomato sauce that includes garlic, balsamic vinegar and brown sugar to add a slightly sweet note. To scale back on the sweetness, switch the balsamic to red wine vinegar and reduce or omit the brown sugar.
On occasion, we have already cooked ears of corn leftover from a previous meal. Here’s a chance to use them up. Cut the kernels off the cobs and add them to boiling water when you toss in the dried fusilli.
Once the pasta is done, plate into a large serving bowl and stir in the pesto—we used a homemade sage pesto* but one made with basil will work just as well. Next fold in the tomato mixture and let guests scoop out a serving, passing the grated parmesan around for topping. A side salad makes a nice companion to the pasta and uses up more of your produce.
*FOR THE SAGE PESTO: • ½ cup pine nuts, toasted • 2 garlic cloves, minced • 1 cup fresh parsley leaves • ½ cup fresh sage leaves • ¾ cup extra-virgin olive oil • 1 oz. (1/2 cup) Parmesan cheese, grated, plus extra for serving • Salt and pepper Pulse pine nuts and garlic in food processor until coarsely chopped, about 5 pulses. Add parsley and sage; with processor running, slowly add oil and process until smooth, about 1 minute. Transfer to bowl, stir in Parmesan, and season with salt and pepper to taste. Set aside.
1 or 2 ears of corn, cooked with kernels cut off the cob
1⁄4 cup fresh basil or sage pesto (see recipe above)
1 lb. whole wheat fusilli, cooked according to package directions
Grated Parmesan for topping
Directions
Preheat oven to 325°F.
Mix together tomatoes and garlic in a nonreactive 9″ x 13″ baking dish.
Whisk together oil, vinegar, thyme, brown sugar and salt in a bowl. Drizzle over tomato mixture.
Bake until tomatoes are softened and caramelized, about 1 hour to 1 hour and 20 minutes.
Meanwhile cook the fusilli according to package directions, adding the corn kernels in with the pasta when the water starts to boil. Time it so the pasta is done at about the same time as the tomatoes.
Mix the pesto into the fusilli and corn and fold in the tomato mixture.
Serve, passing around the grated parmesan for topping.
NYTimes Cooking writes “A good dip transcends time — especially one with fresh herbs, which makes this 1959 recipe from Craig Claiborne stand out amid other recipes from the convenience food era of the 1940s and ’50s. Studded with capers, garlic and anchovies, the dip comes together quickly, then sits in the refrigerator, ready to buy you time when your guests arrive.”
Although the title is a bit of a misnomer in the fact that Florentine recipes usually include spinach as an ingredient. But I won’t quibble over the title because it was a fabulous dip! And if you are squeamish about anchovies, they are mashed up and assist the other ingredients in bringing out a true depth of flavor.
However if you’re adamantly opposed to anchovies, try fish sauce. Don’t be put off by the name. It does not taste fishy. As a fellow anchovy hater however, I have come around to using them mashed up in small amounts as here, where they give an indefinable flavor boost.
BTW, America’s Test Kitchen has a great recipe for an anchovy substitute involving miso and nori. It works beautifully in most recipes that call for anchovies or anchovy paste.
With the last gasps of the unofficial summer calendar closing in on us, let the season’s bounty shine on the plate. And to that end, this lively salad of corn, scallions, jalapeño and avocado tossed with a tangy buttermilk-feta dressing is like summer on a plate. The sweetness of peak-summer corn and the richness of creamy avocado balance out the tartness of the dressing.
While this recipe from NYTimes Cooking could be a side dish or a vegetarian main, we opted to add a protein to give it more heft as an entrée. In that vein, we grilled some chicken breasts with a Japanese 7-spice rub, but grilled shrimp or salmon would work wonderfully also. And to save time on dinner day, we grilled the chicken the day before while barbecuing other items.
The directions below are for the full recipe which allows for 4 to 6 portions. But with just the two of us, we cut most of the recipe in half, while altering quantities of other ingredients as we saw fit. After eating two healthy servings, we still had some leftover for lunch the following day.
Grilled Corn, Avocado and Chicken Salad With Feta Dressing
4 boneless, skinless chicken breast halves, rubbed with spices of your choice (optional)
6 ears corn (about 3 lbs.), shucked and silk removed
1 bunch scallions, trimmed
1 jalapeño, stemmed and halved lengthwise
3 Tbsp.olive oil
Kosher salt and black pepper
4 oz. feta cheese, crumbled (about 3/4 cup)
⅓ cup buttermilk
1 tsp. freshly grated lemon zest plus 1 Tbsp. lemon juice
1 small garlic clove, grated
¼ cup sliced fresh chives
¼ cup finely chopped fresh parsley
1 medium head romaine lettuce, torn into bite-size pieces (about 8 cups)
2 avocados, sliced
Directions
If a protein is desired, grill chicken (or shrimp, salmon) until done. This can be done a day ahead and refrigerated until ready to use.
Heat a grill or grill pan over medium-high. Brush corn, scallions and jalapeño with the oil and season with salt and pepper.
Arrange on the grill and cook, turning occasionally, until corn kernels are browned in spots, 6 to 8 minutes, and the scallions and jalapeño are charred all over and tender, 9 to 10 minutes.
Transfer vegetables to a cutting board and let cool slightly.
In a medium bowl, using a whisk (I used a pestle), mash the feta into a coarse paste. Whisk in buttermilk, lemon zest and juice and garlic, then stir in chives and parsley.
Finely chop the charred jalapeño and stir it into the feta dressing; season with salt and pepper.
In a large bowl, toss lettuce with half the feta dressing and arrange on a platter. Cut corn kernels off the cob and slice scallions into bite-size pieces. Arrange avocado slices, corn and scallions on top of the lettuce.
Eggplants, also known as aubergines or brinjals, grow all over the world. They are fruits — though, like tomatoes, they are treated more in cooking like a vegetable. In fact, they’re closely related to tomatoes and peppers. Purple eggplants are the most common cultivar in American grocery stores. Some purple fruits appear almost black due to their rich pigments.
And these coveted nightshade plants are currently in abundance from your garden, the local farmer’s market, or perhaps some friendly neighbors. With so many recipes to choose from, this particular one from Food Network uses the eggplant in a clever way.
Even though the exterior of eggplant is a gorgeous deep purple color; the beauty of this vegetable lies on the inside. This recipe takes advantage of the fact that the flesh of grilled eggplant transforms into a luscious creamy sauce that’s perfect for dressing up little tubes of rigatoni. To make the most of summer’s bounty, cherry tomatoes are grilled alongside the eggplant until bursting with juices, then mixed into this summer vegetable pasta.
Health Facts: Eggplant is rich in fiber, protein, manganese, and nutrients like potassium and vitamins C and K. It is a great source of antioxidants, which make it effective in guarding your body against future ailments. Being so rich in fiber, eggplants are also great for keeping your blood sugar levels intact.
11 oz. cherry tomatoes (about 2 cups), halved (quartered if large)
3 cloves garlic, thinly sliced
1 Tbsp. olive oil
1 cup ricotta
1/2 cup grated Pecorino Romano cheese, plus more for serving
1 cup packed basil leaves, chopped, plus more for serving
1/2 cup packed parsley leaves, chopped, plus more for serving
Crushed red pepper flakes, for serving (optional)
Directions
Prepare a grill for high heat.
Bring a large pot of salted water to a boil. Add the lemon juice to the boiling water and cook the pasta according to the package directions for al dente. Reserve 1/2 cup of the pasta cooking water, drain the pasta and return it to the pot; set aside.
Pierce the eggplant a few times with a fork or knife. Place on the grill, cover and cook, turning every 8 to 10 minutes, until completely charred all over and the flesh is soft when pressed, 25 to 30 minutes.
Transfer to a large bowl and let cool slightly for 10 minutes.
While the eggplant cooks, prepare 2 sheets of foil, each 12-by-12-inches, and stack them together. Place the tomatoes, garlic, olive oil, 1/2 teaspoon salt and a few grinds of black pepper in the center of the foil. Fold over 2 opposite sides of the foil then fold in the remaining sides to create a tight seal.
When 15 minutes of cooking time remain for the eggplant, add the foil pack to the grill and cook until juices start to bubble out of the top (this means the tomatoes and garlic are sufficiently cooked without having to open the pack), 13 to 15 minutes.
Remove the eggplant to a cutting board (keeping any juices that accumulated in the bowl) and squeeze gently to crack the skin and expose the flesh. Use a spoon to remove the flesh, transfer to the large bowl and mash lightly with the spoon or a potato masher (you should have about 1 cup of flesh); discard the skin.
Stir in the ricotta and Pecorino Romano until smooth then pour into the pot with the pasta and mix until combined. Fold in the contents of the foil pack (including any juices that accumulated), the basil, parsley, lemon zest, 1/2 teaspoon salt and a few grinds of black pepper; stir until combined, adding the reserved pasta water, 1 tablespoon at a time, to thin out the sauce if needed.
Serve with more basil, parsley, Pecorino Romano and crushed red pepper flakes if using.
Did you know that plain yogurt is an excellent base for a marinade? It slowly tenderizes the meat, rendering it juicy, but never meaty or tough; plus it leaves a pleasant tangy flavor behind. In this case, a simple blend of yogurt, shallot, lemon and salt is a perfect match for lamb’s richness.
A portion of the mixture is set aside to purée with tender green herbs and lemon juice for a quick finishing sauce after the lamb is done. The original recipe called for baby lamb chops (aka lollipop chops), but we prefer a meatier cut such as the loin chop, and the ingredients list reflects our changes.
The yogurt sauce mixture not only complimented the meat but benefited the sliced cucumbers as well. Another side was whole wheat pearl couscous cooked in homemade chicken stock for added flavor.
Herby Yogurt Sauce with Grilled Lamb Chops and Cucumber Couscous Salad
1 tsp. grated lemon zest, plus 1 Tbsp. lemon juice, all from 1 lemon
8 loin lamb chops
1 cup packed fresh tender herbs (such as parsley, dill and mint leaves), plus more for serving
1 cup pearl whole wheat couscous, cooked according to package directions
1 cucumber, sliced thin for serving
Directions
Stir together yogurt, shallot, salt, and lemon zest in a medium bowl. Measure 1 cup of the mixture into a large ziploc bag. Cover and refrigerate the remaining 1/2 cup yogurt mixture.
Add lamb chops to ziploc bag; seal bag and turn to coat lamb in sauce. Let marinate in the fridge at least 2 hours, and up to 24. Ours marinated 8 hours.
Preheat grill to high (450°-500°). Scrape off excess marinate from lamb, then discard the bag .
Sprinkle chops evenly with salt and pepper. Arrange chops on oiled grill grates. Grill covered, turning once or twice until browned and a thermometer inserted in the thickest part of the meat registers 135° for medium-rare; about 10 minutes total; lollipop chops will take about 5 minutes.
Transfer chops to a platter and let rest for 5 minutes.
Meanwhile, transfer reserved yogurt mixture to a food processor. Add fresh herbs and lemon juice; pulse until smooth, about 20 pulses.
Serve lamb alongside sauce, cooked couscous, cucumbers and additional herbs.
Curry powder is stirred into this braise only during the last minute of cooking, delivering a bright hit of spice on top of the paprika and turmeric mellowed into the slow-simmered chicken.
This dish needs time on the stove but not much attention, and gets even better after resting in the fridge, making it an ideal weeknight meal that can last days. There’s plenty of coconut milk broth to spoon over rice or noodles; or even platha, a buttery, flaky Burmese flatbread, for dipping.
Based on reader reviews claiming the curry was too soupy, we omitted adding any water. Other changes included altering the amounts of the spices including adding Thai red curry paste and fresh ginger to the mixture. These changes are noted in the list below.
In order to make the most of the ingredients, it is important to let the curry sit for 20 minutes at the end. This allows the chicken to soak in more flavors as the curry cools.
Trim the chicken thighs of excess fat and cut into 1/2- to 1-inch pieces; transfer to a bowl. Add the paprika, turmeric and salt, and use your hands to mix well. Let the chicken marinate at room temperature while you prepare the other ingredients, or cover and refrigerate overnight.
In a large pot, heat the oil over medium-high. Stir in the onions, lower the heat to medium-low and cook gently, stirring often to prevent scorching, until tender and translucent, 8 to 10 minutes. Add the garlic and ginger and continue to cook, stirring often, until most of the water from the onions has been cooked out and a glossy layer of oil has risen to the surface, about 5 minutes more.
Add the marinated chicken and stir to release the spices into the onion. Pour in the coconut milk and bring to a near boil. Let the coconut milk simmer briskly for about 4 minutes to thicken a bit. Lower the heat to medium-low and add the fish sauce. The broth will thin out as the chicken starts to release its juices.
Lower to a gentle simmer and cook, stirring occasionally, until the chicken is tender, about 30 minutes. Droplets of paprika-red oil will rise to the surface. Stir in the curry powder, cayenne and Thai red curry paste and simmer briefly and remove from the heat.
Let the curry sit for at least 20 minutes before serving. This allows the chicken to soak in more flavors as the curry cools. Bring to a simmer again right before serving and taste, adding more salt or fish sauce if desired.
Serve over rice or noodles, with bowls of cilantro and lime wedges.
Local tomatoes are king this time of year so we try to use them in a variety of ways almost everyday during the season. Here’s a simple summer tomato salad recipe that makes the most of—and uses up—some of the tomato bounty from your garden or local farm market.
America’s Test Kitchen (ATK) discovered that salting the tomatoes before mixing them into the salad brings out their juices, which make a great base for the dressing. Another discovery was there’s no need to peel homegrown tomatoes for a tomato salad recipe, because their skins are usually thin and unobtrusive.
The amounts of the ingredients are subjective to your own preferences. If you prefer tuna packed in oil, go ahead and use it; in fact, save the drained oil from the tuna and use it instead of, or with, the remaining olive oil. No blanching or cooking needed here!
The olives, red onions and capers are boldly flavored Mediterranean standbys, typically a healthy diet to follow. It’s a great option to bring on a picnic or to enjoy lunch at your community pool.
While we are on the subject of great tomato recipes, I have to give a shout out to the Heirloom Tomato Tart(shown above) that I blogged about 4 years ago. If you are also interested in that recipe just click on the link. The tomato salad recipe is below.
12 large black olives, such as Kalamata or other brine-cured variety, pitted and chopped
¼ cup red onion, chopped fine
2 Tbsp. chopped fresh parsley leaves
Ground black pepper
1 6-oz. can solid white tuna in water, or oil-packed if preferred
Directions
Core and halve tomatoes, then cut each half into 1/2″ thick wedges. Toss wedges with salt in large bowl; let rest until small pool of liquid accumulates, 15 to 20 minutes.
Meanwhile, whisk oil, lemon juice, capers, olives, onion, parsley, and pepper to taste in small bowl. Pour mixture over tomatoes and accumulated liquid; toss to coat. Set aside to blend flavors, about 5 minutes.
Crumble tuna over tomatoes; toss to combine. Adjust seasonings and serve immediately.
Spice it twice—the mantra for this flavorful beef skewer. After skewering but before going on the grill, the meat is dusted generously with the spices. Those spices toast, their flavors deepening during cooking. Once the meat comes off the heat, it’s seasoned a second time with the same spice blend, creating multiple layers of nuanced flavors from the same few ingredients.
What did we do different? In place of flat iron steak, we substituted flap meat because it was already in our freezer and it’s easier to source than the aforementioned flat iron cut. In keeping with the Asian theme, we also grilled bok choy right along with the meat skewers. They benefited from a chili oil sauce that complimented the meat rub.
Don’t trim the fat from the beef before cooking. The fat adds flavor and helps keep the meat succulent. If you’re using a gas grill, make sure to give it at least 10 to 15 minutes to heat before cooking the skewers. This ensures the meat gets a nice surface char without overcooking the interior.
1½ lbs. beef flat iron steak, sliced against the grain into ¼-inch-thick strips
1 Tbsp. dry sherry or Shaoxing wine
1 Tbsp. soy sauce
2 Tbsp. grapeseed or other neutral oil, plus more for grill grate
2½ Tbsp. cumin seeds
2½ tsp. fennel seeds
1½ tsp. sichuan peppercorns
2 tsp. red pepper flakes
Kosher salt
chili oil, to serve (optional)
Directions
In a medium bowl, combine the beef, sherry, soy sauce and oil. Let stand at room temperature while preparing the spice mix and the grill.
In a small skillet over medium-low, toast the cumin, fennel and Sichuan peppercorns until fragrant, about 2 minutes. Transfer to a spice grinder and add the pepper flakes. Process until coarsely ground, about 10 seconds. Transfer to a small bowl and stir in 1¾ teaspoons salt. Measure out 1 tablespoon of the mix and set aside to use as garnish.
Prepare a charcoal or gas grill for direct, high-heat cooking. For a charcoal grill, ignite a large chimney of coals and let burn until lightly ashed over, then distribute the coals evenly over one side of the grill bed; open the bottom grill vents and the lid vent. For a gas grill, turn all burners to high. Heat the grill, covered, for 10 to 15 minutes, then clean and oil the cooking grate.
While the grill heats, thread the beef onto ten 8- to 10-inch metal skewers, evenly dividing the meat and pushing the pieces together. Sprinkle the remaining spice mixture evenly over both sides of the meat, patting gently to adhere.
Grill until lightly charred, 2 to 3 minutes, then flip and grill until the second sides are lightly charred, another 2 minutes. Transfer to a serving platter, sprinkling both sides of the skewers with the reserved spice mix, then drizzle with chili oil (if using).
Zhoug, a spicy pesto-like condiment with a base of cilantro and often parsley, is popular throughout the Levant and Middle East regions. Its zip and pungency comes from fresh chilies, a small handful of spices and fresh garlic. Olive oil supplies fruity richness.
Milk Street claims zhoug is just the thing to add bold, bracing flavor to mild-tasting fillets of white fish. Readily available cod works well in this recipe, but snapper and tilapia are also good substitutes. Whichever you choose, for quick, even cooking, look for fillets no thicker than about 1 inch. Be sure to dry the fish well by patting it with paper towels, especially if it was previously frozen; removing excess moisture helps ensure they brown well in the pan.
Unable to source Serrano chiles, a jalapeño and a Fresno were substituted. Cod was the fish of choice because it was the most economical of the options—and we like it. To complete the meal, we made sides of steamed green beans lightly dressed in a flavored olive oil, salt and pepper; and whole wheat pearled couscous in homemade seafood stock (instead of water), then finished with sautéed shallot and minced parsley.
NOTE: Don’t leave the cilantro wet after rinsing. Be sure to dry it well so there’s no residual water to cause sogginess during processing. Also, don’t move the fish around once it’s in the skillet, and don’t worry if it releases a little a liquid during cooking. The skinless fillets are delicate, so minimal maneuvering is best to keep them intact, as well as for best browning.
4 cups lightly packed fresh cilantro leaves and tender stems (about 1 large bunch), roughly chopped
2 medium garlic cloves, smashed and peeled
2 serrano chilies, stemmed, halved and seeded
1½ tsp. ground coriander
½ tsp. ground cumin
¼ tsp. ground cardamom
Kosher salt and ground black pepper
¼ cup plus 2 Tbsp. extra-virgin olive oil, divided
4 6-oz. skinless cod, snapper or tilapia fillets, each about 1 inch thick, patted dry
Lemon wedges, to serve
Directions
In a food processor, combine the cilantro, garlic, chilies, coriander, cumin, cardamom, ½ teaspoon each salt and pepper. Process until roughly chopped, about 20 seconds.
Add the ¼ cup oil and process until smooth, about another 30 seconds. Transfer ¼ cup zhoug to a small bowl; set aside for serving.
Season the fish all over with salt and pepper, then brush the one side with half of the remaining zhoug. In a 12-inch nonstick skillet over medium-high, heat the remaining 2 tablespoons oil until shimmering.
Add the fillets zhoug-side down, brush the tops with the remaining zhoug and cook, undisturbed, until golden brown on the bottoms, 3 to 5 minutes.
Using a wide metal spatula, carefully flip the fillets. Cook until golden brown on the second sides and the fillets are opaque throughout, about 3 minutes. Using the spatula, transfer the fillets to a platter. Serve with the reserved zhoug and lemon wedges.