Monthly Archives: August 2017

Is It Soup, or Is It Chili? Whatever. Flavor It Your Way.

If there were an award for the most magical kitchen appliance, the slow-cooker would certainly be in running for first place. For this intensely flavorful Slow-Cooker Chicken Taco Soup, all you have to do is combine the main ingredients, turn it on, and voila! Taco soup. You can call this soup or you can call it chili, but either way it is wonderful! This recipe is also very adaptable to your personal taste so if an ingredient or two isn’t to your liking, adjust it, or simply omit it.

IMG_3665

Mid- to late-summer reigns supreme for fresh corn here in the Delaware Valley, so I was not about to use frozen. Plan on three to four ears, depending on the size of the cobs, to wield three or more cups worth. After husking, simply use a chef’s knife to slice off the kernels. I found that doing so over a rimmed half baking sheet prevents your prep area from turning into a war zone.

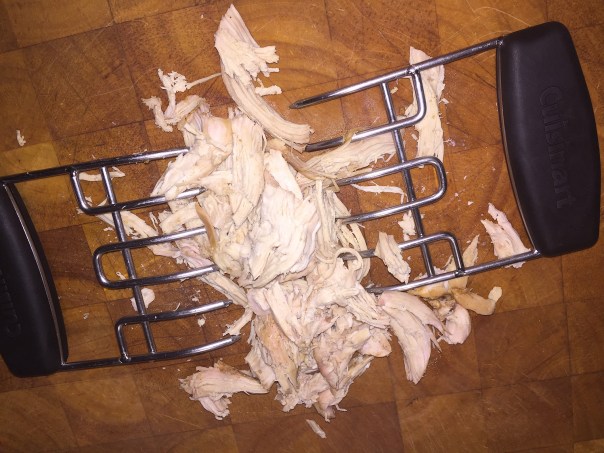
Tongs will give extra stability when you pull the hot chicken out of the soup. Once they’re on the cutting board, switch to two forks to shred into bite-sized pieces. Better yet, if you have meat claws, it’ll make quick work of the shredding process. And don’t sweat it if you don’t have black beans on hand, pintos would work well too.

In making this, I found out too late that I only had 1 tablespoon of the required chili powder. Since it was cold and rainy out I didn’t feel like schlepping back to the supermarket so I Googled a substitute. While there is more to the makeup of chili powder, you can get by with equal parts (1 teaspoon each) of cumin, cayenne pepper and paprika to equal 1 tablespoon of the spice.

When you’re ready to serve, top each bowl with a good quality aged cheddar cheese, it adds an unbelievable creaminess and blankets the dish with a soft subtly to the otherwise bold flavors. Finish off with additional toppings of sour cream (or in our case, crème fraîche), cilantro, and thinly sliced jalapeños.

While sour cream and crème fraîche are both used to add richness and tangy flavor, are they really just the same thing? Sour cream has a fat content of about 20% and may include ingredients like gelatin, rennin, and vegetable enzymes to stabilize it and make it thicker. Crème fraîche has a fat content of about 30% and does not contain any added thickeners, plus it is thicker, has a richer flavor, and is less tangy than sour cream.

If using in a salad or as a topping, they’re pretty much interchangeable and the choice is yours — some people like the tanginess of sour cream, while others like the richness of crème fraîche. So it’s totally up to you—or what happens to be in your fridge.

Russ adored this soup, and we were both glad there was plenty of leftovers for upcoming lunches…

IMG_3651

Ingredients

  • 6 cups chicken broth, preferably homemade
  • 4 boneless, skinless chicken breasts (about 2 lb.)
  • 2 15-oz. cans black beans, drained and rinsed
  • 1 15-oz. can diced fire-roasted tomatoes
  • 10 ounces frozen corn, or 3-4 ears of fresh corn
  • 1 red bell pepper, chopped
  • 1 yellow onion, chopped
  • 1 jalapeño, seeded and finely chopped, plus more sliced for serving
  • 2 tablespoons ground cumin
  • 2 tablespoons chili powder
  • 1 teaspoon kosher salt
  • ½ teaspoon black pepper
  • 3 tablespoons fresh lime juice (from 2 limes)
  • Shredded cheese, sour cream, and hot sauce, for serving
  • Cilantro, optional as a topper

Directions

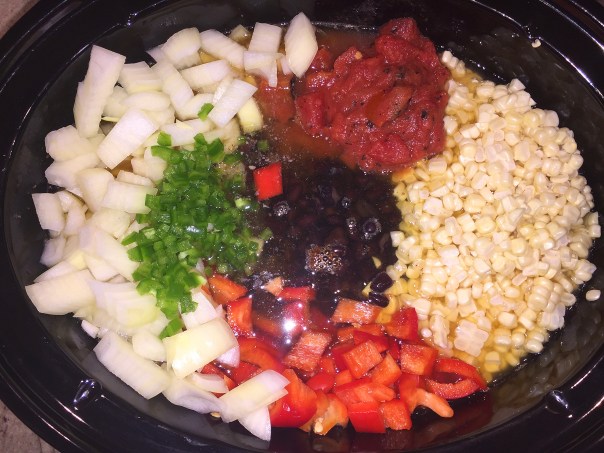
  1. Combine broth, chicken, beans, tomatoes, corn, bell pepper, onion, chopped jalapeño, cumin, chili powder, salt, and pepper in a 4- to 6-quart slow cooker.
    IMG_3652
    IMG_3654
  2. Cover and cook on low until chicken is very tender, 6 to 8 hours. Remove chicken and, using 2 forks, shred into bite-size pieces.
    IMG_3659
  3. Stir chicken and lime juice into soup and serve topped with cheese, sour cream, hot sauce, and sliced jalapeño.
    IMG_3660

IMG_3663

Adapted from a recipe by Paige Grandjean from Real Simple

“Cobb”le Together an Amazing Salad

There’s nothing wrong with a cold supper when it’s bursting with as much color and flavor as this composed Cobb-Style Salad with Roast Beef and Fresh Herb Dressing. While the ingredient list may look long, don’t despair, the prep is quite simple. And you can even buy hard-cooked eggs to save a step, but really, is making a few hard boiled eggs that much of a chore? I made mine the night before so I didn’t have to do any cooking at all.

IMG_3493

Some notable changes that I made were switching out the sour cream with a 1/2 cup of Greek yogurt; using Manchego cheese instead of Gruyère; and adding an outer row of shaved carrot slices for a bright pop of orange around the perimeter. And if you don’t eat red meat, you could always substitute turkey, ham or chicken—or just drop the meat component altogether.

This is quite a large salad, certainly more than enough for two people. Knowing that, I did not top it with dressing before plating our servings. This way the leftovers would keep better until the next day as lunch salads, when we dressed our portions just before consuming. Our combination of delicate herbs consisted of using three from our garden: basil, mint and parsley—very refreshing!

With a glass of chilled dry rosé, it was a perfect meal for a hot summer’s evening.

IMG_3504

Ingredients

  • 1/4 cup mayonnaise
  • 1/4 cup sour cream
  • 1 Tbs. fresh lemon juice
  • 1 Tbs. prepared horseradish
  • 1/4 cup coarsely chopped mixed fresh tender herbs, such as basil, parsley, dill, tarragon, chives, or mint
  • 1 Tbs. pure maple syrup
  • Kosher salt and freshly ground black pepper
  • 1 medium head escarole, trimmed and chopped into bite-size pieces (about 6 cups)
  • 1 Tbs. extra-virgin olive oil
  • 8 oz. roast beef, cut into 1/2-inch cubes (ask at the deli for the roast beef to be sliced 1/2 thick)
  • 1 cup cherry or grape tomatoes, halved or quartered
  • 3/4 cup blanched fresh peas or thawed frozen peas
  • 1/2 small sweet onion, cut into 1/2-inch dice
  • 4 oz. Emmentaler or Gruyère, cut into 1/2-inch cubes
  • 3 oz. crumbled mild blue cheese, such as Gorgonzola or Danish blue
  • 2 hard-cooked eggs, sliced
  • 1 avocado, cut into 1/2-inch cubes

Directions

  • Combine the mayonnaise, sour cream, lemon juice, horseradish, herbs, maple syrup, 1/4 tsp. salt, and 1/4 tsp. pepper in a blender, and blend until smooth. Season to taste with salt and pepper.
    IMG_3492
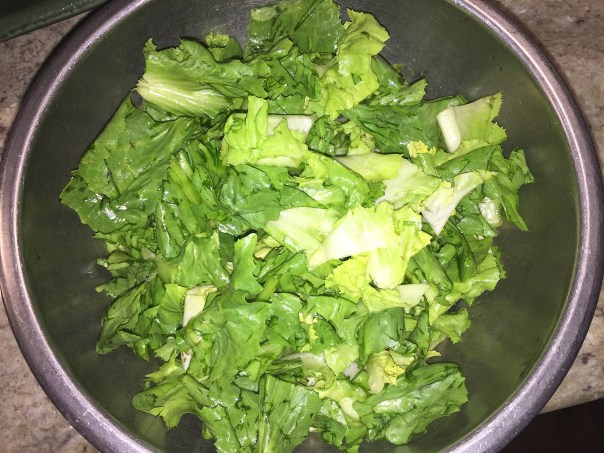
  • In a large bowl, toss the escarole with the oil, 1/4 tsp. salt, and 1/4 tsp. pepper. arrange the escarole on a platter or plates.
    IMG_3491
  • Top with the beef, tomatoes, peas, onion, cheeses, eggs, and avocado.
    IMG_3500
  • Drizzle with a little of the dressing, and serve with the remaining dressing on the side.

By Ronne Day

Bibimbap Bake-up

The versatile casserole is akin to the minivan of dinner options. Practical? You bet. But when it comes to style points, it usually doesn’t float to the top. Here’s a casserole recipe that alters an ancient Korean dish, Bibimbap, with punchy flavors, global inspiration, and plucked-from-the-garden goodness into 13×9 new territory. This one pan Asian dish of rice and vegetables gets a family-style riff.

Here you stretch a relatively small amount of protein per person with on-hand staples. Garlic and ginger give tofu, beef and eggs, big, bold flavor, especially with a Sriracha or kimchi topping. You can change things up to utilize any veggies in your fridge; for instance, instead of broccoli, use spinach, kale or Swiss chard.

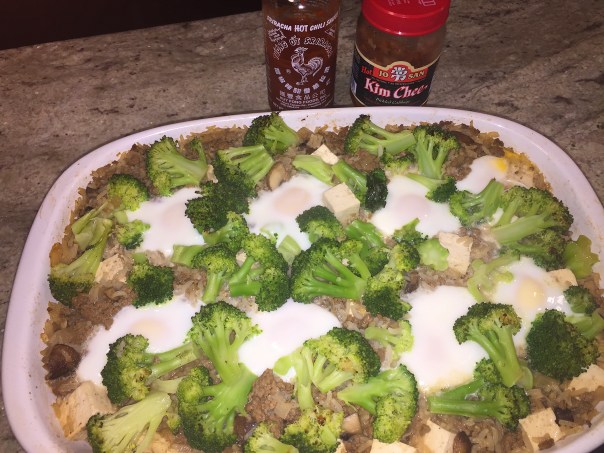
Based on our first experience with this recipe, there are a few changes we will make next time around. First is, we would cut the tofu cubes in half to about 3/8″ instead of 3/4,” (we used the entire package.) And traditionally, the egg yolks should be slightly soft, not completely set like ours ended up being. So if you prefer them a bit gooey, you may want to add them to the casserole half way through the cooking process, at about 10 minutes into it.

IMG_3207

For toppings we did add the sliced scallions and put out both the kimchi and Sriracha which added a nice kick to the meal.

The history of Bibimbap: The name bibimbap was adopted in the early 20th century. From the Joseon Period (1392–16th century) until the 20th century, Bibimbap was called goldongban, which means rice made by mixing various types of food. This dish was traditionally eaten on the eve of the lunar new year as the people at that time felt that they had to get rid of all of the leftover side dishes before the new year. The solution to this problem was to put all of the leftovers in a bowl of rice and to mix them together. Bibimbap is also thought to have been eaten by farmers during farming season as it was the easiest way to make food for a large amount of people. Bibimbap was served to the king usually as a lunch or a between-meal snack.

IMG_3194

Ingredients

  • 2 cups broccoli florets
  • 2 Tbsp. vegetable oil
  • 8 oz. cremini or button mushrooms, sliced (3 cups)
  • 1 lg. onion, chopped (1 cup)
  • 3 Tbsp. peeled and minced fresh ginger
  • 6 cloves garlic, minced
  • 2 lbs. 90 percent lean ground beef
  • 1 14.5 oz. can beef broth
  • 1/4 cup soy sauce
  • 1 tsp. toasted sesame oil
  • 3 cups cooked rice
  • 1/2 14-0z. pkg. extra-firm tofu, drained and cut into 3/4″ cubes (we used the entire package)
  • 8 eggs
  • 5 green onions, thinly sliced
  • Kimchi and/or Sriracha sauce (optional)

Directions

  1. Preheat oven to 450F.
  2. Steam broccoli in a steamer basket 2 minutes. Remove, rinse with cold water; set aside.
    IMG_3196
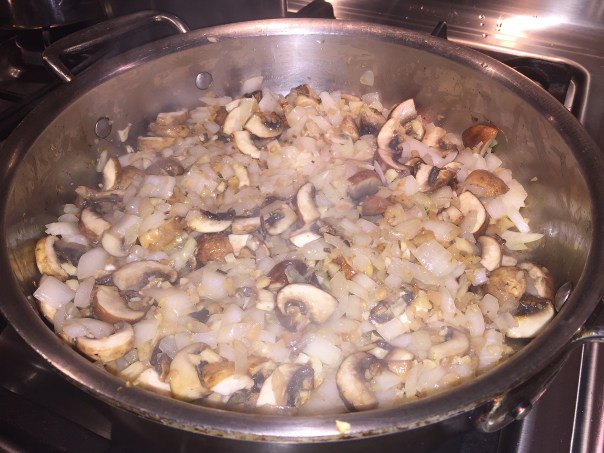
  3. In a 14″ skillet, heat oil over medium-high heat. Add mushrooms, onion, garlic and ginger. Cook and stir 4-5 minutes or until mushrooms start to brown.
  4. Add beef. Cook until browned, stirring to break up meat.
    IMG_3199
  5. Add broth, soy sauce and sesame oil. Stir in rice. Gently fold in tofu.
    IMG_3200
  6. Transfer mixture to a 13×9″ baking dish. Top with broccoli.
    IMG_3203
  7. Make 8 small indentations in mixture, crack and egg into each. Sprinkle eggs with salt and pepper.
  8. Cover with foil. Bake 20 minutes or until heated through and eggs are just set. Remove from oven.
    IMG_3205
  9. Loosen foil; let stand about 20 minutes before serving. Top with green onion slices. Serve with kimchi and/or Sriracha.
    IMG_3210
    IMG_3212

Recipe found in Better Homes & Gardens by Lucinda Scala Quinn

Cumin-Orange-Honey Marinade

This Spanish-inspired marinade has a sweet, spicy, smoky flavor that works well with not only pork but a wide range of meats and vegetables, so feel free to experiment.

IMG_3297

Whether you’re cooking boneless or bone-in pork chops, whether you’re grilling, sautéing, roasting, broiling, or pan-frying, the rule for pork chops is to cook them to an internal temperature of 145°—which yields moist, juicy, and slightly-pink-in-the-middle pork. So be attentive and don’t overcook them and dry the chops out.

The directions indicate you should toss the extra marinade, but with flavors that exciting, we decided to bring it to a boil in a small sauce pan for 5 minutes, reduce it down, and serve as a sauce for the pork.

IMG_3257

Ingredients

  • 3 large cloves garlic
  • Kosher salt
  • 1/3 cup fresh orange juice from 1 1/2 large oranges
  • 1/3 cup sherry vinegar
  • 1/4 cup honey
  • 3 Tbs. olive oil
  • 1 Tbs. ground cumin
  • 1 tsp. smoked paprika
  • 1/2 tsp. ground coriander
  • Pinch cayenne
  • 4 thick, bone-in, pork chops
  • Thinly sliced chives, for garnish

Directions

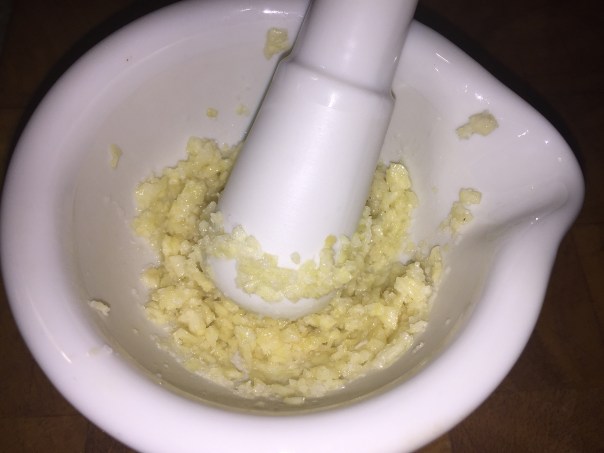
  • Finely chop the garlic. Sprinkle with 1 tsp. salt, and then smear and mash to a paste using the flat side of a chef’s knife, or a small mortar and pestle.
  • IMG_3260
    IMG_3261
  • Whisk the garlic paste with the orange juice, vinegar, honey, olive oil, cumin, paprika, coriander, and cayenne.
    IMG_3263
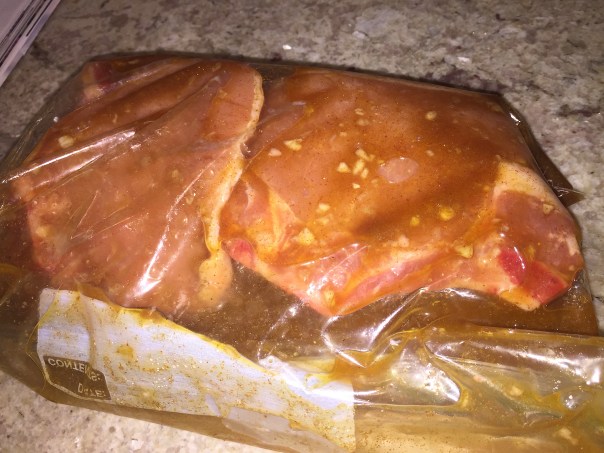
  • Put the chops in a nonreactive (stainless steel, glass, or plastic) container and pour the marinade over them, turning to coat on all sides. Marinate the pork for at least 1 hour at room temperature. Or if you plan to marinate up to 24 hours, put meat in a ziploc and refrigerate until ready to cook.
    IMG_3266
  • When ready to grill, heat a gas or charcoal grill to medium-high heat (400°F to 475°F).
    IMG_3291
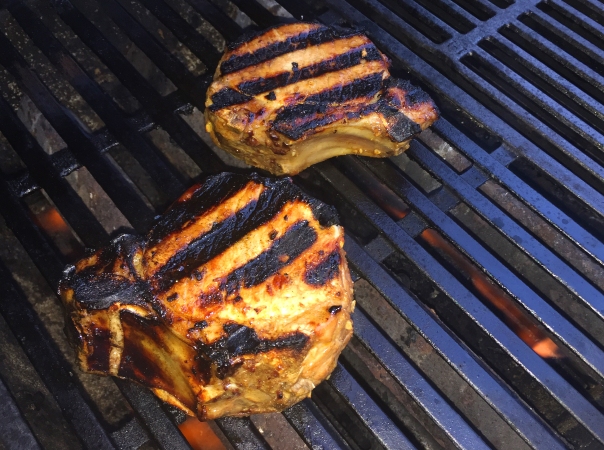
  • Remove the chops from the marinade, shaking off the excess. Grill the pork, turning once, until cooked through, about 10 minutes total over direct heat until the center registers 145 degrees with a digital meat thermometer. If the chops starting getting too charred and they are not yet done, move them over to the indirect heat side of the grill for a couple of more minutes.
    IMG_3293
  • Tent with foil for 5-10 to allow juices to redistribute. Season with more salt to taste, and garnish with the chives before serving.

IMG_3298

Adapted from a Fine Cooking recipe by Joanne Smart


Sufferin’ Succotash No More

If it’s been a while since you’ve had succotash, give this Grilled Vegetable Succotash recipe by Liz Pearson a try. You may harbor some scarred childhood memories of the frozen stuff with mushy lima beans, but believe me, this version will alter your opinion in a good way. The sweet and smoky grilled green beans (yes, you can grill them!) stand in for lima beans in this update—and ours were fresh picked off the vines in our raised garden bed.

IMG_3127

And this time of year is also ripe for fresh corn on the cob and tomatoes which we bought at our local farm stand. Edible at room temperature, this dish is perfect for an outside picnic or potluck.

Besides being straight up delicious, flat-iron steak is nearly as tender as filet mignon, it cooks quickly, and it’s an affordable cut. Smoking steaks can lend them complexity, but most recipes overwhelm the meat’s delicate flavor with too much smoke. We found that the key to Grill-Smoked Herb-Rubbed Flat-Iron Steaks was using a small amount of wood chips and cooking the steaks quickly over direct heat so that they were just kissed with smoke.

IMG_3133

Since wood chips pack differently, we weighed the chips for more control over the smoke quantity. Salting the steaks for an hour before cooking ensured that the seasoning penetrated below the meat’s surface, and coating them with an herb-spice rub lent an extra layer of flavor that complemented the smoke. We also grilled lemons to serve with the steaks for a hit of brightness.

As mentioned, this recipe requires rubbing the steaks with salt and letting them sit at room temperature for one hour before cooking. (You can substitute blade steaks for the flat-iron steaks, if desired.) For us, medium-rare, about 125 degrees, is the only way to go, and so 4 minutes per side was perfect. We like hickory chips in this recipe, but other kinds of wood chips will work just as well.

NOTE: Gas grills (which is what we used) are not as efficient at smoking meat as charcoal grills, so we recommend using 1 1/2 cups of wood chips if using a gas grill.

Succotash Ingredients

  • 1-1/2 Tbs. extra-virgin olive oil
  • Kosher salt and freshly ground black pepper
  • 1/2 lb. green beans, trimmed
  • 6 scallions, trimmed
  • 4 medium ears corn, shucked
  • 2 large firm-ripe tomatoes, halved crosswise
  • 1/4 cup chopped fresh flat-leaf parsley
  • 2 Tbs. fresh lime juice
  • 1 Tbs. heavy cream

Directions

  • Brush the green beans, scallions, corn, and tomatoes all over with 1-1/2 Tbs. oil and season with 1-1/2 tsp. salt and 1/2 tsp. pepper.
    IMG_3111
  • Grill the vegetables, turning occasionally, until softened and lightly charred, 1 to 2 minutes for the scallions; 3 to 5 minutes for the beans; 4 to 6 minutes for the tomatoes; and 8 to 10 minutes for the corn. Transfer to a platter as they finish and set aside.
    IMG_3113
    IMG_3115
  • Slide the skins off the tomatoes. Seed and chop the tomatoes; transfer to a large bowl.
  • Cut the corn kernels from the cobs and add to the bowl with the tomatoes. Working over the bowl, scrape the dull side of a table knife down the length of each cob to remove as much of the corn “milk” as possible; discard the cobs.
    IMG_3124
  • Roughly chop the green beans and scallions and add to the bowl along with the parsley, lime juice, and cream. Toss well and season to taste with salt and pepper.
    IMG_3126

Ingredients for the Grill-Smoked Steak

  • 2 teaspoons dried thyme
  • 1 teaspoon dried rosemary
  • ¾ teaspoon fennel seeds
  • ½ teaspoon black peppercorns
  • ¼ teaspoon red pepper flakes
  • 4 (6- to 8-ounce) flat-iron steaks, 3/4 to 1 inch thick, trimmed
  • 1 tablespoon kosher salt
  • 1—1 ½ cups (2 1/2—3 3/4 ounces) wood chips
  • Vegetable oil spray
  • 2 lemons, quartered lengthwise

Directions

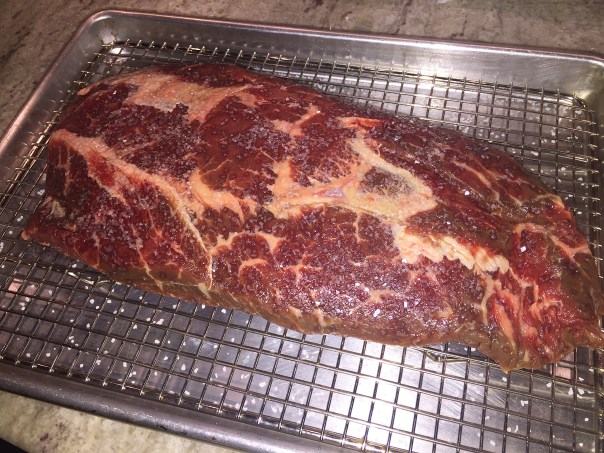
  1. Grind thyme, rosemary, fennel seeds, peppercorns, and pepper flakes in spice grinder or with mortar and pestle until coarsely ground. Transfer to small bowl. Pat steaks dry with paper towels. Rub steaks evenly on both sides with salt and place on wire rack set in rimmed baking sheet. Let stand at room temperature for 1 hour. (After 30 minutes, prepare grill.)
    IMG_3107
  2. Using large piece of heavy-duty aluminum foil, wrap wood chips (1 cup if using charcoal; 1 1/2 cups if using gas) in 8 by 4 1/2-inch foil packet. (Make sure chips do not poke holes in sides or bottom of packet.) Cut 2 evenly spaced 2-inch slits in top of packet.
    IMG_3109
  3. FOR A CHARCOAL GRILL: Open bottom vent completely. Light large chimney starter filled with charcoal briquettes (6 quarts). When top coals are partially covered with ash, pour evenly over half of grill. Place wood chip packet on coals. Set cooking grate in place, cover, and open lid vent completely. Heat grill until hot and wood chips are smoking, about 5 minutes.
    FOR A GAS GRILL: Remove cooking grate and place wood chip packet directly on primary burner. Set grate in place, turn all burners to high, cover, and heat grill until hot and wood chips are smoking, about 15 minutes. Leave primary burner on high and turn other burner(s) to medium.
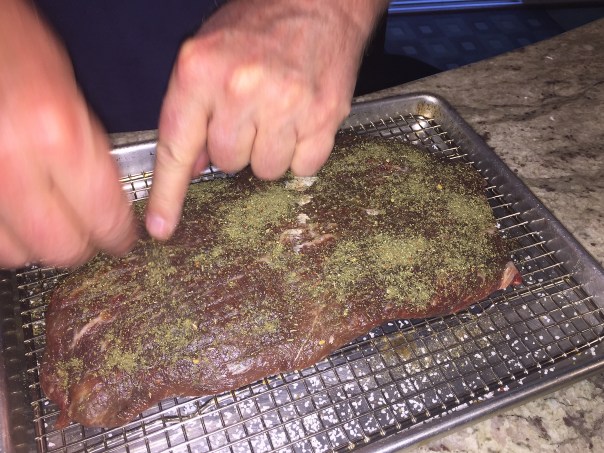
  4. Clean and oil cooking grate. Sprinkle half of herb rub evenly over 1 side of steaks and press to adhere. Lightly spray herb-rubbed side of steaks with oil spray, about 3 seconds. Flip steaks and repeat process of sprinkling and pressing steaks with remaining herb rub and coating with oil spray on second side.
    IMG_3120
    IMG_3122
  5. Place lemons and steaks on hotter side of grill, cover (position lid vent over steaks if using charcoal), and cook until lemons and steaks are well browned on both sides and meat registers 125 degrees (for medium-rare), 4 to 6 minutes per side. (If steaks are fully charred before reaching desired temperature, move to cooler side of grill, cover, and continue to cook.)
    IMG_3134.jpg
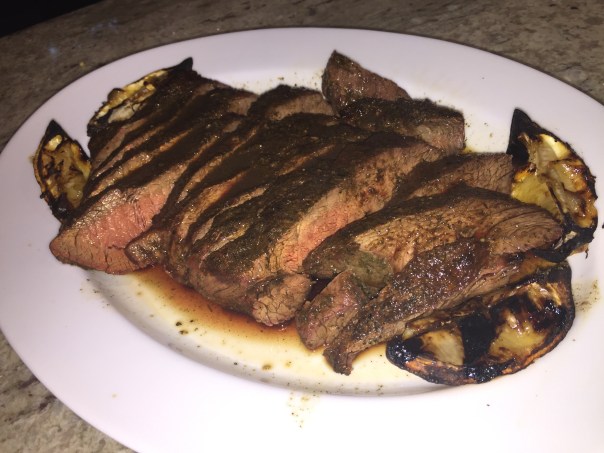
  6. Transfer lemons and steaks to clean wire rack set in rimmed baking sheet, tent with foil, and let rest for 10 minutes. Slice steaks thin against grain and serve, passing lemons separately.

Acqua Pazza (Fish in Crazy Water)

One go-to option when researching dinner menus for the week, is our subscription to the “Make-It-Tonight” series from Fine Cooking. As often as possible I try to include at least one fish/seafood meal, so this Acqua Pazza recipe caught my eye. And as soon as I read the list of ingredients, it definitely made the list.

IMG_3472

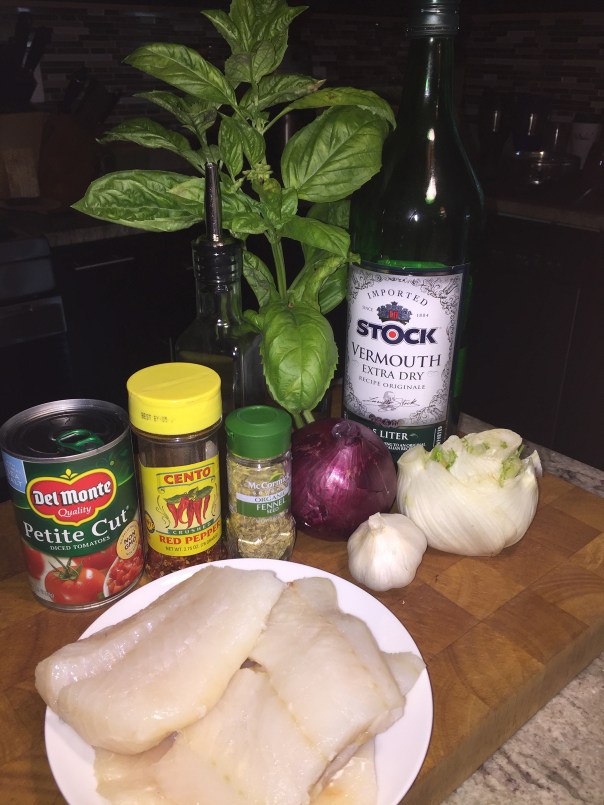
In this Italian dish, fish is gently poached in “crazy water” flavored with fennel, garlic, and tomato. Any firm, flaky white fish, such as cod or red snapper fillets will do. As aficionados of bold flavors, I amped up the red pepper flakes but you can always soften the flavor profile by adding a reduced quantity.

While I know some folks who just can’t STAND the licorice taste of fennel (Dee, I’m thinking of you), hubby and I adore it. Not having ground fennel on hand for the rub, I put fennel seeds in my spice grinder and made the powder myself. That, with a thinly sliced fennel bulb, if your not partial to that particular essence, this dish is definitely not for you.

With only 10 simple ingredients, easy prep and short cooking times, this makes for a perfect healthy weeknight meal. If your not adverse to carbs, serve with a loaf of ciabatta to mop up the flavorful “crazy water.”

IMG_3453

Ingredients

  • 1-1/2 lb. skinless firm white fish fillets, cut into 4 pieces
  • 1-1/2 tsp. ground fennel
  • Kosher salt
  • 3 Tbs. extra-virgin olive oil; more as needed
  • 4 cloves garlic, thinly sliced
  • 1/4 to 1/2 tsp. crushed red pepper flakes
  • 1 medium red onion, halved and thinly sliced lengthwise
  • 1 small fennel bulb, trimmed, halved, cored, and very thinly sliced crosswise
  • 1 14- to 15-oz. can diced tomatoes, drained
  • 1 cup good-quality dry vermouth
  • 1/2 cup chopped fresh basil

Directions

  • Coat the fish with the ground fennel and season liberally with salt.
    IMG_3454
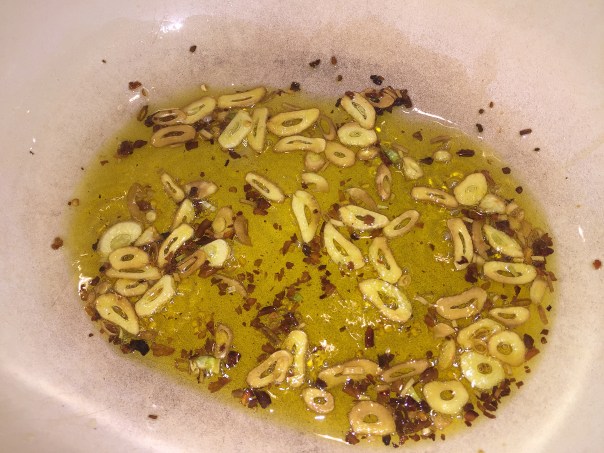
  • Combine the oil, garlic, and pepper flakes in a heavy-duty 5- to 6-quart heavy-duty pot set over medium-high heat and cook, stirring frequently, until the garlic begins to turn golden, about 2 minutes.
    IMG_3461
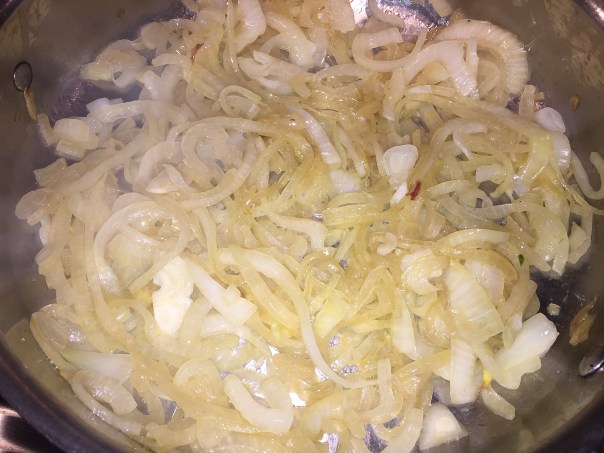
  • Add the onion, sliced fennel, and 1/2 tsp. salt; cook, stirring occasionally, until the vegetables soften, 4 to 7 minutes.
    IMG_3456
    IMG_3463
  • Add the tomatoes, vermouth, and 2 cups of water and bring to a simmer. Reduce the heat to medium low and simmer until the flavors have blended, 4 to 6 minutes. Season to taste with salt.
    IMG_3464
  • Nestle the fish in a single layer in the broth, cover the pot, and cook until the fish is opaque and just beginning to flake, 5 to 8 minutes.
    IMG_3465
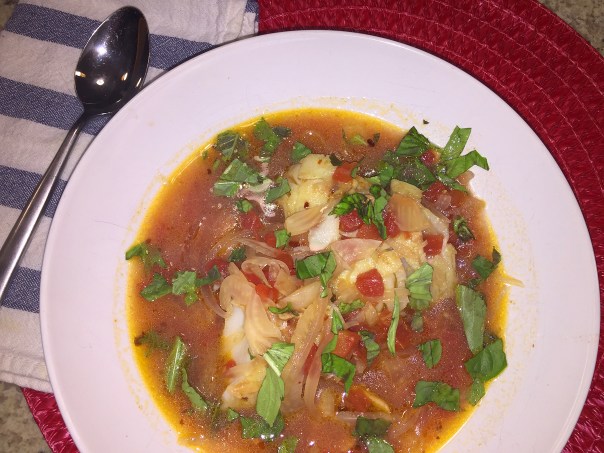
  • Divide the fish and vegetables among 4 wide shallow bowls, spoon the broth around it, and top with the basil.

IMG_3469By Matthew Card from Fine Cooking

Celebrating Summer’s Bounty

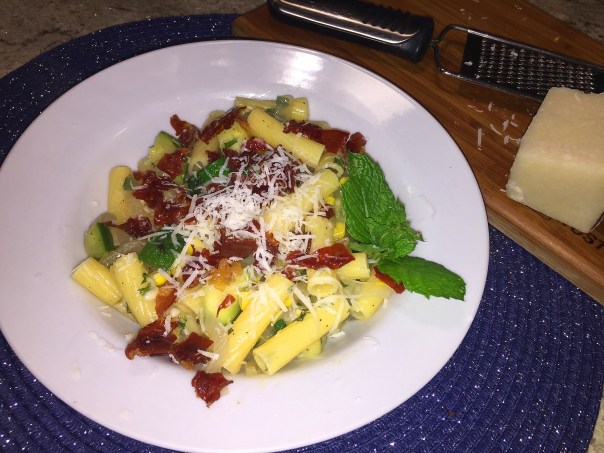
Summer’s bounty is in full regalia right now so make the best of it with home cooked meals that highlight the plentiful produce. It doesn’t matter if you prefer white, yellow, or sugar and butter corn, as long as it’s recently harvested from the stalk, it will contribute it’s natural sweetness to this Penne with Crisp Prosciutto, Zucchini and Corn dish.

And zucchini—well zucchini is well known to reduce weight, yet still boost the nutrient value of your diet. Even though it is technically a fruit, it is usually cooked as a vegetable because it is best when eaten in cooked dishes. A fully developed zucchini is about three feet long, but they are often much too fibrous and not good for eating. Young zucchini have a subtle taste, soft covering, and buttery white flesh. Almost all the parts of this squash are edible, including the flesh, seeds and even the skin.

IMG_3487

Sautéing the prosciutto in a skillet crisps and intensifies its texture and flavor so it becomes like a refined version of bacon. Instead of overpowering the dish, the prosciutto complements the sweetness of the corn, brightness of the mint, and delicate flavor of the zucchini. As a topping, it adds a pleasant crunch to the otherwise soft textures of the pasta and vegetables.

Other than our box of gluten-free pasta at 8.8 ounces, I was definitely heavy handed when measuring the ingredients. After slicing, our onion was more like 2 cups worth and the grated pecorino romano closer to 1 cup. Rounding out the meal was our Arugula Peach Salad; where the sweetness of juicy peaches, another summer staple, pairs well with the peppery greens.

IMG_3473

Ingredients

  • Kosher salt
  • 5 Tbs. olive oil
  • 8 thin slices prosciutto (about 4 oz.), cut into strips
  • 1 medium yellow onion, thinly sliced (1 cup)
  • 2 small zucchini (about 3/4 lb.), trimmed, quartered lengthwise, and cut into 1-1/2-inch pieces
  • 2 ears corn, shucked and kernels sliced off (about 1 cup), or 1 cup frozen corn kernels, thawed
  • 1/2 cup freshly grated Pecorino-Romano
  • 3 Tbs. chopped fresh mint
  • 1 lb. penne
  • 2 tsp. sherry vinegar or cider vinegar
  • Freshly ground black pepper

Directions

  • Bring a large pot of well-salted water to a boil. Meanwhile, put 2 Tbs. oil and the prosciutto in a large (12-inch) skillet, place over medium heat, and cook, stirring occasionally, until the prosciutto browns in places and becomes crisp, about 5 minutes. Transfer the prosciutto to a large plate lined with paper towels.
    IMG_3476
    IMG_3478
  • Add 1 Tbs. oil and the onion to the skillet, sprinkle with 1/2 tsp. salt, and cook, stirring occasionally, until the onion softens completely and turns light brown, about 6 minutes; add 1 or 2 Tbs. water to the skillet if the onion starts to stick or burn.
    IMG_3479
  • Add the zucchini and corn, sprinkle with 1/4 tsp. salt, and cook, tossing occasionally, until the zucchini becomes tender, 4 to 5 minutes.IMG_3481
  • Remove from the heat and stir in half the Pecorino-Romano and all the mint.
    IMG_3482
  • Add the penne to the pot of boiling water and cook according to the package directions. Reserve 1/2 cup of the pasta water and then drain the pasta.
  • Add the pasta, the remaining 2 Tbs. oil, the vinegar, and 1 tsp. black pepper to the skillet with the zucchini and corn mixture.
  • Set the skillet over medium heat and cook, stirring, for 1 minute so the pasta mixes with the vegetables. Add the reserved pasta water and stir.
    IMG_3484
  • Serve sprinkled with the crisp prosciutto and the remaining Pecorino-Romano.

By Tony Rosenfeld from Fine Cooking

Arugula Peach Salad

IMG_3488

Ingredients

  • 4 tsp. extra-virgin olive oil
  • 1 Tbs. balsamic vinegar, preferably white
  • 1/4 tsp. Dijon mustard
  • 2 large ripe peaches, pitted and cut into wedges
  • 4 oz. baby arugula (about 4 cups)
  • 1/2 small red onion, very thinly sliced

Directions

  1. In a medium bowl, whisk together 4 tsp. of the oil, the vinegar, and mustard. Season to taste with salt and pepper. Add the peaches and toss gently.
  2. Add the arugula and onion to the peaches and toss well.

Salad by Laraine Perri 

A Walkaway Wonder

Chimichurri is an uncooked sauce used for grilled meat; it comes in a green version (chimichurri verde) and a red version (chimichurri rojo) and seems to come from Argentinian cuisine. It is made of finely-chopped parsley, minced garlic, vegetable oil, oregano, and white vinegar. In Uruguay, the dominant flavoring is parsley, garlic, red pepper flakes, and fresh oregano.

This Chimichurri Roast Chicken is a slight riff on the traditional in that it uses red wine vinegar instead of white, and incorporates both parsley and oregano. It can really be made with any combination of herbs you have on hand and spiced with chilies for an added kick. We’ve made numerous variants over the years, and never cease to be amazed at how it enhances meat, fish and vegetables.

IMG_3252

This herb-flecked chicken is a walkaway dish; once you stick it in the oven, it’s
completely hands off. There’s no fussy finish to worry about. Just take it out and
serve with your favorite sides. So it was a perfect recipe for the very rainy day we were experiencing when using the outside grill was not a preferred option.

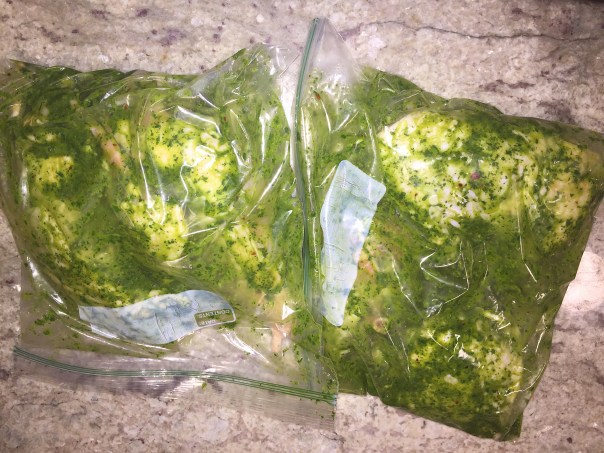
My preferences run toward the white meat, so I cooked a mix of chicken breasts and thighs and did not include any legs. The choice is totally up to you. I made the chimichurri about 7 hours prior to dinner, so instead of marinating the meat in a baking dish, I put the breasts in one ziploc and the thighs in another, both with the marinade, and refrigerated them until just before starting to cook.

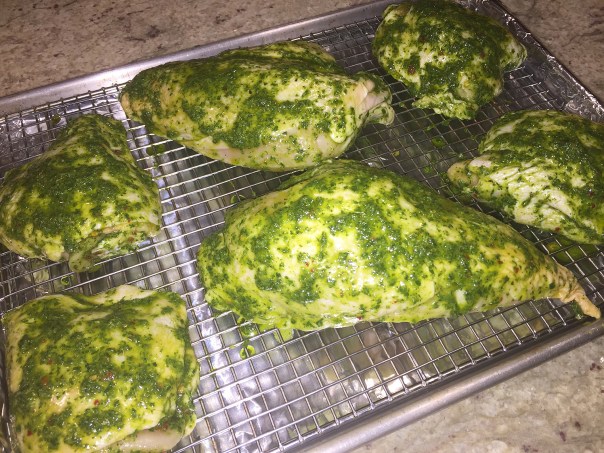
Due to the large size of my chicken breasts, they took an additional 10 minutes in the oven after the thighs came to temp. If you use smaller breasts and/or legs, you likely won’t have to deal with two cooking times. The high oven temperature and the oil in the marinade resulted in super-crispy and flavorful skin with juicy meat interiors—not a recipe you’ll want to walkway from completely, for it’s a keeper!

IMG_3239

Ingredients

  • 2 packed cups fresh flat-leaf parsley leaves
  • 1 cup extra-virgin olive oil
  • 1/4 cup red-wine vinegar
  • 4-6 cloves garlic, smashed and peeled
  • 2 Tbs. fresh oregano leaves
  • 1/2 tsp. crushed red pepper flakes
  • Kosher salt and freshly ground black pepper
  • 3-4 lbs. bone-in chicken thighs or drumsticks, or a mix of both

Directions

  1. Put the parsley, oil, vinegar, garlic, oregano, pepper flakes, 1 tsp. salt, and 1/4 tsp. black pepper in a blender, and purée until smooth. Reserve half for serving. (the sauce will keep up to one week covered and refrigerated.)
    IMG_3242
  2. Put the chicken in a 9×13-inch baking dish, and season all over with 1 tsp. salt. Pour the remaining half of the chimichurri over the chicken and turn to coat the chicken with it. Cover and let sit for 30 minutes at room temperature or refrigerate for up to 24 hours.
    IMG_3243
  3. Position a rack in the center of the oven and heat to 450°F. Line a large rimmed baking sheet with aluminum foil and position a wire rack over the baking sheet.
    IMG_3245
  4. Place the chicken skin side up on the wire rack (discard the remaining chimichurri in the baking dish). Roast until golden brown and cooked through (165°F), rotating the baking sheet halfway through roasting so that the chicken browns evenly, 35 to 45 minutes total. Serve with some of the reserved chimichurri.
    IMG_3252

IMG_3255


A Little Slice of Heaven

Tomato and Roasted Garlic Pie.  Amen.
IMG_3361

If you haven’t used Taleggio before, well what are you waiting for? Now is the perfect time to try it. Don’t be put off by the smell; this cheese has a very mild flavor and is an ideal complement to fresh tomatoes. Never having even heard of the cheese before, I was surprised at the consistency which is very soft and similar to Brie. The directions indicate to coarsely grate the cheese (which I deleted), but I can tell you, there’s no way in the world one can grate Taleggio!

IMG_3344
This is the block of Taleggio cheese as I unwrapped it. Can you imagine trying to grate it?

Once the rind is removed—no easy task—just add the cheese to the bowl with the mayo and parm and it’ll all mix together just fine. As far as the star of the show, the tomatoes, I suggest cobbling together a combo of different color and sizes of the heirloom variety to end up with a show stopper.

IMG_3329

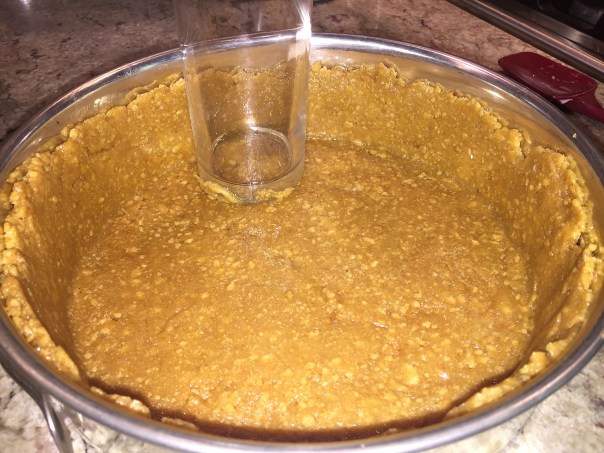
You will need a 9″ spring form pan for this recipe. When pressing the crumb mixture around the spring form pan, I used a straight drinking glass to press the crust into a uniform thickness along the bottom and sides. In the end however, the corners where the sides met the bottom were too thick and I’ll have to be a little more diligent the next time around—and of course there definitely will be, in the near future!

IMG_3347

Because the grocery store was oddly enough not carrying the Red Oval Farms brand of wheat crackers that I prefer, I picked up some Wheat Thins brand which have a slightly sweeter taste. For pie number 2, I will make sure to get the preferred brand.

stoned.wheat.thinss

This is not one of those quick throw together dishes and out the house you go. Plan on around two hours to make, and at least one hour to cool before serving. But once you have a slice of this celestial beauty, you’ll be hearing the angels sing, and praising the Lord for good tomatoes. How divine!

Ingredients

  • 2½ pounds mixed heirloom tomatoes, cored, sliced ¼-inch thick
  • 3 tablespoons olive oil
  • ¾ teaspoon kosher salt, divided, plus more
  • ¼ teaspoon freshly ground black pepper, plus more
  • 6 garlic cloves
  • ½ cup (1 stick) unsalted butter
  • 9 ounces Stoned Wheat Thins or other whole grain crackers
  • 2 large eggs
  • 10 ounces Taleggio cheese, rind removed (about 1½ cups)
  • 2½ ounces finely crumbled Parmesan (about ½ cup)
  • ½ cup mayonnaise
  • 1 tablespoon chopped thyme, plus ½ teaspoon leaves
  • 1 small shallot, thinly sliced

Directions

  1. Place a rack in middle of oven; preheat to 475°. Arrange tomatoes on a rimmed baking sheet, covering entire surface (it’s okay if they overlap). Drizzle with oil; season with salt and pepper. Roast until tomatoes begin to look dry on top, 25–30 minutes. Let cool.
    IMG_3335
    IMG_3341
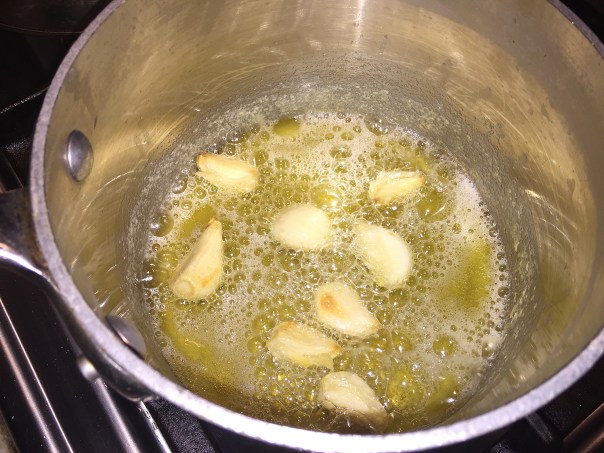
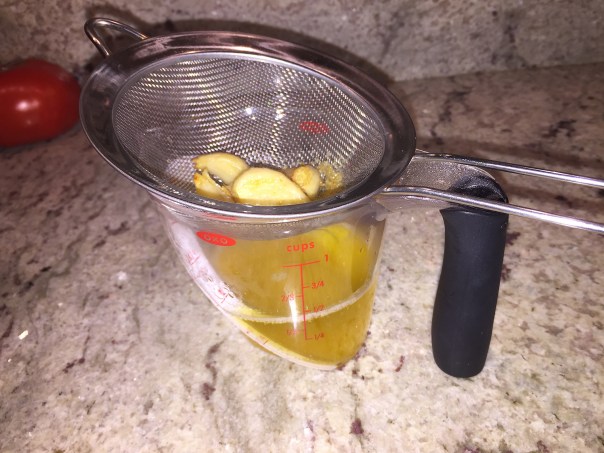
  2. Meanwhile, cook garlic and butter in a small saucepan over medium-low heat, swirling often, until butter foams and milk solids turn golden, 5–8 minutes. Strain through a fine-mesh sieve into a heatproof measuring cup; transfer garlic and toasty bits to a cutting board. Finely chop and set aside.
    IMG_3338
    IMG_3339
  3. Reduce oven temperature to 375°. Pulse crackers and ¼ tsp. salt in a food processor until fine crumbs form (you should have about 2 cups). Add eggs and 6 Tbsp. garlic butter and pulse until mixture is the consistency of wet sand. Transfer to springform pan. Using a flat-sided measuring cup, press crumbs firmly onto bottom and 1½” up sides of pan. Adjust the top edges so that it is not ragged and is consistent all the way around.
  4. Bake crust until fragrant and edge is just starting to take on color, 8–10 minutes. Transfer pan to a wire rack and let crust cool.
    IMG_3352
  5. Mix Taleggio, Parmesan, mayonnaise, chopped thyme, remaining ½ tsp. salt, remaining ¼ tsp. pepper, and reserved chopped garlic in a medium bowl. Gently dollop half of cheese mixture over bottom of crust, then spread into an even layer with an offset spatula (don’t press too hard or you will break the crust).
    IMG_3350
    IMG_3353
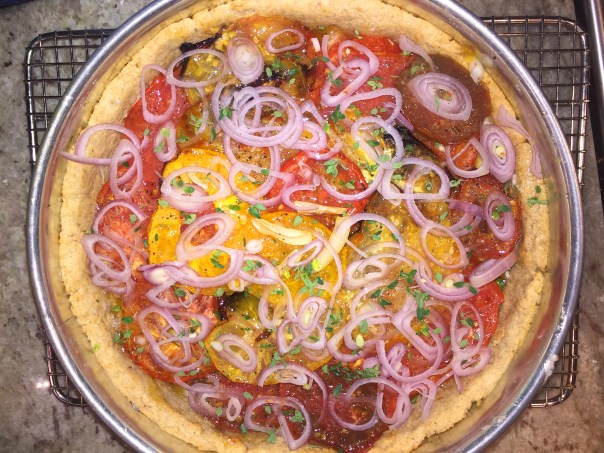
  6. Layer half of tomato slices over and press down to even out layers. Repeat with remaining cheese mixture and tomatoes. Brush remaining garlic butter over tomatoes. Top with shallot, then scatter thyme leaves over.
    IMG_3354
    IMG_3356
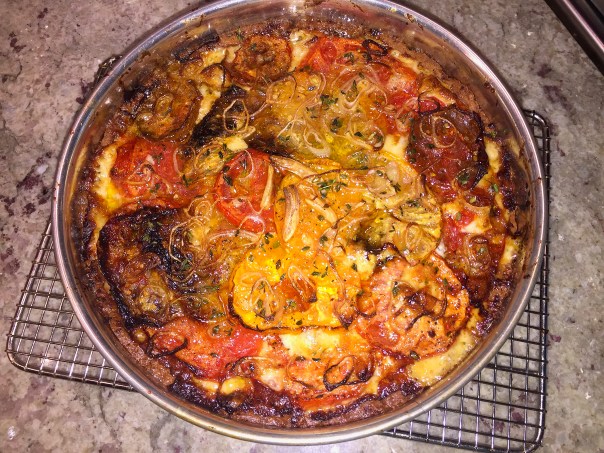
  7. Bake pie until filling bubbles vigorously and crust is browned, 60–75 minutes. (Mine took 65 minutes.) Let cool at least 1 hour before serving.
    IMG_3358
  8. Slide sharp knife between edge of crust and pie pan before removing the outer jacket.

Do Ahead: Pie can be made 1 day ahead. Cover loosely and chill (it’s really good cold).

IMG_3361

Recipe by Rick Martinez from Bon Appétit

Whacka Steak

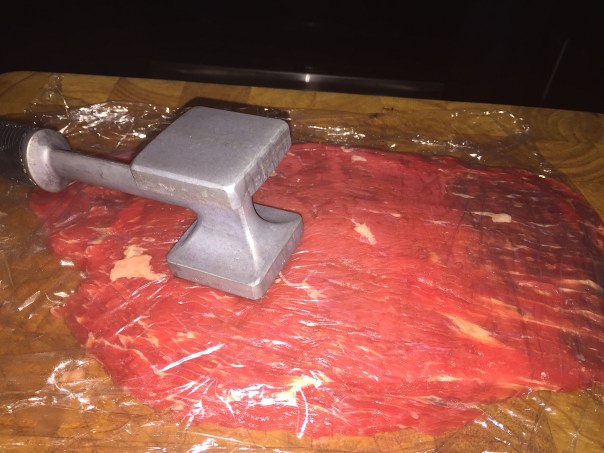
What if you could go grocery shopping without a mile-long list? Because you have plenty of other things you’d rather do then spend lots of time cooking, or food shopping, this fresh, summery Pounded Flank Steak with Zucchini Salsa comes together in a snap. Channel your inner action hero because a little meat-mallet whacking transforms this tough cut of beef into a quick-grilling all-star.

The good news is that this time of year when it’s too dang hot to even look at your oven, it’s also the time of year when most produce is at its plumpest, juiciest, freshest, and downright best. And lord knows, there are plenty of zucchini squash and tomatoes available.

IMG_3271

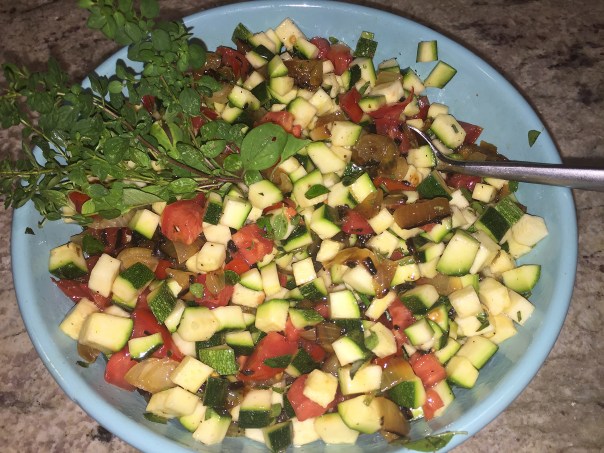
Truth be told, this zucchini salsa with its original list of ingredients, seemed somewhat one-dimensional, and we prefer bolder flavors. In order to kick it up a notch, I added a diced large ripe beefsteak tomato and some chopped up leftover grilled onions. Now that did the trick! With just the two of us eating, we did have leftovers which we used on a bed of lettuce the following night for a dinner salad.

IMG_3272
Our version of the zucchini salsa with added tomatoes and grilled onions.

Understandably, when the entire Bon Appétit Magazine was focused on recipes that only contain 5 ingredients (not including salt and pepper), the chefs had to severely limit themselves as to what to include. Since neither you nor I are under such restrictions, why not enhance the flavor combination with readily available summer produce?

Speaking of grilled onions, we often BBQ 1/4″ slices brushed with olive oil and seasoned with salt and pepper when we have extra room on the grill. Even if we don’t plan on eating them that evening, they can be used on future salads, in salsas, or simply as a side dish. Refrigerate them in an airtight container for up to a week.

A simple side of fresh corn on the cob, either grilled or boiled, completes the meal. Dinner done.

Do Ahead: Zucchini salsa can be made 1 day ahead. Cover and chill.

IMG_3268

Ingredients

  • 1½ pounds zucchini, cut into ¼-inch pieces (about 5 cups)
  • Optional but worth it: 1 large ripe tomato, diced in 1/4″ pieces
  • Optional but worth it: 1 grilled onion, slices chopped
  • ½ cup red wine vinegar
  • 1 tablespoon coarsely chopped oregano, plus leaves for serving
  • ¼ cup olive oil, plus more for steak
  • Kosher salt, freshly ground pepper
  • 1 1½-pound piece flank steak

Directions

  1. Toss zucchini, vinegar, chopped oregano, and ¼ cup oil in a medium bowl to combine; season zucchini salsa with salt and pepper. Set aside.
    IMG_3269
    IMG_3270
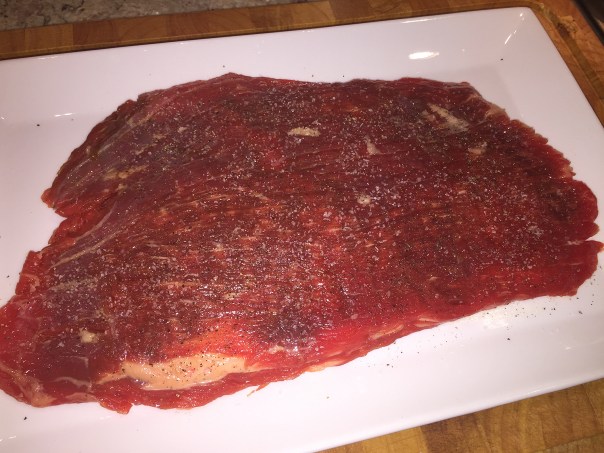
  2. Prepare a grill for high heat. Meanwhile, flatten your steak. Cover a cutting board with a long piece of plastic wrap and set steak on top; fold plastic over steak to cover. Using the smooth side of a meat mallet, pound steak to about ½” thick. (Don’t hold back; you want it good and roughed up.)
    IMG_3276
    IMG_3277
  3. Pat steak dry with paper towels; season generously with salt and rub a bit of oil all over. Grill until browned, about 2 minutes per side for medium-rare. (You might not get that much color on this steak because it’s so thin, but you don’t want it to be overcooked.)
    IMG_3278
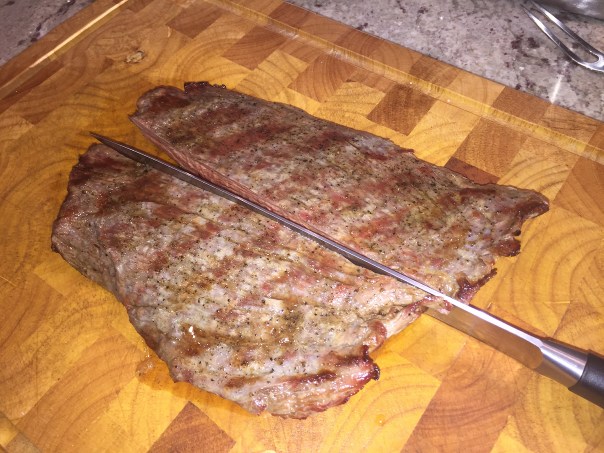
  4. Transfer steak to a cutting board and let rest 5–10 minutes. Cut in half lengthwise with the grain, then slice thinly against the grain.
    IMG_3280
    IMG_3283
  5. Arrange steak on a platter and spoon half of reserved salsa along with some juices over steak. Top with oregano leaves. Serve remaining salsa alongside.

IMG_3286

IMG_3287

An adaptation of recipe by Amiel Stanek from Bon Appétit

Comfortfood

Eleven days into my retirement and the day’s outing was with good friend Jeremy Parry, a pro at the retirement scene with 10 years under her belt already, she was practically a baby when she left ;)! Our main mission was to purchase supplies at Jerry’s Artarama in nearby New Jersey for our upcoming watercolor class. With that accomplished, and a few other chores checked off the list, it was lunch time.

Crossing the bridge back into Pennsy, I suggested Comfortfood, a place I’d been hearing about, and that Jeremy has frequented on several occasions. Their hours are limited, serving mostly lunches and closing at 5:00, except on Fridays when they stay open until 8:00. Not convenient to most working stiffs, or those who work far away and late into the evening like hubby Russ.

With time no longer a hurdle for me, and the location close to Jeremy’s house, we made a beeline to the strip mall restaurant only to find it completely full with a waiting line. Not in any particular hurry, we perused the daily menu while waiting for our table to become available.

IMG_3314

IMG_3316

In the entrance area you are immediately hit with a huge chalkboard outlining the take-out options in bright chalk—items not available to eat-in diners because, as we were told by our friendly waitress, they are prepackaged in containers ahead of time. Oh well, not like there wasn’t an abundance of original options on the regular menu, which changes daily BTW.

IMG_3315

While inescapably located in a cheesy strip mall, the restaurant interior is charming and comfortable. The decor exudes an eclectic-country vibe sporting tin ceilings, chalkboard surrounds, and funky bathroom fixtures. (Yes, I did take a picture of one of the unisex bathrooms!) Emblematic of the care exercised by Comfortfood is the mint-infused water served from a charming clear glass bottle with Ball mason jars as drinking glasses.

IMG_3318

IMG_3317

“Convenient, good food doesn’t have to be expensive or full of bad ingredients,” explains Comfortfood Chef Kim Quay. Over the years, it’s business has morphed from an event-catering business, to take-out catering. Then in the spring of 2015, when the hair salon next door went out of business, Kim took over the space, opened a dining room, and began serving lunch.

IMG_3321

Undeterred that we could not start with a bowl of the Southwest Corn Chowder (it was for take out only), we split an appetizer of the Chicken Buffalo Lollipops with a cucumber blue cheese salad, shown above. The drumsticks had a good tang that wasn’t overpowering and was complimented by the accompanying cool salad.

IMG_3323

For mains, Jeremy chose the Avocado & Pickled Egg Tartine on a bed of arugula and a hit of smoked salt. The portion was quite large and she doggie-bagged half of it. I zeroed in on the Turkey Momos, even after the waitress explained they were more like dumplings in a sauce—intriguing I thought. Well, they were DELICIOUS! Those little momo devils were swimming in a savory tomato cilantro sauce surrounding a center pool of cucumber yogurt and topped with sliced scallions. No leftovers for me!

IMG_3322

Now that I have time during the day, I will definitely be back to Comfortfood. Anyone looking for a lunch date?

*****************************

You’ll find local produce and meats in all Comfortfood’s dishes. Quay buys her food from farms in Bucks County and nearby New Jersey, like the Guzikowski Farm (Yardley), Purely Farm (Pipersville), Charlann Farm (Yardley), Gravity Hill Farm (Titusville, NJ), Beechwood Farm (Hopewell, NJ) and Chickadee Creek Farm (Pennington, NJ), many of them organic or transitional organic, and using sustainable farming methods.

The menu changes daily – Quay posts it on her Facebook page every day and posts a photo of the board on her blog – and is priced reasonably. It includes comfort food but goes beyond to a wide variety of dishes.

A Marinade Serenade

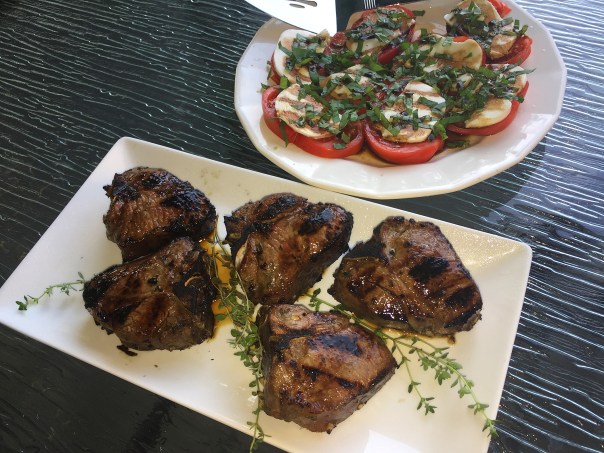
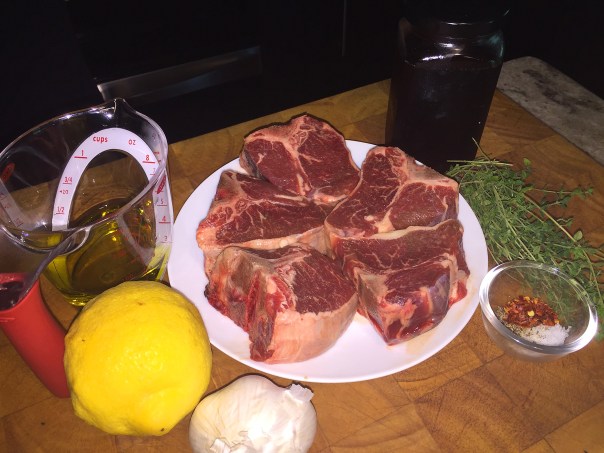
After a lazy summer day hanging at the beach or pool, I don’t usually want to come home and engage in orchestrating a complicated meal. So when I came across a Bon Appétit article on versatile marinades, I thought BINGO we could use one of them on some grilled lamb loin chops we recently purchased at Costco, and for a very good price, BTW.

IMG_2916

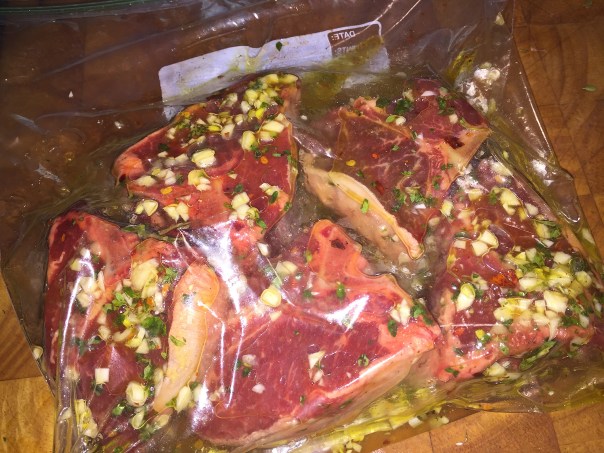
This bright Garlicky Lemon-Thyme-Marinade is a sure-fire hit (besides lamb, it would be great on chicken, swordfish, and/or potatoes.) The recipe below is for a dozen chops and since we were only cooking five small steaks, we cut it in half, which was plenty. In order to get the most flavor from the mixture, I made it up and secured the lamb and marinade in a ziploc for nearly seven hours (while we were at the pool) before we grilled.

Once you have a taste, you’ll be signing a serenade over the bold, savory flavor of this marinade. It hit all the right notes to complement the meat.

IMG_2915

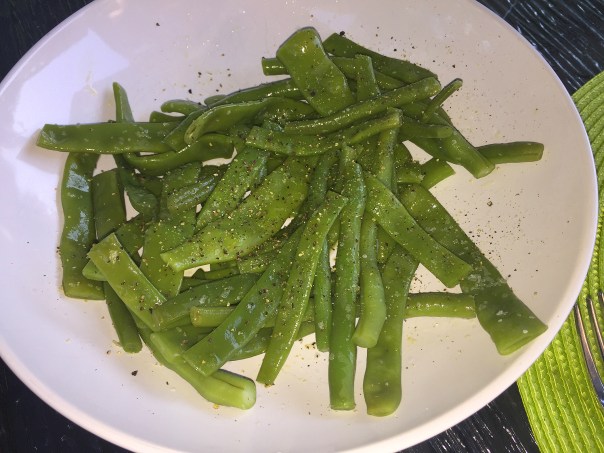
Our first crop of seasonal green beans were ripe for the picking. In the Spring, we planted two kinds, flat Italian and green pole beans. For a quick simple side, we steamed some of the flat ones and then dressed them in a little good EVOO with a pinch of sea salt and a few grinds of fresh cracked pepper. Sliced heirloom tomatoes with fresh mozzarella and a basil chiffonade topped with a drizzle of balsamic glaze rounded out the meal.
IMG_2880
The jar of real pure Vermont syrup, upper right, was given to us from my coworker Wendy—thanks lady!

Ingredients

  • 2/3 cup olive oil
  • 2/3 cup fresh lemon juice; more wedges for serving
  • 1/4 cup pure maple syrup
  • 1/3 cup finely chopped garlic (about 12 cloves)
  • 1/4 cup fresh thyme leaves, plus sprigs (optional)
  • 1/2 tsp. crushed red pepper flakes
  • Kosher salt and freshly ground black pepper
  • 12 lamb rib chops, trimmed

Directions

  • In a medium bowl, whisk the oil, lemon juice, and maple syrup. Add the garlic, thyme leaves (and a  few sprigs, if you like), pepper flakes, 1-1/4 tsp. salt, and 1/2 tsp. black pepper, and stir to combine.
    IMG_2882
  • Put the meat in a nonreactive (stainless steel, glass, or plastic) container and pour the marinade over them, turning to coat on all sides (or use a ziploc.) Marinate the lamb chops for at least 1 hour at room temperature or cover and refrigerate for up to 24 hours.
    IMG_2884
  • When ready to grill, heat a gas or charcoal grill to medium-high heat (400°F to 475°F).
    IMG_2901
    IMG_2907
  • Remove the lamb chops from the marinade, shaking off the excess. Grill the chops, turning once, until cooked through, about 6 minutes. Season with more salt to taste, and garnish with lemon wedges and thyme sprigs, if you like.
    IMG_2918

Marinade by Ronne Day


A New Slant On Eggplant

Made with rice noodles, Grilled Eggplant Noodle Bowl is a one-bowl meal that is hearty without being heavy. Long prized for their deeply purple, glossy beauty as well as their unique taste and texture, eggplants—like many other vegetables—are great sources for dietary fiber, a necessary element in any balanced diet. You can eat an entire cup of cooked, cubed eggplant and consume only 35 calories!
Besides being a mouthwatering addition to just about any meal, eggplants contain almost no fat or cholesterol, a very healthy food for people trying to lose weight. The fiber content is also very filling, which inhibits the release of ghrelin, the hormone which tells our mind that we are hungry again (they ought to market that stuff!) Yet, many people make the mistake of frying them. Although this may be a delicious way to cook eggplant, it also counteracts a number of the health benefits, and can cause weight gain and negatively impact heart conditions.

IMG_2904.jpg

The “aubergines” belong to the nightshade family of vegetables, which also includes tomatoes, bell peppers and potatoes. But be careful because the nightshade family are known to cause somewhat severe allergic reactions.

BTW, if you don’t like peanuts, use cashews instead.

IMG_2921

Ingredients

  • 1 large eggplant, trimmed and sliced lengthwise into 6 1/2-inch-thick slices
  • Olive oil, for brushing
  • Kosher salt and freshly ground black pepper
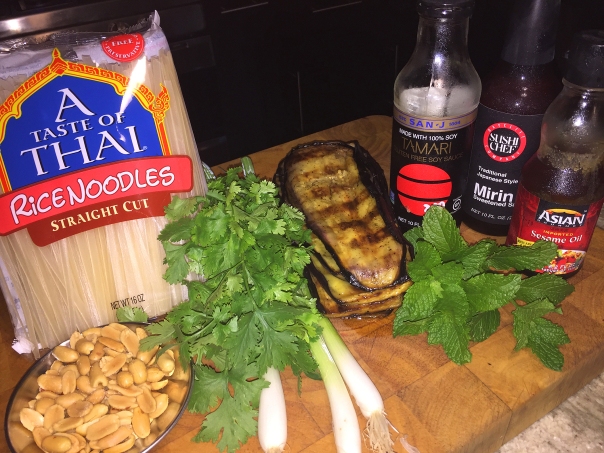
  • 7 oz. flat, wide (pad thai) rice noodles
  • 3 scallions, sliced
  • 1/4 cup mirin
  • 3 Tbs. soy sauce
  • 1 tsp. Asian sesame oil
  • 1 Tbs. chopped fresh mint
  • 2 Tbs. chopped fresh cilantro
  • 1/4 cup chopped salted peanuts

Directions

  • Prepare a medium-high (425°F to 450°F) gas or charcoal grill fire. Brush the eggplant slices with oil and season with salt and pepper.
    IMG_2887
  • Bring a large pot of water to a boil over high heat.
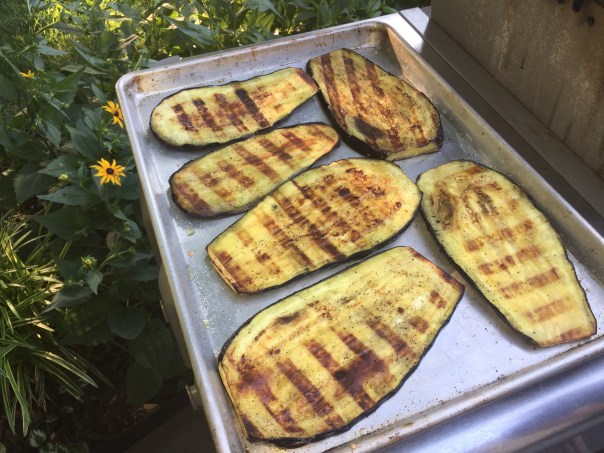
  • Grill the eggplant until grill marks form on one side, about 3 minutes. Flip the slices and continue to grill until the eggplant is tender, about 2 minutes more.
    IMG_2896
  • Cook the rice noodles according to package directions until tender.
  • Meanwhile, chop the eggplant into 1/2-inch pieces, and combine with the scallions in a large bowl.
    IMG_2923
  • In a small bowl, whisk together the mirin, soy sauce, sesame oil, and 1/4 cup warm water.
  • Drain the noodles, rinse under cold running water, drain again, and add to the eggplant. Toss with the sauce, mint, and cilantro. Sprinkle with the peanuts and serve.
    IMG_2924

IMG_2932

Adapted from a recipe by Judith Fertig

A Revolutionary Retirement Dinner

Over the years, the establishment that is now known as Bowman’s Tavern has operated under a myriad of different names. Just prior to Bowman’s, it was known as Revolutions Tavern, a place we dined nearly a decade ago. Suffice it to say, we were NOT impressed, to say the least, with the food, service or ambiance.

Located outside of New Hope, PA, the restaurant is situated close to infamous Washington’s Crossing, where George Washington crossed the Delaware River on Christmas Day during the Revolutionary War in 1776, and pretty much turned the tables on the Hessian forces and the outcome of the war. While my retirement dinner was no historical affair, it does one good to seep yourself in a bit of history every now and again.

With the launch of Bowman’s a few years back, it seems to have struck a more successful chord. The combination of the fun piano bar and variety of menu items apparently has the locals coming back again and again. We have often passed the building once it’s name was changed and have heard from friends that it’s worth another try. With a hefty gift card in hand—compliments of my coworkers as a retirement present—we made the trek to see for ourselves.

IMG_3166

Our venture was on a Tuesday night, and Russ exclaimed, “No need to make a reservation on a Tuesday.” Famous last words! We got the last spot in the parking lot and were told the dining room was completely full but we could choose a table in the bar or on the deck. Seeing as how it was in the 90’s and oppressively humid, we opted to sit on a hammered tin hi-top next to a window in the air-conditioned bar.

IMG_3170

Both popcorn lovers, we enjoyed the small bucket of fresh, salty popcorn they brought to the table while we scanned the menus. And to toast the occasion, we selected a bottle of Pinot Noir. The hectic waitstaff seemed a little dazed and confused because two different folks swung by several times and asked us the same questions. Plus, Russ saw our appetizers whizz by nearly ten minutes before they were brought to our table with flustered apologies. Oh well, we were in no hurry…

IMG_3171

For starters I selected their hefty Heirloom Tomato Salad composed of baby arugula, buffalo burrata, basil oil, malden salt, and a 25-year aged balsamic. It was good, but not over the top. Russ on the other hand, opted for Cornmeal Dusted Fried Virginia Oysters (a fave of his) floating on a bed of tarragon aioli, with toasted garlic, lemon zest, and a sprinkling of pine nuts. Not a fan of oysters, I did however try a swipe of the aioli which was fabulous!

IMG_3172

IMG_3174

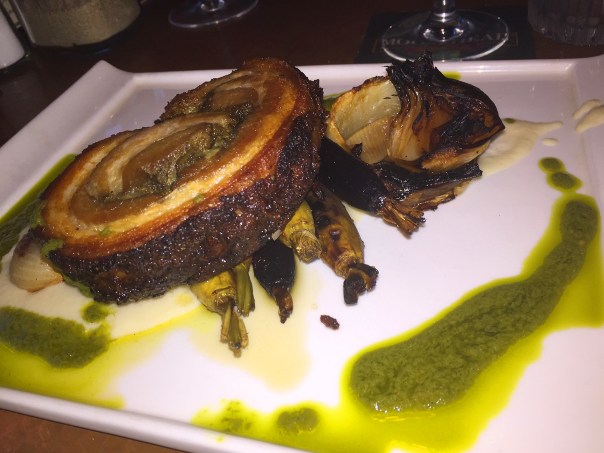
While they do offer burgers and sandwiches, we wanted to celebrate with special entrées. So after some careful thought, Russ zeroed in on the House Roasted Porchetta with kohlrabi puree, roasted heirloom baby carrots, spring onion, and a chimichurri. The only disappointment here was the undercooked baby carrots, charred on the outside, but hard on the inside.

IMG_3176

For my dinner I ordered the Seared Scallops which came plated with six plump and juicy scallops atop local sweet corn grits with a topping of sautéed wild mushrooms, fresh herbs, and a luscious white truffle oil. I loved it, even though most of it went home with me for another day.

Although there were a few missteps, at least the food was very good, so we will definitely make a return trip—this time with reservations!

A Bittersweet Goodbye

Goodbyes are almost never easy. And after working for nearly 33 years at Mercer County Community College, I was retiring and ready for new adventures. But before I bid adieu to my colleagues, I wanted to bake up a batch of my appreciation for all of the years of accomplishments, blood, sweat and tears endured with these folks.

IMG_3142

OK, maybe that’s a bit dramatic, but I spent more time with many of them than I did my own friends and family—and actually, I consider quite a few of them real good friends now! But that’s the way of the work world, no regrets. I pondered over what I could bring to my office farewell get together, and realized most people I know can’t resist a decadent, fudgy, chocolate brownie.

IMG_3141

Ooey, gooey and chewy—these chocolate lovers dream brownies are made with cocoa, semisweet, bittersweet and dark chocolate—the whole enchilada! Below is a single recipe, of which I made three batches, but only doubled the ganache topping, which was plenty.

BTW, lining the pan isn’t busywork; it makes it super easy to remove the brownies.

Ingredients

  • 8 tablespoons (1 stick) unsalted butter, cut into pieces, plus more for pan
  • 4 ounces each semisweet AND bittersweet chocolate, chopped
  • 1 cup all-purpose flour, spooned and leveled
  • 1/4 cup unsweetened cocoa powder
  • 1/2 teaspoon baking powder
  • 1/2 teaspoon salt
  • 1 cup semisweet chocolate chips
  • 1 1/4 cups sugar
  • 3 large eggs

Dark Chocolate Ganache:

  • 1/2 cup heavy whipping cream 
  • 1 cup (6 oz.) dark chocolate morsels

Directions

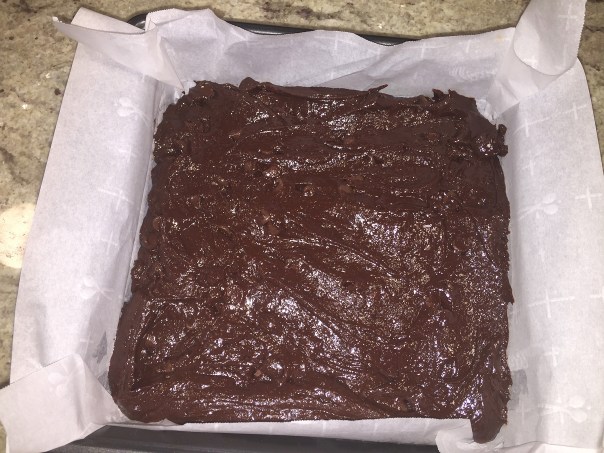
  1. Preheat oven to 350 degrees. Brush a 9-inch square baking pan with butter. Line bottom and two sides with a strip of parchment paper, leaving a 2-inch overhang on the two sides. Butter paper, and set pan aside.
    IMG_3064
  2. In a small bowl, whisk flour, cocoa, baking powder, and salt; set aside.
    IMG_3070
  3. Place butter and chopped chocolate in a large heat-proof bowl set over (not in) a saucepan of gently simmering water. Heat, stirring occasionally, until smooth, 2 to 3 minutes; remove bowl from pan.
    IMG_3066
    IMG_3073
  4. Add sugar; mix to combine. Add eggs, and mix to combine. Add flour mixture; mix just until moistened (do not over mix). Add chocolate chips. Transfer batter to prepared pan; smooth top.
    IMG_3091
    IMG_3093
    IMG_3095
    IMG_3096
    IMG_3097
  5. Bake until a toothpick inserted in center comes out with a few moist crumbs attached, 50 to 60 minutes. Cool in pan for 30 minutes.
    IMG_3086
  6. Using paper overhang, lift brownies out of pan; transfer to a rack to cool completely (still on paper). On a cutting board, using a dampened serrated knife, cut into 16 squares.
    IMG_3089
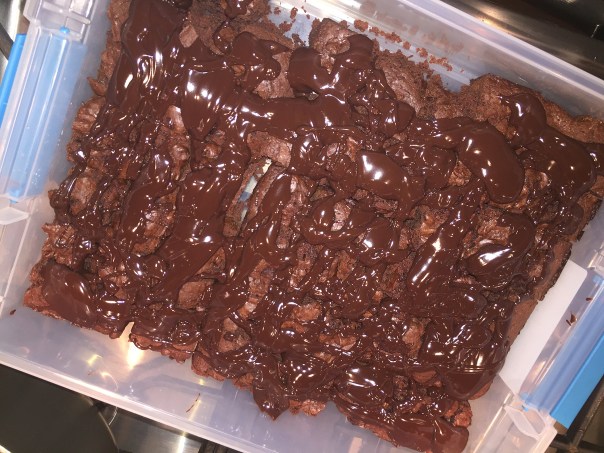
  7. Drizzle ganache over cooled, cut brownies. Let ganache harden somewhat before packing. (It likely won’t harden completely.) Do not stack on top of each other.
    IMG_3103
  8. Store in single layers in an airtight container at room temperature, up to 2 days.

IMG_3098
Get ready for choco-shock!

For Dark Chocolate Ganache:
HEAT cream in 2-cup microwave-safe glass measure or small bowl on HIGH (100%) power for 60 seconds. Slowly add morsels. Cover with plastic wrap and let stand for 5 minutes. Stir well. Refrigerate any remaining ganache. Makes 1 cup. (Since I made three batches of brownies, I doubled, NOT tripled, the ganache.)