Monthly Archives: January 2018

Duckin’ Awesome

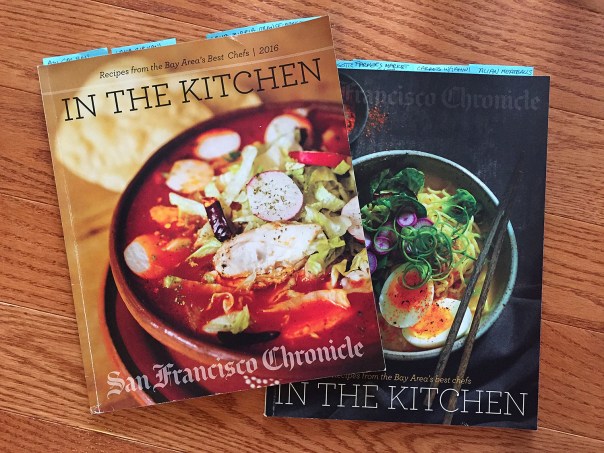
Knowing our passion for cooking, our WCBIL (West Coast Brother-In-Law) David Ruttan, inserted a couple of issues of the San Francisco Chronicle annual food supplement “In The Kitchen” with our Christmas gifts this year. Thumbing through the photo-laden magazines, we zeroed in on the Orange-Braised Duck recipe by Chef David Williams. Now you probably know that Russ is a HUGE duck fan, and I was brought up on the feathery fowl, served on special occasions throughout my childhood years (Grandpa hunted duck.)
IMG_2519

If you’ve never tried duck, this is a perfect recipe to waddle into the waters—metaphorically speaking. Obtaining the bird is another matter. Our trek took us through three towns at two different grocery stores, and a farmer’s market, before finally scoring one at an Asian mart! Luckily it was the day before we planned on cooking it because the 4-pounder was frozen solid. (Note that the duck needs to be cut and seasoned at least two hours, or up to a day ahead.) Salting the meat in advance may seem fussy, but this step ensures the duck will be seasoned to the bone.
IMG_2512
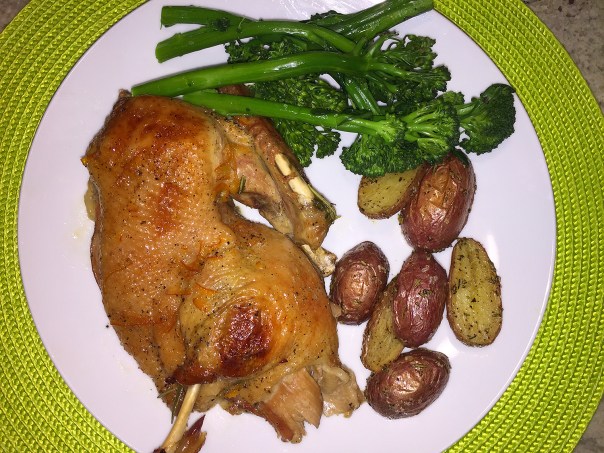
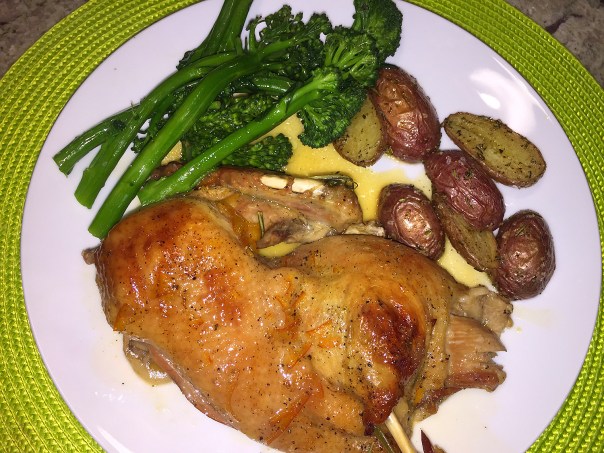
We simply served our bird with steamed broccolini and roasted baby potatoes seasoned with rosemary.

A deep pan or dutch oven is used to combine the duck with onions, carrots, celery, citrus, herbs and wine, allowing it to cook with all the juices. You can swap in blood oranges, mandarins or Meyer lemons for the orange; use rosemary (our choice) in place of thyme; or vary the braising liquid, experimenting with red wine, chicken stock or beer.

Based on the recipe Chef David Williams learned from a Mexican chef, and reminiscent of French-style duck à l’orange, the halved duck is first rubbed with marmalade, then rests on a bed of vegetables and aromatics, the braising liquid a mixture of fresh orange juice and a good splash of dry white wine (or other choices as noted above.)

IMG_2499

Into the oven it goes, to be forgotten about for almost three hours. It’s retrieved from its steam bath when the fat has rendered from the skin and the meat is supple and moist, perfumed with citrus and infused with a wild, herbal flavor. Less time-consuming than confit, less messy and greasy than roasting a whole bird, it’s an approachable way to cook duck, a rich meat that’s ideal for cold weather—and mid-Winter in the Northeast is just that.

IMG_2503

For the last 15 minutes of cooking, we removed the lid and parchment to let the skin brown up a bit more. In the end, the skin will still be too fatty to eat (at least for most of us), but don’t omit making the pan sauce as a finish, it is simply heaven-on-earth, and wonderfully aromatic. The essence of orange reminding me of a childhood favorite dinner, my mom’s Orange Juice Chicken… but I digress, back to the recipe at hand…

Orange-Braised Duck

  • Servings: 2-4
  • Difficulty: moderate
  • Print

Ingredients

  • 1 Pekin or Long Island duck (about 4 pounds)
  • Kosher salt and freshly ground black pepper
  • 2 tablespoons orange marmalade, other citrus marmalade or apricot jam
  • 2 ribs celery, cut into 2-inch lengths
  • 2 carrots, peeled and cut into 2-inch lengths
  • 1 large onion, peeled and quartered
  • 1 small bunch thyme
  • ½ bunch Italian parsley
  • ½ bunch cilantro
  • 1 navel orange, halved
  • 1 bay leaf
  • 1 cup dry white wine

Directions

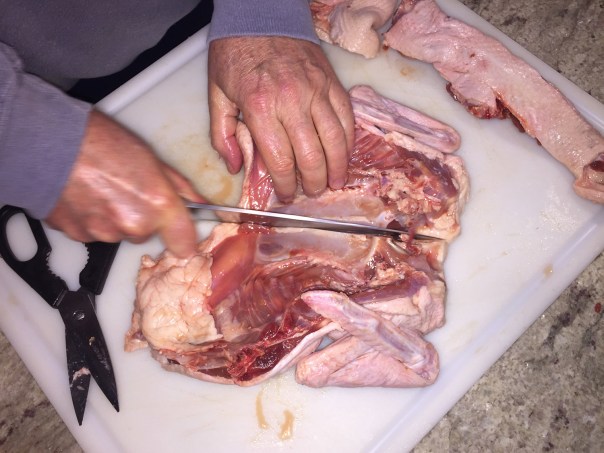
Place the duck, breast side down, on a work surface. With a sharp knife or a pair of kitchen shears, cut alongside both sides of the backbone. Remove the backbone and discard (or save for stock like we did). With a sharp knife, cut off the large flap of skin at the tail end, and cut through the breast bone, separating the duck in half down the center. Season both halves of duck generously with salt and pepper on both sides and place on a rimmed baking sheet, skin side up. Refrigerate at least 2 hours or up to overnight.
IMG_2486
IMG_2488

Roast the duck.

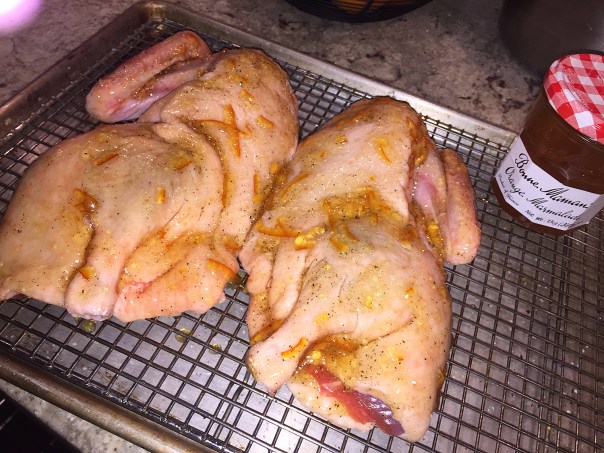
Preheat the oven to 350 degrees. Remove the duck from the refrigerator and slather the skin side of both halves with the marmalade (buy a top-quality brand).
IMG_2492

Put the celery, carrots and onions in a roasting pan or Dutch oven, lay the thyme, parsley and cilantro on top. Squeeze the orange juice over, then add the fruit (peel and all) to the pan. Add the bay leaf.
IMG_2499

Place the duck, skin side up, on top of the bed of vegetables and aromatics, then pour the wine around. The duck will not be submerged in liquid. Cover tightly with foil, or if using a dutch oven, place parchment paper between the pot and the lid for a tight seal; and transfer to the oven.

Finish and serve.
IMG_2505

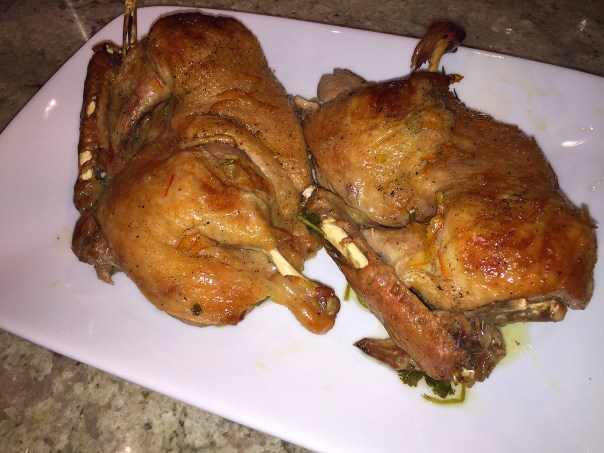
After 2½ hours, check the duck. The meat should pull from the bone easily; if it does not, recover and return to the oven for an additional 30 minutes. When the duck is done, remove it from the oven to a cutting board, carve into pieces and carefully transfer to a warmed platter. We left the duck in two halves, one for each of us. This may sound like a lot, but in the end it was the perfect serving of meat once all of the skin and bones are discarded.
IMG_2514

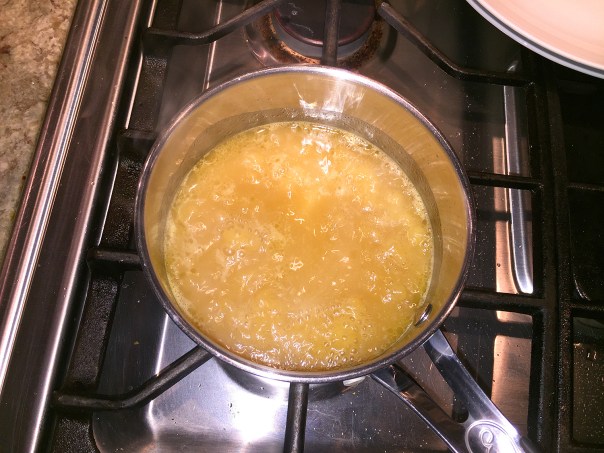
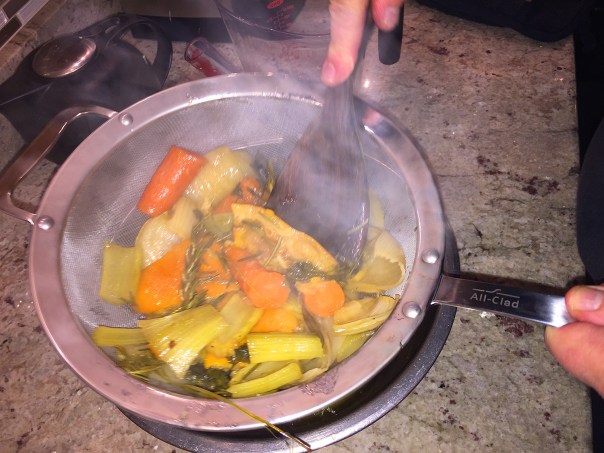
Pro move: For a restaurant-quality finishing touch, pour the braising liquid through a fine-mesh sieve into a clean bowl, pressing hard on the solids to extract the maximum flavor. Skim the fat from the liquid (save that fat for roasting vegetables; it’s liquid gold), then boil the remaining liquid in a saucepan until it has reduced slightly, seasoning to taste with salt, pepper and lemon or orange juice.
IMG_2508
IMG_2511

http://www.lynnandruss.com

From David Williams of Bull Valley Roadhouse in Port Costa, CA.

Are You Ready for Some Football(s)?

Add a little whimsy to your (or someone else’s) Super Bowl party with these cute little Chocolate Football Cookies. They’re not a lot of effort, nor a lot of ingredients. You don’t even need a football-shaped cutter, you can use a simple circle.

IMG_2542

In about two hours time, you can make the dough, roll it out, cut the shapes, bake them, then cool and frost. No need to refrigerate the dough between making the batter and  rolling it out. Of course, they will have to “air dry” for a couple of hours before you can stack or pack them.

IMG_2523
I used the largest of my circles which made about three dozen 3-inch footballs.

Ingredients

  • 2 sticks unsalted butter, room temperature
  • 1 1/2 cups granulated white sugar
  • 2 eggs
  • 1 tsp. vanilla extract
  • 2/3 cup unsweetened cocoa powder
  • 3 cups flour
  • 1/2 tsp. salt
  • 1/2 tsp. baking powder

Directions

  1. Preheat oven to 350F degrees.
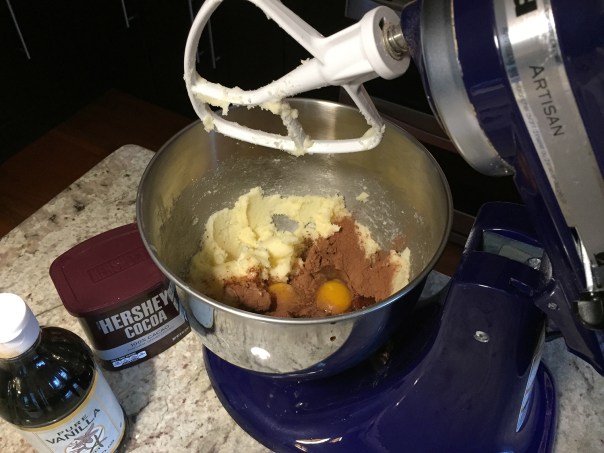
  2. In a stand mixer, beat butter and sugar until creamy.
  3. On low, add in eggs, vanilla and cocoa and blend on medium speed until smooth.
    IMG_2520
    IMG_2522
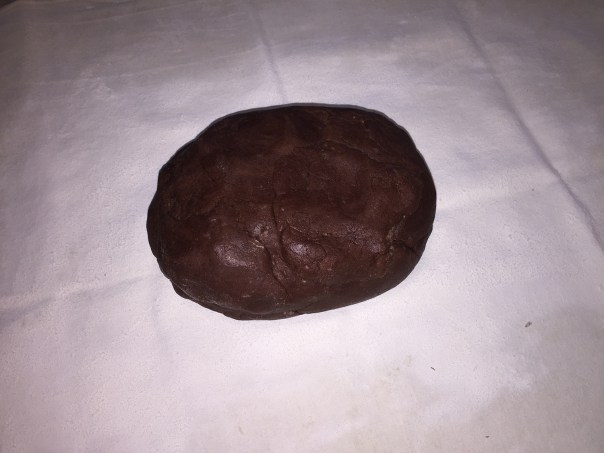
  4. Gradually add in flour, salt and baking powder and mix until smooth. Form dough into two balls.
    IMG_2524
  5. Roll out one ball of dough on floured surface or pastry cloth. The thicker you roll, the chewier the cookie. (I like mine a bit firm, so I make them about 1/8″ thick.)
    IMG_2525
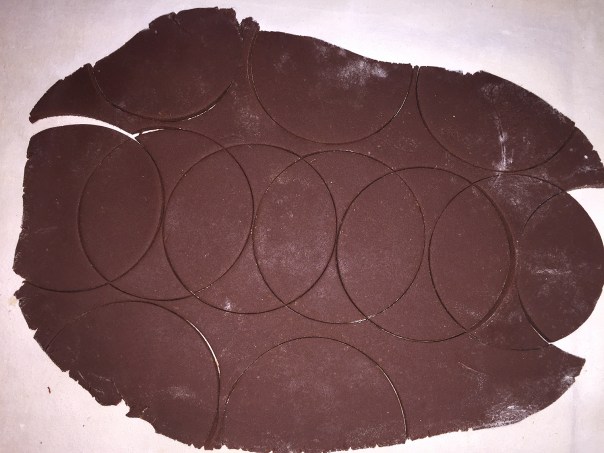
  6. Using a large circle cookie cutter, press down into the dough, then overlap the circle to get a football shape. Place onto a parchment-lined baking sheet about 1 inch apart to allow for spread (although mine barely spread at all).
    IMG_2526
    IMG_2528
  7. Gather leftover dough, reform into a ball, roll out again, and cut more shapes. Repeat as necessary until all the dough has been used.
    IMG_2529
  8. Bake for 10 to 14 minutes (depending on thickness) until the edges are firm. Mine took 12 minutes.
    IMG_2531
  9. Gently slide the parchment paper off of the baking sheet onto a flat surface. Cool completely to allow the cookies to set, 15-20 minutes.
    IMG_2535
  10. Once cooled, frost as desired using Royal Icing (my choice), melted white chocolate or purchased white icing. You can do this right on the used parchment sheets.
    IMG_2539
    PINTEREST
    Fly Eagles Fly!!!!

An International Food Fest

Before the feast (a few recipes follow), our second visit to long-time friend Merry Sue Baum in Nazareth, PA, in 5 weeks time, we began the journey with a movie at The Frank Banko Alehouse Cinemas, a two-screen independent, foreign and arthouse cinema, part of the Steel Stacks renovation twenty minutes away in Bethlehem, a rust-belt city enjoying a cultural renaissance.

IMG_2350
Russ and Merry Sue pose outside of the Town Square building which houses the movie theater.

SteelStacks is a ten-acre campus dedicated to arts, culture, family events, community celebrations, education and fun. Once the home plant of Bethlehem Steel—the second largest steel manufacturer in the nation—the site has been reborn through music and art, offering more than 1,000 concerts and eight different festivals annually. Since its opening in spring 2011, more than one million people have visited SteelStacks to enjoy 1,750-plus musical performances, films, community celebrations and festivals including Musikfest, the largest free music festival in the nation!

For nearly a century, the Bethlehem Steel plant served as the economic lifeblood of the community, employing tens of thousands of people while producing the steel that built our nation’s skyscrapers, bridges and even the U.S. Navy, helping win two World Wars in the process. In 1995, however, after a nearly 120-year history of steel production on the site, the plant closed its doors forever, leaving the region with a void that seemed impossible to fill.

IMG_2352

Rather than demolish the historic mill or walk away and let it fall apart, the community rallied around the iconic plant, working hard to bring new life to the former industrial giant. Through a partnership involving the nonprofit ArtsQuest, plans were put in place to transform the site into an arts and entertainment district that would showcase music, art, festivals, educational programming and more throughout the year. On our previous visit we enjoyed the annual Chriskindlmarkt, which celebrated 25 years this past holiday season.

IMG_2354
Merry Sue keeps Russ company at the kitchen bar…

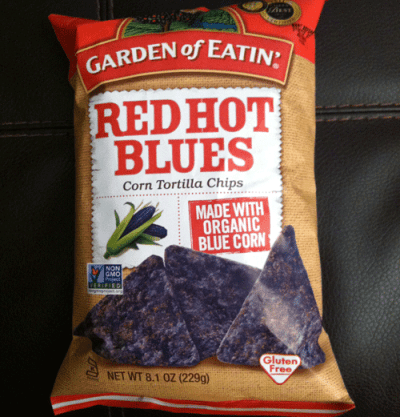
While there are a slew of fabulous restaurants in the area that we could have patronized, Merry Sue planned an International dinner back at the Baum Shelter where we, along with neighbors Marty and Mary Beth, would all contribute an ethnic option to the feast. For starters, we munched on Lynn’s freshly made Holey Moley Great Guacamole with two types of chips. Marty was so impressed with the Red Hot Blues, that he not only took a picture of the front of the chip bag, but also the UPC code!

tortilla_chips_red_hot

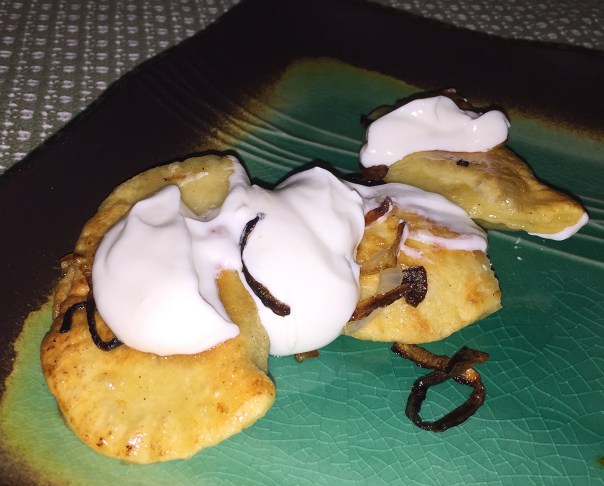
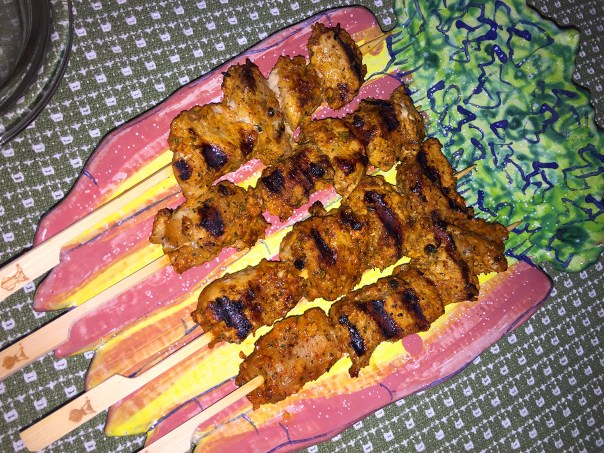
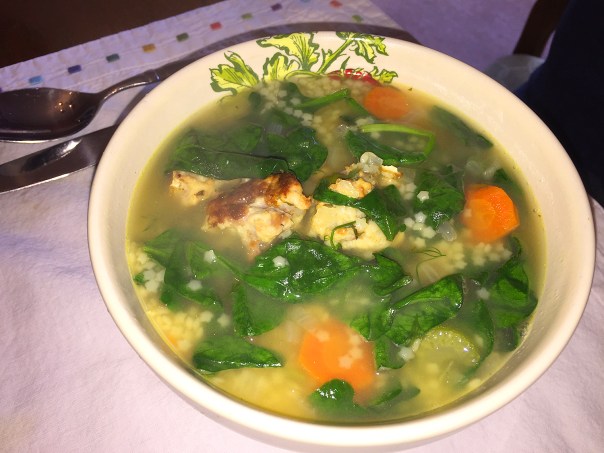
The original plan was to serve Merry Sue’s Italian Wedding Soup (recipe courtesy of Ina Garten), made with chicken meatballs, as the main entrée. But once we polished off Mary Beth’s luscious homemade traditional Polish Perogie’s with onion and sour cream, and our Pinchos Morunos (scroll down on the Savory Side of Life page for recipe), we decided to save the soup for lunch the next day when we had our appetites back.

To enlighten, “pierogi,” also known as varenyky, are filled dumplings of Central European origin made by wrapping unleavened dough around a savory (in this case, potato) or sweet filling and cooking in boiling water. A typical snack of the Spanish Basque Country, “pinchos” consist of an ingredient or mixture of ingredients, and fastened with a toothpick, which gives the food its name “pincho”, meaning “spike.” Moruno means “Moorish.”

IMG_2355Russ skewers the pinchos for grilling.

I always just assumed that Italian Wedding Soup was named as such because it was traditional to serve at an Italian wedding ceremony. Not so. The term “wedding soup” comes from the Italian language phrase “minestra maritata (married soup),” which is a reference to the flavor produced by the combination/”marriage” of greens and the broth. The modern wedding soup is quite a bit lighter than the old Spanish form, which contained more meats than just the meatballs of modern Italian-American versions.

IMG_2357

IMG_2359The culinary trip included Mexican Guacamole, Polish Perogies, Spanish Pinchos and Italian Soup.

IMG_2361The cooks: Mary Beth, Lynn and Merry Sue.
Lynn’s Holy Moley Great Guacamole

guacamole1

Ingredients

  • 1/4 cup chopped red onion
  • 1/4 cup fresh lime juice
  • 1 teaspoon salt
  • 4-5 ripe Hass avocados, halved, pitted
  • 2 plum tomatoes, seeded, diced
  • 2 jalapeños, seeded, minced
  • 1/3 cup chopped fresh cilantro

Directions

  1. In large bowl combine onion, lime juice and salt; let stand at room temperature for 20 minutes.
  2. Meanwhile, chop other ingredients. After the onion mixture is ready, with spoon, scoop avocado into bowl with onion mixture. Coarsely mash with potato masher or fork.
  3. Stir in remaining ingredients. Cover surface directly with plastic wrap and eliminate any air pockets. Refrigerate up to 24 hours before serving. Serve with tortilla chips for scooping.

Italian Wedding Soup

IMG_2369While the soup was delicious, we all agreed, it would have been kicked-up-a-notch if homemade stock was used, as indicated in the ingredient list.
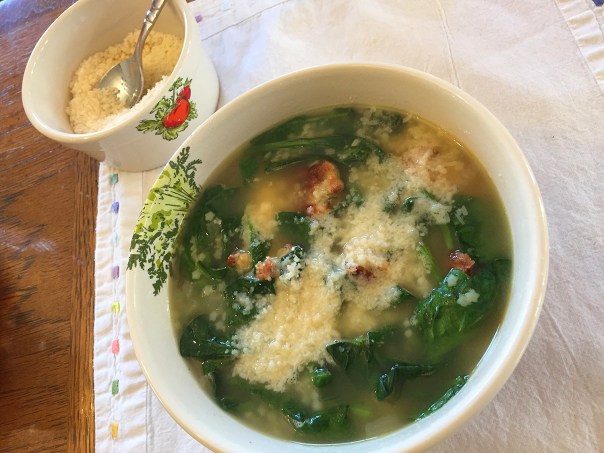
 

Ingredients

For the meatballs:
  • 3/4 pound ground chicken
  • 1/2 pound chicken sausage, casings removed
  • 2/3 cup fresh white bread crumbs
  • 2 teaspoons minced garlic (2 cloves)
  • 3 tablespoons chopped fresh parsley leaves
  • 1/4 cup freshly grated Pecorino Romano
  • 1/4 cup freshly grated Parmesan, plus extra for serving
  • 3 tablespoons milk
  • 1 extra-large egg, lightly beaten
  • Kosher salt and freshly ground black pepper
For the soup:
  • 2 tablespoons good olive oil
  • 1 cup minced yellow onion
  • 1 cup diced carrots (3 carrots), cut into 1/4 inch pieces
  • 3/4 cup diced celery (2 stalks), cut into 1/4 inch pieces
  • 10 cups homemade chicken stock
  • 1/2 cup dry white wine
  • 1 cup small pasta such as tubetini or stars
  • 1/4 cup minced fresh dill
  • 12 ounces baby spinach, washed and trimmed

Directions

  1. Preheat the oven to 350 degrees F.
  2. For the meatballs, place the ground chicken, sausage, bread crumbs, garlic, parsley, Pecorino, Parmesan, milk, egg, 1 teaspoon salt, and 1/2 teaspoon pepper in a bowl and combine gently with a fork.
  3. With a teaspoon, drop 1 to 1 1/4-inch meatballs onto a sheet pan lined with parchment paper. (You should have about 40 meatballs. They don’t have to be perfectly round.) Bake for 30 minutes, until cooked through and lightly browned. Set aside.
  4. In the meantime, for the soup, heat the olive oil over medium-low heat in a large heavy-bottomed soup pot. Add the onion, carrots, and celery and saute until softened, 5 to 6 minutes, stirring occasionally.
  5. Add the chicken stock and wine and bring to a boil.
  6. Add the pasta to the simmering broth and cook for 6 to 8 minutes, until the pasta is tender. Add the fresh dill and then the meatballs to the soup and simmer for 1 minute. Taste for salt and pepper.
  7. Stir in the fresh spinach and cook for 1 minute, until the spinach is just wilted. Ladle into soup bowls and sprinkle each serving with extra grated Parmesan.

IMG_2364


Noodle Soup with Kale and White Beans

You want easy and healthy? Look no further. In about a half hour—including prep—you’ll be able to plate bowls of this luscious and nutritious soup for your family. The lime juice adds a nice bright finish.

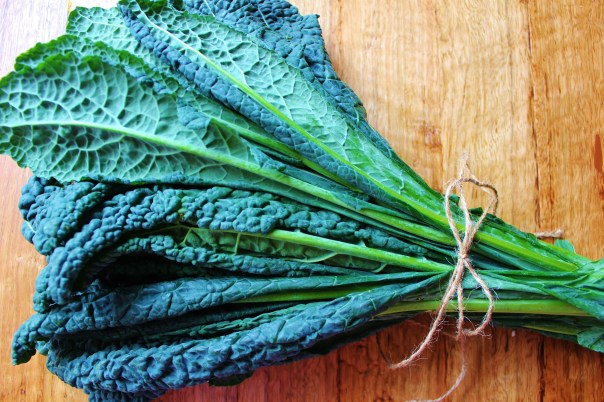
Kale seems to be a love it or hate it kind of a green, and certainly a focus of the health community in recent years. It is a proud member of the cabbage family, which accounts for its rather strong, forward flavor that borders (and sometimes tips over into) bitterness. Their edible leaves vary in color from light green to nearly purple depending on the variety, though they are universally coarse, thick, and fairly tough.

curly.leafed

There are two main kinds that are commonly found in the markets: curly leafed and dino kale. Curly leafed kale is what we used for this recipe. The bright green leaves are sometimes curled so tightly it can be hard to chop them. This kind of kale tends to have a bright, peppery flavor that can become quite bitter.

dino.kale

Alternatively, dino kale goes by many names. Among them are lacinato, dinosaur kale, cavolo nero, black kale, and tuscan kale. This kale has longer spear-like leaves with a pebbled appearance and a dark, mottled green color. Its flavor is deep and earthy, less bitter than curly leafed with an almost nutty sweetness—it’s what we most commonly use.

Keep in mind, there seems to be a sweet spot during cooking when the bitterness recedes and the kale’s sweeter character comes through. Over-cooking makes the kale taste overly bitter and decidedly off-putting.

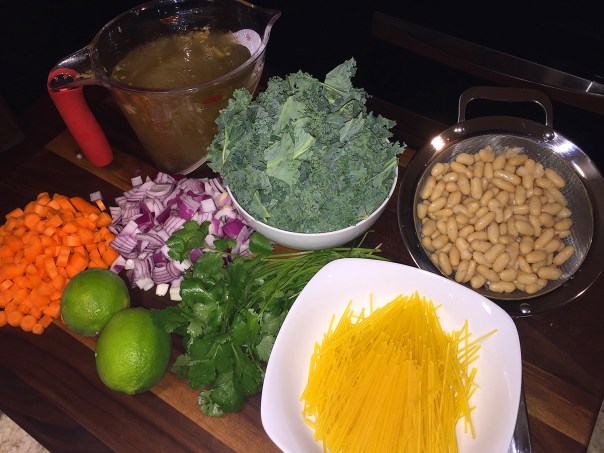
You can’t go wrong with all of the colorful veggies, calcium-loaded kale, and fiber-rich beans. In fact, our can of cannellini was 19 ounces, four more ounces than called for. Without capellini on hand, we incorporated a gluten-free thin spaghetti which didn’t alter the flavor or texture one bit.

IMG_2372

Ingredients

  • 2 Tbs. extra-virgin olive oil
  • 3 medium carrots, peeled and chopped
  • 1 medium red onion, chopped
  • 1 cup broken (2- to 3-inch pieces) dried capellini pasta
  • 2 quarts lower-salt chicken broth
  • 1 small bunch kale, ribs removed, leaves roughly chopped (about 6 cups)
  • One 15-oz. can cannellini beans, rinsed and drained
  • 3 Tbs. fresh lime juice; more to taste
  • Kosher salt and freshly ground black pepper
  • 1/4 cup coarsely chopped fresh cilantro

Directions

  1. Heat 1 Tbs. of the oil in a large pot over medium-high heat. Add the carrots and onion and cook, stirring occasionally, until the onion is soft and just golden-brown, about 10 minutes. With a rubber spatula, scrape the vegetables into a medium bowl and set aside. If necessary, wipe the pot clean.
    IMG_2376
  2. Heat the remaining 1 Tbs. oil in the pot over medium-high heat. Add the pasta and cook, stirring often, until dark golden-brown, 3 to 4 minutes.
    IMG_2380
  3. Add the broth and stir, scraping the bottom of the pot to release any stuck-on pasta. Add the carrots and onions, kale, beans, lime juice, 1/2 tsp. salt, and 1/4 tsp. pepper and bring to a boil. Reduce the heat to medium low and simmer until the kale, carrots, and pasta are tender, 8 to 10 minutes.
    IMG_2381
  4. Remove the pot from the heat, stir in the cilantro and season to taste with lime juice, salt, and pepper before serving.
    IMG_2384
    IMG_2391

Recipe found on Finecooking.com by Liz Pearson 

All Aboard the Pork Chop Train

ONLY THREE INGREDIENTS on this train. Seriously choo-choo chill man. Climb on board and marinate your chops with half the marinade in a ziploc bag for whatever time feels right—a day if you remember, and 10 minutes if you don’t. Everything will still be awesome at the end of the line.

That math works for me! My chop’s passenger ride was 6 hours—went out for a long lunch, flipped the bag when I got home for another few hours, and the result? The chops were so juicy, the flavor so salty-sweet-acidic-perfect, I was ready to blow the engine’s whistle!

IMG_1940

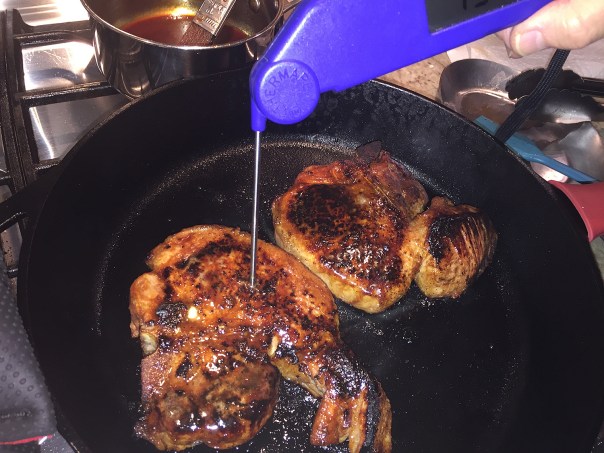
These pups were supposed to be grilled on medium heat according to Bon Appétit’s recipe. But the outside temps barely broke 20 degrees and the wind chills were in the single digits. So I turned to Plan B, a good sear in a cast iron skillet, then a finish in a 425 degree oven, which the directions below bear out.

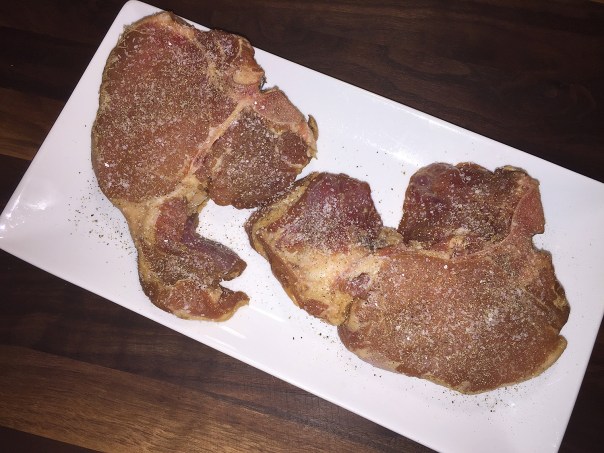
When ready, trash the marinade then dry and season the chops with salt and pepper. After searing in a super hot skillet for 2 minutes per side to get a good outer crust, brush them with the remaining half of the marinade you reduced. Throw the cast iron skillet in the preheated oven for about 8 minutes until the chops clock in at 145 degrees. Then tent with foil and let them rest for 5 minutes so the juices redistribute.

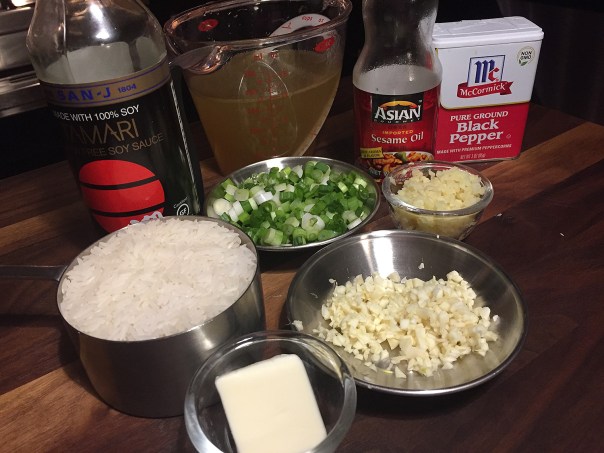
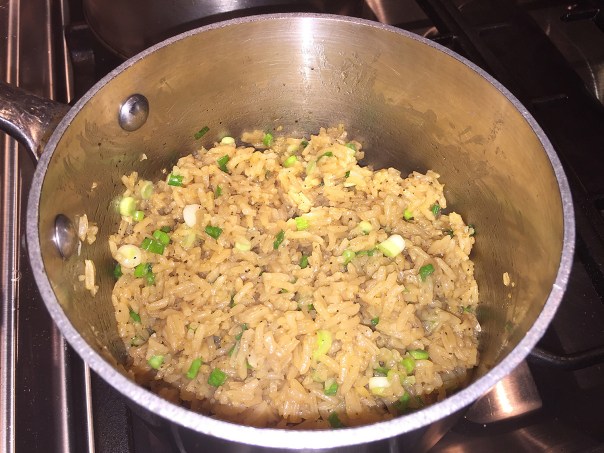
Well now we needed a simple side dish to complement the Asian flavored pork chops, so I concocted this pretty simple rice recipe. With just a few extra minutes, this dish only takes a bit longer to make than regular, plain rice, but it’s so worth it. Incorporating a few more ingredients makes all the difference in the world. Garlic, of course, adds extra flavor, but the ginger, sesame oil and soy sauce are really the stars here, along with using chicken stock instead of water, always my preference. Finally, stir in a handful of chopped scallions at the end to brighten the flavors and add a pop of color. (Recipe below.)

Ingredients

  • ¼ Cup soy sauce
  • ¼ Cup unseasoned rice vinegar
  • 2 Tbsp. dark or light brown sugar
  • 4 thick bone-in pork blade or rib chops (we only cooked 2 chops)
  • Vegetable oil
  • Kosher salt

Directions

  • Stir soy sauce, vinegar, and brown sugar in a small bowl until sugar is dissolved. Prick pork chops all over with a fork and place in a large resealable plastic bag.
  • Pour in half of marinade, seal bag, and turn to evenly coat pork chops, save remainder.
  • Let pork chops sit at least 10 minutes, or chill up to 1 day (cover and chill remaining marinade too).
  • Preheat oven to 425 degrees. Remove pork chops from marinade; discard marinade. Pat chops very dry with paper towels and season lightly with salt and pepper.
    IMG_1925
  • Put the remaining marinade in a sauce pan on medium-low and reduce down to about half.
  • Oil a large cast iron skillet until very hot. Place in chops and sear 2 minutes each side.
    IMG_1931
  • Place skillet into preheated oven for about 8 minutes until chops register 145 degrees. Tent with foil for 5 minutes.
    IMG_1933

Asian Rice Pilaf

IMG_1922
Ingredients
  • 1 Tbsp. butter
  • 3 large cloves garlic, minced
  • 1 Tbsp. fresh ginger, minced
  • 1 cup jasmati rice
  • 1½ cups chicken stock, preferably homemade
  • 2 Tbsp. low sodium soy sauce
  • 1 tsp. sesame oil
  • ½ tsp. black pepper
  • 4-6 scallions, chopped
Directions
  1. Melt butter in a saucepan over medium heat.
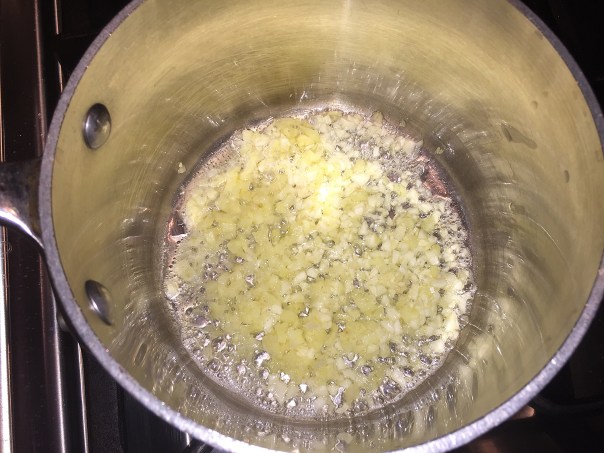
  2. Sauté garlic and ginger until fragrant, about 2 minutes.
    IMG_1926
  3. Stir in rice and sauté for another couple of minutes.
  4. Stir chicken stock, soy sauce, sesame oil and pepper into rice mixture.
  5. Bring mixture to a boil.
  6. Reduce heat to simmer, cover and cook for 15-20 minutes until liquid has been absorbed and rice is tender.
  7. Stir in scallions right before serving.
    IMG_1936

Essiggurke – The Center Surprise!

The official definition: “Rouladen or Rinderrouladen, a German meat dish, usually consisting of bacon, onions, mustard and pickles wrapped in thinly sliced beef which is then cooked.” And for the first time ever, Russ and I got to enjoy the homemade German delicacy at the home of good friends Rosanne and Gary (who are both Italian, BTW).

We were invited over for dinner on a Sunday evening, just as the crazy Steelers vs Jaguars playoff football game was coming to a wild end (as Steelers fans, not the outcome we were hoping for 😦 But hey, we quickly got over the slump by toasting the New Year with a glass of Proseco, followed by our favorite Spanish red, Marques De Riscal Rioja Reserva, while we munched on our assembled antipasto platter.

Rosanne not only took the German Beef Rouladen with Bacon, Onions, and Pickles recipe from her well-worn McCall’s cookbook, but our gorgeous shrimp and asparagus starter salad was from that tome also, although she changed the dressing to her EVOO balsamic dijon classic. The repast was further tastefully enhanced with pops of color from additions of cooked purple cabbage, orange carrots, green beans, and a bowl of some of the creamiest mashed potatoes ever!

IMG_2212

IMG_2215

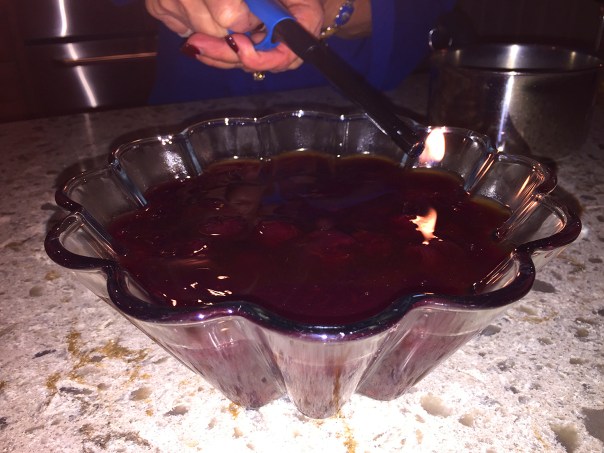
And for dessert, Cherries Jubilee (yes, from the same cookbook) with the brandy-laden cherry sauce that was flambéed before spooning over vanilla ice cream, all smartly plated in martini glasses. Although for the life of me I could not capture the blue flame in a photo.

IMG_2222If you look closely enough, you may see the blue flame in the top center of the dish.

IMG_2226Russ was not allowed to take a taste until I made sure to get a decent photo.
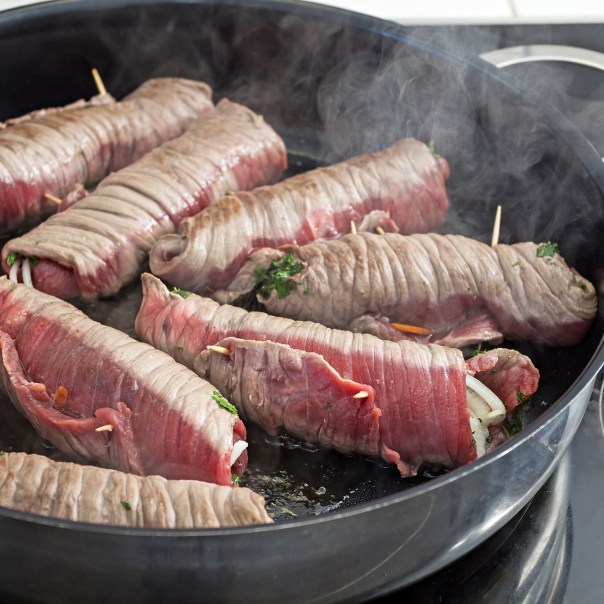
Now in writing this blog, I did not have access to Rosanne’s cookbook, but I did go online and do a little research about Rouladen and found this easy-to-make recipe which seemed to mimic the ingredients that Rosanne used. There are numerous versions of this German comfort dish, so you may want to do some research of your own to find one that appeals to your own culinary senses. And the German word for pickle? Essiggurke…

Ingredients

  • 1 1⁄2 lb flank steak, pounded 1/4 inch thick and cut into 6 inch long pieces
  • 1 kosher salt, to taste
  • 1 black pepper, freshly ground, to taste
  • 1 stone ground mustard, to taste
  • 1⁄2 lb thick sliced bacon
  • 2 large onions, sliced
  • 1 jar (16 oz) dill pickle, slices or spears
  • 2 tbsp butter
  • 2 1⁄2 cup water
  • 1 cube beef bouillon

Directions

  1. Season both sides of steak with kosher salt and black pepper. Spread one side of each piece with mustard. Arrange bacon, onions, and pickle on the mustard and form into a roll. Use string or toothpicks to hold the roll together.
    shutterstock_156147842
  2. Melt butter in a large skillet over medium heat. Add rolls and saute until browned on all sides.
  3. Add water and bouillon cube. Stir until the bouillon is dissolved. Simmer rolls for about an hour or until the steak is tender and cooked through.


Roll With It

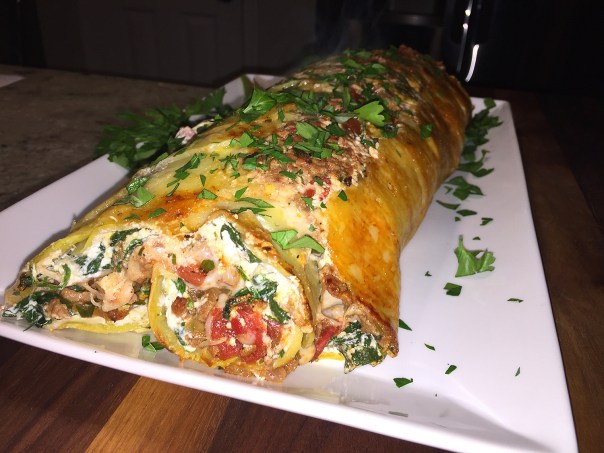
OK, how cool is this entrée? I came across this intriguing Scalloped Potato Roll posting on Facebook and was captivated by the video. I love a challenge and the technique was unusual enough that I knew I had to attempt it. Mind you, it’s not an easy one-two-three type of recipe, so you’ll need a little time and patience. I’ve provided a step-by-step pictorial at the end that should help you with the process.

IMG_2281

Keep in mind this puppy is BIG! The yield is about eight or nine, 2-inch-thick hearty slices, each more filling than you might think. We both agreed the entrée was akin to a mammoth lasagna roll, but with potatoes instead of pasta. To complement and round out the meal, we served a side salad with the surplus spinach. With so much roll leftover, we refrigerated half of the remains and froze the extra portion for a future meal.

IMG_2253

IMG_2270

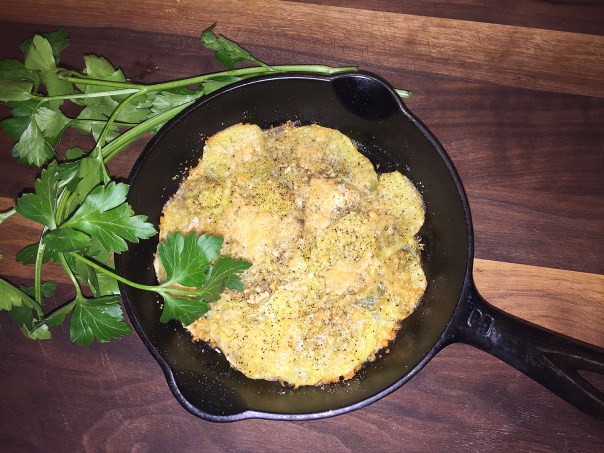
If you have some leftover small potato slices, oil a small cast iron skillet, layer the potatoes in an overlapping circular fashion. Sprinkle with salt and pepper and top with a few tablespoons of grated parm. Cook in the 350 degree oven for 25-30 minutes, until lightly browned (you can cook at the same time as the sheet pan). Let cool, remove from skillet, put on a small plate and eat immediately or cover with plastic wrap/foil and refrigerate until ready to use. Reheat in a microwave and perhaps serve with a weekend breakfast.

I know, I know, it’s not necessarily diet-friendly, but you only need a small slice to satisfy; and it is loaded with some healthy veggies like onion, spinach, garlic and tomatoes. Wouldn’t it make a great contribution to a pot-luck party or an Open House event? In which case I’d make the slices thinner. And the Superbowl is right around the corner… just sayin’…

Following the directions is my step-by-step pictorial.

IMG_2227

Scalloped Potato Roll

  • Servings: 8
  • Difficulty: somewhat challenging
  • Print

Ingredients

  • 6 medium Yukon potatoes, peeled
  • 2 cups grated parmesan cheese, divided
  • 3 teaspoons salt, divided
  • 4 tablespoons olive oil, divided
  • 1 sweet onion, diced
  • 1 lb lean ground beef or turkey
  • 14 ½ oz diced tomato, 1 can, drained
  • 4 tablespoons fresh parsley, chopped, divided
  • ½ teaspoon pepper
  • 1 tsp. paprika
  • 6 cups baby spinach
  • 2 cloves garlic, minced
  • 1 cup ricotta cheese
  • 1 cup mozzarella, shredded

Directions

  1. Preheat oven to 350˚F.
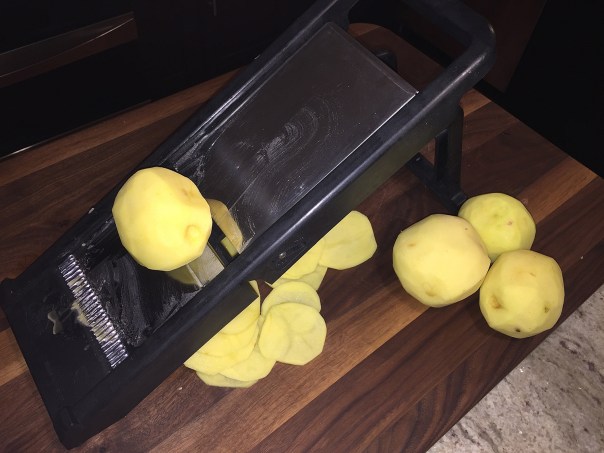
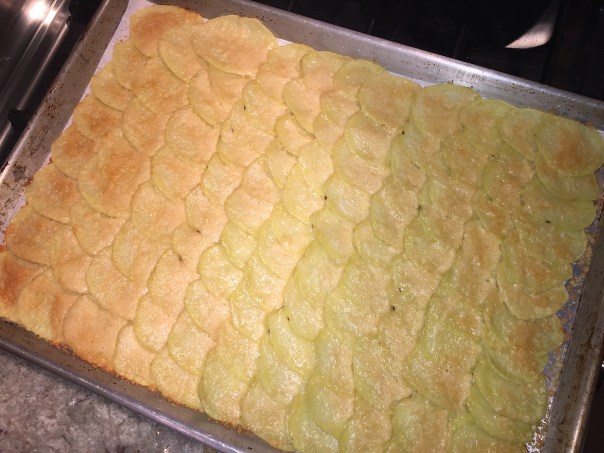
  2. Using a knife or mandolin cut the potatoes into slices 1/8-inch thick.
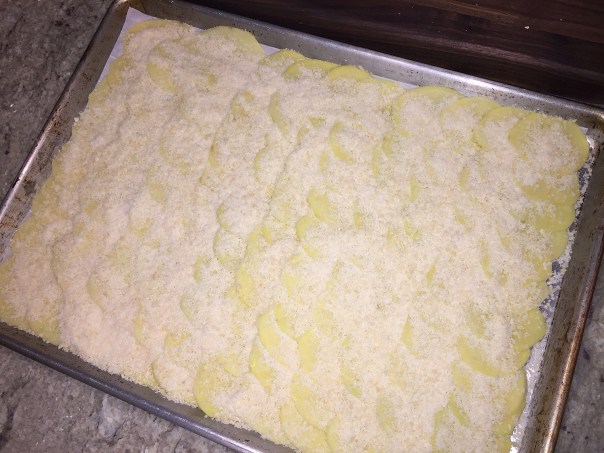
  3. On a parchment paper-lined large rimmed baking sheet, sprinkle half (1 cup) of the Parmesan cheese and spread until it is evenly covering the parchment paper.
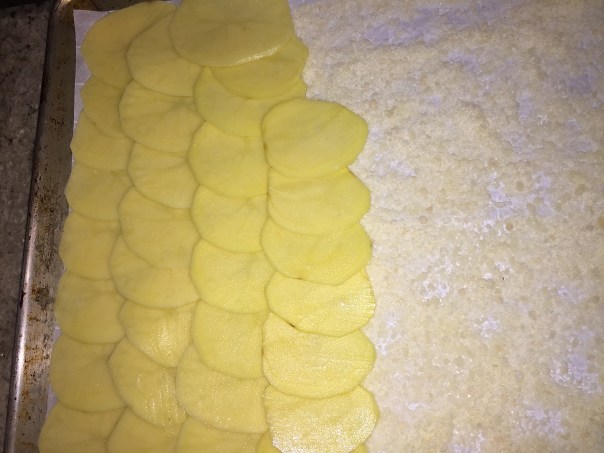
  4. Place the potatoes over the parmesan so each potato is overlapping the previous potato both vertically and horizontally. Continue until the entire pan is filled with potatoes.
  5. Sprinkle the rest of the Parmesan evenly over the potatoes. Season with 1 teaspoon of salt. Bake for 30 minutes, until golden and the potatoes are flexible and slightly crispy.
  6. In a skillet heat 2 tablespoons of olive oil over medium heat. Once the oil begins to shimmer, add the onions, and cook until caramelized, about 15 minutes.
  7. Add the beef/turkey, break up with wooden spoon and mix with the onion until cooked. Mix in the tomatoes, 3 tablespoons of parsley, paprika, 1 teaspoon of salt, and ½ teaspoon pepper. Stir, cooking until the meat is browned and cooked through. Remove from heat.
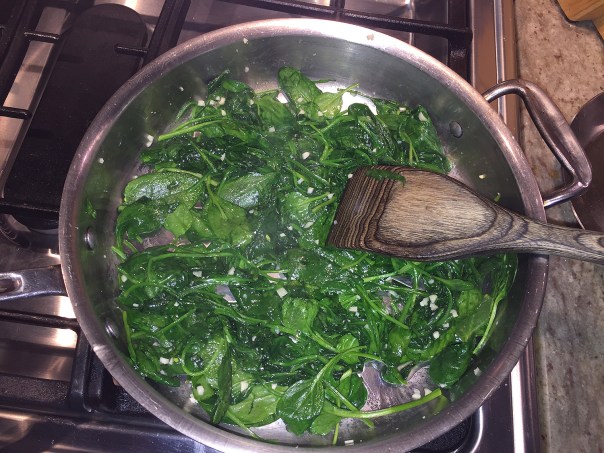
  8. In a skillet, heat 2 tablespoons of olive oil over medium heat. Add the spinach, cook until wilted. Add 1 teaspoon of salt and the garlic. Stir to combine. Remove from heat.
  9. In a bowl combine the spinach mixture and the ricotta.
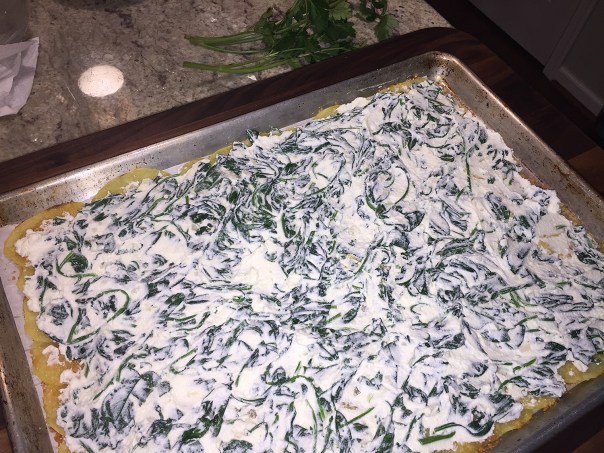
  10. Evenly spread the spinach mixture over the cooked potato sheet.
  11. Evenly spread the meat mixture over the spinach. Sprinkle mozzarella over the top.
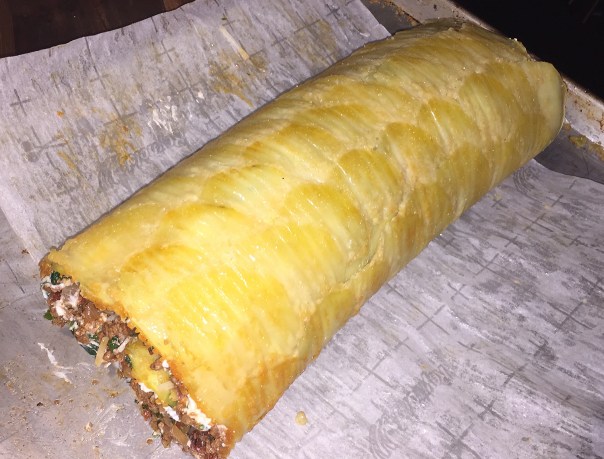
  12. Take one end of the potato sheet holding the parchment paper and begin rolling upward, making sure the ingredients are not coming out the ends.
  13. Once it is completely rolled, place the potato roll on the parchment paper and bake for 15 minutes.
  14. Sprinkle with parsley for garnish. Slice and serve immediately.

http://www.lynnandruss.com

Step-By-Step Pictorial

IMG_2245Slice the potatoes 1/8″ thick on a mandolin for best results.
IMG_2244
Spread one cup of grated parm over parchment before potatoes.

IMG_2249
Layer the slices so each potato is overlapping the previous potato quite a bit both vertically and horizontally. This is important so that the potatoes stay together when rolling.

IMG_2252
Sprinkle the remaining parm over the potatoes and put in oven.

IMG_2255
After the potatoes are a light golden brown, remove from oven and let cool for about 10-15 minutes.

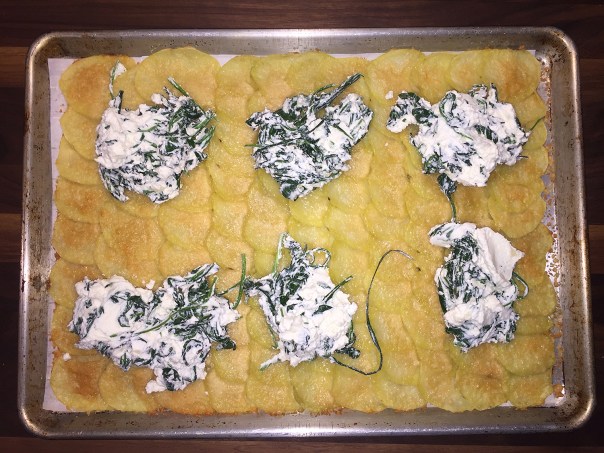
IMG_2232While potatoes are cooking, sauté the spinach and garlic.
IMG_2234
Add cooked spinach to ricotta and mix together.

IMG_2258Dollop out the ricotta mixture…

IMG_2260…then spread it evenly over the potatoes.
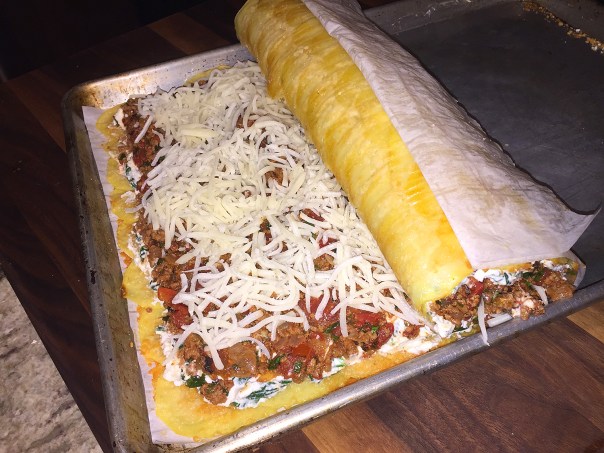
IMG_2262
Next, spread the meat and tomato mixture over the ricotta layer. (Our ground beef weighed in at 1/3 pound more than the recipe called for.)

IMG_2265
After layering on 1 cup of shredded mozzarella, take one end of the potato sheet holding the parchment paper and begin rolling upward. 

IMG_2267Once it is completely rolled, place the potato roll on the parchment paper and bake for 15 minutes.
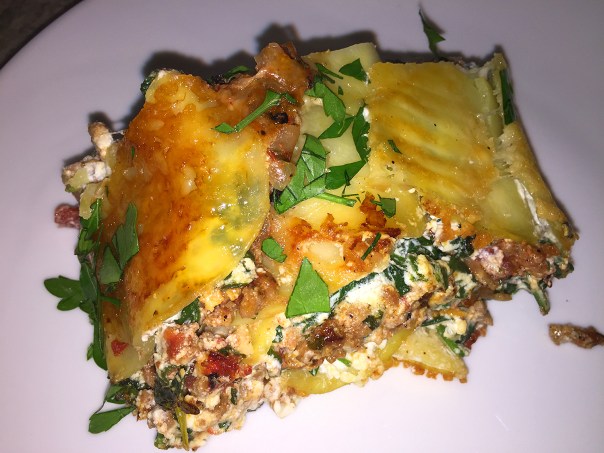
IMG_2279
Position the roll on a platter and garnish with chopped parsley.

IMG_2284
Slice into 2″ wide pieces and serve immediately. It tasted just as good reheated for leftovers.

You can check out the video below.

Video and recipe found on tasty.co by Julie Klink

Dinner in a Blink of Your Eye

Love this Asian-inspired take on beef negimaki, the classic Japanese appetizer of strips of teriyaki-flavored beef rolled around scallions. Trust me, you’ll want to make Broiled Flank Steak and Scallions again and again. It delivers flavor in spades, and is about the easiest-to-make main course ever (especially if you make the rice a day or two ahead of time, which I did.)

IMG_2175

Scallions believe it or not, have a whole lot more to offer than some added color. In fact, they are low in calories, rich in nutrients and boast some serious health benefits, from enhancing immunity to shrinking fat cells. Hip-hip hooray! Just so you know, as a member of the Allium family of plants, scallions are a close relative of garlic, onions, leeks, shallots and chives and share many of the same health-promoting compounds.

IMG_2167
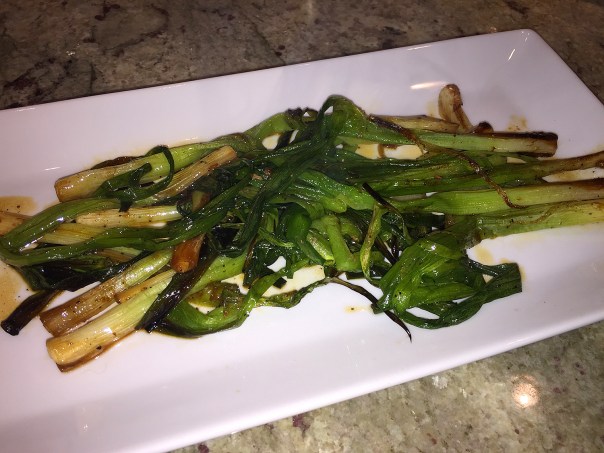
Plan on one bunch of scallions per person as they shrink down quite a bit. I cooked 2 1/2 bunches and this was the result. Russ and I polished off the entire serving in one meal.

One more notable fact about the vegetable, scallions are practically bursting with vitamin K. In fact, just a half cup can meet and exceed your vitamin K requirement for the entire day. Vitamin K is a necessary nutrient for many aspects of health, but its critical role in blood clotting stands out in particular.

Feel free to grill the meat and scallions instead of broiling them if the weather permits (which in January in the Northeast is near impossible.) And you know how I often complain about a broiler in a gas stove, well I went ahead and used ours this time and got great results, I just had to rotate the pan a few times and cook the meat 2 minutes longer than instructed (but I removed the scallions for the last couple minutes.)

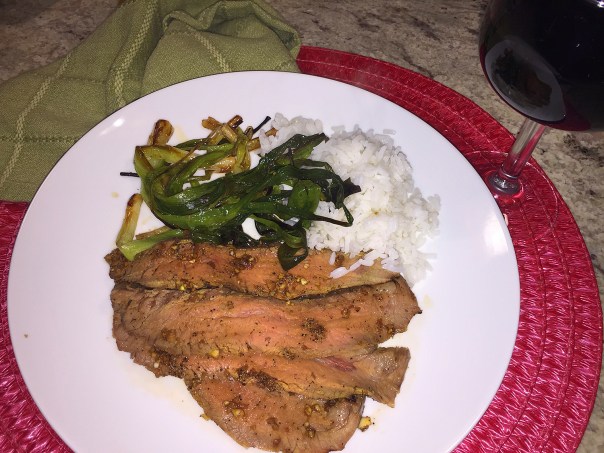
To round out the meal, serve with white rice and a crisp romaine salad… a glass of wine would be a nice accompaniment too…

Ingredients

  • Cooking spray
  • 1/3 cup soy sauce
  • 3 Tbs. honey
  • 1-1/2 Tbs. minced fresh ginger
  • 1 Tbs. minced garlic
  • Freshly ground black pepper
  • 1-1/2 lb. beef flank steak
  • Kosher salt
  • 2 bunches scallions, trimmed
  • 2 tsp. canola or vegetable oil

Directions

  1. Position a rack about 8 inches from the broiler. Line a large rimmed baking sheet with foil and spray with the cooking spray.
  2. Whisk the soy sauce, honey, ginger, garlic, and 1/2 tsp. pepper in a small bowl. Set aside 1/4 cup of the mixture for finishing the dish.
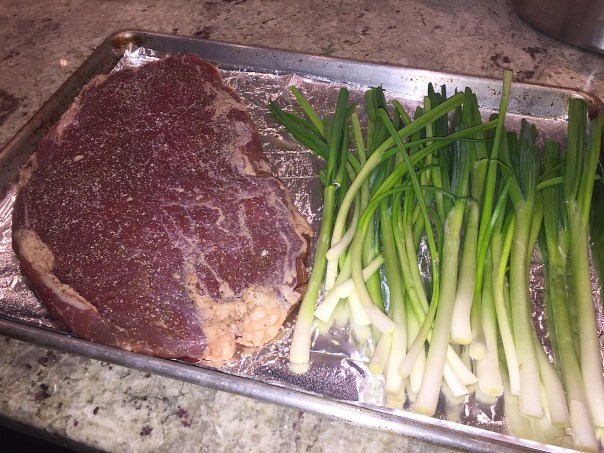
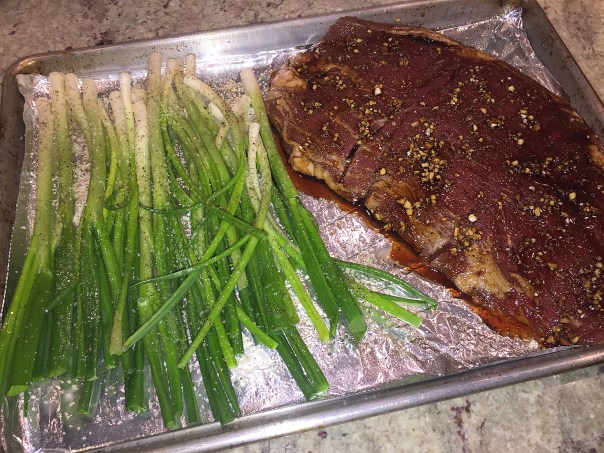
  3. Transfer the steak to the prepared baking sheet, lightly season with salt and pepper, and brush liberally with some of the soy mixture.
    IMG_2161
    IMG_2165
  4. Toss the scallions with the oil, 1/4 tsp. salt, and 1/4 tsp. pepper, and spread in a single layer on the baking sheet next to the steak. Broil until the steak browns on one side, about 5 minutes.
  5. Flip the steak and toss the scallions. Brush the steak with more of the soy mixture. Broil until the scallions are soft and brown in spots and the steak is medium rare (135°F), about 3 minutes; you may need to remove the scallions before the steak is done.
    IMG_2169
    Save any pan juices from the baking sheet to flavor your rice.
  6. Transfer the steak to a cutting board and let rest for 5 minutes. Slice it thinly against the grain, drizzle with the reserved soy mixture, season to taste with salt and pepper, and serve with the scallions.

IMG_2179

From Fine Cooking by Bruce Weinstein, Mark Scarbrough

A Colorful Cornucopia of Shrimp and Veggies

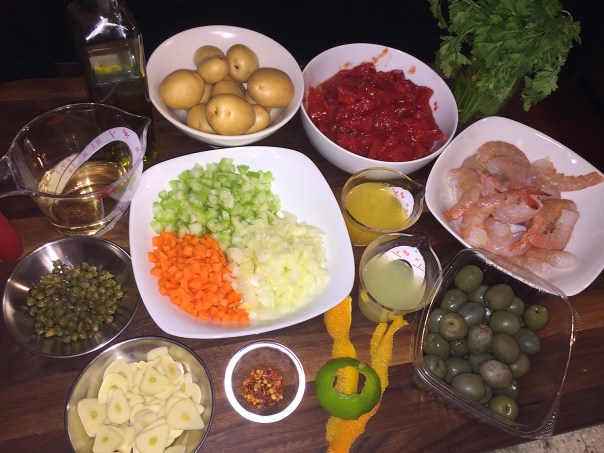
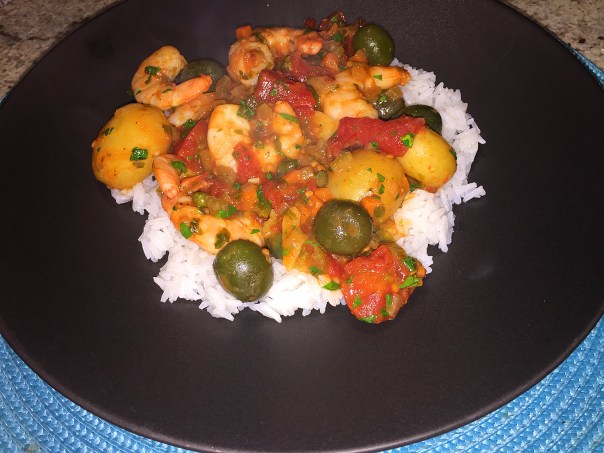
Shrimp and braising rarely make good bedfellows in the culinary world because of the lengthy cooking time—which we all know would render the crustacean inedible. But cookbook author Molly Stevens says of her dish Orange-Scented Mediterranean Shrimp Braise“The shrimp get tossed in just a few minutes before serving, making the finished dish a real cornucopia of seafood and vegetables.”

The braising liquid for this dish consists of a colorful mix of tomatoes, garlic, onion, carrots, and celery that is brightened with the zests and juice of orange and lime. Also included are small potatoes turning it into a satisfying one-dish meal. Since this braise comes out rather soupy, serve it in shallow pasta bowls. But if your appetites are crying for more, ladle the braise over linguine or rice.

IMG_2123

Russ is not a huge potato fan so he wanted rice with the meal. I found it odd having both potatoes and rice, and would have preferred one or the other, but it certainly did not take away from the complexity of flavors that made a heartwarming contrast to the frigid outdoor temps.

About the canned tomatoes, first and foremost the grocery stores never seem to carry the small 14-ounce size, so I was forced to buy the larger 28-ounce can, and I used the entire amount. We like things saucy and Russ was thrilled that I included the whole can, it not only added more of the gorgeous red color, we got an extra boost of lycopene! Plus, according to some researchers “…it is 60% more expensive to get dietary fiber from fresh tomatoes than from a can.” So bring on the fiber!

Then there’s the age old controversy about leaving the olives pitted, which can be annoying when trying to eat civilly in the presence of company. But when you cook olives whole, it’s almost like an anchovy. The salt comes out of the olives, and the olive becomes more like a vegetable, and the salt from the olive flavors the dish really wonderfully. Pits, or no pits, I leave that dilemma up to you…

I also used one entire celery stalk instead of a half, and one large carrot, because, why not? Again, it’s more color, and additional health benefits. And while butter is an option at the end of cooking, and I wasn’t originally going to include it, I took Molly’s advice to cut back on the acidity of the dish, but incorporated only one tablespoon as opposed to two, and it provided the perfect finish.

IMG_2108

Ingredients

  • 3 tablespoons extra-virgin olive oil
  • 3 to 4 garlic cloves, thinly sliced
  • 1 /2 cup finely chopped yellow onion (about ½ small onion)
  • 1 /2 cup finely chopped carrot (1 small carrot)
  • ½ cup finely chopped celery (1/2 stalk)
  • Coarse salt and freshly ground black pepper
  • ½ cup dry white wine or dry white vermouth
  • 2 strips orange zest, removed with a vegetable peeler (each about 3 inches by ¾ inch)
  • 1 strip lime zest, removed with a vegetable peeler (about 2 inches by ½ inch)
  • ¼ cup freshly squeezed orange juice
  • ¼ cup freshly squeezed lime juice
  • One 14½-ounce can whole peeled tomatoes, drained and chopped (or use the large 28-ounce can like we did)
  • Pinch of crushed red pepper flakes
  • ¼ cup chopped flat-leaf parsley
  • ¾ pound small potatoes, preferably fingerlings or white creamers
  • ¼ cup small green olives, such as Picholine, not pitted
  • 2 tablespoons capers, rinsed and drained
  • ¾ pound large shrimp (30 to 35 count per pound), peeled and deveined
  • 2 tablespoons unsalted butter, cut into 4 pieces (optional)

Directions

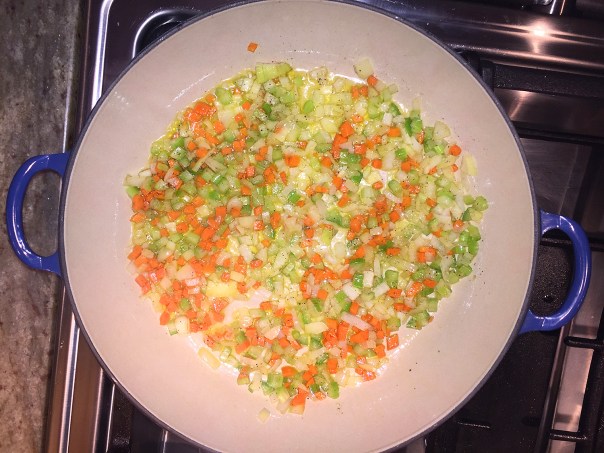
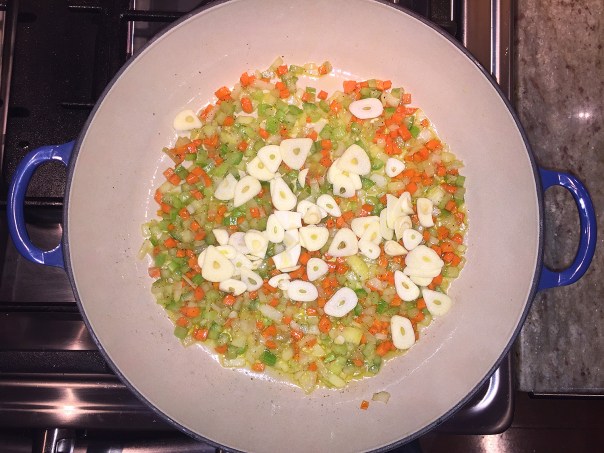
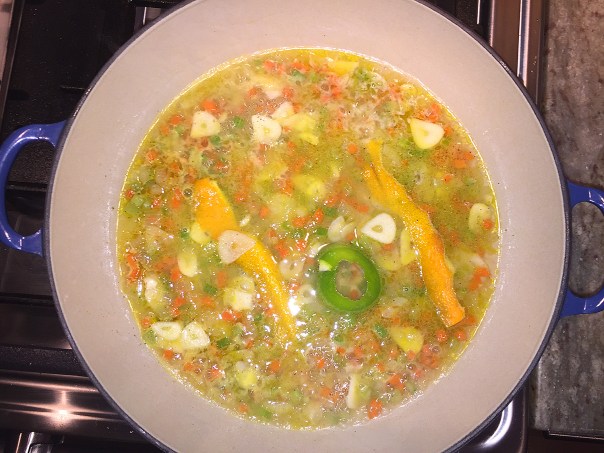
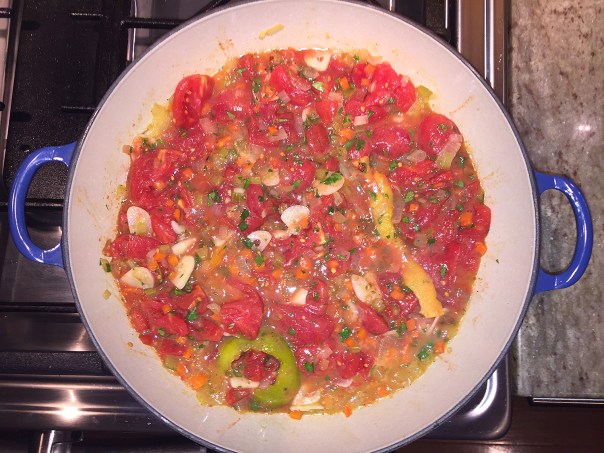
  1. The aromatics and braising liquid: Heat the oil in a large deep lidded skillet (13-inch works well) over medium-high heat until shimmering. Add the onion, carrot, and celery. Season with salt and pepper, stir, and sauté until just beginning to soften, about 5 minutes. Add the garlic, sauté another minute more. Add the white wine, orange and lime zests, and orange and lime juices, and let the liquid simmer vigorously until reduced by half, 5 to 8 minutes. Stir in the tomatoes, crushed red pepper, and 2 tablespoons of the parsley. Return to a simmer.
    IMG_2109
    IMG_2110
    IMG_2111
    IMG_2112
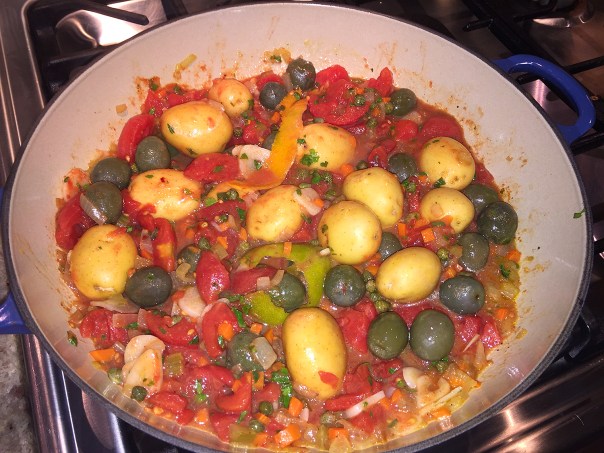
  2. The braise: Turn the heat to very low, cover, and simmer gently for 5 minutes. Then add the potatoes, olives, and capers. Stir so the potatoes are evenly distributed, replace the cover, and continue to simmer until the potatoes are easily pierced with the tip of a knife, another 30 to 40 minutes.
    IMG_2115
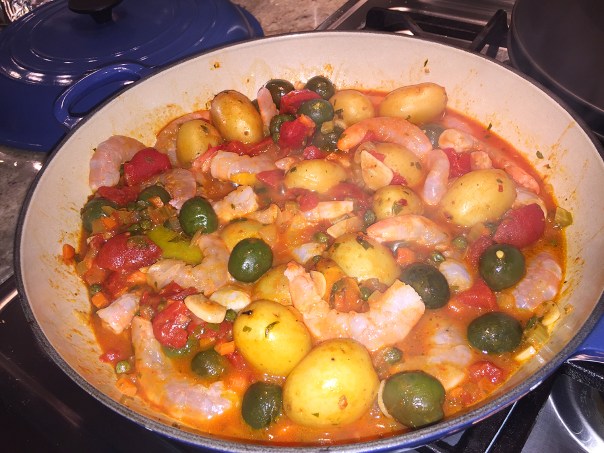
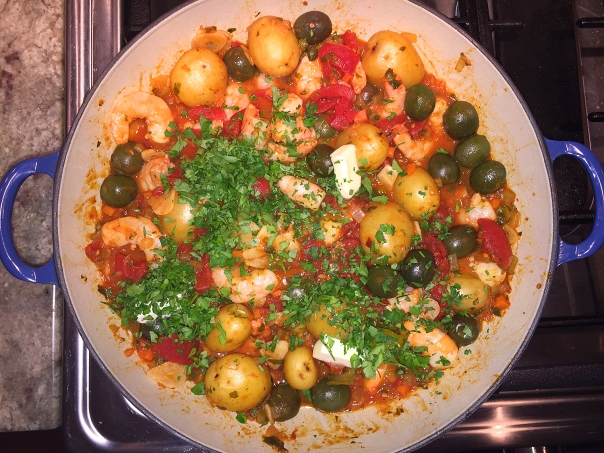
  3. The finish: Add the shrimp, leave the pan uncovered, and adjust the heat so the liquid simmers gently. Simmer just until the shrimp are cooked through, 4 to 5 minutes. Stir in the remaining 2 tablespoons parsley, and taste. If the sauce tastes too acidic or too sharp, stir in the butter. The small bit of butter will soften the acidity nicely. Taste again for salt and pepper. Remove the zests if you like, and serve in shallow bowls.
    IMG_2118
    IMG_2119
    IMG_2121


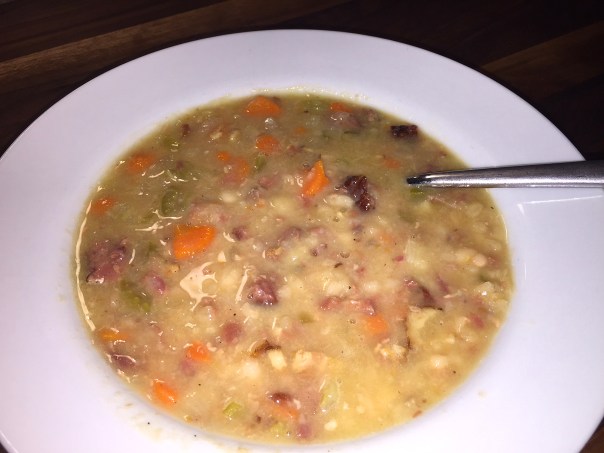
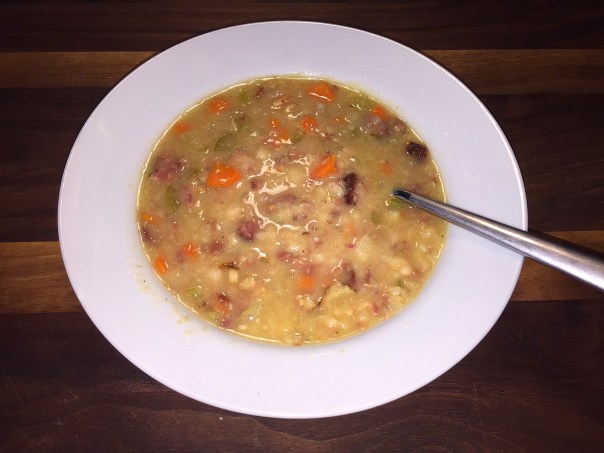
Ham and Navy Bean Soup alla Russ

Baby it’s cold outside… Winter weekends Russ often makes a pot of homemade stock and/or soup. Since he had cooked up a batch of ham stock a few weeks prior, he decided it was time—and certainly cold enough—to make his Ham and Navy Bean Soup. Back in the day, Russ learned to make it from his mother Mary, but he’s made a few tweaks of his own along the way.

IMG_2182

Mary did not make the stock in advance, but rather she’d cook the ham hocks with the beans until tender. After which she’d remove the meat from the bone, and then add the sautéed vegetables. As owner of two pressure cookers, Russ can make his various stocks quickly and freeze them in 4 cup portions (and large cubes) for future use.

With our ham stock ready, the soup prep was relatively easy, and the aroma while it simmered on the stove was a welcome reprieve to the frigid outdoor temps. As with many soups and stews, they are often better tasting the following day after the flavors have had a chance to meld.

IMG_2051
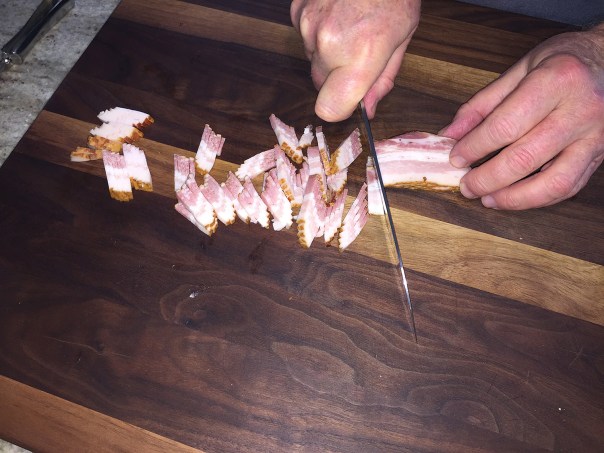
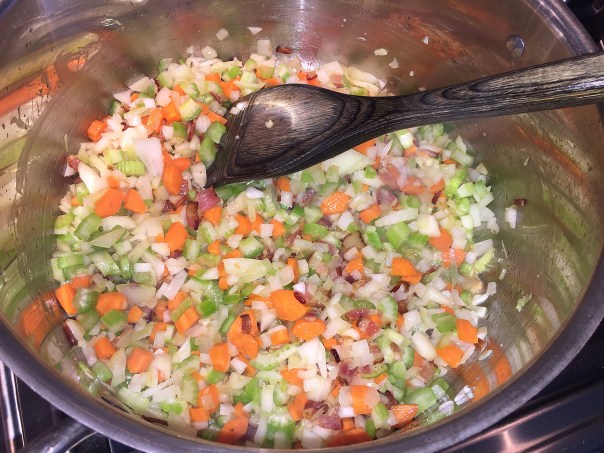
Slice the bacon into 1/2″ strips, and dice the celery and carrots.IMG_2052

No need for a garnish, but if you wish to add a pop of color, sprinkle on some chopped parsley.

Ingredients

  • 16 ounce dried navy beans, soaked overnight, drained
  • 4 ounces bacon, sliced into 1/2″ strips
  • 3 celery stalks, chopped into 1/4″ dice
  • 3 medium carrots, chopped into 1/4″ dice
  • 2 medium onions, chopped
  • 6 garlic cloves minced
  • 5 cups ham stock
  • 3 cups water
  • About 2 cups meat picked off of ham hock bones after making the stock

Directions

  1. Brown bacon pieces in large soup pot over medium heat until crisp, about 4 minutes.
    IMG_2055
  2. Add chopped celery, carrots and onion to pot. Stir in chopped garlic after 2 minutes and sauté over medium heat for 10 minutes until onion softens, stirring occasionally.
    IMG_2056
  3. To pot, add 5 cups of ham stock and 3 cups water. After adding liquids, stir in navy beans and bring to a boil.
    IMG_2057
  4. Reduce heat to low and simmer the covered pot for 60-75 minutes until beans are tender.
    IMG_2061
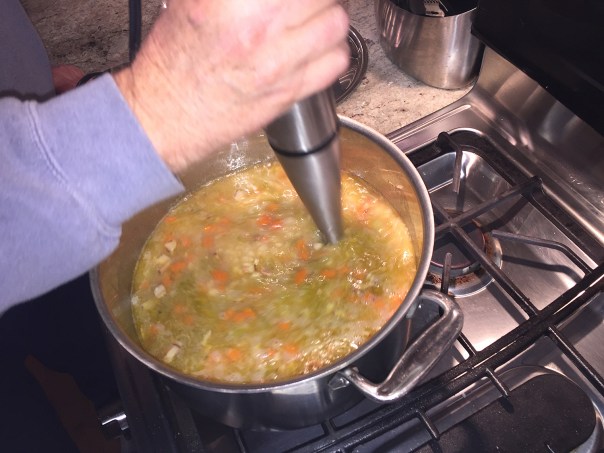
  5. Using an immersion blender, purée some of the ingredients with a few pulses to thicken the soup. Alternatively, put 2 cups of the soup in a blender and pulse until creamy, then pour back into soup pot.
    IMG_2063
    IMG_2065
  6. Add shredded meat and heat for another few minutes. Salt and pepper to taste. Ladle into soup bowls and enjoy!

IMG_2181

Time saving tip: In a pressure cooker, cook the ham hocks and navy beans per unit instructions. When done, remove the meat from the bones and add everything to a pot of the sautéed veggies.

Downright Shady and Low-Carb

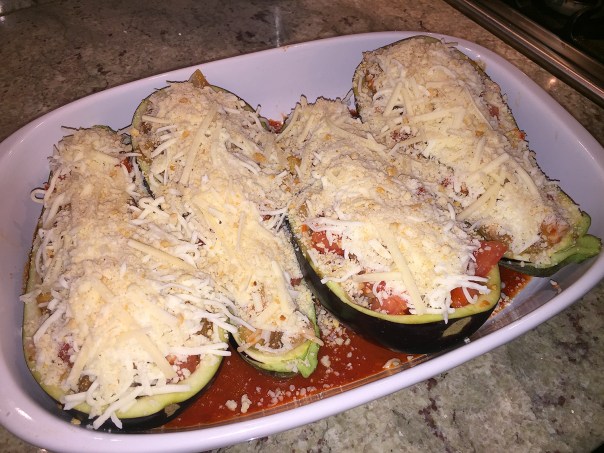
Several online sites were touting this low-carb Stuffed Eggplant Parm recipe as an antidote to all the rich meals that have been consumed over the holidays. No frying needed, and it will even entice you to eat your vegetables. Count me in!

IMG_2145

An interesting aspect of eggplant is its “shady” connections, since it’s a member of the nightshade family of plants with tomatoes, potatoes, and bell peppers, as well as chili peppers, habeñeros, jalapeños, and paprika—all ingredients that I adore.

Let’s ruminate over the “purple peasant” for a moment. Eggplants are fruits native to the Indian subcontinent but are now found throughout the world in different cultural cuisines. In England, they are known as “aubergine”, and are also called brinjal, melongene, and guinea squash. These purple or black glossy fruits can grow more than a foot in length in wild varieties, though they are considerably smaller in normal agriculture.

Although they are fruits, eggplants are commonly called the “king of vegetables,” as they are one of the most versatile and functional foods in the Indian cultural gamut. They have the consistency of a tomato, in terms of texture and density and are a perfect addition to soups, stews, and sauces. They also contain almost no cholesterol, or saturated fat.

When choosing an eggplant, it should be firm and not too large. The length of a cucumber and the general circumference of a very large pear should be about right. Smaller eggplants are less likely to be bitter (a bit of salt can help with this) and have fewer seeds, although these are edible.

Studies indicate that eggplant has a number of health benefits. While eggplants don’t have an overwhelming supply of any one nutrient, they do contain an impressive array across the board of many vitamins and minerals, such as excellent amounts of fiber, folate, potassium and manganese, as well as vitamins C, K, and B6, phosphorus, copper, thiamin, niacin, magnesium, and pantothenic acid.

According to lore, ancient Mediterranean people reportedly nicknamed it “mad apple,” believing that eating eggplant every day for a month would cause insanity. I don’t think I like anything enough to want to eat it every day for a month, but this was way-good-enough to eat several times in one week…

IMG_2124

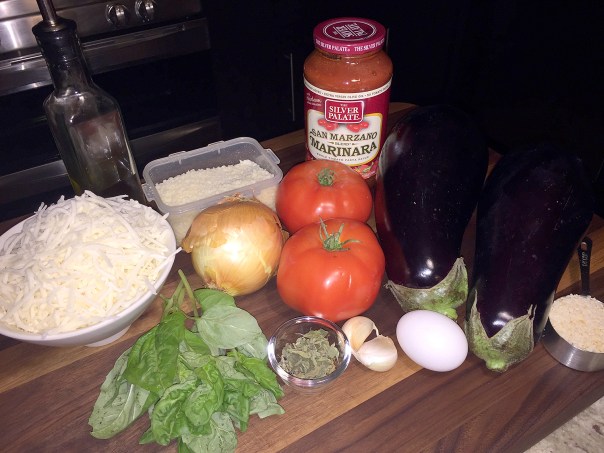
Ingredients

  • 1 1/2 cup marinara, divided
  • 2 medium eggplants, halved
  • 1 tbsp. extra-virgin olive oil
  • 1 onion, chopped
  • 1 tsp. dried oregano
  • kosher salt
  • Freshly ground black pepper
  • 2 cloves garlic, minced
  • 1 cup chopped tomatoes
  • 1 large egg, lightly beaten
  • 2 1/2 cup shredded mozzarella, divided
  • 1 cup freshly grated Parmesan
  • 1/4 cup Italian bread crumbs (we used gluten-free)
  • 1/4 cup basil, chiffonade

Directions

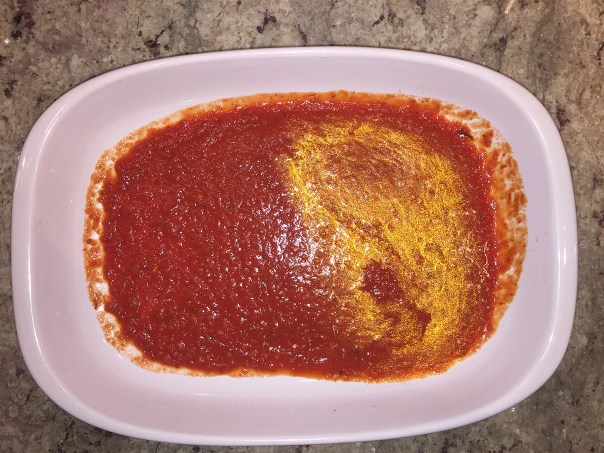
  1. Preheat oven to 350°. Spread about 1 cup marinara sauce in the bottom of a medium baking dish.
    IMG_2126
  2. Using a spoon, hollow out the eggplants leaving about a 1/2” thick border around skin to create a boat. Roughly chop scooped out eggplant.
    IMG_2127
  3. Place eggplant boats on prepared baking dish. In a large skillet over medium heat, heat olive oil. Add onion and cook until softened, about 5 minutes.
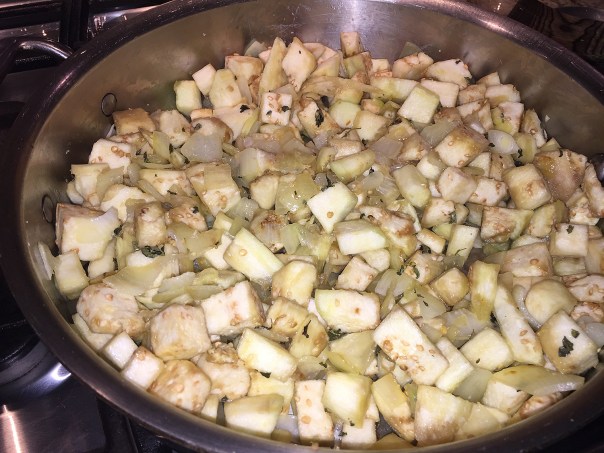
  4. Stir in chopped eggplant and season with oregano, salt and pepper. Cook, stirring often, until the eggplant is golden and tender, about 3 minutes. Stir in garlic and cook until fragrant, about 30 seconds.
    IMG_2130
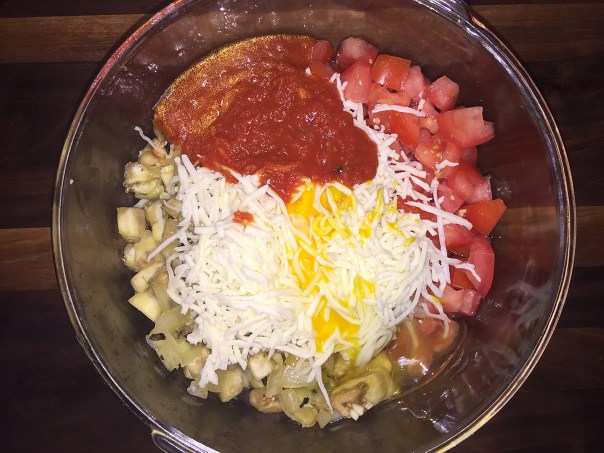
  5. Transfer mixture to a bowl. To the bowl with the eggplant mixture, add chopped tomatoes, egg, 1 1/2 cups shredded mozzarella, and 1/2 cup marinara. Mix until just combined.
    IMG_2131
  6. Scoop mixture into eggplant boats. Top with more mozzarella, Parmesan and bread crumbs.
    IMG_2133
    IMG_2135
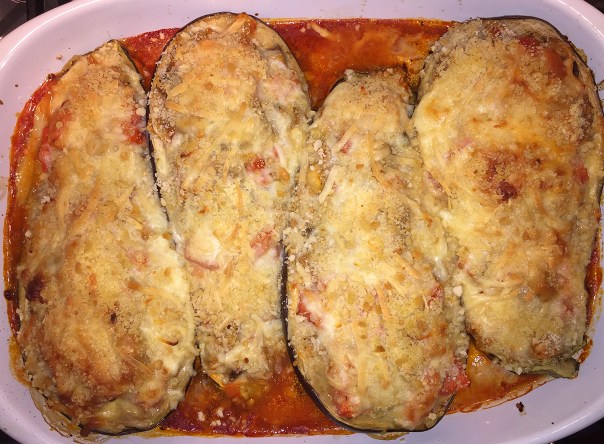
  7. Bake until the eggplants are tender and the cheese has melted and is lightly browned, about 50-60 minutes.
    IMG_2137
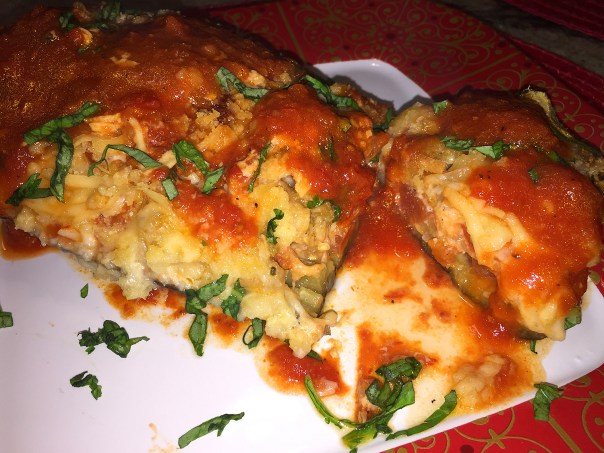
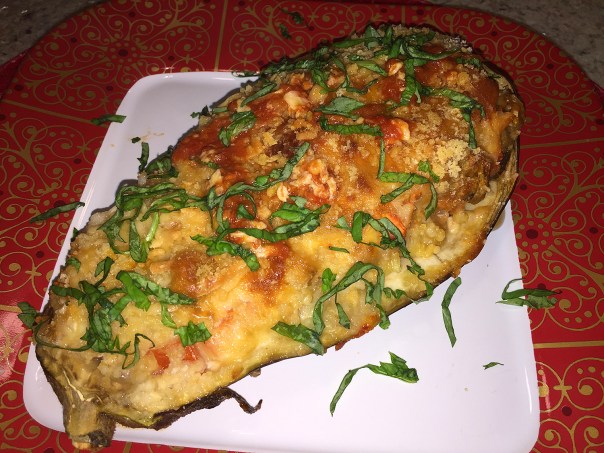
  8. Garnish with basil and serve warm.
    IMG_2141
    IMG_2146

This is a complete meal by itself, but we served ours with a side salad.


Braising with Two Famous Ladies

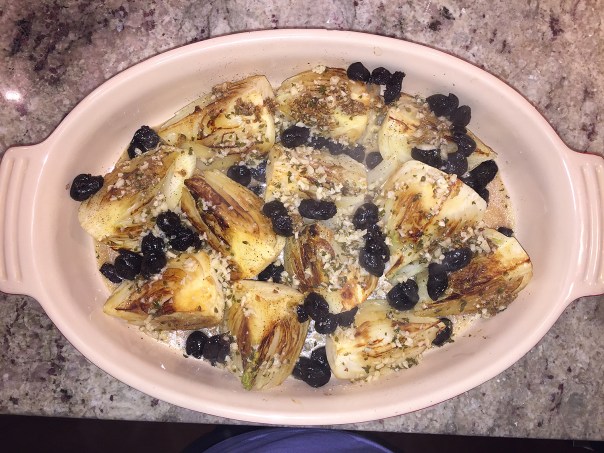
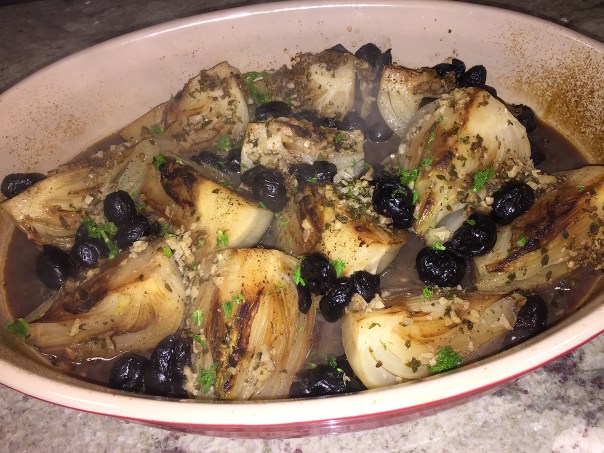
A super fabulous and seductively tender side dish from chef/author Molly Stevens—and you know how much we love her braised dishes! This Fennel Braised with Thyme and Black Olives recipe was a perfect accompaniment to our Chicken in Beer entrée, a heart-warming recipe from Lidia Bastianich’s cookbook Mastering the Art of Italian Cuisine, a Christmas present to Russ from his son David.

IMG_2102

But back to the side dish. Cooking fennel is akin to cooking onions. Considering raw fennel is crisp and almost biting, braised fennel transforms to tame and splendidly supple. The sharp anise flavor of the raw vegetable mellows into a sweetness that even non–licorice lovers will appreciate. (Sister-in-law Dee, I’m telling you, you need to give this a try.)

Molly says don’t be at all put off by the anchovies in the recipe. They are discernible only as a bass note of flavor to match the higher tones of the sweet fennel. If you’re serving these to professed anchovy haters, don’t say a word. They’ll never guess what makes the dish taste so good.

IMG_2067

Ingredients

  • 3 large or 4 medium fennel bulbs (about 3 pounds total)
  • 3 tablespoons extra-virgin olive oil
  • Coarse salt and freshly ground black pepper
  • ½ cup pitted oil-cured black olives, such as Nyons or Moroccan
  • 2 garlic cloves, minced
  • 5 to 6 anchovy fillets, minced
  • 1 teaspoon chopped fresh thyme
  • ½ teaspoon fennel seeds, toasted and lightly crushed
  • ½ teaspoon coriander seeds, toasted and lightly crushed
  • ⅓ cup dry white wine or dry white vermouth
  • ¾ cup chicken stock, homemade or store-bought

Directions

  1. Heat the oven to 325 degrees.
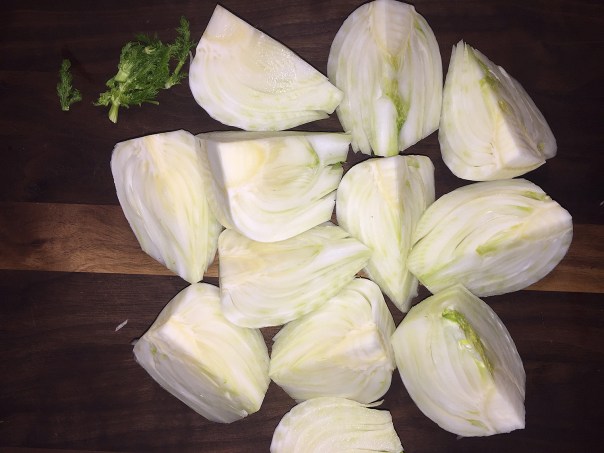
  2. Trimming the fennel: If the fennel came with the feathery green stalks attached, use a large knife to chop these off right down at their base, where the bulb begins. Reserve a few of the brightest and freshest-looking fronds for garnish, and save the rest for stock or discard. If the very base of the fennel bulbs looks brown or at all dried out, slice off a thin sliver. Check the sides of the bulbs as well, and trim off any brown parts with a vegetable peeler. Cut each bulb in half through the core and then halve again, into quarters.
    IMG_2069
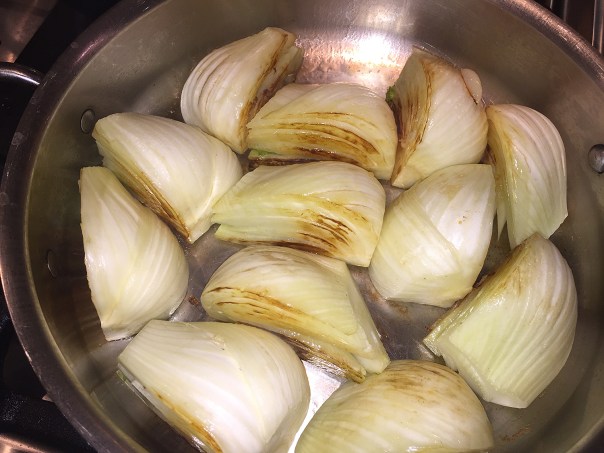
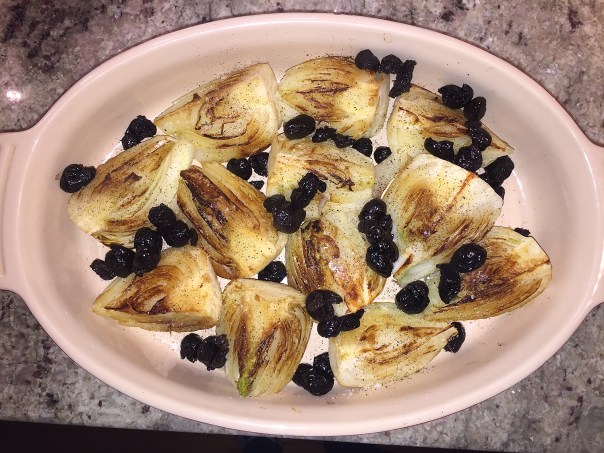
  3. Browning the fennel: Heat 2 tablespoons of the oil in a large heavy-based skillet (12-inch) over medium-high heat until it ripples. Add as many quarters of fennel as will fit without crowding, one cut side down. Leave the fennel undisturbed for 3 minutes—moving the pieces around will only slow down the browning process. With tongs, lift a few quarters to check to see if they’ve browned in spots. Because of its uneven surface, the fennel won’t brown evenly: you’re looking for patches of caramelization. Turn the quarters onto the other cut side and leave again until browned, another 3 to 4 minutes. Remove the quarters from the pan and arrange them browned side up in a large gratin dish or shallow baking dish (9- to 10-by-13- to 14-inches). Add the remaining oil to the skillet and brown the remaining fennel. Add this batch of fennel to the gratin dish, arranging it as best you can so the wedges line up in a single layer. It’s okay if the wedges are a bit cramped; they will collapse and shrink some as they braise. Season with salt and pepper. Scatter over the olives.
    IMG_2085
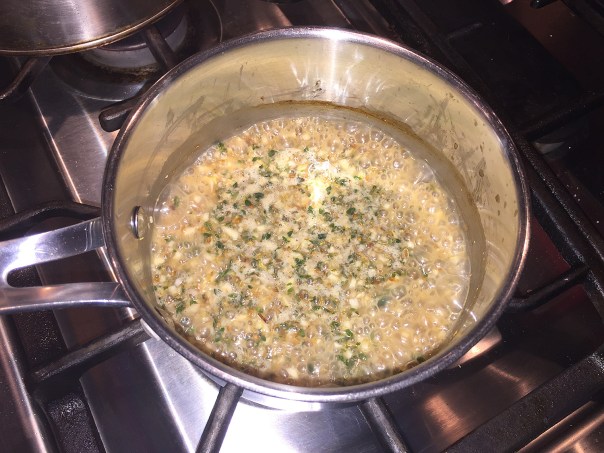
  4. The aromatics and braising liquid: Combine the garlic, anchovies, thyme, fennel seeds, and coriander in a small saucepan, and smash the mixture against the bottom of the pan with a wooden spoon to make a rough paste. Add the wine, bring to a boil over high heat, and boil until reduced by about half, about 2 minutes. Add the stock and bring to a simmer.
    IMG_2071
    IMG_2072
    IMG_2073
    IMG_2083
  5. The braise: Pour the seasoned liquid over the fennel, cover tightly with foil, and slide onto the middle rack of the oven. Braise until the fennel has collapsed and a small knife penetrates the core of the wedges with no resistance, about 1 hour and 15 minutes.
    IMG_2086
    IMG_2087
  6. Serving: If you reserved the feathery tops, chop them to give you about 2 tablespoons, and sprinkle them over the top of the braise. Serve warm or at room temperature.
    IMG_2097


A Four Year Milestone

Today we celebrate the four-year anniversary of launching our food blog, an endeavor that Lynn thought would last maybe one year (since she’d be the one doing the lion’s share of blogging.) Thanks for taking this culinary journey with us, and we hope you stay on the trek as we continue to savor the flavors of foods far and wide—as well as close, and with friends and family.

A few insights that have surprised us is the readership from far flung countries, which in the past year alone included Canada, Croatia, Singapore, Spain, France, United Kingdom, Australia, Ireland, Germany, India and China to name a few. Oddly enough, the most popular day/hour to view our posts is Sunday at 1:00 pm—go figure! Another stat indicates that in 2017, the blog tallied a total of 130,424 words with an average of 758 words per post; and readership increased over 25% in the last quarter. (Lynn is a numbers gal.)

map.stats.1year

Viewers access through a host of different avenues including search engines, Facebook, Lynn’s Casa “H” Pinterest Board, and email notices. A few of the top hit-on recipes have been Lemony Carrot and Cauliflower Soup, Winging It, Meatless Meat Sauce, and Best Ground Beef Chili. But I believe the most-ever-read post in one day was Lynn’s blog on the “Guest Appearances” page interviewing her cousin Maureen Evans Kelly. Just goes to show you that it really is about the people—and their connection with food…

We truly enjoy feedback and comments from you so please keep them coming. This year we hope to expand the media arena by incorporating some videos and perhaps a few polls. And if there is anything you want us to blog on, or a favorite restaurant to check out, please let us know… we could always meet you there…

From our table to yours,
Lynn and Russ


Pollo alla Birra

We’ve been enjoying roaming through our latest cookbook “Lidia’s Mastering the Art of Italian Cuisine” by well-known chef Lidia Bastianich. One frigidly-cold Winter’s Sunday we decided to prepare her Chicken in Beer recipe along with Molly Stevens’ Fennel Braised with Thyme and Black Olives (which I’ll post next.)

IMG_2096

OMG, OMG!! We fell head over heals with both of these braises. The complexity of flavors is amazing and soooo nuanced with a myriad of undertones you practically swoon over every single mouthful. I was originally concerned over the amount of liquid in the braise, but it turned out to be perfect. Just make sure to reduce down the liquid after removing the bird and veggies, you’ll want to save every last drop of the liquid gold. Instead of skimming the fat from the juice, I find it’s easier to put it into a fat separator, and pour from there.

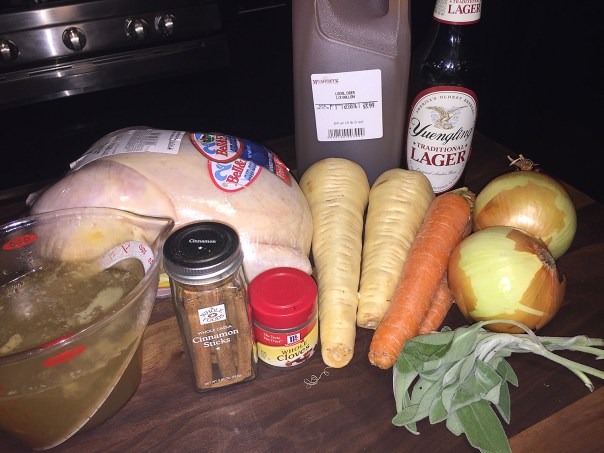
The beer in the chicken entrée adds an interesting depth of distinction, along with the homemade stock and apple cider, and leaves the bird moist with a great glossy skin. Those root vegetables literally melt in your mouth and the sage lends a delightful bass note. Barely discernible but certainly adding to the intricacy of flavors was the cinnamon and whole cloves.

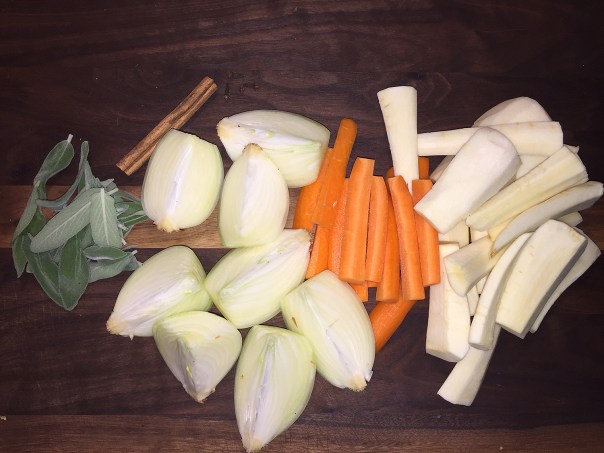
NOTE: Our parsnips were very large, and once they get that big, you need to cut out the woody core. You may think that you dislike parsnips, but they take on an earthy sweet taste in this recipe.

All said and done, between prep and cooking, this meal took me three hours, so it’ll likely be a weekend endeavor for you. But oh so very worth every minute of your time!

IMG_2075

Chicken in Beer

  • Servings: 4-6
  • Difficulty: easy
  • Print

Ingredients

  • A 3½- to- 4- pound roasting chicken
  • 2 teaspoons kosher salt
  • 2 medium onions, peeled, quartered
  • 1 large carrot, peeled, halved crosswise, and quartered lengthwise (about 4 ounces)
  • 2 medium parsnips, peeled, halved crosswise, and quartered lengthwise (about 6 ounces total)
  • 2 tablespoons fresh sage leaves, left whole
  • 4 whole cloves
  • 1 cinnamon stick
  • 1½ cups stock (chicken, turkey, or vegetable broth) or water
  • 1½ cups (one 12- ounce bottle) flavorful beer or ale
  • 1 cup nonalcoholic apple cider, preferably unfiltered

IMG_2078

Directions

  1. Arrange a rack in the middle of the oven, and heat to 400 degrees F.
  2. Trim the excess fat from the chicken, and season it inside and out with half of the salt.
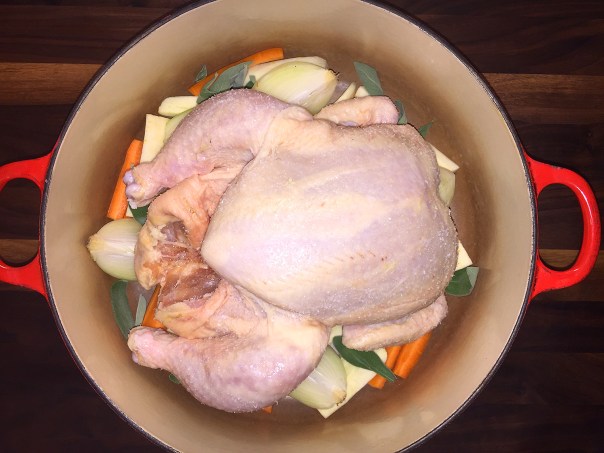
  3. Scatter the onions, carrot, parsnips, sage, cloves, and cinnamon in a large Dutch oven big enough to hold the chicken with a little room around the edges. Sprinkle over this the rest of the salt, and set the chicken on top of the vegetables.
    IMG_2079
    IMG_2080
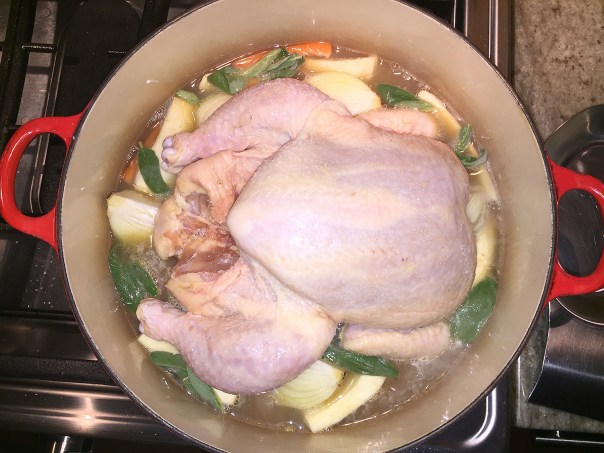
  4. Put the pot on the stove, pour in the stock, beer, and apple cider, and bring to a simmer over medium heat.
    IMG_2081
  5. Cook, uncovered, for about 15 minutes on top of the stove.
  6. Put the pot in the oven, and roast the chicken for about 30 minutes, basting with the pan juices two or three times.
  7. Cover the chicken with a sheet of aluminum foil to prevent over-browning, and roast another 30 minutes.
  8. Remove the foil, and roast another 20 to 30 minutes, basting frequently, until the chicken and vegetables are cooked through and tender.
    IMG_2088
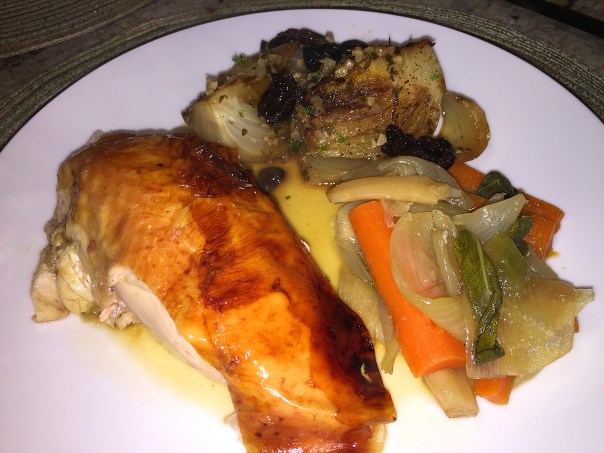
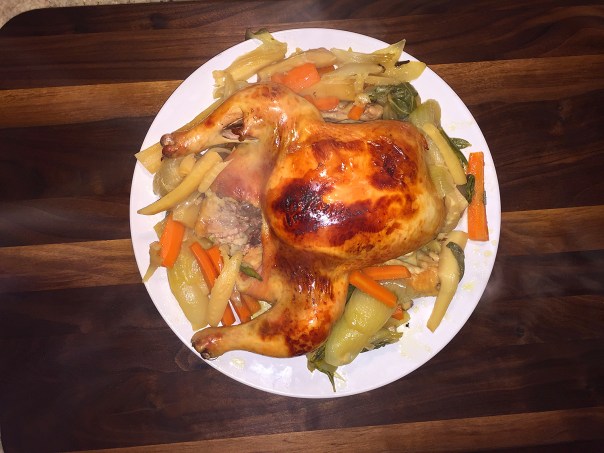
  9. Remove the chicken to a warm platter, and surround with the vegetables. Bring the pan juices to a boil on top of the stove, skim the fat, and cook until reduced by half. Carve the chicken, and spoon some of the pan juices on top.


IMG_2092
IMG_2104

Lidia Bastianich is an Emmy award-winning public television host, a best‐selling cookbook author, restaurateur, and owner of a flourishing food and entertainment business.

A Nutritious Meal in Mere Minutes

Calling all salmon lovers! Here’s a good, nutritious, healthy, and best of all, quick dinner that’ll make you feel a bit self-righteous after all of the could-kick-yourself-moments-for-eating-too-much during the holidays. Five-Spice-Glazed Salmon with Sesame Green Beans came from the Make It Tonight series from Fine Cooking, and not only is it spot-on tasty, it’s such a cinch to prep and cook.

IMG_1713

The ingredients, Chinese five-spice powder, honey, garlic and soy sauce create a tasty glaze for this simple salmon dish. Although some of you may think it a bit too powerful, the saltiness of the soy sauce and the spiciness of the Chinese five-spice and garlic balance the sweetness of the honey nicely. Preferring savory over sweet, I may slightly decrease the amount of honey next time; while you might want to lessen the Chinese five-spice—it’s all a matter of preference.

Broiling the green beans and salmon on the same baking sheet hands you a meal in minutes, and very few dishes to clean! But alas, our broiler in a word, stinks, so I decided to bake everything in a 425F degree oven instead. If your broiler works like it should, by all means follow the directions below, perhaps adding a minute or three. If however you are in the same boat with a sub-par broiler, do as I did, it’ll just take longer. In fact, plan on the total cooking time to be about 15 minutes; stirring the green beans after 7 minutes or so…

…Unless you are serving slender haricot verts (the store wasn’t carrying them at the time I shopped) and smaller salmon fillets. In that case, the cooking time may vary, so you’ll have to keep an eyeball on things. I cut our 1-pound piece of salmon into two pieces, which were larger than 6-ounce fillets listed below, so naturally they took longer.

IMG_1706

Ingredients

  • 1/4 cup honey
  • 4 tsp. reduced-sodium soy sauce
  • 1-1/2 tsp. five-spice powder
  • 2 large cloves garlic, minced
  • Four 6-oz. skin-on salmon fillets (preferably wild), pin bones and scales removed
  • Nonstick cooking spray
  • 1 lb. slender green beans, trimmed
  • 2 tsp. canola oil
  • 1 tsp. Asian sesame oil
  • Kosher salt and freshly ground black pepper
  • 2 Tbs. toasted sesame seeds
  • 1 tsp. lemon juice

Directions

  1. In a small bowl, whisk the honey, soy sauce, five-spice powder, and garlic.
    IMG_1708
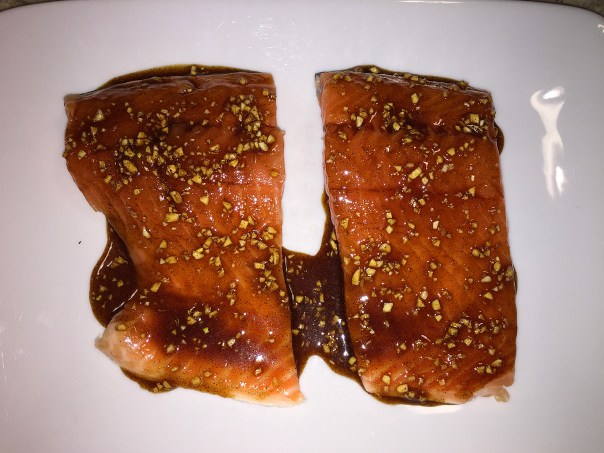
  2. Put the salmon skin side down on a large plate and pour the honey mixture over it. Flip the fillets so they are skin side up. Let the fish marinate for 15 minutes at room temperature.
    IMG_1709
    IMG_1710
  3. Position a rack 6 inches from the broiler and heat the broiler on high. Line a large rimmed baking sheet with foil and coat with cooking spray.
  4. In a large bowl, toss the green beans with the canola and sesame oils. Arrange the beans on one half of the prepared baking sheet and season with salt and pepper. Arrange the salmon skin side down on the other half of the baking sheet. Brush the salmon with any remaining marinade from the plate.
    IMG_1712
  5. Broil the salmon and green beans for 3 minutes. Remove the pan from the oven, toss the green beans with tongs, and reposition the salmon pieces as needed so that they cook evenly. Continue to broil until the salmon is just cooked through and the beans are crisp-tender, 2 to 3 minutes. Toss the green beans with the sesame seeds and lemon juice and serve.
    IMG_1716

By Ivy Manning from Fine Cooking