Monthly Archives: December 2018

Cheesy Scalloped Potato Bundt

For the holidays we always ratchet it up a notch or three when meal planning. And this year we needed to map out three days in a row, plus a homemade dessert for a fourth day. While surfing the net, I put the brakes on when I came across this gorgeous Cheesy Scalloped Potato Bundt from the Food Network Kitchen.

IMG_0371

The boys were visiting with girlfriends for a few days so we put them to work in helping prep the meals. A couple of them were novice cookers, so it was a teaching moment on how to follow recipes, prep appropriately and time the dish to finish when dinner is served.

IMG_0334Son David slices the potatoes very thin on the mandoline; while girlfriend Vykky measures and chops. To boost their confidence, we let them wear our “King & Queen” aprons.
IMG_0333
IMG_0338

Believe me when I tell you, you won’t be able to stop eating these creamy, cheesy spuds. The crowd-pleasing potatoes are layered in a bundt pan and (should) make an impressive dome shape that is sure to intrigue. But it is no simple feat.

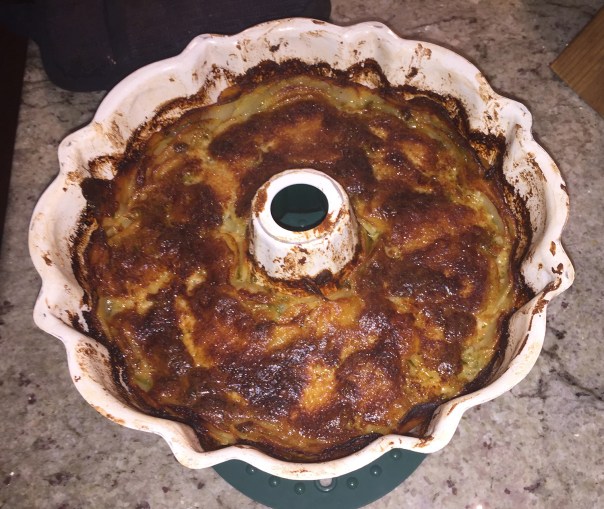
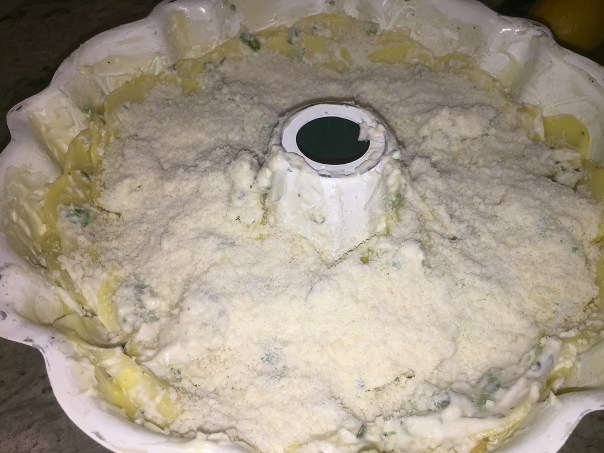
Because our bundt pan was fluted, it was tricky when building it to get the potato slices to stick to the sides. However, they unfortunately DID stick when it was cooked and time to remove from the pan. So while it wasn’t the prettiest presentation, they sure did deliver in flavor, as there was nary a slice left when dinner was done—and there were only six of us!

Since I had about a 1/4 cup of grated parm leftover (and we were a little lean on the cheddar slices), I sprinkled that on top (which is actually the bottom when inverted), giving a golden crusty finish. Be sure to plan ahead when adding this side dish to your menu as it takes a full two hours to assemble and cook.

As an added bonus, I included a tasty green bean side dish recipe at the end…

IMG_0360

Cheesy Scalloped Potato Bundt

  • Servings: 8-10
  • Difficulty: moderate
  • Print

Ingredients

  • 4 tablespoons unsalted butter, at room temperature
  • 2 1/2 pounds Yukon gold potatoes (about 8 medium)
  • 1 cup heavy cream
  • 2/3 cup grated Parmesan
  • 1 clove garlic, grated
  • 1 tablespoon chopped fresh rosemary
  • 3 scallions, thinly sliced
  • Kosher salt and freshly ground black pepper
  • 12 slices mild cheddar, cut in half

Directions

  1. Preheat the oven to 400 degrees F.
  2. Generously butter a 12-cup bundt pan (use all the butter; it may seem like a lot, but the potatoes need it to stick to the sides of the pan and to crisp up).
  3. Thinly slice the potatoes on a mandoline (they need to be thin enough to easily bend when folded). Starting on the bottom of the pan lay the potatoes in a slightly overlapping formation, sticking to the butter, until the entire pan is covered in one layer of potatoes.
    IMG_0339
  4. Stir together the heavy cream, Parmesan, garlic, rosemary, scallions, 2 teaspoons salt and a few grinds of black pepper in a large bowl. Toss the remaining potatoes in the cream mixture until well coated.
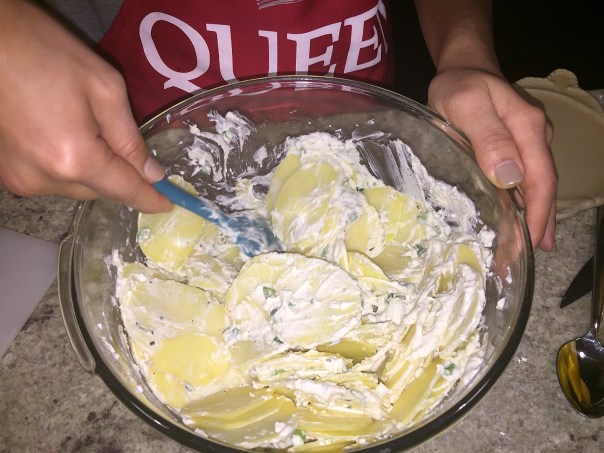
    IMG_0340
  5. Using a quarter of the potatoes, layer them in a circular formation, slightly overlapping in the bottom of the pan. Top with 8 pieces of the cheddar in a slightly overlapping circle. Repeat two more times.
    IMG_0342
  6. Top with the remaining quarter of the potatoes so that all of the cheese is covered. Bake until the potatoes are a dark golden brown, crispy on top and a paring knife can easily be inserted and removed into the center of the dome, about 1 hour 20 minutes.
    IMG_0345
    IMG_0346
  7. Let rest for 10 minutes. Run a small offset spatula around the edges of the pan to help loosen the potatoes from the side. Invert onto a serving platter. Serve immediately.
    IMG_0365
    IMG_0370
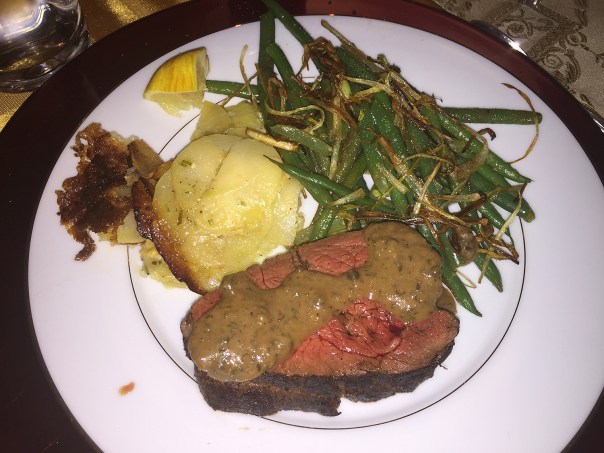
    Our potato bundt was paired with sous vide beef tenderloin au poivre and lemony green beans with frizzled leeks (recipe below).

http://www.lynnandruss.com

Recipe courtesy of Food Network Kitchen

Lemony Green Beans with Frizzled Leeks

Olive oil–fried leeks add crunch, flavor, and an impressive look to this classic holiday meal side. Only three main ingredients too!

IMG_0359

Lemony Green Beans with Frizzled Leeks

  • Servings: 8-10
  • Difficulty: easy
  • Print

Ingredients

  • 2 1/2 pounds green beans, preferably haricot verts, trimmed
  • 1 teaspoon kosher salt, plus more
  • 3 lemons
  • 2 large leeks, white and light-green parts only
  • 1 1/2 cups olive oil
  • 1/2 teaspoon freshly ground black pepper

Directions

  1. Cook green beans in a large pot of boiling salted water until crisp-tender, 5–7 minutes. Drain, then immediately transfer to a large bowl filled with ice water. Drain again and pat dry.
  2. Meanwhile, zest lemons to yield 1 Tbsp. zest. Juice lemons to yield 1/4 cup juice, then slice any remaining lemons into wedges. Cut leeks crosswise into 4″ sections, then thinly slice lengthwise into matchsticks.
  3. Heat oil in a large deep-sided skillet over medium-high until shimmering. Cook half of leeks, stirring occasionally, until lightly golden brown and crispy, about 5 minutes.
  4. Using a slotted spoon, transfer to paper towels; season with salt. Repeat with remaining leeks; reserve oil in skillet.
    IMG_0313
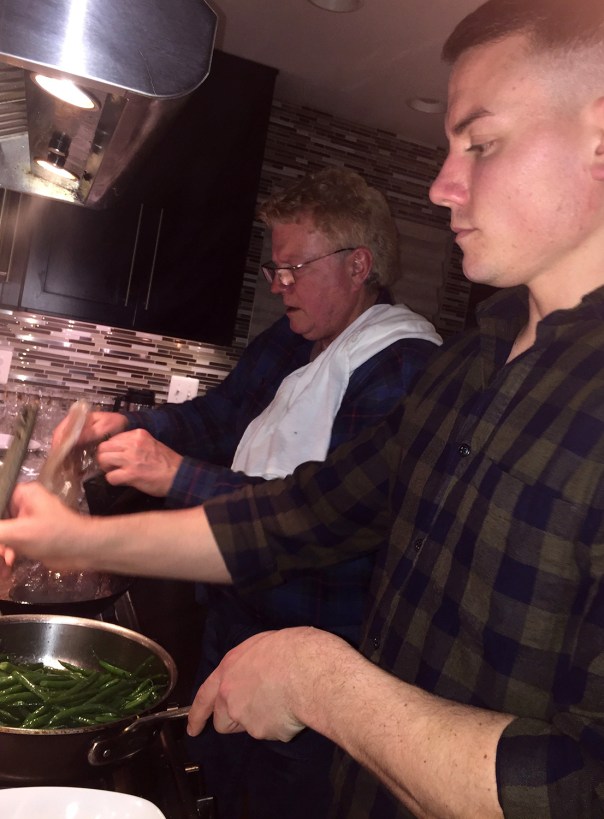
  5. Cook green beans, pepper, lemon zest, and remaining 1 tsp. salt in reserved oil over medium heat, tossing occasionally, just until warmed through, about 5 minutes.
    IMG_0349
  6. Add lemon juice and toss to coat, then transfer to a platter. Drizzle about 1/2 cup oil from pan over; reserve remaining oil for another use. Top with leeks and serve with lemon wedges alongside.

Do Ahead

Green beans can be blanched 1 day ahead; let dry, then transfer to an airtight container and chill.

http://www.lynnandruss.com

By Anna Stockwell from Epicurious
Say Hello to Silky Elegance

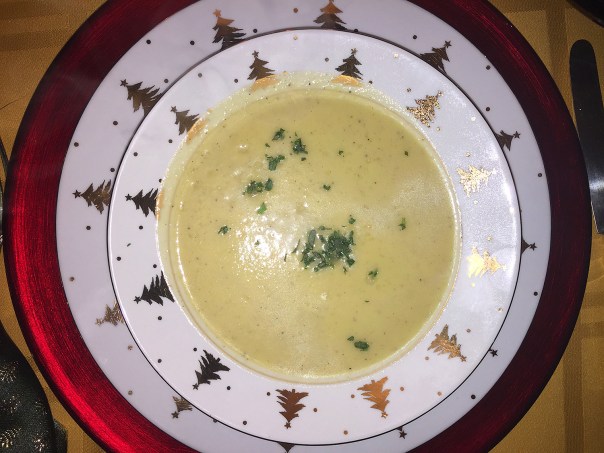
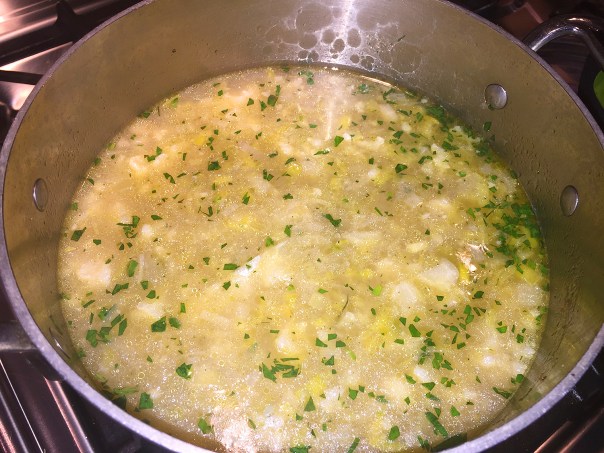
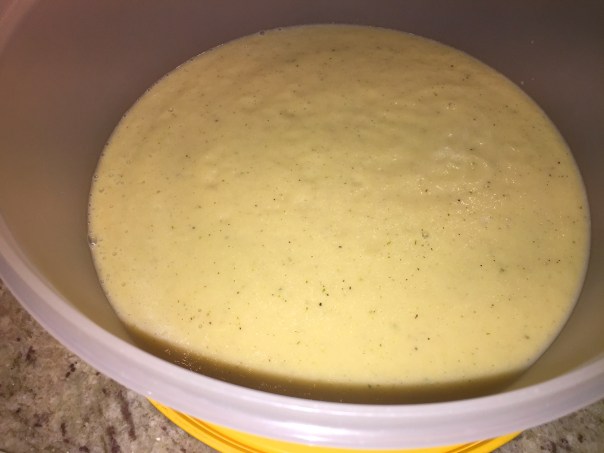
Sweet, earthy, and aromatic with an amazingly smooth texture, this Cauliflower, Pear, and Fennel Soup makes an elegant first course, with the perfect balance of sweetness and acidity. It was an ideal Christmas Day starter to our holiday meal, but would be wonderful served anytime.

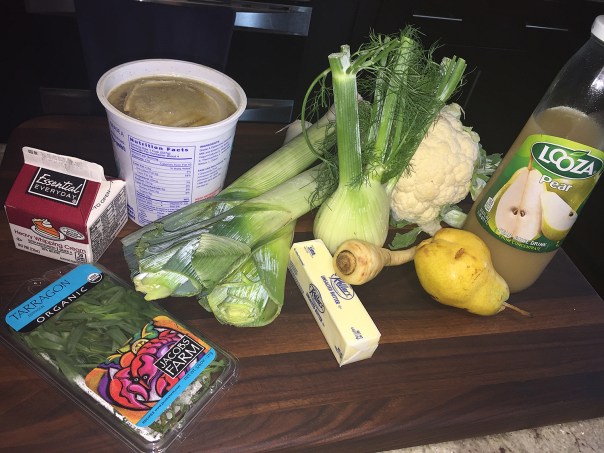
It is chock full of veggies, and if you use homemade chicken broth it will elevate the flavor profile even more. The lone parsnip and single ripe pear, along with the bottled pear juice add just the right amount of sweetness, while a squeeze of fresh lemon and a tad of finishing salt brighten the flavors.

Cauliflower, Pear and Fennel Soup exhibits the maturity of understatement, with the intelligence of communal flavors. For more convenience, you could purée and refrigerate it a couple of days ahead; then add the cream and seasonings after gently reheating it.

Happy slurping, er I mean sipping….

IMG_0459

Cauliflower, Pear and Fennel Soup

  • Servings: 6-8
  • Difficulty: easy
  • Print

IMG_0441

Ingredients

  • 2 oz. (4 Tbs.) unsalted butter
  • 3 medium leeks, white and light-green parts only, sliced 1/8 inch thick (about 3 cups), rinsed well
  • 1 small fennel bulb, trimmed and chopped (about 1-1/2 cups)
  • 1 medium parsnip, peeled and chopped (about 1/2 cup)
  • Kosher salt and freshly ground black pepper
  • 3/4 cup pear juice
  • 7 cups chicken broth, preferably homemade
  • 1 small head cauliflower (about 1-1/2 lb.), chopped into 1/2-inch pieces (about 5 cups)
  • 1 large ripe pear, peeled, cored, and chopped (about 1-1/2 cups)
  • 1 Tbs. chopped fresh tarragon; more for garnish
  • 1/2 cup heavy cream; more for garnish
  • 1 tsp. fresh lemon juice

Directions

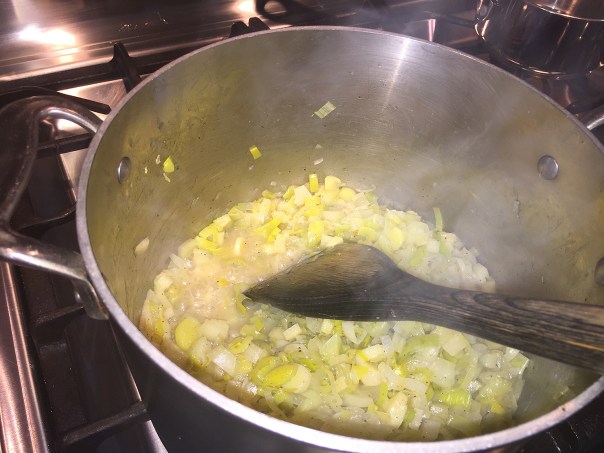
  1. Melt the butter in a 4-quart saucepan over medium heat. Add the leeks, fennel, parsnip, 1 tsp. salt, and 1/2 tsp. pepper, and cook, stirring occasionally, until soft, 5 to 8 minutes.
  2. Add the pear juice, and simmer, stirring occasionally, until the liquid is reduced to a syrup, 6 to 8 minutes.
    IMG_0449
  3. Add the broth and bring to a boil. Add the cauliflower, pear, 1 tsp. salt, and 1/2 tsp. pepper.
    IMG_0451
  4. Turn the heat down to medium low, partially cover, and cook until the cauliflower is very soft, about 40 minutes. Stir in the tarragon.
    IMG_0452
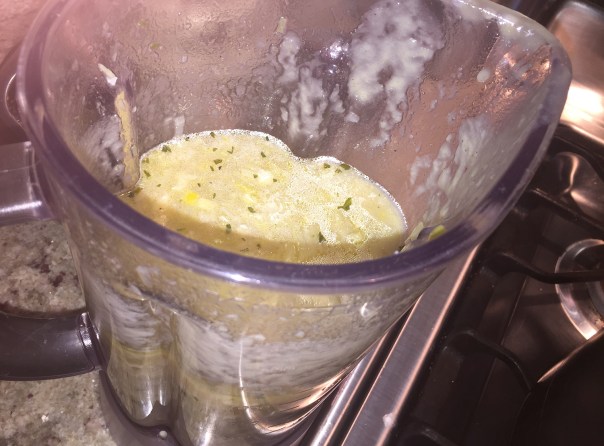
  5. Working in batches, purée the soup in a blender until smooth and transfer to a large bowl.
    IMG_0454
    IMG_0453
  6. Return the soup to the pot, stir in the cream, and reheat. Stir in the lemon juice and season to taste with salt and pepper.
  7. Serve topped with a thin swirl of cream and a sprinkle of tarragon.
    IMG_0458

http://www.lynnandruss.com

By Arlene Jacobs from Fine Cooking

The Sous Vide Finally Takes a Bow

The Mr. added a sous vide machine to his Christmas wish list—last year. Of course, being the dutiful partner that I am, I ordered it, artistically wrapped it, and waited in anticipation for one of the succulent meals they are known to provide.

As unlikely as it seems, hubby didn’t get around to using it until one year later—Christmas 2018. Yes, I know, I could have gone ahead and made something myself, but it was his present after all, and I figured he should be the one to have the first crack at it. Patience is a virtue, right?

IMG_0312Before the cooking starts, our sous vide machine gets an update through the iPad.
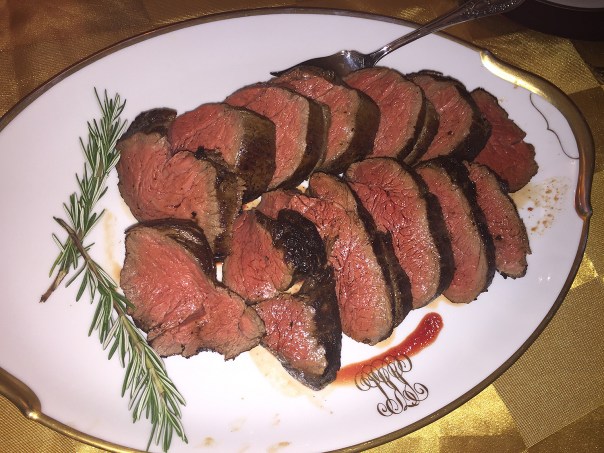
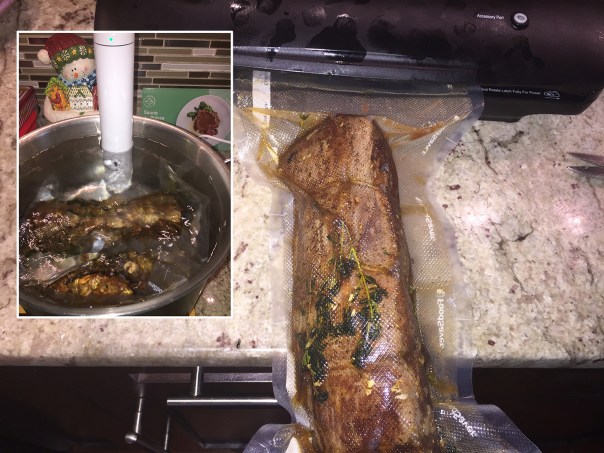
When you cook a center-cut beef tenderloin roast for your family/friends, the pressure is on. You want to make sure the meat emerges perfectly cooked and gorgeous—especially considering you’re working with one of the most expensive items at the butcher shop. The star of our maiden voyage was a 3 3/4-pound beef tenderloin, pictured below, costing just a smidgen under $100 smackaroos. Not a piece of meat one wants to screw up, especially when serving guests on such an important family holiday.

IMG_0314

In an ironic twist, while penning this post, I received and email offering from Amazon with the header The Effortless Sous Vide Cookbook: 140 Recipes for Crafting Restaurant-Quality Meals Every Day.” Coincidence or what? A bit unnerving really…

But I digress.  How does sous vide work? The words sous vide, French for “under vacuum,” refers to the vacuum-sealed bags that the food is typically placed in before being submerged in water. Many people incorrectly assume it is very complicated and requires a ton of commitment.

Consider it a “set it and forget it” method, like a slow cooker and pressure cooker. With the benefit of cooking at a specific and consistent temperature, sous vide takes a lot of the guess work out and ensures that your food will be cooked perfectly every time. You with me now? Then how about this?

Sous vide is basically poaching inside sealed bags under very precise and measured conditions. The water in your cooking vessel is regulated at a specific temperature and is circulated to maintain consistency. Additionally, especially for proteins, very little, if any, extra fat is added into the packages and instead, the protein cooks in its own juices, which leaves the food moist, juicy and tender.

An immersion circulator is the tool that controls the temperature of the water as the food cooks. You can use it in any pot or pan you own as long as the pot is big enough to hold both the immersion circulator and your food.

Just clip it to the side of the pan, or in the case of a Joule, a magnet on the bottom lets you stand it upright in most pots and pans. The immersion circulator will pull the water through its internal heating element, circulating the water in the pot and keeping it at a precise and steady temperature.

Another advantage for sous vide cooking is flexibility. Since this cooking method is so gentle, you have a pretty big window in which your food will be ready. This means that you can start your food cooking, runs some errands, get stuck in traffic, or snuggle up in front of the fireplace with a good book—and all this time, you never have to worry about your food. If you’re not back right when the timer goes off, no big deal!

IMG_0361

For a sauce, we ordered an Au Poivre from ChefSteps.com that also showed a video on this method of cooking.

Sous Vide Beef Tenderloin

  • Servings: 8
  • Difficulty: easy
  • Print

Ingredients

  • 3 1/2 to 4 lb. beef tenderloin
  • Oil for searing as needed
  • 2 Tbsp. Butter, divided
  • 3 Thyme sprigs
  • 1 Rosemary sprig, cut in half

Directions

  1. Preheat Joule to 133° for medium-rare, or adjust to your own preference.
  2. Use butcher’s twine to truss the tenderloin in three spots, creating four to six even sections, depending on the length of your roast. (We had to cut ours into two pieces in order to fit in the pan and skillet.)
    IMG_0319
  3. Set a large skillet over medium-high heat. Coat the bottom of the skillet with oil, and when it’s shimmering, sear the exterior of the loin, turning occasionally, until it has a nice, dark caramelization all over the exterior. This will take about two to three minutes total. (Remember, you’re only giving the exterior a quick sear, not trying to cook it through.)
  4. Set the loin on a plate. Add half of the butter to the pan, and when it’s finished foaming, add the herbs and sauté them until fragrant, removing the pan from the heat as soon as they turn bright green.
    IMG_0325
  5. Transfer the tenderloin to a ziplock-style or sous vide bag, add the cooking juices and herbs, and set the bag into the preheated water. Cook for two hours. (You can leave it in there for up to two more hours if you wish.) Center-cut tenderloins tend to be about two inches thick, but if you’ve got a three-inch-thick cut, leave it in the water for an extra hour.
    IMG_0326
  6. Set a large skillet over medium-high heat and add the remaining butter. Pull the loin from the water, and pour the cooking liquid and herbs from the sous vide bag into the skillet.
  7. When the bubbling slows down, return the loin to the skillet for a final sear, quickly crisping the outside for about 30 seconds per “side” while spooning the hot liquid over the top.
    IMG_0354
  8. Cut into thick slices one or two minutes before dinner, and serve.
    IMG_0355
    IMG_0361

http://www.lynnandruss.com

Cookies and Cream Peppermint Bark Cheese Cake

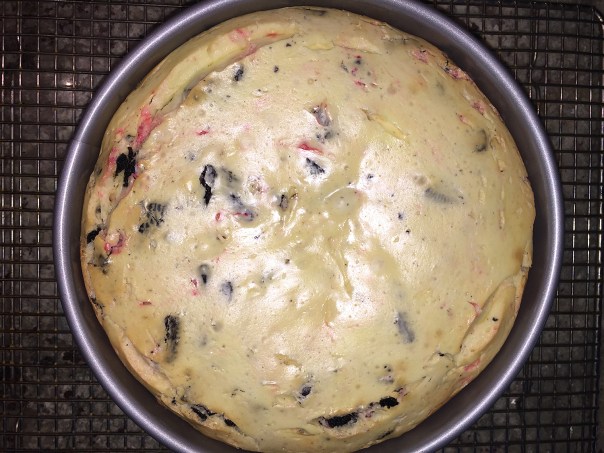
It’s the Most Wonderful Dessert of the Year… if you like cheese cake, peppermint candy and Oreo cookies that is. Well The Mr. seemed to think his boys would love it as their Christmas meal finale, so I was more than willing to give it a go. I noticed the advertisement from Kraft Foods while thumbing through one of our foodie magazines.

IMG_0386

However, when I started looking at the ingredients and instructions, I realized I could save myself a step or two (actually Steps 7-9) by using already-made white and dark chocolate peppermint bark. And seeing as how we were going to be cooking for 4 days straight, that was a no-brainer. (The recipe below is the original.)

There’s a big “BUT” coming, baking the cheesecake actually took an additional 25 minutes! At the 55 minute mark, as indicated below, the center was still almost soup consistency. I added another 10 minutes, still not ready; another 10 minutes, still too wet; 5 minutes more, finally done.

IMG_0391Son Dan and girlfriend Tina savor the efforts with a glass of eggnog.

It will serve up to 16 guests, depending on how thin you slice it. And if doesn’t all go in the first round, a fresh cheesecake will last a week in the refrigerator if covered properly. Keep in mind,  bacteria grow rapidly at temperatures between 40 °F and 140 °F; so it should be discarded if left out for more than 2 hours at room temperature.

Can you freeze cheesecake? Yes, to freeze: wrap cheesecake tightly with aluminum foil or plastic freezer wrap, or place in heavy-duty freezer bag. Properly stored, it will maintain best quality for about 2 to 3 months, but will remain safe beyond that time.

Cookies and Cream Peppermint Bark Cheesecake

  • Servings: 8-16 slices
  • Difficulty: easy
  • Print

IMG_0281.jpeg

Ingredients

  • 30 Oreo cookies, divided
  • Tbsp. butter or margarine, melted
  • 35 starlight mints, divided
  • pkg. (8 oz. each) cream cheese, softened
  • cup sugar
  • eggs
  • pkg. (4 oz.) semi-sweet chocolate chips
  • oz. white chocolate

Directions

  1. Heat oven to 325°F.
  2. Use pulsing action of food processor to process 18 cookies until finely ground. Add butter; mix well. Press onto bottom of 9-inch springform pan. Bake 10 min.
    IMG_0283
  3. Crush 30 mints, then chop 10 of the remaining cookies.
    IMG_0285
  4. Beat cream cheese and sugar in large bowl with mixer until blended.
  5. Add eggs, 1 at a time, mixing on low speed after each just until blended. Stir in crushed mints and chopped cookies. Pour over crust.
    IMG_0287
    IMG_0288
  6. Bake 55 min. or until center is almost set. Run knife around rim of pan to loosen cake; cool before removing rim. Refrigerate cheesecake 4 hours.
    IMG_0299
  7. Meanwhile, crush remaining mints, then chop remaining cookies. Cover baking sheet with parchment.
  8. Melt chocolates separately as directed on packages. Spread semi-sweet chocolate into thin layer on prepared baking sheet; top with tablespoonfuls of the white chocolate. Swirl gently with spoon.
  9. Top with crushed mints and chopped cookies. Refrigerate until firm.
    IMG_0388
  10. Break chocolate bark into small pieces; sprinkle over cheesecake before serving.

Variation

Substitute 3/4 cup crushed candy canes for the starlight mints. Reserve 1 Tbsp. crushed candy for sprinkling over the swirled chocolate bark; stir remaining crushed candy into the cheesecake batter before baking as directed.

IMG_0387


Back to an Old Neighborhood Haunt

Café Antonio in Morrisville sits just steps away from the Calhoun Street Bridge that crosses the Delaware River to New Jersey. A place we used to patronize on a more regular basis when I lived in Yardley, sister township to Morrisville. I know I blogged about it many years ago, but even I can’t find the post!

Well, nothing like the present. I’ll start with the obvious, parking was always an issue. But while we did get a street spot just steps away from their building, we did notice a new parking lot “above” with a staircase leading down to street-level. A promising beginning. And the old-world charm, complete with the historical Vespa motorcycle—a mainstay from years past—still greets you in the entrance. Plus holiday decorations adorned nooks and crannies in a nod to the season.

IMG_0120

IMG_0122

Once inside, the place was jam-packed, but we figured with reservations, we’d be seated promptly. Not so. It was a good 15 minutes before the hostess came back to show us our table. While waiting, we noticed that many other patrons were bringing in their own wine, yet we knew that Antonio’s now had a liquor license with a full-scale bar, when for years they were a BYOB. Once seated, our waitress Diane explained that they allow diners to bring their own wine but have a $10 corkage fee. Something to consider in the future…

After selecting a “Fat Bastard” bottle of Merlot (a night special), we concentrated on what to order. While there was a separate specials menu with a few listings, we began to notice that the regular menus each contained different appetizers. It became apparent when Russ began describing Julia’s Favorite Flatbread as a suggestion and I had no idea what he was talking about because it was not under my list of appetizers. (Diane explained that they were working on making them all the same—I should think so!)

IMG_0129

Well, we were in a seafood kind of mood that evening and decided the flatbread was calling our name. Julia’s consisted of a medley of shrimp, crabmeat, tomato, basil and red onions in a pesto cream sauce topped with melted mozzarella cheese. Wowser, it was good, and pretty filling to boot.

Our entrees came with side salads and Russ upgraded his to Maurizio’s Salad for a few bucks extra; I went with the regular house salad. Both were nicely chilled with crisp greens.

IMG_0133

IMG_0132

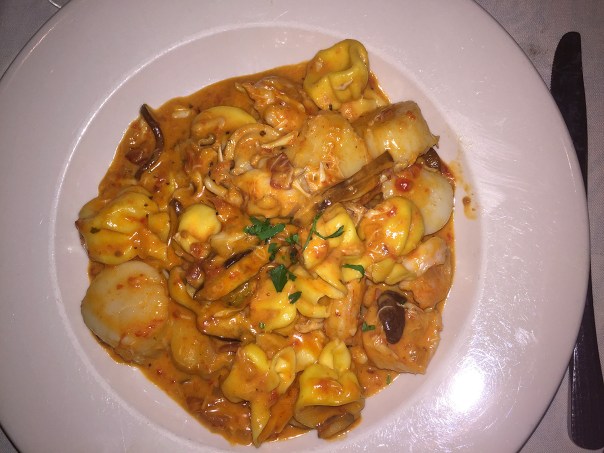
In a recent conversation with friends, “pasta purses” was a topic of discussion and we all agreed, they were impressive little morsels. Antonio’s still had them on their menu, so after some back-and-forth, Russ decided to go with their Seafood Pasta Purses filled with fontina cheese then topped with shrimp, crab meat, scallops and shiitake mushrooms all bathing in a creamy vodka sauce. He was not disappointed!

IMG_0139

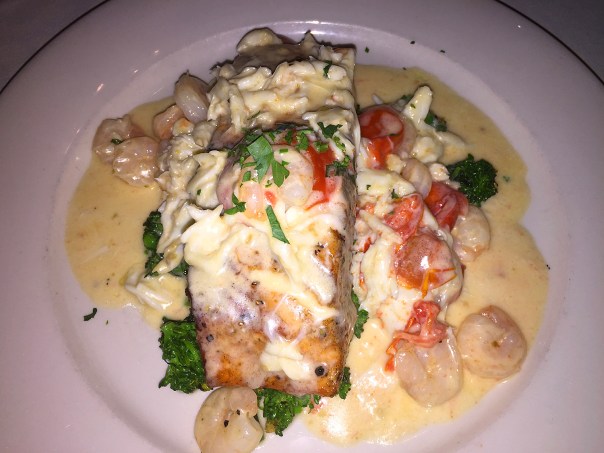
I pretty quickly zeroed in on Chef Chris’s Grilled Salmon. The hefty portion came plated with baby shrimp, jumbo lump crab meat, shiitake mushrooms and plum tomatoes in a light butter white wine sauce with seasonings. Both of our portions were more than enough, so we took home two doggie bags, each brimming with at least half of our entrees.

IMG_0134

While our waitress was friendly and attentive, service was slow. But for a Saturday night during the holiday season, it was no surprise; and in fact, we rather enjoyed the leisurely pace. Other than the fact that the caliber of food was still top notch, we also gained knowledge into additional parking options and the possibility of bringing our own wine—although it pains me to have to pay a $10 corkage fee.

New and Improved Decorated Sugar Cookies

As you know, I’m a bit of a fanatic when it comes to Decorated Sugar Cookies with Royal Icing. I’ve been making them in some fashion or another since I was a young child. The past couple of years I have been using a new-and-improved cookie dough that stays in shape, doesn’t need to be refrigerated for hours, rolls out nicely and is easy to handle.

But the recipe got buried in another blog so I thought I’d post it in and of itself. The images depict a variety of reasons or seasons to make the cookies. Believe me, there is a cookie cutter for just about anything you can think of.

In fact, my next batch after the holidays will be for my garden club. I am a co-designer of one of the annual gala tables, with an overall theme of “Bloom with a View” and our specific table idea centers around an “Artist’s Studio” so stay tuned for an upcoming blog featuring those creative little devils.

IMG_2745Hearts for Valentine’s Day.

IMG_4696Hot air balloons for a child’s pastel-themed first birthday party.

spring cookiesFlowers and butterflies for my Master Gardner’s presentation.

IMG_1218Santa Hats as a donation for a bake sale at an artist’s organization.

1.circle.santasIMG_0108

Circle Santas were introduced during the 2020 Christmas season.

Decorated Sugar Cookies

  • Servings: 3-6 dozen
  • Difficulty: cookie is easy; icing takes practice
  • Print

Ingredients

  • 2 sticks (1 cup), room temperature
  • 1 cup sugar
  • 1 egg
  • Zest from ½ a lemon (about 1 teaspoon)
  • 1 tsp baking powder
  • 1 tsp vanilla extract
  • 3 cups unsifted flour (plus more for rolling cookies out)
  • ½ tsp salt

Directions

  1. Preheat oven to 350 degrees.
  2. Add the butter sticks and the sugar and cream together in a stand mixer, about 3 minutes.
  3. Scrape down the sides of the bowl and add the egg, lemon zest, baking powder and vanilla extract, then beat again for 2 minutes until a creamy.
  4. Add 3 cups flour and ½ teaspoon salt and mix on low speed to combine about 2 minutes.
  5. When done, form the dough into a ball.
  6. On a floured surface or pastry cloth, roll out the cookie dough ball to desired thickness level, about an 1/8″ or a little thicker. Cut out shapes and place on an unrimmed baking sheet.
  7. Reform any leftover dough into another ball and repeat the process.
  8. Put baking sheet(s) in the freezer for 10 minutes.
  9. After 10 minutes take the baking sheet out of the freezer and bake for 10-12 minutes, or until edges just start to turn a light brown. (Mine took the full 12 minutes.)
  10. Remove cookies from oven, allow to cool for a few minutes, then transfer them to a wire rack to cool completely before frosting. Decorate—or not—with Royal Icing.

ROYAL ICING

Ingredients

  • 1 lb. confectioners sugar
  • 3 Tbsp. meringue powder
  • 1 tsp. vanilla extract
  • 1/2 cup warm water

Directions

  1. In a stand mixer, beat the meringue powder and water for about 30 seconds on med-high speed.
  2. Stop the mixer, add the confectioners sugar and beat on low until incorporated. Turn the speed up to high and beat for 7 minutes. Stiff peaks will form.
  3. Divide the frosting into bowls based on the number of colors you are using, remember white is a color too.
  4. Add your food coloring and mix each bowl thoroughly, adding a few drops of water as necessary.
  5. Put about 1/3 of each color in separate pastry bags for piping. Thin out the remainder with more water (a 1/2 teaspoon at a time) to achieve a flooding consistency and add that to squeezable bottles as shown.
    IMG_4661
  6. Add finishing touches as desired.

http://www.lynnandruss.com

Sofrito Scallops with Saffron Rice

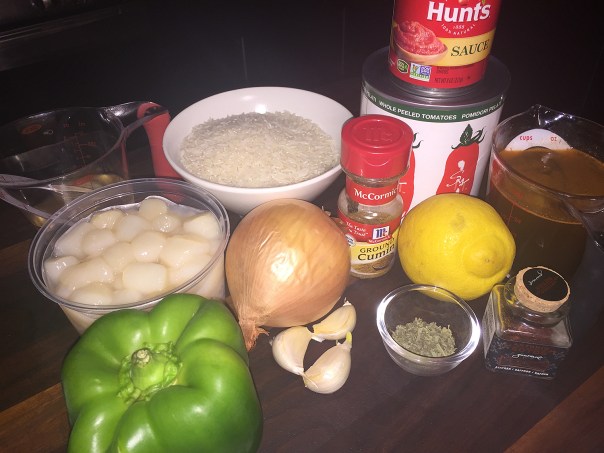
It’s been five long years since we made this meal, can’t understand why because it’s fabulous! It only takes 45 minutes from start to finish so it’s a pretty impressive dish for a weeknight feast. Although the one thing I forgot to add this time around was the hot smoked paprika. Russ included it the first time and we loved the extra kick it provided.

Used with everything from beans, to meat, to fish, the versatile tomato-based sauce called sofrito is the soul of Latin American and Caribbean food. In this Cuban-inspired dish, bay scallops are tossed in the hot sofrito and then served with saffron-infused rice. The rice rallies up several notches with homemade shellfish stock replacing the water; so include it if at all possible. I also substituted tomato paste in place of the ketchup which added more body.

Cooking the meal for just the two of us provided enough leftovers for another meal altogether—and we weren’t complaining! This might come in handy over the hectic holiday season when you’re not in the mood to go out, or you want something quick, but a bit elegant.

IMG_9392

Sofrito Scallops with Saffron Rice

  • Servings: 4
  • Difficulty: easy
  • Print

Ingredients

  • 3 Tbs. extra-virgin olive oil
  • Pinch of saffron threads
  • 1-1/2 cups long-grain white rice
  • Kosher salt
  • 1 medium yellow onion, finely chopped (about 1 cup)
  • 1 small green bell pepper, finely chopped (about 3/4 cup)
  • 3 medium cloves garlic, minced (about 1 Tbs.)
  • 1 tsp. finely chopped fresh oregano (used dried if fresh is unavailable)
  • 1/2 tsp. ground cumin
  • 1/4 tsp. hot smoked paprika (optional)
  • Freshly ground black pepper
  • 1/2 cup dry white wine
  • 1 cup homemade shellfish stock (or water)
  • 1 8-oz. can tomato sauce, (or tomato paste)
  • 1 Tbs. ketchup
  • 1 lb. bay scallops
  • 1/2 lemon

Directions

  1. Heat 1 Tbs. of the oil and the saffron in a 4-quart saucepan over medium-high heat until the saffron is sizzling. Add the rice and stir to coat.
  2. Add 3 cups shellfish stock (or water) and 1-1/2 tsp. salt and bring to a boil. Boil for 1 minute; reduce the heat to a gentle simmer, stir once, cover, and cook until all of the water has been absorbed and the rice is tender, about 15 minutes.
    IMG_9395
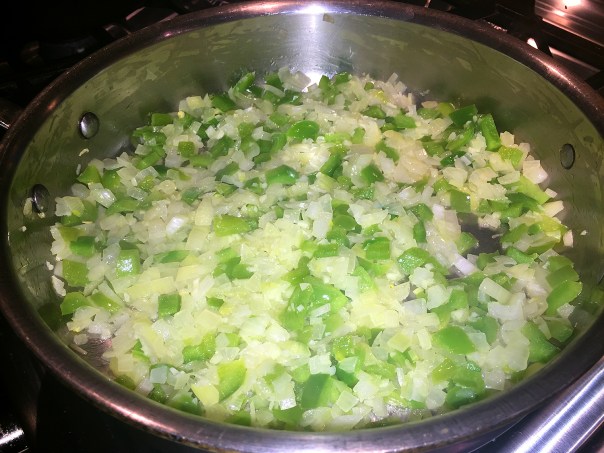
  3. Meanwhile, heat the remaining 2 Tbs. oil in a 12-inch skillet over medium heat. Add the onion, green pepper, and garlic and cook, stirring, until the vegetables are soft, about 8 minutes.
    IMG_9397
  4. Stir in the oregano, cumin, smoked paprika (if using),1 tsp. salt, and 1/2 tsp. pepper. Add the wine and simmer until reduced by half, about 3 minutes.
    IMG_9398
  5. Stir in the tomato sauce and cup water; bring to a simmer. Turn the heat down to low, cover, and cook until slightly thickened, about 7 minutes.
  6. Stir in the ketchup (or tomato paste) and season to taste with salt and pepper.
    IMG_9400
  7. When the rice is ready, add the scallops to the hot sofrito and cook, stirring occasionally, until just cooked through, about 3 minutes.
    IMG_9404
  8. Transfer the rice to a large platter and top with the scallop mixture; or divide all among four dinner plates. Season to taste with lemon juice, and serve immediately.
    IMG_9409

http://www.lynnandruss.com

Adapted from a recipe by Julissa Roberts from Fine Cooking

Roast Chicken with Fingerling Potatoes, Leeks, and Bacon

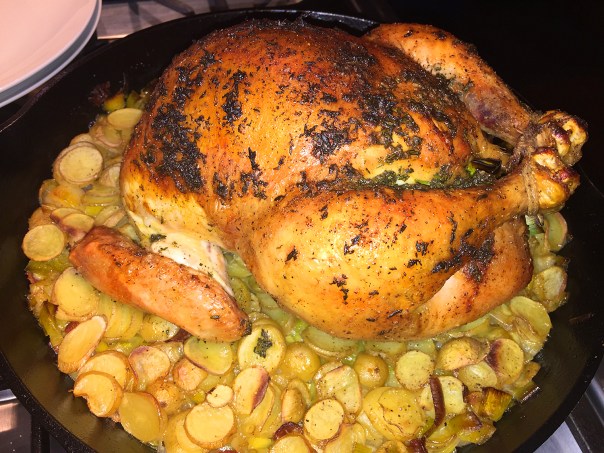
Impress yourself and your guests with this Cast-Iron Roast Chicken with Fingerling Potatoes, Leeks, and Bacon. Once prep is out of the way, just pop the skillet with everything in it into the oven, and presto, an hour later it’s ready! Although you do have to let the chicken rest for 15 minutes for the juices to redistribute allowing you time to make a side salad if desired; or a sip or two of your chilled white wine.

Sautéing the leeks and garlic before layering them with the potatoes renders them meltingly tender and slightly caramelized. The roast chicken on top comes out incredibly juicy, with delicate herbal notes. And what a showstopper with that gorgeous crispy browned skin!

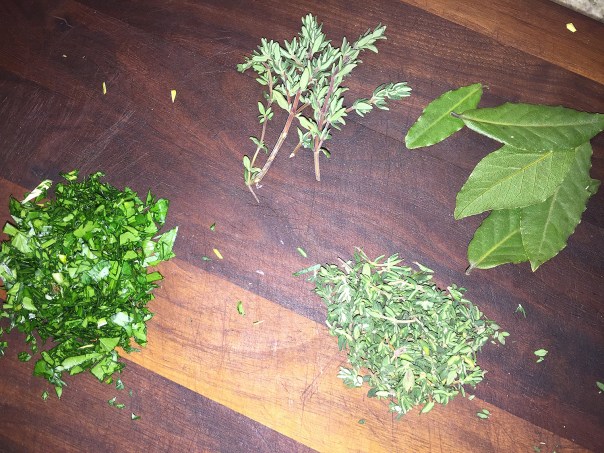
Prior to roasting, the fingerling potatoes need to be cut into 1/8-inch-thick rounds, the leeks sliced and thoroughly rinsed, and your herbs prepped as noted below. Then combine the softened butter with the chopped thyme to make a rub for the chicken (both inside and outside the skin if you like).

IMG_0151
IMG_0141
IMG_0142

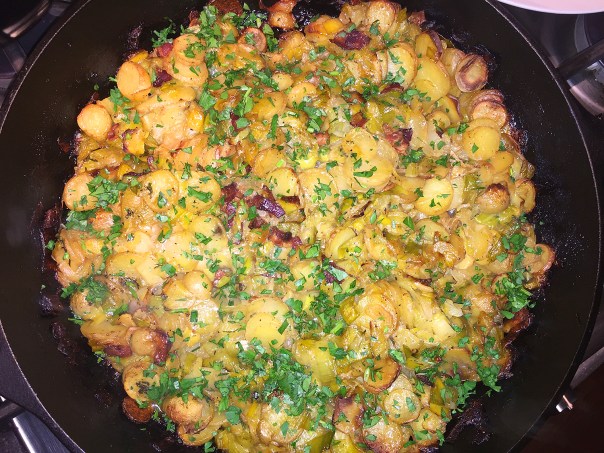
As there were only the two of us for dinner, we had plenty of leftovers. But instead of just reheating the dinner as is, we used the poultry meat in Chicken Enchiladas a few nights later; the remaining potato mixture in a frittata; and the rib cage and bones to make more homemade chicken stock–even leaving the chopped leeks and herbs in the cavity! Now that’s getting our money’s worth!

IMG_0789.jpg

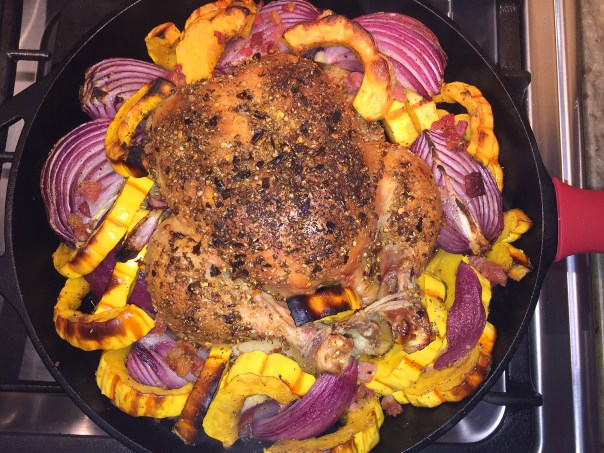
Another fabulous cast-iron chicken dish, the Cast-Iron Roast Chicken with Winter Squash, Red Onions, and Pancetta, can be found at this link.

Roast Chicken with Fingerling Potatoes, Leeks and Bacon

  • Servings: 4
  • Difficulty: easy
  • Print

Ingredients

  • 1 3-1/2- to 4-lb. whole chicken
  • Kosher salt and freshly ground black pepper
  • 2 Tbs. finely chopped fresh parsley, plus 10 small sprigs
  • 4 fresh or dried bay leaves
  • 1 Tbs. finely chopped fresh thyme, plus 4 sprigs
  • 4 large leeks, white and light-green parts halved lengthwise, then sliced crosswise into 3/8-inch pieces (about 4 cups) and rinsed; dark-green parts from 1 leek rinsed and reserved
  • 3 strips thick-cut bacon, cut crosswise 3/8-inch thick
  • 1 Tbs. olive oil
  • 2 large cloves garlic, thinly sliced
  • 1-1/2 lb. large fingerling potatoes, cut crosswise into 1/8-inch-thick rounds
  • 1-1/2 cups lower-salt chicken broth
  • 2 Tbs. unsalted butter, softened

Directions

  1. Discard the giblets from the chicken, trim off any excess fat from the cavity and neck, and pat dry with paper towels. Generously season the chicken inside and out with 1 Tbs. salt and 1/2 tsp. pepper.
    IMG_0143
  2. Stuff the cavity with the parsley sprigs, 3 of the bay leaves (if fresh, crush lightly), 2 sprigs of thyme, and the dark leek greens. Tuck the wings behind the neck of the chicken, using the wing tips to secure any loose neck skin, if necessary. Tie the legs together with string. Let rest at room temperature for 20 to 30 minutes.
    IMG_0145
  3. Meanwhile, position a rack in the center of the oven and heat the oven to 450°F.
  4. In a 12-inch ovenproof skillet, cook the bacon in the oil over medium-high heat, stirring occasionally, until it begins to brown, about 7 minutes. Leaving the bacon in the pan, spoon out and reserve all but 1 Tbs. fat.
    IMG_0148
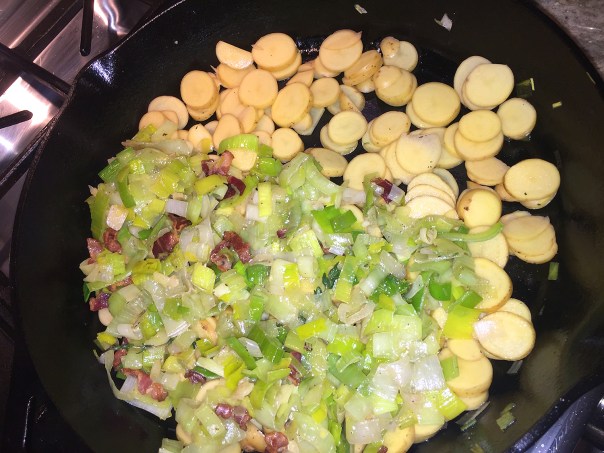
  5. Reduce the heat to medium and add the leeks, garlic, and the remaining bay leaf and thyme sprigs, and season lightly with salt and pepper. Cook, stirring occasionally, until the leeks are soft and translucent, 5 to 7 minutes. Transfer to a plate.
    IMG_0149
  6. In the same pan, arrange half of the potatoes in an even layer, season very lightly with salt and pepper, then scatter the leek mixture over top. Layer the remaining potatoes over the leeks, and season very lightly with salt and pepper. Pour the broth over the vegetables.
    IMG_0157
    IMG_0159
  7. Pour 1 Tbs. of the reserved bacon fat into the cavity of the chicken. Rub the softened butter over the bird’s skin, and sprinkle with the chopped thyme. Set the chicken, breast side up, on the vegetables.
    IMG_0155
    IMG_0160
  8. Roast the chicken until an instant-read thermometer inserted into the thickest part of the thigh registers 165°F to 170°F, about 1 hour.
    IMG_0166
  9. Transfer the chicken to a platter, remove the string, cover loosely with foil, and let rest for about 15 minutes. Meanwhile, discard the thyme sprigs and bay leaf and keep the vegetables warm in the turned-off oven.
    IMG_0177
  10. Sprinkle the potatoes with the chopped parsley, arrange them around the chicken, and serve.

http://www.lynnandruss.com

IMG_0176

Our chicken weighed in at 4 1/4 pounds so after an hour, the breast meat was done but the legs weren’t quite at temp. So Russ removed them, placed them on top of the skillet potatoes and inserted back into the oven while the chicken rested. This not only crisped the leg skin, but also more of the potato surface.

Adapted from a recipe by Arlene Jacobs from Fine Cooking

Maple-Bacon Ginger Cookies. Because You Must.

Every year I add a new cookie recipe or two to my rotation of holiday treats. This year one of them was the Maple-Bacon Ginger Cookies found in the latest Bon Appétit Magazine. I figured they would make a great counterpart to the dozens of sweet confections already crafted.

Savory bacon and sweet maple syrup give a modern twist to classic ginger cookies. Just like the classics, these are crunchy on the outside and chewy on the inside. We were salivating at the thought, and while they were in the oven baking, I was already planning on making another batch.

IMG_0117

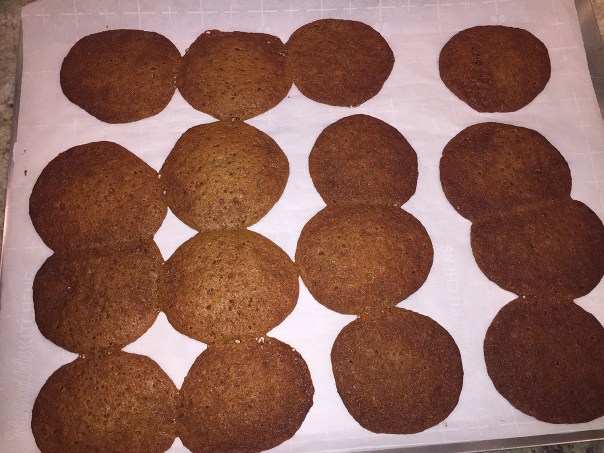
Well, there was no question we’d have to make another batch because the first set came out of the oven as one large flat mass. After a quizzical look with raised eyebrow cocked, Russ commented that it looked as though there was not enough flour in them. Oops, my bad. I looked at the written list of ingredients and quickly realized I had only incorporated 1 1/2 cups of flour, NOT the 2 1/3 listed.

IMG_0099Fiasco number one.

Maple-Bacon Ginger Cookies Take 2. We salvaged a few of the crunchier pieces for tasting purposes and to perhaps use as a topping for ice cream? We could toss the remainder outdoors to wildlife, but I’m pretty sure that is definitely not a good idea. All thoughts of what to do with the failed mess aside, we teamed up and started on a fresh batch.

Russ’ mission was to fry more bacon while I captained the mix master. No sooner had I started (very carefully) measuring the ingredients, when I heard Hubby swear under his breath. When questioned what was the matter, he replied he had just burnt half of the bacon. Knowing it is NOT a flavor profile that most folks associate with a “good cookie” he tossed the inedible strips and began—yet again. As two pretty accomplished chefs, it was just not our day…

IMG_0088Above, the bacon that didn’t burn…
IMG_0092
We used a mini processor to crumble the cooked bacon, then microwaved the remaining portion to use as a topping.

In my defense, I had gotten up at 4 a.m. the day before (not by choice, just never fell asleep, an annoying curse of mine) and starting making cookies and continued into the evening. Then woke up the next day (several hours later, thank you) and began again. When I finished icing the decorated sugar cookies (recipe link below), I thought why not quickly bake the ginger cookies…

Back to the amount of flour. The recipe indicated 2 1/3 cups or 11 ounces. Russ said it is always best to weigh your flour as opposed to using measuring cups. Well, if that’s the case, 11 ounces actually measured out to be 2 1/2 cups, not 2 1/3, so I made that notation in the recipe below.

If you want the bacon garnish to be extra crisp, you can either fry the already-cooked and minced bacon in a skillet for another minute before patting dry with paper towels and using; OR heat in a microwave on paper towel for 1 minute like we did. It is a bit dicey trying to get the bacon bits and sea salt to stick to the maple drizzle. You might have to coax some of it onto the frosting with a utensil.

After all that was it worth it? Thank goodness I can truthfully answer yes. Unfortunately, though I adore the smell of, and love the taste of bacon, it doesn’t love me back, so I eat it with caution, if at all. Plus I’m not a big dessert/sweet eater, but I “forced” myself to sample one so I could write this blog 😉

Maple-Bacon Ginger Cookies

  • Servings: 3 Dozen
  • Difficulty: moderate
  • Print

IMG_0119

Ingredients

  • 6 oz. (12 Tbs. or 1 1/2 sticks) unsalted butter, at room temperature
  • 3/4 cup granulated sugar
  • 1/2 cup pure maple syrup; more as needed
  • 1/4 cup molasses
  • 2 Tbs. grated fresh ginger
  • 1 tsp. ground ginger
  • 1 tsp. pure vanilla extract
  • 2 tsp. baking soda
  • 1/2 tsp. kosher salt
  • 1 large egg
  • 11 oz. (2-1/3 to 2-1/2 cups) all-purpose flour
  • 8 oz. bacon, cooked and finely chopped (about 3/4 cup)
  • 4 oz. confectioners’ sugar (about 1 cup), sifted
  • Flaky sea salt

Directions

  1. Position two racks in the upper and lower thirds of the oven, and heat the oven to 350°F.
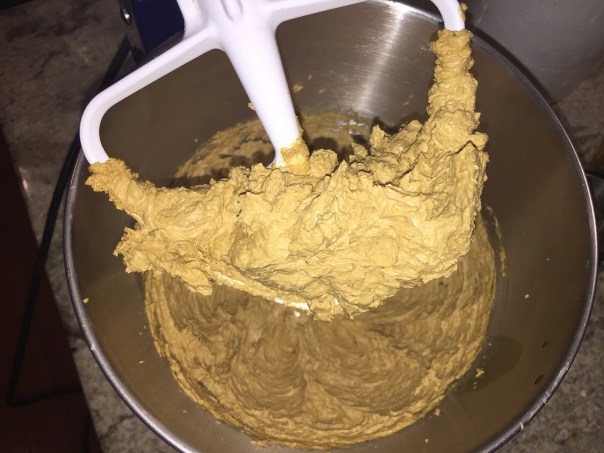
  2. In the bowl of a stand mixer fitted with the paddle attachment (or using a hand-held mixer and a large bowl), add the butter, sugar, 1/4 cup of the maple syrup, the molasses, fresh and ground gingers, vanilla, baking soda, and salt. Beat on medium speed, scraping down the bowl as needed, until light and fluffy, about 5 minutes.
    IMG_0094
  3. Add the egg, and mix on low speed until just combined, scraping down the bowl as needed.
  4. Add the flour and 1/2 cup of the chopped bacon, and mix on low speed, scraping down the bowl as needed, until just combined.
  5. Portion large golf-ball-size pieces, about 2 Tbs. each, onto parchment-lined baking sheets, spacing them about 1 1/2 inches apart.
    IMG_0102
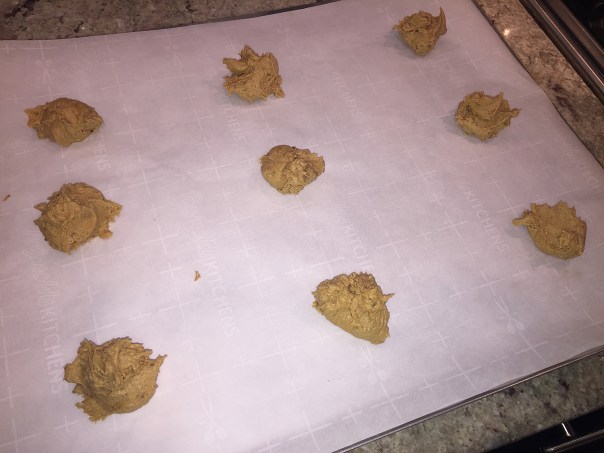
    After being spooked by the first fiasco, I spaced my cookies further apart, only placing 9 portions per sheet.
  6. Bake until the edges are set but the centers are still slightly soft, 13 to 15 minutes.
    IMG_0103
  7. Transfer the pans to wire racks, and let cool for about 30 minutes.
  8. In a medium bowl, whisk the confectioners’ sugar with the remaining ¼ cup maple syrup. Test the icing for a good drizzling consistency, and add more maple syrup 1/2 Tbs. at a time to thin, if necessary.
    IMG_0105
    Just starting to whisk together the icing; make sure it is very well blended with no lumps. I used the whisk to drizzle it over the cookies.
  9. Gently loosen the cookies from the parchment, and drizzle on the glaze. Top each with a sprinkling of the remaining 1/4 cup chopped bacon and a pinch of the sea salt. Store in an airtight container for up to 3 days.
    IMG_0109

http://www.lynnandruss.com

By William Stewart from Fine Cooking

Some of the other cookies I made are featured below with a link to their respective recipes. Just scroll down far enough in the blogs to find the recipes.

Peanut Butter and Chocolate Extravaganzas

IMG_0112

Staying-In-Shape Decorated Cookies

IMG_0114

Cool Beans Baby! It’s Stewp.

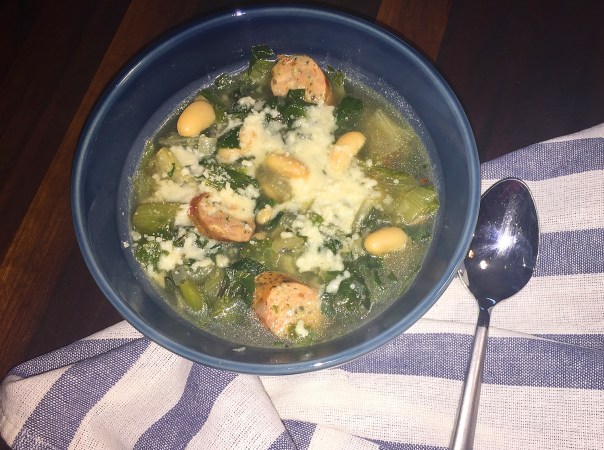
A soup that is so robust, it can be mistaken for stew… “Stewp” anyone? Escarole, Cannellini and Chicken Sausage Soup is hearty, tasty and pretty darn good for you too! Plus it takes less than a half hour to make. OK, what’s not to like? Not an escarole fan? Then exchange it for other greens such as spinach or kale.

IMG_9362

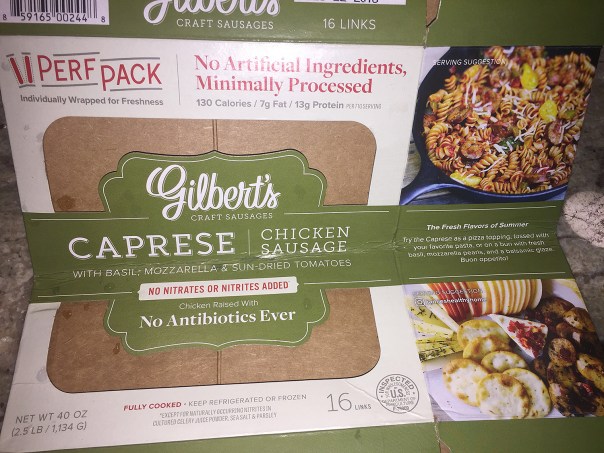
The Gilbert’s Kraft Sausages are individually vacuumed-packed for freshness and contain no antibiotics. The Caprese brand made with mozzarella, basil and sun-dried tomatoes pair well with the cannellini beans and escarole—our riff on Italian Wedding Soup, if you may. If Gilbert’s brand isn’t available in your area, use your favorite chicken or turkey sausage.

You could cut the recipe in half to four servings, but it’s so good, you will wish you had made the entire batch. And you know my mantra, when including stock, use homemade if at all possible, it just raises the taste-bar to a higher level.

Escarole, Cannellini and Chicken Sausage Soup

  • Servings: 8
  • Difficulty: easy
  • Print

IMG_9369

Ingredients

  • 4 tablespoons olive oil
  • 6 chicken sausage links, sliced at diagonal to 1/4″ thick
  • 5-6 garlic cloves, finely chopped
  • 2 small heads escarole, cleaned and chopped
  • 1 large white onion, small dice
  • 1 tsp. salt
  • 8 cups chicken broth, preferably homemade
  • 4 15-ounce cans cannellini beans, drained and rinsed
  • 2 2-3″ pieces Parmesan rind
  • 1/2 tsp. crushed dried rosemary
  • 1/4 tsp. dried red pepper flakes
  • Freshly ground black pepper

Directions

  1. Chop the escarole and place in a salad spinner full of cold water for several minutes, swishing a few times to loosen any dirt. Drain well, rinse again, and spin dry.
    IMG_9356
    IMG_9360
  2. Heat 4 tablespoons of olive oil in a heavy large pot over medium heat.
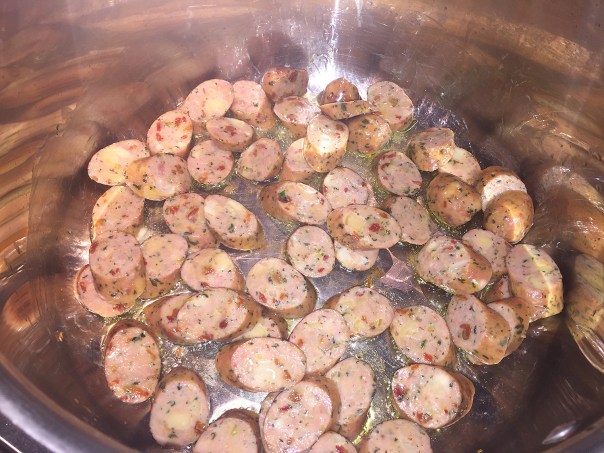
  3. Sauté the sausage pieces to a light brown, stirring occasionally, about 2 minutes. Remove from pot and set aside.
    IMG_9363
  4. Add the garlic and sauté until fragrant, about 15 seconds.
    IMG_9357
  5. Add the escarole and sauté until wilted, about 3 minutes. Add salt, rosemary and red pepper flakes.
  6. Add the chicken broth, beans, sausage slices and Parmesan cheese rinds. Cover and simmer until the beans are heated through, about 7 minutes.
  7. If necessary, season with salt and pepper, to taste.
  8. Remove parmesan rinds and discard.
  9. Ladle the soup into bowls. Sprinkle on grated parm if desired.

http://www.lynnandruss.com

Gift Yourself

Another mind-blowing braised dish by favorite chef/author Molly Stevens. I can’t even begin to tell you how much depth of flavor this lamb dish contains with the additions of preserved lemons, green olives, spices and veggies. Those green olives and preserved lemon give this Moroccan-influenced stew a tart-salty counterpoint to the sweet chunks of butternut squash.

IMG_9531

Earlier in the year, we purchased a large leg of lamb, portioning away what we needed at the time. The remainder was cut into cubes in 2-pound lots, vacuumed-sealed and frozen for later use, like now. Therefore, the amount we used for this recipe was shy by a pound; however we kept the remaining ingredients the same. (Since we used leg instead of shoulder, it took only 45 minutes in Step 12 to tenderize—shoulder will take about a half hour longer.)

IMG_9507The Mr. looks spiffy in his Chef’s jacket and CIA toque (compliments of Gary and Rosanne) while he browns the lamb cubes.

Patience is needed when making this Moroccan Lamb Stew dinner because you’ll need a good three hours with prep and cooking. (See make ahead notation below.) To give you an idea, we started ours late on a Sunday afternoon and had dinner around 7:30. Because of the volume of ingredients serving 5 to 6 people, we had leftovers which we ate a few nights later over a bed of couscous—drooling once again 😉

NOTE: BTW, we usually keep a jar of preserved lemons in our auxiliary refrigerator. Many Moroccan and Middle Eastern recipes call for them—lemons that have been pickled in salt and their own juices. It’s quite easy to do, though takes at least three weeks before the lemons are ready to use. So plan ahead, it’s worth it.

We use Meyer lemons for making preserved lemons because they are milder than Eureka lemons (the regular lemon you buy at the store), they work beautifully preserved this way.

True, this recipe is more complex than many, but so are some relationships. I would marry this dish, but hubby might have an issue 😉

IMG_9528

Moroccan Lamb Stew

  • Servings: 5-6
  • Difficulty: moderate
  • Print

Ingredients

  • 3 lb. boneless lamb shoulder or leg, trimmed of excess fat and cut into 1-1/2- to 2-inch pieces
  • 3 Tbs. grapeseed oil or vegetable oil; more as needed
  • Kosher salt and freshly ground pepper
  • 1 medium yellow onion, coarsely chopped (about 1 cup)
  • 2 medium celery stalks, coarsely chopped (about 1/2 cup)
  • 1 medium carrot, coarsely chopped (about 1/3 cup)
  • 2 medium cloves garlic, minced
  • 1 Tbs. tomato paste
  • 1 tsp. caraway seeds
  • 1/4 tsp. cayenne
  • 1 cup dry white wine
  • 2-1/2 cups homemade or lower-salt store-bought beef broth
  • 2 cups onion wedges (3/4-inch wedges)
  • 2 cups diced butternut squash (1-inch dice)
  • 1 15-oz. can chickpeas, drained and rinsed
  • 1/2 cup halved pitted green olives
  • 1/4 cup chopped preserved lemon
  • 1/4 cup chopped fresh flat-leaf parsley

Directions

  1. Position a rack in the bottom third of the oven and heat the oven to 325°F.
  2. Spread the lamb on paper towels to dry for 10 to 20 minutes before browning. (You can use this time to chop the onion, celery, and carrot). If the meat is very wet, pat it dry.
  3. In a 6-quart Dutch oven or other heavy-duty pot, heat 3 Tbs. oil over medium to medium-high heat until shimmering hot. Season about one-third of lamb with salt and pepper and arrange it in a single layer in the pot (there should be at least 1/2 inch of space between the pieces).
    IMG_9504
  4. Brown well on at least 4 sides, adjusting the heat as necessary; each batch should take about 10 minutes to brown. Transfer the lamb to a large bowl or rimmed baking sheet as it browns and repeat with the rest of the lamb, seasoning with salt and pepper before browning. Once all of the lamb is browned, remove the pot from the heat to let it cool for a few minutes.
    IMG_9510
  5. Pour all but 2 Tbs. of the fat from the pot. (If there is not enough, add oil to equal 2 Tbs.) Return the pot to medium heat, then add the onion, celery, and carrot. Season with a pinch of salt and pepper, and cook, stirring often and scraping the bottom of the pot with a wooden spatula, until the vegetables begin to soften, 5 to 6 minutes.
    IMG_9509
  6. Stir in the garlic, tomato paste, caraway, and cayenne and cook, stirring occasionally, until fragrant, 1 to 2 minutes.
    IMG_9512
  7. Add the wine, stirring with the wooden spatula to dissolve any browned bits on the bottom of the pot. Raise the heat to medium high and boil to reduce by about half, 5 to 8 minutes.
  8. Add the beef broth and 1-1/2 cups water. Bring to a boil.
    IMG_9514
  9. Return the lamb to the pot along with any accumulated juice. Lower the heat to maintain a simmer.
    IMG_9516
  10. Crumple a 12×16-inch piece of parchment, then flatten it out. (Crumpling makes for easy handling.) Place the parchment directly on the surface of the stew, allowing the ends to come up the sides of the pot. Cover and put in the oven.
    IMG_9518
  11. After 1 hour of stewing, add the onion wedges to the pot. Cover with the parchment and lid, return to the oven.
    IMG_9519
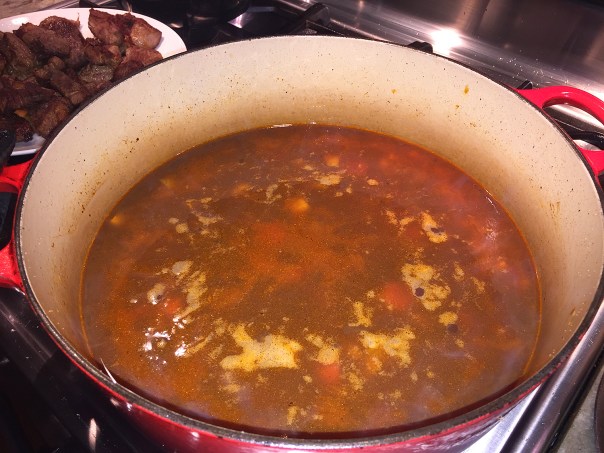
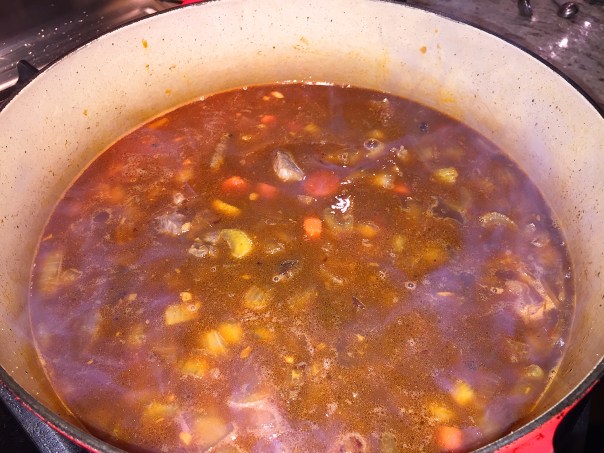
  12. After another 30 minutes, add the squash. Cover with the parchment and lid, return the pot to the oven, and cook until the lamb is fork-tender, 45 minutes to 1-1/4 hours more. (Shoulder cuts will take longer than leg cuts.)
    IMG_9521
  13. Stir in the chickpeas, olives, preserved lemon, and parsley. Return to the oven for 5 minutes.
    IMG_9524
  14. If necessary, degrease the stew by laying a clean paper towel over the surface of the stew and gently pushing it into all the bumps and dips, then quickly peeling it off. Repeat as necessary with more paper towels. Season to taste with salt and pepper and serve.
    IMG_9526

Make Ahead Tips

The stew can be made up to 2 days ahead: Skip the degreasing step, cool to room temperature, cover, and refrigerate. Once the stew is chilled, lift the solidified fat off the top with a slotted spoon. Reheat the stew over medium-low heat to serve.

http://www.lynnandruss.com

Adapted from a recipe by chef/author Molly Stevens

A Real Neat Treat: Caper-Anchovy Butter

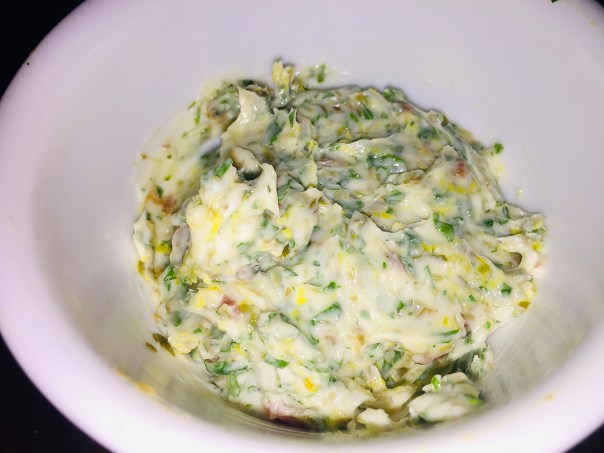
Here’s a ridiculously-easy-to-make flavored butter that elevates your steak from ordinary to elegant. And with some of the leftovers you can put a schmear on your side vegetables too. With the holidays approaching, it’s a simple way to impress your guests.

IMG_9469

Anchovies pack big flavor for such small fish. They’re so strong that only a small amount of anchovy is needed to add flavor to sauces, salad dressings, pasta and pizza. That same small amount also delivers health benefits in the form of essential fatty acids, protein and other nutrients.

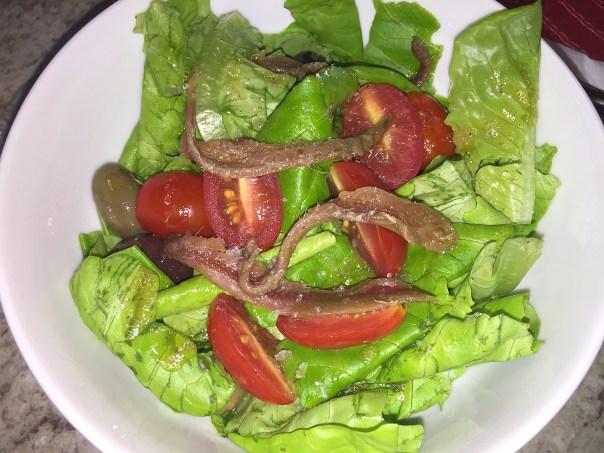
Hubby even went a step further with the anchovies topping his side salad with several whole ones. Me, like many other people I know, only like them when they are mashed up, and can’t abide eating them whole.

IMG_9463

As far as the butter compound, make extra and freeze the remainder. Slice off as needed and let come to room temperature for future uses on potatoes, in eggs or pasta dishes, schmeared on bagels… you get the idea.

IMG_9453

Sirloin Steak with Caper-Achovy Butter

  • Servings: 2+
  • Difficulty: easy
  • Print

Ingredients

  • 2 anchovy fillets, rinsed and mashed
  • 1/4 tsp. chopped garlic
  • Kosher salt
  • 3 Tbs. unsalted butter, cut into 3 pieces
  • 2 tsp. finely chopped fresh parsley
  • 1/2 tsp. capers, rinsed and finely chopped
  • 1/4 tsp. finely grated lemon zest
  • Freshly ground black pepper
  • 1 Tbs. canola oil
  • 1-lb. Sirloin steak

Directions

  1. Mash the anchovy fillets into a paste on a cutting board with the side of a chef’s knife. Sprinkle the garlic with a pinch of kosher salt and mash it into a paste.
    IMG_9456
  2. Bring the butter to room temperature; or put the butter in a small microwave-safe bowl and microwave it on high in 10-second bursts until it just begins to melt. Mash the butter with a fork and stir in the anchovy paste, garlic, parsley, capers, lemon zest, and a few grinds of black pepper.
    IMG_9461
  3. Heat the oil in a 12-inch cast iron skillet over high heat. Season the steak generously with salt and pepper.
  4. Sear the steak on both sides until a meat thermometer reads 120°F for rare or 125°F for medium rare, 8 to 10 minutes total.
  5. Tent the meat with foil and let rest for 5 minutes. Cut the steak at an angle against the grain into 1/2″ slices and top with the butter compound.
    IMG_9465

http://www.lynnandruss.com

Adapted from a recipe found in Fine Cooking

Your Curry Is Calling

Up the ante by using boneless, skinless chicken, which cooks quickly but can lack flavor compared to bone-in, skin-on chicken thighs. Yes, thigh meat tends to have more essence, but I’m an aficionado of the white meat (while Hubby likes the dark meat), so recipes utilizing the fairer flesh appeal to me.

The depth of flavor starts right off the bat with your cooking fat—be it ghee, or oil. You need this bit of fat when you have this lean cut of meat and a lot of seasoning going on. While the honey lends a sweet, caramelize-y twist to this quick curry, if you want to up the heat, add a big pinch of cayenne pepper.

IMG_9449

Spices not only bring ample seasoning but texture to dishes. The triumvirate of onion, ginger, and garlic provides the deep base flavor of most curries, equivalent to onion, carrot and celery in the French tradition. (Note: garlic is not essential. Some Indians eschew it completely on account of its pungency and it is often left out of food served at weddings to avoid offending guests.) 

One hour to make dinner may not be everyone’s idea of a “quick” meal. Yes, you can use a rotisserie chicken and jarred sauce, but to achieve more authentic results, you need to step up your game. The complex flavors of curries include generous spicing of onion, ginger and garlic; and something to give it body. Here, it is the combination of tomatoes, honey, yogurt and coconut milk.

Bon Appétit says canned tomatoes are one of the easiest ways to build a sauce from a handful of ingredients, and coconut milk helps out too. You really want to get the sauce to a thick place, so reduce until it coats the spoon.

The original recipe calls for adding the raw chicken after the coconut milk has been cooked which would release moisture back into the thickened sauce. But I sear the meat first, leaving the luscious browned bits in the pan, and then add it back in toward the end, so no extra moisture thins the sauce.

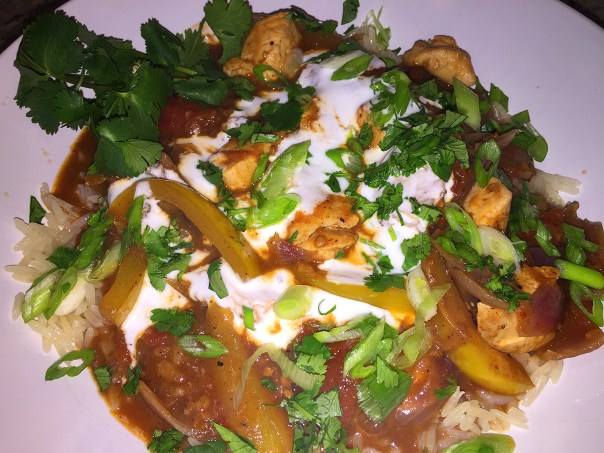
For another layer of flavor, after portioning out, add a generous squeeze of fresh lime juice and scatter on some sliced scallions with the chopped cilantro and drizzle of yogurt sauce. Then have some thick, crusty bread handy to scoop up all the extra sauce, or serve alongside a pile of rice for a low-maintenance comfort food dinner. Speaking of rice, if you steam it in homemade chicken stock, you’ll add even more luscious depth to the dish. We can’t wait until we make this again!

Quick Tomato Chicken Curry

  • Servings: 4
  • Difficulty: moderate
  • Print

Ingredients

  • 4 tablespoons ghee, coconut oil, or extra-virgin olive oil, divided
  • 1 large red onion, cut into ½-inch wedges
  • 1 yellow bell pepper, seeded, stemmed, cut across the equator then into ½-inch strips
  • 1 2-inch piece ginger, peeled, finely grated
  • 4 garlic cloves, crushed
  • Kosher salt
  • 1 tablespoon plus 1 teaspoon garam masala
  • 1 bay leaf
  • ½ teaspoon crushed red pepper flakes
  • 2 tablespoons honey
  • 1 28-ounce can whole peeled tomatoes
  • 1 15-ounce can coconut milk
  • 3 skinless, boneless chicken breasts (about 1½ pounds total), cut into 1-inch-thick pieces
  • ½ cup whole-milk Greek yogurt
  • 2 scallions, thinly sliced on diagonal
  • ½ cup coarsely chopped cilantro

Directions

  1. Heat 1 tablespoon ghee/oil in a large wide saucepan over medium-high. Add chicken pieces and brown on all sides, about 3 minutes total, remove from pan and set aside. (You may have to do this in two batches so that the chicken browns instead of steams.)
    IMG_9431
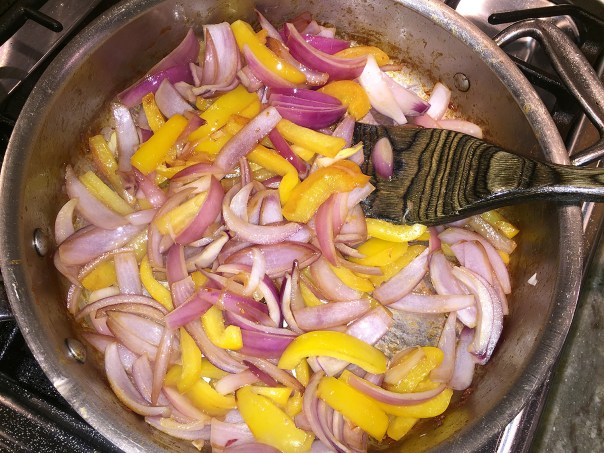
  2. Add remaining ghee/oil, onion and pepper strips and cook, turning occasionally, until undersides are golden brown, about 4 minutes.
    IMG_9434
  3. Add ginger and garlic and cook, stirring, until softened, about 2 minutes; season with salt.
  4. Add garam masala, bay leaf, and crushed red pepper and cook until fragrant, about 30 seconds. Stir in honey and cook until slightly caramelized, about 1 minute.
    IMG_9435
    IMG_9437
  5. Add tomatoes along with juices and bring to a boil, smashing down on tomatoes with a wooden spoon until pieces are no bigger than 1″. Reduce heat to medium and cook, stirring often and scraping up browned bits from bottom of pot, until sauce thickens, 8–10 minutes.
    IMG_9438
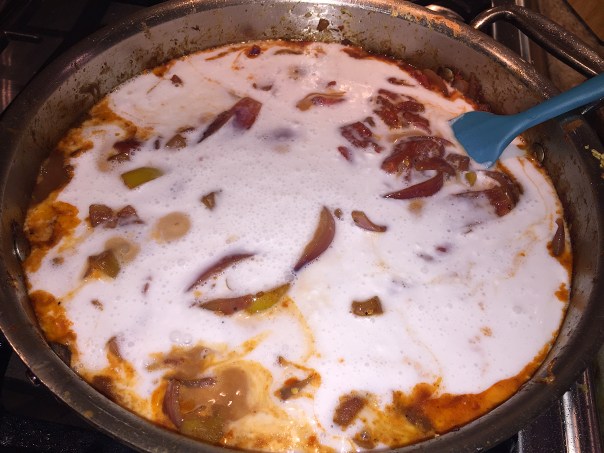
  6. Add coconut milk and cook, stirring occasionally and simmer for 15 minutes.
    IMG_9442
    IMG_9444
  7. Add browned chicken strips and any accumulated juices and reduce heat to low.
  8. Cook, partially covered, until chicken is cooked through, 8–10 minutes. Season with salt.
    IMG_9447
  9. Stir yogurt, a big pinch of salt, and 2 Tbsp. water in a small bowl.
  10. Drizzle yogurt sauce over stew. Top with sliced scallions and cilantro. Serve over rice or noodles if desired.
    IMG_9452

Do Ahead: Curry (without yogurt sauce) can be made 2 days ahead. Cover and chill.

http://www.lynnandruss.com

Adapted from a recipe by Andy Baraghani from Bon Appétit

Kickin’ Off Cocktail Hour

When the weather outside is frightful, or even when it’s not, kick your cocktail hour up a notch with festive pomegranate seeds. The pomegranate is typically in season in the Northern Hemisphere from September to February, and in the Southern Hemisphere from March to May. So for us here in the Northeast US, ’tis the season!

IMG_9344

The name for the fruit is derived from Latin and literally means “seeded apple.” Only the seeds are edible and are found inside this large, rounded red fruit. An average pomegranate contains about 600 juicy seeds, also known as arils, which are encapsulated in white pith.

One of the essential benefits of pomegranate seeds is that this fruit is a powerhouse of various nutrients like calcium, potassium, phosphorus, vitamins C, B complex and K, folic acid, iron, protein, etc. It is also a rich source of dietary fibers, zinc, magnesium and carbohydrates. Also the bright red juice extracted from the pomegranate fruit has been proven to possess medicinal properties in a number of studies (TMI for this blog.)

I’m enthralled with many of the health benefits of pomegranate seeds and juice that have been attributed to their extremely strong antioxidant properties. But the antioxidants in pomegranate can also provide beauty benefits! Due to their ability to destroy free radicals, the antioxidants in pomegranate can help fight wrinkles and fine lines on the skin. Got your attention now?

IMG_9380

OK, so how do you extract those luscious arils and what do you do with them? The process is fairly easy, and the list of uses is only limited by your imagination, but I’m going to focus on how to dress up your cocktail hour for the holiday season with festive ice cubes.

IMG_9376

IMG_9346First, slice all around the equator piercing the tough skin but do not cut through, you don’t want to slice through the seeds inside.
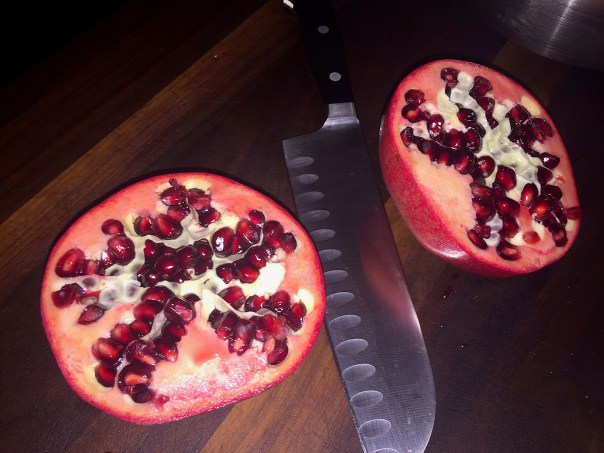
IMG_9347Twist the the halves in opposite directions until you can pull it apart. Then pull the skin outward to help loosen the insides.

IMG_9349
Place one of the halves upside down in your palm over a large bowl and tap often and sharply. This forces the arils to pop out into the bowl.


Repeat with other half. Remove any white pith that may have fallen into the bowl.

IMG_9353You’ll end up with around 600 seeds and some juice.

IMG_9354Place 5-7 seeds in each ice cube square then freeze for a few hours or overnight. When completely solid, pop the frozen cubes into a ziploc bag until ready to use.


Store the leftover seeds in an airtight container in the fridge for 5-7 days, or in the freezer for up to 4 months. Use them to in salads, cereal, smoothies—or more ice cubes!

Three Amigo Meatballs

Quite a while back, when I penned this blog, I’d been on a fennel kick, so when I saw this recipe in Redbook Magazine, it caught my eye immediately. Always looking to expand our repertoire of quick, tasty weeknight meals, the “three amigos” of Pork, Veal and Fennel Meatballs seem to fit the bill perfectly.

plated.meal2

It calls for a pound each of pork and veal, but since the meat we bought was prepackaged in certain amounts, we ended up with slightly more pork, and slightly less veal, which truth be told, didn’t seem to make a lick of difference! We also found it odd that the recipe calls for grated lemon rind—and rind usually is bitter, so we used lemon zest instead (which I noted below).

Pork, Veal and Fennel Meatballs

  • Servings: 60 mini meatballs
  • Difficulty: easy
  • Print

Ingredients

  • 1 cup fresh breadcrumbs (we used prepared panko breadcrumbs)
  • ¼ cup whole milk
  • 2 tsp sea salt
  • 2 tsp fennel seeds
  • 1 tsp dried chile flakes
  • 1 lb ground pork
  • 1 lb ground veal
  • 1 Tbsp finely grated lemon zest
  • 1 egg yolk
  • ½ cup finely grated Parmesan cheese, plus extra for serving
  • 2 Tbsp chopped thyme
  • 2 cloves garlic, crushed
  • Cracked black pepper
  • 2 Tbsp olive oil
  • 1 28-oz can tomato puree

raw.shaped.meatballs
The mixture made 59 small meatballs.

meatballs.sauteeing
If you are cooking all of the meatballs, you will have to sautée in batches. We froze half of them for a later meal.

meatballs.sauce.skillet
While the directions didn’t specify, we let the meatballs sit in the sauce for about 5 minutes to make sure they were heated through.

Directions

  1. Place breadcrumbs and milk in a large bowl and allow to stand 5 minutes.
  2. Place salt, fennel, and chile flakes in a mortar and pestle and grind to combine.
  3. Add salt mixture to breadcrumbs with pork, veal, lemon rind, egg yolk, Parmesan cheese, thyme, garlic, and pepper to taste and mix 2 to 3 minutes or until combined. Roll tablespoons of mixture into balls.
  4. Heat olive oil in a large, nonstick frying pan over high heat. Cook meatballs, in batches, 5 to 6 minutes until browned. Remove from pan and keep warm.
  5. Add tomato puree to pan and bring to a boil. Reduce heat to medium; cook 5 minutes.
  6. While sauce is cooking, cook pasta in a large saucepan of salted, boiling water 10 to 12 minutes or until al dente. Drain and transfer to a large dish. Add meatballs to sauce and stir gently to combine. Top pasta with meatballs and sauce and sprinkle with Parmesan to serve.

Makes 4 to 6 servings.

http://www.lynnandruss.com

plated.meal

The recipe pairs it with spaghetti, but not having any on hand, we opted to use a Black Pepper Fettucini from our pantry, and it made a great companion to the sauce.