Monthly Archives: September 2018

Trust Me, It Was About Thyme

Not surprisingly the historic Black Horse Tavern on State Street in Newtown closed—it was about time! Mishaps occurred on our last two visits—one incident involved spilling an entire glass of red wine on Russ. Red flag number one. But accidents happen, right?

Red flag number two occurred on our follow up visit as we sat starving and waited over an hour for our dinner to arrive. To everyone’s shocked dismay, the chef came out of the kitchen and started break dancing in the dining room, kid you not! To appease the disgruntled diners, they plied us with several glasses of free wine. (I think the chef plied himself with several free glasses too.) Neither scenario left us wanting to return for more. And online comments from other patrons left similar scathing reviews.

Luckily, in late August of this year, it opened under new ownership as the Thyme Bar & Grill, and we were game to try it out. Their menu includes lunch and pub fare with crab towers, ahi tuna, lobster roll, duck quesadillas, as well as burgers, truffle fries and wings; while dinner options range from jambalaya, sea scallops and rack of lamb, to king crab cakes and pork chops.

IMG_7457

We were seated at a two-top next to a wall in the crowded upstairs dining room. It had been redecorated in soft gray tones with gauze fabric and tiny lights undulating through the rafters. The old stone fireplace prevailed and remains a focal point along with a large gilded mirror on the back wall.

IMG_7458

The waitstaff was very attentive, although you could tell they were still smoothing out the kinks toward becoming a well-oiled machine. Our chosen bottle of red wine was not in stock, but we were given an upgrade to a pricier selection—a nice touch indeed.

IMG_7461

For starters we enjoyed one of three choices of Flat Breads. Ours came topped with Boursin cheese, baby arugula, garbanzo beans and Kalamata olives. I must admit, I was a bit concerned about chickpeas on my flatbread, but it was very good; and the arugula added a nice peppery bite. Our one criticism would be the bread itself was slightly thicker than we prefer.

IMG_7464

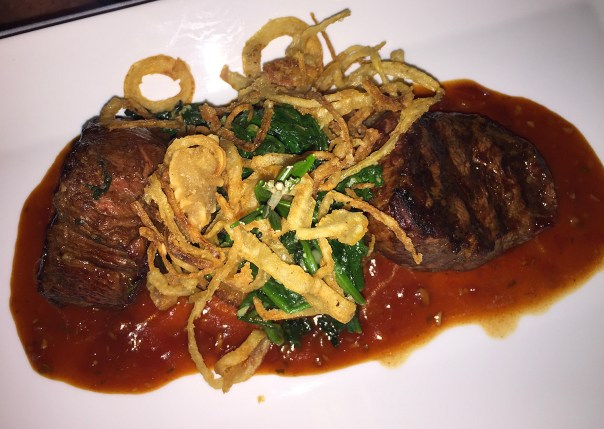
Luckily, there was no lapse in service under the new ownership. Our entrées arrived shortly after consuming our appetizer. Russ loved his perfectly cooked to medium-rare Twin Filets topped with sautéed greens and crispy herbed potato croquettes, resting on a bed of their silky house steak sauce.

IMG_7467

I was in a seafood mood and finally settled on their Seared Sea Scallops that came plated floating on a puddle of creamed sweet corn, tomato jam and braised greens. While it may not seem like a whole lot, I was pretty full from the flatbread and took half of my meal home—which made for a perfect reheated lunch a few days later.

This “Thyme” the dinner was a winner!

Fajitas. Because You Should.

The history of fajitas is short, flavor is not. Most folks aren’t hell-bent on pondering the origin of the foods they like, but I occasionally like to go back and figure out how they came into being. The word “fajita,” as a reference to a particular food, didn’t even appear in print until 1975, about the time I became obsessed with Mexican cuisine. Yet, within a decade, it had become the hottest food craze in the country.

BTW, the word derives from the Spanish “faja,” for “girdle” or “strip”—thus the less desirable cut of meat. Technically, only beef has a fajita, but over the years, the term has been corrupted to mean any kind of meat or seafood wrapped in a tortilla. Its popularity lies in the fact that it’s a delectable combination of flavors and textures, and can be assembled with such ease.

Yes, you can buy the prepackaged stuff, but if you make homemade seasoning, not only does it taste really good, it’s cheaper than buying pack after pack of store-bought, lasts for ages and is full of only what you put in there—herbs and spices!

It’s really impressive if you have a fajita skillet that you can bring to the table sizzling hot. Although we pretty much have every other cooking vehicle, that is one we lack. But don’t fret, it’s just as easy to make them in a cast-iron skillet—and the fajitas taste just as amazing; and they are in actual fact, very healthy.

The most important thing when making fajitas is the marinade. This not only makes the ingredients incredibly tender, but also full of flavor. If you are feeling really adventurous, go ahead and make a side of Bobby Flay’s Avocado Crema. It adds a cool soothing note to the spicy fajita marinade. Recipe follows at the end.

IMG_7641

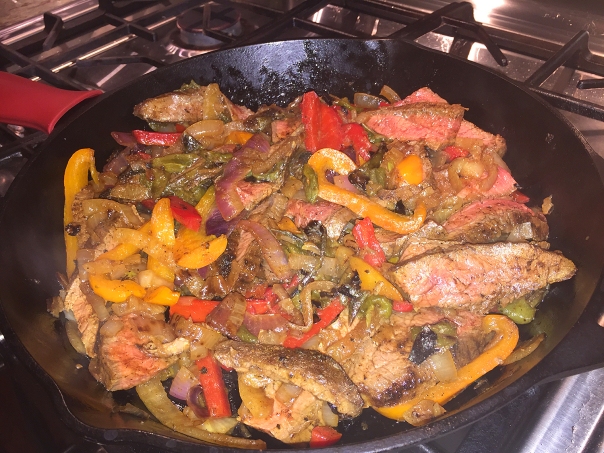
We happened to have some already grill-charred long hot green peppers. I slit them in half, removed the seeds and stems, chopped them up and added them to the skillet at the end—they provided a nice little kick. If your meat seems a little too rare when you slice it, don’t worry, it will cook a bit more in the last stages when you add it back to the skillet with the peppers and onions.

IMG_7663

Sizzling Steak Fajitas

  • Servings: 8-10 Fajitas
  • Difficulty: easy
  • Print

Fajitas

Ingredients

  • 1/4 c. extra-virgin olive oil, plus more for cooking
  • 1 1/2 lbs. skirt or flank steak
  • Juice of 1 lime
  • bell peppers, thinly sliced (preferably two different colors)
  • large onion, sliced into half moons
  • Avocado crema, for serving* (see below)
  • Cilantro, for serving
  • 1 package, 10 flour tortillas

Directions

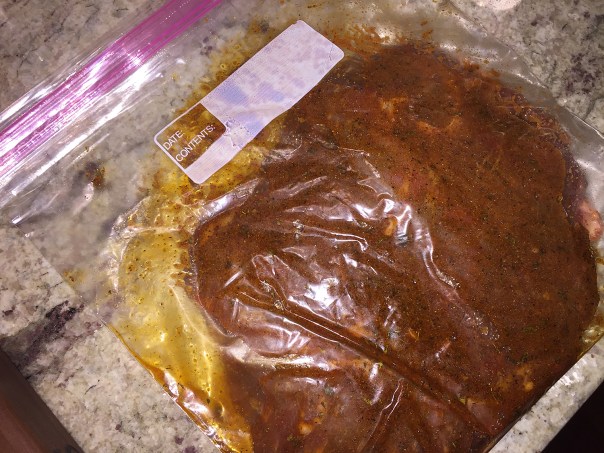
  1. In a large ziploc bag, toss steak in seasoning mixture (see below) with olive oil and lime juice. Refrigerate for 20 minutes, or preferably, up to 4 hours.
    IMG_7632
    IMG_7633
  2. Heat stovetop burner to medium-high. Place a cast-iron skillet directly on hot burner and drizzle a thin layer of olive oil to coat. Add onion and bell pepper and season with salt and pepper. Cook, stirring occasionally, until veggies are soft, about 8 minutes. Remove from heat.
    IMG_7643
  3. Meanwhile, shake off excess marinade from steak and season both sides with salt and pepper. Place in skillet, return to a medium hot burner, and cook to your liking, about 4-5 minutes per side for medium-rare, 125°F.
    IMG_7645
    IMG_7647
  4. Let rest 10 minutes before slicing against the grain into thin strips.
    IMG_7651
  5. Add sliced steak to skillet with veggies and reheat all for about one more minute.
    IMG_7656
    IMG_7659
  6. Garnish steak and veggies with cilantro and serve immediately with warm tortillas, avocado crema and cilantro.
    IMG_7661

Seasoning

Homemade fajita seasoning, hurray! A spice mix so tasty, so versatile, it can be used as taco or burrito seasoning too.

IMG_7630

Ingredients

  • 1 tsp. Cumin
  • 1 tsp. Chilli powder
  • 1 tsp. Paprika
  • 1 tsp. Dried Oregano
  • 1 tsp. Sugar
  • 1 tsp. Salt
  • 1/2 tsp. Black Pepper
  • 1 tsp. Garlic Powder
  • 1 tsp. Onion Powder

Directions

  1. Mix together all the seasonings in a small bowl.
  2. Use the spice mix whenever you would use a store-bought version—generally mix it in with your meat and/or vegetables in the skillet/pan. (Add a couple tablespoons of water if you see the seasoning clumping in the pan.)

http://www.lynnandruss.com

Bobby Flay's Avocado Crema

  • Servings: About 2 cups
  • Difficulty: easy
  • Print

IMG_7636

*Avocado Crema

Makes enough as a condiment for 12 small fajitas

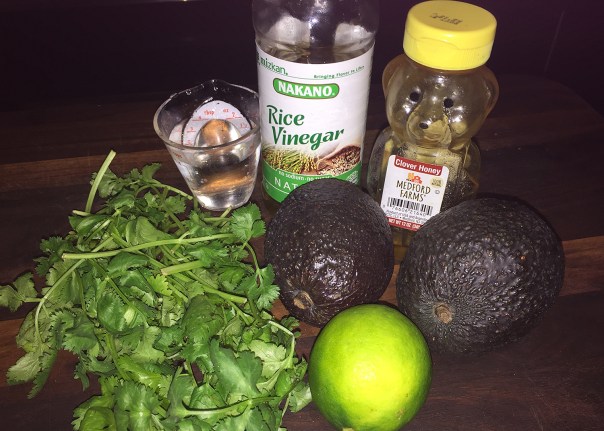
  • 2 ripe Haas avocados, peeled, pitted and chopped
  • 1/4 cup water
  • Juice of 1 lime
  • 2 tablespoons unseasoned rice vinegar
  • 1 teaspoon honey
  • 1/4 cup chopped fresh cilantro leaves
  • Kosher salt and freshly ground black pepper
  1. Combine the avocados, water, lime juice, rice vinegar and honey in a blender and blend until smooth.
  2. Add the cilantro, salt and pepper and blend a few seconds just to incorporate.
    IMG_7639

http://www.lynnandruss.com

Spice-Rubbed Grilled Pork Chops

Juicy grilled pork chops make a perfect, quick meal and dry rubs are a terrific way to season them. Be sure to select chops of close to an inch in thickness—nothing flimsy—then grill them over steady, medium heat.

IMG_6966

Opt for rib chops over the center-cut variety when cooking outdoors because their greater fat content helps keep them moist, and bone-in chops are preferred for their juiciness. You could add a barbecue sauce on the side, but we relish their crispy surface unvarnished.

I must confess, the pork chops I purchased were over 2″ thick!! My choice at the supermarket was either boneless chops—which I wasn’t looking for in this case—or very thin bone-in chops, which I knew would dry out. Obviously, cooking times need to be lengthened to accommodate the extra thick meat, but the directions below cater to a 1″ thickness.

IMG_7440

In order to get the desired cross marks and a perfect doneness, sear over direct heat on both sides, then move the chops to the indirect heat side of the grill until they reach 135°. Carryover cooking will cause the temperature to continue rising after being removed from the heat source, so knowing when to pull the pork chops off the grill is critical. Pull from the grill and allow to rest on a cutting board, tented with foil, for about 5-10 minutes. Spot check the internal temperature after about 5 minutes to be sure you’re at, or almost at the target temp of 145°F.

IMG_7429

Alas, the best laid plans… due to an emergency, I had to freeze the already seasoned chops until two weeks later. And it was raining the evening we actually had them for dinner, so I used another sure-fire method to cook the chops. Just sear both sides on high heat in a carbon steel or cast iron skillet. Then put the skillet directly into a 400° oven until they reach 135°. Tent with foil for five minutes to let the juices redistribute, and voila, juicy pork chops!

IMG_7447

As I mentioned, our two-chops-in-one were over 2″ thick, so they took nearly 20 minutes in the oven to come to temp. But they came out with a perfect light pink interior and crispy exterior. Our sides of crispy/creamy baby roasted potatoes and savory, tender kale completed the meal. Not surprisingly, we had a lot of leftover pork which, when sliced down, came in handy for lunches and munchies…

Spice-Rubbed Grilled Bone-in Pork Chops

  • Servings: 6
  • Difficulty: easy
  • Print

Ingredients

  • 3 Tbsp. hot smoked paprika, preferably Spanish
  • 1 Tbsp. freshly ground black pepper
  • 1 Tbsp. coarse salt, either kosher or sea salt
  • 1 Tbsp. brown sugar
  • 3/4 tsp. chili powder
  • 3/4 tsp. granulated garlic or garlic powder
  • 3/4 tsp. onion powder
  • 1/2 tsp. ground cayenne
  • 6 to 8, 10-ounce bone-in pork rib chops, 1-inch thick
  • Vegetable oil spray

Directions

  1. At least 1 and up to 8 hours before you plan to grill the pork chops, prepare the dry rub, combining the ingredients in a small bowl. Coat the chops with the spice mixture, place them in a large plastic bag, seal, and refrigerate.
    IMG_6967
  2. Fire up the grill, bringing the heat to medium.
  3. Remove the chops from the refrigerator and let them sit covered at room temperature for about 20 minutes.
  4. Spray the chops with oil and transfer them to the grill. Grill for 18 to 20 minutes total. Turn onto each side twice, rotating the chops a half turn each time to get criss-cross grill marks. (If your chops are much thicker, move them over to indirect heat for the time needed to reach 135°.)
  5. Pull from the grill and allow to rest on a cutting board, tented with foil, for about 5-10 minutes. Spot check the internal temperature after about 5 minutes to be sure you’re at, or almost at the target temp of 145°F. Serve hot.

IMG_7448

http://www.lynnandruss.com

Recipe adapted from Cheryl and Bill Jamison, found on Epicuious

Mexican Corn Salad (Esquites)

Corn season is on the wane here in the Northeast, but while you still can, make sure to try the following creamy and tangy recipe. This Mexican Corn Salad from Cook’s Illustrated features charred kernels whose nutty, slightly bitter flavor complements corn’s natural sweetness. It was a perfect companion to our main entrée of Grilled Cedar-Planked Salmon with Lemon Thyme Rub.

The corn is dressed with a mixture of sour cream, a touch of mayonnaise and some lime juice. Chopped cilantro and spicy serrano chiles add bright colors and fresh flavors. A half dozen ears of corn yields enough for 6 to 8 guests, but if you have any leftover, it’s still very good when reheated slightly.

Cotija is a Hispanic-style cheese named after the town of Cotija in the Mexican state of Michoacán. This hard, crumbly Mexican cheese is made mainly from cow’s milk, and is white, fresh and salty thus bearing an immense resemblance to feta cheese, which would make a suitable substitution. However, with aging it becomes hard and crumbly like Parmigiano-Reggiano.

Mexican Corn Salad

  • Servings: 6-8
  • Difficulty: easy
  • Print

Ingredients

  • 3 tablespoons lime juice, plus extra for seasoning (2 limes)
  • 3 tablespoons sour cream
  • 1 tablespoon mayonnaise
  • 1–2 serrano chiles, stemmed and cut into ⅛-inch-thick rings
  • Salt
  • 2 tablespoons plus 1 teaspoon vegetable oil
  • 6 ears corn, kernels cut from cobs (6 cups)
  • 2 garlic cloves, minced
  • ½ teaspoon chili powder
  • 4 ounces cotija cheese, crumbled (1 cup)
  • ¾ cup coarsely chopped fresh cilantro leaves
  • 3 scallions, sliced thin

Directions

  1. Combine lime juice, sour cream, mayonnaise, serrano(s), and ¼ teaspoon salt in large bowl. Set aside.
  2. Heat 1 tablespoon oil in 12-inch nonstick skillet over high heat until shimmering. Add half of corn and spread into even layer. Sprinkle with ¼ teaspoon salt. Cover and cook, without stirring, until corn touching skillet is charred, about 3 minutes.
    IMG_7493
  3. Remove skillet from heat and let stand, covered, for 15 seconds, until any popping subsides. Transfer corn to bowl with sour cream mixture.
  4. Repeat with 1 tablespoon oil, ¼ teaspoon salt, and remaining corn.
  5. Return now-empty skillet to medium heat and add remaining 1 teaspoon oil, garlic, and chili powder. Cook, stirring constantly, until fragrant, about 30 seconds.
  6. Transfer garlic mixture to bowl with corn mixture and toss to combine. Let cool for at least 15 minutes.
    IMG_7495
  7. Add cotija, cilantro, and scallions and toss to combine. Season salad with salt and up to 1 tablespoon extra lime juice to taste. Serve.
    IMG_7501

NOTE: If desired, substitute plain Greek yogurt for the sour cream. For the serrano chile, you can substitute a jalapeño chile that has been halved lengthwise and sliced into ⅛-inch-thick half-moons. Adjust the amount of chiles to suit your taste. If cotija cheese is unavailable, substitute feta cheese.

http://www.lynnandruss.com

IMG_7508We served our corn salad at an outdoor BBQ along with Cedar-Planked Salmon with Lemon Thyme Rub.

Grilled Bistecca with Herby Fish Sauce

Has to be one of the top three BEST steaks I’ve EVER eaten! And to think I was a bit concerned when I saw it was basted with fish sauce. But then I started thinking fish sauce is umami, which pairs beautifully with steak. (Curiously, the Italian word bistecca is actually borrowed from the English “beef steak.”)

IMG_7539

When it comes to the meat, it’s best to order a 1-1/2- to 2-inch-thick porterhouse that weighs in at 2 1/2 to 3 pounds a piece (figure about 3/4 lbs. per person). But the thickest I could get my hands on was 1 1/2″ thick and weighed in at 1.6 pounds. With that knowledge, I chopped off a few minutes in the grilling process to make sure it wasn’t overcooked. Ended up being the perfect amount for the two of us.

Porterhouse is the best cut (and usually the most pricey); failing that a T-Bone, and failing that, a strip steak. Absolute purists say that the T-bone should have filet on one side, and sirloin on the other. One piece of meat is expected to be shared between two and four diners—depending on how much it weighs. You’d be wise to contact your local butcher and ask to have the meat cut and weighed to your exact specifications ahead of time.

The meat should sit out of the refrigerator for at least an hour before starting. Okay, that being said, here’s another takeaway on resting steak at room temperature: Don’t bother. Rather, dry them very thoroughly on paper towels before searing. Or better yet, salt them and let them rest uncovered on a rack in the fridge for a night or two, so that their surface moisture can evaporate. You’ll get much more efficient browning that way.

I’ve also read when cooking thick steaks, start them on the cooler side of the grill and cook with the lid on until they reach about ten degrees below final serving temperature. Finish them off on the hot side of the grill for a great crust. Just the opposite of what this recipe calls for. I’ll leave you to have those arguments with yourself… I followed the recipe as listed below, and our steak was heavenly!

The 20 minute resting time is an excruciating waiting period because it smells absolutely divine; so let’s face it, we had to “taste-test” by dipping our pinky into the juices. This caused an automatic reaction of grumbling stomachs and salivating tastebuds. When it’s finally time to cut the meat off the bone, you are practically ravenous. But gather yourself together enough to slice those slabs against the grain and divvy up amongst the dinner plates. It’s probably a wise idea to have some crusty bread on hand for mopping up any stray juices, it’s just that good!

IMG_7522

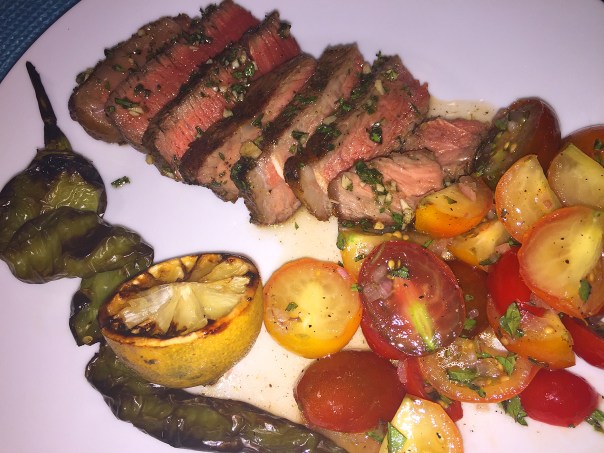
Along with some grilled long hot green peppers, I made an herby side salad of sweet multi-color cherry tomatoes freshly picked from the garden, and seasoned with oregano, minced shallot, olive oil, red wine vinegar and salt and pepper.

IMG_7524

IMG_7532

There’s only one 100% reliable way that I know of to guarantee that your meat will be perfectly cooked every single time, and that’s by using an accurate instant-read thermometer like the Thermapen by Thermoworks.
thermapen-primary
They can be a little pricey, but you will quickly make that money back by never overcooking another piece of expensive meat again, no matter how big it is, how fatty it is, or how many beverages you might have indulged in beforehand. In true Tuscan fashion, the steak should be eaten rare, but these directions are for medium-rare (125°)—just don’t go any more well done than that. Be prepared to oooh and aaah throughout the meal…

IMG_7513

Grilled Bistecca with Herby Fish Sauce

  • Servings: 8
  • Difficulty: easy
  • Print

Ingredients

  • 2 (1 1/2″–2″-thick) porterhouse steaks (about 6 lb. total)
  • 1/2 cup extra-virgin olive oil, divided
  • Kosher salt
  • 3 Tbsp. freshly ground black pepper
  • 2 garlic cloves, finely grated
  • 1/4 cup fish sauce
  • 2 Tbsp. coarsely chopped marjoram, rosemary, and/or thyme

Directions

  1. Rub steak with 1/4 cup oil; season with salt and sprinkle with pepper (it should nearly cover both sides). Let sit at room temperature 30 minutes.
    IMG_7519
  2. Mix garlic, fish sauce, herbs, and remaining 1/4 cup oil in a small bowl.
    IMG_7515
    IMG_7517
  3. Prepare a grill for medium-high indirect heat (for a gas grill, leave one or two burners off; for a charcoal grill, bank coals on one side of grill).
  4. Grill steaks over direct heat until nicely charred, about 2 minutes per side.
    IMG_7525
  5. Move steaks over indirect heat and continue grilling, basting with fish sauce mixture, until browned all over, about 5 minutes per side. An instant-read thermometer inserted into the thickest part of steaks should register 120°F for rare; temperature will rise to 125°F (or medium-rare) as they rest.
    IMG_7534
  6. Transfer to a cutting board and let rest 20 minutes before slicing against the grain.
    IMG_7540
    IMG_7543

http://www.lynnandruss.com

IMG_7546

Bistecca recipe by Ignacio Mattos found on Epicurious.com

Ready For Dessert? Posset-tively!

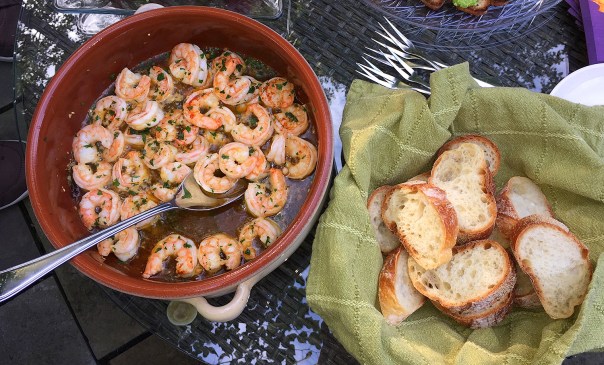
Autumn was right around the corner, and it was a beautiful and warm evening when we hosted an end-of-summer, al fresco BBQ. The party started with some appetizers on the patio, namely the simple-yet-elegant Gambas al Ajillo in a cazuela, compliments of Russ. The other two appetizers arrived via Rosanne. The Pea Pesto Crostini (recipe courtesy of Giada De Laurentiis) not only was gorgeous to look at, but tasted great! And her yummy little skewers were a mix of spicy sausage, and sweet for those with a more delicate palette.

IMG_7490A sliced baguette is a must with this sizzling garlic shrimp dish to mop up all of the luscious EVOO.

IMG_7489

One of the guests was originally going to bring dessert, but the couple had to back out so Russ did a little online investigating and found this Lemon Posset with Berries on the Cook’s Illustrated website (recipe follows). The description of a silky, rich British dessert with bright citrus flavor caught his attention. The fact that there were only four ingredients made it that much more appealing.

IMG_7492Wendy and Rosanne keep me company in the kitchen as I prepare the Mexican corn dish.

According to Wikipedia: A posset (also historically spelled poshoteposhotte) was originally a popular British hot drink made of milk curdled with wine or ale, often spiced, which was often used as a remedy. In the 16th century the drink evolved into a cream, sugar and citrus-based confection, which is still consumed today as a cold set dessert—somewhat like a cross between custard and pudding.

IMG_7511Add a small shortbread cookie on the side for some crunch factor.

Using just the right proportions of sugar and lemon juice is the key to custard with a smooth, luxurious consistency and a bright enough flavor to balance the richness of the cream. Pairing the dessert with fresh berries for textural contrast helps keep it from feeling overly rich. One reviewer commented he added a pinch of Moroccan mint and a star anise pod, claiming the subtleties were delicious and totally complimentary to the lemon—although we did not include those touches.

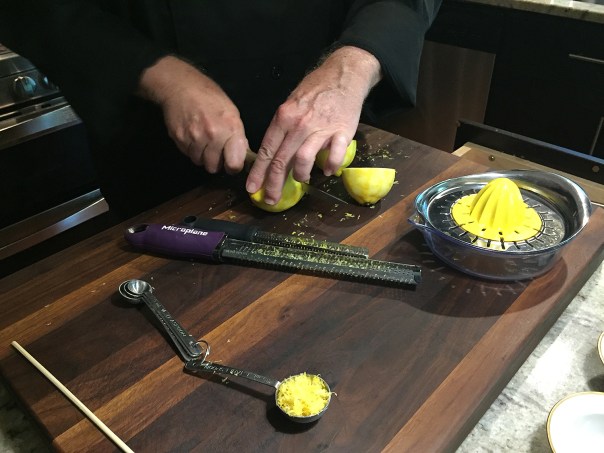
IMG_7470Zesting and juicing the lemons for the posset.

Before dessert however, we enjoyed a main course of Cedar-Planked Salmon with Lemon Pepper Rub, Mexican Corn and Wendy’s cheerful tossed salad brimming with lots of healthy ingredients and containing almost every color in the rainbow.

IMG_7497

IMG_7508A side of horseradish chive sauce is served with the salmon.

Lemon Posset with Berries

  • Servings: 6
  • Difficulty: moderately easy
  • Print

Lemon Posset with Berries

Ingredients

  • 2 cups heavy cream
  • ⅔ cup granulated sugar
  • 1 tablespoon grated lemon zest plus 6 tablespoons juice (2 lemons)
  • 1 ½ cups blueberries or raspberries

Directions

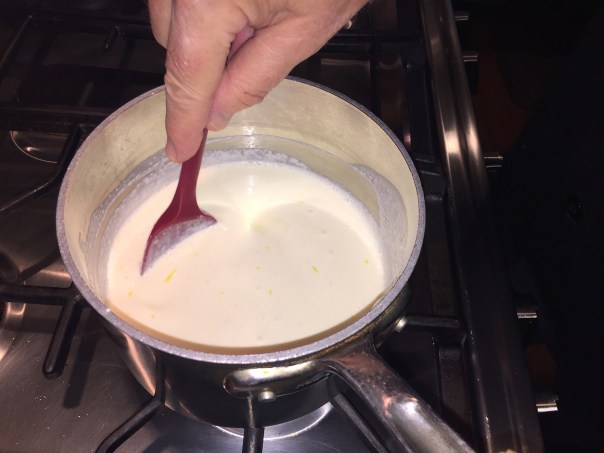
  1. Combine cream, sugar, and lemon zest in medium saucepan and bring to boil over medium heat. Continue to boil, stirring frequently to dissolve sugar. If mixture begins to boil over, briefly remove from heat. Cook until mixture is reduced to 2 cups*, 8 to 12 minutes.
    IMG_7473
  2. Remove saucepan from heat and stir in lemon juice. Let sit until mixture is cooled slightly and skin forms on top, about 20 minutes.
  3. Strain through fine-mesh strainer into bowl; discard zest. Divide mixture evenly among 6 individual ramekins or serving glasses.
    IMG_7477
    IMG_7481
  4. Refrigerate, uncovered, until set, at least 3 hours. Once chilled, possets can be wrapped in plastic wrap and refrigerated for up to 2 days.
  5. Unwrap and let sit at room temperature for 10 minutes before serving. Garnish with berries and serve.

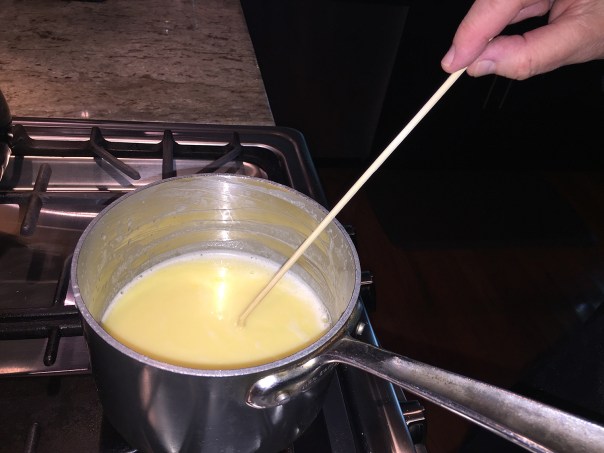
*This dessert requires portioning into individual servings. Reducing the cream mixture to exactly 2 cups creates the best consistency. An easy method is pouring 2 cups of water into your saucepan first. Measure the water height with a wooden skewer, making a notch at that point. Bend the tip at the notch. Pour out the water, bring your ingredients to a boil, checking the depth after about 8 minutes. Continue boiling until the desired depth of 2 cups is reached.
IMG_7475

http://www.lynnandruss.com

IMG_7509

Footnote: We made another Posset the following weekend for more company. It was lime-based and topped with fresh raspberries, shown below.

lime.posset

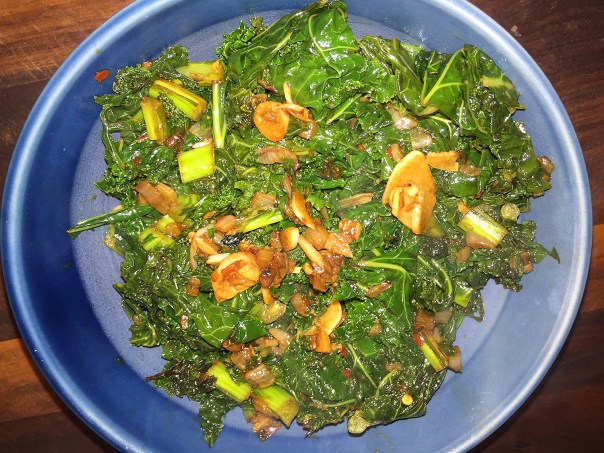
Savory and Tender Sautéed Kale

There is no need to wax poetic on the benefits of kale, because there has been so much good press on the power-veggie over the last few years, you’d have to be a hermit not to be aware.

IMG_7443

One night for dinner, to go along with my extra-thick, spicy pork chops, I wanted a simple side recipe for kale. A version of this one popped up on NYT Cooking website by Sam Sifton. I made several adaptations however, and they are incorporated into the recipe below. Sam said this is a technique that elevates basic sautéed greens into something even more savory and tender, so I was game to try.

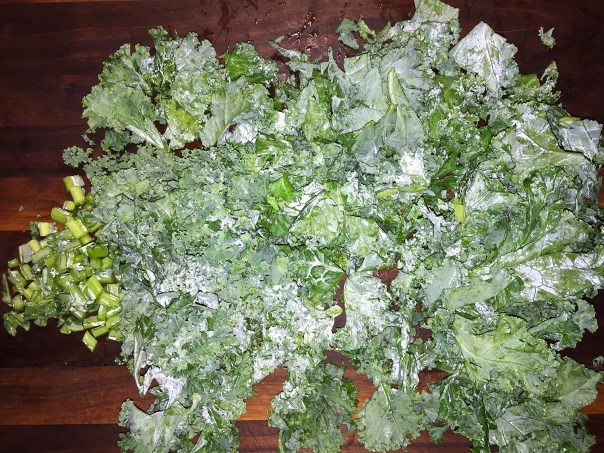
No need to toss the kale stems, just chop them up along with the leaves and sauté them as well. The NYT recipe called for red-wine vinegar, but I substituted an aged tangerine balsamic vinegar (other options are lemon or orange juice.)

IMG_7428

As far as the olive oil, a 1/4 cup seemed a bit excessive for one bunch of the greens, so I reduced it to 2 tablespoons; I upped the number of garlic cloves slightly, and included one minced shallot. My burners tend to run very hot, so I adjusted the setting from high heat to medium to prevent burning, which I noted in the directions bellow.

IMG_7426

Savory & Tender Sautéed Kale

  • Servings: 4
  • Difficulty: easy
  • Print

Ingredients

  • 2 Tbsp. extra-virgin olive oil
  • 4 cloves garlic, peeled and sliced
  • 1 shallot, minced
  • 1 large bunch kale, with leaves and stems coarsely chopped
  • ½ cup vegetable stock, white wine or water
  • Kosher salt, freshly ground black pepper to taste
  • Pinch of red-pepper flakes
  • 2 Tbsp. tangerine balsamic vinegar

Directions

  1. Heat olive oil in a large sauté pan set over medium heat until it shimmers. Add shallot and cook until soft, about 2 minutes. Toss in garlic slices and red pepper flakes and sauté for another minute.
    IMG_7434
  2. Add kale to the pan and add the stock.
  3. Use tongs to toss the greens in the oil and stock, then cover and cook for approximately 7 minutes, until it is soft and wilted, but still quite green.
  4. Remove cover and continue to cook, stirring occasionally until all the liquid has evaporated, another 1 to 2 minutes.
    IMG_7436
  5. Season to taste with salt and pepper, add the vinegar (or juice) using a wooden spatula to release any browned bits, and toss to combine.

http://www.lynnandruss.com

IMG_7448It made a great side dish for the Spice-Rubbed Grilled Pork Chop dinner.

Whattah Wicked Pissah!

Four days after Labor Day, my longtime friend Merry Sue (MS) and her “seestah” Susan (maiden name Fritz) and I made a road trip to Cape Cod. Susan owns a house in Orleans, MASS and needed to address a few things up there, so Merry Sue and I decided to tag along for a girl’s weekend. (The title of this blog was inspired by a passenger’s T-shirt graphic on our ferry ride to Martha’s Vineyard.)

IMG_7333
Doing some shopping at the Artist’s Shanties after buying our Hy-Line Ferry tickets in Hyannis. And yes, those are purple sandals I have on, and purple sunglasses, pocketbook, nail polish…

Wicked Pissah is a slang phrase in the New England area; perhaps most frequently heard in Boston, and used as an adjective to describe something totally cool or awesome—like our trip. However; the phrase can be used in the sarcastic sense too. Wicked Pissah is also a New England Style IPA, described as cloudy with a thick white head, strong tropical fruit aroma with notes of pineapple, citrus fruit and mango—although we didn’t indulge in any.

Anyway, being a food blog and all, I’m going to mention a few highlights and lowlights from our culinary adventure, starting on the day we arrived for lunch at Yardarm, a local spot for many since 1972. Now if you’re a local, and not a wash-ashore like us, it would be pronounced “yahd-ahm.” The place was packed for a Friday afternoon off-season, but we didn’t have to wait long for a table.

IMG_7294

Kind of like the “Cheers” of Orleans… “every town has one, that neighborhood gathering place where friends meet for a drink, some conversation and conviviality, where upon entry, you are greeted with a smile and a thanks for coming; and where, when you get hungry, a table is waiting, and the food is home cooked as is the service.”

Local color abounds, from fishermen to physicians, tradesmen to tourists, all rubbing elbows at the bar and extending conversation from table to table while the Red Sox or the Patriots appear on their many TVs.

IMG_7297

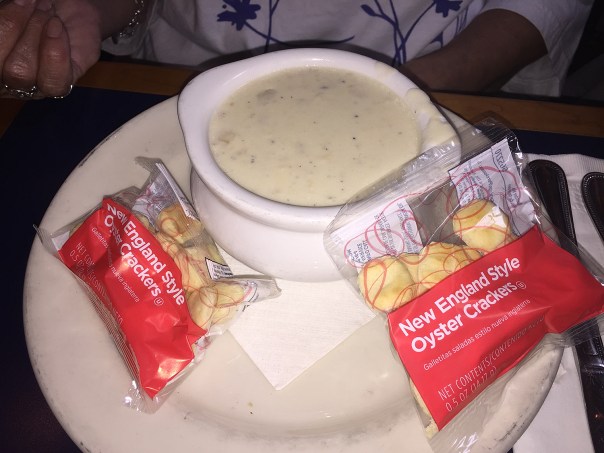
Being on the Cape, the Fritz sisters (above, MS on the left, Susan on the right) both yearned to try their Clam Chowder; and while I will indulge at times, clams are not one of my faves, so I ordered their Chili Con Carne with Cheese, which I luv-luv-loved! Susan got a cuppa chowdah with a side of coleslaw (which she did not like at all); Merry Sue got the bowlful, both sizes came with a packet of oyster crackers.

IMG_7301

IMG_7302

Apparently, Susan was told by her daughter-in-law—who worked for years as a waitress on the Cape—that all restaurants get the same chowder base and therefore every eating establishment basically serves the same thing. MS and I found that hard to believe, but if it’s the case, I’m hypothesizing that they at least doctor it up with additional ingredients to put their own stamp on it. Anyone know for sure?

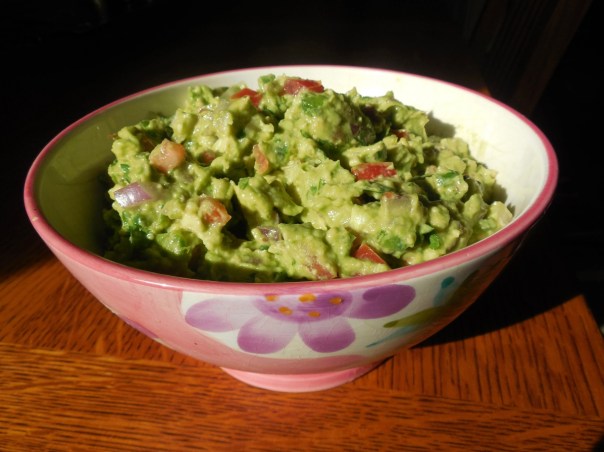
After Yardarm we went grocery shopping to purchase breakfast, lunch and snack items because we didn’t intend on eating out for every meal. Plus we all brought along some vittles, like the ingredients to make my famous guacamole, which you can make yourself following the recipe at the end of this blog.

IMG_7347

Our first dinner out was at the Barley Neck Inn, a small independently owned resort based in an old sea captain’s 1868 home in the rural village of Orleans in the elbow of Cape Cod. Even though it was the Saturday after Labor Day, MS and I thought it prudent to make reservations. Thank goodness we did because it was packed when we got there and they were turning people away, or they had at least an hours wait—and it was already going on 8 p.m.

IMG_7345

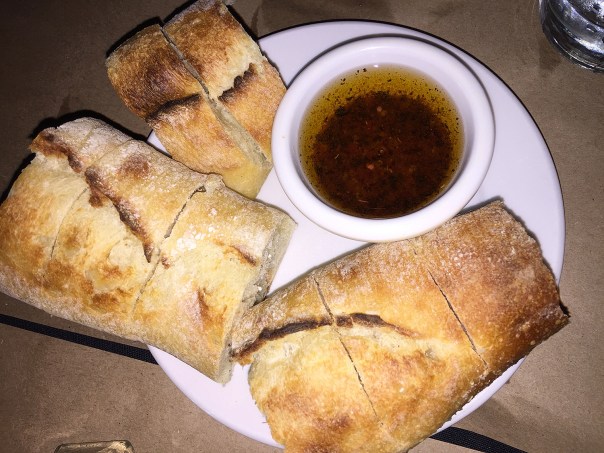
With glasses of wine ordered from our friendly waitress with an obvious accent (she was from London), we scanned the menus and munched on the crusty bread served with a spiced olive oil.

IMG_7349

Figuring appetizers would be too much, we went right for the entrées and Merry Sue chose from the Special Additions Menu and ordered the Day Boat Cod topped with lemon-thyme crumbs resting on a lemon butter sauce, served with sides of rice pilaf and tender asparagus stalks. No complaints from her.

IMG_7351

Susan and I both had a hankering for the Grilled Boneless Salmon Steak with a Marseille butter sauce, steamed broccoli and the same rice pilaf. The bright magenta orchid blooms were an attractive touch to each serving. We just about licked our plates clean, except for Susan’s carrot medallions, a veggie she doesn’t care for unless they are very soft.

IMG_7352

The following morning we took the Hy-Line ferry from Hyannis to Martha’s Vineyard. After a bit of shopping in Oaks Bluff, we took a bus to Edgartown and ended up for lunch at the quaint Among the Flowers Café. Their outdoor patio (which was packed therefore we had to sit indoors) is nestled under a blue and white awning with views of Edgartown Harbor. Apparently it is a little goldmine because for nearly 40 years they have served fresh, healthy, homemade dishes at reasonable prices and the folks keep piling in.

IMG_7384.jpg

Our choices included Lynn’s Asian Chopped Salad arriving in an asymmetrical white bowl filled with mixed greens, grilled chicken, Napa cabbage, edamame, red and yellow peppers wasabi peas and lightly tossed with a Thai peanut dressing. It was soooo good, I ate every last morsel!

IMG_7378

A chalkboard listed some daily specials, one of which was a Mushroom & Spinach Quiche that Susan ordered. She liked the quiche enough, but had to pick out the raw carrots from the side salad. MS went for the Soup & Salad Combo, choosing New England clam chowder that was served in their signature clay mug. These for-sale colorful mugs and mini bud vases lined all of the windowsills and some counters.

IMG_7373

IMG_7376

IMG_7370

Our other dinner on the town was at Chapin’s in Dennis. We chose that because it was close to the Cape Cinema Theater founded in 1930, and they were featuring The Wife, starring Glenn Close—a great movie BTW. The auditorium is designed in the style of Art Deco and includes 317 individual arm chairs of black lacquer and tangerine suede. American painter and illustrator Rockwell Kent designed the massive 6,400-square-foot mural for the auditorium’s ceiling (below), featuring a colorful representation of the heavens and constellations.

IMG_7393

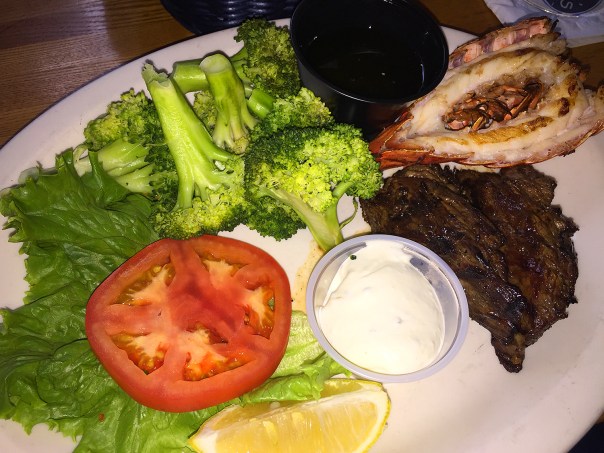
The movie ended at 4:00, and Chapin’s opens at 4:00 which is WAY early for dinner  IMHO, but we considered it a late lunch/early supper meal. And believe it or not, we weren’t the first patrons to arrive on that Monday afternoon. Once seated, we were given multiple menus, one listing the specials which had a Surf N’ Turf option, and included two steak tips and a grilled lobster tail served with a choice of sides.

I hadn’t indulged in lobster since we’d been on the Cape, so my mind was made up. Seems Susan had the same idea. Well, it was a huge disappointment. Problem was, Susan’s steak was overdone as was both of our miniscule lobster tails—not succulent at all. (Must have been leftovers from the weekend.) My steak on the other hand, was a perfect medium-rare and the side of broccoli was cooked just right.

IMG_7406

Miss MS chose the Chapin’s Baked Stuffed Cod chock full with seafood stuffing, lobster sauce, Cheddar Jack cheese, chopped bacon and topped with seasoned bread crumbs. My goodness, that was a big portion! She tried her best to finish it, but in the end had to succumb—couldn’t even take a doggie bag because we were leaving for home early the next morning when we’d have to wash back ashore.

IMG_7405

All in all, we had a PISSAH of a time!

Lynn’s Holey Moley Great Guacamole

Lynn's Holey Moley Great Guacamole

  • Servings: 8-10
  • Difficulty: easy
  • Print

lynn's guacamole

Ingredients

  • 1/4 cup chopped red onion
  • 1/4 cup fresh lime juice
  • 1 teaspoon salt
  • 4-5 ripe Hass avocados, halved, pitted
  • 2 plum tomatoes, seeded, diced
  • 2 jalapeños, seeded, minced
  • 1/3 cup chopped fresh cilantro

Directions

  1. In large bowl combine onion, lime juice and salt; let stand at room temperature for 20 minutes.
  2. Meanwhile, chop other ingredients. After the onion mixture is ready, with spoon, scoop avocado into bowl with onion mixture. Coarsely mash with potato masher or fork.
  3. Stir in remaining ingredients. Cover surface directly with plastic wrap and eliminate any air pockets. Refrigerate up to 24 hours before serving. Serve with tortilla chips for scooping.

A Love/Hate Relationship

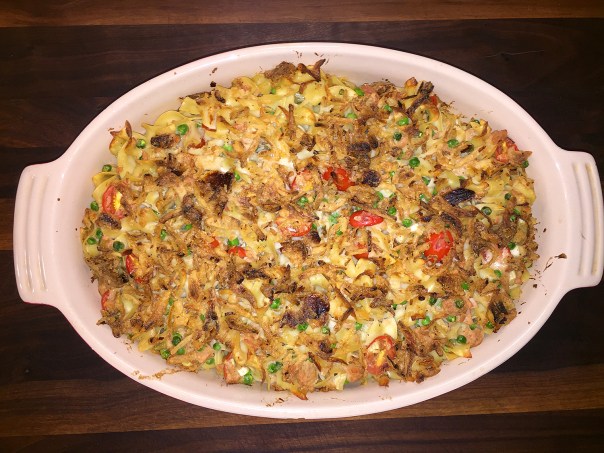
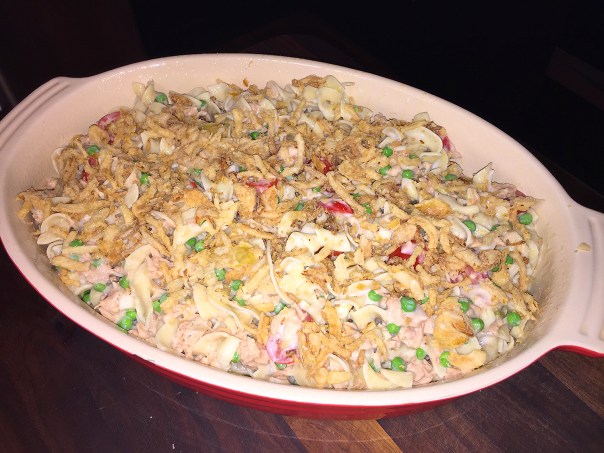
Tuna Noodle Casserole—Either you loved to HATE it, or you hated to LOVE it, am I right? This homey dish either conjures up warm childhood memories or evokes gagging grumbling groans. In my case, I hated it as a child, but finally started to develop a liking to it when I entered my twenties. (Of course, my limited bank account back then may have had something to do with it.) Then when I got married to my Ex, he pretty much barred any, and all, casseroles as a dinner option. Apparently that was the only meal his previous girlfriend seemed to know how to make.

IMG_7419

As you may have well experienced over the years, many tuna-noodle casseroles suffer from overcooked noodles and feature a soggy, bland topping. Here’s a tip: Rinsing the egg noodles after boiling removes any residual starch that would otherwise make the casserole pasty and also halts the cooking process, preventing them from overcooking within the casserole. Finally, adding the fried onion rings as a topping lends a satisfying crunch and great additional flavor in every bite.

A fan or not, Tuna Noodle Casserole dates back to the 1950s when casseroles were a popular dinner item. Originally, this dish was made with non-perishable pantry ingredients as a cheap, wholesome dinner that didn’t require a trip to the store. Yes, you could make the celery soup portion from scratch, but I know pretty much everyone of you don’t, or won’t, do that, so buying a can of the condensed saves a whole host of steps, and probably a portion of your sanity.

I like the fact that there are a fair amount of veggies in the mix with the peas, tomatoes and celery. If you want your casserole on the wetter side, increase the amount of milk slightly and perhaps even add a bit more condensed soup. And if you prefer a browner, crunchier top, leave it in the oven for an extra five minutes, like I did.

Easy Tuna Noodle Casserole

  • Servings: 4
  • Difficulty: easy
  • Print

Ingredients

  • 12 oz. wide egg noodles, cooked according to package directions
  • 15 oz. canned tuna in olive oil, drained
  • 10.5 oz. condensed cream of celery soup
  • 1 cup whole milk
  • 2 oz. sherry (not the vinegar)
  • 1 1/4 cup frozen petite peas
  • 1 cup small grape tomatoes, halved
  • 2 stalks celery, chopped into small dice
  • 1 tsp. kosher salt, or celery salt
  • 1/4 tsp. black pepper
  • 3/4 fried onions

Directions

  1. Preheat oven to 400°.
  2. Cook the noodles according to package directions for al dente. Drain, rinse and transfer to a large bowl.
  3. In a medium bowl, mix together the milk, soup and sherry.
    IMG_7408
  4. To the large bowl with noodles, add the soup mixture and all of the remaining ingredients except the fried onions. Stir until well combined.
    IMG_7410
  5. Spray a 9 x 13-inch casserole dish with cooking spray and add the noodle mixture to the dish. Sprinkle the top with fried onion rings.
    IMG_7414
  6. Bake for 30-35 minutes or until heated through.
  7. Tent lightly with foil and let settle for 5 minutes. Serve warm.

http://www.lynnandruss.com

IMG_7423

BTW, if you have leftovers, add a little milk to your portion before reheating it in the microwave to loosen and moisten it.

The Grey Stone

It was a beautiful summer night—mercifully without rain or high humidity—so we were mulling over places to dine al fresco when Russ suggested the “new place” in Newtown. Recently opened in mid-April of 2018, The Grey Stone, (formerly known as Lavender Hall or 552 Restaurant), has been renovated with a redesigned interior to give it a modern look that maintains the historic charm and presents an upscale casual dining experience.

Screen Shot 2018-08-07 at 8.38.51 PM

Screen Shot 2018-08-07 at 8.39.48 PM

The 300-seat, full-service restaurant includes a reception area with a grand staircase, the main dining room with 70 seats, a bar and lounge area with fireplace and comfortable seating, a second smaller bar area and two private dining rooms, one on the main floor and an 80-seat room upstairs. Not to mention a ginormous outdoor patio with untold capacity for seating.

Before we left the house, I googled The Grey Stone to read reviewers comments on their experiences. The responses ran the gamut, from “the food is great,” “it took forever to get our meal” to “don’t bother wasting your time or money.” So we did harbor some concern but figured maybe they had worked the kinks out since the opening over three months prior.

When we pulled into the large circular driveway with valet parking, it was packed (a good sign) and cars were spilling out onto the main road giving us hesitation, but one glance at the half-filled patio made us think we had a chance of getting seated. Once inside, the hostess asked if we had reservations and when we responded “no, but we want to sit outside” she looked doubtful (a bad sign) and commented that she’d have to see if there was any availability. What? There were clearly at least 20 available tables out there

Screen Shot 2018-08-07 at 8.39.08 PMStock photo of the unoccupied inner dining area.

IMG_6732The band, center, plays some bluesy music in the large patio area.

But the crisis was averted when a younger hostess guided us through the filled-to-capacity inner dining room to a pleasant outdoor four-top along a wrought-iron fence far enough away from the live band for quiet conversation, yet close enough to see them perform. And I have to commend them on table placement, at least outside, where the tables are very generously spaced apart giving patrons breathing room and waitstaff plenty of serving room.

At its bar, The Grey Stone features 33 taps for craft beer, wine and mixed cocktails. In addition, they have cold brew coffee and cold brew latte on draft. We ordered a bottle of red from a semi-lengthy list of varying-priced wines, while perusing the fixed and specials menus.

Their offerings are an eclectic mix of comfort foods featuring modern and classic dishes that seem to highlight every American ethnicity. Selections include everything from chicken, fish and seafood to veal, pork, beef and vegan dishes. Apparently they start you with a bread basket, but we never experienced one. The “bread-women” came by three times, the first to ask if we wanted bread, and then twice more to say she’ll be right out with it—but it never happened. Not that we needed the carbs, but we feared it set the tone for the evening.

Uncharacteristically, I was in the mood to try one of their burgers (something I rarely choose when eating out); while Russ had a similar mind-bent and went for a pork sandwich, both of which came with a choice of homemade potato chips, hand-cut fries, or you could substitute a cup of soup for a nominal fee. Since the soup-of-the-day was a Manhattan Crab Chowder, that’s what we intended on getting. But wouldn’t you know it, they were already out of it by the time we ordered, so we both went with the hand-cut fries.

The band (I think they were called Two Plus One) was off to a good start, playing some bluesy Eric Clapton among other artists. But as the evening wore on, many of the tunes sounded the same and it got a bit monotonous. The evening did wear on indeed because it took nearly one hour and fifteen minutes to get our sandwiches! Although Russ did get his cup of Heirloom Tomato Gazpacho, shown below, in a timely manner.

IMG_6744

And as suspected, my burger was more well-done than I had ordered… but I wasn’t about to send it back and wait for another… For some reason bacon does not agree with me and I should have asked them to put it on the side. As it was, I gave most of it to Russ, but because it was quite dark out, I unknowingly ate some of it and suffered later on that night. I also pretty much tossed the bun aside because it was too much bread for me. (Probably a good thing “bread-women” forgot us.)

IMG_6747

Lynn’s loaded Fireball Burger was made with certified Angus beef and topped with ghost pepper cheese, two cream cheese stuffed jalapeño poppers, jalapeño bacon, a guacamole-stuffed onion ring, with a schmear of sriracha aioli on a brioche bun. Yes, it was good, but I probably wouldn’t get it again. And those fries were delicious at first, but not so much as they cooled down—like most fries, I guess.

IMG_6750

There definitely were some missteps that night, but we’re willing to give it another shot, mainly because it’s close to home and we really love the outdoor dining area. Next visit, we’ll concentrate on some of the entrées and keep our fingers crossed that the food is not only well-prepared, but served in a timely manner to boot!

Fast forward several weeks, we again dine at The Grey Stone, this time on Sunday night of Labor Day weekend. It was decidedly much less crowded, and again we opted to eat out on the expansive patio—us and only two other couples, and no band. Thank goodness the service was much more attentive, although there were still some missteps.

We put in a food order at the same time as our beverage choice, a dry rosé, just in case there was going to be a long lag time, which mercifully there wasn’t. We even got bread right away—and the seasoned dipping oil was fantastic! The bread however was more like a warm hamburger bun, instead of a chewy crusty loaf, which would have been preferable.

IMG_7236

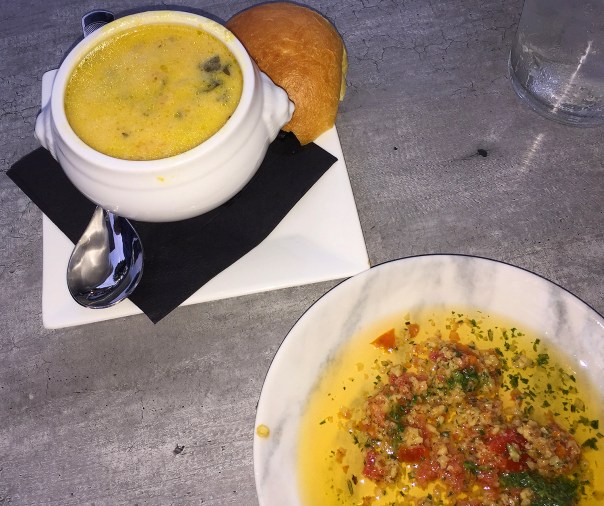
Russ started with a small bowl of their homemade Broccoli and Cheddar Soup. I commented that it looked a bit “thin” but he said that’s how he likes it, and when I took a small taste, it was full of flavor.
IMG_7234

The night’s special menu contained three additional appetizers and three more entrées, one of which, the Grilled NY Strip Steak Chimichurri accompanied with roasted potatoes and Mexican street corn was my first choice. But then I was told that they were already out of it. How could that be when it was still relatively early and there were many empty tables (at least outside)?
IMG_7237

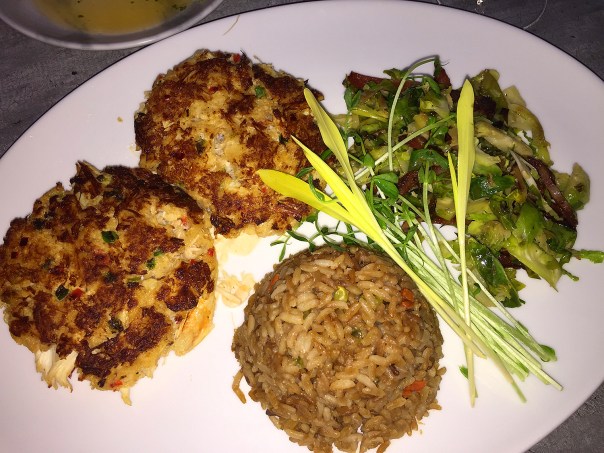
Oh well, always have a Plan B, which was the Cayo Hueso Crab Cakes, the very same meal that Russ decided to order. Our dinners came within minutes of Russ finishing his soup. Two good-sized cakes came plated sitting atop a schmear of key lime remoulade (we asked for more) with sides of Spanish rice and jalapeño bacon Brussels sprouts adorned with sweet baby corn shoots and micro-greens.

All components of the meal were quite tasty and the patties were filled with a lot of lump crab, although I would have preferred that they weren’t so crisp on the exterior. Russ was the recipient of my bacon pieces from the sprouts because it usually doesn’t sit well with me for some reason, and I had not-so-fond memories of the bacon reaction from my past burger. With no room for dessert, and a doggie bag for me, we sauntered out into the night to retrieve our car from their free valet service.

IMG_7240

The Grey Stone is conveniently located on Route 532 between Newtown and Washington Crossing and within easy access to Interstate 95.


Seared Tuna Steak & Shrimp Kebabs

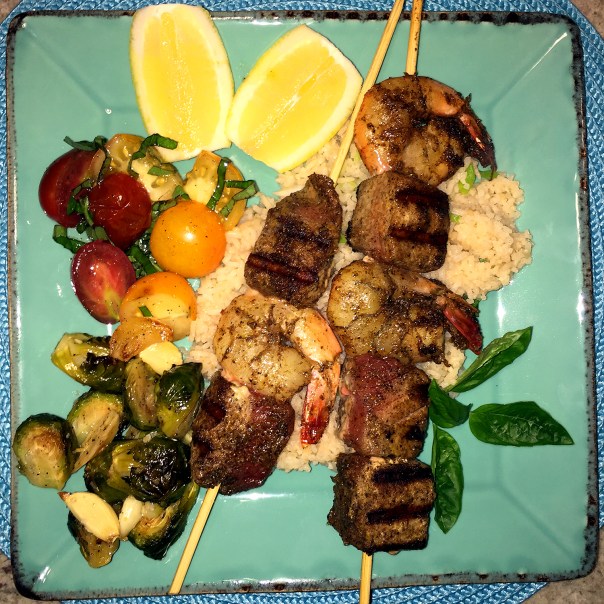
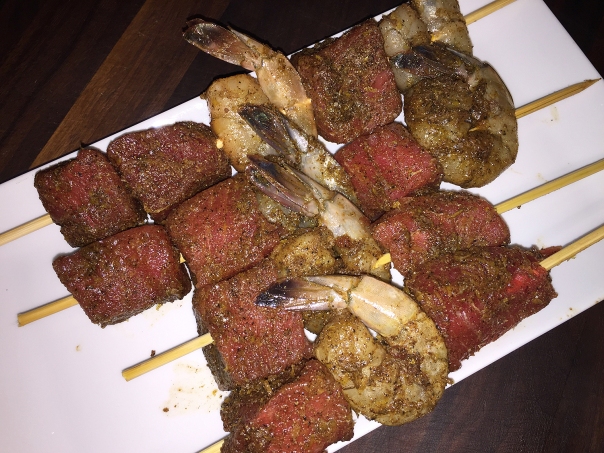
Here’s an intimate, yet quick dinner that’s sure to impress your seafood-loving significant other—especially one who appreciates bold flavors. Try this fragrant, easy-to-make rub for fresh shrimp and tuna steak kebabs. You can grill them outdoors or on a grill pan inside, depending on your preference—or the weather.

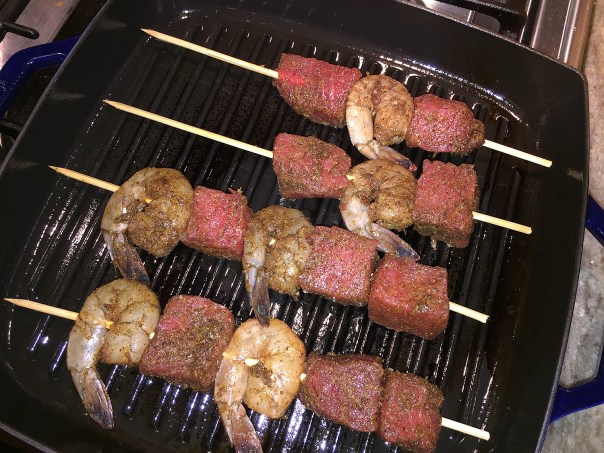
IMG_7285

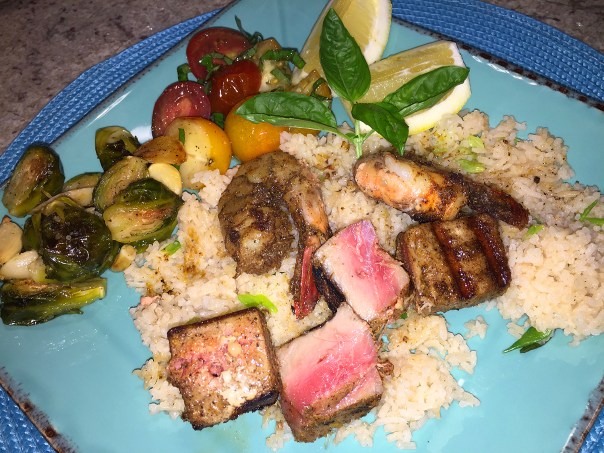
A side of jasmine rice cooked according to package directions but with homemade shellfish stock (instead of water) and sprinkled with sliced scallions made a perfect bed for the fish. Add lemon wedges for garnish and a few ripe tomatoes mixed with fresh basil chiffonade to complete. Then light a few candles, play some soft background music and game on!

Truth be told, this ended being a lot more filling than I expected. One skewer each containing 3 tuna cubes and 2 jumbo shrimp was more than enough for dinner with all of our sides (we also added roasted Brussels sprouts). But it worked out nicely that we had some leftover for lunches the next day (shown below).

IMG_7291

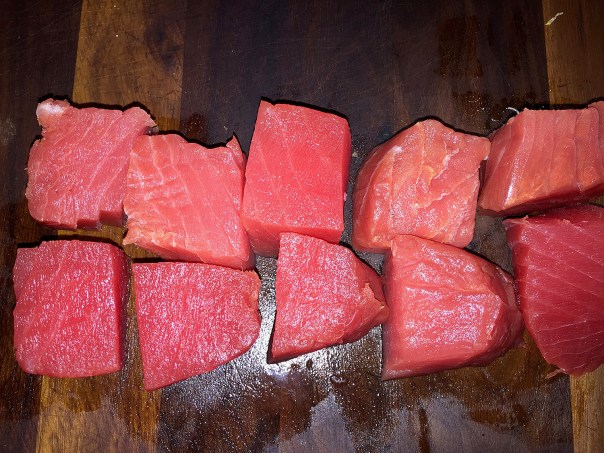
If you want to make this for four people, increase the tuna to a full pound and buy 8 jumbo shrimp. Keep in mind, if you like your tuna more well done, skewer the tuna and shrimp separately and cook the tuna several minutes longer than the shrimp. Try to cube your tuna into as uniform pieces as possible to cook evenly.

IMG_7272

Seared Tuna Steak & Shrimp Kebabs

  • Servings: 2-3
  • Difficulty: easy
  • Print

Ingredients

  • 1 12-oz. tuna steak, about 1 1/2-inch thick, cut into 9-10 cubes
  • 6 jumbo shrimp, shelled and deveined, (tails intact optional)
  • 3 Tbsp. olive oil, divided
  • 2 tsp. ground coriander
  • 1 1/4 tsp. ground black pepper
  • 1 1/2 tsp. ground ginger
  • 1 tsp. salt
  • 1/2 tsp. ground cinnamon
  • 2 Tbsp. grated lemon zest, cut down the lemon to use as wedges for garnish
  • 4 wooden skewers, soaked for at least 30 minutes

Directions

  1. Whisk 2 tablespoons olive oil, lemon zest, coriander, black pepper, ginger, salt, and cinnamon in a small bowl.
    IMG_7273
  2. Place fish in ziploc with marinade and rub together to coat. Place in fridge for 20-30 minutes.
    IMG_7275
  3. Remove fish from bag and alternate onto skewers. (If using wooden skewers, soak in water for at least 30 minutes.)
    IMG_7276
  4. Heat 1 tablespoon olive oil in a large skillet (or spray a grill pan with olive oil coating) over medium-high heat. Sear kebabs until browned but still pink in the center, about 4 minutes on each side.
    IMG_7278
    IMG_7281
  5. Mound the rice on each dish, place two kebabs over rice, garnish with lemon wedges and add any side veggies as desired.
    IMG_7282
    IMG_7290

http://www.lynnandruss.com

Lend Me Your Ear, or Six

Yes, there are a host of corn salads out there (including on this blog site) that provide recipes for fresh, uncooked ears of corn. But what about those leftover cobs that were already cooked but not eaten? For goodness sake, don’t toss them in the compost bin just yet—make this riff on Cooked Corn Sauté with Peppers and Shallot.

IMG_7268

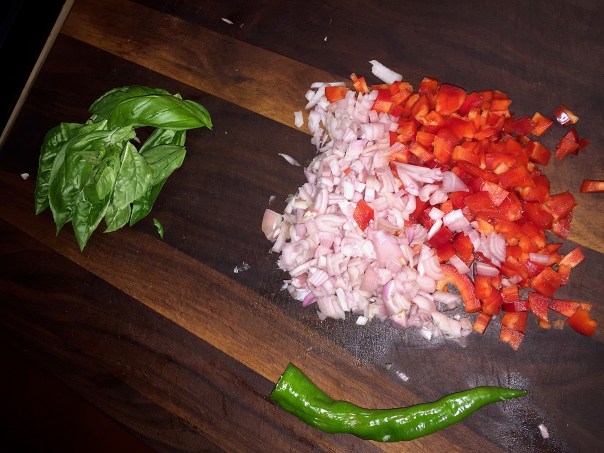
For starters, slice the kernels off the cob in a rimmed baking sheet. This ensures that they don’t go flying every which way off the counter. Then you can package and refrigerate for another day, or proceed with something close to the outline below. The idea here is to use up whatever produce you might have leftover or in your herb bed.

IMG_7241

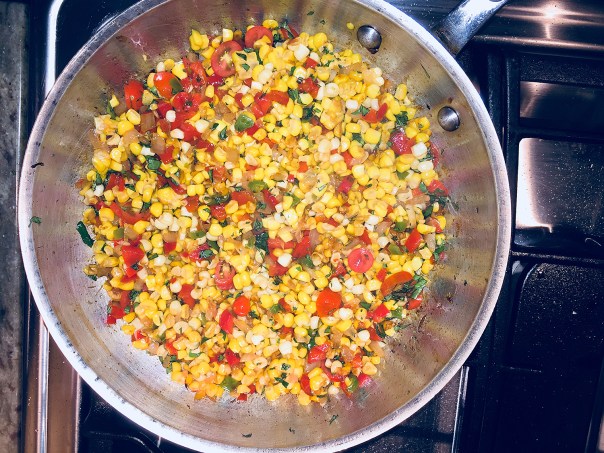
Once in the hot skillet, it is important not to stir the corn for a few minutes to give it a chance to brown. This caramelization enhances the sweetness. The lemon juice at the end will deglaze the pan and loosen all of the brown bits adding more flavor.

IMG_7260

Cooked Corn Sauté with Peppers and Shallot

  • Servings: 4-6
  • Difficulty: easy
  • Print

Ingredients

  • 2 tablespoons vegetable oil
  • ¼ cup red pepper, cut into small dice
  • ¼ cup green long hot pepper, finely diced
  • 1 shallot, finely diced
  • 3 garlic cloves, sliced thin
  • 5-6 ears corn, kernels cut from cobs
  • Salt and pepper
  • ¼ cup cherry tomatoes, halved
  • ¼ cup shredded fresh basil
  • 1 – 2 tablespoons lemon juice
  • 1 – 2 tablespoons butter, optional

Directions

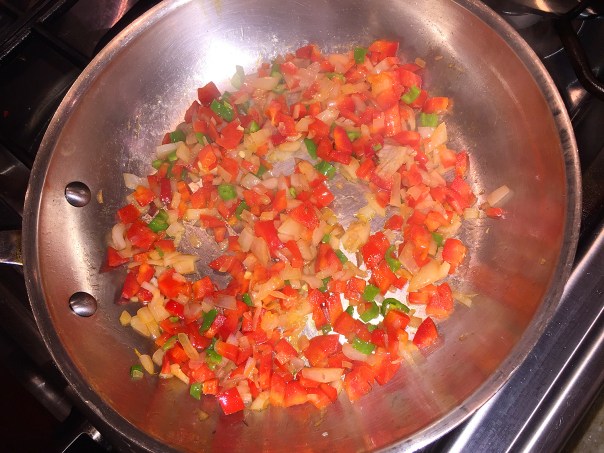
  1. Heat 1 Tbsp. oil in 12-inch skillet until hot. Over medium heat, cook shallot and red and green peppers until tender, about 4-5 minutes. Remove to side dish.
    IMG_7261
  2. Add another Tbsp. oil until hot and add garlic slices. Cook, stirring frequently, until garlic is light golden brown and fragrant, 1 to 2 minutes. Using slotted spoon, transfer garlic to bowl with peppers and shallot, leaving oil in skillet.
    IMG_7263
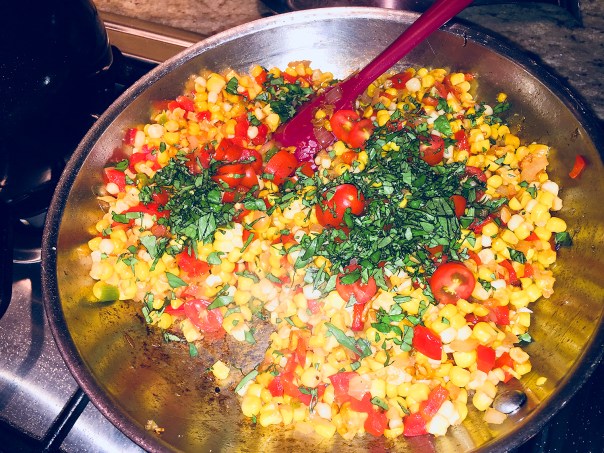
  3. Return skillet to medium-high heat and heat until oil is shimmering. Add corn and sprinkle with 1/2 teaspoon salt. Cook, without stirring, until corn is browned on bottom and beginning to pop, about 3-4 minutes. Stir and continue to cook, stirring once or twice, until corn is spotty brown all over, 2 to 3 minutes longer.
    IMG_7265
  4. Transfer red pepper mixture into skillet with corn.
  5. Stir in tomatoes, basil, 1 tablespoon lemon juice, and 1/4 teaspoon pepper. Stir to loosen browned bits.
    IMG_7267
  6. Season with salt, pepper, and remaining lemon juice to taste. Add in a pat or two of butter, if desired. Sprinkle with remaining extra basil and serve.

http://www.lynnandruss.com

IMG_7270We plated ours with some leftover baby back ribs reheated in the oven. Simple dinner.

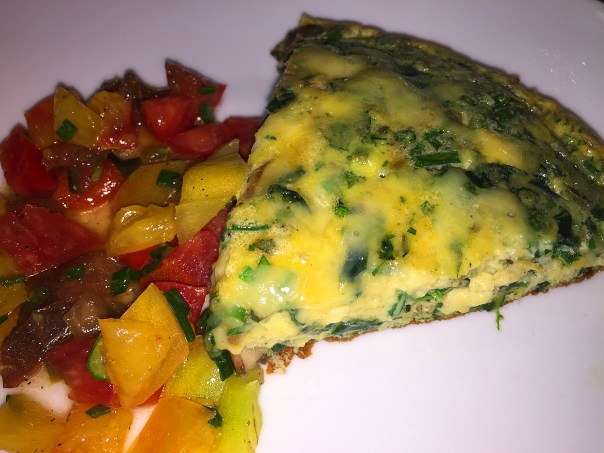
Mushroom & Spinach Frittata

Akin to a crustless quiche, frittatas can hold their own as a brunch item, a light dinner entrée or paired with soup or salad for lunch. Whatever the occasion, just make sure you use a full-fat diary like heavy cream, crème fraîche or cream cheese to mix with the eggs.

IMG_7253

Husband Russ is known to often whip together a weekend frittata with whatever might be on hand leftover in the fridge veggie- and cheese-wise. This particular time, we actually thought ahead and purposely bought the spinach and mushrooms while grocery shopping. The other ingredients we had on hand, and the fresh herbs came from our raised garden bed.

About the cheese. Raclette is a semi-hard cheese made on both sides of the French and Swiss Alps. While you can use whatever cheese you want, try to make an effort to include it in this frittata. The cheese itself is firm with a fairly unremarkable flavor when cool, but the magic happens when melted, Raclette develops a nutty, full sweet flavor with a crisp, delightfully chewy crust.

IMG_7244

The cheese has got a thin, brownish-orange colored rind and a pale yellow pate with a few scattered open holes. It is has a very distinctive pleasant, aromatic smell with a creamy texture, similar to Gruyere cheeses, and does not separate even when melted.  While Switzerland supplies 80% of Raclettes, French Raclettes are slightly softer with a smooth and creamy flavor.

IMG_7243The fresh tender herbs are finely chopped before adding to the egg mixture.
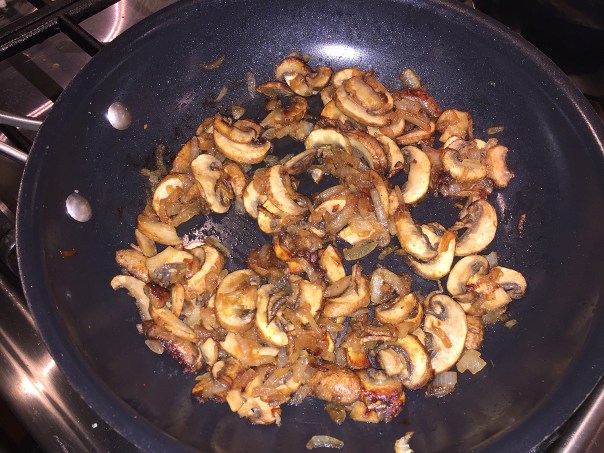
Mushroom & Spinach Frittata

  • Servings: 6
  • Difficulty: easy
  • Print

Ingredients

  • 8 large eggs*
  • 3 oz. heavy cream
  • 1/4 cup onion, finely chopped
  • 10-12 cremini mushrooms, sliced
  • 3 oz. baby spinach
  • 1/4 cup mixed fresh tender herbs, chopped (such as chives, parsley and sage)
  • 1/2 cup Raclette cheese, grated and divided
  • 2 Tbsp. olive oil, divided
  • Salt and Pepper to taste

Directions

  1. Preheat oven to 350°.
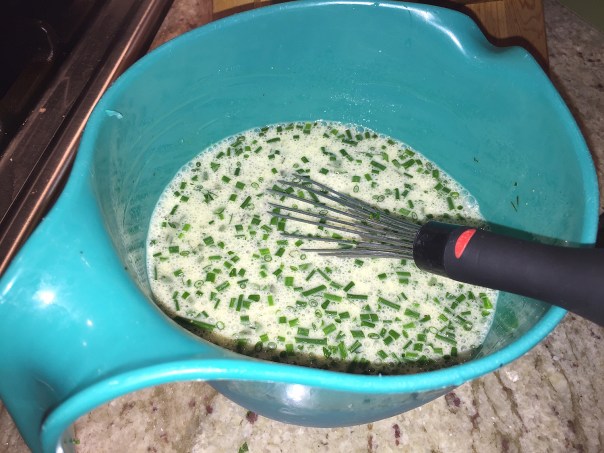
  2. Crack the eggs into a medium bowl, add heavy cream and mix well.
  3. Chop fresh herbs, add to egg mixture and set aside.
    IMG_7245
  4. Heat 1 Tbsp. of the olive oil in a 10″ non-stick skillet. When hot, add the onion and cook until tender, about 3-4 minutes.
  5. Add the mushroom slices in with onion and sauté for about 5 minutes more, until just starting to brown. Move to a side dish.
    IMG_7242
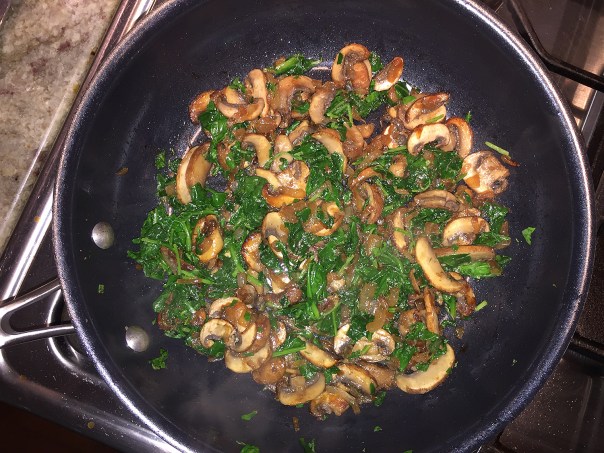
  6. Add the other Tbsp. of oil into pan and when hot, toss in the spinach. Cook until wilted, 1-2 minutes.
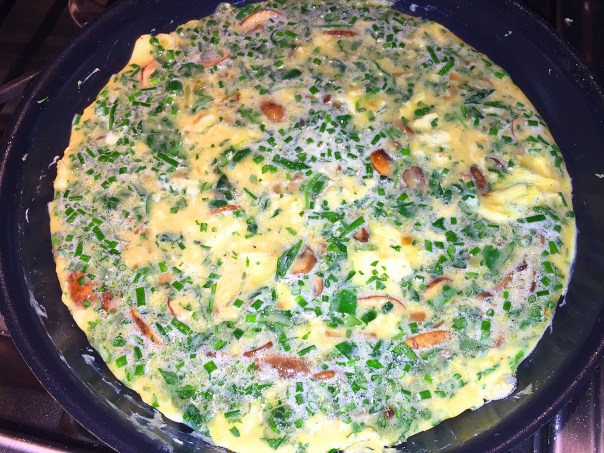
  7. Add mushrooms and onion back into skillet, stir to mix then pour egg mixture over, and cook on stovetop for 5 minutes to set the bottom.
    IMG_7247
    IMG_7248
  8. Top with all but 2 Tbsp. of the grated cheese and slide into preheated oven for 16-20 minutes. Check with knife to see if it is set, top with remaining cheese, and heat for 1 more minute.
    IMG_7250
    IMG_7251
  9. Loosen edges and bottom with a rubber spatula and slide onto serving dish.
    IMG_7252

*Frittata for 8: Increase ingredients to one dozen large eggs, 1/4 cup heavy cream, and 3/4 cup grated cheese. Cook in a 12″ nonstick skillet.

http://www.lynnandruss.com

IMG_7259For brunch one Sunday, we served ours with a small chopped heirloom tomato and fresh chive salad.

Sake, Garlic and Ginger Chicken with Broccolini

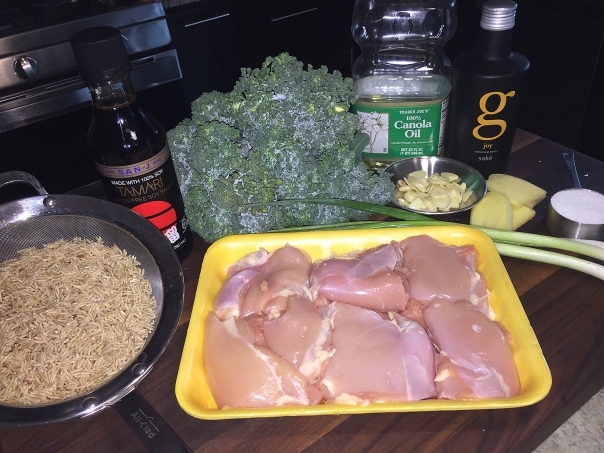
Boneless chicken thighs get treated to sweet, salty, and gingery flavors. Sake, a Japanese rice wine, balances the bold flavors of garlic and soy sauce with its subtle savory-sweet notes. The smaller florets on broccolini are great for mopping up the vibrant sauce, though broccoli works well, too.

IMG_4652

In case you have never imbibed, sake—also spelled saki—is a Japanese alcoholic beverage made from fermented rice. There are many varieties of this light colored, non-carbonated beverage, which has a sweet flavor, and contains up to 18 percent alcohol. Sake is often mistakenly called a wine because of its appearance and alcoholic content; however, it is made in a two-step process similar to that for brewing beer.

As with any ingredient, the higher the quality, the better the outcome and taste. So don’t purchase a bottom-of-the-barrel brand, although no need to buy the most expensive sake either—unless of course that’s what you happen to have in stock 😉

What I love about this meal is not only the ease of making it and the memorable flavors, but the fact that pretty much everything is done in one pan, (except for the rice if you’re serving it). So get your Japanese on, and make some Sake, Garlic and Ginger Chicken with Broccolini real soon!

Sayōnara

IMG_4639

Sake, Garlic and Ginger Chicken with Broccolini

  • Servings: 4
  • Difficulty: easy
  • Print

Ingredients

  • 6 Tbs. sake
  • 6 Tbs. reduced-sodium soy sauce
  • 1/4 cup granulated sugar
  • 2 Tbs. vegetable or canola oil
  • 1-1/2 lb. boneless, skinless chicken thighs
  • Kosher salt and freshly ground black pepper
  • 1 lb. broccolini or broccoli crowns, cut into 3-inch-long pieces
  • 3 medium scallions, thinly sliced, white and green parts separated
  • 3 medium cloves garlic, very thinly sliced
  • 1 3-inch piece fresh ginger, peeled and sliced lengthwise into 4 slabs

Directions

  1. Combine the sake, soy sauce, and sugar in a small bowl, and stir until the sugar dissolves; set aside.
  2. Heat the oil in a 12-inch skillet over medium-high heat until shimmering hot.
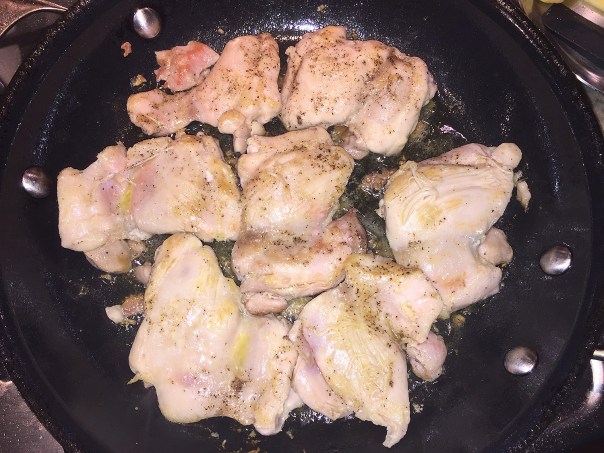
  3. Season the chicken with salt and pepper, and cook, flipping once, until golden brown on both sides, 2 to 4 minutes per side. Transfer to a plate.
    IMG_4644
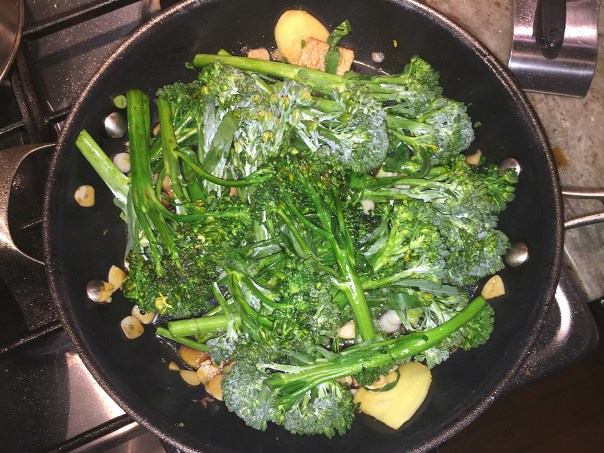
  4. Add the sake mixture, broccolini, scallion whites, garlic, and ginger to the skillet. Bring to a simmer.
    IMG_4645
  5. Arrange the chicken on top of the broccolini. Cover and cook over medium heat until the broccolini is tender and the chicken is fully cooked, about 5 minutes.
    IMG_4648
  6. Discard the ginger. Season to taste with salt and pepper, and serve sprinkled with the scallion greens.
  7. Serve with hot steamed white or brown rice.
    IMG_4659

http://www.lynnandruss.com

Recipe adapted from Abby Simchak Donovan

IMG_4657

Getting Our Greek On

Voted again in 2017 as one of the best restaurants by the Bucks County Courier Times, the Canal Street Grille has been an endeared dining establishment for decades. Nestled in a back alley in historic quaint downtown Yardley, this casual BYOB offers great Greek and American comfort food, with tranquil views overlooking the Delaware Canal—not far from where I used to reside for 25 years.

It’d been well over a decade since we patronized this little gem, and I had heard through the grapevine that the former owners recently bought it back and totally redid the interior. Gone are the old-world spindle chairs, dark paint and checkered tablecloths (if my memory serves me correctly.) Now, it’s a bright, airy dining space with soaring ceilings, swathed in a muted color palette with sparse modern touches such as the stacked stone feature wall lit with twinkling sconces. And love all those windows!

IMG_7120We were seated at a four-top next to a window overlooking the canal.

IMG_7117Our dining companions were Brad and Barb (The B’s), former Yardley neighbors and the folks we were with the last time we ate here prior to the renovation.

Canal Street offers many homemade specialties, from soups, colorful salads, pita sandwiches and burgers, to fresh seafood, grilled meats and, I’ve heard, some of the best wings in town—although we didn’t try any this time around. They also offer daily lunch and dinner specials, as well as various vegetarian and gluten-free options.

While sipping our adult beverages, we got down to the serious business of making dinner choices. When ordering entrées, for an additional $4 fee (over which we were a bit perplexed), you can get a Greek Side Salad which Lynn and Russ chose, or a cup of soup offered in two options that night, either Manhattan Clam Chowder which Barb selected, or Chicken Orzo. Brad refrained altogether.

IMG_7127

For starters, Russ and I shared an appetizer (orektika) of their Greek Meatballs that came plated with five golf-balled sized, ground beef orbs. They were made with Mediterranean seasonings, drenched in a marinara sauce and drizzled with a feta cheese fondue, and were served along with two warm pita wedges. OMG, they were good!!

IMG_7124

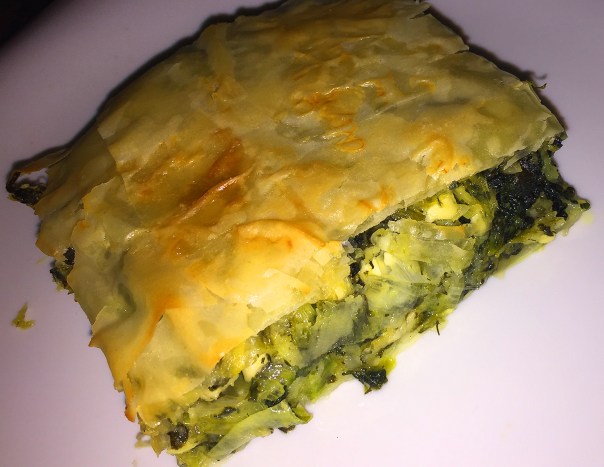
The B’s opted to share the Spanakopita, a classic greek spinach pie in a crusty phyllo. Nary a crumb was left on that plate!

IMG_7121

When it came to the entrées (kuria piata), I was intrigued enough to order the Autumn Chicken, two large breasts pounded down and sautéed in a fabulous orange, dried cranberry and sage sauce, then garnished with toasted walnuts and served over an ample portion of rice with a side of perfectly cooked fresh green beans enhanced with pieces of red bell pepper. Delicious!

IMG_7208

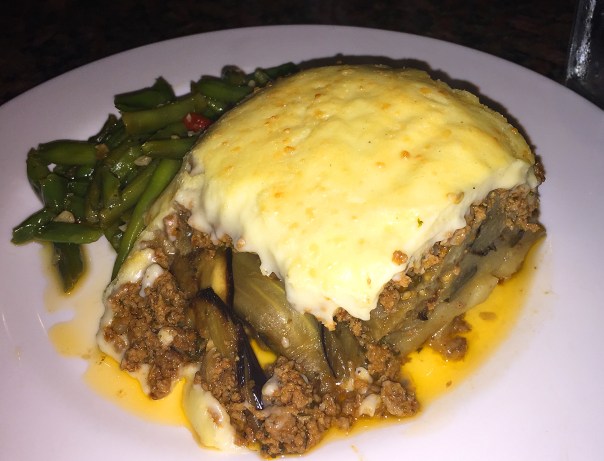
My other three dining companions were all on the same page as they each chose the Greek dish of Classic Meat Moussaka, comprised of layers of ground beef, eggplant, potato, and topped with a parmesan béchamel sauce; also served with a side of those tasty green beans. While they all thoroughly enjoyed it, they said it was very filling.

IMG_7205

I am all-to-happy to add another local ethnic BYO to our list of dining establishments. Keep in mind that they only take reservations for parties of six or more, but apparently their rush is over by about 7:00 p.m. so getting seated after that time (which is more typical for us) is not an issue. Yup, we will be back…