Monthly Archives: March 2017

Lynnie Had a Little Lamb

All of the ingredients come together quickly in Spiced Lamb Patties and Green Beans with Tahini and make a fantastic, out-of-the-ordinary weeknight meal. A touch of plain yogurt in these Middle Eastern-style lamb patties helps keep them wonderfully succulent, and a dollop of mint-flavored yogurt on the side balances their richness—which next time we’ll double because we used it all up before they were halfway gone!

It’s not always an easy task to find bulk ground lamb sold separately. And of course the day we were food shopping, the store only carried lamb patties. But that worked, I just crumbled them into a bowl and added the necessary ingredients without overworking the mixture, then reformed them loosely into eight thicker patties.

IMG_0981

Our couscous was tricolored, one because we had it in stock, and also because I like the colorful aspect. In addition to the chicken broth, cumin and chopped apricots, I included a couple of tablespoons of pinenuts when I added the couscous to the boiling water. Somehow the buttery flavor just goes so well and adds that surprising little bit of texture.

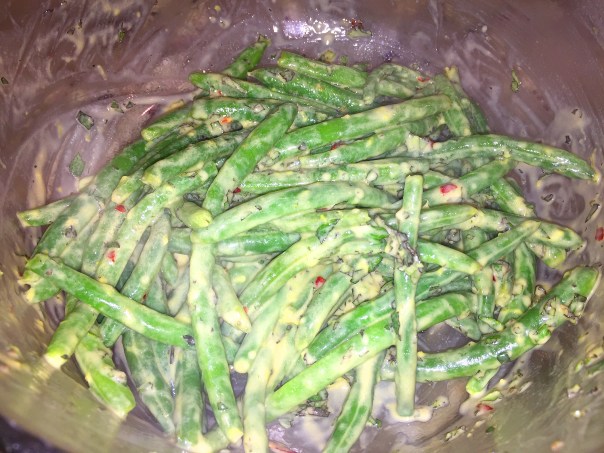
Our veggie side dish, Green Beans with Tahini, is off the charts good! Very simple to make and cooks in the same amount of time as the lamb patties and couscous. But what is Tahini? Tahini is made from sesame seeds, with a little bit of oil mixed in to make it the right consistency, and usually nothing else. It is a ground sesame seed paste, similar to peanut butter and is a creamy, oily, and smooth nut butter rich in calcium.

Like natural peanut butter, the naturally occurring oils in tahini will separate, from the solids so plan on stirring your tahini quite a bit when you first open it, since all of the oil will be on top. Even though it’s a bit of a pain, this is a good thing actually. It means that there’s no additives or chemicals added to prevent it from separating. Tahini is a brilliant pantry ingredient to keep on hand for a creamy yet no-cook sauce.

While it might be a high-calorie food based on volume, a small amount of tahini (you are only using two tablespoons here) goes a long way. It has a rich, nutty flavor that comes through strongly in recipes, plus tahini can benefit your heart, hormonal and skin health even when you use just a small amount. Plus, sesame seeds are a good source of amino acids, vitamin E, B vitamins, trace minerals and fatty acids that all help with skin cell rejuvenation and preventing early signs of aging… I’m listening!

IMG_0977

Ingredients

  • 2 cups lower-salt chicken broth
  • 3-1/2 oz. dried apricots, cut into medium dice (about 1/2 cup)
  • Kosher salt
  • 1 tsp. ground cumin
  • 1-1/3 cups couscous
  • 1-1/4 lb. ground lamb
  • 5 Tbs. plain Greek yogurt
  • 2 large cloves garlic, mashed to a paste with a pinch of salt
  • 1 tsp. ground coriander
  • Freshly ground black pepper
  • 3 Tbs. extra-virgin olive oil
  • 2 Tbs. finely chopped fresh mint; more for garnish

Directions

  1. In a 3-quart saucepan, combine the chicken broth, apricots, 1/2 tsp. salt, and 1/4 tsp. of the cumin; bring to a boil over high heat. Stir in the couscous, remove from the heat, and cover. Let sit until all of the liquid has been absorbed, about 5 minutes.
  2. Meanwhile, in a large bowl, combine the lamb, 1 Tbs. of the yogurt, the garlic, coriander, the remaining 3/4 tsp. of the cumin, 1 tsp. salt, and 1/2 tsp. pepper. Mix by hand, taking care not to overwork the mixture. Shape into eight 1/2-inch-thick patties.
  3. Heat 2 Tbs. of the oil in a heavy-duty 12-inch skillet over medium-high heat until shimmering hot. Add the patties and cook, flipping once, until browned on the outside and barely light pink in the center, 5 to 7 minutes.
  4. Meanwhile, in a small bowl, combine the remaining 4 Tbs. yogurt and the mint.
  5. Fluff the couscous with a fork. Mix in the remaining 1 Tbs. oil and season with salt and pepper. Divide the couscous and patties among 4 plates. Add a dollop of the minted yogurt on the side and garnish with additional mint.

IMG_0983
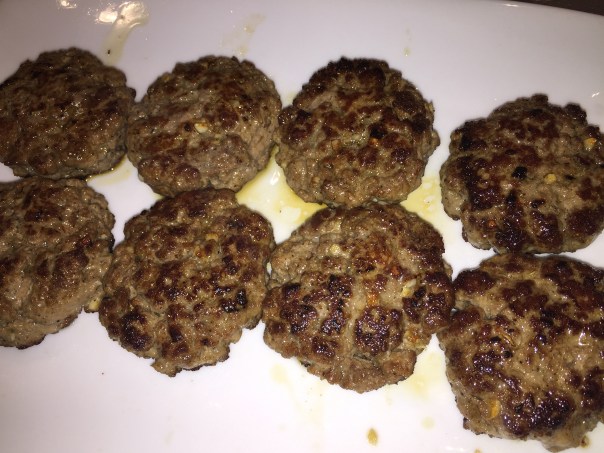
Only six patties fit in the skillet initially, so I plated them when done, covered with tinfoil then cooked the remaining two.
IMG_0985
The cooked patties have a nice crust on the outside while retaining a partially light pink interior.

By Nadia Arumugam from Fine Cooking

Green Beans with Tahini
IMG_0986

Ingredients

  • 1-1/2 lb. green beans, ends trimmed
  • Kosher salt
  • 2 Tbs. extra-virgin olive oil
  • 2 Tbs. tahini
  • 1 Tbs. fresh lemon juice
  • 1 tsp. finely grated lemon zest
  • 2 Tbs. coarsely chopped fresh mint leaves
  • Pinch of Aleppo pepper or crushed red pepper flakes

Directions

  1. In a pot fit with a steamer insert, bring an inch of water to a boil over high heat. Put the green beans in the steamer, sprinkle with kosher salt, cover tightly, and steam until just tender, about 3 to 5 minutes.
    IMG_0978
  2. Meanwhile, in a large bowl, whisk together the oil, tahini, lemon juice and zest, 1 tsp. salt, and 2 Tbs. water until combined.
  3. Add the green beans and toss well to coat. Toss with the mint and Aleppo pepper. Season to taste with salt.

IMG_0989

Bean recipe by William Mickelsen from Fine Cooking

Date-Worthy Chops

Elevate your pork chops to a whole new level with a Ricotta stuffing and impress your significant other. The filling is mixed with garlic and roasted red pepper and flavors these Ricotta-Stuffed Pork Chops from the inside out. When some oozes into the pan and mixes with the juices, it becomes even tastier. Make sure you choose thick, bone-in chops. Ours were gigundo at about 2” thick and therefore took longer to cook, about 20 minutes in the oven after searing for a medium doneness.

IMG_1011We had already heated the oil in the cast iron skillet when we realized all four chops would not fit at once. Therefore we seared two at a time, then transferred all four to a larger pan that had been heating in the oven. Russ drained and strained the juices from the cast iron skillet and made the pan sauce in the larger pan while the meat rested. Moral of this caption? Just use a very large skillet to begin with!

If you’ve never had it, Ricotta is a creamy white, mild, fresh cheese with a soft texture and a slightly sweet flavor. Traditional Italian cheese-makers originally produced Ricotta from whey left behind in the making of Mozzarella and Provolone (Ricotta translates to “re-cooked”). The good stuff is firm but not solid, and consists of a mass of fine, moist, delicate granules. Ounce for ounce, Ricotta has five times more calcium than the cottage cheese it closely resembles.

As a dessert cheese, Ricotta works well with honey, flavoring, fruit, or chocolate as in Cannoli, and makes an excellent low-fat addition to cheesecake recipes. But we’re sticking with dinner in this case. Excellent accompaniments for Ricotta include berries, tangerines, melon, bagels, sweet rolls, and crusty Italian bread.

This type of cheese is a mixed bag as far as its healthfulness goes. It is quite fattening and high in calories; however, it has much nutritional value from the vitamins and minerals it contains. In this recipe the amount used is minimal, about an 1/8 of a cup per chop.

Our two sides consisted of Brussels Sprouts with shallots and thyme and some luscious, creamy mashed potatoes (recipe follows.) Potatoes and leeks are a classic flavor pairing and one of our faves. This recipe doubles or triples easily, but add the milk in increments, as you may not need it all, and we certainly didn’t. In fact, we doubled the amount of potatoes (to make sure we had lots of leftovers), added 50% more sour cream and butter, but used less than half the milk. Not a dieters dream, but you don’t need to slap a huge mound of them on your plate, as a small amount more than satisfies.

IMG_1014

IMG_1020

While the chops rested under foil, Russ made a pan sauce from the browned bits in the skillet. First he deglazed the pan with a half cup of white wine, then added 1 1/4 cup meat stock, two tablespoons of corn starch mixed into cold water, salt and pepper to taste, and a couple pats of butter swirled in at the end. Not super thick, it was delicious over all three items on our plate. As good as my chop was, I surrendered after eating less than half of it because I was too full. No problem there, for it would be my dinner the following night when Russ was going to be away.

So go ahead and make a date to get these puppies on your menu plan…

Ingredients

  • 3 Tbs. olive oil
  • 1/3 cup chopped red onion (from 1/2 small)
  • 1/3 cup coarsely chopped roasted red pepper
  • 3/4 tsp. chopped fresh rosemary
  • 1 medium clove garlic, minced
  • Pinch crushed red pepper flakes
  • 1/2 cup good quality purchased ricotta
  • Kosher salt and freshly ground black pepper
  • 4 1-1/2-inch-thick bone-in pork loin chops

Directions

  1. Heat 1 Tbs. of the oil in a 10-inch skillet over medium-high heat. Add the onion and cook, stirring, until soft, about 2 minutes. Add the roasted pepper, rosemary, garlic, and red pepper flakes and cook, stirring, until the garlic begins to brown slightly, about 2 minutes.
    IMG_1003
  2. Transfer to a medium bowl and cool. Add the ricotta, mix well, and season to taste with salt and pepper.
    IMG_1004
    IMG_1006
  3. Position a rack in the center of the oven and heat the oven to 325°F.
  4. Cut a 2-inch opening in the middle of each pork chop, to make a pocket. Season the chops inside and out with salt and pepper. Spoon the ricotta mixture into the pockets, press the openings closed, and use toothpicks to hold them together, preferably 3 to 4 each.
    IMG_0998
    IMG_1007
  5. Heat the remaining 2 Tbs. oil in a 12-inch ovenproof skillet over medium-high heat. Sear the pork chops on both sides until well browned, about 3 minutes per side.
  6. Transfer the skillet to the oven and roast until an instant-read thermometer inserted near but not touching the bone registers 135°F, about 12 minutes. Remove and discard the toothpicks. Let rest for at least 5 minutes, and serve.
    IMG_1010

By Cathy Whims from Fine Cooking

Sour Cream and Leek Mashed Potatoes

Ingredients

  • 1-1/2 lb. Yukon Gold potatoes, peeled and cut into 1-inch pieces
  • Kosher salt
  • 2 Tbs. unsalted butter
  • 2 medium leeks (white and light-green parts only), quartered lengthwise, washed, and sliced crosswise into 1/4-inch-wide pieces or smaller (about 1 cup)
  • 1/2 cup sour cream, at room temperature
  • 1/2 cup whole milk, heated; more as needed
  • Freshly ground white or black pepper

IMG_0991
We learned this clever stepped way to cut the dark greens off of the leek preserving more of the light green.

IMG_1012Sauté the cut leeks over medium heat being careful not to brown.

IMG_1018

Directions

  1. Put the potatoes in a large saucepan and cover with cold water by at least 1 inch. Bring to a boil over high heat, add a generous 1/2 tsp. salt, and lower the heat to a steady simmer. Cover the pot partially and cook until the potatoes are just tender when pierced with a fork, 10 to 12 minutes.
  2. Meanwhile, melt the butter in a 10-inch skillet over medium heat. Add the leeks and sauté, stirring often, until tender but not browned, about 6 minutes.
  3. Drain the potatoes and return to the pan. Steam-dry over low heat, shaking the pan until the potatoes leave a light film on the bottom, about 3 minutes.
  4. Mash the potatoes with a potato masher. Stir in the leeks, sour cream, and milk, adding more milk as needed to reach your desired consistency. Season to taste with salt and pepper. Serve.
Variations

Steam-drying the potatoes after they’re cooked allows excess moisture to evaporate, so they’re more intensely flavored and have a denser, more luxurious texture.

By Laraine Perri from Fine Cooking

Soothing to the Soul, and Oh So Good!

Are you in the mood for something soothing to the soul that is flavorful and spicy but not overpowering; light but packs a punch? This Thai Hot and Sour Shrimp Soup (Tom Yam Kung), fits the bill and is absolutely delightful! On cold days it’s hard to resist this warms-you-to-the-bone soup, filled with juicy shrimp, fiery chiles, bright lemongrass and spicy ginger. Just the antidote for a very cold month of March here in the Northeast.

IMG_0967

It’s is an easy dish to make and has complex flavors that blend together perfectly, so no need to change a thing. But keep in mind if you plan to reheat at a later date, although the taste is still delicious, the shrimp texture changes and the fresh basil and cilantro get quite soggy. If you know there will be leftovers, purposely put aside some of the shrimp, basil and cilantro then add it to the soup when reheating for another meal. That’s what we did for lunches the following day and it worked out perfectly.

One of the ingredients is lemongrass, which I adore! The herb’s bright flavor exemplifies the fresh, vibrant character of Southeast Asian cuisine. While the leaves of the long, slender plant aren’t particularly eye-catching, the stalk, which looks like a large, woody scallion, possesses a complexity of flavors that isn’t easy to put into words. Some describe it as citrusy, perhaps a little gingery. Its lemon flavor isn’t nearly as overt as lemon juice or zest; it’s more delicate, with a slight floral flavor that gives a dish a refreshing, lingering lift.

IMG_0952Cut off the top green blades of the lemongrass, remove several outer tough layers, slice the tender core into pieces at an angle, and smash the plant with flat blade of a knife to release the oils.
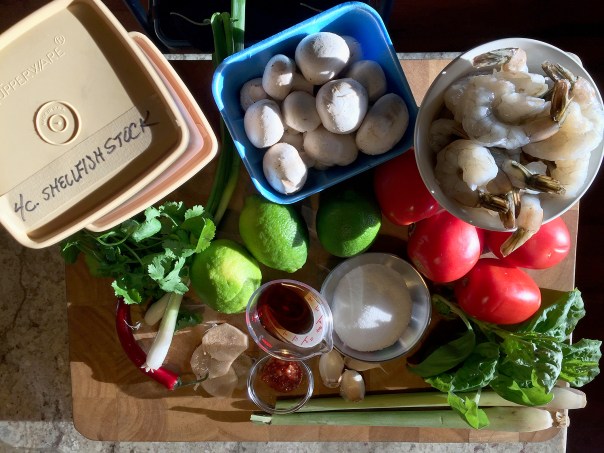
Avoid stalks that are dry and yellow—that’s a signal that they’re old and have lost moisture, flavor, and fragrance. Lemongrass keeps for weeks wrapped in plastic and refrigerated. If you know that you won’t be using it within a couple of weeks, store it in a plastic bag in the freezer, where it will keep for months with just a slight loss of flavor.

For a more intense seafood taste, we replaced the chicken broth with eight cups of our homemade shellfish stock. And for a little more color and heat, I included one thinly sliced red Thai chile in Step 1. And of course when red pepper flakes are an ingredient, I can’t help but add an extra dose!

It does not indicate in the directions to discard the ginger slices or lemongrass pieces before plating. Some people might find them hard to chew, so just set the table with a small bowl for those unwanted pieces and shrimp tails if diners care to remove them from their portions. We ladled ours over hot, brown Jasmati rice, which I intended to cook with some coconut milk in addition to the water, but just plum forgot—however, Russ noted the omission at dinner, mea culpa. There’s always next time!

IMG_0948

Ingredients

  • 1 Tbs. vegetable oil
  • 2 tsp. finely chopped garlic
  • 1 tsp. chile paste
  • 1/2 tsp. crushed red pepper flakes, or more to taste
  • 4 thin slices fresh, peeled ginger
  • 2 stalks lemongrass, bruised with the side of a knife and cut into 1-inch pieces on the diagonal
  • 8 to 10 cups homemade or low-salt chicken broth (or shellfish broth)
  • 3 Tbs. fish sauce
  • 3 Tbs. granulated sugar
  • 8 oz. white mushrooms, quartered
  • 4 plum tomatoes, seeded and chopped
  • 1 lb. raw shrimp, shelled and deveined
  • 1/2 cup fresh lime juice
  • 2 scallions (white and green parts), coarsely chopped
  • 10 fresh basil leaves, chopped
  • 10 fresh cilantro sprigs, chopped

Directions

  1. In a saucepan, heat the oil over moderate heat. Add the garlic, chile paste, and red pepper flakes. Stir until fragrant, about 1 minute.
    IMG_0954
  2. Add the ginger and lemongrass; stir until the ingredients are lightly browned, about 2 minutes. Add the chicken broth and simmer for 15 to 20 minutes.
    IMG_0955
  3. Bring the soup to a boil. Add the fish sauce, sugar, mushrooms, and tomatoes. Add the shrimp and cook until they just turn pink, about 2 minutes. (The shrimp will continue to cook in the hot broth.)
    IMG_0959
  4. Remove the pan from the heat and add the lime juice, scallion, basil, and cilantro. Serve immediately, over rice if desired.
    IMG_0960

By Mai Pham from Fine Cooking

Intensely Flavorful!

Chimichurri is the star salsa of the Argentine grill, but the lesser known salsa criolla is as good, or better. Full of onions, red peppers, and herbs, the mixture is a light but intensely flavorful condiment for grilled steak. Salsa criolla is probably the most important and most popular side dish/sauce in Peru.

The original plan was to cook the Argentine Spiced-Rubbed Flank Steak with Salsa Criolla on a Wednesday evening. But Mother Nature played a cruel joke on us in Mid-March with the biggest snowstorm of the season the day prior, making it all but impossible to grill. I intended to rub the meat and make the salsa a day ahead, which would’ve worked perfectly because my place of business was closed. But then Russ and I took inventory of all our leftovers that needed to be consumed over the next few days… Not to be deterred, we just added it to the following week’s menu plan.

IMG_0938

OMG, this was delicious! Our steak was one piece and weighed in at 2 pounds. With our revised plans to have it for dinner on a Monday, I made the rub adding a tablespoon of olive oil (which is noted in the directions below) to make sure it stuck to the meat, and whipped together the criolla on Sunday afternoon. Note, I did not add the 1/4 cup of water to the criolla as noted in Step 2, and I’m glad I didn’t. In the end the salsa was liquidy enough with the oil, vinegar and juices from the tomato.

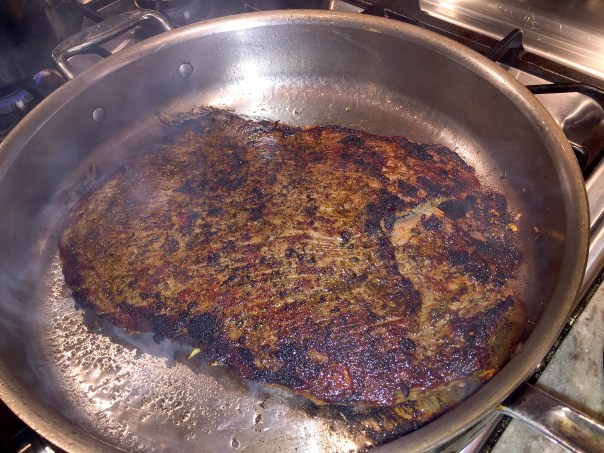
Once rubbed, I put the steak on a platter and wrapped it in saran wrap then put both it and the salsa in the fridge for 27 hours, making sure to take them out and come to room temperature an hour before I started cooking. Still with plenty of snow on the ground, I planned on searing the meat in a very hot skillet as opposed to grilling. Thank goodness we had one big enough to accommodate the large steak. After 5 minutes on side one, I flipped it and seared the other side for 4 minutes, then took it out of the pan and let it rest tented with foil for another 5 minutes.

IMG_0884
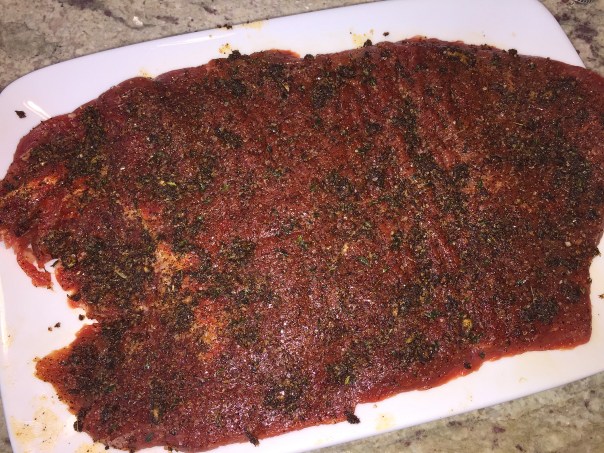
The ingredients for the rub are added to a small bowl and then mixed together.

IMG_0894
After the meat was spread with the rub on both sides, it was covered in plastic wrap and refrigerated.

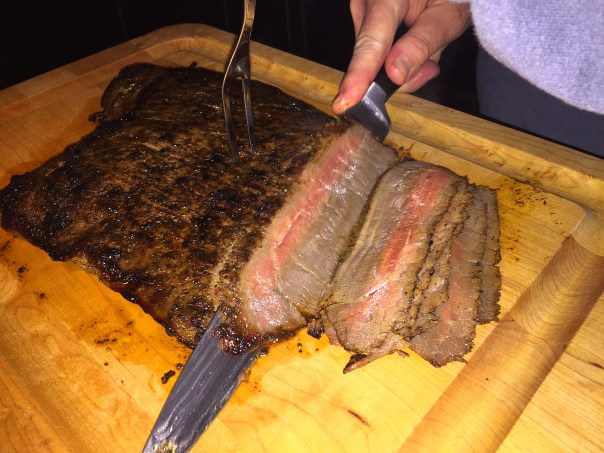
When carving flank steak, it’s best to do so at an angle against the grain in thin slices. We plated the sliced meat and its juices on a platter with a swath of the criolla strewn across the top. Our side was steamed asparagus which also benefited from getting chummy with the salsa. And rounding out the meal was a simple side salad— a perfect low-carb, high protein, colorful dinner that was packed with flavor! I can’t wait until the weather warms and we can make this meal again for company using our grill…

IMG_0886
The garlic paste is made, and the other ingredients for the criolla are assembled.

IMG_0888
The finished salsa is put in an air tight container and refrigerated over night.

Ingredients

  • 3 cloves garlic, minced and mashed to a paste with a pinch of salt
  • 2 Tbs. chopped fresh thyme
  • 1 Tbs. freshly ground black pepper
  • 1 Tbs. chili powder
  • 2 tsp. brown sugar
  • 1-1/2 Tbs. plus 2 tsp. kosher salt
  • 1 Tbs. olive oil
  • 4-1/2 lb. flank steak (about 3 medium steaks), trimmed of excess fat
  • 1 large ripe tomato, cored, seeded, and fi nely diced (about 1-1/4 cup)
  • 1 medium yellow onion, minced (about 1-1/3 cups)
  • 1/2 red bell pepper, cored, seeded, and minced (about 1/2 cup)
  • 1/2 cup extra-virgin olive oil
  • 1/3 cup white-wine vinegar

IMG_0933
The flank steak sears in hot oil in a large skillet for 4-5 minutes per side.

IMG_0935
After resting for 5 minutes, the meat is carved at an angle against the grain.

IMG_0940
Salsa criolla tops both the meat and our side of asparagus.

Directions

  1. In a small bowl, mix about two-thirds of the garlic paste with 1 Tbs. of the thyme, 2 tsp. of the black pepper, the chili powder, brown sugar, olive oil and 1-1/2 Tbs. of the salt. Arrange the steaks on a rimmed baking sheet and pat the spice rub all over them. Cover and let sit for at least 4 hours and up to 1 day in the refrigerator.
  2. In a 1-qt. sealable container, combine the tomato, onion, red pepper, oil, and vinegar with 1/4 cup water (I omitted the 1/4 cup water), and the remaining garlic paste, 1 Tbs. thyme, 2 tsp. salt, and 1 tsp. black pepper. Shake well. Refrigerate for up to 1 day before serving.
  3. Heat a gas grill to medium high or prepare a hot charcoal fire.* Grill the steak (covered on a gas grill) until it has good grill marks on the first side, 4 to 5 minutes. Flip the steak; if using a gas grill, reduce the heat to medium  and cover the grill. Continue to cook until done to your liking (make a slit in the steak to take a peek), 4 to 5 minutes more for medium rare; 6 to 7 minutes more for medium.
  4. Let the steak rest on a cutting board for 5 minutes and then slice thinly across the grain. Stir or shake the salsa criolla and serve with the steak.

*If unable to grill, on high heat for about 4-5 minutes per side, pan sear the steaks in a heavy skillet large enough to accommodate the meat.

Adapted from Tony Rosenfeld of Fine Cooking

A French Twist to an Irish Staple

At first, it may seem like the French and the Irish have little in common, but the two peoples have been allies for centuries. So it’s no wonder they share the passion for food and drink, and no wonder their cuisines pair splendidly. This recipe is a celebration of Franco-Irish relations: Daniel Boulud’s Corned Beef and Cabbage.

Our most recent culinary acquisition was Mr. Boulud’s “Braise” cookbook and this was the first recipe we tried. The timing couldn’t have been more perfect as it was St. Patty’s day weekend—when corned beef and cabbage reign supreme. It cooks for several hours so it’s not quick weeknight fodder, but you’ll be hoping there are leftovers.

IMG_0929

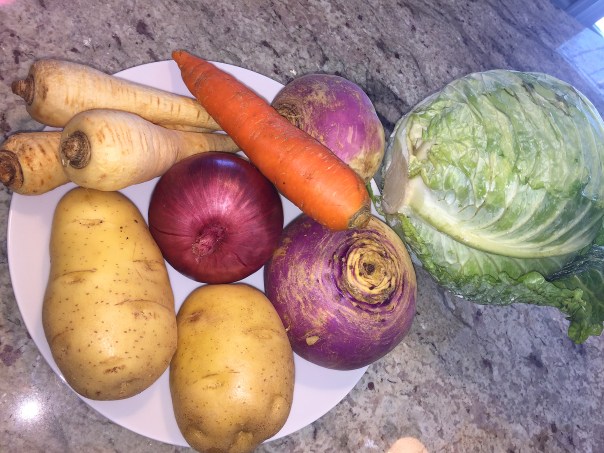
At the grocery store there were only three rutabagas available, all about the size of bowling balls! Needless to say, they were too big, so we bought an extra turnip in its place. And one small parsnip just doesn’t cut the mustard. By the time you peel it, do away with the very narrow end and remove the woody core, you won’t have but a scant few pieces, so we included three parsnips. Not to question an international chef, but just sayin’…

IMG_0883

And alas, after trying to locate pink peppercorns at three different stores, we came away empty handed. We’ll order some online for future use, but in the meantime we used mixed peppercorns which appeared to have some pink ones in it, above. As lucky charms would have it, we had a hunk of fresh horseradish in the vegetable bin for the cream sauce, although I think it may lost some of it’s oomph because we felt we needed to add some prepared horseradish to give it the kick we wanted.

IMG_0907
IMG_0916
The top photo shows the ingredients before the horseradish cream sauce is mixed together, bottom.

Russ planned on making homemade chicken stock the same afternoon for some upcoming meals, and when he realized we needed beef broth for the corned beef recipe, he picked up some leg and neck bones and whipped together that broth too—easy to do with a pressure cooker—and what a difference it makes compared to bland boxed or canned. It’s a double strength recipe that you dilute by half when measuring so it goes a long way and is worth the effort.

IMG_0876
IMG_0878
IMG_0880
These three pics show some of the ingredients to make homemade meat broth, although it’s not necessary to make it for this recipe.

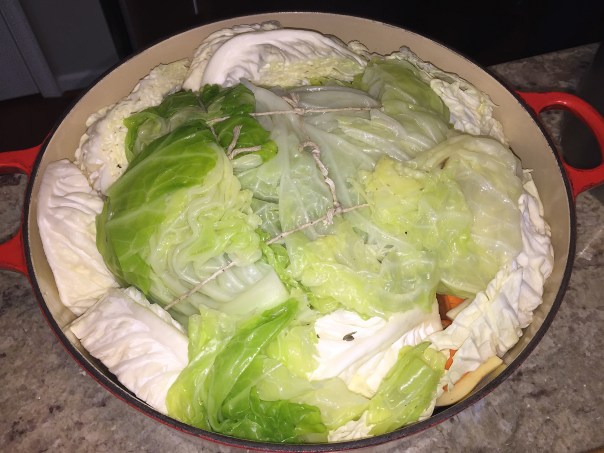
Once we had all of the cut veggies, cabbage-wrapped meat and broth all in the pot, there was nary an inch of room left. Russ actually added a sheet of parchment then put a large cast iron skillet on top of the lid to make a tight seal. After one hour we took it out of the oven to baste it, and it hardly seemed like it cooked at all, although things were hot.

After 3 hours I removed most of the liquid from the pot into a smaller pan, covered the meat pot back up and returned it to the oven while I reduced the sauce. Even after reducing by over half at a vigorous boil for 25 minutes, the sauce remains thin, but it is much more intensely flavored.

An Irish Blessing: “May your home always be too small to hold all your friends.”

IMG_0882

Ingredients

  • 1 savoy cabbage, outer leaves discarded, remaining leaves separated
  • 3 1/2 pounds corned beef, not too lean, not too fat
  • 2 Yukon Gold potatoes
  • 1 small rutabaga, peeled and cut into large chunks
  • 1 medium carrot, peeled and cut into large chunks
  • 1 medium turnip, peeled and cut into large chunks
  • 1 small red onion, peeled and roughly chopped
  • 1 small parsnip, peeled and cut into large chunks
  • 2 bay leaves
  • 3 sprigs fresh thyme
  • Spice sachet: 1 teaspoon black peppercorns, 1 teaspoon pink peppercorns*, and 10 whole allspice, tied in cheesecloth
  • 3 cups beef stock, low-sodium canned beef broth, or water
  • 1/2 cup sour cream
  • 1 (2-inch) piece of fresh horseradish, peeled and grated
  • 1 tablespoon Dijon mustard
  • 1/2 teaspoon paprika

IMG_0891
Russ starts separating the cabbage leaves from the head. Once he got to the inner leaves, Russ just cut them down into wedges to place around the meat with the other veggies.
IMG_0896
The individual cabbage leaves are added to boiling water for 4 minutes.
IMG_0897
After boiling, the leaves are added to an ice bath.
IMG_0900
Put the corned beef in the center of the leaves, then top with the remaining half.
IMG_0902
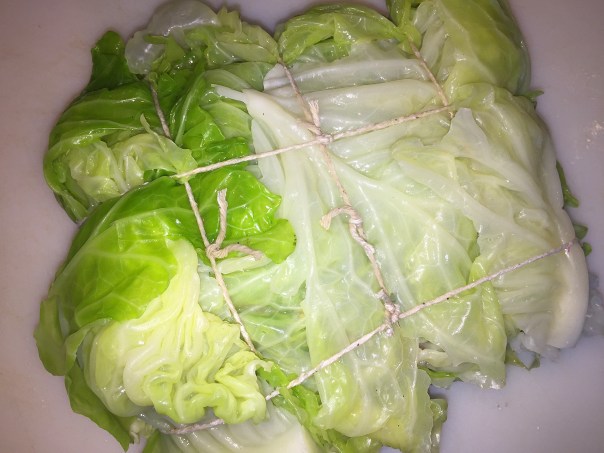
Wrap the cabbage leaves around the corned beef and tie securely with kitchen string, or do the alternative method in Step 4.

Directions

  1. Preheat oven to 300 degrees Fahrenheit
  2. Bring a large pot of water to a boil, and fill a large bowl halfway with ice cubes and cold water. Add the cabbage leaves to the boiling water and blanch just until the leaves are tender, 3 to 5 minutes. Using strainer, transfer the cabbage leaves to the ice water bath and let cool completely. Drain the cabbage leaves and pat them dry with a paper towel.
  3. Using half of the cabbage leaves, make a circle of overlapping leaves one-third larger in diameter than the corned beef. Put the corned beef in the center of the leaves and cover it with the remaining cabbage leaves. Wrap the cabbage leaves around the corned beef and tie securely with kitchen string.
  4. Put the potatoes, rutabaga, carrot, turnip, onion, parsnip, bay leaves, and thyme on the bottom of a medium cast-iron pot or Dutch oven. Place the wrapped corned beef on top of the vegetables. (Alternatively, make a circle of overlapping leaves one-third larger in diameter than the corned beef on the bottom of the pot, put the corned beef in the center of the leaves, cover with the remaining cabbage leaves, and scatter the vegetables and herbs around). Add the spice sachet and pour the stock into the pot.
  5. Cover the pot and transfer it to the oven. Braise, basting the corned beef every 45 minutes, until the beef is very tender, about 3 hours. If the sauce is too thin or is not flavored intensely enough, ladle most of it off into another pot and simmer it until it thickens and intensifies. Then add it back to the first pot.
  6. To serve: mix together the sour cream, horseradish, mustard, and paprika. Remove the string from the corned beef and discard. Cut the corned beef into slices. Serve the beef and vegetables with the seasoned sour-cream on the side.

IMG_0904
The braising pot is completely full before we put parchment and a lid on it.
IMG_0914
We only basted twice during the 3 1/2 hours of cooking.
IMG_0917
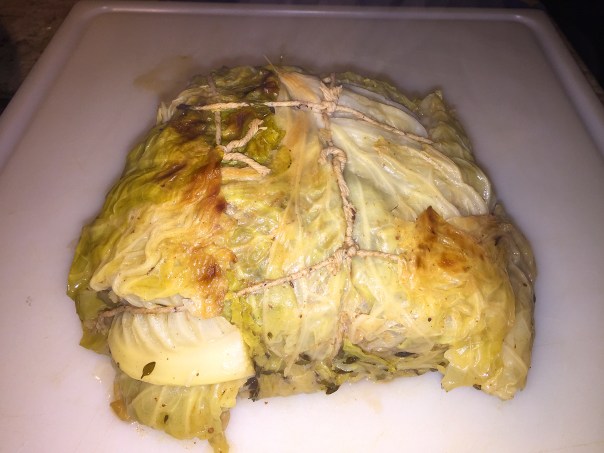
Once the meat packet is removed from the pot, cut away the strings.
IMG_0919
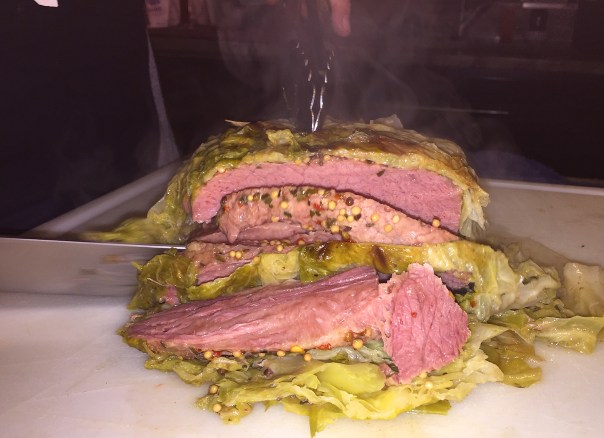
Russ sliced the moist meat right through the cabbage covering.
IMG_0923
The sliced meat and veggies are arranged on a platter before bringing to the table.

Originally from Lyon France, Chef Daniel Boulud is widely celebrated as one of America’s leading culinary authorities. Since arriving in New York City in 1982, he has continually evolved his cuisine and expanded his reach to properties across the U.S., as well as London, Toronto, Montreal and Singapore.

His culinary empire has brought him many accolades, yet his inspiration remains grounded in the rhythm of the seasons. From his Michelin-starred flagship, Daniel, to his properties across the globe, Boulud’s signature remains the contemporary appeal he brings to soulful dishes rooted in the French tradition.

*PINK PEPPERCORNS: Peppercorns come in different colors and tastes. Pink peppercorns are not true peppercorns, but are the ripe berries of the Brazilian pepper tree. They are used as a spice and have a lighter pepper-like taste, with a pungent, piney, sweet flavor.

“Sláinte!”

Richboro Road Trip Let Down

For several weeks we’d been trying to make dinner reservations at DeNicola’s Ristorante in Richboro, about 20 minutes from home. Due to an odd assortment of reasons, it wasn’t until this past Friday evening we finally made the trek for dinner with friends Barb and Brad.

It’s an Italian BYO restaurant located in the Mallard Creek Shopping Center. Barb swears we use to frequent this place decades ago when it was under a different name and when we lived as next door neighbors in Yardley. Me, I have absolutely no recollection of the place whatsoever.

When we arrived the place was packed, mostly with an engagement party with several guests decked out in Irish attire, after all, it was St. Patty’s Day. But we were seated promptly (thank goodness I had made reservations) and what looked like a couple of 12-year-old boys began filling our water glasses and served the bread basket. However Brad had to chase someone down to bring wine glasses and open our bottles.

In advance, I had looked at their offerings online which were limited compared to their much more extensive listings on the printed menus. Reasonably priced choices feature an array of fresh pasta, chicken, veal, beef, pizza and seafood; all of which is prepared and cooked to order by chef/owner Angelo De Nicola. And, they do offer gluten-free pastas upon request.

IMG_0864

While deciding on what to order, one of the young lads delivered a small, complimentary pizza to our table. Then without too much hesitation we put in our selections. Brad opted for the Pasta Primavera which he didn’t end up liking too much; Barb had the Lasagna Abbruzzese which was OK; Russ wasn’t overly thrilled with his pasta dish (gluten-free) that came with chicken, asparagus, and porcini mushrooms topped with mozzarella cheese—although it looked delicious; and I got Blackened Tilipia which was par for the course. All entrees such as mine come with a choice of roasted potatoes and the chef’s vegetable of the day or a side of pasta with red sauce.

IMG_0866
Brad’s less than stellar Pasta Primavera

IMG_0868
Barb’s Lasagna Abbruzzese

IMG_0865
Russ had the (can’t remember the name) chicken and pasta dish

IMG_0871Lyn’s Blackened Tilapia with assorted vegetables

Would we go again? With a plethora of excellent Italian BYOs blanketing our area, there was nothing extraordinary about DeNicola’s that would make us go running back anytime soon. The food was OK (for most of us) and the portions large, but the service was somewhat spotty—one could reason that this was because of the large party, but they were dining off of a buffet and had all of their drinks in buckets, so they didn’t seem to require a lot of attention.

Anywho, it’s always fun to try new places (even though I had apparently eaten there over 20 years ago!) But it’s unlikely we’ll make a return visit. Chalk it up under “been there, done that.”


Pardina My Spanish

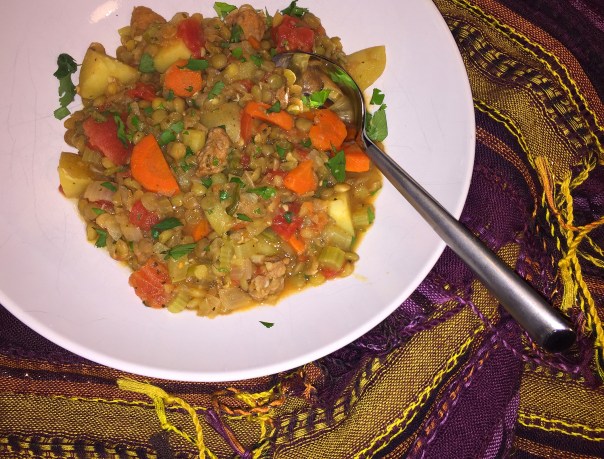
You know Russ’s passion for anything Spanish, and with chorizo being a favorite ingredient, this Spanish Pardina Lentil and Chorizo Stew was screaming his name. Despite its humble looks, this stew is full of bold flavors and is super satisfying. A little goes a long way and is packed with fiber.

spanish padrina lentil stew extra

Spanish pardina lentils are a a bit smaller than other lentils. They have thin greenish-brown or greyish skin on them, and are yellow inside. They hold their shape when cooked and have a nutty taste. Rarely found on the shelves in North America, they are the lentil of choice in Spain and the Mediterranean.

If you can’t find them, substitute brown lentils. Our pantry was brimming with at least five different kind of lentils, so we didn’t even bother trying to locate the Padrina variety. Another swap we made was the choice of chorizo. Our local grocery store did not have cured chorizo in stock, so Russ bought the fresh links. I just treated it like fresh sausage links, removed the casings, cut it into 1/2-inch chunks and added them to the stew a few minutes before the potatoes.

My ginormous carrots must have been on steroids they were so thick! To have them cook in the same amount of time as the potatoes, I halved them lengthwise first before cutting into 1/4-inch slices. After 20 minutes, the lentils, carrots and potatoes were tender. Keep an eye on that because if you let them cook too long, you’ll end with more of a mush than a stew—like the consistency of baby food—not exactly appealing to an adult!

Disfruta de tu estofado!

IMG_0812

Ingredients

  • 1 Tbs. olive oil
  • 1 medium yellow onion, chopped (about 1-1/2 cups)
  • 1 cup sliced carrots (1/4 inch thick)
  • 3/4 cup chopped celery
  • 1-1/2 tsp. finely chopped garlic
  • 1-1/2 lb. Yukon Gold potatoes, peeled and cut into 1-inch pieces
  • 7 oz. cured chorizo, halved lengthwise, then sliced crosswise 1/2 inch thick (about 1-1/2 cups)
  • 4 cups water
  • 1/2 tsp. dried oregano
  • 1/2 tsp. smoked paprika
  • 1-1/2 cups pardina lentils, rinsed
  • 1 14.5-oz. can diced tomatoes with their juice
  • Fine sea salt
  • 1/2 cup chopped fresh cilantro; more for garnish
  • Freshly ground black pepper

IMG_0819
Everything is cut to size and measured before starting to cook.

Directions

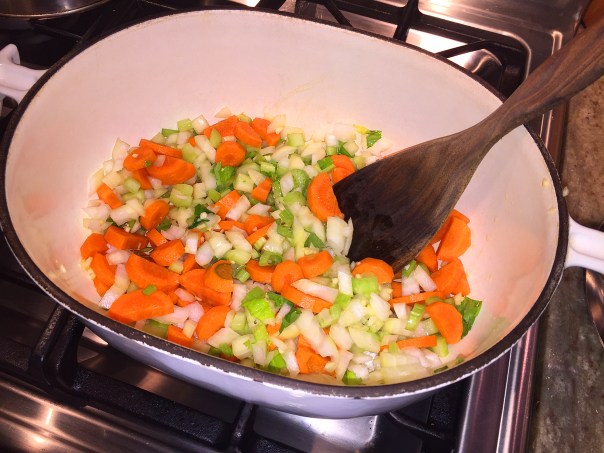
  1. Heat the oil in a 5-quart Dutch oven or other heavy-duty pot over medium-high heat. Add the onion, carrots, celery, and garlic, and cook, stirring occasionally, until the vegetables begin to soften, about 4 minutes.
    IMG_0820
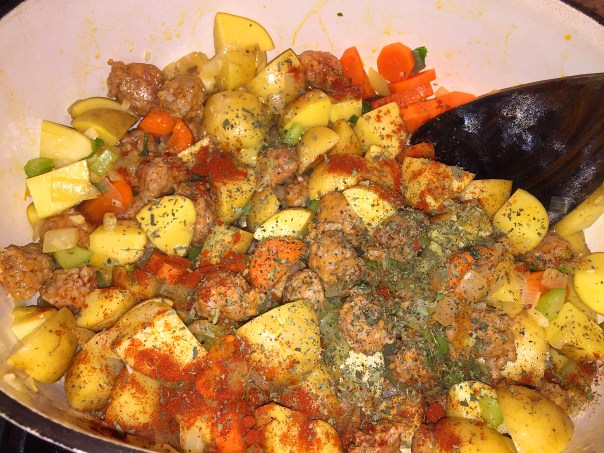
  2. Stir in the potato, chorizo, oregano, and paprika, and cook, stirring occasionally, for 1 minute. Add the lentils and 4 cups water. Bring to a boil, reduce to a simmer, and cook until the lentils are just tender, 20 to 25 minutes.
    IMG_0822
    IMG_0824
  3. Stir in the tomatoes and their juice, and 1/2 tsp. salt, and cook for another 5 minutes.
    IMG_0826
  4. Stir in the cilantro, season to taste with salt and pepper, and serve.
    IMG_0829IMG_0834

By Marge Perry from Fine Cooking

A Little Black Magic

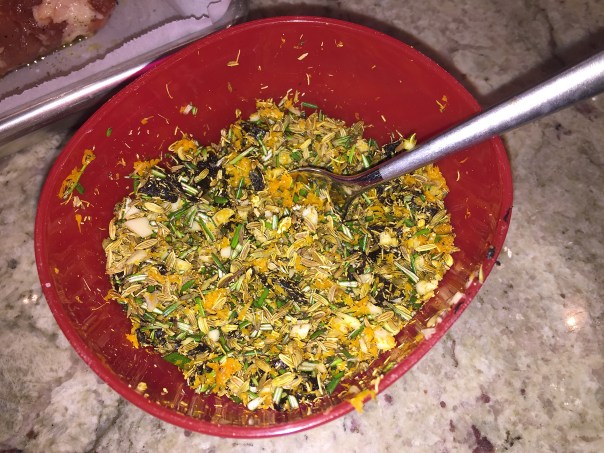
A fragrant mix of fennel seeds, orange zest, and fresh rosemary gives this quick-to-prep dish a French accent. The basis for this Pork Tenderloin Provençal recipe was adapted from Fine Cooking’s Erica Clark, although I made numerous changes while still maintaining the integrity of the dish.

My twists? For one, incorporating black garlic with it’s perfect mix of sweet and savory, producing a molassesy richness with tangy garlic undertones, yum! I had never cooked with black garlic before (nor have I eaten it that I’m aware of) but found the tender texture with a melt-in-your-mouth consistency similar to that of a soft dried fruit. Black magic, indeed!

IMG_0841
I used four large black garlic cloves along with three regular cloves in my rub.

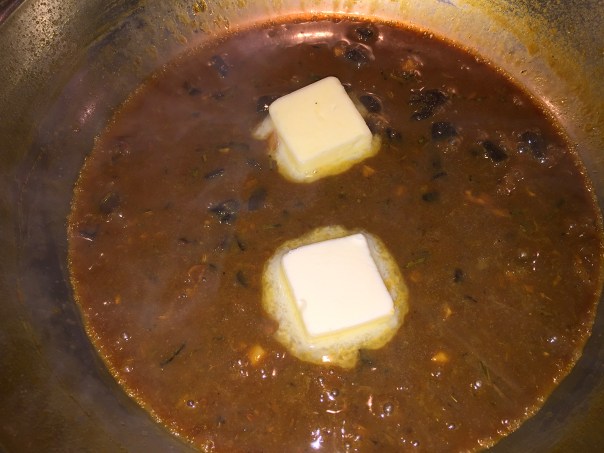
Secondly, to further enhance the meal, I made a pan sauce using the 1/2 cup fresh juice squeezed from the orange after zesting, along with one large cube of our homemade chicken stock, about 1/3 cup. After the meat rested, we poured the pork drippings through a sieve into the skillet with the orange juice and broth and let it reduce down by half, then swirled in two tablespoons of butter. This sauce was sooo good, we both wanted more!

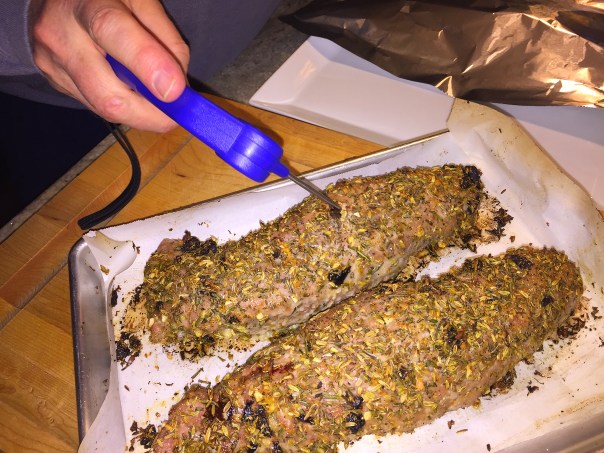
Our package of two pork tenderloins weighed in at a whopping 4.75 pounds, so I tripled the other ingredients (except the olive oil, which I doubled) to make sure there was enough to cover all of the meat. And due to the larger size, the tenderloins took an additional five minutes to come to temperature. These changes are indicated in the directions below.

Luckily we had enough leftovers for two more meals. One we just reheated, the other we made a pork fried rice dish, but knocked off the outer seasonings first.

IMG_0862

Ingredients (Lynn’s revised version)

  • 2, 2 to 2 1/2-lb. pork tenderloins
  • Kosher salt and freshly ground black pepper
  • 2 Tbs. olive oil
  • 6 cloves garlic, minced, preferably half black garlic cloves)
  • 3 Tbs. whole fennel seeds, coarsely ground in a mortar and pestle
  • 3 Tbs. minced fresh rosemary
  • 1 Tbs. finely grated orange zest
  • 1/2 cup juice from zested orange
  • 1/2-1/3 cup chicken stock, preferably homemade
  • 2 Tbs. unsalted butter

Directions

  1. Position a rack in the center of the oven and heat the oven to 450°F. Brush the pork all over with the olive oil, and season generously all over with salt and pepper.
    IMG_0842
    IMG_0843
  2. Combine the garlic, fennel seeds, rosemary, and orange zest, and press the mixture all over the pork. Transfer to a small rimmed baking sheet lined with parchment paper, and roast until an instant-read thermometer inserted in the thickest part of the pork registers 135°F, about 25 minutes.
    IMG_0845
    IMG_0846
  3. Let rest on a cutting board for 5 minutes before slicing and transferring to a platter.
    IMG_0854
  4. While meat is resting, bring the orange juice and chicken stock to a boil and reduce down by half. After the meat has rested and is sliced, pour the juice from the cutting board into the reduction through a strainer, and cook for another minute.
    IMG_0855
  5. Take the sauce off the heat and swirl in the two pats of butter. Pour over the platter of sliced meat, and serve.

IMG_0859

A Wintertime Pasta Caper

Sweet caramelized onion and creamy cheese tame radicchio’s bitter nature in this wintertime pasta of Penne with Ricotta, Caramelized Onion, and Radicchio from Fine Cooking’s Make It Tonight series. The impetus of this dish was we had about one cup of some really good fresh ricotta leftover from another meal a few weeks back, and we wanted to use it up before it went bad. The directions state that it takes less than a half hour to make, perfect for a quick weeknight meal.

However, and this is important, you can’t caramelize onions in six to eight minutes! They usually take 45-60 minutes over a low heat to render sweet, tender, golden onions that are not crispy. I made mine the night before while tending to other things, then threw them in the skillet the next evening toward the end of cooking the radicchio. So, just in case it didn’t sink in: Caramelization takes time. Don’t take them off too early—then, you’re “blonding” them instead of actually caramelizing them. They should be a rich brown, much reduced from where you started, and very soft but not quite mushy.

img_0576
This was about 40 minutes into cooking the onions for an hour the previous evening.

Another real treat in this dish was the fried capers, which also make a great garnish for soups and salads. They added a crisp jolt of brightness to just about every bite. The ingredients called for “large capers” so that’s exactly what we bought—according to the label on the jar. We’re pretty sure though, based on their photo, that what FC meant was large “caper buds” as opposed to the larger “caper berries.”

buds-on-caper-bush

The plant is a spiny, trailing, deciduous shrub native to the Mediterranean. It prefers warm, humid climate and grows in abundance all over the Cyprus, Italy, Greece, North African and some Asia Minor regions. The shrub begins producing flower (caper) buds from the third year of plantation.

Caper berries look like an olive; and are oblong. They’re much bigger than a caper bud, and have a similar taste and are treated in a similar way. Not quite as intense-tasting as the caper bud, they have a very similar flavor that is really quite delicious. In the commercial practice, capers are categorized and sold by their size in the markets. Smaller sized buds fetch more value than large ones.

capers-berries-and-buds
The difference in size between caper buds and berries.

Capers usually come in three sizes: small, medium and large. The downside with the larger ones is these are closer to springing open and becoming flowers. They are not quite as tight in texture, they’re not quite as firm, they have a flower inside them waiting to burst open. However, they have developed to the most gorgeous flavor. So I don’t think it really matters too much what size you use, it’s strictly a preference thing.

img_0578

Ingredients

  • 1/4 cup olive oil
  • 1/2 cup large capers, rinsed and patted dry
  • 1 Tbs. fresh thyme leaves
  • Kosher salt
  • 1 lb. penne pasta (we used 8.8 oz. of farfalle)
  • 1 medium yellow onion, halved and thinly sliced
  • 1 medium head radicchio, halved through the stem, cored, and thinly sliced (about 5 cups)
  • 1/4 tsp. crushed red pepper flakes; more to taste (of course we used more!)
  • 1-1/2 cups fresh whole-milk ricotta

img_0582
Slice each radicchio half into thin ribbons.

img_0586
Fry your capers in oil with fresh time. We suggest NOT wiping out the skillet.

img_0587
The capers and some of the thyme are moved onto a paper towel-lined plate.

img_0590
Near the end of cooking the radicchio, we added the already caramelized onions to heat through.

img_0591
Because we were shy about a half cup of ricotta, I added nearly a 1/4 cup of grated Parm with the reserved pasta water to thicken the sauce.

Directions

  1. Bring a large pot of well-salted water to a boil.
  2. Heat 2 Tbs. of the oil in a 12-inch skillet over medium-high heat. Add the capers and thyme, cover with a splatter shield (if you have one), and fry, stirring occasionally, until the capers are golden and puffed, 2 to 3 minutes. Using a slotted spoon, transfer the capers and thyme to a paper towel-lined plate. Wipe out the skillet. (We do not suggest wiping out the skillet which would remove all of the flavored oil seeped with thyme.)
  3. Boil the pasta to al dente according to package directions. Reserve 1/2 cup of the cooking water, then drain the pasta.
  4. Meanwhile, heat the remaining 2 Tbs. oil in the skillet over medium heat. Add the onion and cook, stirring occasionally, until golden, 6 to 8 minutes. (As I mentioned in the blog, to truly caramelize onions, you need to cook them over low heat for 45-60 minutes. Do it the night before if possible.)
  5. Add the radicchio, pepper flakes, and 1 tsp. salt. Cook, stirring occasionally, until the radicchio and onion are soft and tender, about 4 minutes.
  6. Put 1/2 cup of the ricotta in a large bowl and whisk in the reserved pasta cooking water. Add the pasta and toss to coat. Add the onion and radicchio and toss to combine.
  7. Stir in half of the capers and season to taste with salt. Serve dolloped with the remaining 1 cup ricotta and topped with the remaining capers.

Adapted from Erica Clark of Fine Cooking

img_0594
Instead of penne, we used a gluten-free farafalle pasta.

img_0584
We paired our pasta with a side Caprese salad using heirloom tomatoes and fresh basil, a real treat in the wintertime!

Interpretive-American Fare

Last May for Russ’ birthday he chose “elements” in Princeton, NJ, which was situated above the innovative restaurant Mistral, an establishment we hoped to patronize in the future. Serendipitously, local food activist Scott Anderson broke into the Philadelphia market in early 2017, with another seasonally fared Mistral restaurant in the King of Prussia Mall (KoP). So less than a year later we were fortunate enough to dine with a group of friends at the new location.

But before our reservations, the eight of us all gathered at Kim and Jeff’s beautifully decorated townhome in Collegeville, conveniently located about 8 miles from the KoP Mall. The last time we were all together was six months ago down in Culpeper, VA for Paula and Mike Graham’s daughter Kelsey’s wedding back in September. It was time for some catching up…

IMG_0777

What I didn’t know was that Jeff and Kim, above, are as enthusiastic chefs as me and Russ, and find pleasure in cooking as a team. After greetings and choices of wine in hand, we were treated to a tour of the home they moved into three years ago. Jeff proudly announced that Kim was the interior decorator and picked all of the choices, from flooring, to cabinets, countertops and light fixtures. However they are still waiting for the painter to come and give it that finishing touch with their already chosen color palette.

IMG_0781

IMG_0782

IMG_0783

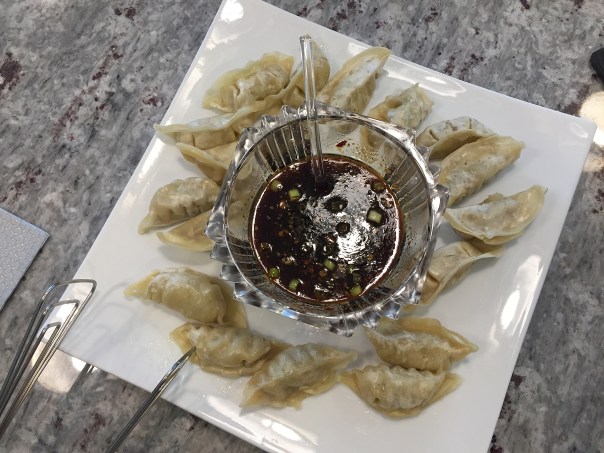
It was almost ludicrous to plan on dining out after the wonderful, and plentiful, appetizers prepared by Kim and Jeff. The ramekins of seafood salad were plump full of crab, lobster and shrimp with a slight kick from the vinaigrette. And those crab-stuffed cooked mushrooms were divine! Kim admitted the dumplings were store bought, but she did make the accompanying tasty soy-scallion dipping sauce.

IMG_0778
Denise, Dan and Russ sip some wine while enjoying each other’s company.

IMG_0779
Paula and Mike on the other side of the large kitchen island.

Satiated from all of the wonderful appetizers and Jeff’s wine cellar bursting with a fine selection of reds, we had second thoughts about leaving—but go we did, since we had reservations and we all were excited about checking the place out.

After the short ride over, we were seated immediately at a long table with a view into the open kitchen. Our one complaint was the proximation to the front door. It being a bitterly cold night, as other diners entered, we were occasionally hit with a cold breeze. But we soldiered on. Jeff chose a bottle of red which five of us shared, while three others imbibed on a selection of beers. Now it was time to make the hard decisions and narrow down our choices on what to eat…

IMG_0789
The ladies, Kim, Denise, Lynn and Paula line one side of the table…

IMG_0788
…while our other halves, Mike (not pictured), Russ, Dan and Jeff line the other.

IMG_0791
All together here…

Mistral’s menu is a vanguard of modern-global cuisine. As their website states “culinary pioneer’s chef Scott Anderson and chef de cuisine Ben Nerenhausen place a superlative emphasis on fresh, local ingredients, ultimately creating a progressive menu of seasonally curated small plates for guests to savor and share.” Both Scott and Ben were named as 2014 James Beard Foundation Award Semi-Finalists — Scott for Best Chef Mid-Atlantic, and Ben for Rising Star Chef of the Year. Impressive!

mistral.chefs

The word Mistral derives from a strong Mediterranean wind that sweeps through, bringing fresh air and clearing weather. We are excited for Mistral KOP to bring that same sense of fresh air to the Montgomery County dining scene.
— Chef Scott Anderson

our-menu-at-mistral-restaurant-in-princeton-nj-1030x772

Menu items differ from Mistral Princeton to reflect the highest quality ingredients that Montgomery County PA’s local farms, aquaculturists and butchers have to offer. A good portion of their menu is geared towards sharing, with plates a little smaller although not to be mistaken as tapas.

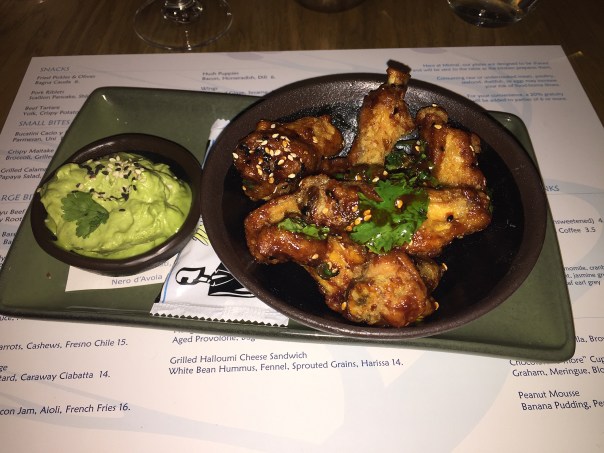
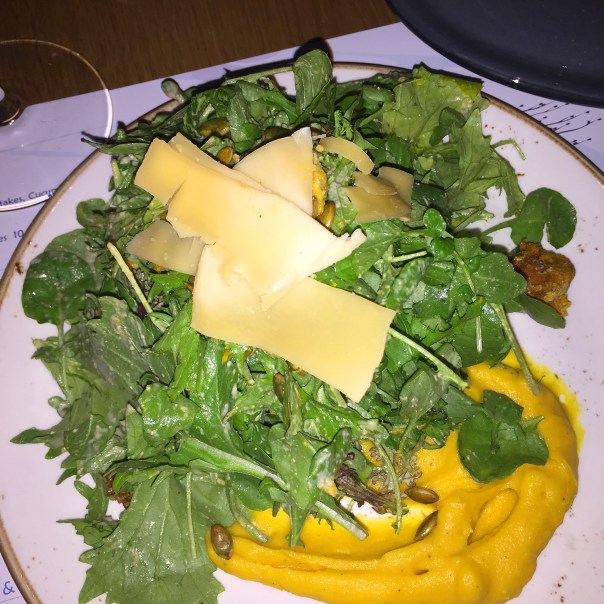
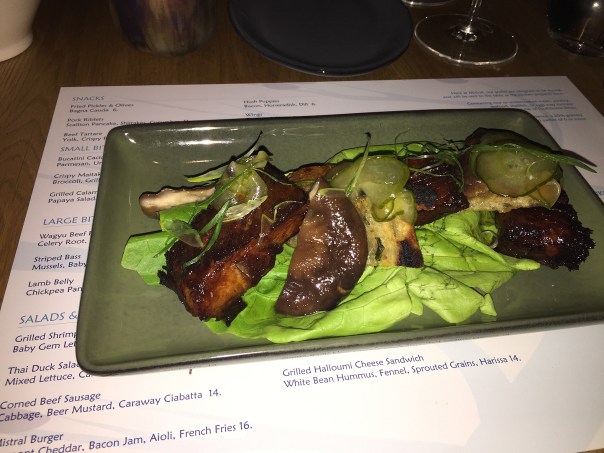
To begin, we ordered an assortment of Snacks, Small Bites and Salads. Wings with tamarind glaze and sesame; Hush Puppies with bacon, horseradish and dill dipping cream; Market Greens Salad with roasted vegetable puree, shaved gouda, pumpkin seed tossed in a  vinaigrette; Bucatini Cacio y Pepe with parmesan and uni; Pork Riblets on scallion pancakes with pickled cucumber; Crispy Maitake Mushrooms with broccoli, grilled onion, and topped with a creme fraiche; and last but not least Grilled Calamari with papaya salad, peanuts, and brown butter.

IMG_0792
Chicken Wings for Dan

hush.puppies
Hush Puppies for Denise and Kim who loved them so much she intends on going back for some take out orders

IMG_0799
The ginormous salad for Lynn

IMG_0798
Buccatini for Jeff

IMG_0794
Mike had the Pork Riblets

IMG_0793
A bowl of Crispy Maitake Mushrooms for Russ

IMG_0795
And Paula had the interesting plate of Grilled Calamari

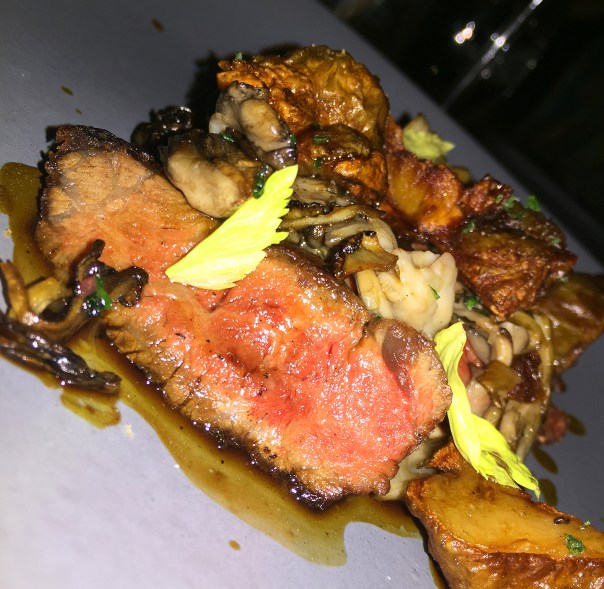
For our main dishes, the most popular choice was the Wagyu Beef, which Russ, Mike, and Denise all opted for. The steak was accompanied by a celery root purée, maitake mushrooms and sunchokes. Russ gave me a taste and it was definitely drool-worthy!

IMG_0809

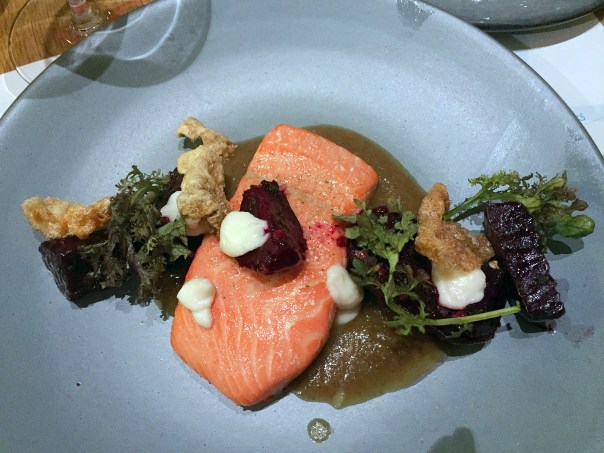
Paula and I chose the Olive Oil-Poached Organic Salmon with onion soubise, roasted red baby beets, mustard, and buttermilk. The salmon was exquisite and melted in your mouth!

IMG_0804

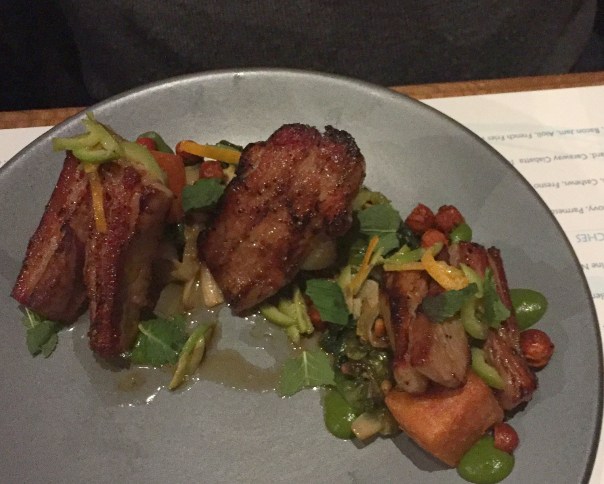
Jeff decided on the Lamb Belly with chickpea panisse, anchovy, and green olives and loved it. While Dan enjoyed his Grilled Shrimp Caesar with baby gem lettuce, anchovies and Parmesan as an entrée.

IMG_0802

IMG_0803

Finally for dessert, a few of the couples split some Peanut Mousse with banana pudding, peanut crunch and apricot. While they agreed it was good, they weren’t over the top with it.

For our next get together we talked about the possibility of doing one of those Amazing Escape Rooms, a recent worldwide trend. The idea is to challenge your mind and ability to collaborate with others in an interactive, team-building environment in your choice of a variety of themed rooms. Paula and Mike, along with several of their kids, recently had a great time busting out of one in Philly.

Here’s how it works—Groups of up to 10-12 will work together to solve problems, uncover clues, and crack codes in order to progress as a team. You and your team have 60 minutes to escape the room. Each room has a storyline that you’ll be introduced to upon entering, along with basic instructions on what you’ll need to uncover to escape.

I’m hoping they have a Culinary-themed room, which would be just the ticket for this group!

Winging It

Occasionally I’m asked if I ever whip up my own meals without the aid of a recipe. The answer is, yes, absolutely! The impetus behind it is usually we don’t have anything planned for dinner and/or more likely, I need to use up some ingredients that are about to spoil. This Seared Tuna Steaks with Shallots and Mustard Lemon Butter Sauce is but one of many meals thrown together on the fly.

IMG_0758

The supermarket was having a great sale on some gorgeous tuna steaks, tempting me to buy two. With no recipe in mind, I knew the steaks would cook up quickly with little to no fuss. Before shopping, I did a quick inventory and made a mental note of provisions on hand including lemons, parsley, shallots and a large package of baby spinach about to expire. With the addition of some staples of olive oil, butter, dijon mustard, and a smattering of salt and pepper, it would only be a short prep away from preparing a quick tasty tuna dinner.

Let’s dig into tuna’s health benefits. For one, it has omega-3 fatty acid, which helps prevent high blood pressure. Plus it is a good source of selenium, an antioxidant that helps improve the body’s immune system. The immune system is a vital part of the body that is integral for fighting off sickness, diseases and infections. I mean, who doesn’t want to be healthy?

So make tuna your next meal choice. It is loaded with vitamins and nutrients, low in saturated fat and is an excellent source of protein. When eaten in moderation, you can reap the healthy benefits of this tasty fish, while avoiding the negative effects of high levels of mercury in your food.

When looking for a source of lean protein, tuna is an excellent choice. The fact that it is low in both fat and calories makes it an excellent substitute for dairy products and meats that have a higher fat content. So with all of this good-for-you-knowledge, start winging it today and see where your culinary adventures will take you…

IMG_0748

Seared Tuna Steaks with Shallots and Mustard Lemon Butter Sauce

  • Servings: 2
  • Difficulty: very easy
  • Print

Ingredients (for two)

  • 2 thick tuna steaks
  • 3 tablespoons olive oil
  • Salt and pepper to taste
  • 1 small lemon zested, than juiced and divided
  • 2 medium shallots, minced and divided
  • 1 teaspoon dijon mustard
  • 4 tablespoons unsalted butter
  • 2 tablespoons chopped fresh parsley
  • 1/2 teaspoon dry mustard (optional)

Directions

IMG_0746

  1. Have two skillets at the ready. Heat 2 tablespoons of the oil in a large carbon steel or cast iron skillet over medium high heat. Season the tuna steaks on both sides with salt and pepper.
    IMG_0751
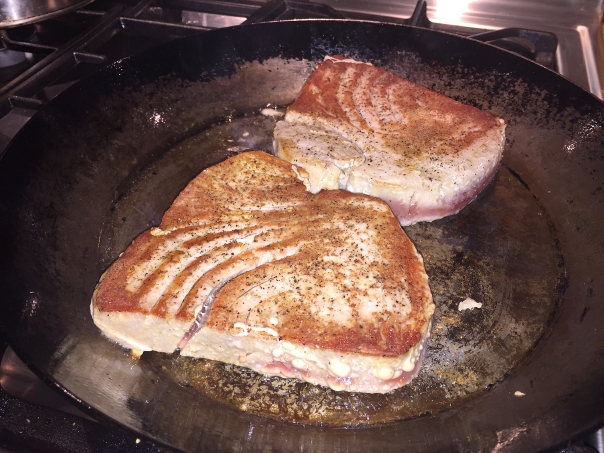
  2. Add the tuna to the hot skillet and sear well, about 4 minutes per side, depending on the thickness and desired doneness. Remove from pan to platter and tent with foil.
    IMG_0749
    IMG_0754
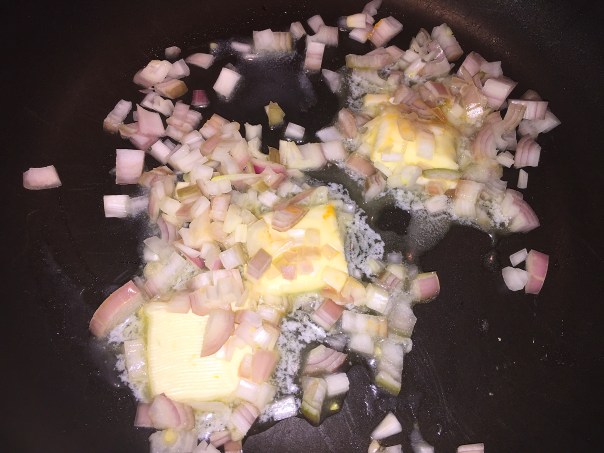
  3. While the tuna is searing, add 3 tablespoons of the butter to the other skillet over medium heat. Add half of the minced shallots and sauté for several minutes until softened. Turn the heat down to low, swirl in the mustard then toss in the lemon juice and half of the lemon zest, mixing until well incorporated and slightly reduced. Add the parsley at the very end before plating.
    IMG_0753
  4. After the tuna is removed from the first pan, turn the heat down to medium and add the last tablespoon of butter and olive oil and the other half of the minced shallots. After a few minutes add the baby spinach in batches as it wilts down. At this point I also incorporated a half teaspoon of dry mustard, threw in the rest of the lemon zest and seasoned with salt and pepper.
    IMG_0755
  5. Place a tuna steak on each dinner plate and drizzle the lemon shallot mixture over each. Split the spinach, which will have cooked down considerably, between both plates and serve immediately.


Get Your Stir-Fry On

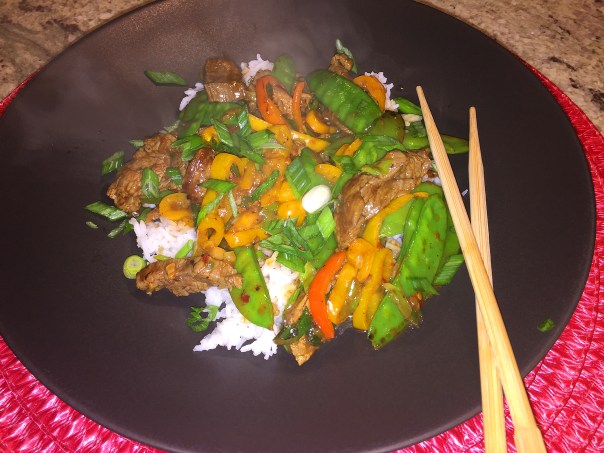
This wonderfully fragrant and spicy dish of Stir-Fried Chili Beef with Peppers gets its deep, nuanced flavor from Asian hot bean sauce, which contains soybeans in addition to chiles. It’s a rich, complex flavor worth seeking out, but if you can’t find it in an Asian market or your supermarket, you can use chili garlic sauce or Sriracha instead.

img_0692

As with many recipes from one of our favorite Asian chef-authors, Grace Young, make sure you prep everything ahead of time because you won’t have the luxury to do so once you start the stir-frying process. The actual total cooking time is only about five minutes.

For both additional color and health reasons, I increased the portions for the snow peas and bell pepper strips. Chili bean sauce (Toban Djan), made from a special blend of chilies and fermented beans was already a staple in our fridge, and it adds a bit of spice to the dish, but not overwhelmingly so. We served the stir-fry over some fluffy jasmine rice, but it could stand alone on its own too.

img_0680

Ingredients

  • 12 oz. flank steak
  • 3 Tbs. Shaoxing rice wine or dry sherry
  • 1 Tbs. minced fresh ginger
  • 2 tsp. soy sauce
  • 1-1/2 tsp. cornstarch
  • Kosher salt and freshly ground white pepper
  • 1 tsp. plus 2 Tbs. peanut or vegetable oil
  • 2 Tbs. hot bean sauce (also called chili bean sauce), chili garlic sauce, or Sriracha
  • 2 Tbs. hoisin sauce (preferably Koon Chun)
  • 1 Tbs. minced garlic (from 3 medium cloves)
  • 6 oz. snow peas, strings removed (about 2 cups)
  • 1 medium red bell pepper, stemmed, seeded, and cut into 1/2 x 2-inch strips
  • 8 medium scallions, thinly sliced on the diagonal (about 1 cup)

Directions

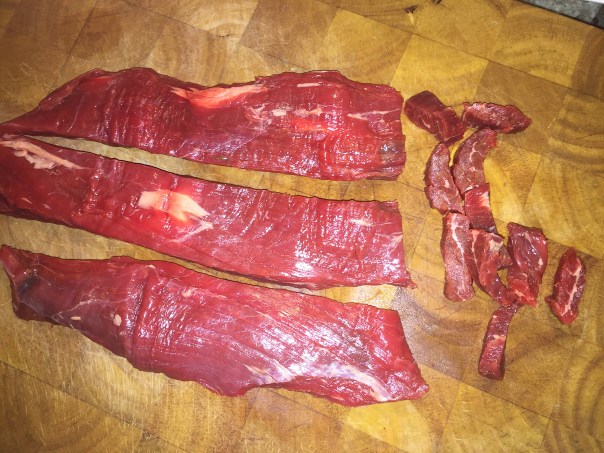
  1. Cut the beef with the grain into 2-inch-wide strips, and then cut each strip across the grain into 1/4-inch-thick slices. Transfer to a medium bowl.
    img_0677
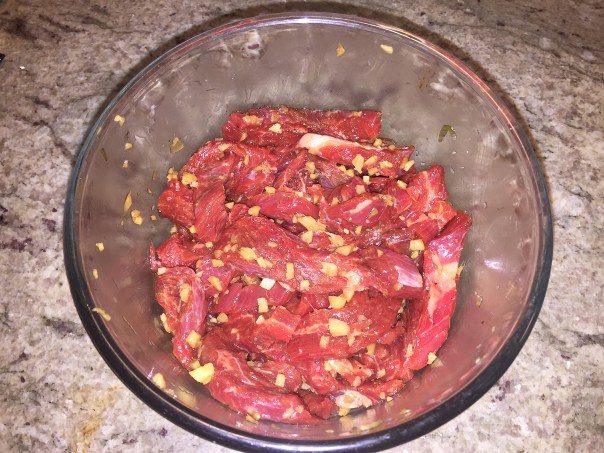
  2. Add 1 Tbs. of the rice wine, the ginger, soy sauce, cornstarch, 1/4 tsp. salt, and 1/8 tsp. pepper to the beef. Stir until the cornstarch is no longer visible. Add 1 tsp. of the oil and stir until the beef is lightly coated.
    img_0682
  3. In a small bowl, stir the hot bean sauce, hoisin sauce, and the remaining 2 Tbs. rice wine. Heat a 14-inch flat-bottom wok (preferably seasoned carbon steel) over high heat until a bead of water vaporizes within 1 to 2 seconds of contact.
  4. Add 1 Tbs. of the remaining oil, swirl to coat, add the garlic, and stir-fry with a metal wok spatula until fragrant and light golden, about 10 seconds. Push the garlic to the sides of the wok and carefully add the beef, spreading it evenly over the bottom and sides of the wok in a single layer.
  5. Cook, undisturbed, for 1 minute, letting the beef begin to sear, then stir-fry with the garlic until the beef is lightly browned but not yet cooked through, about 1 minute. Transfer the beef and garlic to a plate.
    img_0686
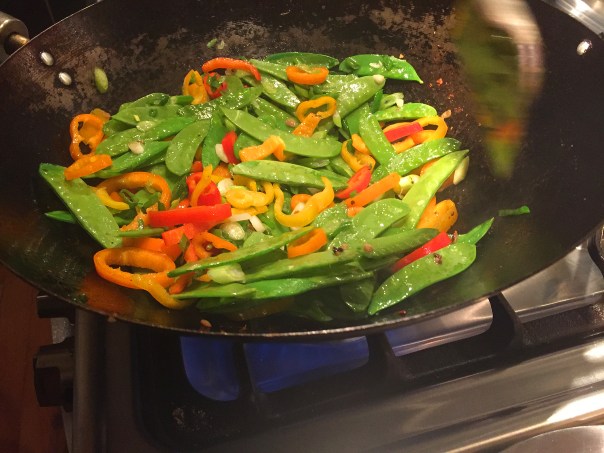
  6. Add the remaining 1 Tbs. oil to the wok and swirl to coat. Add the snow peas, bell pepper, and scallions, sprinkle with 1/2 tsp. salt, and stir-fry until the snow peas are bright green, about 1 minute.
  7. Return the beef with any accumulated juice to the wok. Add the hot bean sauce mixture by swirling it down and around the sides of the wok; if you pour the sauce directly into the center of the pan, the temperature of the wok will drop.
    img_0690
  8. Stir-fry until the beef is just cooked through and the vegetables are crisp-tender, 30 seconds to 1 minute more. Serve immediately.

By Grace Young

Good COD Almighty!

Cod have been an important economic food since the Viking period (around 800 AD). They have a lean, mild flavor profile with a dense, flaky, white flesh and a tender-firm texture. And they are not fishy tasting at all, making them appealing to folks who are not necessarily fond of fish. You can manipulate the flavor profile by whatever ingredients you are cooking with—a big plus for the variety of personal preferences.

The two most common species of cod are the Atlantic cod, which lives in the colder waters and deeper sea regions throughout the North Atlantic, and the Pacific cod, found in both eastern and western regions of the northern Pacific. Luckily, cod is available throughout the year and is a wonderful substitute for meat protein with its versatility making it easily adaptable to all methods of cooking.

Studies show that people who eat fish regularly have a much lower risk of heart disease and heart attack than people who don’t consume fish. For numerous reasons, we try to have fish a minimum of at least one night per week. This quick Roasted Cod with Lemon-Parsley Crumbs by one of our favorite chef/authors Molly Stevens, immediately piqued our interest due to the short ingredients list and quick turnaround time.

img_0705

Besides being an excellent low-calorie source of protein, cod contains a variety of very important nutrients and has also been shown to be useful in a number of different health conditions—as little as a weekly serving of fish lowers risk of ischemic stroke, for instance. And not for nothing, fish consumption is also correlated with a reduced incidence of colon cancer.

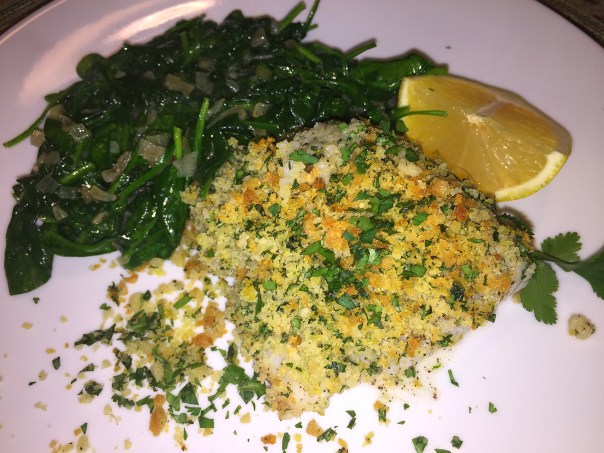
For an additional wholesome boost, we paired our cod with some sautéed baby spinach, another powerhouse in the health benefits department, and a quick cooker to boot. Recent studies continue to underscore the amazing versatility of spinach. This leafy vegetable is rich in water-soluble and fat-soluble vitamins, minerals, and a wide variety of phytonutrients. So if you’re craving a healthy meal, this one is a good bet!

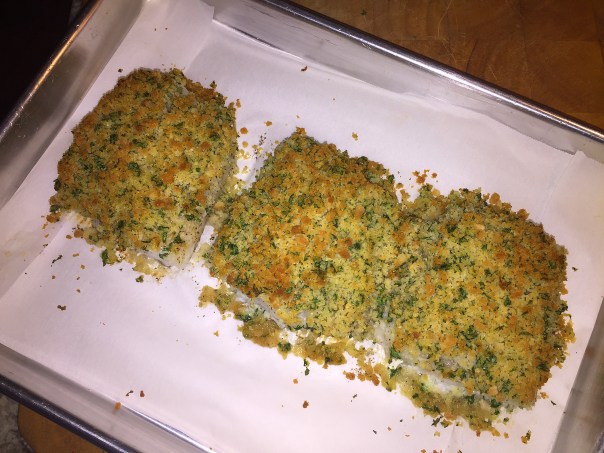
NOTE: If you have some fillets with the tapered narrow end, tuck under as shown in the photo below, so that it won’t dry out.

Ingredients

  • 1 cup panko breadcrumbs
  • 3 Tbs. melted unsalted butter
  • 3 Tbs. finely chopped fresh flat-leaf parsley
  • 2 tsp. finely grated lemon zest
  • Kosher salt and freshly ground black pepper
  • Six 1- to 1-1/2-inch-thick cod fillets (about 6 oz. each)

Directions

  1. Position a rack in the center of the oven and heat the oven to 425°F.
  2. In a medium bowl, combine the panko, butter, parsley, and lemon zest. Add a pinch of salt and a grind of pepper and stir to evenly distribute the ingredients.
    img_0697
  3. Line a heavy-duty rimmed baking sheet with parchment. Arrange the cod fillets on the baking sheet and season both sides with salt and pepper. Divide the panko topping among the fillets, pressing lightly so it adheres.
    img_0700
  4. Roast until the breadcrumbs are browned and the fish is mostly opaque (just cooked through), with a trace of translucence in the center (cut into a piece to check), 10 to 12 minutes, depending on the thickness of the fillets. Serve immediately.
    img_0701

img_0708
We paired our cod with a side of sautéed baby spinach in a seasoning of shallots and dry mustard.

By Molly Stevens

The Pot Roast Bar is Raised

February in the Northeast was way above average this season with many days hovering in the hi-60’s and even 70’s, but March came roaring in like a lion, cold and windy—perfect for a long afternoon braise. And who’s recipe is better to follow than our favorite braising cookbook author, Molly Stevens. She raises the bar for the lowly chuck roast, a humble cut of meat made company-worthy in this Red Wine-Braised Pot Roast recipe.

img_0734

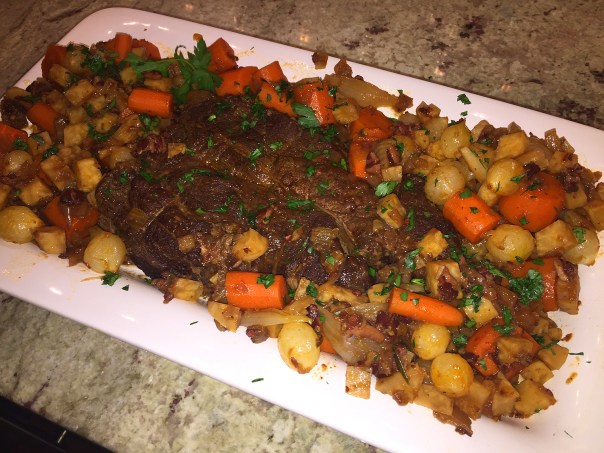
All kinds of yummy ingredients meld together in perfect harmony after a long, slow, three-hour braise. The tantalizing aromas will drive you insane with anticipation until you plate the star of the show on the dinner table. In fact, after the roast was removed from the pot, I couldn’t contain myself any longer, I just had to have a taste while the sauce was being made.

The largest chuck roast available at the supermarket was only 2.75 pounds, smaller than the 4-pounder listed, but plenty big for the two of us. As is our custom, I increased the veggie amounts and also added some halved shallots. But just as I voiced out loud to Russ, asking him to help me remember adding the frozen pearl onions when needed, I totally forgot (apparently so did he) until 3 minutes before the pot roast was supposed to be pulled from the oven 😦 So I threw them in, and let everything cook an additional half hour—our stomach’s were really growling by this point.

At the end as you make the sauce, I knew Russ would not be keen on discarding the spent onion, fennel, and pancetta. Instead, we strained the liquid in order to make the “gravy,” but kept those other ingredients, mixing them in with the carrots, pearl onions and celery root. Why would you waste such lusciousnesss? Plus, it would have been almost impossible to separate them.

NOTES: If your pot doesn’t have a tight lid, cover the pot tightly with heavy-duty foil, crimping it well over the edges. Chuck roast comprises several different muscles, so you may want to pull apart the various pieces with your hands before carving, then slice each piece across its grain.

Yes, it is somewhat labor-intensive, but every bit worth it. There is some “make-ahead” directions following the recipe, and like most braises, it tastes even better when made ahead and left to sit for a day or three; so that might be the path to take next time. We were definitely glad there were leftovers!

Ingredients

  • 2 garlic cloves, smashed
  • 2 sprigs fresh rosemary
  • 5 whole black peppercorns
  • 2 wide strips orange zest
  • 1 4-lb. boneless beef chuck pot roast
  • Kosher salt and freshly ground black pepper
  • 2 Tbs. olive oil
  • 5 oz. thick-sliced (1/4 inch) pancetta, cut into 1/2-inch squares (to yield 1 cup)
  • 1 cup finely chopped onions
  • 1/2 cup finely chopped fennel bulb
  • 1/4 cup tomato paste
  • 1/4 cup brandy
  • 1-1/2 cups dry red wine
  • 1-1/2 cups homemade or low-salt chicken or beef broth
  • 2 cups peeled, diced carrots (3/4-inch chunks)
  • 2 cups peeled, diced celery root (3/4-inch chunks)
  • 2 cups frozen pearl onions (leave whole, add frozen)
  • 1/4 cup chopped fresh flat-leaf parsley
  • 2 Tbs. chopped capers
Directions
Brown the meat and aromatics:
  1. Set a rack on the lower third of the oven and heat the oven to 300°F. Select a 5- to 6-quart Dutch oven with a tight-fitting lid. Cut a large single-layer square of cheesecloth, and rinse it to remove any loose fibers. Spread the cheesecloth flat and pile the garlic, rosemary, peppercorns, and orange zest in the center. Gather the edges to form a pouch and tie tightly with kitchen twine. Set aside.
    img_0716
  2. Tie the roast into a snug shape with twine, pat it dry with paper towels, and season with salt and pepper. In the Dutch oven, heat the olive oil over medium-high heat. Brown the meat thoroughly on all sides, turning with tongs, about 5 minutes per side. The meat should sizzle but not scorch; adjust the heat accordingly. Transfer the meat to a large plate.
    img_0719
    img_0721
  3. Lower the heat to medium, add the pancetta, and cook until just browned and beginning to crisp, 5 to 8 minutes. Remove the pot from the heat. With a slotted spoon, transfer the pancetta to the plate with the beef. Spoon 2 Tbs. of the fat from the pan into a small dish and discard the rest.
    img_0722
    img_0723
  4. Evaluate the drippings on the bottom of the pot. They may be very dark, almost black, but if there are any scorched bits, wipe these out with a wadded paper towel (if in doubt, taste a fleck; as long as it doesn’t taste acrid, it’s fine). Return the pot to medium heat and add the 2 Tbs. reserved fat. Add the onions and fennel, season with salt and pepper, and cook until they start to soften, about 5 minutes. Add the tomato paste and cook, stirring, until darkened slightly, 2 to 3 minutes.
Deglaze and braise:
  1. Add the brandy, stirring with a wooden spoon to scrape up any remaining drippings on the bottom of the pot if necessary. Bring to a boil over high heat, and cook until the liquid has reduced to about 2 Tbs.
  2. Add the red wine, beef or chicken broth, and the cheesecloth pouch of flavorings to the pot. Bring the liquid to a simmer. There should be at least 1 inch of liquid in the pot. Add more broth if needed.
    img_0726
  3. Return the meat to the pot, along with the pancetta and any juices that have accumulated. Return the liquid to a simmer, and cover the pot with a sheet of parchment, pushing down so the paper touches the meat. Set the lid in place. Slide the pot into the oven and cook for 2 hours, turning the roast with tongs after 1 hour.
    img_0730
  4. Turn the roast over once more and then scatter the carrots, celery root and pearl onions into the liquid around the roast. Continue braising, covered with the parchment and the lid, until the meat is fork-tender, about an hour longer. Test for doneness by spearing the meat toward the center with a carving fork. Pull out the fork carefully: If it lifts the meat along with it, continue cooking for another 20 to 30 minutes.
    img_0732
Make a sauce from the braising liquid:
  1. Transfer the pot roast and vegetables to a shallow platter; tent with foil. Strain the remaining liquid into a measuring cup, discarding the spent onion, fennel, and pancetta and the cheesecloth sachet of flavorings (we did not discard anything but the sachet.) Let the fat rise to the surface and spoon it off. Wipe out the braising pot with a paper towel.
  2. Return the strained juices to the pot  and bring to a simmer over medium heat. Taste and evaluate. If the flavor seems weak, simmer vigorously over medium-high heat to reduce the volume and concentrate the flavor, 5 to 15 minutes; season to taste with salt and pepper. Whisk in parsley and capers.
    img_0739
    img_0740
  3. Snip the strings from the pot roast and carve the meat across the grain into 1/4- to 1/2-inch-thick slices. Arrange the meat on a serving platter. Ladle about half the sauce over all, garnish with the vegetables, and serve, passing the remaining sauce at the table.
img_0741
Make Ahead Tips

Follow the method through the oven-braising, and transfer the meat and vegetables to a platter. Strain and degrease the juices as directed, wipe out the pot, and then return the meat and vegetables to the pot and pour the strained juices over all. Let cool to room temperature, then cover and refrigerate for up to three days. To serve, gently reheat the roast in the pot until the juices are once again liquified. Transfer the meat and vegetables to a baking dish, moisten with some of the juices, cover, and heat in a 325°F oven until warmed through. While the meat and vegetables are warming, proceed with the recipe as directed to make a sauce from the juices.
Hominy Harmony

Posole, the savory and hearty, rather soupy stew made from dried large white corn kernels simmered for hours, is traditional and easy to prepare. But here’s a speedy version of the classic Mexican chicken and hominy stew that hits all the right notes. Posole can be prepared in many ways. All variations include a base of cooked hominy in broth.

Hominy is made from whole corn kernels that have been soaked in an alkaline solution to soften the tough outer hulls. The kernels are then washed to remove the excess solution, the hull, and often the germ. Once you’ve had hominy, you’re not likely to forget it! These big kernels of corn are puffy and chewy with a very unique flavor owing to a special processing technique.

img_0674
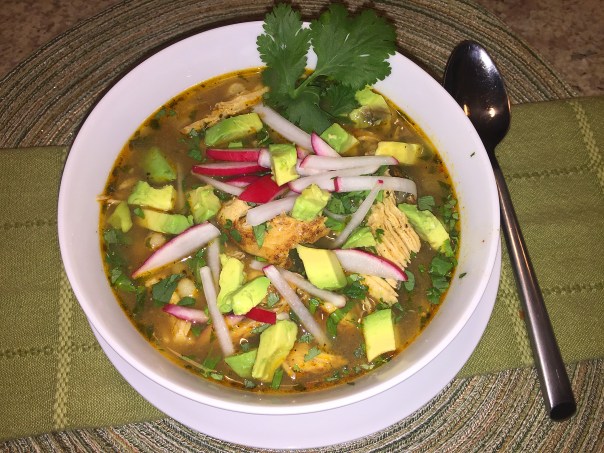
Along with extra chopped cilantro, we garnished our bowls of posole with julienned radishes and cubed avocado.

Cooked hominy is about triple the size of a raw sweet-corn kernel, but has an unmistakably nutty-sweet “corn” flavor. Canned hominy is widely available, both at Mexican markets and many national supermarket chains. Look for it in the canned bean aisle, where it will be labeled “white hominy” or “mote blanco.” Use canned hominy like you would use beans in a stew. Unlike beans, which mainly absorb the flavor of whatever liquid they’re cooked in or added to, hominy retains its distinct corn flavor even in the meatiest, chile-rich posoles.

As with other corn products, hominy is rich in carbohydrates and low in fat, so it can be a healthy addition to your diet. One cup of hominy contains just 119 calories. Another benefit of hominy is that it is high in fiber with each cup of hominy providing 4 grams, a nutrient that can help you lose weight because it stimulates satiety. Plus it’s low in sugar.

Neither of us ever remember eating or cooking with hominy before so we were intrigued by this quick weeknight version of the Mexican classic found in the Fine Cooking “Make It Tonight” series. When I first opened the can of hominy I expected to find lose kernels in a liquid, but the contents were one solid mass that needed to be rinsed and separated, a simple task.

We did not have ancho chile powder in stock, so a quick substitute is chile powder with a pinch of red pepper flakes (and you just know I added one heck of a healthy pinch!) And, unusual for us, we had no fresh limes on hand, so we added a squirt of key lime juice with the other garnishes. In the end, we were amazed at how much we really liked this dish—and will definitely be making it again… glad to have met you Hominy!

Quick Mexican Posole

img_0645

Ingredients

  • 1 Tbs. ancho chile powder
  • 1 tsp. ground cumin
  • 1/4 tsp. smoked paprika
  • 1/4 tsp. dried oregano
  • Kosher salt and freshly ground black pepper
  • 1-1/2 lb. boneless, skinless chicken breasts
  • 2 Tbs. vegetable oil
  • 1 medium yellow onion, halved and thinly sliced lengthwise
  • 2 tsp. finely chopped garlic
  • 2 15-oz. cans white or yellow hominy, drained and rinsed
  • 6 cups homemade or lower-salt chicken broth
  • 1/4 cup chopped fresh cilantro; more for serving
  • Your choice of the following garnishes: shredded green cabbage, thinly sliced or julienned radishes, diced avocado
  • 1 medium lime, cut into wedges

img_0651
Pat the chicken dry and season generously with the spice mixture of chile powder, cumin, paprika, oregano, salt, and black pepper. 

img_0657
Over medium-high heat brown the chicken well on both sides for 3 to 4 minutes per side.

img_0655
Because I didn’t have any room in the bottom of the pot, I cooked the onion and garlic in a separate skillet for a few minutes.

img_0659
The cooked onions are thrown into the pot with the browned chicken breasts.

img_0661
Stir in the hominy and chicken broth and bring to a boil. 

Directions

  1. Mix the chile powder, cumin, paprika, oregano, 1/2 tsp. salt, and 1/4 tsp. black pepper in a small bowl. Pat the chicken dry and season generously with the spice mixture.
  2. In a heavy-duty 5-quart pot, heat the oil over medium-high heat. Add the chicken and brown well on both sides, 3 to 4 minutes per side.
  3. Add the onion and garlic and cook, stirring, until fragrant, about 30 seconds. Stir in the hominy and chicken broth and bring to a boil. Turn the heat down, cover, and simmer until the chicken is cooked through, about 10 minutes.
  4. Remove the chicken and shred it or cut it into chunks. Return it to the pot, stir in the cilantro, and season to taste with salt.
  5. Divide the posole among bowls and top with the garnishes and additional cilantro. Serve with the lime wedges.

img_0664
Once the pot starts boiling, turn the heat down, cover, and simmer until the chicken is cooked through, about 10 minutes.

img_0667
Remove the chicken and shred it or cut it into chunks. We used our shredding claws, but forks work just as well.

img_0669
Return the shredded chicken to the pot, stir in the cilantro, and season to taste with salt.

img_0672
You can let it sit for awhile over very low heat before you divide among bowls.

By Barb Freda from Fine Cooking