Monthly Archives: October 2020

Roasted Rosemary Butternut Squash and Shallots

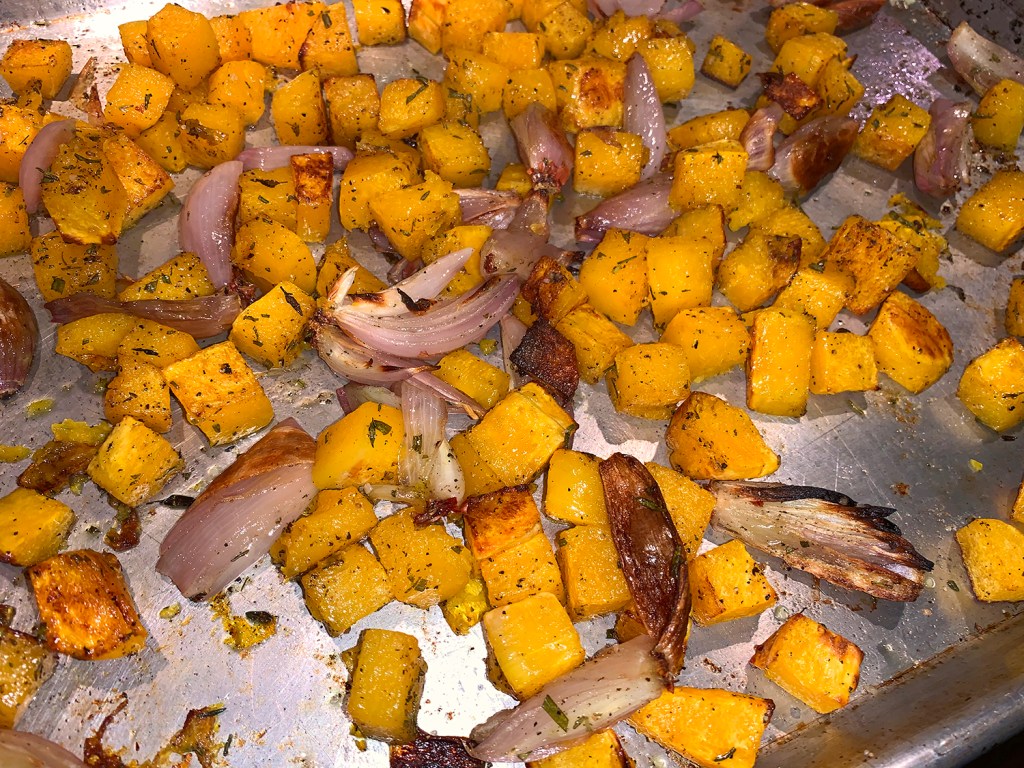
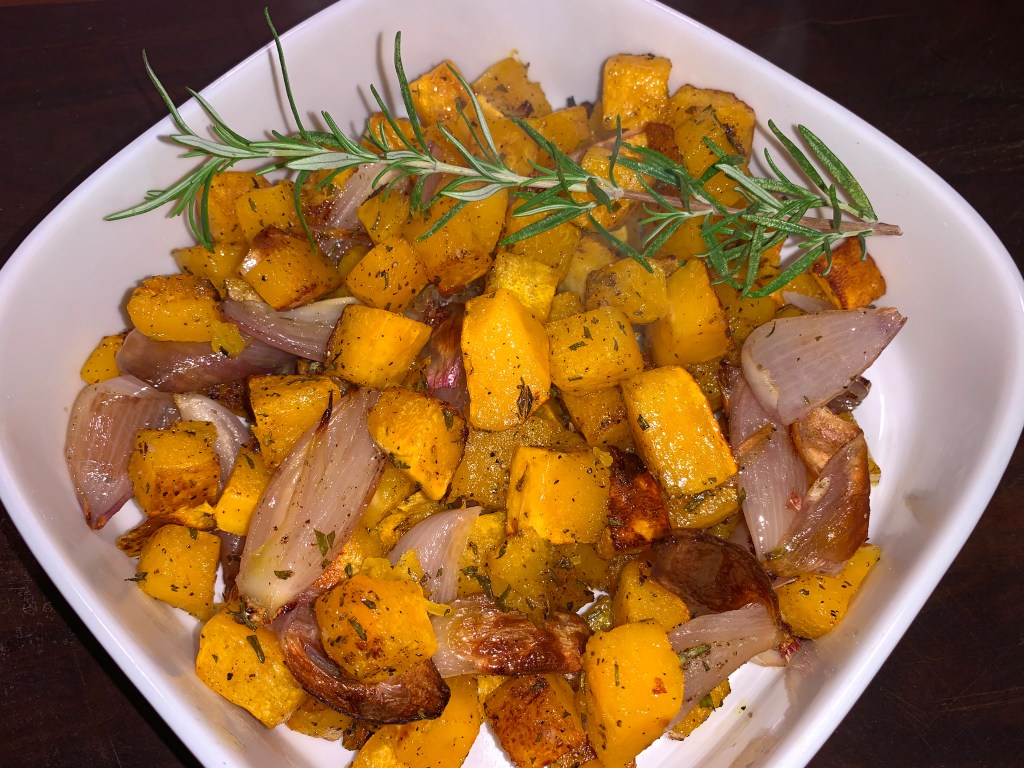
Butternut squash is a fall heavyweight in my opinion. It pairs well with a variety of flavors and can reinvent itself either sweet or spicy. In this case, we are talking naturally sweet which really develops as it roasts. And you all know that butternut squash is very nutritious with the flesh full of vitamins A and C.

It was a gift from our compost. I noticed squash vines starting to grow in our herb bed backed by a trellised fence. We hadn’t planted any squash so I knew it came from when we composted the garden earlier in the season. Plus the rosemary was freshly picked from our herb garden. Thank you Mother Nature!

Oops, I completely forgot to add the 1/2 teaspoon of granulated sugar. It really wasn’t needed taste-wise because our squash was naturally sweet, but the sugar was more a conductor for caramelization. Although our cubes were lightly browned without it.

This recipe calls for a specific amount of squash, so you may have some leftover. Ours weighed in at 3.3 pounds—a good bit larger than the recipe called for. After peeling and seeding, your squash will lose 2-3 ounces of weight. For example, a 3-pound squash will yield about 2 pounds 13 ounces of flesh. This recipe calls for 2 pounds of diced squash, you’ll want to look for a squash that is around 2 pounds, 3 ounces in weight.

If you have leftovers like us, you may want to sauté the extra cubes and use them in a future frittata, salad or side dish. The toughest part of this recipe is peeling the squash, so it is permissible to buy already cubed, just make sure they are cut to 3/4″ cubes and uniformly sized.

Roasted Rosemary Butternut Squash and Shallots

  • Servings: 4
  • Difficulty: easy
  • Print

Ingredients

  • 3 cups 3/4-inch-diced, peeled butternut squash (from about a 2-pound squash)
  • 4 medium shallots, peeled, root end left intact, quartered
  • 2 Tbsp. extra-virgin oil
  • 1 tsp. chopped fresh rosemary
  • 1 tsp. kosher salt
  • 1/2 tsp. granulated sugar
  • 1/2 tsp. freshly ground black pepper

Directions

  1. Preheat oven to 450°F.
  2. Put the squash cubes on a heavy-duty rimmed baking sheet. Add the shallot quarters to the squash.
  3. Drizzle the olive oil over the vegetables; toss to coat. Sprinkle the rosemary, salt, sugar and pepper over the veggies. Toss to coat again and distribute evenly over the baking sheet.
  4. Roast for 20 minutes. Stir, then continue rosting until the veggies are tender and lightly browned, 10-15 minutes more.
  5. Before serving, taste and season with more salt if desired.

http://www.lynnandruss.com

Adapted from a recipe found on finecooking.com

Salmon Chraimeh

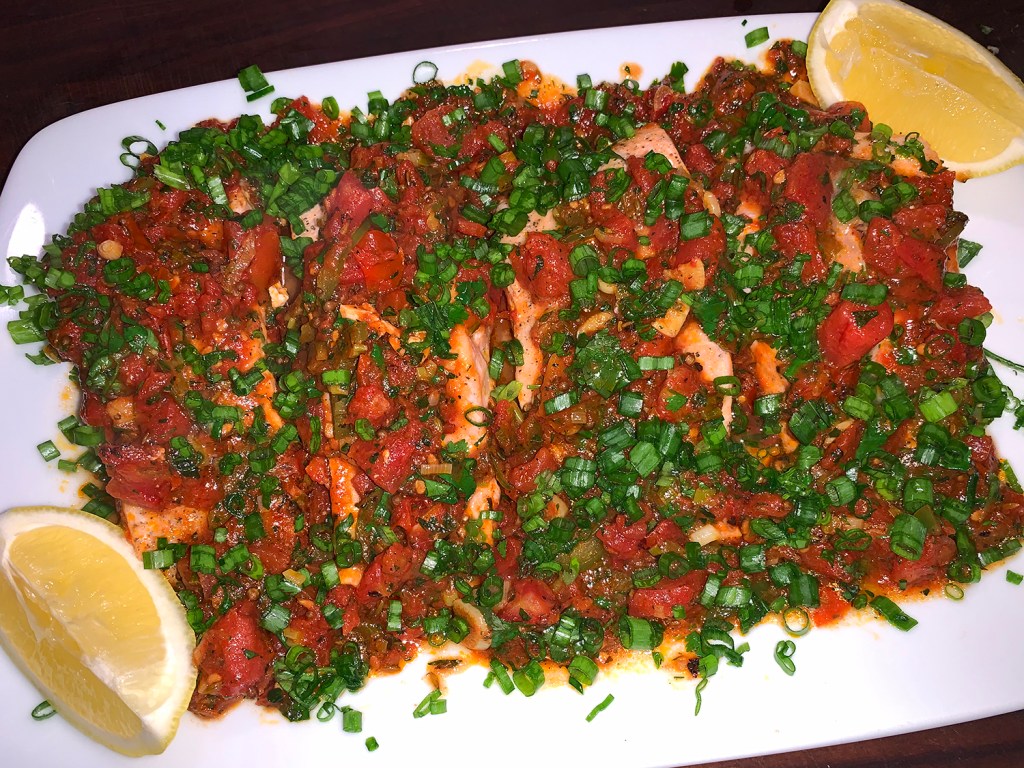
A fish dish that sneaks up on you like a thief. An unlikely menu description, but its a good translation of both the name and flavor of chraimeh, a Sephardic recipe in which fish is braised in oil, garlic and a spicy tomato sauce… so explains Jenn Ladd of Milk Street. That spicy sauce has a way of tricking you.

“The origin of the word chraimeh is the thief, or like a bastard. The spice comes at the end. It kind of surprises you.”

—Einat Admony, Tel Aviv native and New York City restaurateur

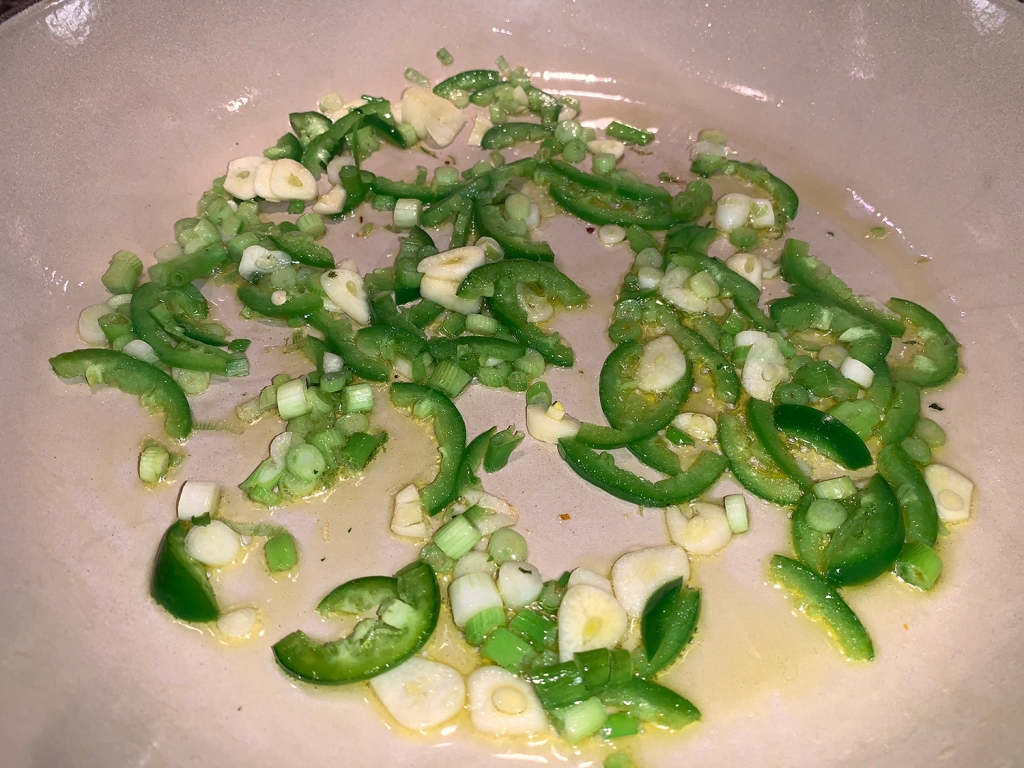
Start with easily accessible, affordable salmon fillets. Sliced jalapeño and scallions round out the aromatics, which are lightly browned in hot oil. For more distinct flavor, bloom whole cumin and coriander seeds, with ¾ teaspoon smoked paprika. Add to the mix diced tomatoes and their liquid, then nestle salmon fillets into the piquant sauce.

This weeknight easy dinner tops center-cut salmon fillets with chraimeh (pronounced KHRY-may), a simple and mildly spicy tomato sauce. The salmon cooks between 115°F and 120°F, which leaves the thickest part with some translucency. We like it a bit more well done at 125°F, so after simmering we removed the skillet from the heat and left the fillets in the covered pan until cooked to desired doneness, another 5 minutes or so.

Keep in mind, you don’t want to use fillets of widely varying thicknesses; they will require different cooking times. If unavoidable, begin checking the thinner fillets ahead of the thicker ones. Fresh mint and cilantro, as well as lemon and reserved scallion greens, finish the chraimeh. A drizzle of olive oil also gives it a final hit of richness.

The chraimeh would be equally as wonderful on halibut, bronzino, red snapper or even chicken or pork.

Salmon Chraimeh

  • Servings: 4
  • Difficulty: easy
  • Print

Ingredients

  • 4 6-oz. center-cut salmon fillets
  • Kosher salt and ground black pepper
  • 1 Tbsp. extra-virgin olive oil, plus more to serve
  • 4 scallions, thinly sliced, white and light green parts separated from dark green tops
  • 3 medium garlic cloves, thinly sliced
  • 1 jalapeño chili, stemmed, seeded and sliced into thin half-rings
  • 1 tsp. coriander seeds
  • 1 tsp. cumin seeds
  • ¾ tsp. smoked paprika
  • 1 14½-ounce can diced tomatoes
  • 2 Tbsp. finely chopped fresh mint
  • ¼ cup fresh cilantro leaves, lightly packed
  • Lemon wedges, to serve

Directions

  1. Season the salmon fillets on both sides with salt and pepper. In a 12-inch skillet over medium-high, heat the oil until shimmering. Add the white and light green parts of the scallions, the garlic and jalapeño. Cook, stirring occasionally, until lightly browned, about 2 minutes.
  2. Stir in the coriander, cumin and paprika, then cook until fragrant, about 30 seconds.
  3. Stir in the tomatoes, ½ teaspoon salt and ¼ teaspoon pepper. Bring to a simmer, then nestle the fillets, skin side up, in the sauce. Reduce to medium, cover and simmer for 6 to 8 minutes, or until the thickest parts reach 115°F to 120°F.
  4. Using tongs, carefully peel off and discard the skin from each fillet, then use a spatula to transfer to serving plates.
  5. If the sauce is watery, continue to simmer over medium-high until slightly thickened, 1 to 2 minutes.
  6. Off heat, stir in the mint and cilantro. Taste and season with salt and pepper. Spoon the sauce over the salmon, sprinkle with the remaining scallion greens, then drizzle with olive oil. Serve with lemon wedges.

http://www.lynnandruss.com

Recipe from Sandra Rose Gluck for Milk Street

Tuscany’s Fagioli All’uccelletto

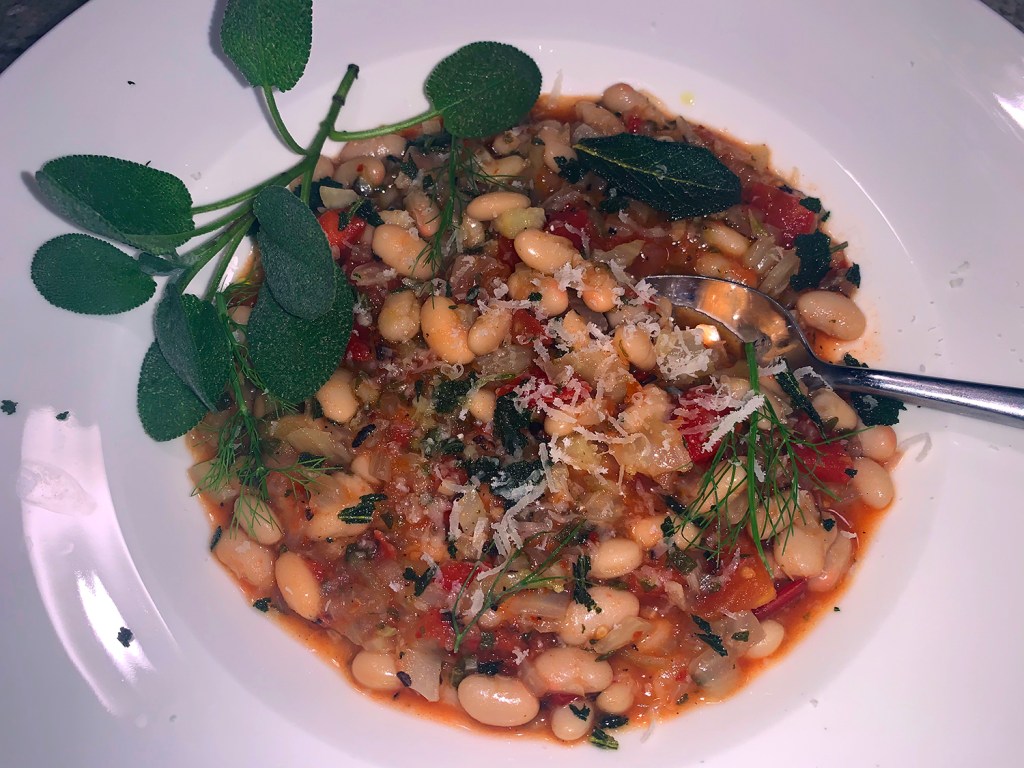
Otherwise known in English as White Beans with Sage, Garlic and Fennel. Super-fab! This one-pot vegetarian meal is so satisfying and tasty, that if you are a meat-eater—and we are—you won’t miss the meat. The simple combination of white beans, sage and garlic exemplifies the clarity of flavor the Tuscany region’s cooks can pull from just a few ingredients.

It is advised not to use cannellini beans, but rather Navy or Great Northern. We used the latter which are smaller than cannellini beans but larger than navy beans. Known for their delicate, nutty flavor, they’re usually added to casseroles and soups, such as this recipe. In summary, white beans provide a good source of protein, an excellent source of fiber, and several essential nutrients.

This recipe gave us a perfect opportunity to harvest the remainder of our fresh sage from the garden before the cold weather set in. Used in two ways—finely chopped and fried whole—this herb has a pronounced herbal flavor that is earthy, has a slightly peppery taste, and emits hints of mint, eucalyptus, and lemon. What’s more, sage is faintly piney, though not like juniper. It’s much softer and mixed with subtle citrus notes; perhaps a little on the bitter side, though not harshly so.

We loved it topped with an ample garnish of grated parmesan, but if omitted, it could work for the vegans in the family.

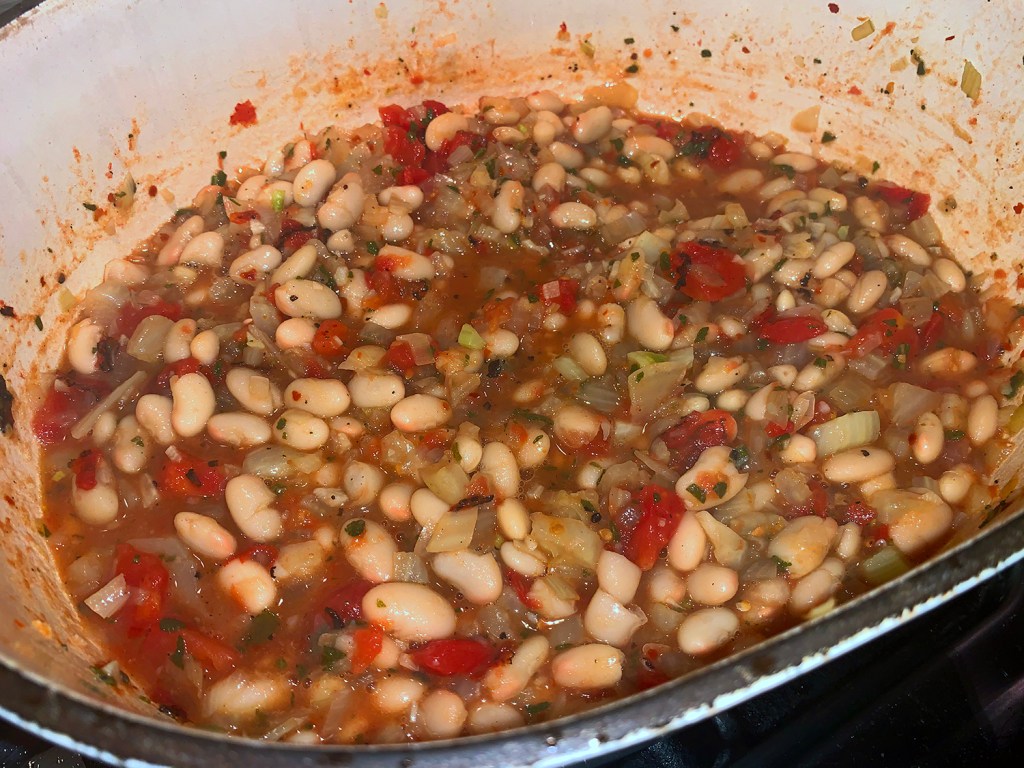
Don’t drain both cans of beans. The liquid from one of the cans creates a sauce-like consistency that keeps the beans succulent.

Tuscany's Fagioli All'uccelletto

  • Servings: 4
  • Difficulty: easy
  • Print

Ingredients

  • 6 Tbsp. extra-virgin olive oil, divided
  • 1 large fennel bulb, trimmed and finely chopped
  • 1 medium yellow onion, finely chopped
  • 4 large garlic cloves, finely chopped
  • 3 Tbsp. finely chopped fresh sage, plus 20 whole leaves
  • ¼ tsp. red pepper flakes
  • Kosher salt and ground black pepper
  • 1 14½-oz. can diced tomatoes
  • 2 15½-oz. cans white beans, 1 can rinsed and drained
  • Shaved or grated parmesan cheese, to serve

Directions

  1. In a large Dutch oven over medium, heat 3 tablespoons of the oil until shimmering. Add the fennel, onion, garlic, chopped sage, red pepper flakes and 1 teaspoon salt. Cover and cook, stirring occasionally, until the vegetables have softened, about 15 minutes.
  2. Stir in the tomatoes and the beans. Cook, uncovered, stirring occasionally and adjusting the heat as needed to maintain a gentle simmer, for 10 minutes. Taste and season with salt and pepper.
  3. Meanwhile, line a plate with paper towels. In a 12-inch skillet over medium-high, heat the remaining 3 tablespoons oil until shimmering. Add the sage leaves and cook, flipping the leaves once, until the edges begin to curl, about 1 minute. Transfer to the prepared plate; reserve the oil.
  4. Transfer the beans to a serving bowl, then drizzle with the sage oil. Coarsely crumble the sage leaves over the beans. Top with Parmesan.

http://www.lynnandruss.com

Recipe from Catherine Smart for Milk Street

Kung Pao Chicken

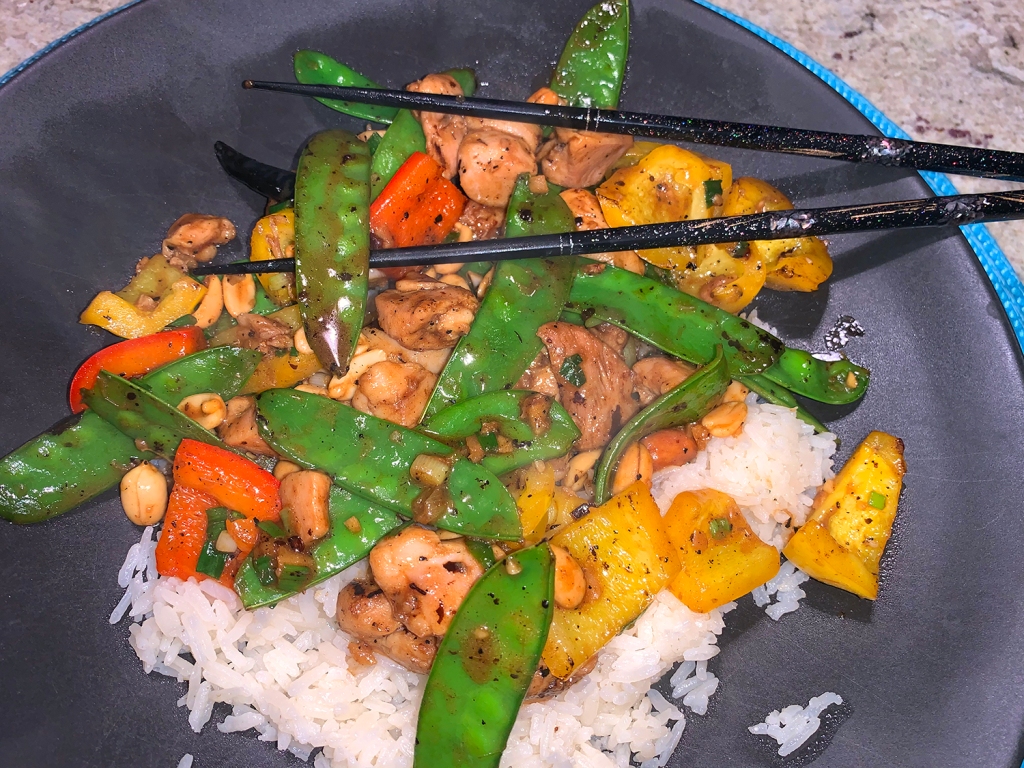
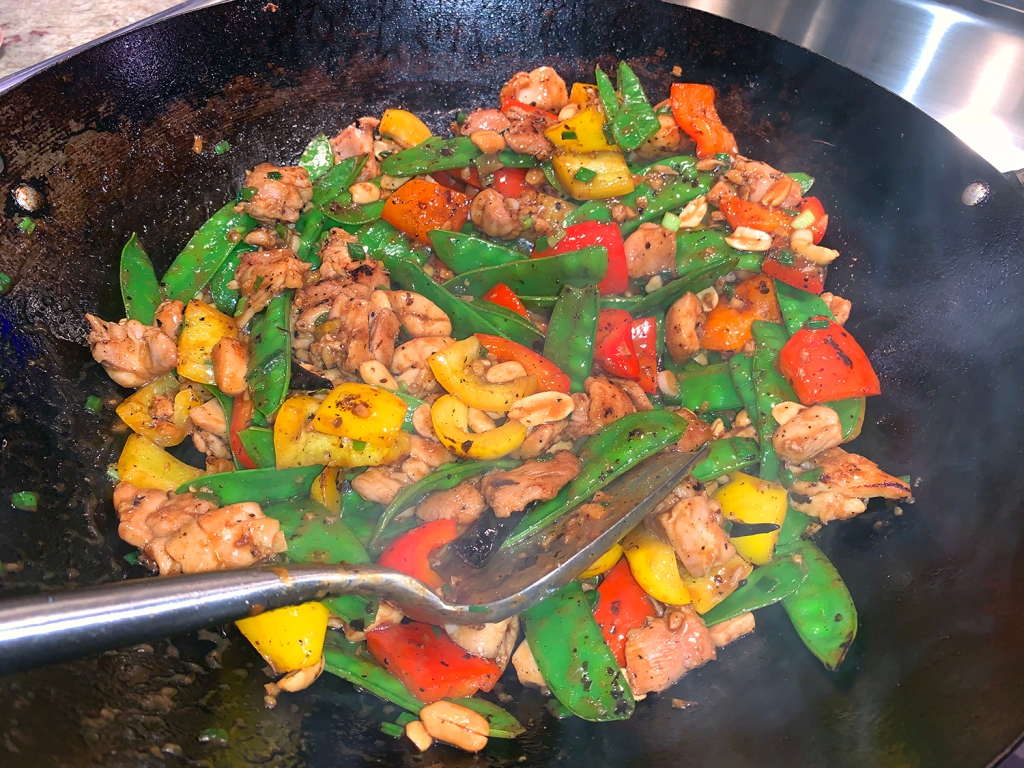
In this Kung Pao Chicken recipe, the dark, rich sauce clings to the chicken and veggies, with just an undertone of heat and aromatic flavor from the chiles and Sichuan peppercorns. I’m typically a white meat fan, but here we used boneless, skinless dark thigh meat which imparts more flavor. Use whatever suits your preference.
Have you been confused before on the difference between Kung Pao and General Tso’s chicken recipes? The main difference between the two is how the meat is cooked. General Tso is fried in a crispy coating, however Kung Pao Chicken is seared in the wok. Both are coated in a similar sauce, but Kung Pao typically always has veggies and peanuts mixed in.

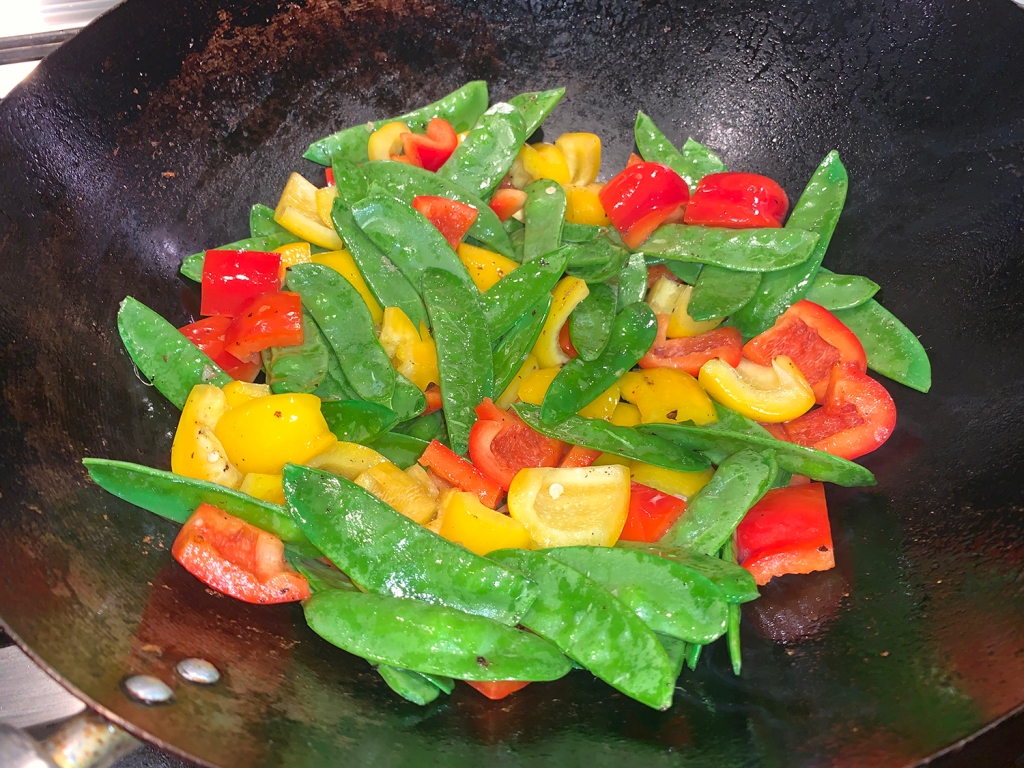
Plus, Kung Pao Chicken is a healthy choice for most people, containing a range of vitamins and minerals, as well as complete protein. It is also low in saturated fat and calories. To up the ante in nutrition, fiber and color, I added a yellow bell pepper and some snow peas.

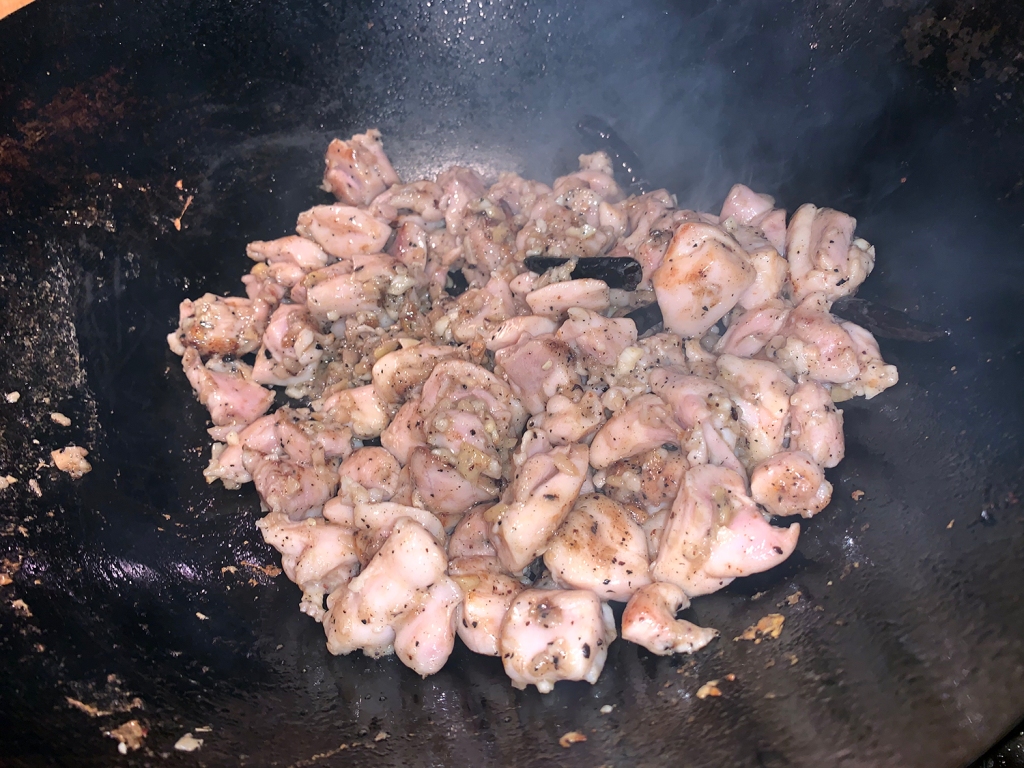
Because of these extra ingredients, I altered the directions to accommodate them. Instead of adding the veggies with the chicken still in the wok, we moved the poultry to a bowl while we stir-fried the peppers and snow peas, then added the chicken back to the wok before stirring in the broth mixture.

As with most stir-fries, this process goes very quickly so make sure to prep everything BEFORE you start cooking. Keep in mind, rice typically takes about 20 minutes total, so it’s best you start that process first. And don’t omit those roasted and ground Sichuan peppercorns. A half teaspoon may seem like a minor nuisance, but they add a necessary flavor component. Serve with steamed rice, preferably cooked in homemade chicken stock.

Kung Pao Chicken

  • Servings: 3
  • Difficulty: easy
  • Print

Ingredients

  • 1 lb. boneless, skinless chicken thigh or breast, cut into 3/4-inch cubes
  • 2 Tbsp. minced ginger
  • 1 Tbsp. minced garlic
  • 2-1/2 tsp. cornstarch
  • 1 tsp. soy sauce
  • 1 tsp. plus 1 Tbsp. Shao Hsing rice wine or dry sherry
  • 2 tsp. sugar
  • 3/4 tsp. salt
  • 2 Tbsp. chicken broth
  • 1 Tbsp. Chinkiang or balsamic vinegar
  • 1 tsp. dark soy sauce
  • 1 tsp. sesame oil
  • 2 Tbsp. peanut oil or vegetable oil
  • 4 to 8 dried red chili peppers, snipped on one end
  • 1/2 tsp. roasted and ground Sichuan peppercorns
  • 1 large red bell pepper, cut into 1-inch squares
  • 1 large yellow bell pepper, cut into 1-inch squares
  • 6 0z. snow peas, strings removed, cut in half on a diagonal if large
  • 3/4 cup unsalted roasted peanuts
  • 1/2 cup minced scallions
  • Steamed white or brown rice for serving
Add the peanuts and scallions.

Directions

  1. Before you begin prepping the stir-fry ingredients, start the rice according to package directions, preferably using homemade chicken stock as the liquid.
  2. In a medium bowl combine the chicken, ginger, garlic, cornstarch, soy sauce, 1 teaspoon of the rice wine, 1 teaspoon of the sugar, 1/2 teaspoon of the salt, and 1 teaspoon cold water. Stir to combine. In a small bowl combine the broth, vinegar, dark soy sauce, sesame oil, and the remaining 1 tablespoon rice wine.
  3. Heat a 14-inch flat-bottomed wok or 12-inch skillet over high heat until a bead of water vaporizes within 1 to 2 seconds of contact. Swirl in 1 tablespoon of the peanut oil, add the chillies and ground Sichuan peppercorns, then, using a metal spatula, stir-fry 15 seconds or until the chillies just begin to smoke.
  4. Push the chili mixture to the sides of the wok, carefully add the chicken, and spread it evenly in one layer in the wok. Cook undisturbed 1 minute, letting the chicken begin to sear. Then stir-fry 1 minute or until the chicken is lightly browned but not cooked through. Move to a bowl.
  5. Swirl the remaining 1 tablespoon peanut oil into the wok. Add the bell peppers and snow peas then stir-fry 1-2 minutes or until the peppers begin to soften. Add the chicken back to the wok. Swirl the broth mixture into the wok and stir-fry 1 minute or until the chicken is just cooked through.
  6. Add the peanuts and scallions, sprinkle on the remaining 1 teaspoon sugar and 1/4 teaspoon salt, and stir-fry 30 seconds or until the scallions are bright green.
  7. Serve over white or brown steamed rice.

http://www.lynnandruss.com

Roasted Glazed Parsnips and Carrots with Orange and Thyme

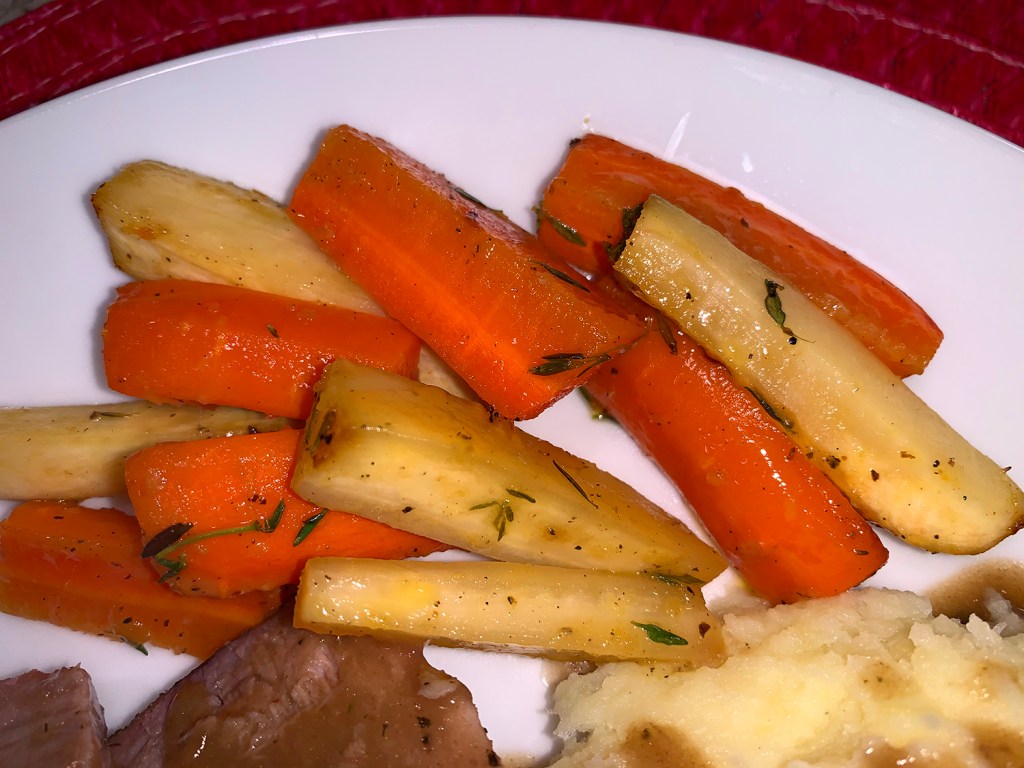
Root vegetables often get a bad rap, so says Cook’s Country. I agree, they can be hard and fibrous and have often been prepared and presented in unappealing ways. But with a creative glaze and tempered cooking, this Roasted Glazed Parsnips and Carrots with Orange and Thyme recipe breaks out of its place as a humble side dish and gets ready to shine.

Cooking root vegetables in liquid transforms their fibrous textures into silky, tender morsels. Root vegetables do an amazing job of absorbing the flavor of the liquid they are cooked in. Chicken stock and water mixed with ingredients like onions, herbs and vinegar creates just the right addition. Sweeteners such as jellies, jams and syrups help bring out the natural sweetness of the vegetables and help tame any bitter flavors.

Our mistake was cutting the entire recipe in half. For only two of us, two pounds of veggies seemed like a lot, so we made it with a half-pound each of carrots and parsnips. What we shouldn’t have done was decrease all of the other ingredients too because ours ended up being a little too dry, not the silky, tender morsels described.

One other note, in Step 3, we would lengthen the time covered in foil to 25-30 minutes to allow the vegetables to steam in the liquid, then remove the foil and continue roasting for another 20 minutes or so. Anyway, we do plan to make again—but with all of the initial ingredients.

Artist Unknown

Roasted Glazed Parsnips and Carrots with Orange and Thyme

  • Servings: 4
  • Difficulty: easy
  • Print

Ingredients

  • 1 lb. carrots, peeled and cut into 2 by 1/2-inch sticks
  • 1 lb. parsnips, peeled and cut into 2 by 1/2-inch sticks
  • 2 tsp. minced fresh thyme leaves
  • 1 Tbsp. cider vinegar
  • 3 Tbsp. orange marmalade
  • 1 tsp. grated fresh ginger
  • Salt and pepper
  • 3 Tbsp. unsalted butter (1 Tbsp. melted and 2 Tbsp. cubed)
  • ½ cup water

Directions

  1. Adjust oven rack to middle position and heat oven to 450 degrees.
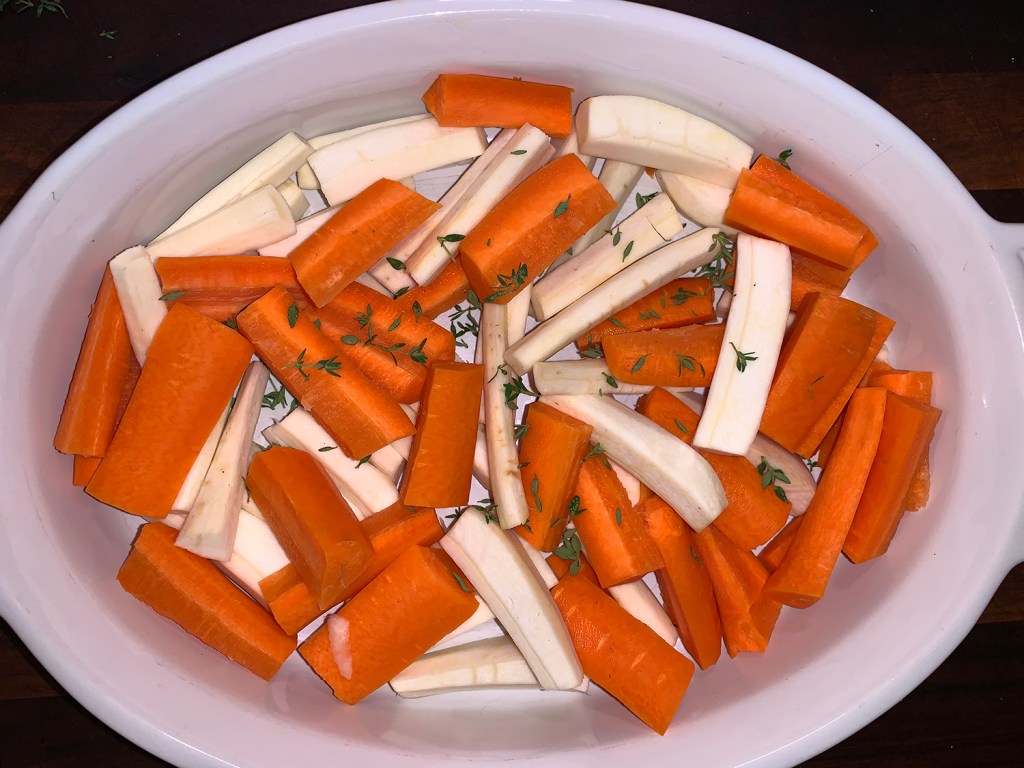
  2. Toss carrots, parsnips, 1 teaspoon thyme, vinegar, marmalade, ginger, 1/2 teaspoon salt, 1/8 teaspoon pepper, and melted butter in 13 by 9-inch Pyrex baking dish.
  3. Pour water over vegetables, cover with foil, and roast until vegetables just begin to soften, about 20 minutes.
  4. Remove foil and continue to roast, tossing occasionally, until vegetables are tender and browned and liquid is reduced to thick glaze, 20 to 25 minutes.
  5. Add remaining teaspoon thyme and cubed butter and toss. Adjust seasonings and serve.

http://www.lynnandruss.com
Recipe from Cook’s Country

Pork Roast with Mushroom Gravy

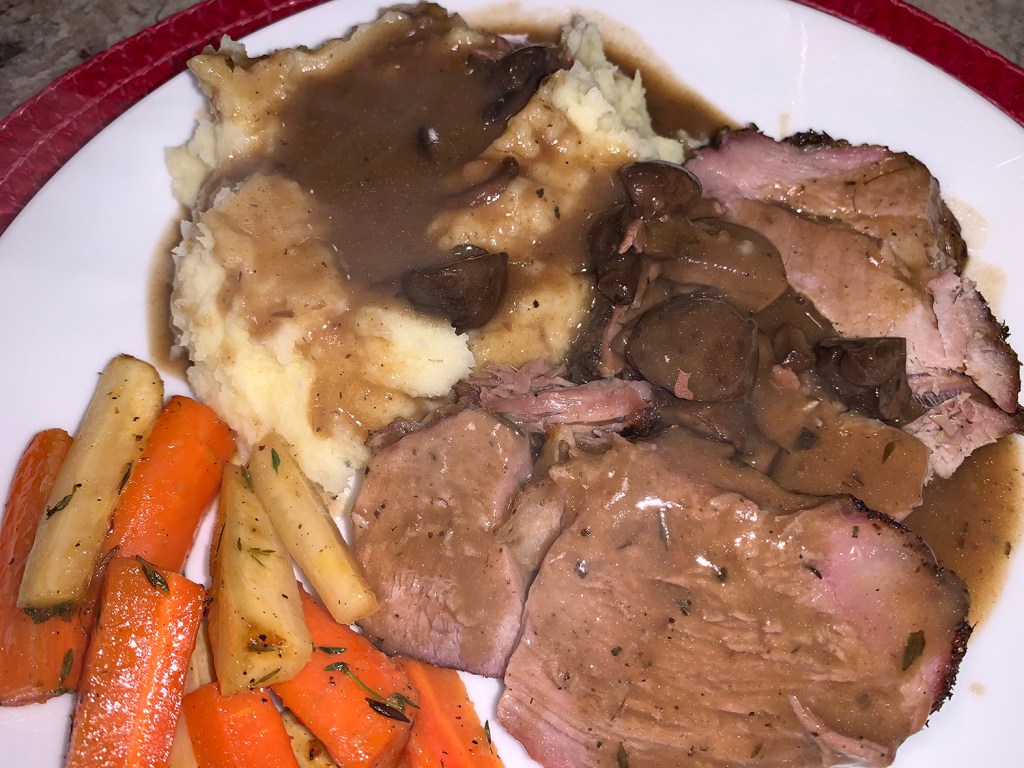
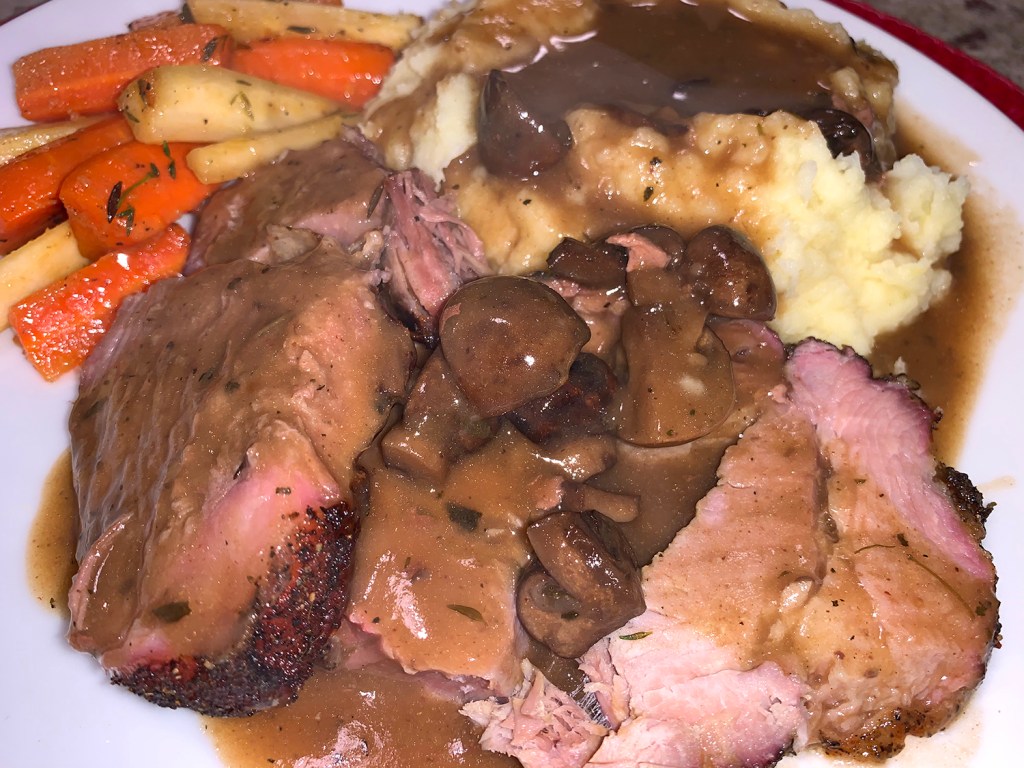
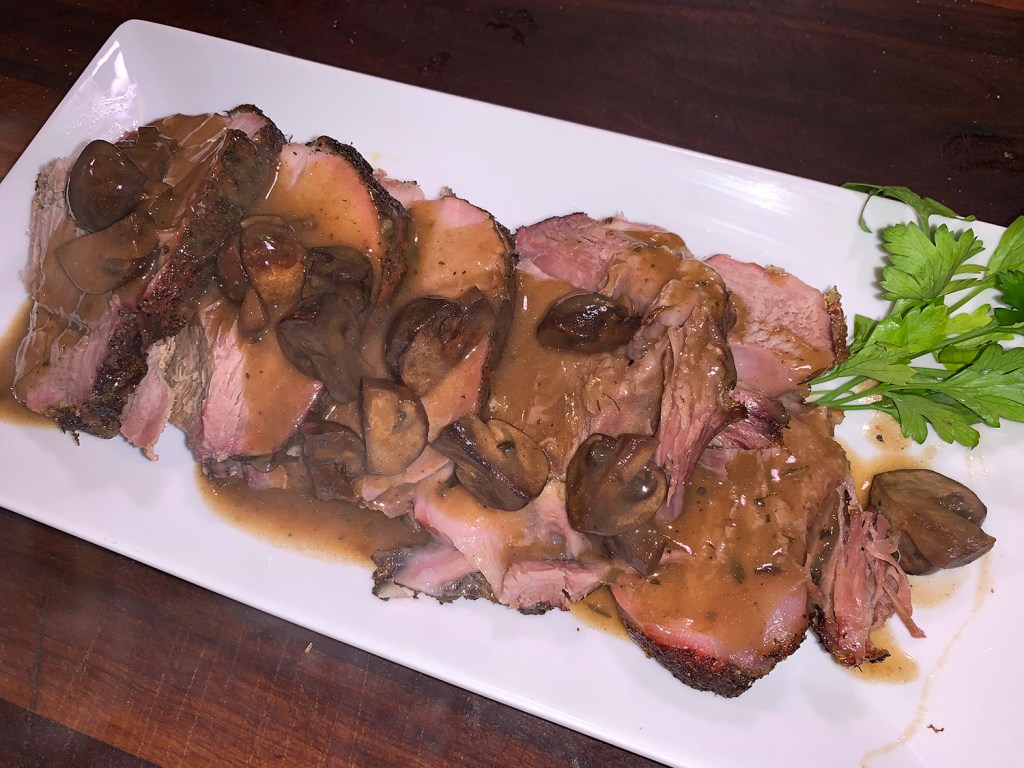
Seven hours may seem like a long time to make dinner, but much of it is hands off, and it is soooo worth it! Pork Roast with Mushroom Gravy might possibly be “the meal” that I would choose if it was going to be my last. Keep in mind, it needs to cook slowly so that the fat melts and the tough connective tissue softens. The original recipe came from Cook’s Country and it was a great starting point for this long, lazy Sunday afternoon braise.

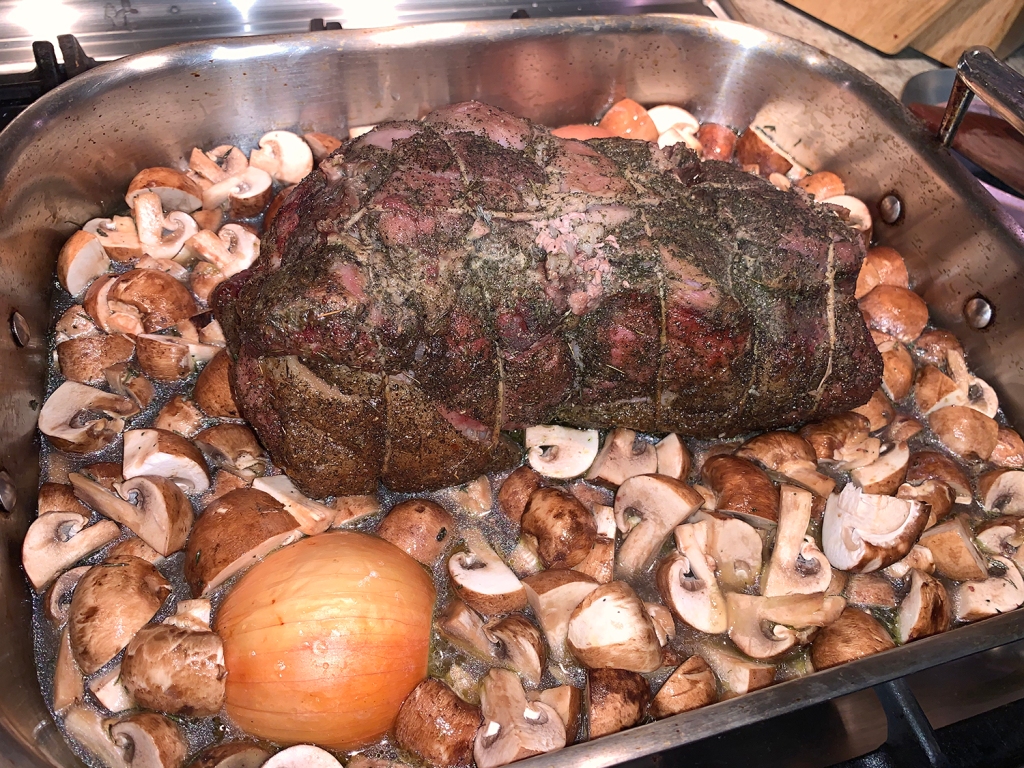
After 6 hours in the oven, the pork has a nice crust and the mushrooms turn a rich brown.

To build a hearty gravy, start with chicken broth and add water. To maximize the mushroom flavor, toss the mushrooms directly into the roasting pan. This not only imbues the broth with deep, woodsy flavor but also allows the mushrooms to soften and caramelize. We even upped the quantity of the funghi by 20% to a full pound-and-a-half (noted in the list of ingredients).

Sometimes not even grocery stores label pork roasts properly. Were you ever confused between a pork shoulder and pork butt? These two cuts of pork are often mixed up. Both come from the shoulder of the pig, but pork butt is higher on the foreleg, while pork shoulder is farther down—confusing to start with, I know. As relatively tough and fatty cuts, both benefit from long, slow cooking methods such as roasting, stewing, and braising.

To begin with, we doubled the seasonings for the rub, wrapped the pork in plastic wrap, and let it get happy in the fridge overnight. Since we love a good gravy, we also increased by 50%, the amount of liquid (broth and water) that went into the roasting pan. Finally, because we did increase the liquid, we needed to balance the amount of flour to make a roux for the gravy. All of our changes are noted below.

To complete the meal, we made garlicky mashed potatoes—a great vehicle for that mushroom gravy—and a side of Roasted Glazed Parsnips and Carrots with Orange and Thyme, recipe also compliments of Cook’s Country.

Pork Roast with Mushroom Gravy

  • Servings: 6-8
  • Difficulty: easy
  • Print

Ingredients

  • 1 (4- to 5-pound) boneless pork shoulder roast, fat trimmed to 1/8 inch thick
  • 1 Tbsp. dried thyme
  • 1 Tbsp. dried sage
  • 1 Tbsp.. salt
  • 2 tsp. pepper
  • 1 onion, peeled and halved
  • 24 oz. cremini or white mushrooms, quartered
  • 1 1/2 cups chicken broth, preferably homemade
  • 1 1/2 cup  water
  • 1 bay leaf
  • 4 Tbsp. all-purpose flour

Directions

  1. PREP PORK Adjust oven rack to lower-middle position and heat oven to 300 degrees. Pat pork dry with paper towels and rub all over with 2 teaspoon thyme, 2 teaspoon sage, salt, and pepper. Tie roast at 1-inch intervals with kitchen twine. The roast can be seasoned and refrigerated overnight until ready to cook.
  2. ROAST PORK Arrange roast, fat side up, in roasting pan and cook until beginning to brown, about 3 hours. Add onion, mushrooms, broth, 1 cup water, bay leaf, remaining thyme, and remaining sage to pan and continue to roast until meat is well browned and skewer inserted in center meets no resistance, about 3 hours. Transfer roast to cutting board, tent with foil, and let rest 30 minutes.
  3. STRAIN JUICES Discard onion and bay leaf. Strain contents of roasting pan through fine-mesh strainer into fat separator; reserve mushrooms. Let liquid settle, then pour defatted pan juices (you should have about 2 cups) into measuring cup and add another 1/2 cup water to yield 2½ cups.
  4. MAKE GRAVY Transfer 4 tablespoons of fat from separator (we did not have enough fat so we added butter too) to large saucepan and heat over medium-high heat until shimmering. Stir in flour and cook until golden, stirring constantly, 1 to 2 minutes. Slowly whisk in pan juices and bring to boil. Add reserved mushrooms and simmer over medium-low heat until gravy is slightly thickened, about 5 minutes. Remove twine from pork. Cut pork into 1-inch slices. Serve with gravy.

http://www.lynnandruss.com

Adapted from a recipe by Cook’s Country

Traditional Japanese Dinner Chez Tae

Thanks to my brother Bill’s girlfriend Tae (pronounced “tie”), we were recently treated to a traditional multi-course Japanese dinner at her place in Bryn Mawr, PA. Russ was really looking forward to it because he embraces all Japanese cuisine including sashimi, which is raw fish. That is where I typically start to get a bit apprehensive.

We had barely arrived when we were shown to our seats at the dining room table and out came the first course. According to Tae who gave me the menu descriptions, she called the white component Shiraae: consisting of tofu, snow peas, dried shiitake mushroom, fried tofu, corn, konnyaku (konnyaku yum jelo) in white miso sauce.

On the rest of that first plate was Kinpira gobo: brown shreds of gobo, a root vegetable, and carrot with chili pepper and sesame oil. Finally completing plate one was Hijiki: the black hijiki seaweed and carrot, konnyaku, fried tofu, edamame in sakke, dashi, and soy sauce. And that was all just the first course!

Now I have to admit, I cannot use chop sticks. Over the years I tried and failed on umpteen occasions, only to end in frustration, so I just gave up. Therefore, I had to ask Tae for a fork. (She also noted later that I was also struggling without a knife and one quickly found its way to my seating.) We all had a chuckle when Tae indicated that brother Bill, an avowed meat eater, quickly learned the art of manipulating chop sticks and that it actually slows him down—he’s a rather fast consumer of food, to put it politely.

With each course, Tae also served a small portion of an alcoholic beverage such as champagne, sake and white wine.

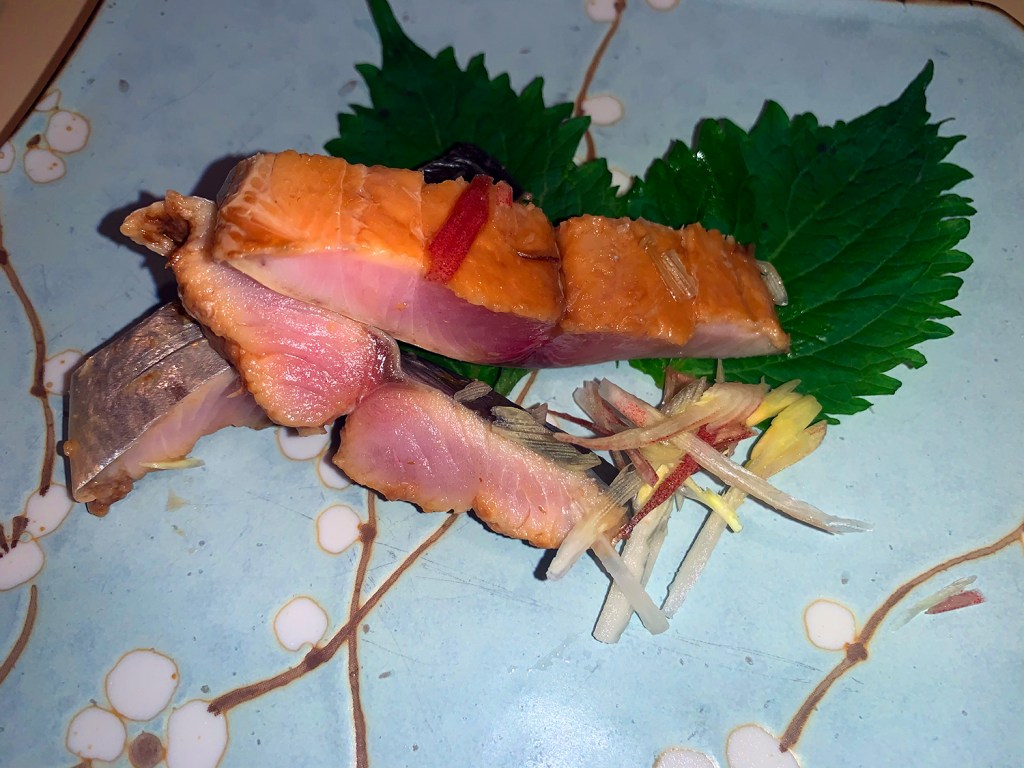
No sooner had Tae whisked away our plates when she supplied course number two, Mackerel Ceviche in rice vinegar, soy sauce, sugar and konbu dashi with shiso leaves and myoga (Japanese ginger flower). This is where I thought I’d have to forego the offering, although after one taste, I realized it was really good (but I drew the line at consuming the skin).

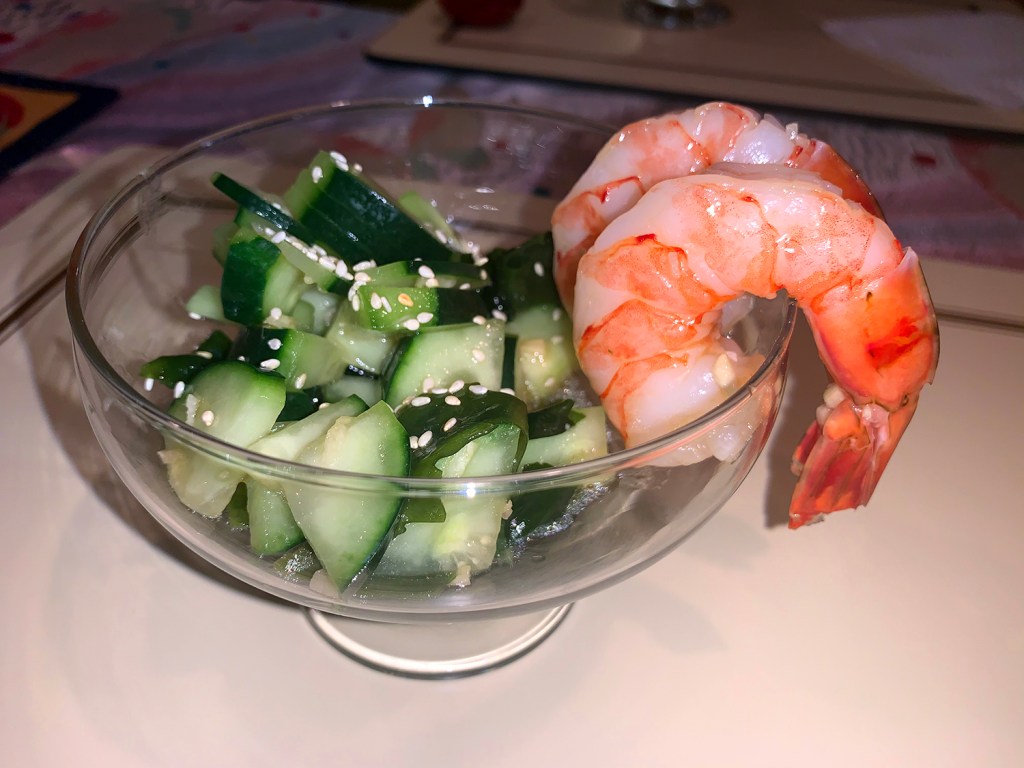
What came next was a cleverly plated Cucumber and Wakame (seaweed) Salad with shredded ginger, a couple of plump shrimp and sprinkled with sesame seeds. Delish!

Round number three was Boiled Daikon Radish in konbu and rice with ginko nuts, a white miso sauce and topped with salmon eggs. Very different than anything I’ve ever had before, but very good!

By now I am noticing Tae often retreated from the tiny kitchen to a bedroom (she calls her craft room) retrieving various dishware. I had to marvel at all of the intricate plates and bowls, especially for the next course Ahi Poke. It was ahi tuna marinated with nori and chives on mixed rice topped with dried squid and Takuan, pickled daikon, probably my favorite course of the night, and arguably the most beautiful.

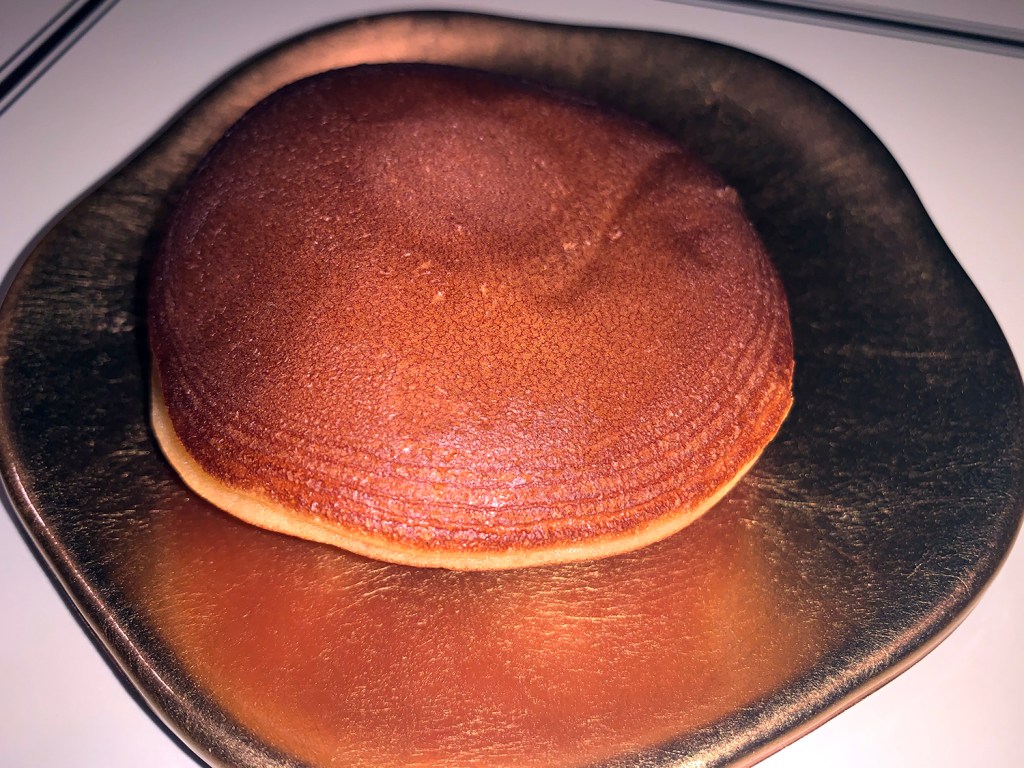
By this time, I couldn’t eat another bite, in fact, I asked for a doggie bag for the remainder of my ahi poke. But there was still one last course to be had. Along with the Red Bean Sweet (although Russ claimed it wasn’t sweet at all) on a gold side dish, we were treated to Macha green tea, which I truly enjoyed.

After a few hours of chit chat it was time to bid Sayōnara. But before we left, Tae gifted Russ a set of chop sticks as a parting souvenir. How sweet.

さようなら

Braised Lamb Shanks Provençal

In Autumn, the first nips of cold air waken our desire for braised dishes which take hours in the oven permeating the house with wonderful appetite-inducing aromas. One of our favorite go-to chef/authors for slow-cooking recipes is—as I’ve mentioned many times—Molly Stevens. This Braised Lamb Shanks Provençal hails from her All About Braising, a treasury of one-pot meals.

While it is not a complicated dish, you do have to carve out a good chunk of time from start to finish. We happened to have four lamb shanks in the freezer, and while the recipe calls for six, it was only The Hubs and me for dinner, which would also give us scrumptious leftovers for another weeknight.

Make sure to take the time to remove the bit of papery white covering called “fell”, and any large fatty deposits, from the shanks. This will lessen any gamey flavor as the meat is cooked. Best to use a small, sharp knife to loosen the silverskin, but don’t fuss with trying to peel off any of the thin membrane—this holds the shank together and will melt down during braising. (Oops, I may have gotten a little carried away and removed some of the silver skin too, mea culpa.)

If you’ve never removed “fell” before, you can check out this short YouTube video for a quick tutorial. https://www.youtube.com/watch?v=6Qvf98zVzCk

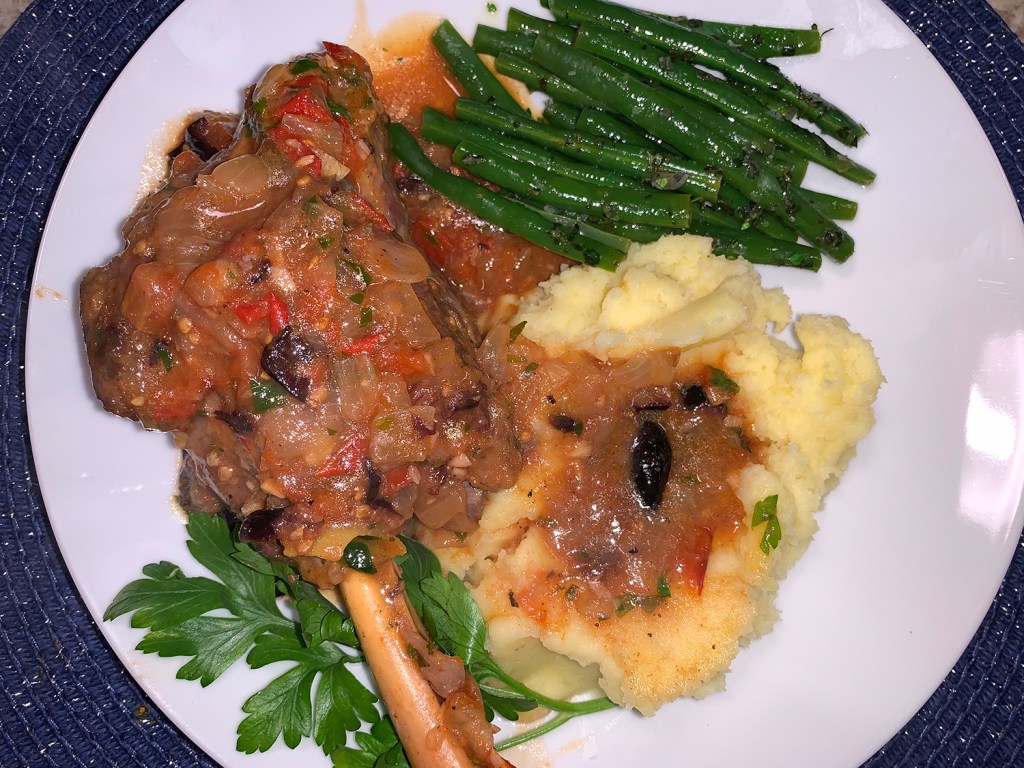
A cherished side dish as an accompaniment for braised dishes is garlicky mashed potatoes—sigh. And this lamb dish provides plenty of luscious sauce for topping those spuds. Steamed green beans with a lemony vinaigrette completed the meal.

Braised Lamb Shanks Provençal

  • Servings: 6
  • Difficulty: moderate
  • Print

Ingredients

  • 6 lamb shanks (about 1 pound each)
  • All-purpose flour for dredging (about 1 cup)
  • 1 Tbsp. plus ½ teaspoon sweet Hungarian paprika
  • Coarse salt and freshly ground black pepper
  • 1 Tbsp. extra-virgin olive oil
  • 2 large yellow onions (about 1 pound total), chopped into ½-inch pieces
  • 1 lb. plum tomatoes, coarsely chopped (or one 14½-ounce can whole peeled tomatoes, coarsely chopped, juice reserved)
  • 4 garlic cloves, finely minced
  • 1 cup dry white wine or dry white vermouth
  • 1 cup chicken stock, homemade or store-bought
  • 2 lemons
  • 3 small or 2 large bay leaves
  • ½ cup pitted and coarsely chopped oil-cured black olives, such as Nyons or Moroccan
  • ¼ cup coarsely chopped flat-leaf parsley

Directions

  1. Heat the oven to 325°F.
  2. Trim the lamb shanks: If the shanks are covered in a tough parchment-like outer layer (called the fell), trim this away by inserting a thin knife under it to loosen and peeling back this layer. Remove any excess fat as well, but don’t fuss with trying to peel off any of the thin membrane—this holds the shank together and will melt down during braising.
  3. Dredge the lamb shanks: Pour the flour into a shallow dish and stir in 1 tablespoon of the paprika. Season the shanks all over with salt and pepper. Roll half the shanks in the flour, lifting them out one by one and patting to remove any excess, and set them on a large plate or tray, without touching.
  4. Brown the lamb shanks: Heat the oil in a large heavy-based braising pot (6- to 7- quart) over medium heat until it shimmers. Add the 3 flour-dredged shanks (you’re searing in two batches so as not to crowd the pot). Cook, turning the shanks with tongs, until they are gently browned on all sides, about 10 minutes total. Transfer the shanks to a plate or tray, without stacking or crowding. Dredge the remaining shanks in flour, patting to remove any excess, and brown them. Set beside the already browned shanks, and discard the remaining flour.
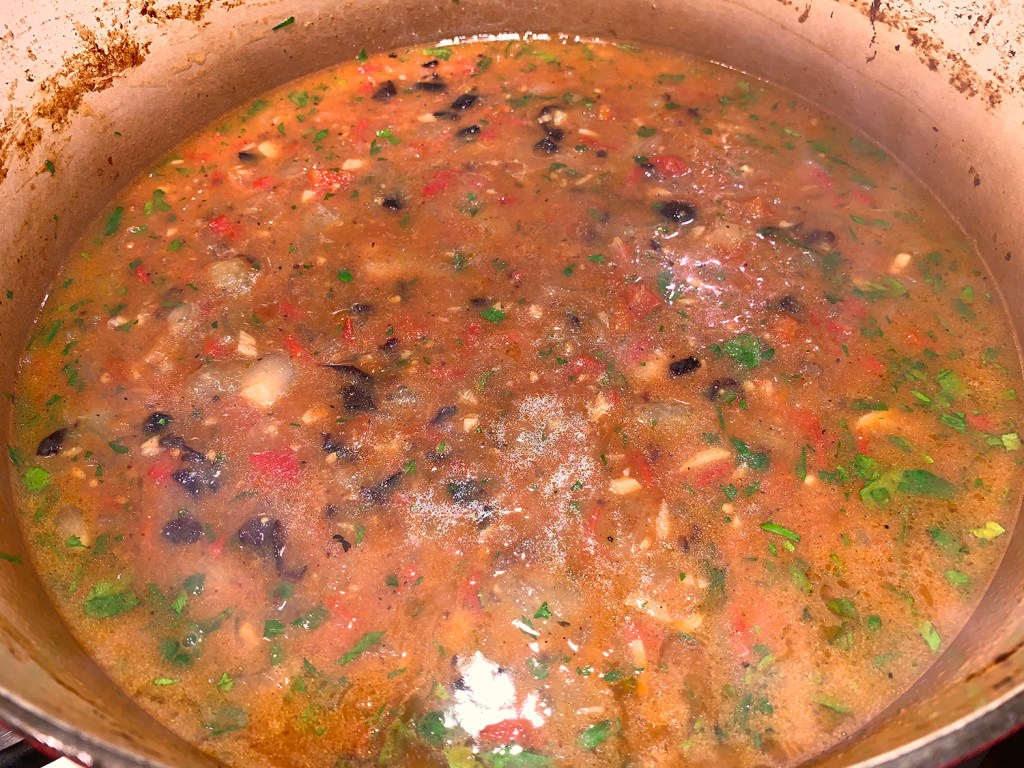
  5. Make the aromatics and braising liquid: Pour off all but 1 tablespoon of fat from the pot and return the pot to the heat. If the bottom of the pot is at all blackened, wipe it out with a damp paper towel, being careful to leave behind any tasty caramelized drippings. Add the onions, tomatoes with their juice, and the garlic and season with the remaining ½ teaspoon paprika and salt and pepper to taste. Sauté over medium heat, stirring occasionally, for 8 to 10 minutes, or until the onions are mostly tender. Pour in the wine and stir and scrape with a wooden spoon to dislodge any browned bits on the bottom of the pot that will contribute flavor to the liquid. Simmer for 3 minutes. Pour in the stock, stir and scrape the bottom again, and simmer for another 3 minutes.
  6. Meanwhile, zest the lemon: Using a vegetable peeler, remove the zest from half of 1 lemon, being careful to remove only the outermost yellow zest, not the bitter-tasting white pith; reserve the lemon. Add the zest to the pot, along with the bay leaves.
  7. Make the braise: Arrange the lamb shanks on top of the vegetables. The shanks should fit fairly snugly in the pot, but you may need to arrange them “head-to-toe” so they fit more evenly. Don’t worry if they are stacked in two layers. Cover the pot with parchment paper, pressing down so that it nearly touches the lamb and the edges of the paper extend about an inch over the side of the pot. Set the lid in place, slide the pot into the lower part of the oven, and braise for about 2½ hours. Check the shanks every 35 to 45 minutes, turning them with tongs and moving those on top to the bottom and vice versa, and making sure that there is still plenty of braising liquid. If the liquid seems to be simmering too aggressively at any point, lower the oven heat by 10 to 15 degrees. If the liquid threatens to dry out, add ⅓ cup water. The shanks are done when the meat is entirely tender and they slide off a meat fork when you try to spear them.
  8. Segment the lemon: While the shanks braise, use a thin-bladed knife (a boning knife works well) to carve the entire peel from the 2 lemons. The easiest way to do this is to first cut off the stem and blossom end of each one so the lemon is flat on the top and bottom. Then stand the lemon up and carve off the peel and white pith beneath it with arcing slices to expose the fruit. Trim away any bits of pith or membrane that you’ve left behind, until you have a whole naked lemon. Now, working over a small bowl to collect the juices, hold a lemon in one hand and cut out the individual segments, leaving as much of the membrane behind as you can. Drop the segments into the bowl, and pick out the seeds as you go. When you finish, you should be holding a random star-shaped membrane with very little fruit pulp attached. Give this a squeeze into the bowl and discard. Repeat with the second lemon.
  9. The Finish: Transfer the shanks to a tray to catch any juices, and cover with foil to keep warm. Using a wide spoon, skim as much surface fat from the cooking liquid as possible. Lamb shanks tend to throw off quite a bit of fat: continue skimming (tilting the pot to gather all the liquid in one corner makes it easier) until you are satisfied. (We barely had any fat.) Set the pot over medium heat and bring to a simmer. Stir in the lemon segments, olives, and parsley. Taste for salt and pepper. Return the shanks to the braising liquid to reheat for a minute or two. Serve with plenty of sauce.

http://www.lynnandruss.com

White Balsamic Chicken with Tarragon

Sweet-tart white balsamic vinegar and tangy Peppadew peppers bring flavor and color to this weeknight chicken dish found on Milk Street. White balsamic, which is not cooked and aged as long as regular balsamic vinegar, has a mellow acidity that complements the peppadews, a variety of small, sweet peppers from South Africa.

Peppadews add slight heat and additional sweetness, as well as a vivid splash of red. Find them (or not) jarred at most grocery stores, and sometimes loose at the olive bar. Unable to locate peppadews, we substituted cherry peppers. And for some odd reason, there were no plain pitted green olives (no open olive bar during COVID) and all the jarred versions were pimento stuffed. Frustrating yes, but in the end… FRIGGIIN’ delicious!!

Packed with Flavor

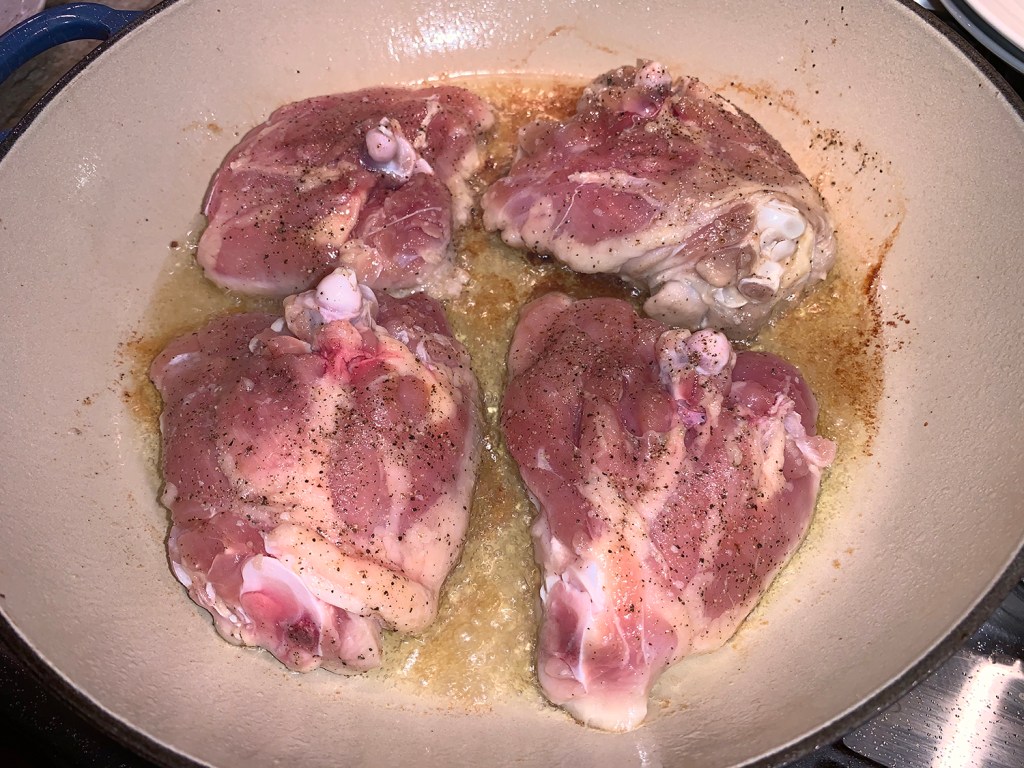
Don’t rush rendering the fat from the skin on the chicken thighs. The skin should be golden brown and feel crisp. When reducing the sauce before serving, add water if the liquid is less than 1 cup. It took us extra time to get the sauce reduced to one cup, more like 6 minutes,

The sauce was just bursting with flavor and the chicken retained crispy exteriors and juicy interiors. Some serving suggestions are with roasted sweet potatoes—our choice—boiled baby red potatoes or spinach pasta tossed with butter and poppy seeds.

White Balsamic Chicken with Tarragon

  • Servings: 4
  • Difficulty: easy
  • Print

Ingredients

  • 3 lbs. bone-in, skin-on chicken thighs, trimmed and patted dry
  • Kosher salt and ground black pepper
  • 1 Tbsp. grapeseed or other neutral oil
  • 3 garlic cloves, thinly sliced
  • 1 medium shallot, minced (about ⅓ cup)
  • ¾ cup white balsamic vinegar
  • ¾ cup low-sodium chicken broth
  • ⅓ cup pitted green olives, chopped
  • 4 Tbsp. finely chopped fresh tarragon, divided
  • ⅓ drained peppadew peppers, chopped

Directions

  1. Heat the oven to 450°F with a rack in the middle position. Season the chicken on all sides with salt and pepper.
  2. In a 12-inch oven-safe skillet over medium-high, heat the oil until smoking. Add the chicken, skin down, and cook until fat is rendered and the skin is golden brown, about 5 minutes. (You will probably have to do this in two stages as you don’t want to crowd the pan and steam instead of crisp the skin.)
  3. Transfer the chicken skin up to a plate. Pour off all but 1 tablespoon of fat from the skillet. Stir in the garlic and shallot and cook over medium, stirring occasionally, until light golden brown, about 1 minute.
  4. Add the vinegar and broth and bring to a simmer, scraping up any browned bits. Return the chicken to the skillet, skin up. Transfer to the oven and bake until the chicken reaches 175°F at the thickest part, or a skewer inserted into the thickest part meets no resistance, 12 to 15 minutes.
  5. Transfer the chicken, skin up, to a deep platter and return the skillet to the stovetop (handle will be hot) over medium-high. Bring the sauce to a boil and cook until reduced to about 1 cup, 2 to 3 minutes (or longer if necessary).
  6. Stir in the olives, then taste and season with salt and pepper. Off heat, stir in half the tarragon, then spoon the sauce around the chicken.
  7. Top with Peppadews and the remaining tarragon.

http://www.lynnandruss.com

Adapted from a recipe by Courtney Hill of Milk Street

Oven Lamb and Barley Stew

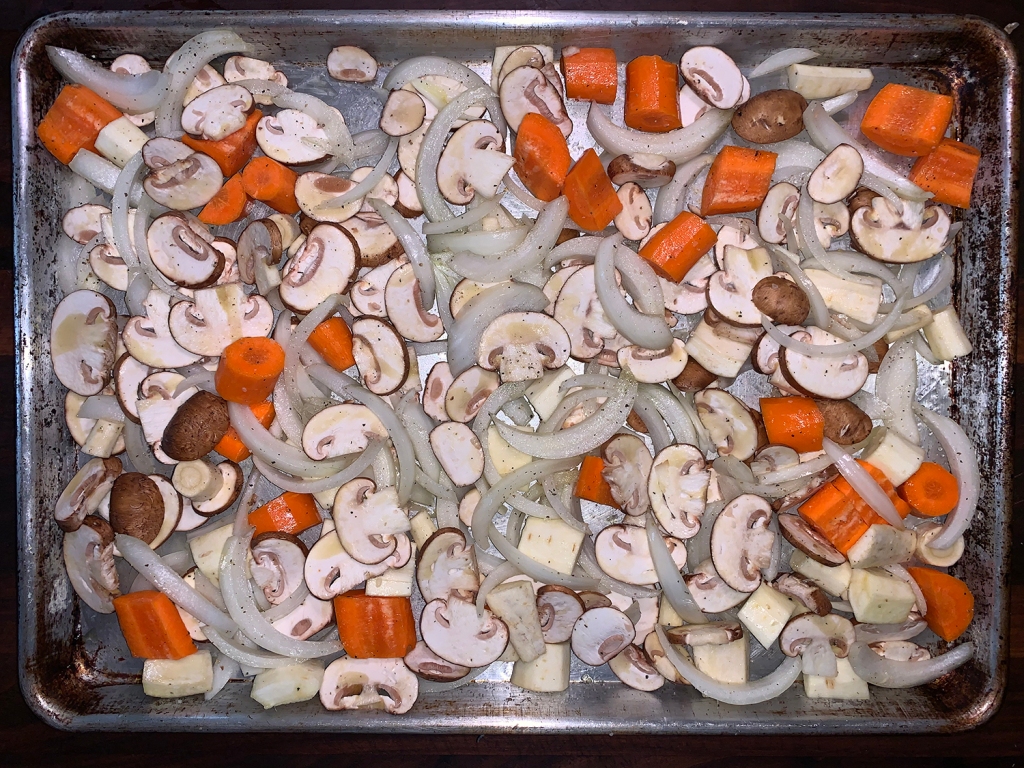
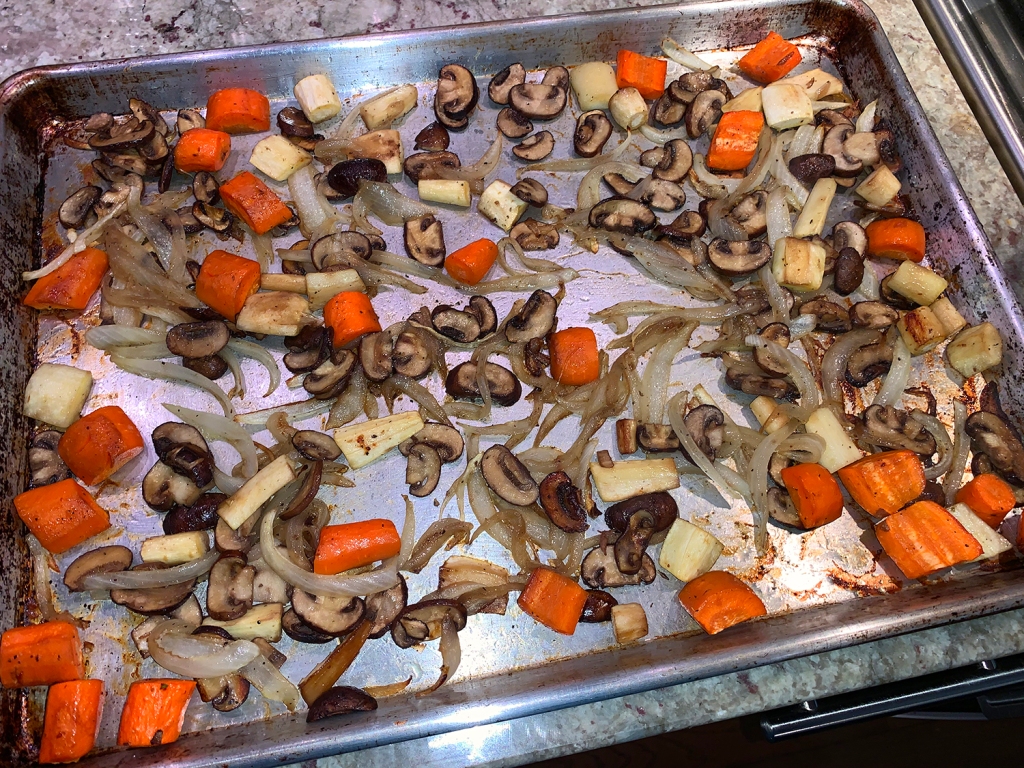
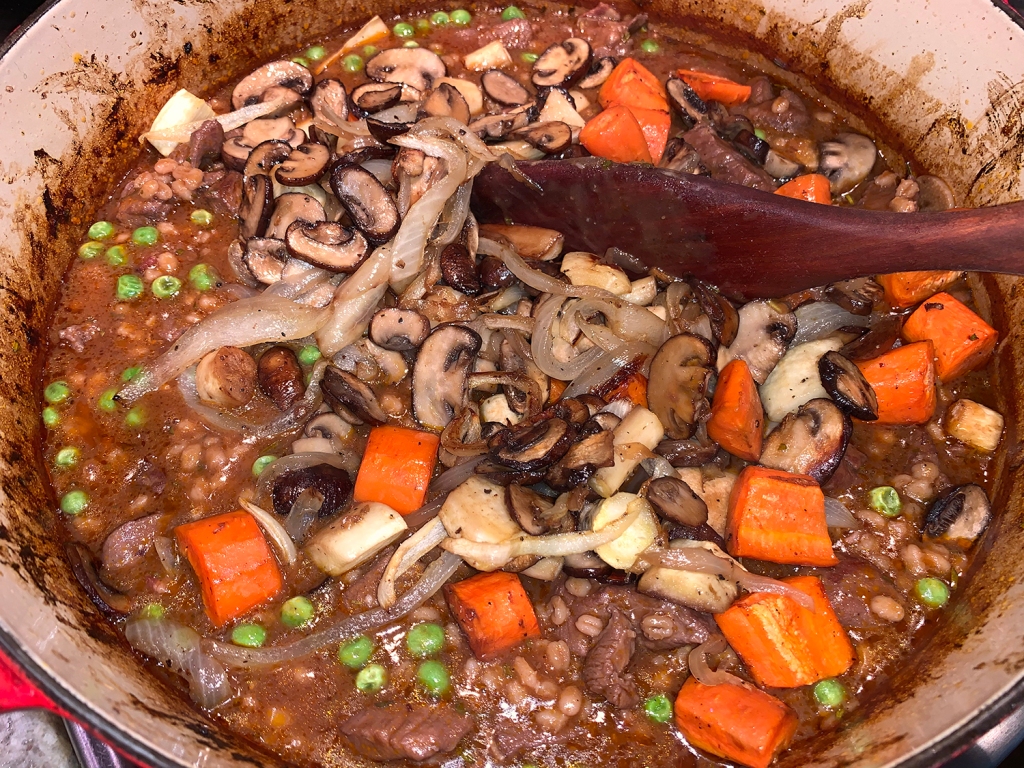
Although this looks like a traditional beef stew recipe, it’s not made like one. While the beef—or lamb as in our recipe—braises in the oven, the carrots, mushrooms, and onions roast on a sheet pan alongside for a caramelized flavor. How’s that for a change?

We made this on a Sunday afternoon for a weeknight meal when we knew there wouldn’t be much time to prep dinner. But of course we had to taste-test the finished product. WOW, it was fantastic. The lamb (you could use stew beef instead) was super tender and the sauce was so silky and full of flavor.

Instead of one or the other, we used both carrots and parsnips. If you choose to include parsnips, make sure to remove the woody core before cooking them.

Oven Lamb and Barley Stew

  • Servings: 6
  • Difficulty: easy
  • Print

Ingredients

  • 3 Tbsp. olive oil
  • 2–2.5 lbs. beef or lamb stew meat
  • 2 strips bacon, coarsely chopped
  • 3 cloves garlic, thinly sliced
  • 3 Tbsp. tomato paste
  • 1 cup dry red wine or 50%-less-sodium beef broth
  • 1 qt. (32 oz.) beef broth
  • 1–2 Tbsp. fresh thyme or rosemary, chopped
  • ¾ tsp. kosher salt
  • ¾ tsp. ground black pepper
  • ¼ cup all-purpose flour
  • ½ cup regular barley, farro, or brown rice*
  • 4 carrots or parsnips, peeled and cut into 1- to 2-inch pieces, or 2 cups baby carrots
  • 2 cups sliced cremini or button mushrooms
  • 1 medium onion, cut into thin wedges
  • 1 cup frozen peas
  • 2 croissants, cut into 1/2-inch chunks (optional)
  • 2 Tbsp. butter, melted
  • 2 cloves garlic, minced
  • 1 Tbsp. finely chopped flat-leaf parsley

Directions

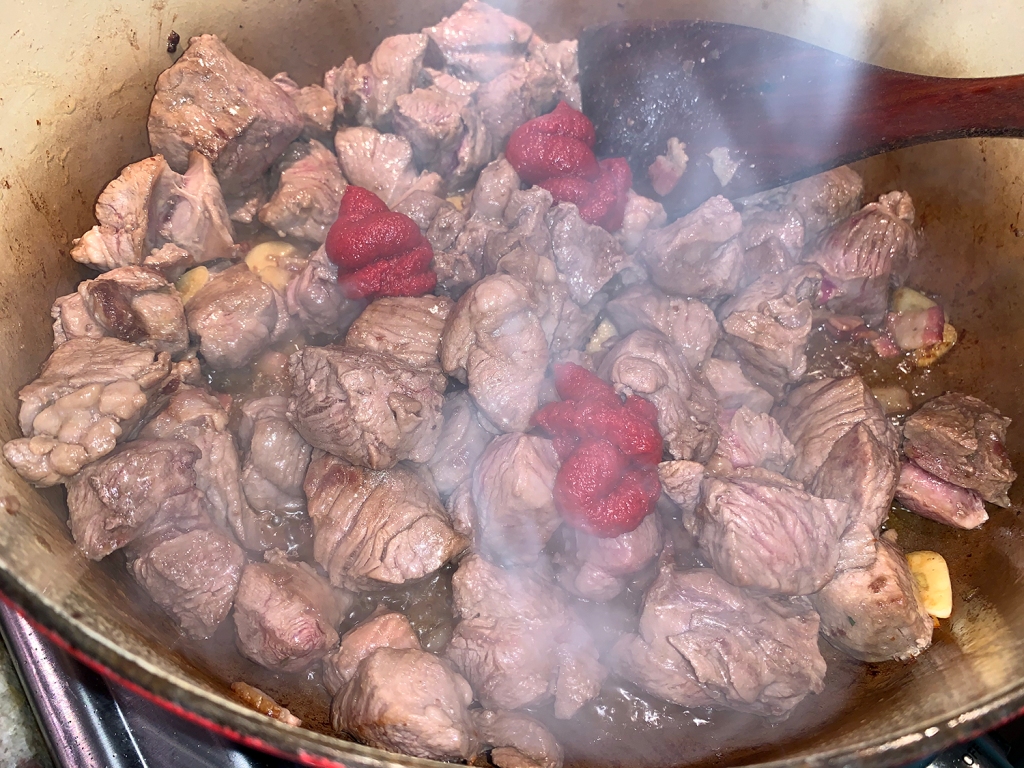
  1. Arrange oven racks, placing one rack at the lowest level. Preheat oven to 325°F. In a 5- to 6-qt. Dutch oven heat 1 Tbsp. olive oil over medium-high. Add half the beef and bacon; cook until browned, stirring occasionally. Using a slotted spoon, transfer meat to a bowl. Add an additional 1 Tbsp. olive oil, remaining beef and bacon, and the sliced garlic to Dutch oven. Cook 3 minutes, stirring occasionally. Return all meat to Dutch oven. Stir in tomato paste; cook and stir 2 minutes.
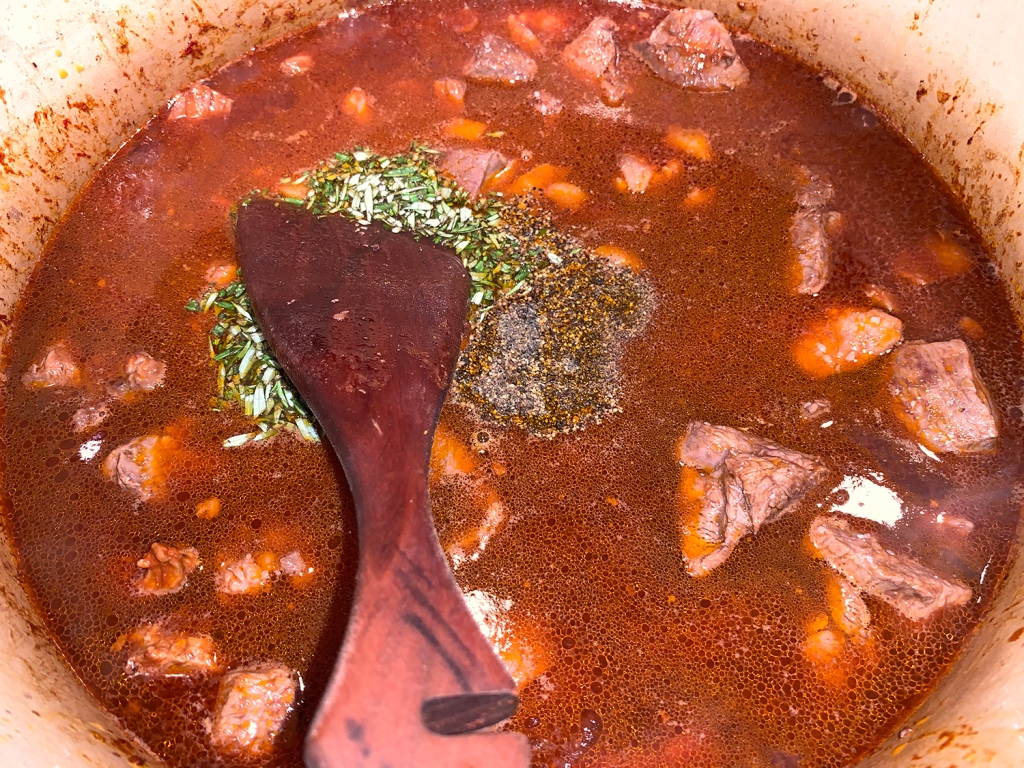
  2. Carefully add wine, stirring to scrape up any browned bits from bottom of pot. Reserve 1/2 cup of the 50%-less-sodium beef broth. Add remaining broth to meat mixture. Stir in thyme and 1/2 tsp. each salt and ground black pepper. Bring to boiling. Cover and place pot on the lower oven rack; braise 1 hour.
  3. In a small bowl whisk together reserved 1/2 cup broth and the flour; stir into beef mixture. Stir in barley. Bake, covered, 35 minutes more or until barley is tender and stew is thickened.
  4. Meanwhile, in a shallow baking pan combine carrots, mushrooms, onion, remaining 1 Tbsp. olive oil, and remaining 1/4 tsp. each salt and pepper; toss to coat. Place on a separate oven rack; roast, uncovered, 45 minutes, stirring once.
  5. Stir vegetables and peas into stew; let stand, covered, 5 minutes. Increase oven temperature to 425°F.
  6. OPTIONAL: For croutons: Line a shallow baking pan with foil. In a large bowl combine croissant chunks, melted butter, minced garlic, and parsley; toss to mix. Spread croissants evenly in prepared pan. Bake 5 minutes or until toasted; let cool. Serve croutons over stew.

*If you sub in brown rice, increase baking time in Step 3 to 45 minutes.

http://www.lynnandruss.com

Recipe found in Better Homes & Gardens October 2020 issue

Skirt Steak with Paprika Butter and Sagey Potatoes

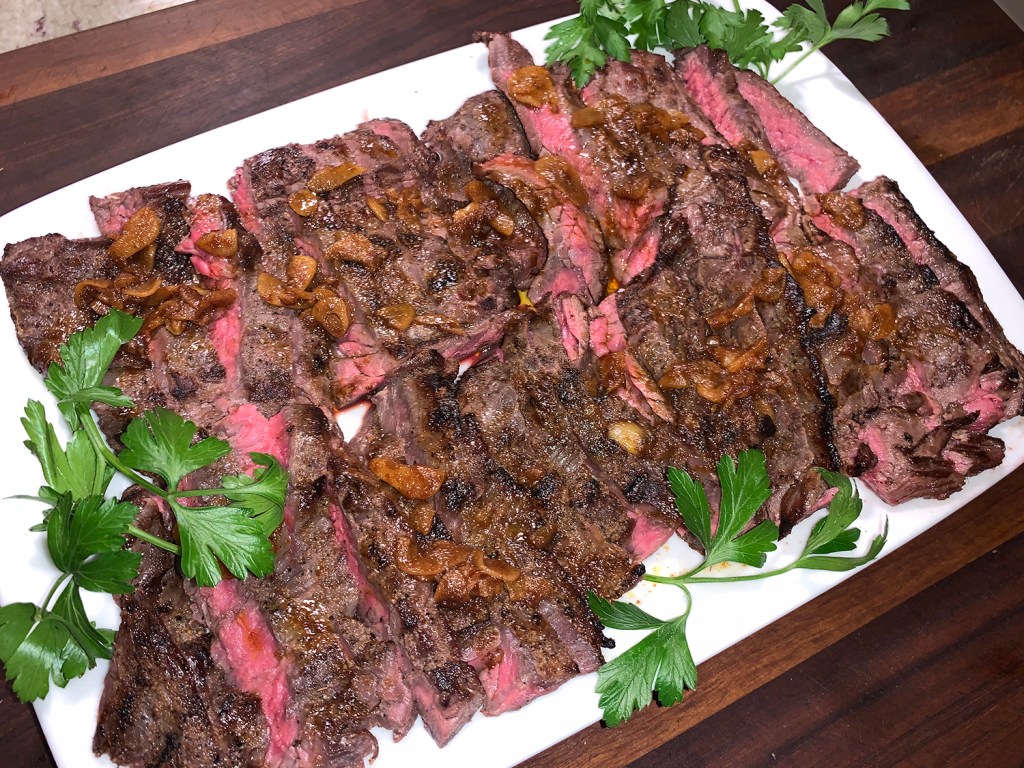
A new take on your steak and potatoes menu is this thinly sliced skirt steak with a lightly smoky, tangy paprika butter. While the steak recipe is enough to feed 10, and the potato recipe feeds 6-8, we halved both of them and still had leftovers for another meal. Both the meat and potato recipes hail from Food & Wine, neither of which employ a long list of ingredients.

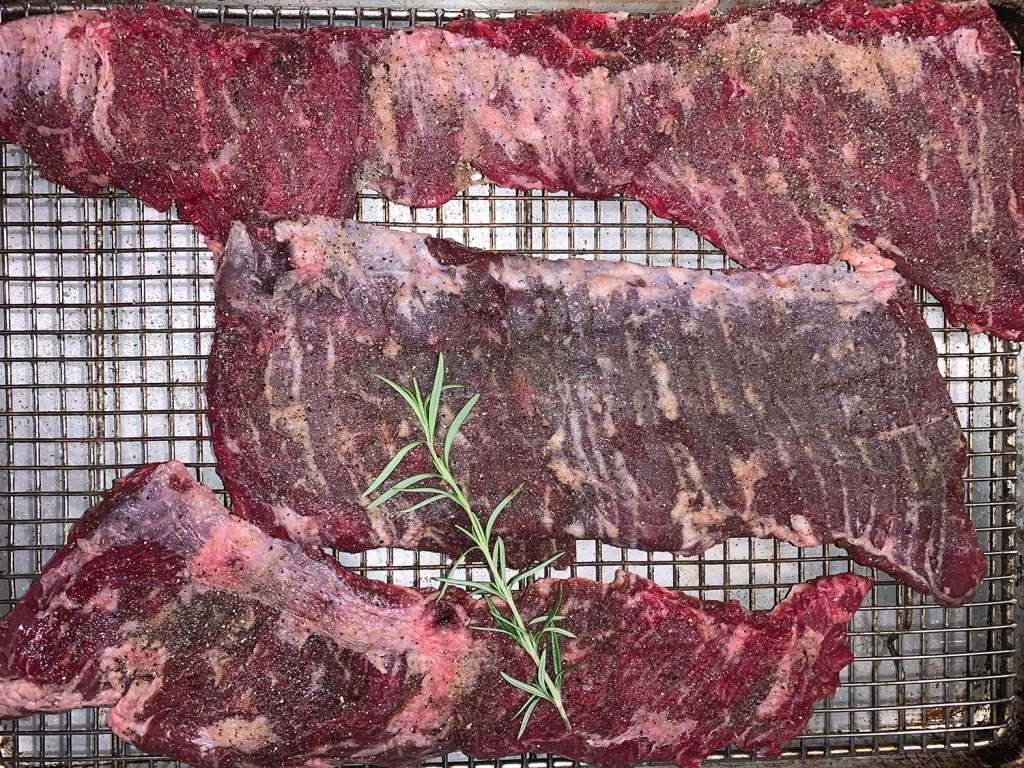
Adobo Seco was our seasoning of choice for rubbing both sides of the steak(s), although just using salt and pepper works fine too. Remember, skirt steak is a very thin piece of meat so it will cook quickly on the grill, just a couple of minutes per side for medium rare. Make sure to slice against the grain when cutting it.

If desired, go ahead and make the paprika butter which can stand at room temperature for up to 4 hours; reheat the butter gently. We took the opportunity to do this step ahead of time, so we wouldn’t be rushed at the last minute.

Skirt Steak with Paprika Butter

  • Servings: 10
  • Difficulty: easy
  • Print

Ingredients

  • 6 Tbsp. unsalted butter
  • 6 garlic cloves, thinly sliced
  • 1 1/2 tsp. smoked hot paprika
  • 2 Tbsp. fresh lemon juice
  • Salt
  • 5 lbs. skirt steaks
  • Vegetable oil, for rubbing
  • Freshly ground pepper

Directions

  1. Light a grill or heat a grill pan. In a small saucepan, melt the butter. Add the garlic and cook over low heat, stirring, until golden, about 3 minutes.
  2. Add the paprika and cook until fragrant, about 30 seconds. Remove from the heat, stir in the lemon juice and season with salt; keep warm.
  3. Rub the skirt steaks with oil and season with salt and pepper (or Adobo Seco seasoning). Grill over high heat until nicely charred and medium-rare, about 3 minutes per side.
  4. Transfer the steaks to a cutting board and let rest for 5 minutes. Thinly slice the steaks across the grain.
  5. Spoon the paprika butter over the steak and serve right away.

http://www.lynnandruss.com

Recipe compliments of Jon Shook and Vinny Dotolo for Food & Wine

We also added ratatouille made a few days ago and reheated for tonite’s dinner.

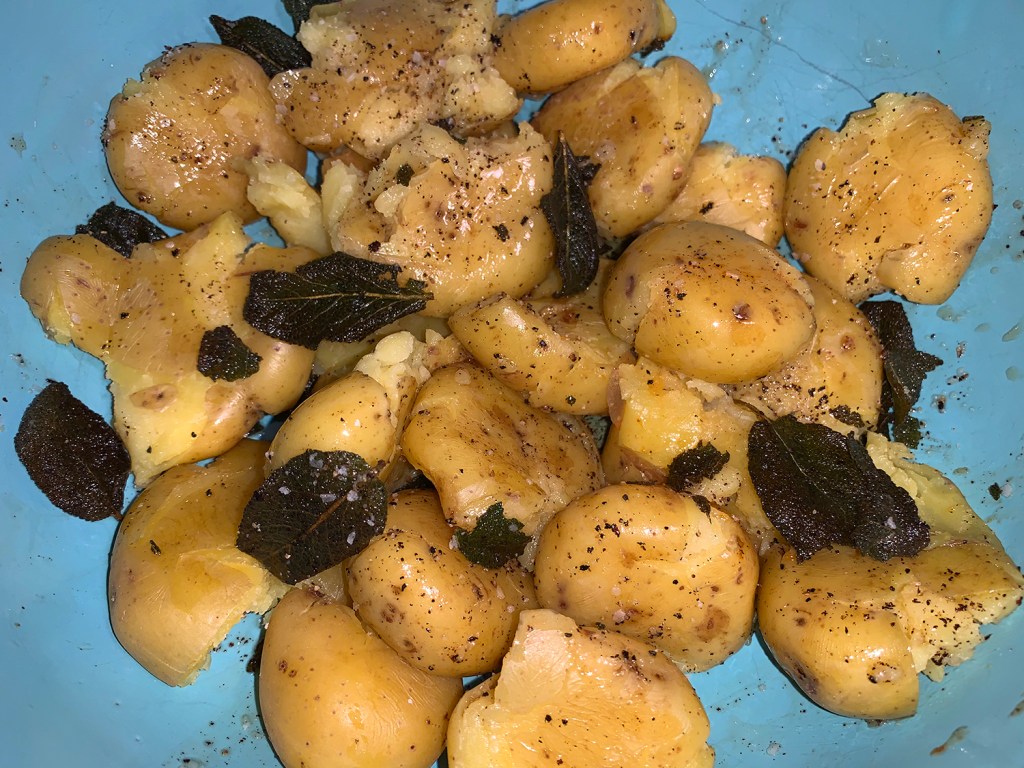
Smashed Sage-Butter Potatoes

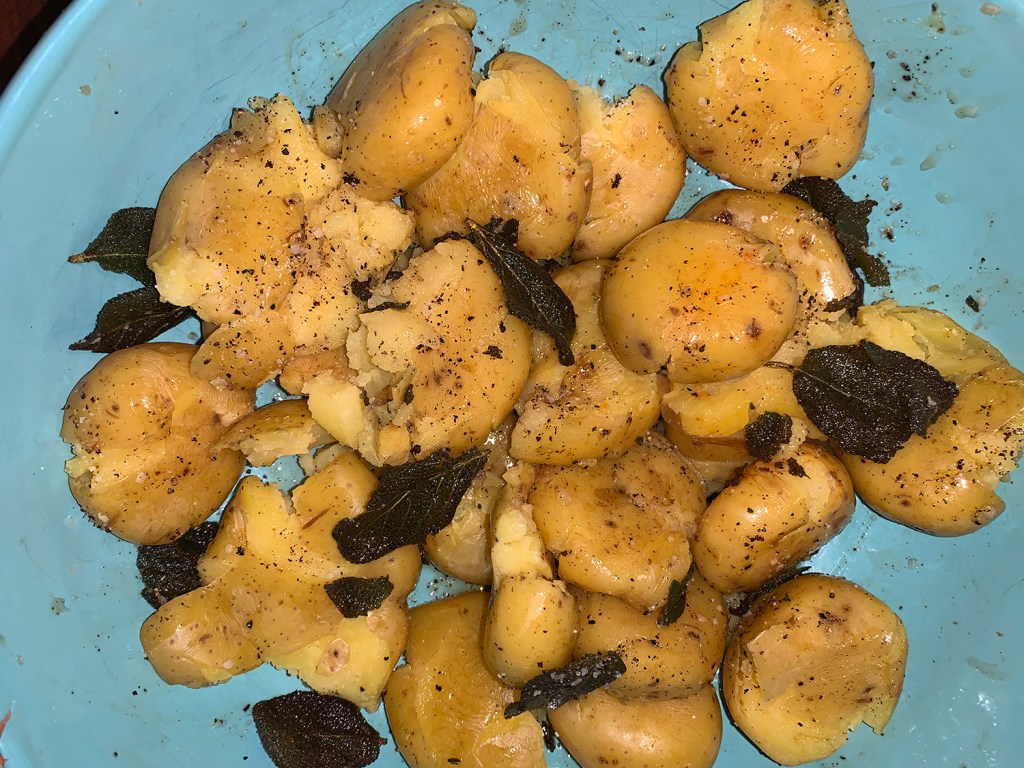
Among the BEST potatoes we’ve ever eaten!

Smashed Sage-Butter Potatoes

  • Servings: 6-8
  • Difficulty: easy
  • Print

Ingredients

  • 4 lbs small Yukon Gold potatoes, about 1 1/2″ diameter
  • 1/2 cup unsalted butter (4 ounce)
  • 1/2 cup fresh sage leaves (about 1/4 ounce)
  • Kosher salt, to taste

Directions

  1. Add water to a Dutch oven to a depth of 1/2 inch; place a steamer basket in Dutch oven. Bring water to a boil over high. Place potatoes in steamer basket. Cover, reduce heat to medium, and steam until potatoes are tender, 30 to 35 minutes. Let cool 10 minutes.
  2. Meanwhile, melt butter in a large skillet over medium. Add sage leaves, and cook, stirring constantly, until leaves turn dark green in spots and butter is light golden brown, 4 to 5 minutes. Remove from heat.
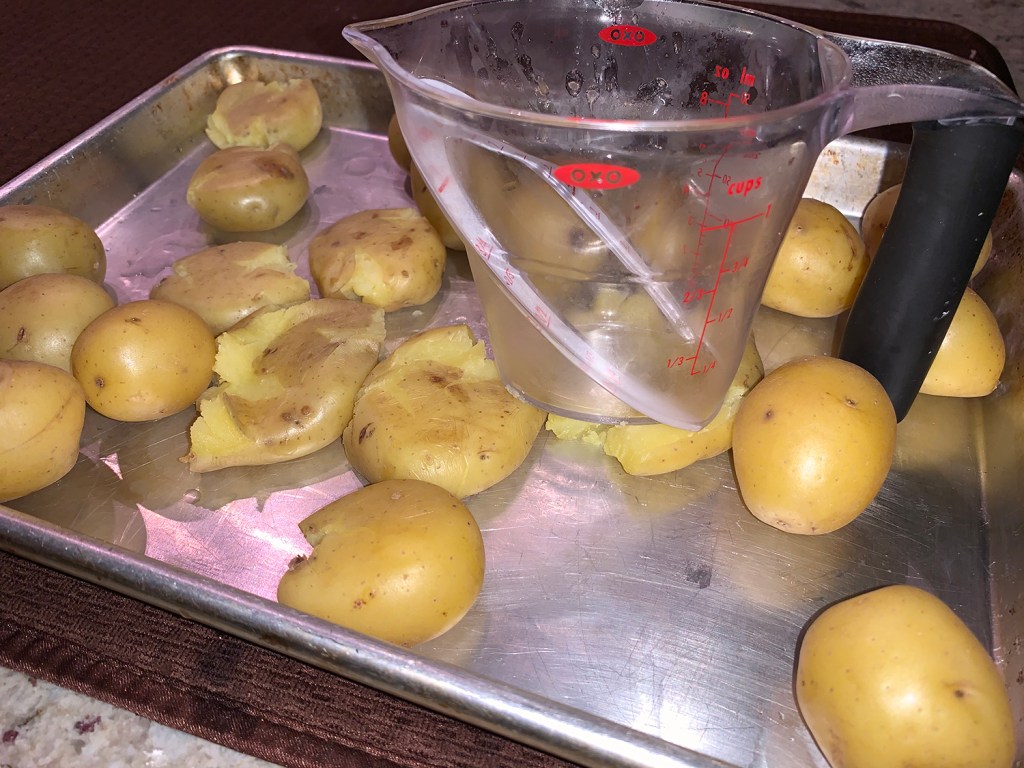
  3. Place potatoes on a baking sheet, and gently smash using the bottom of a measuring cup. Transfer to a large serving bowl, and gently toss with sage butter. Season with salt to taste.

http://www.lynnandruss.com

Recipe compliments of Brian Marcy for Food & Wine

French-Style Pork Chops with Apples and Brandy

Pork and apples is a classic, but usually an everyday pairing. Cook’s Illustrated turned to the French recipe for porc à la Normande to inspire a more elegant rendition. Using thick bone-in chops allows more leeway to avoid overcooking, while salting them an hour before cooking helps keep them moist.

An evenly heated pan is key to a good sear on these big chops, so heat your skillet over medium high for a full 5 minutes before turning up the heat. Cutting the apples into attractive rings provides a bed to raise the chops off the skillet’s bottom to allow for even cooking once transferred to the oven.

For a sauce with layered apple flavor, rely on a combination of sweet cider, cider vinegar, Calvados (or regular brandy), and a few chopped apples, which break down and help produce the right texture. A bit of butter gives the sauce richness, while chicken broth and bacon lend a balancing savoriness. Flambéing the sauce is critical to create an elegantly complex sauce, and doing it in two batches keeps the job easy.

Natural pork is preferred, but if the pork is enhanced (injected with a salt solution), just decrease the salt in step 1 to 1/2 teaspoon per chop. To ensure that they fit in the skillet, choose apples that are approximately 3 inches in diameter. With just the two of us for dinner, we cut the number of chops and apples down from 4 to 2, but kept the amount of the other ingredients the same. Applejack or regular brandy can be used in place of the Calvados. The amount of vinegar to add in step 4 will vary depending on the sweetness of your cider.

Before flambéing, Cook’s Illustrated highly suggests to roll up long shirtsleeves, tie back long hair, and turn off the exhaust fan and any lit burners. Use a long match or wooden skewer to flambé the brandy.

We paired this main dish with a Braised Red Cabbage dish from The NY Times cooking site that also included apples.

French-Style Pork Chops with Apples and Brandy

  • Servings: 4
  • Difficulty: moderate
  • Print

Ingredients

  • (12- to 14-ounce) bone-in pork rib chops, 1 inch thick
  • Kosher salt and pepper
  • 4 Gala or Golden Delicious apples, peeled and cored
  • 2 slices bacon, cut into 1/2-inch pieces
  • 3 shallots, sliced
  • Pinch ground nutmeg
  • ½ cup Calvados, Applejack or other brandy
  • 1 ¾ cups apple cider
  • 1 ¼ cups chicken broth
  • 4 sprigs fresh thyme, plus 1/4 tsp. minced
  • 2 Tbsp. unsalted butter
  • 2 tsp. vegetable oil
  • ½ – 1 tsp. apple cider vinegar

Directions

  1. Evenly sprinkle each chop with 3/4 teaspoon salt. Place chops on large plate, cover loosely with plastic wrap, and refrigerate for 1 hour.
  2. While chops rest, cut 2 apples into 1/2-inch pieces. Cook bacon in medium saucepan over medium heat until crisp, 5 to 7 minutes. Add shallots, nutmeg, and 1/4 teaspoon salt; cook, stirring frequently, until shallots are softened and beginning to brown, 3 to 4 minutes.
  3. Off heat, add 1/4 cup Calvados and let warm through, about 5 seconds. Wave lit match over pan until Calvados ignites, then shake pan gently to distribute flames. When flames subside, 30 to 60 seconds, cover pan to ensure flame is extinguished, 15 seconds.
  4. Add remaining 1/4 cup Calvados and repeat flambéing (flames will subside after 1 1/2 to 2 minutes). (If you have trouble igniting second addition, return pan to medium heat, bring to bare simmer, and remove from heat and try again.)
  5. Once flames have extinguished, increase heat to medium-high; add cider, 1 cup broth, thyme sprigs, butter, and chopped apples; and bring to rapid simmer. Cook, stirring occasionally, until apples are very tender and mixture has reduced to 2 1/3 cups, 25 to 35 minutes. Cover and set aside.
  6. Adjust oven rack to middle position and heat oven to 300 degrees.
  7. Slice remaining 2 apples into 1/2-inch-thick rings. Pat chops dry with paper towels and evenly sprinkle each chop with pepper to taste.
  8. Heat oil in 12-inch skillet over medium heat until beginning to smoke. Increase heat to high and brown chops on both sides, 6 to 8 minutes total. Transfer chops to large plate and reduce heat to medium.
  9. Add apple rings and cook until lightly browned, 1 to 2 minutes. Add remaining 1/4 cup broth and cook, scraping up any browned bits with rubber spatula, until liquid has evaporated, about 30 seconds.
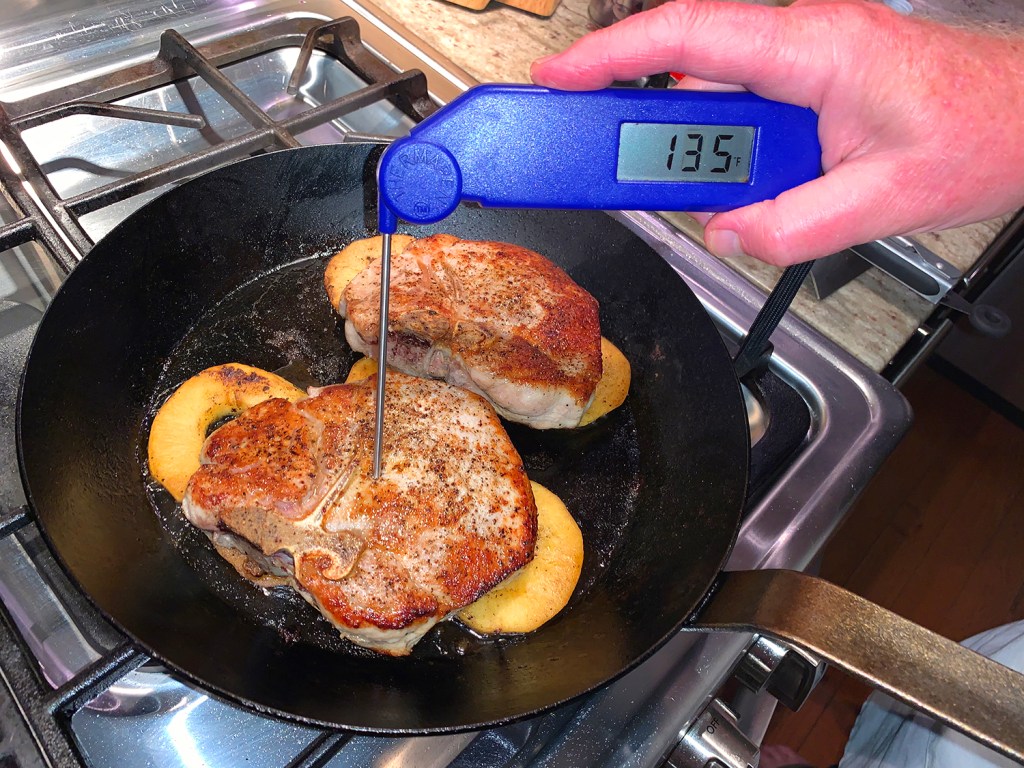
  10. Remove pan from heat, flip apple rings, and place chops on top of apple rings. Place skillet in oven and cook until chops register 135 to 140 degrees, 11 to 15 minutes.
  11. Transfer chops and apple rings to serving platter, tent loosely with foil, and let rest for 10 minutes.
  12. While chops rest, strain apple/brandy mixture through fine-mesh strainer set in large bowl, pressing on solids with ladle or rubber spatula to extract liquid; discard solids. (Make sure to use rubber spatula to scrape any apple solids on bottom of strainer into sauce.)
  13. Stir in minced thyme and season sauce with vinegar, salt, and pepper to taste. Transfer sauce to serving bowl. Serve chops and apple rings, passing sauce separately.

http://www.lynnandruss.com

Chipotle Rice with Shrimp and Cilantro

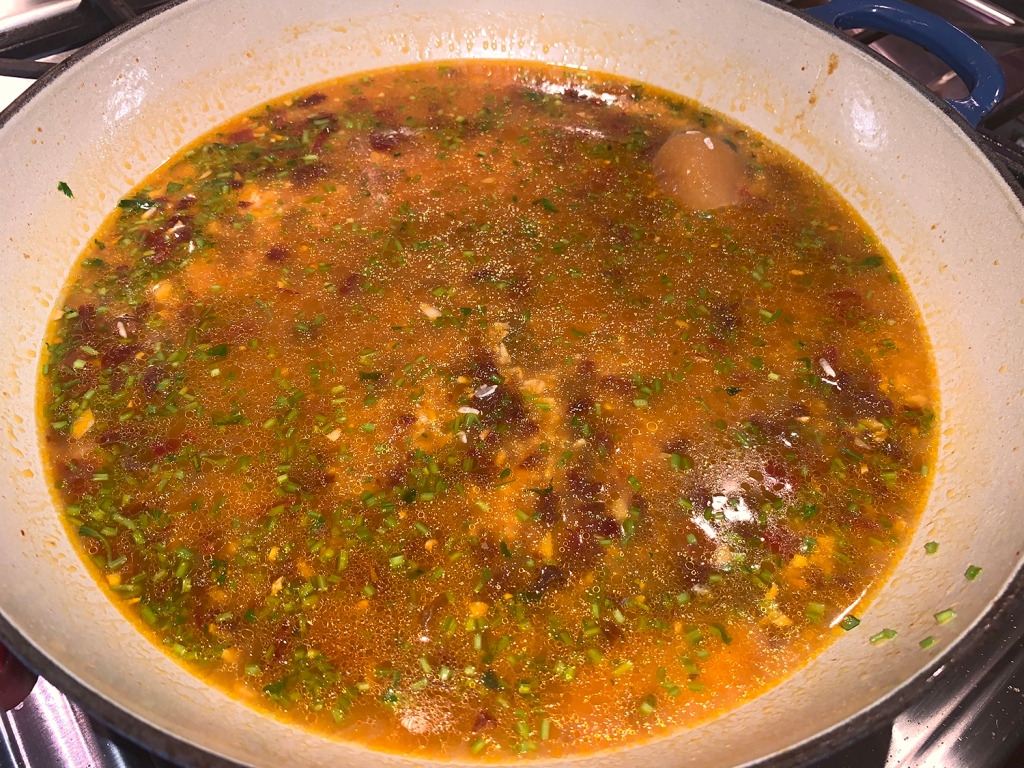
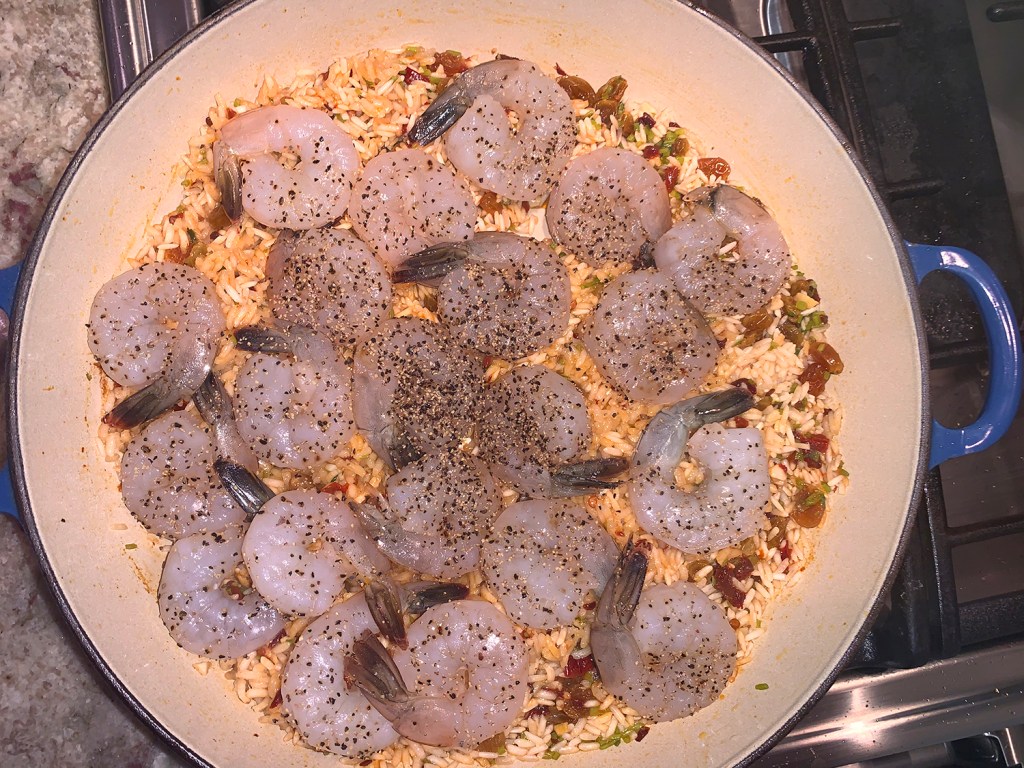
This recipe from Milk Street is an adaptation of one from “More Mexican Everyday” by Rick Bayless. Adding the shrimp at the end, after the rice has steamed, and allowing them to cook gently with residual heat ensures they are plump and tender and not overdone. Then layer in herbal notes by simmering minced cilantro stems with the rice, and folding in chopped cilantro leaves just before serving.

The entire bunch of cilantro goes into this one pot meal, so you’d better be committed. We happen to love the herb, but I know several folks who think it tastes like soap and/or have an issue digesting it. Parsley could be an option, but the flavor profile will be altogether different.

When looking at the ingredients, I thought why not use our homemade shellfish stock instead of chicken broth? Makes more sense when the star protein is shrimp. And speaking of the liquid component, do yourself a huge favor and read the amount necessary shown on the package of long grain rice that you are using.

The original recipe said to use two cups and that’s initially what we did. We checked the rice doneness after 15 minutes, again after 20 minutes and a final time at 25 minutes and the rice was STILL not done. Finally I checked the package which says to use 3 cups liquid per 1 1/2 cups rice, duh!

We had to remove the shrimp to a plate and cover with foil. Measure another cup of stock, heat it in the microwave, pour it back into the pan, cover and simmer for an additional 5 minutes. Then once again, remove the pan from the heat, add the shrimp back to the mixture, cover and let sit for a couple minutes more before adding the cilantro.

Just sayin’, read your rice package for the proper amount of liquid and save your self the headache… Then enjoy the feast, it was fabulous and the shrimp were tender and succulent.

Chipotle Rice with Shrimp and Cilantro

  • Servings: 4
  • Difficulty: easy
  • Print

Ingredients

  • 1 lb. extra-large (21/25 per pound) shrimp, peeled (tails left on), deveined and patted dry
  • Kosher salt and ground black pepper
  • 2 Tbsp. grapeseed or other neutral oil
  • 4 medium garlic cloves, finely chopped
  • 2 chipotle chilies in adobo sauce, minced
  • 1 bunch cilantro, stems minced, leaves chopped, reserved separately
  • 1½ cups long-grain rice, rinsed and drained
  • ½ cup golden raisins
  • 2-3 cups chicken or shellfish stock*

Directions

  1. Season the shrimp with ½ teaspoon each salt and pepper; set aside at room temperature.
  2. In a large saucepan over medium, cook the oil and garlic, stirring often, until the garlic is just barely golden, 2 to 3 minutes.
  3. Stir in the chipotle chilies, cilantro stems, rice and raisins, then add the broth and 1 teaspoon salt. Bring to a simmer over medium-high, then cover and reduce to low. Cook until the rice is tender and the liquid has been absorbed, 15 to 20 minutes.
  4. Uncover the pan and scatter the shrimp evenly over the rice. Re-cover, remove from the heat and let stand for 10 minutes.
  5. Gently fluff the rice with a fork, folding in the shrimp. Re-cover and let stand until the shrimp are opaque throughout, another 5 to 7 minutes.
  6. Stir in the cilantro leaves, then taste and season with salt and pepper.

*TIPS: Read your rice package label for the correct amount of liquid for 1 1/2 cups. Don’t lift the lid to peek at the shrimp after they’ve been added to the pan, except to stir them into the rice. Uncovering releases the residual heat needed for gently cooking the shrimp.

http://www.lynnandruss.com

Cheesesteak Meatloaf Paired with Ratatouille

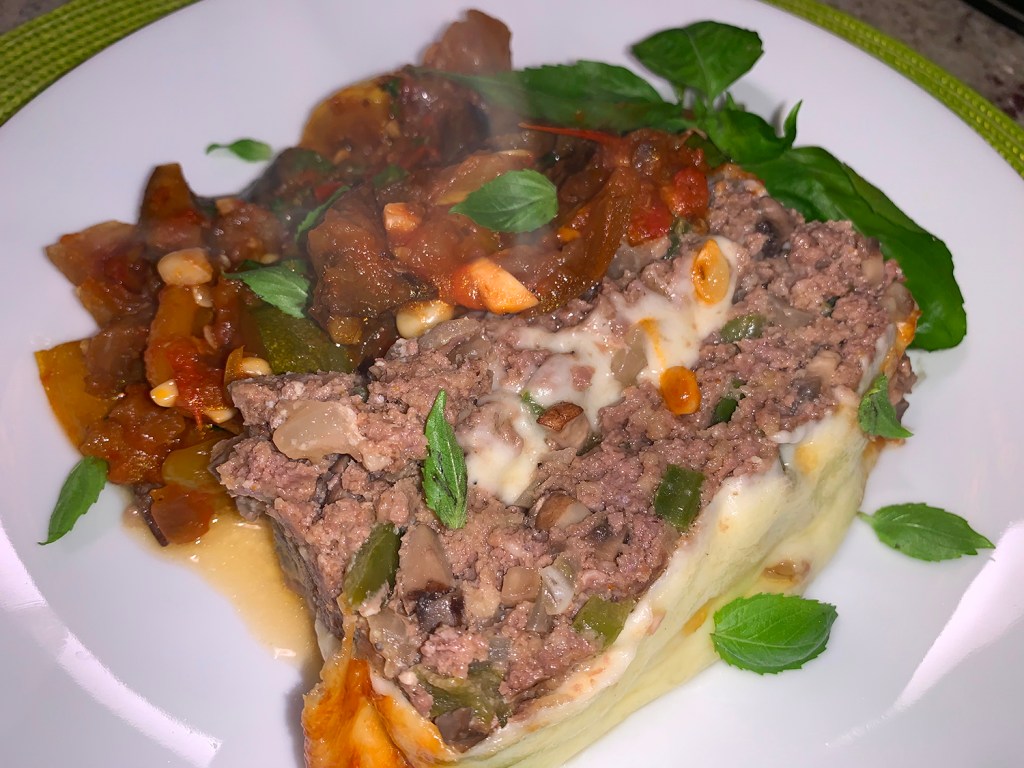
Folks in much of the U.S. start to breathe a sigh of relief as the temps and humidity become more humane. With the welcome respite, we start craving comfort foods that haven’t made appearances on our dinner table since the early Spring. Meatloaf comes to mind as one of those cool-weather comfort foods, and here’s one with a local twist: Philly Cheesesteak Meatloaf.

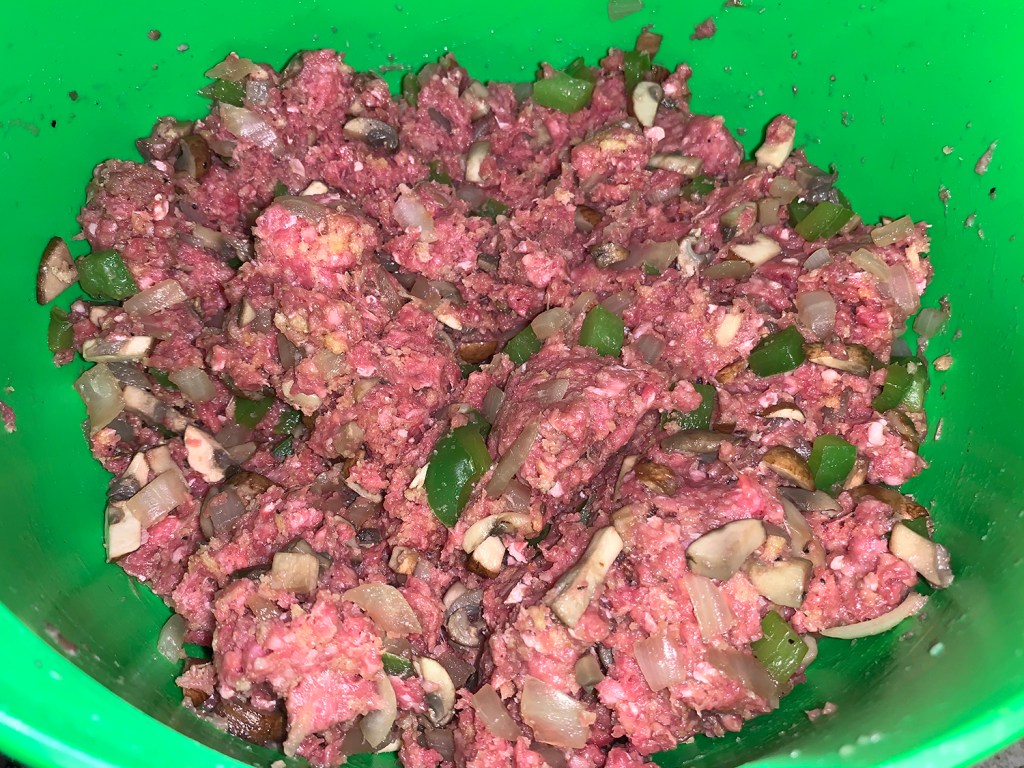
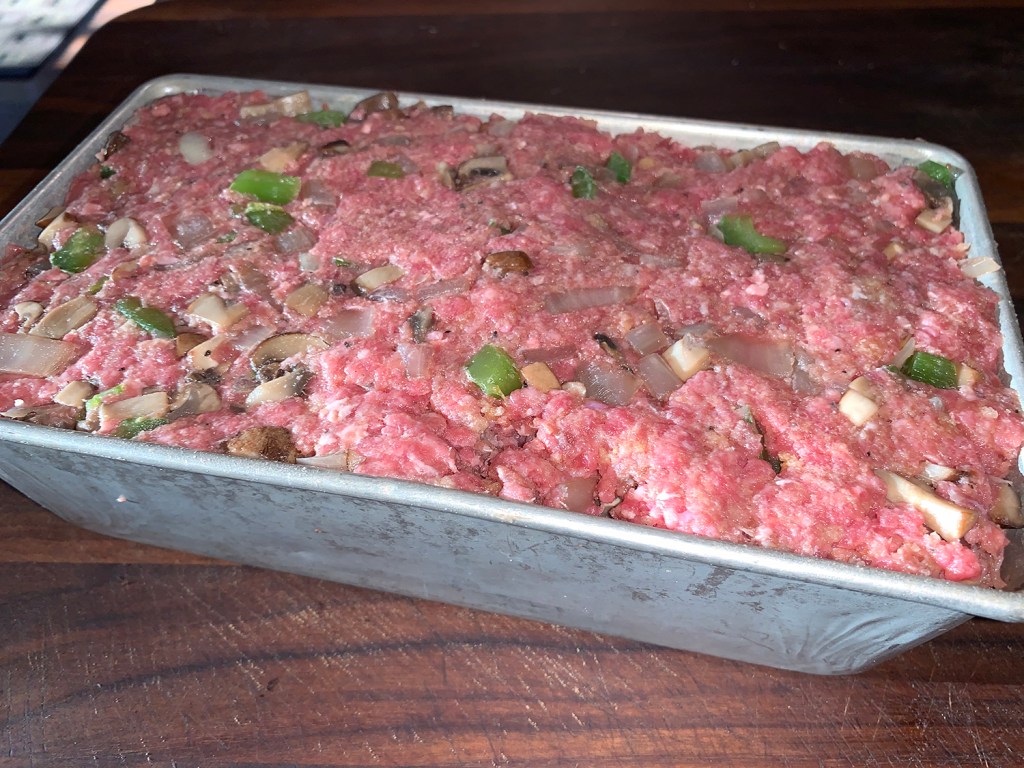
I found this recipe on dinnerthendessert.com and decided it was worth a try, after all Philadelphia is our “mother” city, the place we refer to when on vacay and asked where we call home. It contains not only ground beef but green bell peppers, onions and mushrooms, and is topped and stuffed with provolone cheese. Not exactly haute cuisine, but certainly worth a try. And BTW, it is fantastic leftover!

Typically I like to serve mashed potatoes with meatloaf, but The Hubs suggested we pair it with a Farmers Market Ratatouille recipe found in our latest issue of Fine Cooking magazine. It is an example of simple food, prepared in a way to let humble ingredients shine that gets even tastier as it sits. You could even make it the day before, let the flavors meld in the refrigerator and reheat it when ready. A win-win in my book.

For a touch more depth of flavor, I included 1 teaspoon dried oregano, two dried bay leaves and a pinch of red pepper flakes. Keep in mind, the ratatouille is done in a slow cooker and takes over 6 hours total including the prep, so plan ahead. But you will love it because it’s rich in flavor, gluten-free, vegetarian, and absolutely delicious! If you have a non-meat eater in the household, they could make this their main course along with a hefty slice of crusty bread.

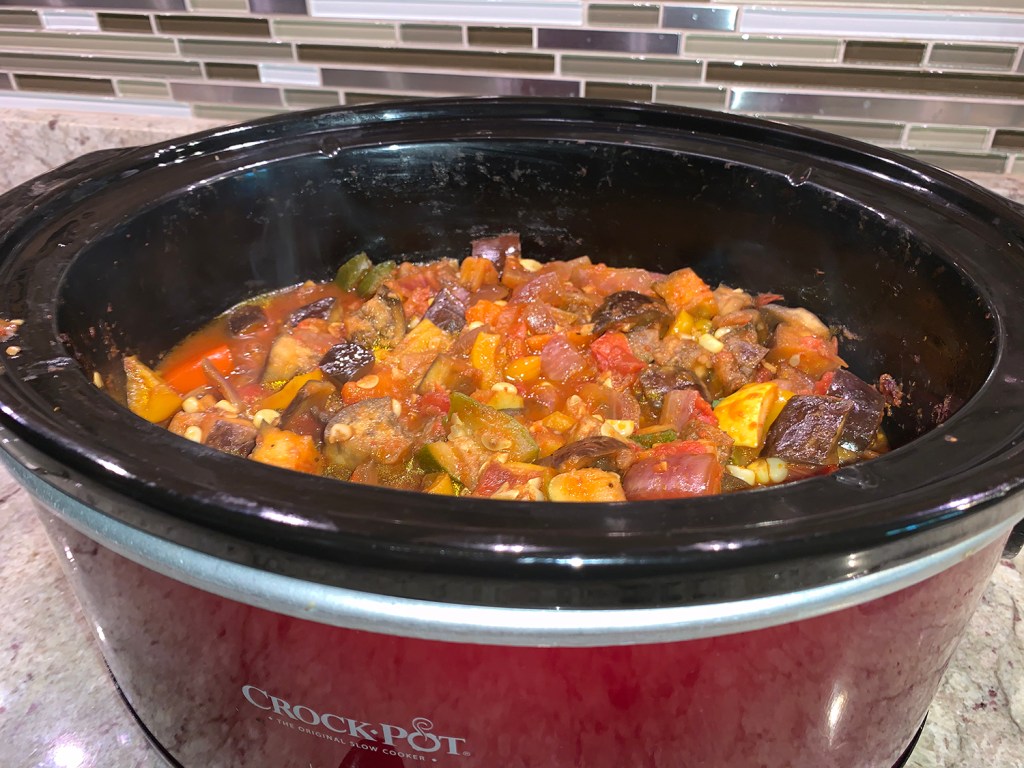
The directions instruct to employ a 6-quart slow cooker. We used our 7-quart model and it was filled to the brim initially, but everything cooked down to about half by the end. So you might want to start with a larger cooker if you have one. Oh, and feel free to throw in any errant veggies you may have lurking in the fridge. We had one cooked ear of corn, so I shaved off the kernels and threw them in for the last several minutes before the basil.

Philly Cheesesteak Meatloaf

  • Servings: 6-8
  • Difficulty: easy
  • Print

Ingredients

  • 2 Tbsp. butter
  • 1 small yellow onion, diced
  • 1 small green bell pepper, diced
  • 8 oz.s brown mushrooms, minced
  • 1/2 tsp. Kosher salt
  • 1/2 tsp. fresh ground black pepper
  • 2 lbs. lean ground beef, 85/15
  • 2 Tbsp. ketchup
  • 2 Tbsp. Worcestershire sauce
  • 2 eggs
  • 1 cup panko breadcrumbs
  • 8 oz. Provolone cheese slices

Directions

  1. Preheat the oven to 375 degrees and spray a large loaf pan with cooking spray.
  2. In a large skillet over medium high heat, add the butter and the onions and bell peppers, mushrooms, salt and pepper.
  3. Let brown for 3 minutes before stirring, then let brown for another 1-2 minutes before stirring again.
  4. Let cool for five minutes.
  5. In a large bowl add the ground beef, ketchup,Worcestershire sauce, eggs, panko breadcrumbs and the cooled vegetable mixture.
  6. Add half the mixture to your loaf pan then add half of the cheese, overlapping the slices.
  7. Cover with the rest of the meat and form into a flat-top loaf shape. Place your loaf pan on a rimmed baking sheet and put in the oven.
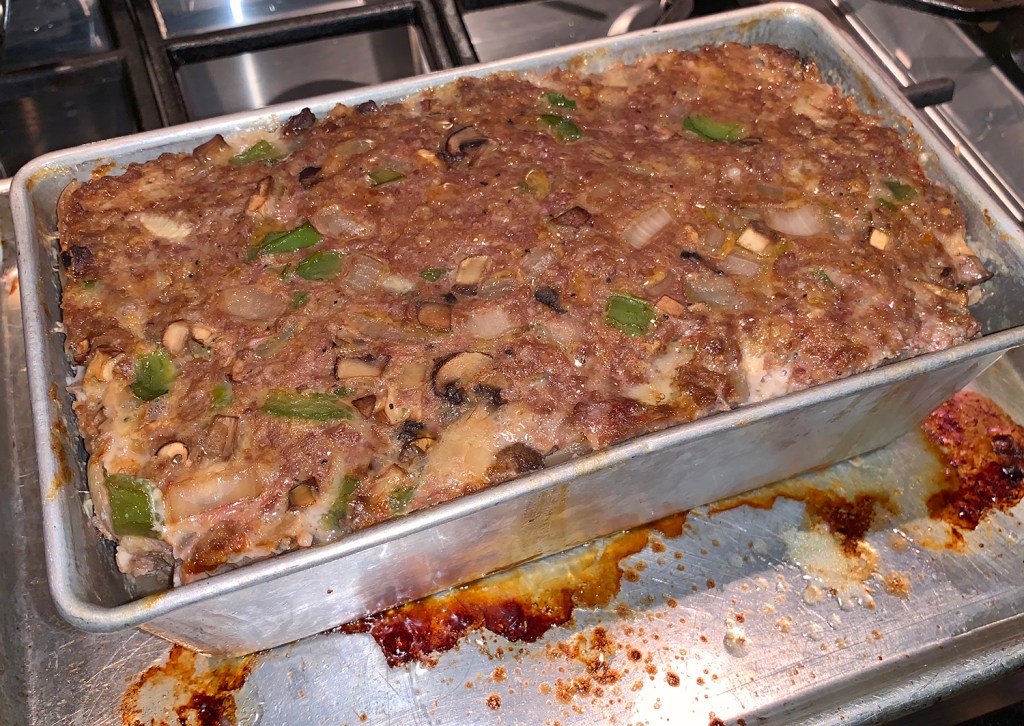
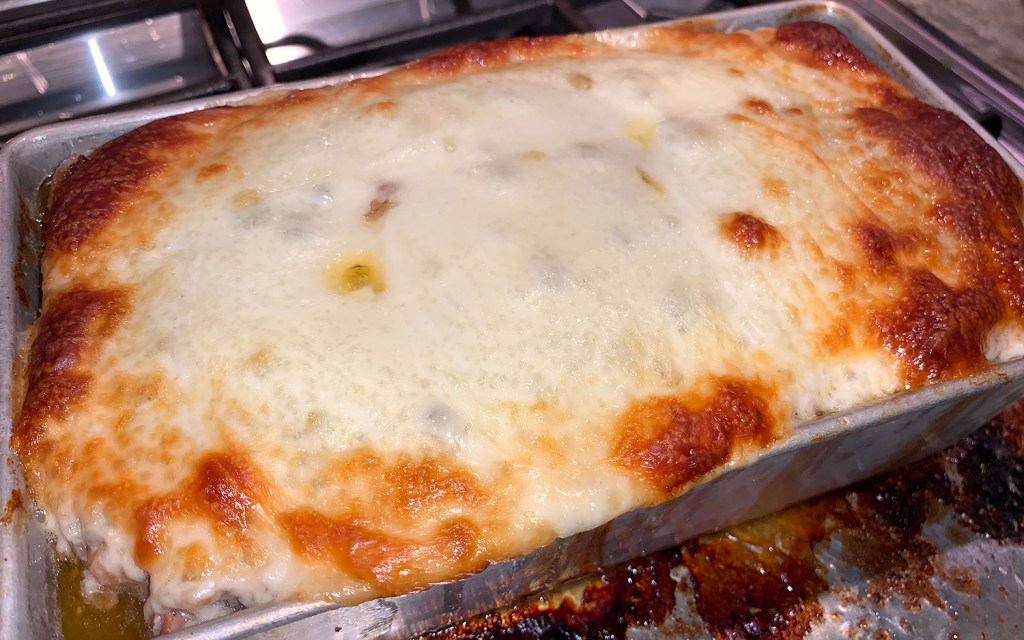
  8. Cook for 40 minutes, then pull out of the oven. Remove any excess grease from the corners with a baster. Cover with remaining cheese and put back in the oven.
  9. Cook for 15-20 minutes, then let rest for 10 minutes before cutting.

http://www.lynnandruss.com

Farmers Market Ratatouille

Farmers Market Ratatouille

  • Servings: 6-8
  • Difficulty: easy
  • Print

Ingredients

  • 1/3 cup extra-virgin olive oil
  • 4 large (at least) garlic cloves, finely chopped
  • 1, 6-oz. can tomato paste
  • 1 medium eggplant, trimmed and cut into 1/4-inch dice
  • 3 medium Roma tomatoes, seeded and chopped
  • 1 large red onion, coarsely chopped
  • 1 medium red bell pepper, cut into 3/4-inch pieces
  • 1 medium yellow bell pepper, cut into 3/4-inch pieces
  • 1 medium zucchini, trimmed and cut into 3/4-inch dice
  • 1 medium yellow summer squash, trimmed and cut into 3/4-inch dice
  • 2 dried bay leaves
  • 1 tsp. dried oregano
  • Pinch of red pepper flakes
  • Kosher salt and freshly ground black pepper
  • 1 lightly packed cup thinly sliced basil

Directions

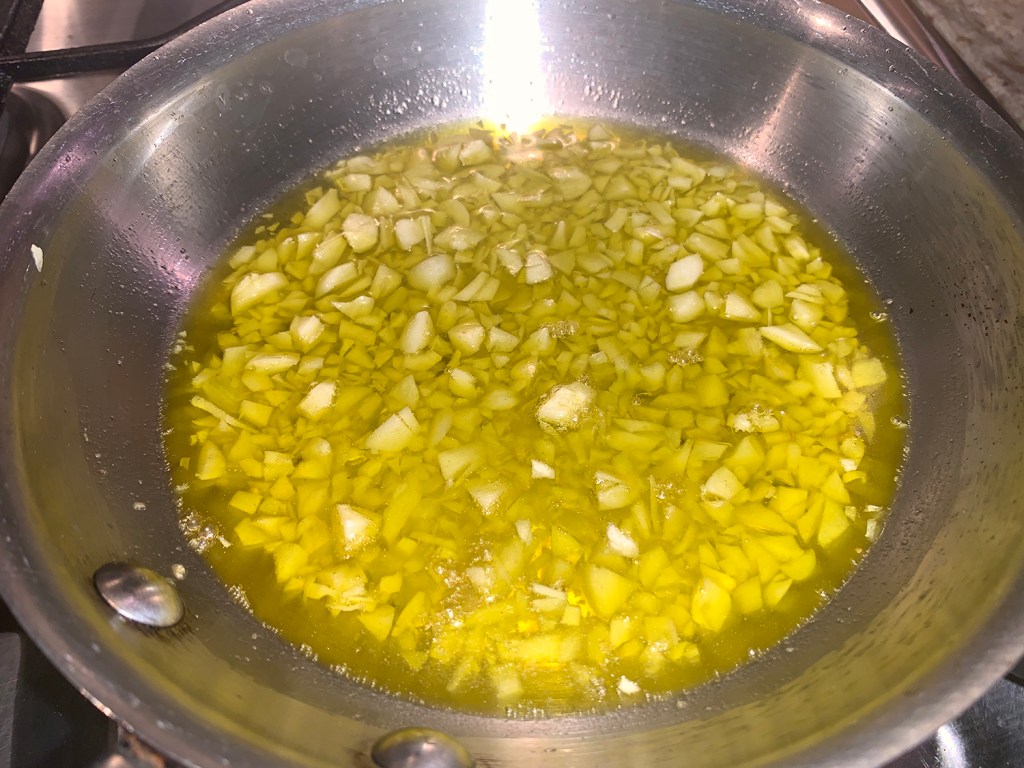
  1. Heat the oil in a small skillet over medium heat until shimmering. Add the garlic, remove from the heat, and let cool 5 minutes
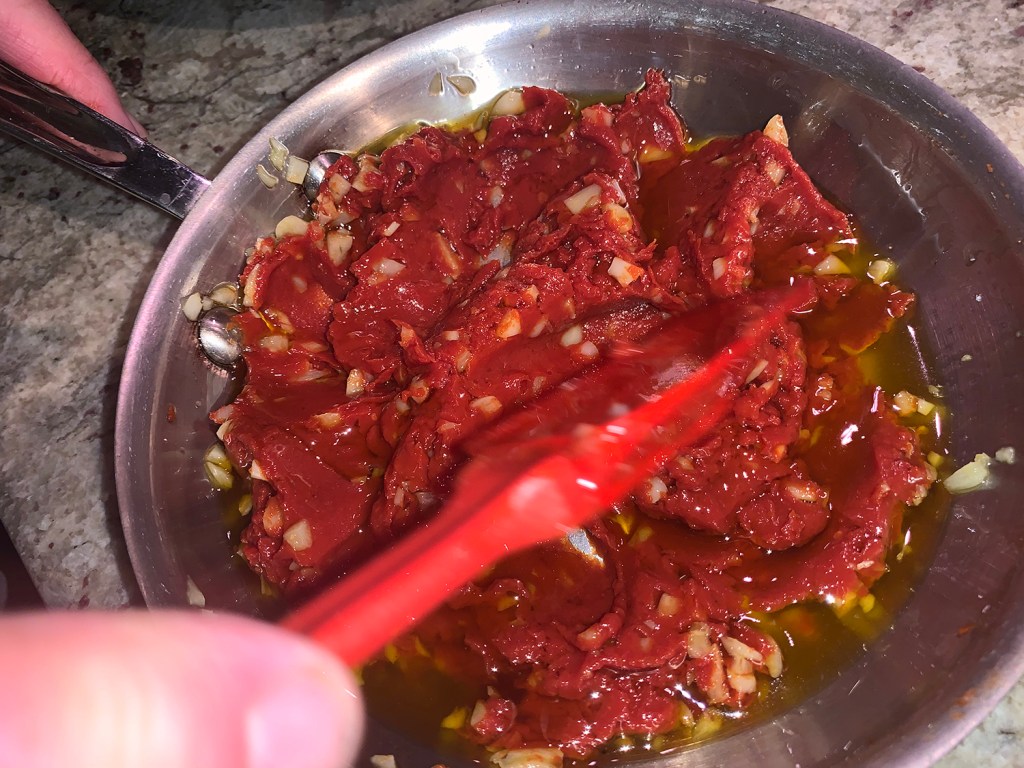
  2. Stir in the tomato paste until smooth.
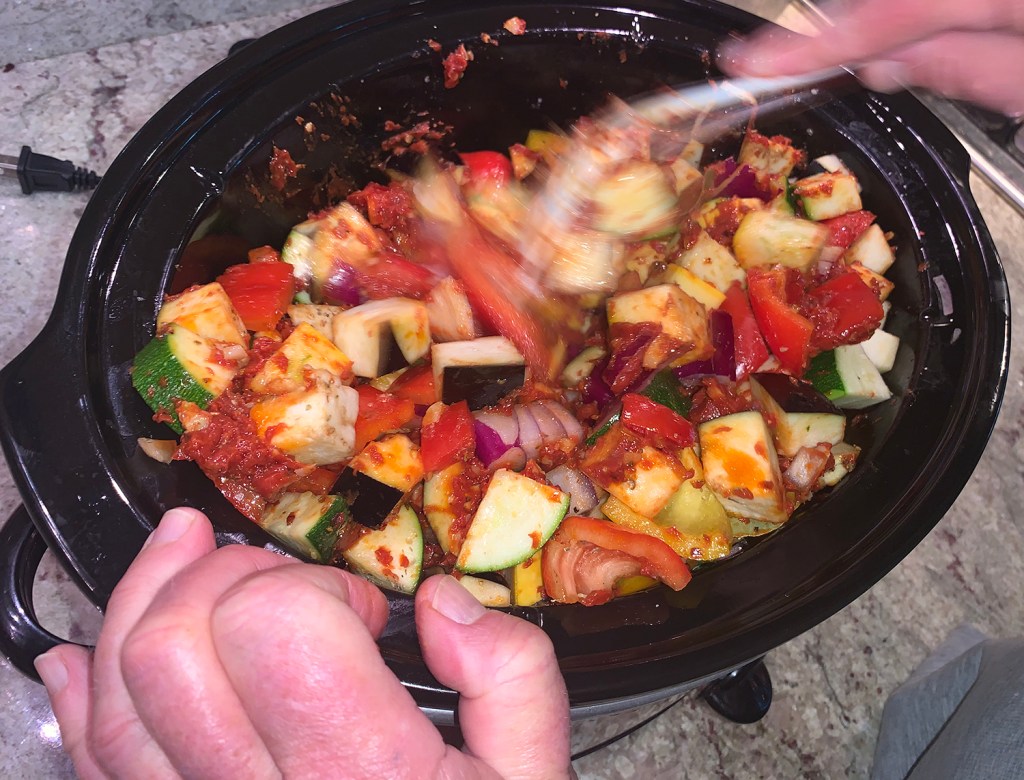
  3. Combine all of the prepped veggies (except the basil) in a 6-qt. (or larger) slow cooker. Add the tomato paste mixture, bay leaves, dried oregano, red pepper flakes, 1 1/4 teaspoon salt and 1/4 teaspoon pepper; stir well.
  4. Cover and cook on low until the vegetables are tender, about 5 hours.
  5. Remove the lid, and continue cooking until some of the liquid evaporates, about 30-45 minutes.
  6. Stir in the basil, season to taste with salt and pepper, and serve or cool and refrigerate until ready to eat.
Uncover and continue cooking for 30-45 minutes to evaporate some of the liquid.

http://www.lynnandruss.com

Braised Red Cabbage With Apples

What do you do with a red cabbage leftover from a Farmers Market Arrangement made for your garden club? I know this is a dilemma for many of you…

Initially, my red cabbage was part of this arrangement.

Kidding aside, cooler October temps invite the braising season to commence. And this is one of those dishes that’s even better the following day, so go ahead and make it when you have time and then serve it on a weeknight with quick cooking chops of some sort.

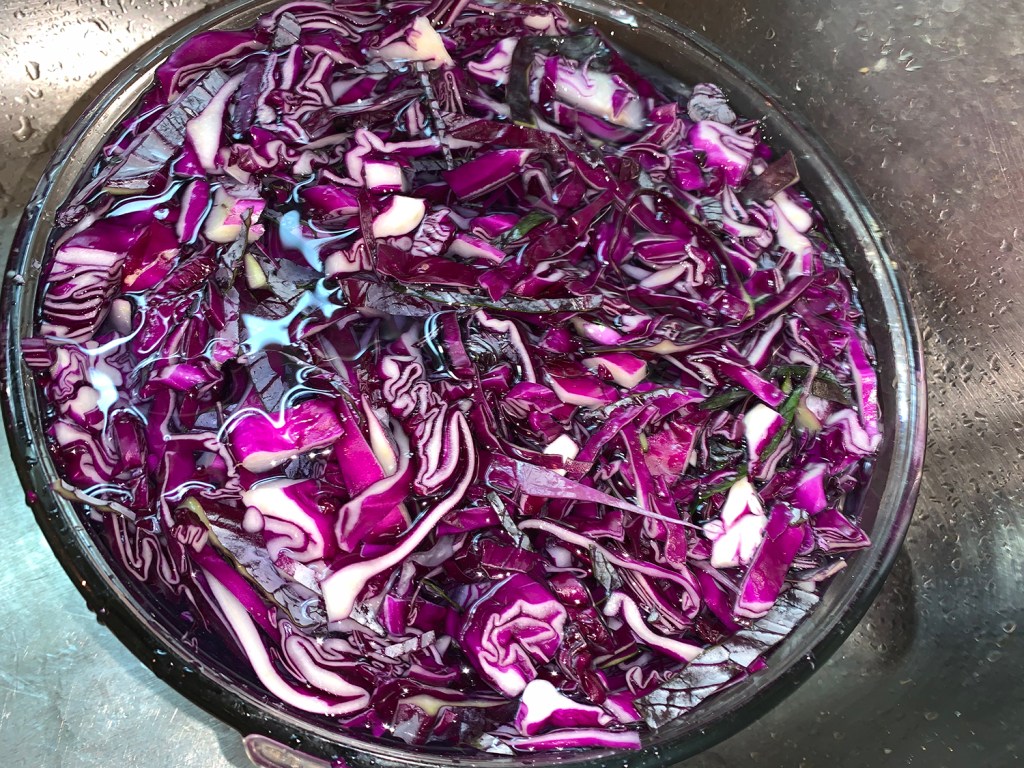
Be sure to soak the shredded cabbage in cold water as suggested in Step 1. The cabbage absorbs water, which is then released in cooking, and helps to steam the cabbage for utmost tenderness.

We concur, this is probably THE BEST braised cabbage we’ve ever had, and no sugar!

Braised Red Cabbage with Apples

  • Servings: 8
  • Difficulty: easy
  • Print

Ingredients

  • 1 large red cabbage, 2 to 2 1/2 pounds, quartered, cored and cut crosswise in thin strips
  • 2 Tbsp. canola oil
  • 1 small onion, thinly sliced
  • 2 tart apples, such as Braeburn or granny smith, peeled, cored and sliced
  •  About 1/3 cup balsamic vinegar
  • ¼ teaspoon ground allspice
  •  Salt
  •  Freshly ground pepper to taste

Directions

  1. Prepare the cabbage, and cover with cold water while you prepare the remaining ingredients.
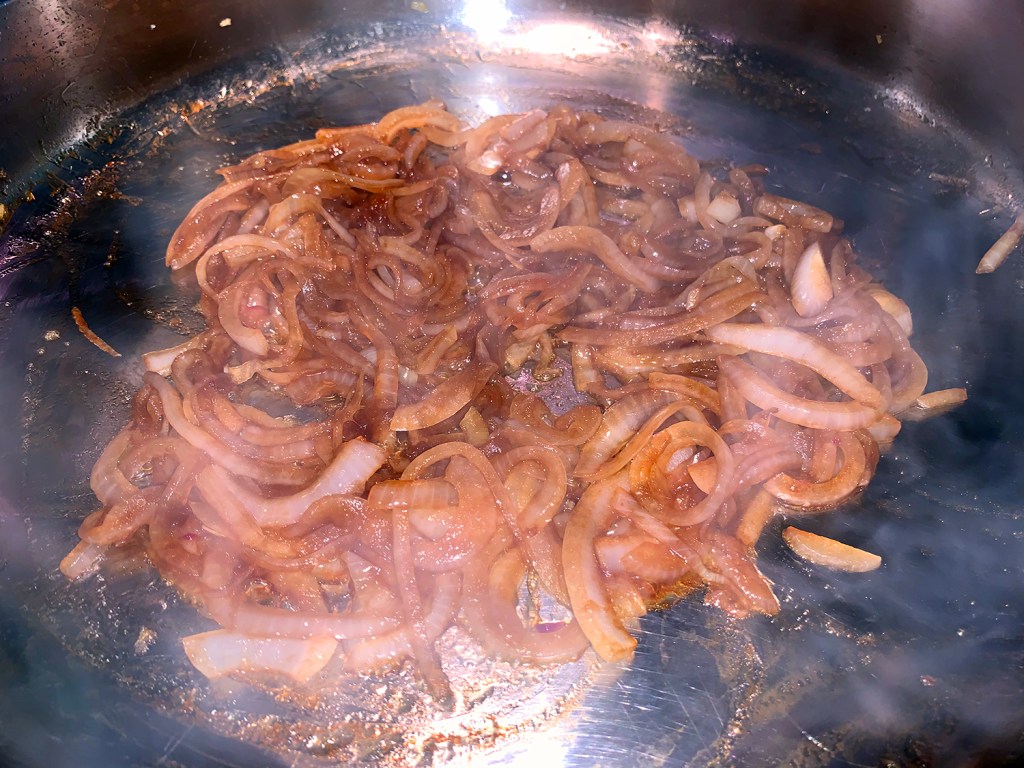
  2. Heat the oil over medium heat in a large, lidded skillet or casserole, and add the onion. Cook, stirring, until just about tender, about three minutes.
  3. Add 2 tablespoons of the balsamic vinegar and cook, stirring, until the mixture is golden, about three minutes, then add the apples and stir for two to three minutes.
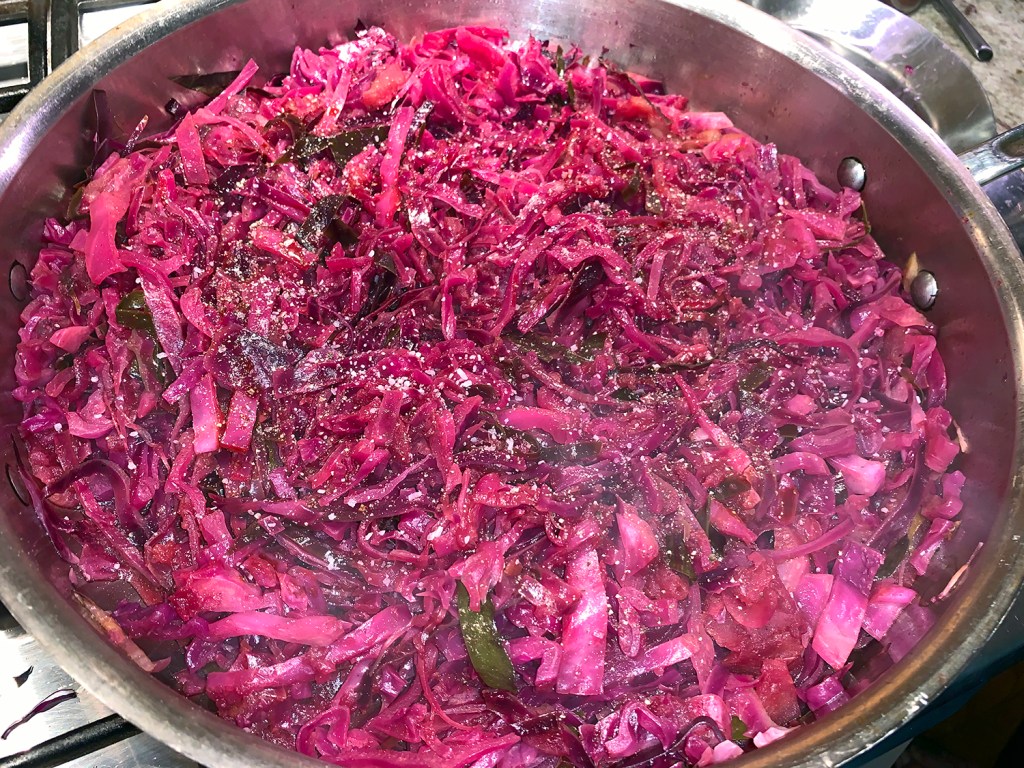
  4. Drain the cabbage and add to the pot. Toss to coat thoroughly, then stir in the allspice, another 2 tablespoons balsamic vinegar, and salt to taste. Toss together.
  5. Cover the pot, and cook over low heat for one hour, stirring from time to time.
  6. Add freshly ground pepper, taste and adjust salt, and add another tablespoon or two of balsamic vinegar as desired.

http://www.lynnandruss.com

Recipe from Martha Rose Shulman for The NY Times