Monthly Archives: February 2017

Have a Heart, or Three, or More…

Tender roasted artichoke hearts and crispy panko add nutty, toasted flavors to this Pasta with Garlicky Roasted Artichokes recipe that brims with briny olives and sweet sun-dried tomatoes.

img_0555

Our pasta-to-veggie ratio was a bit skewed, but in a good way because the box of gluten-free pasta was only 8.8 ounces, and we incorporated two 9-ounce packages of frozen artichokes, 50% more than called for. You might not be aware of the humble artichoke’s position as a nutrient powerhouse and the amazing health benefits you can have simply by adding this veggie to your diet.

A serving of artichokes provides greater antioxidant benefits per serving than many other foods traditionally considered to be antioxidant-rich such as dark chocolate, blueberries and red wine—all three of which I love! Plus, just one artichoke provides over 10 grams of dietary fiber, making them a powerful tool for helping to not just keep you regular but also to improve your digestive health overall.

The recipe didn’t specify, but we used dried (more like a half cup) as opposed to oil-packed sun-dried tomatoes. I’d be remiss if I also didn’t mention the health benefits of this fruit. These intensely flavored, sun-kissed beauties are a concentrated source of nutrients. They provide vitamins C and K, iron, and lycopene, an antioxidant associated with lower risk of certain cancers.

As with all vegetables, roasting intensifies the flavors and preserves the sweetness while creating hard-to-resist crispy edges; and it’s an easy and relatively hands-off process. In fact, it’s so easy you may want to double the artichoke recipe so that you can also serve the veggie as a side dish for another meal.
img_0540

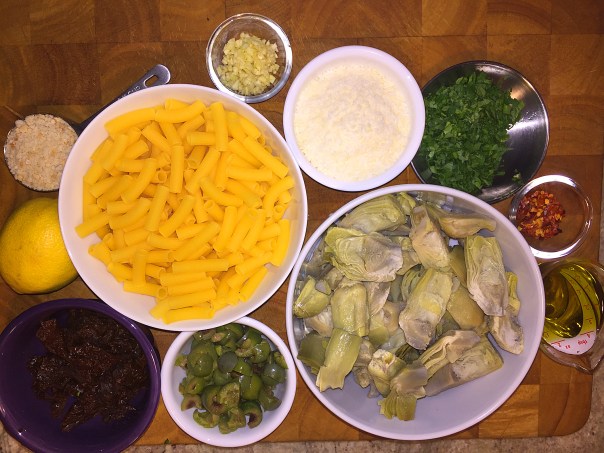
Ingredients

  • Kosher salt
  • 12 oz. penne, mezze rigatoni, or similar short pasta
  • 1/4 cup finely chopped fresh flat-leaf parsley
  • 1 tsp. finely grated lemon zest
  • Garlicky Roasted Artichoke Hearts (recipe follows)
  • 1/3 cup coarsely chopped sun-dried tomatoes
  • 1/3 cup coarsely chopped pitted Castelvetrano or Cerignola olives
  • 1/4 cup extra-virgin olive oil; more for drizzling
  • 1/2 oz. Grana Padano or Parmigiano-Reggiano, finely grated (about 1/4 cup); more for serving
  • Lemon wedges, for serving (optional)

img_0551
Add the panko and a pinch of salt to the garlic, and stir until the oil is absorbed and the panko turns golden brown. Although adding bread to a pasta dish is odd, the small amount of toasted panko adds a wonderful crunch and texture.

img_0549
In a large bowl, combine the parsley and lemon zest. I also added the red pepper flakes (extra of course), tomatoes, and olives at this point.

img_0552
Then I added the pasta, panko, roasted artichokes, oil, and cheese, and tossed until well combined.

Directions

  1. Bring a large pot of well-salted water to a boil. Cook the pasta according to package directions until al dente.
  2. Meanwhile, in a large bowl, combine the parsley and lemon zest. Add the pasta, artichokes, tomatoes, olives, oil, and cheese, and toss until well combined.
  3. Drizzle with more oil, top with additional cheese, and serve with lemon wedges, if you like.

Roasted Artichokes
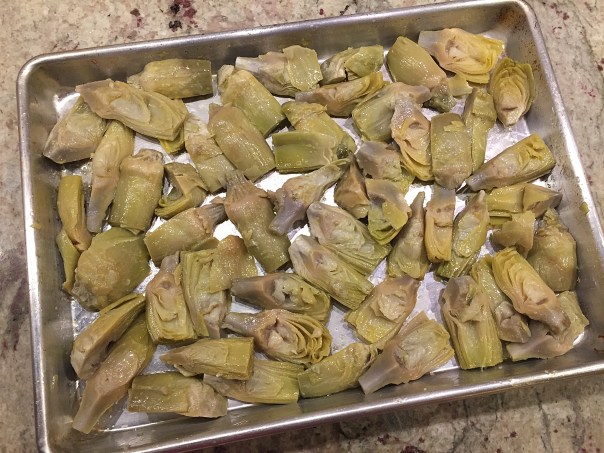
img_0543
Thawed frozen artichoke hearts are tossed in oil, sprinkled with salt, and spread out in a single layer on a rimmed baking sheet.

img_0556

Ingredients

  • 12 oz. thawed frozen artichoke hearts, drained and patted dry
  • 4 Tbs. extra-virgin olive oil
  • Kosher salt
  • 1 tsp. minced garlic
  • 1/4 cup panko
  • 1/2 tsp. crushed red pepper flakes; more to taste
  • 1 Tbs. finely chopped fresh flat-leaf parsley
  • Lemon wedges, for serving (optional)

Directions

  1. Position a rack in the center of the oven and heat to 425°F.
  2. On a rimmed baking sheet, toss the artichokes with 2 Tbs. oil and 1/2 tsp. salt, spread in a single layer, and roast until the artichokes are golden on the bottom, about 20 minutes. Flip and roast until golden brown in places, 5 to 7 minutes.
  3. In an 8-inch nonstick skillet, heat 1 Tbs. oil on medium-low heat. Add the garlic and stir with a wooden spoon until fragrant, about 30 seconds. Add the panko and a pinch of salt, and stir until the oil is absorbed and the panko turns golden brown, 2 to 3 minutes.
  4. In a large bowl, toss the artichokes with the panko, pepper flakes, and remaining 1 Tbs. oil. Serve sprinkled with the parsley and lemon wedges on the side, if you like.

Recipes by Diana Andrews from Fine Cooking

Meyer’d in Lemony Love

We are head over heels with this recent recipe Crispy Flounder with Pears, Endive, and Meyer Lemon, another from Fine Cooking’s Make It Tonight series. The flavors all melded together wonderfully to create an almost sensual sauce with a sweet lemony note, soft buttery pears and tender endive… perhaps a new holy trinity in cooking…

Smoother, rounder, and deeper in color than standard lemons, Meyer lemons are less acidic, with orange and floral flavor notes. They are plenty juicy too, because I squeezed over three whole tablespoons from just one piece of fruit. It is critical that you use Meyer lemons because regular ones are too tart and will sour you on the results. If your local supermarket doesn’t have them in stock, substitute a regular lemon but add some fresh squeezed orange juice to mellow the flavor.

img_0613

When food shopping, we found that tilapia fillets were less than half the cost of flounder due to a sale at the seafood counter. Knowing that both fish are white, firm-fleshed, mild tasting, lean and flaky, we saved ourselves a few bucks and bought the tilapia. A few other tweaks included using scallion greens instead of chives (because I forgot to put them on the grocery list), and scaling back on the total amount of butter by about 20 percent.

One thing to note, after you remove the lid from cooking the pears and endive, the directions indicate the produce should start browning in places after two minutes. Well that didn’t happen for me until nearly 10 minutes, and by that time, some of the luscious juices had evaporated. It would be nice to have the best of both worlds, but if it means sacrificing that heavenly sauce for a few brown spots, I’d prefer the extra liquid in this case.

You’ll likely have a good bit of the cornmeal and flour leftover after dredging the fillets because not much sticks to the fish, which is a good thing in my opinion. Plus, I think the recipe title of “Crispy Flounder” is a bit of a misnomer on the grounds that you are  sautéing the fillets as opposed to frying them, which result in browned exteriors that are not necessarily crispy. But all said and done, the dish was divine!

img_0596Ingredients

  • 2 small Meyer lemons
  • 6 Tbs. unsalted butter
  • 3 medium Belgian endives, trimmed and quartered lengthwise
  • 3 medium firm-ripe pears, peeled, cored, and sliced lengthwise 1/2 inch thick
  • Kosher salt
  • 1/2 Tbs. thinly sliced chives; more for garnish
  • 1/2 cup unbleached all-purpose flour
  • 1/2 cup fine-ground cornmeal
  • 4 small flounder or sole fillets (about 1-1/2 lb.)
  • Freshly ground black pepper
  • 2 Tbs. olive oil
  • 1/2 cup dry white wine

img_0600
Pears, endive and Meyer lemons get prepped.

img_0601
The endives, pears, lemon juice, lemon zest, and salt are added to hot sauté pan.

img_0603
Combine the flour and cornmeal in a shallow bowl, season the fish lightly with salt and pepper and then dredge it in the mixture.

img_0605
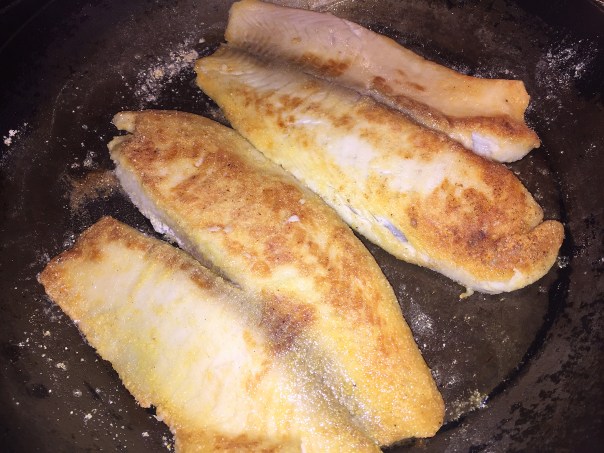
Cook 2 of the fillets at a time, flipping once, until golden-brown and cooked through, 2 to 3 minutes per side.

img_0609
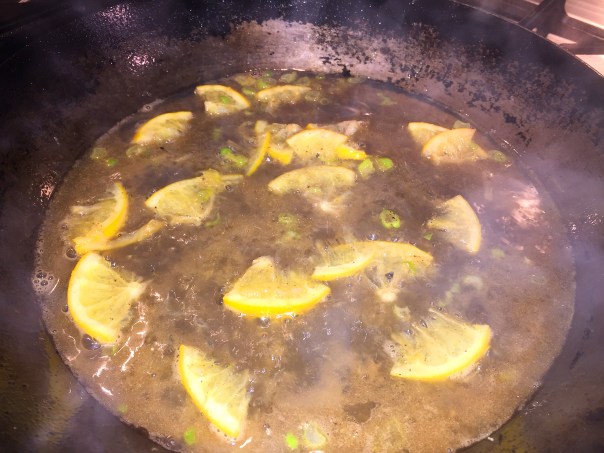
Heat the remaining two tablespoons of butter in the pan until melted and browned and then stir in the lemon slices and a pinch of salt.

img_0612
Add the wine, bring to a simmer, and reduce by half.

Directions

  1. Finely grate 2 tsp. zest from one of the lemons. Squeeze 1-1/2 lemons to yield 2 Tbs. of juice. Thinly slice the remaining half and cut each slice into quarters; set aside.
  2. In a 10- to 11-inch straight-sided sauté pan, melt 3 Tbs. of the butter over medium heat until foamy. Add the endives, pears, lemon juice, lemon zest, and 1/2 tsp. salt; stir to combine. Cover, reduce the heat to medium low, and cook, stirring occasionally until tender, 15 to 20 minutes.
  3. Remove the lid and cook until the endives and pears are lightly browned in places, about 2 minutes. Remove from the heat and stir in the chives.
  4. While the endives and pears cook, combine the flour and cornmeal in a shallow dish. Season the fish lightly with salt and pepper and then dredge it in the cornmeal mixture.
  5. Heat 1/2 Tbs. of the butter with 1 Tbs. of the oil in a 12-inch skillet over medium-high heat.
  6. Cook 2 of the fillets, flipping once, until golden-brown and cooked through, 2 to 3 minutes per side. Transfer to a clean plate. Wipe out the skillet and repeat with another 1/2 Tbs. butter and the remaining 1 Tbs. oil and fillets. Transfer to the plate with the other fish. Wipe out the skillet again.
  7. Heat the remaining 2 Tbs. butter in the pan until melted and browned and then stir in the lemon slices and a pinch of salt. Add the wine, bring to a simmer, and reduce by half, 1 to 2 minutes. Season to taste with salt and pepper.
  8. Divide the pear mixture among 4 dinner plates and top with a fillet. Spoon the lemon pan sauce over the fish, garnish with chives, and serve.

By Melissa Pellegrino from Fine Cooking

img_0618

Bucks County’s “Cheers”

When I moved to Yardley, PA way back in 1984, about the only dining options in the area other than the more upscale Yardley Inn, was the Continental Tavern on Main at the intersection of Afton. Located in the heart of Yardley’s Historic District and just two blocks from the Delaware River, the Continental Tavern offers an “atmosphere that is comfortable, inviting and reminiscent of bygone days when hospitality was paramount.”

My ex-husband and I dined there frequently during our tenure together, and especially when my parents came to visit, because my mom just loved their hamburgers! This would be one instance where she’d allow herself to ignore her otherwise strict diet. The tavern was pretty dated back then and looks completely different now, but their burgers are still the bomb.

continental-tavern-front
The Continental Tavern as it looks today.

From the mid 1800’s through the Civil War the building served as a way station on the Underground Railroad, an escape route for slaves. Known hiding places were under the eaves of the Continental and during the recent renovation, parts of the underground railroad were revealed and glassed over. It was also the scene of two murders over the course of its long operation.

continental-tavern-old
The Continental Hotel back in the 1800’s.

Current owner Frank Lyons is a revolutionary war re-enacter and participates in the yearly Christmas crossing of the Delaware River in Washington’s Crossing. He began renovation in 2007, and it now boasts a restored outdoor porch, a semi-Victorian façade, and a second floor library now known as the Parlor Room. The tavern is commonly known as Bucks County’s “Cheers” where everyone knows your name—yet also has the moniker of the most haunted building in the county.

The spacious outdoor porch overlooking picturesque Lake Afton offers outdoor dining when the weather cooperates. Which on our most recent visit in mid-February with Rosanne and Gary, it was in the balmy mid-60’s earlier in the day, and the porch was packed with diners when we arrived—luckily we had reservations inside.

bar
The bar is always hopping (although not in this stock photo), and there is live entertainment on weekends.

While excavating for the Underground Railroad during construction, 10,000 whiskey bottles were found from the Prohibition Era as noted on dated newspapers found in the dig—no doubt a Speak Easy during that alcohol-free time period.

The tavern boasts nine great draught beers, a hefty selection of bottled beers and nine large LCD screens on two floors for all sports—not necessarily a plus for some patrons. They feature a daily entrée, soup and appetizer specials which are listed on the large chalk boards in the dining room and the bar. Also highlighted is a weekly bottled craft beer special.

img_0557

img_0561

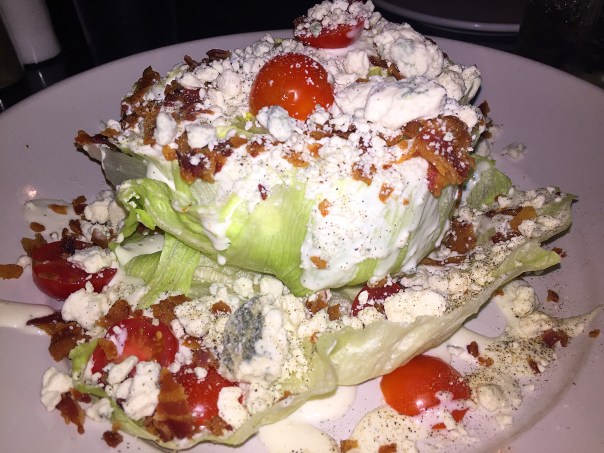
After putting in drink orders, we zeroed in on the menu finally deciding to split salads with our partners. Gary and Rosanne chose the beautiful Roasted Beet Salad on a bed of baby greens and topped with chunks of feta cheese and a balsamic glaze. Hubby and I shared the ginormous Wedge Salad made up of a half head of iceburg lettuce showered with more than ample blue cheese, grape tomatoes and crumbled bacon. Both salads were plenty big enough to divide or order as an entrée.

img_0563

img_0564

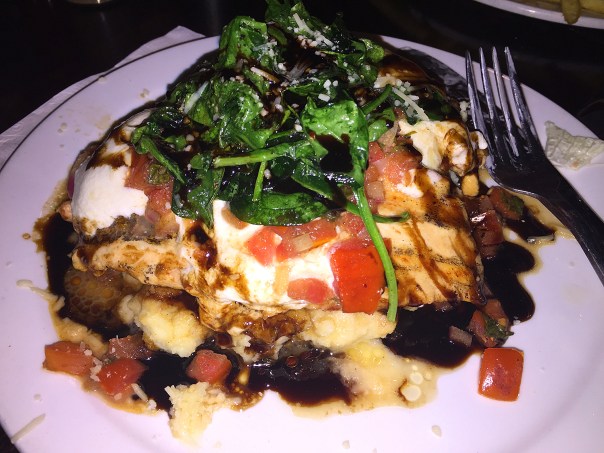
Speaking of entrées, I was the odd man out because, instead of getting a burger, I ordered the Chicken Bruschetta which came plated over a bed of roasted garlic whipped potatoes, and was smothered with mozzarella cheese, tomato bruschetta and sautéed spinach, all bathed in a wonderful drizzle of balsamic reduction. After consuming a good-sized portion of the wedge salad, I had plenty of my entrée leftover to take home.

img_0568

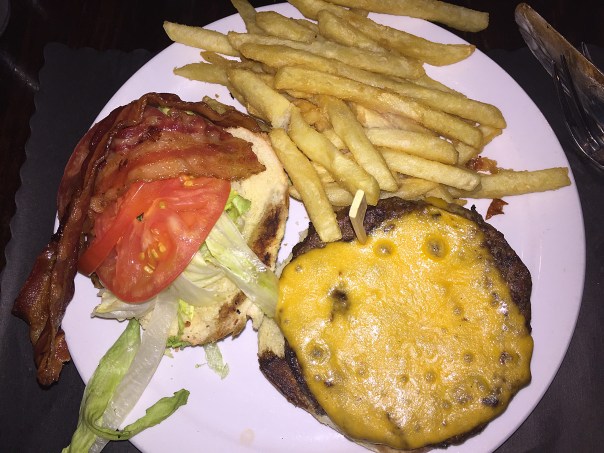
My other three dining companions all opted for one of their famous burgers, with our friends both ordering the Classic Burger made with certified angus beef, choice of cheese and lettuce and tomato. Rosanne wanted to pair hers with the zucchini fries (which I was also hoping to do instead of mashed potatoes) but our waiter Chris informed us they no longer carry them.

img_0569

So regular fries it was, although they also offer curly fries, Con Tav fries dusted with Old Bay seasoning served with a cheese dip, and sweet potato fries with maple syrup. Mr. Russ settled on the Continental Tavern Burger with sautéed mushrooms, caramelized onions and Swiss cheese. He was pleased that he could order a gluten-free bun, but ended up not eating most of it.

img_0571

Maybe halfway through our meal, a guitarist started playing in the bar area singing tunes from the 70’s and 80’s, prompting us and nearby patrons to start singing or humming along. I was hoping to talk with the proprietor Frank about the underground railroad excavation but because the place was so busy, he was unavailable yet gave me his card in case I wanted to follow up at a later date.

After spending a relaxing 2 1/2 hours over dinner, it was time to bid farewell. But not before we made plans to do a NYC foodie tour in late April. Stay tuned for the details…

Comforting and Versatile

Beef Picadillo is a traditional dish in Spain and many Latin American countries that is similar to hash. A Latin American and Caribbean favorite with many variations, picadillo has a savory-sweet ground beef and tomato filling that’s delicious wrapped in lettuce leaves. It is often served with rice or used as a filling in dishes such as tacos, savory pastries or croquettes. The name comes from the Spanish word picar, which means “to mince” or “to chop.”

Raisins are added toward the end, and they plump up beautifully in the sauce. For the olives, you may experiment with fancy and plain, but most chefs agree that pimento-stuffed green olives are best. To compensate for the fact that we had pitted green olives without the pimento, we added a chopped piquillo pepper to add a similar taste and color component.

The result is crazily comforting: an island dish that is warm though hardly spicy, at once slightly sweet and savory. It will fill your home with a mouthwatering aroma. Once you have your ingredients chopped, the whole meal comes together pretty fast.

Picadillo is also very versatile—you can eat the savory meat and vegetable mixture in burritos, tacos, empanadas, over spaghetti noodles, or stuffed in a bell pepper, the possibilities are endless. We thought it went well with the Mexican Rice and Beans side dish that follows.

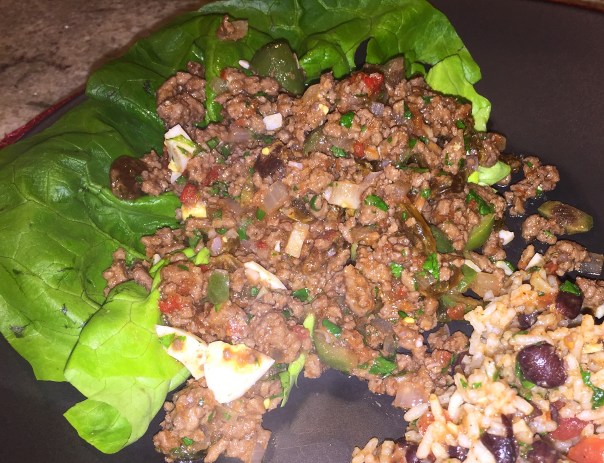
img_0407

Ingredients

  • 3 Tbs. extra-virgin olive oil
  • 1-1/2 lb. lean ground beef
  • 1/3 cup dry red wine
  • 1 small yellow onion, minced
  • 3 cloves garlic, minced
  • 1 cup canned crushed tomatoes
  • 1/2 cup golden raisins
  • Kosher salt and freshly ground black pepper
  • 2 large hard-cooked eggs, finely chopped
  • 6 Tbs. chopped pimiento-stuffed green olives
  • 1/4 cup minced fresh cilantro
  • 1 small head Boston lettuce, cored and leaves separated

img_0413
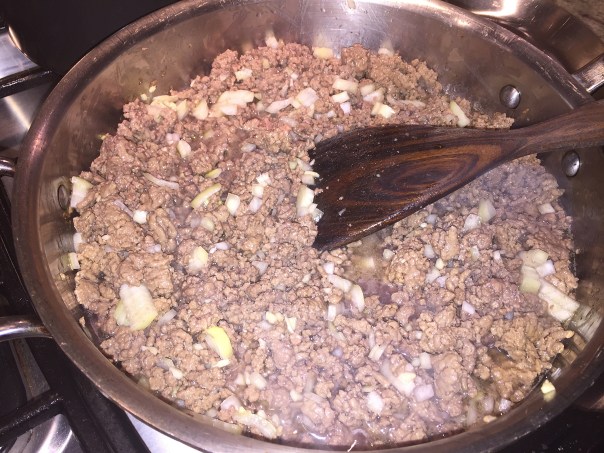
Heat the oil in a large skillet and add the ground beef; then add the wine, onion, and garlic.

img_0416
Siphon off any extra fat then add the tomatoes and raisins and simmer until the liquid has almost evaporated.

img_0420
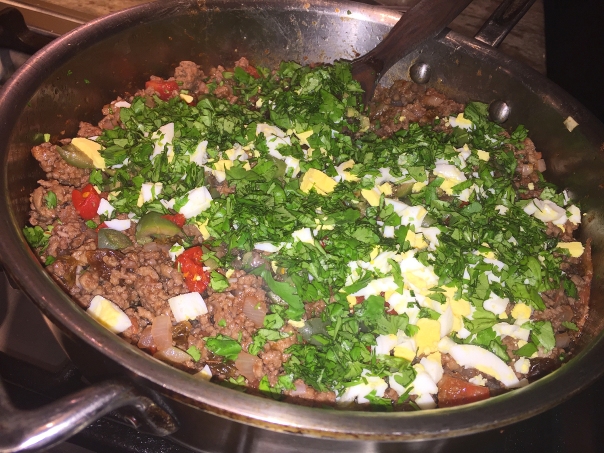
Remove the skillet from the heat and stir in the chopped eggs, olives, and cilantro.

img_0423
Mix everything together until well blended.

img_0428
Serve hot with the lettuce leaves for wrapping.

Directions

  1. Heat the oil in a large skillet over medium heat. Add the ground beef and cook, stirring occasionally and breaking up the meat with the edge of a spoon, until done, about 5 minutes.
  2. Add the wine, onion, and garlic and cook, stirring occasionally, until the wine is almost evaporated, about 5 minutes.
  3. Add the tomatoes and raisins and simmer, stirring occasionally, until the liquid has almost evaporated, 2 to 3 minutes. Season with 1-1/2 tsp. salt and a few grinds of pepper.
  4. Remove the skillet from the heat and stir in the chopped eggs, olives, and cilantro. Serve hot with the lettuce leaves for wrapping.

By Mark Scarbrough, Bruce Weinstein from Fine Cooking

Mexican Rice and Beans

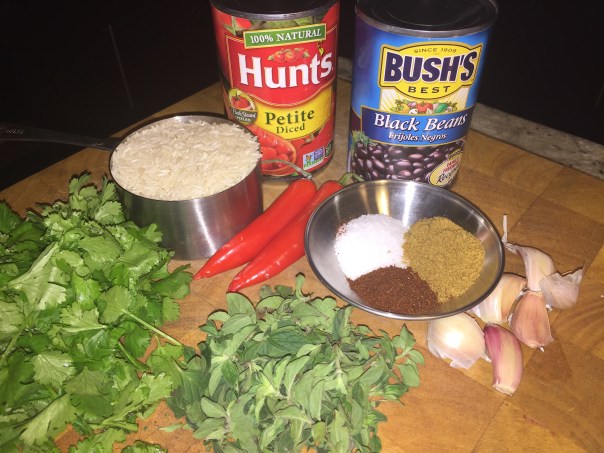
img_0402

When cooked using the absorption method, medium-grain rice yields a tender, starchy, slightly creamy kernel that’s ideal for saucy rice dishes like this one.

Ingredients

  • 1 cup uncooked medium-grain white rice
  • 1 14-1/2-ounce can diced tomatoes (preferably “petite-cut”)
  • 2 Tbs. extra-virgin olive oil
  • 6 medium cloves garlic, finely chopped
  • 1 medium fresh jalapeño, cored and finely chopped (if you like spicy foods, leave in the ribs and seeds; if not, remove them)
  • 1 15-oz. can black beans, drained and rinsed
  • 2 tsp. kosher or fine sea salt
  • 2 tsp. ground cumin
  • 1 tsp. chili powder
  • 1/4 cup finely chopped fresh oregano leaves and tender stems
  • 1/4 cup finely chopped fresh cilantro leaves and tender stems

img_0404
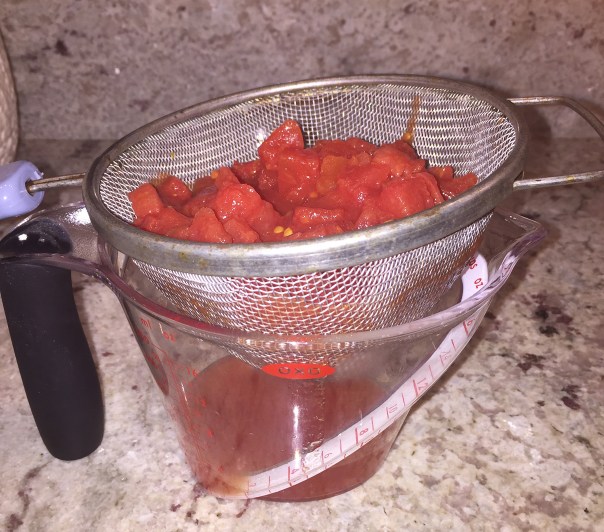
I found it easiest to drain the tomatoes directly over a 2-cup measuring cup.

img_0409
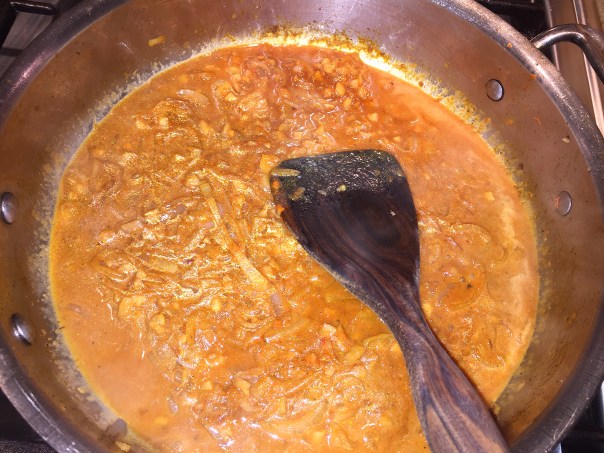
Stir-fry the garlic and jalapeño until the garlic browns and the jalapeño smells pungent.

img_0411
Next add the black beans, salt, cumin, and chili powder.

img_0417
Stir in the tomato juice and water mixture, bring to a boil and adjust the heat to maintain a gentle boil and cook the beans until they absorb much of the liquid.

img_0418
Add the tomatoes, oregano, cilantro.

img_0421
The skillet was too small to effectively mix all of the ingredients so I tossed it all into a large bowl.

Directions

  1. In a 1-quart saucepan, combine the rice with 2 cups cold water. Bring to a boil over medium-high heat, cover, reduce the heat to low, and cook for 20 minutes. Remove from the heat and let the pan stand, covered, for another 5 minutes.
  2. While the rice steams, set a fine sieve in a bowl and drain the can of tomatoes. Pour the tomato juices into a 1-cup liquid measure. Add enough water to the tomato juices to equal 1 cup.
  3. Heat a 10- to 12-inch skillet over medium-high heat. Pour in the oil and stir-fry the garlic and jalapeño until the garlic browns and the jalapeño smells pungent, about 1 minute.
  4. Add the black beans, salt, cumin, and chili powder; stir two to three times to incorporate the mixture and cook the spices, about 30 seconds. Stir in the tomato juice and water mixture and bring to a boil.
  5. Adjust the heat to maintain a gentle boil and cook, stirring occasionally, until the beans absorb much of the liquid, 5 to 7 minutes.
  6. Add the tomatoes, oregano, cilantro, and cooked rice and cook, stirring occasionally, until the rice is warm, 1 to 2 minutes. Serve immediately.

By Raghavan Iyer from Fine Cooking

img_0430

Curry-ious About Another Thai Dish?

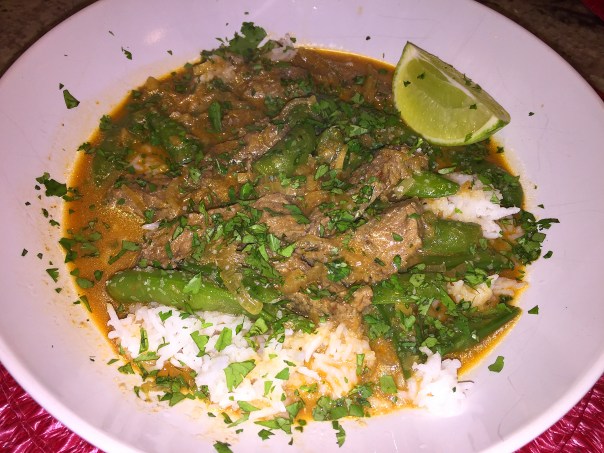
Yes, another Thai dish. If you are also a fan of bold, flavorful Asian dishes, this delicious Spicy Thai Beef Curry over a bed of steamed jasmine rice is a good one to try. While the word “curry” might first bring about thoughts of Indian food, different types of curry can be found all over the world.

Curries contain a complex mix of spices, fresh herbs and chilies and the proportions of these ingredients vary depending on national, regional, religious or family traditions. While Indian dishes tend to use more dry spices, Thai cuisine often uses curry paste and fresh herbs instead. Thai curries are cooked for a shorter period of time and typically include vegetables, chicken, seafood accented with fresh herbs like mint, cilantro and basil. They also tend to be soupier, thanks to the addition of coconut milk or water.

Unlike Indian curries, where the spice lingers on the palate, Thai curries deliver the heat upfront because of their fresh ingredients. Thai curry paste usually is made of fresh chilies, lemon grass, galangal (ginger), garlic, shallot, kefir lime leaves, cilantro roots and shrimp paste, with spices like cumin seeds, coriander seeds and turmeric. The red chilies that make red curry paste are moderate in heat.

Not only are curries delicious, but there are some great health benefits too! Recent research has shown that curry can actually be good for you, even protecting you from Alzheimer’s. Plus, ginger acts as an effective pain reliever from the agony of arthritis; onions contain an agent called diallyl sulfide, which prompts the body to make more of a cancer-fighting molecule; and garlic, as you know, has been found to have a wide range of health benefits, from protecting the heart by lowering cholesterol to helping to purify the blood. Time for a curry craze!

img_0537

As far as more medicinal pluses, most curries contain spices with strong anti-bacterial properties. That’s why they’re found in dishes from hot countries, where meat needs to be preserved. Studies have found that garlic, cinnamon and cumin can destroy up to 80 per cent of meat-borne bacteria, while ginger can slow bacterial growth by 25 per cent.

A few principles to follow when making curry. Be generous with your spices, they not only bring flavor but texture to dishes. Decide what is going to give your curry sauce its body. This will normally be one, or a combination, of the following: tomatoes; pureed peppers or chilis; yogurt or cream; coconut milk (as in this recipe); spinach, or finely diced or pureed onion. And the holy trinity of onion, ginger, and garlic provide the deep base flavor of most curries—equivalent to onion, carrot and celery in the French tradition.

Note to the wise, not all curries are healthy. Avoid kormas, masalas and pasandras, which contain frightening amounts of cream. This recipe does use a lot of coconut milk, and you could use a “lite” version to cut back on calories, it just won’t be as thick or creamy.

Our supermarket was not carrying beef sirloin tips so we bought a sirloin steak and cut it into large chunks for the initial searing step. And when it comes to red curry paste, I tend to err on the “more-is-better” principle, which was confirmed by many reviewers who had already made the dish. In fact, one woman who said she likes things “medium-spicy” added 4 tablespoons and didn’t think it ended up too zesty at all.

img_0526

Ingredients

  • 1 Tbs. vegetable oil
  • 1-1/2 lb. beef sirloin tips
  • Kosher salt and freshly ground black pepper
  • 1/2 cup thinly sliced shallots (about 2 medium-large)
  • 1/4 cup finely chopped fresh ginger
  • 1 tsp. to 1 Tbsp. Thai red curry paste (or even more to taste)
  • 1/2 cup low-salt canned chicken broth
  • 1 13-1/2-oz. can unsweetened coconut milk
  • 1 Tbs. fish sauce
  • 1-1/2 cups frozen sugar snap peas
  • 1 large lime, zest finely grated and fruit cut into wedges
  • 1/3 cup chopped fresh cilantro

img_0528
Season the meat with salt and pepper and sear the meat in batches until nicely browned on two sides.

img_0529
Add the shallots to the pan and cook until just tender and lightly browned.

img_0531After the ginger and curry paste, stir in 1/4 cup of the broth, scraping up any bits that are stuck to the pan, then add 1/3 cup of the coconut milk.

img_0532
Stir until the curry paste has blended in completely.

img_0533
After the meat rests, slice it thinly across the grain and return it to the pan along with the lime zest.

Directions

  1. Heat the oil in a 10-inch straight-sided sauté pan over medium-high heat. Season the sirloin tips with salt and pepper and sear the meat in batches until nicely browned on two sides, 1 to 2 minutes per side. Transfer to a plate.
  2. Reduce the heat to medium. Add the shallots to the pan and cook until just tender and lightly browned, 2 to 4 min. Add the ginger and cook, stirring, until fragrant, about 1 min. Add the curry paste and cook, stirring, about 30 seconds. Stir in 1/4 cup of the broth, scraping up any bits that are stuck to the pan. Add 1/3 cup of the coconut milk, stirring until the curry paste has blended in completely. Stir in the remaining coconut milk and broth. Add the fish sauce.
  3. Increase the heat to medium high. Return the beef to the pan (along with any juices), stir, and simmer until the meat is just cooked through, 8 to 12 min.
  4. Take the pan off the heat. Remove the meat and transfer to a cutting board. Stir the sugar snap peas into the sauce and cover the pan. Let the meat rest for 1 min., then slice it thinly across the grain; return it to the pan along with the lime zest. If necessary, return the pan to medium heat until the peas are thawed and  heated through.
  5. Portion the curry into four warm bowls, sprinkle with the cilantro, and serve with the lime wedges.

By Joanne Smart from Fine Cooking

img_0538

For the Larb of Me, I Can’t Remember Ever Eating This

As I’ve mentioned often, Thai cuisine is among one of my favorites, yet neither Russ nor I have ever dined on larb before. The unofficial national dish of Laos, larb is also popular in Thailand and exemplifies the bold flavors of the region. Usually served with fresh vegetables as a salad, this Spicy Chicken Larb recipe is made more winter-friendly served over Thai-Style Roasted Cabbage (recipe follows).

Laoisan Style Larb is most often made with chicken, beef, duck, fish, pork or mushrooms, flavored with fish sauce, lime juice, padaek, roasted ground rice and fresh herbs. The meat can be either raw or cooked; it is minced and mixed with chili, mint and, optionally, assorted vegetables. Roughly ground toasted rice (khao khoua) is also a very important component of the dish. The dish is served at room temperature and usually with a side of sticky rice and raw vegetables.

img_0521

So as you can see, there are numerous variations of this dish. This particular one we found in the Make It Tonight series from Fine Cooking, one of our go-to places for quick, tasty weeknight meals.

Don’t be shocked how dark the cabbage gets, but be aware of the time as there is a fine line between roasted and burnt. The recipe calls for it to be cooked anywhere from 45-50 minutes, but our small head only took 30 minutes. And make sure you give it a toss every 10 minutes during the roasting period or it will be charred on one side.

LARB (can also be spelt laap, larp or laab )

img_0503

Ingredients

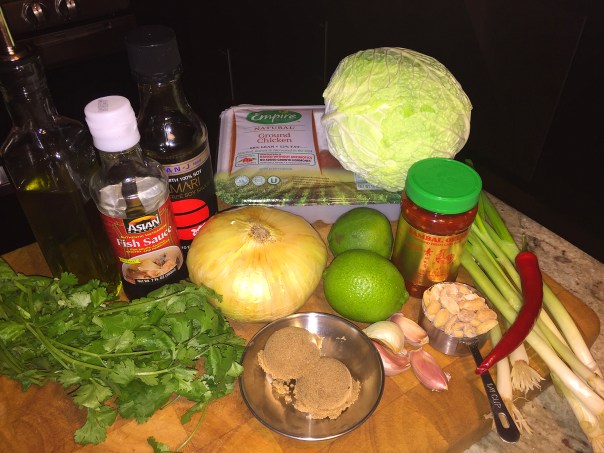
  • 3 Tbs. soy sauce
  • 1 Tbs. light or dark brown sugar
  • 1 tsp. fish sauce
  • 1/2 tsp. sambal oelek; more to taste
  • 3 Tbs. grapeseed or vegetable oil
  • 1-1/2 cups finely chopped sweet onion
  • 1 Thai bird chile, half seeded and minced, half cut into rings and reserved for garnish, if desired
  • 1 tsp. minced garlic
  • 1 lb. ground chicken
  • 1/2 cup coarsely chopped fresh cilantro
  • Kosher salt
  • 1 tsp. finely grated lime zest; more to taste
  • 1 Tbs. fresh lime juice; more to taste
  • Thai-Style Roasted Cabbage
  • 3 to 4 scallions, green parts only, thinly sliced on a diagonal (about 1/4 cup)
  • 1/4 cup coarsely chopped dry-roasted peanuts

img_0508
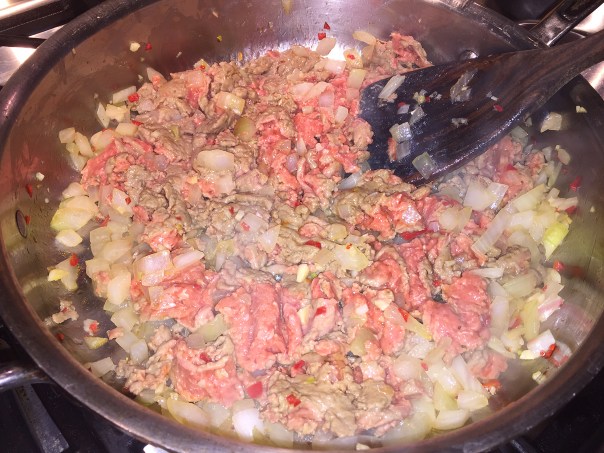
Add the onion and minced chile to a hot skillet, and cook, stirring frequently, until the onion begins to soften, then add the garlic and cook just until fragrant.

img_0509Next, add the chicken and cook, breaking it up with a wooden spoon, until no longer pink.

img_0513
Remove the pan from the heat, and add the lime zest and juice.

Directions

  1. In a small bowl, whisk the soy sauce, sugar, fish sauce, and sambal oelek.
  2. In a 12-inch nonstick skillet, heat the oil over medium-high heat. Add the onion and minced chile, and cook, stirring frequently, until the onion begins to soften, 2 to 3 minutes. Add the garlic and cook just until fragrant, about 30 seconds.
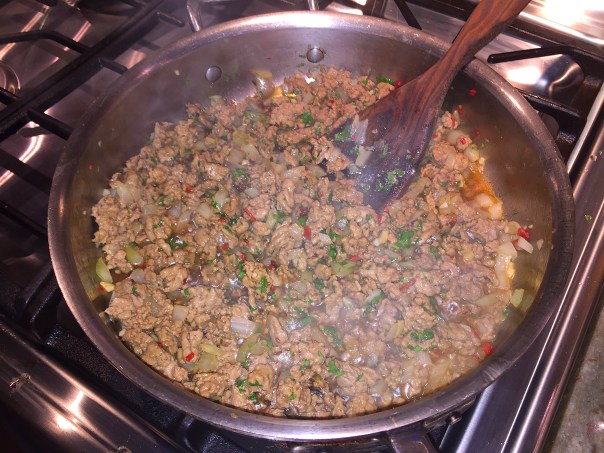
  3. Add the chicken and cook, breaking it up with a wooden spoon, until no longer pink, 6 to 8 minutes.
  4. Add the soy sauce mixture, half of the cilantro, and 1/4 tsp. salt. Cooking, stirring, until the pan is almost dry, about 2 minutes.
  5. Remove the pan from the heat, and add the lime zest and juice. Toss to combine, and season to taste with more zest, juice, and salt.
  6. Serve the chicken over the cabbage. Top with the remaining cilantro, scallions, peanuts, and chile rings, if using.

Thai-Style Roasted Cabbage

Peppery cabbage becomes delightfully sweet post roast. Paired with a Thai-inspired dressing, it makes a perfect side for steak and a great base for Spicy Chicken Larb.

img_0506
Spread the cabbage out on a rimmed baking sheet, and roast, tossing every 10 minutes.

Ingredients

  • 1 medium head Savoy cabbage, halved through the core, cut lengthwise into 1/2-inch ribbons, thick ribs and core discarded (about 16 cups)
  • 2 Tbs. grapeseed or vegetable oil
  • Kosher salt and freshly ground black pepper
  • 3 Tbs. fresh lime juice
  • 1 Tbs. finely chopped garlic
  • 1 Tbs. fish sauce
  • 1 Tbs. packed dark brown sugar
  • 1 Tbs. packed finely chopped fresh cilantro; more for garnish
  • 1/2 tsp. sambal oelek; more to taste

Directions

  1. Position a rack in the center of the oven and heat to 425°F.
  2. On a rimmed baking sheet, toss the cabbage with the oil, 1/2 tsp. salt, and a few grinds of pepper. Spread the cabbage out (it’s OK if the cabbage is mounded; it will shrink as it roasts), and roast, tossing every 10 minutes, until tender and most of the cabbage has turned golden brown, 45 to 50 minutes.
  3. Meanwhile, in a small bowl, whisk the lime juice, garlic, fish sauce, sugar, cilantro, and sambal oelek.
  4. Transfer the cabbage to a large bowl and toss with 2 Tbs. of the dressing. Season to taste with additional dressing and salt, top with cilantro, if using, and serve.

img_0518
Transfer the cabbage to a large bowl and toss with the dressing, season to taste with salt, and top with cilantro.

Both recipes by Diana Andrews from Fine Cooking


Backward Braising with Pork and Fennel—A Dynamic Duo

Lynne Curry from Fine Cooking dishes on the benefits of Backward Braising. Try her wonderful aromatic Braised Pork Shoulder with Fennel, Garlic, and Herbs, it is delicious!

img_0496

Braised meat is a beautiful thing. Thanks to low, slow cooking in a flavorful liquid, the meat becomes crazy tender and full of flavor. It’s the perfect choice for winter dining, when you’re hankering for a hearty meal and having the oven on for a few hours is most welcome. A braise is practically foolproof and only better if made ahead, so it’s great for both casual family meals and stress-free entertaining. This method is supposed to be even easier, although we both thought it took the same amount of time and work, if not a bit more.

When braising, you typically sear meat to brown it for flavor and color, then add liquid and aromatics before cooking it until tender. With this “backward” method, you braise the meat to tenderness first, then brown it in a hot oven. The end result is more of the meat surface is browned, which we consider a plus.

There are several rewards for doing this. You skip the messy step of searing the meat on the stovetop and have no chance of burned fat leaving an off taste. You also create a flavorful broth in the pot, which means you don’t need to have stock on hand to braise.

Slow cooking followed by a blast in the oven creates tender meat with an appealing crust, all without searing. The flavor combination in this braise is reminiscent of porchetta, and leftovers make a great sandwich. For the best results, season the pork at least a day ahead, or up to three days (ours was in the rub for 23 hours.)

The meat from this recipe can be served for dinner as is, in chunks or slices along with its sauce and, say, some potatoes. But you can also shred the meat to use in tacos, as a filling for ravioli, or as a topping for risotto, polenta, or pasta along with some of the sauce.

img_0431
Fennel seed is coarsely ground in a mortar and pestle.

img_0433
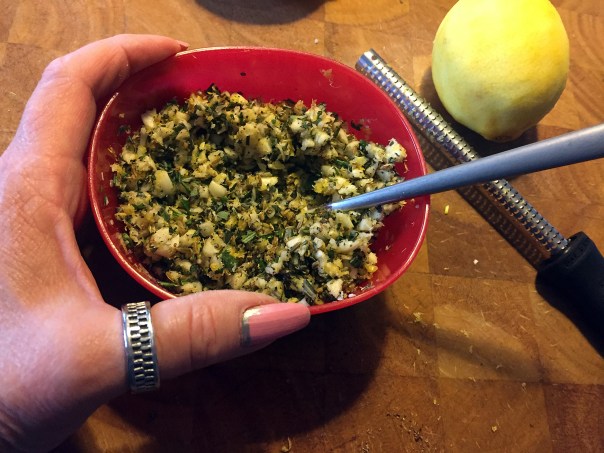
Combine the garlic, zest, rosemary, salt, sage, fennel seeds, and pepper in a small bowl.

Ingredients

For the spice rub
  • 8 large cloves garlic, minced
  • 2 Tbs. finely grated lemon zest (from about 2 lemons)
  • 2 Tbs. chopped fresh rosemary
  • 1 Tbs. kosher salt
  • 2 tsp. coarsely chopped fresh sage
  • 2 tsp. coarsely ground fennel seeds
  • 1 tsp. freshly ground black pepper
  • 1 3- to 31/2-lb. bone-in pork shoulder roast
For the braise
  • 1 medium yellow onion, chopped
  • 1 fennel bulb, chopped (about 2-2/3 cups), plus 1/2 cup fennel fronds for the braise and more for serving, if you like
  • 1 tsp. finely chopped fresh rosemary
  • 1 bay leaf, preferably fresh
  • 2 cups dry white wine

Directions

img_0441
Using a paring knife, trace the fat seams of the roast and around the bone to make a series of deep incisions on both sides, without completely separating the muscles.

img_0445
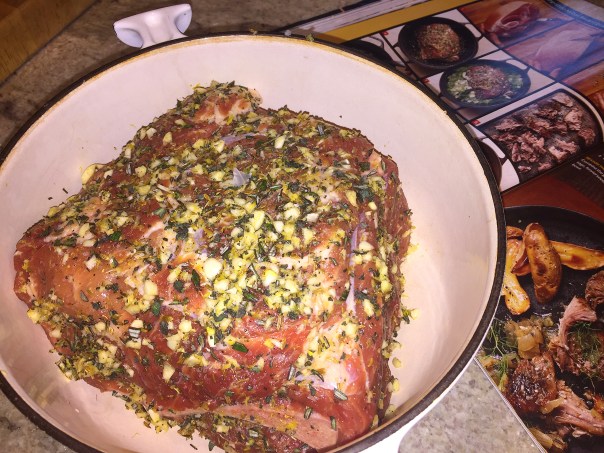
Coat the meat all over with the rub, massaging it between the muscles and on all sides of the roast.

img_0448
Put the pork in a Dutch oven or high-sided skillet that fits it snugly. Cover and refrigerate for at least 12 hours and up to 3 days.

img_0484
In order for room to add wine, and the chopped onion and fennel, we transferred the roast to a larger braising pot.

Season the pork
  1. Combine the garlic, zest, rosemary, salt, sage, fennel seeds, and pepper in a small bowl.
  2. Using a paring knife, trace the fat seams of the roast and around the bone to make a series of deep incisions on both sides, without completely separating the muscles. Score any external fat or skin and fat with a series of incisions 1 inch apart. Coat the meat all over with the rub, massaging it between the muscles and on all sides of the roast.
  3. Put the pork in a Dutch oven or high-sided skillet that fits it snugly. Cover and refrigerate for at least 12 hours and up to 3 days.

img_0485
Since our roast was nearly 4 1/2 pounds, we roasted it for 3 1/2 hours.

img_0487
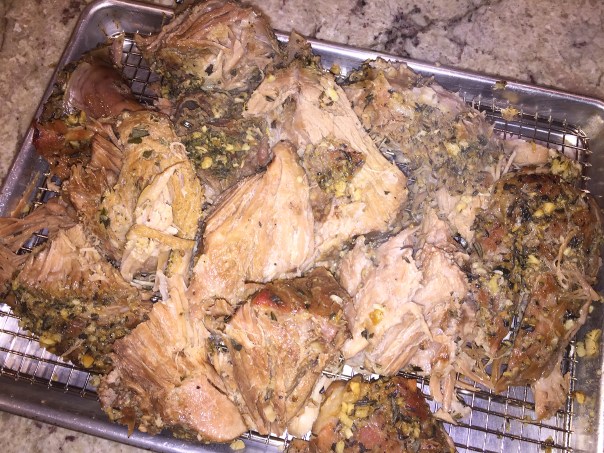
After the roast has cooled slightly, the meat is pulled off of the bone in large chunks.

img_0490
The shredded meat is put back into the pot in one layer over the veggies.

img_0492
Brown one side in high heat for 20 minutes, then turn and brown the other side for another 20.

Braise the pork
  1. Remove the pork from the refrigerator and let it sit at room temperature for 1 to 1-1/2 hours before cooking.
  2. Position a rack in the center of the oven and heat to 300°F. Uncover the pork, and add the onion, fennel bulb and fronds, rosemary, bay leaf, and wine. Cover tightly and cook until the meat is fork-tender, 2-1/2 to 3 hours.
  3. Leaving the liquid and vegetables in the pot, transfer the meat to a rimmed baking sheet to cool slightly. Separate the meat into large chunks, and remove and discard all the fat.
  4. Discard the bay leaf. Skim the fat from the broth. Return the meat to the pot, and arrange the pieces in a single layer. (The dish can be prepared up to this point and refrigerated for 1 to 2 days. Reheat at 300°F, covered, for 30 minutes before proceeding with the recipe.)
  5. Raise the oven temperature to 425°F. Cook the pork, uncovered, flipping once, until the exposed surface is well browned, about 40 minutes. Serve with the vegetables and sauce, garnished with fennel fronds, if you like.

by Lynne Curry from Fine Cooking

img_0499
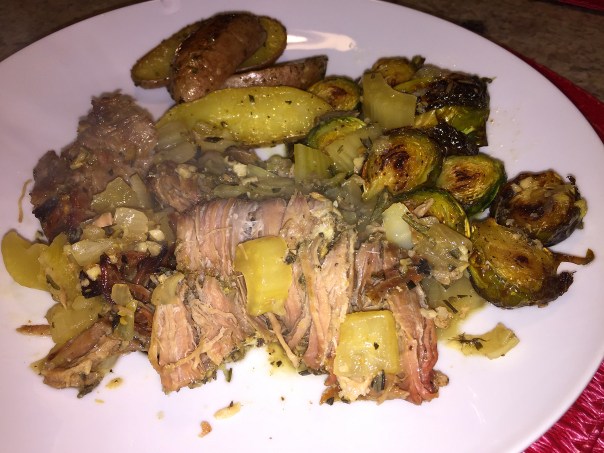
We served ours with roasted fingerling potatoes and Brussels sprouts.

FYI, while braising is similar to stewing, the two cooking methods do have some slight differences.

BOTH are moist heat, slow cooking methods that tenderize the beef and develop rich beef flavor.
BOTH start with less-tender beef cuts as this cooking method softens the strong muscle fibers and connective tissue, guaranteeing tender, moist, flavorful results.

The Difference?
Braising cooks large cuts of beef in enough liquid to partially cover the meat .
Stewing uses small, uniform pieces of beef pot roast or beef for stew meat that are totally immersed in liquid.

Hell-UVA Cool Atmosphere

It was a Saturday and we had no fixed plans for dinner. Initially we thought of making reservations at a nearby restaurant, but while online to make a res, up popped a link for UVA Ristoranti Italiano. I mean, who doesn’t like Italian cuisine? It was an establishment unbeknownst to us, which always entices our foodie curiosity. The extensive menu tempted us enough to call, where we also found out they’re a BYO—our preference.

img_0449

UVA (Italian word for “grape”) is located on Second Street Pike in Richboro, PA at one end of a small strip mall, about a 20-minute ride from our home. Pulling into the parking lot you immediately notice their neon purple sign beckoning you in. Patronage was a bit light, but that was to be expected because it was only 5:45, way early for us but the only workable time we could get a reservation on such short notice. However, by the time we left the placed was packed to the rafters!

img_0454
The wall partitions turned different colors as bubbles created an intriguing graphic movement.

img_0455
Mood lighting is everywhere without being intrusive.

img_0453
This side of the dining area was pretty empty when we first arrived.

Our first impression of the upscale vibe with modern decor was very positive. The unusual ceiling discs, glowing partitions with color-changing bubbling liquid, branches with twinkling lights, and fascinating wall sconces all worked together in exuding a hip lounge-like atmosphere. After taking our coats, the cheery hostess promptly seated us at a table for two near a window looking directly into the foyer, which provided Russ an ample view of the steady stream of customers piling in as the evening wore on.

Initially, a soft jazz wafted in the background, a pleasant atmosphere for easy conversation in an intimate dinner setting. But as time wore on, that all changed. We didn’t notice how close all of the tables were until we needed to use the restrooms (very nicely appointed, btw) and worm our way through the completely full dining areas. And at some point an experienced lounge singer began her set of well-known songs, but with sound levels that made conversation difficult.

img_0451
Two different vegetable spreads were delivered to each table with a basket of fresh bread.

There was a large attentive waitstaff who took orders, brought meals, filled water glasses and just made sure everything was as it should be. At first it was. While pondering the menus, a basket of fresh bread and a plate of two spreads were presented. Not sure what they were, but liking them a lot, we found out that one was a carrot spread and the other was made with zucchini with a slight sweet note to it. We noted (and overheard) that other diners received similar but different spreads, i.e. eggplant.

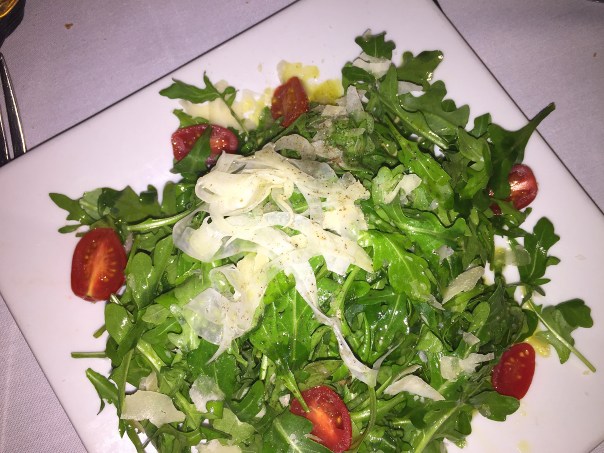
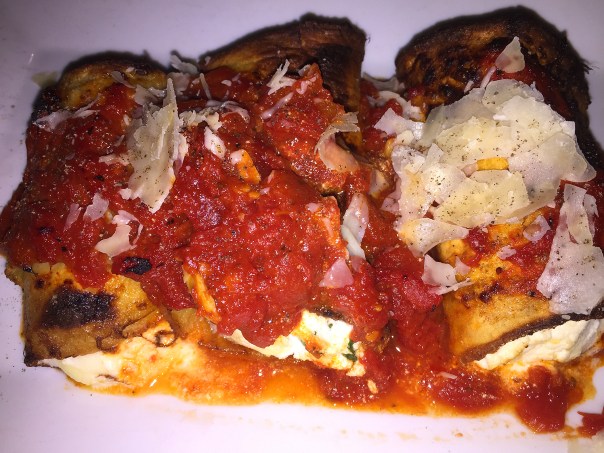
I started with a large Arugula Salad and allowed Russ to take nearly half of it, while I asked for just a small bite of his Eggplant Rollatini. Both appetizers were hefty in size and very tasty, although not earth shattering.

img_0459
ARUGULA SALAD—With fennel, tomato, lemon and oil topped with shaved parmigiano

img_0458
EGGPLANT ROLLATINI—Stuffed with ricotta and prosciutto in marinara and parmigiano

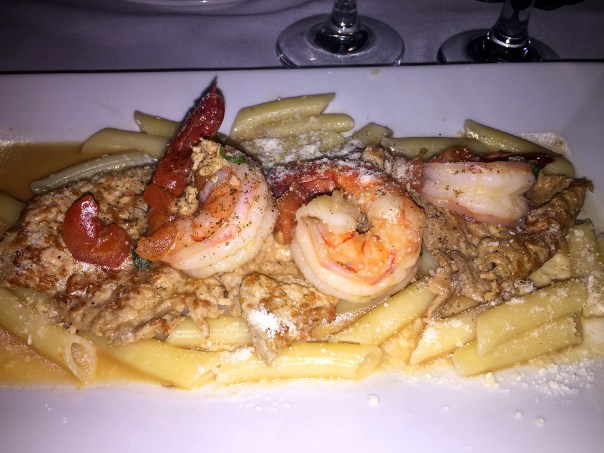
Things went a bit downhill once our entrees started to arrive. Russ chose the Veal D-Uva accompanied by shrimp in a fresh tomato and champagne sauce. But once it was delivered and he couldn’t find any shrimp, he realized he got someone else’s order and it took a few minutes to flag down a waiter to remedy the situation.

In the meantime, my Grilled Cajun Salmon dinner arrived several minutes before Russ got his correct meal. And even though my dinner was plated nicely, the salmon itself was overcooked. Russ did enjoy his veal over a bed of gluten-free penne, but again, pretty average in taste.

A nuance that particularly irritates us is when fine restaurants serve most entrées with the same sides, such as the mashed potatoes, instead of using originality and pairing each meal with appropriate accompaniments. I know it saves time and money, but lacks the finesse of a high-brow establishment.

img_0461
GRILLED CAJUN SALMONDusted with Cajun spices, topped with tomato bruschetta, and served over a sautéed bed of kale, with a side a creamy mashed potatoes.

img_0462
Russ originally received this veal dish which was not what he ordered.

img_0465
In the end, Russ enjoyed his entrée choice of Veal D’Uva.

Despite the shortcomings, we liked the place enough to try again and will give it another shot. We’ll just make an effort to be more specific with our orders when we do return…

SkyBrunch at Top of the Tower

The day dawned dismal with rain and fog blanketing the entire area, not necessarily the best conditions to enjoy a brunch 50 floors up in the city skyline. But we had reservations, A Deal for Two from TravelZoo, and still looked forward to a scrumptious meal, no matter how limited our views would prove to be—and limited they were.

SkyBrunch in Philadelphia is on the 50th floor of Three Logan Square at 1717 Arch Street, and features some of the most spectacular views in Philadelphia from the expanse of the western horizon to the Art Museum, Parkway and City Hall. Available with a side of awe, it sits 50 stories above the city streets, with a panorama beyond anything you’ve ever seen before—if the weather is cooperating…

img_0476
Our less-than-spectacular view.

Convenient parking is available through a back entrance underneath the building. Luckily for us, we then didn’t have to schlepp out in the rain, instead we took one elevator up to the lobby, then an express elevator to the 50th floor. The hostess greeted us in the center of a long hallway backed by sweeping views of the city behind her, and food stations flanking her on either side.

img_0466
Our table by a window when we first arrived.

IMG_0467.jpg
A partial view of one of the dining areas.

Within a few minutes we were lead to our table at one end of the floor (there is an identical dining area on the opposite end) at a table round for two overlooking what would have been an impressive vista.

Overall the waitstaff is very attentive and professional without being overbearing or in-your-face. Our waitress Javaughn explained that in addition to coffee, tea or a variety of juices, we were entitled to a free cocktail, so we both settled on the Silver Lining, a libation akin to a Bloody Mary made with Skyy vodka, V8 juice, fresh horseradish, worcestershire, tabasco, lemon juice, topped with a cherry tomato, olive and pepper jack skewer—excellent! There is a full-service bar if you wish to imbibe on beer, wine or other cocktails.

img_0478
Our perfectly seasoned, on-the-house Silver Lining cocktail.

img_0473
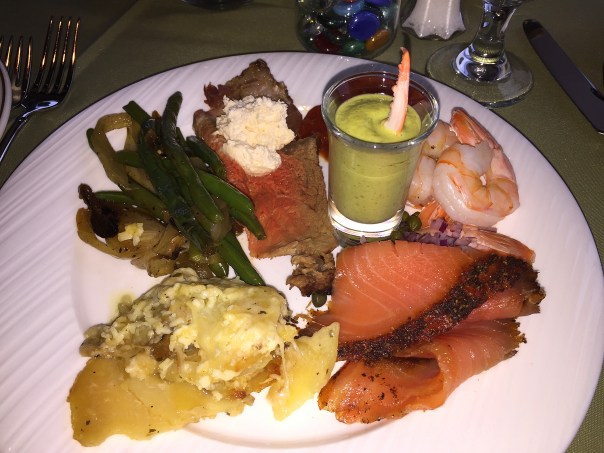
Russ’ first plate was all from the Seascape station.

img_0474
Offerings from the Seascape and Landscape stations.

img_0472
A side of the Tower caesar salad caprese.

Our first foray to the food stations started at the Seascape with jumbo shrimp cocktail, a crab claw shooter and smoked salmon (all stations described in full detail below), and pretty much ended for me at the Landscape with the perfectly medium-rare prime rib with merlot and horseradish sauces, an unbelievably good green bean dish with caramelized onions, just a taste of the very rich Gruyere potato gratin, and the Tower caesar salad caprese.

There were four stations I didn’t even attempt, although Russ helped himself to a sampling from a few of them. After the meal, we enjoyed some hot tea and coffee and decided to check out the Sugar High station with an array of miniature desserts. You know I pretty much never eat dessert, but this time I did take a bite or two of a couple samples, namely the chocolate chip and walnut blondie and a mini chocolate chip cheesecake. Russ savored his lemon and raspberry cheesecake minis.

img_0470
The unmanned Panorama Station offers yogurt, fruit and granola.

img_0468
The Sugar High dessert station is the the only one inside the dining area.

img_0479
A close-up of a few mini desserts from the Sugar High Station.

All you can eat buffets are not necessarily a bargain for me, but looking around at the amount other patrons piled on their plates, they certainly got their money’s worth. Regular price for adults is $50 a pop, making it more of a special occasion place in my opinion. But for kids 13 and under you only pay $1 per year (i.e. a 6-year-old would cost only $6).

They do not serve meals any other time during the week, but they will hold special events such as Cupid in the Sky on Valentine’s Day. Over the years, Top of the Tower has seen it all. Spectacular fireworks watching VIP parties on the 4th of July…Intimate 50th wedding anniversaries…Birthday parties from Sweet 16 to 60+… Commitment Ceremonies… New Year’s Eve Parties… Senior Proms and Formals for nearby schools… Graduation Receptions and Brunches from Penn to Villanova.

And on the 51st floor, there is a bar on Wednesdays through Saturdays, although we didn’t have access to check it out on that Sunday afternoon.

clear-view
What the view looks like on a clear day.

*****************************************

Chef Matt Lane’s stations include seven options plus, there’s a table of charcuterie and cheeses with pickled vegetables and artisan mustards and a display of assorted dessert miniatures.

SEVEN SUMPTUOUS BUFFET FOOD STATIONS

THE OUTLOOK: Honey-Stung Fried Chicken, Crème Brulee Brioche French Toast, Chantilly Cream and Mixed Berries, Shemanski Farm PA Pure Maple Syrup, House Made Jams and Butters, Breakfast Pastries

THE LANDSCAPE: Carved to Order Meats featuring Pepper-Cured Prime Rib, Merlot Sauce and Horseradish Cream, Fresh Vegetables, Pasta of the Day, Gruyere Potato Gratin, Tower Caesar Salad Caprese, Charcuterie

THE SEASCAPE: Cocktail Shrimp en Barigole, Crab Claw Shooters, Variety of Duck Trap Smoked & Cured Salmon, Classic Garnitures and Cream Cheese Varieties, Sushi by Zento

THE VIEW: Pecan Smoked Bacon, House Crafted Sausages, Baby Yukon Home Fries

THE PANORAMA: Assorted Cereals, Fresh Fruit, Yogurt Parfait, Metropolitan Granola

THE SUNNY SIDE: Omelets & Scrambles

THE SUGAR HIGH: Hand Dipped Chocolate Ganache Strawberries, Variety of Miniature Desserts, Cookies and Brownies

DRINKS FIRST ROUND’S ON US!

Each adult is offered a complimentary cocktail from among the following …

PIECE OF HEAVEN: Oatmeal Infused Skyy Vodka, PA Pure Maple Syrup, Light Cream, Fireball Whiskey, Dash of Cinnamon

BLUE SKYY: Blueberry Skyy Vodka, White Cranberry Juice, Blue Curacao, Splash of Lime Juice, Fresh Blueberry Skewer

SILVER LINING: Skyy Vodka, V8 Juice, Fresh Horseradish, Worcestershire, Tabasco, Lemon Juice, Cherry Tomato, Pepper Jack Skewer

CLOUD 50 COCKTAIL SPRITZER: La Marca Prosecco and Freshly Squeezed Blood Orange Juice

PIE IN THE SKY (FOR THE LITTLE GUYS): Apple Juice, Sprite and a Dash of Grenadine with a Cherry Garnish.

When You Don’t Feel Like Red Sauce

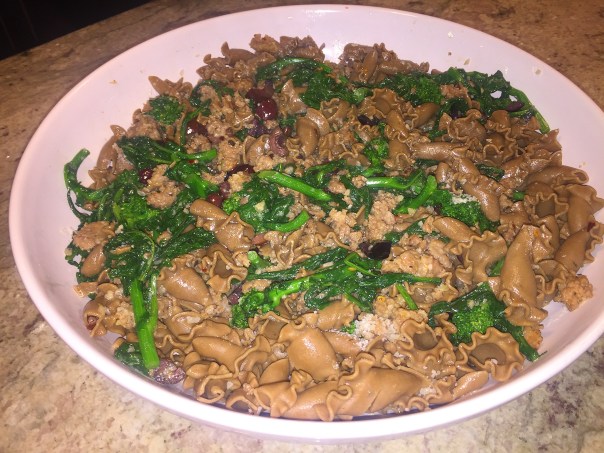
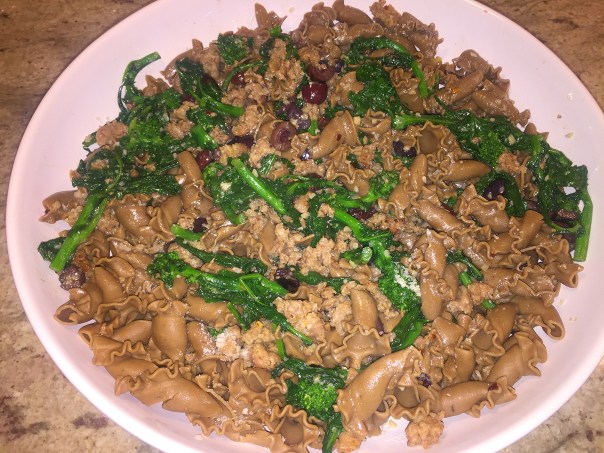
Don’t you just love all of those interesting twisty pasta shapes? Until recently, trying to find gluten-free options wasn’t a walk in the park. But somewhere in the not too distant past, we purchased this bag of porcini mushroom flavored large trumpets which worked perfectly for Campanelle with Broccoli Raab, Sausage and Olives.

Served with a side salad, this could become a weeknight favorite when wanting a pasta dish without red sauce. Don’t get me wrong, I love red sauce, but just like anything else, you need a change every now and then—except for maybe your partner, but I’ll leave that decision up to you!

img_0099

In it’s original inception, this recipe is heavier on the greens (although we will double the amount next time) and lighter on the pasta than most. But we used a 9-ounce bag of campanelle so we added extra broth (1 cup instead of 3/4 cup) to moisten it. And our package of bulk sausage came as one-pound, and I’m pretty sure I incorporated more than a 1/2 cup of olives, not to mention extra garlic and red pepper flakes. So go ahead and adjust the ingredients to your own personal preferences.

img_0087

Ingredients

  • 1 lb. broccoli raab, thick stems trimmed off, leaves and florets rinsed well
  • 6 oz. dried campanelle pasta (2 cups)
  • 3 Tbs. extra-virgin olive oil
  • 3/4 lb. sweet Italian sausage (bulk sausage or links removed from casing)
  • 3 cloves garlic, minced
  • 1/4 tsp. crushed red chile flakes
  • 3/4 cup homemade or low-salt chicken broth
  • 1/2 cup pitted Kalamata olives, quartered
  • 2 tsp. finely grated lightly packed lemon zest
  • 1/3 cup freshly grated Pecorino Romano
  • Kosher salt

img_0090Trimmed broccoli raab gets rinsed before cooking.

img_0092
With tongs or a slotted spoon, transfer the broccoli raab to the bowl of ice water to stop the cooking.

img_0094
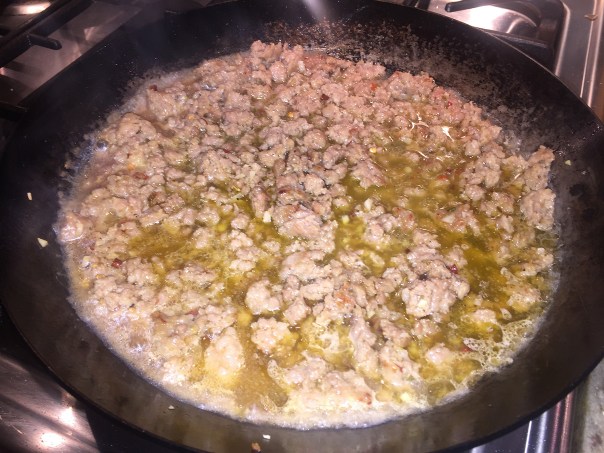
Add the sausage to hot skillet and cook, stirring and breaking it into smaller pieces with a wooden spoon until it’s browned and almost cooked through.

img_0096
Broccoli raab, olives and lemon zest are added after the broth reduces.

img_0097
There was not enough room in our skillet to add the pasta and cheese, so we moved it all to a large bowl and tossed together.

Directions

  1. Bring a large pot of well-salted water to a boil over high heat. Have a bowl of ice water ready. Add the broccoli raab and cook until bright green and tender, 2 min. (the water doesn’t have to come back to a full boil once the broccoli raab has been added).
  2. With tongs or a slotted spoon, transfer the broccoli raab to the bowl of ice water to stop the cooking. Drain well and gently squeeze the broccoli raab to remove excess water.
  3. Return the pot of water to a boil, add the pasta, cook according to package directions, and drain.
  4. While the campanelle cooks, heat the oil in a 12-inch skillet over medium- high heat. Add the sausage and cook, stirring and breaking it into smaller pieces with a wooden spoon until it’s browned and almost cooked through, 4 to 6 min.
  5. Add the garlic and chile flakes and cook until the garlic is lightly golden, about 1 min. Pour in the broth and bring to a boil; cook, scraping the pan with a wooden spoon occasionally, until the broth is reduced by about half, 3  to 4 min.
  6. Add the broccoli raab, olives, and lemon zest and cook, stirring, until hot, 1  to 2 min.
  7. Add the pasta and cheese to the skillet and toss well. Season to taste with salt and serve immediately.

By David Bonom from Fine Cooking

img_0100

Quick Sear-Roasted Chicken

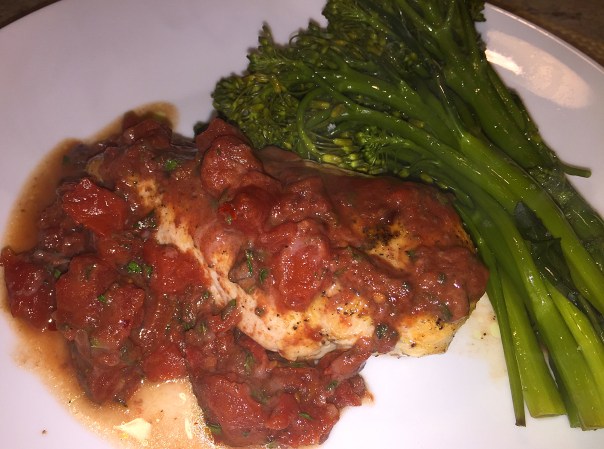
It’s a weeknight, you don’t have much time yet want to serve something healthy that everyone (or maybe just you) will enjoy. This Sear-Roasted Chicken with Tomato and Red Wine Sauce recipe fits the bill. Paired with some steamed broccolini, this dinner is low-calorie, low-carb and gluten-free.

img_0396

When you sear-roast chicken breasts you get perfect browning and even doneness. It’s a simple restaurant technique you can do at home with great results. Here’s a tip to get the most out of this dish: Be sure that the oven has reached 425°F before starting to sear—most ovens take 20 to 30 minutes to heat up thoroughly. And ours is no exception.

For a quick sauce, it had a wonderful depth of flavor. If, like us, you like things spicy, make that “pinch” of red pepper flakes a healthy one!

img_0373

Ingredients

For the Chicken:
  • 4 boneless, skinless chicken breast halves (about 1-1/2 lb. total)
  • Kosher salt and freshly ground black pepper
  • 2 Tbs. olive oil, canola oil, or peanut oil
For the Tomato and Red Wine Sauce:
  • 1/2 cup red wine
  • 1 14-1/2-oz. can diced tomatoes (preferably “petite-cut”), with their juices
  • 2 Tbs. loosely packed chopped fresh oregano
  • Pinch crushed red chile flakes
  • 1/3 cup freshly grated Parmigiano-Reggiano
  • Kosher salt and freshly ground black pepper

img_0376
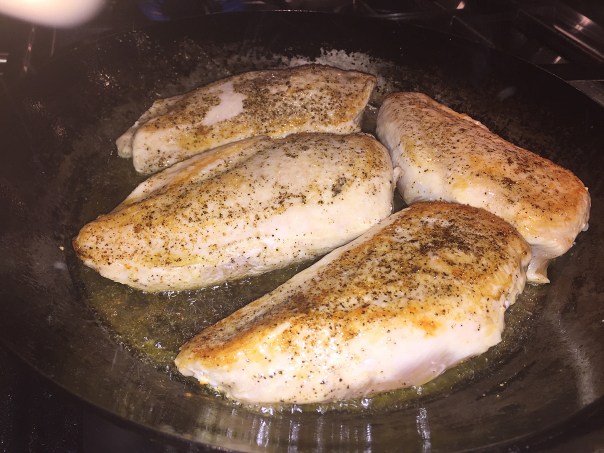
Pan-sear a couple of minutes on each side in a hot skillet.

img_0380
Our chicken breasts came to temperature after 10 minutes in the oven.

img_0383
Pour off any excess fat from the skillet. Return the pan to high heat and add the red wine.

Directions

Sear-roast the chicken:
  1. Heat the oven to 425°F. Turn the exhaust fan on to high. Pat chicken dry with paper towels. Season both sides generously with salt and pepper (about 1 tsp. of each total). Heat a 12-inch heavy-based ovenproof skillet over medium-high heat until a droplet of water vaporizes in 1 or 2 seconds, about 1 min. (If the water skitters around the pan and doesn’t evaporate, the pan is too hot; take it off the heat for about 30 seconds to cool.)
  2. Add the oil, swirl it around the pan, and then evenly space the chicken in the pan. Cook without touching for 2 min. Using tongs, lift a corner of the chicken, check that it’s both well browned and easily releases from the pan, and flip it over. (If it sticks or isn’t well browned, cook for 1 to 2 more min. before flipping.) Cook the second side for 1 min. and then transfer the skillet to the oven.
  3. Roast until the chicken reaches an internal temperature of 165°F and is firm to the touch, about 5 to 8 min. Using potholders, carefully remove the pan from the oven, transfer the chicken to a large plate, tent with foil, and let it rest while you prepare the sauce in the same skillet.
Prepare the pan sauce:
  1. Pour off any excess fat from the skillet. Return the pan to high heat and add the red wine. Cook, scraping the pan with a wooden spoon to incorporate any browned bits, until the wine is reduced to a glazy film.
  2. Add the tomatoes with their juices and the red chile flakes; cook until the juices reduce to a saucy consistency, about 3 min.
  3. Stir in the oregano and Parmigiano; season generously with salt and pepper to taste. Serve immediately spooned over the sear-roasted chicken.

img_0388
Without wiping out the pan, add the tomatoes with their juices and the red chile flakes.

img_0389
Once the tomatoes are reduced to a saucy consistency, stir in the oregano and Parmigiano.

img_0393
Serve immediately spooned after the sauce is over the sear-roasted chicken.

By Tony Rosenfeld from Fine Cooking

Will Thai One On Again

Nearly a year had passed since the Ethnic Dining Group was able to continue their treks to discovering new culinary delights. So the timing was perfect when thanks to a tip from my coworker Kami, we made reservations at Thai Tida in Lambertville, NJ. A few weeks earlier, Kami couldn’t stop raving about the restaurant and when I told her Thai was one of my favorite cuisines, she said we MUST go soon. That’s all it took to convince me…

This charming BYO is located conveniently off of North Union Street, where curbside parking is available as well as a large lot behind their building. Although it wasn’t clear the parking was for the restaurant, we took advantage of the space. The restaurant entrance plants you directly into a very small foyer area which doesn’t allow for much room if you have to wait. Luckily we had reservations and were seated promptly at a window table in the single dining area.

img_0290

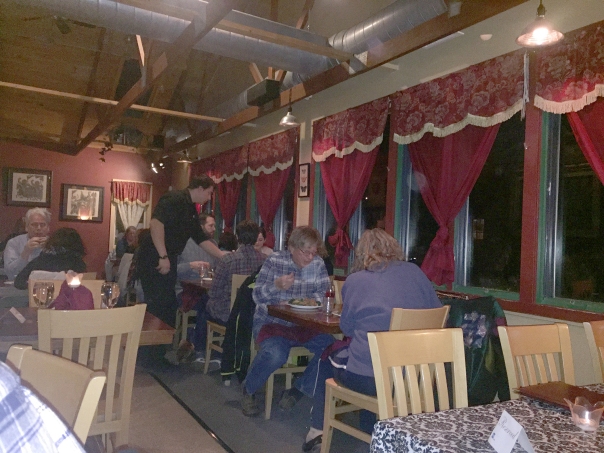
Inside, the cozy atmosphere is awash in a maroon color palette with soaring beamed ceilings, industrial pipes and light fixtures, and plenty of room between tables so that you are not in the laps of fellow diners. Oddly, some tables had cloths, such as ours, while many others were bare wood.

img_0293
I asked our waiter to take a couple of pictures of the 6 of us, yet both times he cropped out Joe on the right.

We had some menu questions addressing a limited diet of one of our companions due to health reasons, but our waiter was not a big help in that area, so he sent what may have been one of the owners to assist us. Through her we learned they use very little oil in their cooking, and certain dishes could be made without any at all.

duck
Russ and Teresa both enjoyed the de-boned Duck Panaeng Curry.

img_0302
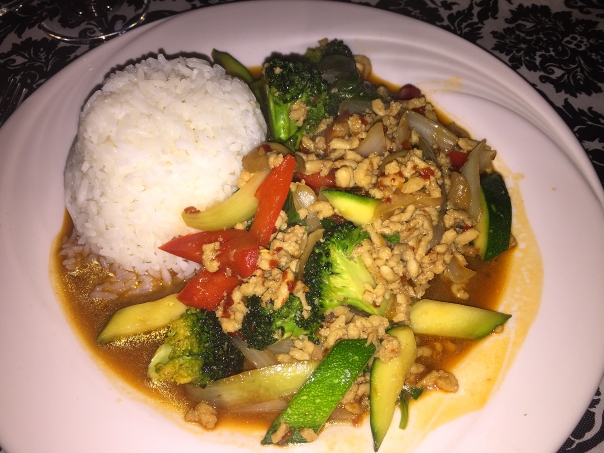
I chose the delicious Pad Ka-Praw, Thai Basil Stir-Fry with fresh Thai basil, onion, shiitake mushroom, vegetables and chicken, with spicy basil brown sauce.

After some catching up and scrutinizing the lengthy vegan, wheat and gluten-free friendly menu, we put in our orders. To be fair, Russ and I eyeballed that menu pretty thoroughly online at home before going out. Once Russ saw the Duck Panaeng Curry his mind was made up—and I was all over the Thai Basil Stir-fry. Most curries and stir-fries come with a choice of vegetarian, chicken, shrimp, beef or pork, with the option of as mild or as spicy as you’d like.

img_0294
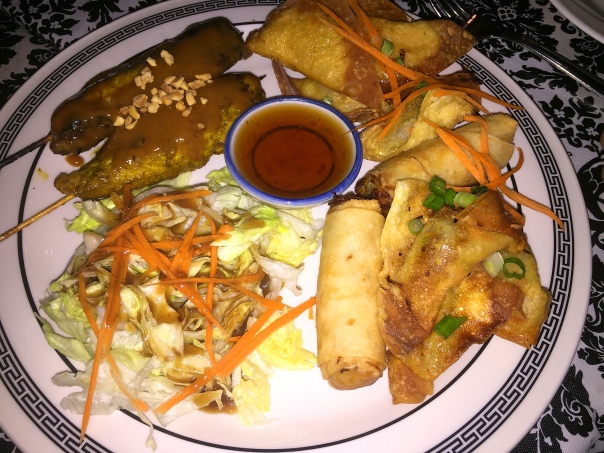
Appetizer Combo for 2—Grilled Chicken Satay, Crispy Siamese Spring Roll, Vegetable and Chicken Wonton with sweet-sour dipping sauce, accompanied with a side of mini-house salad.

img_0291
An order of Tom Yum Soup with Thai spicy lemongrass, seasoned with chili and lime caught the attention of Maria Odilia. While Joe feasted on Tom Jued Tao Hou, a lightly flavor clear soup with tofu and vegetables. Perfect for vegan, but can be ordered with chicken or shrimp (not pictured.)

For starters they offer numerous appetizers, soups, and an extensive selection of salads. A few of the diners started with soup or salad, but Russ and I couldn’t decide so we opted for the Appetizer Combo for 2, and shared with the whole table. While most of the combo items were very good, we were most fascinated with the delicious mini-salad and plan to order that alone next time.

img_0298
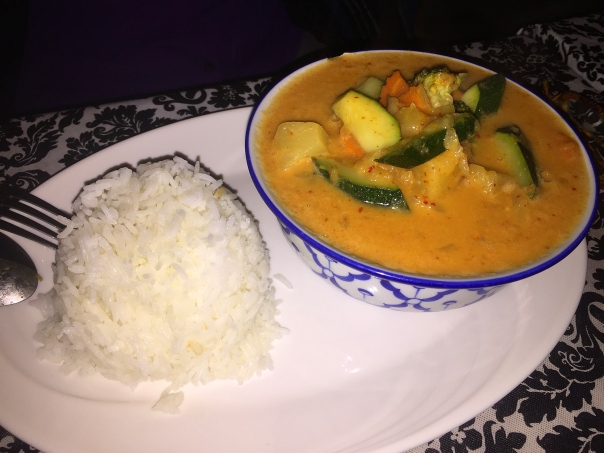
Maria Odilia loved her sweet and aromatic Kaeng Kua Pupparod – Pineapple Curry which was a marvelous red curry with coconut milk based with pineapple and vegetables.

img_0300
Steve enjoyed the Vegetable Pad Thai—a grand mix of textures and tastes with stir-fried rice noodles, bean sprouts, scallions and crushed peanuts, with homemade Pad Thai sauce.

Their offerings are extremely affordable with generous portions. And I can’t say enough about how good our meals were! Yes, there is no doubt we will be back—hopefully very soon… Thanks Kami for the tip! I know without a doubt, Thai Tida will become one of our go-to restaurants when we have a hankering for Thai cuisine.

Lime-Ginger Butter Adds Pizzazz

Cool weather season is always a good excuse to try as many Brussels sprout recipes as possible, at least in our line of thinking. And we came across the Brussels Sprouts and Leeks with Lime-Ginger Butter recipe in the Fine Cooking Make-It-Tonight series. Here, lime and ginger brighten the deeply nutty character of well-browned Brussels sprouts and silky leeks in a very good way.

I know, you don’t like Brussels sprouts, right? They really deserve to be featured on dinner plates more often than they usually are. The unfortunate fate of many Brussels sprouts is overcooking, which is why so many people have unpleasant childhood memories of a nasty, sulfurous odor emanating from the stove.

So even if you’ve had a bad experience with them in the past (I mean, who didn’t?), they’re worth giving another shot because they are low in calories and high in nutrients. Brussels sprouts are a part of the cruciferous vegetable family, which also includes the nutritional powerhouses kale, broccoli, cauliflower, cabbage, and collard greens, all of which supply loads of nutrients for a small amount calories. If you are trying to improve your diet, cruciferous vegetables should be at the very top of your grocery list.

And guess what? When combined with whole grains, Brussels sprouts make a complete protein. That means they’re a great option for vegetarian meals. Plus for the guys, Brussels sprouts are also said to increase male virility.

The time factor for this recipe is a pretty quick turn around for both chopping and cooking, so it makes for a plausible weeknight side dish, as well as for more formal affairs. We paired it with delicious Whole Braised Chicken with Rosemary and Pears, and what a dynamic duo they made!

img_0200
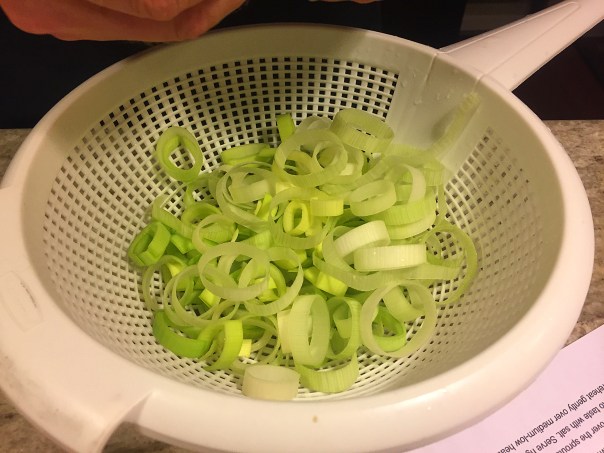
Cut the leeks into 1/2-inch-thick rounds, rings separated and washed well but not dried.

img_0203
After the leeks are cut into rings, Russ quarters our extra-large sprouts.

img_0223
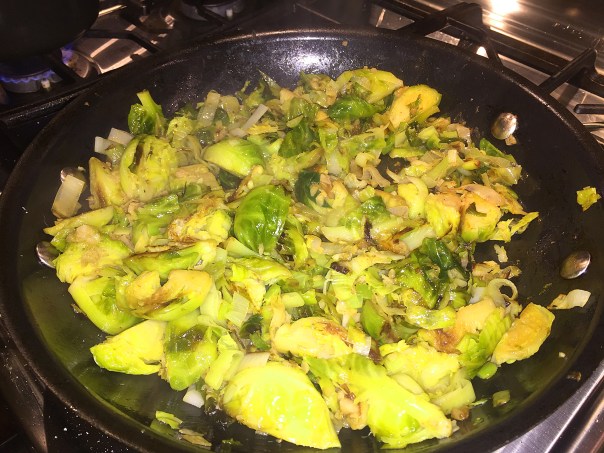
Push the vegetables back into a single layer so that most have direct contact with the pan, until the leeks are limp and the sprouts are well browned.

Ingredients

  • 2 Tbs. unsalted butter
  • 1 Tbs. minced peeled fresh ginger
  • 1 medium lime, finely grated to yield 1 tsp. zest and squeezed to yield 1 Tbs. juice
  • 3 Tbs. extra-virgin olive oil
  • 1-1/4 lb. Brussels sprouts, trimmed, and quartered lengthwise if large, halved if small
  • Kosher salt
  • 3 medium leeks, white and light-green parts only, cut in half lengthwise, then cut into 1/2-inch-thick rounds, rings separated and washed well but not dried

Directions

  1. Melt the butter in a small skillet or saucepan over medium-low heat. Cook, swirling occasionally, until the milk solids turn light brown, about 5 minutes. Add the ginger and stir for a few seconds. Remove the pan from the heat, add the lime zest and juice, and swirl to combine.
  2. Heat the oil in a 12-inch nonstick skillet over medium heat. Add the Brussels sprouts and 1 tsp. salt; toss well to coat with oil.
  3. Cover the pan with the lid ajar by about 1 inch. Turn the heat down to medium low, and cook, stirring occasionally, until the sprouts start to brown, 8 to 12 minutes. As the mixture cooks, you should hear a gentle sizzle.
  4. Uncover, turn the heat down to low, add the leeks (with any water still clinging to them) and cook, stirring occasionally and then pushing the vegetables back into a single layer so that most have direct contact with the pan, until the leeks are limp and the sprouts are well browned, about 15 minutes.
  5. Remove the pan from the heat. Pour the butter mixture over the sprouts and leeks and stir, scraping the bottom of the pan and tossing well to coat. Season to taste with salt. Serve right away or let sit off the heat, partially covered, until ready to serve, and then reheat gently over medium-low heat.

By Susie Middleton from Fine Cooking

img_0232
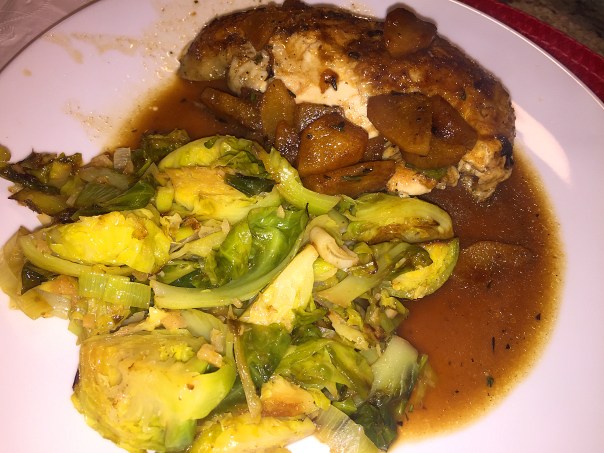
The Brussels sprouts accompanied the braised chicken and pears entrée.

For the Love Lentils (and Salmon)

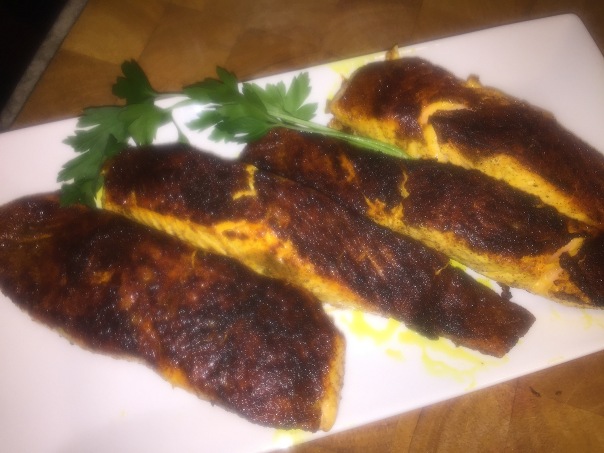
This dinner, North African Spiced Salmon Over French Lentils, ended up being one of those meals that far exceeded our expectations. While the recipe sounded real good when we read it in our Fine Cooking Magazine, the final result was fantastic! Even if you’re not overly fond of lentils, or haven’t tried them in some time, do yourself a favor and give them another chance.

Lentils are an inexpensive, low-carbon, high-fiber source of protein with plenty of important nutrients, including potassium and folate. But mainly, they’re down-right delicious! Although they weren’t high on my list (for some unexplainable reason) all that many years ago… I’m glad I came to my senses since then…

img_0271

Dried lentils are a year-round staple, essential for rounding out salads during hot weather and hearty soups in the winter months. Regardless of the season, their quick-cooking, no-soak-required nature makes them ideal for healthy weeknight meals. It’s also important to buy the freshest lentils you can find and then use them within a few months. Older lentils take longer to cook and tend to shed their skins during cooking.

With some variation, lentils are earthy and sweet. Their texture ranges, depending on the type and how long the’ve been cooked, from nubby and just tender, to soft and almost puréed, perfect for soups and stews. (See the list of the most common and their characteristics at the end of this post.) Cooked lentils will keep refrigerated for about a week.

According to award-winning food, nutrition and travel writer, Marge Perry, go to any French bistro, and you’ll likely find a dish of lentils and salmon. It’s a classic for good reason: lean, mellow lentils complement the richness of the fish. Her version, North African Spiced Salmon Over French Lentils, includes a Moroccan-inspired spice rub on the salmon. (Do not substitute other lentils for the French in this recipe.)

The rich peppery flavor of French Green Lentils is due in part to the volcanic soils where they grow. Also known as puy lentils, they were originally grown in Puy, in southwest France. Today they are also grown in Italy and North America, but are still identified as “Puy lentils” or “lentilles du Puy” because of their origins. And while their color is mostly a beautiful slate green, they are marbled with flecks of darker slate blue. If they were stones, I’d love to make jewelry out of them, but I digress…

img_0149

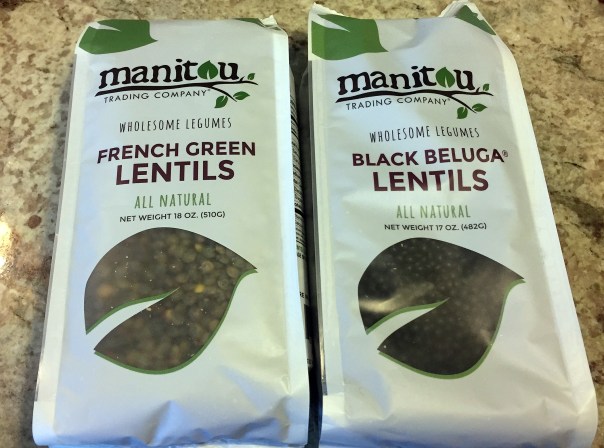
French lentils are not always easy to find. Our main grocery store, which carries a lot of unusual and exotic food items, did not have them; but our local, less upscale supermarket did carry them along with Beluga lentils (which I will blog about in the future.) There’s also a subtle flavor difference with French lentils which have a slightly flinty taste—earthy with a slight mineral edge.

For the full-flavor experience as you eat, flake the salmon into the lentils to better distribute those aromatic spices throughout the dish… then sit back and savor every bite…

img_0238

img_0241
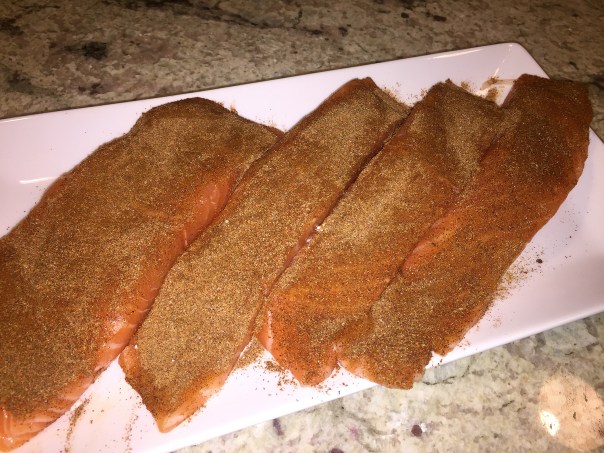
Mix the spices together and rub all over the top flesh side of the salmon.

img_0245
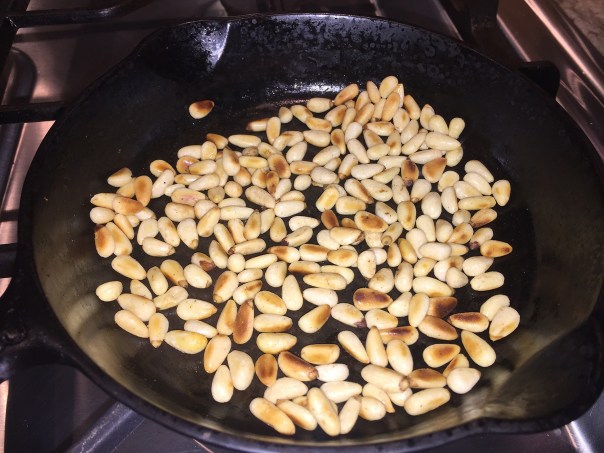
Toast the pine nuts, but watch carefully as they will burn quickly.

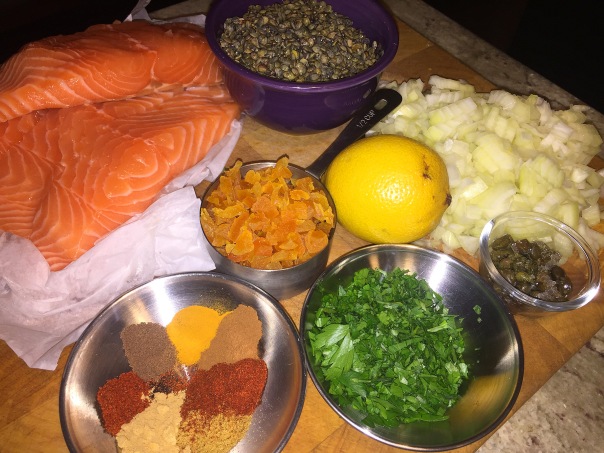
Ingredients

  • 1 cup French lentils (lentils du Puy), rinsed
  • 1/3 cup dried apricots, finely diced
  • 2 Tbs. olive oil
  • 1 large onion, chopped (about 2 cups)
  • 1/4 cup chopped fresh flat-leaf parsley; more for serving, if you like
  • 1 Tbs. drained capers
  • 1/2 tsp. finely grated lemon zest
  • 1 Tbs. fresh lemon juice
  • Fine sea salt
  • 1/2 tsp. ground cumin
  • 1/2 tsp. paprika
  • 1/4 tsp. ground cinnamon
  • 1/4 tsp. ground ginger
  • 1/4 tsp. ground turmeric
  • 1/8 tsp. ground allspice
  • 1/8 tsp. cayenne
  • 4 6-oz. salmon fillets, skinless or skin on
  • Lemon wedges, for serving

img_0252
Chopped dried apricots and French lentils simmer for about 35-45 minutes (ours took 37 minutes.)

img_0254
After the onions cook, add the lentils, parsley, capers, lemon zest and juice, and salt…

img_0266
…and stir to combine.

img_0264
Cook the salmon, flesh side down, until golden brown, 3 to 4 minutes, then flip.

img_0268
Salmon fillets are plated and ready for serving.

Directions

  1. In a 4-quart saucepan, bring the lentils and 3 cups water (see our note below*) to a boil over medium-high heat. Reduce to a simmer, add the apricots, and gently simmer until the lentils are tender but still hold their shape, 35 to 45 minutes. Drain.
  2. Meanwhile, heat 1 Tbs. of the oil in a 12-inch skillet over medium heat. Add the onion and cook, stirring occasionally, until soft and golden, 6 to 8 minutes. Add the lentils, parsley, capers, lemon zest and juice, and 1/4 tsp. salt, and stir to combine. Keep warm over low heat.
  3. Combine the cumin, paprika, cinnamon, ginger, turmeric, allspice, cayenne, and 1/2 tsp. salt in a small bowl. Pat the spice mix onto the salmon.
  4. Heat the remaining 1 Tbs. oil in another 12-inch nonstick or cast-iron skillet over medium-high heat. Add the salmon, flesh side down, and cook until golden brown, 3 to 4 minutes.
  5. Turn and cook to your liking, another 2 to 3 minutes for salmon that’s barely opaque in the center. Serve the salmon over the lentils, garnished with more parsley, if you like, and with the lemon wedges.

FYI—The directions indicate to simply cook the lentils in water*, because a number of other additional ingredients will lend a variety of flavor nuances. But if making them alone, I learned from another favorite cookbook author, Dorie Greenspan to cook in plenty of homemade stock with one lone clove, a bay leaf, and a bit of Cognac. These few ingredients make all of the difference in the world because the flavors are so much deeper and more pronounced, the one little clove will add warmth, the stock a meatiness, and the Cognac a bit of richness that you don’t often find in legumes.

img_0256
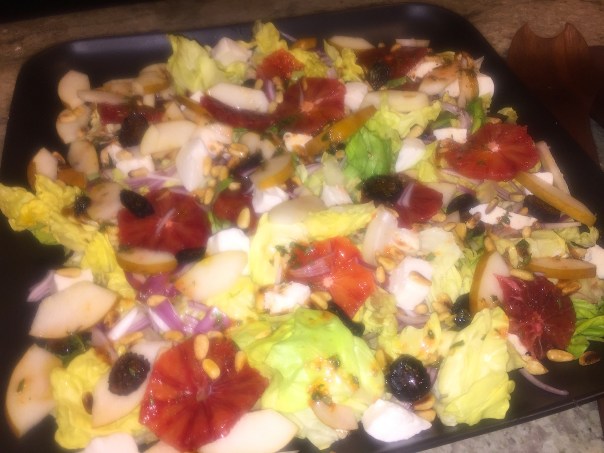
And keep your eyes peeled for an upcoming blog on our side salad: Orange, Pear, and Date Salad with Orange-Rosemary Vinaigrette… (unfortunately my camera lens was fogged and many of the pictures are not crisp 😦

The Six Most Common Types of Lentils

Yellow and Red

Cook time: 20 to 25 minutes
Small split lentils with a tendency to break down during cooking. Great for making thick soups or dal, an Indian lentil stew usually served with rice.

Green

Cook time: 20 to 30 minutes
Widely available, large, and mild in flavor, these cook quickly, making them a good choice for a simple side dish. Just toss with fresh herbs, oil, and vinegar.

Brown

Cook time: 20 to 30 minutes
The most common variety sold in the United States. Large and rich, but prone to mushiness. Stir into a vegetable stew to add protein and thickness.

Black (Beluga)

Cook time: 30 to 40 minutes
Like caviar (hence the name), these are small and nearly spherical, with a firm texture that makes them a great addition to cold or warm salads.

French (du Puy)

Cook time: 40 to 45 minutes
Small and dark green, with a deep, earthy flavor. They take longer to cook but retain their shape, making them a fine upgrade for classic lentil soup—and this recipe!

Goulash or Stew? Does It Really Matter?

Not too long ago, I wrote about the differences between cooking a meal in your choice of a pressure cooker for a real quick turn around, or a slow cooker which obviously takes much longer but produces the same luscious results. This Short Rib Goulash is another one in the series written about in the January issue of Better Homes & Garden Magazine.

img_0076

There’s stew and then there’s its amazing cousin: goulash. Technique-wise, there’s not a huge difference between goulash and other beef stews. Traditional goulash is a stew/soup, usually using a cheaper cut of meat suited to slow cooking. It usually contains potatoes and other vegetables, as well as noodles.

Ask a bunch of people what a goulash is—and you’ll get as many different answers: a soup, a stew, a meat dish served on a plate; brown, red, mild, hot, spicy; made with beef, pork, mutton, game, even vegetarian. Although goulash originated in Hungary, this popular dish later spread beyond its borders, first to the Austrian Empire, Germany, and the Balkans, and finally around the world. That’s why there are so many versions of goulash today. Paprika seems to be the one undisputed staple that must be included.

img_0046
The night prior, I seared the ribs and let them cool before storing in the refrigerator.

In almost all cases, you want to make sure to sear the short ribs first, which allows them to brown more efficiently, giving the goulash more flavor while also ensuring that the meat stays very tender. They will emerge from the cooker fork-tender and bathed in a gravy punched with flavor from butternut squash and a healthy dollop of horseradish. Doesn’t that sound heavenly on a cold winter’s night?

This recipe takes quite a bit longer than the Salmon with Lentil Hash and Bacon dish using either method, so keep that in mind. That falling-off-the-bone goodness is known territory for the slow cooker, but the pressure cooker cranks out the same delectable goulash in a half hour at pressure—giving you enough time to cook your noodles.

Because the slow method takes 12 hours and I could leave it get happy all day while we were at work, we chose the slow cooker again as opposed to the pressure cooker. But I did much of the prep the night before.

img_0064
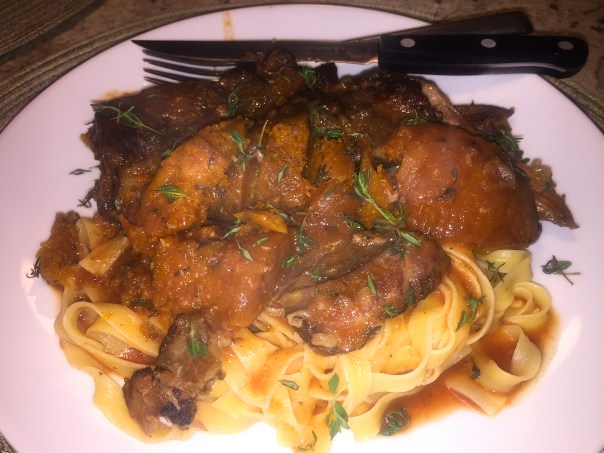
We used a gluten-free fettuccine, but you could also serve over egg noodles or polenta.

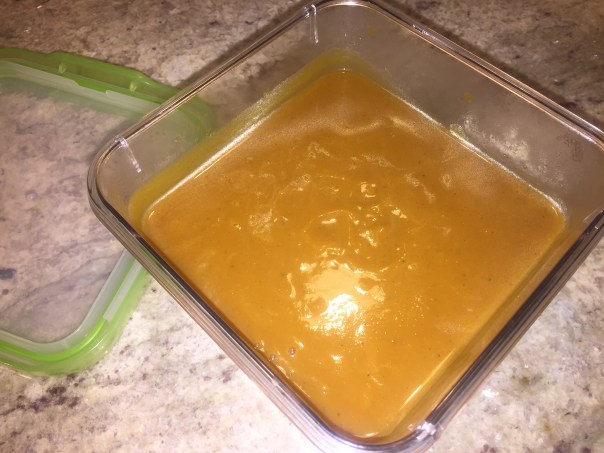
We were about a pound shy of the ribs and a half-pound over on the squash. After dinner, I suggested we make a quick soup out of the leftover butternut and beef broth. So Russ heated up a cup and half of the broth in the same pot we cooked the noodles, then added the already tender squash and used an immersion blender to make a very tasty, creamy soup. Instant lunch!

Total Time (includes hands-on prep)—
Slow Cooker: 
10 hrs 30 mins to 12 hrs 30 mins (low); or 5 hr 30 min to 6 hr 30 min (high)
Pressure Cooker: 1 hr, plus time to build and release pressure 

img_0045

Ingredients

  • bone-in beef short ribs (3 3/4 to 4 1/2 pounds total), trimmed
  • tablespoon paprika
  • teaspoons kosher salt
  • 1/4 teaspoon freshly ground black pepper
  • tablespoons olive oil
  • pounds butternut squash, and/or rutabaga, peeled, seeded, and cut into 2-inch cubes (about 4 cups)
  • 1/2 cup beef broth (preferably homemade)
  • 1/2 cup dry red wine
  • tablespoons soy sauce
  • cloves garlic, minced
  • teaspoon dried thyme, crushed
  • tablespoons tomato paste
  • tablespoons prepared horseradish
  • Hot cooked noodles (we used gluten-free fettuccine noodles)
  • Fresh thyme

img_0058
After prepping most of the ingredients the night before, I put everything in the slow cooker before leaving for work, and turned it on low.

img_0071After I got home from work, I removed the meet and squash to a covered dish and poured the sauce into a gravy separator.
img_0066
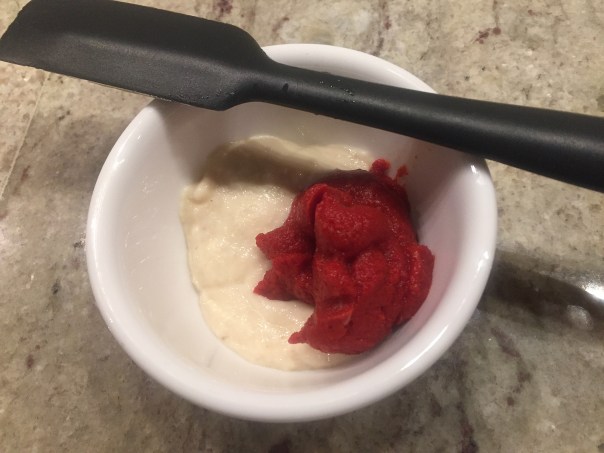
Horseradish sauce and tomato paste are measured out….

img_0073
…then whisked into the strained liquids.

Directions

  1. SLOW COOKER: Season ribs with paprika, salt, and black pepper. In a very large skillet, brown meat in hot oil over medium-high heat or until well browned, turning occasionally (or use slow cooker browning function).
  2. Transfer to 6-qt. slow cooker. Add squash, broth, wine, soy sauce, garlic, and dried thyme. Cover; cook on low 10 to 12 hours or high 5 to 6 hours.
  3. Remove ribs and vegetables to a serving dish. Skim fat from cooking liquid. (I found using a gravy separator makes it an easy task.) Whisk in tomato paste and horseradish. Serve sauce with ribs and noodles. Top with fresh thyme.
  1. PRESSURE COOKER: Season the ribs with paprika, salt, and black pepper. For a 6-qt. electric cooker, use saute setting to brown ribs, half at a time, in hot oil. For a 6-qt. stove-top cooker, brown meat, half at a time, in hot oil in cooker.
  2. Return all meat to cooker. Add squash, broth, wine, soy sauce, garlic, and thyme. Lock lid.
  3. Set electric cooker on high pressure to cook 30 minutes. For stove-top cooker, bring up to pressure over medium-high heat according to manufacturer’s directions; reduce heat enough to maintain steady (but not excessive) pressure. Cook 30 minutes.
  4. Remove from heat. Let stand to release pressure naturally, at least 15 minutes. Open lid carefully.
  5. Transfer ribs and vegetables to serving dish. Skim fat from cooking liquid. Whisk in tomato paste and horseradish. Serve sauce with ribs and noodles. Top with fresh thyme.

img_0082
We had quite a bit of leftover cooked butternut squash so we made a quick creamy soup with more beef broth using an immersion blender.