Monthly Archives: June 2018

Cool Salad for a Hot Night

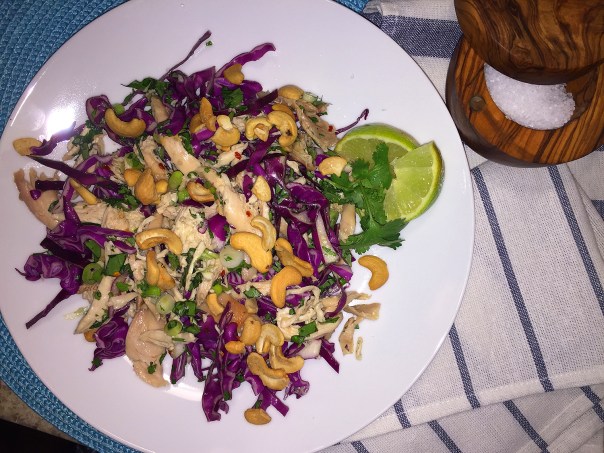
It is sweltering here on the East Coast so who the heck wants to slave over a hot stove, or even a fiery grill? Fresh, colorful, and a little crunch from the cabbage and cashews, this cool Chicken Cabbage Salad with Basil, Cilantro, and Cashews salad is perfect on a sizzling summer’s night. You can whip up this Asian-inspired baby in 10-15 minutes, especially if you pick up a store-bought rotisserie chicken.

IMG_5777

And if you grow an herb garden, there’s a high likelihood that you can already harvest enough fresh basil and possibly even cilantro. Finish with a squeeze of lime and a light sprinkle of flaky sea salt. Yummy!

We loved the flavor profile of this crunchy satisfying salad. And any leftovers won’t be a soggy mess—just don’t add the cashews until your ready to eat it.

IMG_5768

Chicken Cabbage Salad with Basil, Cilantro and Cashews

  • Servings: 3-4
  • Difficulty: easy
  • Print

Ingredients

  • 3 Tbs. seasoned rice vinegar
  • 1 Tbs. plus 2 tsp. fish sauce
  • 2 medium cloves garlic, minced
  • 1/8 tsp. crushed red pepper flakes
  • 4 cups very thinly sliced purple cabbage (about 1/2 small head)
  • 3 cups shredded cooked chicken (store-bought rotisserie works well)
  • 1 bunch scallions, thinly sliced
  • 1/2 cup chopped fresh basil
  • 1/2 cup chopped fresh cilantro
  • Flaky sea salt
  • 1/2 cup roasted salted cashew halves
  • Lime wedges, for serving

Directions

  • In a small bowl, whisk the vinegar and fish sauce with 2 Tbs. water. Add the garlic and pepper flakes, and set aside.
    IMG_5771
  • In a large bowl, toss the cabbage, chicken, scallions, basil, and cilantro with the dressing.
    IMG_5772
    IMG_5774
  • Season to taste with salt. Serve topped with the cashews and the lime wedges on the side.

IMG_5778

Recipe by Lynne Curry from Fine Cooking


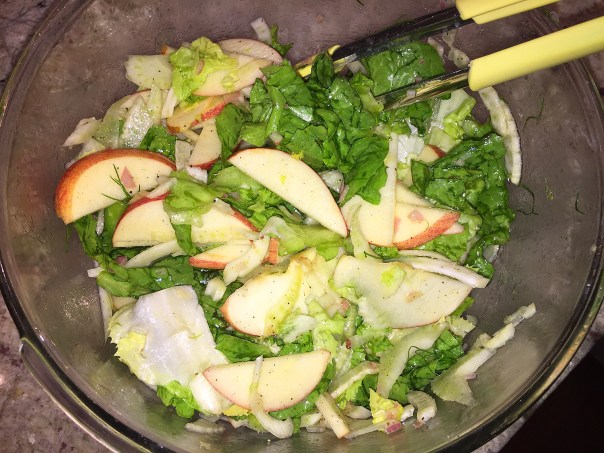
Fennel-Rubbed Pork Tenderloin with Escarole and Apple Salad

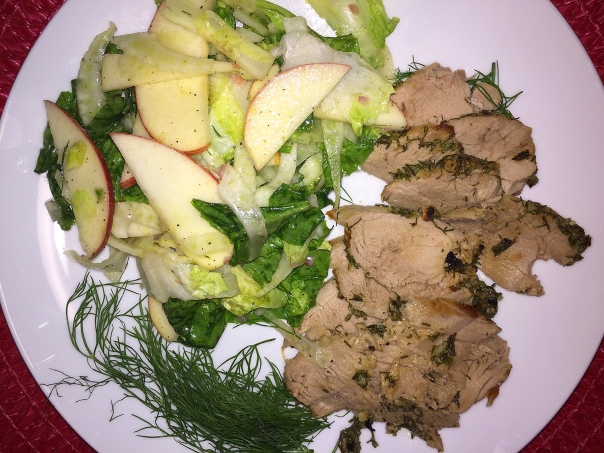
The ingredients in Fennel-Rubbed Pork Tenderloin with Escarole and Apple Salad suggest a Autumnal meal as opposed to early Summer. But the garlicky pork pairs perfectly with a crisp salad in this easy supper and it won’t keep you bound in the kitchen around a hot stove for long. Plus you can have it on the table in less than a half hour.

IMG_4569

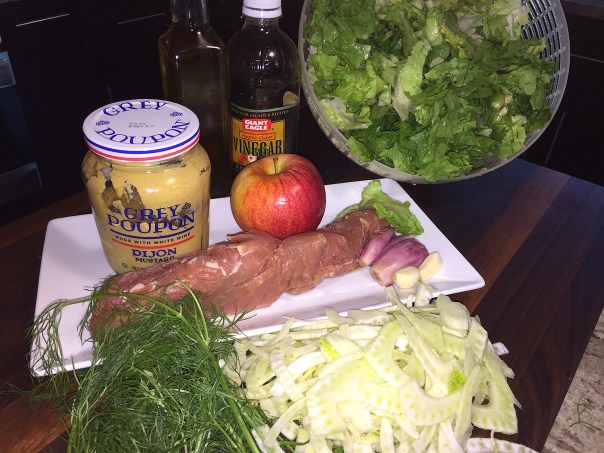
Often the grocery store carries fennel bulbs without much frond to them. If at all possible, try to buy them with a lot of feathery greenery at the top because you’ll need them to make the rub, plus any leftover is nice for garnish.

This recipe calls for two pork tenderloins, but we only had one in the freezer and figured it would be enough for the two of us—we surprisingly even had some leftover!

NOTE: If your grocery store doesn’t carry Pink Lady apples, look for another variety that is both sweet and tart with a crisp texture, such as Honey Crisp, Jonagold, Cameo or Mutsu.

IMG_4546

Fennel-Rubbed Pork Tenderloin with Escarole and Apple Salad

  • Servings: 4
  • Difficulty: easy
  • Print

Ingredients

  • 6 Tbs. plus 2 tsp. extra-virgin olive oil
  • 3 Tbs. cider vinegar
  • 1 small shallot, finely chopped
  • 1 tsp. Dijon mustard
  • Kosher salt
  • 1 small head fennel, fronds and tender stems finely chopped together, bulb cored and very thinly sliced
  • 2 cloves garlic, finely chopped
  • Freshly ground black pepper
  • 2 small pork tenderloins (1-3/4 to 2 lb. total)
  • 1 head escarole (about 12 oz.), leaves torn into small pieces
  • 1 Pink Lady or other sweet-tart red apple, thinly sliced

Directions

  1. Position an oven rack 6 inches below the broiler and heat the broiler on high. Line a large rimmed baking sheet with foil.
  2. In a small bowl (or a mini processor), whisk 6 Tbs. of the oil, the vinegar, shallot, 1/2 tsp. of the mustard, and 1/4 tsp. salt; set aside.
  3. In another small bowl, combine the fennel fronds and stems, the remaining 2 tsp. oil and 1/2 tsp. mustard, the garlic, 1/2 tsp. salt, and 1/2 tsp. pepper.
  4. Rub the pork all over with the fennel mixture. Transfer to the prepared baking sheet and broil, flipping once, until just cooked through (145°F), about 15 minutes. Transfer to a cutting board and let rest for 5 minutes.
    IMG_4549
    IMG_4557
    IMG_4559
  5. Meanwhile, in a large bowl, toss the fennel bulb, escarole, apple, 1/4 tsp. salt, and a pinch of pepper with half of the dressing.
    IMG_4554
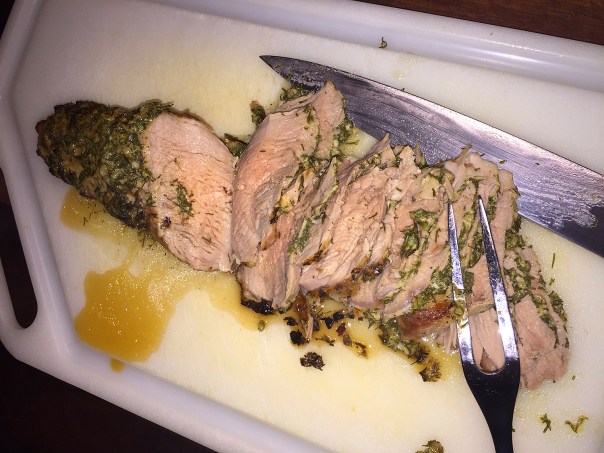
  6. Slice the pork and drizzle with any juice. Serve with the salad, passing the remaining dressing at the table.
    IMG_4564

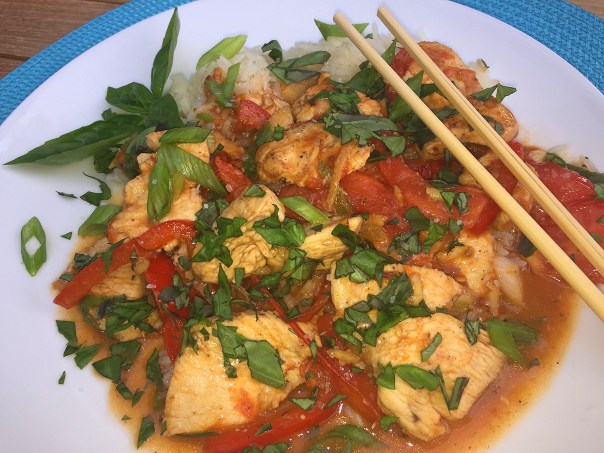
Quite Possibly Our Best Stir-Fry Yet!

Spicy Orange Chicken stir-fry is a great meal to make when pressed for time yet you still want to serve something special. A ripe tomato, orange zest and chicken breasts, combined with some basic staples become a sumptuous and impressive meal. Russ and I both concurred, this was one of the BEST stir-fries we’ve ever made—and we’ve made a lot of them. It came from our coveted cookbook: Stir-Frying to the Sky’s Edge by Grace Young.

IMG_5366

Most of the time is spent measuring and prepping the ingredients, while the actual cooking time, other than the rice, takes only minutes. It might seem like a long list, but don’t leave out any of the ingredients, especially the ground Sichuan peppercorns because they truly add a necessary dimension. As far as the chili bean sauce, increase or decrease the amount depending on your tolerance for spicy—just don’t omit it altogether.

That being said, I did add a couple of extra ingredients (which I listed below), involving a few more simple steps, but we both think they added welcome flavors. First, since I had a half of red bell pepper in the fridge, I cut that up into thin strips. Then as a final garnish, I snipped some fresh basil from our herb garden and sprinkled that on top.

IMG_5349

Please make sure you have everything prepped before beginning to stir-fry because like many others, there is no time in between each step and it goes crazy fast. Also don’t forget to time your rice to be finished prior to the last step of the stir-fry. I know it might not seem like a lot of liquid to start, but the tomatoes will release their juices and you end up with a good balance.

And of course, rice is a big factor in how good this stir-fry turned out. First off, instead of just water, I used some homemade chicken stock to steam the jasmine rice. It was light and fluffy, not sticking together as rice sometimes can.

We really can’t wait to make this again!

IMG_5342

Spicy Orange Chicken

  • Servings: 2-3
  • Difficulty: moderate
  • Print

Ingredients

  • 1 lb. skinless, boneless chicken breast, cut into 1/4″-thick bite-sized pieces
  • 2 Tbsp. finely shredded ginger
  • 2 Tbsp. Shao Hsing rice wine or dry sherry
  • 2 tsp. soy sauce
  • 1 1/2 tsp. corn starch
  • 1/4 tsp. sugar
  • 1/4 tsp. ground white pepper
  • 1/4 tsp. roasted and ground Sichuan peppercorns
  • 1/4 cup chicken broth
  • 2 tsp. rice vinegar
  • 2 tbsp. peanut or vegetable oil
  • Zest of 1 orange
  • 1 tsp. chili bean sauce
  • 1/2 red bell pepper, sliced thin lengthwise, then slices cut in half
  • 1 very large ripe tomato, (preferably heirloom) cored and cut into thin wedges
  • 1/2 cup thinly sliced scallions
  • 1/4 cup chopped fresh basil (optional)
  • 3/4 tsp. salt

Directions

  1. In a medium bowl combine the chicken, 1 tablespoon of the ginger, 1 tablespoon of the rice wine, 1 teaspoon of the cornstarch, sugar, white pepper and ground Sichuan peppercorns. Stir to combine.
    IMG_5345
  2. In a small bowl, combine the broth, rice vinegar, and the remaining 1 tablespoon rice wine and 1/2 teaspoon corn starch.
  3. Heat a 14-inch flat-bottomed wok over high heat until a bead of water vaporizes within 1 to 2 seconds on contact.
  4. Swirl in the oil, add the pepper strips and stir-fry rapidly for 1 minute.
    IMG_5352
  5. Add to the peppers the remaining 1 tablespoon ginger, then, using a metal spatula, stir-fry 10 seconds until the ginger is fragrant. Remove the peppers and ginger to a bowl and set aside.
  6. Carefully add the chicken, and spread it evenly in one layer. Cook undisturbed for 1 minute, letting the chicken begin to sear.
  7. Add the orange zest and chili bean sauce. Then stir-fry for 1 minute or until the chicken is lightly browned but not cooked through.
    IMG_5355
  8. Stir the bell pepper and ginger back in and add the tomatoes and stir-fry 30 seconds or until just combined.
    IMG_5356
  9. Restir the broth mixture and swirl into the wok.
  10. Add the scallions, sprinkle on the salt, and stir-fry 1 minute or until the chicken is cooked through.
    IMG_5361
  11. Serve over steaming white or brown rice, and top with chopped fresh basil and any leftover scallion greens.

http://www.lynnandruss.com

IMG_5365

Maple-Molasses Glazed Hamloaf

Hamloaf? Never heard of it—until I visited Russ’s mother, Mary, out in Butler County, PA nearly 2 decades ago. And when I heard that’s what we would be having for dinner upon arrival, I was none too excited. Apparently it’s a Western Pennsylvania thing, and every summer thereafter whenever we returned to visit, it seemed to be everywhere. You’ll find it at grocery stores, butcher shops, mini marts; I think you can even buy it at some gas stations. Along with a list of other meats for our vacation stay, Mary would have us get the goods from the reputable meat market, Brose’s—no gas station purchase on her watch!

IMG_5448

If you are in the realm of the uniformed, hamloaf is a baked meat dish, similar to meatloaf, made of ground ham and ground pork and combined with other ingredients to form a loaf like shape. Distinct in color and taste from meatloaf, hamloaf is often baked with a sweet & savory glaze—Mary’s was a combo of currant jelly and grated horseradish—which actually went quite well with the meat, although neither of us can remember the exact proportions…

Of course, I did end up liking it that first time, and pretty much every time since. So recently when I was shopping at our local Amish Farmer’s Market picking up some rib-eyes for Father’s Day, I noticed they had a tub of the hamloaf mixture and promptly bought a couple of pounds thinking it would make for an easy weeknight dinner—and perhaps bring back some fond memories.

A good number of years have passed since we indulged in this “delicacy” and I wanted to up the game by getting a smidge more intricate with the glaze by incorporating a half dozen ingredients as opposed to two. The end result was a more complex and nuanced flavor base. In combination with some steamed fresh green beans and roasted baby red potatoes, it was an easy and tasteful meal.

IMG_5451

NOTE: Make measuring sticky liquids like molasses and maple syrup easy by coating the measuring cup with nonstick cooking spray before adding the liquid; this will ensure it slides right out into the saucepan.

IMG_5436

Maple-Molasses Glazed Hamloaf

  • Servings: 4-6
  • Difficulty: simple
  • Print

Ingredients

  • 1 1/2 – 2 lbs hamloaf mixture
  • 1/2 cup pure maple syrup
  • 1/4 cup blackstrap molasses
  • 2 Tbsp orange juice (freshly squeezed if possible)
  • 1 Tbsp Dijon mustard
  • 2 cloves garlic, minced
  • 2 Tbsp apple cider vinegar (for the finish)

Directions

  1. Preheat oven to 350°F.
  2. In small saucepan set over medium heat, combine maple syrup, molasses, orange juice, mustard and garlic.
  3. IMG_5438
  4. Cook, stirring often, until mixture is well combined, steaming and reduced down a bit; about 15 minutes.
  5. Remove from heat; stir in vinegar.
  6. Shape the meat mixture into a loaf shape and place loaf in small casserole dish.
  7. Brush enough of the mixture over ham to coat evenly.
    IMG_5440
    IMG_5442
  8. Bake ham loaf, basting occasionally with some of the remaining glaze, for 40 to 45 minutes total or until heated through and top is browned and sticky. Let stand for 10 minutes before slicing.
  9. Serve with extra glaze on the side.
    IMG_5449

http://www.lynnandruss.com

If you’ve already had an experience with hamloaf, or have another special glaze recipe, I’d love to hear about it!

Sichuan-Style Green Beans with Pork

Three key ingredients make up this fiery stir-fry from Food & Wine’s Justin Chapple: ground pork, green beans and dried hot red chiles. To round it out, just add three simple ingredients: garlic, soy sauce and lime juice. Can’t get much easier than that!

IMG_4124

The original recipe called for just a 1/2-pound of ground pork which we thought was pretty paltry for four servings, so we doubled it to one full-pound. And since we like spicy, I added nine dried hot red chiles, although in the end it wasn’t that spicy at all. Were our chiles too old and lost some of their impact? Possibly…

In which case we could have added a tablespoon or so of chili garlic sauce, but I didn’t think of that until after the fact. The overall taste was good but we prefer saucier concoctions. But given how simple this recipe is, it’s a good one to have when time is of essence.

For most stir-fries we use our wok instead of a skillet, which we did here. The stir-fry is perfect served over freshly steamed white or brown rice, or even over rice noodles.

What is Sichuan-style anyway? Sichuan (can also be called Szechuan or Szcehwan) food, originated from the Southwestern region of China, is the most widely served cuisine in China itself. The dishes of this cuisine are known for their deep and rich flavors, especially the taste of Sichuan pepper which is rare in other regional cuisines. Oddly, this recipe didn’t include Sichuan peppercorns.

The cooking methods of Sichuan cuisine vary according to texture and bite required for each specific dish. The array of cooking methods include stir-frying, steaming, braising, baking, and the most popular of which is fast-frying. Many dishes incorporate a lot of garlic and chili peppers. Some of the most common Sichuan dishes are twice-cooked pork, spicy diced chicken with peanuts, and fish-flavored pork shred.

IMG_4111

Sichuan-Style Green Beans with Pork

  • Servings: 4
  • Difficulty: super simple
  • Print

Ingredients

  • 2 tablespoons canola oil
  • 1 pound ground pork
  • 3/4 pound green beans, thinly sliced crosswise
  • 7 to 10 dried Chinese hot red chiles, cracked
  • 2 garlic cloves, minced
  • 1 1/2 tablespoons soy sauce
  • 1 1/2 tablespoons fresh lime juice
  • Salt and white pepper
  • Steamed rice, for serving

Directions

  1. In a large skillet (or wok), heat the oil until shimmering. Add the ground pork and cook over moderately high heat, breaking it up with a fork, until nearly cooked through, about 5 minutes.
    IMG_4116
  2. Add the green beans, red chiles and garlic and stir-fry over high heat until the green beans are crisp-tender, about 7 minutes.
    IMG_4118
  3. Stir in the soy sauce and lime juice and season with salt and white pepper. Serve with steamed rice.
    IMG_4128

http://www.lynnandruss.com

‘Tis the Season—For Strawberries and Corn, That is.

Recently we hosted Dr. David Greenspan—a coworker with Russ—and his lovely wife Lisa on our backyard patio. David had heard about the all-but-famous BBQ’d Baby Back Ribs that Russ often grills when the weather permits, and was eager to put them to the test. However, Lisa, a long-time vegetarian, had no designs on partaking of said ribs.

IMG_5250David and Lisa Greenspan smile for the camera.

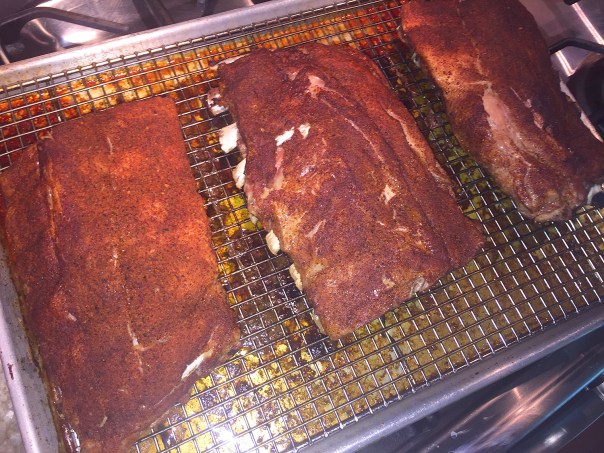
The baby backs are a bit time consuming up front, but with an easy finish—perfect for an outdoor BBQ. The evening before the party, we rub a special spice mix all over the racks. The ribs then get covered and placed in the refrigerator to get happy over night. The morning of the party, we cook the meat set on racks on baking trays with water in a 300-325 degree oven for 2 1/2 hours. Afterward they cool down and the drippings are placed is a separator to remove any fat, with the remaining liquid cooked in a pot until heavily reduced. Stubbs Original BBQ Sauce is added to the sauce reduction and this is basted on the meat as they are grilled.

IMG_5233The ribs after cooking in the oven for 2 1/2 hours.

IMG_5242After grilling and basting the racks, they are moved to a platter and sliced into sections.

You know the saying “You can’t please everyone.” Well maybe you can, especially when feeding a group that includes meat-eaters, vegans, vegetarians and sweet-tooth cravers alike. Just need to do some planning ahead on what to serve. Knowing mid-June in the Mid-Atlantic area of the U.S., is prime time for fresh strawberries, they became the impetus for the Buttermilk Panna Cotta dessert topped with a strawberry glaze and sprig of fresh mint. Served with a side of Pepperidge Farm Dark Chocolate and Sea Salt Milano’s that satisfied the sweet tooth…

IMG_5248

Luckily, the custard set up properly because last time Russ made it, the base never solidified and we had to toss dessert. (Thank goodness for the local bakery.) But this time, it was the topping we had to chuck. It’s really important to keep a close eyeball on, while often stirring the strawberries as they cook down. Russ became preoccupied with some garden issue out on the patio, and ended up burning the sauce. Plan B. Luckily I had purchased extra strawberries and we had enough ingredients and time to make another batch from scratch. Crisis averted.

But I’m putting the cart (or dessert) before the horse here. The evening commenced with glasses of wine while enjoying a platter of cheeses, crackers, Marcona almonds and a sweet/spicy raspberry preserve that the Greenspans purchased at DiBruno Brothers, a pioneering specialty food retailer and importer. WOW, were they fabulous! Unfortunately, I was so involved with tasting the goods, that Yours Truly completely forgot to take a photo, mea culpa 😦 Among topics of conversation which included upcoming vacation plans, was my recent status as a Master Gardner apprentice, and discovering Lisa’s ambition to become one also, as soon as she retires.

IMG_5243

Now about the dinner, in addition to our bone-sucking ribs, we also made a colorful Sautéed Corn with Black Beans and Red Bell Pepper side dish that even vegans can relish. Although it’s not quite height of the season for locally picked corn on the cob, the supermarkets carry some decent ears of sweet kernels. Lisa kept me company in the kitchen while I made the sauté, and since I prepped everything ahead of time, it went together very quickly and I didn’t have to concentrate too heavily on what I was doing, thus allowing me brain space to chat with Lisa.

At the same time, David was outside watching Russ make the “other” main dish: Rice with Vegetables and Saffron, or in Spanish “Arroz con Verduras y Azafrán.” It’s a vegan entrée we found in our cookbook, Spain: A Culinary Road Trip with Mario Batali and Gwynyeth Paltrow. The dish is kind of like risotto, in that it begins by combining the raw rice with vegetable stock without first sautéing it in olive oil. The oil only comes in at then end as an enriching and flavoring addition. Again, we prepped the ingredients ahead of time which streamlined the cooking process.

IMG_5236Russ readies the tray for the patio to cook the rice dish.

In the end, we were so thankful that the weather cooperated and we could dine al fresco because the forecasts had been predicting rain for days. The chances of any precip diminished drastically just hours beforehand. With several more outdoor picnics to host over the coming months, we’re hoping Mother Nature will be just as kind…

Rice with Vegetables and Saffron

IMG_5244

Rice with vegetables and Saffron

  • Servings: 6-8 as a side
  • Difficulty: moderate
  • Print

Ingredients

  • 1 Tbsp. saffron threads
  • 8 cups vegetable stock
  • 2 cups bomba rice (or Arborio)
  • 1/2 cup finely diced carrot
  • 1/2 cup finely diced peeled turnip
  • 1/2 cup finely diced scallions
  • 1/2 cup finely diced 1/2-inch-dice asparagus
  • 1/2 cup finely diced 1/2-inch-dice zucchini
  • 1/2 cup olive oil
  • Fresh Thyme, a few sprigs, leaves only
  • Rosemary blossoms (optional)
  • Coarse sea salt

Directions

  1. Combine the saffron and 1 cup water in a small saucepan, bring to a simmer, and simmer for a few minutes to infuse the water.
    IMG_5234
  2. Heat the stock in a medium saucepan; keep warm over low heat.
  3. Pour the saffron water into a large sauté pan, add the rice and bring to a boil over high heat. Cook, stirring until the rice has absorbed most of the liquid.
  4. Add a generous cup of the vegetable stock, the carrot, pepper and turnip and bring to a simmer, then reduce the heat slightly and cook, stirring until most of the stock has been absorbed.
  5. Continue to cook, stirring and adding stock each the the previous addition has been absorbed, for about 18 minutes, or until the rice is barely al dente.
  6. Add the remaining vegetables and 1 cup more stock (you ay not need all of the stock) and cook, stirring until the vegetables are tender and the rice is perfectly cooked, about 5 minutes longer.
  7. Remove from the heat and stir in the olive oil. Spoon into deep bowls and sprinkle with the thyme, lavender, optional rosemary blossoms, and a generous pinch of salt.

http://www.lynnandruss.com

Sautéed Corn with Black Beans and Red Bell Pepper

To create corn side dishes with rich, toasted flavor, we strip the corn from the cobs when they are raw and then cook the kernels in a nearly smoking skillet. It is important not to stir the corn for a few minutes to give it a chance to brown. Once the corn is cooked, we mix in plenty of salty, savory ingredients to balance the sweetness. Finally, an acidic component rounds out the dish.

Sautéed Corn with Black Beans and Red Bell Pepper

  • Servings: 6-8
  • Difficulty: easy
  • Print

Ingredients

  • 2 tablespoons vegetable oil
  • ½ red onion, chopped fine
  • ½ red bell pepper, cut into 1/4-inch pieces
  • 1 jalapeño chile, stemmed, seeded, and minced
  • 1 garlic clove, minced
  • ½ teaspoon ground cumin
  • Salt
  • 1 15-ounce can black beans, rinsed
  • 3 ears corn, kernels cut from cobs (3 cups)
  • ½ cup chopped fresh cilantro
  • 2 – 3 tablespoons lime juice (2 limes)

Directions

  1. Heat 1 tablespoon oil in 12-inch nonstick skillet over medium heat. Add onion, pepper, and jalapeño; cook, stirring occasionally, until onion is softened, 4 to 6 minutes.
  2. Add garlic, cumin, and ¼ teaspoon salt and cook until fragrant, about 1 minute.
  3. Add beans and cook until warmed through, about 1 minute. Transfer black bean mixture to large bowl and wipe out skillet.
  4. Heat remaining 1 tablespoon oil in now-empty skillet over medium-high heat until shimmering. Add corn and sprinkle with 1/2 teaspoon salt. Cook, without stirring, until corn is browned on bottom and beginning to pop, about 3 minutes.
  5. Stir and continue to cook, stirring once or twice, until corn is spotty brown all over, 2 to 3 minutes longer. Transfer corn to bowl with black bean mixture.
  6. Stir in cilantro and 2 tablespoons lime juice. Season with salt and remaining lime juice to taste. Serve.


The Perfect Spicy Grilled Cheeseburger

Order a hamburger at a restaurant? Not me. They never measure up to my expectations. Yes, I will sometimes eat them when served at a picnic, but my preference is grilling them at home, and that’s a rare treat. This way I know exactly what they’re made of, how they’re made, and can let the juices dribble down my chin without worrying who’s watching, or how many napkins I use.

Let’s face it, it’s all about the meat. I’ve heard, read, saw and tasted so many different approaches from the pros, and non-pros alike. But in the end, you are the one who is going to eat it and therefore it should appeal to your tastebuds. Well, as you certainly know by now, Russ and I like things spicy, and that includes our grilled burgers.

IMG_5325

As mentioned, there are a lot of ways to make a good hamburger patty. They can be made out of ground beef, pork, lamb, sausage, turkey, or more. They can be stuffed full of garlic, cheese, spices, peppers, or virtually anything small enough to fit inside. But this blog centers on the plain, unstuffed beef burger. Simpler is usually better in our humble opinion, and it all starts with making the perfect patty.

Fresh ground meat creates a more tender burger because it was never compacted tightly together, so let’s start with the packaging. To make exceptionally tender burgers you need to grind your own meat or buy it from your grocery store freshly ground. If your hamburger was stuffed into meat tubes it was already compacted too much and will never make a great burger. You want to still be able to see the individual strands of meat still loosely intact after coming out of the grinder.
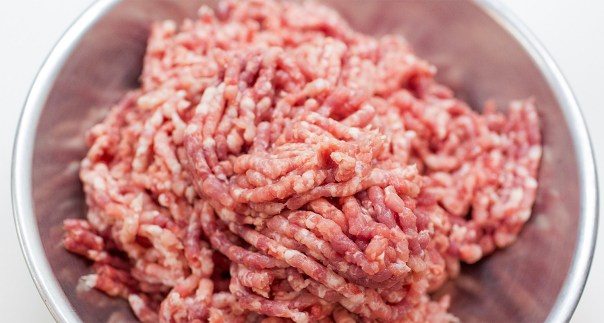
ground.meat.large.jpg

Next, you want to make sure it is the right cut which is fresh ground chuck. Ground chuck will typically have the perfect ratio of fat to meat, which is 80/20. Now 90/10 may sound like a good idea because it is healthier, but it will be too dry to make a good burger, so I often compromise and use 85% lean, as we did here. Burgers need some fat to be juicy. Adversely, you also don’t want anything fattier than 80/20, if there is too much fat the burger will shrink excessively during cooking and you will end up with hockey pucks in a pool of grease.

Measure each portion to weigh approximately the same size—we prefer an 8-ounce patty. Then simply, but not too firmly, press down to form the 3/4″ high round patties leaving the edges slightly loose so you can still identify the strands of meat made from the meat grinder. This is a sign that you succeeded in not overworking the meat. The strands will separate more easily from each other when you take a bite than if you squished and squeezed the meat together. This is what makes your burger so tender.

Many aficionados swear by the act of slightly depressing the center of the patty to push a little extra meat towards the edges to produce an even patty without a bulging middle. Sometimes I do this, most often I don’t, and we rarely end up with protruding centers once cooked.

IMG_5323Note, there are no bulging middles to these babies.

Oh, and when it’s time to grill, for Pete’s sake don’t press the patty while cooking, just don’t do it! You are not making it cook faster, you are squeezing all the life and juice out of it, guaranteeing you will end up with a dry burger. Only flip it once which allows the burger time to build up a charred crust which adds flavor, and it is easier to time doneness—which depending on your thickness, will be about 8 to 10 minutes total for a medium finish with a slightly pink interior.
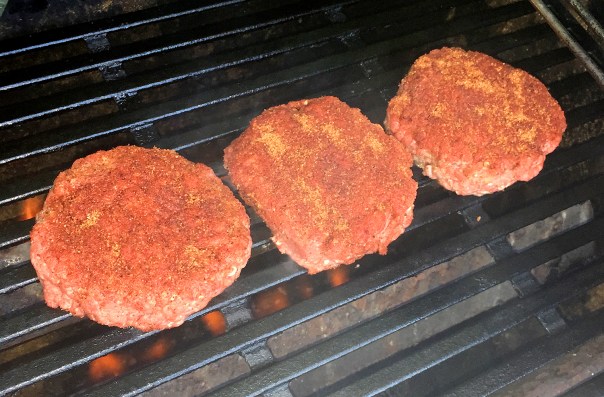
IMG_5317
IMG_5331The burger will be charred on the outside, but still juicy and moist on the inside if you don’t squish the juices out.

The bun you choose makes a BIG difference in how great you burger tastes. You simply want a bun that feels light and squishy. A heavy, dense bun will steal the show from the tender burger patty. One of our preferences is soft, 100% whole wheat buns which not only taste good, they add 5 grams of fiber!
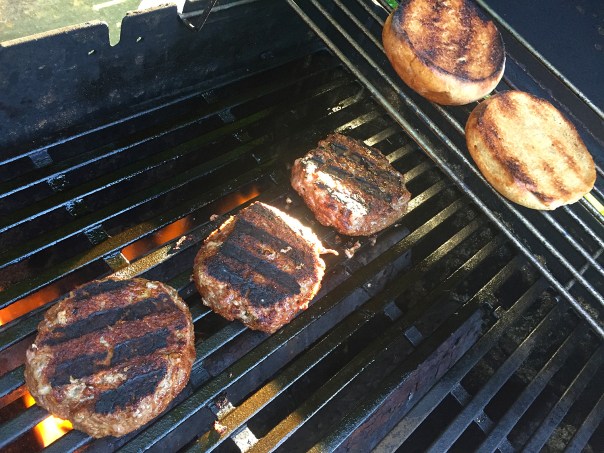
IMG_5320

To toast or not to toast? That is the question. Russ always toasts his buns saying the heat lightens up the texture allowing the texture of the tender patty to be the star of the show and the bun doesn’t get as soggy from the juices. Me? I like mine untoasted which just seems to work better for my tastebuds…

You can top your burger with whatever you want. But we’re talking a spicy burger, so that’s where we’re going here. First, we season the patties with a spicy rub, in this case it’s what we also use on Russ’ famous Baby Back Ribs. We got the rub recipe from our Complete Meat Cookbook by Bruce Aidells and Denis Kelly, consisting of a lively mix of herbs and spices including paprika, chile powder, cayenne pepper, garlic powder and cumin among others.

IMG_5321

About one minute before the burgers are ready, lay a slice or two of cheese—in this case Jalapeño Jack—on top of each burger, close the lid, and let the cheese melt, then remove the patties from the grill. Note: the chef may request a slice of said cheese to munch on while he/she mans the grill… just sayin’…

Once those burgers are done, spread some Dijon mustard and ketchup (or Sriracha if you dare) on the bottom half of your toasted (or not) bun, position the patty, then top with a large slice of heirloom tomato, sliced red onion and hot pepper rings. (Your mouth should be watering right about now.)

IMG_5330

The final touch is the lettuce. The best lettuce in our opinion is either red/green leaf or Bibb lettuce which all have better flavor, better texture, and a more pleasing appearance than romaine or ice burg varieties. Crown with the top bun and your ready to chow down. Yes, it’ll probably be too tall to get your mouth over the entire stack of lusciousness, but OMG the mess is worth it, and you have lots of napkins handy, right?

IMG_5311All of the photos show the fixings for 3 burgers, but the recipe below is for four servings.

Spicy Grilled Cheeseburgers

  • Servings: 4
  • Difficulty: easy
  • Print

Ingredients

  • 2 lbs. 80-85% lean loose ground chuck, formed into 4, 3/4″-high patties (they should measure just slightly larger in diameter than your buns)
  • Spicy dry rub mix*
  • 4-8 Jalapeño Jack cheese slices
  • 1 very large heirloom tomato, cored and cut into 4 thick slices across the equator
  • 1/2 red onion, thinly sliced
  • 1/2 cup hot pepper rings, moisture removed
  • 8 large leaves from Bibb, red or green leaf lettuce, rinsed and dried
  • Dijon mustard
  • Ketchup or Sriracha
  • 4 100% whole wheat hamburger buns, or bun of your choice

Directions

  1. Heat one side of grill to very hot.
  2. Form four 8-ounce patties from the ground chuck being careful not to smush together to tightly and leaving the edges a little rough. Sprinkle both sides of each patty with your spice rub.
  3. Slice the onion and tomato, prep the hot pepper rings and lettuce leaves and place all on a platter for the table.
  4. Very important: oil the grates of the grill with a vegetable oil. Place the patties on the hot, oiled grates and leave them alone for 5-6 minutes. We usually oil the grates again right next to the burgers, and then flip them onto the newly oiled area for another 3-4 minutes. (It’s a real good idea to use grilling gloves when oiling the grates so as not to burn yourself.)
    IMG_5315
  5. If you are toasting buns, place them on the direct heat for just a minute and then move them to the side or onto the higher rack.
    IMG_5320
  6. Place the cheese slice(s) on each patty in the final minute of cooking and close the lid so the cheese melts.
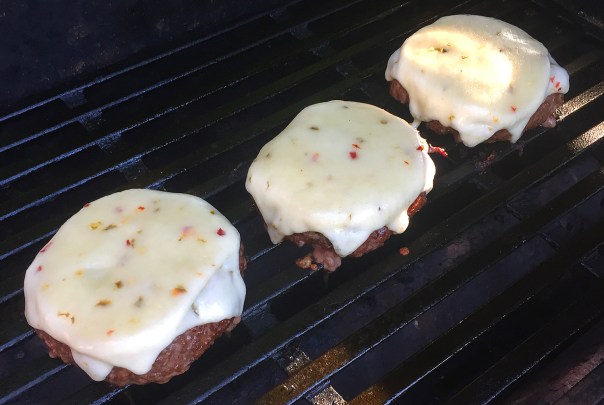
    IMG_5322
  7. Spread the mustard and ketchup on the bottom half of each bun, top with cooked cheeseburger, then add onion, hot pepper rings, tomato slice and lettuce leaf followed by the top half of the bun. Dig in!
    IMG_5326

http://www.lynnandruss.com

*Spice rub recipe available from The Complete Meat Cookbook by Bruce Aidells and Denis Kelly.

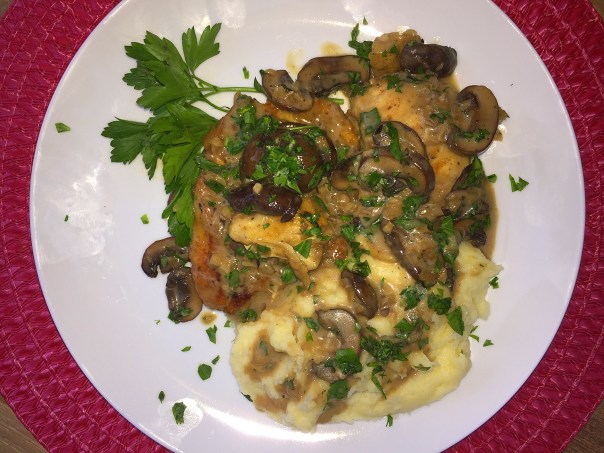
Chicken Marsala with Parmesan Garlic Mashed Potatoes. The Best!

If you’re not familiar with Chicken Marsala, it is an Italian-American dish of rich golden colored pan-fried chicken cutlets and mushrooms in a rich Marsala wine sauce. It appears on most classic Italian restaurant menus, but it’s really quite easy to concoct at home. So if you haven’t already made it, why not give it a whirl and impress your family—or just yourself!

IMG_5191

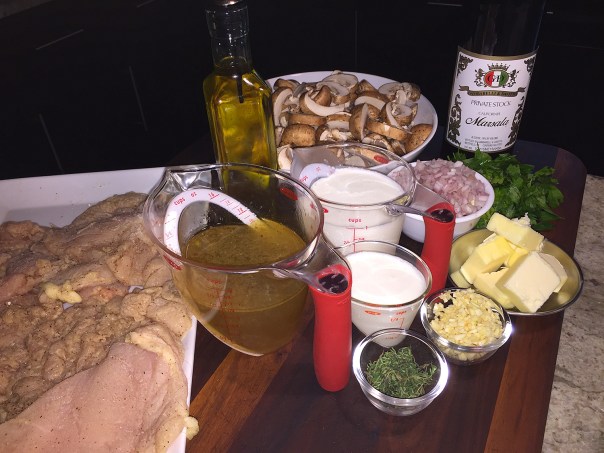
Not a fan of the ultra-thin, pre-sliced cutlets, I buy the boneless split breasts and pound them down myself, mainly because it’s a much cheaper way to go. If your chicken breasts are large, first cut them horizontally, then in half vertically to form eight flat fillets, and pound them to an even 1/4-inch thickness.

IMG_5167

Marsala is a brandy-fortified wine from Sicily that is worth adding to your pantry, if only to make this dish time and again; it will keep in a cool, dry spot for months. But please, do not buy the grocery store cooking marsala which is mostly salt, get a decent brand from your liquor store, it truly makes a difference especially when using the amount needed here.

Since I was winging it, I started out with a 12-inch stainless steel pan. In the end, it wasn’t quite big enough to hold everything once it was time to add the chicken back to the sauce. So, after the marsala sauce reduced down and got happy from all of the browned bits left in the pan, I added the browned chicken cutlets to a larger skillet, poured the sauce over, cover and cooked for several minutes for the meat to heat through. Word to the wise: start with a very large skillet.

This recipe yields a lovely sauce that is wonderful over pasta, polenta, rice, or mashed potatoes. Our side was Parmesan Garlic Mashed Potatoes, which are simply heaven-on-earth! I listed the ingredients below. Just go ahead and boil your peeled potatoes until tender, add the ingredients, and beat with a hand mixer until smooth.

IMG_5172

Chicken Marsala with Parmesan Garlic Mashed Potatoes

  • Servings: 6-8
  • Difficulty: moderate
  • Print

Ingredients

  • 2.5 lbs. boneless skinless chicken breasts, pounded ¼-inch thick
  • 6 Tbsp. all-purpose flour
  • 2 tsp. salt, divided
  • 3/4 tsp. freshly ground black pepper, divided
  • 2 Tbsp. olive oil
  • 4 Tbsp. unsalted butter, divided
  • 1 lb. cremini mushrooms, sliced
  • 2 medium shallots, finely chopped
  • cloves garlic, minced
  • 1 1/3 cup dry Marsala wine
  • 1 1/3 cup chicken broth
  • 1 1/3 cup heavy cream
  • 1 Tbsp. chopped fresh thyme
  • 4 Tbsp. chopped fresh Italian parsley, for serving

Directions

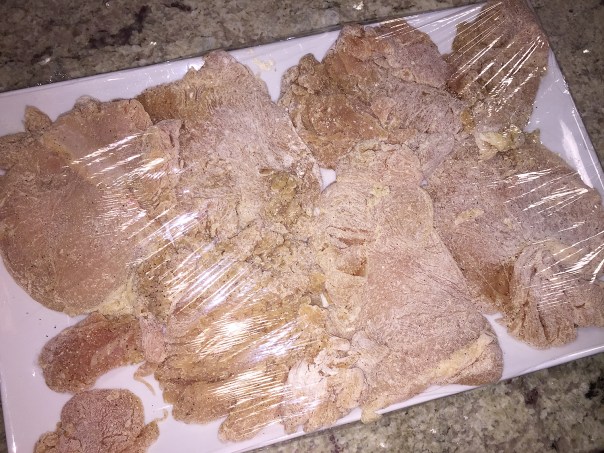
  1. Place the flour, 1 teaspoon salt, and 1/2 teaspoon pepper in a ziplock bag. Add the chicken to the bag; seal bag tightly and shake to coat chicken evenly. Arrange on a platter, cover with plastic wrap and store in the fridge until ready to use.
    IMG_5169
  2. Heat the 1 tablespoon oil and 1 tablespoon of the butter in a large skillet over medium-high heat. (Use a large stainless steel pan for the best browning.) Place the flour-dusted chicken in the pan, shaking off any excess first, and cook, turning once, until the chicken is golden and just barely cooked through, about 5 to 6 minutes total. Transfer the chicken to a plate and set aside. Repeat the process with another tablespoon each of oil and butter and the remaining chicken cutlets.
    IMG_5176
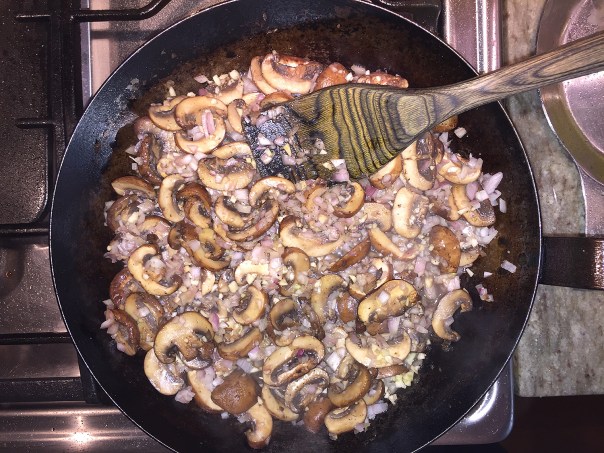
  3. Melt the remaining 2 tablespoons of butter in the pan. Add the mushrooms and cook, stirring frequently, until the mushrooms begin to brown, 3 to 4 minutes.
  4. Add the shallots, garlic, and 1/2 teaspoon of salt; cook for 1 to 2 minutes more.
    IMG_5179
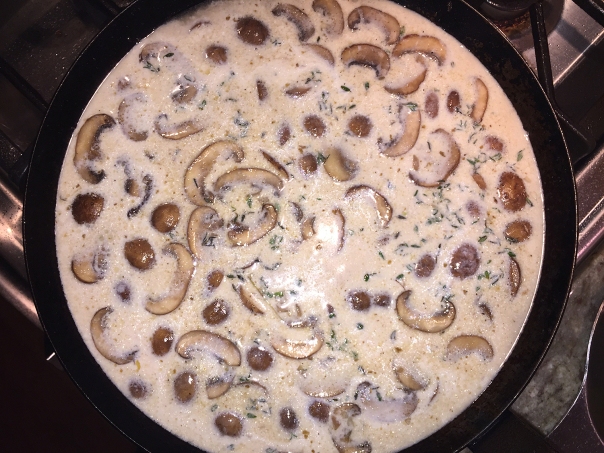
  5. Add the wine, broth, heavy cream, thyme, 1/2 teaspoon salt, and 1/4 teaspoon of pepper; use a wooden spoon to scrape up any brown bits from the pan into the liquid.
    IMG_5181
  6. Bring the liquid to a boil, then reduce the heat to medium and gently boil, uncovered, until the sauce is reduced by about half, slightly thickened, and darkened in color, about 20-25 minutes (it won’t start to thicken until the very end of the cooking time).
    IMG_5183
  7. Add the chicken back to the pan, along with any juices that accumulated on the plate. Reduce the heat to low and simmer until the chicken is warmed through and the sauce thickens a bit more, 3 to 5 minutes. Sprinkle with parsley and serve.
    IMG_5186

Parmesan Garlic Mashed Potatoes

Ingredients

  • 3 lbs. combination of Russet and Yukon Gold potatoes, peeled and cut into quarters
  • 1/4 cup heavy cream, room temp
  • 1 Tbsp. roasted garlic paste
  • 1/2 cup grated parmesan
  • 1 tsp. salt
  • 1/4 tsp. white pepper

http://www.lynnandruss.com

IMG_5193We served ours with a simple side salad to add color and fiber.

Grilled Glossy & Glazy

With a guest staying with us for the weekend—and one who really enjoys pork—we came across this Grilled Pork Chops with Pineapple-Turmeric Glaze recipe in our latest issue of Bon Appétit magazine and thought perfecto! We knew we wanted to grill and we weren’t going to have a lot of time to fuss with dinner, so this couldn’t have fit our criteria any better.

For this recipe, don’t be afraid of getting a good char here. It just means the sugars in the glaze are caramelizing (not that the meat is burning), resulting in deep, complex flavor. Our dining guest can’t tolerate really spicy food like the two of us, so we held back on how much marinate we added to her chop. So when making your own, if there are some “delicate palettes” in your household, adjust accordingly.

To expedite the meal further, our friend bought a couple of different prepared potato salads and we steamed some asparagus. With a crisp Sauvignon Blanc to sip, dinner was a quick and tasty al fresco meal on which we christened our new teak patio set. The summer season is off to a great start…

This glaze would also be dynamite on shrimp, whole fish, chicken breasts, slab bacon, or beef skewers.

IMG_5113

Grilled Pork Chops with Pineapple-Turmeric Glaze

  • Servings: 4
  • Difficulty: easy
  • Print

Ingredients

  • Vegetable oil (for grill)
  • ½ cup pineapple juice (from a can)
  • ¼ cup honey
  • ¼ cup unseasoned rice vinegar
  • 3 Tbsp. Dijon mustard
  • 1 tsp. crushed red pepper flakes
  • ½ tsp. toasted sesame oil
  • ½ tsp. ground turmeric
  • 4 1″-thick bone-in pork chops
  • Kosher salt

Directions

  1. Prepare a grill for high indirect heat (for a gas grill, leave one or two burners off; for a charcoal grill, bank coals on one side); oil grate.
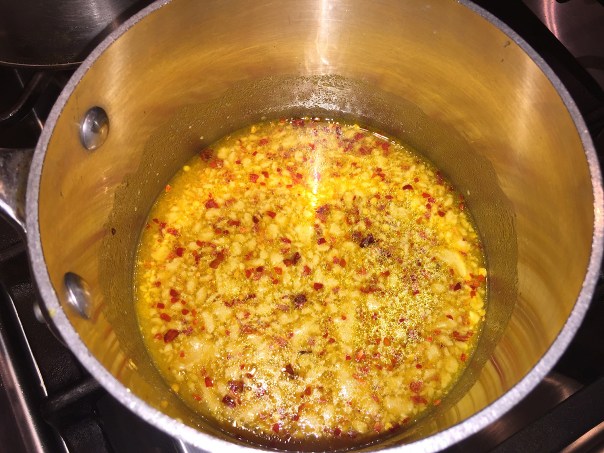
  2. Bring pineapple juice, honey, vinegar, mustard, red pepper flakes, sesame oil, and turmeric to a simmer in a small saucepan over medium heat and cook, swirling occasionally, until reduced to ¾ cup, 10–15 minutes. Let cool. Transfer half of sauce to a small bowl and set aside for serving.
    IMG_5114
  3. Season pork with salt.
    IMG_5116
  4. Grill over direct heat until browned all over, about 3 minutes per side. Continue to grill, turning several times and basting with remaining sauce, until charred and coated with a thick layer of glaze, about 4 minutes.
    IMG_5118
  5. Move to cooler part of grill and take internal temperature of pork. If needed, continue grilling over indirect heat until an instant-read thermometer inserted into chops near bone registers 130°, 1–4 minutes more.
  6. Transfer pork chops to a wire rack and let rest 10 minutes before slicing. Serve with reserved sauce alongside.
    IMG_5121

http://www.lynnandruss.com

Hauntingly Sweet and Savory

The early June Sunday dawned cool, wet and windy, making me hunger for one final braised dish before the heat of the summer would warrant other cooking methods. We both decided a lamb dish would fit the bill and Russ remembered one he recently made for his Men’s group in which they all absolutely loved it—one even exclaiming “It was the best lamb I ever had!” I’m not quite sure I’d go that far, but it does find a spot up there among the top of the list. The flavor is delicious and the meat is meltingly tender.

IMG_5154

This Lamb Tagine with Cinnamon-Scented Onions and Tomatoes originates from the western foothills of the High Atlas mountains in Morocco, North Africa. Its haunting sweet and savory flavor will stay with you long after the meal has ended. You can make this dish at any time of year, but if tomatoes are in season, replace the canned tomatoes in the recipe with thick slices of large, ripe ones; lay them between the lamb and the onions.

tagine

The traditional tagine pottery, shown above—sometimes painted or glazed—consists of two parts: a circular base unit that is flat with low sides and a large cone- or dome-shaped cover that sits on the base during cooking. The cover is designed to return all condensation to the bottom. We don’t own one, but we find using our Le Creuset copper enameled braising pot is just as effective.

Couscous makes a perfect bed over which to ladle the finished tagine as it will absorb a lot of those luscious juices. And if you’re lucky enough to have any leftover, you’ll enjoy it just as much reheated.

NOTE: While this is done on top of the oven for 2 to 2 1/2 hours, you can also braise the dish in a 275° oven for 3 hours.

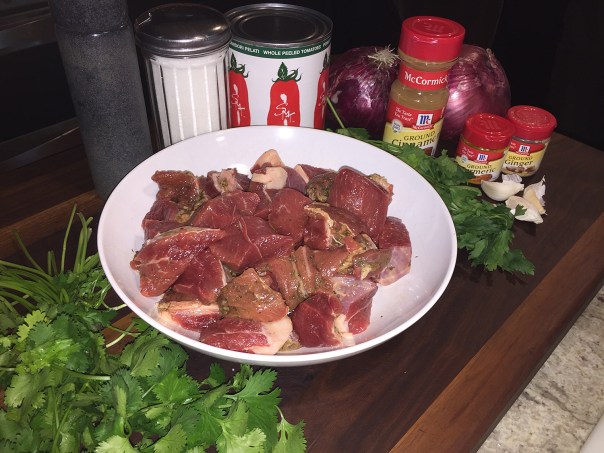
IMG_5126

Lamb Tagine with Cinnamon-Scented Onions and Tomatoes

  • Servings: 4
  • Difficulty: moderate
  • Print

Ingredients

  • 2 Tbs. finely chopped fresh flat-leaf parsley
  • 2 Tbs. finely chopped fresh cilantro
  • 2 medium cloves garlic, minced
  • 1/2 tsp. ground turmeric
  • 1/2 tsp. ground ginger
  • 1 tsp. ground cinnamon
  • Kosher salt and freshly ground black pepper
  • 3 Tbs. extra-virgin olive oil
  • 2 1/2-3 lb. boneless leg of lamb, cubed into 1 1/2″ chunks
  • 1 28-oz. can whole peeled tomatoes, drained, preferably San Marzano
  • 2 large red onions, 1 finely chopped, the other sliced into 1/8″ rounds
  • 2 tsp. granulated sugar

Directions

  • In a large bowl, combine the parsley, cilantro, garlic, turmeric, ginger, 1/4 tsp. of the cinnamon, 3/4 tsp. salt, and several grinds of pepper. Add 2 Tbs. water and the olive oil, and mix.
  • Add the lamb chunks to the marinade and turn to coat. They can marinate covered in the refrigerator for an hour if needed, but not necessary.
    IMG_5128
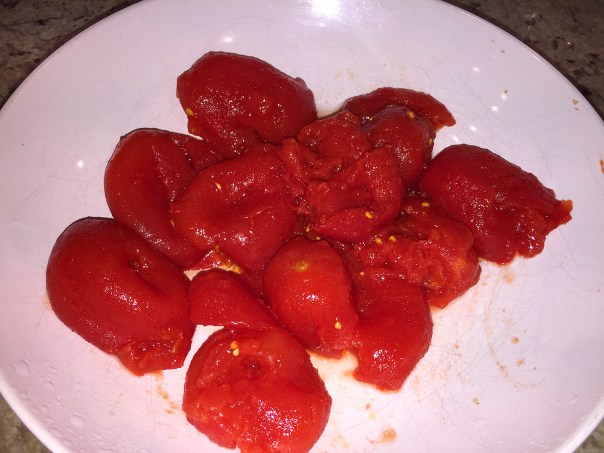
  • Meanwhile, drain the tomatoes in a sieve. Using a paring knife, make a small incision in each one and gently press out and discard any excess juice and seeds; set the tomatoes aside.
    IMG_5132
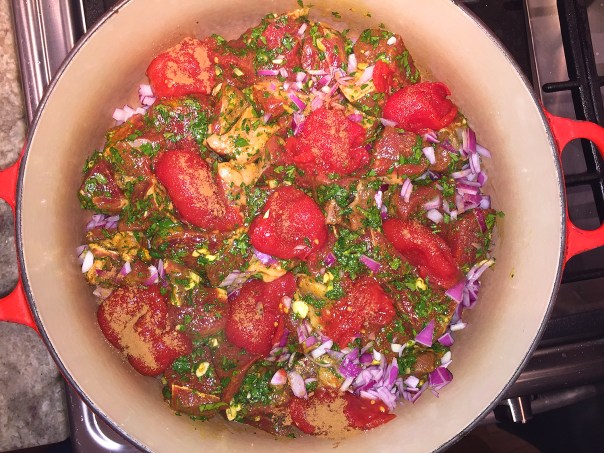
  • Scatter the chopped onions over the bottom of an 11- to 12-inch tagine or braising pot. Arrange the lamb in a snug, single layer on top and drizzle over any remaining marinade. Arrange the drained tomatoes in and around the lamb, and then sprinkle 1 tsp. of the sugar and 1/4 tsp. of the cinnamon over the tomatoes.
    IMG_5135
  • Peel and cut the remaining onion crosswise into 1/8-inch-thick rounds; do not separate the rings. Carefully lay the onion rounds on top of the lamb, and then sprinkle the remaining 1 tsp. sugar, 1/2 tsp. cinnamon, and a pinch of salt over the onions.
    IMG_5136
    IMG_5138
  • Put the tagine or pot over medium heat and cook uncovered, nudging the lamb occasionally to keep it from sticking, until the chopped onion is translucent, about 15 minutes.
    IMG_5143
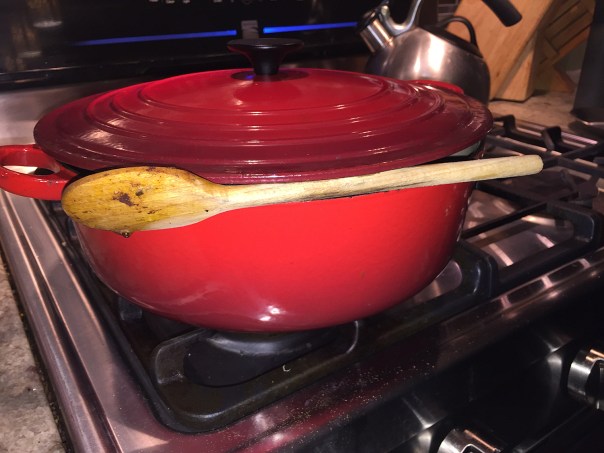
  • Add 1/4 cup water around the edges (so that you don’t disturb the sugar and cinnamon). Cover with the lid, propping a wooden spoon between the base and the lid to keep it from sealing.
    IMG_5144
  • Turn the heat down to low and gently simmer, nudging the lamb from time to time to prevent sticking and swapping the spoon position halfway through, until the lamb is very tender and the sliced onions are soft, 2 to 2-1/2 hours.
  • Drizzle in a few spoonfuls of water as necessary during cooking to keep the sauce loose, or remove the lid at the end of cooking to evaporate and thicken the sauce if it’s watery.
    IMG_5147

http://www.lynnandruss.com

IMG_5149Serve over a bed of couscous.

Adapted from a Fine Cooking recipe by Jeff Koehler


Crispy Skin, Juicy Meat, Happy Diners

Does moist, flavorful chicken with crispy skin float your boat? Then look no further. This recipe is very similar to one we often cook using the whole bird. You can vary the herbs as you like, but stick to the hardy ones—thyme, rosemary, sage, and oregano. They’ll roast without burning and have a stronger flavor.

While the Baked Chicken with Herbs, Garlic & Shallots takes longer overall than most of my weeknight recipes, the process is largely hands off and the oven does the lion’s share of the work.

IMG_4940

Because we are extremely partial to the allium family, we increased the number of shallots and garlic cloves, which is noted in the list of ingredients below. And while it’s optional, we definitely made the au jus, but for more flavor, we incorporated homemade chicken stock and white wine in place of one cup of water, and it was mighty tasty!

IMG_4945

Our side of Roasted Vegetables was a perfect companion to the baked poultry and the meal was complete with some leftover reheated spiced polenta. Take the easy way and use frozen pearl onions. Fresh are great, but they are no picnic to peel.

Baked Chicken with Herbs, Garlic and Shallots

  • Servings: 4
  • Difficulty: easy
  • Print

IMG_4922

Ingredients

  • 1 4-lb. chicken, cut into quarters
  • 3 Tbs. unsalted butter
  • 8 medium shallots, cut in half and peeled
  • 12 large garlic cloves, peeled
  • Leaves stripped from 10 sprigs fresh thyme
  • Leaves stripped from 8 sprigs fresh rosemary
  • Leaves stripped from 6 sprigs fresh oregano
  • 1-1/2 tsp. coarse salt
  • Freshly ground black pepper

IMG_4926

For the roasted vegetables

  • 1 lb. cremini (baby bella) mushrooms, trimmed and halved if medium, quartered if large
  • 1 lb. fresh pearl onions, peeled; or frozen pearl onions, thawed
  • 1 lb. Brussels sprouts, trimmed and halved
  • 4 Tbs. extra-virgin olive oil
  • 4 medium cloves garlic, minced
  • 2 tsp. fresh thyme leaves
  • Sea salt and freshly ground black pepper
  • 1 Tbs. sherry vinegar

Directions

  1. Heat the oven to 425°F. Rinse the chicken and pat it dry with paper towels. Cut away any excess fat and tuck the wings behind each breast.
  2. Put the butter into a large, shallow rectangular baking pan. Put the pan into the oven while it’s heating. When the butter is melted (about 10 minutes), remove the pan and set it on a heatproof surface or on a couple of potholders.
  3. Add the shallots, garlic, thyme, and rosemary, and swirl the pan to coat the ingredients in the butter.
    IMG_4932
  4. Dredge the chicken, skin side down, in the butter and herb mixture, and arrange, skin side up, in the pan. Sprinkle the chicken generously with the salt and pepper.
    IMG_4934
  5. Bake until the chicken is browned and cooked through, 50 to 60 minutes. Serve with the shallots and garlic along with a drizzle of the pan drippings.
    IMG_4940

Optional Au Jus: After chicken and shallots are done, remove them to a platter and cover loosely with foil. Stir in 1/2 chicken stock and 1/2 cup wine to make a jus with the drippings, loosening any browned bits. Strain through a fine mesh sieve and serve on the side.
IMG_4942

For the roasted vegetables

  1. Position a rack in the top third of the oven and heat the oven to 450°F.
  2. In a large bowl, toss the mushrooms, onions, and Brussels sprouts with 2 Tbs. of the oil, the garlic, thyme, 1-1/2 tsp. salt, and a few grinds of pepper.
    IMG_4928
  3. Spread on a large rimmed baking sheet. Roast for 20 minutes, stir the vegetables, and continue roasting until tender and browned, about 35 minutes total.
    IMG_4929
  4. Transfer to a serving bowl and toss with the remaining 2 Tbs. oil and the vinegar.

http://www.lynnandruss.com

Chicken recipe adapted from Abigail Johnson Dodge of Fine Cooking

Healthiest and Tastiest Summer Salad Ever!

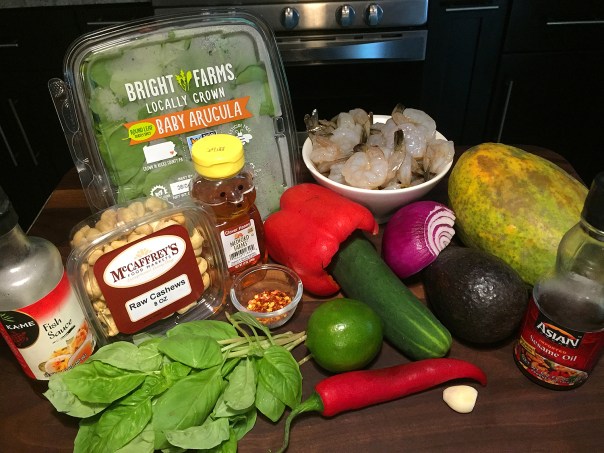
I’m throwing you a lifeline to rescue you from those dull, bland salads that we all tend to throw together at home. Instead, try this super-healthy and fabulously delicious Red Pepper, Shrimp and Papaya Salad. It’s chockfull of nutrients that boost your immunity, vision, heart and brain health. Got your attention now?

IMG_5050

While oranges are perennial favorites as an immune booster, it’s time to shine the light on papayas. They boast slightly more vitamin C than the all-star orange and are loaded with betacarotene, an antioxidant that helps protect tissues from cellular damage. Plus, eating antioxidant-rich food can help you feel less sluggish and decrease your risk of chronic disease.

Additionally, the sweet red peppers add color, crunch and lots of vitamins, boost heart health, and strengthen immunity such as ferulic acid, an anti-aging skin phytonutrient. And who doesn’t need a little help in that arena—especially after a certain age…

IMG_5037
A papaya as it looks once cut in half.

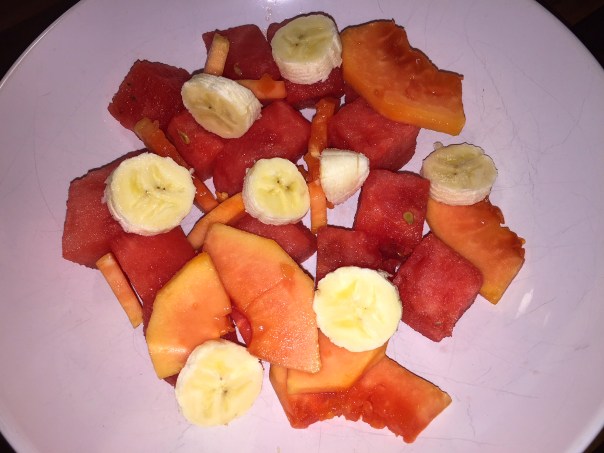
The bonus on papaya? It’s high in fiber that feeds the good bacteria in your gut! You’ll feel like a million dollars when you’re done eating. My papaya was a bit large so I only used half of it. But the remainder was perfect in a morning fruit salad containing sliced bananas and watermelon chunks.

IMG_5053

Bring on the summer!

IMG_5029

Red Pepper, Shrimp & Papaya Salad

  • Servings: 4
  • Difficulty: easy
  • Print

Ingredients

Dressing

  • Juice of 1 lime
  • 2 Tbsp. honey
  • 2 Tbsp. fish sauce
  • 3 Tbsp. sesame oil
  • 1 garlic clove, minced
  • 1 small red chili pepper, finely minced (more or less to taste)
  • Salt and pepper to taste
    IMG_5034

Salad

  • 1 Tbsp. coconut oil
  • 3/4 lb. raw shrimp, peeled and deveined
  • 1 tsp. chili flakes
  • 1 small papaya, cut in half lengthwise, seeded, peeled, then sliced horizontally into 1/4″ thick C-shaped slices
  • 1/2 cup raw cashews or almonds; roughly chopped
  • 3-4 oz. baby arugla
  • 1/2 red onion, thinly sliced
  • 1/2 red pepper, thinly sliced
  • 1 small cucumber, thinly sliced on a diagonal
  • 1/2 cup fresh basil, chopped

Directions

  1. Whisk dressing ingredients together and set aside.
  2. Place a large frying pan over high heat and add the coconut oil.
  3. Add the shrimp and chili flakes and cook lightly, flipping the shrimp to cook all sides. for about 5 minutes, until the shrimp are just opaque.
    IMG_5045
  4. Divide and arrange the salad ingredients between 2 plates and top each with shrimp and chopped nuts. Lightly dress and serve immediately.

http://www.lynnandruss.com

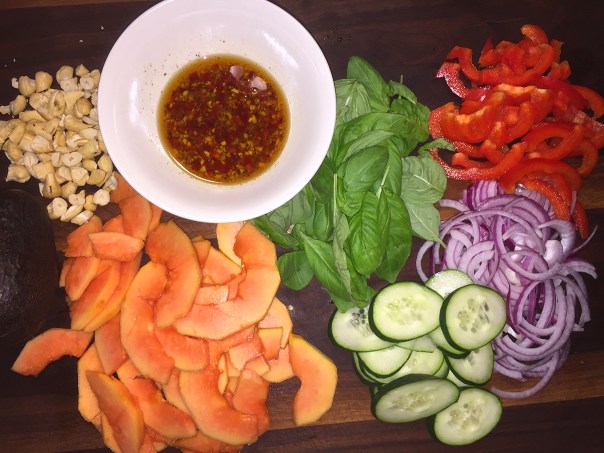
IMG_5038After making the dressing, prep all of the veggies and chop the nuts.

IMG_5041
Assemble all of the salad ingredients on a couple of plates, then top with shrimp, nuts and dressing.
IMG_5051

Recipe adapted from one found in Bottom Line Health