Monthly Archives: October 2018

Skillet-Braised Green Curry Chicken

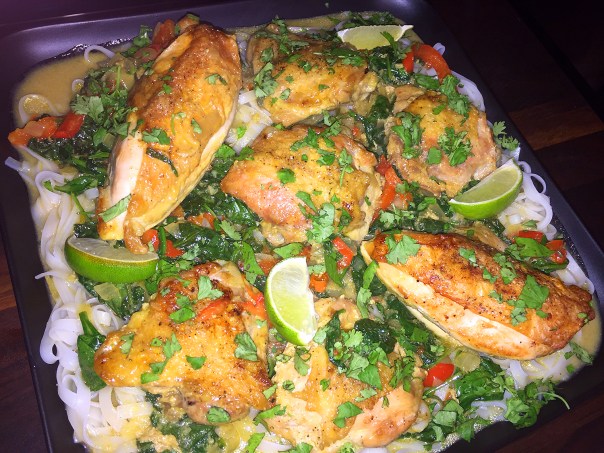
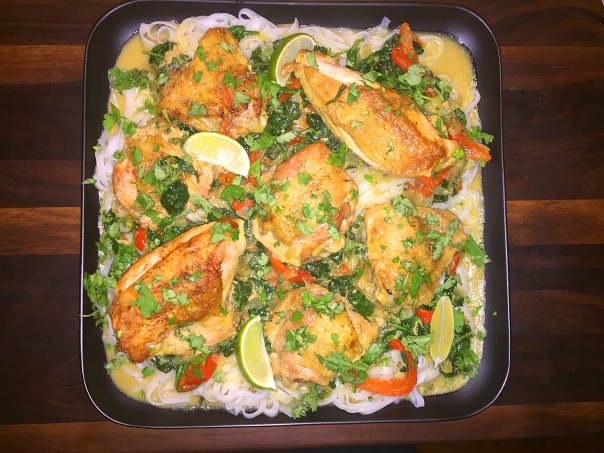
Winner, winner, chicken dinner—perhaps an 11 on a scale of 1 to 10. Chicken curries are often made with boneless, skinless chicken. Here, bone-in, skin-on thighs (and in our case, breasts) are cooked until the skin is nice and crisp; the contrast of that rich crackle with the bright, aromatic sauce was just magical! Certainly impressionable enough to serve to guests.

IMG_8803

I often tweak a recipe to align with our own culinary predilections. In this case, I cooked closer to 3 1/2 pounds of chicken and included two bone-in breasts (I prefer white meat) along with five thighs. And usually two cloves of garlic never cuts it, so I minced up four. And the most perplexing ingredient quantity was only 2 ounces of baby spinach, really?? I nearly quadrupled the amount, and as you can see by the photos, it didn’t overwhelm the dish.

For some reason the chicken pieces took between 10-12 minutes (the recipe suggests 6-8 minutes) to crisp and brown to my expectations; but the remainder of the directions were spot on. When everything was ready, we spooned the contents over cooked Thai rice noodles which not only made for a fabulous full-on meal, it also provided a striking presentation.

IMG_8785

Skillet-Braised Green Curry Chicken

  • Servings: 4
  • Difficulty: easy
  • Print

Ingredients

  • 1 Tbs. vegetable oil
  • 2 to 2-1/4 lb. bone-in, skin-on chicken thighs
  • Kosher salt and freshly ground black pepper
  • 1 medium yellow onion, diced
  • 3 Tbs. Thai green-curry paste; more to taste
  • 2 cloves garlic, minced
  • 1 13- to 15-oz. can coconut milk
  • 1 medium red bell pepper, thinly sliced
  • 1 Tbs. fish sauce
  • 1 packed tsp. light brown sugar
  • 2 oz. baby spinach (or much more like 7 oz. as we did)
  • 1 medium lime, cut into wedges
  • 1 Tbs. coarsely chopped fresh cilantro
  • Hot cooked rice or rice noodles

Directions

  1. Position a rack in the center of the oven, and heat the oven to 400°F.
  2. Meanwhile, heat the oil in a large cast-iron or other oven-safe skillet over medium-high heat. Pat the chicken dry with paper towels, and season with 1 tsp. salt and 1/4 tsp. pepper.
  3. Add the chicken to the skillet skin side down, and cook until the fat is rendered and the skin is crisp and golden, 6 to 8 minutes (do not flip; the chicken will cook more later).
    IMG_8789
  4. Transfer the chicken to a large plate. Remove all but 1 Tbs. of fat from the pan.
    IMG_8790
  5. Add the onion to the skillet, and cook over medium heat, stirring occasionally, until softened, 2 to 3 minutes.
  6. Add the curry paste and garlic, and cook, stirring, until fragrant, about 30 seconds.
    IMG_8793
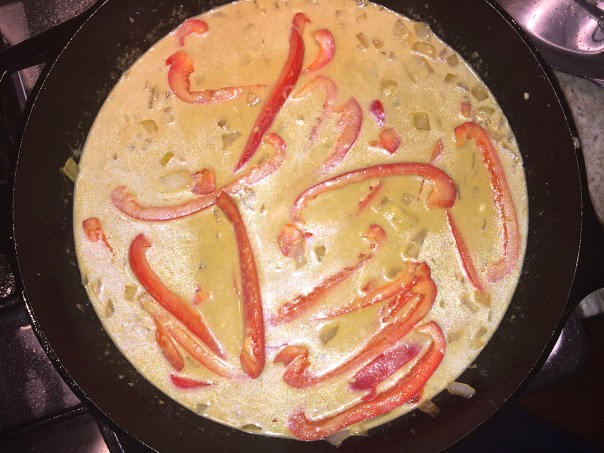
  7. Add the coconut milk, bell pepper, fish sauce, sugar, and 1/4 tsp. salt. Scrape up any brown bits at the bottom of the pan with a wooden spoon, and bring to a simmer. Season to taste with additional curry paste.
    IMG_8795
  8. Return the chicken to the pan skin side up, along with any accumulated juices from the plate.
  9. Transfer to the oven uncovered, and braise until a thermometer inserted in the thighs registers 165°F, 20 to 30 minutes.
    IMG_8800
  10. Transfer the thighs to a plate, leaving the sauce in the skillet. Add the spinach to the skillet, and stir until wilted. Season to taste with juice from a couple of the lime wedges, salt, and pepper.
    IMG_8802
    The 7 ounces of baby spinach wilted down a lot more than shown here.
  11. Pour the sauce onto a serving platter or divide among plates, then nestle the chicken into the sauce and sprinkle with the cilantro. Serve with rice or noodles and the remaining lime wedges.
    IMG_8806

http://www.lynnandruss.com

Adapted from a recipe by By Christine Gallary from Fine Cooking

Show-Stopping Presentation

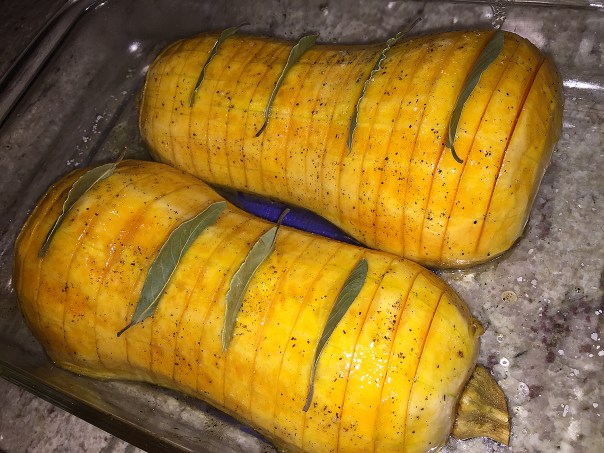
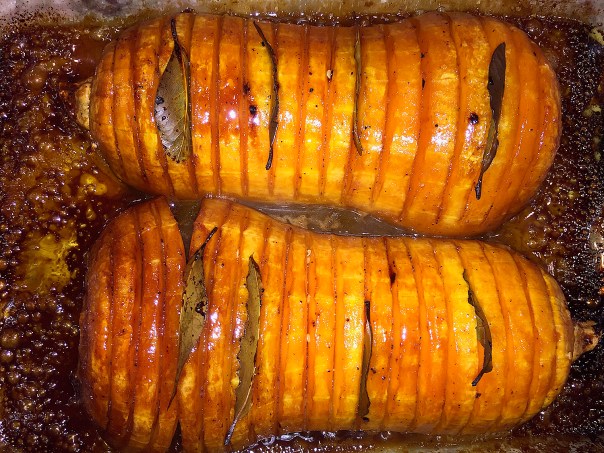
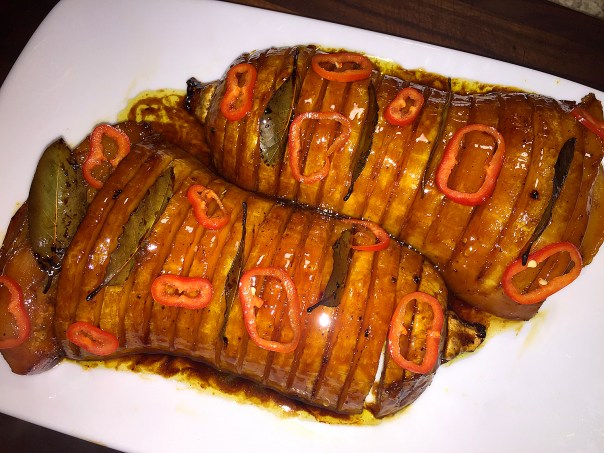
WOW your guests at Thanksgiving (or anytime) with this impressive Hasselback Butternut Squash with Bay Leaves side dish. The perfectly thin, uniform slices make any dish a showstopper. As the squash bakes, the slices fan out slightly for a crowd-pleasing presentation. Once cooked, the preparation is crusty on the outside and soft on the inside. Need I say more?

IMG_8757

The bay leaves tucked between some of the slices will perfume the vegetable as it cooks. While the squash spends its first round in the oven, you’ll prepare the glaze until it looks like rich caramel and then use it to baste with every 10 minutes or so while the squash finishes roasting to an almost shellacked-looking exterior.

When making the thin slices, put a thin dowel or chopstick on either side of the squash so that you don’t accidentally cut all the way through. If you’re interested in creating a similar effect with spuds, check out my blog from a couple of years ago on the impressive Hasselback Yukon Gold Potato.

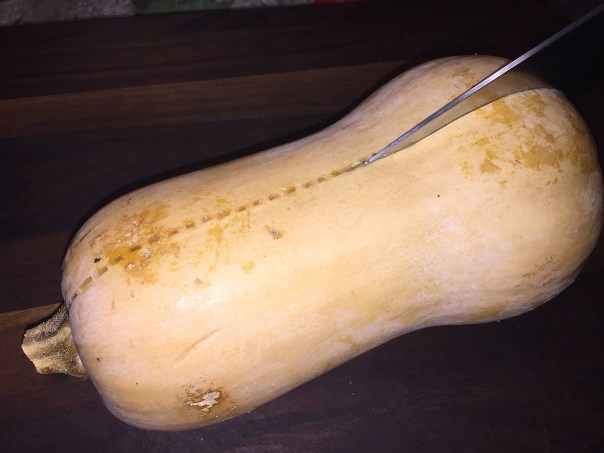
A trick I use to aid in cutting the squash is to first score it in half with a fork along the length on both sides, then slice through the bottom seed end. Finally cut through the stem end which is a bit more difficult. And I have to admit, peeling a squash is sooo not my thing, so I enticed the Mr., who is stronger than me, to do the deed.

IMG_8725
IMG_8728
IMG_8735After scooping out the seeds, peel away the skin and pith.

A word to the wise about the Fresno pepper. You know I gravitate toward all things spicy, but I only left the slices in the glaze about 1 minute at the most, in Step 3. It was one hot chile pepper! They add a nice pop of color used as garnish at the end. Guests can always remove them if they don’t want any more heat. Me? I ate mine 😉

IMG_8723

Hasselback Butternut Squash with Bay Leaves

  • Servings: 6-8
  • Difficulty: moderate
  • Print

Ingredients

  • 1 large butternut squash (about 3 pounds total)
  • 1 tablespoon olive oil
  • Kosher salt, freshly ground pepper
  • 1 Fresno chile, thinly sliced
  • ¼ cup pure maple syrup, preferably grade B
  • 3 tablespoons unsalted butter
  • 2 tablespoons apple cider vinegar
  • 8 dried bay leaves

Directions

  1. Place a rack in upper third of oven; preheat to 425°. Halve squash lengthwise and scoop out seeds with a large spoon. Using a peeler, remove skin and white flesh below (you should reach the deep orange flesh). Rub all over with oil; season with salt and pepper.
    IMG_8737
  2. Roast in a baking dish just large enough to hold halves side by side until beginning to soften (a paring knife should easily slip in only about ¼”), 15–18 minutes.
  3. Meanwhile, bring chile, maple syrup, butter, and vinegar to a simmer in a small saucepan over medium-high, stirring occasionally and removing chile as soon as desired heat level is reached (set chiles aside for serving), until just thick enough to coat spoon, 6–8 minutes. Reduce heat to very low and keep glaze warm.
    IMG_8740
  4. Transfer squash to a cutting board and let cool slightly. Using a sharp knife, score rounded sides of squash halves crosswise, going as deep as possible but without cutting all the way through.
    IMG_8745
  5. Return squash to baking dish, scored sides up, and tuck bay leaves between a few of the slices; season with salt and pepper.
    IMG_8747
  6. Roast squash, basting with glaze every 10 minutes or so and using pastry brush to lift off any glaze in dish that is browning too much, until tender and glaze forms a rich brown coating, 45–60 minutes.
    IMG_8752
    IMG_8754
  7. Serve topped with reserved chiles.
    IMG_8755
    IMG_8759
    A serving size is about 5-6 slices.

Do Ahead: Squash can be roasted 4 hours ahead. Let cool until just warm; cover and store at room temperature. Reheat before serving.

http://www.lynnandruss.com

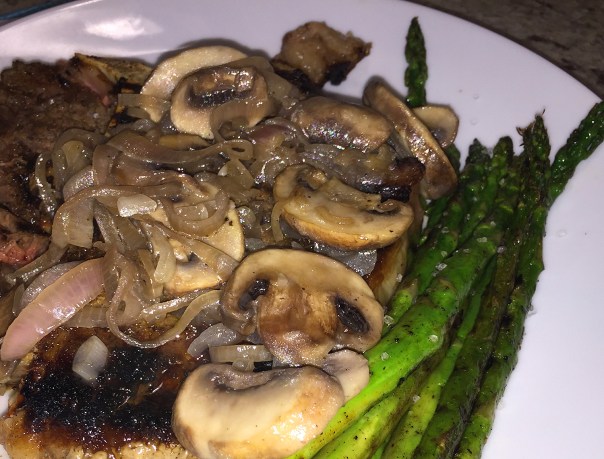
We paired our Hasselback squash with juicy, pan-grilled T-bone steaks seared to a perfect medium-rare, and grilled asparagus spears. Then for even more goodness, we smothered them in sautéed mushrooms and shallots. OMG, what a meal!

IMG_8761
IMG_8763

Hasselback squash recipe by Ann Redding & Matt Danzer from Bon Appétit

When in Doubt, Pull Out a Sheet Pan.

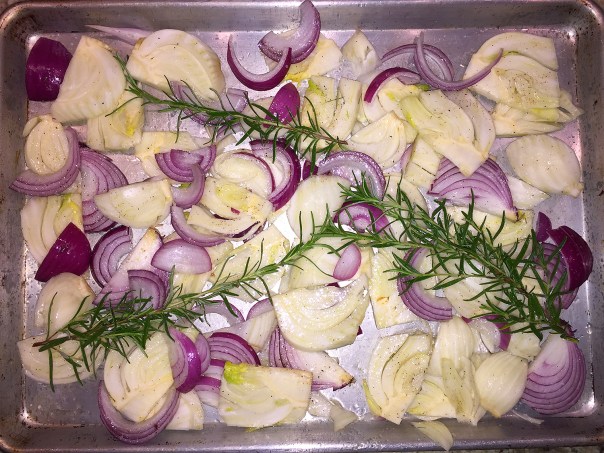
Not into a cleaning a lot of dishes tonight? Then Roast Sausage and Fennel with Orange—a one sheet-pan wonder dinner—is here for you. Roasting the sausages at a higher temperature helps them achieve the same golden brown color you’d get from searing them in a hot skillet, so why bother!

IMG_8641

Our local Amish Farmer’s Market was showcasing their homemade bratwurst the day we went shopping and expected to pick up the Italian sweet sausage links for this recipe. Somehow we both had the same bright idea to use the brats instead. I also added an extra navel orange because after cutting away the thick outer peel and pith, the amount of flesh was scant and I wanted a prominent citrus note.

Thinly sliced shallots, leeks, or cabbage would all be great here too. And think of fennel fronds as a bonus that comes with the bulb; use them anywhere you would another tender herb like parsley or dill. I may have gotten a bit carried away on the garnish 😉

IMG_8644

We served ours with a side of rainbow baby potatoes also rubbed in olive oil, with minced fresh rosemary, salt and pepper. They were put on a smaller sheet-pan lined with parchment paper, which when done, required no cleaning. If both pans fit in the same oven, you can cook them at the same temp. Since we have a double oven, I cooked them at 400° for slightly less time than the sausage combination, turning them once halfway through.

The leftovers were perfect for lunch later that week.

IMG_8621

Roast Sausage and Fennel with Orange

  • Servings: 3-4
  • Difficulty: easy
  • Print

Ingredients

IMG_8628

  • 2 medium fennel bulbs, fronds reserved, bulbs halved through root end, thinly sliced lengthwise
  • 1 small red onion, halved through root end, thinly sliced lengthwise
  • 3 sprigs rosemary
  • 4 Tbsp. extra-virgin olive oil, divided, plus more for drizzling
  • Kosher salt, freshly ground pepper
  • 6 sweet Italian sausages, about 1½ lb. total; (or use bratwurst like we did)
  • 1 medium navel orange
  • 1 Tbsp. red wine vinegar
  • Flaky sea salt

Directions

  1. Place a rack in highest position in oven; preheat to 425°. Combine fennel bulbs, red onion, and rosemary sprigs on a large rimmed baking sheet. Drizzle with 3 Tbsp. oil, season generously with kosher salt and pepper, and toss to combine. Arrange sausages on top, spacing evenly and nestling into vegetables.
    IMG_8631
    IMG_8633
  2. Prick sausages all over with the tip of a paring knife and drizzle with 1 Tbsp. oil. Roast until sausages are browned on top and cooked though and fennel is tender and deeply browned in spots, 25-35 minutes.
    IMG_8635
  3. Meanwhile, coarsely chop reserved fennel fronds (you want about ¼ cup); set aside.
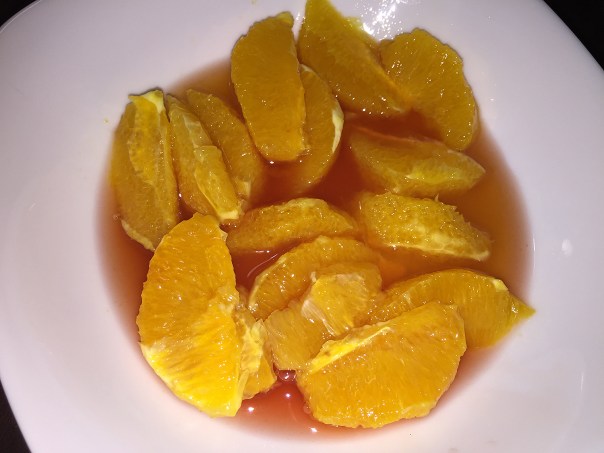
  4. Cut the ends off orange(s) to reveal flesh. Rest orange upright on a cut side and cut down around orange to remove peel and white pith, rotating it as you go; discard peel.
    IMG_8626
  5. Working over a small bowl, hold orange in your hand and cut between membranes to release segments into bowl. Squeeze membranes to extract any remaining juice into bowl; discard membranes. Add vinegar to orange segments and juice and toss to combine; season with kosher salt and pepper.
    IMG_8630
  6. Remove baking sheet from oven. Using your hand or a spoon to block segments, pour juices from orange over sausage and fennel mixture. Set orange segments aside and let sausages and fennel mixture cool 5 minutes.
  7. Transfer sausages and fennel mixture to a platter. Crumble rosemary leaves over and scatter reserved orange segments and fennel fronds on top. Season with sea salt and a bit more pepper; drizzle with oil.
    IMG_8639

http://www.lynnandruss.com

Adapted from a recipe by Claire Saffitz from Bon Appétit

Polenta Pizza With Sausage, Swiss Chard, and Ricotta

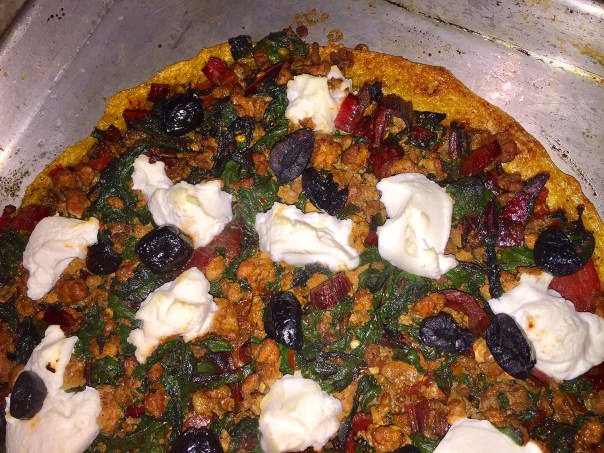
I was excited when I first saw this recipe, although my enthusiasm subsided a tad once I took note of the “Total Time” needed to accomplish the meal. A pizza is a quick thing right? Not so much in this case because of the time necessary to prepare and cook the crust—though it’s a great alternative to pizza for gluten-free eaters.

IMG_8529

Okay, technically polenta baked into an oval crust isn’t a pizza, but what’s the point of obsessing over titles when the result is a crazy delicious dinner, perfect for a party with friends or a cozy night on the couch? The crispy toasted corn crust and cheesy sausage will win over anyone with taste buds.
—Real Simple Magazine

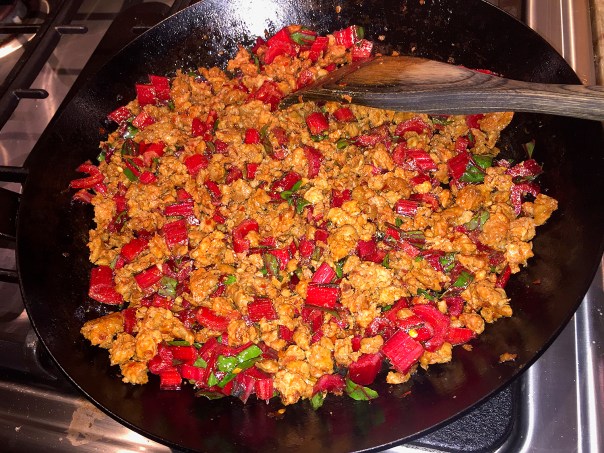
I forgave myself because at least I noted the time process early in the morning which allowed me to rethink my afternoon schedule. Just giving you fair warning here. Plus, I had to pat myself on the back for thinking to spread my roasted garlic olive oil paste (instead of plain EVOO) over the polenta crust before cooking it in Step 4. Another add-on was about a 1/4 cup of halved, cured, pitted black olives which gave a bit of a salty bite.

Our Italian hot sausage (you can use mild if preferred) came in a package of five links, so I just cooked all of them and saved the leftover meat to throw into a pasta dish later in the week—it would’ve been too much for the one pie.

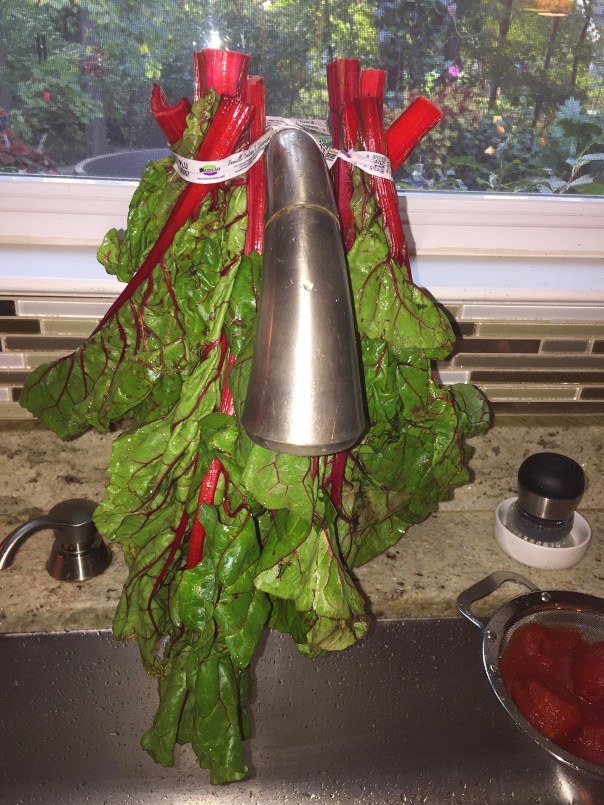
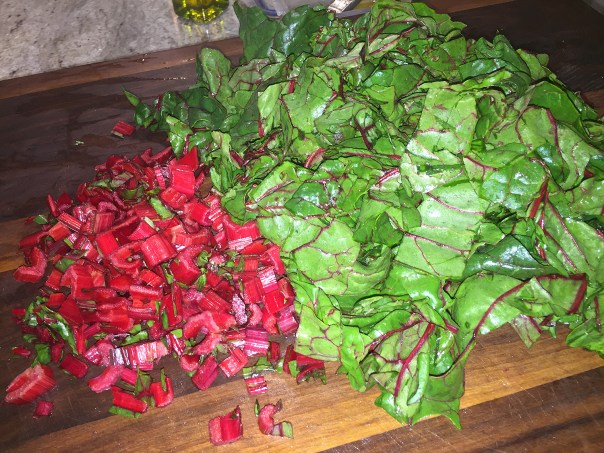
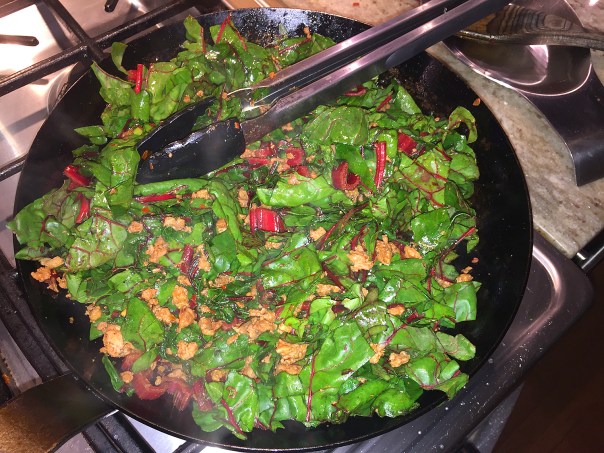
It will seem like a whole lot of chard initially when you add it to the skillet, but just like spinach, it wilts down to about 10% of its volume. Chard tends to be gritty so give it a good rinse before you chop it up. I found hanging it over the kitchen faucet with the twist tie it came with is a good way to let it drip dry.

IMG_8496

IMG_8502

Was it worth it? The short answer is yes, we both loved the taste. When you have some downtime, I suggest you make the crust ahead of time, and even the sausage/chard topping if possible. When assembled later on, the pizza will be in the oven long enough to heat through everything. Then it truly does become a quick weeknight dinner.

Shopping tip: Make sure to buy instant polenta, not the regular kind, otherwise it won’t cook enough to make firm crust. A tip I should have paid heed to when I decided to add this to our weekly menu list. Without “instant” in our pantry, I had to run out and buy some after we had already done our grocery shopping 😦 —no pat on the back here.

IMG_8486

Polenta Pizza with Sausage, Swiss Card and Ricotta

  • Servings: 4
  • Difficulty: moderately easy
  • Print

Ingredients

  • 1½ teaspoon kosher salt, divided
  • 1 cup instant polenta
  • 5 tablespoons olive oil, divided
  • ¾ teaspoon freshly ground black pepper, divided
  • Roasted garlic paste (optional)
  • 3 hot Italian sausages, casings removed
  • 1 bunch Swiss chard, stems chopped and leaves torn into bite-size pieces
  • 1 14-ounce can whole peeled tomatoes, drained
  • ¾ cup ricotta cheese
  • 1/4 cup cured, pitted black olives, halved (optional)

Directions

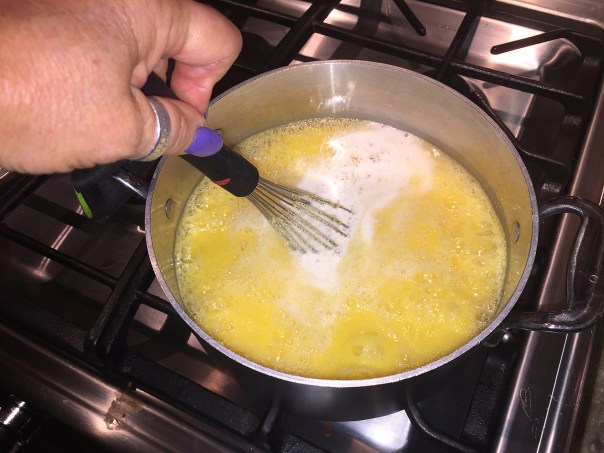
  1. Bring 4 cups water and 1¼ teaspoons salt to a boil in a medium pot over high. Slowly whisk in polenta. Reduce heat to medium-low and cook, whisking often, until no lumps remain and polenta begins to pull away from sides of pot, 8 to 10 minutes. Remove from heat and stir in 1 tablespoon oil and ½ teaspoon pepper.
    IMG_8489
    IMG_8491
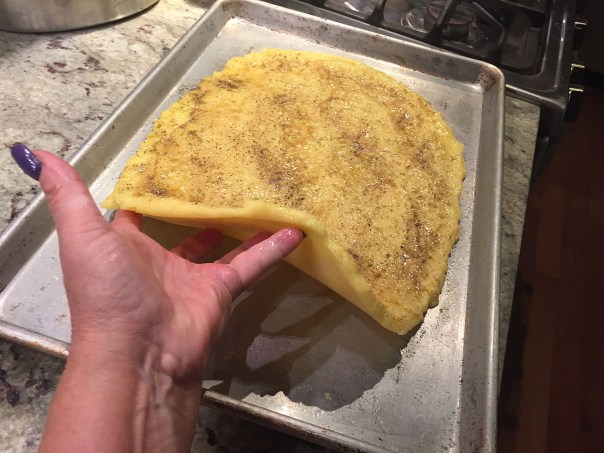
  2. Brush a large rimmed baking sheet with 1 tablespoon oil. Pour polenta onto baking sheet and spread to a ¼-inch-thick oval. Let cool slightly (about 10 minutes), cover loosely with plastic wrap, and chill until firm (about 45 minutes).
    IMG_8494
  3. Preheat oven to 400°F with rack in lowest position.
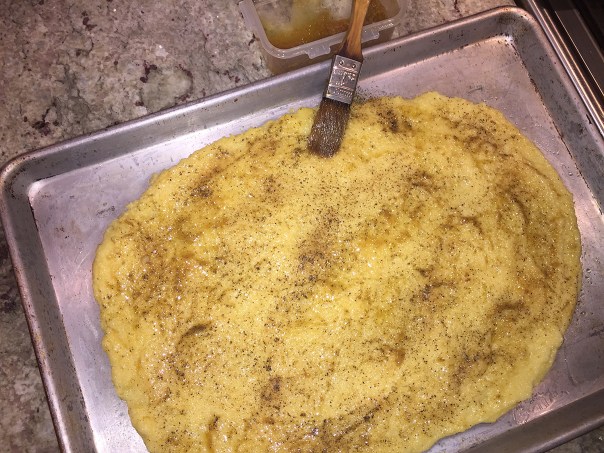
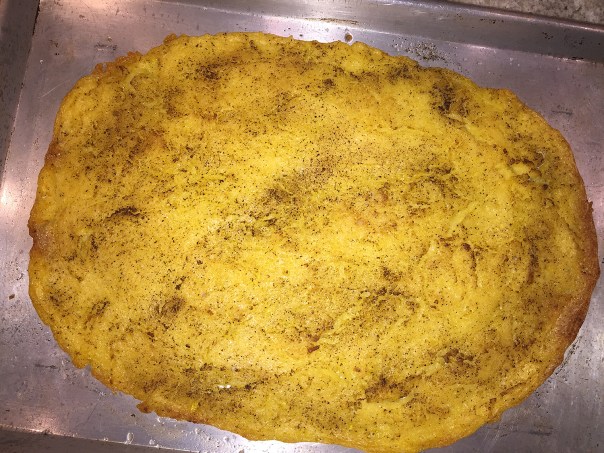
  4. Brush top of polenta with 1 tablespoon oil (or olive oil garlic paste if you have it). Bake until edges are golden brown and crisp, 45 to 50 minutes.
    IMG_8506
    I forgot to add in the ground pepper in Step 1, so I sprinkled it on after chilling it.
    IMG_8509
    IMG_8519
  5. Meanwhile, heat remaining 2 tablespoons oil in a large skillet over medium-high. Add sausage; cook, breaking it up with a wooden spoon, until no longer pink, about 5 minutes. Add chard stems and cook until tender, about 2 minutes.
    IMG_8505
  6. Add chard leaves and remaining ¼ teaspoon each salt and pepper. Toss until wilted, about 2 minutes.
    IMG_8512
    IMG_8515
  7. Top polenta with tomatoes (breaking them up as you go), sausage, and chard. Dollop cheese over top. If using, sprinkle on halved olives.
    IMG_8520
  8. Bake until cheese and greens begin to brown, 12 to 15 minutes. Serve immediately.
    IMG_8527

http://www.lynnandruss.com

IMG_8532

Adapted from a recipe found in Real Simple Magazine By Grace Elkus

Baingan Bharta is “The Bomb” (In a Good Way)

Baingan Bharta (pronounced BHURR-taah), refers to dishes in which the ingredients are roughly mashed either before or after the dish is prepared. In this spicy, smoky dish from the Punjab region of India, eggplant (baingan) is cooked until silky and tender, and then mixed with aromatics and spices.

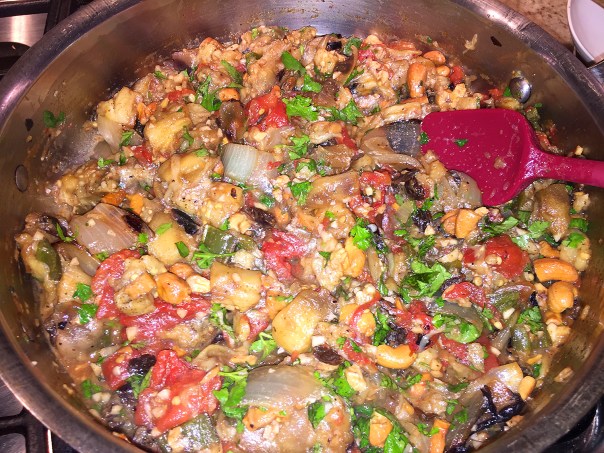
When researching this dish, I found its preparation is very similar to baba ghanoush in that you roast and mash the eggplant before seasoning it with aromatics, herbs and spices, but its flavor profile is wildly different. Here, fresh ginger, garam masala and jalapeño add warmth, while the addition of lime juice provides brightness. This version keeps the veggies less mashed than many, and therefore more appealing to us.

IMG_8616I cooked the rice in vegetable broth instead of water which gave it a nice light golden color and added a bit of flavor.

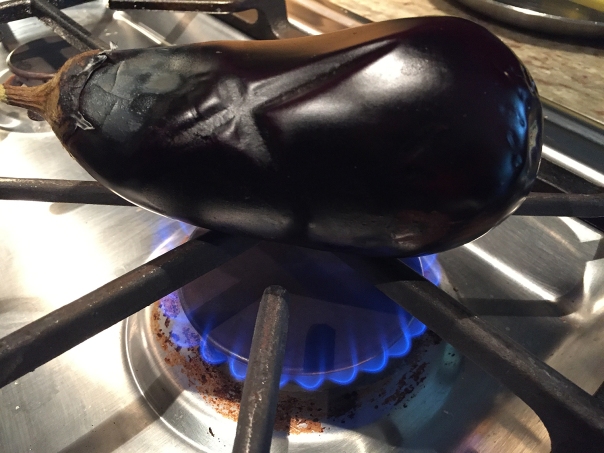
There is something about roasting baingan on an open fire in that its skin just changes everything and gives it an incredible flavor. The entire process takes about 8-10 minutes on a medium high flame and you’ll need to turn it every 1-2 minutes for even roasting. Or you can char the eggplant under the broiler as directed below, although you won’t get that distinctive smokiness. It will be piping hot once you roast it, so cover it with some foil and let it rest for a few minutes. This creates a bit of steam and loosens the skin.

IMG_8584
IMG_8595
To save time later on, I charred the eggplants earlier in the day, cooled and peeled them, then stored them in an airtight ziploc container until time to make dinner.

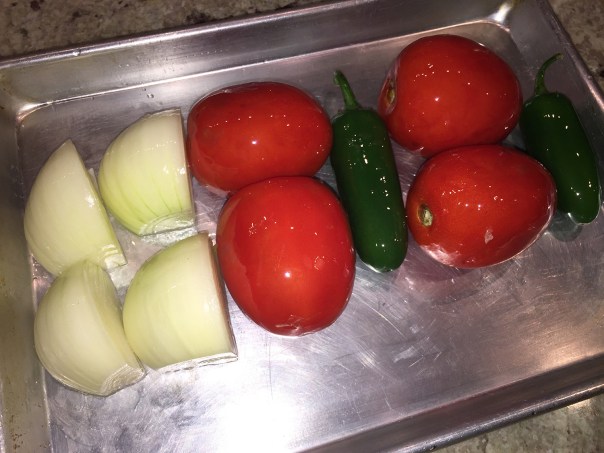
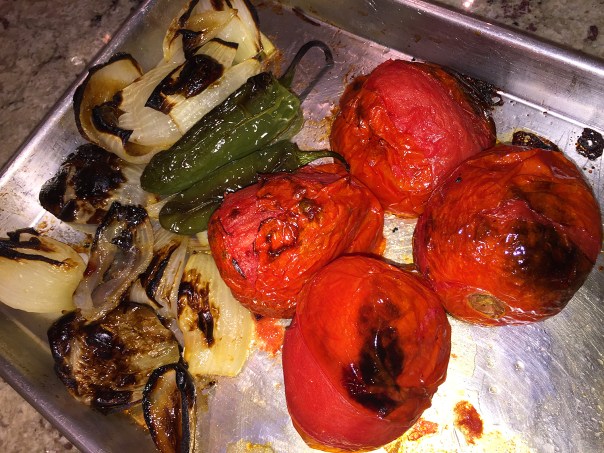
Since I had 4 small eggplants, I was going to try a combination of both methods, two on the stovetop, two in the oven. But roasting them over the open flame was so successful, that I did the final two the same way, with both on one burner—plus my gas broiler basically sucks, as I’ve mentioned before 😦 The tomatoes, onion and jalapeño did get charred under the broiler as directed.

IMG_8592

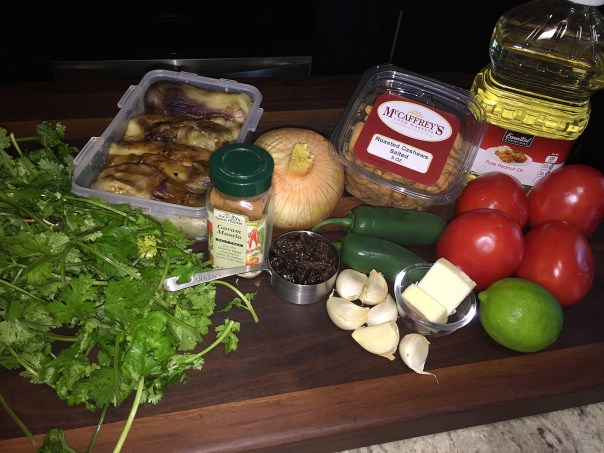
You can find ghee and the spice mix garam masala at most supermarkets, but if ghee is unavailable, butter works as an OK substitute. The plum tomatoes were just gorgeous at the grocery store so we bought four (the recipe calls for 3 regular). Afterward, i think the dish could have used even another one or two more tomatoes. And of course I had to include a few extra garlic cloves and an additional jalapeño 😉

We were totally unprepared for how good this dish was! Don’t omit the golden raisins because they gave just enough of a sweet note to offset the other pungent flavors. This meal is a perfect option for those adhering to a plant-based diet, or maintaining a Meatless Monday regimen. Serve over rice or with warm naan or other flatbread.

IMG_8596

Baingan Bharta

  • Servings: 3
  • Difficulty: moderate
  • Print

Ingredients

  • 2 Tbs. peanut or other neutral oil
  • 2 lb. eggplant (about 2 medium or 4 small)
  • 1-1/2 lb. ripe tomatoes (about 3 medium)
  • 1 medium sweet onion, peeled and quartered
  • 1 medium jalapeño
  • Kosher salt
  • 1 oz. (2 Tbs.) ghee or unsalted butter
  • 1/3 cup roasted salted cashews, coarsely chopped
  • 1/4 cup golden raisins
  • 4 cloves garlic, finely chopped or grated
  • 1-1/2 Tbs. grated fresh ginger
  • 2 tsp. garam masala
  • 1/4 cup coarsely chopped fresh cilantro
  • Cooked basmati rice or naan
  • 1 lime, cut into wedges

Directions

  1. Position a rack in the center of the oven, and heat the broiler on high. Brush some of the oil on a large rimmed baking sheet.
  2. Put the eggplant, tomatoes, onion, and jalapeño on the baking sheet. Pierce the eggplant all over with a knife, and brush the vegetables on all sides with the remaining oil. (Alternatively, roast the eggplant on a gas stove over the open flame.)
    IMG_8601
  3. Broil the vegetables, turning them a couple of times during cooking, until the eggplant are soft and well charred and the other vegetables are well charred in places, about 25-30 minutes.
    IMG_8604
  4. When cool enough to handle, peel and discard the stem and skin of the eggplant, tomatoes, and jalapeño (discard the seeds for less heat), leaving some charred bits behind, and transfer to a large bowl. Coarsely chop the vegetables, return them to the bowl, season with 1 tsp. salt, and stir to combine.
    IMG_8607
    IMG_8608
  5. In a large skillet, heat the ghee (or butter) over low heat. Add the cashews, raisins, garlic, ginger, garam masala, and 1 tsp. salt. cook, stirring frequently, until fragrant, about 5 minutes.
    IMG_8610
  6. Using a rubber spatula, transfer the eggplant mixture to the skillet.
    IMG_8613
  7. Raise the heat to medium, and cook, stirring frequently and breaking up any large pieces of eggplant, until just heated through, about 5 minutes.
    IMG_8615
  8. Season to taste with salt, top with the cilantro, and serve with rice or naan and lime wedges.
    IMG_8620

http://www.lynnandruss.com

Adapted from a recipe by Diana Andrews from Fine Cooking 

Casa Pepe in Córdoba

Our second trip to Spain centered on the Andalusian region in the southwest portion of the country, and our first few days were spent in Córdoba. Córdoba’s history can be traced back to prehistoric times, but the first historical reference is probably the Carthaginian settlement of ‘Kart-uba’, literally meaning “the City of Juba.” It was one of the few places in Europe where free Muslims, Jews and Christian people could mingle quite comfortably together. From 756 to 1031 it was the capital of al-Andalus (Islamic Spain).

As part of our trip, we had pre-scheduled a personal tour of the walled city with a third-generation tour guide Wallada (shown below with Russ) who was named after an Andalusian poet. At some point in her explanation of the history, Russ asked what her favorite restaurant was, and without hesitation she replied Casa Pepe. That was all we needed to hear…

walladah.guide

IMG_7849Casa Pepe de la Judería restaurant is located in the heart of the city’s Jewish quarter. They specialize in southern Spanish cuisine with a modern touch. It boasts an eclectic interior, replete with a typical Andalusian patio, pleasant dining rooms and a charming rooftop terrace. Our first choice of getting seated in the center courtyard was not possible due to the long list of hungry diners, so we were shown to a small room with soaring ceilings featuring a chandelier and a chocolate-colored back wall.

detalle-patio2

azotea-casa-pepe-de-dia2

IMG_7832

IMG_7831

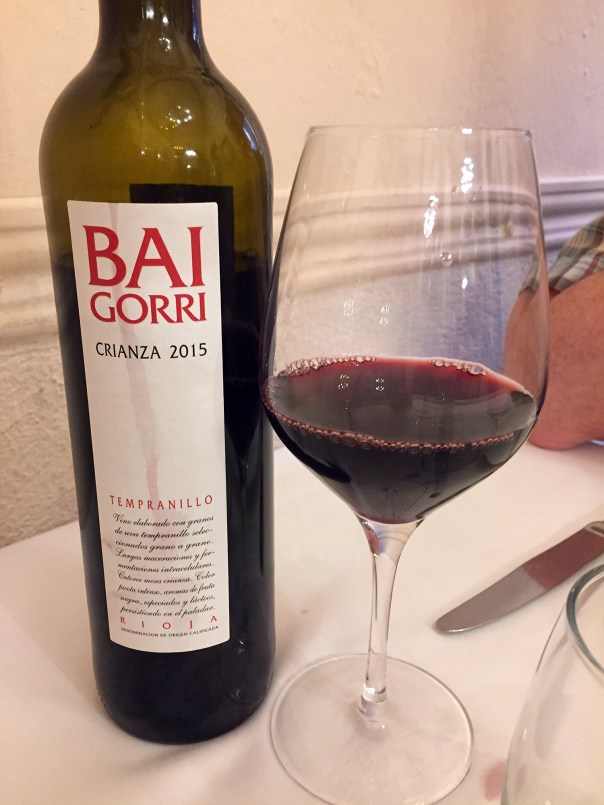
While contemplating the menu, Russ was thrilled to see they stocked a Bai Gorri Tempranillo, a winery we patronized on our first trip to Spain over five years ago. It was a nice segue to begin our dining experience, and it only got better from there.

IMG_7838

For starters we ordered their well-merited Creamy Croquettes, individually hand-made with stewed meat and Ibérico ham. After one bite, we literally died and went to heaven! Soft, fluffy pillows of luscious goodness, they will forever be the ultimate croquette to which we will compare every future croquette we encounter.

IMG_7844

IMG_7841

Desiring some colorful vegetables, we also chose another starter of Grilled Lettuce Hearts with Garlic and Peppers. Typical of Córdoba, this method of preparing lettuce hearts is served with crunchy garlic fried in extra virgin olive oil. There wasn’t a morsel left on the platter. FYI, the area surrounding the nearby settlement of Montalbán is one of the largest garlic-producing areas in Spain.

IMG_7845

For my main, I couldn’t resist the Iberian Pork Fillet—after all we were on the Iberian Peninsula. Iberian pork is an especially tender and succulent meat because of the animal’s foraged diet of acorns and pasture. On top of being extremely tasty, it is also very healthy because its fat graining contains fatty acids that are beneficial to the cardiovascular system. Hands-down, the BEST pork I’ve ever eaten, my 100% acorn-fed grilled shoulder fillets came plated with roasted potatoes and Padrón peppers—their peculiarity lies in the fact that, while their taste is usually mild, a minority (10-25%) are particularly hot, although mine we are all on the milder side.

IMG_7848

For Russ, it was also all about the pork. His choice was the Taco of Iberian acorn-fed ‘Presa’ fillet, marinated and grilled. Taco in Spanish means “tube” which describes the tenderloin that was then sliced down and spread across the plate with a side of bright red piquillo peppers sprinkled with fresh chives. We did exchange a bite of each other’s pork, but we couldn’t choose a winner because both of them were truly memorable.

Of all the places we ate in Spain on this trip—and there were a LOT—Casa Pepe stands out as the pinnacle choice of the eating establishments. Thanks Wallada for the suggestion! If you ever happen to find yourself in Córdoba, don’t miss the opportunity to feast on some of the best pork and croquettes you’ll ever taste.

Roasting Whole Heads of Garlic. Because You Should.

For several decades I’ve been roasting whole heads of garlic with extra virgin olive oil—because it is soooo worth it. I am amazed to find out how many people still have never attempted making this simple and versatile caramelized deliciousness! So here is a quick “how to” on the uncomplicated technique, and how you came tame it’s brasher profile for its softer side.

As far as the process, there are numerous ways to go about it, but I find the steps below work best for me. Sometimes I don’t even slice off the tops before roasting, but doing so certainly makes it easier to squeeze out the caramelized paste when they are finished cooking. I’ve noticed that many cooks roast their bulbs at 400°F, but I do mine at a lower temp of 325° so that they don’t burn (which has happened in the past.)

IMG_8565

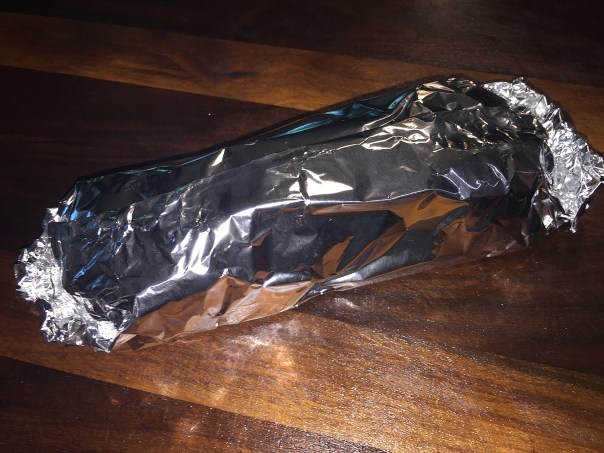
Doing it my way, you also don’t have any pans leftover to clean. Some chefs place the cut bulbs in a pie plate or in the cups of a muffin pan. I simply put them in a large piece of aluminum foil and fold it up to seal in the heat. When done, just toss the tinfoil in the garbage.

IMG_8563

Did you know roasting garlic changes its chemical makeup so that it’s easier to digest? You can eat a lot more garlic if it is completely cooked, with fewer side effects than you would get from eating raw garlic. And just imagine that heady aroma wafting through your house as they cook! Pungent cloves go silky and sultry, warm and welcoming, like a bonfire burned down to glowing embers.

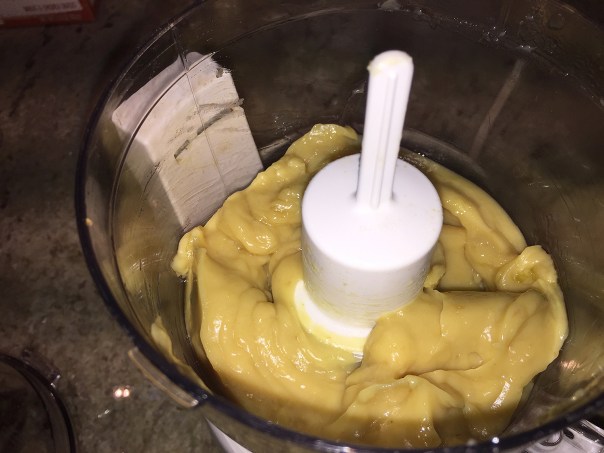
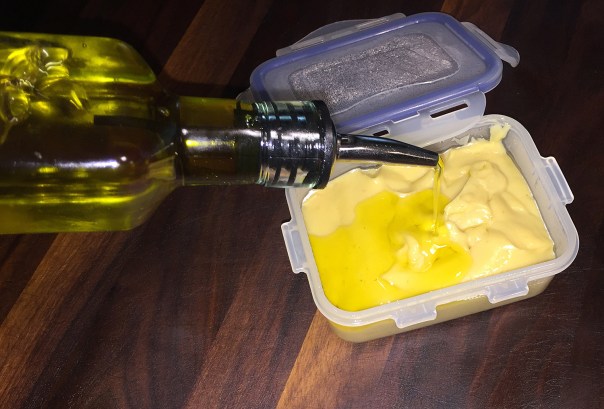
For garlic aficionados, you can eat the caramelized roasted cloves directly out of the heads—just sayin’. Once roasted, you can store the whole cloves covered with olive oil. My preference however, is to blend them with EVOO into a velvety paste, put in a tightly sealed loc-n-loc, top with a thin layer of EVOO and refrigerate.

The applications for using roasted garlic are endless. You can spread some of this buttery, nutty deliciousness on a piece of crusty baguette or make toasty garlic bread. Or use the paste (or cloves) in pasta dishes, mashed or roasted potatoes, over and under skin for roasted chicken, add to soups or even mix it with sour cream for a dip. I recently spread it over a pizza crust before topping with the other ingredients.

If you’ve never made this, today’s a good day to start—you won’t regret it!

Roasted Garlic Heads

  • Servings: About 3/4 Cup
  • Difficulty: very easy
  • Print

Ingredients

  • 3 Large heads of garlic
  • Extra Virgin Olive Oil
  • Fresh thyme sprigs, optional

Directions

  1. Preheat your oven to 325°F
  2. Remove any loose papery skin from the heads and using a sharp knife, cut 1/4 inch from the top of cloves, exposing the individual cloves of garlic. Don’t worry if a few of them are still intact, the garlic will still squeeze out later.
  3. Place the garlic heads, cut side up, in tinfoil, drizzle heavily with extra virgin olive oil (top with fresh thyme if using) and fold to completely enclose. Put in the oven for at least 60, or up to 90 minutes.
  4. Remove from oven, open the tinfoil to release the steam.
    IMG_8564
  5. When cool, squeeze each clove into a mini-blender and drizzle in olive oil while puréeing until a thick homogenized paste forms.
    IMG_8572
    IMG_8574
  6. Place into a container, drizzle on another thin layer of EVOO over the top, seal tightly, and refrigerate, where it will last for several months.
    IMG_8577
    IMG_8580ALTERNATIVELY: Squeeze the cloves directly into a container and pour enough olive oil over to cover them completely. Close tightly with lid and refrigerate.
  7. When ready to use, take the container out of the fridge for about 30 minutes to soften and let the oil come to room temp. Spoon out necessary amount.

http://www.lynnandruss.com

Way More Than Meh…

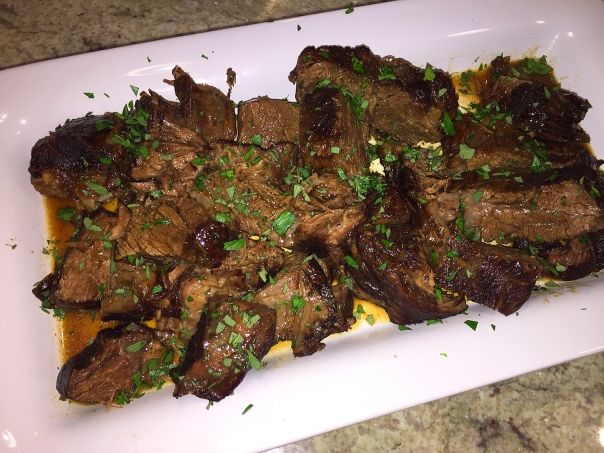
For me, a pot roast dinner is certainly not the first meal that comes to mind when I think “company-worthy.” Until my later adult years, I’ve always considered it a “meh” meal. But this Zinfandel Pot Roast with Glazed Carrots & Fresh Sage recipe from cookbook author Molly Stevens altered my “meh” mindset. She thinks of it as dinner-party pot roast, and after making it, so do I—although for our first go-around, it was just for me and hubby, with leftovers of course.

IMG_8461

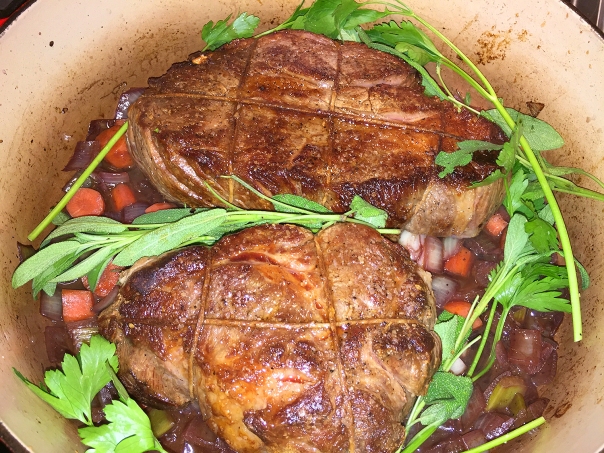
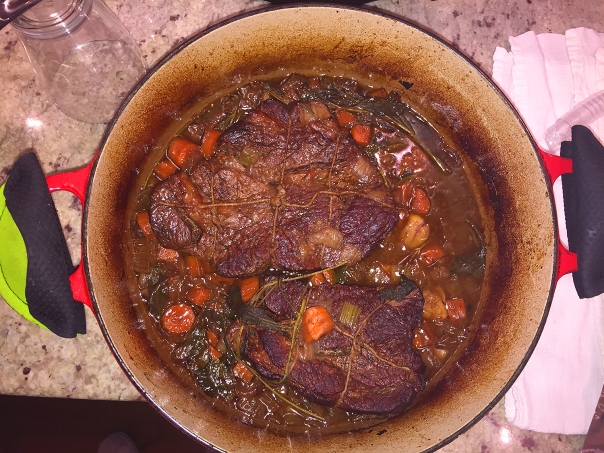
It may seem a bit unwieldy at first glance when you take note of the long list of ingredients and the number of steps in the directions. Don’t shy away though, it’s great for a slow, lazy weekend afternoon. Plan on about 4+ hours from start to finish. After the initial prep of browning the meat and making the braising liquid, the roast will cook unattended for three hours (with just one flip midway) and fill your home with tantalizing aromas—prepare your self.

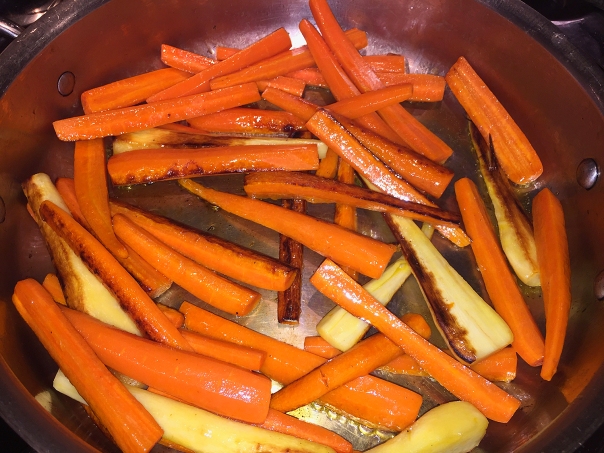
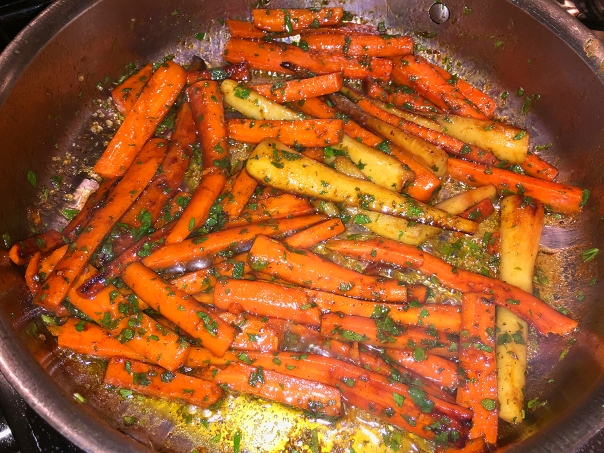
According to Molly, while the basic technique is the same as a regular Sunday night pot roast, the herb-flecked carrot garnish makes it dressy enough for company. Instead of braising along with the beef, the carrots are glazed on top of the stove in a bit of the Zinfandel braising liquid just before serving, so that they remain bright and crisp—a fresh contrast to the gorgeously tender beef.

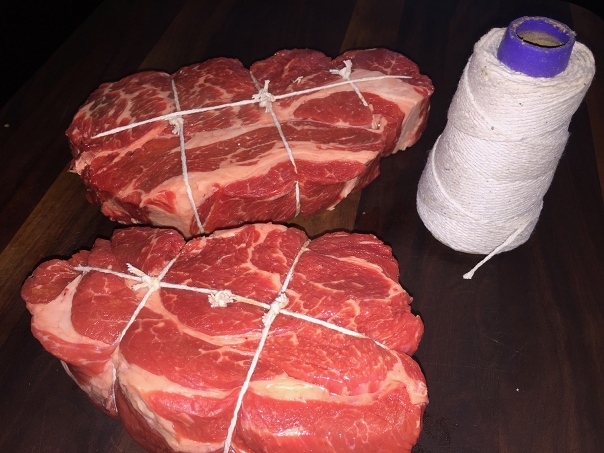
At Molly’s suggestion, we used a combination of parsnips and carrots, which both cook in the same amount of time. Your first choice for this recipe should be top blade roast because its neat shape makes it easy and elegant to carve for guests. You can certainly select other pot roast cuts, which we had to because no top blade was available. In fact, we bought two smaller chuck roasts as that was our only option.

Molly’s recipe only calls for two garlic cloves, but “go big or go home” I say, so I tossed in four large. And you know I’m always touting the use of homemade stock instead of store-bought, but with no homemade beef in-house, I incorporated the Better Than Bouillon brand. Next time, we’re seriously toying with the idea of increasing the amount of wine and stock by 50% (1 1/2 cups each) resulting in more of the cherished liquid—it was truly oralgasmic!

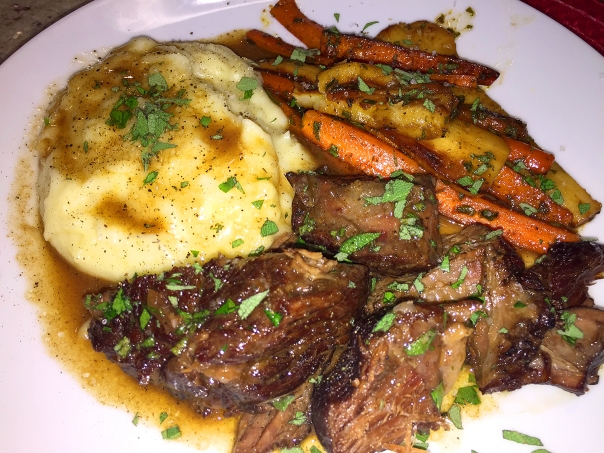
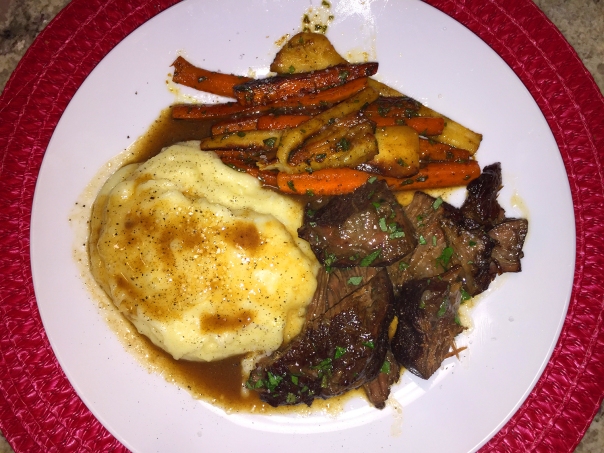
Our pot roast was paired with garlicky, buttery mashed potatoes, yum! (Creamy polenta would make a good substitute.) Oh, and those carrots, we agree they may have been the BEST ever! In our household, braising season has begun in earnest…

IMG_8420

Zinfandel Pot Roast with Glazed Carrots & Fresh Sage

  • Servings: 4-6
  • Difficulty: moderate
  • Print

Ingredients

  • One 3 ½ to 4-pound boneless beef chuck roast, preferably top blade roast
  • Coarse salt and freshly ground black pepper
  • 2 tablespoons extra virgin olive oil
  • 1 large yellow onion (about 8 ounces), coarsely chopped
  • carrot, coarsely chopped
  • celery stalk, coarsely shopped
  • 2-4 garlic cloves, peeled and smashed
  • 1 cup Zinfandel or other robust dry red wine
  • 1 cup beef, veal, or chicken stock, homemade or store-bought
  • Three large 3- to 4-inch leafy fresh sage sprigs
  • Two to three 6- to 8-inch leafy flat-leaf parsley sprigs
  • 8 to 10 black peppercorns

For the Carrots

  • 1 ½ pounds small to medium carrots, peeled, or ¾ pound each carrots and parsnips, peeled
  • 1 tablespoon extra-virgin olive oil
  • 1 tablespoon unsalted butter
  • Coarse salt and freshly ground black pepper
  • 1 tablespoon red wine vinegar
  • Pinch of sugar
  • 2 tablespoons chopped fresh sage
  • 2 tablespoons chopped flat-leaf parsley

Directions

  1. Heat the oven to 300 degrees.IMG_8418
  2. Tying the meat: Using a kitchen string, tie the beef into a neat, snug shape.
    IMG_8424
    IMG_8431
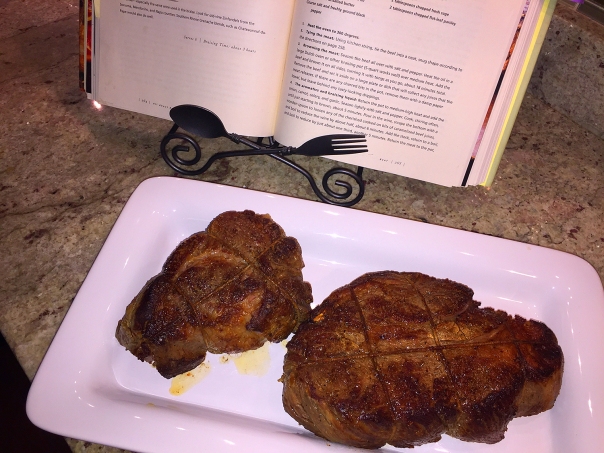
  3. Browning the meat: Season the beef all over with salt and pepper. Heat the oil in a large Dutch oven or other braising pot (5-quart works well) over medium heat. Add the beef and brown it on all sides, turning it with tongs as you go, about 18 minutes total. Remove the beef and set it aside on a large plate or dish that will collect any juices that the meat releases. If there are any charred bits in the pot, remove them with a damp paper towel, but leave behind any tasty-looking drippings.
    IMG_8430
    IMG_8434
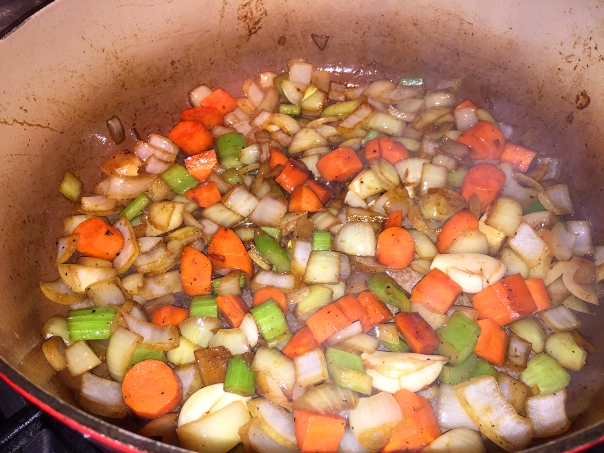
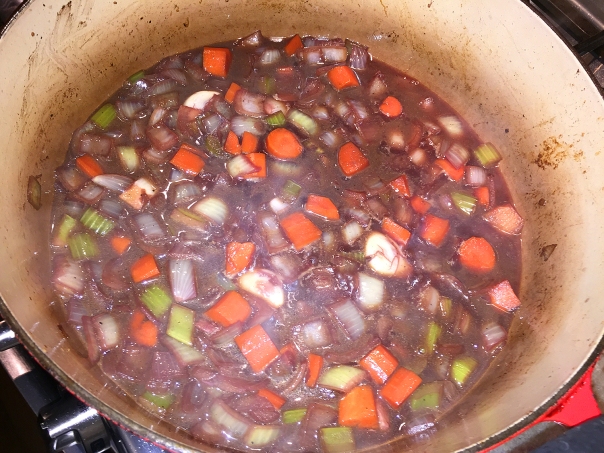
  4. The aromatics and braising liquid: Return the pot to medium-high heat and add the onion, carrot, celery and garlic. Season lightly with salt and pepper. Cook, stirring often, until just starting to brown, about 5 minutes. Pour in the wine, scrape the bottom with a wooden spoon to loosen any of the cherished cooked-on bits of caramelized beef juices, and boil to reduce the wine by about half, about 6 minutes. Add the stock, return to a boil, and boil to reduce by just about one third, another 5 minutes.
    IMG_8436
    Return the meat to the pot, and add the sage, parsley, and peppercorns. Cover with a piece of parchment paper, pressing down so that it nearly touches the meat and the edges of the paper overhang the pot by about an inch. Set the lid in place.
  5. The braise: transfer the pot to the low third of the oven and braise at a gentle simmer, turning the roast once halfway through braising, until fork-tender, about 3 hours. Peek under the lid after the first 10 to 15 minutes to check that the liquid isn’t simmering too vigorously; if it is, lower the oven heat by 10 or 15 degrees.
    IMG_8438
  6. The garnish: while the beef braises, cut the carrots into sticks by cutting them crosswise in half, then cutting the halves lengthwise into sticks about 3 inches by ½ inch. This typically means cutting the thicker tops into quarters and the skinnier tips in half. (If using parsnips, remove any woody core before cutting them into sticks) You can chop the sage and parsley for the garnish now as well. Set aside.
    IMG_8445
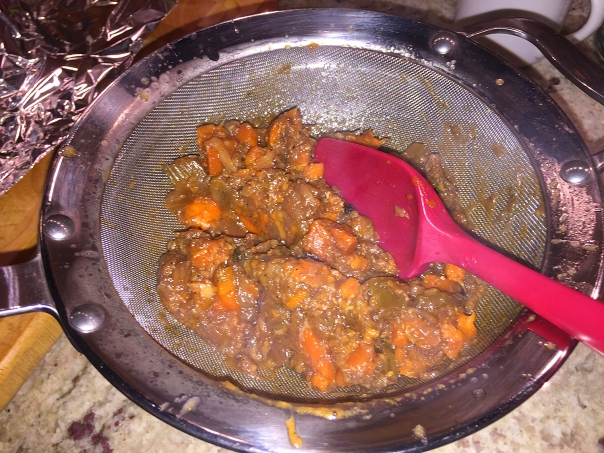
  7. The finish: remove the pot from the oven. Lift the beef out with tongs or a sturdy spatula, set on a carving platter to catch the juices, and cover loosely with foil to keep warm. Strain the cooking liquid, pressing down on the solids to extract as much liquid as possible.
    IMG_8447
    Discard the spent aromatics (there is a lot of flavor in this and Russ likes to eat the solids and/or add to his mashed potatoes), and pour the liquid into a medium saucepan. Let the braising liquid settle, then if possible, spoon off and discard as much fat as you easily can with a wide spoon. Measure out ½ cup of the juices for glazing the carrots and set the rest aside in a warm spot.
    IMG_8451
  8. Glazing the carrots: heat the oil and butter in a large skillet (12 or 13 inch) over medium-high heat. When quite hot, add the carrots (and parsnips, if using), season with salt and pepper, and cook briskly, shaking or stirring them, until lightly glazed and brown in spots, about 8 minutes.
    IMG_8452
    Add the ½ cup braising liquid, cover partway, reduce the heat to medium, and simmer until tender but not at all mushy, 6 to 8 minutes. Uncover, raise the heat, and bring back to a boil. Add the vinegar, sugar, sage and parsley and cook until the liquid is reduced to a glaze, about 1 minute. Taste for salt and pepper.
  9. The finish: heat the remaining reserved cooking juices over medium-high heat, and boil for 1 or 2 minutes to concentrate their flavor. Taste. You may not need to add any salt or pepper, but do so if the juices are lacking in flavor.
    IMG_8454
  10. Serving: remove the strings from the roast. For a platter presentation, arrange the carrots (and parsnips, if using) around the pot roast. Alternatively, slice the roast into ½-inch thick slices and arrange the slices on dinner plates along with the carrots (and parsnips, if using). Spoon a bit of sauce over the meat and serve immediately. Pass any remaining sauce at the table.
    IMG_8457

http://www.lynnandruss.com

Food Is Life.

Having recently returned from southern Spain where we enjoyed an other-wordly gastronomic experience, it was a treat back home to be able to dine at the nearby authentic Spanish restaurant, Vida & Comida (literal translation is Life and Food). Not long ago, our friends Paula and Mike Graham  enjoyed a fantastic meal there and knew it would be right up our alley.

Chef/owner Manuel J. grew up on a big farm in Spain. He moved with his brother to Switzerland where they both attended culinary school and eventually became executive chefs; Manuel then moved to America in 1979. He opened Vida & Comida in the center of Ambler in the Spring of 2017, and recently announced a new executive chef, Chef Abde Dahrouch, above right. Both chefs integrated their expertise to create a menu that is modern, yet accented with classical style.

IMG_8398

But before dining at V&C, we got the party started at the Graham’s lovely home. Russ just couldn’t fathom making anything other than an authentic Spanish appetizer—and it had to be transportable for the 20+ minute car ride. Therefore he made these super-simple, but none-the-less super-tasty Manchego Cheese Canapés with Olives and Piquillo Peppers (shown above with recipe at this link.) And Paula made a beautifully arranged platter of cheeses, olives, peppers and mini toasts.

IMG_8399

wine.bottle

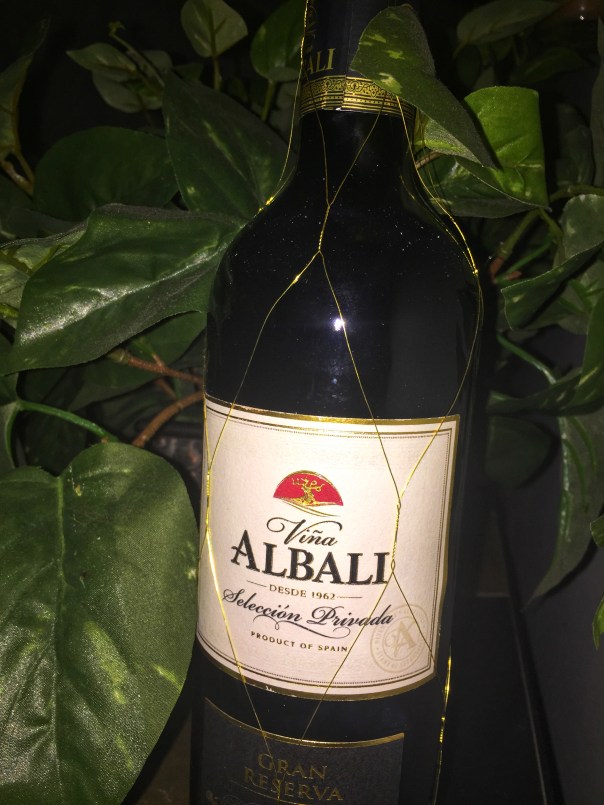
Lucky for us Vida & Comida is a BYOB, and we just happened to have brought back a Viña Albali Gran Reserva—a red wine from Valdepeñas with the best tempranillo grapes of 2011—from our trip to the mother country. A tasteful segue to begin the meal.

IMG_8404

IMG_8408

V&C’s carefully planned menu contains 10 mouth-watering appetizers, a couple of soups, 4 salads, 7 seafood options, and 6 meat entrées that include chicken, beef, pork, lamb and veal; not to mention nightly specials. Surprisingly, they also offer a traditional seafood Paella to-go; which is, by far, their most popular, and most talked about, dish.

Not only did we have the same mindset when making our appetizers, both couples actually ordered the very same thing from our starters, to the entrées, and even dessert!

IMG_8410

Gambas al Ajillo—Famous Spanish, tapas style wild, Gulf shrimp sautéed with garlic and extra virgin olive oil. Russ has made this fantastic appetizer on occasion for company at home, on a much bigger scale of course. It is a hit every time, and you want to make sure to include crusty bread to mop up the leftover garlicky olive oil.

IMG_8414

Corvina—Seared corvina with jumbo crab, corn ragout, grilled asparagus, and truffle oil. Paula and I were on the same page when it came to choosing this entrée. The perfectly cooked piece of fish came floating in a luscious pool of lump crab meat and sweet corn with just the right amount of truffle oil to pull it all together. The topping of grilled asparagus stalks added a nice pop of color and a pleasant toothy texture. Simply mahvelous dahling!

Interesting Tidbit: Corvina, a firm white fish similar to sea bass, is a general name for a bevy of fish found in many different parts of the world. They belong to the scaienidae family, which is better known as “drums or croakers.” Drum fish and croaker fish are differentiated by whether they produce a drumming sound or a croaking sound when they pop their heads above the water.

IMG_8411

The men both went for the Medallones de Ternera Salteados con Jamón Serrano, Salvia y Vino Blanco, a riff on the Italian dish Veal Saltimboca. Three large sautéed veal medallions are suffused in a velvety white wine sauce with Serrano ham, sage and a medley of crisp-tender veggies, then topped with a bit of microgreens. Did they love it? You betcha!

IMG_8417

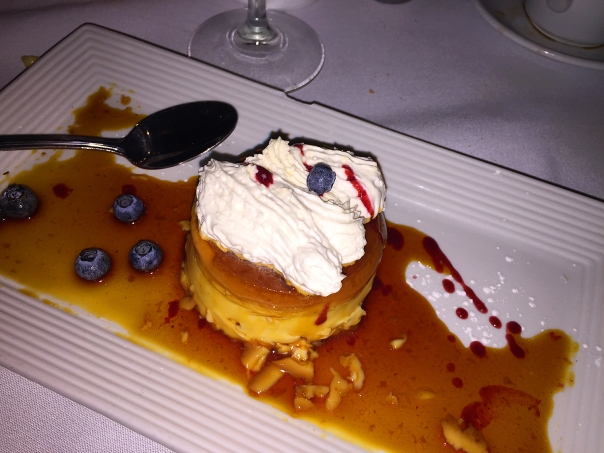
Even though I’m not a dessert person, it didn’t stop the other three from indulging in some authentic Flan artfully plated in a large swath of melting caramel and topped with real whipped cream, fresh blueberries and a raspberry drizzle. Now totally satiated, not one of us had any leftovers this time around!

What a pleasant way to spend an evening which reminded us of our recent trip to Spain.

In the Tradition of Sicily

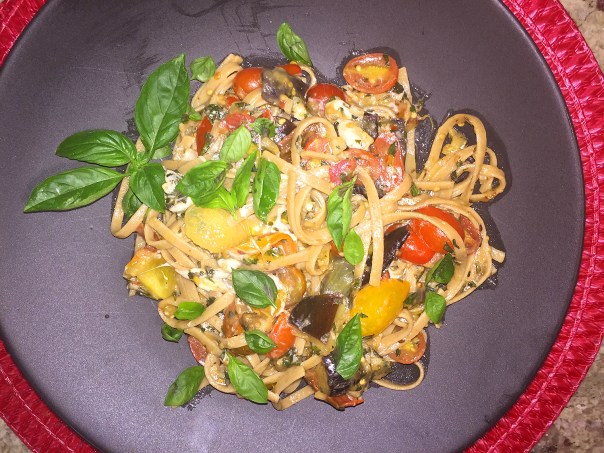
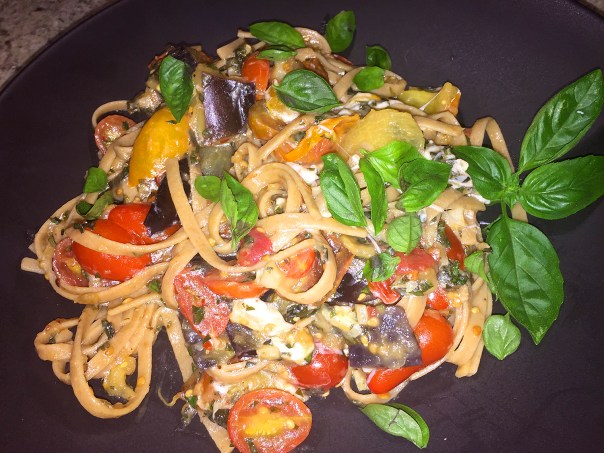
This Sicilian classic, made with sautéed eggplant, tomatoes, basil, and red pepper
flakes, is Italian comfort food at its best—it really embodies the flavors of the island.

IMG_7595

A tasty and colorful recipe from the Sicilian gastronomic tradition, Pasta alla Norma is a triumph of Mediterranean flavors and was so called in honor of Vincenzo Bellini’s opera “Norma”. The story says that in 19th century, Nino Martoglio, a Sicilian writer, poet and theater director, was so impressed when he first tasted this dish that he compared it to “Norma”, Bellini’s masterpiece. And the name lasted ever since.

Traditionally, I believe that penne was the pasta of choice, but here, we’re using a more healthy whole wheat fettuccini. Choosing pasta is no longer just about the size and shape. Whether it’s fettuccini, rigatoni or good ol’ spaghetti, white versus wheat is the latest supermarket quandary. While the stripped-down white stuff boasts a longer shelf life, not to mention a cheaper price tag, it’s considered nutritionally weaker.

It may take some getting used to, but in many pasta dishes we prefer its strong, nuttier flavor and more grainy consistency. With the right sauce or topping, adding whole wheat pasta is an easy way to enjoy a healthy meal and sneak those whole grains into the menu.

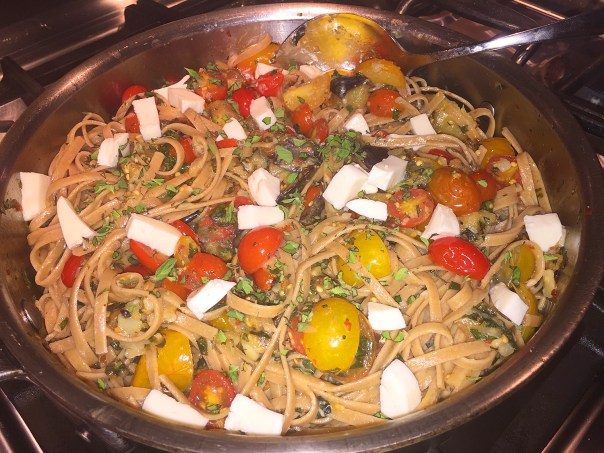
We were leaving for a two-week vacation a few days hence, so we made a concentrated effort to use up any foods that might spoil while we’d be away. Eyeballing a small piece of fresh mozzarella in the fridge, I cut that into small chunks and tossed it in when mixing everything together. We didn’t have ricotta, and I wasn’t about to buy any when all we needed was a few dollops, so I grated up our chunk of Grana Padano.

IMG_7590

Note my optional comment in Step 1 concerning removal of excess moisture from the eggplant. The original recipe did not include this notation, but I find that eggplant is less mushy if you follow this process. And in the end, the amount of kick you add with the red pepper flakes is certainly a personal preference… you know my take on that…

Mangiamo!

Spicy Pasta Alla Norma

  • Servings: 4
  • Difficulty: easy
  • Print

Ingredients

  • Kosher salt
  • 3 Tbs. olive oil; more as needed
  • 1-1/2 lb. Italian eggplant (about 2 medium), cut into 3/4-inch dice
  • 2 large cloves garlic, chopped
  • 2 lb. ripe tomatoes, cut into 3/4-inch dice (or one 28-oz. can whole peeled tomatoes, with juice)
  • 1 tsp. dried oregano
  • 1 to 1-1/2 tsp. crushed red pepper flakes
  • 12 oz. fettuccine, preferably whole wheat
  • 1/2 cup chopped fresh basil; more for garnish
  • 1/3 cup fresh ricotta or 1/4 cup grated Grana Padano or Parmigiano-Reggiano, for serving

Directions

  1. Bring a large pot of well-salted water to a boil.
    OPTIONAL: Before sautéing the eggplant, place the cubes in a colander over the sink, sprinkle with salt, and let drain for 30-60 minutes to remove the excess liquid. Pat dry with paper towels, and omit the salt in Step 2.
    IMG_7579
    IMG_7583
  2. Heat 2 Tbs. of the oil in a large skillet over medium heat. Add one quarter of the eggplant and 1/4 tsp. salt, and cook, stirring often, until the eggplant is browned and softened, about 8 minutes. Transfer to a bowl. Repeat with the remaining eggplant, adding more oil as needed.
    IMG_7586
  3. Heat 1 Tbs. of the oil in the same pan over medium heat. Add the garlic and cook, stirring, until fragrant, about 30 seconds.
  4. Add the tomatoes and oregano, and cook, stirring, until heated through, about 2 minutes.
    IMG_7588
  5. Add the eggplant and pepper flakes and toss to combine. Keep warm.
  6. Cook the pasta according to package directions until al dente. Reserve 1 cup of the pasta cooking water. Drain the pasta and transfer to a large bowl.
  7. Add the eggplant mixture, toss to combine, and add a little of the cooking water if the pasta seems dry. Season to taste with salt and pepper.
  8. Serve with a dollop of ricotta or some grated cheese. Drizzle with olive oil and garnish with basil leaves.
    IMG_7593

http://www.lynnandruss.com

Adapted from a recipe by Lisa Lahey from Fine Cooking

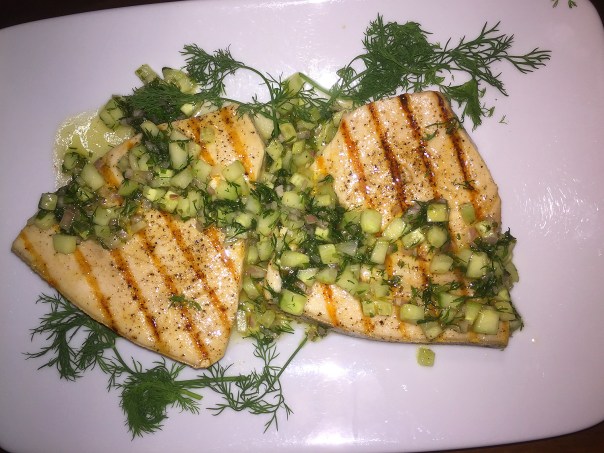
Grilled Swordfish with Lemon, Dill & Cucumber Sauce; Plus Couscous Tabbouleh

You probably already know that you’re supposed to be eating fish twice a week. Fish are a lean, healthy source of protein. Keep in mind, mercury poisoning is still a concern when it comes to fish consumption, but there are ways to mitigate this risk. Because of high mercury levels in swordfish, limit consumption to once a week or less (I would go with the less concept)—and not at all if you’re pregnant. The FDA recommends only one 7-ounce helping per week of large fish, such as shark and swordfish.

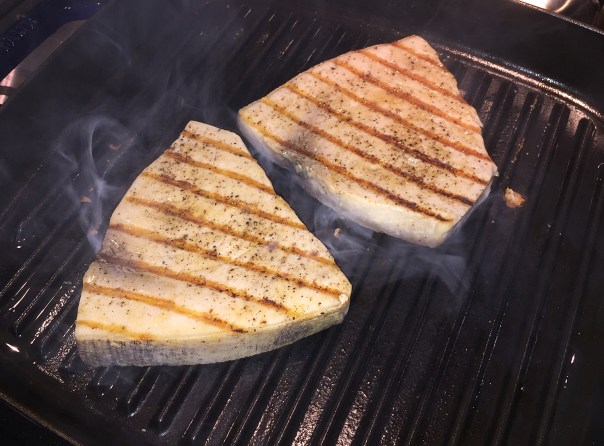
IMG_7571If the weather is not cooperating outdoors, use an indoor grill pan to get similar results.

But, swordfish also offers many health benefits, especially for people who are following low-carbohydrate, high-protein diets. It has no carbohydrates and contains essential amino acids and omega-3 fatty acids. It contains a significant amount of fat—the majority of that fat consists of heart-healthy mono- and polyunsaturated fats. These fats aid in lowering cholesterol and the risk of coronary artery disease.

Delicate and light, this cucumber sauce has a loose texture that’s somewhere between a vinaigrette and a salad. It complements most any grilled fish, so feel free to substitute salmon, tuna or halibut steaks for the swordfish.

IMG_7560

Along with the fish, more heart-healthy ingredients appear in the cucumber sauce and the couscous tabbouleh. To intensify the flavors of the couscous, I used homemade shellfish stock instead of water. And it seemed that 2 cups of parsley was overkill, so I incorporated only about 1/2 bunch and that seemed to be a good balance. Finally, since we had lots of sweet cherry tomatoes on the vine, I picked those for the tabbouleh instead of buying plum tomatoes.

Add in a side salad and you’ve got a healthy superstar meal!

IMG_7548

Grilled swordfish with Lemon, Dill & Cucumber Sauce

  • Servings: 4
  • Difficulty: easy
  • Print

Ingredients

For the sauce:

  • 1 medium English cucumber, peeled and finely diced to yield 2 cups
  • 2 Tbs. fresh lemon juice
  • 1/2 tsp. granulated sugar
  • Kosher salt and freshly ground black pepper
  • 1/4 cup extra-virgin olive oil
  • 2 Tbs. minced fresh dill
  • 1 Tbs. minced shallot
  • 2 tsp. minced fresh mint

For the swordfish:

  • 1-1/2 Tbs. olive oil; more for brushing the grill
  • Six 1-1/4-inch-thick swordfish steaks (6 to 8 oz. each)
  • 1 tsp. kosher salt

Directions

Make the sauce:

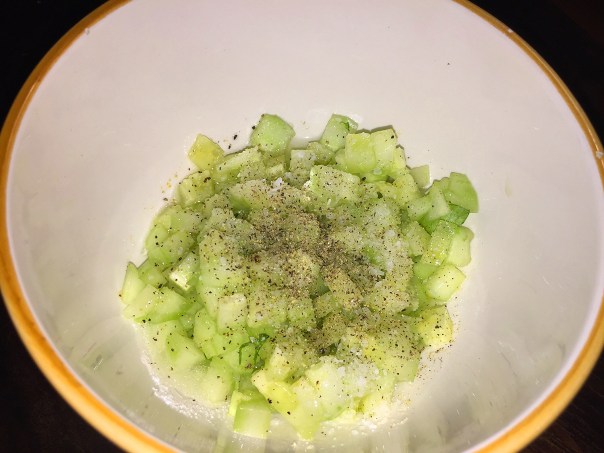
  1. Put the cucumber in a medium bowl. Add the lemon juice and the sugar, toss to combine, and season with salt and pepper to taste.
    IMG_7555
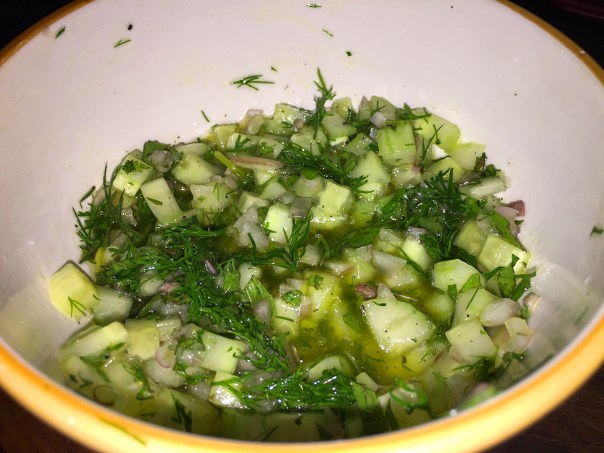
  2. Stir in the olive oil, dill, shallot, and mint, and add more salt and pepper if necessary. Let sit for 30 minutes to allow the flavors to marry.
    IMG_7557
  3. Taste for seasoning again just before serving and adjust if necessary.

Grill the swordfish:

  1. Clean and oil the grates on a gas grill and heat the grill to medium high, or prepare a medium-hot charcoal fire.
  2. Meanwhile, generously coat both sides of the swordfish with the oil and season both sides with salt. Let the fish sit at room temperature for 15 minutes (while the grill heats).
  3. Grill the swordfish steaks directly over the heat source (covered on a gas grill, uncovered on a charcoal grill), without touching, until they have good grill marks, 2 to 4 minutes.
    IMG_7567
  4. Flip the steaks and grill until the second sides have good grill marks and the fish is done to your liking, another 2 to 4 minutes. (Check for doneness by slicing into one of the thicker pieces.)
  5. Serve immediately, topped with the cucumber sauce.
    IMG_7571

http://www.lynnandruss.com

Couscous Tabbouleh

With fresh lemon and plenty of herbs like mint and parsley, the tabbouleh is a wonderful complement to the fish.

Couscous Tabbouleh

  • Servings: 4
  • Difficulty: easy
  • Print

Ingredients

  • 6 Tbs. couscous
  • 1/2 cup shellfish stock (or water)
  • 4 Tbs. extra-virgin olive oil
  • Kosher salt
  • 2 Tbs. chopped fresh mint
  • 3 ripe plum tomatoes, cored and cut into 1/2-inch dice (about 1-1/2 cups)
  • 1/2 bunch chopped fresh flat-leaf parsley
  • 4 scallions (white and green parts), thinly sliced (about 1/2 cup)
  • 2 Tbs. fresh lemon juice; more if needed

Directions

  1. In a small saucepan over medium heat, bring 1/2 cup water to a boil. Remove from the heat, add the couscous, 1 Tbs. of the olive oil, and 1/4 tsp. salt.
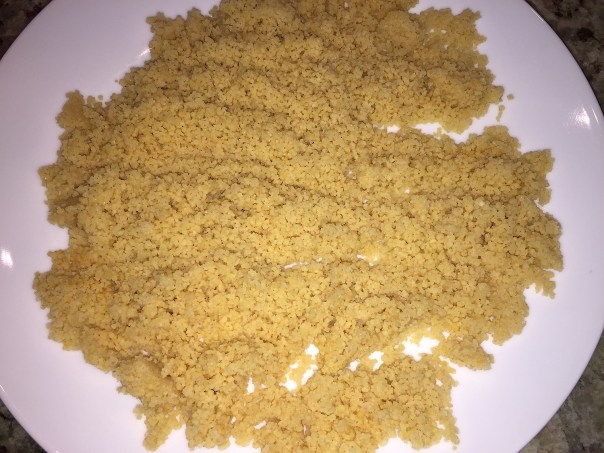
  2. Stir well, cover the pan, and let sit for 5 min. Fluff the couscous with a fork and spread on a large plate to cool.
    IMG_7554
  3. In a large bowl, season the tomatoes with 1 tsp. salt and a few generous grinds of black pepper. Add the couscous, parsley, scallions, and 1 Tbs. of the mint and toss.
    IMG_7553
  4. In a small bowl, whisk together the lemon juice and 3 Tbs. of the olive oil. Add to the couscous mixture and toss well. Taste and add more lemon juice if needed.
  5. Garnish with more mint if desired.
    IMG_7560

http://www.lynnandruss.com

Both recipes are from Fine Cooking

Free Tapas. A Tradition Still Alive and Kicking in Granada.

What better way to get to know a new area than investigating it with a knowledgeable guide? And while we had a more typical tour planned for Granada, Spain the following day, on our first evening we had prescheduled a walking tapas tour. (Tapa is Spanish for a hot or cold appetizer or snack.) Our tour was set to begin at 8 p.m. and we were to meet the others at a nearby church. Easier said than done.

In these ancient cities, the roads are a bit convoluted with cobblestone streets, narrow passage ways, and steep inclines, to put it mildly. Well, suffice it to say, we couldn’t find the original meeting spot, but Russ recognized the first taverna, La Tabernilla del Darro, as we were scouting out the back streets. The place is an old water tank reconditioned and integrated into the typical buildings located on the banks of the Darro River.

IMG_7917

We had no idea what our guide looked like, although we knew she was female and named Antonia working for a company called Devour Tours. For about 10-15 minutes we scrutinized everyone walking by—and the streets were packed with pedestrians and taxis due to the fact that a major parade was happening in town the following day. Eagle-eyed Russ finally noted a woman decked out in an white polka-dotted orange dress talking with 4 other tourists, and simply wrangled his way in and started speaking to her in Spanish. Later on, Antonia told us she thought he was some rude Spanish local trying to get in on the action!

What we learned was, in a culture almost unique to this city, bars and eateries around town serve tapas to patrons at no cost, whenever they order a drink! With every drink comes a different tapa, often more substantial than the one before, and several rounds of drinks means a full meal can be had—the only cost being the couple of euros paid for every glass of wine (or other libation.)

FYI, if you sit at a bar anywhere in town and ask for a tapas menu to order from, it’s a surefire sign that you’re a tourist because Granadians would never to think to pay for them. An interesting concept, though I doubt it would take a stronghold here in the U.S.

IMG_7918

Our first drink in the grotto-like interior of La Tabernilla was an amber-colored, slightly sweet vermouth on ice, not my usual cup of tea, but I was game to try anything. While Antonia regaled us with the bar’s history, the group exchanged names as well as our points of origin. Two retired school teachers from Sydney, Australia—Karen and Sue (above left)—were in the middle of a 5-week extensive vacation to several countries that was to include a one-week cruise. Another couple, Gypsy and Don, hailed from Madison, Wisconsin.

Antonia herself was born in a cave-house in the Sacramonte district on the hill and valley of Valparaís just outside the city limits before moving into the town’s center as a baby. As an adult, she has lived in several countries, is fluent in five languages, and is currently tackling Chinese.

IMG_7919

IMG_7921

With our vermouth came the first tapa, a Requeté served on two plates with three forks each, which we were to split amongst ourselves. (As a guide, Antonia neither eats nor drinks.) Three breadsticks were erected in a mound of flaky tuna and piquillo peppers doused in a piquant mixture of sherry and extra virgin olive oil. Then, before most of us could even finish our drinks, it was time to hop off of the stools and head to our next destination, a not-too-short walk away.

IMG_7924

Hiding in an abbreviated alleyway off Plaza Nueva, Bar Casa Julio has some of the most unpredictable opening hours in Granada, if they even open! The inside resembles a kiosk more than a bar, so most patrons stand around the four or five tall circular tables in the alleyway outside, as did we. Along with our sangria-like drink, the “summer wine” is a mix of red wine and lemon soda (which I again couldn’t finish in time), we were served two plates (with the allotted 3 forks each) of the tastiest fried fish I’ve ever eaten, crispy on the outside and succulent on the inside.

IMG_7927.jpgDon, Gypsy, Karen, Sue, Lynn and Russ salute the camera outside of Casa Julio.

IMG_7930

Time to meander down several more streets and alleyways to our next stop, La Botilleria. Since opening in 2013, La Botillería has established a fine local reputation thanks to its elegantly presented food and thoughtful wine list. It’s smart in a modern, casual way, with a bar area for tapas and a back restaurant where you can enjoy full meals. In fact, Russ and I liked it so much, we went back there for dinner the following day.

IMG_7939

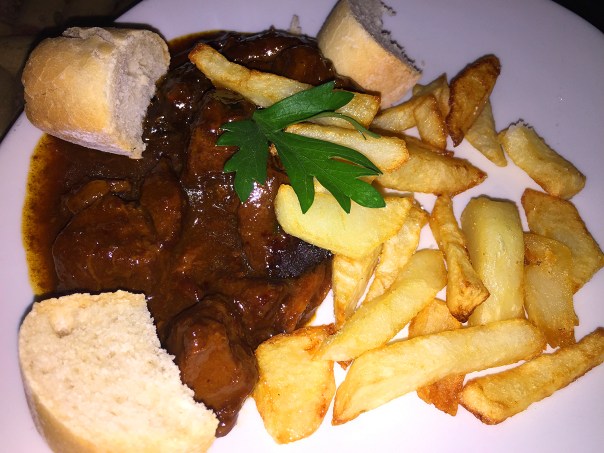
While our waitress poured glasses of a crisp white wine and gave us olives to nibble on, Antonia let us know we would be served two different tapas and two glasses of wine. First arriving was the incredible Carrillada Tapa, chunks of succulent pork cheeks bathing in a tasty sauce plated with crispy potatoes fried in EVOO and a few thick slices of crusty white bread.
IMG_7940

Next was another glass of chilled white wine and a delicate cod tapa topped with a tomato sauce and a side salad with more crusty bread chunks. Here we seemed to linger a bit longer…

IMG_7943

The tour concluded a few streets away at our fourth and final destination, rustic La Tana. Somehow Antonia managed to squeeze us all into the space between the crowded bar and few sparse tables lining the wall. But feeling claustrophobic, without even elbow room to spare, we spilled back out onto the street. As it was the end of the “meal,” sweet Baileys Irish Cream liqueur, along with a cannoli-like dessert tapa were offered. Sweet is not my thing, so I sipped a glass of dry red wine instead.

IMG_7945

Without even small bistro tables onto which we could rest our cocktails, it was quite a balancing act to sip and eat at the same time. There just so happened to be a window ledge on the building across the street where some of us placed our stemware. Mind you, we never had individual plates at any of the bars, we just used forks, fingers and napkins.

IMG_7947

At this point it was nearing 10:30 at night and it was time to meander back to our separate accommodations. Russ and I were pleasantly surprised when we realized that our hotel was only a brief jaunt away—although a longer trek would have helped burn up some of those calories…

TAPAS: The origin of the term, is uncertain, with countless stories as to how and when the practice came about.

One such tale has it that under the monarchy of Fernando el Católico, it became obligatory for bar owners to serve food with alcohol as a response to an increasingly drunken workforce. As a result, patrons can now order a drink and be provided with a plate of something tasty to sop up the alcohol. Though the practice may be fading in certain parts of Spain, any visitor looking to eat tapas in Granada will quickly discover the tradition is still alive and kicking.
Sweet Dumpling Squash

How do you get to be our age and have never heard of a Sweet Dumpling squash before? Can’t answer that, but I do know that when we recently eyeballed some at the supermarket, we didn’t hesitate to purchase one.

Dumpling squash, botanically classified as Cucurbita pepo, grows on short trailing vines and is a member of the Cucurbitaceae family along with gourds and pumpkins. Also known as Sweet Dumpling squash, it has a striking exterior similar in appearance to the delicata and sugar loaf and is known for its unique appearance and size.

IMG_7666

What’s ironic is, we had some “bonus” plants growing in our yard this summer, most likely from seeds in our compost. My plant identifier App “PlantSnap” established it as a Cucurbita pepo! The vines got ridiculously long and grew some beautiful yellow hibiscus-like flowers, but never produced the fruit.

IMG_6858Our “bonus” Cucurbita pepo vine got to be 5 times this length and was taking over the patio!

IMG_7015Hibiscus-like flowers from the Cucurbita pepo vine.

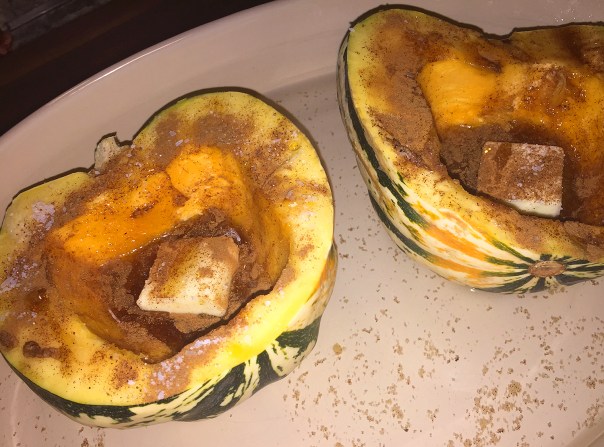
Of course there are as many recipes, as there are types of squash, so without getting too complicated, I wanted to make a simple roasted squash recipe with comfort-food qualities reminiscent of Autumn. After all, the new season just got under way and the weather cooled down. When cooked, Sweet Dumpling is smooth-textured, light, and tender with a sweet, mild flavor—just the ticket to complement our grilled lamb chops.

It is best suited for cooked applications such as roasting, sautéing, baking, and steaming and it can be used in both sweet and savory preparations. Its lumpy exterior and small size make it difficult to peel and are most often cooked with their skin on. But to me that’s the beauty of it—the shell creates a natural decorative bowl in which to serve it.

Tastewise, the squash is like, if a sweet potato, butternut squash and acorn squash had a flavor baby, it would be the Dumpling. It’s a little sweet and full of flavor. The texture is almost like a sweet potato – more dense and not as stringy as an acorn squash. So I used a similar approach to cooking it as I do when I roast acorn squash.

All at once with this recipe, each bite is sweet, savory and salty. Now that Sweet Dumpling squash is on our radar, it’ll be a more frequent guest at our dinner table.

IMG_7668

Roasted Sweet Dumpling Squash

  • Servings: 4
  • Difficulty: easy
  • Print

Ingredients

  • 1 Sweet Dumpling squash
  • 1/2 tsp. ground cinnamon
  • 1/2 tsp. salt
  • 1/4 tsp. ground nutmeg
  • 2 Tbsp. butter
  • 2 Tbsp. maple syrup

Directions

  1. Preheat oven to 400 degrees.
  2. Cut the squash in half and remove seeds with a spoon. Use a fork to poke several holes in the outside skin of each half of the squash.
    IMG_7669
    IMG_7670
  3. Place squash in baking pan with hollow side up. Add 1/2″ of water to bottom of pan. Place 1 tablespoon of butter, 1/8 teaspoon of nutmeg, 1/4 teaspoon of cinnamon and 1/4 teaspoon salt in the hollow of each squash half.
    IMG_7673
  4. Pour 1 tablespoon of maple syrup in each well. (It will run off the edges if you try to pour it there.) Bake uncovered on middle rack, and after 25 minutes, baste the entire flesh, including the edges, with the butter mixture.
    IMG_7674
  5. Continue to roast for another 15-25 minutes (40-50 minutes total) or until the flesh is soft and the top is starting caramelize.
    IMG_7679
  6. The buttery goodness will have pooled in the hollow, so using a spoon or fork, mash it all together (you can scrape it into a serving bowl if desired.) Serve hot.

http://www.lynnandruss.com

Stuffed Mushrooms—Champinoñes Rellenos de Jamón

Hosting a small dinner party was on our horizon, but due to a mix-up, we couldn’t remember if we had charged ourselves with making an additional appetizer. (Senior moment setting in.) Our motto is better to have too much than too little—when it comes to serving company anyway. We were a few days shy of our departure to Spain, so hubby thought to get us in the mood, he’d make something Spanish.

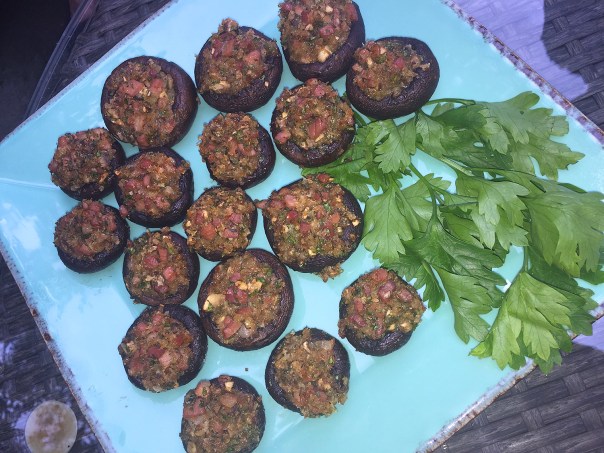
It had to be easy and not contain a long list of ingredients, so Champinoñes Rellenos de Jamón fit the bill perfectly. Rich and salty Serrano ham is combined with finely chopped mushrooms, parsley and bread crumbs for a tasty filling. After heating them, just stuff the mushroom caps and bake for a short while and serve hot. Sit back, have a sip of wine, and enjoy your company….

Muy buena!

Champiñones Rellenos de Jamón

  • Servings: 4
  • Difficulty: easy
  • Print

Ingredients

  • 24 large mushrooms, 2-3 inches wide
  • 4 Tbsp. EVOO
  • 2 oz. Jamón Serrano, (or prosciutto)
  • 1/4 cup bread crumbs
  • 3 sprigs Italian parsley
  • Juice from 1/2 lemon

Directions

  1. Preheat oven to 325°.
  2. Clean mushroom caps of dirt and debris and rinse under cold water.
  3. Twist off stems from caps. Set aside 4 mushrooms for later.
  4. Brush or mist caps with olive oil and place on a cookie sheet. Bake for 5-8 minutes in oven.
    IMG_7607
  5. Meanwhile, chop the reserved 4 mushroom caps into small pieces and add the lemon juice.
  6. Cut the ham into about 1/4″ dice. Sauté mushrooms and ham in 1/2 Tbsp. olive oil in a small frying pan for 2-3 minutes. Remove from heat.
  7. Finely chop parsley and place in a small bowl with the bread crumbs. Mix thoroughly.
    IMG_7608
  8. Remove extra moisture that has accumulated in well of mushrooms.
    IMG_7611
  9. Spoon stuffing into caps and place in oven for 8 minutes. Remove to serving dish and serve hot.
    IMG_7614

http://www.lynnandruss.com