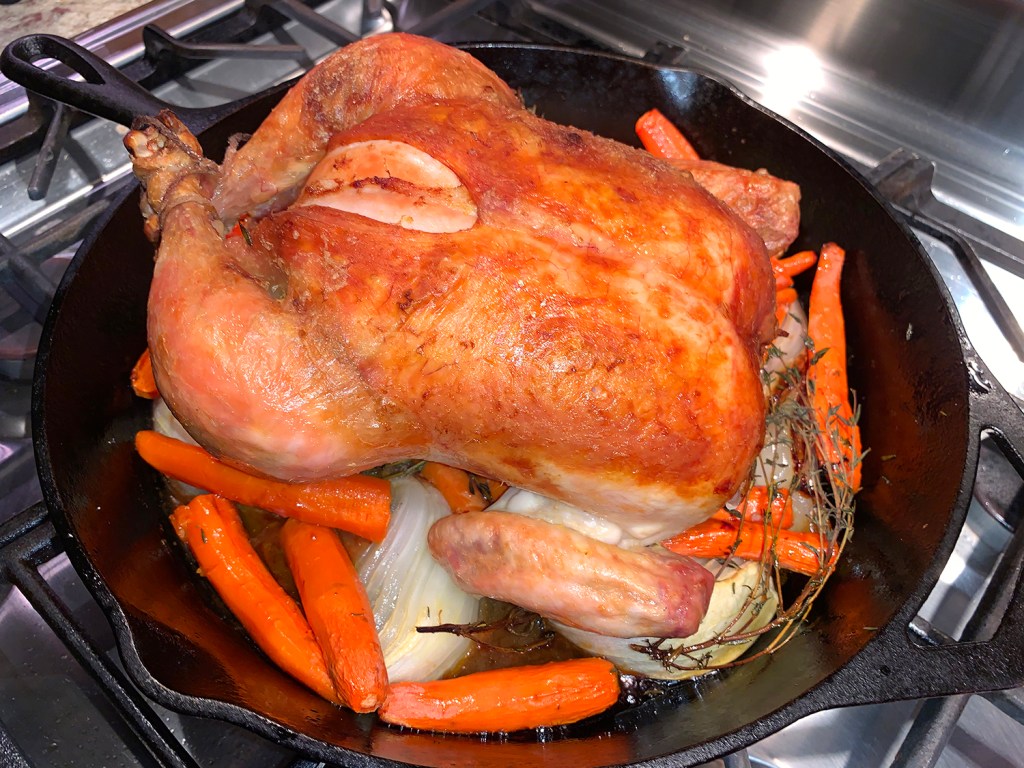
Monthly Archives: November 2020

Szechuan Pork Stew and Chinese Broccoli with Garlic

For those of you who favor bold Asian dishes, you’re going to want to put this recipe on your short list. It used to be that the only place to experience Szechuan cooking was China’s Sichuan province—a region located in the southwestern part of the country. But it is quite common just about everywhere now.

Though it is particularly unique in that Szechuan cooking is known for its dishes loaded with beef, rice, vegetables and, of course, Szechuan (or Sichuan) pepper. Although the main protein in this dish is pork.

Szechuan pepper is the trademark ingredient in Szechuan cuisine, however it doesn’t carry a lot of heat because it’s not even a pepper! Instead the regional spice is made from tiny peppercorns made from the dried husk of an ash shrub. These tiny pink peppercorns provide a kick of citrusy flavor that marries well with ingredients like ginger, soy and steamed veggies.

I didn’t notice until after I made and ate this fabulous dish, that I had completely forgotten to include the 1 tablespoon of sugar in the pork marinade. But we didn’t miss it at all, so if you have scaled back on sugar in your diet, then I would say it is OK to eliminate it here.

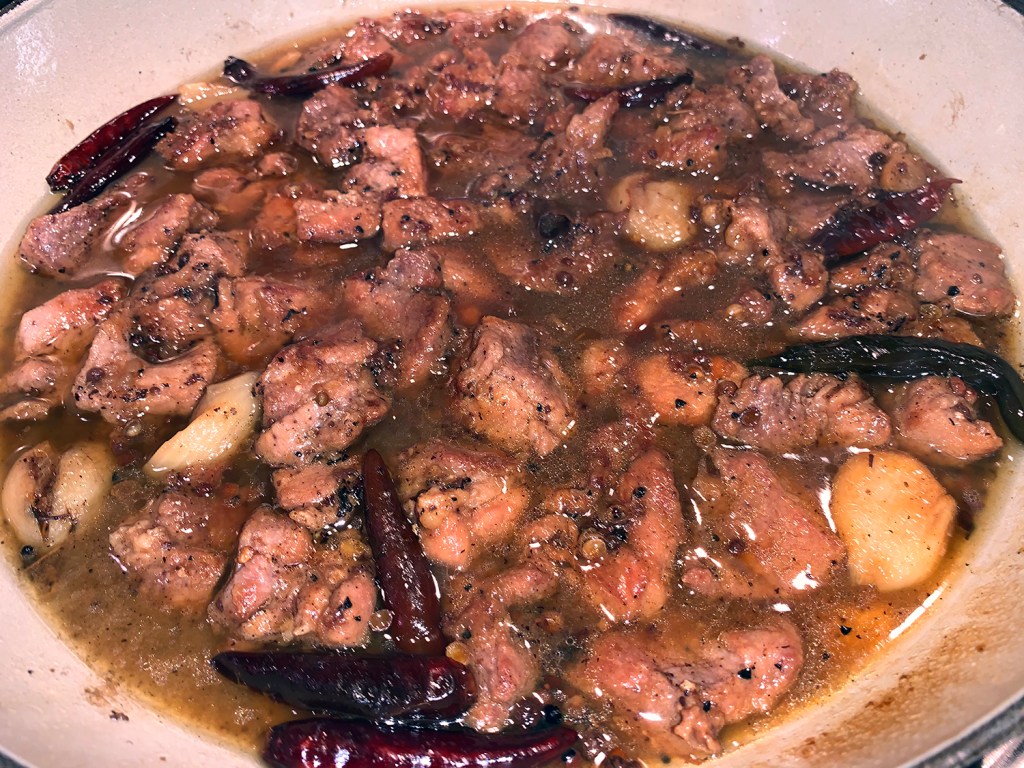
At the very end of the cooking process, we weren’t satisfied with how thin the liquid in the stew appeared. Russ made a last minute decision to make a slurry from corn starch and water to thicken the sauce. It only took another couple of minutes, and not only coated the meat nicely, it gave a more substantial appearance overall.

Szechuan Pork Stew with Chiles

  • Servings: 4
  • Difficulty: easy
  • Print

Ingredients

For the Marinade:

  • 2 lb. pork shoulder, trimmed of excess fat, cut into 1″ pieces
  • 3 Tbsp. soy sauce
  • 1 Tbsp. Shaoxing wine or dry sherry
  • 1 Tbsp. toasted sesame oil
  • 1 Tbsp. granulated sugar
  • 1/2 tsp. five-spice

For the Stew:

  • 1 Tbsp. cornstarch
  • 3 Tbsp. peanut oil, divided
  • 1 knob ginger (about 2 oz.), peeled and thinly sliced
  • 4 garlic cloves, peeled and smashed
  • 10 whole dried red chiles
  • 1 Tbsp. Szechuan peppercorns (about 1/4 oz.), cracked
  • 1 1/2 cups chicken broth, preferably homemade
  • 3 Tbsp. soy sauce
  • 2 Tbsp. oyster sauce
  • 1 Tbsp. cornstarch with 1 Tbsp. water for slurry (optional)
  • 4 scallions (both white and green parts), thinly sliced

Directions

Make the Marinade:

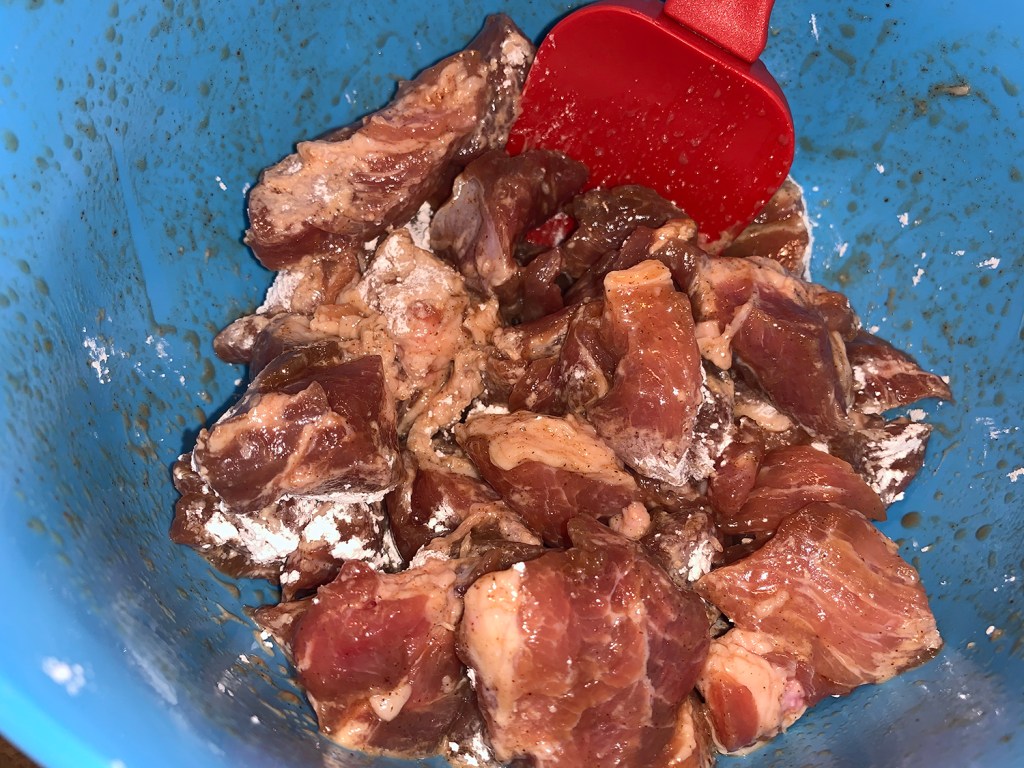
  1. Toss the pork cubes with the soy sauce, wine, sesame oil, sugar, and five-spice powder. Let sit at room temperature for 1 hour, or, cover and refrigerate up to 24 hours. (We marinaded for 8 hours.)

Make the Stew:

  1. Sprinkle the pork with the cornstarch and toss to coat.
  2. Heat a large, heavy Dutch oven over medium-high heat.
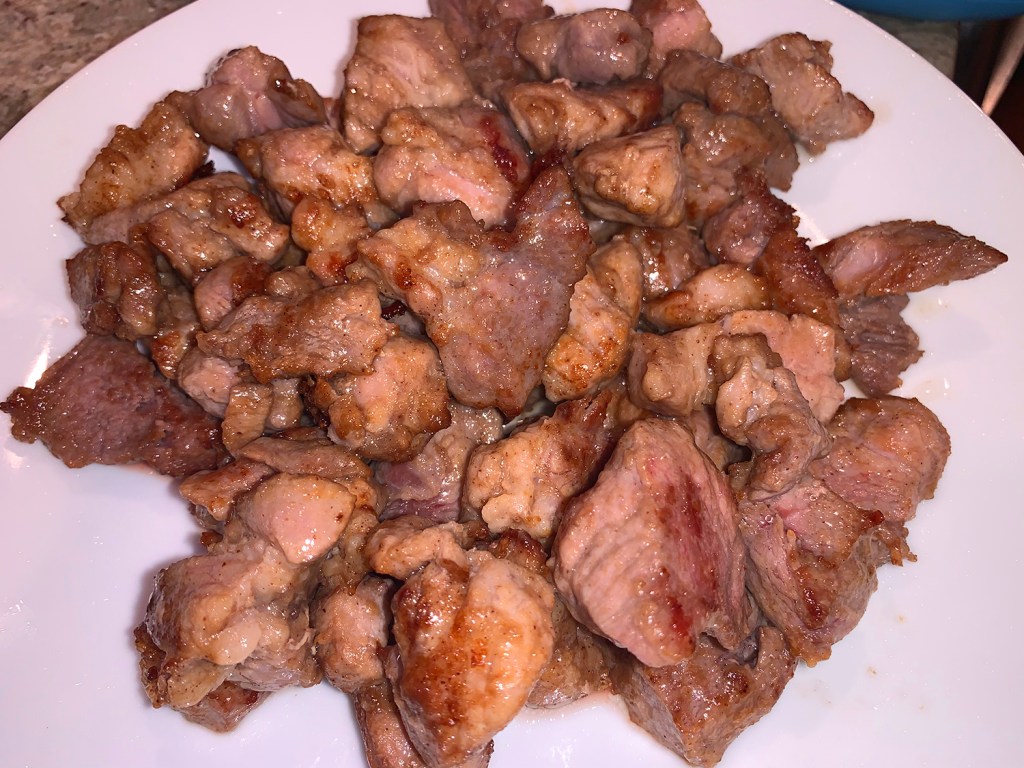
  3. Add 2 tablespoons of the oil, and when it’s shimmering, add half of the pork in an even layer, Cook, undisturbed, until browned around the edges, and pork lifts easily with tongs, about 3 minutes.
  4. Reduce the heat to medium. Flip, and cook the other side until browned, about 2 minutes more. Transfer to a plate.
  5. Repeat the process with the remaining half of the pork.
  6. Add the remaining 1 tablespoon of oil, the ginger, garlic, szechuan peppers and chiles. Cook, stirring, until lightly browned, 2 minutes.
  7. Add the broth, soy sauce and oyster sauce, scraping up any browned bits on the bottom of the pot.
  8. Add the pork and any accumulated juices. Reduce the heat to medium-low and cook, covered, stirring occasionally, until the pork is tender, about 1 hour.
  9. To make a thicker sauce, add 1 tablespoon of cornstarch to 1 tablespoon of cold water and mix until smooth. Heat the pot until a simmering boil and add the slurry a little at a time, mixing well after each addition. Stir together for 30 seconds.
  10. Serve immediately over steamed jasmine rice.

http://www.lynnandruss.com

Adapted from a recipe for Fine Cooking

Chinese Broccoli with Garlic

Chinese broccoli, also known as Chinese kale, is a leafy green vegetable closely related to thick-stemmed broccoli, cabbage, and Brussels sprouts. It has flat leaves, thick stems, and tiny florets. It’s not easy to find Chinese broccoli in regular grocery stores, so check your local Asian market, which is more likely to carry it.

Chinese Broccoli with Garlic

  • Servings: 4
  • Difficulty: easy
  • Print

Ingredients

  • 1 lb. Chinese broccoli, trimmed and cut into small sections
  • 1/2 tsp. salt
  • 6 cloves garlic, roughly chopped
  • 2 Tbsp. vegetable cooking oil
  • 2 tsp. oyster sauce
  • 1 Tbsp. Chinese cooking wine
  • 1 Tbsp. sesame oil

Directions

  1. Trim Chinese broccoli, remove the hard skins and diagonally cut into 2″ sections. Separate the leaves and roughly chop.
  2. Bring a large pot of water to a boil and then add salt. Add the stems, cooking for 20 seconds. Add the leaves and cook for 10 seconds more. (This helps remove some bitterness.) Drain into a colander.
  3. Add oil in preheated wok and stir-fry the garlic until slightly seared, about 1 minute. 
  4. Place Chinese broccoli into wok, add cooking wine and sesame oil. Stir-fry several seconds to mix well and serve immediately.

http://www.lynnandruss.com

Loosely adapted from a recipe found on chinasichuanfood.com

Geng Dang Muu

I must admit, neither of us had ever heard of this dish, but when we saw the recipe with an accompanying gorgeous photo, it certainly caught our attention. Geng Dang Muu was featured in an article highlighting Chef Parnass Savang in a recent Bon Apppétit magazine. It apparently originated from Savang’s Laos grandmother where the curry and ground pork reference the origins of the dish, while the brussels sprouts and leeks are a nod to the local ingredients of Georgia.

Lime leaves aren’t the easies product to locate. We happened to have some in our freezer bought years ago at Wegmans for, get this, $39.99 a pound! Once we got over the initial shock and realized we only needed a minute amount, the real cost was only $2.50 an ounce—and we still have some.

Palm sugar is a sweetener that is made from the sap present in the flower buds of the coconut palm tree. It is known as natural sugar because it involves minimum processing and no chemicals are used. In the stores, palm sugar is available in the block/cones, granular and liquid form.

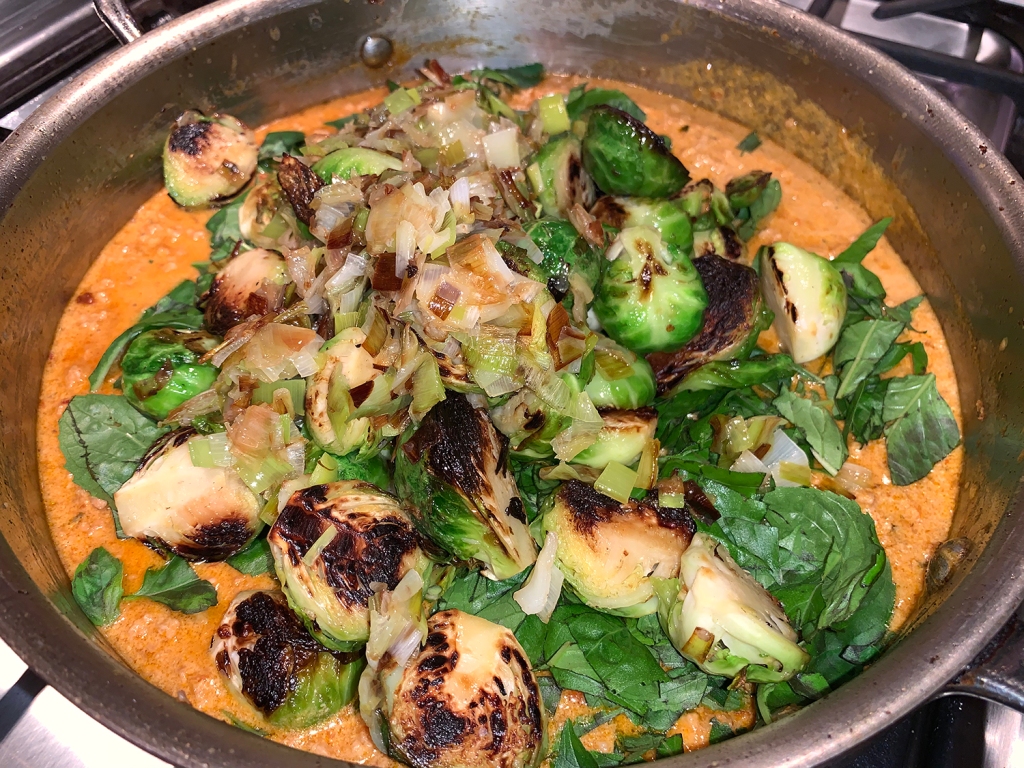
A few takeaways here. First, the color of our Muu was a light beigy-orange, unlike the magazine photo which was a deep reddish-orange. I believe that was due to the different brands of red curry (we had made our own a while ago). The magazine image also showed a more brothy finish, but because we reduced ours longer, it was thicker.

And if you have diners who can’t tolerate Brussels sprouts, go ahead and switch them out for broccoli or another veg to their liking. Even though it’s not indicated in the directions below, or our photos, if you do go with the sprouts, slice each half down further to 1/4″ half moons. When only halved, they did not get cooked through and were somewhat too firm.

For even more depth of flavor, cook your jasmine rice in homemade chicken stock.

Geng Dang Muu

  • Servings: 4
  • Difficulty: easy
  • Print

Ingredients

  • 6 Tbsp. virgin coconut oil, divided
  • 1 medium leek, white and pale green parts only, halved lengthwise, coarsely chopped
  • Kosher salt
  • 1 lb. Brussels sprouts, trimmed, halved through stem end
  • ¼ cup red curry paste (without added salt)
  • 2 tsp. palm sugar or light brown sugar
  • 2 tsp. fish sauce, plus more
  • 4 fresh makrut (Thai) lime leaves, 3 whole, 1 very thinly sliced
  • 1 lb. ground pork
  • 1 13.5-oz. can unsweetened coconut milk
  • 1 cup Thai basil leaves
  • Cooked jasmine rice (for serving)

Directions

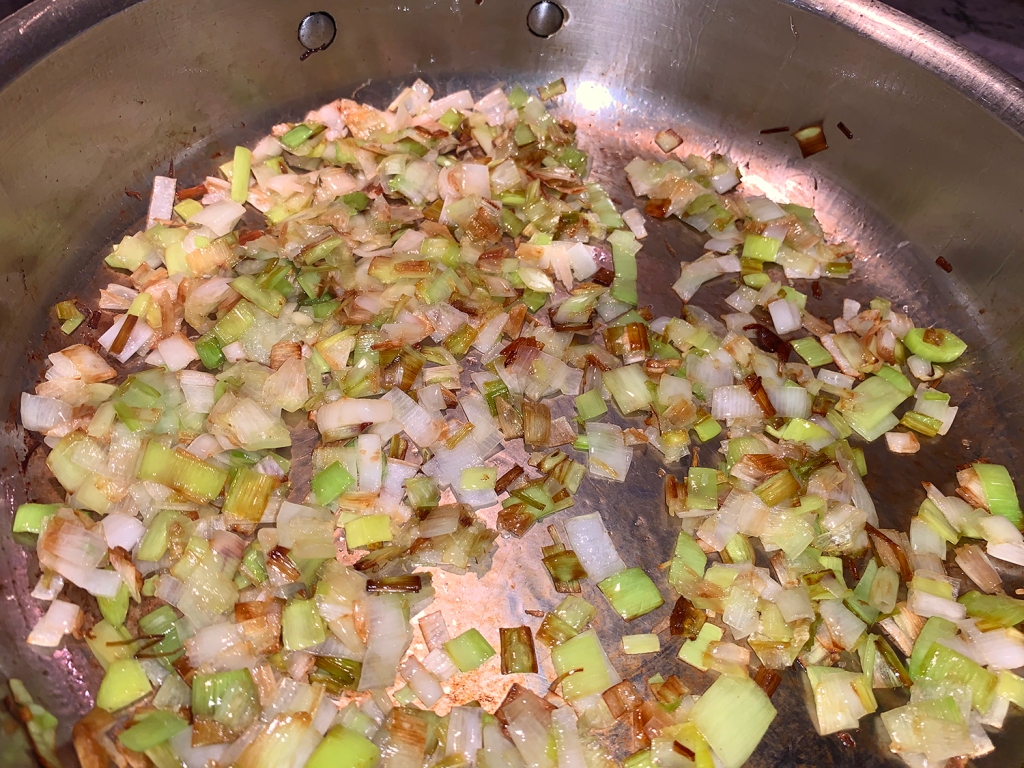
  1. Heat 2 Tbsp. oil in a large skillet, preferably high-sided, over medium-high. Add leek, season lightly with salt, and cook, stirring occasionally, until most of it is golden brown, about 5 minutes. Transfer to a bowl; wipe out skillet.
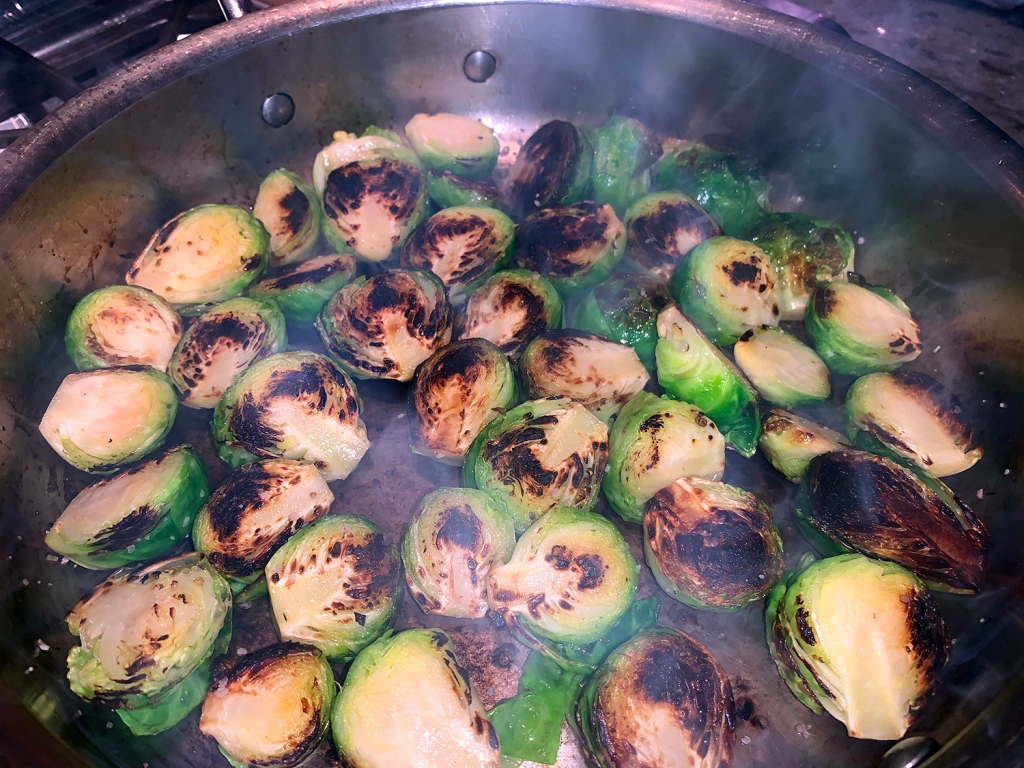
  2. Pour another 2 Tbsp. oil into same skillet over medium-high. Cook Brussels sprouts, in a single layer, undisturbed, until golden brown underneath, about 3 minutes. Turn over and cook until other side is browned, about 2 minutes. Transfer to bowl with leek.
  3. Wipe out skillet and heat remaining 2 Tbsp. oil (still over medium-high). Add curry paste, palm sugar, 2 tsp. fish sauce, and 3 whole lime leaves. Cook, stirring often, until paste darkens slightly, about 1 minute.
  4. Add pork and cook, stirring and breaking up, until in small pieces, about 2 minutes (pork doesn’t need to be fully cooked at this point). Pour coconut milk into skillet and reduce heat to medium. Simmer, stirring occasionally, until pork is cooked through and curry thickens slightly, about 5 minutes.
  5. Remove skillet from heat and stir in Thai basil, leek and Brussels sprouts. Scatter remaining thinly sliced lime leaf over and serve with rice.

http://www.lynnandruss.com

Winter Feast for Our Feathery Friends

Winters, whether mild or harsh, are challenging times for birds when food is in short supply. During these cold months they’ll need lots of energy to help them survive the frigid temperatures. That’s where suet feeders come in. The hard white fat you feed to birds is energy.

Russ and I attended a “For the Birds” garden talk about a year ago where fellow avid gardener, Connie Fairchild, did a hilarious demo on making suet cakes. One ingredient not in Connie’s recipe, but that we meant to put in, was cayenne pepper. If you have problems with raccoons, squirrel, opossums or deer eating your suet too, just add about 2-4 tablespoons of ground cayenne pepper to the mix. Birds don’t have the ability to taste hot pepper because they lack the receptor cells that are sensitive to capsaicin.

While we initially followed her recipe, our finished cakes were a bit too soft, although usable. According to a Farmer’s Almanac recipe, they use 2 parts melted fat (bacon, suet or lard), and 1 part peanut butter. This combo would make firmer cakes in my opinion. You can mix up the dry ingredients any which way you want, just keep the same ratio. (Our revised amounts are indicated below.) However, we did include some chia seed that we had leftover.

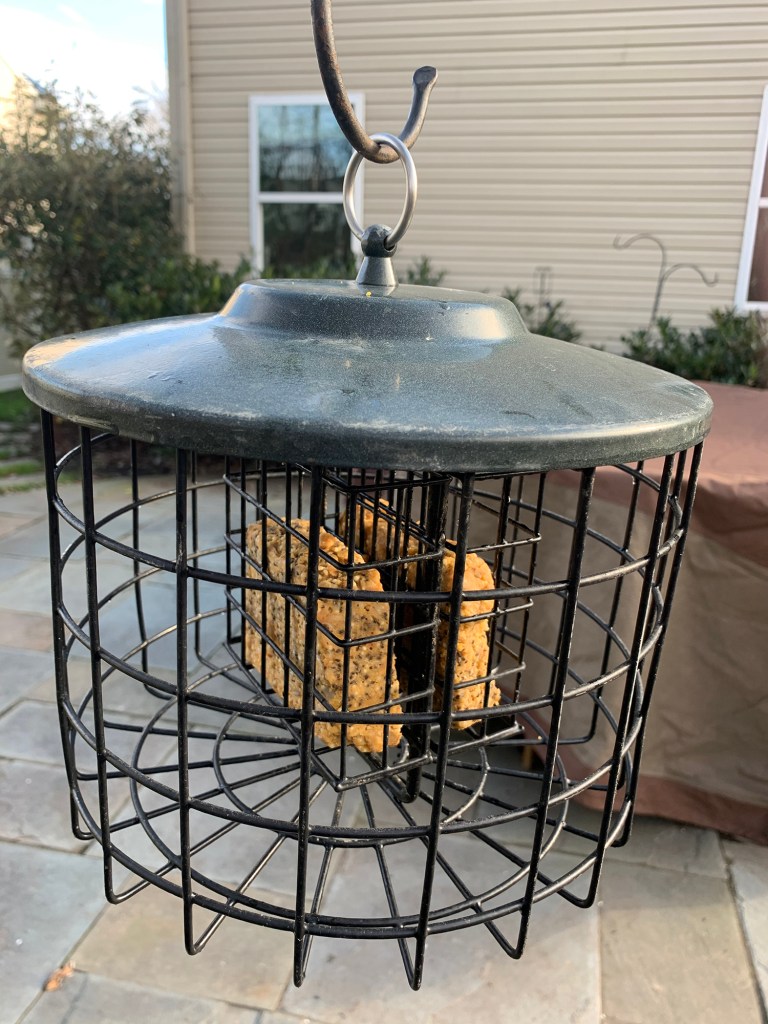
One of our feeders, gifted from another Master Gardner, has two slots for cakes.

We increased the base recipe by 50% in order to fill our 8 1/2″ x 8 1/2″ x 4″ deep corning ware dish. Even so, the cakes were slightly smaller than the ideal 4 1/2″ x 4 1/2″ slots of our suet cage. At least smaller, they fit in the slots. Don’t make them larger than the openings they are intended for—so do the math first!

Reminder: As suet heats up, its fat can go rancid and harbor fungus and bacteria that can be harmful to birds. Fat and oil can be just as dangerous to birds’ feathers as a toxic oil spill. Melted suet that smears on a bird’s feathers will destroy their natural insulation and waterproofing, making the bird vulnerable to temperature changes and poor weather. There are special suet cakes for warmer weather; these are not suitable.

Suet Cakes for the Birds

  • Servings: 10-12 cakes
  • Difficulty: easy
  • Print

Ingredients

  • 2 cups lard
  • 2 cups chunky peanut butter
  • 3 cups quick-cook (uncooked) oatmeal
  • 2 cups cornmeal
  • 1 cup shelled sunflower hearts
  • 1 cup millet
  • 2 Tbsp. cayenne pepper (optional)

Directions

  1. Melt lard and peanut butter over low heat, stirring occasionally.
  2. Take pan off heat and stir in other ingredients.
  3. Pour into wax-paper lined (very important!) container. We used a 8 1/2″ x 8 1/2″ x 4″ deep corning ware dish.
  4. Place in fridge to harden. We left ours uncovered in the fridge overnight.
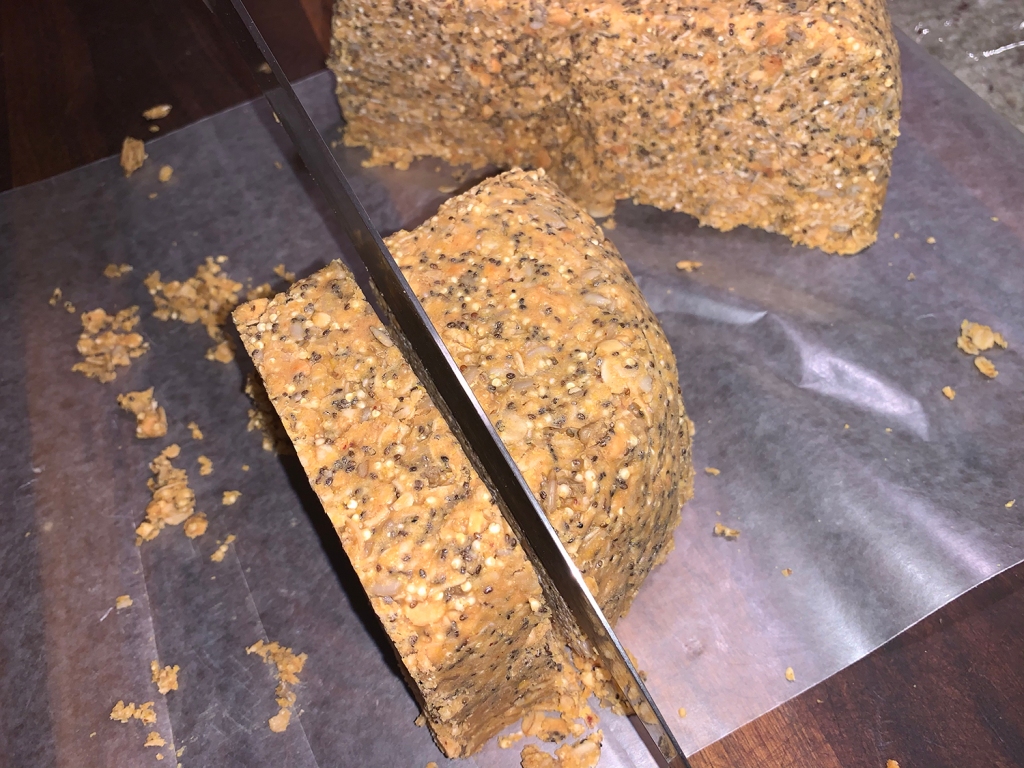
  5. Cut into bricks that fit your suet feeder. Ours could be no larger than 4 1/2″ x 4 3/4″ x 1 1/2″ thick. Actual size ended being a bt smaller
  6. Wrap each brick in plastic wrap and store in refrigerator (or freezer) until ready to use.

http://www.lynnandruss.com
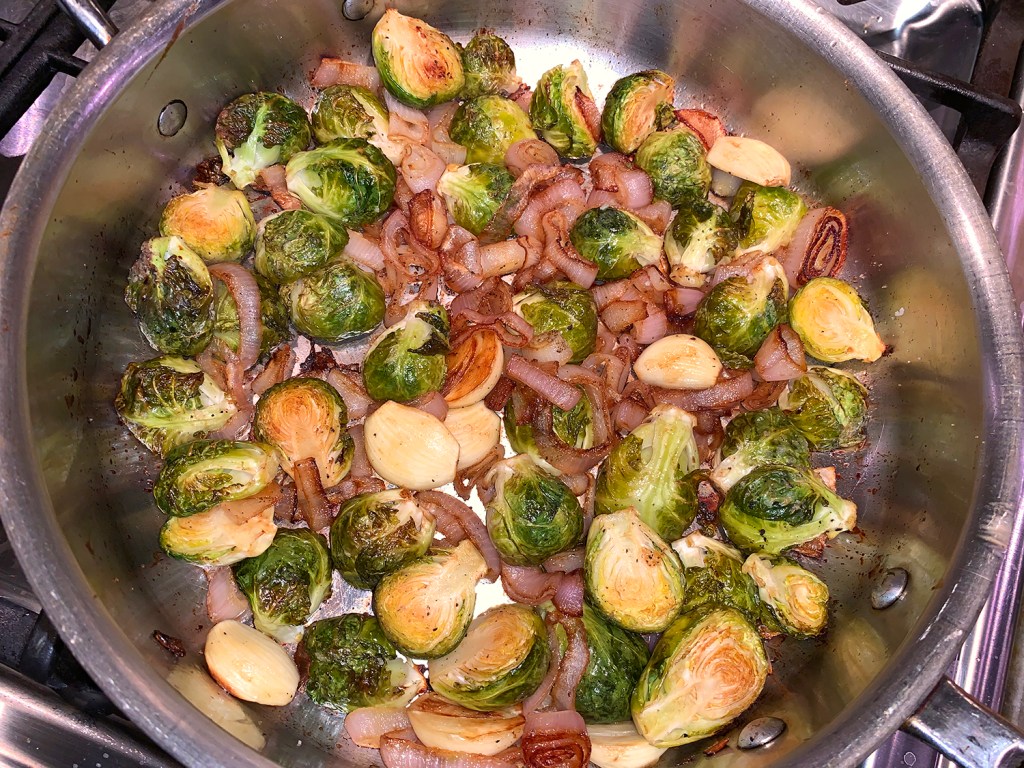
Balsamic Roasted Brussels Sprouts and Shallots

Brussels sprouts was one veggie that I steered clear of for years, mostly because they were never cooked properly and/or lacked any depth of flavor. But when I met Russ, he made a side of them for some home cooked meal when we first started dating, and I became a convert.

Over the following decades, we have often added Brussels sprouts to a menu, trying a whole host of various recipes. This one is a simple sauté of shallots, sprouts, and garlic, that are then browned in the oven and tossed with balsamic vinegar, and thyme. Toasted walnuts were also an ingredient, but not in this house as My Man detests them. You could always make some and serve them separately for those who want a nutty crunch.

I “Lynnized” the recipe to fit our preferences and pare back the 6-8 servings to 3-4. The ingredients list and directions speak to my changes.

Balsamic Roasted Brussels Sprouts and Shallots

  • Servings: 3-4
  • Difficulty: easy
  • Print

Ingredients

  • 1 lb. Brussels sprouts, tough outer leaves removed, base trimmed, sprouts cut in half
  • 1 Tbsp. extra virgin olive oil
  • 4 large shallots, peeled and thickly sliced
  • 4 large cloves garlic, peeled, sliced in half
  • 2 Tbsp. balsamic vinegar
  • Salt and pepper to taste
  • 3/4 tsp. fresh thyme leaves or 1/4 teaspoon dried thyme

Directions

  1. Preheat oven to 425°F.
  2. Heat the olive oil in an oven-safe sauté pan on medium high heat. Add the shallots, spread them out in an even layer, lower the heat to medium low, and let them cook for 6 to 8 minutes, stirring occasionally, until softened and lightly browned.
  3. Add the Brussels sprouts and the garlic to the shallots. Cook for 5 to 6 minutes more, stirring occasionally, until the sprouts begin to brown.
  4. Drizzle with 1 1/2 tablespoons of balsamic vinegar. Sprinkle with salt and pepper. Toss to coat.
  5. Place in oven, uncovered. Roast at 425°F for 15 to 20 minutes, until cooked through and caramelized on the edges.
  6. Remove from oven. Sprinkle with remaining 1/2 tablespoon of balsamic vinegar and the thyme. Stir to combine. Add more salt and pepper to taste.

http://www.lynnandruss.com

Adapted from a recipe found on Simply Recipes

Pasta Alla Norma

The name of the dish is said to originate from the apocryphal exclamation by the Italian writer Nino Martoglio who, upon tasting the dish, exclaimed “This is a real ‘Norma‘!”, comparing it with the exceptional perfection of the Vincenzo Bellini opera Norma.

We obtained the recipe from Milk Street, but changed the penne pasta to gemelli, which gives a twist to the texture and captures more of the sauce in its curves. Feel free to use whatever pasta suits your fancy.

The eggplant is typically fried before being added to the sauce, but here it is roasted to concentrate the flavors and condense the porous texture. The eggplant is in the oven for about 30 minutes unattended, except for one toss; so use that time to prep the other ingredients, cook the pasta and simmer the tomatoes to make the sauce.

If you’ve never had ricotta salata, it is a firm cheese with a milky, salty flavor. Do not substitute fresh ricotta; a mild feta is a more appropriate substitute.

Don’t forget to reserve about ½ cup of the pasta cooking water before draining. You’ll need the starchy, salted liquid to help bring together the eggplant, pasta and sauce during the final simmer.

Pasta Alla Norma

  • Servings: 4
  • Difficulty: easy
  • Print

Ingredients

  • 1 lb. eggplant, peeled and cut into ¾-inch cubes
  • Kosher salt
  • 6 Tbsp. extra-virgin olive oil, divided
  • 12 oz. penne rigate or mezze rigatoni pasta
  • 8 large garlic cloves, finely chopped
  • ½ tsp. red pepper flakes
  • 2 pints grape tomatoes
  • 2 Tbsp. white balsamic vinegar
  • ½ cup lightly packed fresh basil leaves, roughly chopped
  • 2 oz. ricotta salata, shredded

Directions

  1. Heat the oven to 475°F with a rack in the upper-middle position. Line a rimmed baking sheet with kitchen parchment.
  2. In a large bowl, toss the eggplant with 1½ teaspoons salt and 4 tablespoons of the oil. Spread in a single layer on the prepared baking sheet and roast until browned and tender, 30 to 35 minutes, stirring once.
  3. Meanwhile, in a large pot, bring 4 quarts of water to a boil. Stir in the pasta and 2 tablespoons salt; cook until the pasta is al dente. Reserve about ½ cup of the cooking water, then drain the pasta.
  4. While the eggplant roasts and the water heats, in a 12-inch skillet over medium-high, heat the remaining 2 tablespoons oil until shimmering. Add the garlic and pepper flakes and cook, stirring, until fragrant, about 30 seconds.
  5. Add the tomatoes and 1½ teaspoons salt, then cover and cook, occasionally shaking the pan, until the tomatoes begin to release their liquid, about 1 minute.
  6. Stir in the vinegar, then use the back of a large spoon to crush the tomatoes. Cover, reduce to medium and cook, stirring, until the mixture breaks down into a lightly thickened sauce, 8 to 9 minutes.
  7. Add the drained pasta, eggplant and ¼ cup of the reserved pasta water to the tomatoes. Cook over medium, stirring constantly, until the sauce begins to cling to the pasta, 2 to 3 minutes.
  8. Taste and season with salt. Stir in half of the basil and transfer to a serving bowl. Sprinkle with the remaining basil and the ricotta salata.

http://www.lynnandruss.com

Recipe adapted from Milk Street

Roasted Sweet Potatoes with Kale-Miso Salad

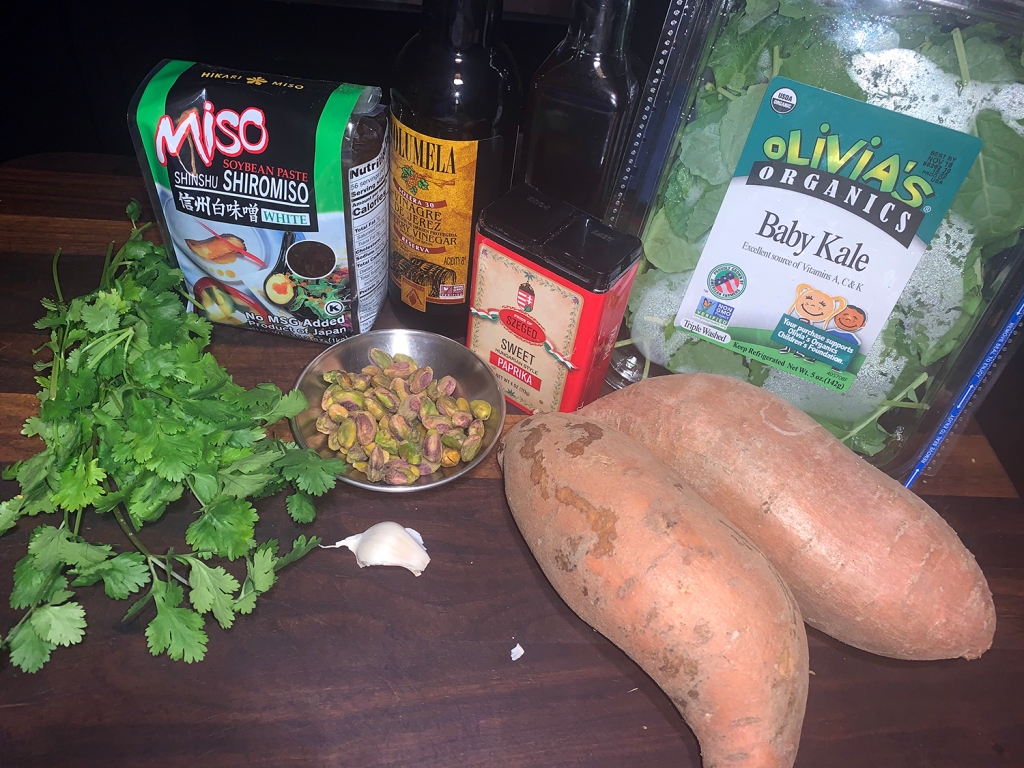
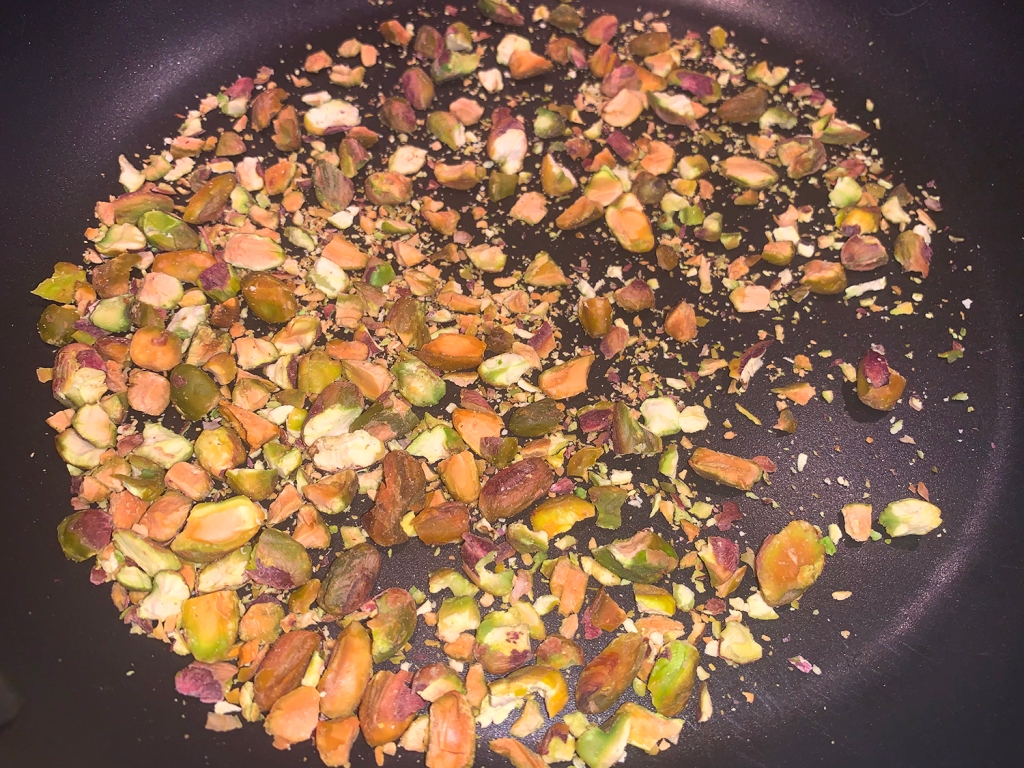
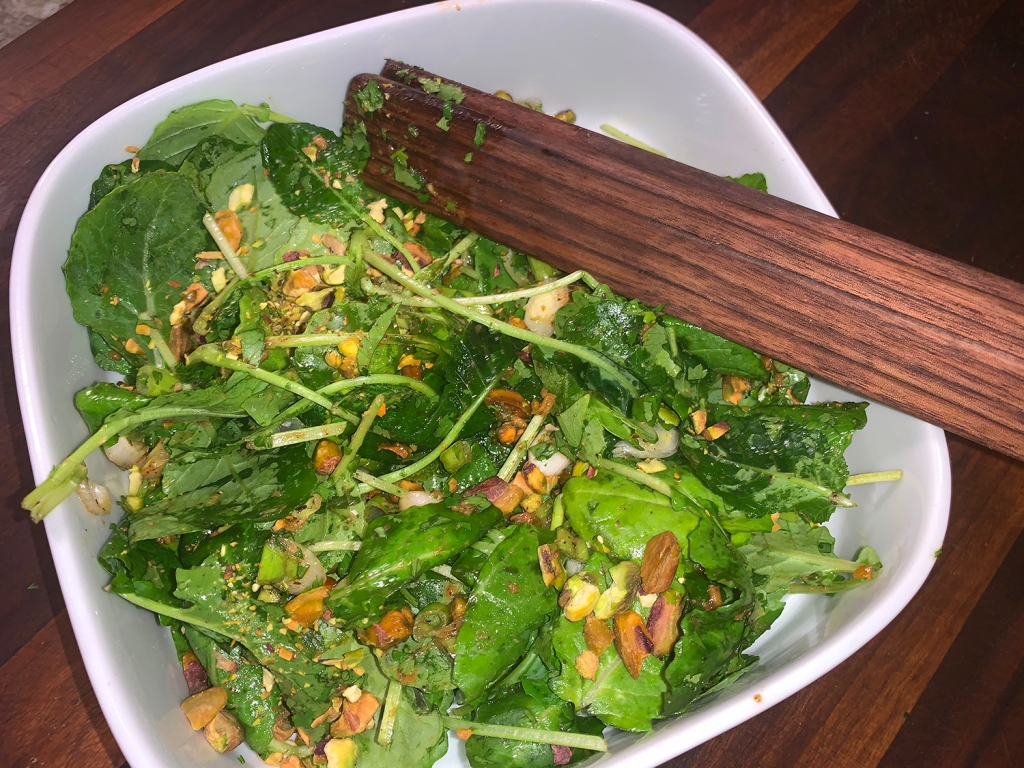
Sweet potatoes roasted until deeply browned and tossed with a touch of paprika are a great foil for the savory, minerally notes of a miso-dressed kale salad, as noted in Milk Street magazine. The char on the potatoes provides a note of bitterness that balances the richness of the miso. Scallions and cilantro add fresh herbal notes and toasted nuts add crunch. (I switched out pistachios for the walnuts which The Hubs can’t stand.)

This was a perfect side dish for our Deviled Pork Chops entrée. Problem was, the chops took so much longer to cook than the recipe suggested, our sweet potatoes were way overdone by the time the meat was finally ready. And without white miso on hand, we incorporated red miso. Even so, it was still a fabulous pairing.

Don’t dress the salad until just before serving. If left to stand, the kale will turn limp and soggy.

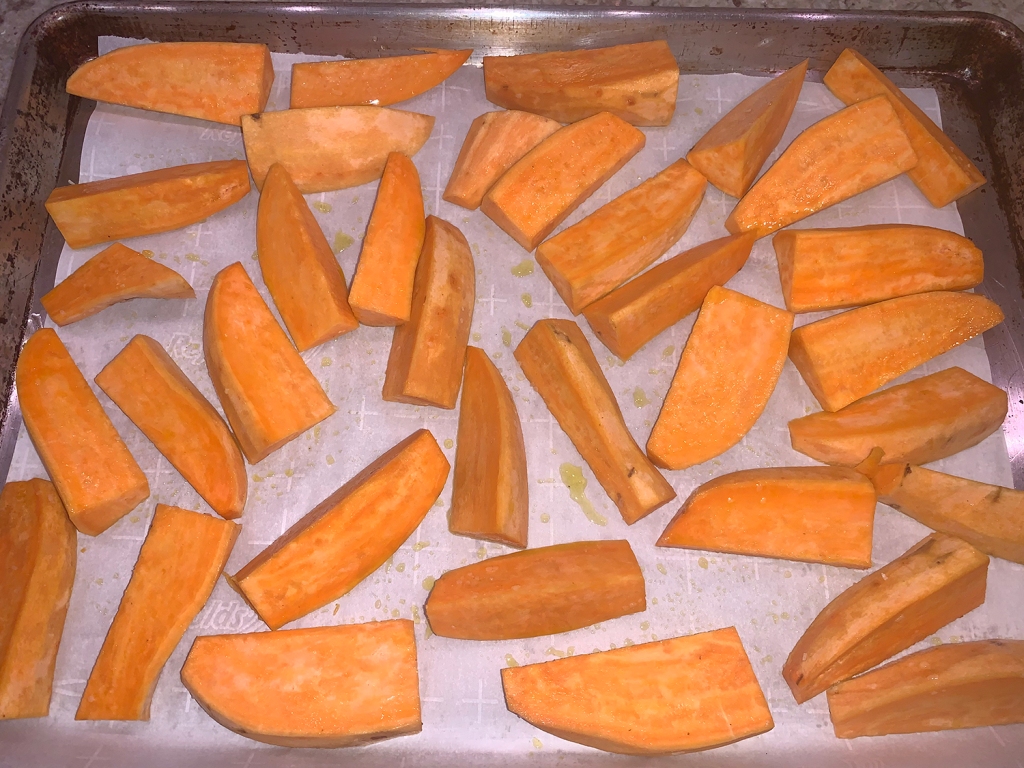
Our potatoes were huge so after peeling them, I first cut them in half vertically before slicing into wedges.

Roasted Sweet Potatoes with Kale-Miso Salad

  • Servings: 4
  • Difficulty: easy
  • Print

Ingredients

  • 4 medium orange-fleshed sweet potatoes (about 2¼ pounds), peeled, halved crosswise and cut into 1-inch wedge
  • 6 Tbsp. extra-virgin olive oil, divided
  • ¼ tsp. sweet paprika
  • Kosher salt and ground black pepper
  • 1 small garlic clove, grated
  • 4 tsp. sherry vinegar
  • 1½ tsp. white miso
  • 5 oz. baby kale
  • 3 scallions, thinly sliced on bias
  • ½ cup roughly chopped fresh cilantro leaves
  • ½ cup chopped walnuts or pistachios, toasted

Directions

  1. Heat the oven to 425°F with a rack in the middle position. Line a rimmed baking sheet with kitchen parchment. In a large bowl, toss the sweet potatoes with 4 tablespoons of the oil. Spread the potatoes in an even layer on the baking sheet and roast until tender and the edges begin to darken, about 30 minutes.
  2. Stir the potatoes, return to the oven and increase to 500°F. Roast until dark spotty brown and slightly crisped, about another 10 minutes. Transfer to a large bowl. Sprinkle with paprika, ½ teaspoon each salt and pepper, then toss.
  3. While the potatoes roast, in a small bowl, stir together the garlic and vinegar. Let stand for 10 minutes to mellow the garlic. Whisk in the remaining 2 tablespoons oil, the miso and ¼ teaspoon pepper. Set aside.
  4. When the potatoes are done, in another large bowl, toss together the kale, scallions, cilantro and half the walnuts. Pour in the dressing and toss. Divide the sweet potatoes among serving plates and top with the salad. Sprinkle with the remaining walnuts/pistachios.

http://www.lynnandruss.com

Recipe adapted from Milk Street

German Pork Schnitzel, Sehr Gute!

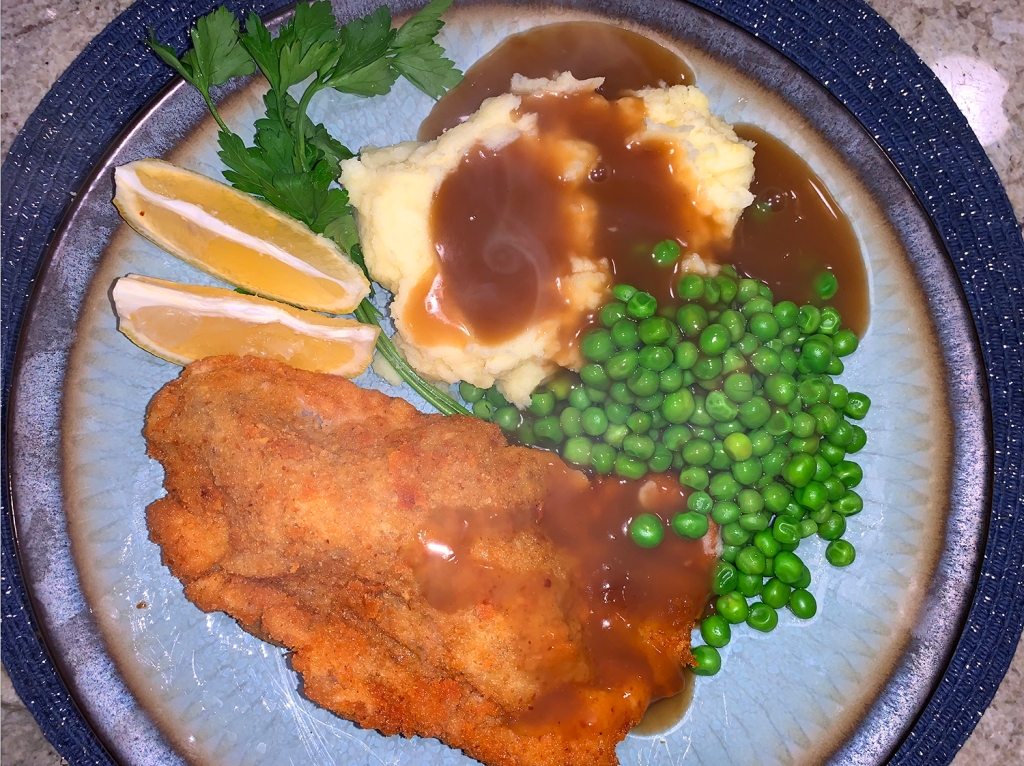
I used to claim that German food was my least favorite cuisine. But after a trip to Germany for my nieces wedding in late 2019, I thoroughly changed my mind. One of my most memorable dishes was a pork schnitzel entrée, so when we saw a recipe for German Pork Schnitzel in our latest Milk Street magazine, we knew it had to get on the short list.

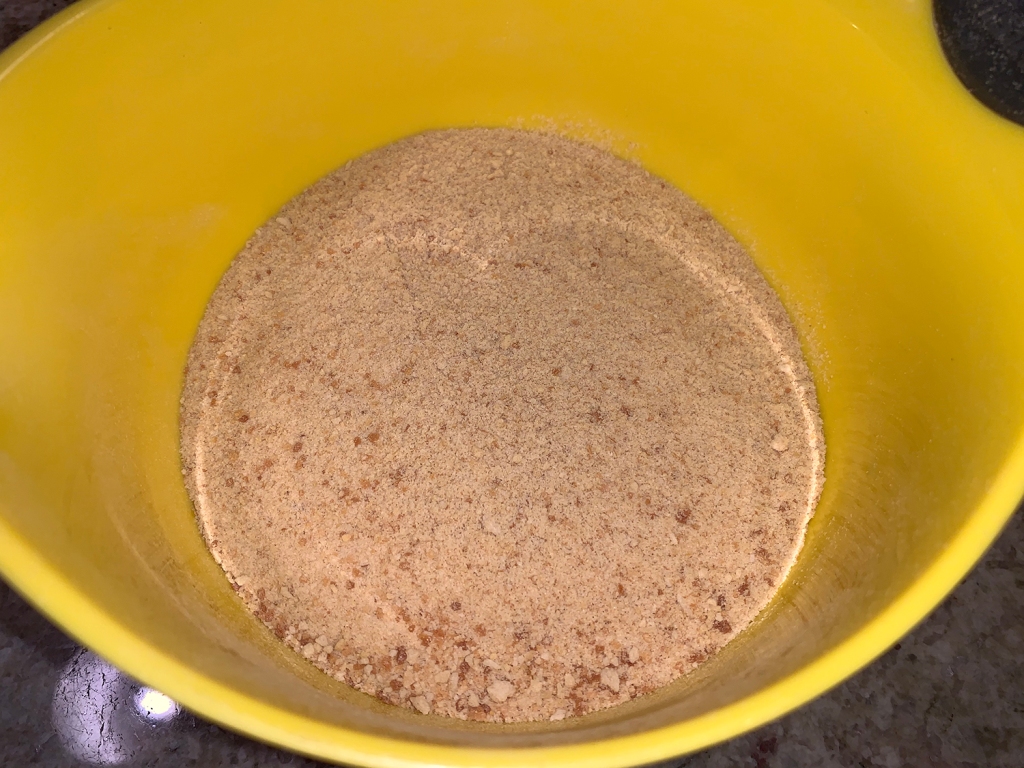
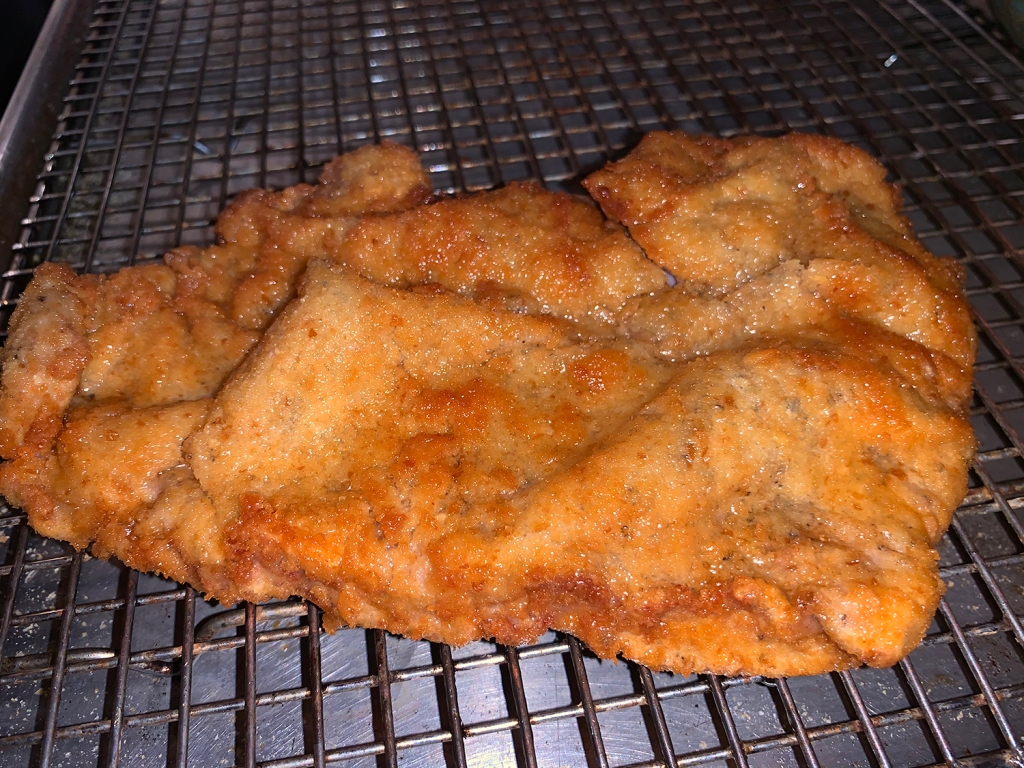
During a visit to Berlin, Milk Street staffers learned that the coating for authentic German pork Schnitzel, or Schweineschnitzel, is dry breadcrumbs made from kaiser rolls, which are extremely fine-textured. It’s a bit of work to get them from rolls to fine bread crumbs, but apparently they make all the difference.

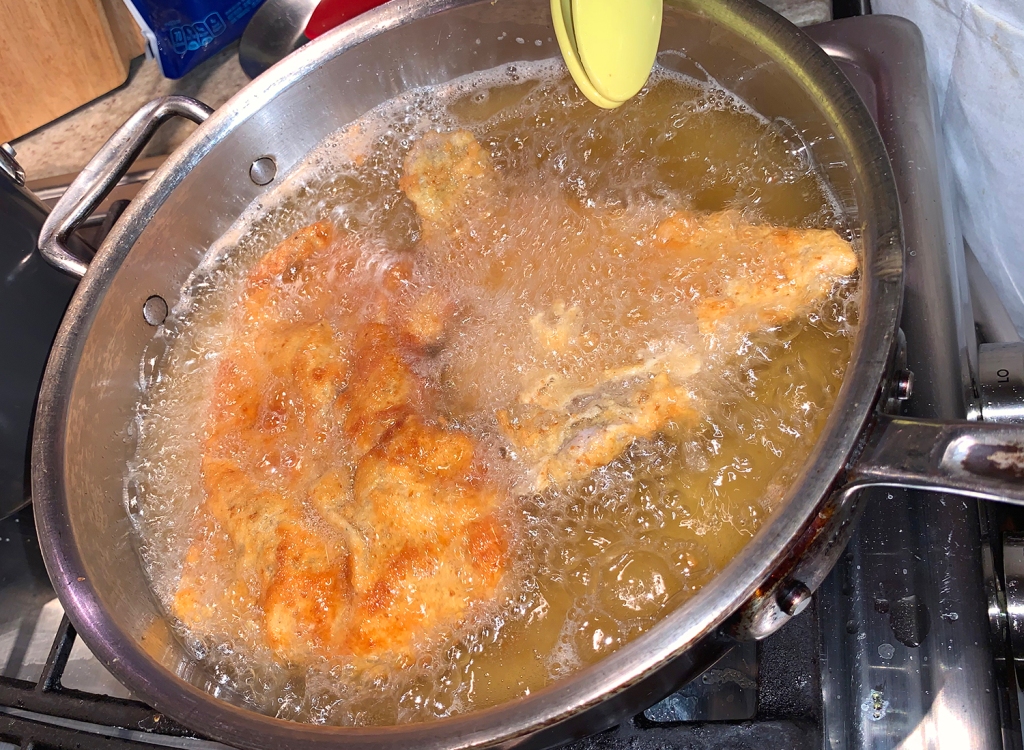
Indian ghee (clarified butter) is a counterintuitive ingredient for Schnitzel, but adding just a small amount to the frying oil adds richer, fuller flavor. If you cannot find it, the Schnitzel is still tasty without it I’m told. Typically, I stay away from breaded and fried food, but we felt compelled to give this method a try. Not only does it look attractive, it tastes sehr gute!

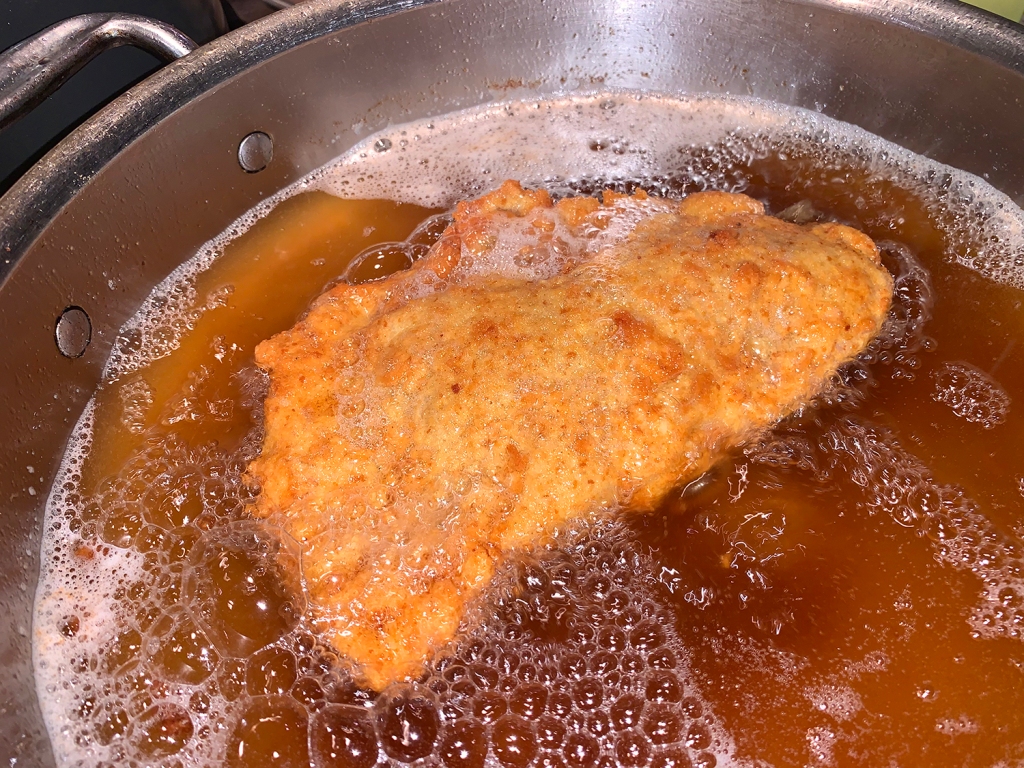
To fry the cutlets, use a large Dutch oven instead of a skillet; the pot’s high walls safely contain the hot oil and reduce splatter on the stovetop. To test if the oil is at the correct temperature, an instant or deep-fry thermometer is best. Milk Street suggests lingonberry preserves and lemon wedges as classic Schnitzel accompaniments; we however paired ours with garlicky mashed potatoes and pork gravy (yes, we used a jarred brand).

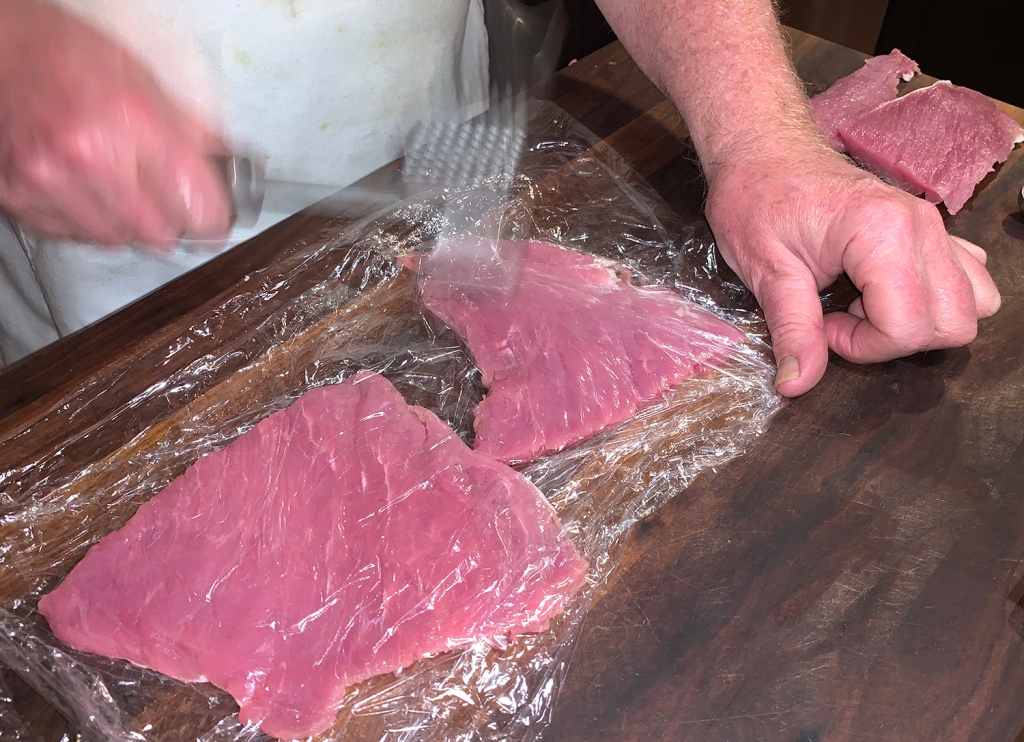
Tips from Milk Street: Don’t use a heavy hand when pounding the tenderloin. A lighter touch works best to flatten the cutlets to a ⅛-inch thickness without inadvertent tears. After breading the cutlets, fry them right away; if left to stand, the coating won’t puff properly. Finally, when frying the cutlets, don’t crowd them in the pot or they will brown unevenly. Depending on the dimensions of the cutlets and the diameter of your pot, the pieces may need to be fried one at a time.

German Pork Schnitzel

  • Servings: 4
  • Difficulty: easy
  • Print

Ingredients

  • 1 cup all-purpose flour
  • 2 large eggs
  • 1 Tbsp. plus 2 cups grapeseed or other neutral oil
  • 1 cup plain dry breadcrumbs (see headnote)
  • 1¼ pound pork tenderloin, trimmed of silver skin
  • Kosher salt and ground black pepper
  • 2 Tbsp. ghee (optional)
  • Lingonberry preserves, to serve (optional)
  • Lemon wedges, to serve

Directions

  1. Heat the oven to 300°F with a rack in the middle position. Tear 6 to 8 plain kaiser rolls (about 1 pound) into 1-inch pieces, then distribute in an even layer on a rimmed baking sheet. Toast until completely dry but not browned, about 45 minutes, stirring every 15 minutes or so. Cool completely, then transfer to a food processor and process to fine, even crumbs, about 2 minutes. Makes about 1 cup.
  2. Set a wire rack in a rimmed baking sheet and place in the oven on the middle rack; adjust the heat to 200°F. Put the flour in a wide, shallow bowl. In a second wide, shallow bowl, beat the eggs with the 1 tablespoon oil. Put the breadcrumbs in a third wide, shallow bowl.
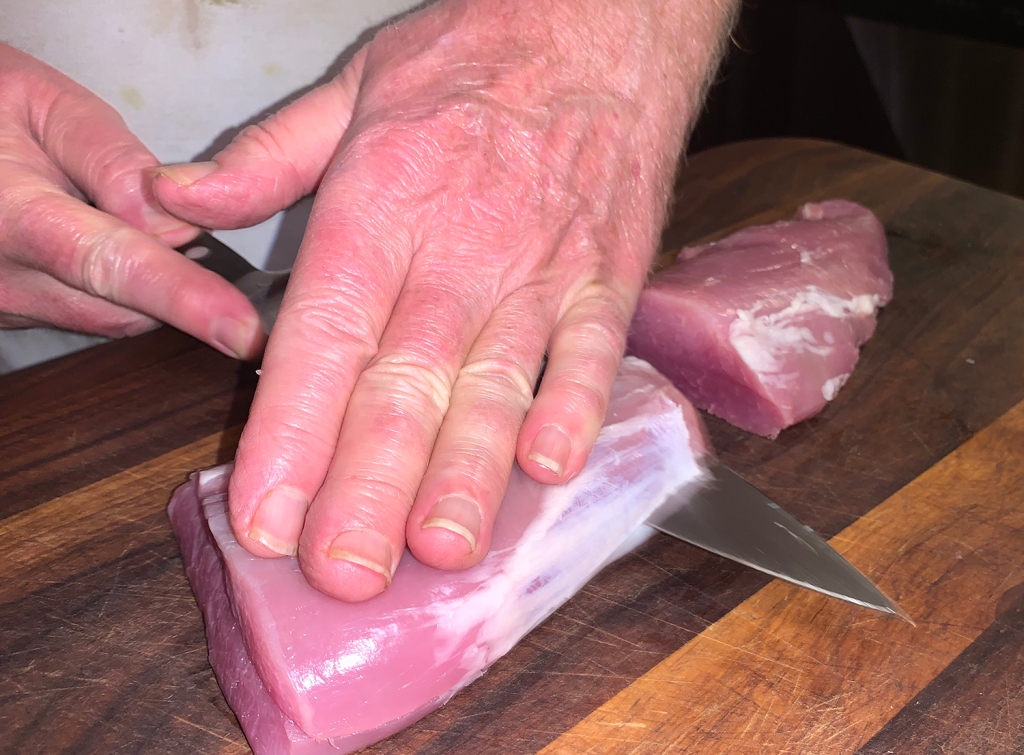
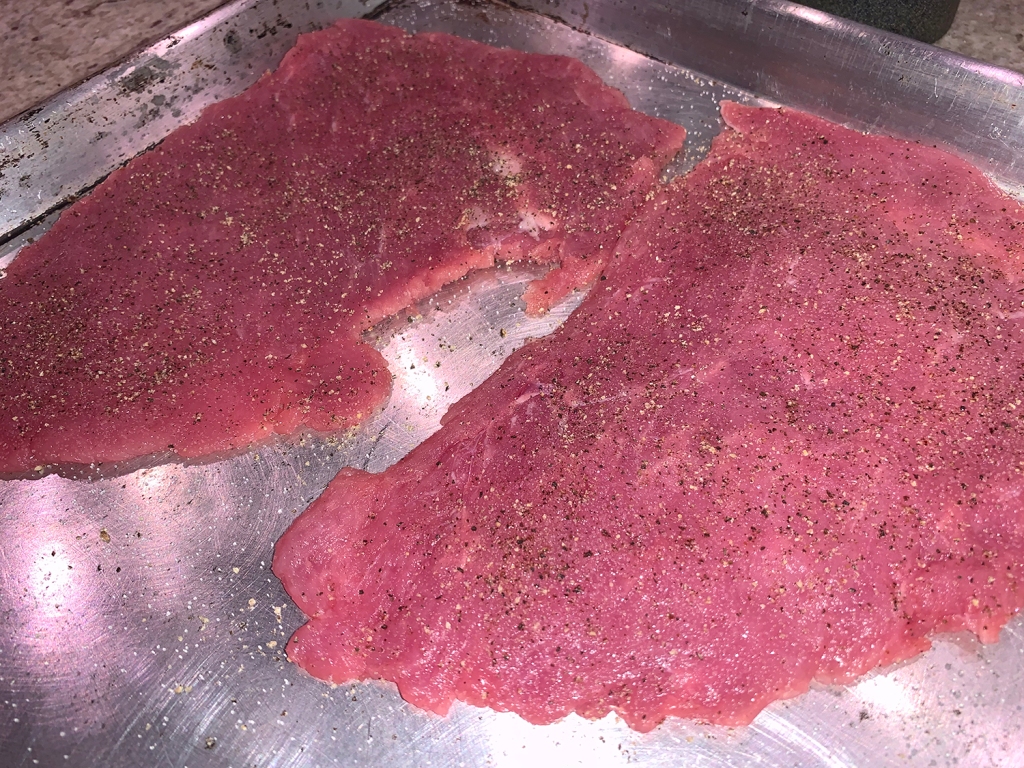
  3. Cut the pork tenderloin in 2 pieces crosswise, making the thinner end slightly larger, then cut each piece in half again. Place 2 pieces between 2 large sheets of plastic wrap. Using a meat pounder, gently pound each piece to an even ⅛-inch thickness. Repeat with the 2 remaining pieces. Season each cutlet on both sides with salt and pepper.
  4. One at a time, coat the cutlets on both sides with flour, shaking off the excess, then dip into the eggs, turning to coat and allowing excess to drip off, then coat both sides with breadcrumbs, pressing to adhere. Place the cutlets on a large plate, stacking them if needed.
  5. In a large Dutch oven over medium-­high, heat the 2 cups oil and ghee (if using) to 360°F. (It takes a while to heat to temperature.) Carefully place 1 or 2 cutlets in the oil—add only as many as will fit without overlapping—and cook, gently jostling the pot so oil flows over the cutlets, until light golden brown on both sides, 2 to 3 minutes total; use tongs to flip the cutlet(s) once about halfway through. Transfer to the prepared rack in the oven to keep warm.
  6. Return the oil to 350°F and cook the remaining cutlets in the same way. Serve with lingonberry preserves (if using) and lemon wedges.

http://www.lynnandruss.com

A Lesson on “Chashnee”

According to the Washington Post article where we found the recipe, this Spicy Tamarind Fish and Herb Stew isn’t just memorable, it offers a teachable moment. Cookbook author Naz Deravian uses it for a lesson on “chashnee,” a Persian word that describes “a particular ingredient,” a spice or special something, “that brightens the dish, bringing it to life, like lemon or vinegar,” and it changes from one region to another. In the Persian Gulf region of Iran, chashnee comes from incomparably tangy tamarind and the heat of chile pepper.

Ghalieh Mahi (Spicy Tamarind Fish and Herb Stew)

In our neck of the woods, halibut is more than twice the price of cod, so that’s our preference here. Keep in mind, the sauce is bold. In fact, we, who love spicy food, didn’t bother to add any cayenne. You may also prefer to remove the chile seeds to further tame the flavor. I do feel the brown sugar (which we used instead of honey) balanced the tanginess of the tamarind.

Fenugreek leaves, powder and seeds

Fenugreek seeds and powder are used in many Indian dishes for their nutritional profile and slightly sweet, nutty taste. If you’re unable to locate it at a nearby grocery store, you can check specialty markets or just order online like we did.

Beware, if you are not a cilantro lover, then this dish is not for you.

Spicy Tamarind Fish and Herb Stew

  • Servings: 6
  • Difficulty: easy
  • Print

Ingredients

  • 3 Tbsp. olive oil
  • 1 medium yellow onion, diced
  • 2 tsp. kosher salt, plus more as needed
  • 6 cloves garlic, crushed to a paste or finely grated
  • 1 tsp. ground turmeric
  • 1 red serrano or small jalapeño chile pepper, thinly sliced, plus more for garnish
  • 3 bunches fresh cilantro, tough stems trimmed, finely chopped (5 to 6 cups, chopped); plus some whole leaves reserved for optional garnish
  • 2 Tbsp. dried fenugreek, or 1/2 bunch fresh leaves, finely chopped; OR, 1 Tbsp. dried crushed seeds
  • 2 Tbsp. unbleached all-purpose flour
  • 2 Tbsp. tamarind paste , dissolved in 2 cups warm water, plus more to taste
  • 2 Tbsp. tomato paste
  • 2 tsp. brown sugar or honey, plus more to taste (optional)
  • Cayenne pepper (optional)
  • 2 pounds cod, halibut or other firm-fleshed fish
  • Freshly ground black pepper
  • Cooked rice, for serving

Directions

  1. In a large pan, heat the oil over medium-high heat until shimmering. Add the onion and cook, stirring frequently, until golden brown, about 6 minutes. Sprinkle with a little salt, reduce the heat to medium, and add the garlic, turmeric and chile pepper. Cook, stirring frequently, until fragrant, about 1 minute.
  2. Add the cilantro and fenugreek and cook, stirring frequently, until fragrant and the cilantro has considerably wilted, about 10 minutes. (This step actually only took 2 minutes for the cilantro to be completely wilted.)
  3. Add the flour and the 2 teaspoons of salt and stir to incorporate for 1 minute. Stir in the tamarind mixture and tomato paste. Reduce the heat to medium-low and simmer, uncovered, until thickened, about 10 minutes.
  4. Taste as it simmers. If the sauce is too sour, add the sugar or honey to take the edge off the tang. Taste again for salt (keep in mind you will salt the fish as well), heat (add cayenne if you like), and more tang from tamarind.
  5. Meanwhile, cut the fish into 2-inch pieces and season well with salt and black pepper. Raise the heat to medium, add the fish, and simmer, uncovered, until the fish cooks through, 10 to 15 minutes. Stir gently to make sure nothing sticks to the bottom of the pan. If the stew gets too watered-down, remove the fish and raise the heat to reduce the sauce a little, if it’s too dry, add a little more water.
  6. Garnish with more chile peppers and cilantro leaves, if you like, and serve with rice.

http://www.lynnandruss.com

Recipe compliments of Justin Tsucalas for The Washington Post

Roasted Mediterranean Potatoes

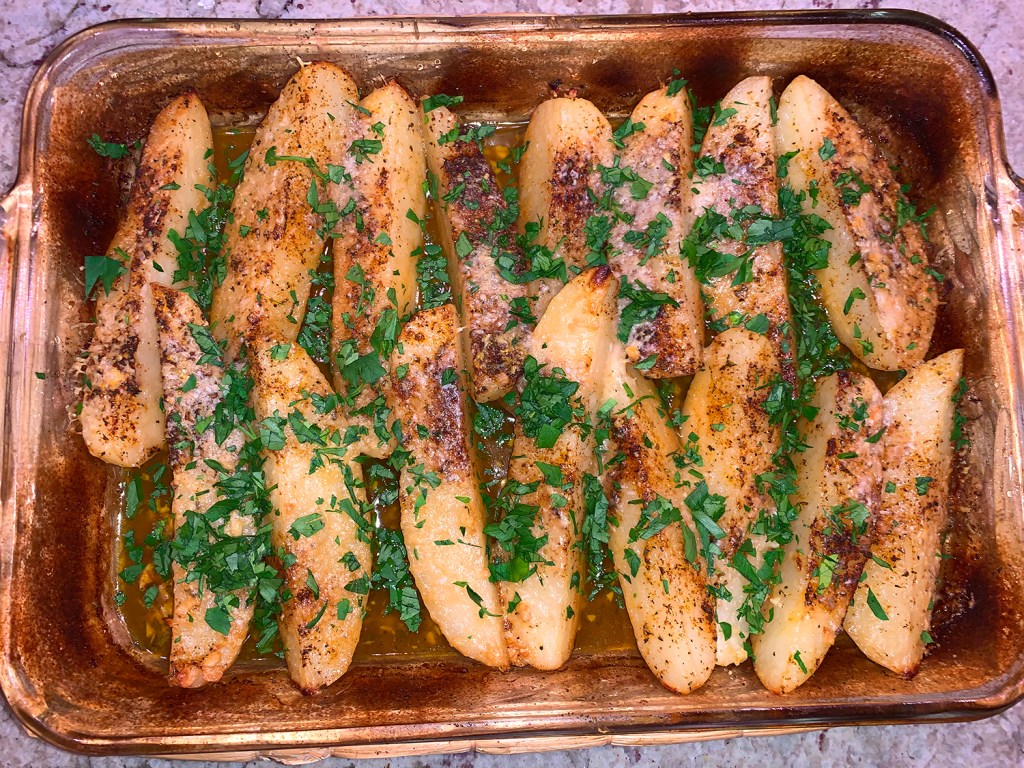
We were Going to the Greek for dinner one Sunday evening when son David, and his lovely Greek girlfriend Vyktorya (Vikki) were paying a visit. It’s always a little tricky with Vikki (rhyme intended) who was a staunch vegan for quite some, but now does eat meat on occasion. Lucky for us lamb is one she enjoys. (Something to do with the Greek ancestry perhaps?)

Once we settled on the entrée, we had to come up with sides that would complement the Greek flavors of the lamb marinade. Potatoes were kind of a no-brainer, and Russ quickly settled on these Best Roasted Greek Potatoes that he found themediterraneandish.com website.

To achieve just the right texture, first the potatoes are baked covered for 40 minutes or so in plenty of liquid—olive oil, lemon juice, and broth. As they are covered, the potatoes tenderize as they absorb steam and take in the perfectly flavored liquid.

A little secret ingredient here is a sprinkle of Parmesan cheese
added midway through baking.

Roasted Mediterranean Potatoes

  • Servings: 6-8
  • Difficulty: easy
  • Print

Ingredients

  • 1 tsp. seasoned salt
  • 1 tsp. black pepper
  • 1 tsp. sweet paprika
  • 1 tsp. rosemary
  • 4 large baking potatoes, peeled, washed, cut into wedges
  • 8 large garlic cloves, chopped
  • 4 Tbsp. extra virgin olive oil
  • 1 lemon, juice of
  • 1 ¼ cup vegetable or chicken broth
  • ½ cup grated parmesan cheese
  • 1 cup parsley leaves, roughly chopped

Directions

  1. Preheat oven to 400 degrees F.
  2. In a small bowl, mix together spices. Set aside.
  3. Place potato wedges in a large lightly-oiled baking dish and sprinkle with the spice  mix. Toss potatoes together briefly to evenly distribute spices.
  4. In a bowl, whisk together chopped garlic, olive oil, lemon juice and broth. Pour into baking dish with potatoes.
  5. Cover the baking dish with foil and place in the 400 degree F-heated oven for 40 minutes.
  6. Remove from oven briefly. Uncover and sprinkle Parmesan cheese on the potato wedges. Return to oven uncovered to roast for another 10-15 minutes or until potatoes are cooked through and have turned a nice golden brown with a little crust forming.
  7. To add more color, place the dish under the broiler for 3 minutes or so, watching carefully.
  8. Remove from oven. Garnish with fresh parsley before serving.
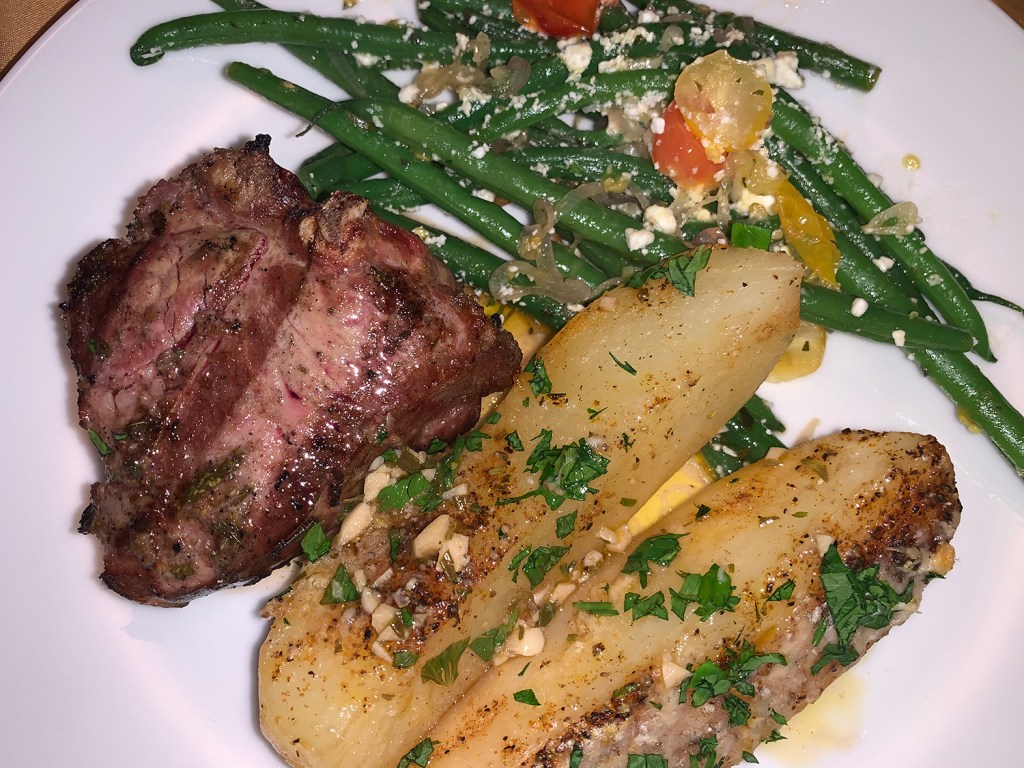
Rounding out the Greek-themed dinner were grilled loin lamb chops with a garlic-oregano paste, and sautéed green beans and grape tomatoes with crumbled feta.

http://www.lynnandruss.com

Recipe found on http://www.themediterraneandish.com

Marinated Sirloin Flap Steak

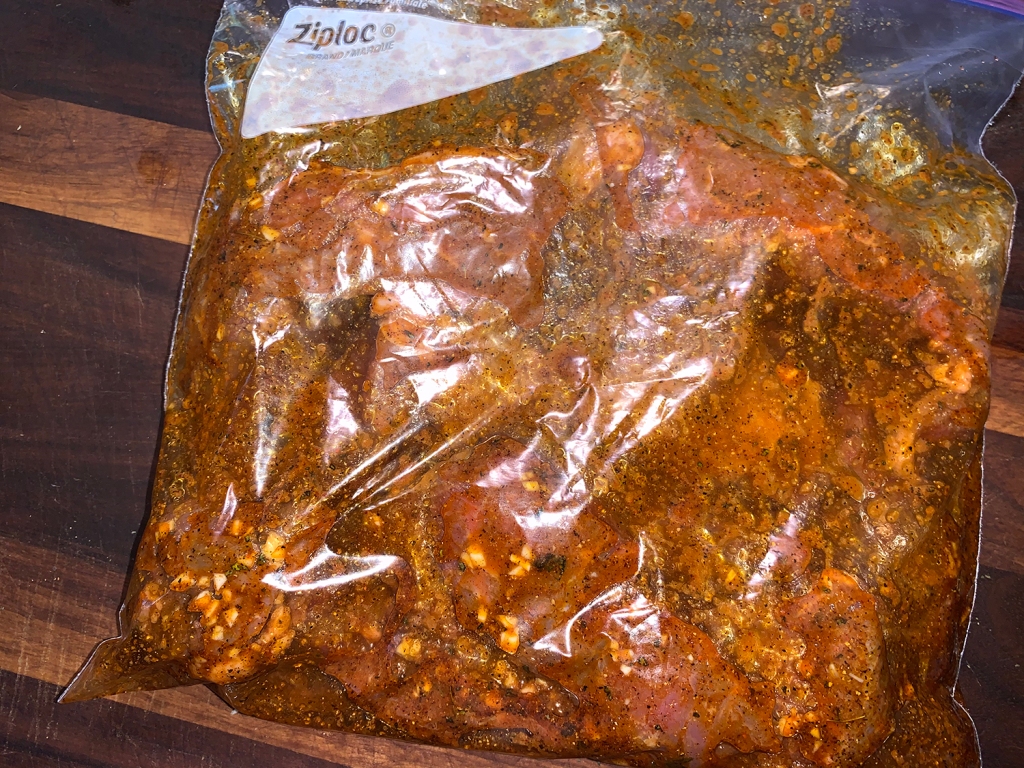
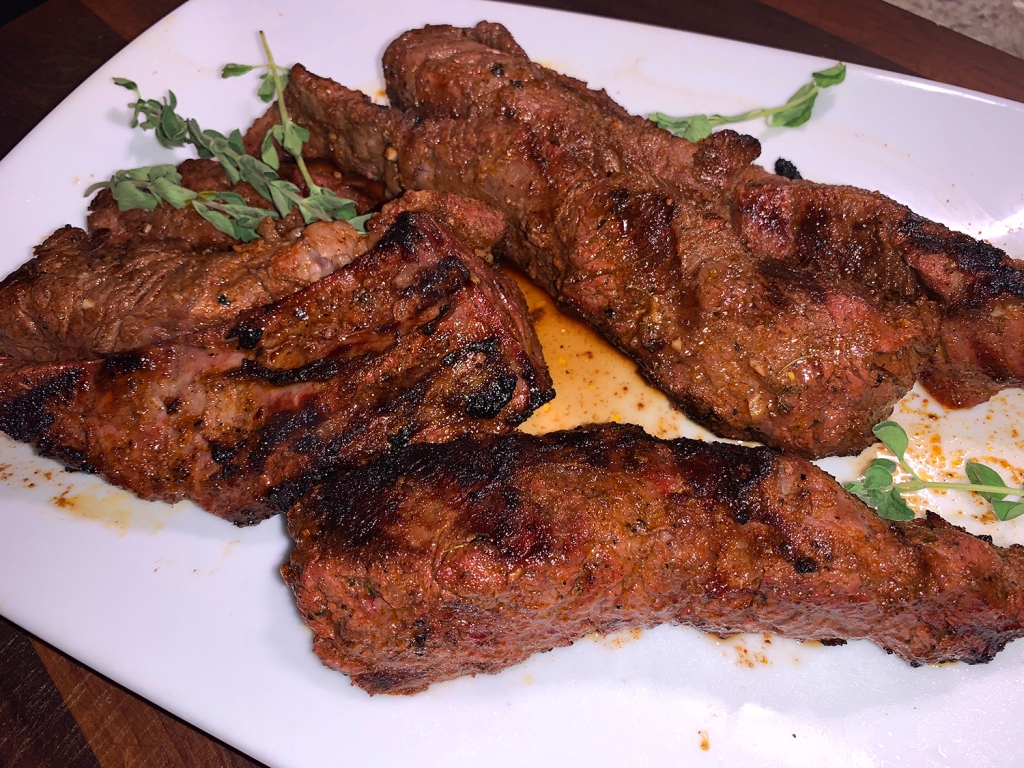
I‘ve posted several blogs on flap meat. The only place we ever find it is at Costco, so we load up on it when we go there. Flap steak is cut from the bottom sirloin and is sometimes call beef loin tip. It is less tender than more expensive steaks, but has a great beefy flavor. It is ideal for marinating and needs to be cooked quickly on high heat for medium rare.

Although it has the reputation for not being very tender, we don’t seem to have that experience. It is well-marbled and flavorful and sometimes called bavette, but bavette can also refer to flank steak, which is a different cut altogether.

Our steak marinated for the full eight hours, and then we grilled it for about 12 minutes total for medium-rare at 125°. The original recipe indicated to cook the meat for 20-25 minutes, that would be well-done, a no-no in our house!

Some of our strips had thick and thinner ends. You may want to cut the thinner portions off and add them to the grill a few minutes after the thick pieces have cooked. This will ensure the meat is all cooked to the same temperature, if that is your desired outcome. (Discard any leftover marinade.)

Our accompaniments were roasted Brussels sprouts with thyme and a divine Roasted Rosemary Butternut Squash and Shallots.

Marinated Sirloin Flap Steak

  • Servings: 4
  • Difficulty: easy
  • Print

Ingredients

  • 2 lbs. sirloin flap steak
  • 1/3 cup cider vinegar
  • 1/4 cup olive oil
  • 1 Tbsp. water
  • 2 tsp. onion powder
  • 2 tsp. chili powder
  • 2 tsp. salt
  • 2 tsp. Worcestershire sauce
  • 2 tsp. red wine vinegar
  • 2 tsp. paprika
  • 2 tsp. ground cumin
  • 1 tsp. dried marjoram (1 Tbsp. if using fresh)
  • 1 tsp. black pepper
  • 1/2 tsp. garlic powder (or 2 fresh cloves, minced)
  • 1/2 tsp. ground ginger
  • 1/2 tsp. ground cloves

Directions

  1. Gather the ingredients.
  2. Place the flap steaks into a resealable plastic bag.
  3. Combine marinade ingredients together and pour over the steaks, making sure all surfaces are well coated. Carefully let air out of the bag, seal, and place into refrigerator for 2 to 8 hours. 
  4. Preheat the grill for medium-high heat.
  5. Remove the steaks from the bag and place them onto a hot grill grate over direct flames. Cook, turning occasionally, for 12 to 15 minutes for medium-rare at 125°, or to your desired doneness.
  6. Once cooked, remove the steaks from the heat and place them onto a cutting board. Let steaks rest for 5 minutes before slicing.
  7. Serve with your favorite sides and enjoy!

http://www.lynnandruss.com

Sautéed Celery and Leeks with Mushrooms

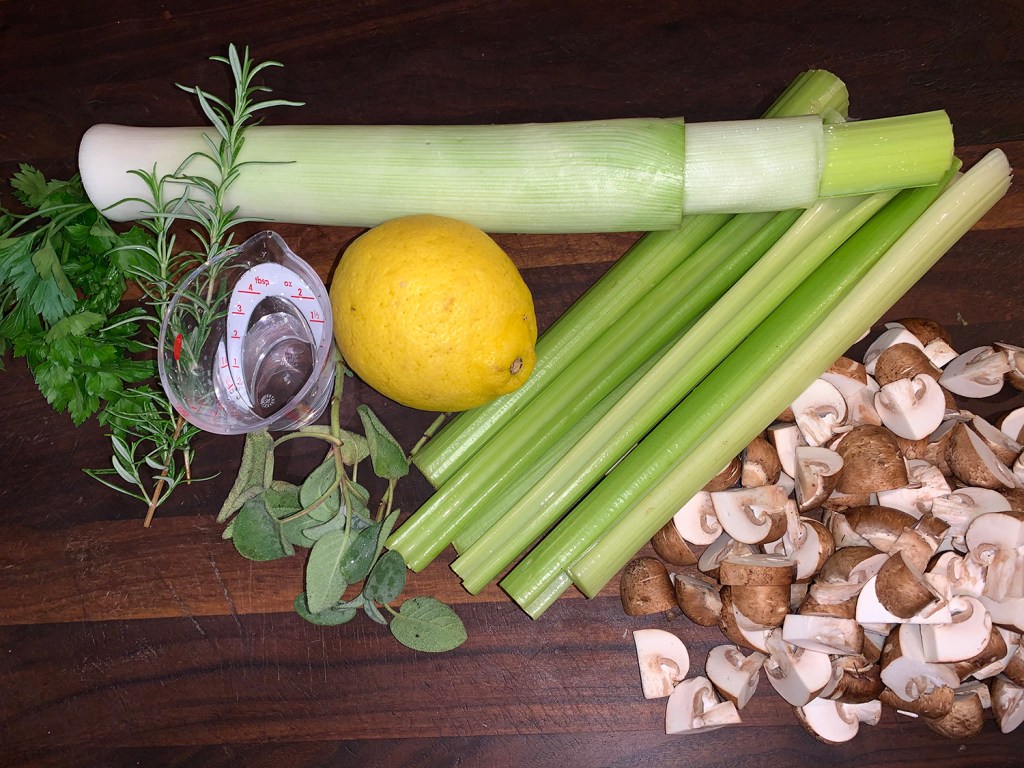
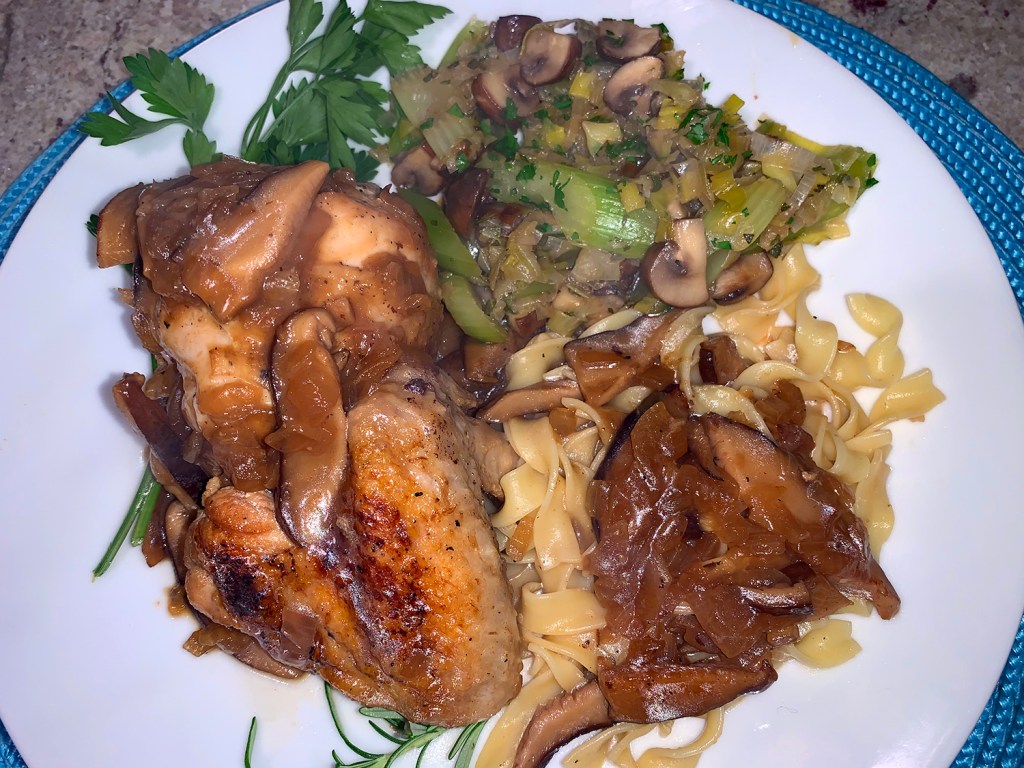
This savory herb-flecked sauté tastes just like stuffing, but without the bread—goodbye carbs! It embraces celery’s crisp texture and distinctive flavor. Found in a decade-old issue of Fine Cooking Magazine, it intrigued us enough to include as a side dish for our Smothered Chicken with Bourbon and Miso.

One rarely thinks of cooked celery as the star of a side dish. It typically takes a back burner as a mix-in to salads, additive to soups, or an accompaniment to hot wings. But here it shines and surprises. We have now added the recipe to our favorites and plan to serve to guests, especially those who are vegetarian.

Sautéed Celery and Leeks with Mushrooms

  • Servings: 3-4
  • Difficulty: easy
  • Print

Ingredients

  • 2 Tbsp. extra-virgin olive oil
  • 1 medium leek, rinsed, halved lengthwise and thinly sliced crosswise (white and light green parts only)
  • 6 stalks celery, cut in a diagonal in 1/2″ slices
  • Kosher salt
  • 8 oz. cremini mushrooms, quartered
  • 1 Tbsp. fresh lemon juice
  • 1 1/2 tsp. finely chopped fresh rosemary
  • 1 tsp. chopped fresh sage
  • 2 Tbsp. chopped fresh flat-leaf parsley
  • Freshly ground black pepper
  • 2 Tbsp. chicken broth or water

Directions

  1. Heat a 12-inch skillet over medium heat. Add the oil, leek, and a pinch of salt; cook stirring often, until just tender, 3 to 4 minutes.
  2. Add the mushrooms and another pinch of salt and cook until the mushrooms are lightly browned and tender, 4 to 5 minutes.
  3. Add the celery and a pinch of salt and cook until crisp-tender, 5 to 8 minutes.
  4. With a wooden spoon, stir in the lemon juice and scrape up any browned bits from the bottom of the pan.
  5. Stir in the rosemary and sage and cook until fragrant, about 1 minute.
  6. Stir in the parsley and season to taste with salt and pepper. Transfer the mixture to a bowl.
  7. Return the pan to medium heat, add the chicken broth or water, and scrape up any remaining bits. Let this liquid reduce by half and then pour over the celery.
  8. Serve immediately.

http://www.lynnandruss.com

Compliments of Melissa Pellegrino

Miso Loved this Savory Dish!

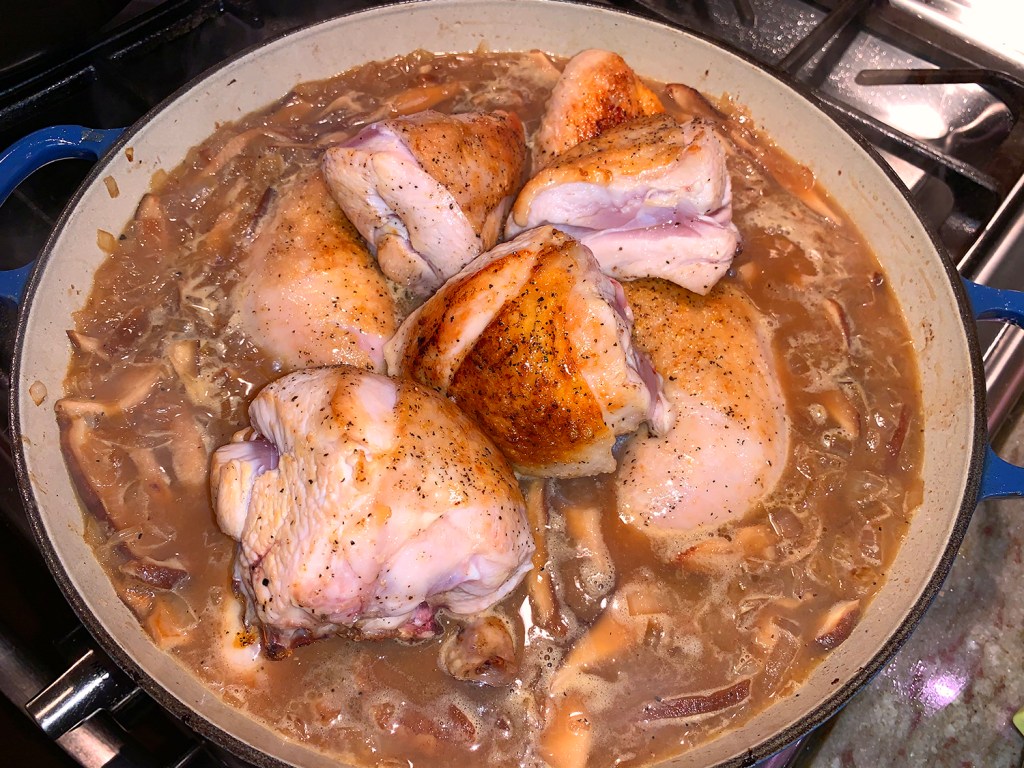
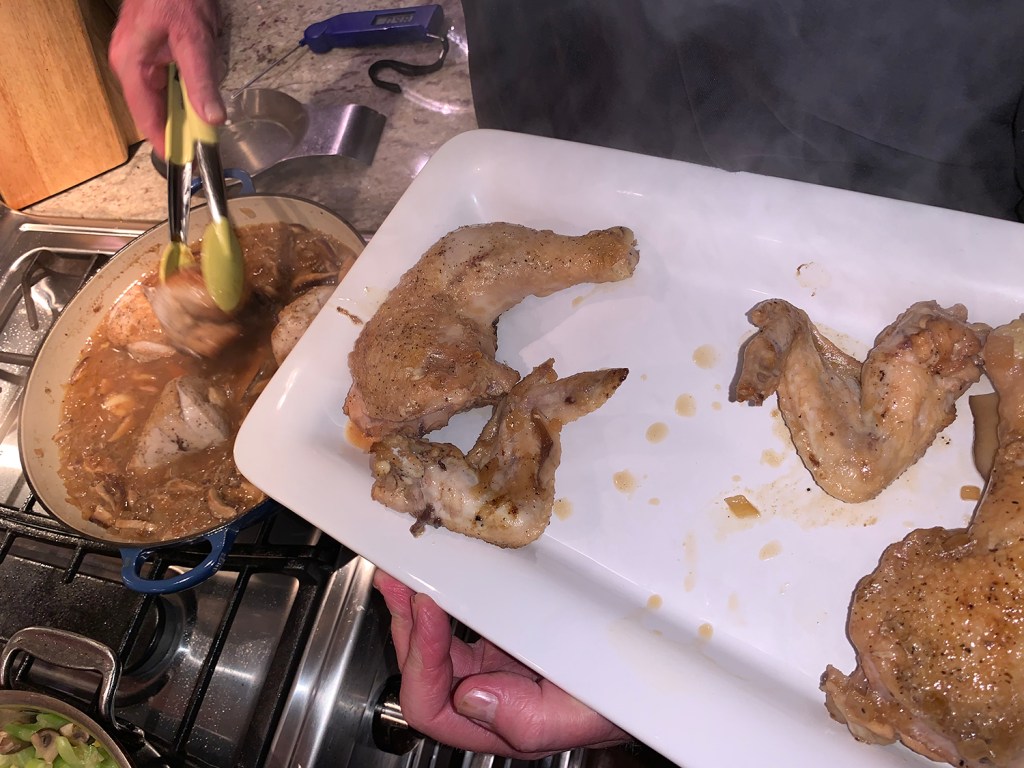
We saw this Smothered Chicken with Bourbon and Miso recipe in our latest Milk Street magazine and knew it had to get on our short list. It is their adaptation of a recipe from the cookbook “Smoke and Pickles” by Edward Lee.

As described by Milk Street, “It’s a fantastic Asian-inflected spin on an all-American favorite: smothered pork chops. A combination of umami-rich ingredients, woodsy bourbon and sweet-tangy orange juice produces a silky, deeply flavored mushroom sauce for smothering tender bone-in chicken legs.”

And since I am not a fan of chicken legs, we decided to buy a whole 3 1/2-pound chicken. This option gives us the extra “body parts” for making homemade stock later on. Plus, I get my preferred white meat.

Don’t worry if you have the wrong variety of miso. Dark miso, such as red (aka) or barley (mugi) miso is preferred, but white (shiro) miso is easier to find and more versatile. The sauce will be a little sweeter and milder, but still delicious.

Smothering typically refers to braising meats in gravy, a process that produces tender meat and a rich sauce to ladle over it—but it is time-intensive. Here, corners are cut to streamline the technique but keep the savory flavor. Chief among them are the bourbon whisky, dark soy sauce and shiitake mushrooms.

Bourbon is a wonderful ingredient to add when you want a smoky, aged sweetness with a bit of leathery caramel flavor.

Edward Lee

The result? A rich, velvety umami-packed chicken that offers the savory flavors of a long braise in a fraction of the time. Works for us!

If you are interested in the unusual but fantastic side dish, check out this recipe for Sautéed Celery with Leeks and Mushrooms.

Smothered Chicken with Bourbon and Miso

  • Servings: 4
  • Difficulty: easy
  • Print

Ingredients

  • 2 Tbsp. soy sauce
  • 1 Tbsp. dark miso, such as red or barley miso (see note)
  • ½ cup orange juice
  • 4 bone-in, skin-on chicken leg quarters (about 3 pounds total), patted dry
  • Kosher salt and ground black pepper
  • 2 Tbsp. grapeseed or other neutral oil
  • 2 medium yellow onions, chopped
  • 12 oz. shiitake mushrooms, stemmed and thinly sliced
  • 4 large garlic cloves, smashed and peeled
  • ⅓ cup bourbon

Directions

  1. In a small bowl, whisk together the soy sauce and miso until smooth. Whisk in the orange juice and set aside.
  2. Season the chicken on both sides with salt and pepper. In a large Dutch oven over medium-high, heat the oil until shimmering. Add the chicken skin down and cook undisturbed until well browned, about 5 minutes. (You may have to do this in two batches.)
  3. Flip and cook until the second sides are well browned, another 5 minutes. Transfer to a large plate, then pour off and discard all but 2 tablespoons fat from the pot.
  4. Return the pot to medium-high. Add the onions, mushrooms and garlic, then cook, stirring occasionally, until the vegetables are softened and beginning to brown, about 5 minutes.
  5. Add the bourbon and cook, scraping up the browned bits, until most of the liquid has evaporated, about 30 seconds.
  6. Pour in the miso mixture and 2 cups water, then bring to a simmer. Return the chicken skin up to the pot and pour in the accumulated juices.
  7. Cover, reduce to medium-low and cook, adjusting the heat as needed to maintain a gentle simmer, until the thickest parts of the legs reach 175°F, 20 to 25 minutes.
  8. Using tongs, transfer the chicken to a serving dish. Bring the sauce to a boil over high and cook, uncovered and stirring occasionally, until the sauce has thickened to a gravy consistency, 7 to 9 minutes.
  9. Taste and season with salt and pepper, then spoon over the chicken.

http://www.lynnandruss.com

Double Mushroom and Sherry Meatloaf with a Companion Gravy

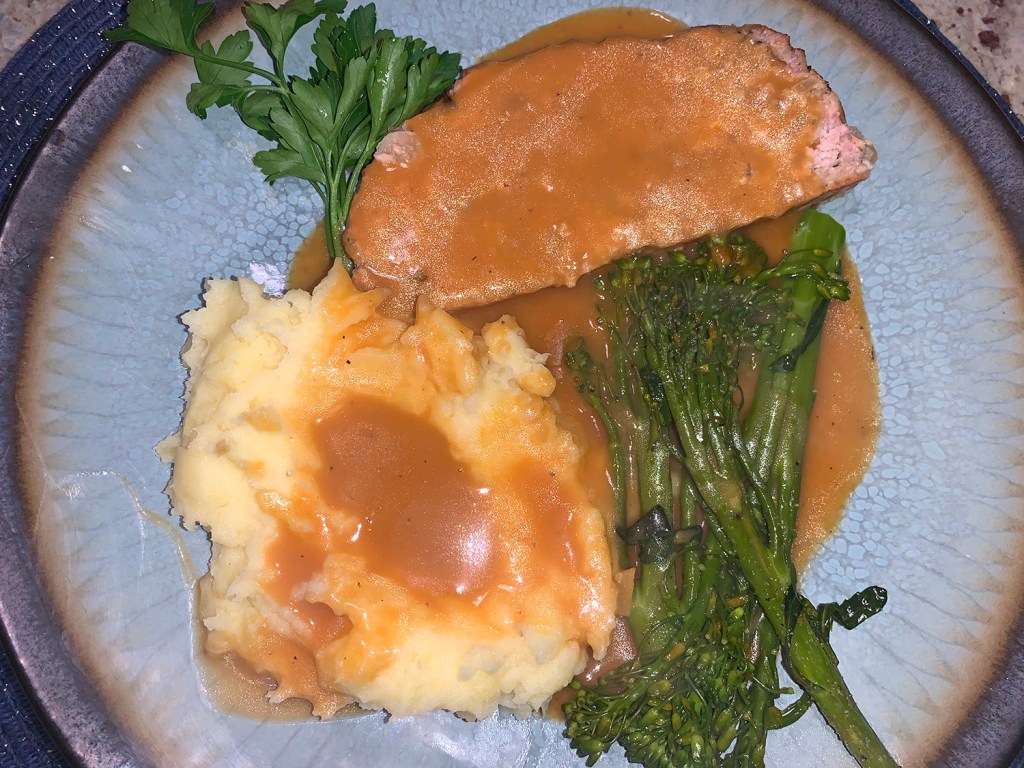
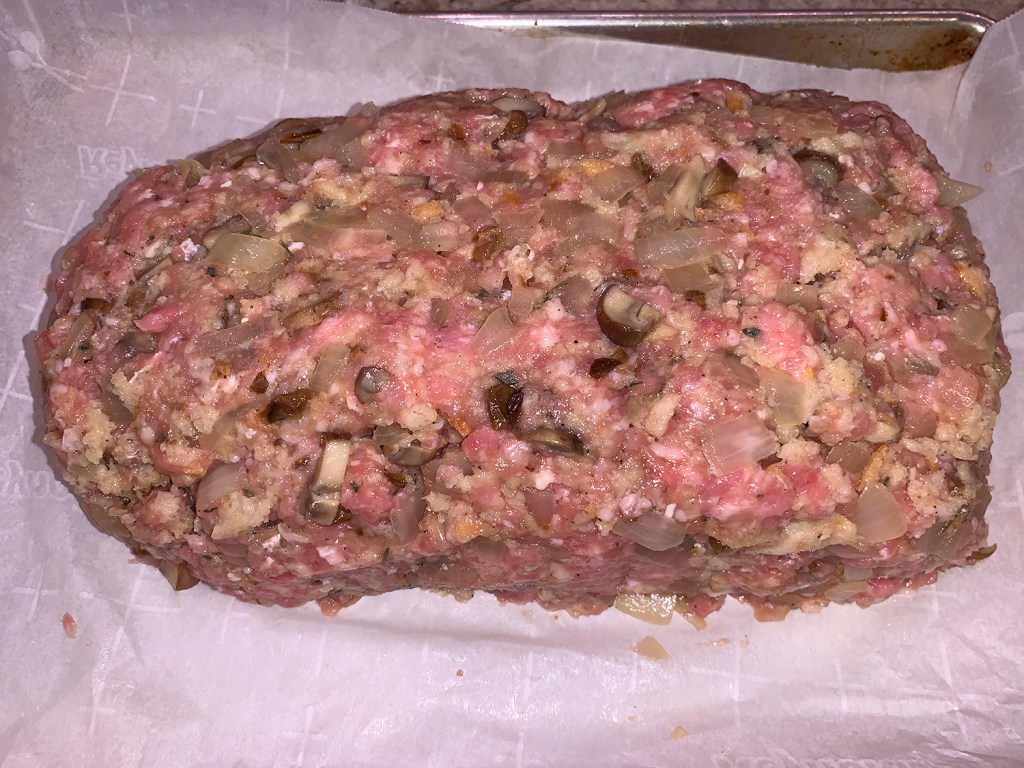
The beauty of this meatloaf and gravy is that they share several essential ingredients: mushrooms, dry sherry and garlic. While this recipe uses just ground pork and veal, if all you can get your hands on is the meatloaf mix combo, go ahead, the flavor profile won’t be too heavily altered.

Soaking the bread in the milk gives the meatloaf its tender texture. The bread should be wet but not drenched, so squeeze it gently to remove excess liquid. Then chop it all up into very small pieces. You don’t want big hunks of bread marring the perfect loaf.

A bed of garlicky mashed potatoes and steamed broccolini rounded out our meal.

Double Mushroom and Sherry Meatloaf

  • Servings: 6-8
  • Difficulty: easy
  • Print

Ingredients

  • 1 lb. ground veal
  • 1 lb. ground pork
  • 2 large eggs, lightly beaten
  • 1 Tbsp. Worcestershire sauce
  • 2 1/2 tsp. kosher salt
  • 1/2 tsp. freshly ground black pepper
  • 1/4 cup dried porcini mushrooms, rehydrated and chopped (save the hydration water for the gravy, if making)
  • 4 oz. sliced medium-coarse white bread such as Italian, French or sourdough
  • 1 cup whole milk
  • 2 Tbsp. canola or olive oil
  • 1 medium yellow onion, chopped
  • 2 large garlic cloves, finely chopped
  • 1 cup fresh cremini mushrooms, coarsely chopped
  • 3/4 cup dry sherry (do not use cooking sherry)
  • 2 Tbsp. fresh sage, finely chopped
  • 2 Tbsp. fresh thyme, finely chopped

Directions

  1. Preheat oven to 375°F. Line the bottom of a 9″ x 13″ rimmed baking sheet with parchment.
  2. In a shallow dish that holds it in a single layer, soak the bread in the milk, flipping once, until soggy but not drenched, 5 to 10 minutes depending on your bread type.
  3. Heat oil in a 12″ skillet over medium-low heat. Cook the onion, garlic and fresh mushrooms, stirring frequently, until softened and just beginning to brown, about 4-5 minutes.
  4. Add the sherry and simmer briskly until almost dry, 4 to 5 minutes. Transfer to a large bowl and let cool until warm.
  5. Lightly squeeze a handful of bread at a time to remove some of the milk. Finely chop and add to the bowl of cooked aromatics.
  6. Add the ground pork and veal, eggs, Worcestershire sauce, salt and pepper to the bowl. Use you hands to gently combine the meat mixture without overworking it.
  7. Transfer the meatloaf mixture to the prepared baking sheet and form into a 10″ x 4″ rectangle.
  8. Bake until an instant read thermometer registers 160°, 55 to 60 minutes. Let rest for 10 minutes. Cover with foil if the meatloaf won’t be sliced until the gravy is ready.
  9. Slice into 3/4″ to 1″ slabs.

http://www.lynnandruss.com

Mushroom Gravy with Sherry and Thyme

This ridiculously flavorful vegetarian gravy will satisfy even the heartiest meat-eaters. Along with sherry and tomato paste, dried porcini mushrooms (available in the produce sections of large supermarkets) replicate the savory flavor of drippings. It has to be up there as one of the best gravies we’ve ever had!

Mushroom Gravy with Sherry and Thyme

  • Servings: Yields 3 cups
  • Difficulty: easy
  • Print

Ingredients

  • 8 Tbsp. butter, divided
  • 1 medium onion, chopped
  • 3 cloves garlic, finely chopped
  • 1 Tbsp. tomato paste
  • ⅔ cup dry sherry (do not use cooking sherry)
  • 3 cups vegetable or mushroom broth
  • ½ oz. dried porcini mushrooms, see below*
  • *1 cup porcini soaking liquid from rehydrating above mushrooms
  • 3 large thyme sprigs
  • 6 Tbsp. all-purpose flour
  • Freshly ground black pepper

Directions

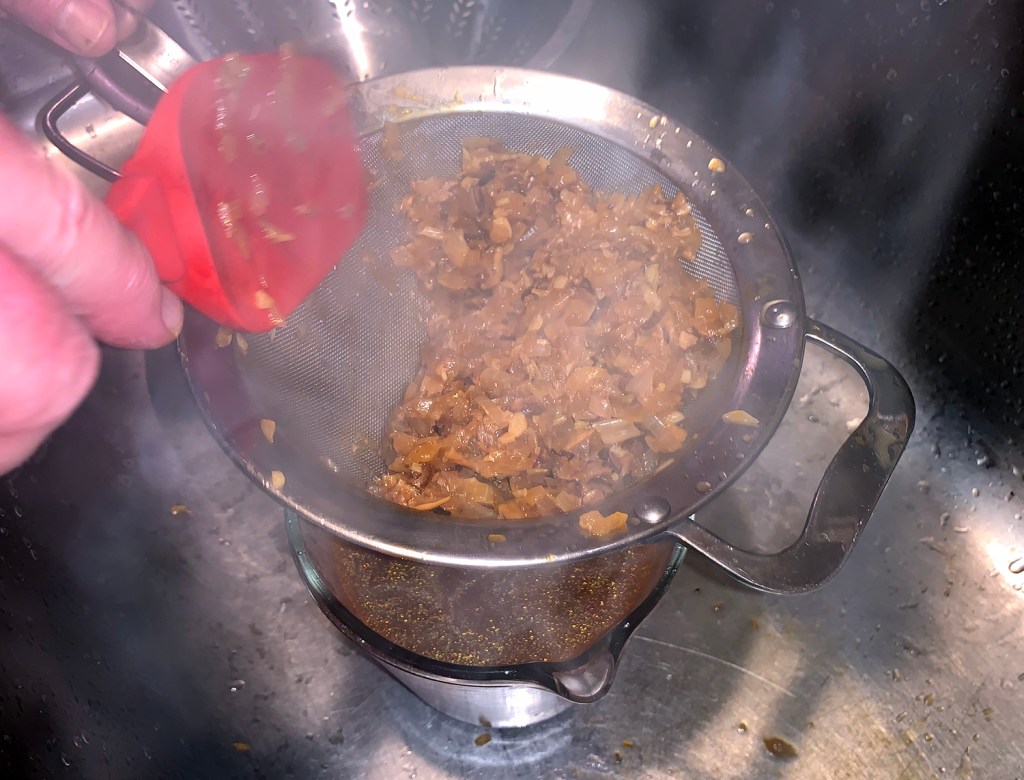
  1. Rehydrate porcini mushrooms by pouring 1 cup of boiling water over them in a heat-proof bowl. Let soak 15 minutes. Drain liquid into 1 cup measure, squeezing porcinis over container to remove all liquid. Strain through a very fine sieve to remove any grit from liquid, and set aside. (Add more water if necessary to equal 1 full cup.)
  2. In a medium saucepan, melt 2 tablespoons of the butter over medium heat.
  3. Add onion; cook, stirring occasionally, until softened but not browned, about 5 minutes.
  4. Add garlic; cook 1 minute more.
  5. Add tomato paste; cook, stirring until color deepens, about 2 minutes.
  6. Add sherry; bring to a boil. Reduce heat and simmer until reduced slightly, about 3 minutes.
  7. Add broth, strained mushroom liquid, rehydrated mushrooms and thyme sprigs; bring to a boil. Simmer 15 minutes.
  8. Strain again through a fine-mesh sieve into a bowl, pressing on solids (discard solids). Do not wash pan.
  9. Melt remaining 6 tablespoons butter in the same saucepan over medium heat. Add flour; cook, whisking, 1 to 2 minutes (don’t let flour brown).
  10. Add about 1/2 cup of the hot broth, whisking to blend. Add remaining broth a bit at a time, whisking until mixture is smooth. Season with pepper.

http://www.lynnandruss.com

Gravy source: MidwestLiving.com

Premium Pumpkin Bread

On a recent super-rainy, windy fall afternoon I made the comment that it would be a good day to bake bread. Russ immediately ran with that thought and mentioned he had just seen a pumpkin bread recipe from The New York Times.

“Yeah, but we don’t have any canned pumpkin,” was my reply. (When I was actually thinking more along the lines of a crusty whole grain loaf.) “I am capable of driving to the grocery store you know,” he bantered—and so he did just that.

But the only pumpkin purée The Hubs could find at the grocery store was a 29-ounce can which is almost double the amount required. We considered freezing the remainder, but then thought better of it and decided to make two loaves, and either freeze the second loaf or gift it.

We are both fans of pumpkin seeds and happened to have a bag of sprouted seeds on hand which I used as a topping. It is totally optional, but adds a nice little crunch to the velvety soft bread—the BEST pumpkin bread we’ve ever had, BTW.

Premium Pumpkin Bread

  • Servings: 1 loaf
  • Difficulty: easy
  • Print

Ingredients

  • ½ cup vegetable oil, plus more for greasing the pan
  • 2 ¼ cups all-purpose flour
  • 1 tsp. baking powder
  • 1 tsp. ground cinnamon
  • ¾ tsp. kosher salt
  • ½ tsp. baking soda
  • About 2 cups pumpkin purée or 1 (15-ounce) can
  • 1 cup granulated sugar
  • ¾ cup packed light or dark brown sugar
  • 2 large eggs
  • ¼ cup full-fat sour cream or plain yogurt
  • 1 ½ tsp. pure vanilla extract
  • Sprouted pumpkin seeds for topping (optional)

Directions

  1. Heat the oven to 350 degrees. Oil an 8 ½- or 9-inch loaf pan; line with parchment, leaving a 2-inch overhang on two sides.
  2. In a medium bowl, whisk together the flour, baking powder, cinnamon, salt and baking soda.
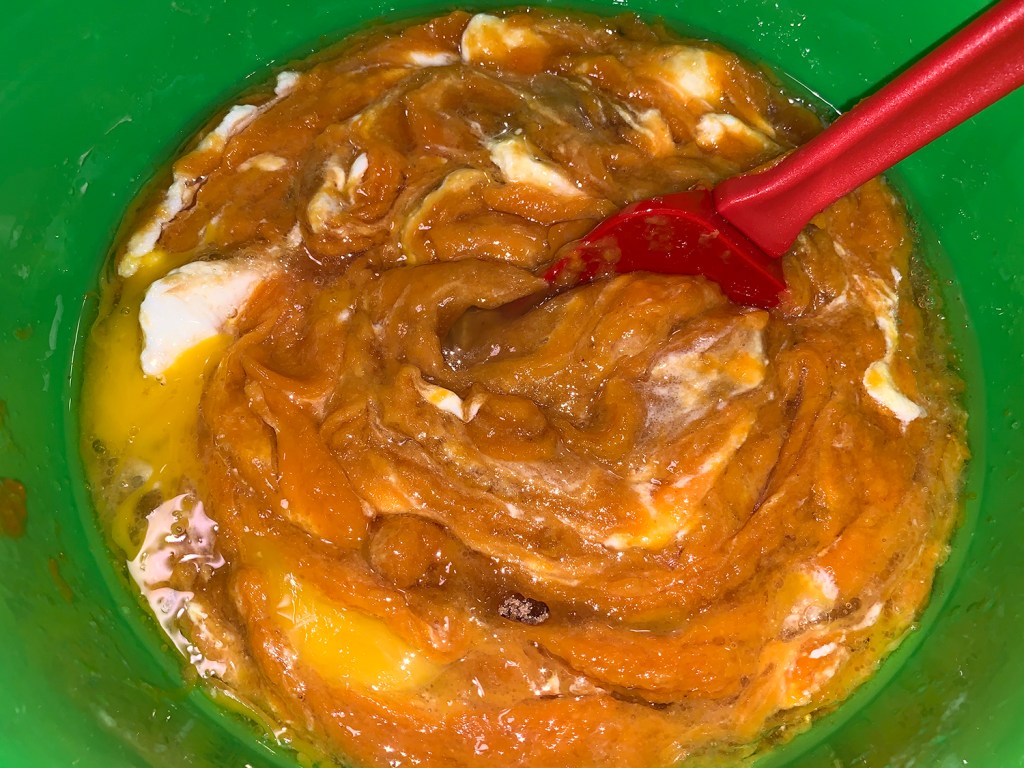
  3. In a large bowl, whisk together the vegetable oil, pumpkin purée, granulated sugar, brown sugar, eggs, sour cream and vanilla.
  4. Fold the dry ingredients into the wet ingredients until fully combined. Transfer the batter to the prepared pan and smooth into an even layer.
  5. Bake until the loaf is puffed and set, and a skewer inserted into the center comes out with moist crumbs attached, 60 to 75 minutes. (Ours took the full 75 min.)
  6. Transfer the bread, in the pan, to a rack to cool for 20 minutes.
  7. Use a paring knife to cut the two exposed sides of bread away from the pan, then use the parchment to transfer the cake to the rack. Let cool completely.

http://www.lynnandruss.com

Cast Iron Skillet Chicken

Let’s be honest, 2020 has been the most trying year overall—on so many levels. So when it comes to food, it makes sense to throw in a couple of comfort meals to soothe the soul and bring back memories of simpler times. One of my favorite comfort-inducing dinners is crispy-skinned roast chicken with homemade gravy, creamy mashed potatoes and a side veg.

And simple in the fact that you use just one pan, a large cast-iron skillet. The poultry, the vegetables and the gravy all do their magic in the same pan. Of course if you add some garlicky, creamy mashed potatoes, you’re on your own there. We had leftovers from another meal and just reheated them, making a perfect vehicle in which to ladle the gravy.

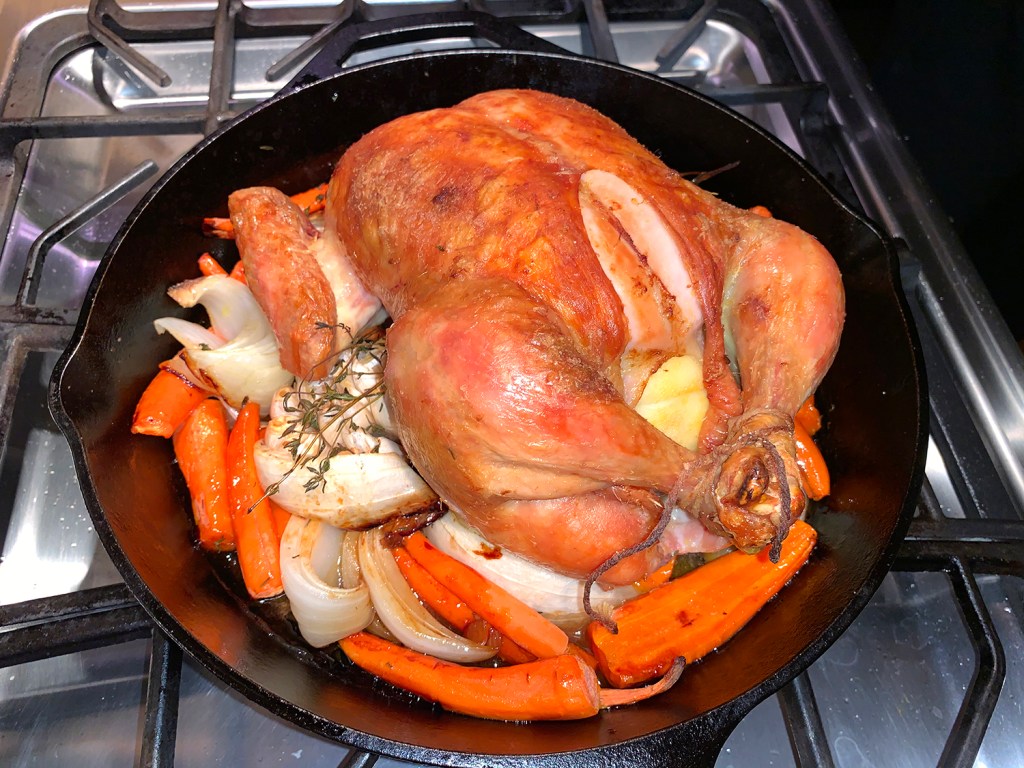
Not able to purchase a 5-pound chicken we went with the biggest we could get our hands on weighing in at just over 4 pounds. We thought the smaller size might mean less cooking time, but in the end, it took just as long as the recipe indicates for a 5-pounder: 1 hour, 25 minutes.

Don’t be afraid to season the chicken generously. Salt and pepper not only makes the chicken taste good; they help render the fat, yielding a crispy, crackly crust—and who doesn’t love that? Sprinkle salt and pepper inside and outside the chicken for the best flavor. And for even more flavor, stuff the chicken with aromatics such as citrus, garlic, and/or herbs.

Check the chicken temperature about one hour in, the bird probably won’t be done yet, but you can turn the onions and carrots so that they get moisture all over and won’t dry out.

The Hubs realized the proportion to make the roux was incorrect so we changed the amount of flour from one tablespoon to two. His formula for every one cup of liquid, you need one tablespoon of fat and one tablespoon of flour. Therefore with two cups of chicken broth, we needed two tablespoons each of fat and flour.

Oh and don’t toss the luscious onions and garlic. Simply serve the onions mixed with the carrots; then squeeze some of those roasted garlic cloves right into the gravy which will also help thicken the sauce and add a touch of comfort-food goodness. We even went so far as to squeeze some onto our plates and mash it around to drag the chicken through.

Next time we make this, I’m going to switch out the citrus and herbs for orange and rosemary.

Cast-Iron Skillet Chicken

  • Servings: 4
  • Difficulty: easy
  • Print

Ingredients

  • 1 Tbsp. lemon zest
  • Zested lemon cut in quarters for cavity
  • 3 tsp. kosher salt, divided
  • 1 (5-lb.) whole chicken, giblets removed
  • 1 (16-oz.) package carrots, peeled and cut into 5-inch pieces
  • 1 large sweet onion, root-end intact, cut into wedges
  • 1 head garlic, tips cut off, plus more cloves for cavity
  • 4 sprigs fresh thyme, plus more for cavity
  • 2 Tbsp. olive oil
  • 2 Tbsp. all-purpose flour
  • 2 cups chicken broth, preferably homemade
  • ½ tsp. ground black pepper
  • Garnish: fresh thyme sprigs

Directions

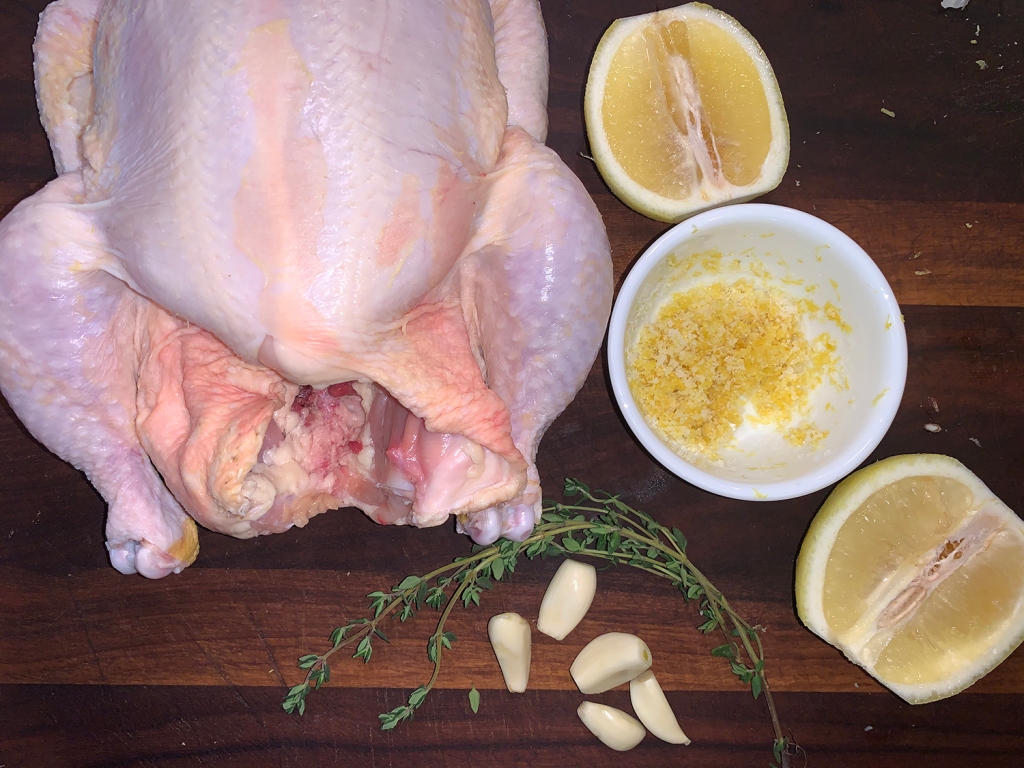
  1. In a small bowl, combine zest and 2 teaspoons salt. Pat chicken dry with paper towels. Gently loosen skin from chicken, keeping skin intact. Rub salt mixture under skin and all over chicken. Place lemon halves, thyme and a few extra garlic cloves inside chicken cavity. Tie legs with kitchen twine. Refrigerate overnight.
  2. Preheat oven to 425°. Let chicken stand at room temperature for 30 minutes.
  3. Place carrots, onion wedges, garlic head, and thyme in a 12-inch cast-iron skillet. Place chicken on top of vegetables. Rub chicken with oil, and sprinkle with remaining 1 teaspoon salt.
  4. Bake until a meat thermometer inserted in thickest portion registers 165°, about 1 hour and 25 minutes, covering with foil to prevent excess browning, if necessary. Let stand for 10 minutes.
  5. Remove chicken, carrots, onions and garlic from skillet; whisk in flour. Pour in broth, and cook over medium heat, whisking constantly, until thickened. Stir in pepper. Serve gravy with chicken. Garnish with thyme, if desired.

http://www.lynnandruss.com

Adapted from a recipe found on southerncastiron.com