Monthly Archives: April 2020

Upside-Down Chicken and Rice

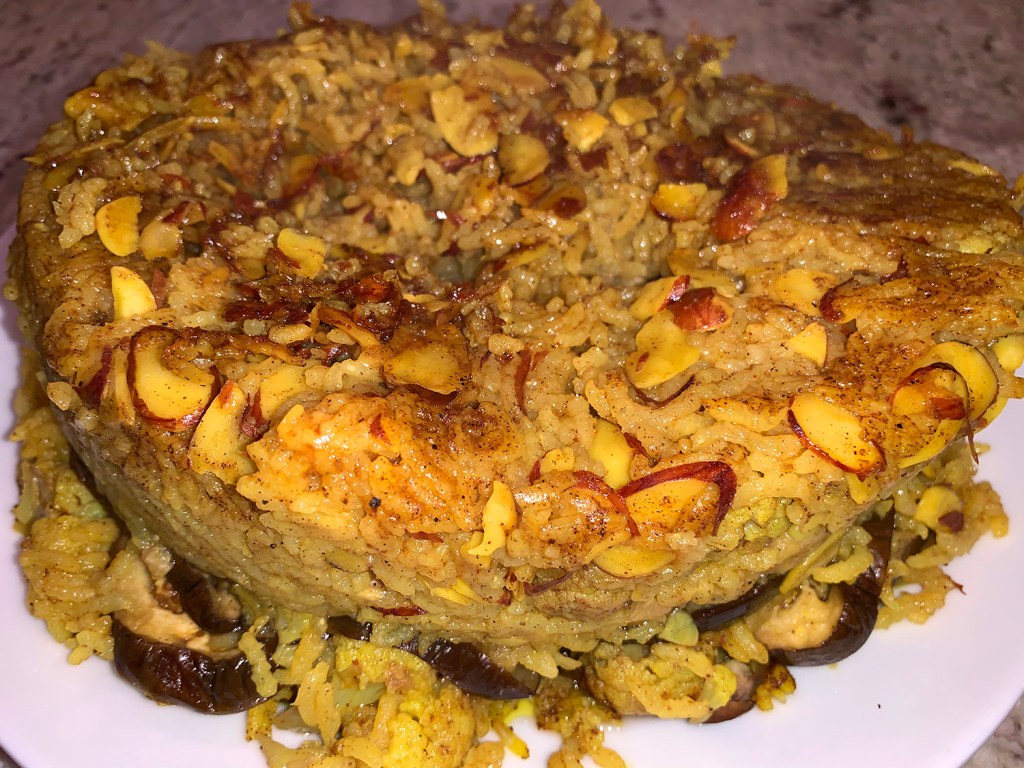
This Palestinian Upside-Down Chicken and Rice (Maqlubeh) was hands-down delicious! Typically a fan of white meat, if I do eat poultry dark meat, it’s usually the skinless, boneless thigh variety. Well this recipe uses thighs with the bones and skins intact, and was probably the best chicken thighs I’ve had in recent memory. Oh and that rice!!
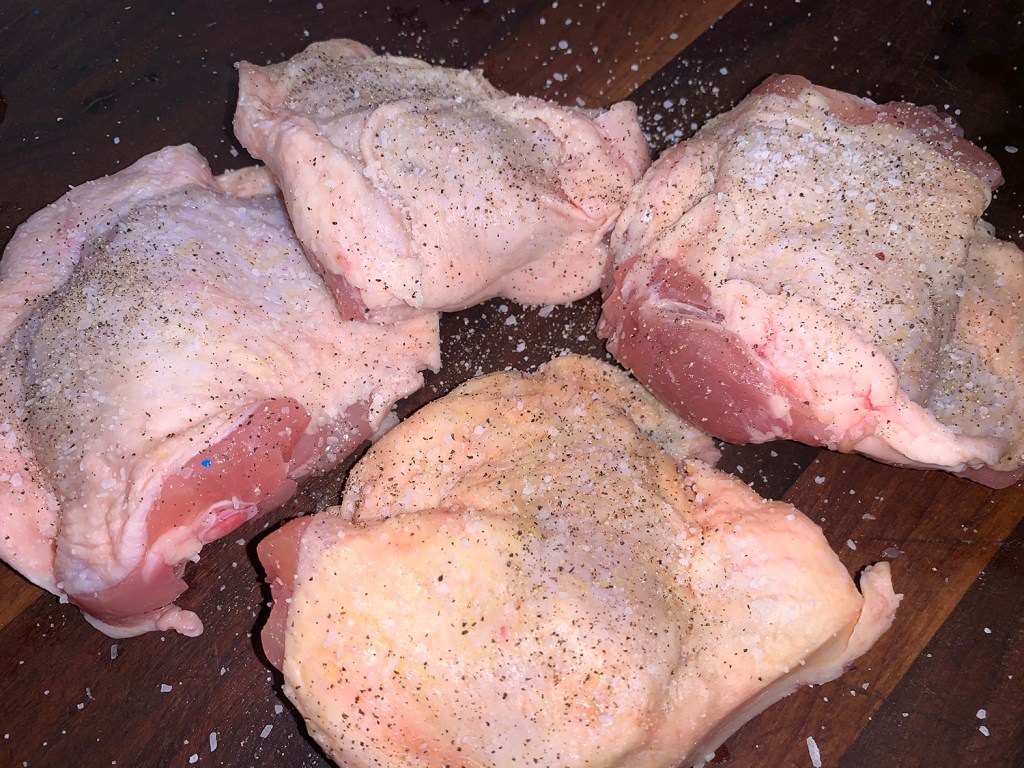
We decided (regrettably now) to make only half a recipe. What’s interesting about this however is the amount of poultry. 50% of 1 1/2 pounds of chicken would be 3/4 pounds right? Well, that equated to about 2 thighs, so I incorporated 4 pieces weighing in at over 1 pound, just enough for the two of us, but with lots of the rice mixture leftover (not that that was a bad thing).

Of course, a ton of flavor came from our homemade chicken stock; and the fact that I still used the full amount of garlic, because that’s just how we roll. The eggplant and cauliflower practically melt into the rice resulting in one harmonious mouthful!

Maqlubeh translates from the Arabic as “upside down,” which describes how this traditional multilayered rice dish is served. Though this streamlined recipe still requires a small investment in ingredients and prep, the work mostly is front-loaded and produces a one-pot dish impressive enough for a special occasion.

For proper cooking, it’s important to use a pot 9½ to 11 inches in diameter and 4 to 6 inches deep—which became another interesting dilemma for us. We were reducing the recipe by half in which case the author indicates to use a 6-7″ wide by 4 ” deep pot. Our pot of choice was 8″ wide (but we included more chicken, remember?), yet the handles rose higher than the sides of the pan which made inverting the mixture onto a platter at the end a little challenging to say the least.

Maqlubeh

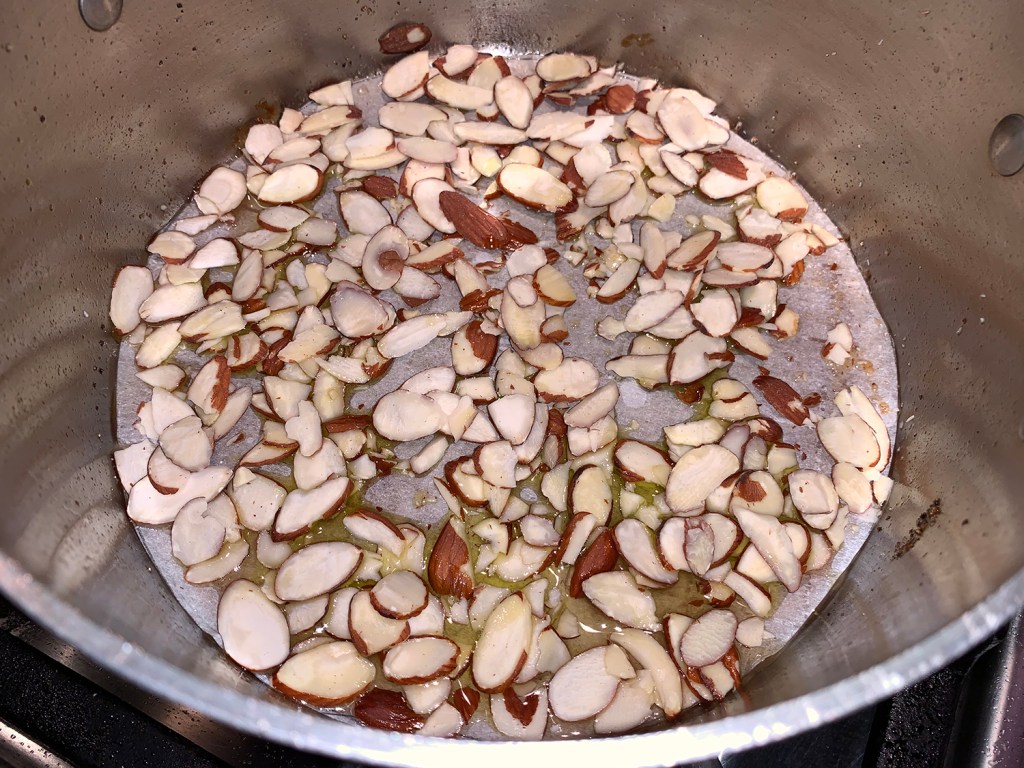
After searing and removing the chicken, you are instructed to line the bottom of the pot with a parchment round to guarantee that the rice forms a crisp, browned bottom layer, and does not stick when the pot is inverted for serving. Truth be told, as many other reviewers reported, our rice did not form a crisp, browned bottom layer. Can’t say I was too upset over that fact. I did garnish with a sprinkle of slivered almonds which provided a crunch factor.

The classic accompaniment for maqlubeh is a tomato, cucumber and yogurt salad.

Palestinian Upside-Down Chicken and Rice

  • Servings: 6-8
  • Difficulty: easy
  • Print

Ingredients

  • 2 Cups basmati rice
  • Kosher salt and ground black pepper
  • 1½ Lbs. bone-in, skin-on chicken thighs, trimmed
  • 4 Tbsp. extra-virgin olive oil, divided
  • ⅓ Cup slivered almonds
  • 8 Oz. cauliflower florets (1-inch pieces)
  • 8 Medium garlic cloves, chopped
  • 4 Tbsp. (½ stick) salted butter, melted
  • 4 tsp. ground cumin
  • 1 Tbsp. ground allspice
  • 2 tsp. ground turmeric
  • 1 tsp. grated nutmeg
  • ½ Medium eggplant (about 8 ounces), sliced into ¼-inch-thick rounds
  • 1 Qt. low-sodium chicken broth

Directions

  1. In a large bowl, combine the rice and 2 tablespoons salt. Add water to cover by 1 inch, then set aside. Have ready a lidded pot that measures 9½ to 11 inches in diameter and 4 to 6 inches deep. Cut 2 rounds of kitchen parchment the size of the pot.
  2. Season the chicken all over with salt and pepper. Set the pot over medium and heat 1 tablespoon of the oil until shimmering. Add the chicken skin down and cook until browned, about 10 minutes. Transfer to a plate and set aside. Remove the pot from heat. Place 1 parchment round on the bottom, then turn to coat it with fat.
  3. Add the remaining 3 tablespoons oil to the parchment-lined pot, then sprinkle evenly with the almonds. Drain the rice in a fine mesh strainer, then rinse under cool running water and drain again.
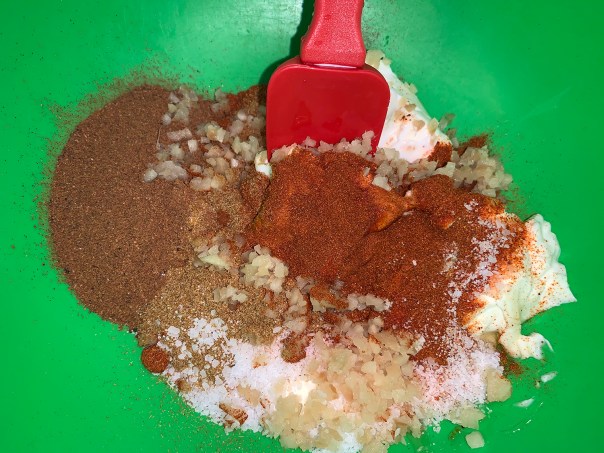
  4. Scatter 1 cup of the rice in a thin, even layer over the almonds. In a medium bowl, mix together the remaining rice with the cauliflower, garlic, butter, cumin, allspice, turmeric, nutmeg and 1¾ teaspoons each salt and pepper.
  5. Reserve ½ cup of this mixture, then distribute the remainder in an even layer in the pot.
  6. Place the chicken in the pot, slightly nestling the pieces into the rice-cauliflower layer; discard any accumulated juices. Shingle the eggplant slices over the chicken in an even layer. Sprinkle with the reserved ½ cup rice mixture.
  7. Pour the broth into the pot (it will not fully cover the eggplant), then bring to a boil over medium-high. Set the second parchment round over the food, then cover the pot with the lid. Cook for 5 minutes, reduce to low and cook, undisturbed, for 35 minutes.
  8. Remove the pot from the heat, uncover and let stand for 15 minutes. Remove the parchment, then invert a serving platter onto the pot.
  9. Holding the platter against the pot, carefully invert the two together; leave the pot overturned on the platter and let rest for about 10 minutes. Slowly lift off the pot and, if needed, remove and discard the parchment.

Tip: Don’t forget to soak and rinse the rice. This helps the grains cook up light and separate.

http://www.lynnandruss.com

Adapted from a recipe by Courtney Hill from Milk Street

Chicken Sausage and Noddle Casserole

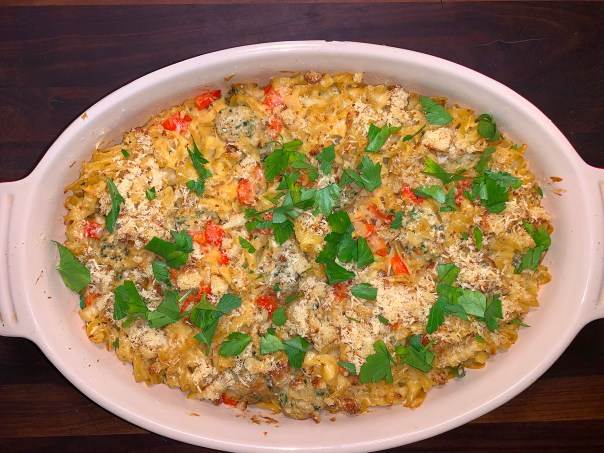
This sausage and noodle casserole is an excellent choice for an everyday weeknight meal with a bit of nostalgia thrown in. With no more than 15 minutes prep time, you’ll have a satisfying family dinner in under an hour. It’s a tasty one-pot meal to serve with steamed vegetables or a salad—our choice. To beef it up even more, include dinner rolls or buttermilk biscuits.

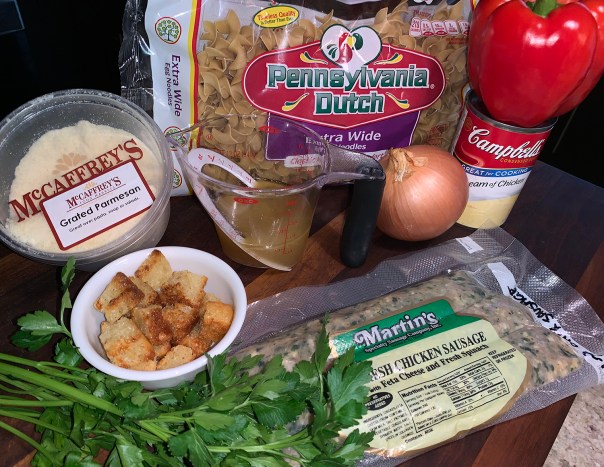
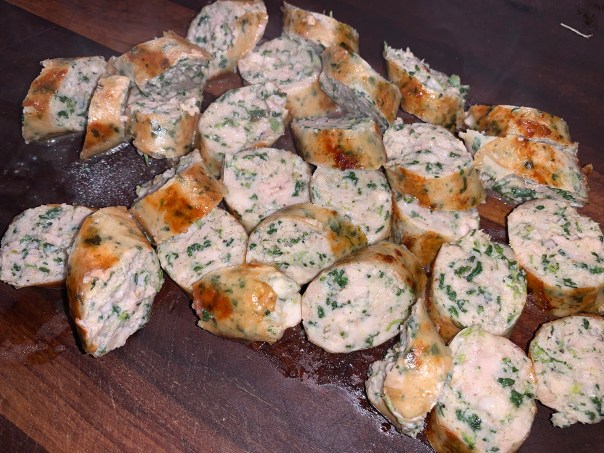
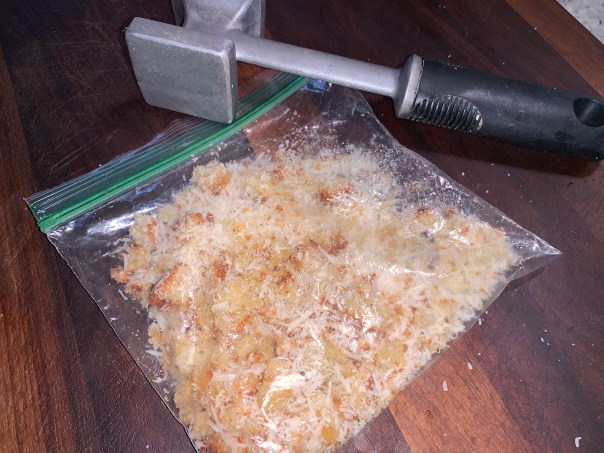
The recipe was predicated on the fact that I wanted to use up a package of Martin’s brand fresh chicken sausages with feta and fresh spinach. So a comfort-food casserole came to mind. And for the crisp crumbly topping, I combined homemade focaccia croutons with some grated parmesan.

Decades ago using Campbell’s Cream-of-whatever soup was a mainstay for many home chefs. My favorite used to be the Golden Cream of Mushroom. Somehow this casserole called out for one of those soups, so I selected the Cream of Chicken (another option would be Cream of Broccoli). And instead of combining it with water, you know my mantra “use homemade stock” if at all possible.

We absolutely loved it! The leftovers didn’t least long…

Chicken Sausage and Noodle Casserole

  • Servings: 4-6
  • Difficulty: easy
  • Print

Ingredients

  • 8 ounces egg noodles
  • 3, 8″ chicken sausage links
  • 1 large onion, chopped
  • 1 red bell pepper, chopped
  • 1, 10 3/4-oz. can cream of chicken soup
  • 1/2 cup chicken stock, preferably homemade
  • 1/4 teaspoon salt, or more to taste
  • Freshly ground black pepper to taste
  • 1/2 to 1 cup croutons, crumbled
  • 1/4 cup grated parmesan cheese
  • Fresh Parsley, chopped as garnish

Directions

  1. Gather the ingredients.
  2. Heat the oven to 350 F. Lightly butter a shallow 3-quart baking dish or spray it with cooking oil spray.
  3. Cook the noodles in a saucepan of boiling salted water following the package directions.
  4. Drain in a colander and set aside.
  5. Place the sausage links into a large skillet and cook until browned on both sides, about 10 minutes, flipping several times until browned all over. Remove from pan and cut 1/2-inch slices at a diagonal.
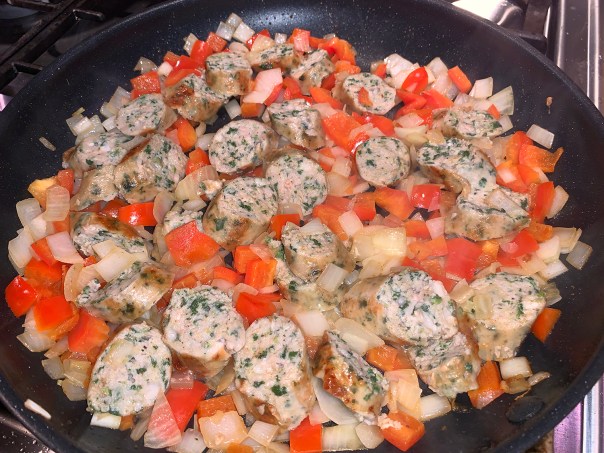
  6. Add the chopped onion and red bell pepper to now empty skillet. 
  7. Place the skillet over medium heat and cook, stirring, until the vegetables are tender, about 5-6 minutes. Drain off excess drippings, if any. Return sausage slices to pan and heat for 1 minute.
  8. In a large bowl, combine the sausage/vegetable mixture with the cream of chicken soup, broth, and cooked noodles. Taste and add salt and pepper, as needed.
  9. Spoon the mixture into the prepared baking dish. Sprinkle with crumbled crouton/cheese combination.
  10. Bake in the preheated oven for about 35 minutes, or until hot and bubbly.
  11. Remove from oven and let sit for 5 minutes. Sprinkle with chopped parsley before serving.

http://www.lynnandruss.com

Lentil and Spinach Soup with Roasted Peppers

This hearty, meat-free soup gets loads of flavor from shallots, cumin, smoked paprika and roasted red peppers. If you’d like to make it vegetarian/vegan, substitute vegetable broth for the chicken broth. If the finished soup is too thick for your taste, thin it with water or additional broth. Serve with hunks of warm crusty bread.

NOTE: Don’t use lentils du Puy for this soup; they hold their shape and remain too firm. Regular green lentils, on the other hand, will soften to a silky texture that lends body to the broth.

Lentil and Spinach Soup with Roasted Peppers

  • Servings: 4-5
  • Difficulty: easy
  • Print

Ingredients

  • ¼ cup extra-virgin olive oil, plus more to serve
  • 4 medium shallots, halved and thinly sliced
  • 1 Tbsp. ground cumin
  • 1 tsp. smoked paprika
  • 2 bay leaves
  • Kosher salt and ground black pepper
  • 1 cup green lentils
  • 1 cup drained roasted red peppers, chopped
  • 1½ qts. low-sodium chicken broth
  • 5 oz. container baby spinach

Directions

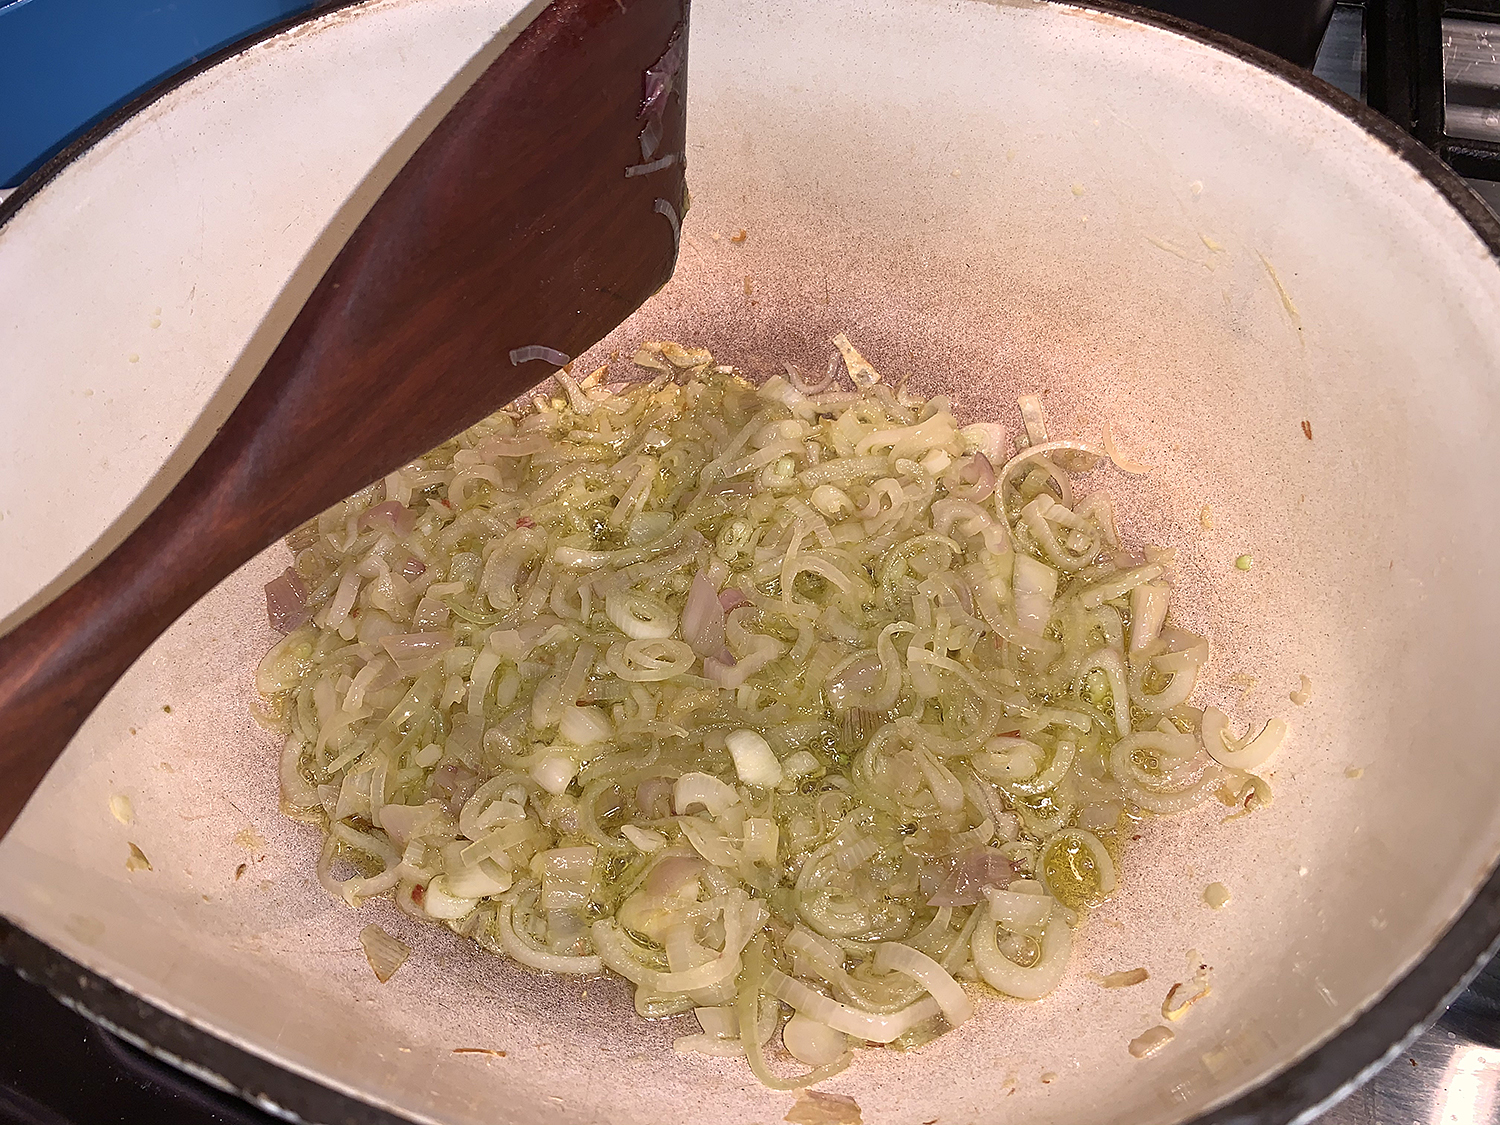
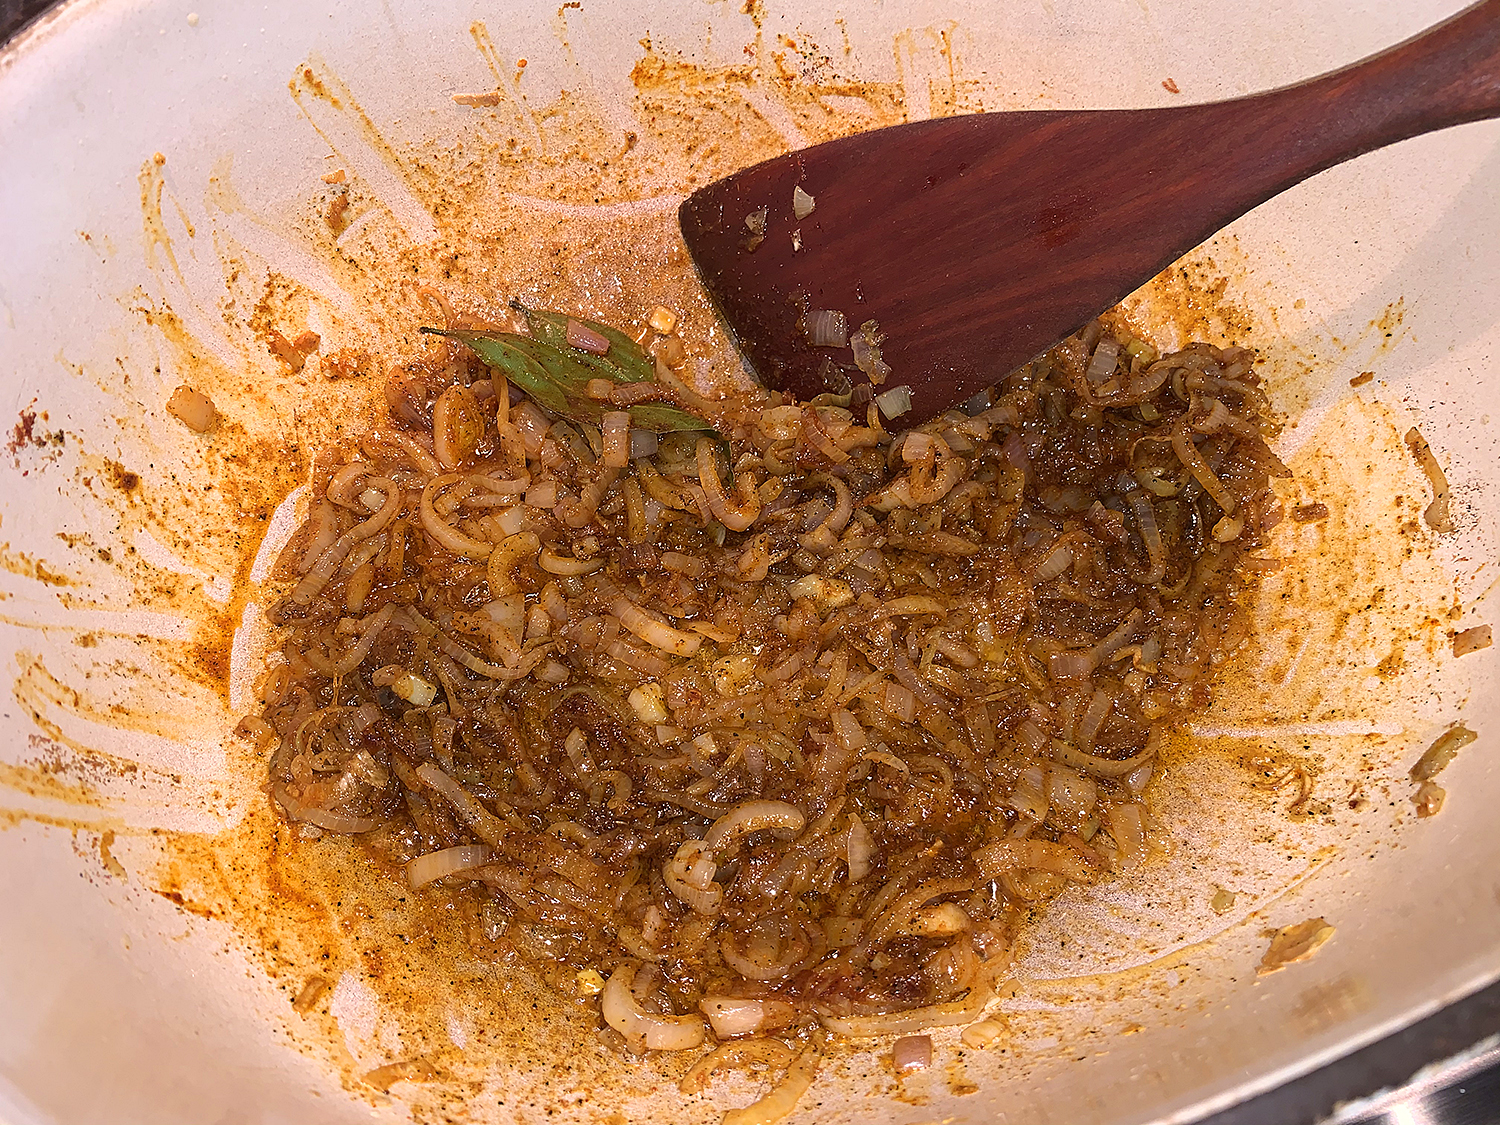
  1. In a large saucepan over medium-high, heat the oil until shimmering. Add the shallots and cook, stirring occasionally, until softened, about 5 minutes.
    IMG_4527
  2. Add the cumin, paprika, bay leaves and 1 teaspoon pepper, then cook, stirring, until fragrant, about 30 seconds.
    IMG_4528
  3. Add the lentils, roasted peppers and broth, then bring to a boil. Cover, reduce to low and cook, stirring occasionally, until the lentils are softened and just beginning to fall apart, about 35 minutes.
  4. Remove and discard the bay, then add the spinach and stir until wilted.
  5. Taste and season with salt and pepper. Serve drizzled with additional oil.
    IMG_4544

http://www.lynnandruss.com

Recipe by Rebecca Richmond from Milk Street

Garlicky Spiced Chicken and Potato Traybake with Pomegranate Molasses

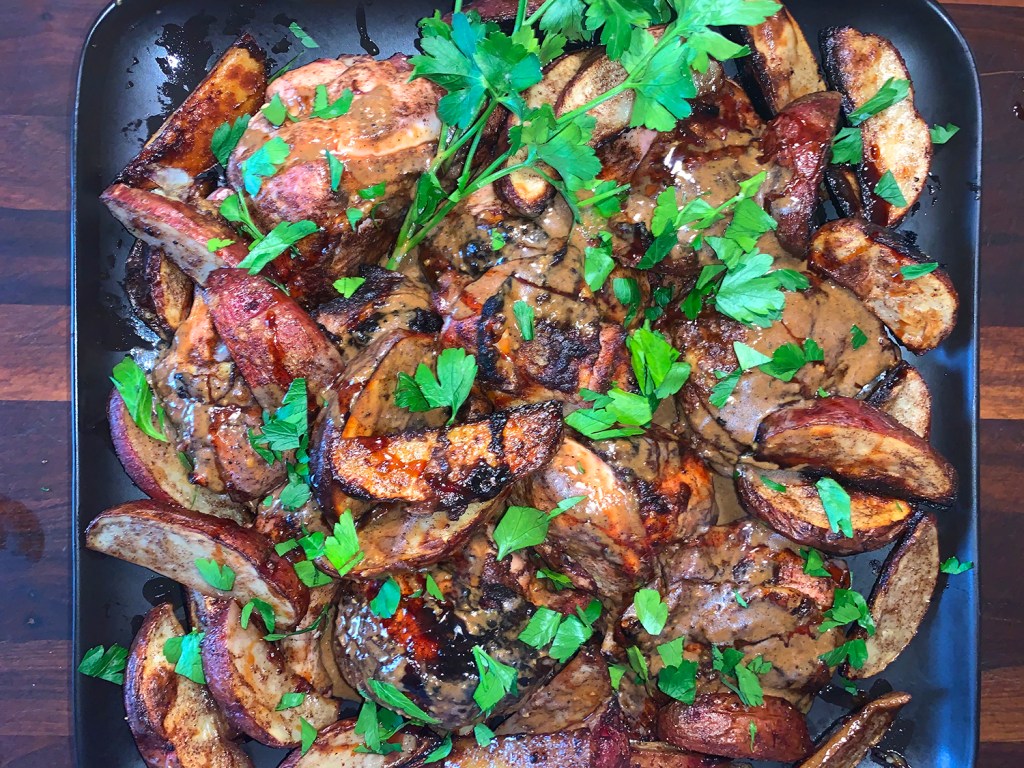
Most home chefs I know love a good traybake. They’re easy, typically don’t require much prep, and all of the ingredients go on one baking sheet. Plus it’s pretty much hands off until the cooking is done. And unless you don’t eat poultry, there’s not many folks I know that don’t appreciate a good roast chicken and potato dinner. Trust me on this one.

Found in our latest edition of Milk Street Magazine, this meal-in-one is an adaptation of a recipe in “The Palestinian Table” by Reem Kassis. In lieu of seasoning the chicken and potatoes with the Kassis family’s nine-spice blend, they make a simpler mixture from a few select ground spices.

And to make a simple but flavorful sauce, roast a handful of garlic cloves with the chicken and potatoes, then mash the softened cloves with pan drippings and deglaze with water (or homemade chicken stock).

Dark, syrupy pomegranate molasses, which we’ve been using a lot lately, has a fruity, floral, tart-sweet taste that complements the fragrant spices, as well as the caramelization that results from roasting. It was easy enough to find the molasses in the international aisle of our supermarket. You could also try a Middle Eastern grocery store, or online. (If not available, substitute with 1 teaspoon each lemon juice and honey in the seasoning mixture and serve with lemon wedges.)

Don’t use boneless, skinless chicken parts, as they will overcook. Also, make sure to put the garlic cloves at the center of the baking sheet, where they’re protected from the oven’s high heat, so they don’t wind up scorched.

You’ll notice we made two trays full. One, because I had five pounds of chicken pieces to use up, plus we wanted leftovers for another meal. Because we LOVE garlic, I increased the amount substantially. But in the end, the garlic was not quite as soft as anticipated so we used an immersion blender, doubling the amount of liquid, (using our homemade chicken broth instead of water) to make the sauce. Dang glad we did, because everything was delicious!

It didn’t mention to, but you should turn the potato wedges halfway through the cooking time. Ours got a bit too charred so I made a notation in the directions below as a reminder.

Garlicky Chicken and Potato Traybake with Pomegranate Molasses

  • Servings: 4
  • Difficulty: easy
  • Print

Ingredients

  • ¼ Cup extra-virgin olive oil
  • 2 tsp. pomegranate molasses (see note), plus more to serve
  • 1 Tbsp. ground allspice
  • 1 tsp. ground coriander
  • ¾ tsp. ground cinnamon
  • ⅛ tsp. ground cardamom Kosher salt and ground black pepper
  • 3 Lbs. bone-in, skin-on chicken parts, trimmed and patted dry
  • 1½ Lbs. medium to large red potatoes, unpeeled, cut into 1½-inch-thick wedges
  • 8 Medium garlic cloves, peeled (more to preference)
  • Fresh flat-leaf parsley, to serve

Directions

  1. In a large bowl, stir together the oil, molasses, allspice, coriander, cinnamon, cardamom, 4 teaspoons salt and ¼ teaspoon pepper. Add the chicken and potatoes, then toss to coat. Set aside at room temperature while the oven heats.
  2. Heat the oven to 450°F with a rack in the middle position.
  3. Place the garlic cloves in the center of a rimmed baking sheet. Arrange the chicken parts, skin up, around the garlic; this prevents the garlic from scorching during roasting.
  4. Arrange the potatoes evenly around the chicken. Roast until the thickest part of the breast (if using) reaches about 160°F and the thickest part of the largest thigh/leg (if using) reaches about 175°F, 30 to 40 minutes. (It’s a very hot oven, so check the temperature after 25 minutes.)
  5. Halfway through (about 15 minutes), turn the potato wedges so that they get equally crisp on both sides and not overly charred on one side.
  6. Using tongs, transfer the chicken and potatoes to a platter, leaving the garlic on the baking sheet. With a fork, mash the garlic until relatively smooth.
  7. Carefully pour ¼ cup water (we doubled the amount of liquid using homemade stock) onto the baking sheet, then use a wooden spoon to scrape up the browned bits. Taste the sauce and season with salt and pepper, then pour over the chicken and potatoes. (Like us, you may want to use an immersion blender to make a more unified sauce.)
  8. Drizzle with additional pomegranate molasses and sprinkle with parsley.

http://www.lynnandruss.com

Adaptation of a recipe in “The Palestinian Table” by Reem Kassis

Elevate That Lowly Can of Tuna

Running out of meal ideas and tired of spending time in the kitchen? As I was penning this post, the worst week (so far) of the coronavirus pandemic was in full bloom, with dire warnings to stay at home if at all possible. With consternation about navigating the perils of the grocery store, we took preventative measures and revamped our weekly meal plan around the food we already had in stock and did an inventory on what our cupboards were harboring. Aha, a couple of large cans of tuna!

Take that can of tuna—(no, don’t shove it anywhere)—and raise it up a couple of notches. Here, pesto, olive, and artichokes turn a simple tuna salad mixture into a delightful surprise. You could even develop it into a tuna melt sandwich with the addition of your cheese of choice on top. Whatever floats your boat, amigo.

In fact, the very next day for lunch using the leftover mixture, I made an open-faced, toasted Ezekiel bread sandwich with melted cheddar.

Of course, these amounts are flexible. Adjust the quantity to suit your own preferences, or what you may have on hand. Perhaps you have green olives instead of black kalamatas? No pesto? Create your own version with fresh herbs, nuts and olive oil and some grated parm.

TIP: For future use, harvest fresh basil from your garden or local farmer’s market during the summer months. Wash, dry and blend with a good olive oil. Pack into silicon ice cube trays and freeze until solid. Store cubes in a freezer ziploc until ready to use in individual servings for soups, pastas, dips, etc.

Once plated over a bed of greens, tomatoes and carrots strips, drizzle your favorite dressing over the greens. I personally didn’t feel it needed anything more, but The Mr. dressed his greens with a homemade salad dressing. Alas, we forgot to top with some garlicky croutons we made the night before from leftover focaccia bead… There’s always tomorrow’s salad…

Pesto, Olive and Artichoke Tuna Salad

  • Servings: 2 1/2 dozen
  • Difficulty: easy
  • Print

Ingredients

  • 1/2 cup chopped artichoke hearts
  • 3 Tbsp. homemade or store bought pesto
  • 2 Tbsp. olive oil
  • 2 doz. pitted kalamata olives, roughly chopped
  • 1 12-oz. can tuna, drained
  • Kosher salt and freshly ground black pepper, to taste
  • Greens, tomato wedges and carrot strips
  • Optional: sliced and toasted bread of your choice, for serving
Once combined, the mixture can be covered and refrigerated until ready to use.

Directions

  1. In a medium bowl, mix together the artichoke hearts, pesto, olive oil, olives, and tuna.
  2. Season with salt and pepper to taste.
  3. Also add some greens, or even a few slices of tomato.
  4. Heck, turn it into a tuna melt and add some provolone over the top. You do you.

http://www.lynnandruss.com

Adapted by a recipe from Farideh Sadeghin

Salted Double-Chocolate Olive Oil Cookies

As you are all too aware by now, one has to get creative in how to pass time constructively during this stay-at-home lockdown period. So I decided to treat us to something decadent like these Salted Double-Chocolate Olive Oil Cookies. The Hubster, an olive oil fanatic, actually discovered this recipe online weeks ago and it was the perfect foil to pass some time over the weekend.

They were inspired by a recipe for Olive Oil and Sea Salt Brownie Cookies that Phyllis Grant found all over the Internet. She traced it back to Ashton Epps Swank from the blog Something Swanky. Phyllis removed the brownie component by taking out the baking soda and one egg. Less sugar, flour, and cocoa were included; but more salt and vanilla were added. Then Phyllis snuck in a bit of butter (because even though these are olive oil cookies, she claims butter makes everything better). Who’s going to disagree?

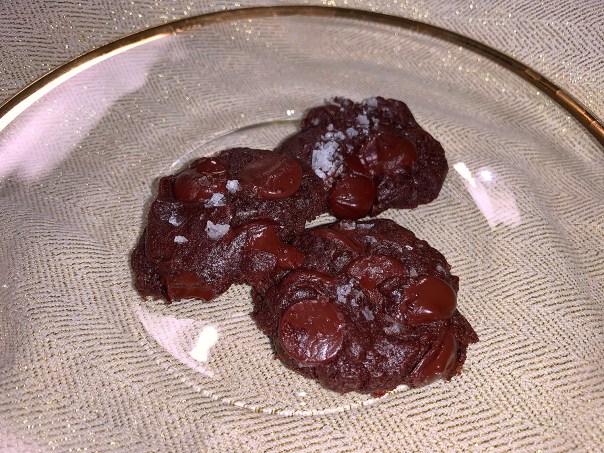
Fudgy Goodness!

Once upon a time, salt was just salt. Not so in this case. It’s important that you use Maldon Sea Salt as the topping. Maldon is, first, a place—a town in the county Essex on the River Blackwater, an estuary in the east of England. As for the ingredient, it is loved by chefs and shoppers the world over because the soft flaky texture of the sea salt crystals and the cleanness of the salt flavor they deliver make all the difference.

As for the taste, Maldon is considered less bitter, less salty than other salts. There’s a quick savory zing that doesn’t overpower or overstay, it’s almost sweet. Plus, it’s a good finishing salt on almost anything—I use it nearly everyday. Many grocers do not carry it, but you can order it online pretty easily.

And to make sure the cookies were the best, I used and entire 10-ounce bag of the large Ghirardelli premium baking bittersweet chips. End result? They were friggin’ amazing and some of the richest and most flavorful chocolate nuggets we’d ever eaten! After one bite, Hubby labeled them “little chocolate bombs.” I dare you to eat just one…

Use an olive oil that is mild and affordable. Save your fancy herbaceous olive oil for drizzling.

—Phyllis Grant

Salted Double-Chocolate Olive Oil Cookies

  • Servings: 2 1/2 dozen
  • Difficulty: easy
  • Print

Ingredients

  • 2/3 cup non-alkalized unsweetened cocoa
  • 2/3 all-purpose flour
  • 1 teaspoon kosher salt
  • 1/2 cup extra-virgin olive oil (mild)
  • 2 tablespoons salted butter, room temperature
  • 1/2 cup white sugar
  • 1/4 cup dark or light brown sugar
  • egg, room temperature
  • 1 tablespoon vanilla extract
  • 10 oz. bittersweet chocolate chips
  • 1 tablespoon Maldon sea salt (to sprinkle on top before baking)

Directions

  1. Sift together the cocoa, flour, and salt. Sift again. Set aside.
  2. In a standing mixer (or by hand) beat the sugars, olive oil, and butter on high speed for 2 minutes. Scrape down the sides.
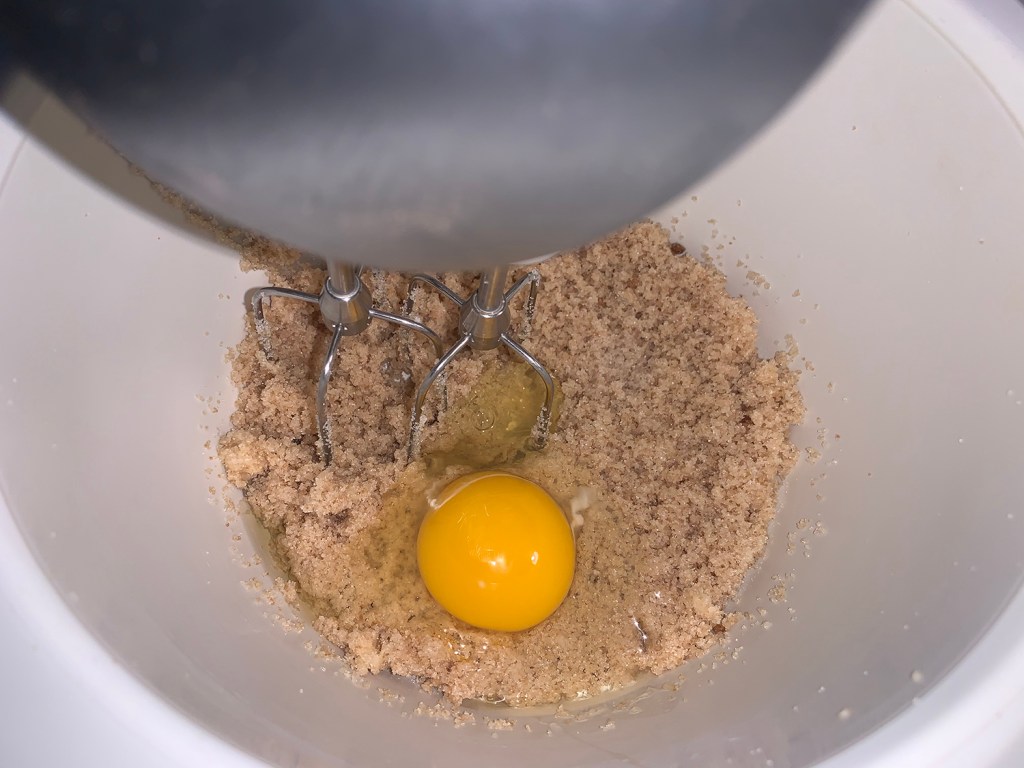
  3. Add your egg. Beat at medium speed for 8 seconds. Scrape down the sides.
  4. Add your vanilla extract. Beat on medium speed for 5 seconds. Scrape down the sides.
  5. Add 1/3 of the dry ingredients and beat for 8 seconds on low speed. Scrape down the sides. Add the second 1/3 of the dries, beat for 8 seconds on low. Scrape down the sides. Add your final 1/3 of the dries, beat on low for 5 seconds.
  6. Add the chocolate chips and stir with wooden spoon until incorporated. If there are any pockets of flour remaining, mix them in by hand. Refrigerate the dough for about an hour (it will be easier to handle).
  7. Heat the oven to 350° F.
  8. Line a sheet pan with parchment or a Silpat. Scoop the dough into half spheres. Or you can scoop with a spoon and quickly roll with your hands. They will spread a bit so leave a few inches between the cookies.
  9. Sprinkle each cookie with sea salt (amount is up to you). Bake them for 4 minutes. Spin the tray around 180 degrees (to cook evenly) and bake for another 3 to 4 minutes. You want the centers to still be glistening. Don’t worry—they will firm up quite a bit as they cool. (I must admit, I was very concerned with this, but after a few hours, they did indeed get firm.)
  10. Remove from the oven and allow them to cool on the sheet pan for at least 15 minutes.
  11. Being very careful, remove them to a cooling rack for at least an hour to firm up.
  12. Eat right away, or store in an air tight container. You could also freeze for a few months.

http://www.lynnandruss.com

Classic Butter Chicken—Minus Most of the Butter

Here’s a great Butter Chicken recipe that uses very little butter but actually makes a creamier chicken. How’s that? Boneless chicken thighs are briefly marinated in yogurt and spices, then broiled until lightly charred. You will then make a separate sauce into which the chicken is stirred.

As you know, in many recipes for butter chicken, copious amounts of butter and heavy cream supply richness, but with this recipe, as in India, cashews are pureed with a small amount of water until smooth. The nut puree adds creaminess without making the dish heavy. Brilliant!

Butter Chicken

We were shy almost 1 tablespoon of garam masala, and at our previous grocery shopping attempt, they weren’t carrying any. I decided to go ahead with the lesser amount because there were so many other flavor ingredients, I didn’t think it would be missed (it wasn’t). There are online recipes to make the spice yourself, if you are interested, but it’s best made from toasted seeds.

Don’t scrape the marinade off the chicken before broiling. The yogurt and honey help the chicken brown and char under the broiler. Serve this with steamed basmati rice for soaking up the sauce—and it makes a LOT of sauce.

Classic Butter Chicken (with little dairy)

  • Servings: 4-6
  • Difficulty: easy
  • Print

Ingredients

  • 1 cup plain whole-milk yogurt
  • 2 Tbsp. honey
  • 1 Tbsp. sweet paprika
  • ½ teaspoon cayenne pepper
  • 4 Tbsp. garam masala, divided
  • 2 Tbsp. ground cumin, divided
  • 2 Tbsp. finely grated fresh ginger, divided
  • Kosher salt and ground black pepper
  • 2½ lbs. boneless, skinless chicken thighs, cut crosswise into 3 strips
  • 1 cup roasted salted cashews
  • 4 Tbsp. (½ stick) salted butter, cut into 2 pieces, divided
  • 1 large yellow onion, finely chopped
  • 6 medium garlic cloves, finely grated
  • 28 oz. can crushed tomatoes
  • ¼ cup finely chopped fresh cilantro
  • 2 Tbsp. lime juice

Directions

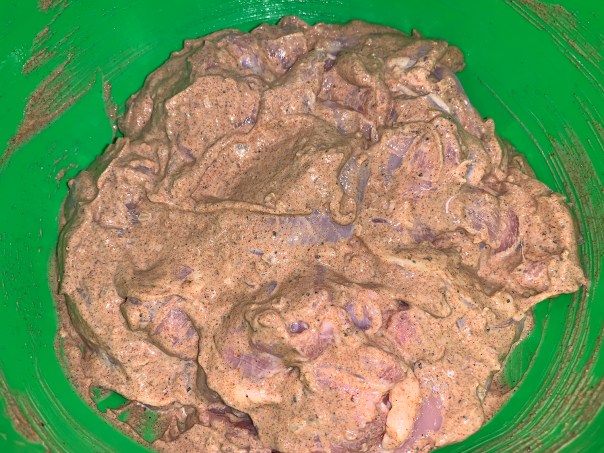
  1. In a large bowl, whisk together the yogurt, honey, paprika, cayenne, 3 tablespoons garam masala, 1 tablespoon cumin, 1 tablespoon ginger and 2 teaspoons salt.
  2. Add the chicken and stir until evenly coated. Cover and refrigerate for at least 30 minutes or for up to 1 hour.
  3. Heat the broiler with a rack about 6 inches from the broiler element. Line a rimmed baking sheet with foil, set a wire rack in the baking sheet and mist it with cooking spray.
  4. In a blender, puree the cashews with ¾ cup water until smooth, about 1 minute; set aside.
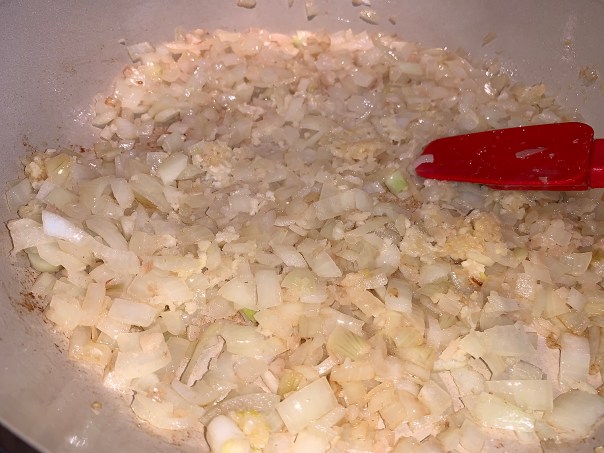
  5. In a large Dutch oven over medium, melt 2 tablespoons of butter. Add the onion and cook, stirring occasionally, until beginning to brown, about 5 minutes. Stir in the remaining 1 tablespoon ginger and the garlic, then cook until fragrant, about 30 seconds.
  6. Stir in the remaining 1 tablespoon garam masala and the remaining 1 tablespoon cumin. Add the cashew puree and cook, stirring constantly, until the mixture begins to brown, about 3 minutes.
  7. Stir in the tomatoes and 2 cups water, scraping up any browned bits. Add the remaining 2 tablespoons butter and bring to a simmer, stirring to combine. Reduce to medium and cook, stirring often, until the sauce is thick enough to heavily coat a spoon, 12 to14 minutes.
  8. Taste and season with salt and pepper. Remove from the heat and cover to keep warm.
  9. Arrange the chicken with its marinade still clinging to it in an even layer on the prepared rack. Broil until well browned and lightly charred on both sides, 15 to 20 minutes, flipping the pieces once about halfway through.
  10. Transfer to the sauce, bring to a simmer over medium and cook, stirring occasionally, until a skewer inserted into the chicken meets no resistance, about 10 minutes.
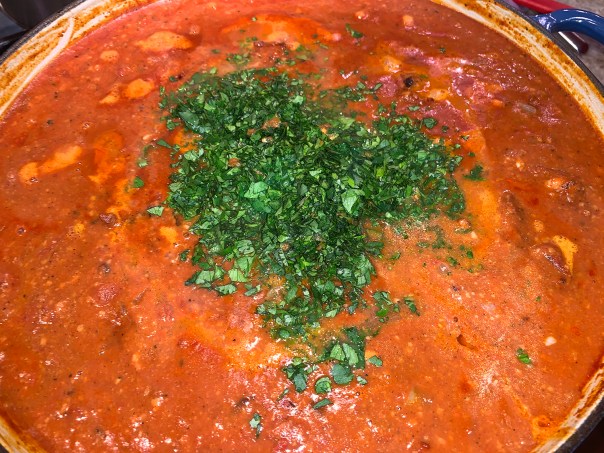
  11. Off heat, stir in the cilantro and lime juice, then let stand for 5 minutes. Taste and season with salt and pepper.

http://www.lynnandruss.com

Adapted from a recipe by Diane Unger from Milk Street

Potato, Fennel and Leek Gratin—To Die For!

As promised when I posted our Easter Sunday braised lamb dinner, here’s the recipe for that luscious and so-decadent potato gratin side dish by Molly Stevens. The original recipe indicated it would serve 12, however with just the two of us (COVID-19 lockdown was still in effect), we halved the amount and still ended up with enough to feed eight.

Here’s where we went rogue. First of all, when we did the grocery shopping, there was no heavy cream to be had, so we bought light cream. You can create a substitute by adding butter, but with all of the cheese, I didn’t want to contribute even more calories and fat. In the end, the light cream worked out just fine since the starch from the potatoes naturally thickens it.

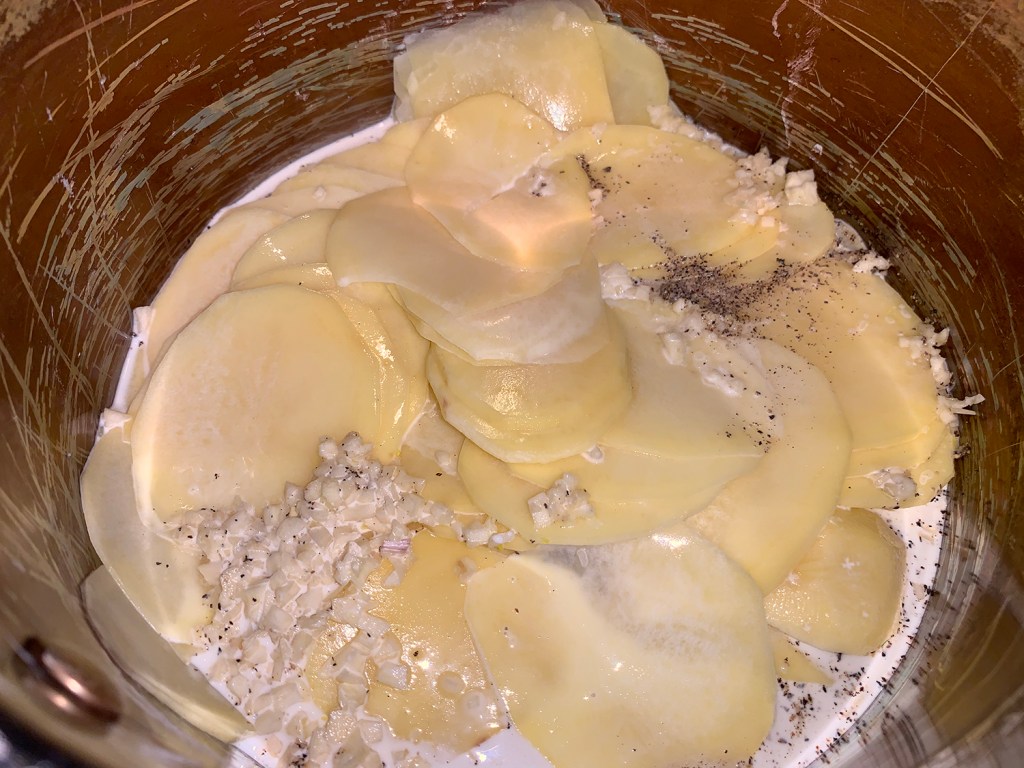
At the point where you are supposed to combine the potatoes and cream with the leek mixture, I opted to layer the ingredients instead. I was concerned that stirring everything together would break up the thin slices of potato and become a heaping mess as opposed to a more controlled layered dish.

The layers started with potatoes, followed by half of the leek mixture, then a layer of cheese. More potatoes on top of that cheese, the rest of the leek/fennel, the last layer of potatoes and finally all of the remaining cheese.

To Die For!

Potato, Fennel and Leek Gratin

  • Servings: 10-12
  • Difficulty: moderate
  • Print

Ingredients

  • 3 Tbs. unsalted butter, softened
  • 2-1/2 lb. Yukon Gold potatoes, peeled and sliced 1/8 inch thick (about 7 cups)
  • 2-1/2 cups heavy cream
  • 2 cloves garlic, finely chopped
  • Kosher salt and freshly ground black pepper
  • 1 tsp. fennel seeds, lightly crushed
  • 3 large leeks, white and pale-green parts only, trimmed, halved, and sliced crosswise 1/2 inch thick
  • 1-1/2 to 1-3/4 lb. fennel bulbs, trimmed, quartered, cored, and thinly sliced (about 5 cups)
  • 8 oz. Gruyère, grated (about 2 cups)

Directions

  1. Position a rack in the center of the oven and heat the oven to 400°F. Grease the bottom and sides of a 10×15-inch (4 quart) baking dish with 1 Tbs. of the butter.
  2. Put the potatoes, cream, garlic, 1-1/2 tsp. salt, and 1/2 tsp. pepper in an 8-quart pot. Bring to a simmer over medium heat and cook, stirring occasionally, until the potatoes are barely tender when pierced with a fork, about 8 minutes.
  3. Meanwhile, melt the remaining 2 Tbs. butter in a heavy-duty 12-inch skillet over medium heat. Add the fennel seeds and stir just until fragrant, about 30 seconds. Add the leeks and fennel, season lightly with salt and pepper, and cook, stirring occasionally, until just tender, 8 to 10 minutes.
  4. Gently mix the leeks and fennel with the potatoes. Transfer to the prepared baking dish, evening out the vegetables. Top with the cheese, and bake until the cheese is deep golden brown, the cream has thickened, and the potatoes are tender when pierced with a knife, 35 to 40 minutes. (If the top is becoming too brown before the vegetables are done, cover the gratin loosely with foil.) Let cool for 10 to 20 minutes before serving.
  5. If desired, sprinkle the finished gratin with fennel fronds for a pop of color.

http://www.lynnandruss.com

Lamb Lovers Rejoice: Herb-Stuffed Leg of Lamb Braised in Red Wine

Boneless leg of lamb makes a reliable main course for a sit-down dinner party. It’s elegant, it’s not at all fussy to cook, and it carves as neatly as a loaf of bread, according to chef/author Molly Stevens. Would I miss the rosy-pink interior of a roasted leg? This was Easter Sunday after all, and it is pretty much a given that we would serve lamb on this festive occasion, so why not give braising a try?

“The Lamb is Glam; the Sauce is Boss”

Supposedly, nothing matches the succulence of a braised leg of lamb. Here, the boned leg gets rolled up around a simple stuffing of herbs, garlic, and shallots to add flavor and color to the meat. And, the best part: the strained braising liquid turns instantly into a wonderful silken savory sauce that tastes as good as something you’d get in a fine restaurant. The Sauce was Boss IMHO!

The Hubs loved the silky sauce so much that he claimed he could just drink it straight from a glass. Cheers!

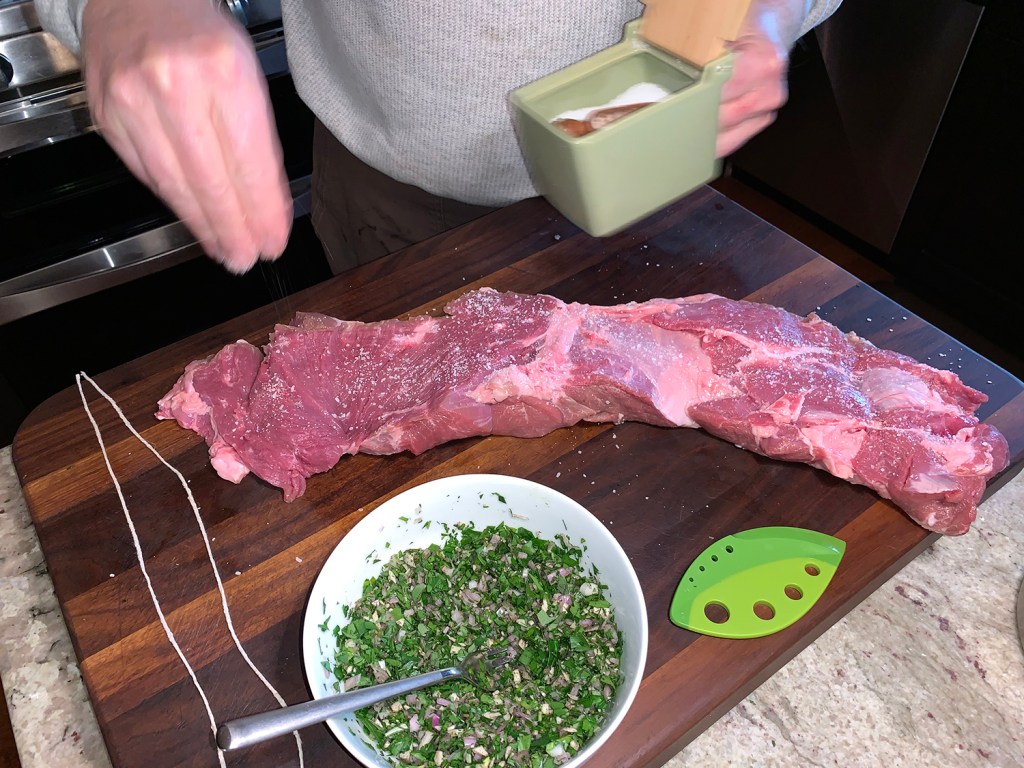
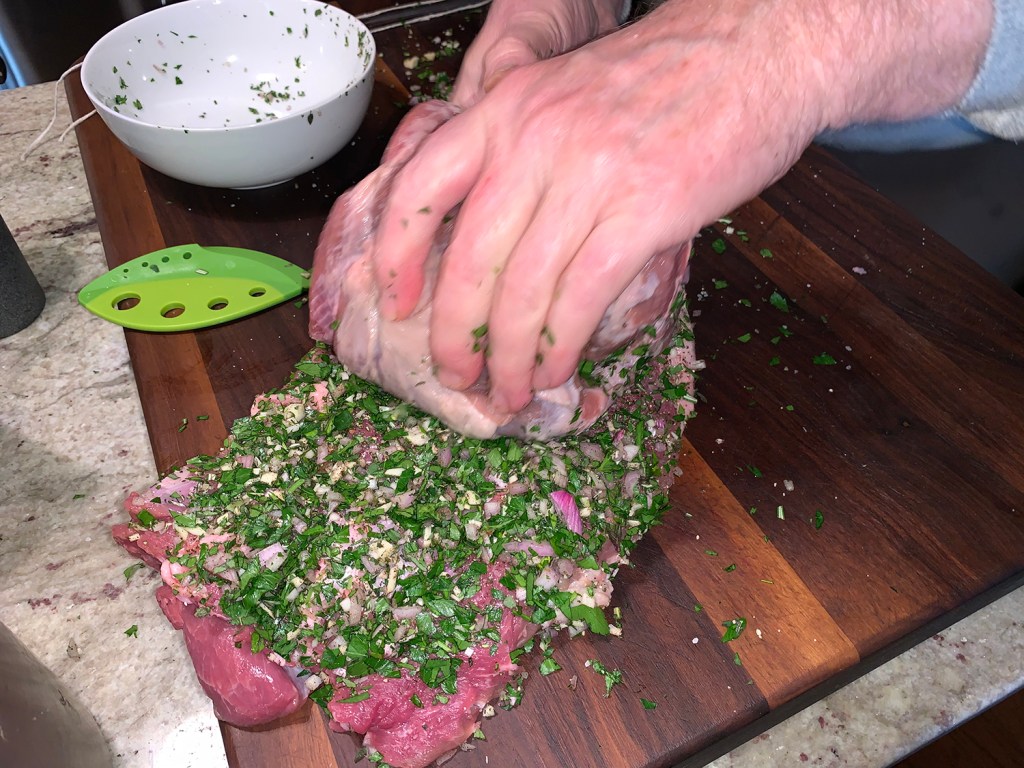
Most food markets carry boned/rolled leg of lamb. In order to stuff the lamb, you’ll need to slip off the netting or butcher twine that holds it together. Then it’s simply a matter of rolling it back into a cylinder and tying it up with kitchen string after stuffing. Molly offers this tip: If you have a butcher who does bone the lamb for you, ask him to saw or chop the bones into 1-inch pieces so you can add them to the braising pan. They will add flavor and body to the sauce. We did not have this option.

While yes, this is a decadent entrée, consider that it’s also egg-free, gluten-free, lactose-free, low carb, peanut- and soy-free. Of course, our side of cheesy potato gratin was none of those things! But then the fresh spring peas provided a nice pop of color while containing a fair amount of fiber and antioxidants.

NoteWorking ahead: The lamb can be seasoned, rolled, tied, covered, and refrigerated up to 18 hours before braising (steps 1 and 2). Ours got happy in the herbed stuffing for nearly 15 hours beforehand.

Our accompaniments consisted of the best-ever Potato, Fennel and Leek Gratin by Jeanne Keeley from Fine Cooking. Jeanne claims the cheesy Gruyere topping will have you coming back for seconds! Believe me, I wanted more, but was just too full. I will post that blog soon, so stay tuned.

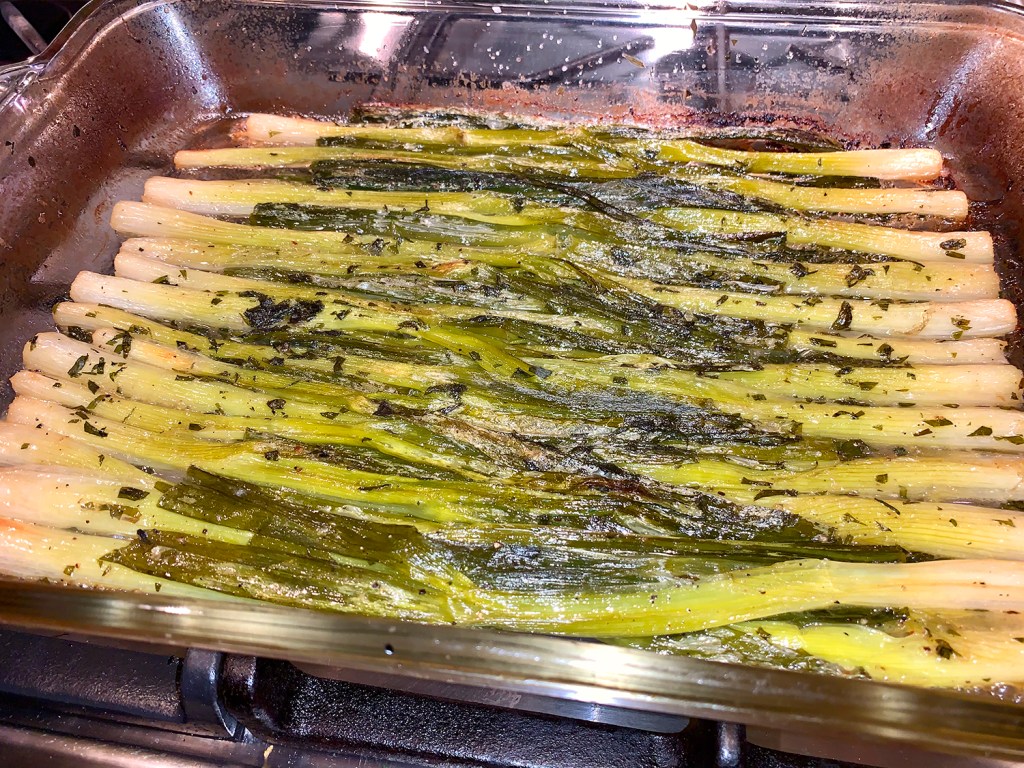
We also enjoyed Sweet Braised Whole Scallions (5 bunches worth!), a recipe also from Molly Stevens. If you’ve never had them, you’re in for a treat. As the scallions braise, the sweet anise flavor of the tarragon mingles with their oniony juices.

Finally, sweet fresh peas are a must on a Spring table. For this, we followed a recipe by Alton Brown, although his included adding cheese. We omitted that ingredient since our potato dish was brimming with it.

Herb-Stuffed Leg of Lamb Braised in Red Wine

  • Servings: 6-8
  • Difficulty: moderate
  • Print

Ingredients

  • One 5-pound boneless leg of lamb (plus reserved bones, sawed or chopped into 1-inch pieces; optional)
  • Coarse salt and freshly ground black pepper
  • ½ cup chopped flat-leaf parsley; stems reserved
  • 2 tablespoons chopped fresh thyme, mint, rosemary, and/or sage (in any combination)
  • 1 shallot, finely chopped
  • 2 garlic cloves, minced
  • ¼ teaspoon ground allspice
  • 2 tablespoons extra virgin olive oil
  • 1 large yellow onion (about 8 ounces), coarsely chopped
  • 2 large carrots, coarsely chopped
  • 2 tablespoons tomato paste
  • 1 teaspoon chopped fresh thyme, mint, rosemary, and/or sage (the same combination you used in the stuffing)
  • 2 bay leaves
  • Reserved parsley stems from the stuffing, torn into 4-inch lengths
  • 1 cup dry red wine
  • 2 cups lamb, veal, or chicken stock, homemade or store-bought

Directions

  1. Trimming the lamb: open the lamb out flat, fat side down, on your work surface. If there are any especially thick spots, make a lengthwise incision with a knife, without cutting through the meat, and lay it open like a book. You want to get the meat as even in thickness as possible while keeping it intact. Season the cut side generously with salt and pepper.
  2. The stuffing: in a small bowl, combine the parsley, mixed herbs, shallot, garlic, and allspice. Stir until evenly mixed together.
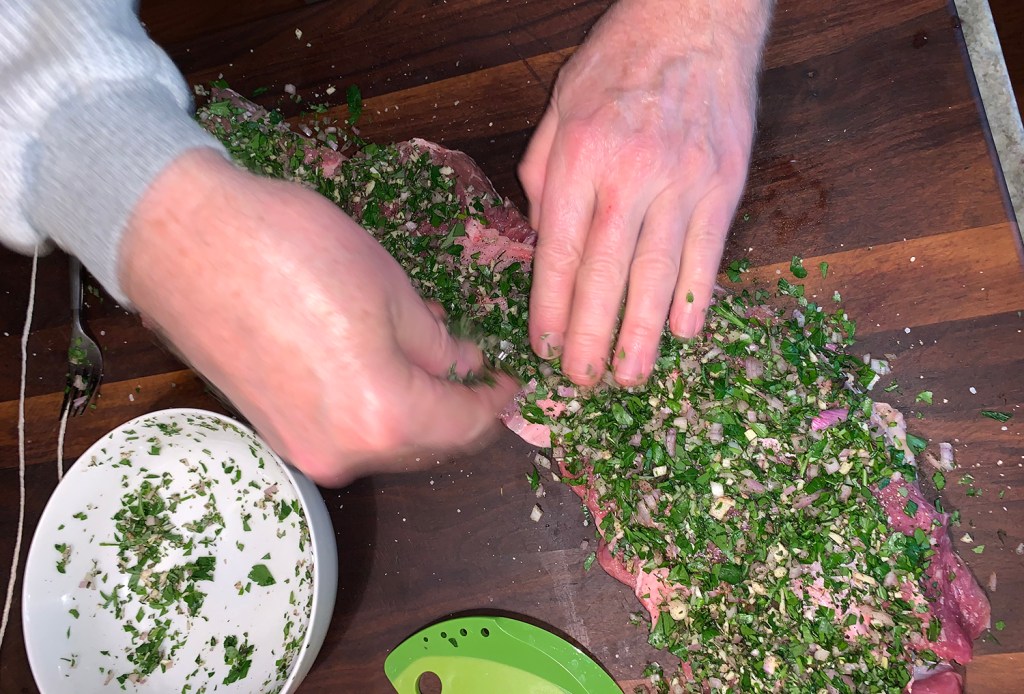
  3. Stuffing and shaping the lamb: spread the stuffing over the cut side of the leg of lamb with a rubber spatula. Press the stuffing into the meat with your hands to make it adhere, and spread it around so that it covers the entire inside surface. Roll the lamb up into a cylinder, and tie it neatly and snugly with kitchen string. Season the outside of the meat with salt and pepper. (The lamb can be prepared to this point and refrigerate for up to 18 hours before braising. When you are ready to braise the lamb, remove it from the refrigerator, and let it sit at room temperature while you heat the oven.)
  4. Heat the oven to 325 degrees.
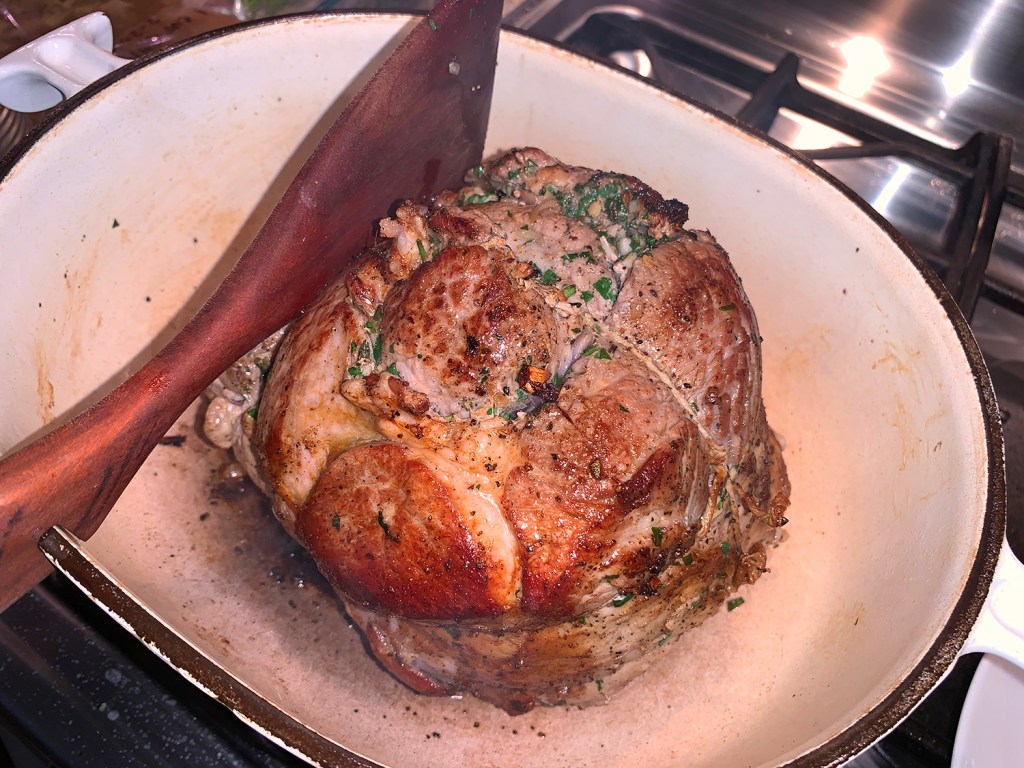
  5. Browning the lamb: add the oil to a heavy lidded Dutch oven or braising pan just large enough to hold the lamb (5-quart), and heat it over medium-high heat until it simmers. Lower the lamb into the pot with tongs, and brown it evenly, turning to brown all sides, until mahogany in spots but not at all burnt, 10 to 12 minutes total. Transfer the lamb to a platter. Add the bones to the pot if you have them, and brown them as best you can without charring, turning them ever 4 minutes, for about 12 minutes. Set aside with the lamb. Pour off all but about 1 tablespoon of fat from the pot. If the bottom is at all blackened, wipe those bits out with a damp paper towel, doing your best to leave behind the caramelized juices.
  6. The aromatics and braising liquid: return the pot to medium-high heat, add the onion and carrots, and sauté, stirring, until beginning to brown, about 4 minutes. Add the tomato paste and stir it in with a wooden spoon so it coats the carrots and onions. Add the teaspoon of herbs, the bay leaves, and parsley stems. Pour in the wine and bring it to a boil, stirring and scraping with the spoon to dislodge all those wonderful caramelized bits stuck to the bottom of the pot from browning the lab. Boil to reduce the wine by about half, about 2 minutes. Pour in the stock and bring to a boil. Continue to boil, stirring occasionally, for about 4 minutes allowing the flavors to meld.
  7. The braise: return the lamb to the pot, along with any juices that have seeped from the meat, and tuck the bones, if using, around the meat. Cover with a piece of parchment paper, pressing down so the paper nearly touched the meat and the edges extend over the sides of the pot by about an inch. Then put the lid in place, and slide the pot onto a rack in the lower third of the oven. After about 15 minutes, check to see that the liquid is simmering gently, not aggressively. If it’s simmering too vigorously, lower the oven heat 10 or 15 degrees. Continue to braise, turning the lamb with tongs and basting once or twice, until the meat is fork-tender and cooked through, 2 to 2 ½ hours.
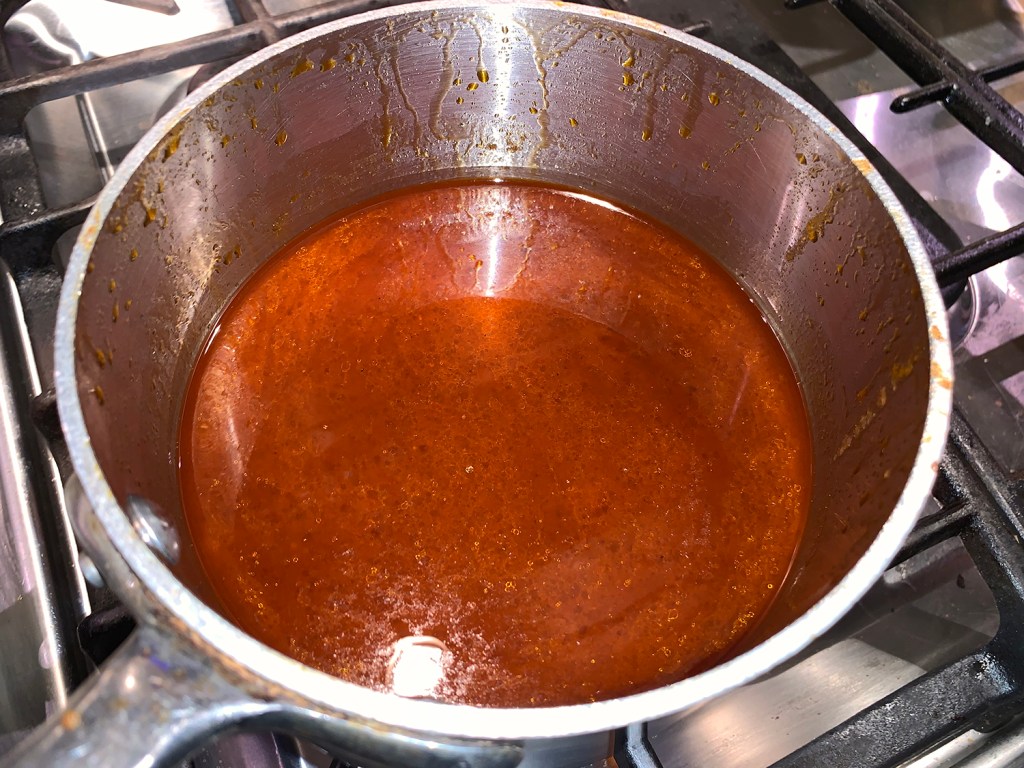
  8. The finish: transfer the lamb to a carving board with moat or platter to catch the juices, and cover loosely with foil to keep warm. Strain the pan juices into a saucepan, and skim off and discard excess fat – there may be as much ½ cup, so it’s a good chance to use your gravy separator, if you have one. Bring the sauce to a boil and simmer for 5 minutes to concentrate the flavor and thicken it some. Taste: if it tastes too brothy, boil for another 3 or 4 minutes. Taste again for salt and pepper.
  9. Serving: remove the string from the lamb, pour any juices that have accumulated on the carving board into the sauce, and carve the lamb into ½ inch slices. Arrange the slices on dinner plates or a serving platter, and pour over enough sauce to moisten. Pass the remaining sauce at the table.

Don’t forget to brown the end caps. Our notched wooden spatula helps hold the meat in place while the ends brown.

http://www.lynnandruss.com

Pork Chops Milanese

To get you up to speed, the milanesa is a South American variation of an Italian dish where generic types of breaded meat fillet preparations are known as a milanesa. It consists of a thin slice of beef, chicken, veal, or as in this case, pork. Cutlet is one of most typical dishes from Milan, Italy, typically a veal cutlet, coated with egg, covered with bread crumbs and then fried in butter with sage.

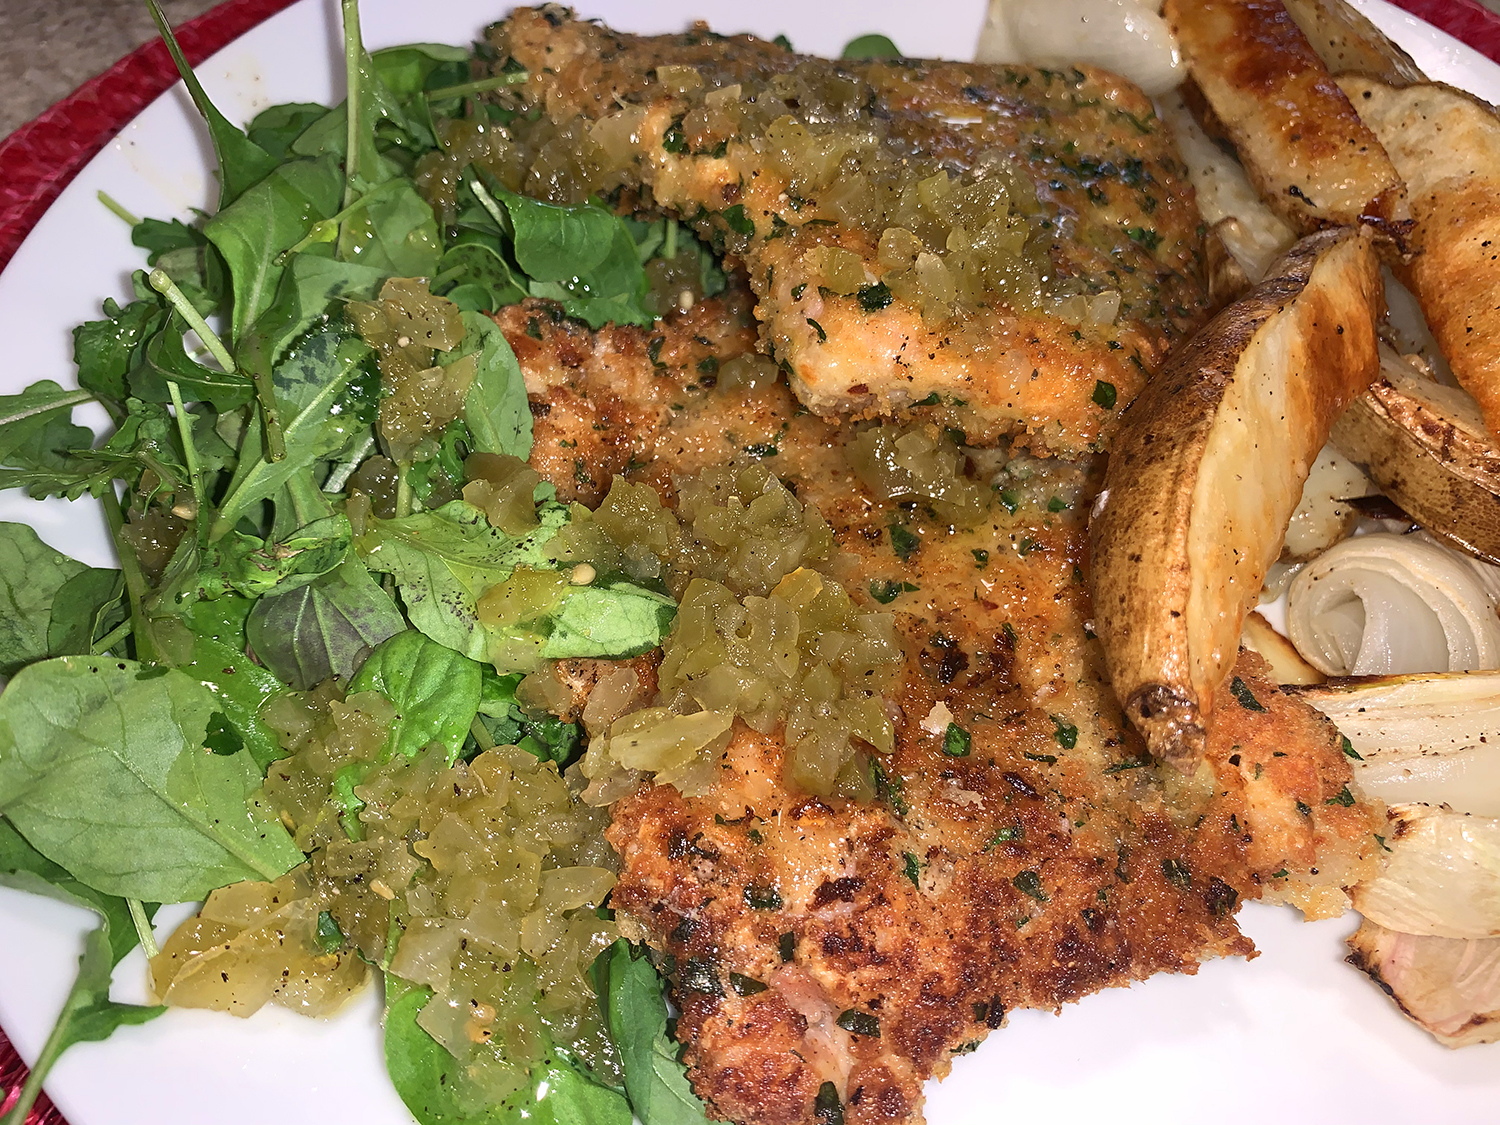
This version of Pork Chop Milanese hailed from Ronne Day of Fine Cooking. She claims you can’t have too much of the sweet-sour dressing to sop up the crispy bites of pork chop. Sweet meat is not our beat, so we reserved our thoughts regarding this marriage of ingredients until after we consumed the dinner. In the end, we both thought the mostarda dressing was a little too sweet for our taste.

You may never have even heard of mostarda, which is a Northern Italian condiment made of candied fruit and a mustard-flavored syrup. Traditionally mostarda was served with boiled meats, more recently it has become a popular accompaniment to cheeses. Just use it sparingly until you get a feel for how much suits your own palette.

Originally this recipe was formulated with bone-in frenched rib chops. And many reviewers noted the amounts of panko and flour were grossly excessive, so I took it upon myself to adjust quantities which are reflected in the recipe below—and they worked out perfectly, BTW.

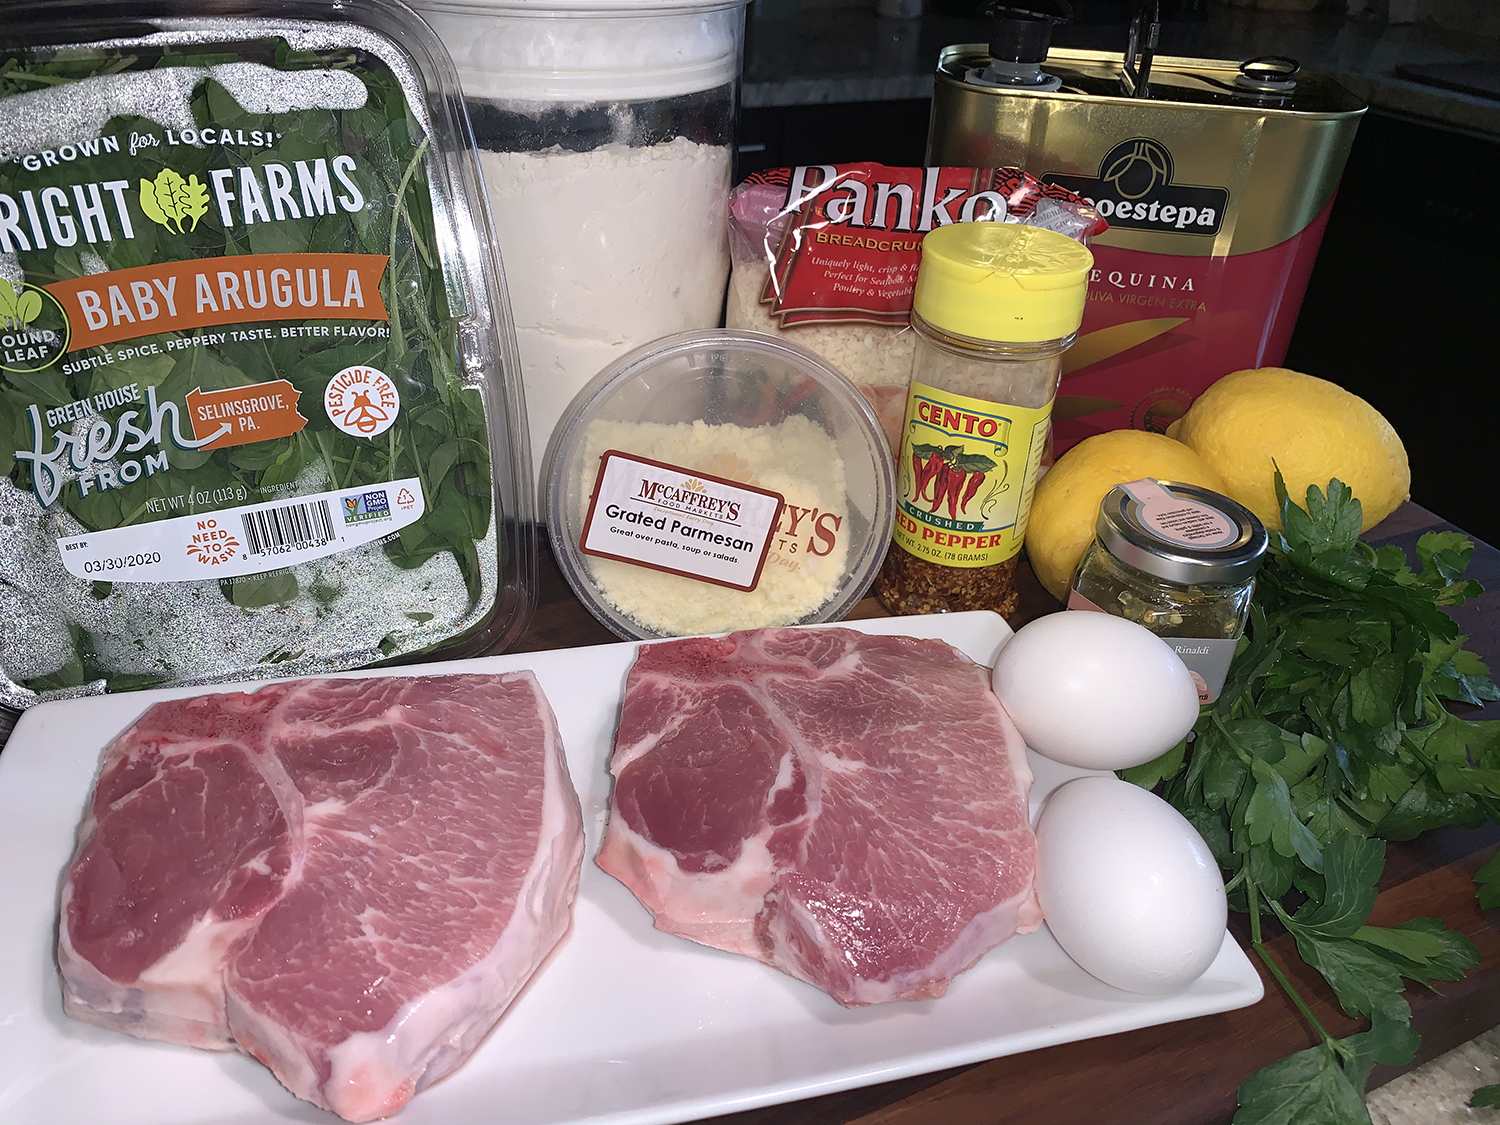
We had two thick pork chops in the freezer, so instead of buying rib chops we just used what we had. However, we did need to make a few adjustments, such as cutting the meat off the bones (it was almost impossible to pound down with a center bone). This resulted in six fillets because the large side, once pounded thin, was then cut in half.

IMG_4715

My suggestion is just to buy boneless pork cutlets to begin with, which are cheaper than frenched rib chops. Plus, you don’t have to keep spooning oil over the large end because they are a consistent thickness. Speaking of oil, we had a container of oniony olive oil from a previous meal which added a notch of additional flavor.

We didn’t toss the bones either, but rather seared them in the olive oil which provided more seasoning (plus it was a nice little nosh for the Hubby). To further streamline the process, I did not wipe out the pan between cooking the chops, this saved both time and oil. While we weren’t entirely sold on the mostarda sauce, we absolutely loved the pork fillets!

IMG_4696

Pork Chops Milanese

  • Servings: 3-4
  • Difficulty: easy
  • Print

Ingredients

  • 1/4 cup fresh lemon juice
  • 1/4 cup mixed-fruit mostarda, finely chopped
  • Kosher salt and freshly ground black pepper
  • 3/4 cup extra-virgin olive oil, divided
  • 4 boneless pork cutlets, trimmed of fat (if your chops have bones, cut the meat away before pounding thin)
  • 1/2 cup all-purpose flour
  • 1/2 tsp. crushed red pepper flakes, ground in a spice grinder
  • 2 large eggs
  • 1 cup plain panko
  • 1/2 cup finely grated Parmigiano-Reggiano
  • 3 Tbs. finely chopped fresh flat-leaf parsley
  • Baby arugula, enough for each serving
  • Lemon wedges, for serving
  • Flaky sea salt, for serving

Directions

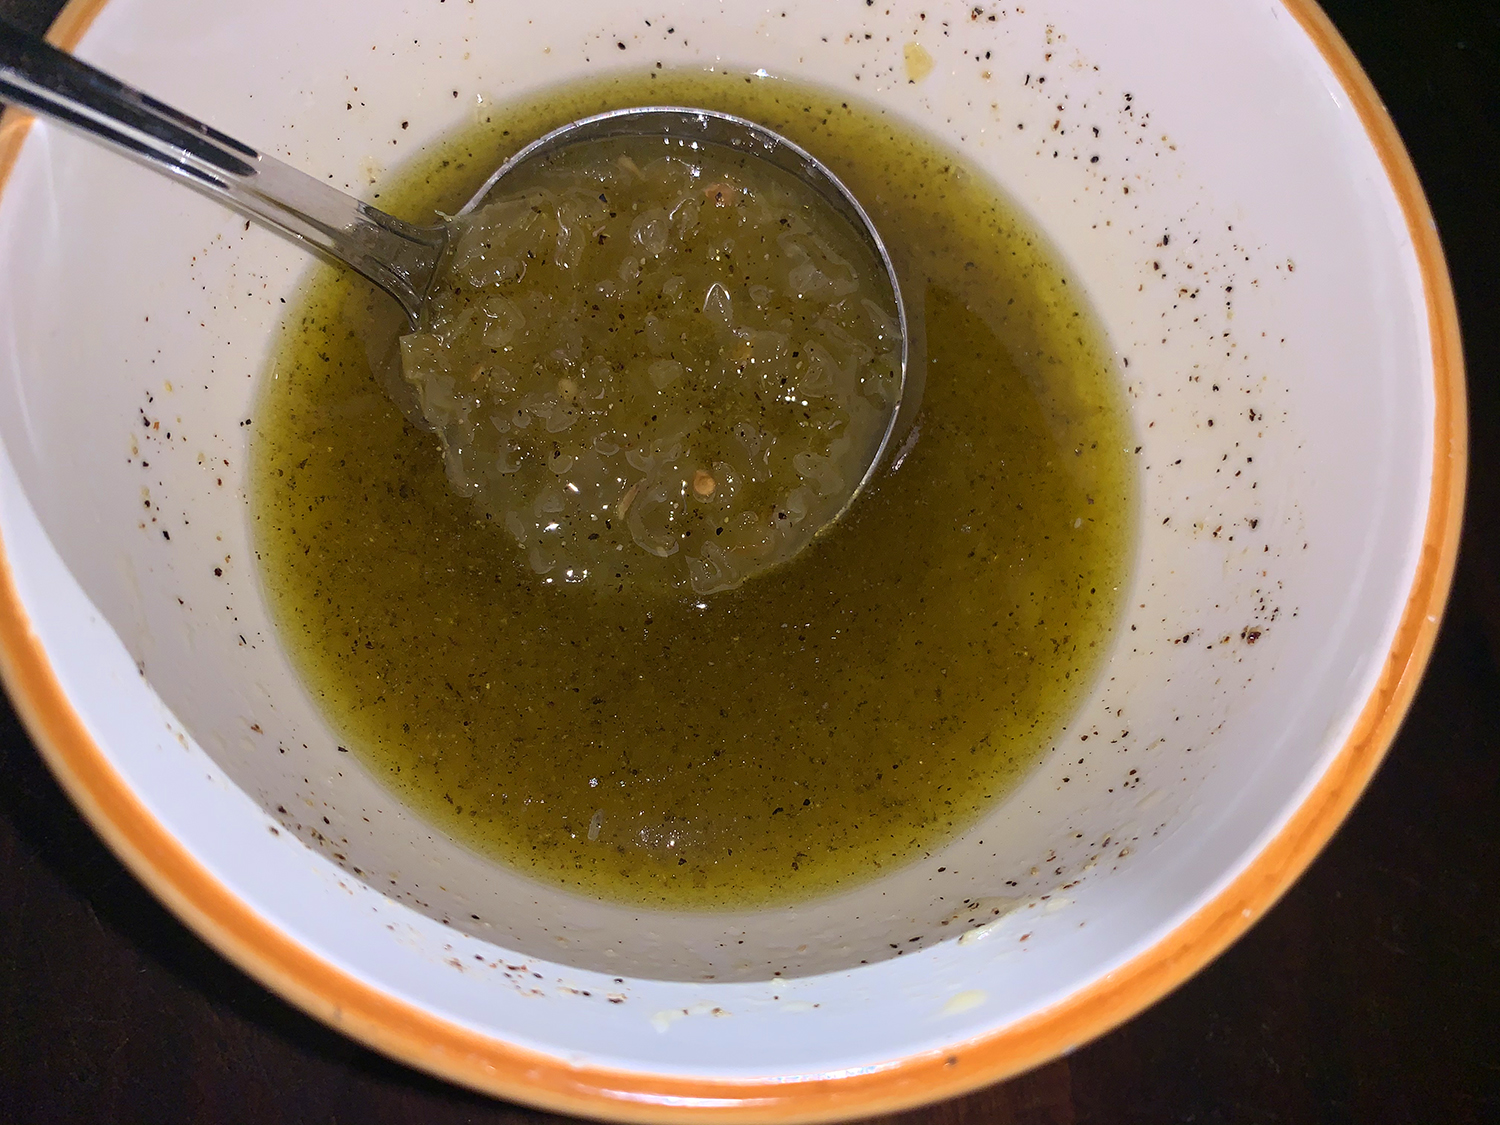
  1. In a small bowl, combine the lemon, mostarda, 1/4 tsp. salt, and 1/4 tsp. pepper. Whisk in 1/4 cup. cup of the extra-virgin olive oil. Set aside.
    IMG_4714
  2. Put each chop between two pieces of plastic wrap, and pound with a mallet until about 1/4 inch thick. Season both sides with salt and pepper. (All this meat shown below came from two bone-in chops.)
    IMG_4712
  3. Have ready three shallow bowls large enough to hold one pork cutlet at a time. In one bowl, combine the flour and red pepper; in another, beat the eggs with 1 Tbsp. water; and in the third, combine the panko, Parmigiano, parsley, 1/2 tsp. salt, and 1/4 tsp. pepper.
    IMG_4703
  4. Position a rack in the center of the oven and heat to 200°F. Put an oven-safe wire rack on a rimmed baking sheet and set it in the oven.
  5. Dredge each pork chop in the flour, then egg, and finally panko, lightly pressing the panko to adhere. Transfer to a plate.
  6. Heat 1/4 cup of the olive oil over medium-high heat in a large nonstick skillet. Fry one chop (two if your pan allows) at a time, about 2-1/2 minutes per side, then transfer to the wire rack in the oven to keep warm. Repeat with the remaining chops.
    IMG_4719
    IMG_4722
  7. Serve the chops with the arugula and a drizzle of the dressing. Pass the lemon wedges, flaky salt, and any extra dressing at the table.
    IMG_4725
    We paired ours with a side of roasted potato and onion wedges.

http://www.lynnandruss.com

Adapted from a recipe by Ronne Day from Fine Cooking

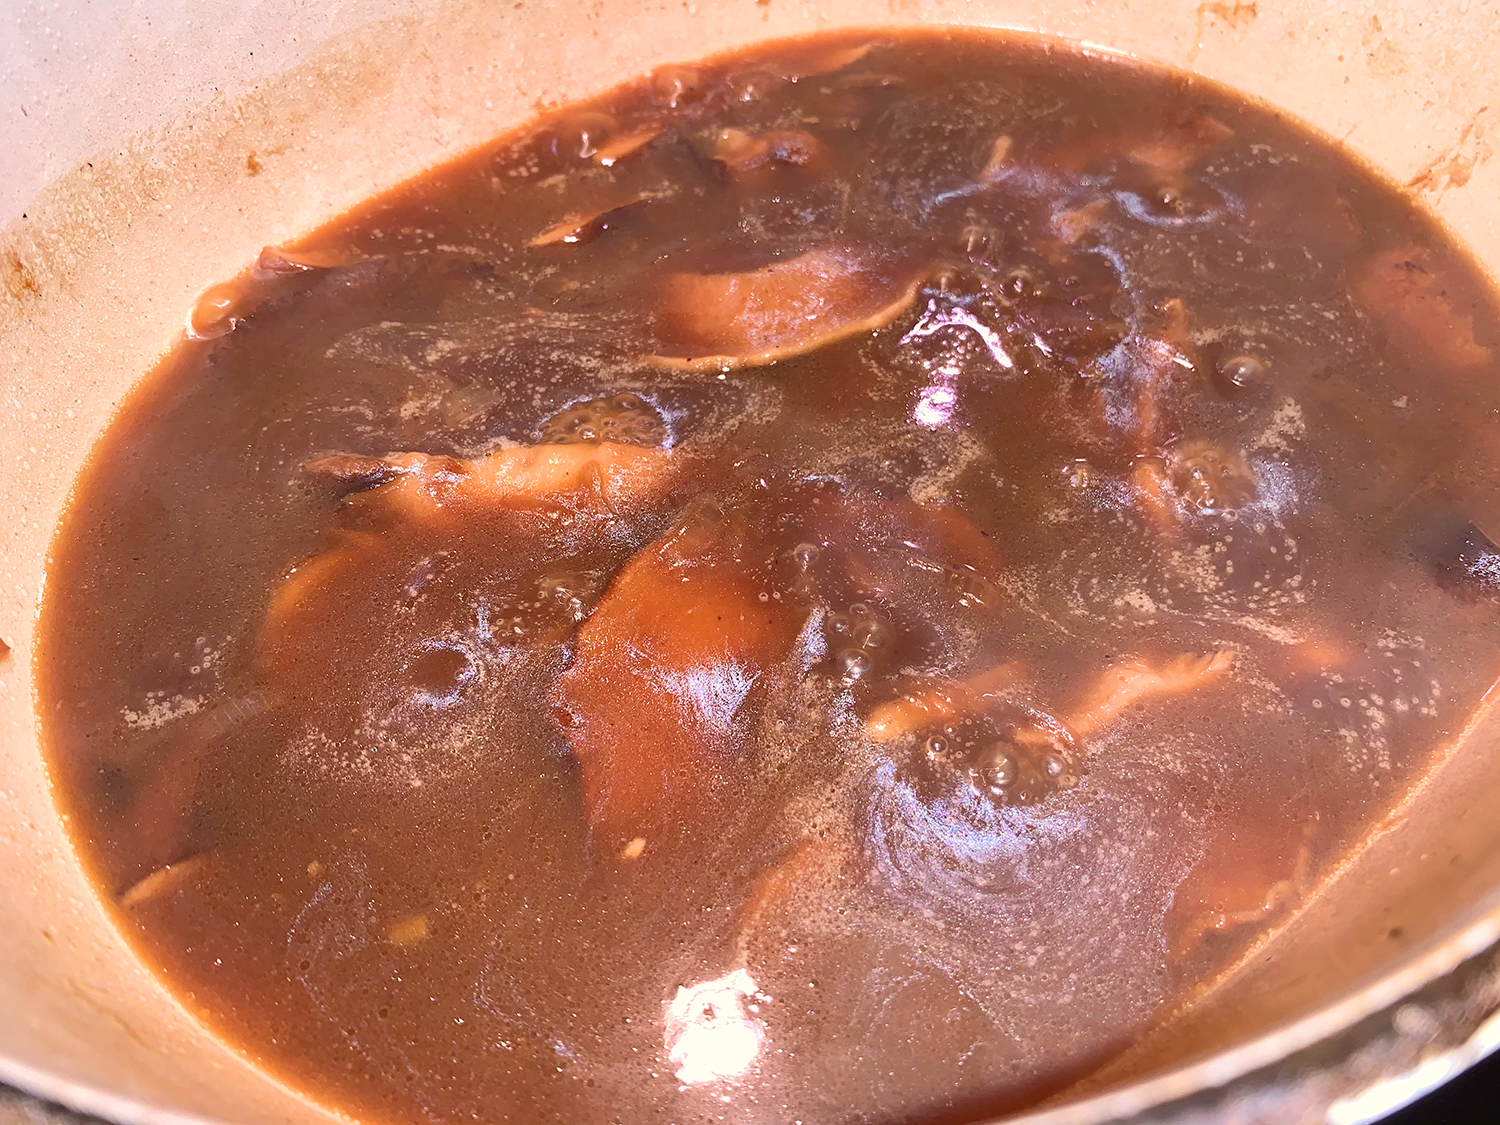
Yum, Yum and YUM. Shiitake-Sesame Braised Chicken

In Hong Kong, clay pot meals—called wu wei—arrive steaming with succulent marinated meat and savory rice in shops offering up to 60 combinations of toppings. Minced beef with egg. Chinese sausage with bits of salt-cured fish. Pulled chicken thighs with abalone. One constant—the flavor profile. The meat generally is marinated in a savory blend of soy sauce, sweet rice wine and oyster or fish sauce, as the recipe is here.

From Milk Street, this dish (now a favorite) packs tons of umami into the dish, while ginger adds a balancing piquancy. Although it seems a sacrilege, don’t forget to remove the chicken skins after searing. The skins are left on for browning to develop drippings that add depth to the finished dish and to render flavorful fat that’s used for sautéing the mushrooms and aromatics. But the skins will turn soggy when cooked in liquid, so remove them before nestling the thighs into the pot for braising.

IMG_4748

However, don’t necessarily discard the skin. If there’s a crispy skin lover in the family, (which typically I’m not), they will adore the treat. I tried one and was astounded by the taste and the crackle, so The Hubs proceeded to scarf the remainder as a pre-dinner nosh.

Some of you may be put off by large slices of ginger, quite the contrary for us, but if you rank among the latter group, either toss it after the cooking is done, or chop it finely at the get-go, but don’t disregard altogether.

As a garnish, a sprinkle of sliced scallions add a freshness, while toasted sesame seeds lend a subtle nuttiness. I’m so glad we had leftovers for lunch the next day. YUM!

Shiitake-Sesame Braised Chicken

  • Servings: 4
  • Difficulty: easy
  • Print

IMG_4735

Ingredients

  • 2 lbs. bone-in, skin-on chicken thighs, trimmed and patted dry
  • Kosher salt and ground black pepper
  • 2 Tbsp. grapeseed or other neutral oil
  • 12 oz. fresh shiitake mushrooms, stemmed and halved
  • 1 medium yellow onion, halved and thinly sliced
  • 1 cup low-sodium chicken broth
  • 6 Tbsp. oyster sauce
  • ¼ cup low-sodium soy sauce
  • 3 Inch piece fresh ginger, peeled and thinly sliced
  • 1 tsp. cornstarch
  • Thinly sliced scallions, to serve
  • Sesame seeds, toasted, to serve

Directions

  1. Season the chicken with salt and pepper. In a large Dutch oven over medium-high, heat the oil until barely smoking. Add the chicken skin down, reduce to medium and cook without disturbing until the skin is well browned, about 10 minutes.
    IMG_4737
  2. Flip and cook until lightly browned on the second sides, about 3 minutes. Transfer to a large plate, then pour off and discard all but 3 tablespoons of fat from the pot. Remove and discard the skin from the chicken thighs.
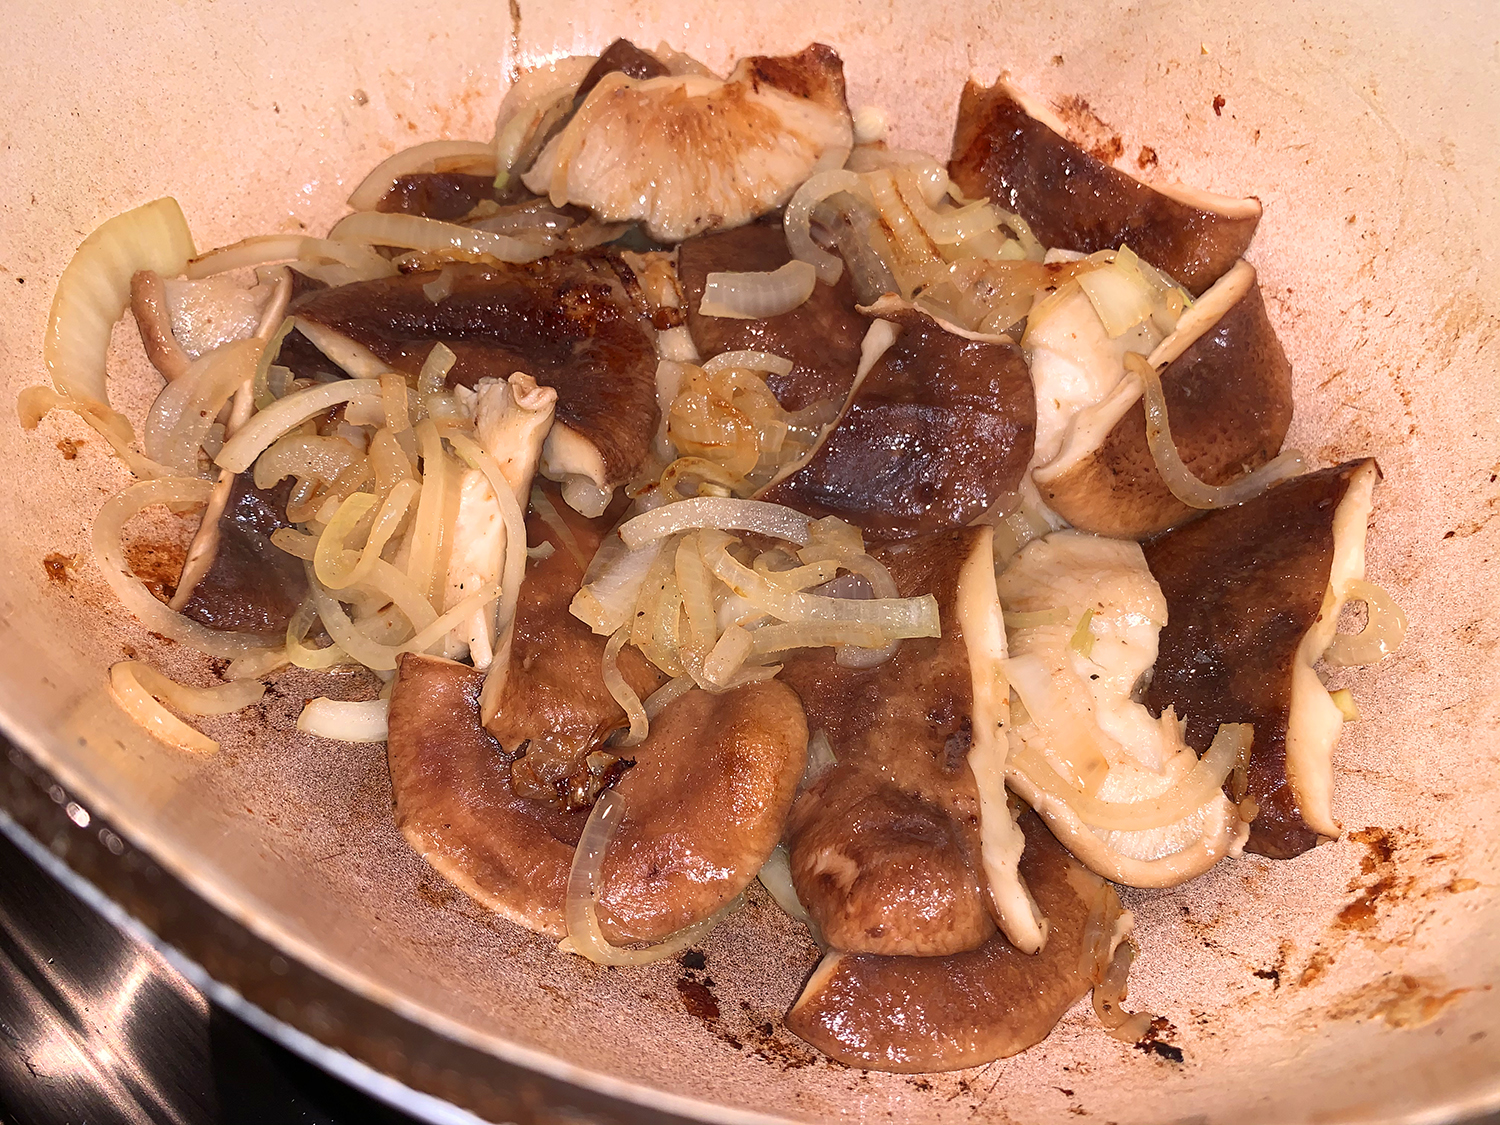
  3. Return the pot to medium and add the mushrooms and onion. Cover and cook over medium, stirring occasionally, until the mushrooms begin to brown and the onion has softened, 6 to 8 minutes.
    IMG_4742
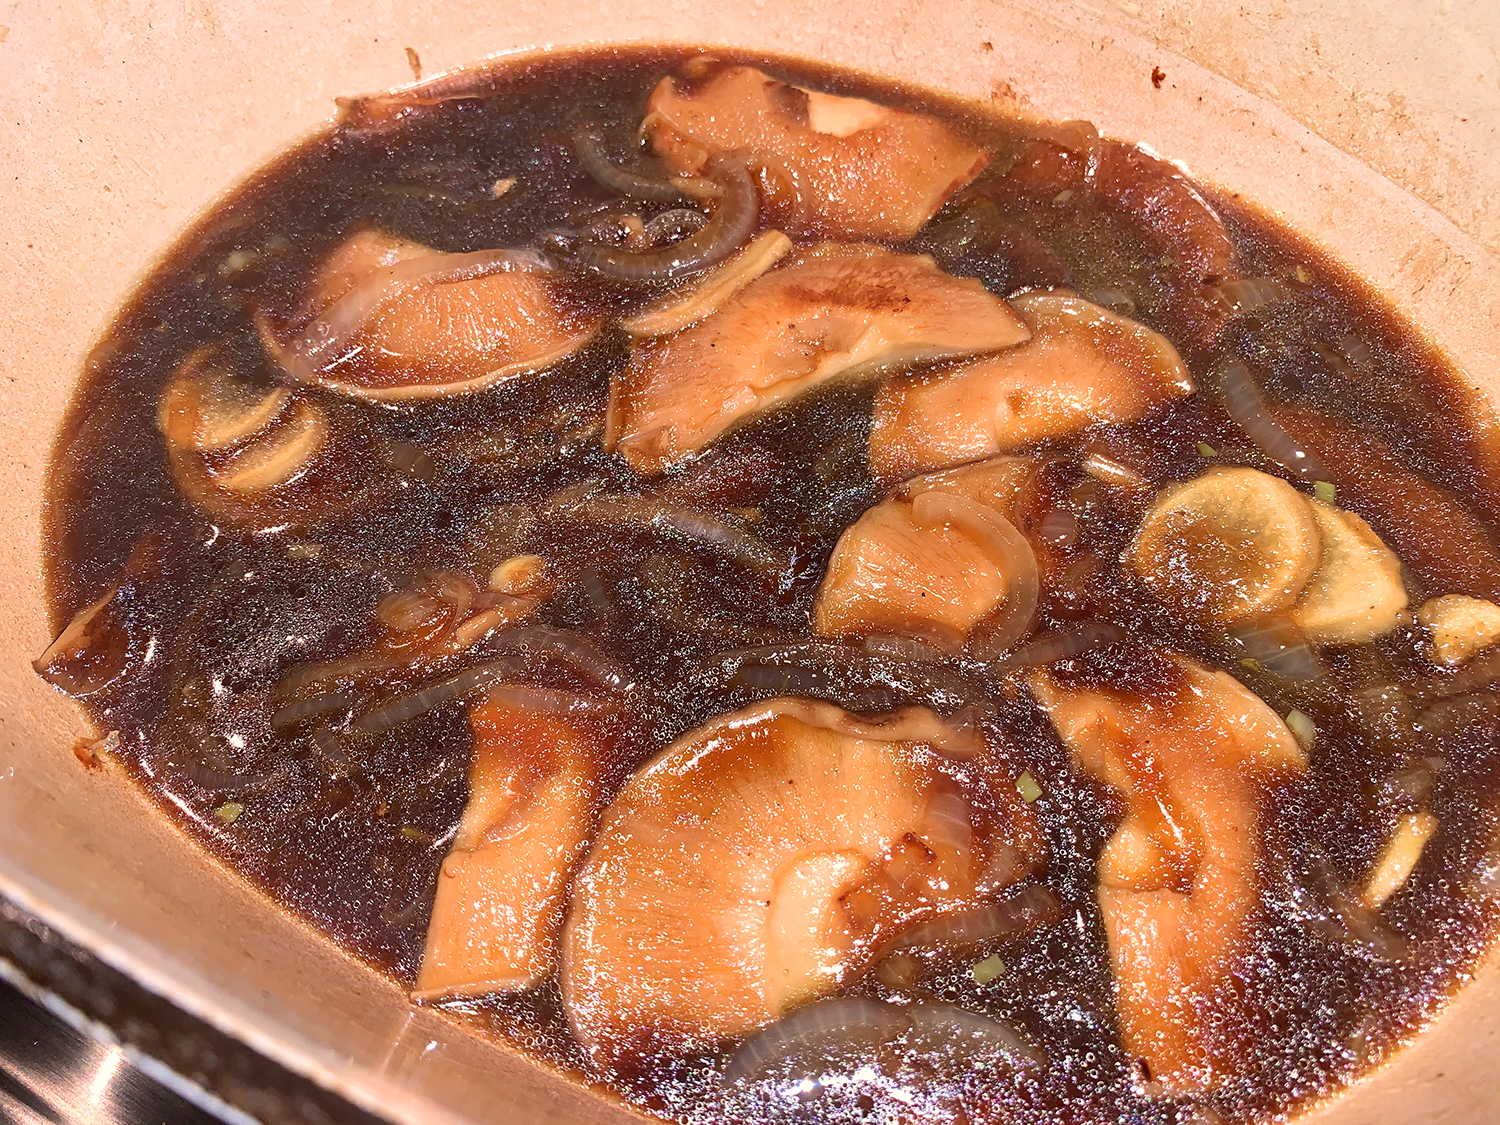
  4. Stir in the broth and 1 cup water, scraping up any browned bits. Stir in the oyster sauce, soy sauce and ginger, then bring to a simmer.
    IMG_4744
  5. Return the chicken and accumulated juices to the pot, cover and cook over medium until a skewer inserted into the largest thigh meets no resistance, about 40 minutes, flipping the pieces halfway through.
    IMG_4745
  6. Using tongs, transfer the chicken to a serving dish and cover to keep warm.
  7. In a small bowl, stir together 2 tablespoons water and the cornstarch, then whisk the mixture into the cooking liquid. Bring to a simmer over medium-high and cook, stirring constantly, until thickened, about 2 minutes.
    IMG_4747
  8. Taste and season with salt and pepper, then spoon the mushrooms and sauce over the chicken. Sprinkle with scallions and sesame seeds.
    IMG_4755

http://www.lynnandruss.com

Festoni Con Polpette Di Mamma

Another meatball recipe?? Why not, there are so many variations that it doesn’t make culinary sense to prepare the same old/same old each time. Take a walk on the wild side and break out of your solitary meatball confines. Although to be brutally honest, Mamma Gina’s Meatballs really aren’t all that novel.

But they’re definitely very good. The Hubs made them for a men’s group retreat a few weeks ago along with Sunday Sauce and the guys loved ’em! So with time on our hands, and the necessary ingredients in the house, we were good to go. In fact, I upped the fun factor by using Festoni pasta instead of the ho-hum penne or spaghetti.

IMG_4810

Festoni is a long, wide noodle, sort of like pappardelle only with curly edges, and it is swirled into little bunches that get dropped into boiling salted water. As they boil though, the nests unfurl into long strands. But of course, if you have a different shape of pasta on hand, just use that.

The sauce for this dish provides a lovely topping to pasta and the ‘bath’ for the meatballs to simmer in. No precooking or browning the meatballs beforehand. Once the meatballs are removed, the sauce carries the aroma of the meat and tastes wonderful on your pasta. Of course, we had to tweak it a bit by increasing the amount of crushed tomatoes, include additional garlic and a parmesan rind. Adjust the amount of crushed red pepper to suit your own preferences (we like it spicy).

The meatballs should be served along side the pasta, NOT on top, as that is the true Italian way.

IMG_4831

Festoni Con Polpette Di Mamma

  • Servings: about 22 meatballs
  • Difficulty: easy
  • Print

Ingredients

  • ½ lb. ground pork
  • ½ lb. ground veal
  • ½ lb. ground beef 85/15 blend
  • 1 Tbsp. chopped parsley
  • 1 Tbsp. kosher salt
  • 1 tsp. freshly ground black pepper
  • 2 eggs, beaten
  • 1 cup freshly grated Pecorino Romano cheese
  • 1 cup bread crumbs, preferably Italian seasoned
  • ½ cup milk
  • ½ cup brodo di mamma, cooled (see recipe below)

Directions

  1. In a large bowl, hand mix all the ingredients. The mixture will be very soft but resist the urge to add more bread crumbs, this makes a tender, melt in your mouth meatball!
    IMG_4816
  2. Once all the ingredients are just combined, wet your hands and pinch ¼ cup of the mixture and roll into balls. (Ours weighed about 2.2 ounces.) Place on a baking sheet.
  3. Carefully drop the meatballs into the sauce. If the pot seems to be full, simply shimmy the pot back and forth to make more room. (If you stick a spoon in the pot you will break the meatballs apart.)
    IMG_4823
  4. Allow to simmer in the sauce for 45 minutes or up to 2 hours.

*Mamma Gina’s meatballs freeze exceptionally well.  Freeze on the baking sheet and then transfer to freezer bags.  Will keep up to a month.  When ready to cook, make Mamma’s brodo and drop frozen meatballs right into the sauce.  And don’t forget to shimmy!  Cook for 1 hour or up to two.

http://www.lynnandruss.com

Brodo Di Mamma (Italian Red Sauce)

Brodo Di Mamma

  • Servings: 6-8
  • Difficulty: easy
  • Print

Makes about 8 cups of sauce

Ingredients

  • ½ cup Italian extra virgin olive oil
  • Fresh basil leaves; 5 whole, 1 Tbsp. chopped
  • 4 cloves garlic, peeled and smashed
  • 2 tsp. crushed red pepper (optional and more to taste)
  • 3 28 oz. cans crushed tomatoes
  • 2 cups of water
  • 2 Tbsp. tomato paste
  • 1 Tbsp. kosher salt
  • 1 tsp. freshly ground black pepper
  • 2″ parmesan rind, optional to throw into sauce

Directions

  1. In a small saucepan, combine olive oil with basil and garlic (crushed red pepper flakes for a spicy brodo). On very low heat, allow the basil and garlic to simmer in the olive oil for 10 to 15 minutes. This steeping process will allow olive oil to become fragrant. Careful that garlic gets toasted brown but not black.  Remove from heat and strain aromatics. Set aside.
    IMG_4813
  2. In a large pot or Dutch oven, pour in the tomato sauce and the water. Add tomato paste and salt and pepper.
    IMG_4814
  3. Pour reserved olive oil into the sauce and mix to combine. Bring to a boil and then immediately reduce to a simmer. If also making meatballs, remove ½ cup of the brodo and set aside to cool.
  4. Add parmesan rind to sauce. Partially cover the pot and allow sauce to simmer for at least 45 minutes or up to 2 hours. The longer it cooks, the better it tastes.
  5. Mix to combine in olive oil that has separated to the top and add chopped basil.
  6. Serve with your pasta of choice, in this case, festoni.
    IMG_4828

http://www.lynnandruss.com

Adapted from Mamma Gina’s Meatballs and Sunday Sauce found on annasheirloomkitchen.com

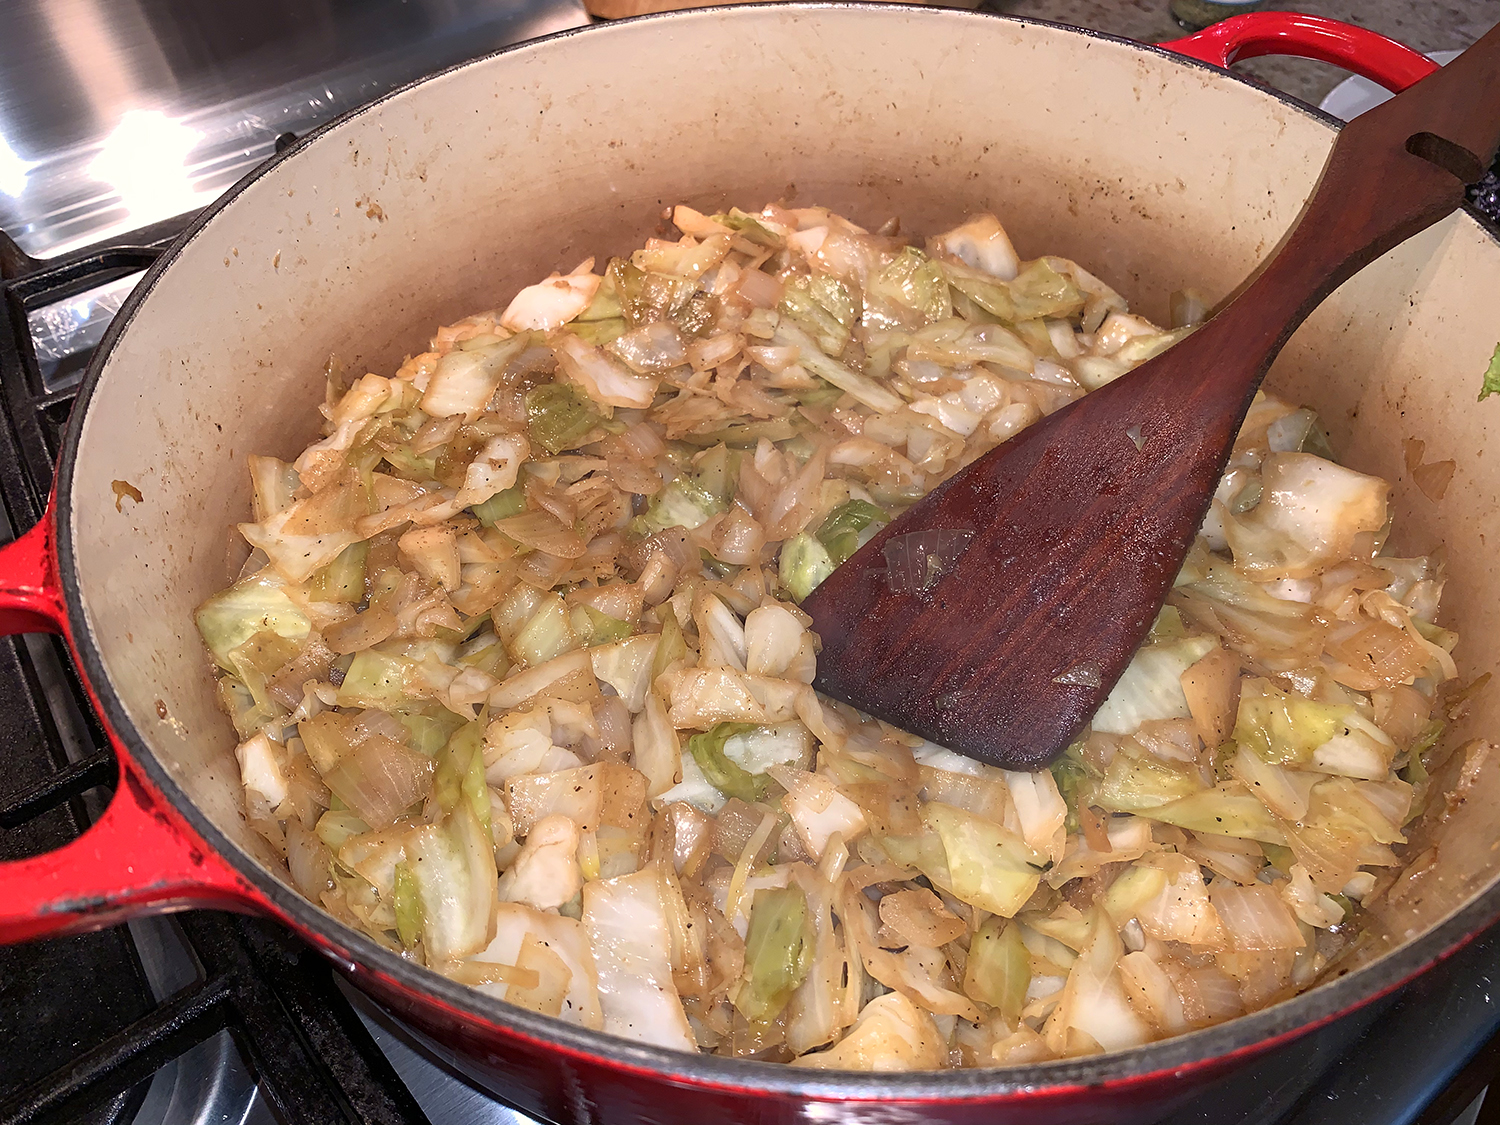
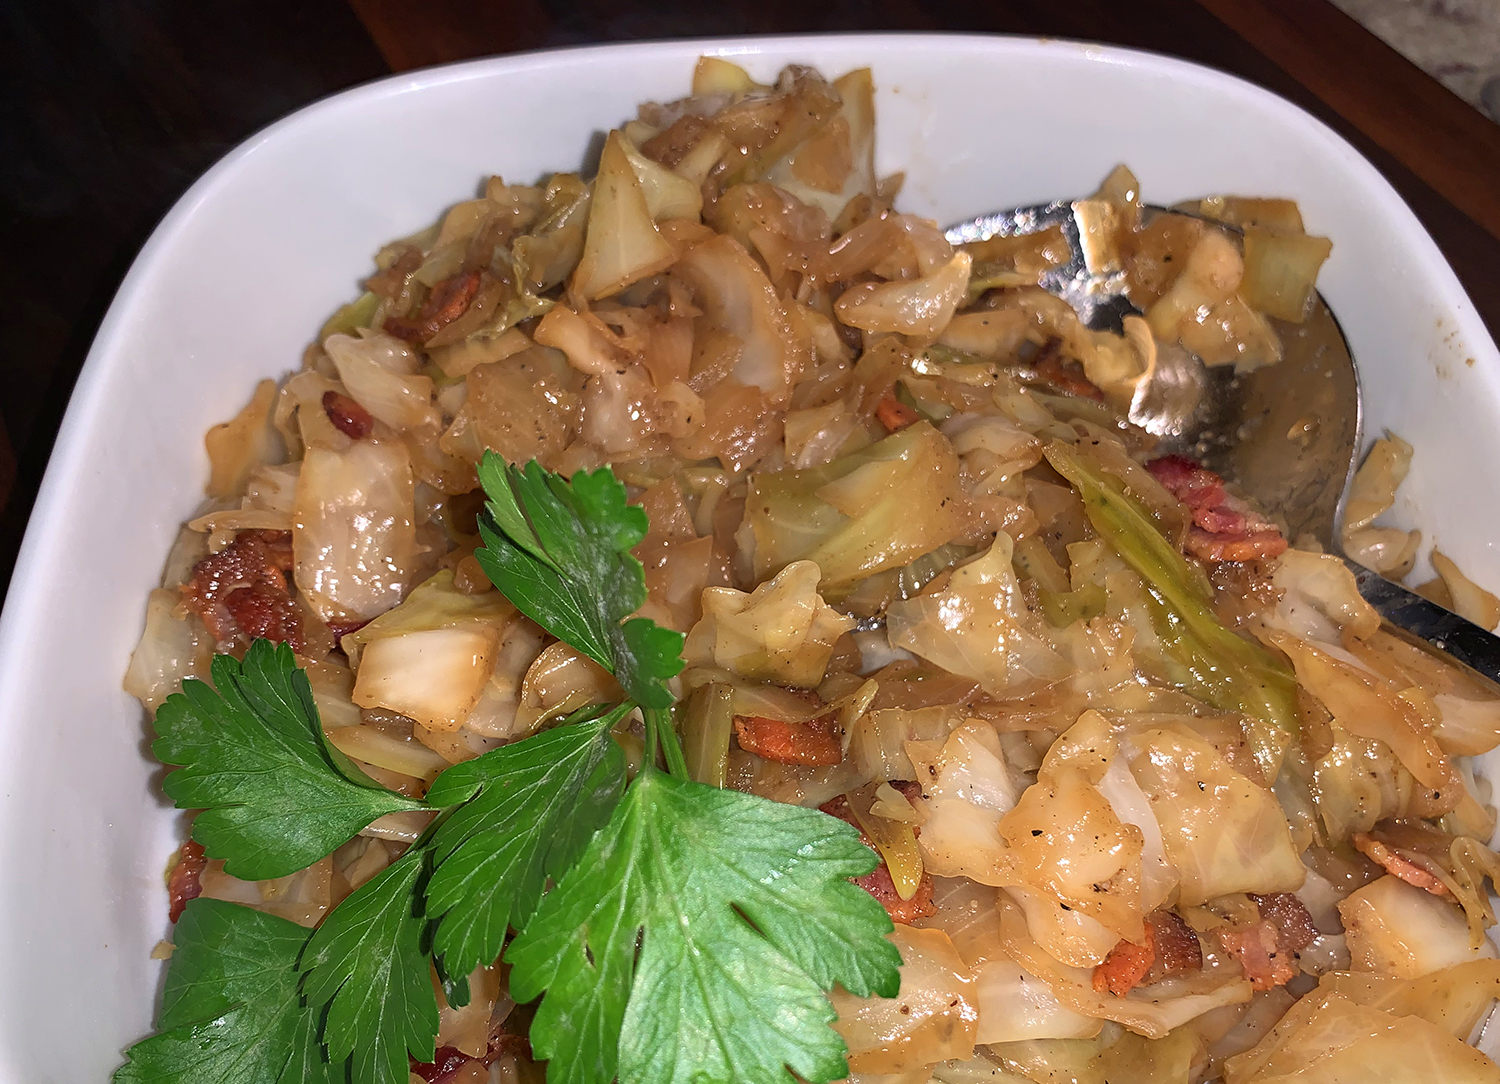
Southern Fried Cabbage, Y’all

Thanks to a conversation with cousin Maureen for introducing us to Southern Fried Cabbage. I noticed her posting on Facebook a few weeks back, and then we got to chatting via phone about our culinary endeavors while on the pandemic “lockdown.” She really gushed about how she and her husband Marty loved the dish, and I knew I had to get it into the dinner rotation soon.

Truth be told, I was a tad worried about the bacon factor. Now don’t get me wrong, I love the smell and taste of bacon, but it often doesn’t love me back. But I powered through my hesitation and went full steam with the recipe. Boy, am I glad I did, and so was the Mister.

Bacon gives it the smoky flavor that is put over the top by just enough brown sugar and apple cider vinegar—the right proportions so as not to overwhelm. The cabbage is melt-in-your-mouth tender and succulent, amazingly so because there is very little fat (just a couple of tablespoons from the bacon) and no other liquid.

Our steak entrées were first cooked in a water bath with fresh herbs and garlic. They were finished with a quick sear with a little butter and those herbs in a super-hot carbon steel pan. As a side dish, the cabbage was a perfect compliment to our medium-rare rib-eye steaks. Oh, and a glass of pinot noir didn’t hurt either… Bellísimo!

IMG_4782

Southern Fried Cabbage

  • Servings: 6-8
  • Difficulty: easy
  • Print

Ingredients

  • 5 strips bacon, diced raw
  • 1 head cabbage, chopped
  • 1 large onion, diced
  • 2 Tbsp. Worcestershire
  • 1 Tbsp. apple cider vinegar
  • 2 Tbsp. brown sugar
  • 1 tsp. garlic powder
  • Black pepper to taste

Directions

  1. Add chopped bacon to a large heavy pot such as a dutch oven.
  2. Cook bacon over medium heat until extra crispy.
    IMG_4783
  3. Remove bacon from pot, leaving the fat.
  4. Add cabbage to pot and cook over medium-high heat for 10 minutes, stirring every minute or so.
  5. Add chopped onion and continue cooking 5 more minutes, continue stirring every minute.
    IMG_4785
  6. Add Worcestershire, apple cider vinegar, garlic powder and brown sugar.
    IMG_4786
  7. Reduce heat to medium and continue cooking for 30 minutes, stirring occasionally, until cabbage is cooked through.
    IMG_4791
  8. Add cooked bacon to cabbage and taste to adjust seasonings and serve.
    IMG_4793
    IMG_4800

http://www.lynnandruss.com

Beef, Orange and Olive Stew (Boeuf À La Gardiane)

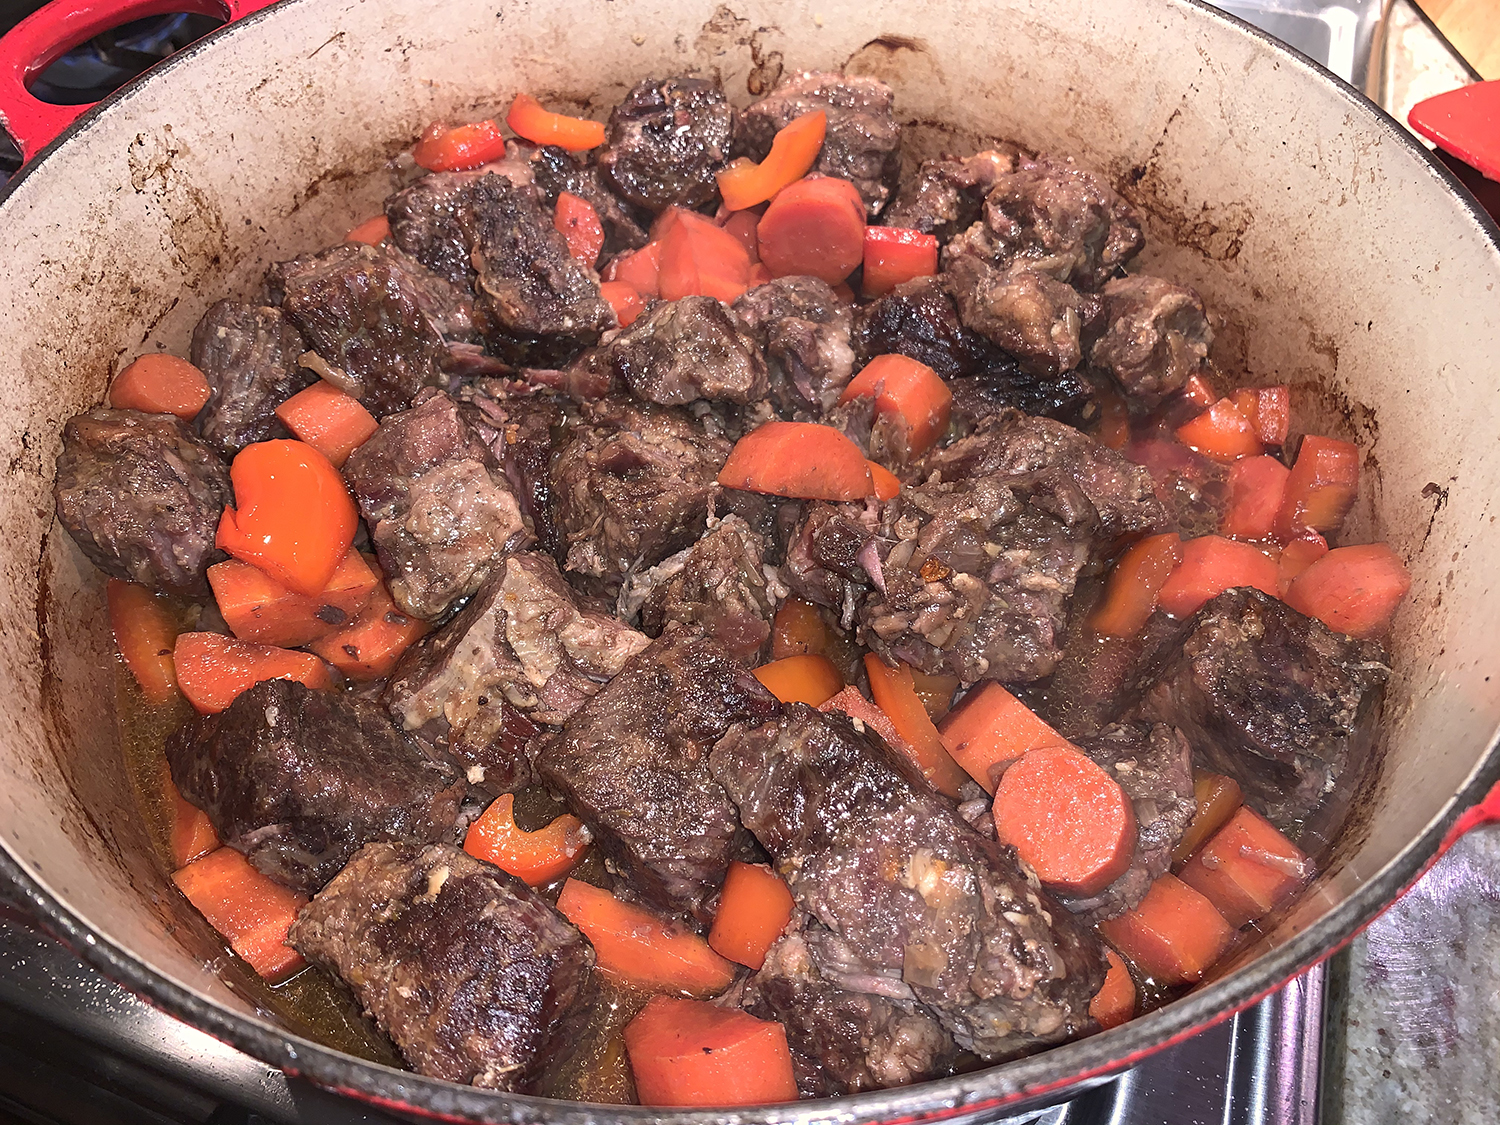
OK, now you don’t have the excuse of not enough time to make an hours-intensive recipe. As far as I know, pretty much the entire world is on lockdown due to the spread of the corona virus. And while this dish takes nearly five hours from start to finish, the pot sits in the oven for 3 1/2 of those hours, leaving you plenty of time to watch whatever show you’re currently bingeing on.

And while it’s getting all happy in the oven, the aromas will be wafting around the house teasing you into a frenzy, but be patient because the end game is truly memorable.

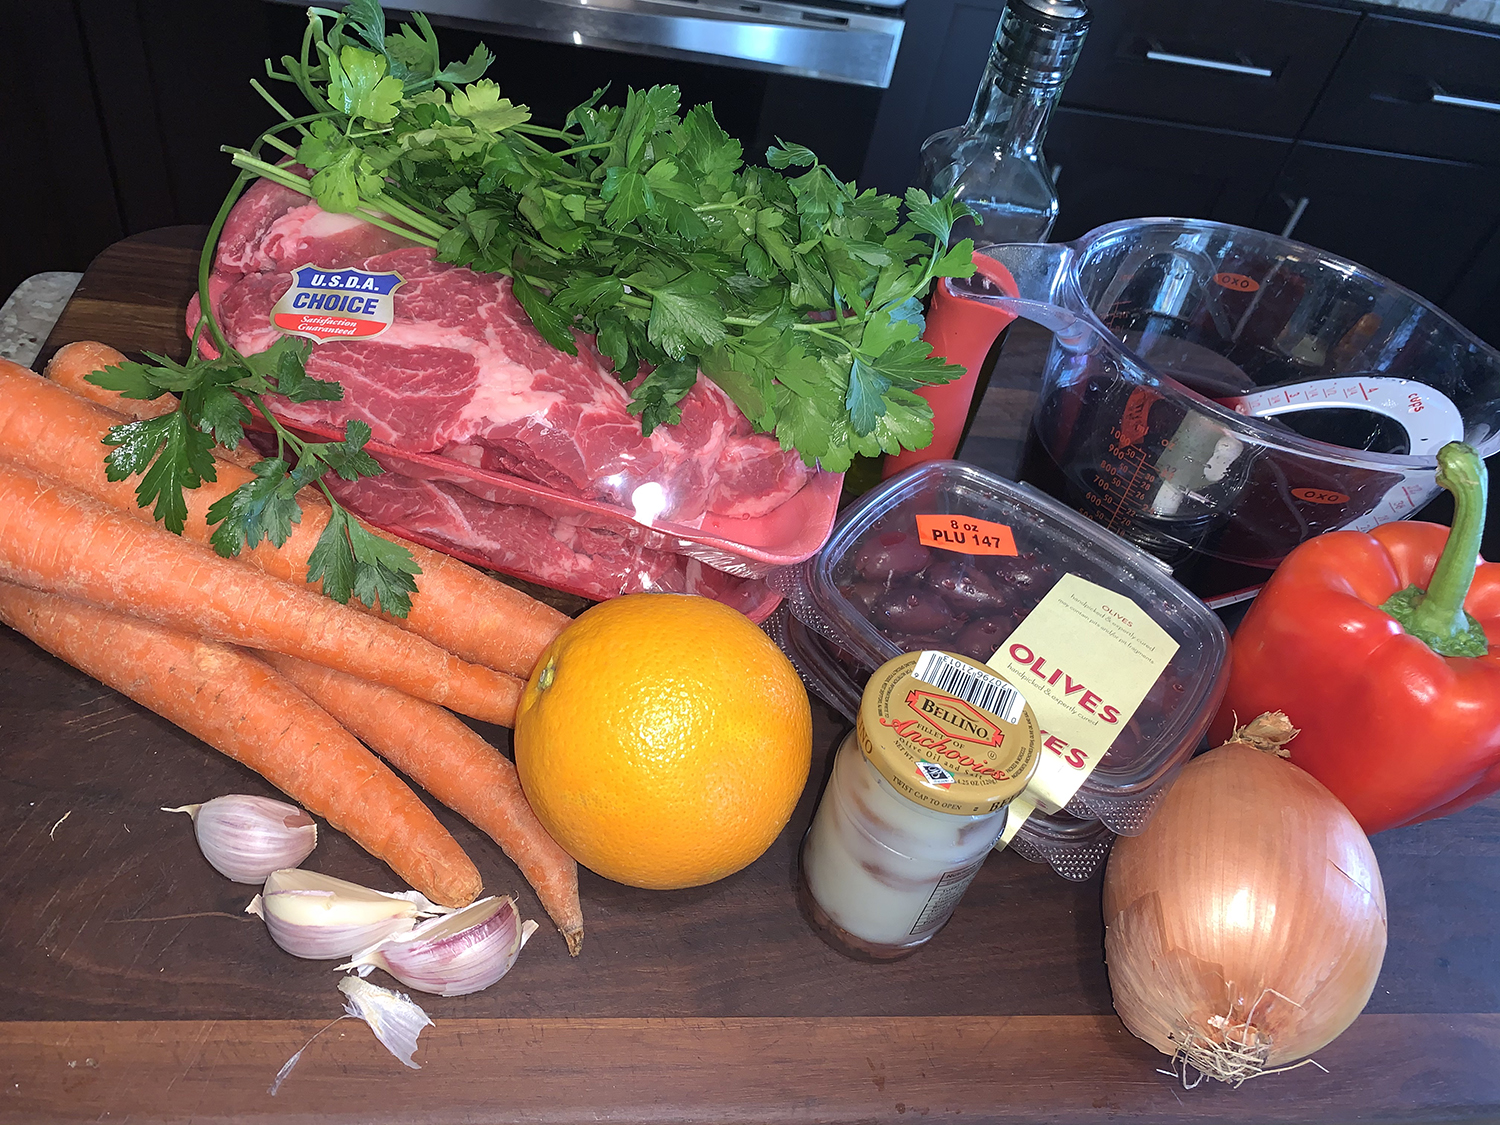
This hearty Beef, Orange and Olive Stew (Boeuf À La Gardiane) from Camargue, in the south of France, is traditionally made with taureau, or bull meat, but beef is a common substitute. Chuck roast is used instead because the fatty cut becomes tender and succulent with simmering.

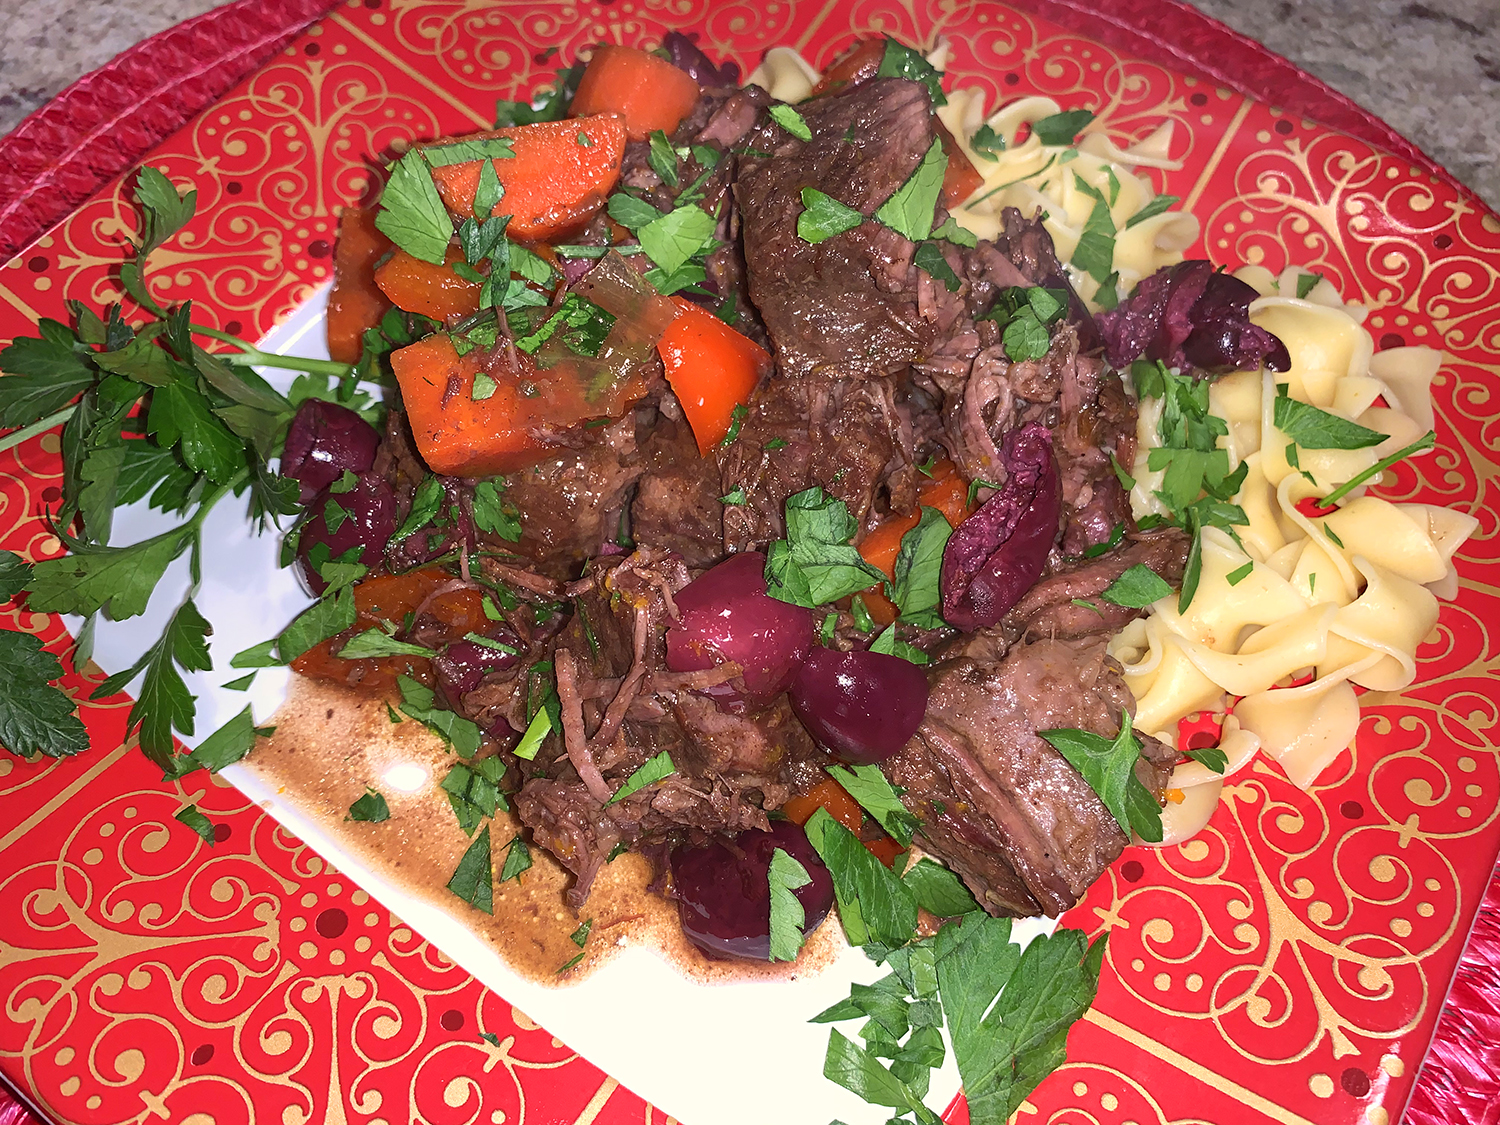
The stew gets robust flavor from classic Provençal ingredients—red wine, olives, anchovies and garlic. Orange is traditional, too; it lends the braise a brightness that balances its depth and richness. A bold, full-bodied dry red wine such as Côtes du Rhône or syrah is ideal, as it holds its own among the other big flavors. Serve with rice, egg noodles (our choice) or potatoes.

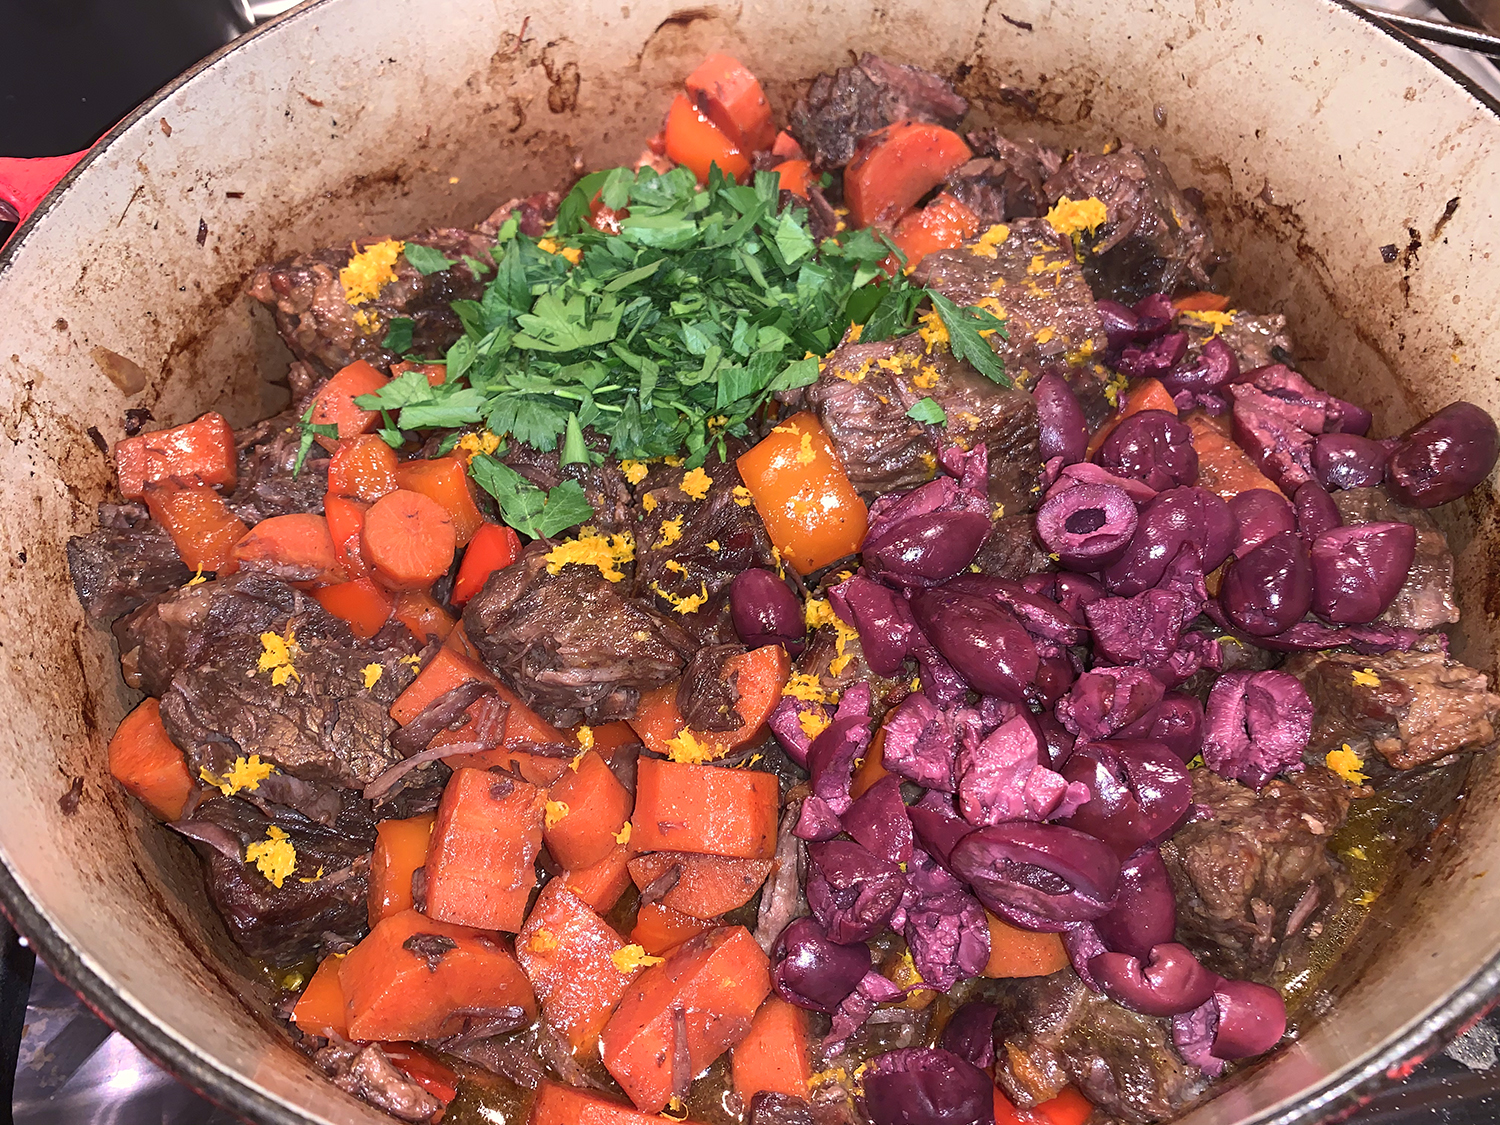
BTW, don’t pull a rookie move and forget to zest the orange before juicing it. It’s much easier to grate the zest from a whole orange than from one that’s been halved and squeezed.

Don’t add all of the carrots to the pot with the beef. Adding some at the beginning gives the stew a subtle sweetness, but after hours of braising, these carrots are spent. More carrots are added near the end of cooking so that they are tender but still flavorful.

NO. 67: Use Less Liquid for More Flavor

IMG_4517

Beef, Orange and Olive Stew

  • Servings: 6-8
  • Difficulty: easy
  • Print

Ingredients

  • 6-7 lbs. boneless beef chuck roast, well trimmed and cut into 2-inch cubes
  • Kosher salt and ground black pepper
  • 4 Medium carrots, peeled and cut crosswise into ½-inch rounds, divided
  • 3 Anchovy fillets, patted dry
  • 2 Tbsp. extra-virgin olive oil
  • 2 Medium garlic cloves, thinly sliced
  • 1 Medium yellow onion, chopped
  • 1 Cup pitted kalamata olives, rinsed, patted dry and chopped, divided
  • 2½ Cups dry red wine
  • 1 Medium red bell pepper, stemmed, seeded and cut into 1-inch pieces
  • 1 Tbsp. grated orange zest, plus ⅓ cup orange juice
  • 2 tsp. red wine vinegar
  • 1 Cup lightly packed fresh flat-leaf parsley, roughly chopped

Directions

  1. Heat the oven to 325°F with a rack in the lower-middle position. In a large Dutch oven, toss the beef with 2 tablespoons salt and 2 teaspoons pepper. Add ½ the carrots, the anchovies, oil, garlic and onion, then toss. Cover, transfer to the oven and cook for 2 hours.
  2. Remove the pot from the oven and stir in ½ cup of the olives. Return to the oven uncovered and cook until a knife inserted into a piece of beef meets no resistance, 1 to 1½ hours.
    IMG_4524
  3. Using a slotted spoon, transfer the meat to a large bowl, leaving the vegetables in the pot. Set a fine mesh strainer over a fat separator or medium bowl. Pour the meat juices into the strainer, pressing on the solids to extract as much liquid as possible; discard the solids. You should have about 2½ cups liquid (we ended up with only 3/4 cup); if needed, add with water.
  4. Pour the wine into the now-empty pot and bring to a boil over medium-high, scraping up any browned bits. Reduce to medium and simmer, stirring occasionally, until the wine is reduced by half, about 8 minutes. Meanwhile, if you strained the meat juices into a bowl, use a spoon to skim off and discard the fat from the surface.
  5. Pour the defatted meat juices into the pot and add the remaining carrots and the bell pepper. Return to a simmer and cook, uncovered and stirring occasionally, until the vegetables are tender and the sauce is slightly thickened, 10. (After 10 minutes, cover the pot to maintain the juices and further soften the carrots, cooking for another 15 minutes.)
  6. Stir in the orange juice and beef. Continue to cook, stirring occasionally, until the sauce begins to cling to the meat, 3 to 6minutes.
    IMG_4546
  7. Off heat, stir in the remaining ½ cup olives, the orange zest, vinegar and half of the parsley. Taste and season with salt and pepper. Sprinkle with the remaining parsley.
    IMG_4547
    IMG_4550

http://www.lynnandruss.com

Adapted from a recipe by Milk Street: The New Rules.

Broiled Flank Steak, Asparagus, Scallions, and Radishes

Broiled flank steak served with nutty asparagus, charred scallions, and caramelized radishes makes an easy sheet-pan dinner—with little clean up! We were a bit skeptical of the roasted radishes, but came away converts. They were so good, especially in tandem with the other charred veggies.

IMG_4681

Remember Green Goddess Sauce? It pulled the meal together with a bright herby note. This light, creamy version is also delicious with roasted potatoes and fish, or as a dip with vegetables.

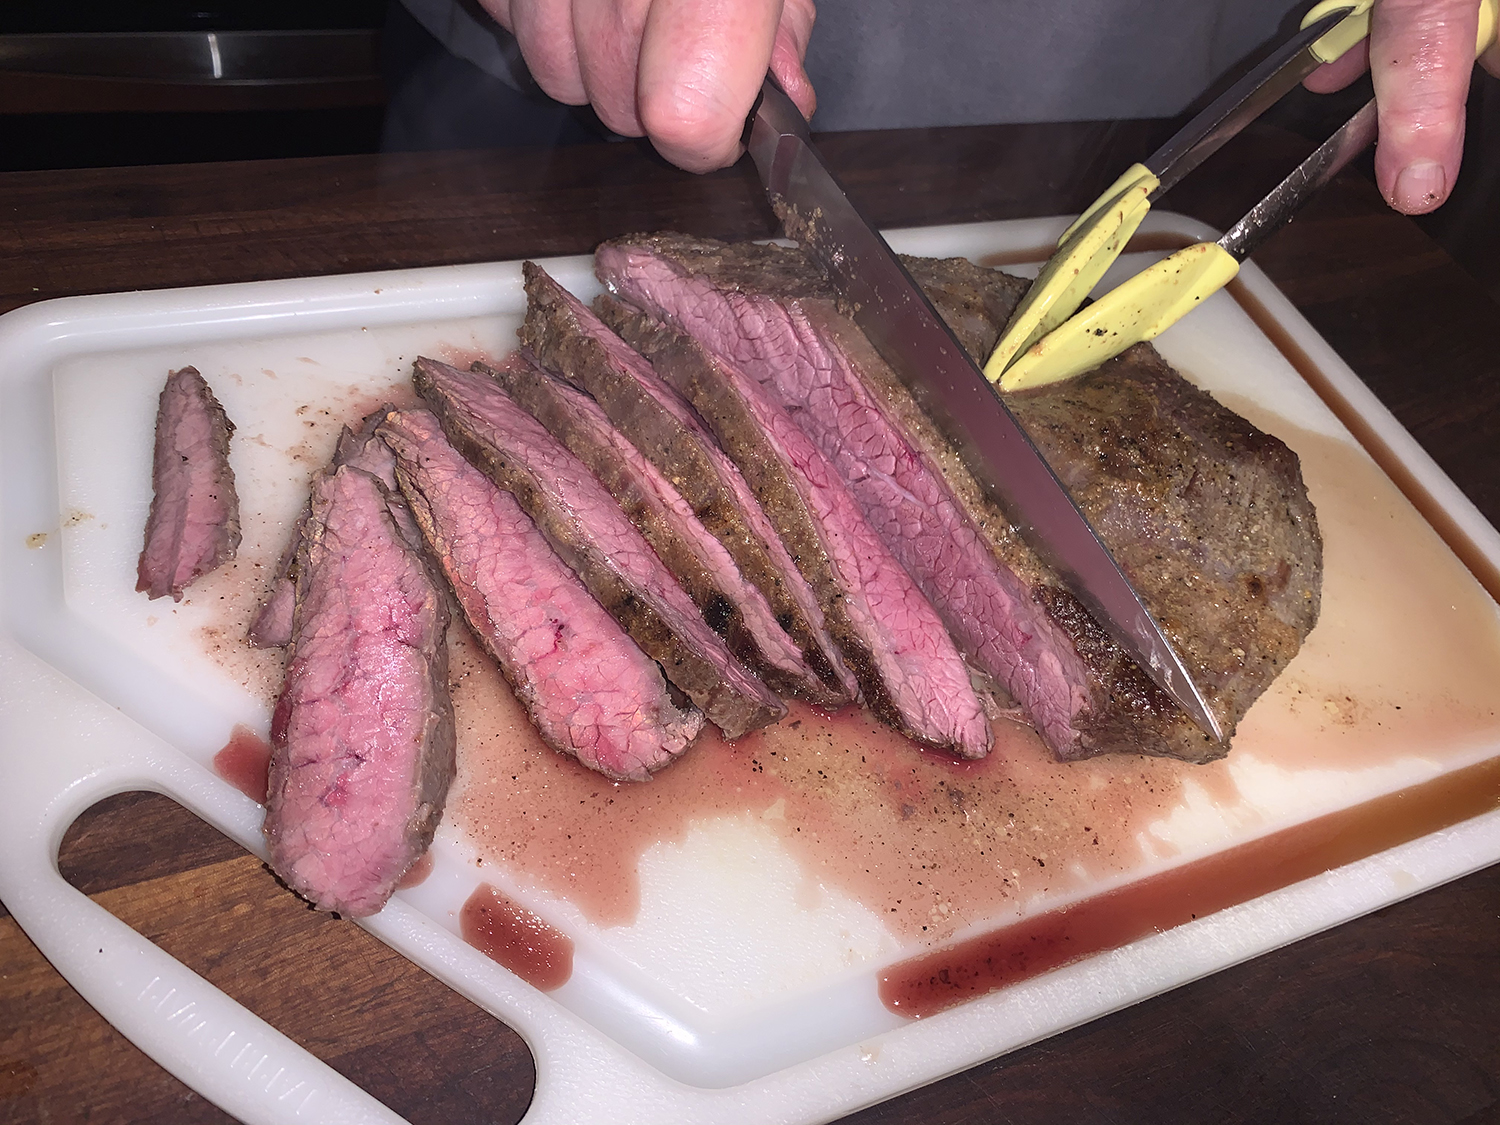
Our piece of steak weighed in a bit heavier at 2 pounds. One end was much thinner so we tucked it under the thicker portion. However, it still got done ahead of time, so we sliced the thin part off and tented with tinfoil on a cutting board with moat while the remaining ingredients continued broiling.

But then the veggies were done before the thick part of the steak, so those went under foil on a platter. Ideally everything would be a wrap at the same time, but you have to be ready to improvise if necessary.

As is, it’s a great low-carb dinner. For a heartier meal, serve with a cooked grain, such as quinoa or farro.

IMG_4656

Broiled Flank Steak, Asaparagus, Scallions and Radishes with Green Goddess Sauce

  • Servings: 4
  • Difficulty: easy
  • Print

Ingredients

For the green goddess sauce

IMG_4667

  • 2 anchovies, rinsed and patted dry
  • 1 medium clove garlic
  • 1/2 cup loosely packed fresh flat-leaf parsley leaves and tender stems
  • 2 Tbs. chopped scallions (from about 1 large scallion)
  • 1 Tbs. fresh tarragon leaves
  • 3/4 cup whole-milk yogurt
  • 3 Tbs. mayonnaise
  • 1 Tbs. fresh lemon juice
  • Kosher salt and freshly ground black pepper

For the steak and vegetables

  • 1-1/4-lb. flank steak
  • 1-1/2 tsp. granulated garlic
  • Kosher salt and freshly ground black pepper
  • Nonstick cooking spray
  • 1 lb. asparagus, trimmed
  • 1 bunch scallions, trimmed
  • 6 medium radishes, quartered
  • 2 Tbs. canola or vegetable oil

Directions

Make the green goddess sauce

  1. Put the anchovies and garlic in a mini food processor, and pulse until chopped.
  2. Add the parsley, scallions, and tarragon, and process until finely chopped.
    IMG_4658
  3. Add the yogurt, mayonnaise, lemon juice, 1 tsp. salt, and 1/2 tsp. pepper. Process until smooth. Season to taste with more salt and pepper.
    OR: To make the sauce by hand, mince the garlic, then mash with the anchovies. Put the mixture into a small bowl. Finely chop the herbs and scallions, and add to the garlic mixture. Stir in the yogurt, mayonnaise, lemon juice, salt, and pepper.
  4. The sauce can be made up to 1 day ahead. Store in the refrigerator in an airtight container.

Broil the steak and vegetables

  1. Season the steak with 1 tsp. of the granulated garlic, salt, and pepper, coating both sides. Let sit at room temperature for at least 30 minutes or up to 1 hour.
  2. Position an oven rack 4 inches from the broiler element, and heat the broiler on high. Line a large rimmed baking sheet with foil, and spray it lightly with cooking spray.
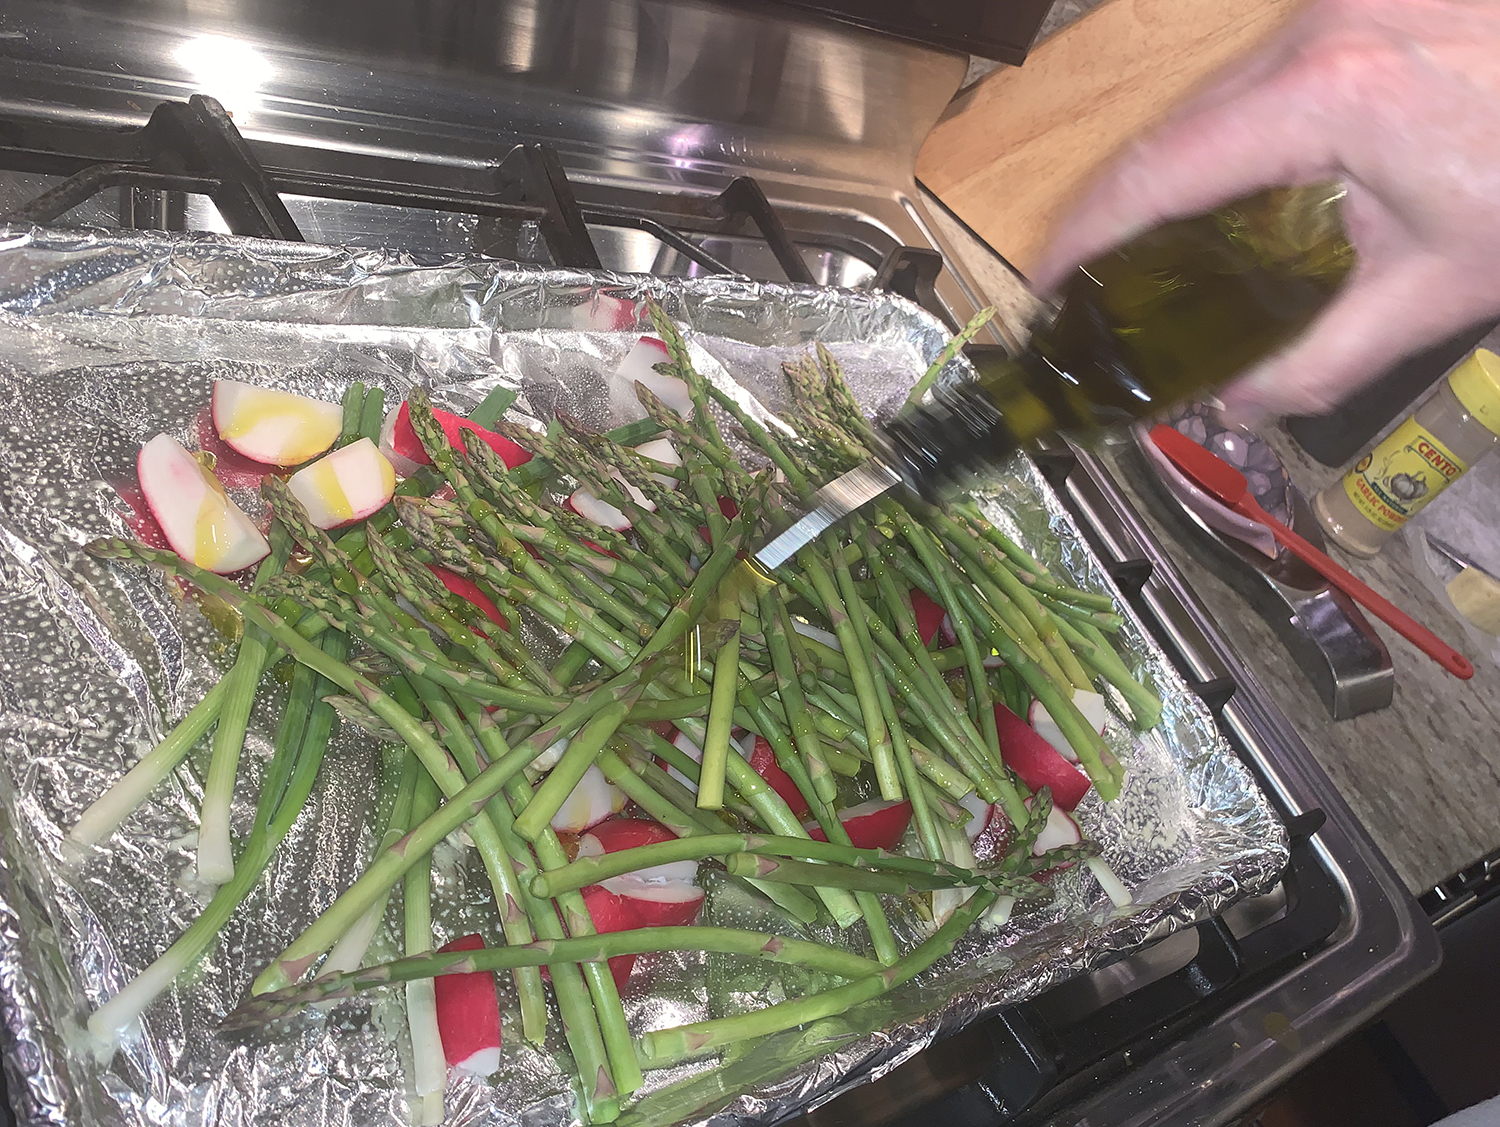
  3. Put the asparagus, scallions, and radishes on the baking sheet. Drizzle with 1 Tbs. of the oil and toss to coat. Sprinkle with the remaining 1/2 tsp. granulated garlic, and season with salt and pepper. Nudge the vegetables to the sides of the pan, keeping them in a single layer.
    IMG_4662
  4. Add the steak to the center of the pan, and drizzle with the remaining 1 Tbs. oil.
    IMG_4666
  5. Broil, flipping the steak once and stirring the vegetables, until the internal temperature of the steak is 125°F to 130°F for medium rare, about 5 to 6 minutes per side.
  6. Transfer the steak to a cutting board, and let rest for 5 to 10 minutes. Thinly slice the steak against the grain. Serve the steak and vegetables drizzled with the Green Goddess Sauce.
    IMG_4673
    IMG_4680

http://www.lynnandruss.com

Adapted from a recipe by Nicki Sizemore from Fine Cooking