Monthly Archives: July 2019

Summer-Perfect Salad

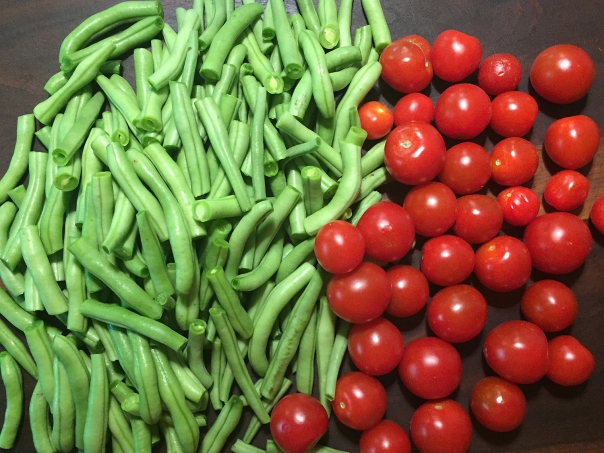
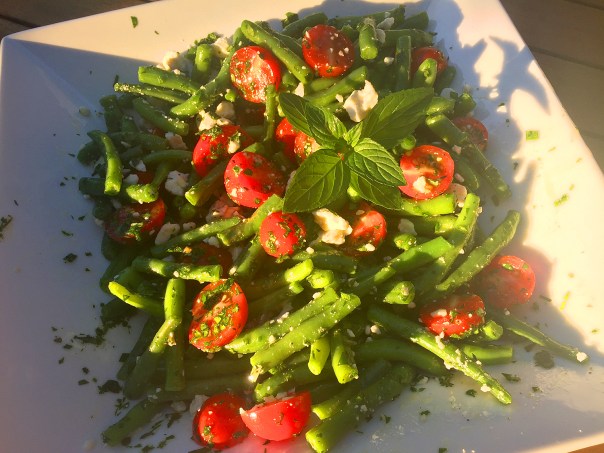
Green Bean Salad with Cherry Tomatoes and Feta was the perfect side dish to highlight the beans and herbs from our garden. Plus a bounty of tomatoes at nearby farm stands rounded out this flavorful salad. But cooking beans until they’re soft enough to be speared with a fork generally means you’ve got to boil the living daylights out of them—not to mention all their fresh, grassy flavor.

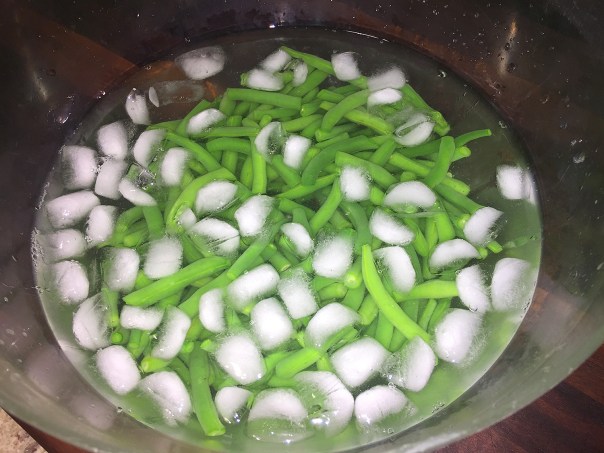
To make the beans tender, bright green, and deeply flavored, blanche them in highly concentrated salt water (¼ cup of salt to 2 quarts of water). According to Cook’s Illustrated, this quickly softens the pectin in the beans’ skins, so they became tender before losing their vibrant color; it also seasons them inside and out.

This recipe is a Mediterranean composition using mint, parsley, feta cheese, and tomatoes; but you can also switch things up with a French-style version with Dijon, capers, and tarragon; or a Southeast Asian–influenced salad with fried shallots, carrots, and peanuts.

NOTE: If you don’t own a salad spinner, lay the green beans on a clean dish towel to dry in Step 2. The blanched, shocked, and dried green beans can be refrigerated in a zipper-lock bag for up to two days.
IMG_4080

Green bean with Cherry Tomato and Feta Salad

  • Servings: 4-6
  • Difficulty: easy
  • Print

Ingredients

  • 1 ½ pounds green beans, trimmed and cut into 1- to 2-inch lengths
  • ¼ teaspoon table salt, plus salt for blanching
  • 12 ounces cherry tomatoes, halved
  • ¼ cup extra-virgin olive oil
  • 2 tablespoons chopped fresh mint
  • 2 tablespoons chopped fresh parsley
  • 1 tablespoon lemon juice
  • ¼ teaspoon table salt, plus salt for blanching
  • ¼ teaspoon pepper
  • 2 ounces feta cheese, crumbled (½ cup)

Directions

  1. Bring 2 quarts water to boil in large saucepan over high heat. Add green beans and ¼ cup salt, return to boil, and cook until green beans are bright green and tender, 5 to 8 minutes.
    Our beans were freshly picked from our garden, so the actual blanching time took only 4 minutes.
  2. While green beans cook, fill large bowl halfway with ice and water. Drain green beans in colander and immediately transfer to ice bath.
    IMG_4084
  3. When green beans are no longer warm to touch, drain in colander and dry thoroughly in salad spinner. Add them and halved tomatoes in large serving bowl.
  4. Place oil, mint, parsley, lemon juice, pepper, and salt in a small bowl and whisk together thoroughly.
  5. Drizzle the dressing over the beans and tomatoes and toss to combine; sprinkle with feta, and serve.
    IMG_4087

http://www.lynnandruss.com

Original recipe courtesy of Cook’s Illustrated

Hearty Meal Minus the Meat

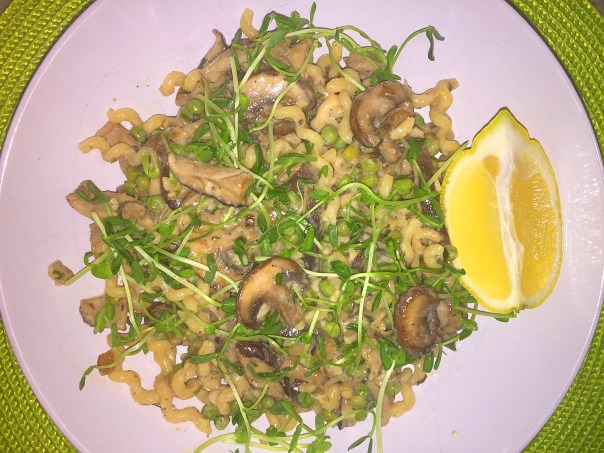
Like many folks nowadays, we try to cut back on meat consumption a few times a week. This Fusilli with Gourmet Mushrooms, Peas and Creamy Tarragon Sauce is hearty enough to satisfy even the most die-hard meat lover (providing they like mushrooms…)

The original recipe by Ronne Day calls for 12 ounces of bucatini pasta, but I scaled back the amount by 50% and substituted fusilli because I feel the curls tend to wrap themselves around the other ingredients better than straight pasta. And it’s almost impossible to get the fresh morels and chanterelles required of the original recipe, more power to you if you can. Instead, I used a gourmet mix of oyster, shiitake and cremini ‘shrooms.

I didn’t hold back on the chopped fresh garlic and increased the peas (fresh or frozen) to two cups. You may object to topping each serving with pea shoots, but give them a try, they really do add some welcome texture to the dish.

IMG_3435

Fusilli with Gourmet Mushrooms, Peas and Creamy Tarragon Sauce

  • Servings: 4-6
  • Difficulty: easy
  • Print

Ingredients

  • 1/2 stick (4 Tbs.) unsalted butter
  • 2 Tbs. Champagne vinegar
  • 2 medium lemons, 1 zested and juiced, 1 cut into wedges for serving
  • Kosher salt
  • 8 oz. fusilli
  • 3 Tbs. olive oil
  • 1/2 cup chopped shallots
  • 1 lb. fresh gourmet mushroom mix (oyster, shiitake, cremini and morels and chanterelles if possible), cut into bite-size pieces, (about 4 cups)
  • 2 cups fresh or frozen peas, thawed
  • 1/4 cup finely chopped garlic (about 14 cloves)
  • 8 oz. mascarpone, at room temperature
  • 2 Tbs. chopped fresh tarragon
  • Freshly ground black pepper
  • 1 oz. pea shoots
  • Parmigiano-Reggiano or Grana Padano, for serving

Directions

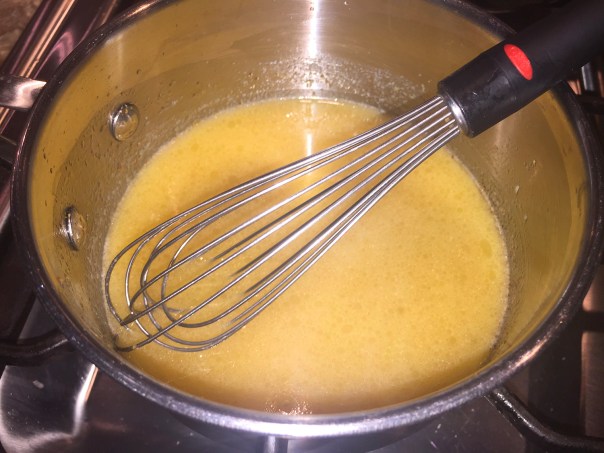
  1. In a medium saucepan, melt the butter over medium-low heat until the milk solids are deep golden brown and the butter has a nutty aroma, about 4 minutes.
  2. Whisk in the vinegar and 1 Tbs. of the lemon juice, and set aside.
    IMG_3439
  3. Meanwhile, bring a large pot of well-salted water to a boil. cook the fusilli according to package directions until al dente.
  4. Drain, reserving 1 cup of the pasta cooking water. Return the pasta to the pot and toss with the brown-butter mixture.
  5. In a large straight-sided skillet, heat the oil over medium-high heat until shimmering. Add the shallots and cook until golden brown in spots, 1 to 2 minutes.
    IMG_3440
  6. Add the mushrooms and cook, stirring frequently, until golden brown and crisp in spots, about 5 minutes.
  7. Add the peas and cook, 1 minute, and then add the garlic and cook, about 15 seconds.
    IMG_3444
  8. Transfer the fusilli to the skillet, and toss with the mushroom mixture. Add the mascarpone, 1/2 cup cooking water, 2 Tbs. of the lemon juice, the tarragon, 2 tsp. of the lemon zest, 1-1/2 tsp. salt, and 1 tsp. pepper, and toss until the cheese melts and the sauce is creamy. Add cooking water as needed.
    IMG_3446
  9. Divide the pasta among four plates. Top with the pea shoots. Serve with lemon wedges, and pass the Parmigiano-Reggiano.
    IMG_3451

http://www.lynnandruss.com

Original recipe by Ronne Day

All Aboard the Soup Train. Hot or Not.

Who in their right mind makes hot soup on a 95° summer day? OK, so maybe I didn’t have all of my faculties in order when planning this meal, but I did have the ingredients on hand (other than the baby bok choy, that is), and thought why not? There is scientific reasoning behind my madness, so stay with me.

Though it’s counter-intuitive, when you eat hot food, your body’s receptors notice. They relay the hotness to the brain, which in turn signals your body’s systems to cool down—you start sweating as a result. As your sweat evaporates, it cools your body down. Did you ever notice, people in countries with warm climates like India often eat very hot, spicy foods? Just sayin’…

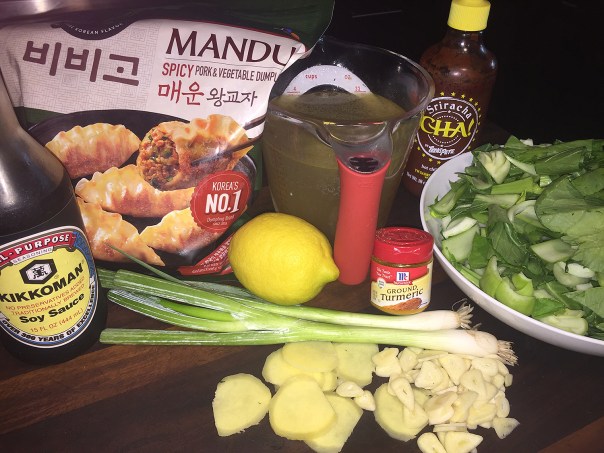
This brightly flavored Turmeric-Ginger Dumpling Soup is ready in no time, thanks to prepared dumplings (our bag was 50% more at 1 1/2 lbs.). With plenty of homemade chicken stock, a bag of frozen pork/vegetable dumplings, lemons, scallions and all of the herbs and spices—plus only 20 minutes of my time—I was stoked to whip up this quick, tasty recipe from Fine Cooking’s “Make It Tonight” series.

IMG_4099

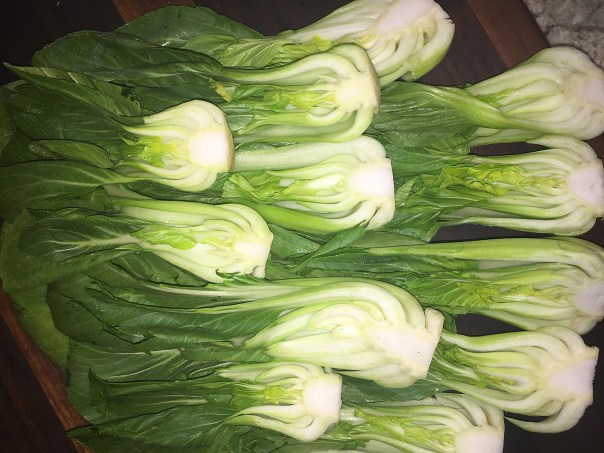
Baby bok choy (shown cut in half above ) can vary in size from the length of your index finger to the length of your hand; in the end, you’re looking to have pieces that are 2 inches long, so trim accordingly. Make sure to rinse really well, because a lot of grit can lodge itself within the leaves.

We topped ours with both a drizzle of Sriracha and soy sauce, which, along with the spicy pork dumplings, provided an extra jolt. You of course may want to tame things a tad and select a milder dumpling, and omit the Sriracha.

Yes, I would jump on this train again…

IMG_4101

Turmeric-Ginger Dumpling Soup

  • Servings: 4-6
  • Difficulty: easy
  • Print

Ingredients

  • 1 Tbs. vegetable oil
  • 8 1/8-inch-thick peeled slices fresh ginger, smashed
  • 4 cloves garlic, thinly sliced
  • 1-1/2 tsp. ground turmeric
  • 2 quarts lower-salt chicken broth
  • 4 3/4-inch-wide strips lemon zest
  • Kosher salt
  • 1 lb. frozen Asian meat or vegetable dumplings
  • 1 lb. baby or Shanghai bok choy, halved through the stem or quartered if large and cut crosswise into 2-inch pieces
  • 1-1/2 tsp. fresh lemon juice
  • 2 medium scallions, thinly sliced diagonally
  • Asian sesame oil, Sriracha, or soy sauce, for serving

Directions

  1. Heat the oil in a large saucepan over medium-high heat. Add the ginger, garlic, and turmeric, and cook, stirring, until fragrant, about 30 seconds.
    IMG_4104
  2. Add the broth, lemon zest, and 1/4 tsp. salt, and bring to a boil. Reduce the heat to a simmer, cover, and cook until the flavors meld, about 5 minutes.
  3. Uncover, bring to a boil, and add the dumplings. Return to a boil, and cook for 2 minutes less than the package directs.
    IMG_4106
  4. Add the bok choy, and continue cooking until the dumplings are cooked through and the bok choy is crisp-tender, about 2 minutes total.
    IMG_4107
  5. Stir in the lemon juice, and season to taste with salt. Sprinkle with the scallions, and serve with a drizzle of sesame oil, Sriracha, or soy sauce.
    IMG_4116

http://www.lynnandruss.com

By Christine Gallary from Fine Cooking

Use Your Noodle

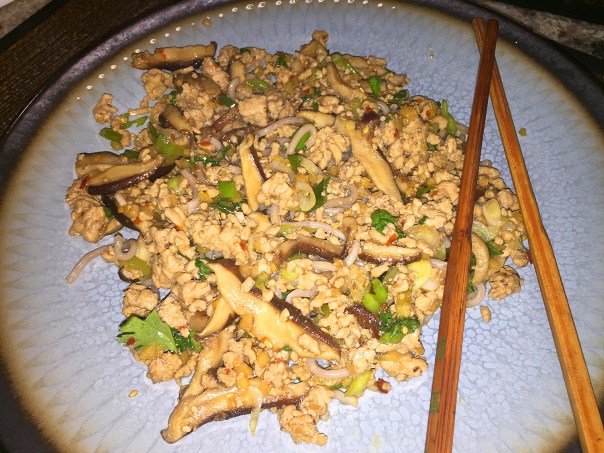
This Cha Soba Noodles with Ginger, Mushrooms and Pork is a lovely and quick Asian meal. We loved the spicy, gingery, tangy and slightly sweet notes it had to offer.

If you can find them (which I couldn’t), cha soba noodles are subtly flavored with green tea and pair well with the flavors of the pork. Look for them where you buy noodles. If you can’t find cha, then substitute regular soba noodles. In fact, you may even want to purchase the “ready to serve” brand, which saves a bit of time. It comes with two individual 7-ounce packages. Keep in mind, when seven ounces of dried soba noodles are cooked, you’ll have more volume than the already cooked kind.

IMG_4152

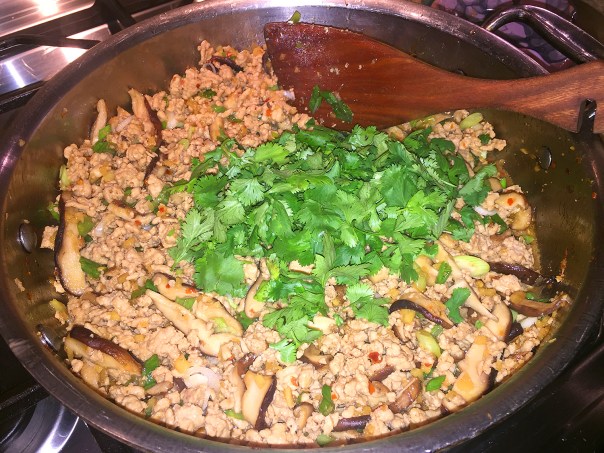
Anyway, I beefed up the amount of ground pork and shiitake mushrooms by 25% each, but kept the remaining ingredients the same. In the last few steps, I reengineered the process a tad. Instead of removing the cooked pork mixture to another bowl (why bother?), I just added the scallions and mushrooms directly to the pan with the meat. Once the scallions were softened, I stirred in the cilantro.

IMG_4131

Cha Soba Noodles with Ginger, Mushrooms and Pork

  • Servings: 3-4
  • Difficulty: easy
  • Print

Ingredients

  • 7 oz. cha or regular soba noodles
  • 2 Tbs. canola oil
  • 5 cups thinly sliced fresh shiitake mushrooms
  • 1 lb. ground pork
  • 1 tsp. crushed red pepper flakes
  • 1/4 cup finely minced fresh ginger
  • 1/4 cup soy sauce
  • 1/4 cup rice vinegar
  • 1/4 cup mirin
  • 1 cup thinly sliced scallions
  • 1/2 cup fresh cilantro leaves
  • 2 tsp. toasted sesame seeds

Directions

  1. Cook the noodles according to package directions until al dente. Drain, rinse with cold water, and set aside.
  2. Heat 1 Tbs. of the oil in a large skillet over medium heat. Add the mushrooms and cook, stirring occasionally, until golden-brown and beginning to crisp on the edges, about 8 minutes. Transfer to a plate.
    IMG_4136
  3. Swirl the remaining 1 Tbs. oil in the same skillet. Add the pork and pepper flakes, and cook, breaking up the pork with a wooden spoon, until cooked through and no longer pink, about 5 minutes.
    IMG_4137
  4. Add the ginger and cook, stirring, until fragrant, about 1 minute.
    IMG_4138
  5. Add the soy sauce, vinegar, and mirin. Bring to a simmer while scraping up the bits on the bottom of the pan. Reduce the heat to medium low, and continue to cook until the liquid is reduced by about half.
  6. Transfer the pork mixture to a large bowl, tossing to help cool slightly.
    OR, as I did, just add the scallions and mushrooms directly into the skillet with the pork.
    IMG_4141
  7. Add the scallions, cilantro, and mushrooms to the skillet, and cook until the scallions soften. Transfer to the bowl with the pork, and toss to combine.
    IMG_4142
  8. Divide the reserved noodles among four plates, top with the pork and mushroom mixture, sprinkle with the sesame seeds, and serve.
    IMG_4144

http://www.lynnandruss.com

By Emily Peterson from Fine Cooking


Bright. Bold. Saucy.

You’ll rave about this grilled Piri Piri Chicken with its spicy moist flavor profile. Serve it with a side of just picked corn-on-the-cob and fresh green beans off the vine, and you’ve got a winner, winner chicken dinner on your hands.

IMG_3998

Piri piri often hyphenated or as one word—and with variant spellings peri peri or pili pili—is a cultivar of Capsicum frutescens, a chili pepper that grows both wild and as a crop. Its name sometimes refers to the bird’s eye chili. Sauce made from piri piri chilis (used as a seasoning or marinade) is Portuguese in origin and a very popular dish there. I see why…

Like many dishes, the history of piri-piri chicken is a little vague. According to most accounts, when the Portuguese landed in Mozambique, they discovered the malagueta pepper. Naturally, they brought some of those chilies and the recipes back to Portugal with them and even brought the chili to other parts of the world including India. In recent years, piri-piri chicken has become extremely popular around the world. That’s more due to the South Africans than the Portuguese, though.

While you may be thinking you can substitute ancho, chipotle and regular chili powders in this recipe, don’t, the flavors taste off. Instead, use New Mexico (I ordered online through Amazon) or California chili powders. If you can’t find them, both are sold as dried, whole chilies that can be ground. Or simply leave it out and increase the paprika to ¼ cup (not preferable).

Fresno chilies are fresh red chilies similar in size and shape to jalapeños but with pointier tips; if they are unavailable, fresh cherry peppers work well, too. Don’t reduce the number of fresh chilies in the sauce; all eight are needed for flavor and color. To reduce spiciness, remove some or all of the seeds and ribs from the chilies before processing. And don’t substitute Thai chilies for the Fresnos; they pack far more heat.

When we first made the sauce and starting basting the chicken, we thought Holy Hot Sauce, that was one potent marinade! Oddly, once the chicken was cooked and given a final baste with the cilantro mixture, the flavor profile really seemed to mellow. Verdict is in, we’ll definitely make it again.

For a smokier flavor, add apple, cherry or hickory wood to the fire. Keep in mind that the entire process takes over two hours, so plan in advance.

Piri Piri Chicken

  • Servings: 4
  • Difficulty: easy
  • Print

Ingredients

  • 3 Tbsp. New Mexico or California chili powder
  • 1 Tbsp. ground cumin
  • 1 Tbsp. ground coriander
  • 1 Tbsp. sweet paprika
  • 1½ Tbsp. kosher salt
  • 1 4- to 4½-pound whole chicken, spatchcocked
  • 2 Tbsp. white sugar
  • 8 medium fresno chilies, stemmed and quartered
  • 3 medium garlic cloves
  • ⅓ cup lemon juice (2 to 3 lemons)
  • ¼ cup red wine vinegar
  • 1 cup fresh cilantro leaves and tender stems, finely chopped

Directions

  1. In a medium bowl, mix together the chili powder, cumin, coriander, paprika and salt. Transfer 2 tablespoons of the mixture to a small bowl, setting the rest aside.
     

  2. Loosen the skin over the chicken’s breast and thighs by gently working your fingers between it and the flesh. Using a small spoon, evenly distribute the 2 tablespoons of spice mixture under the skin, then rub it into the flesh. Set the chicken on a baking sheet.
    IMG_3970
  3. In a food processor, combine the reserved spice mixture, the sugar, chilies and garlic. Pulse until finely chopped, scraping down the bowl as needed. With the machine running, pour in the lemon juice and vinegar; process until smooth, scraping down the bowl once or twice.
     

  4. Measure out ¼ cup of the sauce, reserving the rest for later, and brush evenly over the chicken, including the bone side. Let stand at room temperature for 45 minutes to 1 hour.
     

  5. Meanwhile, prepare a grill for indirect, high-heat cooking. For a charcoal grill, spread a large chimney of hot coals evenly over one side of the grill bed; open the bottom grill vents. For a gas grill, set half of the burners to high. Heat the grill, covered, for 5 to 10 minutes, then clean and oil the cooking grate.
  6. Set the chicken skin side up on the cooler side of the grill. Cover and cook for 25 minutes.
    IMG_3983
  7. Using tongs, rotate the chicken 180 degrees to bring the far side of the chicken closest to the heat. Cover and continue to cook until the thickest part of the breast reaches 160°F and the thighs reach 175°F, another 25 to 35 minutes.
     

  8. Brush the chicken with 2 tablespoons of the reserved sauce, then use tongs to flip it skin side down onto the hot side of the grill. Cook until the skin is lightly charred, 1 to 2 minutes.
    IMG_3987
  9. Transfer skin side up to a cutting board and let rest for 10 minutes. Stir the cilantro into the remaining sauce, then baste the chicken once more. Serve with the sauce on the side.
    IMG_3994

http://www.lynnandruss.com

IMG_3997

177milkstreet.com b 

Armenian Grilled Pork and Potatoes

Continuing on our ethnic culinary journey, this recent meal heralds from Armenia. Bone-in, blade-end pork loin chops are the best cut for this Armenian Grilled Pork with Pepper Sauce recipe because they contain a good amount of fat, which keeps the meat moist and flavorful; rib chops will work, too, but because they are leaner, it’s important not to overcook them.

IMG_4043

The sauce that accompanies these chops was inspired by an Armenian grilled vegetable recipe called summer khorovats. It’s excellent with any grilled pork or chicken. (You will need a disposable foil pan for cooking the vegetables.) To recreate khorovats, or Armenian barbecue, use thick-cut, bone-in pork chops, marinate them in a mix of onion and oregano, then grill them with wood chips to infuse the pork with smokiness.

Don’t soak the wood chips before wrapping them in foil. Dry chips smoke more readily, which is desirable for quick-cooking foods such as pork chops. After placing the pork on the grill, don’t open the lid for 10 minutes. This allows the smoke to collect and create a more intense smokiness in the chops.

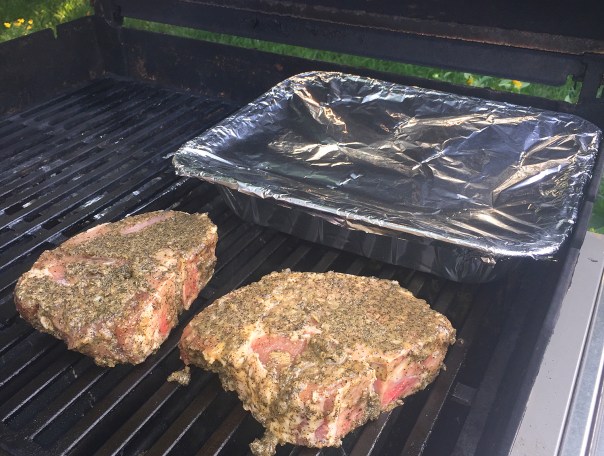
For just the two of us, we cooked only two chops as opposed to four. But they were huge, and in my case at least, I could only eat half of it. Plus, we had hickory wood chips on hand instead of apple, which might have resulted in a slightly different flavor profile, but I doubt one that would be too discernible.

You can make the meal without the skewered potatoes, but I recommend you don’t. They are fabulous, especially when cut up and mixed with those luscious peppers and tomatoes. I’m not gonna lie to you, the meal required quite an assortment of pots, pans, trays and other cookware. But my oh my, it was Magnifico!

Armenian Grilled Pork with Pepper Sauce

  • Servings: 4
  • Difficulty: moderate
  • Print

Ingredients

FOR THE PORK CHOPS:

  • ¼ cup extra-virgin olive oil
  • 1 large yellow onion, cut into large chunks
  • 3 Tbsp. dried oregano
  • kosher salt and ground black pepper
  • 4 10- to 14-ounce bone-in pork chops, each 1 to 1½ inches thick
  • 3 Tbsp. salted butter, cut into 4 pieces (placed on the chops as a finish)
  • 3 cups apple wood chips (for smoking)

FOR THE SAUCE:

  • 1 pound plum tomatoes (4 medium), cored
  • 12 ounces Cubanelle peppers, Hungarian wax peppers or Anaheim chilies, stemmed, kept whole and seeded
  • 1 Tbsp. extra-virgin olive oil
  • 12 medium garlic cloves, peeled
  • 4 Tbsp. (½ stick) salted butter, cut into 4 pieces, divided
  • ½ tsp. dried oregano
  • 3 Tbsp. red wine vinegar
  • kosher salt and ground black pepper

Directions

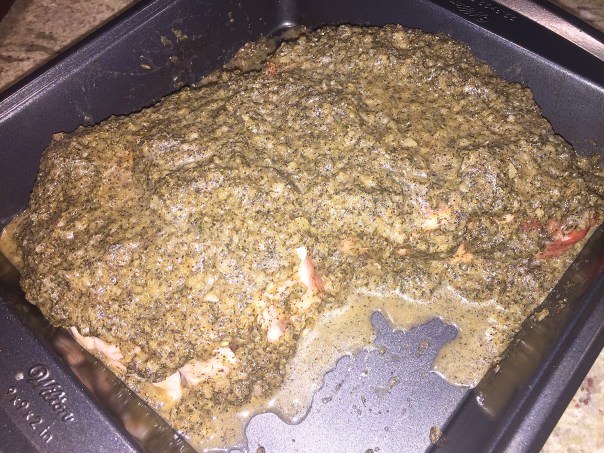
  1. To prepare the chops, in a food processor, combine the oil, onion, oregano, 2 tablespoons salt and 1 tablespoon pepper. Process to form a coarse paste, about 1 minute, scraping the bowl as needed. Transfer the mixture to a large bowl.
    IMG_4007
  2. Using a paring knife, make verticals cuts spaced about ½ inch apart into the fat on each chop. In a large ziploc, add the chops to the onion paste and turn to coat, rubbing the mixture into the meat. Refrigerate for at least 2 hours or up to 24 hours. Remove from the refrigerator 30 minutes before heating the grill.
    IMG_4006
    IMG_4009
  3. Loosely wrap the wood chips in a 12-by-18-inch sheet of foil, forming a flat packet roughly 7 inches square. Poke several holes in each side of the packet.
  4. Prepare a grill for indirect, high-heat cooking. For a charcoal grill, pour a heaping chimney of hot coals evenly over one side of the grill bed and set the wood chip packet on the coals; open the bottom grill vents and lid vents.
    For a gas grill, place the wood chip packet directly on one burner that will remain on during cooking; turn all burners to high. Heat the grill, covered, for 5 to 10 minutes, then clean and oil the cooking grate. If using a gas grill, turn off one burner, leaving the remaining burner(s) on high.
  5. To prepare the sauce, while grill heats, in a large bowl, toss the tomatoes, peppers and oil.
    IMG_4011
  6. Place the vegetables on the hot side of the grill, then cover and cook, turning occasionally, until lightly charred all over, 5 to 10 minutes.
    IMG_4023
  7. Transfer to a disposable foil pan and add the garlic, 2 tablespoons of butter and the oregano. Cover with foil and poke a few holes in the foil, then place the pan on the cool side of the grill.
    IMG_4024
  8. Scrape any excess marinade off the pork chops and place the chops on the cool side of the grill alongside the foil pan. Cover the grill, positioning the lid vents over the pork chops if using a charcoal grill. Cook without lifting the lid for 10 minutes.
    IMG_4026
  9. Move the chops to the hot side of the grill and cook, uncovered and turning occasionally, until well-browned on both sides and the centers near the bone are just barely pink when cut into or reach 135°F, 5 to 8 minutes.
  10. Transfer to a platter, place 1 piece of the butter on each chop and tent with foil. Let rest for 15 minutes.
    IMG_4027
  11. Meanwhile, uncover the foil pan; the vegetables and garlic cloves should be completely softened. Using a fork, mash the vegetables until broken down but a bit chunky. Use tongs to remove and discard any large pieces of tomato or pepper skins that do not break down.
    IMG_4031
  12. Stir in the remaining 2 tablespoons butter until melted, followed by the vinegar. Season with salt and pepper to taste. Transfer to a serving bowl and serve with the pork.
    IMG_4033
    IMG_4041

http://www.lynnandruss.com

Armenian Grilled Potatoes

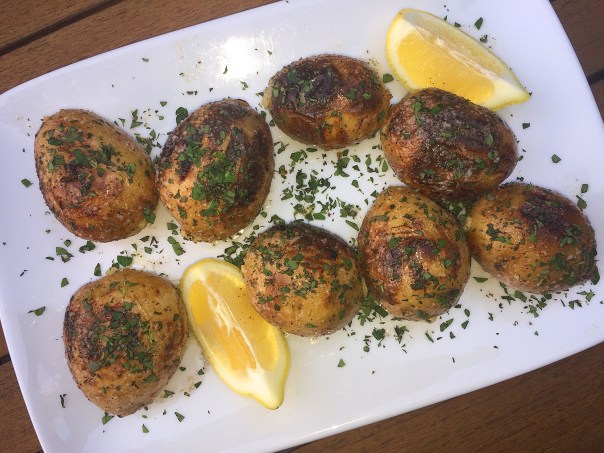
When purchasing potatoes for this recipe, look for ones about the size of an extra-large egg (although mine were the size of eggs on steroids) and that weigh about 2 ounces each. And for even cooking, try to select potatoes of similar shape and size. The potatoes can be precooked and refrigerated up to a day in advance; just before grilling, skewer them, brush with lard/butter and season with salt and pepper.
IMG_4038

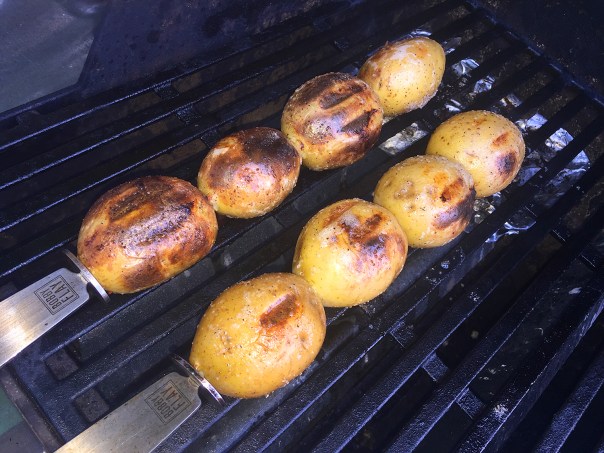
You’ll need two to four sturdy 12- to 14-inch metal skewers; skewers with pins that are flat rather than round or square to help prevent the potatoes from spinning around, making them easier to manage on the grill. If you’re preparing this recipe to serve with Armenian-style grilled pork chops, place the skewered potatoes on the hot side of the grill after you’ve removed the chops and allow the potatoes to brown while the chops rest.

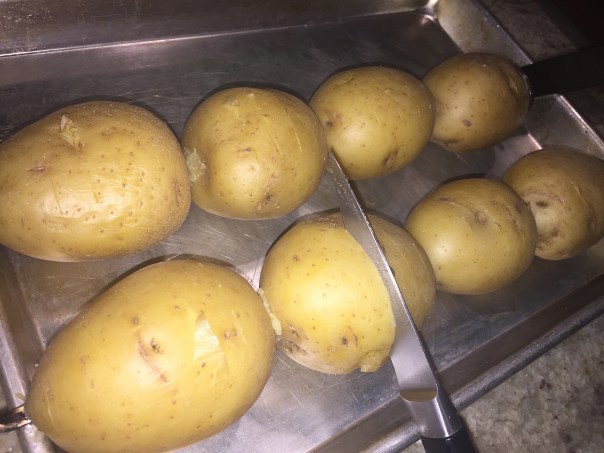
Don’t precook the potatoes at a rolling boil; this can cause the skins to split. Aim to keep the water at a gentle but constant simmer. Don’t skewer the potatoes without first chilling them in an ice bath. Chilling firms the potatoes slightly so that they cut more cleanly when scored with a paring knife.

Armenian Grilled Potatoes

  • Servings: 4
  • Difficulty: easy
  • Print

Ingredients

  • 2 pounds small yukon gold potatoes
  • 2 Tbsp. lard or salted butter, melted
  • Kosher salt and ground black pepper
  • 3 Tbsp. minced fresh oregano
  • Lemon wedges, to serve

Directions

  1. In a large pot over high, bring the potatoes and enough water to cover by about 1 inch to a boil. Reduce to medium-high, cover partially and cook until a paring knife inserted into the largest potato meets just a little resistance, adjusting the heat as needed to maintain a gentle but steady simmer, 8 to 12 minutes.
  2. Meanwhile, fill a large bowl with ice water. Drain the potatoes in a colander, then transfer to the ice water. Let stand for 10 minutes. Drain again and pat dry with paper towels.
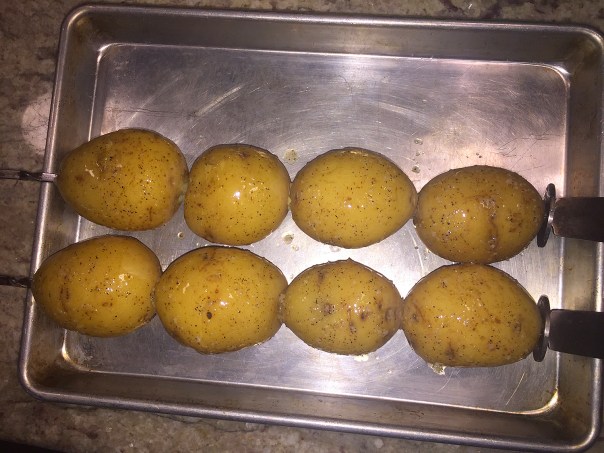
  3. Thread the potatoes lengthwise onto each of three 12- to 14-inch flat metal skewers, dividing them evenly.
  4. Using a paring knife, make 4 or 5 parallel crosswise cuts into each potato, stopping when knife blade reaches the skewer; leave the second sides of the potatoes uncut.
    IMG_4013
  5. Brush the potatoes on all sides with about ½ of the melted butter and season with salt and pepper.
    IMG_4016
  6. Prepare a grill for high-heat cooking. For a charcoal grill, pour a large chimney of hot coals evenly over one side of the grill bed and open the bottom grill vents and lid vents; for a gas grill, heat all burners to high. Heat the grill, covered, for 5 to 10 minutes, then clean and oil the cooking grate.
  7. Place the skewered potatoes on the hot side of the grill and cook, turning occasionally, until browned all over, 7 to 10 minutes.
    IMG_4034
    IMG_4035
  8. Transfer to a platter, brush with the remaining butter. Sprinkle with additional salt and pepper and the oregano. Serve with lemon wedges.

http://www.lynnandruss.com

Both recipes by Diane Unger from 177milkstreet.com

Brandywine Prime

Birthdays only roll around once a year (a good thing at my age), so we always try to make it memorable for each other. Last year, even though it wasn’t a milestone, Russ bought tickets to the Longwood Gardens Fountain & Fireworks show “Monet in the Garden.” Originally, I was going to treat him to one of their fountain and fireworks shows for his birthday back in mid-May, but they were sold out. Well, either way, both of us got to enjoy(?) it for someone’s birthday.

Our original plan was to celebrate beforehand with a special dinner at Longwood’s fine dining restaurant, 1906. Apparently however, they close that restaurant early (like mid-afternoon early) on the days when they have the fireworks concerts. So after a little research, we found Brandywine Prime at the location of the historic Chadds Ford Inn less than 5 miles from the gardens. Ironically, that is the same restaurant I dined at with my parents after a trip to Longwood around 25 years ago!

The best laid plans right? You may recall from a previous post that it rained so hard that day, and never got out of the 60’s (in mid-July!!) so we grudgingly changed our plans to eat a quick pizza on our way to Longwood Gardens. It poured pretty much the entire show 😦

But I guess we’re gluttons for punishment because almost one year later we got tickets for another Fountains & Fireworks show and revived our plans to dine at Brandywine Prime


A short clip of this year’s spectacular fireworks display.

From the time Brandywine Prime opened in February of 2007, it has been a unique dining destination, a restaurant that brings distinctive American fare to the charming and historic Chadds Ford community. It has been lovingly modernized to offer a comfortable dining experience. One of the reasons for Brandywine Prime’s success has been the willingness by the owners to adapt and change based on what customers want and expect.

It’s rustic charm and casual atmosphere can be attributed to the fact that it is situated in the beautifully restored 300-year-old Chadds Ford Inn. The superb traditional American fare of steaks, chops, and seafood, brings an elegant and upscale touch to the restaurant. Everything is made from scratch including their own bread and desserts. They place an emphasis on prime steaks and chops and seasonally changing seafood selections that arrive daily.

fireworks movie

After an hour-and-a-half touring Longwood Gardens (the weather was sunny and hot this year), we arrived a few minutes early for our dinner reservation, and were shown immediately to an upstairs corner window table. Due to the somewhat early time, only one other four-top was already seated, but the place was filling up quickly when we left.

IMG_3784

But let’s get down to the reason we came. The Food. The meal was fantastic!! Our very friendly and seasoned waiter started us off with glasses of the day’s featured wine, a Grenache Red. Shortly thereafter, we were served a basket of still warm, crusty bread accompanied by soft triangles of butter scattered with a red sea salt (apparently a restaurant staple).

I zeroed in on the Jumbo Lump Crab Cocktail from the Raw Bar section of the menu. Holy Moses, the bowl was brimming with the largest lump crab I’ve ever seen—and I’ve eaten a lot of it in my lifetime! The succulent morsels were atop a bed of wakame seaweed (not visible in photo), and garnished with red sea salt and an artisan olive oil, with a side of wonderful cocktail sauce.

IMG_3786

A coworker with Russ informed him that the Kennett Square Mushroom Tart was phenomenal so that’s where he started. Filled with a triple cream brie, local sautéed mushrooms are topped with truffle oil and microgreens; each bite literally melted in your mouth (I know, because he gave me a taste).

IMG_3789

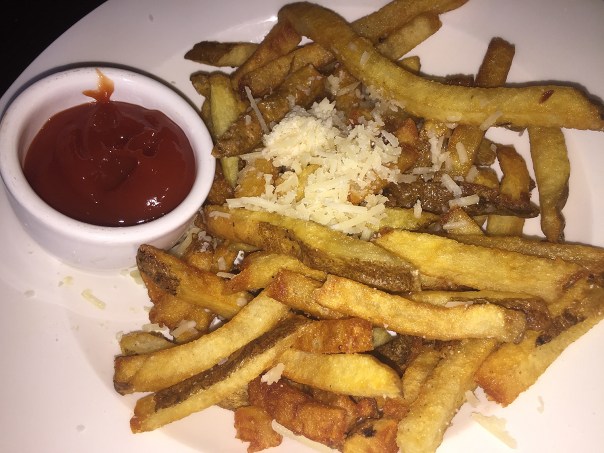
For entrées, Russ opted for the 14-ounce Milk Fed Veal Chop from the Steakhouse Grill section of the menu. It was served simply with butter-braised French green beans with herbed butter and their homemade BP steak sauce. While he had declared my appetizer as the winner of the two choices, he claimed the chop was the BEST veal he can ever remember eating, and told the waiter too. He also couldn’t pass up a side of Truffle Parmesan Fries that came with a nice crisp, a touch of salt, lots of grated parm and a side of ketchup.

IMG_3794

IMG_3791

I stuck with the seafood theme and chose the Grilled Faroe Island Salmon, which was wild caught and artfully plated with tender asparagus, salt-roasted beets, pesto vinaigrette and a Meyer lemon aioli. Yes, it was quite good, but I had to agree, Russ won the entrée round with his veal chop.
IMG_3790

With zero room left to even consider coffee or dessert, we paid the bill, which was by-the-way a bit pricey, but well worth it. So if you ever find yourself in the Chadds Ford Chester County, PA area, treat yourself to some fine dining at Brandywine Prime—and take in a stroll through Longwood Gardens…

Slammin’ Carolina-Style Barbecued Chicken

Y’all are aware, barbecue is practically synonymous with summer here in the United States, and some would insist South Carolina is the spiciest. This southern state is one of several that claim to be the “birthplace of barbecue,” and it has a whole host of different sauce options if you’re looking to change it up—like this tangy sauce which is a nice reprieve from the traditional red BBQ sauces.
The Midlands of South Carolina serve a barbecue sauce that is easily recognizable thanks to its brightly colored mustard base. This recipe, Carolina-Style Barbecued Chicken is sweet and tangy, and arguably the one the state is most known for. Here, mustard tames the sweetness of the brown sugar. If you don’t have regular yellow mustard on hand, substitute Dijon-style like I did—it provides a golden yellow color and a bit more twang.

IMG_4056

Because daughter Julia was visiting, I cooked 4 each of both dark (Hubby’s preference) and light meat (the ladies’ choice); and being the “saucy” folks that we are, I increased the marinade mixture. Well, I’m so glad I did because the chicken was slammin’ good! This might be my new favorite BBQ sauce; and in fact, we’re thinking of smothering our next racks of grilled baby back ribs with it…. stay tuned…

IMG_4044

TIP: If using breasts halves, chop each one into two so that the pieces are approximately the same size as the thighs.

Carolina-Style Barbecued Chicken

  • Servings: 4
  • Difficulty: easy
  • Print

Ingredients

  • 1/2 cup yellow or Dijon mustard
  • 1/4 cup apple cider vinegar
  • 1/4 cup packed light brown sugar
  • 1 1/2 tablespoons mustard powder
  • 2 teaspoons hot sauce, such as Frank’s
  • 1/2 teaspoon Worcestershire sauce
  • Kosher salt and freshly ground pepper
  • 2 tablespoons unsalted butter, melted
  • 8 pieces skin-on, bone-in chicken thighs and/or breasts
  • Vegetable oil, for brushing
  • 1 large tomato, sliced

Directions

  1. Preheat a grill for direct and indirect heat to high.
  2. Whisk the mustard, vinegar, brown sugar, mustard powder, hot sauce, Worcestershire sauce, 1/2 teaspoon salt, and pepper to taste in a bowl. Whisk in the butter.
    IMG_4048
  3. Season the chicken with salt and pepper, then toss with about one-third of the mustard sauce in a large ziploc until coated. Refrigerate for at least 20 minutes and up to 2 hours.
    IMG_4049
  4. Brush the grill grates generously with vegetable oil. Remove the chicken from the fridge.
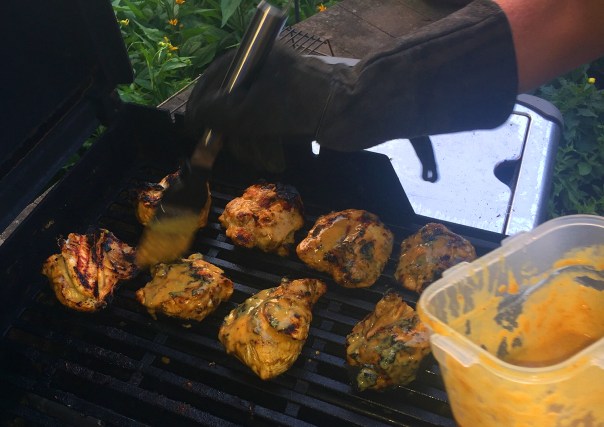
  5. Put about 1/4 cup of the remaining mustard sauce in a small bowl for basting and reserve the rest for topping.
  6. Sear the chicken over the direct heat until well marked on both sides, about 2-3 minutes each side.
    IMG_4051
  7. Move the chicken to the indirect heat side of the grill and cover, basting occasionally with the sauce, and flipping after about 10 minutes. It is ready when a thermometer inserted into the thickest part of the thighs registers 170 degrees F, 10 to 12 minutes per side.
    IMG_4053
    IMG_4055
  8. Serve the chicken with the reserved mustard sauce, sliced tomato and other sides as desired.
    IMG_4058

http://www.lynnandruss.com

Adapted from a recipe from Food Network Kitchen

The Reverse Sear

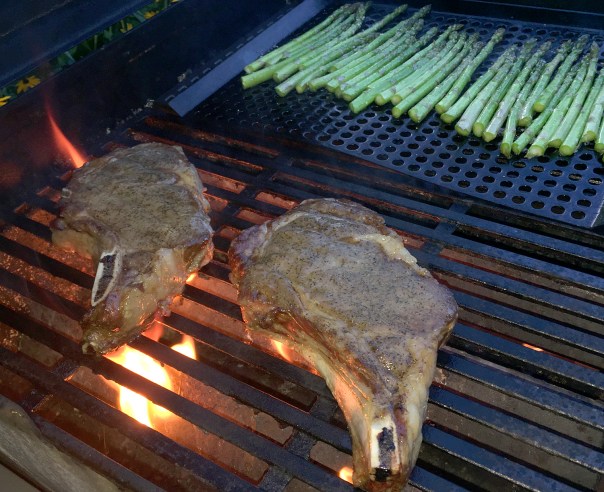
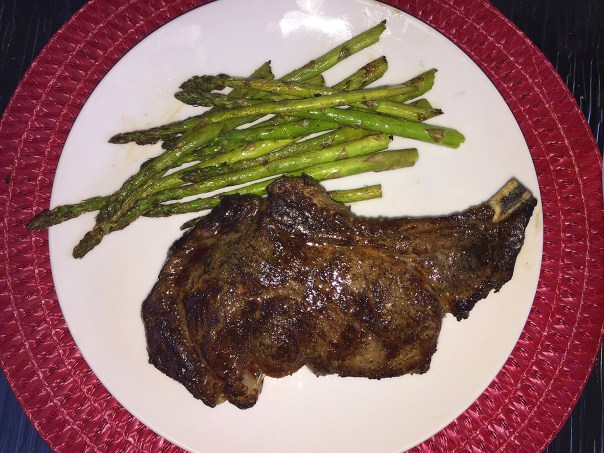
SUMMERTIME = GRILLING TIME. Sometimes there’s just nothing better than a perfectly grilled steak. While we have often used the reverse sear method in a cast-iron skillet on the stove top and in the oven, this season we finally started using it outside on our gas grill. It works so well for a perfectly medium-rare steak with a charred exterior, I doubt we’ll go back to the old way. We liken the process to a sous-vide without a sous-vide machine, or slow-cooking without the extensive time commitment.

IMG_3371

In food terminology, searing is a technique in which you cook the surface of the food over high heat in order to form a brown crust. Reverse sear refers to when you sear your meat in the cooking process. With a reverse-sear, you cook your steak over a low temperature first before giving it a final sear over high heat.

As far as the choice of meat, the ribeye, the perfect blend of taste and tenderness, is also one of the most forgiving steaks due to all of the marbling. You don’t want to go all-out miserly here, so go ahead and purchase one good steak per guest. You’ll need bone-in (preferable) or boneless ribeye (or T-bone) steaks at a minimum 1 1/4″-thick. Sprinkle steaks evenly with salt and pepper, set on a wire rack in a shallow pan. Chill uncovered in the fridge, 4 to 48 hours.

IMG_3349

Setting up your grill for the two-zone method:

GAS GRILL:

Light all burners to preheat the grill. Turn off the center burner to create a cool zone below steaks for indirect cooking. If your grill does not have a temperature gauge, use an oven thermometer to monitor the heat.

CHARCOAL GRILL:

Ignite briquettes (50-75 for a 22″ grill) with vents open. Once covered with ash, bank half the coals on opposite sides of the grate, leaving a cool zone in the middle for indirect cooking. Set rack in place.

Directions

  1. Prepare your grill for a two-zone fire (see above).
  2. Grill steaks indirectly in a closed grill. Try to keep the heat at 300°F. Like cooking in a low oven, the gentle heat moves slowly to the center of the steak without overcooking the outside.
  3. Pull steaks off the grill when they reach an internal temp of 100°F. They won’t look delicious yet, but don’t sweat it. Let them rest to redistribute juices while you stoke/adjust the fire.
  4. A good sear requires blistering heat of 450°-500°F. For a gas grill ignite the center burner and adjust heat to high.
  5. The final step is what develops the complex flavors we crave. Sear steaks over direct heat 4 to 5 minutes, turning often until well-browned and crusty and an instant-read thermometer reaches 130°F for medium-rare.
    IMG_3367
  6. Let steaks rest for 5 minutes before slicing.
    IMG_3370


Little Scrolls with a Twist

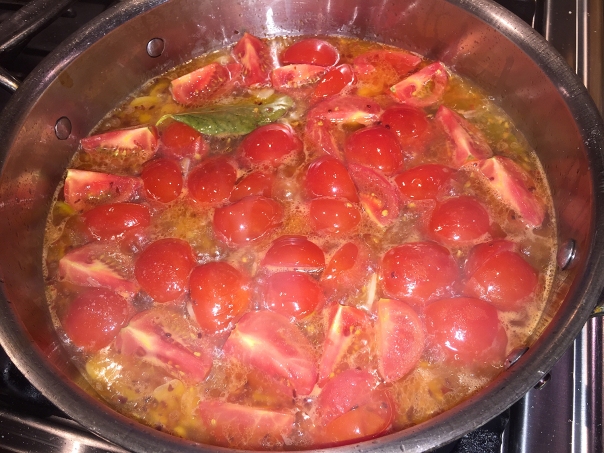
Here is my riff on a recipe from Yotam Ottolenghi’s cookbook, “Simple” that I’m calling Casarecce Pasta with Campari Tomato Sauce and Fresh Sage. With gentle simmering and a bit of water to facilitate cooking, campari or cherry tomatoes are transformed into a bold pasta sauce. To ratchet up the flavor, herbs, red pepper flakes and pecorino Romano are added.

IMG_3725

Casarecce, a classic pasta shape from Sicily (shown above), are short pasta noodles with curled edges and a groove down the middle; they look a bit like little rolled up scrolls. It is also known as ‘casareccia’ in certain areas of Italy. Its shape catches and holds sauce very well, but other short pastas such as bucatini, penne and ziti could work too.

The end result was an extremely robust and flavorful sauce that we couldn’t get enough of. And while I’ll often cut back the amount of pasta by 50%, I used the entire 12 ounces and it made for the perfect ratio to the other ingredients.

You know, normally I don’t think of sage as being the go-to herb in Italian red sauces—for me it’s usually basil and/or oregano. But I have to say, we had some beautiful sage in our herb garden that was screaming to be picked and used, and it was a wonderful compliment to the garlic and tomatoes.

IMG_3709

Casarecce Pasta with Campari Tomato Sauce and Fresh Sage

  • Servings: 4
  • Difficulty: easy
  • Print

Ingredients

  • ⅓ cup extra-virgin olive oil, plus more to serve
  • 4 medium garlic cloves, thinly sliced
  • ¼ tsp. red pepper flakes
  • 2 bay leaves
  • 1 lb. campari tomatoes, quartered (or halved cherry tomatoes)
  • ½ tsp. white sugar
  • Kosher salt
  • 2 Tbsp. chopped fresh sage, divided
  • 12 oz. casarecce pasta
  • ¾ tsp. smoked paprika
  • Shaved pecorino romano, to serve

Directions

  1. In a 12-inch skillet over medium-high, heat the oil until shimmering. Add the garlic, pepper flakes and bay, then cook, stirring, until fragrant, about 30 seconds.
    IMG_3711
  2. Add the tomatoes, sugar, 1 teaspoon salt and 1 cup water. Bring to a simmer and cook, stirring occasionally, until the tomatoes begin to break down, about 4 minutes.
    IMG_3714
  3. Reduce to medium-low and cook, uncovered and stirring occasionally and adjusting the heat as needed to maintain a steady simmer, until the tomatoes have fully broken down and the sauce is thick enough that a spatula drawn through it leaves a trail, 45 to 55 minutes.
    IMG_3726
  4. Remove from the heat and remove and discard the bay. Stir in 1 tablespoon of sage and the smoked paprika, then cover to keep warm.
    IMG_3729
  5. When the sauce is almost ready, in a large pot, bring 4 quarts water to a boil. Add 2 tablespoons salt and the pasta, then cook, stirring occasionally, until al dente.
  6. Drain the pasta, then return to the pot. Add the sauce and toss until well combined. Transfer to a serving bowl.
    IMG_3730
  7. Sprinkle with the remaining 1 tablespoon sage and shaved pecorino, then drizzle with additional oil.
    IMG_3735

http://www.lynnandruss.com

Chicken, Shiitake and Watercress Stir-Fry

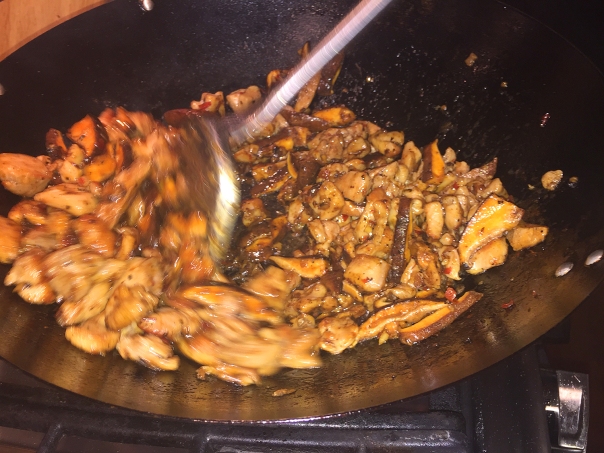
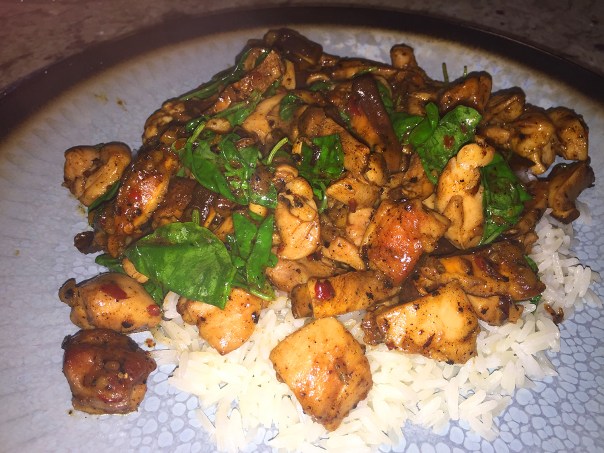
We loved this stir-fry which gets deep complexity from Chinese fermented chile-bean sauce, also called toban djan, found in the Asian section of well-stocked supermarkets. Chicken, Shiitake and Watercress Stir-Fry comes together in a snap and is great with rice—preferably steamed with homemade chicken stock for a boost of flavor.

The original recipe from Fine Cooking called for only one pound of chicken. The smallest package of thighs I could buy was a little over 1-1/2 pounds, and I used the entire amount, and therefore adjusted some of the other ingredients. What baffles me is, we barely got three servings out of the enlarged proportions, and the original said it would serve up to 4—if you eat like a mouse maybe.

Three bunches of watercress may seem overkill, but once it is de-stemmed and wilted into the stir-fry, it almost disappears. The recipe below has been altered to fit our changes and serve 3-4 adults.

IMG_3490

Chicken, Shiitake and Watercress Stir-Fry

  • Servings: 3-4
  • Difficulty: easy
  • Print

Ingredients

  • 1 1/2 lbs. boneless, skinless chicken thighs, cut into 3/4-inch pieces
  • 1 1/2 Tbs. soy sauce
  • 1 Tbs. sake or Shaoxing
  • 1 Tbs. cornstarch
  • Kosher salt
  • 2 Tbs. canola or other neutral oil
  • 2 Tbs. Chinese chile-bean sauce; more to taste
  • 1 Tbs. minced fresh ginger
  • 6 oz. shiitake mushrooms, stemmed and sliced (about 2-1/2 cups)
  • 1/4 cup lower-salt chicken broth
  • 3 medium bunches watercress, stemmed (about 1-1/2 lbs.)
  • 1 1/2 Tbs. rice vinegar

Directions

  1. Put the chicken in a medium bowl and toss with 1 tablespoon of the soy sauce, the sake, cornstarch, and 1/4 tsp. salt.
    IMG_3492
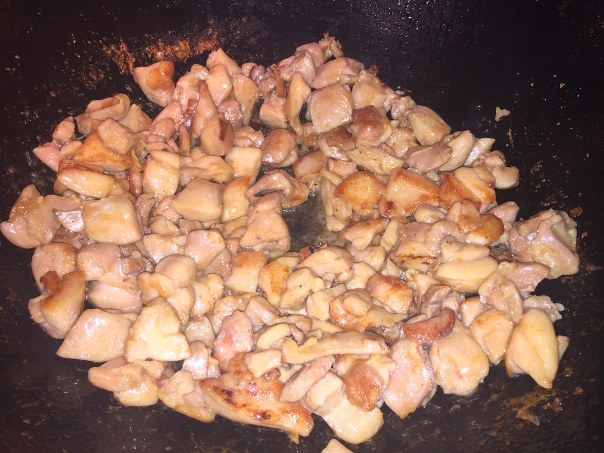
  2. Heat a wok or a 12-inch skillet over high heat. Add 1 tablespoon of the oil and the chicken to the pan in a single layer. Leave the chicken undisturbed for about a minute before stirring, and then cook, stirring occasionally, until browned and partially cooked, about 4 minutes. Transfer the chicken to a bowl.
    IMG_3495
    IMG_3496
  3. Return the pan to high heat. Add the remaining 1 tablespoon oil, the chile-bean sauce, and ginger to the pan, and stir to combine.
  4. Add the mushrooms, and cook, stirring frequently, until tender, about 2 minutes.
    IMG_3501
  5. Return the chicken and any accumulated juices to the pan. Stir in the broth and the remaining 1/2 tablespoon soy sauce. Cook, stirring frequently, until the chicken is cooked through, about 2 minutes.
    IMG_3502
  6. Remove the pan from the heat and stir in the watercress, vinegar, and more chile-bean sauce to taste. Toss until the watercress wilts. Serve hot.
    IMG_3504
    IMG_3505
    IMG_3509

http://www.lynnandruss.com

Adapted from a recipe by Lisa Russell