Monthly Archives: September 2022

Easy Eggplant Parm for Two

This is an incredibly tasty Eggplant Parm dish that has been streamlined not only for the number of people it feeds, but in its simplicity and amount of time it takes from start to finish. Some of the time-consuming steps have been omitted, such as salting the eggplant slices to reduce bitterness and peeling the outer skin. We were both bowled over by how flavorful it was!

To be honest, our eggplant was about 1 1⁄2 pounds, so we slightly deviated the recipe to accommodate for the larger size. For instance, we were able to carve out three 3⁄4″ slices, which after cutting crosswise made 6 planks. To compensate, we needed another egg in Step 2, and used an extra can of tomatoes.

Some of our other changes included increasing the amount of cheese (because that’s the way we roll 🙂 ), adjusting some of the cooking times, and frying the planks in two separate batches, otherwise, we kept everything else pretty much the same. With our changes, the finished dish easily feeds 3 people.

Recipe Notes: 1. Using a sharp knife, slice off one side of eggplant (reserve) and cut two 3/4-inch planks from the center. 2. Cut planks in half crosswise so they’ll neatly fit into the pan for frying in a single batch. 3. Chop reserved side pieces into strips, then into ½-inch cubes and set aside for building the tomato pan sauce.

Easy Eggplant Parm for Two

  • Servings: 2
  • Difficulty: easy
  • Print

Ingredients

  • 1 1-lb. eggplant
  • 14 cup all-purpose flour
  • 1 large egg
  • 12 cup panko breadcrumbs
  • 34 cup grated parmesan cheese
  • 14 salt
  • 14 tsp. pepper
  • 12 cup olive oil, plus 3 Tbsp. olive oil, divided
  • 4 garlic cloves, minced
  • 14 tsp. red pepper flakes
  • 1 14 1⁄2 oz. can diced tomatoes
  • 14 cup chopped fresh basil
  • 12 cup shredded provolone cheese

Directions

  1. Bread Eggplant: Cut two 3/4-inch planks lengthwise from center of eggplant, halve each plank crosswise. Cut remaining eggplant into 1/2-inch dice and set aside.
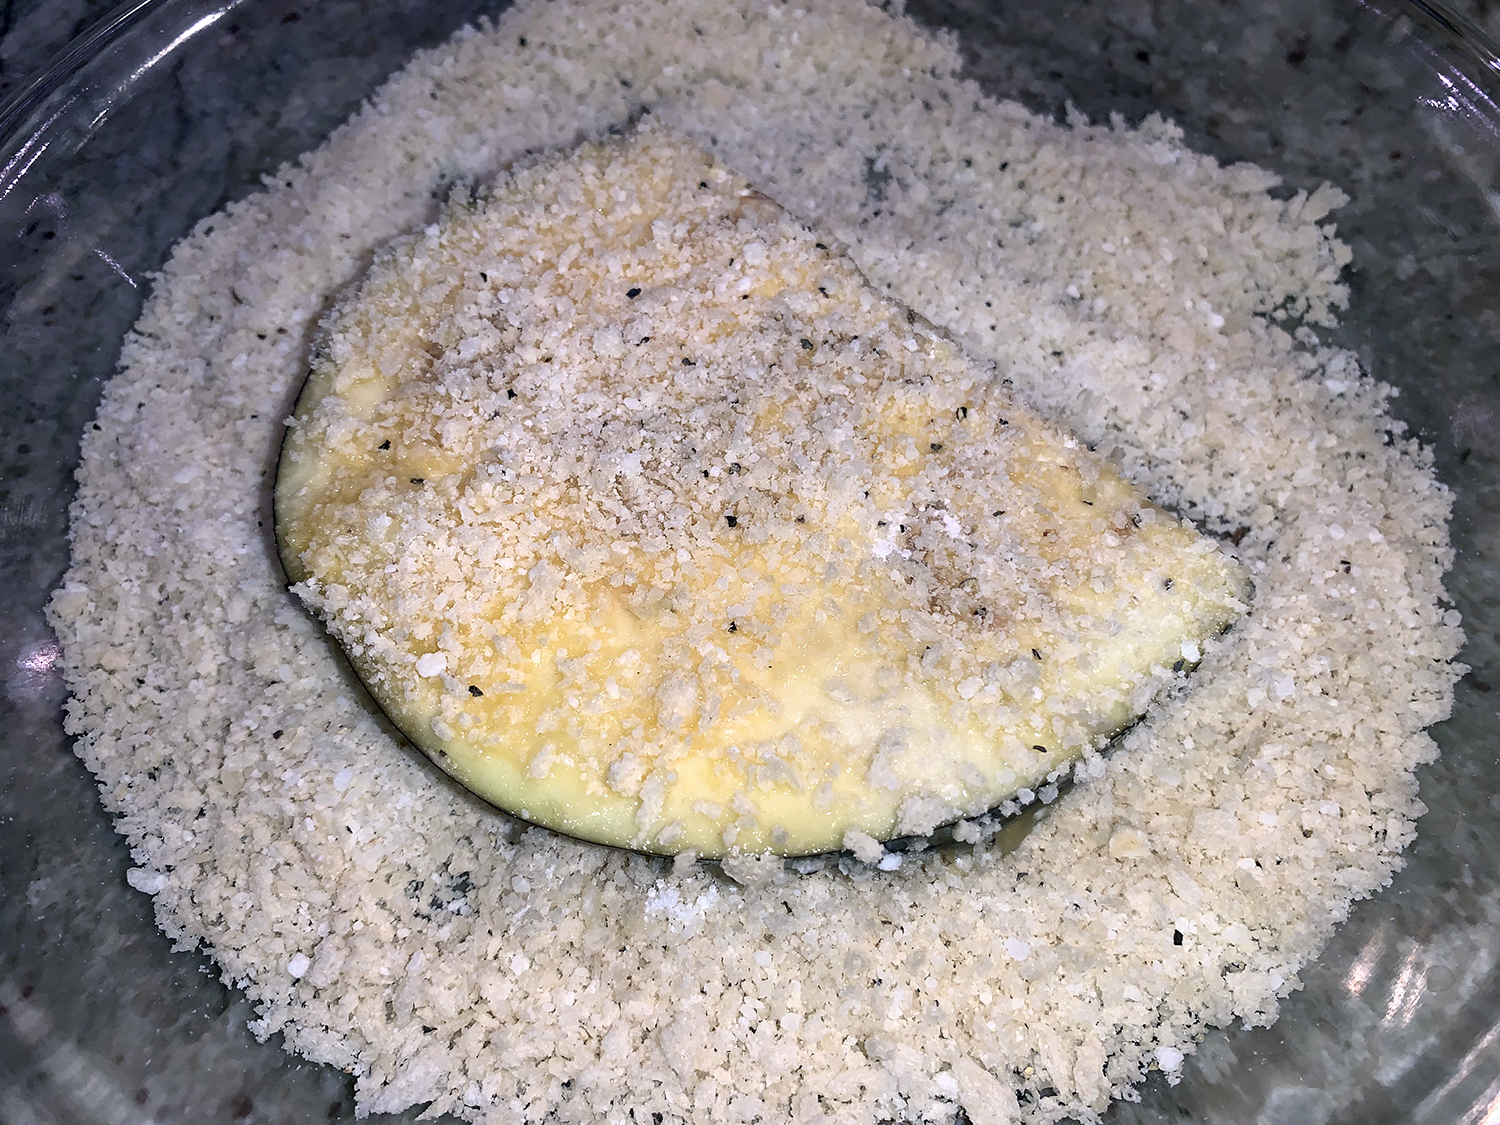
  2. Place flour in shallow dish. Beat egg in second shallow dish. Combine bread crumbs, 1/4-cup Parmesan, 1/4 teaspoon salt and 1/4 teaspoon pepper in third shallow dish. One at a time, coat eggplant slices lightly with flour, dip them in egg and dredge in bread crumb mixture, pressing to adhere.
  3. Transfer to wire rack set inside rimmed baking sheet and let sit 5 minutes (or refrigerate up to 1 hour).
  4. Cook Eggplant: Adjust oven rack to upper-middle position and heat oven to 450°F.
  5. Heat 1/2 cup oil in large nonstick skillet over medium-high heat until shimmering. Cook eggplant slices until lightly golden browned, about 1 minute per side.
  6. Transfer to wire rack set inside baking sheet and bake until eggplant is tender and deep golden brown, 15 to 18 minutes.
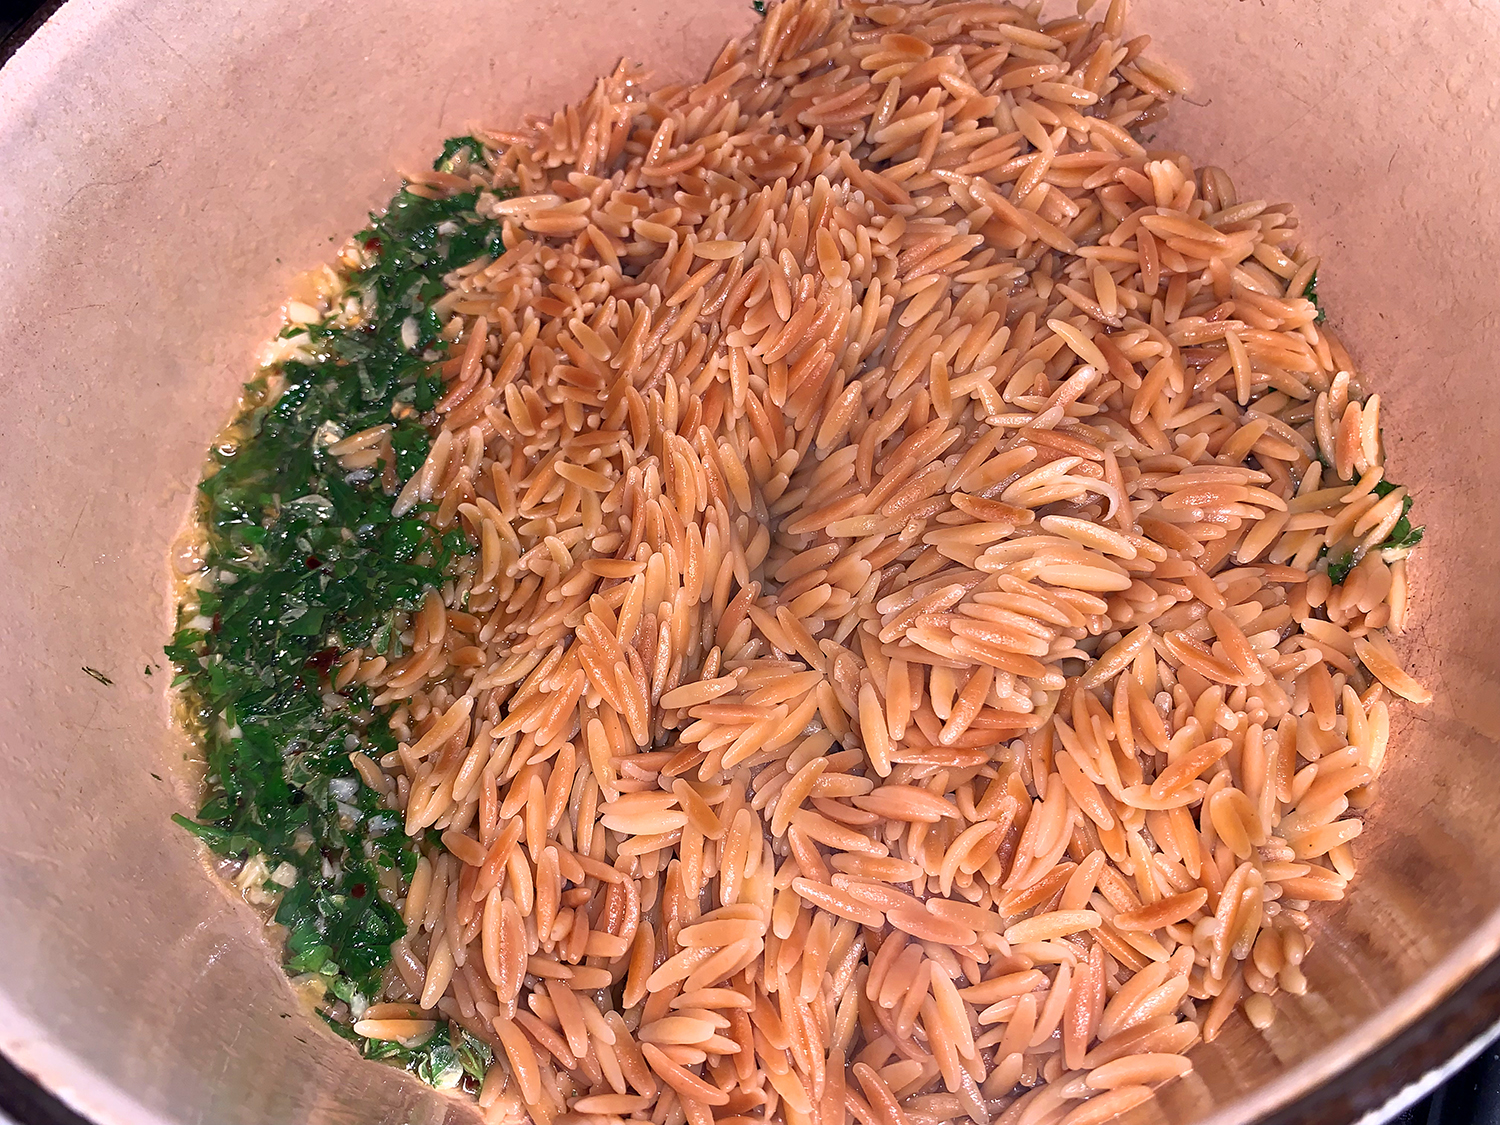
  7. Make Sauce: Meanwhile, pour off oil and wipe out skillet with paper towels. Heat 2 tablespoons oil in empty skillet over medium-high heat until shimmering.
  8. Add the reserved chopped eggplant and 1/4 teaspoon salt and cook, stirring occasionally, until lightly browned, about 3 minutes. Stir in remaining 1 tablespoon oil, garlic and pepper flakes and cook until fragrant, about 30 seconds.
  9. Add tomatoes and reduce heat to medium. Simmer until eggplant is tender and sauce is thickened, about 5 minutes. Stir in basil and season with salt and pepper; cover and keep warm.
  10. Assemble: Combine remaining 1/2 cup Parmesan and provolone in medium bowl. Top browned eggplant slices with cheese mixture and bake until cheese is melted, about 3 minutes (or longer if you increase the amount of cheese like we did).
  11. Transfer half of sauce to platter and top with eggplant slices. Spoon remaining sauce over eggplant. Serve.

http://www.lynnandruss.com

Adapted from a recipe for Cook’s Country

Greek Spinach Salad with Grilled Flap Steak and Marinated Feta

As grilling weather will begin its hibernation not too far down the road, at least for many of us, it’s time to take advantage of that weather and grill al fresco as often as we can. This wonderful Greek salad incorporates flap meat as one of its ingredients. We like that cut of meat for it’s beefiness and loose grain for the marinade to seep into.

Here, grilled steak turns a Greek salad into a substantial dish, while marinating the feta in a mixture of spicy chile flakes, briny capers, bright lemon, and herbs adds a big punch of flavor. For a heftier meal, serve with grilled pita or crusty bread rubbed with fresh garlic.

As far as amount of beef, we happened to have 2 pounds of flap meat in the freezer, so even though that is double the amount listed, we used it all. Therefore our salad was a little more meat-forward than the original.

Unable to source mini cucumbers, we opted for a seedless Persian variety and used about half of it sliced into small rounds. Additionally, there was very little dressing left after draining the feta from its marinade, so we increased the amount of a few of those ingredients which are noted below.

Greek Spinach Salad with Grilled Flap Steak and Marinated Feta

  • Servings: 4
  • Difficulty: easy
  • Print

Ingredients

  • 9 Tbsp. extra-virgin olive oil, divided
  • 3 cloves garlic, minced
  • 1 Tbsp. chopped fresh oregano or 1 tsp. dried
  • 2 tsp. red wine vinegar
  • Kosher salt and freshly ground black pepper
  • 1 1b. beef flap meat, cut into pieces of even thickness, if necessary
  • 2 Tbsp. chopped fresh flat-leaf parsley
  • 1 Tbsp. capers, rinsed and chopped
  • 2 Tbsp. fresh lemon juice
  • 1 tsp. chopped fresh thyme
  • 1/4 tsp. crushed red chile flakes
  • 7 oz. feta (preferably Greek), cut into small cubes (about 1-1/2 cups)
  • 5 oz. baby spinach, (about 5 lightly packed cups)
  • 2 mini cucumbers, halved lengthwise and thinly sliced crosswise
  • 1 1/2 cups cherry tomatoes (preferably a mix of colors and shapes), halved
  • 1/2 cup pitted Kalamata olives, halved

Directions

  1. In a medium bowl, whisk 3 Tbs. of the oil with the garlic, oregano, vinegar, 1/4 tsp. salt, and a few grinds pepper. Add the steaks and turn to coat. Cover and marinate in the refrigerator for up to 4 to 6 hours.
  2. Meanwhile, in a medium bowl, whisk the remaining 6 Tbs. oil, the parsley, capers, lemon juice, thyme, and chile flakes. Add the feta and stir gently to coat. Marinate at room temperature for up to 1 hour, or in the refrigerator for up to 6 hours. Remove from the fridge one hour before using.
  3. Prepare a medium-high (400°F to 475°F) gas or charcoal grill fire. Remove the steaks from the marinade and pat dry. Grill, turning every 2 minutes, until cooked to your liking, 6 to 8 minutes for medium (140°F).
  4. Transfer to a cutting board, cover loosely with foil, and let rest for 5 to 10 minutes. Thinly slice the steak against the grain, then season lightly with salt.
  5. Put the spinach, cucumbers, tomatoes, and olives in a large bowl. Drizzle all of the marinade from the feta over the salad, using a spatula to hold back the feta (it’s OK if a few pieces fall in).
  6. Season with salt and pepper, and toss to coat. Arrange on a serving platter or divide among four dinner plates. Scatter the steak and feta over the salad, and serve.

http://www.lynnandruss.com

Original recipe from Fine Cooking

Youvetsi: Greek Lamb Stew with Orzo

Youvetsi is a popular and comforting Greek stew made with tender bits of lamb or beef and cooked with small noodles such as orzo. Red meat is the more typical choice, however you may also make it with chicken.

For this easy, modern riff from The Mediterranean Dish, they instruct to use a large, heavy ceramic braising dish with a lid. In it, the tender pieces of lamb (or beef) and orzo will cook together in an aromatic tomato sauce with garlic, oregano, and other comforting Greek flavors.

Keep in mind, this is not a quick weeknight meal. This Greek lamb stew is best enjoyed straight from the pan, when the orzo is perfectly cooked. However, any leftovers can be stored in the fridge for up to 3 days. And once you taste it, you’ll hope to have leftovers to reheat during the week. The recipe can easily be cut in half if you are so inclined.

Youvetsi: Greek Lamb Stew with Orzo

  • Servings: 6-8
  • Difficulty: easy
  • Print

Ingredients

  • 2 lbs. lamb shoulder (boneless, or lamb leg, trimmed of fat and cut into small 1-inch chunks)
  • Kosher salt and black pepper
  • Extra virgin olive oil
  • 4 large onions, finely chopped
  • 8 garlic cloves, minced
  • 2 cup dry red wine (and a glass for yourself 😉
  • 2 tsp. dry oregano
  • 2 tsp. paprika
  • 1 tsp. ground cinnamon
  • 1 tsp. nutmeg
  • 2 bay leaf
  • 2, 28 oz. cans whole San Marzano tomatoes
  • 1 cup orzo pasta
  • 2 cup fresh parsley, chopped
  • Feta cheese for garnish, optional

Directions

  1. Pat the lamb dry and season with kosher salt and black pepper.
  2. In a large, ceramic braising pan or heavy pan with a lid, heat 3 tablespoons extra virgin olive oil over medium-high heat until shimmering but not smoking. Add the lamb and cook for 7 to 10 minutes, tossing regularly, until browned. Transfer the lamb to a large plate for now.
  3. In the same pan, add the onions and garlic. Season with kosher salt. Cook for 3 to 5 minutes, stirring regularly, until softened.
  4. Return the lamb to the pan. Add the red wine, oregano, paprika, cinnamon, nutmeg and bay leaf. Cook until the wine has reduced by at least ½, then add 1 cup of water and the tomatoes. Break the tomatoes up using a wooden spoon. Bring to a boil, then reduce the heat to low. Cover and let simmer for 45 minutes to 1 hour, or until the lamb is cooked through.
  5. Stir in the orzo and cover the pan. Let cook for another 20 minutes or until the orzo has cooked through and most of the moister has been absorbed. Move off the heat and let sit another 5-10 minutes so that the orzo absorbs more moisture.
  6. Garnish with parsley and crumbled feta, if you like, before serving.

http://www.lynnandruss.com

Adapted from a recipe for MediterraneanDish.com

Baked Cajun Seafood and Rice

Instead of more traditional ground beef lasagna, try this shrimp and crabmeat casserole from Better Homes & Garden. Pair it with a side salad for a satisfying and vegetable-rich dinner.

With the cost of fresh lump carb meat sky-high, refrigerated pasteurized lump crabmeat is an excellent choice over the traditional canned crabmeat or more expensive fresh crab. Look for it at the meat and seafood counter of your supermarket.

When it comes to the rice, measure out 3 cups AFTER it is cooked. The Hubs had an off-moment and cooked too much rice and we used all of it. Although it did not alter the flavor of the dish, it did make it a bit too rice-forward. If you do have extra rice, save it for another meal.

Purchasing a 1-pound bag of frozen salad shrimp made prepping a lot easier because they didn’t need to be peeled and deveined; plus the small size was perfect in the casserole. This is an ideal dish when hosting/attending a potluck lunch or dinner, just make sure to keep it warm until serving time.

Baked Cajun Seafood and Rice

  • Servings: 6-8
  • Difficulty: easy
  • Print

Ingredients

  • 1 lb. fresh or frozen small shrimp, peeled and deveined
  • 1 medium green sweet pepper, chopped
  • 1 onion, chopped
  • 1 stalk celery, sliced
  • 2 cloves garlic, minced
  • 3 Tbsp. butter, divided
  • ½ tsp. dried thyme, crushed
  • 3 cup cooked long grain white rice, (1 cup uncooked)
  • 4 strips thick-cut bacon, chopped
  • 8 cups fresh baby kale or spinach, stems removed
  • 2 Tbsp. butter
  • 2 Tbsp. all-purpose flour
  • 1 Tbsp. Cajun seasoning
  • 2 cup milk
  • 2 cups shredded Monterey Jack cheese (8 oz.)
  • 16 oz. cooked crabmeat, flaked
  • ½ cup shredded Parmesan cheese (2 oz.)
  • ½ cup chopped green onions (4)

Directions

  1. Make rice according to package directions.
  2. Thaw shrimp, if frozen; set aside. Preheat oven to 350°F. In a large skillet cook the green pepper, onion, celery, and garlic in 1 tablespoon hot butter over medium heat about 4-5 minutes or until vegetables are tender.
  3. Stir in thyme; cook and stir for 1 minute. Transfer to a large bowl. Add cooked rice; stir to combine. Set aside.
  4. In the same skillet cook bacon over medium heat until crisp. Add the kale; cook and stir for 3 to 5 minutes or until wilted and tender. Remove from heat. Set aside.
  5. In a medium saucepan melt 2 tablespoons butter over medium heat. Stir in flour and Cajun seasoning; cook and stir for 1 minute.
  6. Stir in milk; cook and stir until thickened and bubbly. Cook and stir for 1 minute more. Reduce heat to low. Add Monterey Jack cheese; stir until cheese melts.
  7. Lightly grease a 4-quart rectangular baking dish. Spread half of the rice mixture over bottom of dish. Layer with half of the kale mixture, half of the shrimp, half of the crabmeat, and half of the cheese sauce. Repeat layers. Sprinkle evenly with Parmesan cheese.
  8. Bake, uncovered, for 30-45 minutes or until bubbly and lightly golden. Sprinkle with green onions.

http://www.lynnandruss.com

Roughly adapted from a recipe for Better Homes & Garden

Pad Thai with Ground Pork

Across Bangkok, there are more than a dozen versions of pad Thai. Milk Street tasted many of the iconic noodle stir-fries to find a way to make the dish doable in American home kitchens, complete with its enticing spicy-sour-salty-sweet profile.

Based on lessons from numerous Thai cooks, Milk Street developed a recipe that delivers fantastic results—perfectly balanced flavors and the layers of contrasting textures that define great pad Thai.

This version achieves nuances of wok hei, or the hard-to-describe and even more difficult to attain (on a home cooktop) hints of smokiness that come from stir-frying in a wok over a raging-hot fire. The key is to add ingredients in batches to prevent the temperature of the wok from dropping precipitously.

A few pointers for success: A 12- to 14-inch wok is essential, ideally one made of carbon steel that is well seasoned and conducts heat quickly. Use a neutral oil with a high smoke point; grapeseed, peanut or safflower oils are a good choice. Each time oil is heated in the empty wok, be sure it is smoking-hot before adding any ingredients.

Use the cooking times as guidelines, don’t take them as scripture, as burner output and heat-conduction properties of woks can differ greatly. Finally, be sure to have all ingredients and equipment, including a serving dish, ready before you head to the stovetop. Once cooking begins, it demands your full attention and is done in a matter of minutes.

TIP: Don’t oversoak the noodles. They should be softened to the point of limpness, which takes about 30 minutes, but far from fully tender. If the noodles are too soft when they go into the wok, they may break during stir-frying and/or wind up overcooked. If you’re not yet ready to stir-fry when the noodles are done soaking, not to worry. Drained of their water, they can wait to be used. If they begin to stick together, simply give them a quick rinse under cold water and drain again.

Our version ended up darker than most Pad Thais and that’s because we used tamarind puree, not tamarind pulp. If you do use the puree, you can omit Step 2 which involves hydrating the tamarind pulp.

Pad Thai with Ground Pork

  • Servings: 4
  • Difficulty: moderate
  • Print

Ingredients

  • 10 oz. ¼-inch-wide rice noodle sticks
  • 2 Tbsp. tamarind pulp, (or 1 Tbsp. each of tamarind puree and water)
  • 1/3 cup boiling water
  • 2 1/2 Tbsp. packed light brown sugar or grated palm sugar
  • 2 Tbsp. oyster sauce
  • 2 Tbsp. soy sauce
  • 1 1/2 Tbsp. fish sauce
  • 1 cup bean sprouts
  • 1 cup lightly packed fresh chives or slender scallions, cut into 1-inch lengths
  • 1/2 cup roasted peanuts, chopped
  • 4 Tbsp.s grapeseed or safflower oil, divided
  • 1 medium shallot, halved and thinly sliced
  • 3 medium garlic cloves, minced
  • 1 lb. ground pork
  • 1/2-3/4 tsp. red pepper flakes
  • 2 large eggs, beaten
  • Lime wedges, to serve
  • Fresh chilies in vinegar, to serve

Directions

  1. Place the noodles in a large bowl and add hot water to cover (the water should feel hot to the touch, but should not be scalding). Let stand, stirring once or twice to separate any strands that are sticking together, for about 30 minutes; the noodles will become pliable but will not fully soften.
  2. Meanwhile, in a small bowl, combine the tamarind pulp and boiling water; stir with a fork to break up the pulp. Cover and let stand for about 30 minutes. Strain the mixture through a fine-mesh sieve set over another small bowl; press on the solids and be sure to scrape the underside of the sieve to collect the pulp that clings; you should have about ¼ cup.
  3. Wipe out the small bowl used to hydrate the tamarind, then measure 3 tablespoons of the strained tamarind into it (reserve the remainder for another use). Add the sugar, oyster sauce, soy sauce and fish sauce. Stir until the sugar dissolves; place near the stove.
  4. Drain the noodles in a colander. Shake the colander to remove excess water and set near the stove. In a medium bowl, toss together the bean sprouts, chives and peanuts; also set near the stove.
  5. In a 12- to 14-inch wok over high, heat 1 tablespoon of the oil until smoking, swirling to coat. Add the shrimp and cook, stirring, until just beginning to curl and turn pink, 1 to 2 minutes; the shrimp will not be fully cooked. Transfer to a large plate; set aside. Wipe out the wok.
  6. Return the wok to high and heat 2 tablespoons of the remaining oil until smoking, swirling to coat. Add the shallot, garlic and pepper flakes; cook, stirring, until fragrant and lightly browned, 20 to 30 seconds. Add the eggs (they will immediately puff) and cook, stirring from the edges inward, until the curds are barely set and shiny, 20 to 30 seconds.
  7. Add half of the noodles. Cook, stirring, tossing and moving the noodles in a circular motion against the sides of the wok while also breaking up the eggs, until the noodles are dry, sizzling and no longer stark white in color, 1 to 1½ minutes. Drizzle the remaining 1 tablespoon of oil down the sides of the wok and add the remaining noodles; cook in the same way until the mixture is once again dry and sizzling.
  8. Pour half of the sauce mixture down the sides of the wok; it should bubble immediately and begin to thicken. Cook, tossing and moving the noodles in a circular motion against the sides of the wok, until the liquid is absorbed, about 30 seconds. Add the remaining sauce mixture and cook in the same way.
  9. Add the pork and half of the bean sprout mixture. Cook, stirring, until the pork is lightly browned and the sprouts are just wilted, 1 to 2 minutes. Taste the noodles; if they are still too firm, drizzle in water 2 tablespoons at a time and cook, stirring, until the noodles are tender. Toss in the remaining sprout mixture. Transfer to a platter and serve with lime wedges and chilies in vinegar (if using).
  10. To make Pad Thai with Tofu: Cut 8 ounces firm or extra-firm tofu into ½- to ¾-inch cubes. Place in a single layer on a plate lined with a double thickness of paper towels. Cover with additional paper towels, place another plate on top, then set a few cans or jars on top as weights; let stand while you soak the noodles, prepare the tamarind and mix the sauce ingredients. Follow the recipe, substituting the tofu for the pork and stir-frying until the tofu is golden brown on all sides, about 3 minutes, setting it aside, then returning it to the wok as with the pork.
  11. Pad Thai with Shrimp: Follow the recipe, omitting the pork. When the shallot, garlic and pepper flakes are fragrant and lightly browned, add 12 oz. medium (41/50 per pound) shrimp, peeled (tails removed) and deveined; cook, until the shrimp are lightly opaque, 2 to 3 minutes. Make a clearing in the center of the mixture and add the eggs to the clearing, then continue with the recipe.

http://www.lynnandruss.com

Adapted from a recipe by Courtney Hill for Milk Street

Roasted Butternut Squash with Hoisin and Chives

Hands down, our favorite new roast squash recipe! Here, hoisin mixed with rice vinegar and sesame oil makes a salty-sweet-tangy-nutty dressing for tender chunks of roasted butternut squash that provides a creamy and tasty mouthful.

You can purchase already peeled and cut squash from the grocery store, but keep in mind that if the pieces are smaller or larger than specified here, you may need to adjust the cooking time. Use a broiler-safe rimmed baking sheet, as the squash chars for about 10 minutes under the broiler.

Peeling squash was never a favorite prep step. But our new Milk Street Precision Peeler makes it so easy! Few peelers actually do what they are designed to do: shave away the skins and peels from fruits and vegetables. At a cost of $29.95, it is pricey, but so well worth it.

The ovoid shape fills the palm for comfort when gripping tight and the graceful pinch grip provides a precision hold for controlled peeling even the toughest peels, skins and zest. The blade has a wide pivot to accommodate ingredients of all shapes and size, from butternut squash and eggplant to Parmesan and chocolate. Comes with extra blades.

The weight of our two butternut squash exceeded the required 3 pounds. We decided to roast all of it (in two baking sheets) and use the remainder to accompany another meal, and make butternut squash soup. Don’t crowd the baking sheets with squash flesh otherwise it will steam and not obtain the light char that is preferable.

As far as cooking time, our sheet of squash chunks roasted in the hot oven for 15 minutes instead of 10. Then a total of 15 minutes under the broiler while turning and moving the baking sheet a few times—even so, some squash obtained more a of a char than others.

With cooler temps rolling in for the autumn and winter months, this side dish is a welcome accompaniment to grilled meats, braised dishes, vegetarian meals, and roasted poultry.

Roasted Butternut Squash with Hoisin and Chives

  • Servings: 4
  • Difficulty: easy
  • Print

Ingredients

  • 3 lbs. peeled and seeded butternut squash, cut into 1½- to 2-inch cubes (about 6 cups)
  • 2 Tbsp. neutral oil
  • 2 tsp. packed brown sugar
  • Kosher salt and ground black pepper
  • ¼ cup hoisin sauce
  • 2 Tbsp. unseasoned rice vinegar
  • 1 tsp. toasted sesame oil
  • 3 Tbsp. chopped fresh chives OR 3 scallions, thinly sliced on the diagonal

Directions

  1. Heat the oven to 475°F with a rack 6 inches from the element.
  2. In a large bowl, toss the squash with the neutral oil, sugar, 1 tablespoon salt and ¼ teaspoon pepper. Spread in an even layer on a rimmed baking sheet and roast until just shy of tender, 10 to 12 minutes.
  3. Turn the oven to broil and broil until charred and fully tender, about 10 minutes.
  4. In a large bowl, whisk together the hoisin, vinegar and sesame oil. When the squash is done, immediately add it and the chives to the bowl, then toss.

http://www.lynnandruss.com

Recipe courtesy of Milk Street

Salmon with Barigoule

As a Milk Street article informed us, barigoule is a Provençal braise of fresh artichokes in white wine, with aromatics such as garlic and thyme. The name “barigoule” comes from a type of mushroom once said to be a part of the dish; the moniker stuck even though the fungi no longer are added to modern versions.

Here, cremini mushrooms are added for their earthy depth and meaty texture that balance the acidity of the wine and complement the mildness of the artichokes. To make this doable on a weeknight, use canned artichokes rather than fresh, but to keep their flavor as bright as possible, cook them in the broth only for as long as it takes to heat them through.

Our changes? Instead of four, 6-ounce filets, we bought a 1 1⁄2-pound single filet and cut it into 3 strips, which gave each of us an 8-ounce portion. Similarly, 4 ounces of mushrooms just didn’t float our boat, so we doubled that amount to 8 ounces.

Another alteration was cutting the artichoke hearts in half instead of quartered, because they were on the small side to begin with. Finally, because our salmon filets were a bit larger, and the fact that prefer ours less translucent, we simmered them until they reached an internal temperature of 130°. All changes are noted below.

Don’t forget to turn down the heat after adding the salmon to the skillet. Gentle poaching ensures the fillets cook evenly and stay moist. Don’t cover the skillet while cooking the salmon; too much heat will be trapped inside, resulting in overcooked fillets.

Salmon with Barigoule

  • Servings: 4
  • Difficulty: easy
  • Print

Ingredients

  • 4 6-oz. salmon fillets, each about 1 inch thick
  • Kosher salt
  • 2 Tbsp. extra-virgin olive oil
  • 8 oz. cremini mushrooms, trimmed and thinly sliced
  • 3 medium garlic cloves, thinly sliced
  • 2 medium shallots, chopped
  • 1 sprig tarragon, plus 2 Tbsp. chopped fresh tarragon
  • 1 cup dry white wine
  • 1 1/2 cups chicken broth or vegetable broth
  • 14 oz. can artichoke hearts, drained, cut into halves or quarters if whole
  • 2 Tbsp. salted butter, cut into 4 pieces

Directions

  1. Season the salmon all over with salt. In a 12-inch nonstick skillet over medium-high, heat the oil until shimmering. Add the mushrooms and cook, stirring occasionally, until the moisture released by the mushrooms has evaporated and the mushrooms are browned, 4 to 6 minutes.
  2. Add the garlic, shallots, tarragon sprig and ½ teaspoon salt; cook, stirring often, until the garlic is golden brown, 1 to 2 minutes.
  3. Add the wine and cook, stirring occasionally, until reduced by about half, 3 to 5 minutes.
  4. Add the broth and bring to a simmer. Place the salmon boned side down in the pan, reduce to low and cook at a very gentle simmer, uncovered, for 5 minutes. Flip the fillets and cook until the thickest parts reach 130°F or are slightly translucent when cut into, about 5 minutes.
  5. Remove the pan from the heat. Using a wide metal spatula, transfer the salmon to wide, shallow serving bowls.
  6. Bring the broth to a simmer over medium-high, then add the artichokes and butter; cook, stirring, until the artichokes are heated through and the butter is emulsified into the sauce, about 1 minute.
  7. Off heat, taste and season with salt. Remove and discard the tarragon sprig, then spoon the mixture over and around the salmon and sprinkle with the chopped tarragon.

http://www.lynnandruss.com

Recipe by Courtney Hill for Milk Street

Dark Chocolate and Pecan Cookies

Some times you feel like a nut, some times you don’t. In this case, we are talking pecans—not loosing your marbles. With the dark chocolate morsels, they elevate flavor another notch above your typical chocolate chip cookie.

I like to add a whole pecan on top of each cookie after you drop them onto the cookie sheet and before they go into the oven. This takes the guess work out of wondering if they contain nuts for those who deal with nut allergies; or for those who have an aversion to particular nuts, such as walnuts (ahem, my other half).

Make sure your butter is softened, otherwise you won’t obtain a creamy base with which to start.

Dark Chocolate and Pecan Cookies

  • Servings: Yields 3 1⁄2 to 4 dozen
  • Difficulty: easy
  • Print

Ingredients

  • 2 1/3 cups all-purpose flour
  • 1 tsp. baking soda
  • 1 tsp. salt
  • 2 sticks (1 cup) butter, softened
  • 3/4 cup packed brown sugar
  • 3/4 cup granulated whit sugar
  • 1 tsp. vanilla extract
  • 10 oz. dark chocolate morsels, more for topping
  • 1 cup chopped pecans, more for topping

Directions

  1. Preheat oven to 375°F.
  2. In a small bowl, combine flour baking soda and salt.
  3. In a large mixing bowl, beat butter, granulated sugar, brown sugar and vanilla until creamy.
  4. Add eggs, one at a time, beating well after each addition.
  5. Beat in flour mixture gradually. Hand stir in nuts and chocolate morsels.
  6. Drop onto ungreased baking sheets by rounded tablespoon. Top with a whole pecan.
  7. Bake for 12 to 13 minutes or until golden brown. Switch and turn each cookie sheet after 6 minutes, continue baking.
  8. Cool on baking sheets for 2 minutes before moving to wire racks to cool completely.

http://www.lynnandruss.com

I made another batch a few weeks later and packaged them up for a bake sale.

Toasted Orzo with Parmesan and Sun-dried Tomato

Prepared Mediterranean-style, this nutty Toasted Orzo Pasta Recipe with Garlic, Parmesan and Sun-dried Tomatoes will steal the show next to your favorite protein. You can even serve it as a quick and easy vegetarian meal on its own; it will feed 4 people as a vegetarian main and about 6 or so as a side dish. 

It was a superb complement to our top sirloin and veggie kebabs. In fact, this orzo recipe jumped to the top of the list and one we’ll make time and again!

Leftovers? Lucky you. It will keep in the fridge for up to 4 days in a tightly closed container. Warm over medium heat.

Toasted Orzo with Parmesan and Sun-dried Tomato

  • Servings: 4-6
  • Difficulty: easy
  • Print

Ingredients

  • Extra virgin olive oil
  • 1 1/2 cups orzo pasta
  • Kosher salt
  • 5 cloves garlic, minced
  • 1 pinch red pepper flakes, or more to taste
  • 1/2 lemon, juiced
  • 1 cup parsley, chopped
  • 1/2 cup oregano, chopped
  • 1/3 cup sun-dried tomatoes in olive oil, chopped
  • black pepper
  • 1/2 cup grated parmesan, or more to your liking

Directions

  1. In a large saucepan, heat 2 tablespoons extra virgin olive oil over medium-high. Add the orzo and cook, tossing around, until toasted to a beautiful golden brown.
  2. Add at least 7 cups of boiling water to the saucepan and season well with 1 tablespoon of kosher salt. Cook the pasta in boiling water to al dente according to the package instructions (about 7 to 8 minutes).
  3. Just before the pasta is fully cooked (after about 5 minutes), remove 1 cup of the starchy pasta water and set it aside.
  4. In a large pan, warm 1/2 cup extra virgin olive oil over medium heat. Add the garlic and season with a pinch of kosher salt and red pepper flakes, if using. Cook, tossing regularly, until just fragrant. Add the lemon juice and 1/2 cup of the pasta cooking water. Raise the heat if needed to bring to a boil. Add the parsley and oregano.
  5. When the pasta is ready, drain and add it to the pan and toss to combine. Season with kosher salt and black pepper. Add the sun-dried tomatoes and a 1/4 cup of the grated parmesan. Toss to combine. If needed, add a little more of the pasta cooking water.
  6. Finish with more Parmesan and red pepper flakes, if you like.

http://www.lynnandruss.com

Adapted from a recipe for MediterraneanDish.com

Top Sirloin and Veggie Kebabs

When selecting the type of beef to make your kebabs, you have unlimited choices but ultimately you want your beef on the skewer to be tasty, tender and not bust your wallet. For those looking for great flavor on a budget, sirloin tips work well if they are marinated ahead to make them more flavorful. 

Sirloin steaks are usually cut about an inch thick to begin with, have little fat, and have a beefy flavor a little more delicate than other cuts. This allows you to get the full flavor of the marinade with a nice underlying beefiness that isn’t over powering. Top sirloin is the perfect steak for these kebabs.

Therefore, we recommend sticking with top sirlion or New York Strip since it’s more lean than some other steaks leaving you with nice uniform cubes and not a lot of excess fat. It has great flavor and comes out tender when marinated and properly cooked.

Because the meat and the veggies need different amounts of time to cook, we thread them onto to separate skewers. If at all possible, use metal skewers because they contribute to cooking the meat from the center as they pick up heat from the exposed parts and conduct it throughout.

It is a good idea not to crowd your metal skewers with pieces of food to expose more surface area for the food to caramelize. Doing this on a wooden skewer runs the risk of burning the skewers and losing food into the grill.

Want the perfect side dish to compliment your kebabs? Try Toasted Orzo Pasta Recipe with Garlic, Parmesan and Sun-dried Tomatoes.

Top Sirloin and Veggie Kebabs

  • Servings: 4-6
  • Difficulty: easy
  • Print

Ingredients

  • 3⁄4 cup olive oil
  • 3⁄4 cup balsamic vinegar
  • 2 Tbsp. Dijon mustard
  • Kosher salt
  • Freshly ground black pepper
  • 2 Tbsp. minced fresh rosemary
  • 1 1⁄2 lbs. top sirloin steak, cut into 1 1⁄2″ cubes
  • 8 oz. baby bella mushrooms, stems removed
  • 10 cocktail tomatoes
  • 1 each red and yellow pepper, stemmed, seeded and cut into 1 1⁄2 pieces
  • 1 large red onion, root intact, sliced into 12 wedges

Directions

  1. Whisk oil, vinegar, mustard, and rosemary into a large bowl. Season with salt and pepper. Add steak to ziploc bag, pour in half of the marinade, mix to coat. Transfer to the refrigerator to marinate for a minimum of 1 hour and up to 8 hours, turning occasionally.
  2. In another ziploc bag, add all of the vegetables and the remaining half of the marinade. Transfer to the refrigerator to marinate for a minimum of 1 hour and up to 8 hours, turning occasionally.
  3. If using bamboo skewers, soak 16 in water for at least an hour.
  4. To assemble vegetable skewers: Start with a piece of red bell pepper, onion wedge, yellow pepper, mushroom, and so on until the vegetables are used up.
  5. On the meat skewers: Thread 7 pieces of beef onto 4 metal skewers (more if needed).
  6. Preheat the grill on high for 15 minutes. Reduce heat to medium-high and clean and then oil grates. Add vegetable skewers and cook for 4 minutes and then flip skewers.
  7. Add the meat skewers, cook for another 4 minutes, then turn.
  8. Baste all skewers a few times with the leftover marinade as you cook.
  9. Continue cooking for additional 2-3 minutes until an instant thermometer registers 130° on the meat.
  10. Transfer to serving plate. Garnish with fresh rosemary if desired.

http://www.lynnandruss.com

Spice-Crusted Oven-Roasted Potatoes

I’m a huge fan of potatoes no matter how they are made, be it mashed, smashed, roasted, french fried, twice-baked, scalloped, or au gratin. This Spice-Crusted Oven-Roasted Potatoes recipe elevates spuds to a new dimension and earns top honors in my plethora of potato recipes.

The mix, known as “suya” in Nigeria has a kick to it, but it’s also got an earthy and nutty taste to it as well, making it a favorite side dish for many entrées. A food processor makes the assembly of the mixture a breeze. Though suya is typically a powder when used on meats, adding a bit of oil produces a paste that adheres better to skin-on potatoes.

It is paired with a refreshing tomato-shallot recipe to spoon over the top, or even used for dipping. While it is not necessary, it adds a bright note to the side dish and complimented our grilled lamb loin chops.

Making them is a bit messy when you try to adhere the spice rub to the potato halves. Some of the mixture on the baking sheet will likely occur and char, but don’t worry because the cooking spray prevents it from sticking to the sheet.

Spice-Crusted Oven-Roasted Potatoes

  • Servings: 4-6
  • Difficulty: easy
  • Print

Ingredients

  • 1⁄2 cup unsalted dry-roasted peanuts
  • 2 tsp. hot or sweet paprika
  • 2 tsp. ground ginger
  • 2 tsp. granulated garlic
  • 1 tsp. packed light brown sugar
  • Kosher salt and ground black pepper
  • 3 Tbsp. grapeseed or other neutral oil, divided
  • 2 lbs. small Yukon Gold or red baby potatoes
  • 3 plum tomatoes, cored and finely chopped
  • 1 medium shallot, peeled and finely chopped
  • 1 serrano chili, stemmed. seeded and finely chopped
  • 1⁄2 cup lightly packed fresh flat-leaf parsley, chopped
  • 2 Tbsp. lime juice

Directions

  1. Heat oven to 475°F with a rack in the middle position.
  2. Mist a rimmed baking sheet with cooking spray.
  3. In a food processor, combine peanuts, paprika, ginger, garlic, sugar, 1⁄2 teaspoon salt and 1 teaspoon black pepper. Process until finely ground.
  4. Add 2 tablespoons of the oil and pulse until evenly combined, scraping the bowl as needed.
  5. In a large bowl, toss the potatoes with the remaining oil and 1⁄4 teaspoon salt. Add the nut-spice mixture and use your hands to toss and press the seasoning onto the potatoes so it sticks.
  6. Scrape the potatoes and any residual seasoning onto the prepared baking sheet, then distribute in an even layer.
  7. Roast until well-browned all around and a skewer inserted in the potatoes meets no resistance, 20 to 25 minutes, turning the potatoes about halfway through.
  8. OPTIONAL: While the potatoes roast, in a small bowl, stir together the tomatoes, shallot, chili, parsley, lime juice and a 1⁄2 teaspoon each of salt and pepper.
  9. When the potatoes are done, transfer to a serving dish and sprinkle with salt. Serve with the tomato relish on the side, if using.

http://www.lynnandruss.com

Adapted from a recipe found in Milk Street Magazine

Chinese Ginger-Soy Braised Pork

There are as many versions of this hong shao rou dish as there are families because recipes for Chinese red-cooked pork vary by region and often are passed down within generations. The up-shot though, is succulent pork coated in savory spiced caramel. And the verdict? In a word, FANTASTIC!!

Dark soy sauce develops a crimson tint with long-cooking, lending hong shao rou its characteristic hue. This Instant Pot iteration from Milk Street omits the condiment, which can be tricky to source, resulting in a dish that’s less red but no less delicious. The pork shoulder is braised with ginger, garlic and warm spices, rounded out by sugar, soy sauce and dry sherry, an easier-to-find alternative to Shaoxing, the rice wine traditionally used in the dish. (We had some Shaoxing on hand.)

Whether pressure- or slow-cooked until fork-tender, the meat is reserved and its aromatic braising liquid is reduced into a sticky-sweet sauce. Assertive and robust in flavor, hong shao rou is best served with plain rice and simple steamed or stir-fried vegetables. So we paired ours with steamed jasmine rice and baby bok choy sautéed with ginger, garlic, Shaoxing rice wine—many of the same ingredients as the pork.

NOTE: Don’t add liquid to the pot other than the ⅓ cup of dry sherry. Allowing the pork to braise in its own juices yields rich, meaty flavor and results in less liquid to reduce to a glaze at the end.

Chinese Ginger-Soy Braised Pork

  • Servings: 4
  • Difficulty: easy
  • Print

Ingredients

  • 1/4 cup white sugar
  • 3 lbs. boneless pork shoulder, trimmed of fat, cut into 1-inch chunks
  • 1 bunch scallions, thinly sliced, whites and greens reserved separately
  • 1/4 cup minced fresh ginger
  • 4 medium garlic cloves, minced
  • 1 cinnamon stick
  • 3 star anise pods
  • 1/3 cup dry sherry or Shaoxing wine
  • 2 Tbsp. soy sauce, preferably dark soy sauce
  • Kosher salt and ground black pepper

Directions

  1. On a 6-quart Instant Pot, select Normal Sauté. Add the sugar and 1 tablespoon water, then cook, stirring occasionally, until the sugar has liquified and is golden brown, 6 to 8 minutes.
  2. Add the pork and toss to coat. Cook, stirring occasionally, until the pork is no longer pink and has rendered some fat, 7 to 10 minutes.
  3. Stir in the scallion whites, ginger, garlic, cinnamon, star anise, sherry and soy sauce. Press Cancel, then distribute the mixture in an even layer.

FAST: Lock the lid in place and move the pressure valve to Sealing. Select Pressure Cook or Manual; make sure the pressure level is set to High. Set the cooking time for 25 minutes. When pressure cooking is complete, allow the pressure to release naturally for 5 minutes, then release the remaining steam by moving the pressure valve to Venting. Press Cancel, then carefully open the pot. OR

SLOW: Select More/High Sauté and bring the mixture to a boil. Press Cancel, lock the lid in place and move the pressure valve to Venting. Select Slow Cook and set the temperature to More/High. Set the cooking time for 4½ to 5½ hours; the pork is done when a skewer inserted into a piece meets no resistance. Press Cancel, then carefully open the pot.

  1. Transfer the pork to a medium bowl, leaving the cooking liquid in the pot. If necessary, using a large spoon, skim off and discard the fat from the surface of the liquid.
  2. Select More/High Sauté, bring the liquid to a boil and cook, stirring occasionally, until reduced to the consistency of honey, 13 to 15 minutes. Remove and discard the cinnamon and star anise.
  3. Return the pork and any accumulated juices to the pot and cook, stirring, until heated through, 2 to 3 minutes. Press Cancel to turn off the pot.
  4. Taste and season with salt and pepper. Serve sprinkled with the scallion greens.

http://www.lynnandruss.com

Recipe by Rose Hattabaugh for Milk Street

Lemon and Garlic Baked Chicken

Garlic and lemon with chicken is an iconic pairing that satisfies almost any appetite. In this recipe, poultry pieces are marinated in lemon and garlic, then topped with a sauce made with more of the same, producing extremely flavorful and juicy chicken.

One of the toppings is pimento which adds not only a bright pop of color, but more depth of flavor. If you’ve ever tried southern pimento cheese, or enjoyed pimento stuffed green olives, you have already tried the pimento pepper in pickled form. The word “pimiento” translates to “pepper” from Spanish. Pimento peppers are not spicy, but rather mild, sweet and succulent.

While the recipe indicates to start with a whole chicken and cut it down into pieces (our preference), you could just as easily buy bone-in, skin-on pieces to begin with, especially if the eaters go for all white meat or all dark meat.

Please keep in mind that the chicken needs to marinate at least an hour up to overnight. Doing so in the morning, allows for about 8-10 hours.

There is a good amount of sauce left in the skillet so dredge your side veg into it. Our broccolini sopped up many of the juices creating a more cohesive dinner.

Lemon and Garlic Baked Chicken

  • Servings: 4
  • Difficulty: easy
  • Print

Ingredients

  • 1/2 cup plus 2 Tbsp. olive oil
  • 2 Tbsp. fresh lemon juice 
  • 2 1/2 tsp. garlic powder 
  • 2 1/2 tsp. kosher salt, plus more to taste 
  • 1/2 1/2 tsp. freshly ground black pepper, plus more to taste 
  • One 3 1/2- to 4-lb. chicken, cut into pieces 

Sauce:

  • 2 Tbsp. unsalted butter
  • 1 1/2 tsp. honey, plus more if needed 
  • 1 1/2 tsp. chopped fresh oregano 
  • 4 cloves garlic, minced 
  • Juice of 2 lemons (about 1/4 cup) plus 1/2 tsp. lemon zest 
  • One 4-oz. jar diced pimientos, drained 
  • 1/4 cup chopped fresh parsley 
  • Lemon wedges, for garnish

Directions

  1. Whisk together the olive oil, lemon juice, garlic powder, salt and pepper in a small bowl. Add the chicken pieces to a large resealable plastic bag and pour the marinade over the top. Seal the bag, removing as much air as possible, and massage the marinade around the chicken to coat evenly.
  2. Refrigerate for at least an hour and up to overnight.
  3. Preheat the oven to 400 degrees F.
  4. Remove the chicken from the marinade and transfer, skin-side up, to a large cast-iron skillet. Pour half the marinade all over the chicken in the skillet.
  5. Sprinkle the chicken with a generous pinch of salt and pepper. Roast until the chicken is deeply browned, the meat is cooked through and the juices run clear, about 30-40 minutes. (An instant-read thermometer inserted in the thigh, avoiding bone, should read 165 degrees F.)
  6. Remove the chicken to a platter and let rest while you make the sauce.
  7. For the sauce: Melt the butter in a saucepan over medium heat. Whisk in the honey, oregano, garlic, lemon juice and zest and 1/4 cup skimmed drippings from the skillet and bring to simmer.
  8. Taste and season with salt and pepper, and if too tangy, add a bit more honey. Pour the sauce over the chicken, then garnish with the pimientos, chopped parsley and lemon wedges and serve.

http://www.lynnandruss.com

Recipe from Food Network

Healthy Blueberry Banana Bread with Dark Chocolate

Healthy-ish. A closer look at the ingredients of whole wheat flour, ripe bananas, fresh blueberries, dark chocolate and 2% Greek yogurt, you can’t help but feel a bit smug when eating something so decadent. No butter, honey instead of refined sugar, and you are patting yourself on the back.

This combines parts of two previous banana bread recipes I’ve made in the past. And it is a treat anytime of day—for breakfast with more fresh fruit, a snack in the afternoon, or dessert in the evening with perhaps a dollop of good French vanilla ice cream. OK, so maybe the ice cream isn’t in keeping with the healthy factor, but sometimes you just need some self-love, right?

No mix master needed. Simply get a large mixing bowl, mash the ripe bananas, add the other ingredients and then pour batter into your prepared loaf pan. Top with a smattering of additional blueberries and chocolate pieces, pop in the preheated oven for an hour. Voila, masterpiece accomplished!

A popular item to share at a Sunday brunch. If it is not all eaten right away, wrap in plastic wrap followed by a layer of tinfoil and keep in the refrigerator, or freeze.

Healthy Blueberry Banana Bread with Dark Chocolate

  • Servings: 8-10 slices
  • Difficulty: easy
  • Print

Ingredients

  • 3 very ripe bananas, peeled and broken into large chunks
  • 2 eggs
  • ½ cup 2% plain Greek yogurt
  • ⅓ cup honey
  • 1 tsp. vanilla extract
  • 1 tsp. baking soda
  • 1 ½ cups whole wheat flour
  • ½ cup fresh blueberries, plus about 20 more for topping
  • ½ cup dark chocolate pieces, plus about 20 more for topping

Directions

  • Preheat the oven to 350˚F.
  • In a medium bowl, mash bananas. Mix eggs, yogurt, honey, vanilla extract, and baking soda into mixture.
  • Add flour and mix.
  • Gently fold in blueberries and chocolate chips into mixture. Save about 20 blueberries and chocolate pieces for the top.
  • Grease a 9 x 5-inch loaf pan. Press in parchment that slings over the sides for easier removal. Pour the batter into the pan. Top with the saved berries and chocolate.
  • Bake for about 50-60 minutes, or until a toothpick comes out clean from the middle of the bread.
  • Allow to cool at least 20 minutes in the pan. Lift out of pan using the parchment sling and cool another 15 minutes or so before serving.

http://www.lynnandruss.com