Tag Archives: chicken

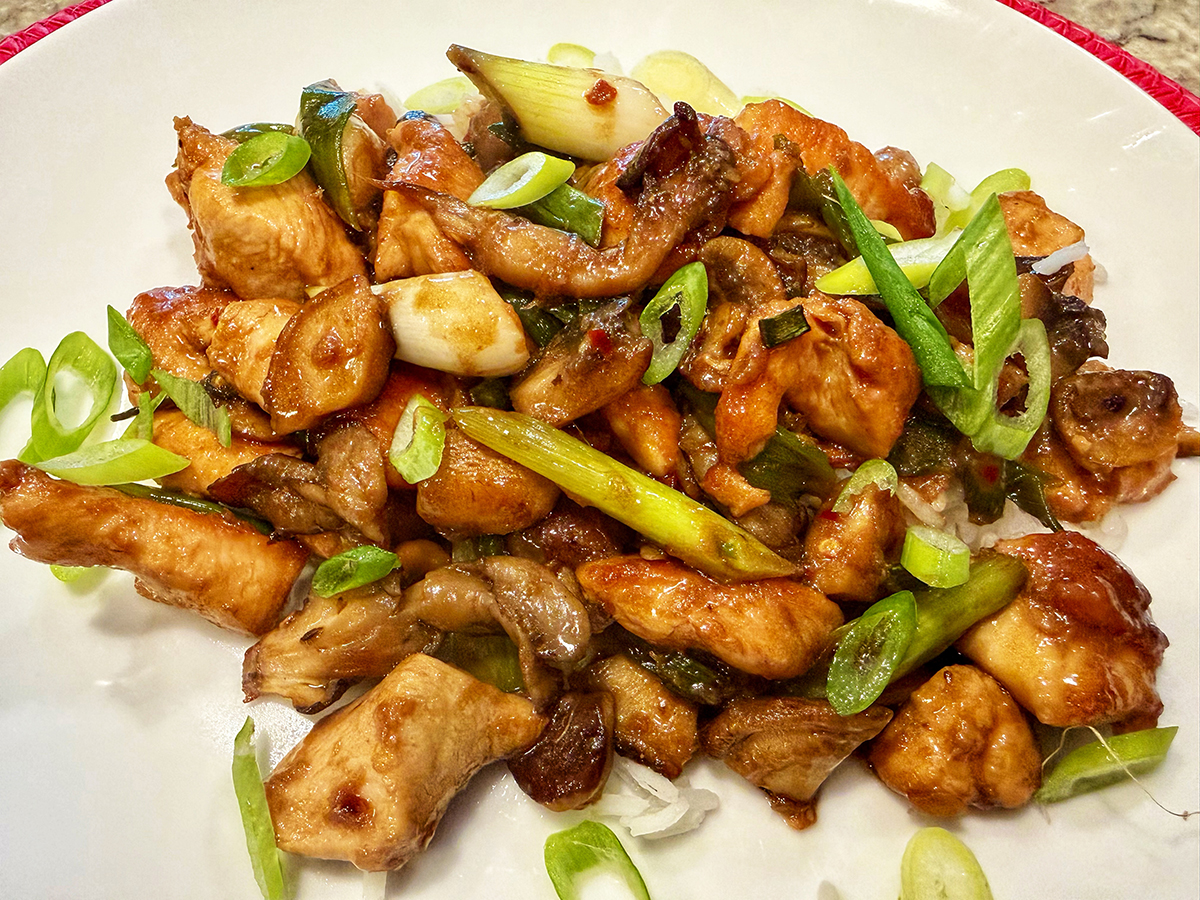
Chicken and Mushroom Stir-Fry

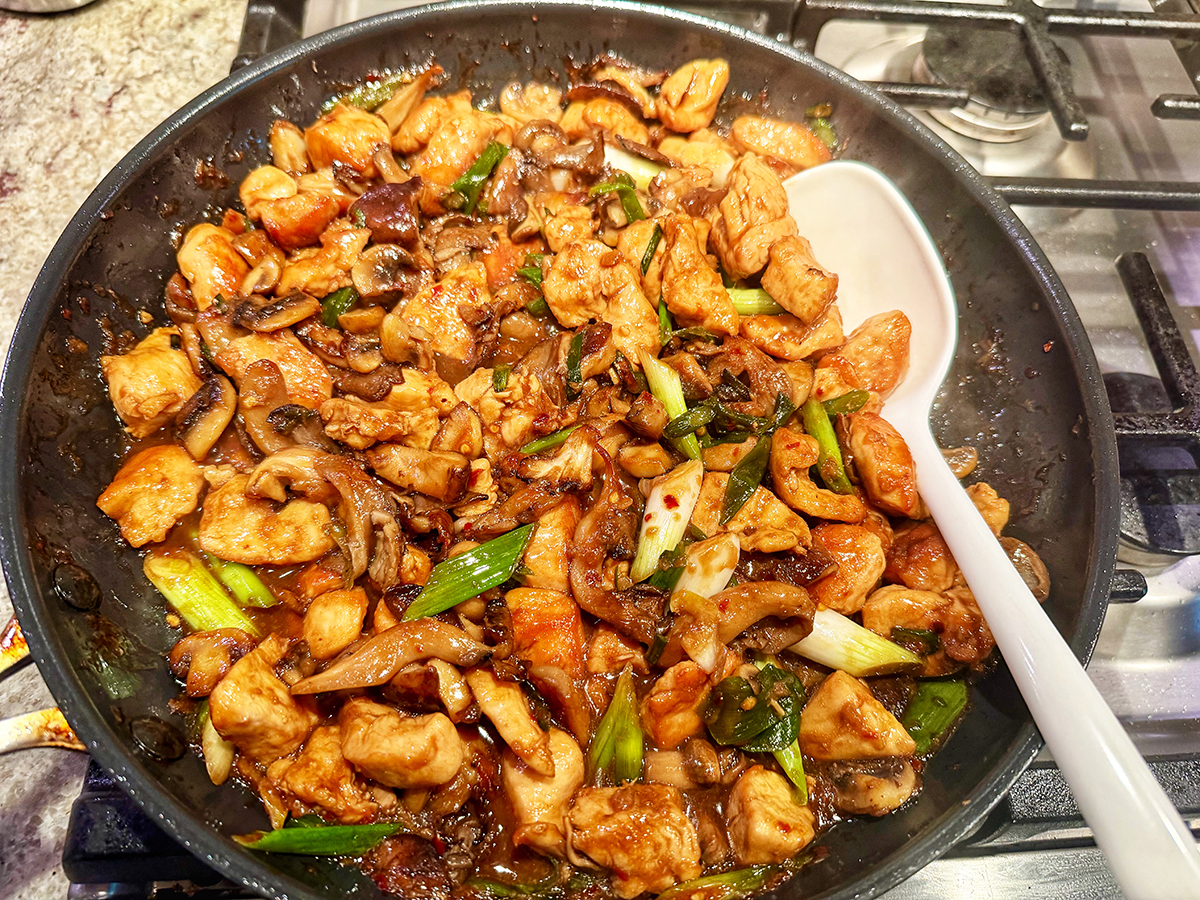
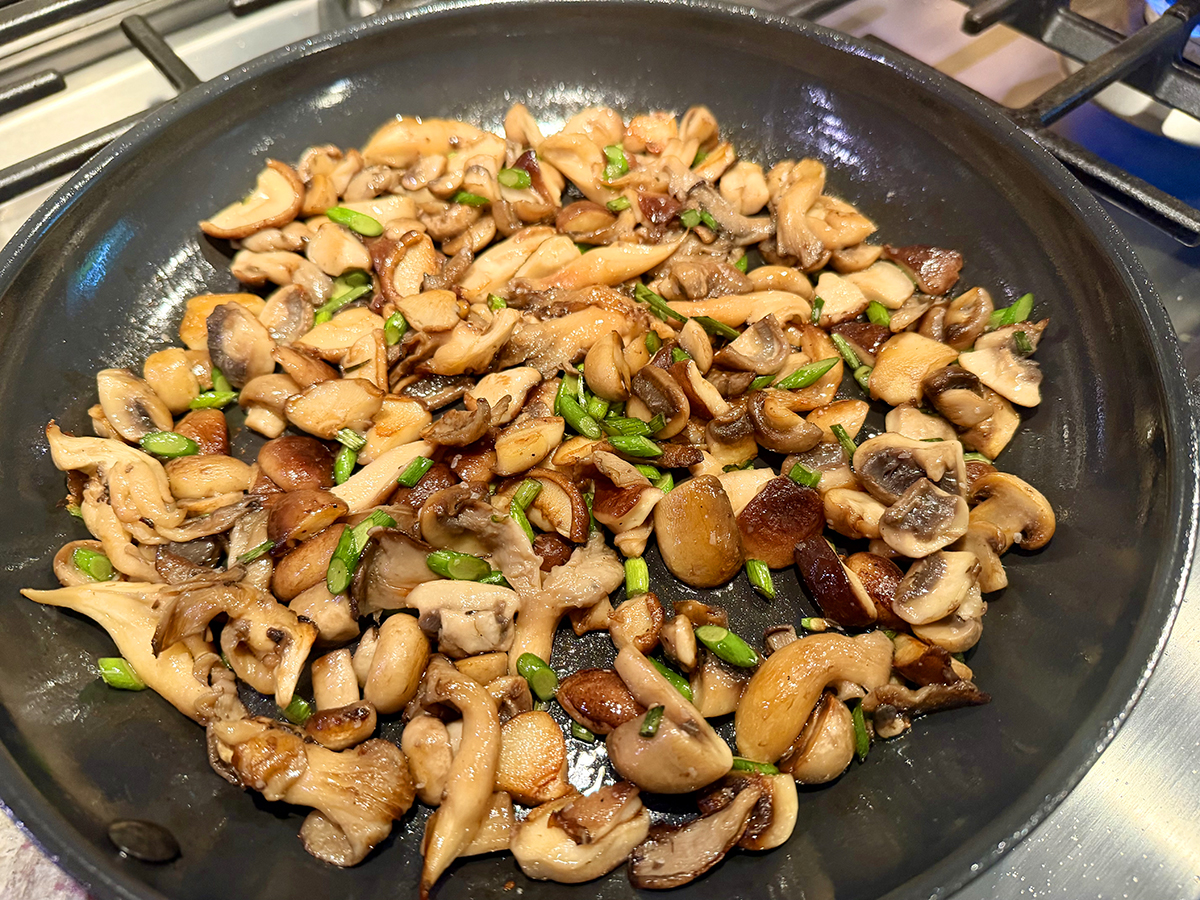
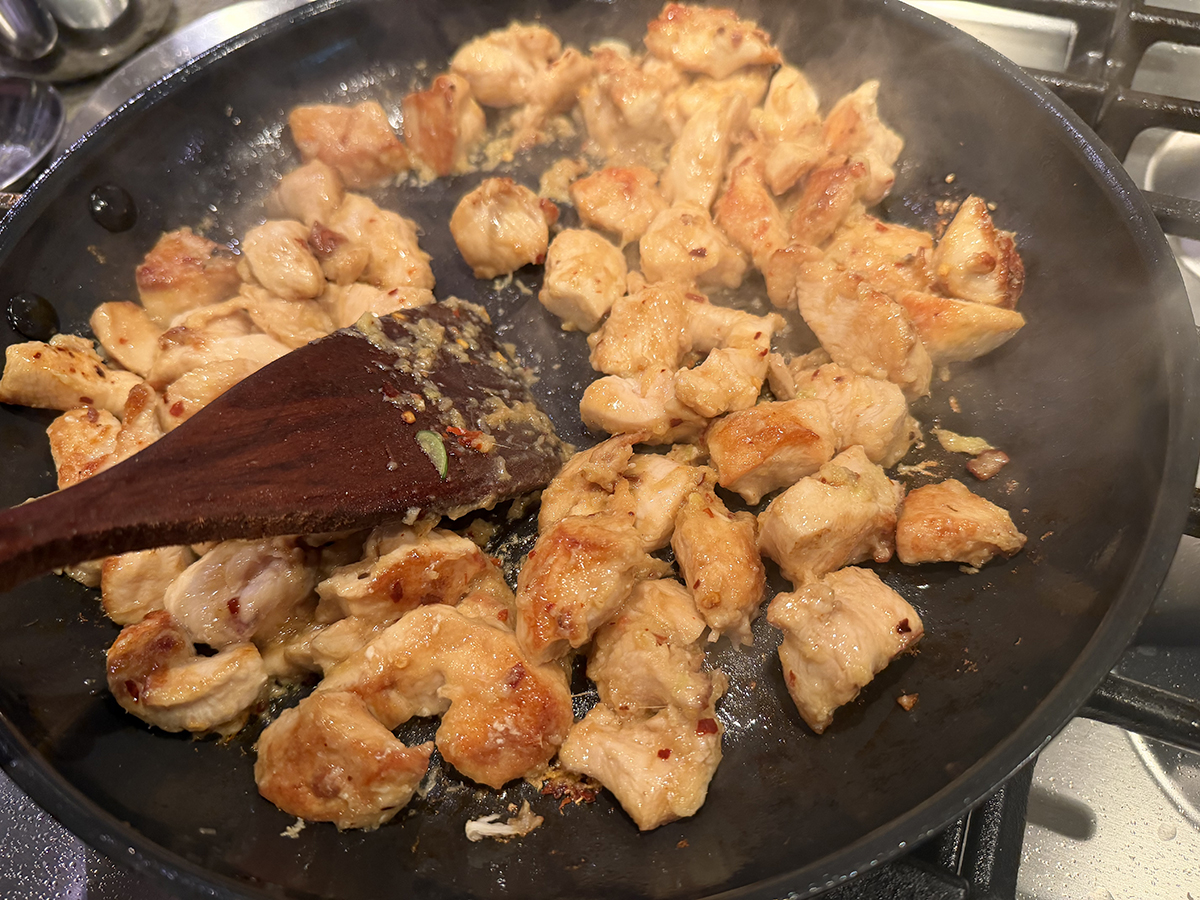
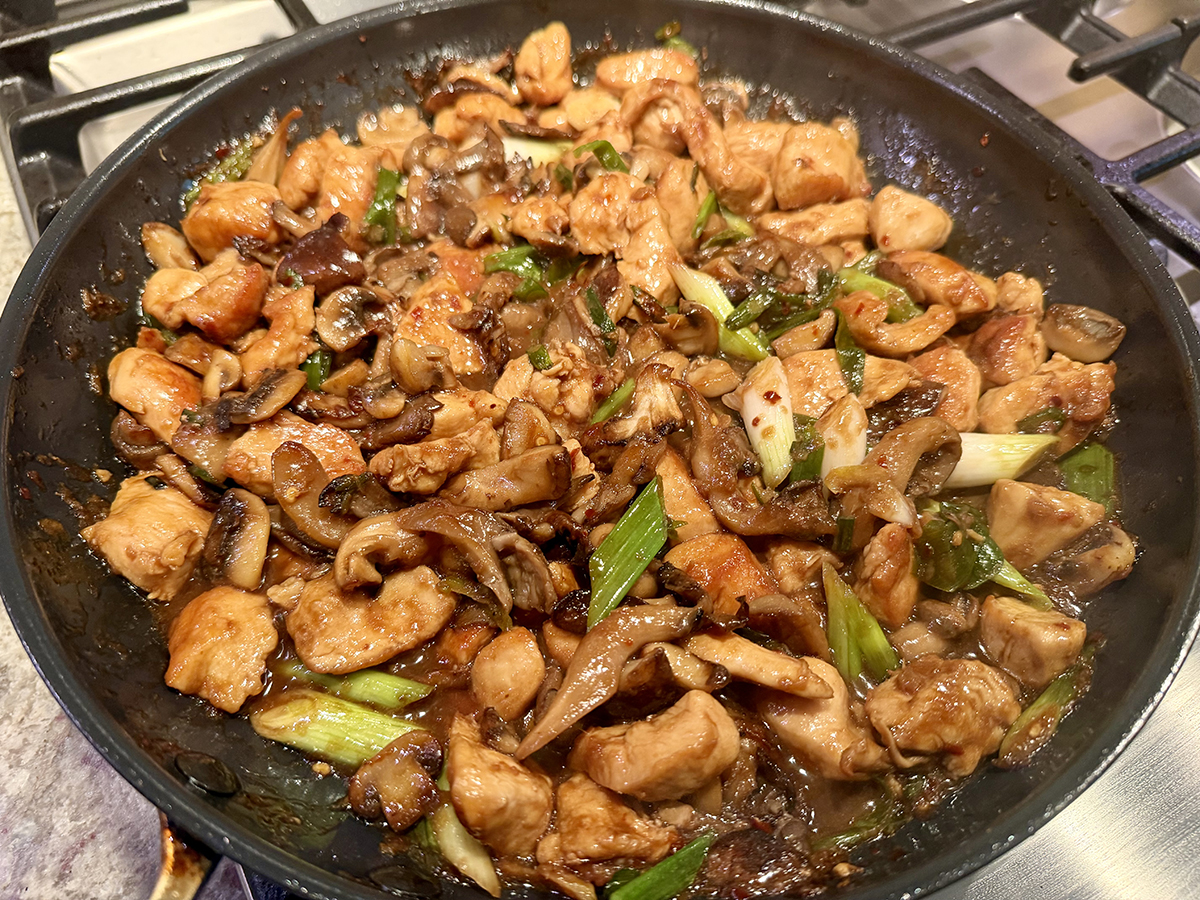
For a superfast dinner that relies heavily on pantry staples, look no further than this deeply savory, scallion-studded stir-fry. Chicken pieces and torn bits of meaty mushrooms team up to form the base, well browned separately to maximize color and flavor.

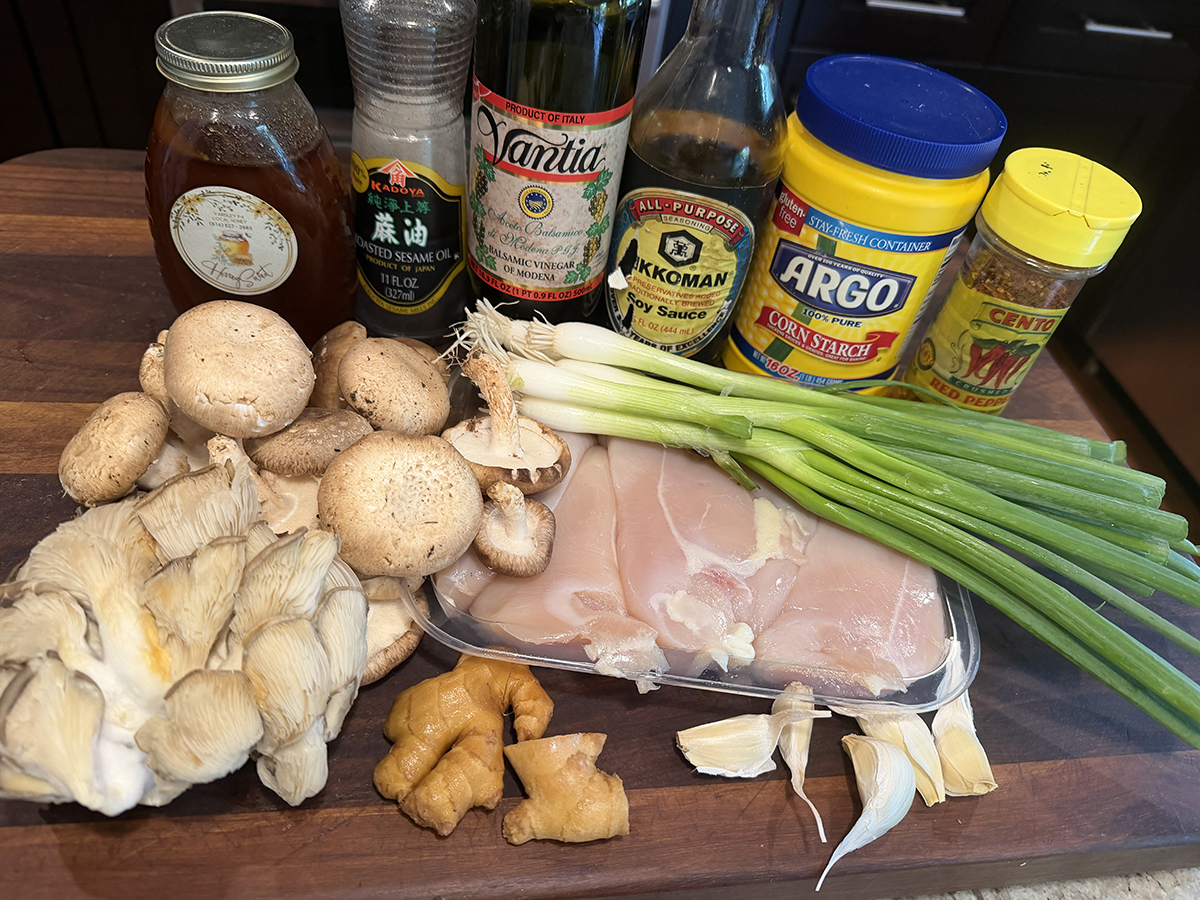
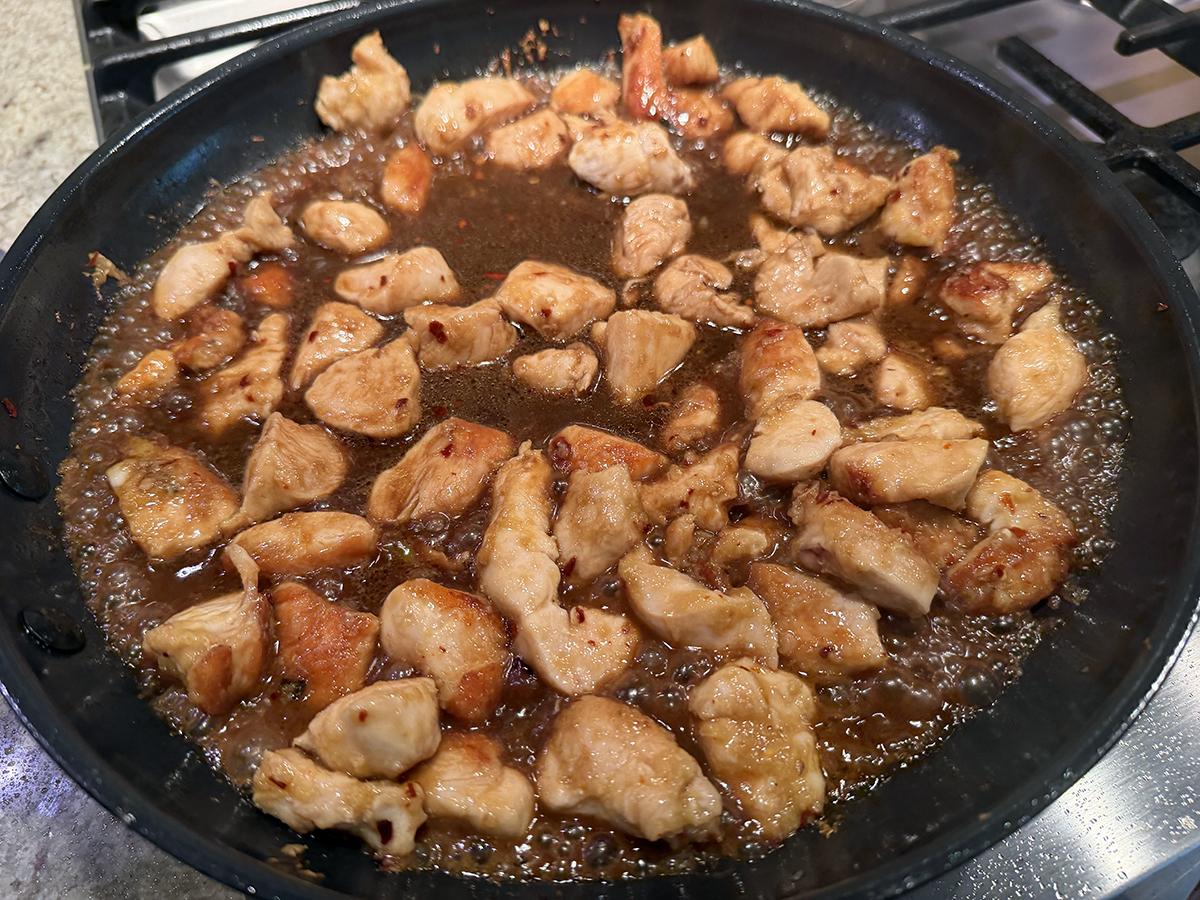
The sauce, thickened with a smidge of potato starch or cornstarch, is built with aromatics (ginger and garlic, the classics), soy sauce, sesame oil, and honey, as well as one addition that may surprise you: balsamic vinegar. In the mix, it plays a bit like Chinese black vinegar, providing depth, complexity, and a touch of sweetness.

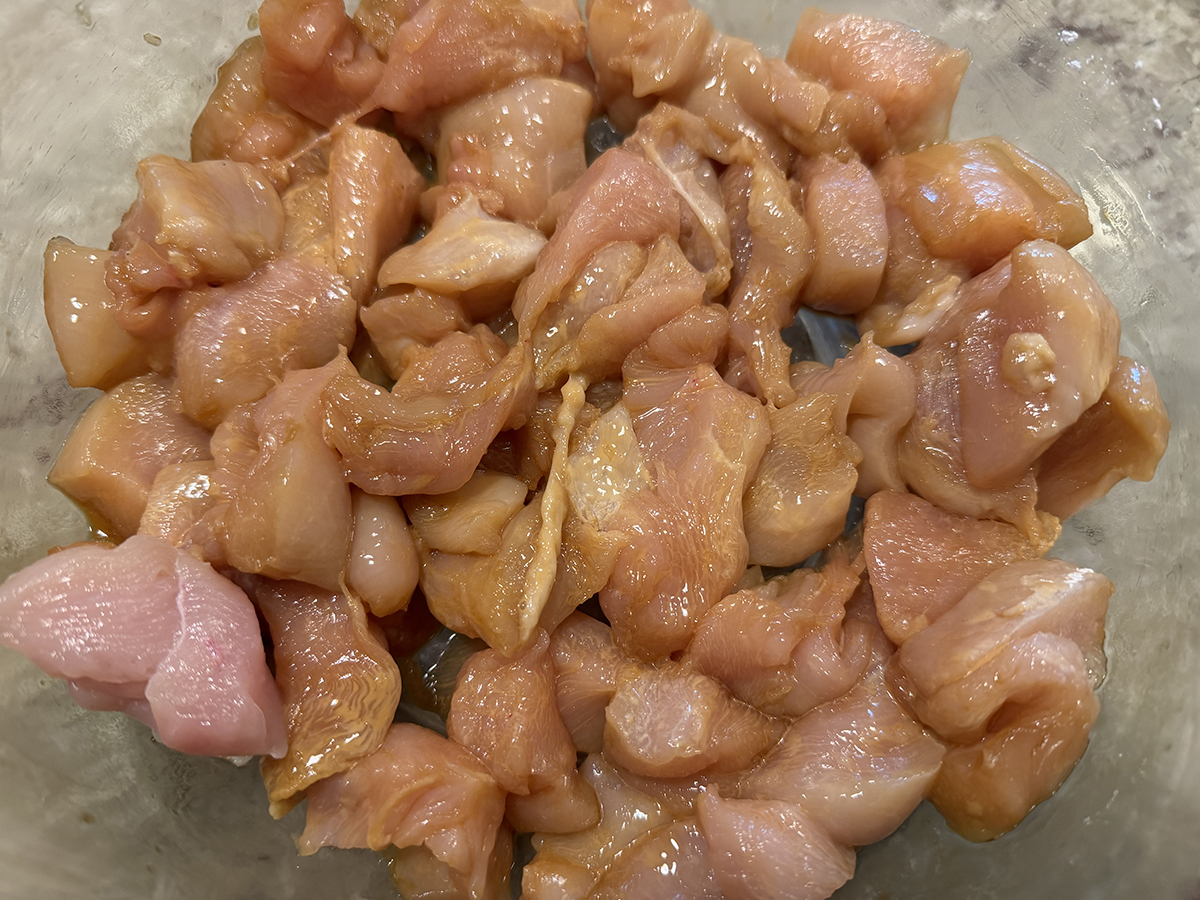
While you could omit the starch in this recipe, it works in two ways to nail the textures you’re looking for in a stir-fry. First, it coats the chicken pieces to aid in their browning, and also provides a protective barrier, ensuring they stay tender and moist without overcooking (easy to do with such small pieces). Second, it thickens the sauce, to create the sticky, viscous texture you expect alongside a scoop of steamed rice.

Chicken and Mushroom Stir-Fry

  • Servings: 4
  • Difficulty: easy
  • Print

Ingredients

  • 1½ lb. skinless, boneless chicken breasts (about 4–6), cut into 1½” pieces
  • 3 Tbsp. soy sauce, divided
  • 1 Tbsp. plus ½ tsp. cornstarch or potato starch
  • 3 Tbsp. balsamic vinegar
  • 1 Tbsp. toasted sesame oil
  • 1 tsp. honey
  • ¼ cup plus 2 Tbsp. extra-virgin olive oil
  • 10 oz. mixed mushrooms (such as cremini, oyster, and/or king trumpet), torn into bite-size pieces
  • Kosher salt
  • 1 3″ piece ginger, peeled, finely grated
  • 4 garlic cloves, finely grated
  • ½ tsp. crushed red pepper flakes; plus more for serving (optional)
  • 1 bunch scallions, cut into 1½” pieces
  • Steamed rice (for serving)

Directions

  1. Vigorously stir skinless, boneless chicken breasts (about 4–6), cut into 1½” pieces, 1 tablespoons soy sauce, and 1 tablespoon cornstarch in a large bowl until starch is dissolved into soy sauce (you want to create a sticky coating, which will help ensure the meat stays tender). Set aside.
  2. Stir 3 tablespoons balsamic vinegar, 1 tablespoon toasted sesame oil, 1 teaspoon honey, remaining 2 tablespoons soy sauce, remaining ½ teaspoon cornstarch, and ⅓ cup water in a small bowl or measuring glass to combine and set sauce aside.
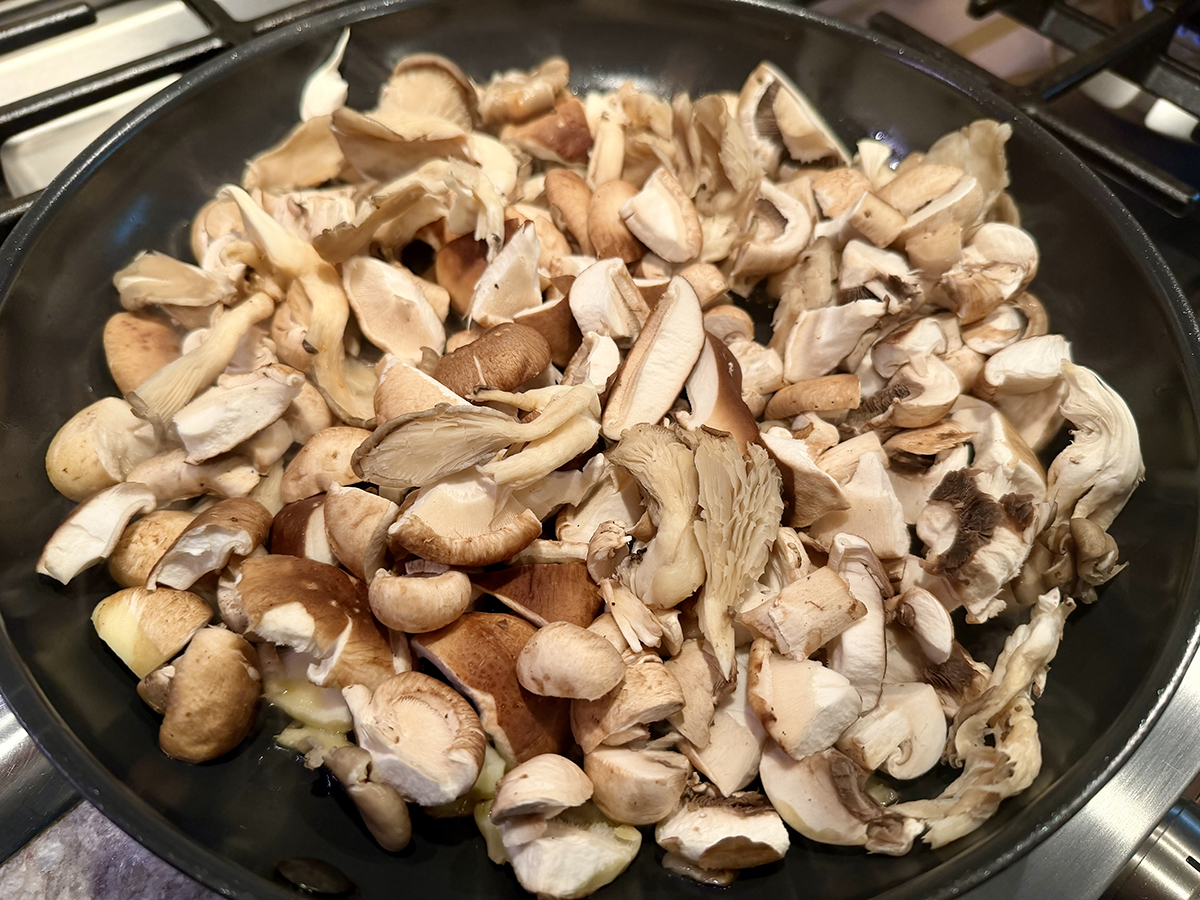
  3. Heat ¼ cup extra-virgin olive oil in a large nonstick skillet over medium-high. Add mixed mushrooms, torn into bite-size pieces, and cook, stirring often, until softened, about 5 minutes. Stir in a pinch of kosher salt and continue to cook, stirring often, until mushrooms release their moisture and it evaporates and mushrooms are deeply browned, about 3 minutes. Transfer to a plate.
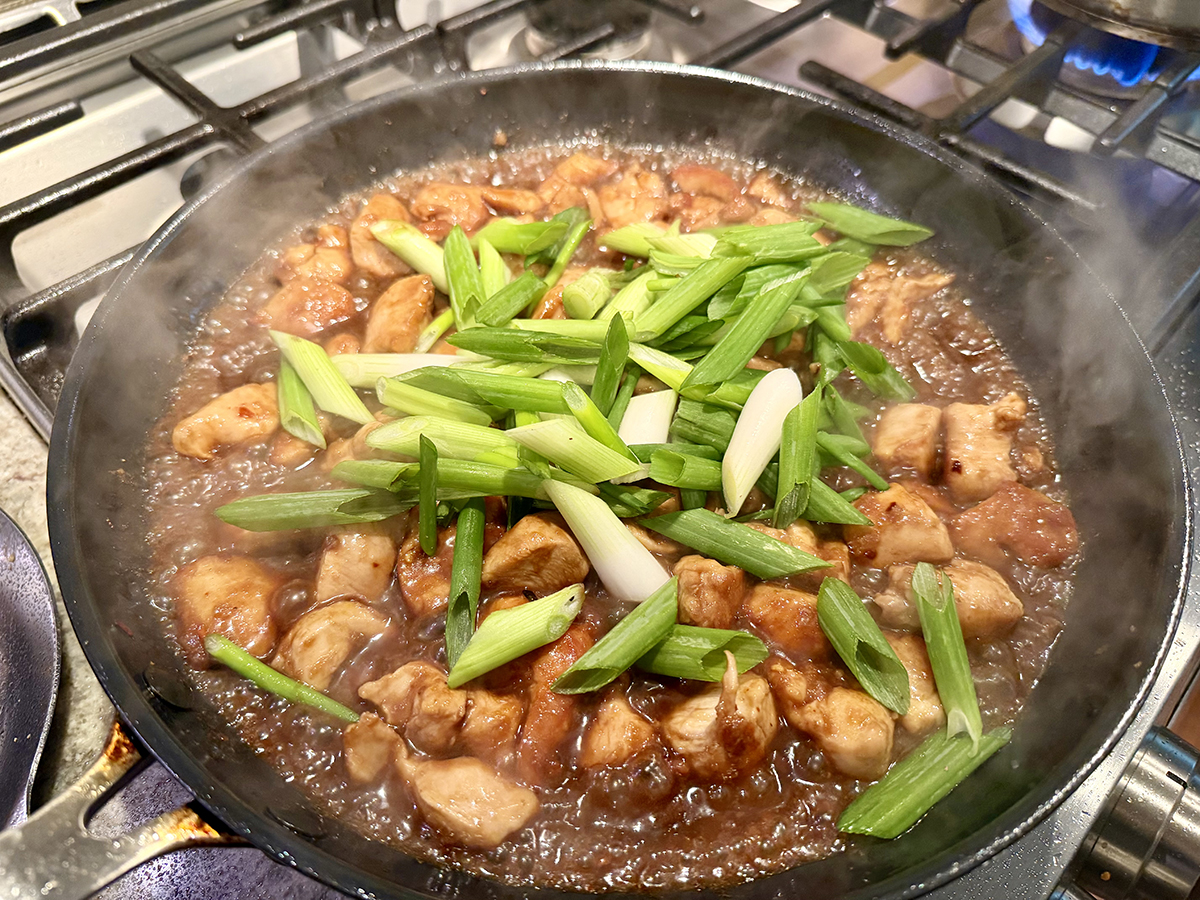
  4. Heat remaining 2 tablespoons extra-virgin olive oil in same pan over medium-high. Arrange reserved chicken in pan in an even layer and cook, undisturbed, until lightly browned underneath, about 2 minutes. Add ginger, garlic cloves, and crushed red pepper flakes and cook, stirring often, until combined and fragrant, about 1 minute. Add reserved sauce and cook, stirring often, until thickened, about 3 minutes. Add 1 bunch scallions, cut into 1½” pieces, and return mushrooms to pan; cook, stirring often, until combined and chicken is cooked through, 1–2 minutes.
  5. Transfer stir-fry to a platter and top with more red pepper flakes if desired. Serve with steamed rice.

http://www.lynnandruss.com
Recipe by Kendra Vaculin for Bon Appétit

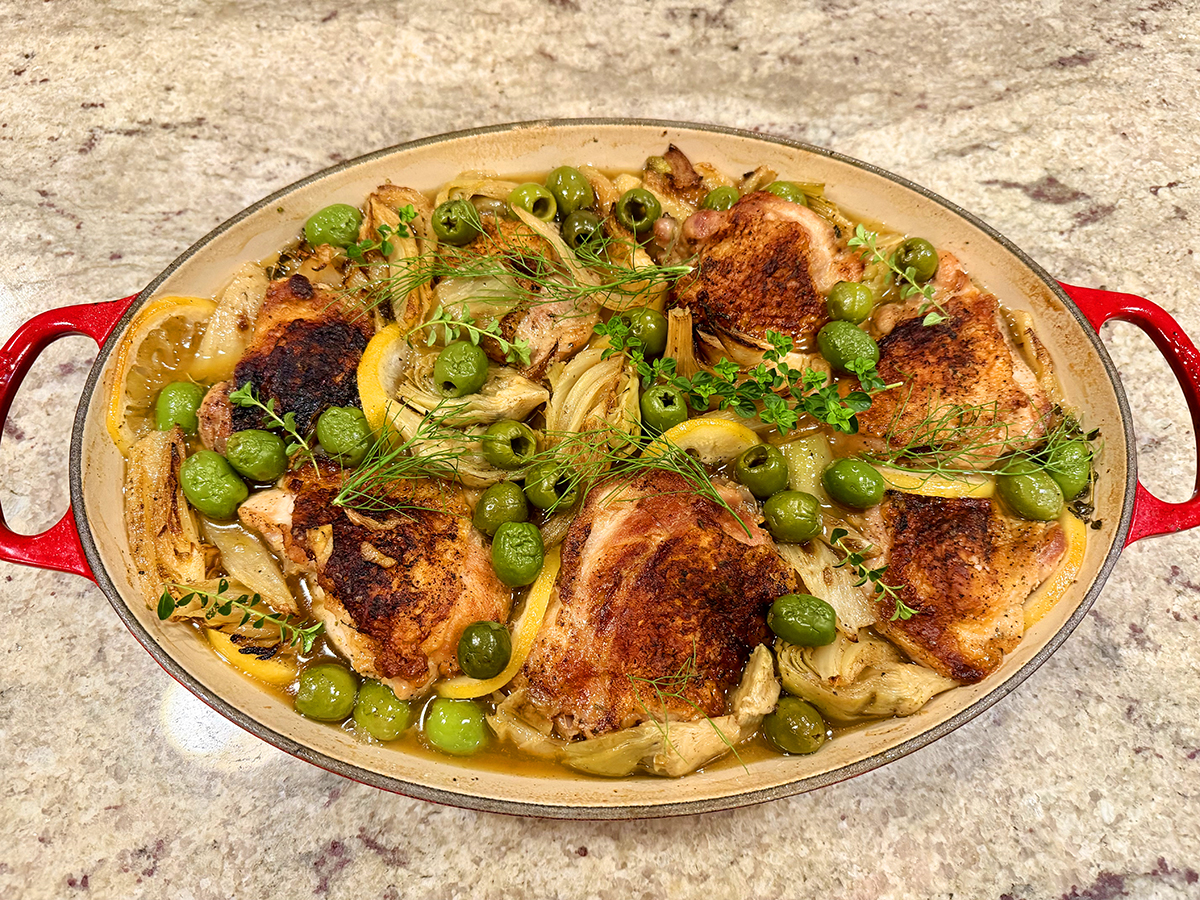
Braised Chicken with Marinated Artichoke Hearts

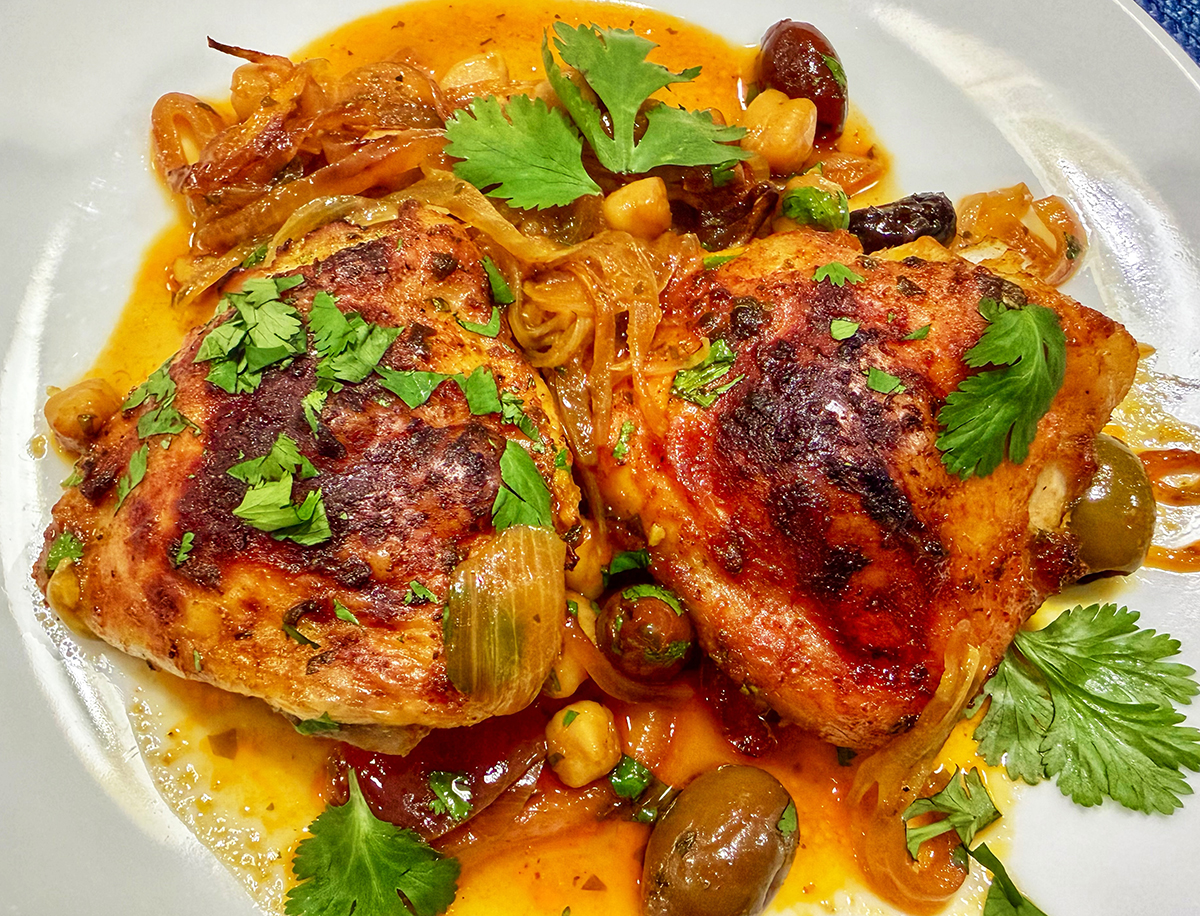
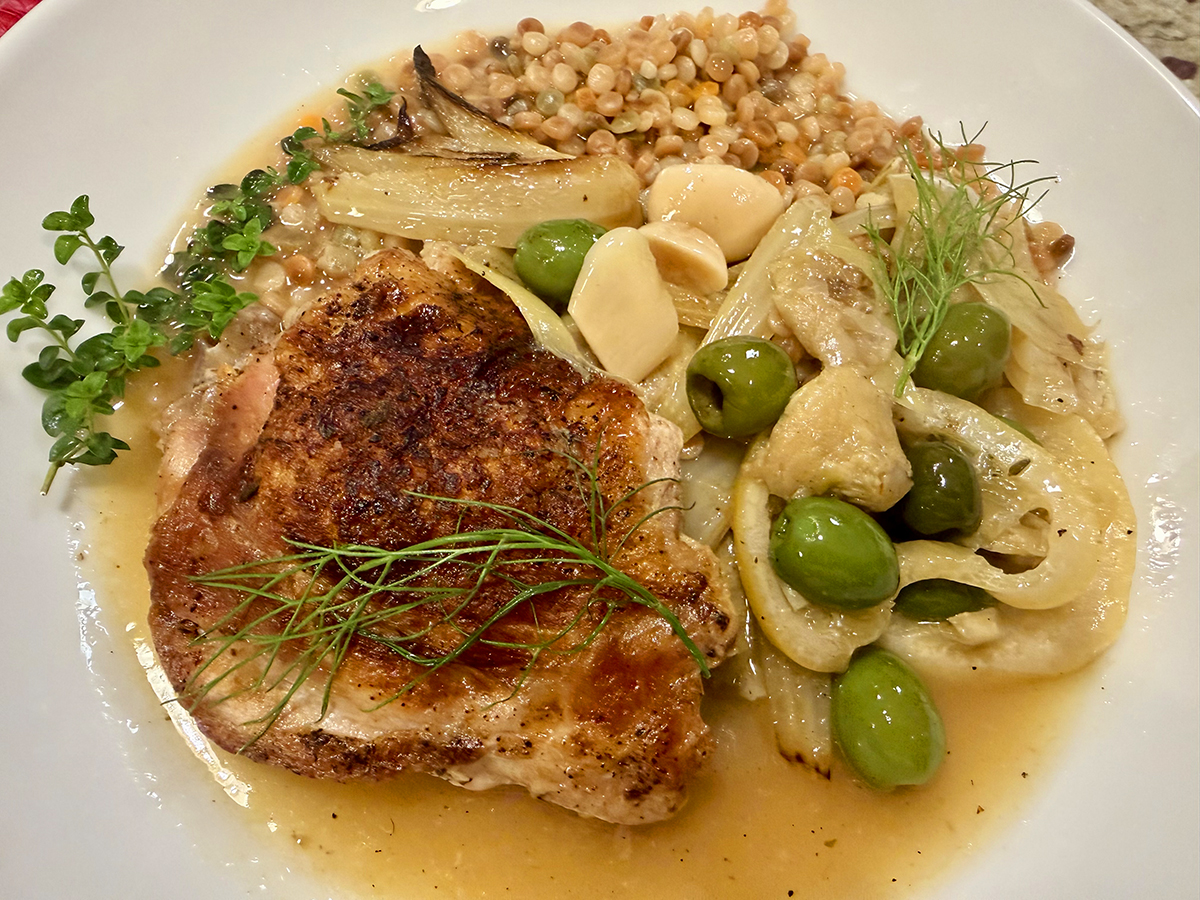
This Food & Wine recipe pairs crispy-skinned chicken thighs and drumsticks with a briny, sun-bright mix of buttery olives, marinated artichokes, and lemon. The pan sauce does the heavy lifting: sherry, fish sauce, thyme, and garlic simmer together into a savory, herb-flecked broth that’s begging to be mopped up. Pure magic in the mouth!

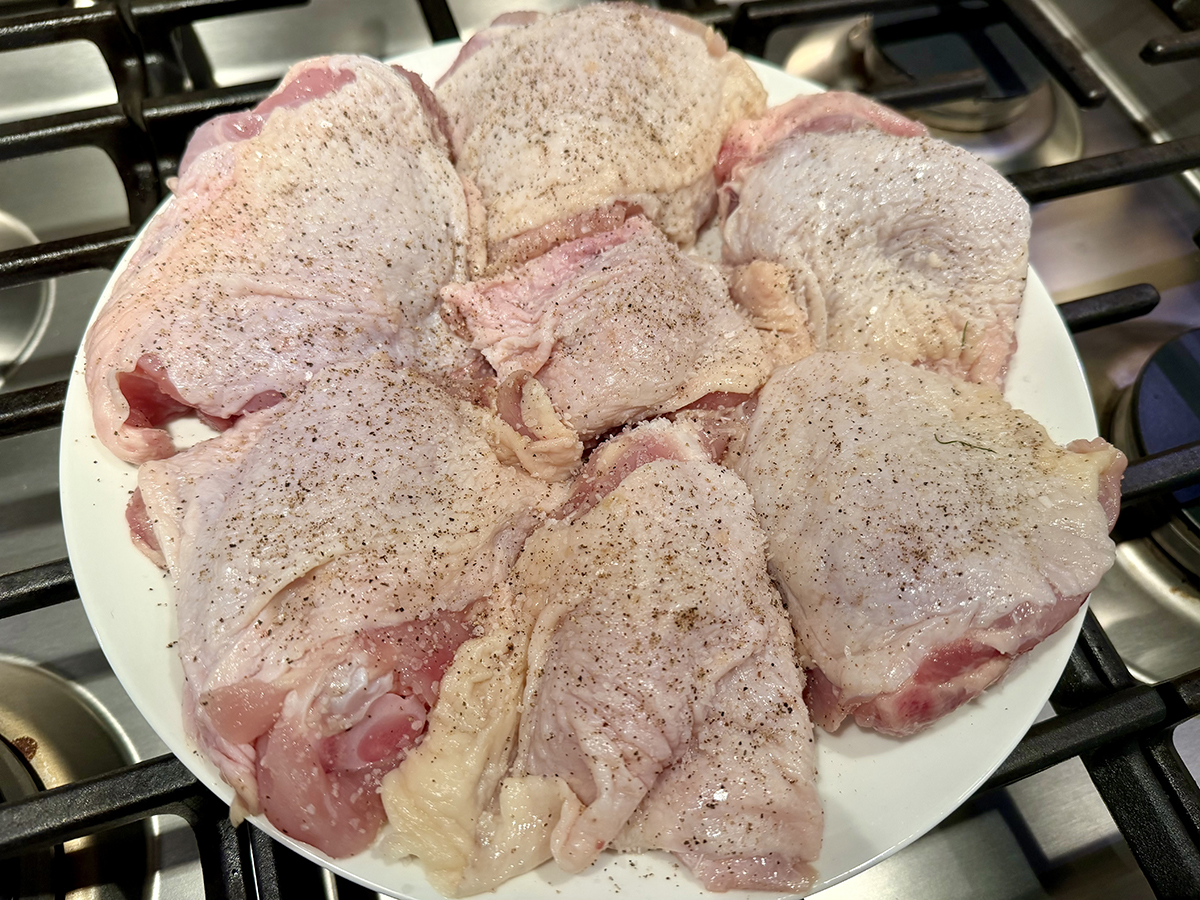
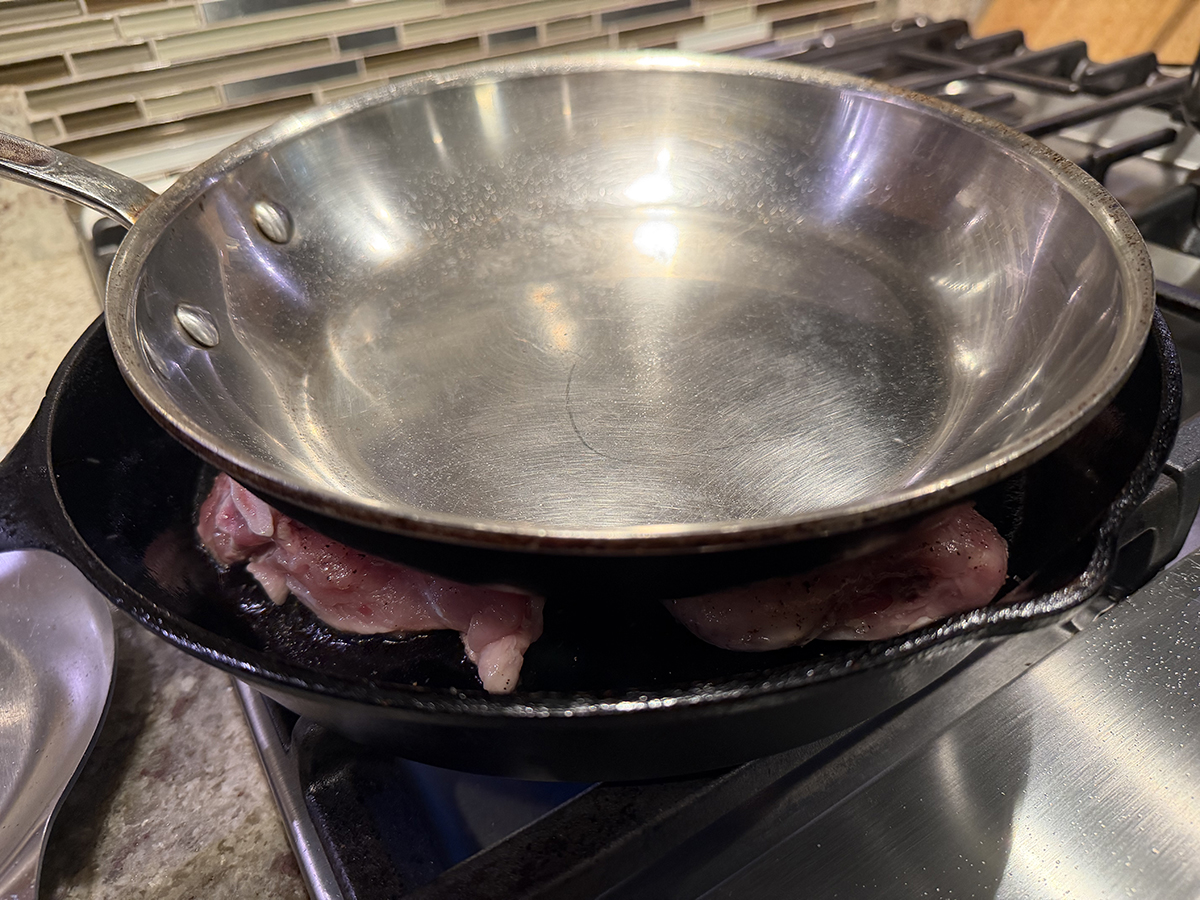
A few keys to get there: pat the chicken bone-dry before it hits the pan, so the skin actually browns instead of steaming. Weighing it down with a heavy lid or grill press (or a smaller cast-iron skillet, if that’s what you’ve got) keeps the skin flush against the heat for a deeper, more even crust. Then braise covered for most of the cooking time to keep the meat fall-apart tender, and uncover it for the last 15 minutes to let the skin crisp back up.

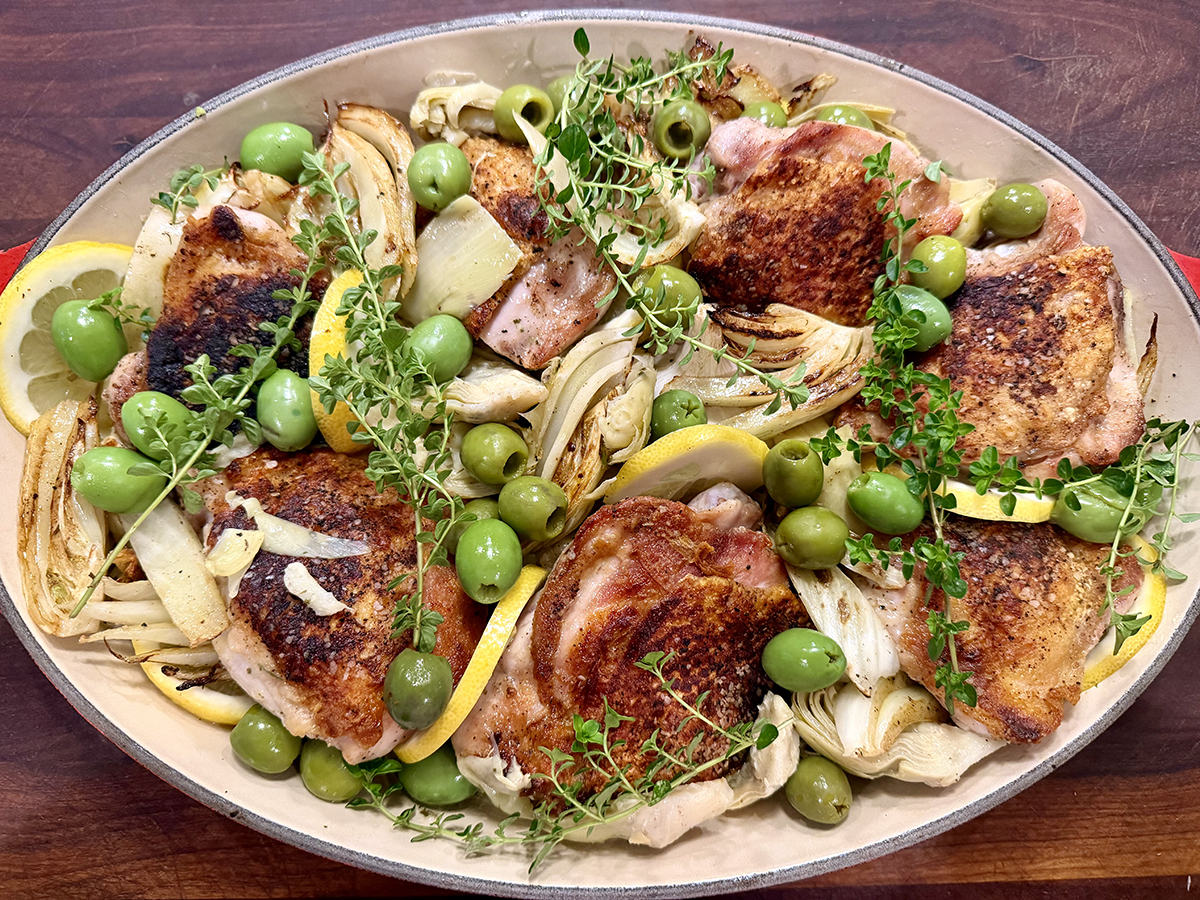
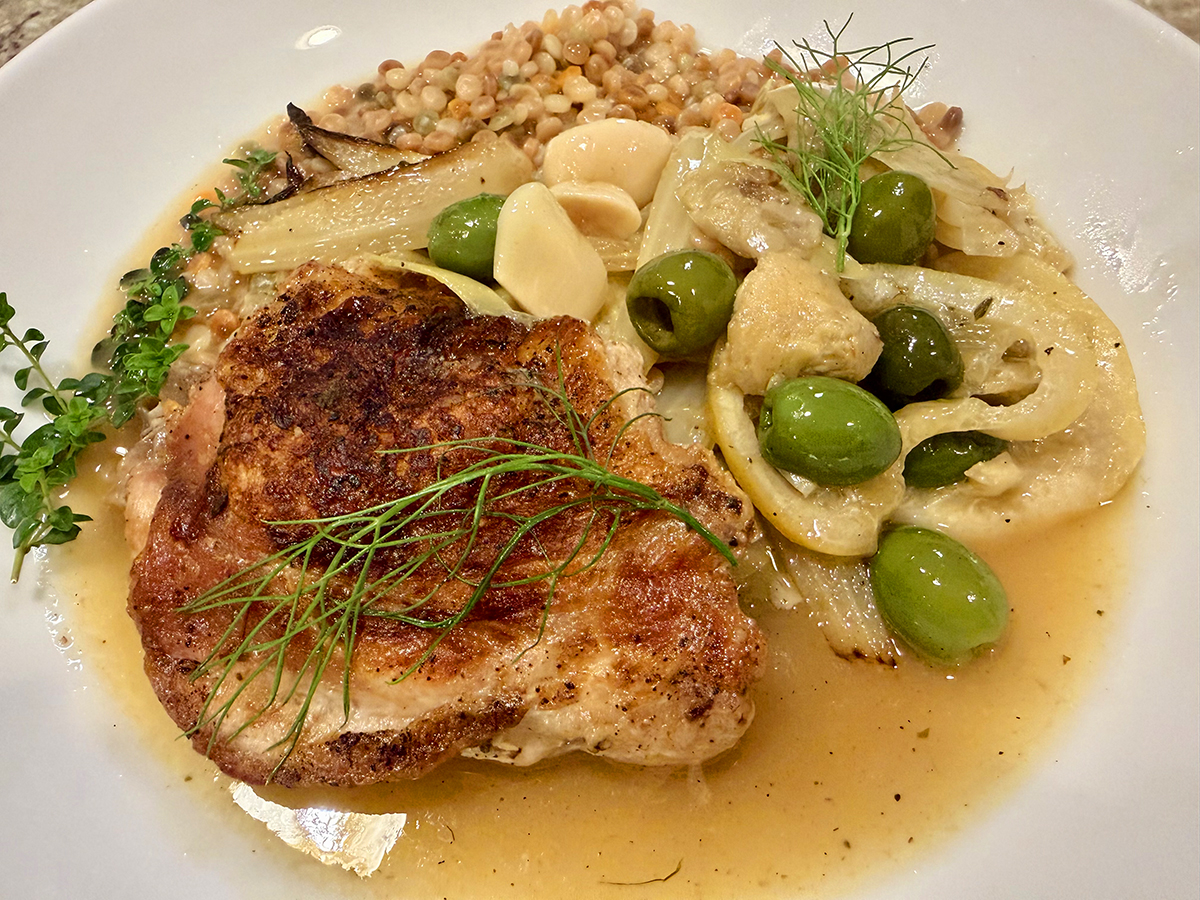
Serve it with crusty bread, couscous, or orzo for sauce-sopping duty. Turn it into a full one-pan dinner by tucking halved baby potatoes and/or sliced fennel (our choice) into the dish before it goes in the oven.

SUBSTITUTES: If you don’t have dry sherry, substitute dry white wine and add 1 to 2 teaspoons of honey to mimic sherry’s subtle sweetness. If you don’t have fish sauce, replace it with 1 to 2 teaspoons of soy sauce for a similarly savory, umami-rich finish. Cerignola olives are buttery and mild, manzanilla olives add a brinier bite, and kalamata olives contribute a deeper, more robust flavor. Any of these will work well, so use your favorite.

Braised Chicken with Marinated Artichoke Hearts

  • Servings: 4-6
  • Difficulty: easy
  • Print

Ingredients

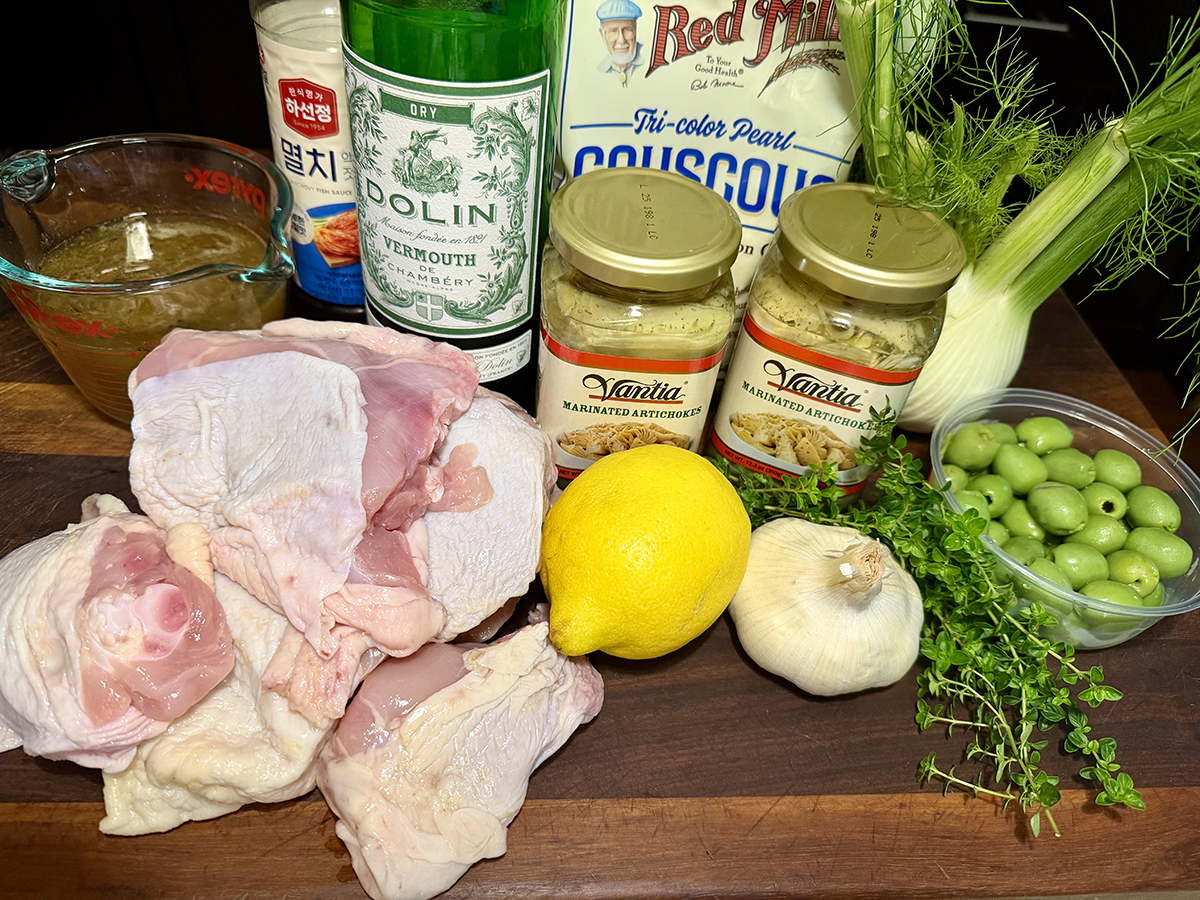
  • 8 bone-in, skin-on chicken drumsticks and thighs (about 2 1/2 lbs.)
  • 1/2 tsp. black pepper
  • 2 1/2 tsp. kosher salt, divided
  • 1 Tbsp. extra-virgin olive oil
  • 1 cup Castelvetrano olives
  • 6 Thyme sprigs
  • 1 large garlic head, halved crosswise
  • 1 Lemon, thinly sliced
  • 1 small fennel bulb, halved lengthwise, cored, sliced into thin wedges
  • 3 cups drained marinated artichoke hearts, plus 1/4 cup brine from jar, divided
  • 1 cup chicken stock
  • 1/2 cup (4 oz.) dry sherry
  • 1 Tbsp. fish sauce

Directions

  1. Preheat oven to 375°F. Sprinkle both sides of chicken evenly with pepper and 1 1/2 teaspoons salt. Heat oil in a large cast-iron skillet or black carbon steel skillet over medium-high. Add half of the chicken, skin sides down; place a heavy pot lid on top of chicken pieces to weigh them down. (Do not cover skillet.) Cook, undisturbed, until browned and crisp, 10 to 12 minutes. Remove lid; transfer chicken, skin sides up, to a 12- x 9-inch oval baking dish or a 13- x 9-inch baking dish. Repeat cooking process with remaining chicken. Scatter olives, thyme, garlic (cut sides down), lemon, fennel slices and artichoke hearts around chicken in baking dish.
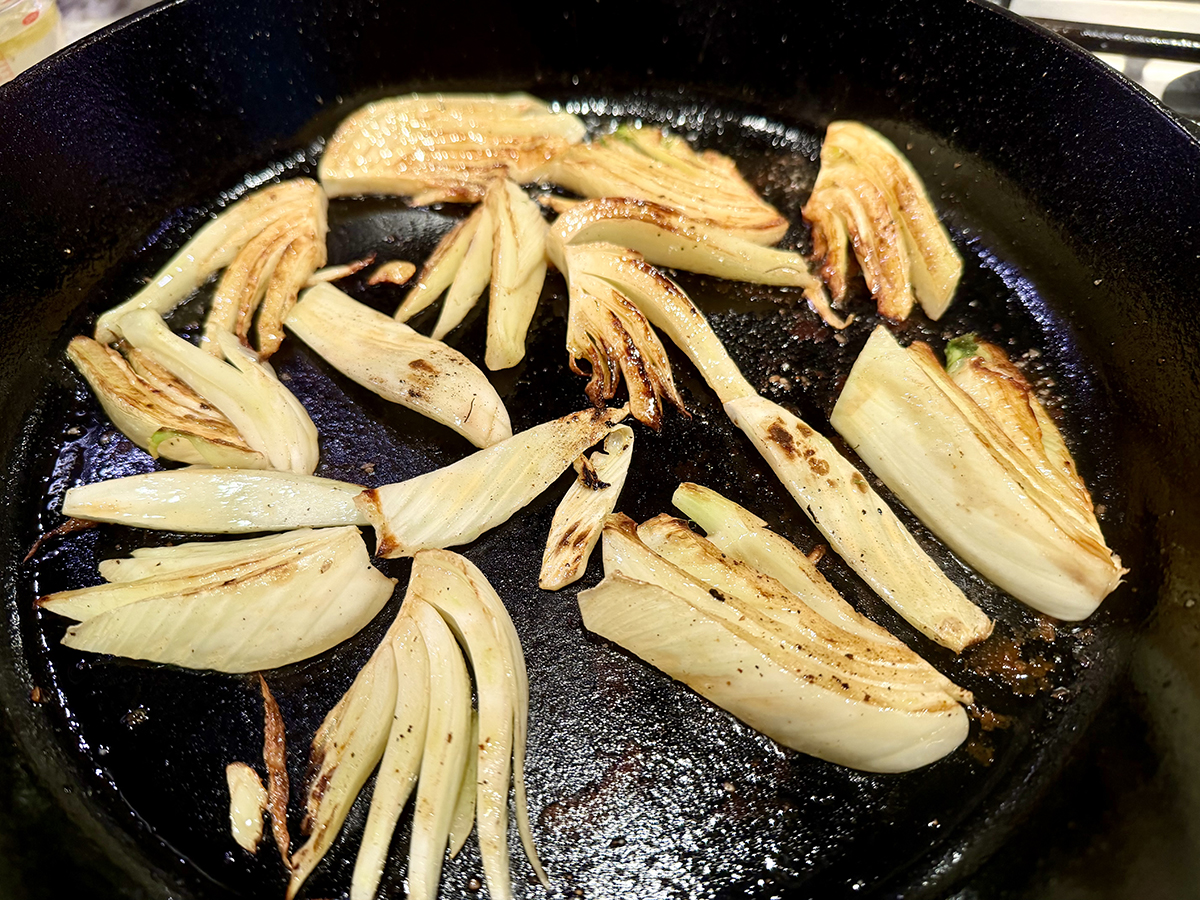
  2. Brown the fennel wedges in hot empty skillet for about 2 minutes per side. Move to casserole dish with chicken.
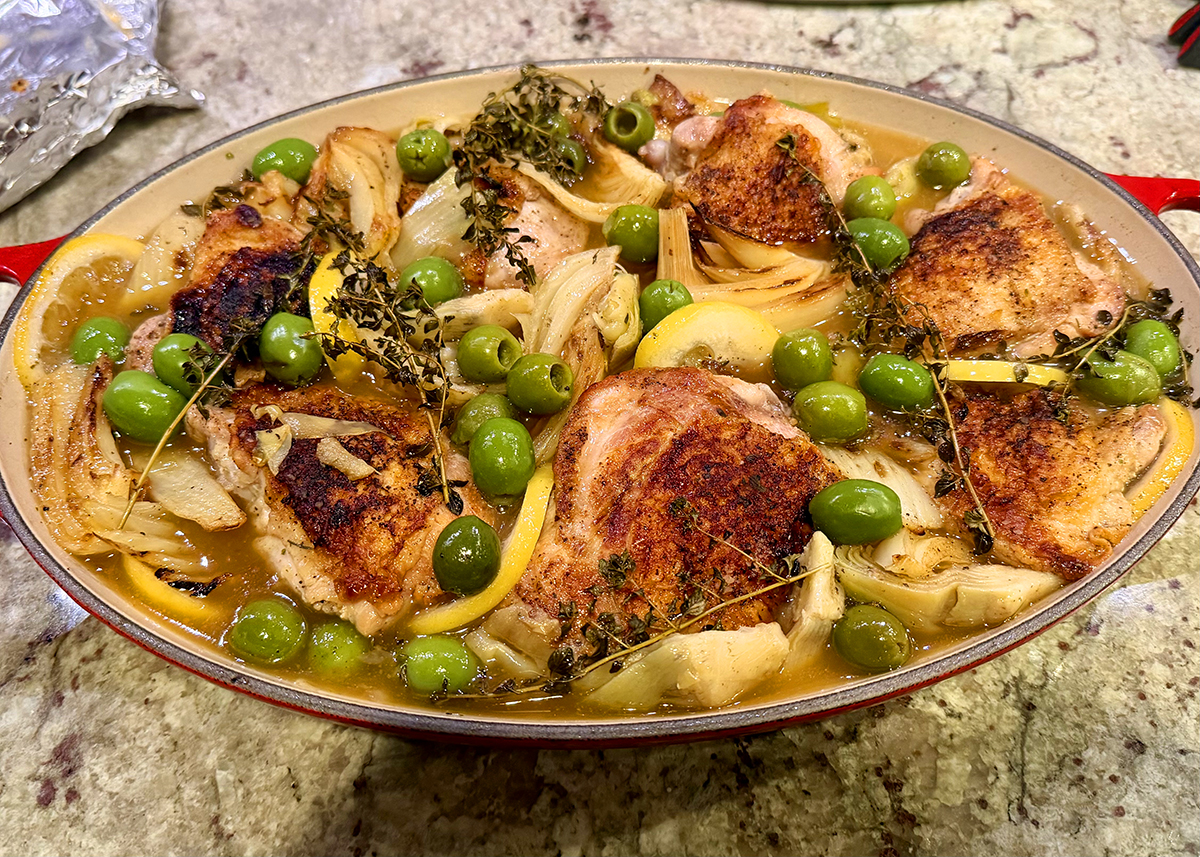
  3. Add stock, sherry, fish sauce, and artichoke brine to skillet; bring to a boil over medium-high, scraping up browned bits from bottom of pan. Stir in remaining 1 teaspoon salt; pour mixture around chicken in baking dish. Cover tightly with aluminum foil; braise until chicken is very tender, about 1 hour.
  4. Remove foil from baking dish; increase oven temperature to 400°F. Turn garlic halves cut sides up. Roast chicken until skin is crisp, about 15 minutes.
  5. Discard thyme sprigs. Either discard garlic (not us!), or remove cloves from skins and mash into sauce. Transfer to individual plates, and serve in shallow bowls.

http://www.lynnandruss.com

Adapted from a recipe by Naomi Pomeroy for Food & Wine

Thai-Style Grilled Chicken (Gai Yang)

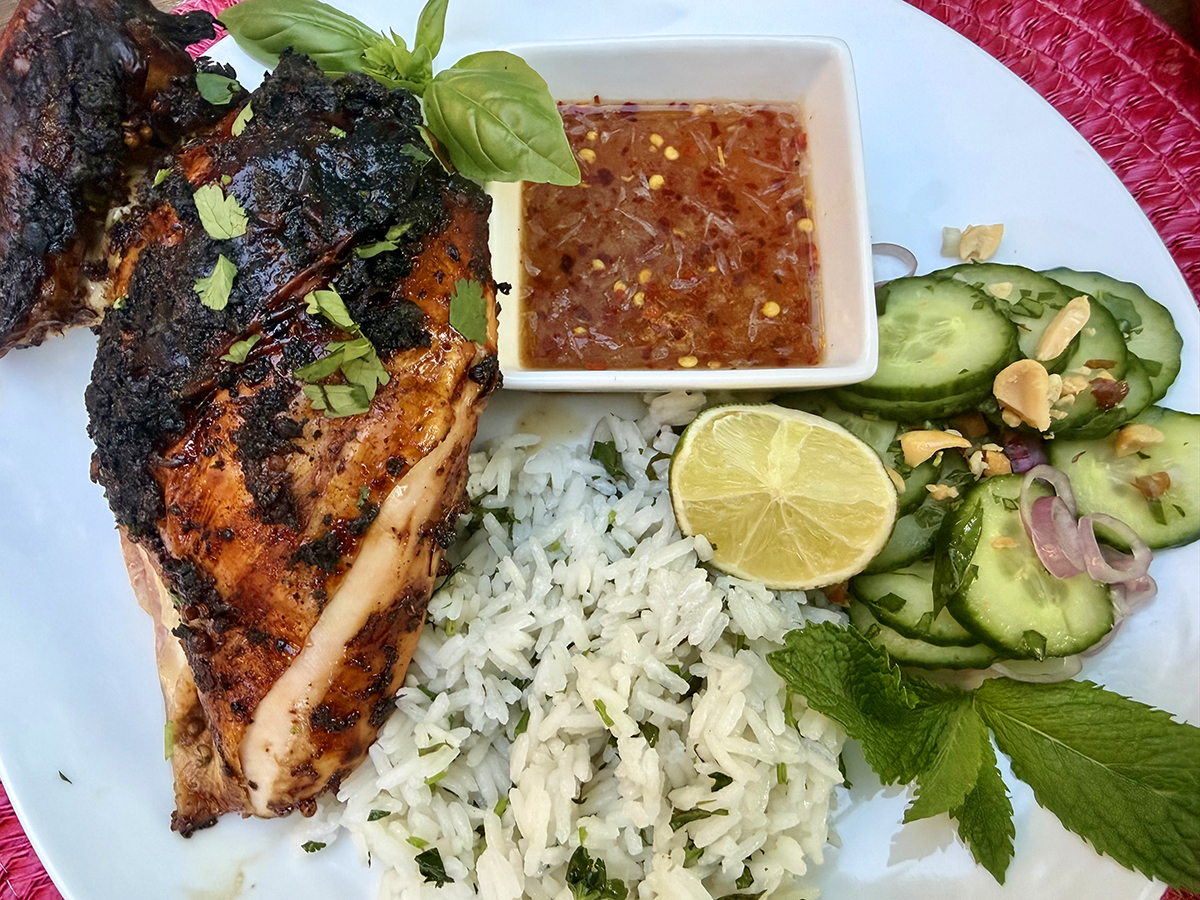
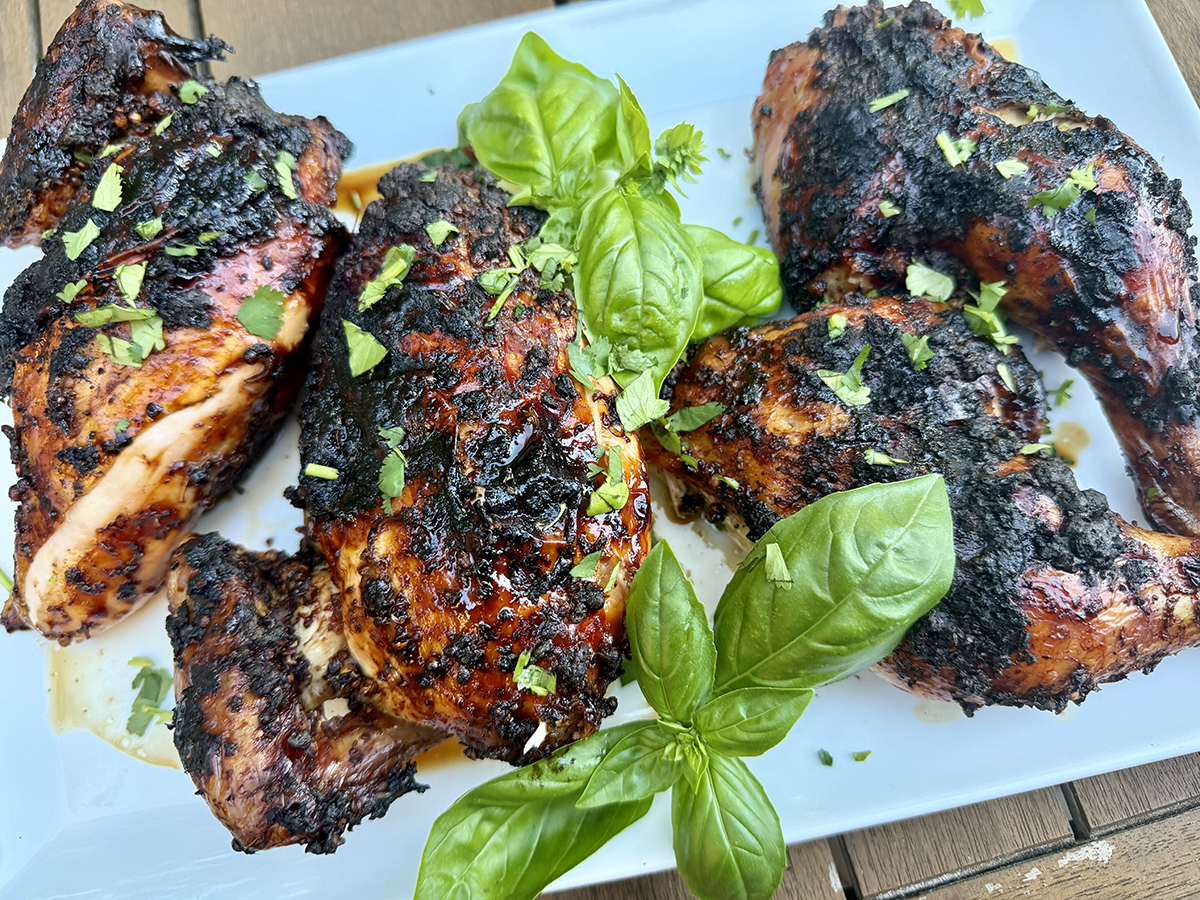
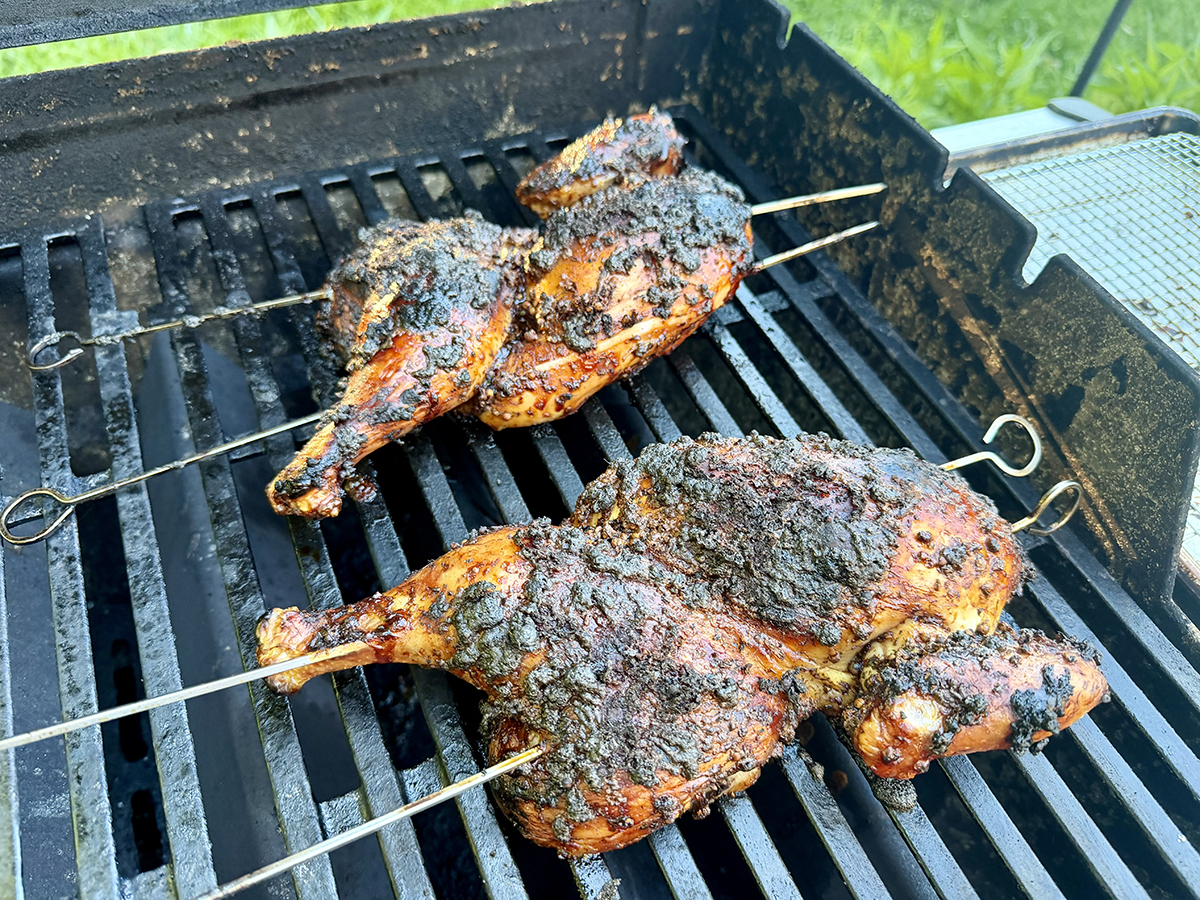
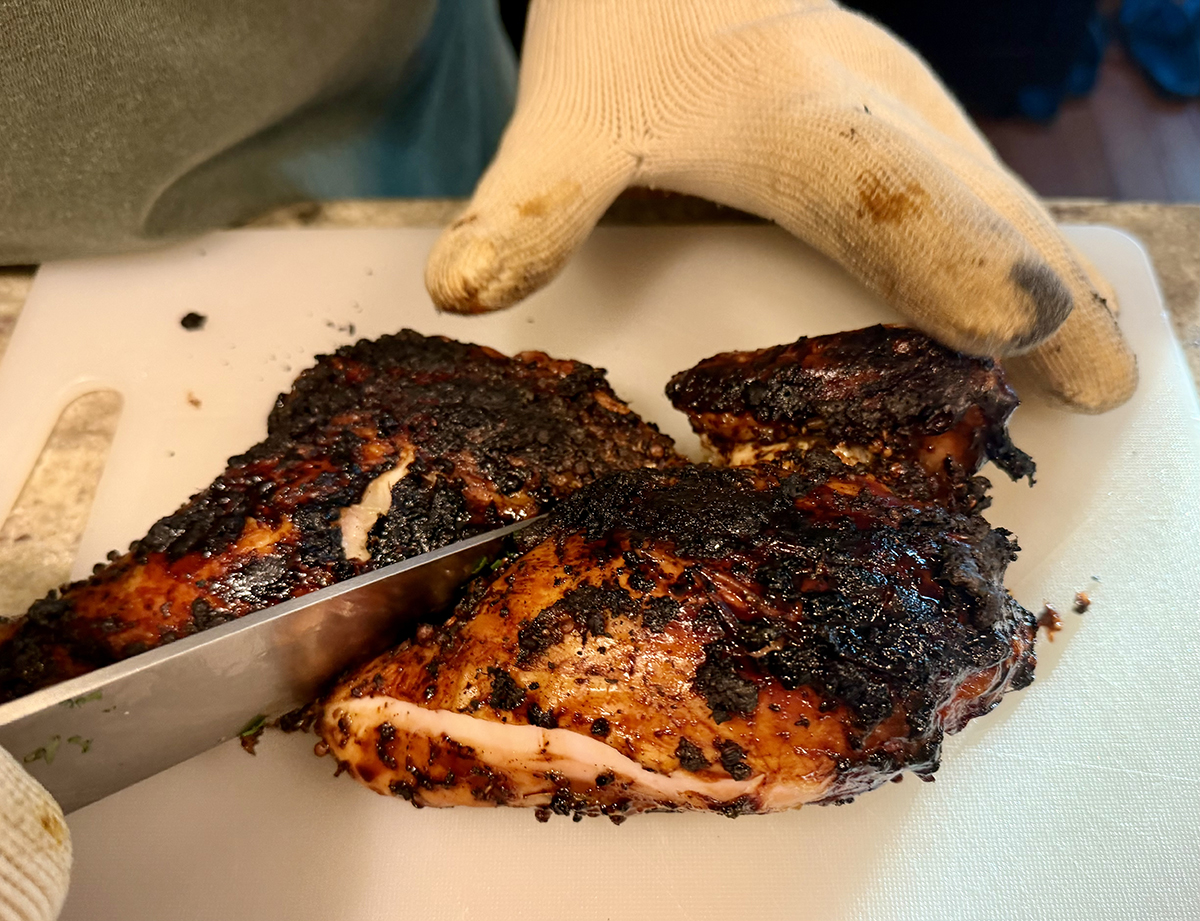
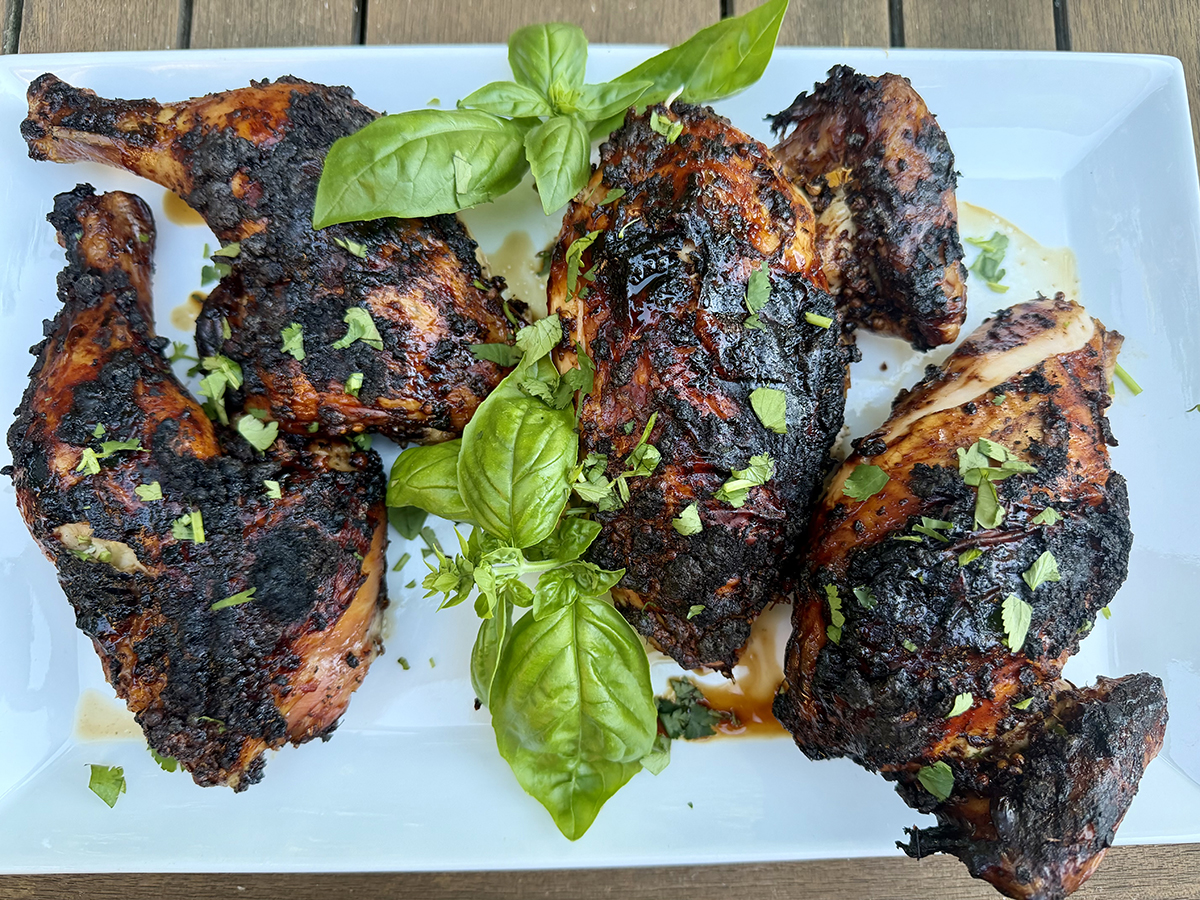
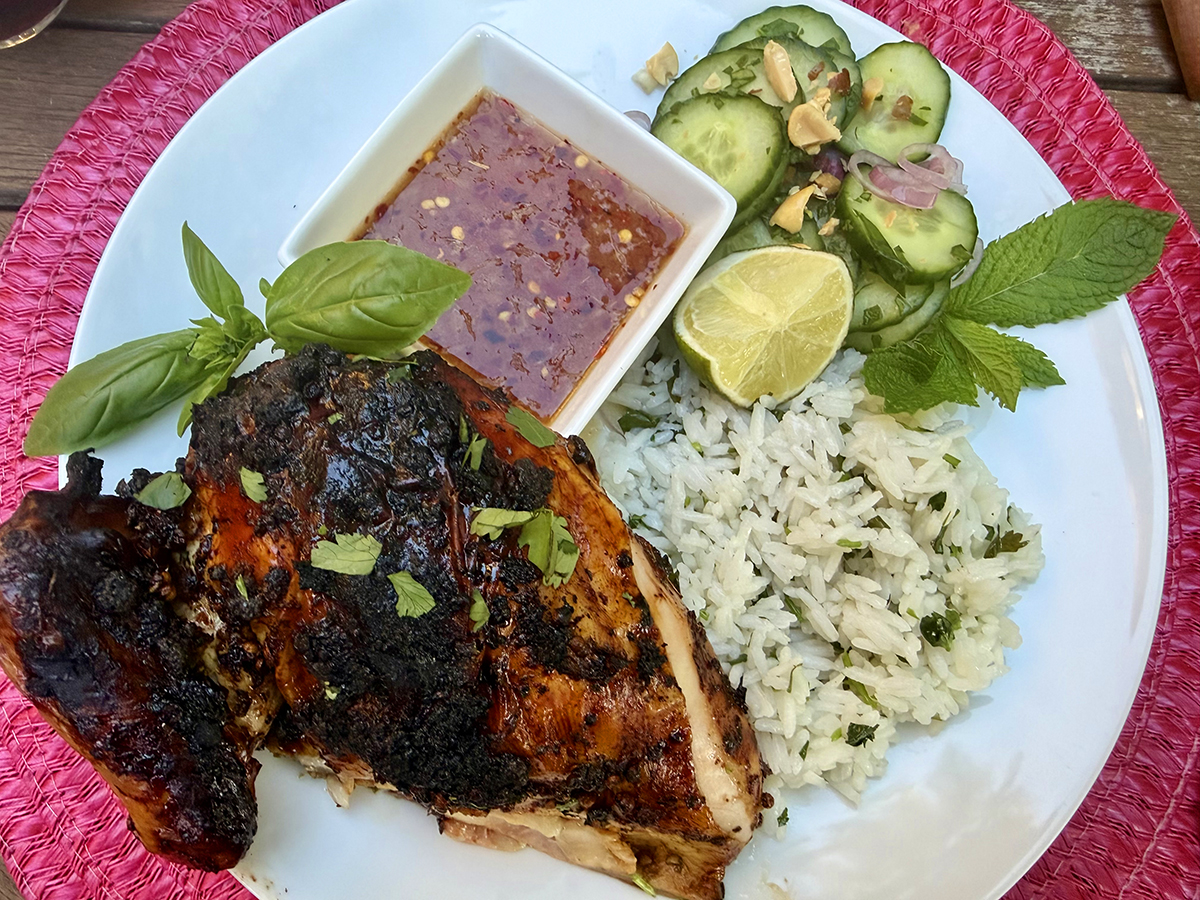
Gai yang — Thailand’s iconic grilled chicken from the northeastern Isan region — is one of those dishes so irresistible it has swept across the entire country and well beyond. Butterflied, skewered, and slow-grilled over charcoal (or a gas grill), the chicken emerges with gloriously crisp, golden skin wrapped in a richly charred crust of toasted spices, cilantro, white pepper, and fish sauce — one of the tastiest things you’ll ever pull off your grill.

We paired ours with a Thai cucumber salad and coconut rice.

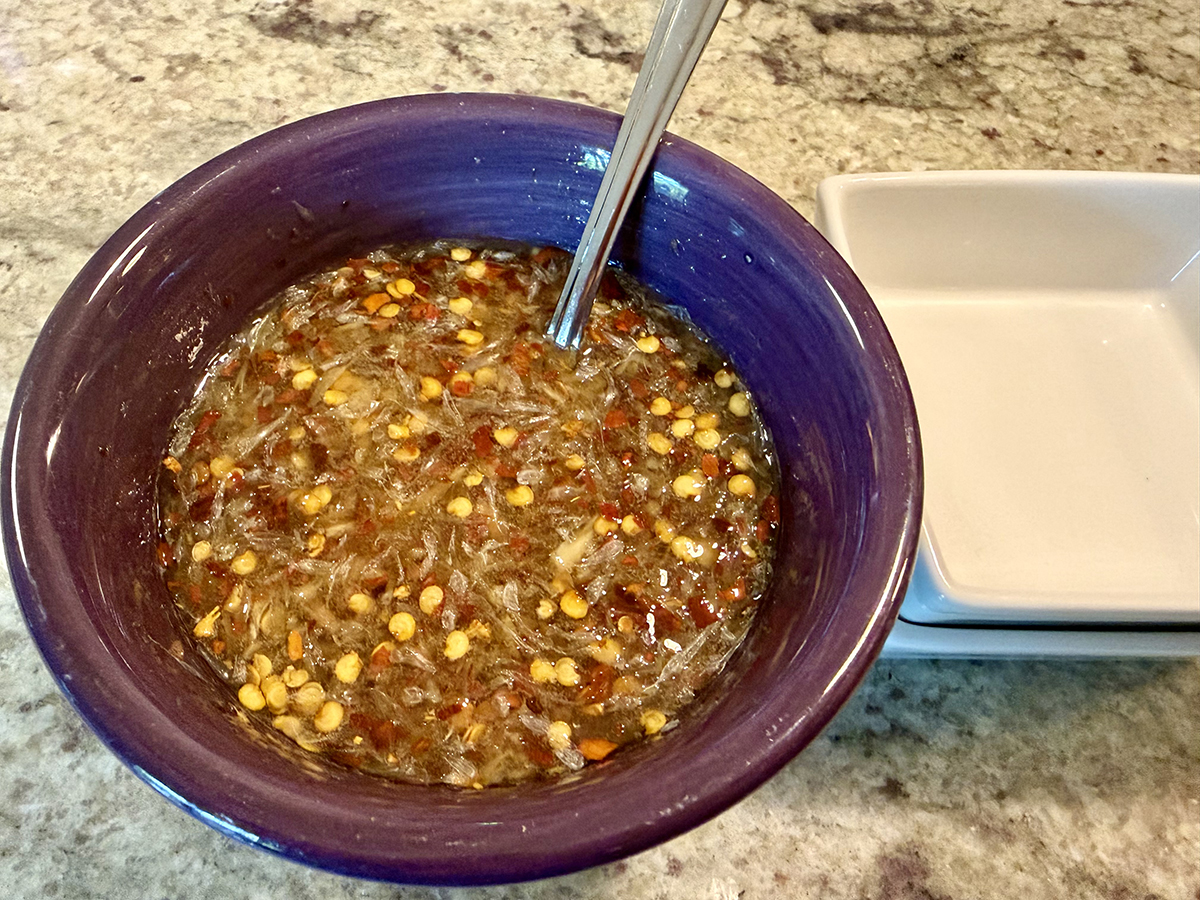
It’s extraordinary on its own. But dipped into a sweet and spicy chile sauce? Absolutely mind-blowing. That sauce is what we’re here for — the bright, punchy, perfectly balanced counterpart that takes every bite of that smoky, savory chicken to another level entirely.

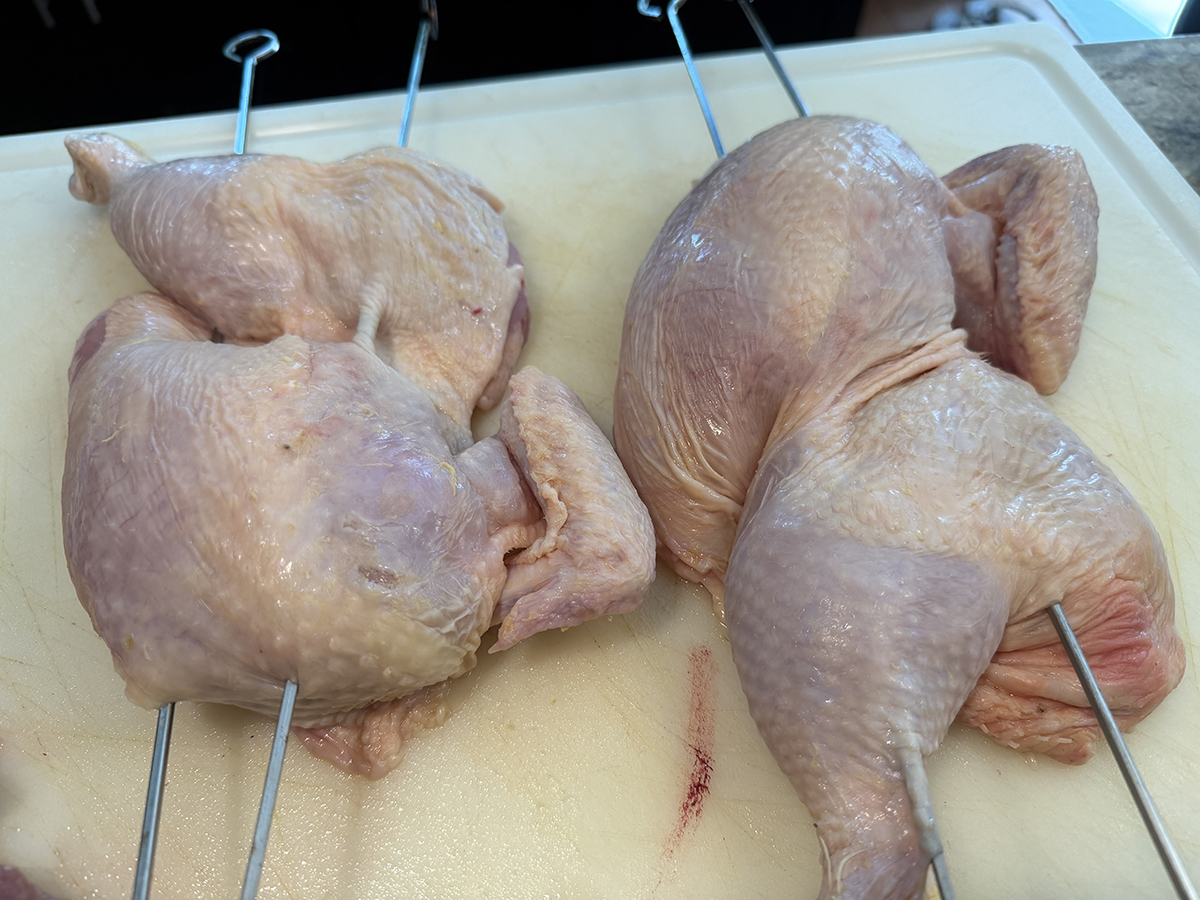
A butterflied bird has all of its skin on one side, in more or less a single plane. This makes crisping it evenly much easier, and, with plenty of space for rendering fat to escape, it gets crisper than it ever could were the bird left whole. This flat shape also makes it easier to maneuver and flip as it cooks on the grill.

NOTES: Because we were unable to source a few of the ingredients, we made a few substitutions, specifically, red pepper flakes in lieu of Thai Chiles and lemon grass paste instead of the stalks.

Thai-Style Grilled Chicken (Gai Yang)

  • Servings: 4-6
  • Difficulty: easy
  • Print

Ingredients

  • 6 cloves garlic
  • 12 sprigs cilantro, including thick stalks
  • 3 Tbsp. palm or light brown sugar
  • 2 tsp. ground white pepper
  • 1 tsp. ground coriander
  • 2 Tbsp. fish sauce
  • 2 tsp. dark soy sauce
  • 2 3-inch segments lemongrass (see above note)
  • 1 whole chicken, spine removed, split in half along the breastbone
  • 1 recipe Thai-style sweet chile dipping sauce (see below)

Directions

  1. Combine garlic, cilantro, sugar, white pepper, coriander, fish sauce, dark soy sauce, and lemongrass (if using) in the bowl of a food processor. Process until a rough paste is formed. Set aside.
  2. Place chicken halves flat on a cutting board. Insert 2 metal skewers into each chicken half, running parallel through legs and breasts. Transfer chicken to a baking dish that just fits them. Rub on all surfaces with marinade. Cover, transfer to refrigerator, and allow to marinate for at least 2 hours and up to overnight.
  3. When ready to cook, light 1 chimney full of charcoal. When all charcoal is lit and covered with gray ash, pour out and spread coals evenly over half of coal grate. Alternatively, set half the burners of a gas grill to high heat. Set cooking grate in place, cover grill, and allow to preheat for 5 minutes. Clean and oil grilling grate.
  4. Place chicken, skin side up, on cooler side of grill, with legs facing toward hotter side. Cover grill, with vents on lid open and aligned over chicken. Open bottom vents of grill. Cook until an instant-read thermometer inserted into thickest part of breast registers 140°F, about 45 minutes. Carefully flip chicken and place, skin side down, on hotter side of grill, with breasts pointed toward cooler side. Cover and cook until skin is crisp and an instant-read thermometer inserted into thickest part of breast registers 145 to 150°F, about 3 minutes longer. (Be careful, as the skin is very prone to burning.) If chicken threatens to burn before temperature is achieved, carefully slide to cooler side of grill, cover, and continue to cook until done. Do not leave lid off for longer than it takes to check temperature, or chicken will burn.
  5. Transfer chicken to a cutting board and allow to rest for 5 minutes. Carve and serve with chile dipping sauce.

Ingredients

  • 10 to 12 red Thai bird chiles, finely minced, OR 1 tsp. Red Pepper Flakes
  • 4 cloves garlic, finely minced (about 4 tsp.)
  • 1/4 cup Asian fish sauce
  • 1/2 cup palm or light brown sugar
  • 3 Tbsp. distilled white vinegar
  • 2 Tbsp. fresh lime juice

Directions

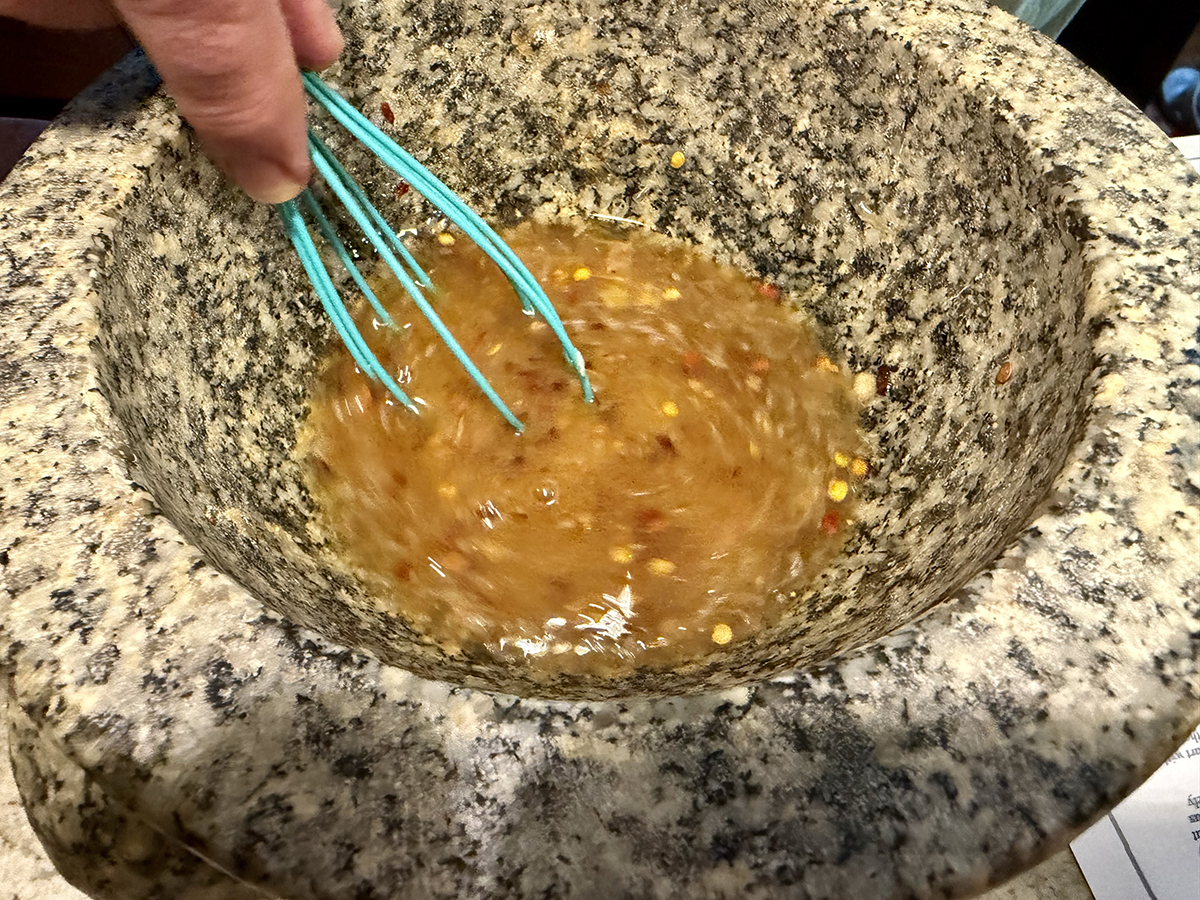
  1. Combine all ingredients in a small sealable container. Shake well, set aside, and allow sugar to dissolve, shaking every 10 minutes or so. When sugar is fully dissolved, store in refrigerator until ready to use. Sauce will keep in the refrigerator for up to 3 weeks.

http://www.lynnandruss.com

Adapted from a recipe by J. Kenji Lopez-Alt for Serious Eats
Chicken Pesto Pasta

This chicken pesto pasta comes together with a handful of simple, flavorful ingredients in less than half an hour. If you are making your own pesto the amount of time will increase. Make it a day or two ahead and save time on dinner night. (A Classic Pesto recipe follows.)

Ridged pasta like penne works especially well, as the grooves help hold onto the creamy sauce, though any shape—even spaghetti or homemade pasta—can be used. (We used gemelli here.) Boneless, skinless chicken breast provides a lean counterpoint to the richness of the sauce, while kosher salt, black pepper, red pepper flakes, and Italian seasoning bring layers of savory, aromatic flavor with a bit of a kick. A good extra virgin olive oil is used to pan-sear the chicken, giving it a golden, flavorful crust.

The sauce gets its velvety texture from just a small amount of heavy cream, along with freshly grated Parmesan for deep umami flavor—block Parmesan is preferred over pre-grated for maximum taste. Sun-dried tomatoes add tangy, slightly sweet bursts of flavor and pleasant texture that balance the richness of the pesto and chicken, with halved cherry tomatoes serving as a suitable substitute if needed.
TIP: If you think you might have leftovers, save some of the pasta cooking water to add to the remains before you refrigerate. Leftovers were just as good, if not better!

Basil pesto, whether homemade or a high-quality store-bought version, ties the dish together, while a final garnish of fresh basil leaves adds brightness and helps balance the creaminess of the sauce.

Chicken Pesto Pasta

  • Servings: 4
  • Difficulty: easy
  • Print

Ingredients

  • 1 lb. boneless skinless chicken breasts, cut into 1-inch pieces
  • 1 tsp. Italian seasoning
  • Kosher salt
  • Black pepper
  • 8 oz. penne pasta, preferably with ridges
  • 2 Tbsp. extra virgin olive oil
  • 1/2 cup heavy cream
  • 1/4 cup parmesan cheese, plus more for serving if you like
  • 1/4 cup sun dried tomatoes, drained if packed in oil
  • 1/2 cup basil pesto, homemade or quality store-bought, plus more if you like
  • 1/2 to 1 tsp. red pepper flakes
  • Handful of torn basil leaves, for garnish

Directions

  1. Add the chicken to a bowl and season with the Italian seasoning and a big pinch each of kosher salt and black pepper. Toss to coat.
  2. Bring a medium pot of water to a boil and salt it well with about 1 tablespoon of salt. Drop the pasta in the boiling water and cook until al dente according to package instructions (about 8 to 9 minutes).
  3. While the pasta is cooking, add the olive oil to a large non-stick skillet and heat over medium-high. Add the chicken and cook, tossing occasionally, until golden brown on the outside and cooked through, about 7 to 8 minutes.
  4. When the pasta is ready, reserve about 1 cup of the cooking water and drain.
  5. To the pan with the chicken, lower the heat and stir in the cooked pasta, heavy cream, parmesan, and sundried tomatoes. Stir until everything is well combined. If it looks a bit dry, add a splash of the pasta cooking water (a couple tablespoons at a time) until the pasta is glossy and coated in the creamy sauce.
  6. Turn off the heat and take the pan off the burner. Stir in the basil pesto and finish with a sprinkle of grated parmesan, red pepper flakes, and basil leaves. Serve.

http://www.lynnandruss.com

Adapted from a recipe from themediterraneandish.com

Pesto alla Genovese

  • Difficulty: easy
  • Print

Pesto alla Genovese (Classic Basil Pesto Sauce)

Ingredients

  • 2 medium cloves garlic
  • 2 Tbsp. pine nuts
  • 3 oz. fresh basil leaves, washed with water still clinging to the leaves (about 4 cups basil leaves)*
  • Coarse sea salt, as needed
  • 3/4 oz (about 2 Tbsp.) grated Parmigiano-Reggiano cheese
  • 3/4 ounce (about 2 Tbsp.) Pecorino Romano
  • 1/2 to 3/4 cup mildly flavored extra-virgin olive oil

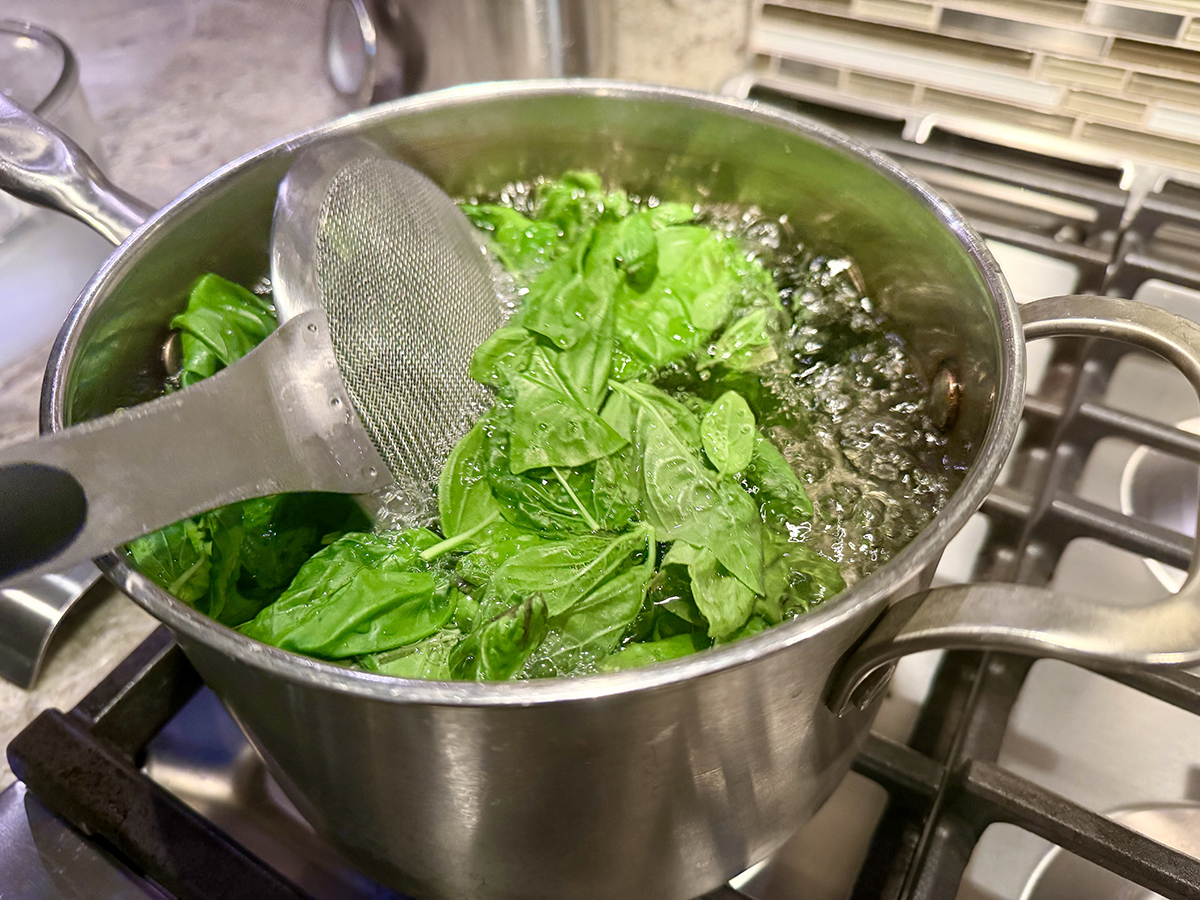
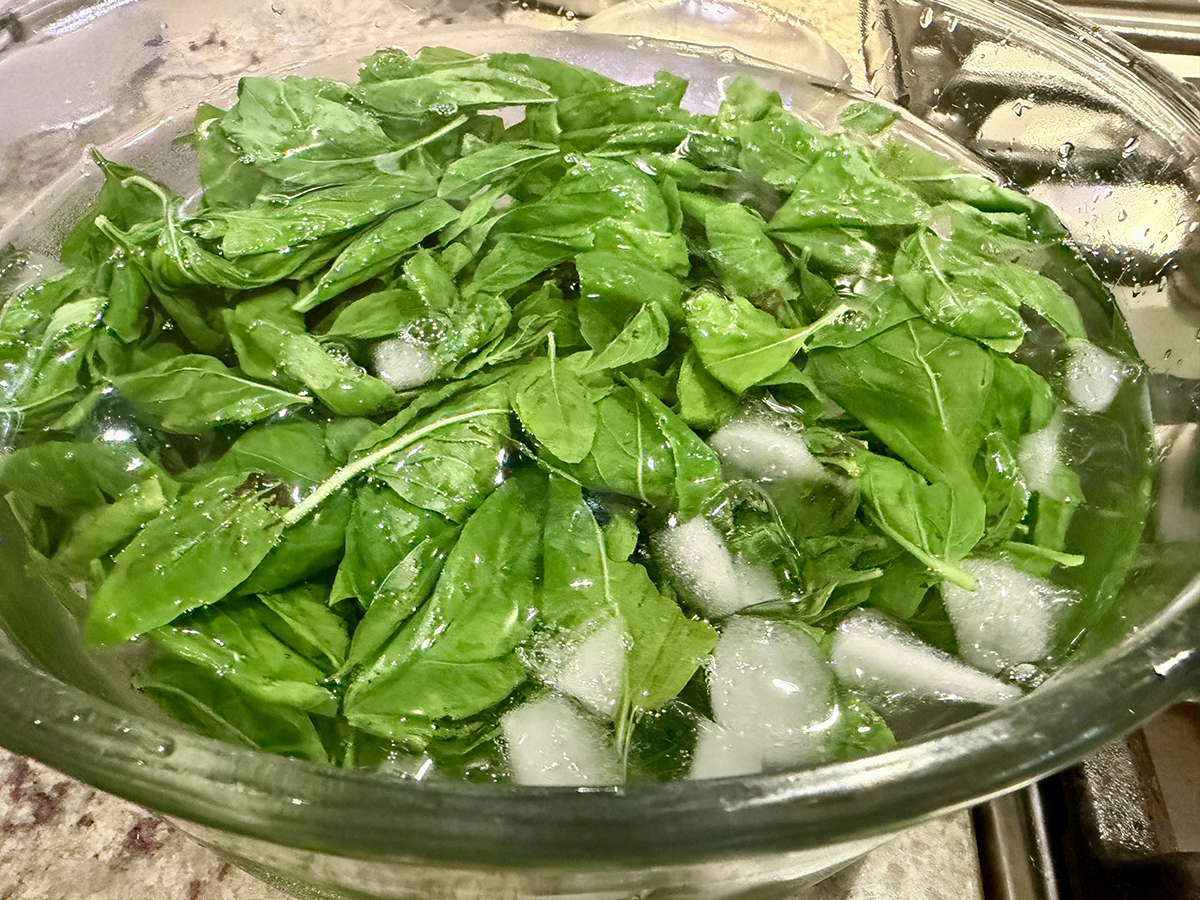
*To preserve the bright green color, drop the basil leaves in boiling water and blanch just until they’re wilted, only 5 seconds. Immediately use tongs to transfer the basil leaves to a bowl of prepared ice water. This stops them from continuing to cook. Wrap the basil in paper towels. Squeeze to wring out all the water (or use a salad spinner) and transfer to the mortar along with the mashed garlic and pine nuts.

Directions

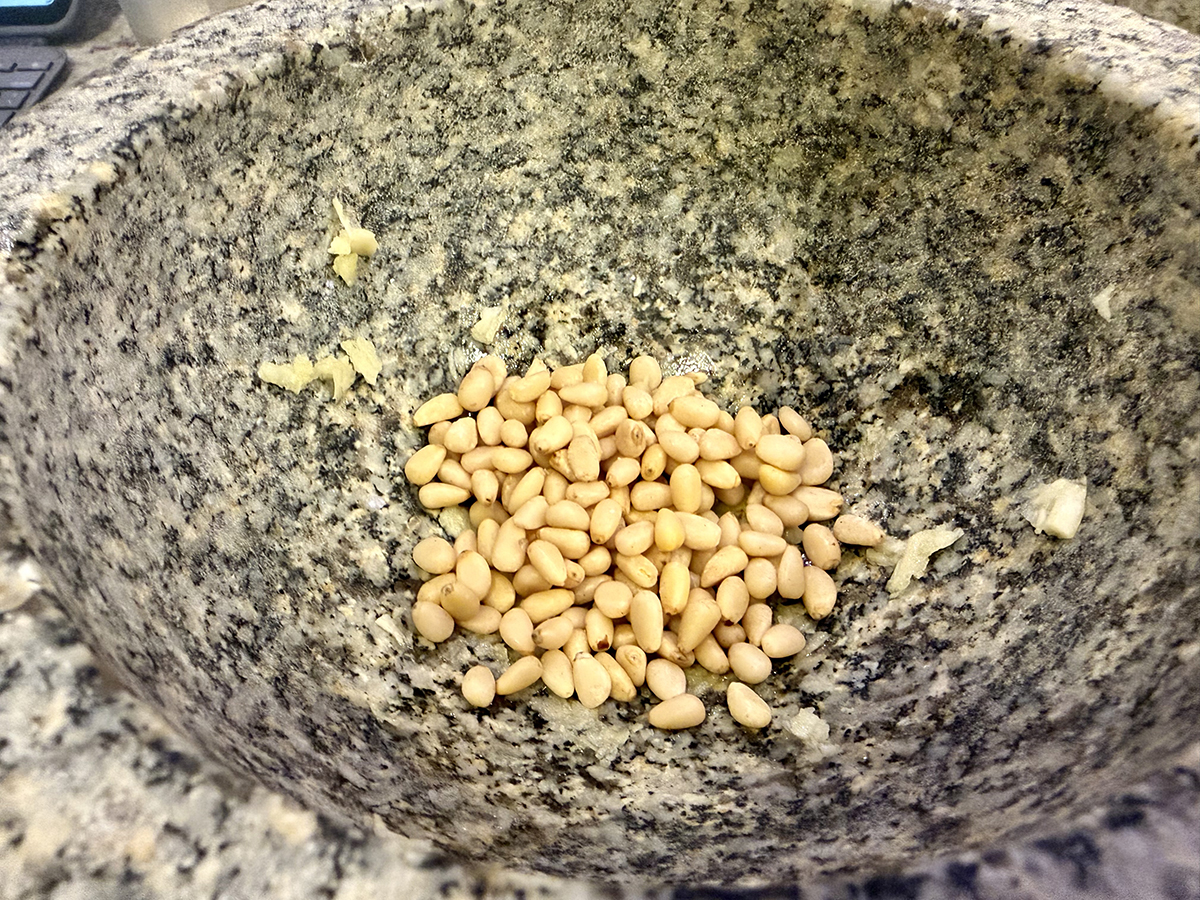
  1. Using a marble mortar and wooden pestle, pound the garlic to a paste.
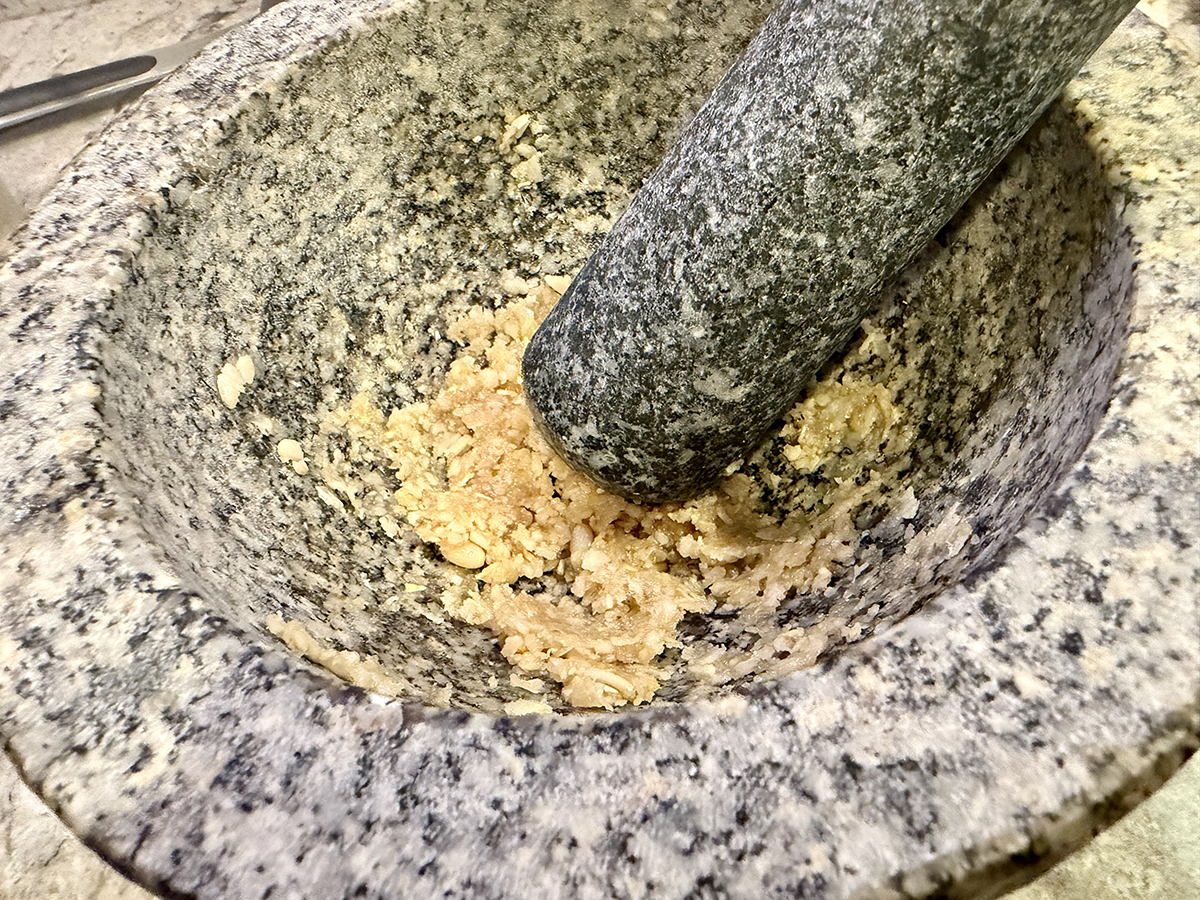
  2. Add pine nuts and continue to crush with pestle, smashing and grinding them, until a sticky, only slightly chunky, beige paste forms.
  3. Add basil leaves a handful at a time and pound and grind against the walls of the mortar. Add pinch of salt with each handful to act as an abrasive. Continue until all basil leaves have been crushed to fine bits.
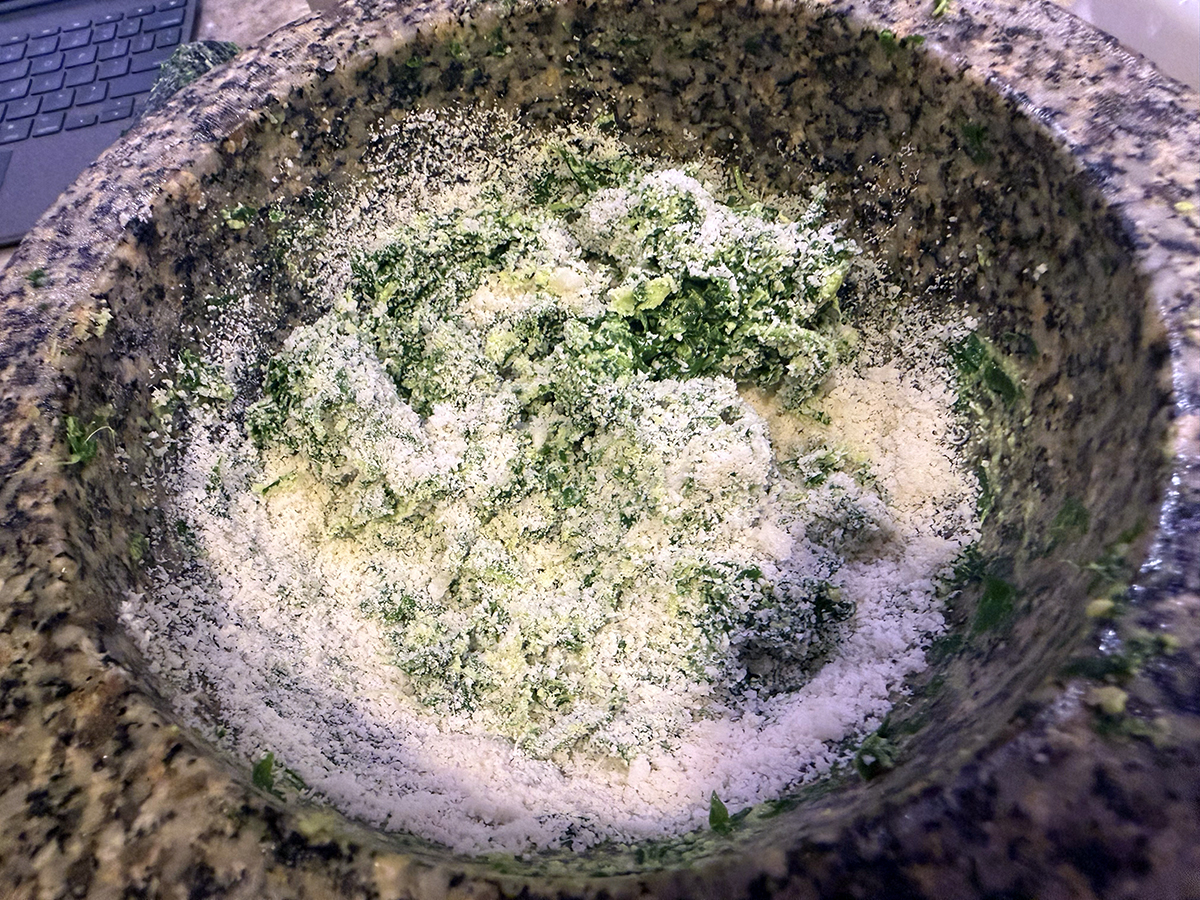
  4. Add both cheeses, then slowly drizzle in olive oil, working it into the pesto with the pestle until a fairly smooth, creamy, emulsified sauce forms. Add more oil, if desired.
  5. Pesto can be served with pasta right away or transferred to a jar or container, covered with a small layer of olive oil, and sealed and refrigerated overnight.

http://www.lynnandruss.com

One week later we made the same dish using the remaining pesto and half box of gemelli, but switching out the chicken breasts for sausage. Links were first browned in a little olive oil, then removed from the skillet, sliced diagonally, then returned to the pan and browned further.

Lemon-Lime Lacquered Grilled Chicken

Filipino chicken barbecue, “inihaw na manok” (which translates simply as “grilled chicken”) is one of the most beloved street foods and backyard staples across the Philippines. Unlike its American counterpart, which leans smoky and savory, this version is distinctly sweet-savory, with a glossy, caramelized char that makes it instantly recognizable.

The magic is in a marinade that sounds unusual but works beautifully together. Lemon-lime soda (Sprite or 7Up) is the secret weapon — the carbonation helps tenderize the meat while the sugar contributes to deep caramelization on the grill. It also brightens the overall flavor.

With sweetness tempered by tangy vinegar, salty soy sauce and savory garlic and black pepper, the marinade infuses bone-in, skin-on chicken parts and produces nicely lacquered skin. Together, these create a marinade that hits sweet, salty, tangy, savory, and aromatic all at once.

Bone-in, skin-on pieces are essential — thighs and drumsticks are most common, though whole spatchcocked chicken appears at larger gatherings. The bones keep the meat moist over the long, slow cook, and the skin is the canvas for that prized lacquered crust. The chicken typically marinates for a few hours, so the flavors penetrate deeply. The finished chicken should have deep mahogany, almost burgundy skin, visibly sticky, caramelized exterior and juicy, fully cooked meat that pulls cleanly from the bone.

NOTE: Gas grills vary in heat output; check the browning on the chicken when you uncover the grill for the first basting—if the bottoms threaten to scorch, shut off the burners under the chicken. If you cook both breasts and legs, make sure to take the internal temperatures of the different parts and remove the pieces as they are done cooking, as white meat is done at about 160°F and dark meat at about 175°F. 

TIP: Don’t flip the chicken or place the pieces directly over the fire until the final minutes of cooking. The basting sauce contains a good dose of sugar and will burn if it gets too much direct heat.

It has been six years since we made this dish up in Cape Cod while on vacation, and can’t figure out why it took us so long to make it again! Pretty much anyone who’s ever had it says “That is damn good chicken!” This recipe can easily be doubled for larger gatherings (which is what we did all three times).

Lemon-Lime Lacquered Grilled Chicken

  • Servings: 4
  • Difficulty: easy
  • Print

Ingredients

  • 3/4 cup cider vinegar
  • 1/2 cup ketchup
  • 1/3 cup soy sauce
  • 6 Tbsp. packed light or dark brown sugar
  • 6 medium garlic cloves peeled
  • 4 bay leaves
  • 1 Tbsp. black peppercorn
  • Kosher salt
  • 1 cup lemon-lime soda such as Sprite or 7Up
  • 3 lbs. bone-in skin-on chicken breasts, thighs and/or drumsticks, trimmed and patted dry
  • 1 Tbsp. lime juice

Directions

  1. In a blender, combine the vinegar, ketchup, soy sauce, sugar, garlic, bay, peppercorns and 1 1/2 teaspoons salt. Blend until well combined and the bay leaves are broken into tiny bits, 15 to 30 seconds. Pour the mixture into a large bowl, then stir in the soda.
  2. If using chicken breasts, use a sharp chef’s knife to cut each in half crosswise. Cut 2 or 3 diagonal slashes about 1/2 inch deep through the skin and meat of each piece of chicken. Add the chicken to the marinade and turn to coat. Cover and refrigerate for 1 hour or up to 2 hours.
  3. Prepare a charcoal or gas grill for indirect cooking. For a charcoal grill, spread a large chimney of hot coals evenly over one side of the grill bed; open the bottom grill vents and the lid vent. Heat the grill, covered, for 5 to 10 minutes, then clean and oil the grate. For a gas grill, turn all burners to high and heat, covered, for 15 minutes, then clean and oil the cooking grate; leave the primary burner on high and turn the remaining burner(s) to low.
  4. While the grill heats, transfer the chicken to a large plate, allowing the marinade to drip off. Pour the marinade into a medium saucepan, bring to a simmer over medium and cook, stirring occasionally, until reduced to 1 cup, about 20 minutes. Stir in the lime juice and set aside. Set aside 1/3 cup for serving; use the remainder as a basting sauce.
  5. Place the chicken skin side up on the cooler side of the grill. Cover and cook for 15 minutes. Generously brush the pieces with basting sauce, then re-cover and cook until the thickest part of the breast, if using, reaches 160°F or the thickest part of the thighs and drumsticks, if using, reach 175°F, another 15 to 20 minutes. Brush the chicken with the reduced sauce, thenflip the chicken skin side down onto the hot side of the grill. Cook until deeply browned, about 1 minute. Brush the bone side with basting sauce, then flip a final time and cook until deeply browned, about 1 minute. Transfer skin side up to a platter and let rest for about 5 minutes. Serve with the reserved sauce.

http://www.lynnandruss.com

Adapted from a recipe by Laura Russell for Milk Street

Chinese Eggplant Stir-Fry with Chicken

This Cantonese-style Eggplant Stir-Fry with Chicken lets the eggplant take center stage, its silky texture soaking up all the savory goodness of garlic, scallions, and ginger, while tender velveted chicken rounds out the dish into a satisfying, one-pan meal. It’s quickly become our favorite way to cook Chinese eggplant, and once you try it, I think it’ll become one of yours too.

If you’ve only ever cooked with the big, glossy globe eggplants from the grocery store, Chinese eggplant is worth seeking out. Slender and lavender-streaked, these eggplants have noticeably fewer seeds, thinner skins, and a more tender bite—which means they also cook faster and never turn bitter or spongy the way globe eggplant can. Summer is peak season for them, so farmers markets and Asian grocery stores alike tend to be overflowing with these beautiful eggplants right now, making it the perfect time to put them to good use.

The technique here follows classic Cantonese stir-fry logic: velvet the chicken first in a quick cornstarch-and-oyster-sauce marinade so it stays juicy and tender through the cook, then stir-fry the eggplant in batches so it browns and softens without turning greasy or waterlogged. A fragrant hit of ginger, garlic, and scallion whites builds the aromatic base, and a savory sauce of oyster sauce, soy sauce, and Shaoxing wine ties everything together into something deeply comforting yet simple enough for a weeknight.

A couple of issues we had with the original recipe from Woks of Life included the amount of sauce. We decided to double it and glad that we did. The ingredients list below is altered to reflect the increased amounts. Additionally, we barely got three servings from the dish. If you are counting on four portions, be prepared to serve another course along with it.

Chinese Eggplant Stir-Fry with Chicken

  • Servings: 3-4
  • Difficulty: easy
  • Print

Ingredients

For the chicken:

  • 12 oz. chicken breast
  • 2 Tbsp. water
  • 2 tsp. cornstarch
  • 2 tsp. oil (any neutral oil, such as vegetable or canola oil)
  • 2 tsp. oyster sauce

For the rest of the dish:

  • 1 pound Chinese eggplant (2-3 eggplants)
  • 4 Tbsp. neutral oil (such as canola, vegetable, or avocado oil, divided)
  • 3 Tbsp. oyster sauce
  • 2 Tbsp. light soy sauce
  • 1⁄2 tsp. sesame oil
  • 1⁄2 tsp. salt
  • 1⁄2 tsp. white pepper
  • 3 thin slices ginger
  • 3 cloves garlic, chopped
  • 3 scallions, whites cut into 1-inch lengths; green parts sliced thin on a diagonal, divided
  • 4 Tbsp. Shaoxing wine 
  • 2 Tbsp. water

Directions

  1. Thinly slice the chicken breast against the grain. Transfer to a small bowl and toss with the water, cornstarch, oil, and oyster sauce until the chicken has absorbed all the liquid. Set aside while you prepare the other ingredients.
  2. Cut the Chinese eggplant on a sharp angle into chunks, turning the eggplant a quarter turn with each cut, so you end up with triangular shapes.
  3. Premix the sauce: the oyster sauce, light soy sauce, sesame oil, salt, and white pepper. Set aside.
  4. Heat your wok over medium-high heat until it’s lightly smoking. If you’re using a skillet, use a stainless steel skillet and preheat it until a drop of water beads on the surface.
  5. Add 3 tablespoons of oil and the eggplant. Stir immediately to coat the eggplant (it absorbs oil quickly). Cook over medium heat for 5-6 minutes. Don’t turn the heat too high, as it can scorch the eggplant. When the eggplant is slightly softened but not so soft that you can mash it, transfer it to a dish.
  6. Next, wash the wok/pan. (This step may not be necessary.) You can use water to cool it down before you scrub. The goal is to remove any eggplant residue and moisture from the wok that could burn or cause sticking when you sear the chicken next.
  7. Place the wok over medium-high heat until all the water has evaporated and the wok is lightly smoking once again. Add the remaining tablespoon of oil to the wok and swirl to coat. Add the chicken in a single layer. Let it sear undisturbed for about 2 minutes. Flip and cook for another minute. Stir-fry until the chicken is about 80% cooked. Transfer back to the marinating bowl.
  8. Add the ginger, garlic, and white parts of the scallions. Stir-fry until fragrant. Add the wine around the perimeter of the wok to deglaze. Then return the eggplant and chicken back to the pan, along with the premixed sauce and the green parts of the scallions. If the wok seems dry, add 2 tablespoons of water. Stir-fry to coat the chicken and eggplant in the sauce. Serve immediately with steamed rice garnished with scallion greens

http://www.lynnandruss.com

Adapted from a recipe for Woks of life

Chicken Bog

Chicken bog is a beloved South Carolina Lowcountry staple — essentially a hearty one-pot rice dish cooked with chicken, smoked sausage, and simple seasonings until the rice absorbs all the savory cooking liquid. The consistency of the dish feels like chicken and rice soup meets jambalaya.

The basics: Bone-in chicken pieces are simmered in a seasoned broth until tender, then the meat is pulled off and returned to the pot along with sliced smoked sausage (usually kielbasa or andouille) and raw long-grain Carolina gold rice. Everything cooks together until the rice soaks up the rich, chickeny broth.

The texture is the defining feature — the rice is meant to be moist and slightly sticky (“boggy”), not fluffy and separate like a pilaf. That’s where the name comes from: the rice bogs down in the liquid.

Seasonings are intentionally humble — onion, salt, pepper, and maybe a bay leaf or two. Depth and layers of flavor are built by browning the sausage in the chicken drippings and then using those drippings to sauté the vegetables. A little butter at the end adds richness.

Culturally, it’s deeply tied to the Pee Dee region of South Carolina (around Loris, SC, which calls itself the “Chicken Bog Capital of the World”) and is the quintessential community and festival food — traditionally made in giant cast-iron pots to feed crowds.

It’s humble, unfussy, and deeply satisfying — a dish where technique matters more than fancy ingredients. The hot sauce is optional, and we decided to use some as a spice enhancer. Oh, and because our package of andouille weighed in at 13 ounces, we used the entire thing 😉 .

Chicken Bog

  • Servings: 6-8
  • Difficulty: easy
  • Print

Ingredients

  • 2 lbs. bone-in, skin-on chicken thighs (about 4 thighs)
  • 1 1/2 tsp. kosher salt, divided
  • 1 tsp. black pepper, divided
  • 2 tsp. olive oil
  • 8 oz. andouille sausage, chopped (about 1 cup)
  • 1 1/2 cups chopped yellow onion (about 1 medium onion)
  • 1 cup chopped carrots (about 2 medium carrots)
  • 1 cup chopped celery (about 3 stalks)
  • 1/2 cup chopped green bell pepper
  • 1/2 cup chopped red bell pepper
  • 1/2 tsp. dried thyme
  • 2 garlic cloves, thinly sliced
  • 1 cup Carolina Gold rice
  • 4 cups chicken broth, preferably homemade
  • 2 fresh bay leaves or 1 dried bay leaf
  • 1 Tbsp. unsalted butter
  • 1 Tbsp. fresh lemon juice
  • 1 Tbsp. chopped fresh flat-leaf parsley
  • Hot sauce (such as Tabasco, OR Louisiana Crystal), optional
  • Lemon wedges

Directions

  1. Preheat oven to 350°F. Sprinkle chicken evenly with 1/2 teaspoon salt and 1/2 teaspoon black pepper. Heat oil in a large Dutch oven over medium. Add chicken, skin side down; cook until skin is golden brown, 9 to 12 minutes. Flip chicken, and cook until both sides are browned, 4 to 6 minutes. Transfer chicken to a plate. Add sausage to drippings; cook, stirring occasionally, until browned on all sides, 5 to 7 minutes. Transfer sausage using a slotted spoon to a bowl lined with paper towels.
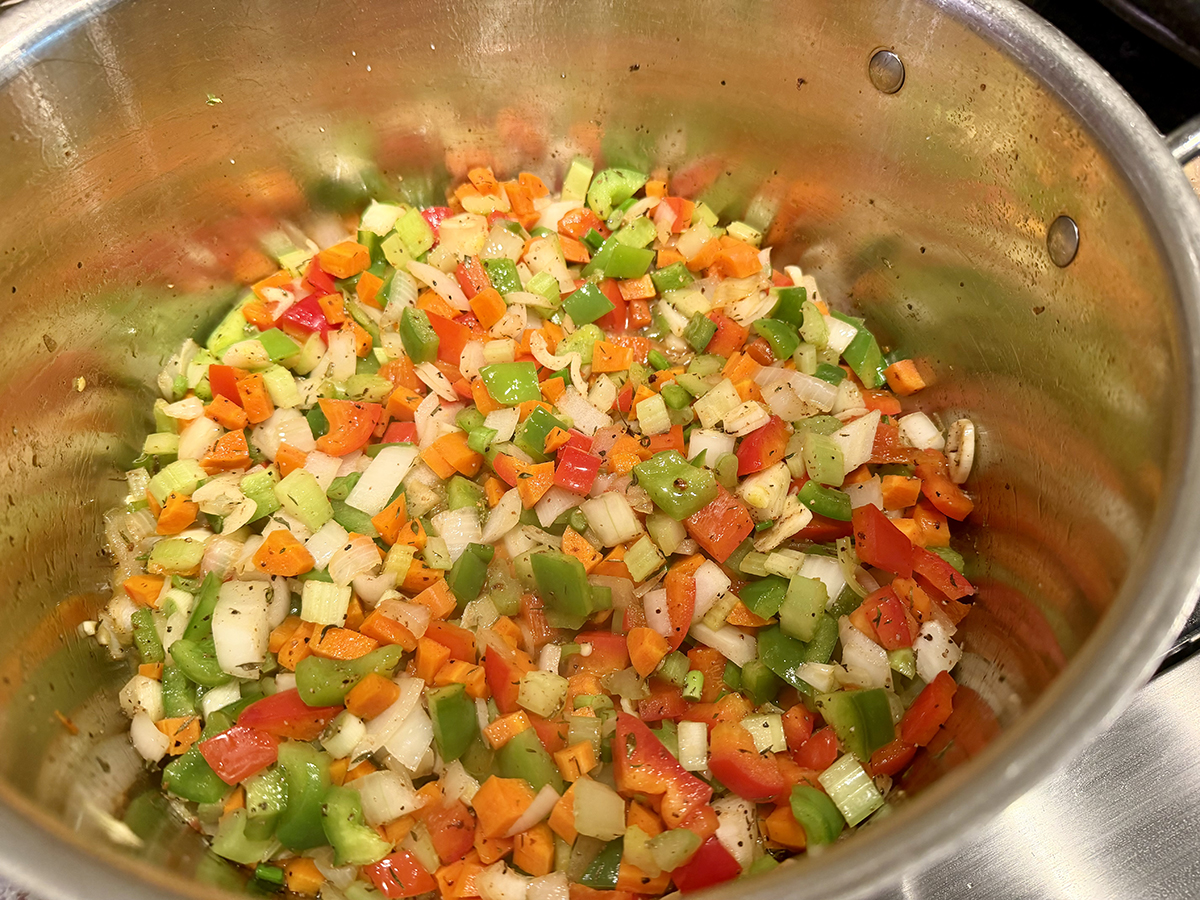
  2. Add onion, carrots, celery, bell peppers, thyme, garlic, remaining 1 teaspoon salt, and remaining 1/2 teaspoon black pepper to drippings in Dutch oven. Cook over medium, stirring occasionally, until vegetables are softened, about 10 minutes. Add rice; cook, stirring constantly, until lightly toasted, about 1 minute. Stir in broth and bay leaves. Return sausage and chicken thighs along with any juices to Dutch oven; bring to a simmer over high.
  3. Cover Dutch oven, and transfer to oven. Bake until a thermometer inserted into thickest portion of chicken registers 160°F and rice is tender, about 15 minutes.
  4. Remove Dutch oven from oven. Let stand, covered, for 5 minutes. (Internal temperature of chicken will continue to rise to 165°F.) Transfer chicken thighs to a plate; let cool 5 minutes. Shred chicken into bite-size pieces; discard skin and bones.
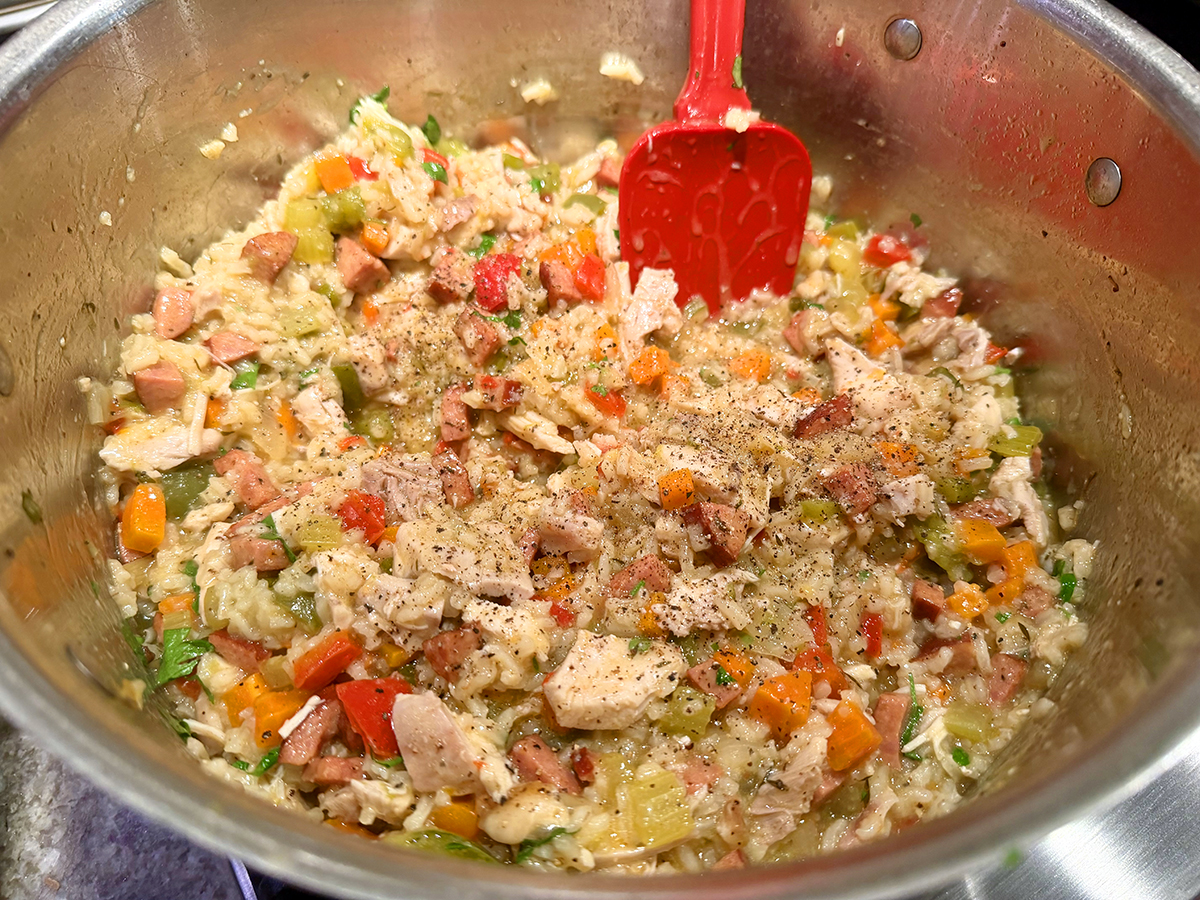
  5. Stir shredded chicken and any juices into Dutch oven. Discard bay leaves. Stir in butter, lemon juice, and parsley. Garnish with black pepper. Serve with hot sauce and lemon wedges (if using).

http://www.lynnandruss.com

Adapted from a recipe by Jenni Lata for Food & Wine

Roasted Rosemary Chicken with Citrus Marinade

If you’re into roast chicken with oodles of flavor, this recipe is for you. Fragrant rosemary and oregano, bright citrus, spices and aromatics come together for a dish that’s effortlessly elegant. Imagine crisp, tangy, and succulent chicken seasoned Mediterranean-style and bathed in a bold wine and a orange-lime marinade.

The delicious jammy onion and citrusy-tangy sauce are splendid served over garlicky mashed potatoes, rice or polenta. To complete the dinner, add a side of roasted Brussels sprouts.

TIP: Use split chicken or chicken pieces of similar size for even cooking. For best flavor, allow 30 minutes, or preferably 2 hours for marinating.

Our bird was a good bit larger than the 3 1/2-pound listed chicken, and therefore required a longer cooking time. *And while it brings visual appeal to the platter, there really is no need for all of the extra citrus slices, perhaps just a few for color.

Because our chicken was sufficiently charred once it reached the proper internal temperature, we opted not to put it under the broiler, but did slather on the honey glaze. If however you might be broiling it, make sure to use an enameled cast iron, or other broiler-proof pan that won’t shatter under intense heat.

Roasted Rosemary Chicken with Citrus Marinade

  • Servings: 4
  • Difficulty: easy
  • Print

Ingredients

  • 1 whole chicken (about 3 ½ lbs.), split in half through the backbone
  • Kosher salt
  • 1 cup Pinot Noir
  • 3 oranges, 1 zested, 2½ juiced, plus ½ sliced for garnish
  • 2 limes, 1 juiced, plus 1* lime sliced for garnish
  • Extra virgin olive oil
  • 3 Tbsp. tomato paste
  • 1 ½ tsp. dried oregano
  • 1 tsp. dried rosemary
  • 1 tsp. sweet paprika
  • 1 tsp. Aleppo pepper
  • 7 to 8 garlic cloves minced
  • 1 white onion, halved, peeled and sliced
  • 1 Tbsp. honey

Directions

  1. Season the chicken with kosher salt on all sides, making sure to season underneath the skin as well. (You can do this one night ahead of time and keep the chicken in the fridge to air-chill uncovered).
  2. Prepare the citrus marinade. In a medium bowl, add the wine, orange juice and zest, lime juice, 3 tablespoons extra virgin olive oil, tomato paste, spices, and a good dash of kosher salt. Add the garlic, whisk to combine.
  3. In a extra-large ziploc, add the chicken and onion slices and toss to coat, making sure to lift the skin up and spoon some of the marinade underneath (this will give you more flavor). Set aside at room temperature for 30 minutes. Alternatively, refrigerate for an hour or two, turning the bag every 20 minutes or so. (For best results, take it out of the fridge and leave the chicken at room temperature for 30 to 45 minutes before cooking)
  4. Preheat the oven to 425°F and adjust a rack in the middle.
  5. Transfer the chicken and the marinade to a braising pan that can withstand a broiling temperature. Roast for 30 minutes, then carefully turn the pan 180 degrees and roast for another 15 minutes or until the chicken is fully cooked and tender (juices should run clear).
  6. In a small bowl, mix together the honey with 1 tablespoon of extra virgin olive oil. Carefully remove the chicken from the oven and brush the top with the honey and olive oil mixture.
  7. If necessary, switch the oven to the broil function. Return the chicken back to the oven about 6 inches away from the broiler and cook briefly for 3 to 4 minutes, watching for the skin to turn a nice golden brown.
  8. Remove from the heat and finish with lime juice. Add slices of fresh orange and lime, if desired.

http://www.lynnandruss.com

Adapted from a recipe by Suzy Karadsheh

Normandy Chicken with Apples

Poulet Vallée d’Auge, a rustic braise that marries chicken with apples, Calvados, hard cider and cream. As it is classically known in English, Normandy Chicken with Apples smells like an autumn orchard, although it is a meal that is welcomed anytime of year.

The sequencing of the apples is the real ingenuity of this recipe. By pulling them out after a brief sauté and not returning them until the sauce is nearly finished, you preserve that sweet-tart brightness — they taste of apple rather than dissolving anonymously into the braise. It’s a small act of restraint that makes a big difference in the bowl. Keeping them unpeeled helps the wedges hold their shape through the brief sauté. Their early removal and late return is the key to bright, distinct fruit flavor in the finished dish. (If you prefer softer apples, cook them a few minutes longer in Step 2.)

The uncovered Dutch pot in the oven is also worth trusting. It’s counterintuitive — braising usually means lid on, low and slow — but the oven’s dry, ambient heat does something a stovetop lid cannot: it keeps the skin taut and golden while the liquid below gently simmers and reduces. You get crispness and succulence in the same bite.

One practical note: when you nestle the chicken back in for the oven braise, make sure those skin surfaces are genuinely sitting above the braising liquid, not totally submerged in it. You can use a combination of thighs and breasts (we just used thighs).

Braised recipes with apples tend to be considered a Fall/Winter dish. However, since good apples are available any time of year, there is no reason not to make the meal in the Springtime. (Hot summers, maybe not the best time.) It is lovely served over buttered egg noodles or alongside crusty bread to catch the cream sauce.

Calvados is an aged apple brandy produced in Normandy. If it is not available, domestic apple brandy is a fine substitute, as is applejack. As for the hard cider, use one that is dry, not sweet, and do not replace it with nonalcoholic cider or apple juice, both of which are too sugary.

TIP: Don’t aim for deep browning on the chicken, apples or mushrooms. Light to medium caramelization at all stages is desirable here. The gentle flavors in the braise are easily overwhelmed by aggressive searing.

Oh, and because we ADORE shallots, the amount was doubled from 2 to 4, and it was perfect!

Normandy Chicken with Apples

  • Servings: 4
  • Difficulty: easy
  • Print

Ingredients

  • 2½ – 3 lbs. bone-in, skin-on chicken thighs and/or breasts, trimmed and patted dry, breasts halved crosswise if larger than 12 oz. each
  • Kosher salt and ground black pepper
  • 1 Tbsp. neutral oil
  • 4 Tbsp. salted butter, cut into 1-Tbsp. pieces, divided
  • 2 medium crisp, sweet-tart apples, such as Honeycrisp or Gala (about 12 oz.), unpeeled, halved, cored and cut into ½-inch-thick wedges
  • 8 oz. cremini mushrooms, trimmed and quartered
  • 2 medium shallots, cut into ¼-inch-thick wedges (root ends intact)
  • 1/4 cup Calvados or other apple brandy (see headnote)
  • 12 oz. bottle dry hard apple cider (see headnote)
  • 1/2 cup heavy cream
  • Chopped fresh flat-leaf parsley, to serve

Directions

  1. Heat the oven to 425°F with a rack in the lower-middle position. Season the chicken all over with salt and pepper. In a large Dutch oven over medium-high, heat the oil until shimmering. Add the chicken skin side down, in batches if needed to avoid crowding; cook, reducing the heat if needed, until light golden brown, 6 to 8 minutes. Transfer the pieces skin side up to a large plate. Pour off and discard the fat from the pot.
  2. To the now-empty pot, add 2 tablespoons butter and heat over medium until just melted. Add the apples and cook, stirring, until lightly golden and starting to soften, about 3 minutes (or a few minutes longer if you prefer softer apples). Transfer the apples to another plate; set aside.
  3. Return the pot to medium and melt the remaining 2 tablespoons butter. Add the mushrooms, shallots and ½ teaspoon salt; cook, stirring, until the vegetables begin to soften, 2 to 3 minutes. Remove the pot from the heat and add the Calvados. Return to medium-high and cook, scraping up the browned bits, until syrupy, about 2 minutes. Add the cider, bring to a simmer and cook, stirring occasionally, until reduced by half, about 5 minutes.
  4. Off heat, return the chicken skin side up to the pot and add the accumulated juices. Place uncovered in the oven and cook until the thickest part of the breasts (if using) reaches 160°F or the thickest part of the thighs (if using) reaches 175°F, 20 to 25 minutes.
  5. Transfer the chicken to a platter. Return the pot to medium-high and stir in the apples and cream. Cook, stirring occasionally, until the sauce lightly coats the back of a spoon, about 5 minutes. Off heat, taste and season with salt and pepper. Spoon the sauce and vegetables around the chicken. Sprinkle with the parsley.

http://www.lynnandruss.com

Recipe adapted by Courtney Hill for Milk Street

Chicken Chasseur

Très bon! Chicken Chasseur, literally “hunter’s chicken” in French, harks back to a time when game birds and mushrooms from the woods were a natural autumn combination. Though Italian chicken cacciatore also has the same translation, the ingredients are quite different — most notably, it often includes bell pepper, uses red instead of white wine, and relies on a different set of herbs for flavor.

The beauty of this chicken chasseur recipe is that it comes together in one pot, complete with an aromatic sauce. It’s sophisticated enough to serve to guests, but simple enough to prepare on a weeknight for a cozy meal at home (although it takes longer than an hour).

We were in a bit of a time crunch, so we cranked the oven to 325°F and cooked the covered dish for 40 minutes (changes noted in the directions below). To ensure that the chicken thighs brown instead of steam, it’s best to do so in two batches, leaving space between each piece.

Let me just say, we could not believe how incredibly delicious this meal was. The depth of flavor was mind-boggling! A couple of things we did differently was broil the thighs at the very end for about 3 minutes to crisp up the skin, and add a cornstarch slurry to thicken the sauce while the chicken was under the broiler.

Served with egg noodles and a side of steamed green beans, it was a momentary bit of heaven on earth…

Chicken Chasseur

  • Servings: 4
  • Difficulty: easy
  • Print

Ingredients

  • 6 bone-in, skin-on chicken thighs, trimmed
  • Kosher salt and freshly ground black pepper
  • 2 Tbsp. olive oil
  • 3 Tbsp. unsalted butter, divided
  • 3 large shallots, chopped
  • 3/4 lb. mushrooms, sliced
  • 2-3 garlic cloves, minced
  • 1/2 cup dry vermouth (or 1/4 cup cognac and 1/4 cup dry vermouth)
  • 1 cup chicken stock, preferably homemade
  • 1 Tbsp. double-concentrated tomato paste
  • 1 Tbsp. all-purpose flour
  • 1 tsp. dried thyme or 1 Tbsp. fresh
  • 1 Tbsp. chopped fresh tarragon, divided

Directions

  1. Preheat oven to 325°F.
  2. Pat thighs dry and season generously with salt and pepper. Heat oil and 1 tablespoon of butter in a large skillet or braisier over medium-high. Add chicken to the pan skin-side-down (in batches if necessary) and sear until well-browned, turn and cook briefly on the other side, then remove from the skillet and set aside. Pour off all but 2 tablespoons fat from the pan.
  3. Add 1 tablespoon butter to the pan and reduce heat to medium-low. Add onion and cook, stirring occasionally, until translucent, about 5 minutes. Increase the heat to medium-high. Add the mushrooms, garlic, and 1/4 teaspoon salt. Cook, stirring frequently, until the vegetables are browned, about 5 minutes.
  4. Stir in the tomato paste and cook until it darkens a bit. Sprinkle the flour over the vegetables and stir to combine well. Deglaze the skillet with the vermouth (or vermouth cognac mixture) and bring back to a simmer. Stir in the stock, thyme, 2 teaspoons of tarragon, and 1/2 teaspoon salt.
  5. Return the chicken, skin-side-up, along with any accumulated juices. Cover tightly and place in the preheated oven. Braise the chicken until it reaches an internal temperature of 175°F, about 40-45 minutes.
  6. If desired, remove chicken to a rimmed baking sheet with a rack. Crank the oven to broil and crisp up the skin for about 3 minutes.
  7. If the sauce is thinner than you would like, reduce it over medium-low heat on the stovetop (adding a cornstarch slurry if needed). Swirl in the remaining tablespoon of butter and the remaining teaspoon of tarragon, along with 1/4 teaspoon black pepper. Taste and adjust for salt. Spoon sauce over the chicken and serve.

http://www.lynnandruss.com

Creamy Spinach-Artichoke Stew

This creamy chicken stew is spinach-artichoke dip reimagined as a simple stovetop braise. It comes together quickly, thanks to frozen spinach and jarred artichoke hearts, though if you have time, NYTimes Cooking also has a slow-cooker version of this recipe.

Fresh dill and scallions are added just before serving, and provide bright, herbal flavor that offsets the richness of the finished dish. Delicious and packed with flavor, that is even better the next day!

Some changes we made included adding olive oil with the butter and browning the chicken thighs on both sides to render some of the fat and add that extra layer of flavorful fond for the base. A parm rind was incorporated at the time the wine and stock are added to the pot. The original amount of 1/2 cup of fresh dill just seemed overpowering, so we cut by half, to a quarter cup, plus more for garnish.

Creamy Spinach-Artichoke Stew

  • Servings: 4
  • Difficulty: easy
  • Print

Ingredients

  • 2 Tbsp. unsalted butter
  • 3 Tbsp. olive oil
  • 2 to 2¼ lbs. boneless, skinless chicken thighs
  • 1 large yellow or red onion, finely chopped
  • Kosher salt and black pepper
  • 3 celery stalks, chopped
  • 8 garlic cloves, smashed and chopped
  • 2 cups chicken stock, preferably homemade
  • ¾ cup white wine
  • Parm rind
  • ½ lemon, juiced (about 1½ Tbsp.)
  • 1 tsp. red-pepper flakes
  • 1 10-oz. package frozen cut spinach
  • 1 12-oz. jar marinated artichoke hearts, drained (about 1 heaping cup artichoke hearts)
  • ½ cup cream cheese (about 4 oz.)
  • 1⁄4 cup finely chopped fresh dill, more for garnish
  • 4 to 6 scallions, thinly sliced, for topping
  • Grated Parmesan cheese, for topping

Directions

  1. In a large Dutch oven over medium-high heat, add the olive oil and melt the butter. Add the seasoned chicken thighs, and brown for a few minutes on both sides. Remove to a platter and cut in half.
  2. Add the onion, season lightly with salt, and cook, stirring occasionally, until softened and translucent, about 5 minutes. Add the celery and cook, stirring, until softened, about 5 minutes, adjusting the heat as necessary to avoid scorching. Stir in the garlic.
  3. Pour in the stock and wine and add the parm rind, and bring to a bubble. Add the chicken thighs, lemon juice and red-pepper flakes; season with 1 teaspoon salt and a generous amount of pepper. Mix well to combine all the ingredients and bring to a boil.
  4. Reduce the heat to maintain a low simmer and simmer, uncovered, for 20 minutes.
  5. Add the frozen spinach and the artichoke hearts to the pot. Increase the heat to medium-high and cook, stirring to help the spinach defrost and wilt into the stew. When the spinach is warm and evenly distributed, reduce the heat and simmer until the chicken is tender and the flavors are blended, another 10 to 15 minutes.
  6. Add the cream cheese in dollops, stirring to melt it into the soup. Add the dill. Using two forks, coarsely break or shred the chicken into large chunks. Taste and add more salt and black pepper if necessary. Remove the parm rind.
  7. Divide the stew among bowls, and top with scallions and Parmesan.

http://www.lynnandruss.com

Adapted from a recipe by Sarah DiGregorio for NYTimes Cooking.

Chicken Paillard with Lemon Butter Sauce

Not only is this French-inspired chicken paillard delicious, but the entire dish comes together in about a half hour with one pan and a handful of ingredients. It’s quick enough for any night of the week, but special enough to serve whenever you want something that feels a bit elevated. Don’t know of any home cook that doesn’t appreciate that!

Thin, golden, and covered in a bright lemon-butter sauce, this chicken paillard turns boneless, skinless chicken breasts into a dish that’s quick, elegant, and unexpectedly luxurious—-not necessarily an easy thing to accomplish.

By pounding the meat into thin, even cutlets, the chicken cooks quickly, develops a golden exterior, and stays juicy—a far cry from the dry, tasteless results that often afflict boneless, skinless chicken breasts.

While paillard is a French culinary term for pounding meat thin for quick and even cooking, in the US, chicken paillard often refers to seared chicken breasts with a lemony herb-butter sauce. It’s become a weeknight staple thanks to its ease and speed, offering a meal that feels far more refined than its quick cooking time might suggest.

The fond in the pan becomes the base for a quick pan sauce after the chicken is seared. Wine and stock deglaze the browned bits, and cold butter melts gradually as it is swirled in at the end. This allows the fat to emulsify evenly into the sauce creating a rich, glossy consistency. Lemon zest and juice brighten the flavors, and fresh parsley, chives, and tarragon add a burst of herbal freshness.

We find it is easier to pound the chicken inside a large ziploc as opposed to covering with plastic wrap because the bag is thicker and is easier to handle.

NOTE: You can use 4 store-bought chicken breast cutlets instead of whole chicken breasts, but pounding your own ensures even thickness and more reliable cooking.

Chicken Paillard with Lemon Butter Sauce

  • Servings: 3-4
  • Difficulty: easy
  • Print

Ingredients

  • 1/2 cup all-purpose flour
  • 2 tsp. Diamond Crystal kosher salt, divided; for table salt, use half as much by volume
  • 1 tsp. freshly ground black pepper, divided
  • 2 medium boneless, skinless chicken breasts (about 6 to 8 oz. each)
  • 1/4 cup extra-virgin olive oil, divided
  • 3/4 cup dry white wine
  • 1/2 cup homemade chicken stock (preferable) or store-bought chicken broth
  • 1 medium garlic clove, grated
  • 5 Tbsp. unsalted butter, cut into ½-inch pieces and chilled
  • 1 tsp. grated lemon zest, plus 1 Tbsp.  fresh juice, divided
  • 2 Tbsp. finely chopped fresh flat-leaf parsley, divided
  • 2 Tbsp. thinly sliced chives, divided
  • 2 tsp. finely chopped tarragon leaves, optional, plus more for garnish
  • Flaky sea salt, such as Maldon, for sprinkling

Directions

  1. Preheat oven to 200°F. Place a wire rack inside a baking sheet; set aside.
  2. In a shallow dish or plate, stir together flour, 1 1/2 teaspoons kosher salt, and 3/4 teaspoon pepper; set aside. Set aside a large plate to transfer chicken to after breading.
  3. Working with one chicken breast at a time, place chicken breast on a cutting board. Hold it in place with the palm of your non-cutting hand, and use a sharp knife to slice chicken horizontally into two even cutlets. Repeat process with remaining chicken breast. Cover each breast half with plastic wrap, and use a meat mallet or rolling pin to pound to 1/3-inch thickness.
  4. Place 2 chicken halves in prepared flour mixture, and turn to coat; tap off excess flour mixture, and transfer chicken to the large plate. Repeat process with remaining chicken halves.
  5. In a large stainless steel, cast iron, or carbon steel skillet, heat oil over medium-high until shimmering. Working in batches, add two chicken pieces to hot oil; cook, undisturbed, until golden brown on both sides, 4 to 5 minutes total. Repeat process with remaining 2 chicken pieces. Place browned chicken halves on prepared baking sheet, and place in warm oven (do not wipe out skillet).
  6. While chicken is resting in oven, heat the same skillet over medium-high. Add wine; cook, stirring occasionally and scraping up browned bits from bottom of skillet, until reduced to about 1/4 cup, 3 to 4 minutes. Add stock and cook, stirring constantly, until mixture has reduced to about 1/3 cup, 3 to 4 minutes. Reduce heat to medium-low. Add garlic, butter, lemon juice, 1 tablespoon of parsley, 1 tablespoon of chives, 2 teaspoons tarragon (if using), remaining 1/2 teaspoon salt, and remaining 1/4 teaspoon pepper; cook, swirling and stirring constantly, until butter is completely melted, about 1 minute.
  7. Spoon sauce over chicken, and garnish with remaining chives, parsley, and additional tarragon (if using), lemon zest, and flaky salt. Serve immediately.

http://www.lynnandruss.com

From a recipe developed by Marianne Williams for Serious Eats

Orecchiette Salad with Roasted Vegetables, Chicken and Jalapeño-Lime Dressing

For a pasta salad that could serve as a main course, some of the pasta is swapped out for chicken, roasted corn and zucchini. Orecchiette works great because its little cup shapes are perfect for holding dressing. The pasta is cooked until it is a little too soft so that as it cools and firms up, it has just the right tender texture.

Because a classic thin vinaigrette would slide to the bottom of the bowl, it is thickened by blending it with pickled jalapeños and scallion whites. Add some crunch with bits of carrot and sliced radish, then top with cilantro leaves and scallions to contribute color and fresh herbal notes.

NOTES: For convenience, a store-bought rotisserie is the way to go. And, the pasta is intentionally overcooked in this recipe so that it remains tender, even when served cold. If making this salad ahead, dress the salad and garnish it with the reserved cilantro right before serving.

There is a fair amount of prep, and it easily took closer to an hour than the 45 minutes suggested in the original recipe. Since good fresh corn was available at farm stands, we used that instead of frozen corn. Just slice the kernels off the cob, and mix with the cut zucchini.

It may seem like a lot of jalapeños, but we found it to be just right. The quantity is versatile, so add or subtract the pickled chile to suit your own preferences.

Orecchiette Salad with Roasted vegetables, chicken and Jalapeño-Lime Dressing

  • Servings: 4-6
  • Difficulty: easy
  • Print

Ingredients

  • 1 lb. zucchini, quartered lengthwise and sliced ¼ inch thick
  • 1½ cups fresh or frozen corn kernels
  • 2 Tbsp. plus
  • ½ cup vegetable oil, divided
  • 1½ tsp. table salt, divided, plus salt for cooking pasta
  • 8 oz. (2¼ cups) orecchiette
  • ⅓ cup plus ¼ cup jarred sliced jalapeños, drained, divided
  • 4 scallions, white parts sliced thin, green parts cut into 1-inch pieces
  • ¼ cup lime juice (2 limes)
  • 1 lb. cooked chicken, torn into bite-size pieces (3 cups)
  • ¾ cup fresh cilantro leaves, divided
  • 8 radishes, trimmed, halved, and sliced thin
  • 1 large carrot, peeled and shredded

Directions

  1. Arrange oven rack 4 inches from broiler element and heat broiler. Combine zucchini, corn kernels, 2 tablespoons oil, and ½ teaspoon salt in large bowl and toss to coat. Transfer to rimmed baking sheet (do not wash bowl) and spread into even layer. Broil until spotty brown in places, 8 to 10 minutes, stirring halfway through broiling. Transfer sheet to wire rack to cool.
  2. Meanwhile, bring 2 quarts water to boil in large saucepan. Add pasta and 1½ teaspoons salt and cook until pasta is tender throughout, 2 to 3 minutes past al dente. Drain well and rinse with cold water. Drain well and transfer to now-empty bowl.
  3. Process ⅓ cup jalapeños, scallion whites, lime juice, and remaining 1 teaspoon salt in blender until coarse paste forms, about 30 seconds. With blender running, drizzle in remaining ½ cup oil and continue to process until dressing is emulsified and smooth, about 1 minute.
  4. Chop remaining ¼ cup jalapeños and add to pasta along with chicken, ½ cup cilantro, radishes, carrot, zucchini and corn, and scallion greens. Pour dressing over salad and toss to coat. Transfer to serving bowl. Sprinkle with remaining ¼ cup cilantro and serve.

http://www.lynnandruss.com

Recipe by Andrea Geary for America’s Test Kitchen

Hibachi-Style Chicken with Charred Vegetables

Soy-marinated grilled chicken thighs paired with smoky, charred summer vegetables make this a sensational summer supper. Here, grilled chicken thighs are soaked in a sweet, garlicky, soy-based marinade and grilled alongside skewers with peak-season summer vegetables. Some steamed rice or couscous completes the meal.

The grill imparts a delicious char, similar to a Japanese hibachi charcoal grill, while basting the vegetables with a mixture of melted butter and reserved marinade enhances the full-bodied smoky flavor signature to hibachi.

The key to evenly cooked vegetable skewers is cutting the veggies into similarly sized pieces so they fit neatly on the skewers. Drizzled with a creamy chile-mayo sauce and served over rice (or couscous), this dish becomes a hearty, flavor-packed meal that can be easily prepped ahead for the week.

Make Ahead TIPS: Marinate chicken overnight, covered in the refrigerator, for up to 12 hours. Chop and store all vegetables in an airtight container in the refrigerator for up to one day. The mayonnaise sauce can be prepared up to five days in advance and stored in an airtight container in the refrigerator.

BTW, Kewpie mayonnaise is a Japanese brand of mayo made with egg yolks, vinegar, and MSG. Its use of egg yolks (rather than whole eggs) and vinegar makes it richer and tangier than regular mayonnaise. Find it at most grocery stores or online at yamibuy.com.

NOTE: *We knew the skewered vegetables would take longer than the chicken, so we started them about 8-10 minutes prior to adding the thighs to the hot grill. So in total, the veggies grilled for 20 minutes, while the chicken was on for 12 minutes.

While the mayo sauce was indeed tasty, we don’t feel it is absolutely necessary to complete the dish, so if it is not inspiring to you, just omit it. HOWEVER, we feel strongly that the basting marinade and butter sauce need to be doubled, as there was not enough. The new amounts are indicated in the ingredients list below.

Hibachi-Style Chicken with Charred Vegetables

  • Servings: 4
  • Difficulty: easy
  • Print

Ingredients

Chicken Marinade:

  • 1 1/4 cup soy sauce
  • 1/4 cup light brown sugar
  • 1/4 cup finely chopped garlic (about 5 large garlic cloves) 
  • 2 Tbsp. plus 1/2 tsp. toasted sesame oil, divided
  • 2 lb. boneless, skinless chicken thighs (about 6 thighs), patted dry

Vegetables:

  • 2 red bell peppers, cut into 1 1/2-inch pieces (about 2 cups)
  • 1 zucchini, halved lengthwise and cut into 1-inch-thick half-moons (about 2 1/2 cups) 
  • 1 medium red onion, cut into 1 1/2-inch-thick wedges (about 1 1/2 cups)
  • 4 (8-inch) metal or wooden skewers
  • 1/2 tsp. kosher salt, divided

Butter and Sauce:

  • 4 Tbsp. unsalted butter, melted 
  • Canola oil, for grilling
  • 1/2 cup Kewpie mayonnaise
  • 2 tsp. sriracha chile sauce
  • 1/2 tsp. Dijon mustard
  • Cooked white rice, or couscous, for serving

Directions

  1. Whisk together soy sauce, brown sugar, garlic, and 1 tablespoon sesame oil in a small bowl until sugar is dissolved. Pour soy mixture into a large ziplock plastic bag, reserving 6 tablespoons soy mixture in bowl. Add chicken to bag; seal bag, and gently massage soy mixture into chicken. Set aside, and let marinate at room temperature for at least 30 minutes or up to 12 hours.
  2. Thread peppers, zucchini, and onion onto skewers. Brush vegetables with 1 tablespoon reserved soy mixture; sprinkle with 1/4 teaspoon salt. Stir melted butter and remaining 1/4 teaspoon salt into remaining 2 tablespoons soy mixture in bowl; set aside.
  3. Preheat grill to medium-high (400°F to 450°F). Remove chicken from marinade, shaking off excess; discard marinade. Lightly grease grill grates with canola oil; place chicken and skewered vegetables on grates. Grill, uncovered, turning skewers and chicken occasionally and basting with soy-butter mixture until a thermometer inserted into thickest portion of chicken registers 170°F, 12 to 15 minutes, and vegetables are tender and charred in spots, about 12 minutes. (*Please see note our cooking times above.) Transfer to a cutting board, and let rest for 5 minutes.
  4. Stir together mayonnaise, sriracha, mustard, and remaining 1/2 teaspoon sesame oil in a small bowl. Chop chicken into bite-size pieces, and remove vegetables from skewers. Serve chicken and vegetables over cooked rice, and drizzle with mayonnaise mixture. Garnish with scallions and shichimi togarashi.

http://www.lynnandruss.com

Adapted from a recipe by Andee Gosnell for Food & Wine

Panang Curry

Rich with coconut milk and crushed peanuts, panang curry, also known as phanaeng or panaeng curry, is subtly spiced with coriander and cumin. This version is made with chicken, but you’ll often find it made with beef and sometimes prawns.

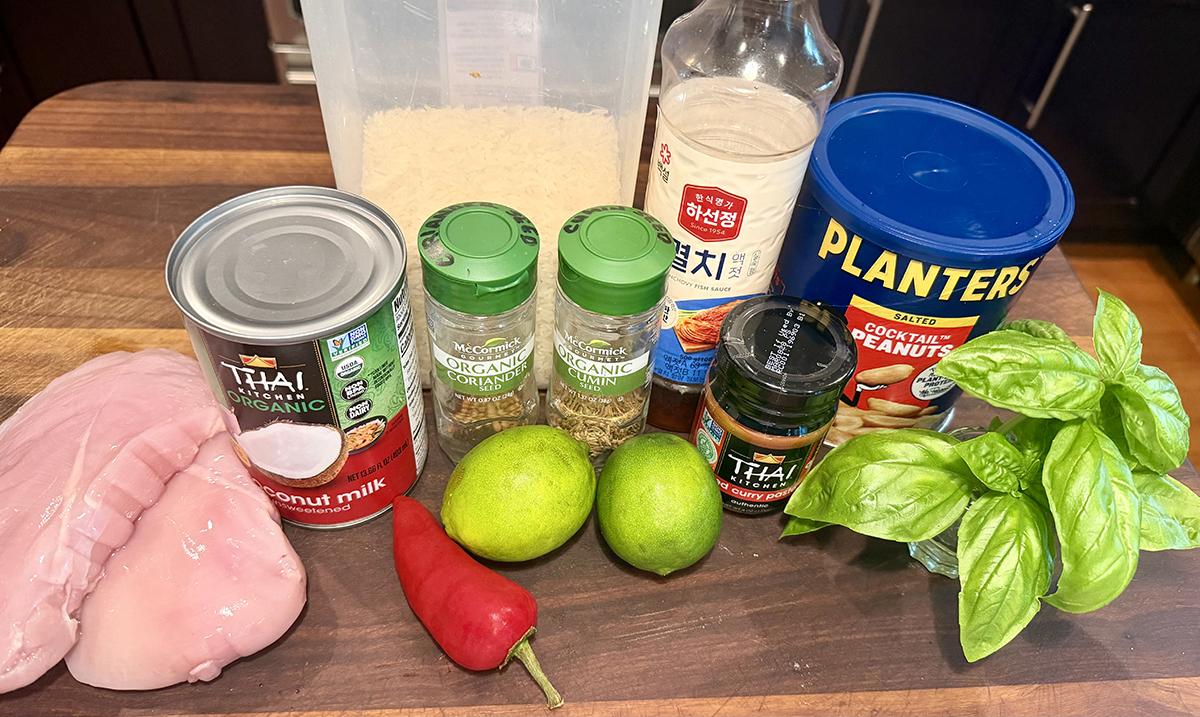
Panang curry is sometimes mistakenly linked to Penang, a Malaysian island, but it actually originated in Thailand. It’s important to use thick coconut milk for the creamiest results, and be sure to break the sauce by simmering until a layer of bright red oil shimmers on top. Purchase panang curry paste online or at an Asian market and add crushed peanuts to it if it doesn’t include them (not all of them do), or prepare your own paste, as is done here.

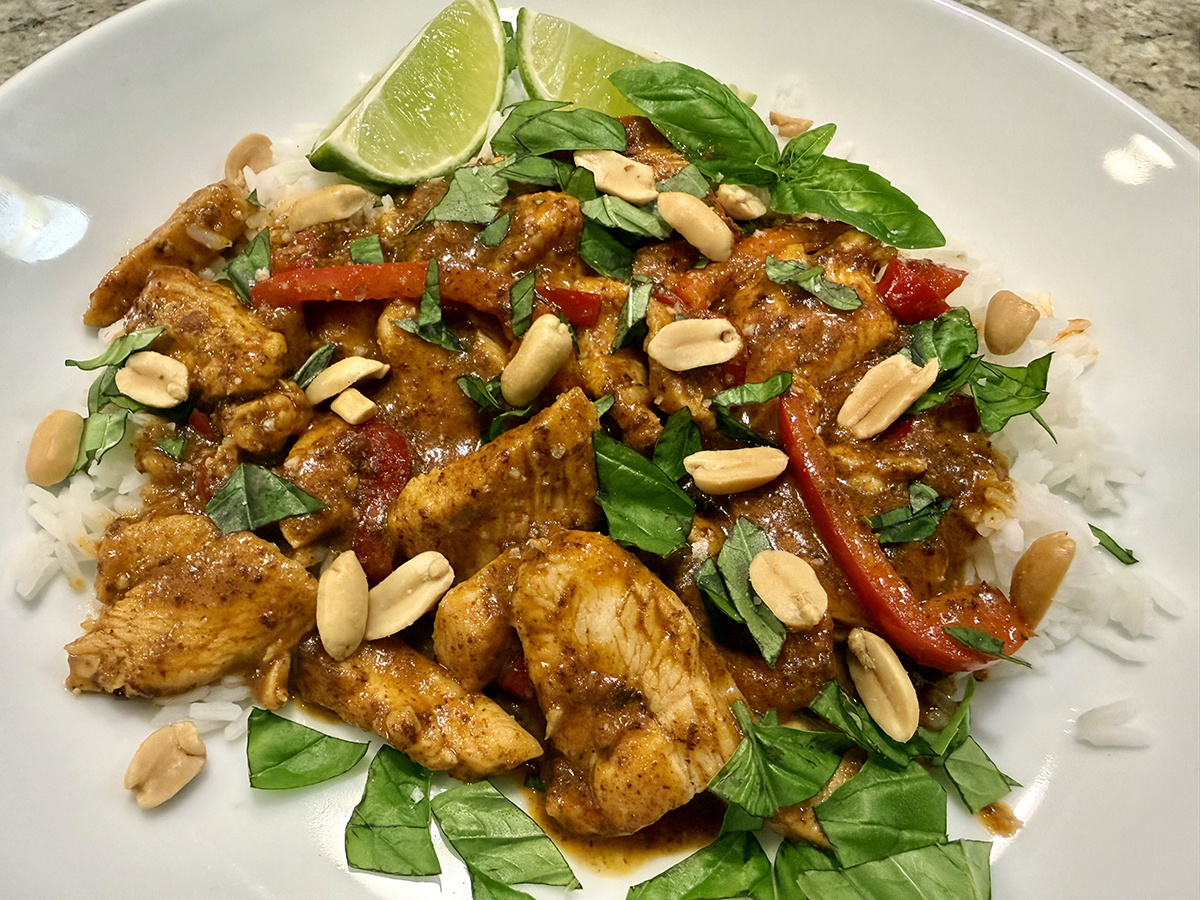
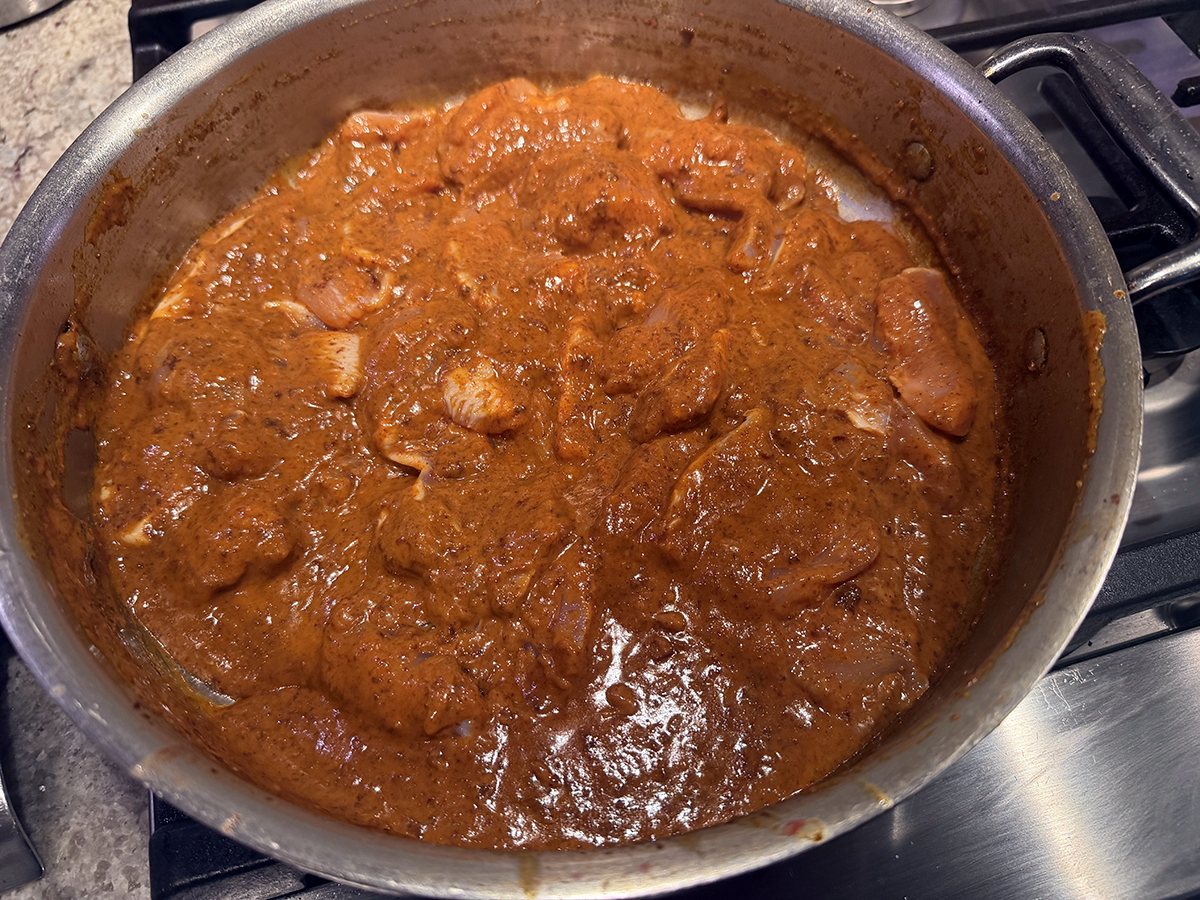
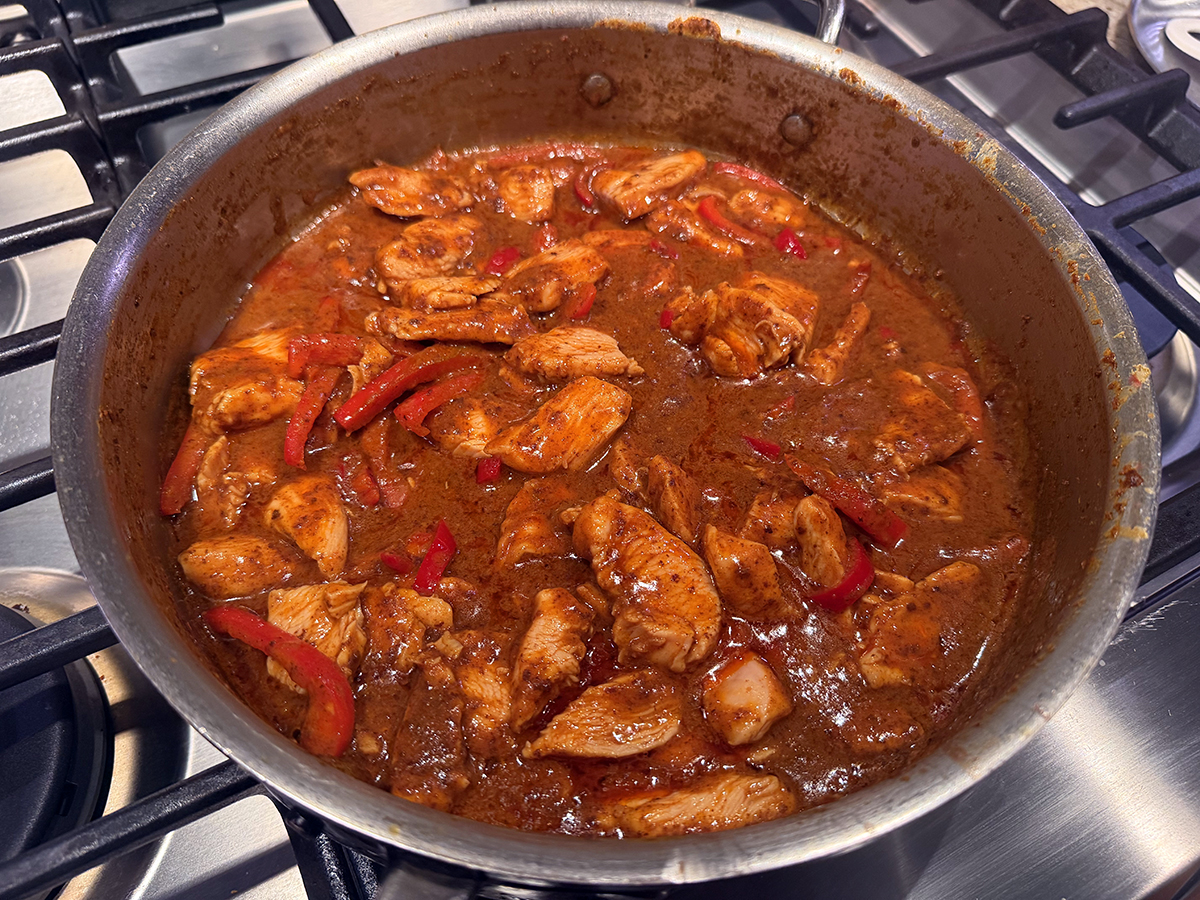
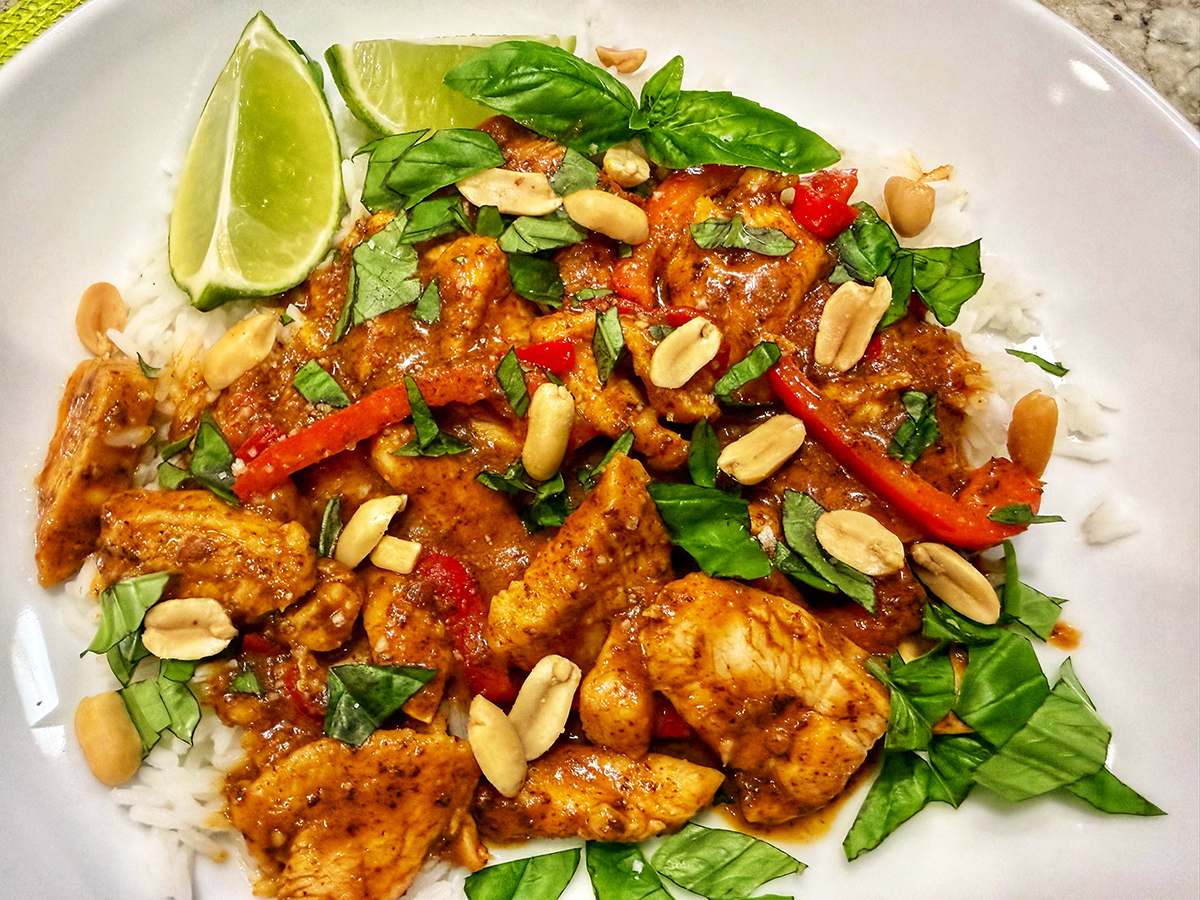
Since there are really no veggies other than the Fresno chili, serve with a vegetable side and/or salad. The original recipe indicates it will create 4 servings with rice. We beg to differ. You could maybe squeeze out 3 servings, but realistically plan on 2. (See above photo showing one of our serving portions.)

TIPS: Different brands of curry paste vary in spice levels. Taste a little first and determine how much to use. Maesri brand curry paste is highly recommended.
Coconut milk varies widely in its make up. Some cheap brands have as little as 25% coconut. Look at the ingredients, you should not accept less than 60%, some brands go up to 85% plus… Not all coconut milks are the same, it will makes a huge difference to the taste.

Panang Curry

  • Servings: 2-3
  • Difficulty: easy
  • Print

Ingredients

For the Panang Curry Paste

  • ½ tsp. coriander seeds
  • ½ tsp. cumin seeds
  • ¼ cup/1 ounce dry-roasted, unsalted peanuts
  • 2 to 4 Tbsp. red curry paste, to taste (see Tip)

For the Curry

  • 1 lb. boneless, skinless chicken breasts or thighs
  • 2 tsp. fish sauce, plus more as needed
  • 1 (13.5-oz) can full-fat coconut milk (do not shake)
  • 8 makrut lime leaves, deveined, 6 torn and 2 thinly sliced, OR 1 teaspoon grated lime zest, for serving
  • 1½ tsp. palm, granulated or brown sugar, plus more as needed
  • 1 small, mild, thin-skinned pepper, such as a Fresno, Anaheim or banana pepper, or ½ small red bell pepper, thinly sliced
  • Thai basil, thinly sliced, for serving (optional, if makrut lime leaves are not used)
  • Rice, for serving

Directions

  1. Prepare the curry paste: Heat a medium sauté pan over medium. Add the coriander and cumin. Swirl the pan around, or toss the seeds with a wooden spoon, and gently toast until fragrant, about 1 minute, taking care not to burn the spices. Transfer to a small plate and cool, then place in a spice grinder or mortar and pestle, and grind to a fine powder.
  2. Add the peanuts and finely grind until smooth. Transfer the mixture to a small bowl, add the red curry paste and stir until mixed.
  3. Thinly slice the chicken into 1½-inch-long pieces. Place in a medium bowl, drizzle with the fish sauce and mix until coated.
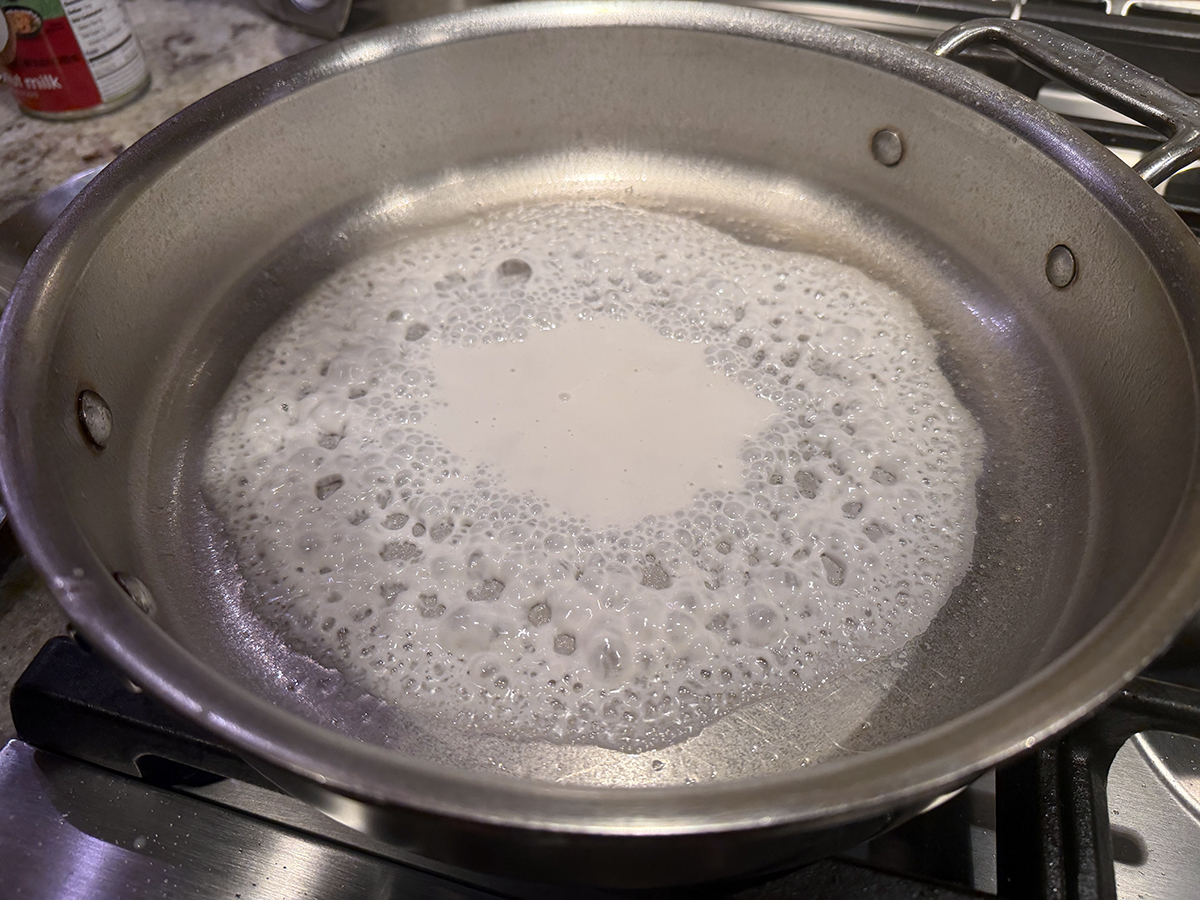
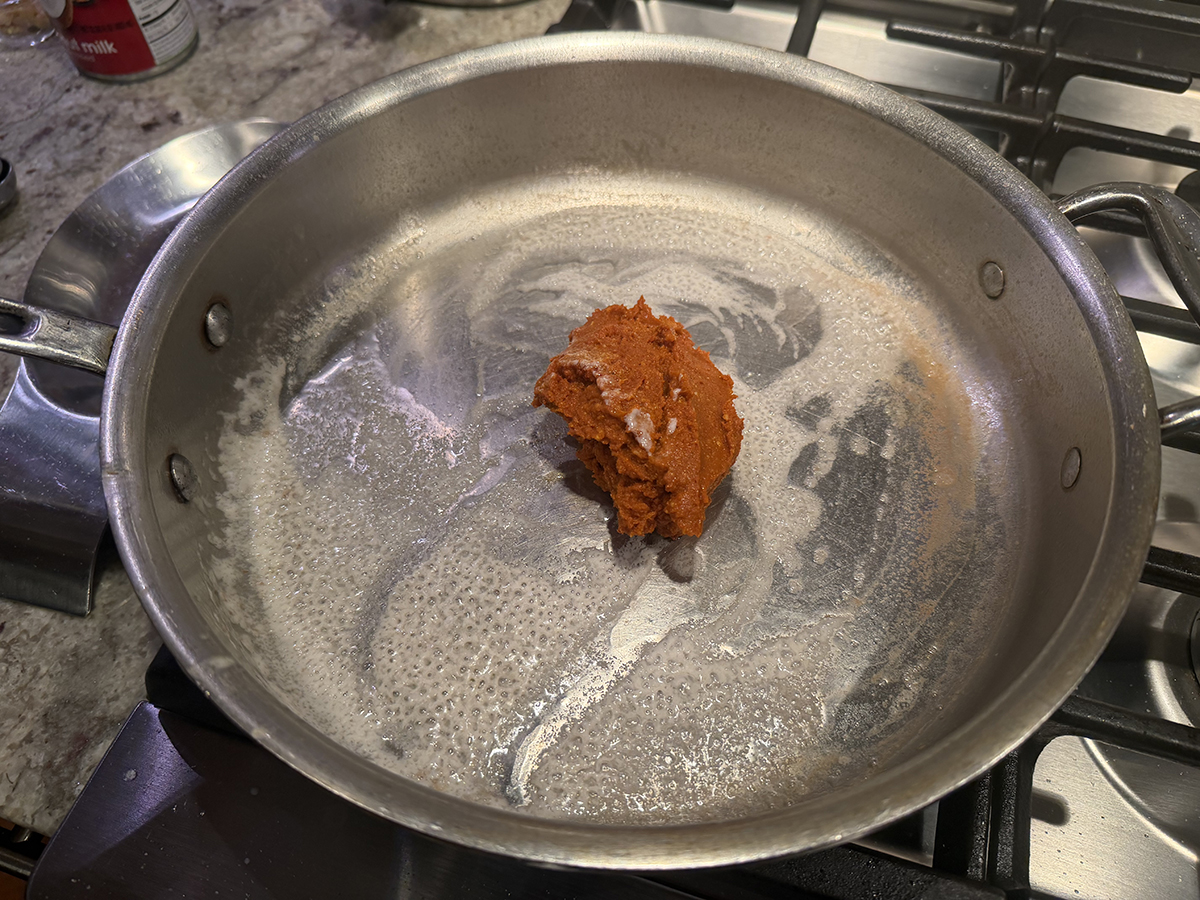
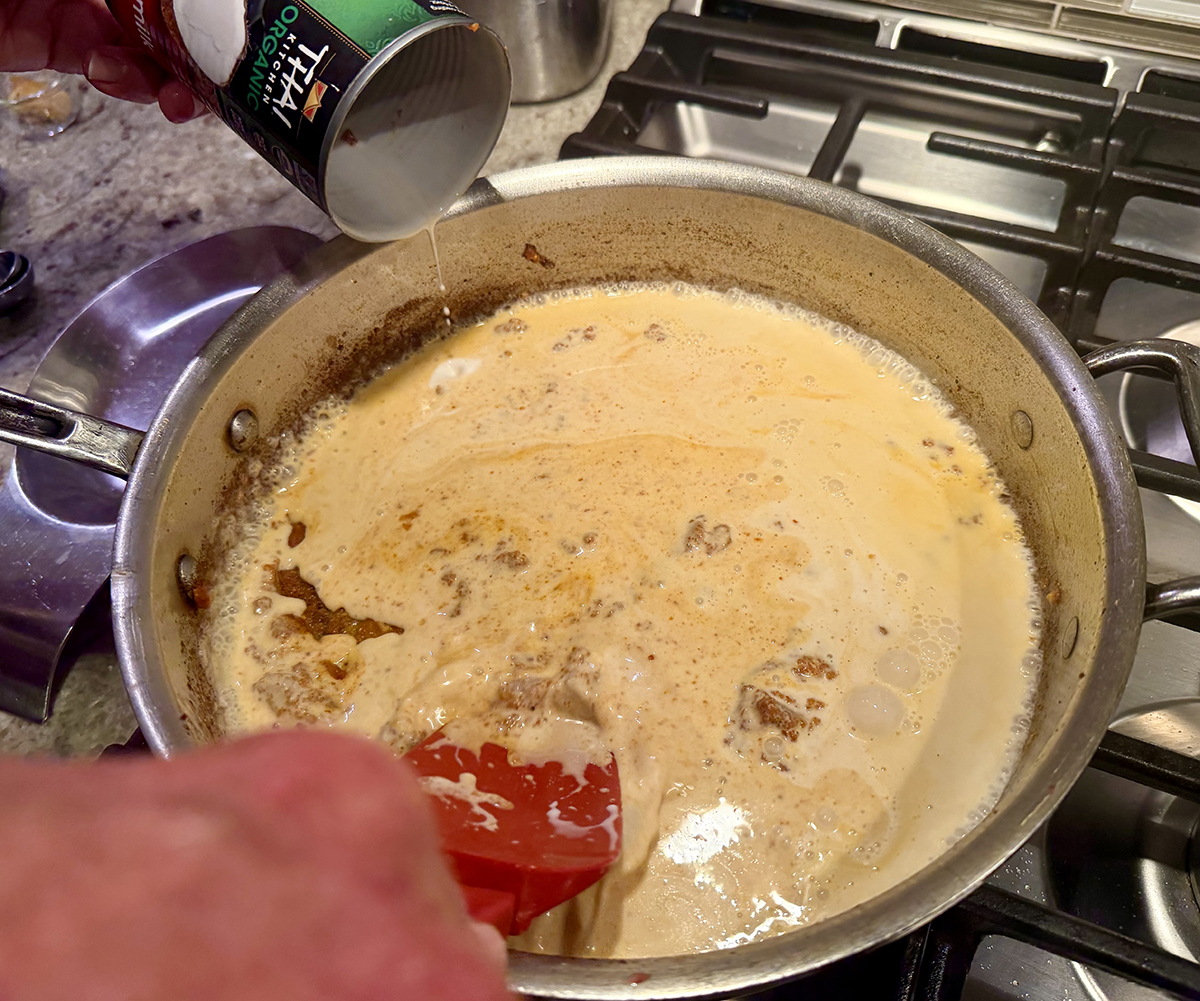
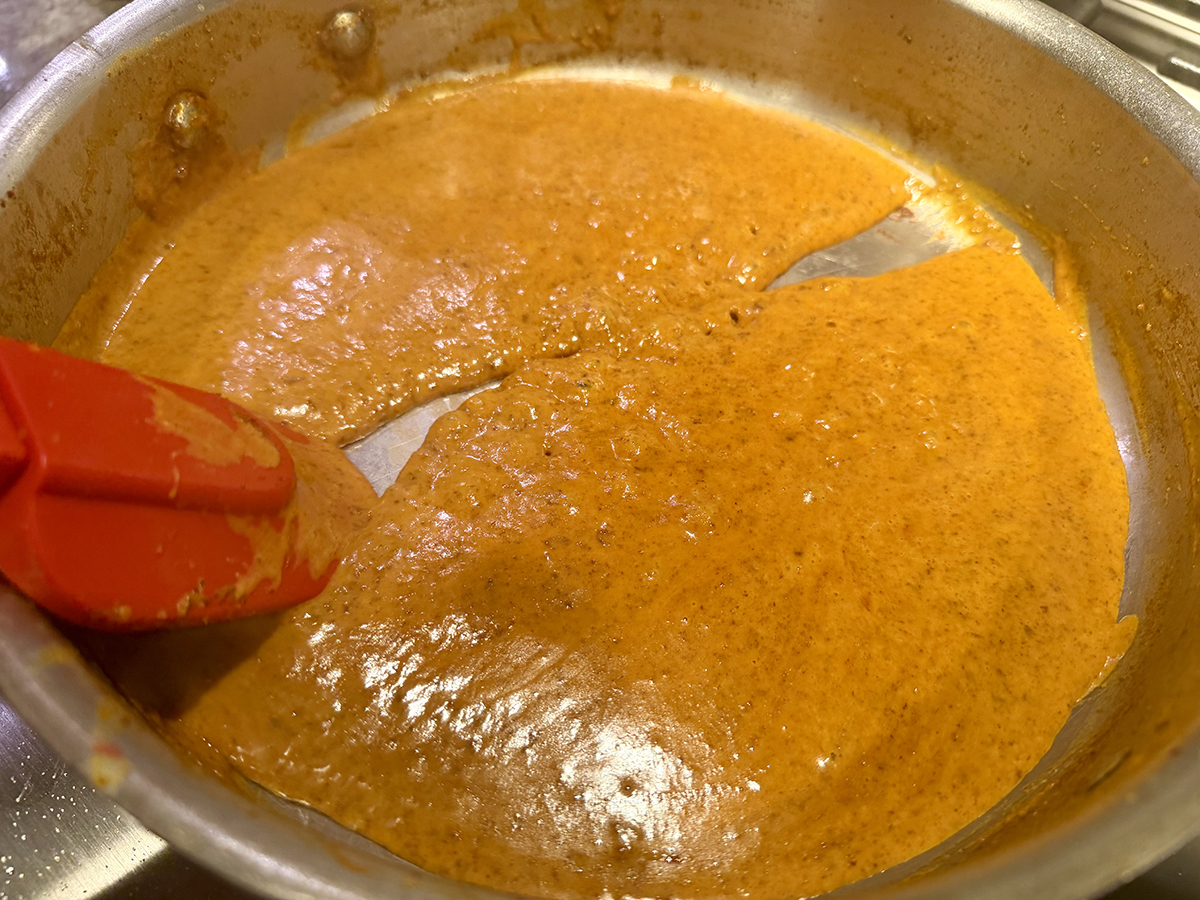
  4. Heat the same pan over medium-high. Scoop 4 tablespoons of the thick cream off the top of the coconut milk and add it to the pan; it will immediately sizzle. Stir until thickened and bubbling on the sides, about 30 seconds. Stir in the curry paste, to taste. Reduce to medium, and cook the paste, continuously stirring, until a thick paste forms and the coconut oil separates (the sauce “breaks”), 2 to 3 minutes. If it starts sticking, add a splash of coconut milk and scrape up anything from the bottom of the pan.
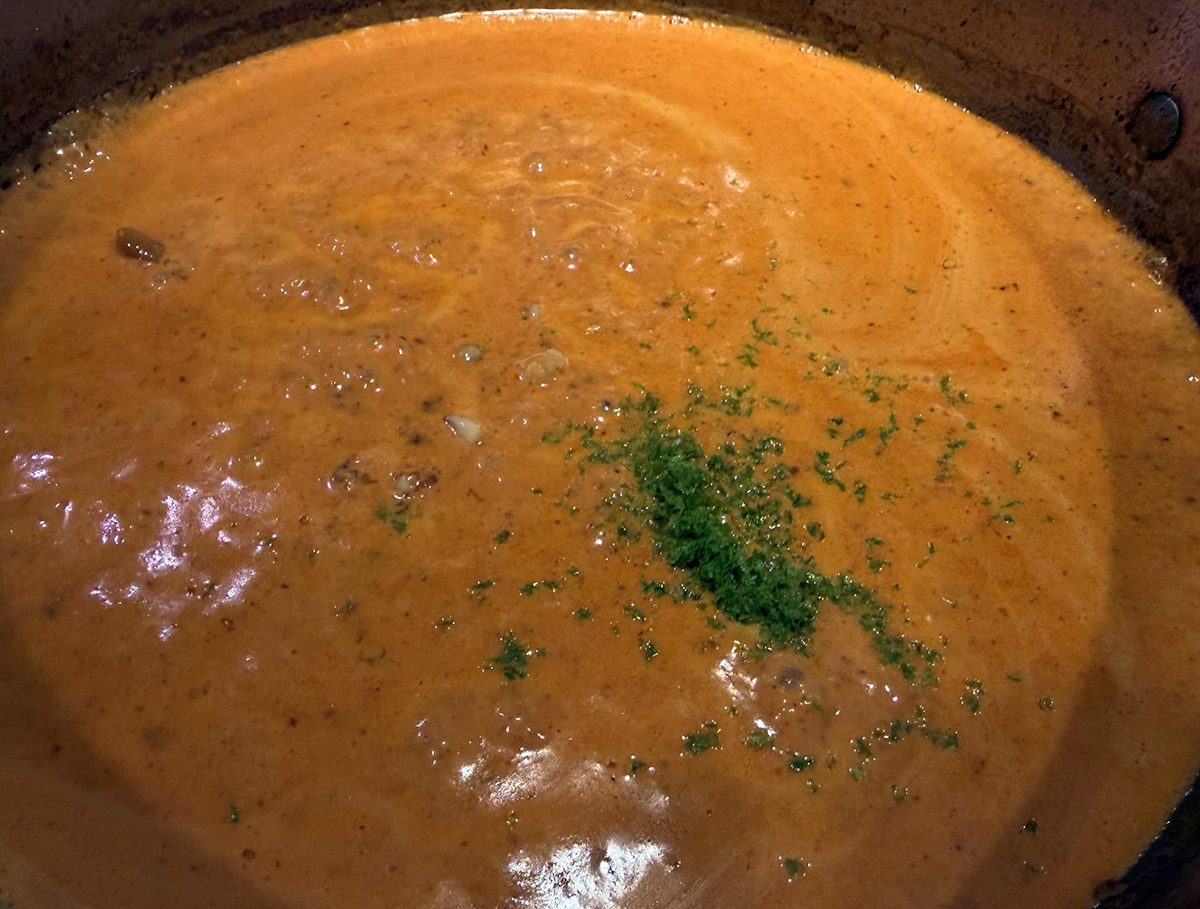
  5. Add the torn lime leaves or zest and sugar. Cook, continuously stirring, to dissolve the sugar and infuse the flavors, about 2 minutes. Add the remaining coconut milk, increase to medium-high, bring to a boil and cook, continuously stirring, until the curry has thickened enough to coat the back of a spoon and has a layer of bright red oil on top, 4 to 8 minutes. The curry should be at a lively simmer; adjust the heat as necessary.
  6. Add the chicken and cook, stirring frequently, until cooked through, 3 to 4 minutes. If using, stir in the peppers, saving a few for serving, and cook until just incorporated, about 1 minute. Taste and add more fish sauce and sugar, if needed. (Be mindful, this is not a sweet curry; the sweetness should hit a back note, not lead with it.)
  7. Garnish with the sliced lime leaves or Thai basil and reserved peppers. Serve alongside rice.

http://www.lynnandruss.com

Recipe by Naz Deravian for NYTimes Cooking