Monthly Archives: August 2023

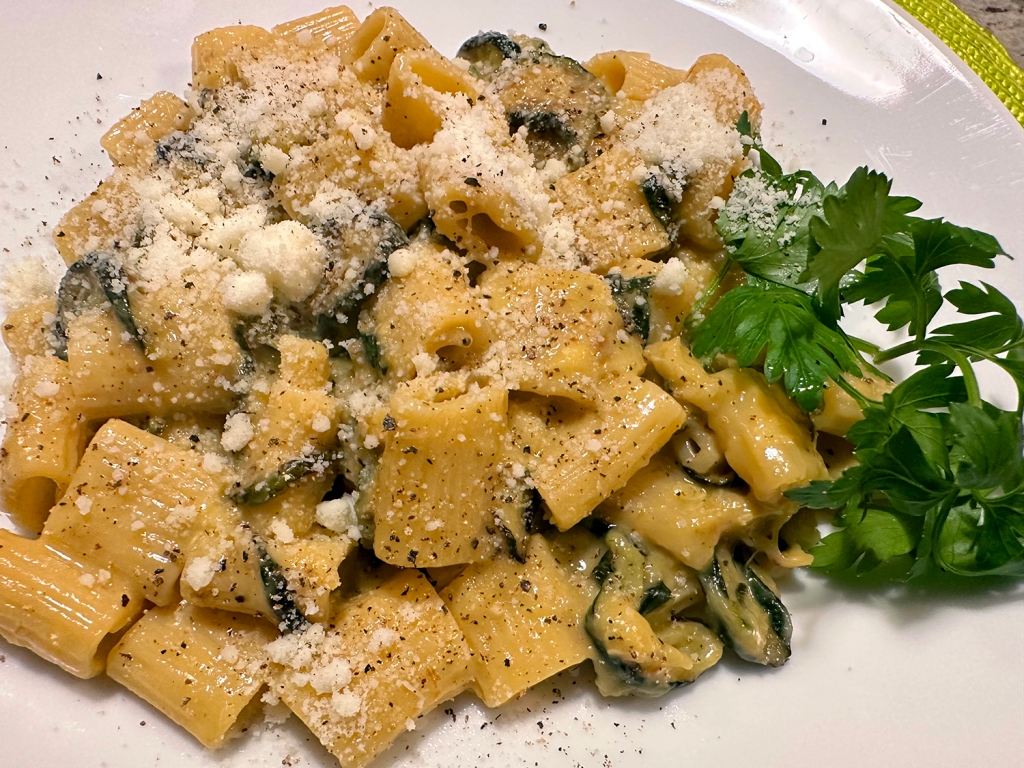
Zucchini Carbonara

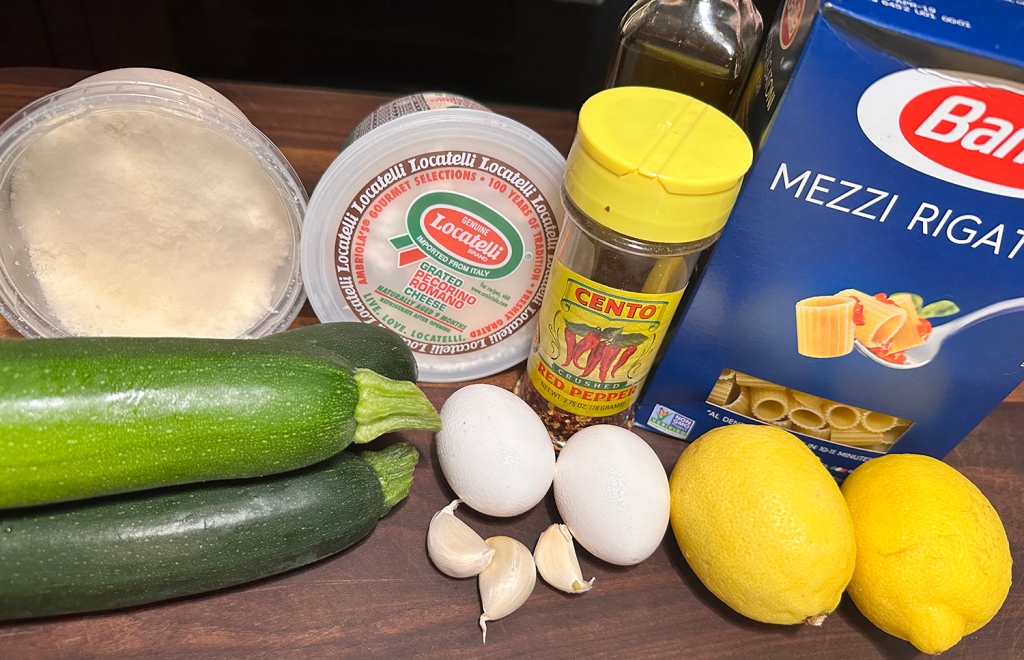
A fantastic vegetarian riff on classic pasta carbonara, typically made with eggs, cured pork and cheese. The guanciale or pancetta traditionally used is replaced by garlicky, golden-brown zucchini that itself brings a meatiness to the dish. And there is no butter or cream used in making the satiny sauce.

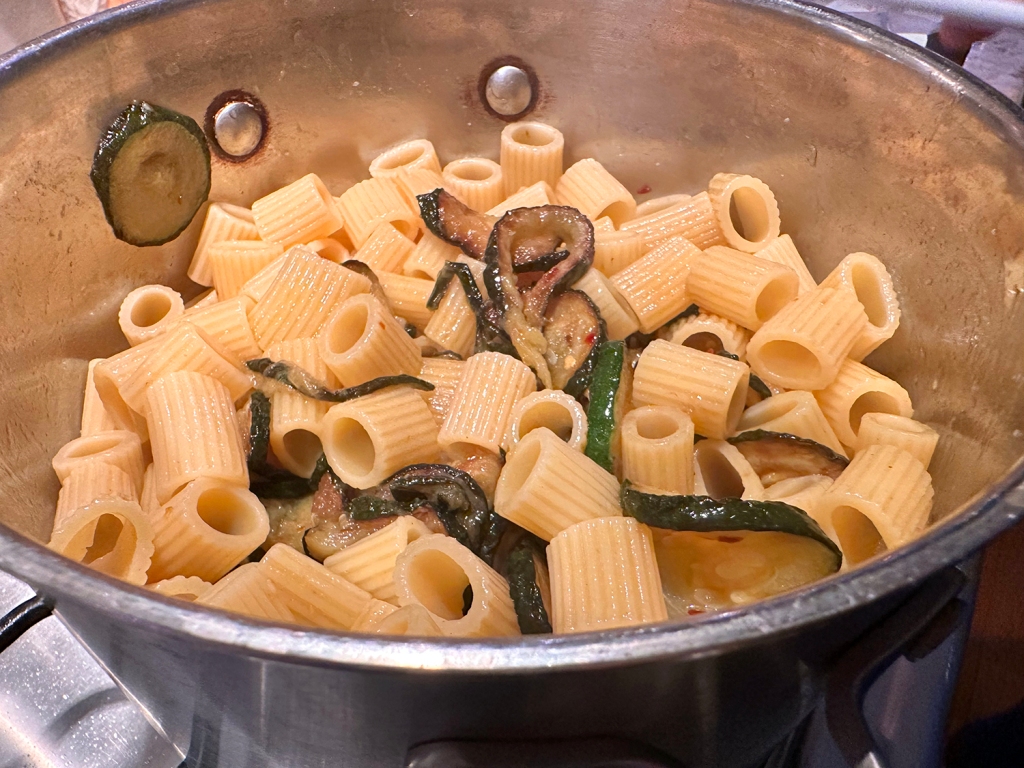
The squash is sautéed and the pasta boiled, then the two are tossed with a mixture of umami-packed Parmesan, tangy pecorino Romano, rich eggs and starchy pasta cooking water. The resulting sauce is silky-smooth and creamy, yet light. Add lemon zest to the mix to bring fresh, zingy notes, as well as red pepper flakes for subtle heat.

Don’t add the egg-cheese mixture until the pot is off the heat. This will prevent the eggs from overcooking and ensure that the sauce’s texture is velvety smooth.

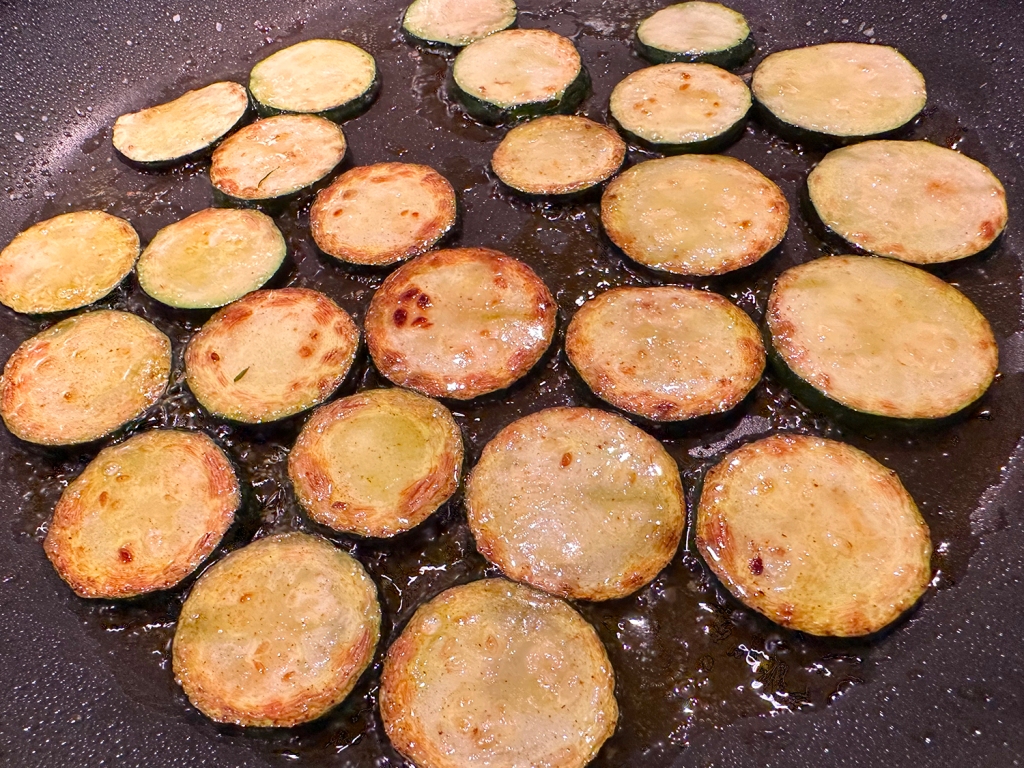
One major difference from the original recipe in Milk Street, was the sliced zucchini had to be portioned into 4 groups, each done separately in the 12-inch skillet, adding about 15 more minutes, bringing the total time to about one hour.

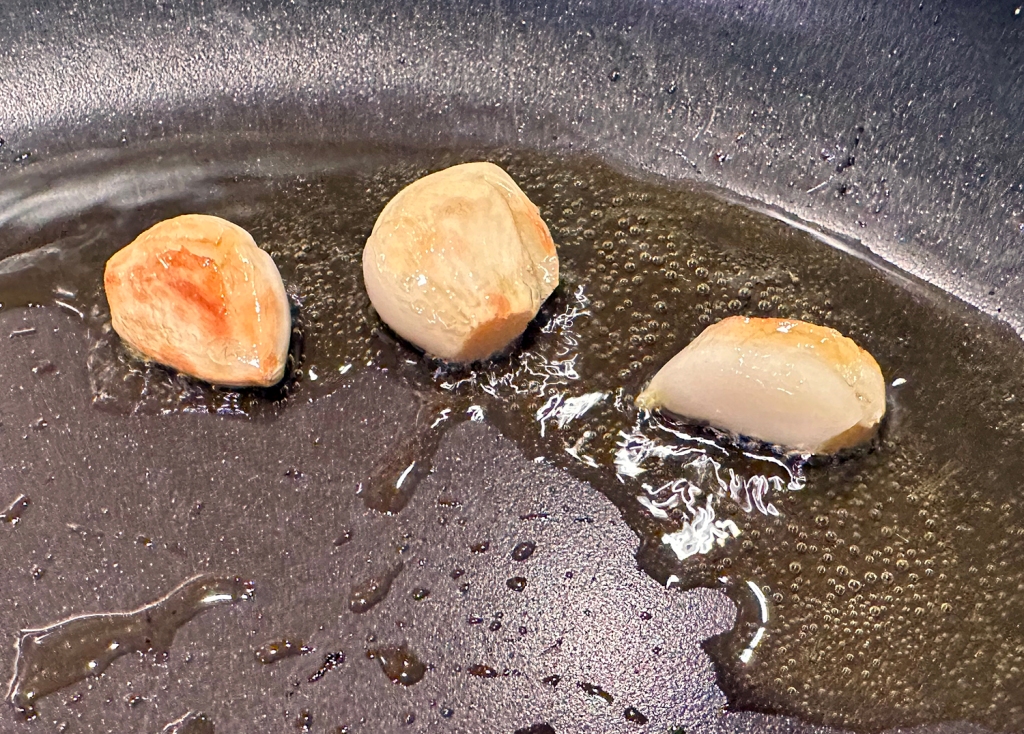
We also did not discard the cooked garlic (blasphemy!). Instead, we minced it and tossed it into the zucchini with the red pepper flakes. The Hubs mentioned at least three times that, for company, this would be a great first course to an Italian-themed dinner.
Zucchini Carbonara

  • Servings: 4-6
  • Difficulty: easy
  • Print

Ingredients

  • 1 large egg plus 1 large egg yolk
  • 1 oz. pecorino Romano cheese, finely grated (½ cup), plus more to serve
  • 1 oz. Parmesan cheese, finely grated (½ cup), plus more to serve
  • 1 Tbsp. grated lemon zest
  • Kosher salt and ground black pepper
  • 3 Tbsp. extra-virgin olive oil, divided
  • 2 large garlic cloves, smashed and peeled
  • 1 1/2 lbs. small to medium zucchini, trimmed and sliced into ¼-inch rounds
  • 1/4-1/2 tsp. red pepper flakes
  • 1 lb. rigatoni, mezzi rigatoni or ziti

Directions

  1. In a small bowl, whisk together the whole egg plus yolk, both cheeses, the lemon zest and ½ teaspoon black pepper; set aside. In a 12-inch nonstick skillet over medium, combine 1½ tablespoons of the oil and the garlic. Cook, stirring occasionally, until the garlic is lightly browned, 2 to 3 minutes. Remove and discard the garlic, then add half the zucchini in an even layer and sprinkle lightly with salt. Cook, without stirring, until golden brown on the bottoms, 3 to 4 minutes.
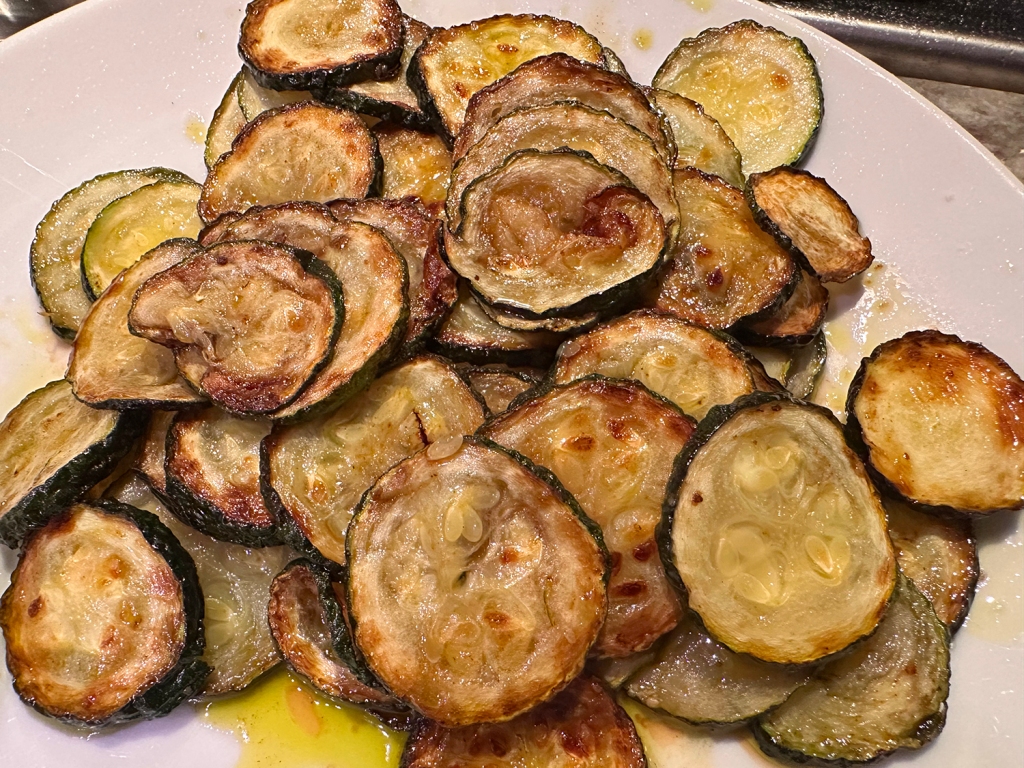
  2. Stir the zucchini, flipping the slices, then redistribute in an even layer. Cook until golden brown on the second sides, another 3 to 4 minutes. Transfer to a plate. Add the remaining 1½ tablespoons oil to the skillet, then cook the remaining zucchini in the same way. (You may have to do this in more than two batches, it took us four.) Off heat, add the first batch of zucchini to second in the skillet. Stir in the pepper flakes and set aside.
  3. In a large pot, bring 4 quarts water to a boil. Stir in the pasta and 1 tablespoon salt, then cook, stirring occasionally, until al dente. Reserve about 1 cup of the cooking water, then drain. Return the pasta to the pot, then add ½ cup of the reserved pasta water and the zucchini. Cook over medium-high, stirring, until heated through, about 1 minute.
  4. Off heat, add the egg mixture; stir until the sauce thickens slightly and clings to the pasta and zucchini, 2 to 3 minutes. If needed, add reserved pasta water 1 tablespoon at a time to adjust the consistency. Taste and season with salt and black pepper. Serve sprinkled with additional black pepper and cheeses.

http://www.lynnandruss.com

Recipe from Milk Street
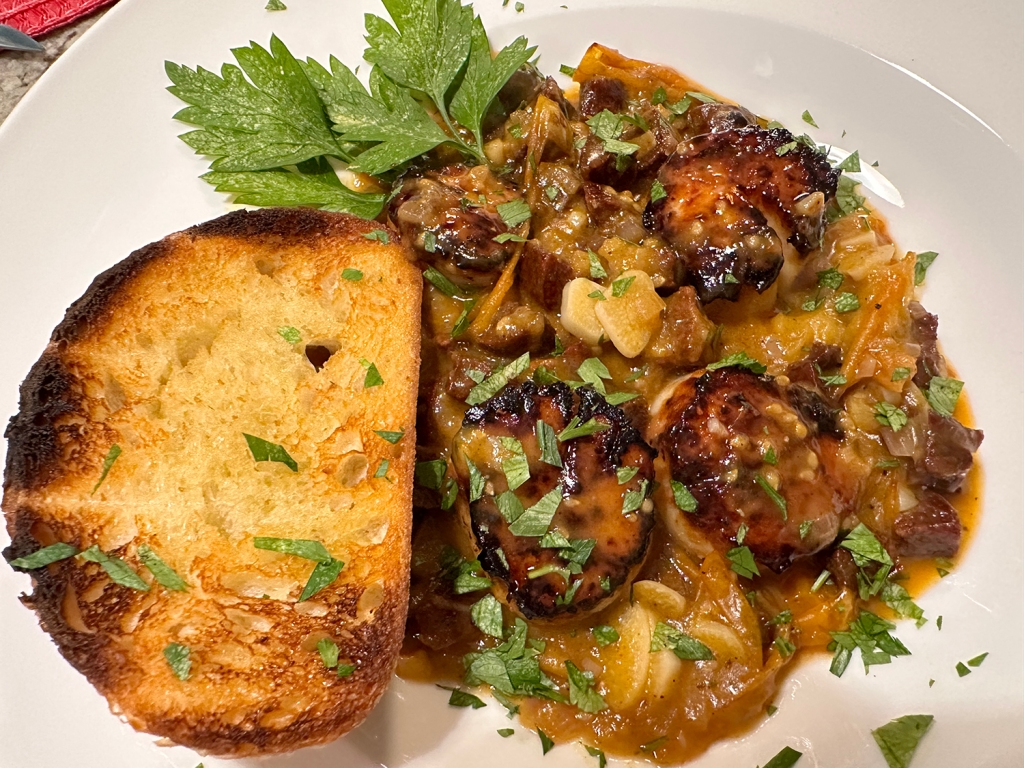
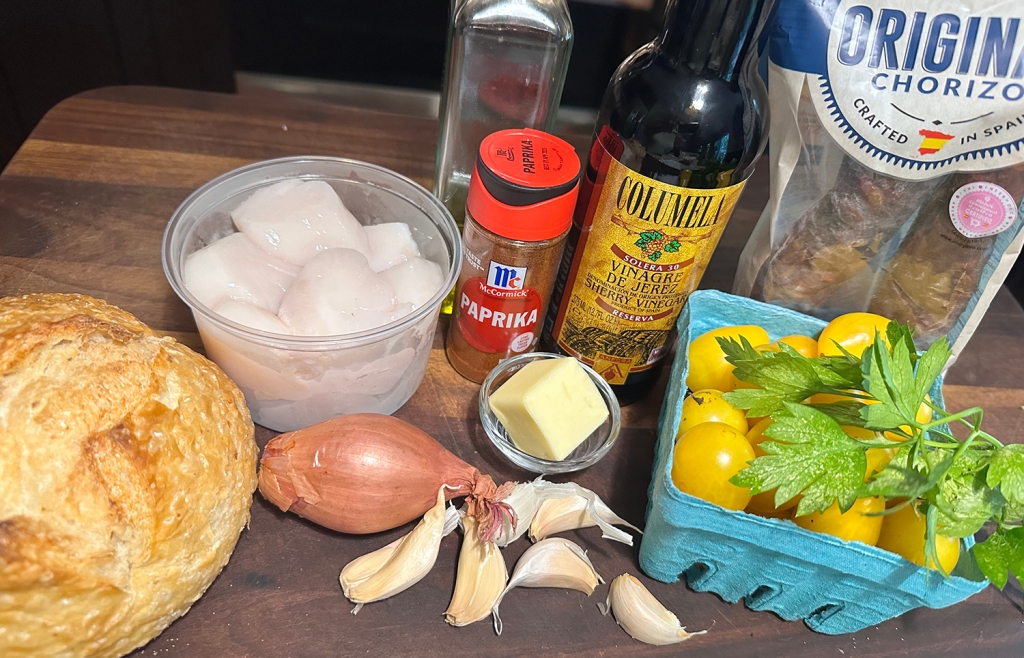
Scallops and Chorizo in Tomato Sauce

We had our doubts as to whether or not tender scallops and bold Spanish chorizo would make good bedfellows. This unusual combination proves that spiced cured pork and delicate shellfish are a match made in one-skillet weeknight-dinner heaven.

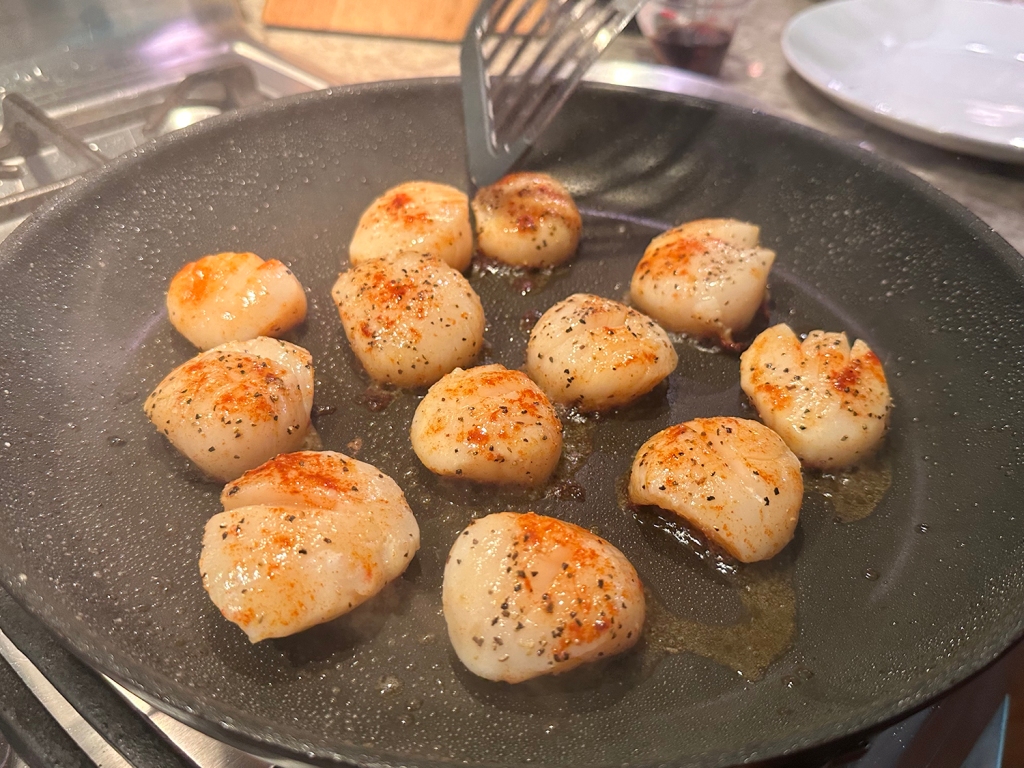
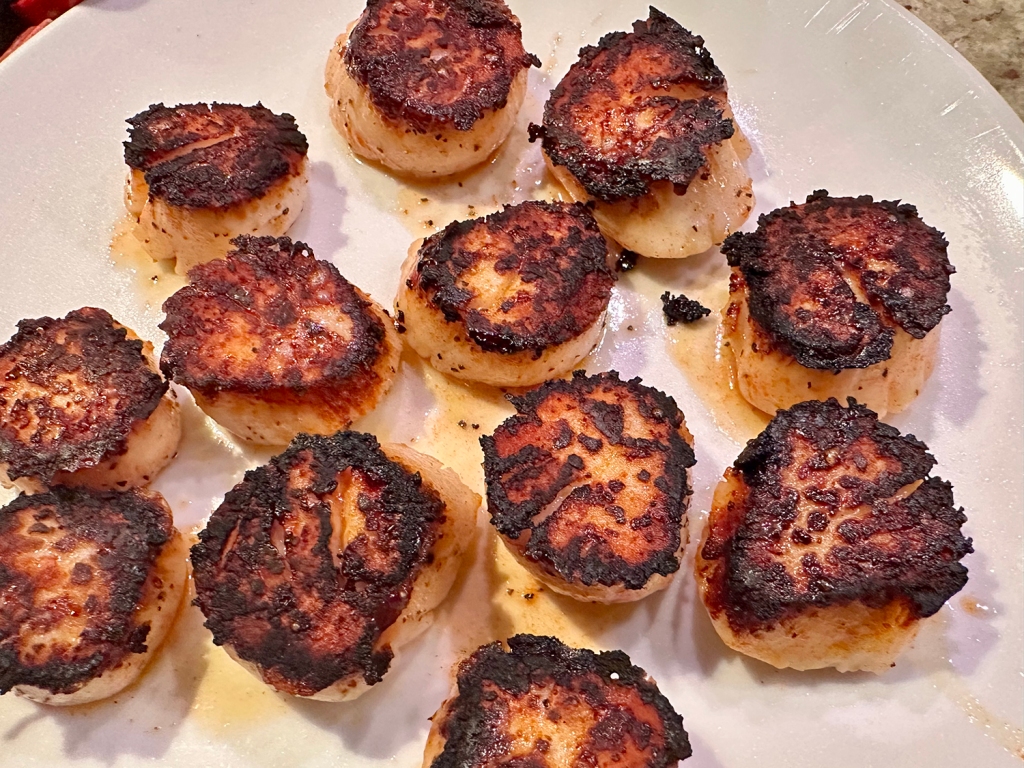
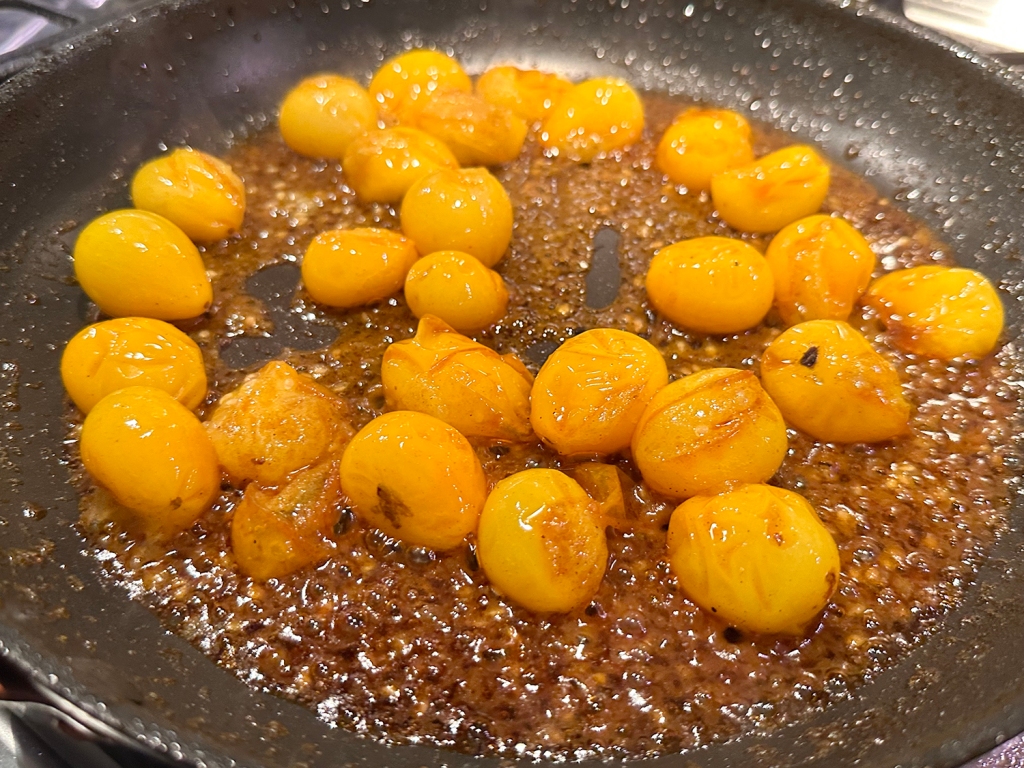
The recipe from Bon Appétit starts with searing scallops on one side over high heat to develop a golden brown crust, then a sauce is built from salty chorizo, lots of garlic, and bright Sun Gold tomatoes (you can use any variety of cherry tomatoes, but that vibrant yellow hue can’t be beat). The scallops are nestled back into the sauce for the last few minutes to cook through. Serve with toast for a bright, satisfying meal that comes together in about 30 minutes.

It’s worth it to seek out Spanish chorizo—a firm, cured pork product like salami—for this dish, if you can. Unlike Mexican chorizo, which is raw spiced ground pork sold loose or in sausage casings, the Spanish variety is well-salted and already cooked, so it only requires a minute or two in the pan to crisp up and render out some flavorful fat to sizzle with your sauce’s aromatic base.

Don’t be fooled by the seemingly spare quantity in the skillet before serving. The entrée is very rich and filling. I only managed to eat 3 of the scallops. Of course, if you want to beef up the meal, serving over a Baked Rice dish (Arroz Al Horno) provides more heft.

Scallops and Chorizo in Tomato Sauce

  • Servings: 3-4
  • Difficulty: easy
  • Print

Ingredients

  • 12 large dry sea scallops, side muscles removed, patted dry
  • Kosher salt, freshly ground pepper
  • ½ tsp. smoked paprika, plus more for serving
  • 2 Tbsp. extra-virgin olive oil
  • 6 oz. smoked Spanish chorizo, cut into small pieces
  • 1½ lb. Sun Gold and/or cherry tomatoes
  • 2 Tbsp. sherry vinegar or red wine vinegar
  • 1 shallot, finely chopped
  • 6 garlic cloves, thinly sliced
  • 2 Tbsp. unsalted butter
  • Chopped parsley (for serving)
  • 1 baguette, sliced, toasted

Directions

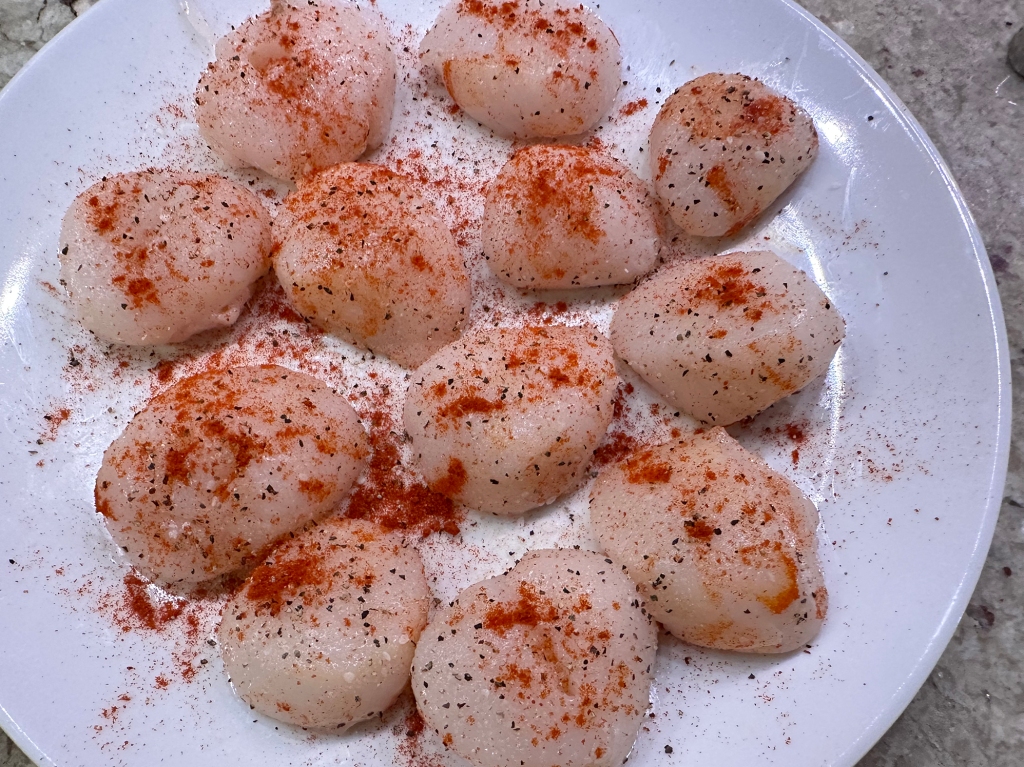
  1. Season 12 large dry sea scallops, side muscles removed, patted dry, with kosher salt and freshly ground pepper and sprinkle with ½ tsp. smoked paprika. Heat 2 Tbsp. extra-virgin olive oil in a large skillet over high. Cook scallops until golden brown underneath, about 2 minutes (no need to brown on the other side). Transfer to a plate and arrange, browned side up.
  2. Reduce heat to medium-high and cook 6 oz. smoked Spanish chorizo, cut into small pieces, in pan, stirring occasionally, until slightly crisped, about 2 minutes. Using a slotted spoon, transfer chorizo to a bowl.
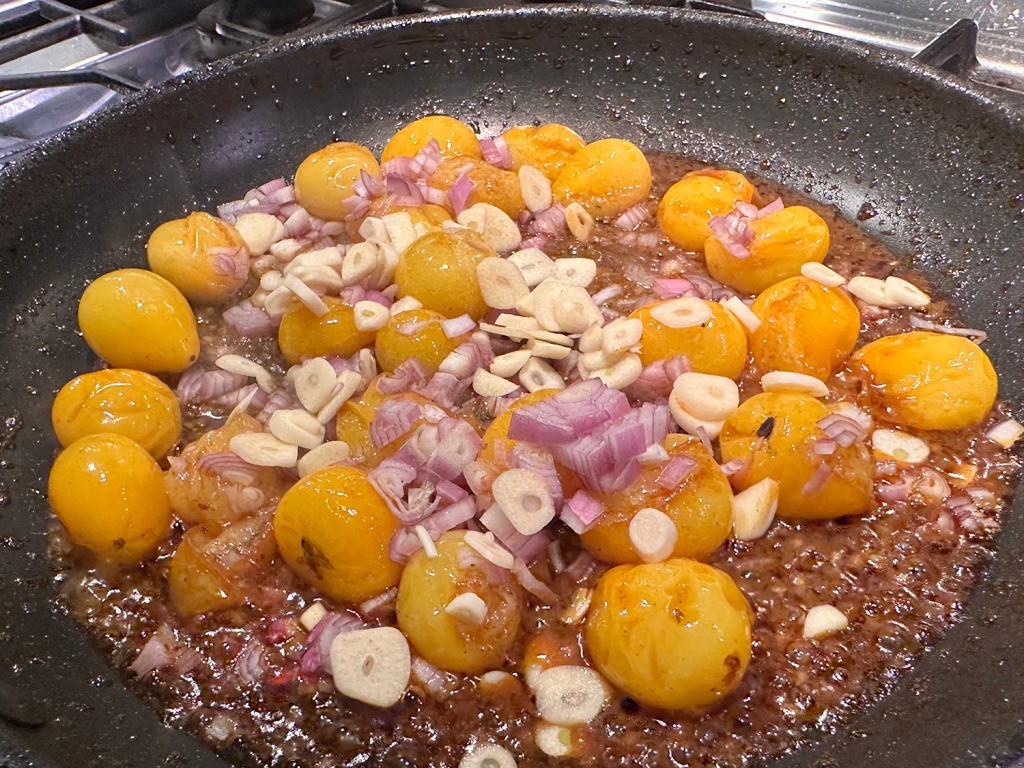
  3. Cook 1½ lb. Sun Gold and/or cherry tomatoes in same pan, undisturbed, until lightly blistered underneath, about 1 minute. Add 2 Tbsp. sherry vinegar or red wine vinegar and cook, stirring often, until tomatoes have burst and are falling apart, 2–3 minutes. Add 1 shallot, finely chopped, and 6 garlic cloves, thinly sliced, and season with salt and pepper; cook, stirring often, until slightly thickened and garlic has started to soften, about 5 minutes.
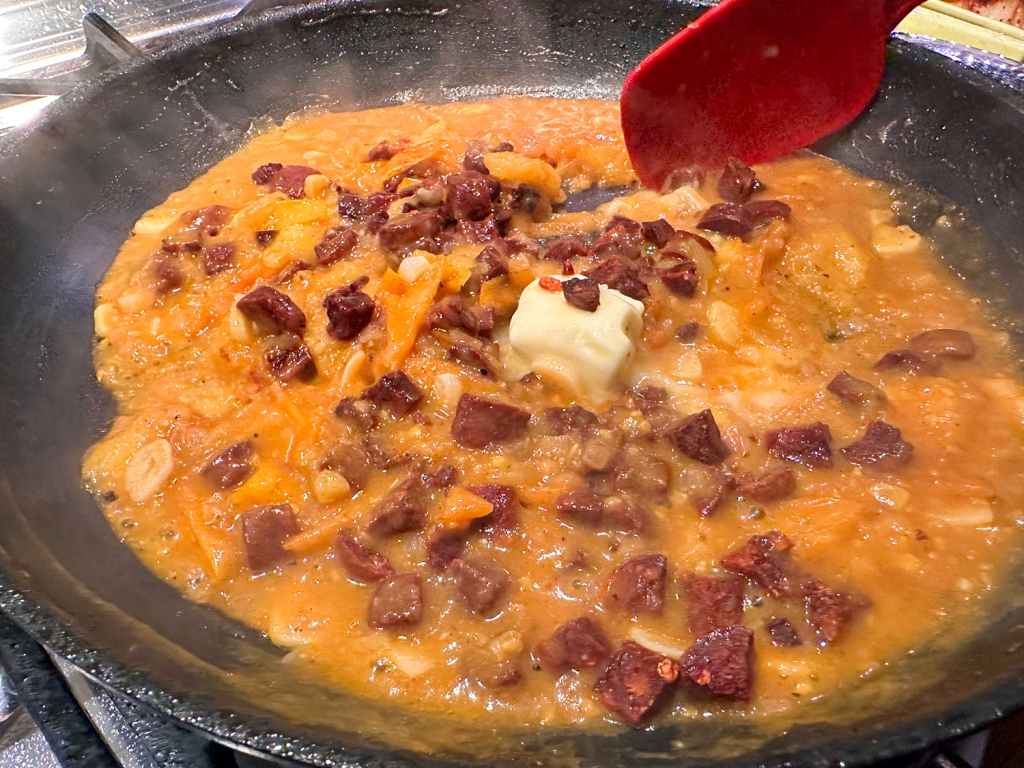
  4. Add ½ cup water and cook, stirring occasionally, until saucy, about 2 minutes. Reduce heat to medium; add chorizo and 2 Tbsp. unsalted butter and stir to melt butter. Add scallops, nestling into sauce browned side up, and cook until scallops are just cooked through, about 3 minutes.
  5. Divide scallops and sauce among shallow bowls; top each with chopped parsley and a pinch of paprika. Serve with 1 baguette, sliced, toasted.

http://www.lynnandruss.com

Recipe by Kendra Vaculin for Bon Appétit

Steak with Olive White-Wine Pan Sauce

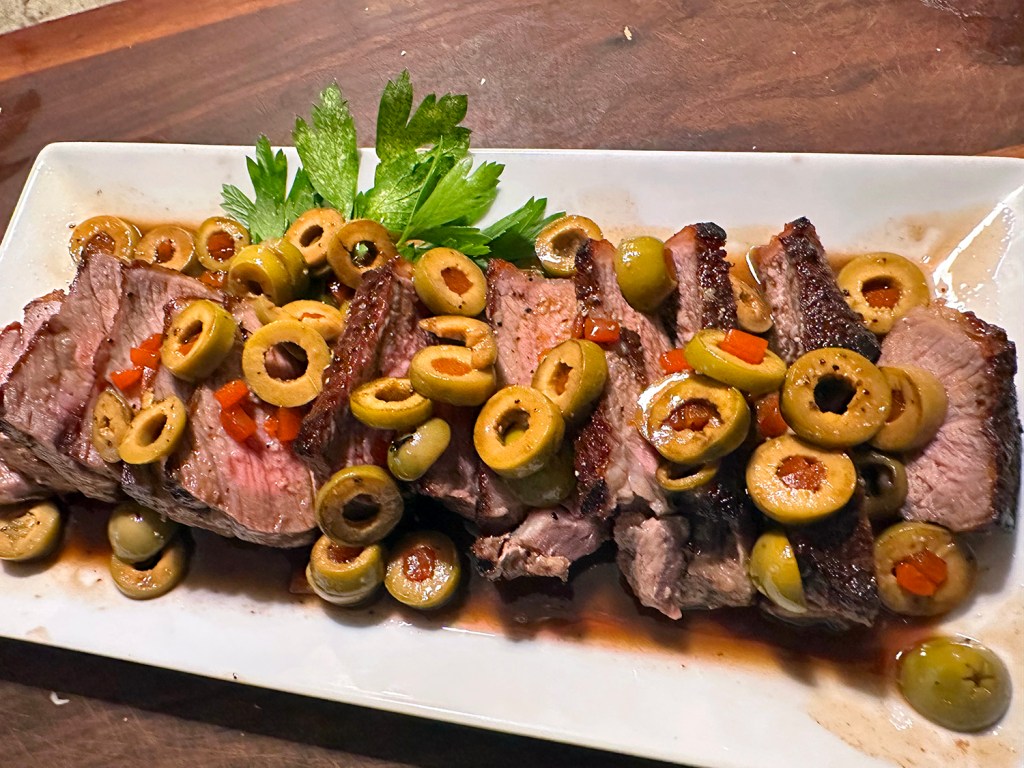
Craving a quick red meat meal? Rib-eye steaks are front and center here, while pimento-stuffed green olives and white wine provide a salty, briny component. With just the two of us for dinner, only one steak was necessary, but it was big and thick—we even had some leftovers. We did not cut back on the other ingredients, and intentionally used more than a half cup of the olives.

Oh, an addition to the recipe was dry-aging our steak. Dry-aging, improves flavor and texture while making cuts easier to cook simply and beautifully. Tenderization occurs when enzymes naturally present in the meat act to break down some of the tougher muscle fibers and connective tissues. A well-aged steak should be noticeably more tender than a fresh steak.

As you are well aware, dry-aged meat at a restaurant or grocery store can cost twice as much as its younger counterparts, but you can do it at home, better—and for free. Exposing meat to cold, circulating air for an extended period of time gently dehydrates it, concentrating flavor and increasing the ratio of fat to muscle. It’s best to dry-age a steak on a rack, uncovered, overnight and up to several days.

Don’t slice the steaks until they have rested for 10 minutes. Resting not only permits the meat to finish cooking with residual heat, it gives the muscle fibers a chance to relax, thereby allowing the juices forced to the surface during cooking to redistribute throughout meat. This results in less moisture loss during slicing.

A little history behind this recipe: This is a riff on a dish from the new edition of “Spain: The Cookbook” written by Simone Ortega and first published in Spain in 1972. The 1,080-recipe tome has since become a bible of Spanish home cooking. We use pimento-stuffed green olives to add pops of bright color and flavor to the white wine pan sauce. Serve with warm, crusty bread to soak up any sauce left on the plate.

Steak with Olive White-Wine Pan Sauce

  • Servings: 4-6
  • Difficulty: easy
  • Print

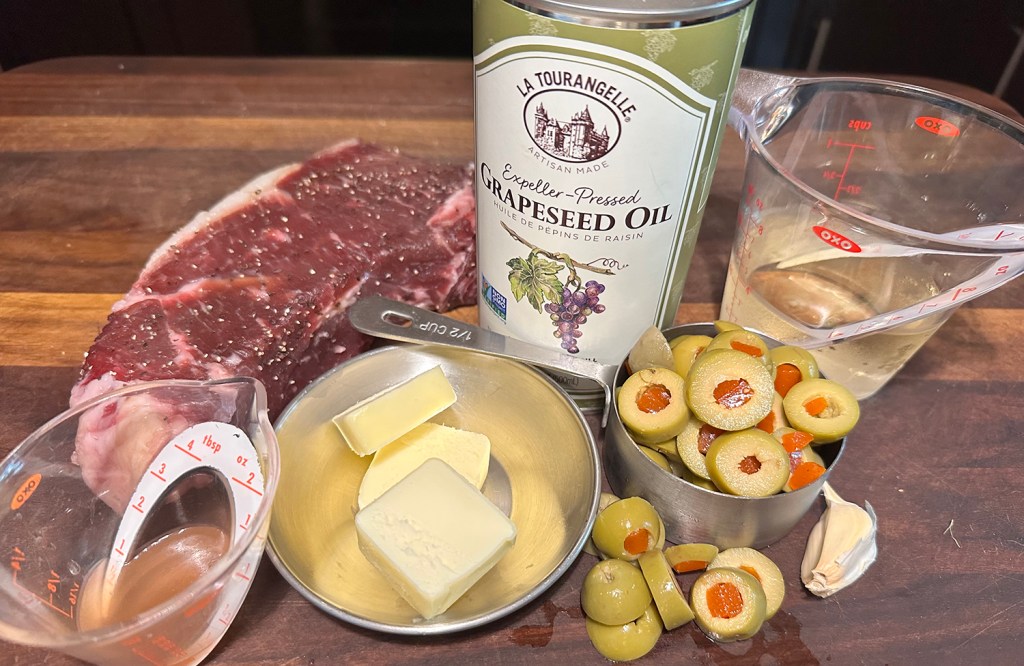
Ingredients

  • 2 1-lb. boneless ribeye steaks, each about 1 inch thick, trimmed and patted dry
  • Kosher salt and ground black pepper
  • 1 Tbsp. grapeseed or other neutral oil
  • 3 Tbsp. salted butter, cut into 1-Tbsp. pieces, divided
  • 1 medium garlic clove, smashed and peeled
  • ½ cup pimento-stuffed green olives, finely chopped, plus 1 Tbsp. olive brine
  • ½ cup dry white wine
  • 1 Tbsp. sherry vinegar

Directions

  1. Season the steaks on both sides with salt and pepper. If possible, dry age the steak on a rack, uncovered, overnight and up to several days.
  2. In a 12-inch skillet over medium-high, heat the oil until barely smoking.Add the steaks, reduce to medium and cook until well browned on the bottoms, 5 to 7 minutes.
  3. Flip and cook for 3 minutes, then add 1 tablespoon of butter and the garlic. Swirl the pan to distribute the butter and continue to cook until the second sides of the steaks are well browned, another 3 to 4 minutes. Transfer to a serving platter, tent with foil and let rest for 10 minutes.
  4. While the steaks rest, remove and discard the garlic, then set the pan over medium-high. Add the olives and cook, stirring, until fragrant, 30 to 60 seconds. Add the wine, bring to a simmer and cook, scraping up any browned bits, until the liquid has almost evaporated, about 3 minutes.
  5. Remove from the heat, stir in the olive brine, vinegar and remaining 2 tablespoons butter, then stir until melted. Remove from the heat, then taste and season with salt and pepper. Cover and set aside.
  6. After the steaks have rested, cut them on the diagonal into ¼- to ½-inch-thick slices. Transfer to a platter, pour over any accumulated juices and spoon on the sauce.

http://www.lynnandruss.com

Adapted from a recipe for Milk Street

Salmon with Avocado Sauce and Tomato-Cilantro Salsa

Milk Street borrows from Colombia’s take on guacamole—spiked with both lime juice and vinegar as well as fresh chilies—to create an easy, no-cook sauce for salmon fillets. A fresh tomato-cilantro salsa finishes the dish, adding a bright, acidic note to balance the rich, savory fish.

Don’t shy away from using the habañero chili. Its fruity flavor pairs perfectly with the avocado. It does give bold spiciness to the sauce, but the richness of the salmon keeps the heat in check. The recipe makes enough avocado salsa, so you could easily by 2-pounds* of salmon or more to feed more dinner guests.

For just the two of us, we purchased a one-pound piece of organic salmon and split it into two filets. Fresh corn on the cob and a hefty side salad rounded out the healthy, flavorful meal.

Seared Salmon with Avocado Sauce and Tomato-Cilantro Salsa

  • Servings: 4
  • Difficulty: easy
  • Print

Ingredients

  • 1 1/2 cups cherry or grape tomatoes, roughly chopped
  • 5 Tbsp. lime juice, divided, plus lime wedges, to serve
  • Kosher salt
  • 2 scallions, cut into 1-inch lengths
  • 1 Anaheim chili, stemmed, seeded, cut into rough 1-inch pieces
  • 1 habañero chili, stemmed and seeded
  • 2 Tbsp. white vinegar
  • 1 1/2 cups fresh cilantro leaves and tender stems, divided
  • 1 ripe avocado, halved, pitted, peeled and chopped
  • 4 6-oz. center-cut salmon fillets (each 1 to 1¼ inches thick), patted dry
  • 1 Tbsp. grapeseed or other neutral oil
  • 2 Tbsp. salted butter

Directions

  1. In a medium bowl, toss the tomatoes with 1 tablespoon of the lime juice and a pinch of salt. Set aside.
  2. In a blender, combine the scallions, both chilies, vinegar, 2 tablespoons of the remaining lime juice and ½ teaspoon salt. Blend until smooth, about 30 seconds. Add ¾ cup of the cilantro and the peeled avocado.
  3. With the blender running, stream in 3 tablespoons water and blend until smooth and creamy, about 1 minute, scraping the blender jar as needed; if needed, add up to 1 tablespoon more water to achieve the correct consistency. Set aside.
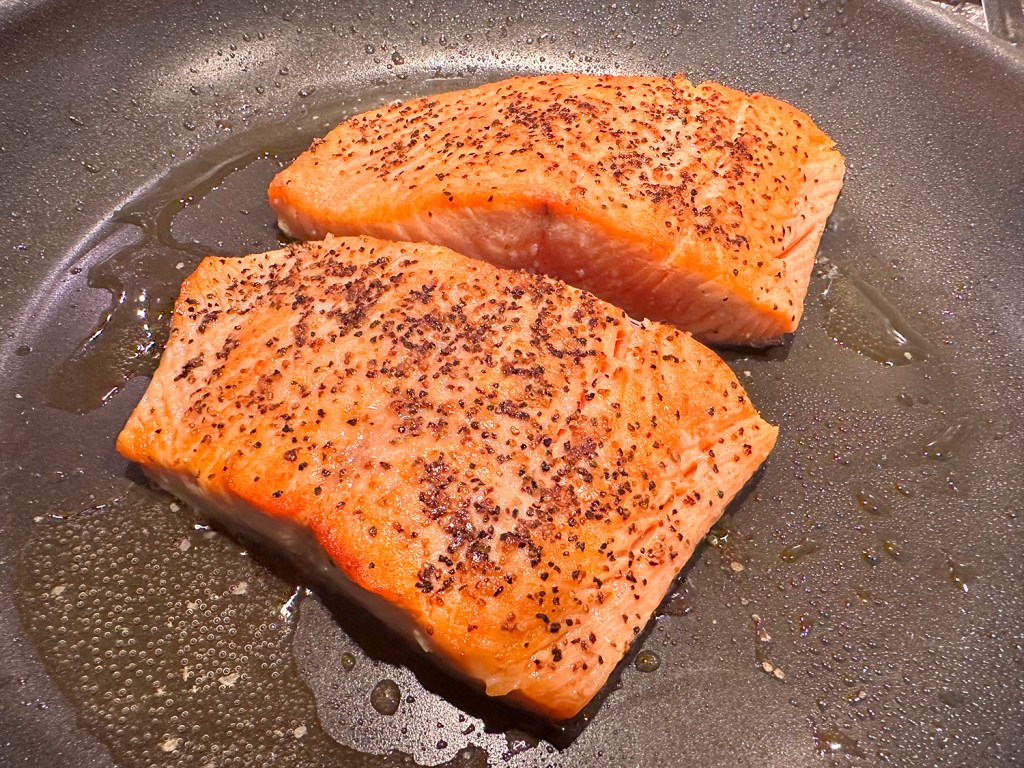
  4. Season the salmon on both sides with salt. In a 12-inch nonstick skillet over medium-high, heat the oil until shimmering. Add the fillets flesh side down, reduce to medium and cook until golden, about 4 minutes.
  5. Using a wide metal spatula, flip the fillets, add the butter and increase to medium-high. Once the butter stops foaming, spoon it over the fillets, adjusting the heat to prevent the butter from burning.
  6. Cook and baste the fish until the thickest parts reach 115°F to 120°F, or are nearly opaque when cut into, 2 to 3 minutes. Pour the remaining 2 tablespoons lime juice into the pan and baste the fillets once or twice more.
  7. With a wide metal spatula, transfer the fillets to individual plates. Spoon about 2 tablespoons avocado sauce over each fillet.
  8. Add the remaining ¾ cup cilantro to the tomatoes and toss, then spoon over the salmon. Serve the remaining avocado sauce on the side, along with lime wedges.

http://www.lynnandruss.com

Recipe from Milk Street

Laotian Grilled Chicken (Ping Gai)

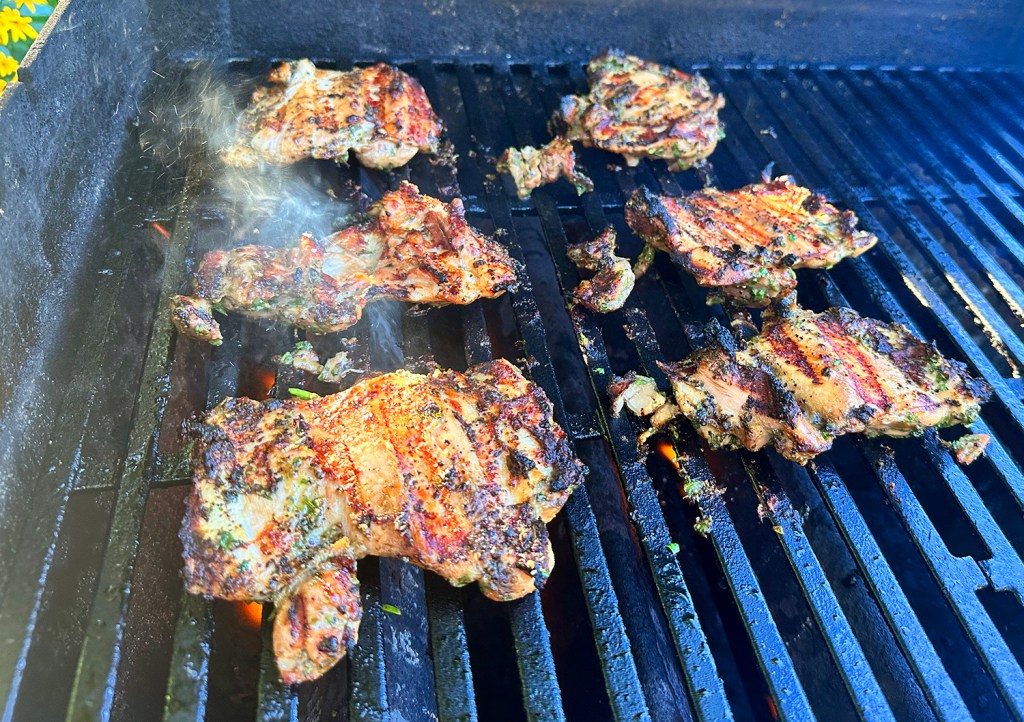
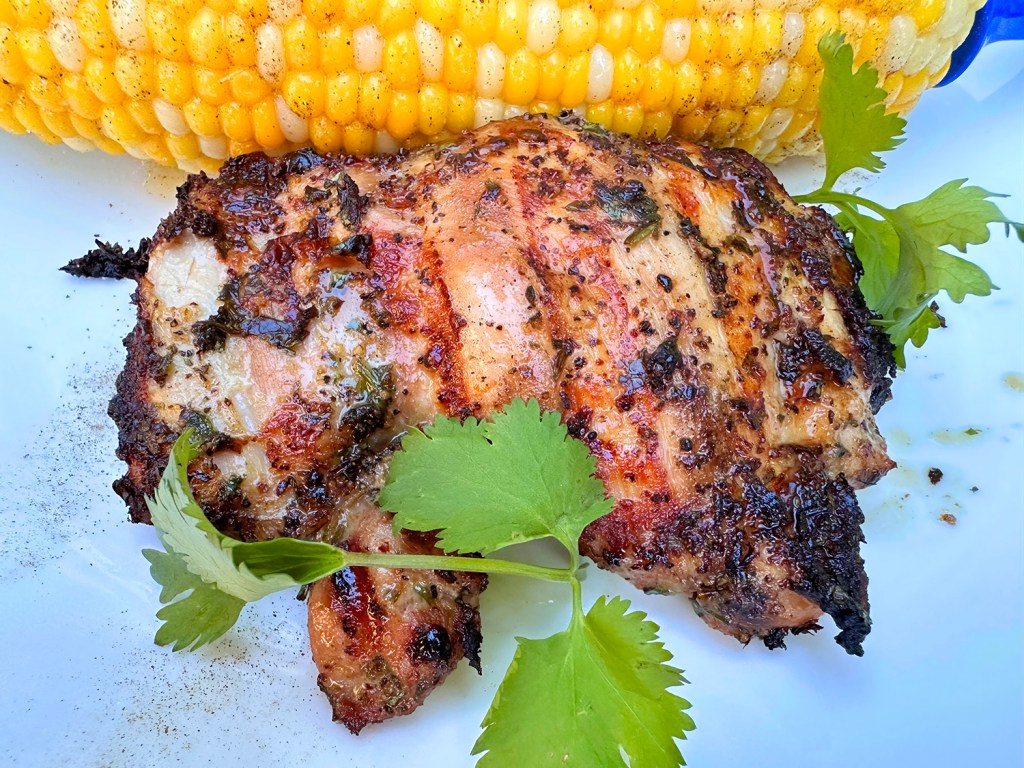
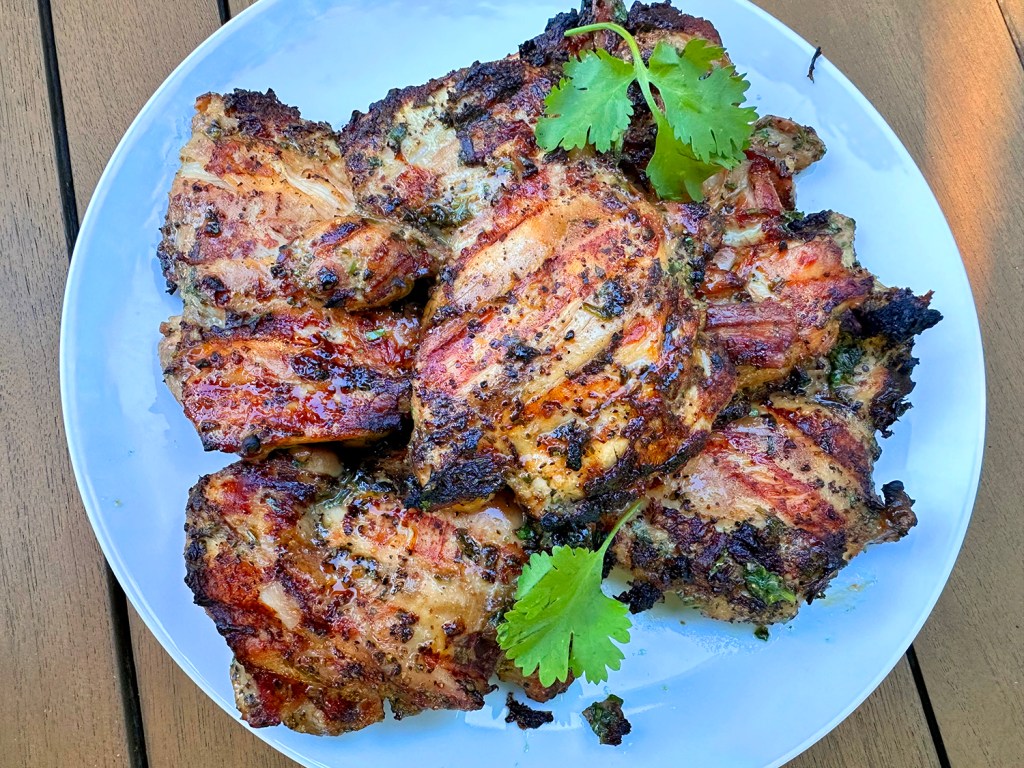
During grilling season (or all year for those in more temperate climates), it’s good to have several chicken recipes in waiting. This one bursts with flavor, and only takes about 40 minutes once the poultry has marinated for 4-12 hours.

“This particular ping gai (Laotian for ‘grilled chicken’) recipe seems to have originated from the Queen Mother Cafe in Toronto, so some North-Americanization may have occurred. But rest assured, this is at least twice as good as your average grilled chicken, North American or otherwise. Generous amounts of freshly ground pepper and chopped cilantro are the main players in the marinade, while a sweet, garlicky dipping sauce is the perfect accompaniment.”

We chose to cook just six chicken thighs for the two of us, but kept the amount of other ingredients the same. It would have fed three, with two breasts per diner. Feel free to increase the number up to ten, depending how many guests will be eating.

Fresh corn is king at this time of year, and our garden was bursting with string beans. They paired wonderfully with the grilled chicken.

Laotian Grilled Chicken (Ping Gai)

  • Servings: 6-8
  • Difficulty: easy
  • Print

Ingredients

For the Marinade:

  • 1 Tbsp. whole black peppercorns, or more to taste
  • 1 large bunch fresh cilantro stems and leaves
  • 3 Tbsp. oyster sauce
  • 2 Tbsp. soy sauce
  • Tbsp. fish sauce
  • 2 Tbsp. vegetable oil
  • 2 pinches cayenne pepper
  • 6-10 boneless, skinless chicken thighs

For the Dipping Sauce:

  • ⅔ cup seasoned rice vinegar
  • 1 lime, juiced
  • 4 cloves garlic, crushed
  • 1 Tbsp. sambal oelek (chile paste)
  • 1 Tbsp. fish sauce
  • ¼ cup freshly chopped cilantro
  • 2 Tbsp. honey, or more to taste

Directions

  1. Grind peppercorns coarsely using a mortar and pestle, electric grinder, or spice mill.
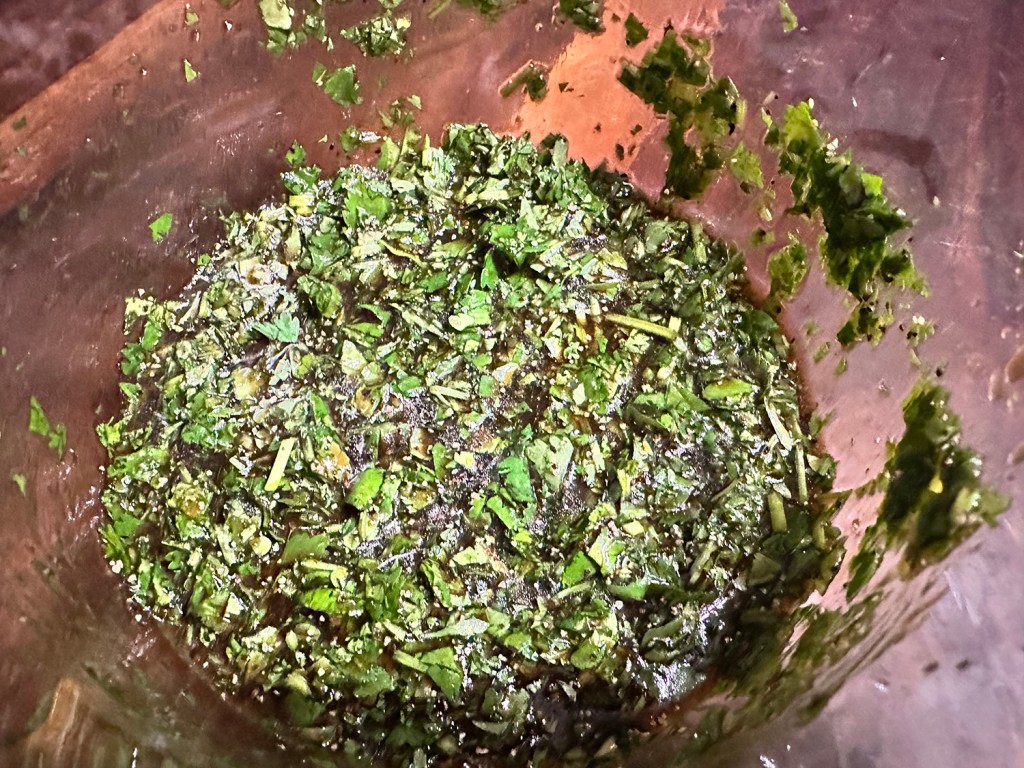
  2. Chop cilantro finely and transfer to a mixing bowl. Stir in the freshly ground pepper, oyster sauce, soy sauce, fish sauce, oil, and cayenne. Add chicken thighs and toss by hand until completely coated. Cover with plastic wrap and marinate in the fridge for 4 to 12 hours.
  3. Combine rice vinegar, lime juice, garlic, sambal, fish sauce, cilantro, and honey to make the dipping sauce. Refrigerate until ready to use.
  4. Preheat grill for medium- to medium-high heat and lightly oil the grate.
  5. Place chicken thighs on the grill, discarding any excess marinade. Cover and grill until thighs spring back to the touch, 5 to 6 minutes per side. An instant-read thermometer inserted into the center should read at least 155 degrees F (68 degrees C). Slice and serve with the dipping sauce.

http://www.lynnandruss.com

Recipe from Chef John for All Recipes

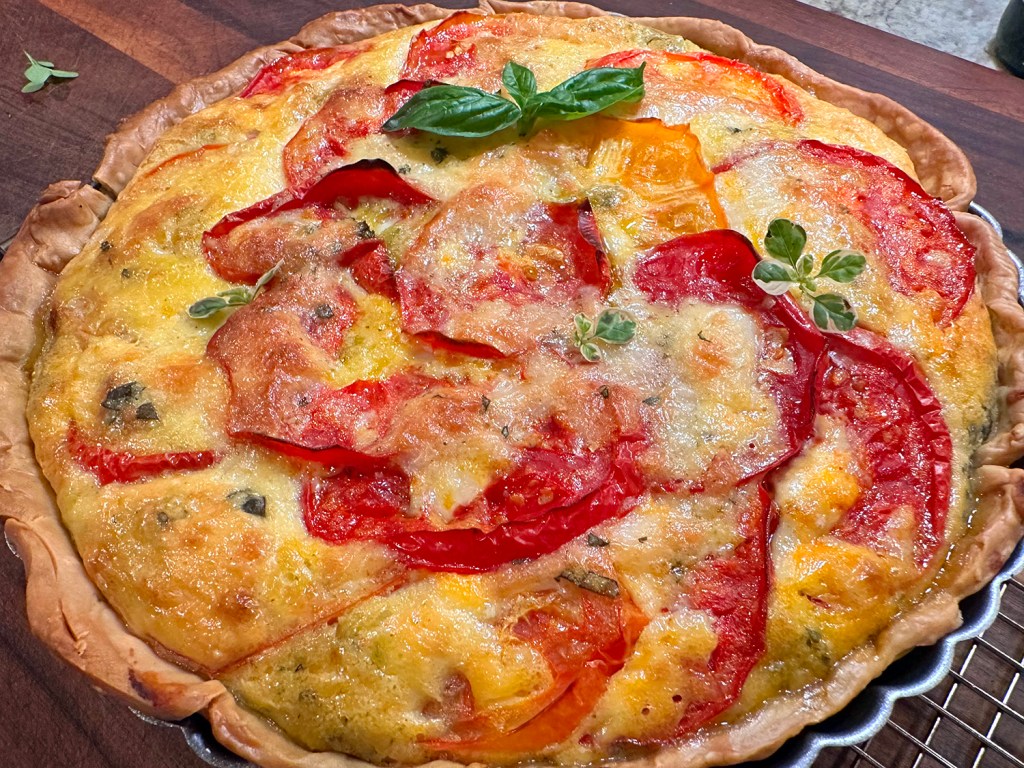
Heirloom Tomato Tart

Got Tomatoes? When it is tomato season, heirlooms are front and center in our household. At first glance, some heirloom tomatoes may seem flawed, but it’s actually their uniformly red counterparts who are the genetic deviants of the tomato family.

According to NY Times Cooking, decades ago, many businesses decided to prioritize cookie-cutter-like hybrid tomatoes, which grow year-round and can survive a long, bumpy journey. It left heirloom tomatoes on the wrong side of the deal. The varieties that remain have a shorter shelf life and are relegated to just a few months of summer, but they’re sweeter with a more robust flavor. This tart celebrates juicy, vibrant tomatoes in a cheesy, herby, custard-filled, flaky crust, with each bite punctuated with pesto.

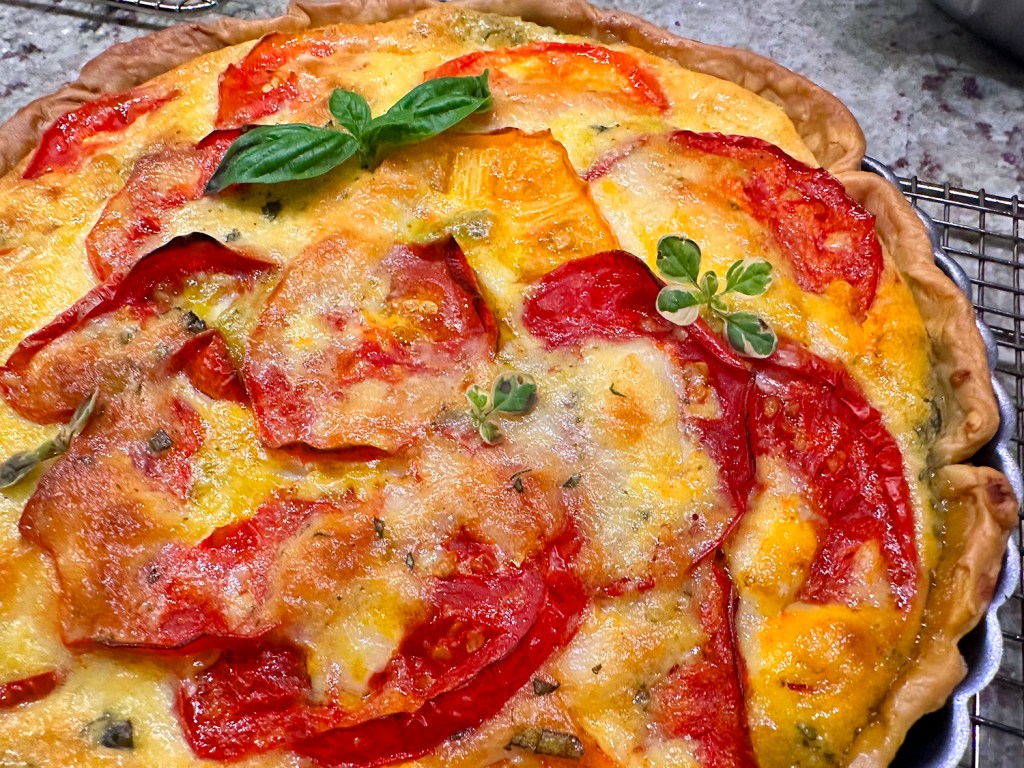
Due to the final results, we made numerous changes and made another tart. By roasting the tomato slices first, much of the moisture evaporates and the tomato flavor is more concentrated. We doubled the amount of shredded mozzarella and added it to the custard, layering the tomatoes on top of that.

The second pie was firmer, and these new instructions are noted below. The tart will feed 4 as a main course with a salad; 6-8 as a starter course.

Heirloom Tomato Tart

  • Servings: 4-8
  • Difficulty: easy
  • Print

Ingredients

  • Dough for a 9-inch single crust pie, or use store-bought, rolled into an 11-inch round
  • 1½ lbs. ripe heirloom tomatoes (about 4 medium), cored and sliced ¼” thick
  • ¼ cup store-bought pesto, such as Classico
  • 1½ cup shredded mozzarella (about 6 oz.)
  • 1 Tbsp. finely chopped fresh basil
  • 1 Tbsp. finely chopped fresh oregano
  • 3 large eggs
  • ⅓ cup heavy cream
  • ½ tsp. kosher salt
  • ½ tsp. freshly ground black pepper

Directions

  1. Heat oven to 375 degrees. Cut the tomatoes into 1/4-thick slices. Salt tomato slices, brush with olive oil, place on sheet pan lined with foil and roast in the oven for 30 minutes, turning pan once halfway through.
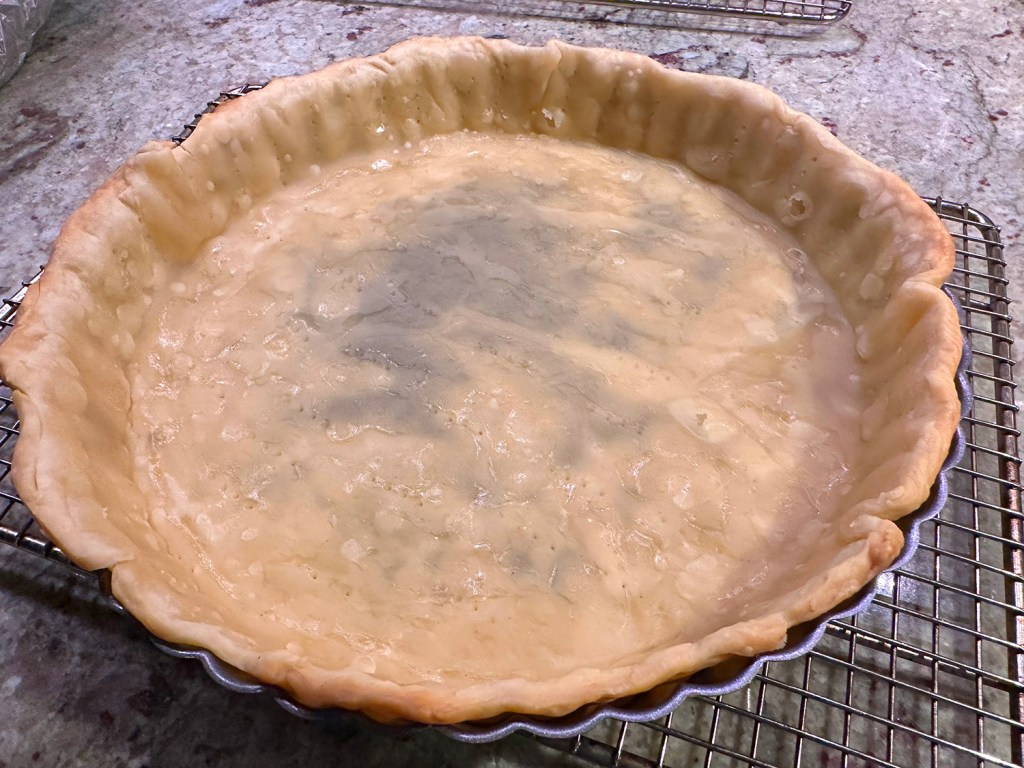
  2. While tomatoes roast, fit the rolled-out dough into a 9-inch tart pan, allowing the edges to rise about ¼ inch above the rim of the pan. Prick the dough all over with a fork.
  3. Line the dough with aluminum foil and fill with pie weights or dried beans. After the tomatoes have been roasting for 15 minutes, place the crust in the oven and bake for 15 minutes until beginning to brown at the edges. Remove from the oven to cool slightly. Remove tomatoes from the oven and allow them to cool slightly. Carefully remove the foil and weights from the crust.
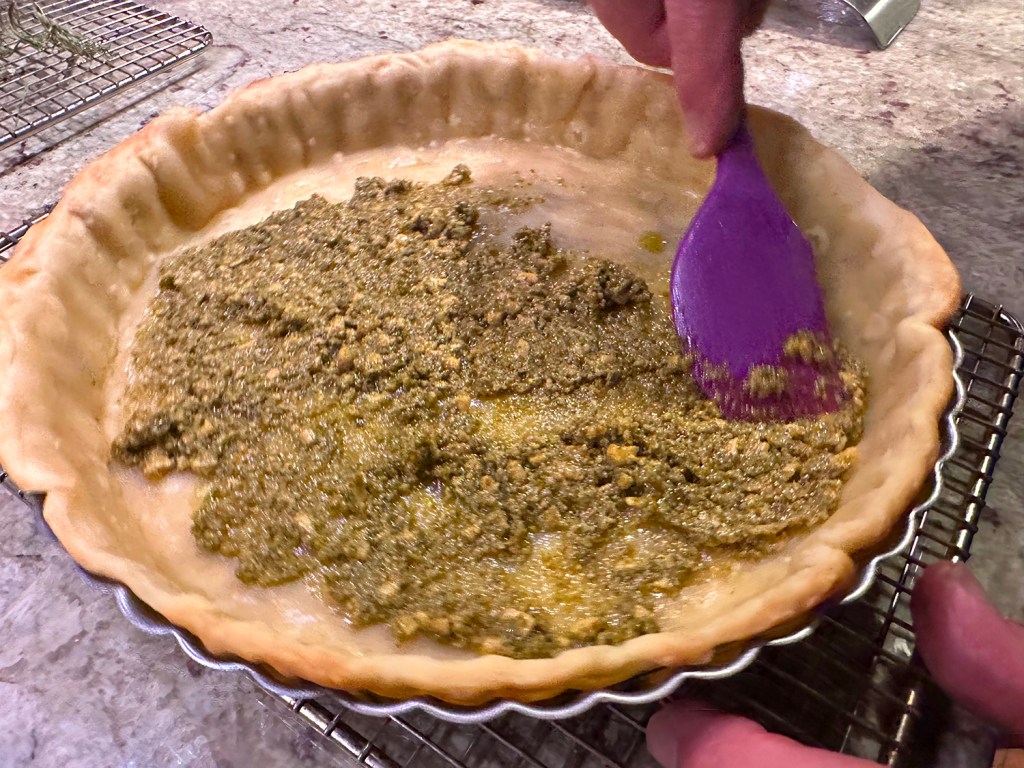
  4. Spread ¼ cup pesto in an even layer over the par-baked tart crust. Sprinkle the fresh basil and oregano over the pesto.
  5. In a medium bowl, prepare the custard: Whisk together the eggs, cream, salt and pepper; add the shredded mozzarella and stir to combine.
  6. Pour most of the custard over the pesto and herbs then place the sliced tomatoes evenly over the custard in overlapping concentric circles. Spoon on remaining custard in spots on top of tomatoes.
  7. Swirl the pan to evenly distribute the liquid. Bake until the filling is set and won’t jiggle when shaken, about 35 minutes.
  8. Remove from the oven and let cool for 15-20 minutes to solidify. This tart can also be served at room temperature.

http://www.lynnandruss.com

Loosely adapted for a recipe by Vallery Lomas for NYTimes Cooking

Braised Cauliflower with Garlic and Scallions

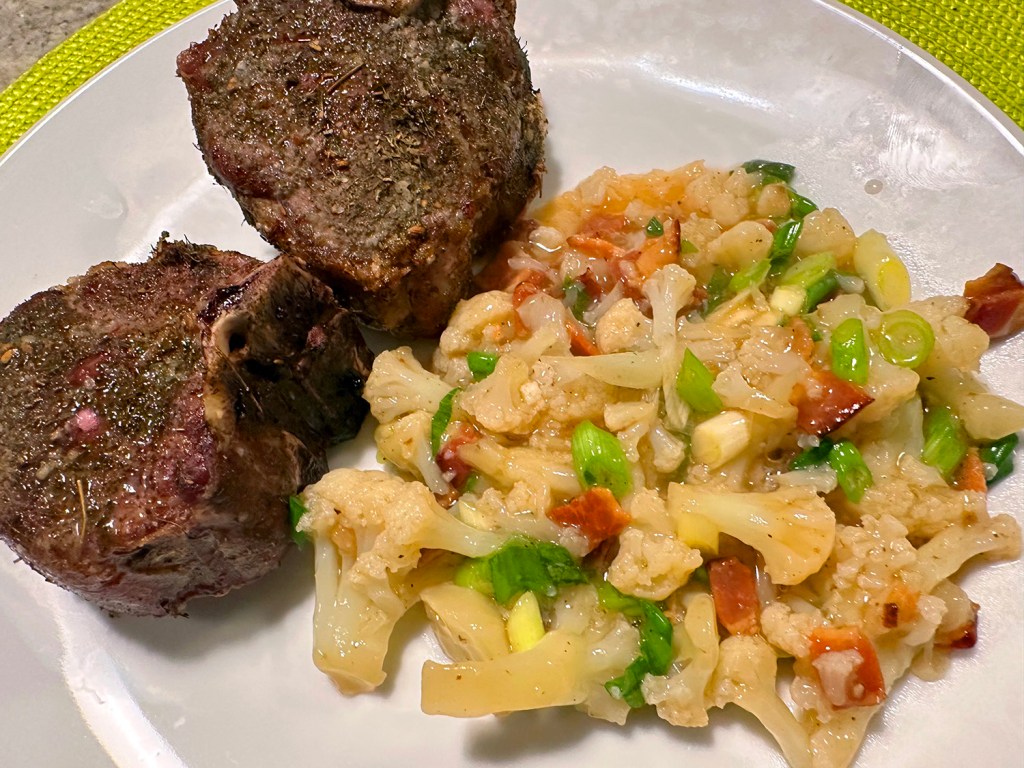
Looking for a unique and tasty side dish? Cauliflower tends to be quite bland on its own, but perks up when seasoned with any number of different flavorings. Known as the chameleon of the culinary world, cauliflower adapts well to everything from “rice” to pizza crusts. But no matter how you use it, the key is pairing it with high impact ingredients.

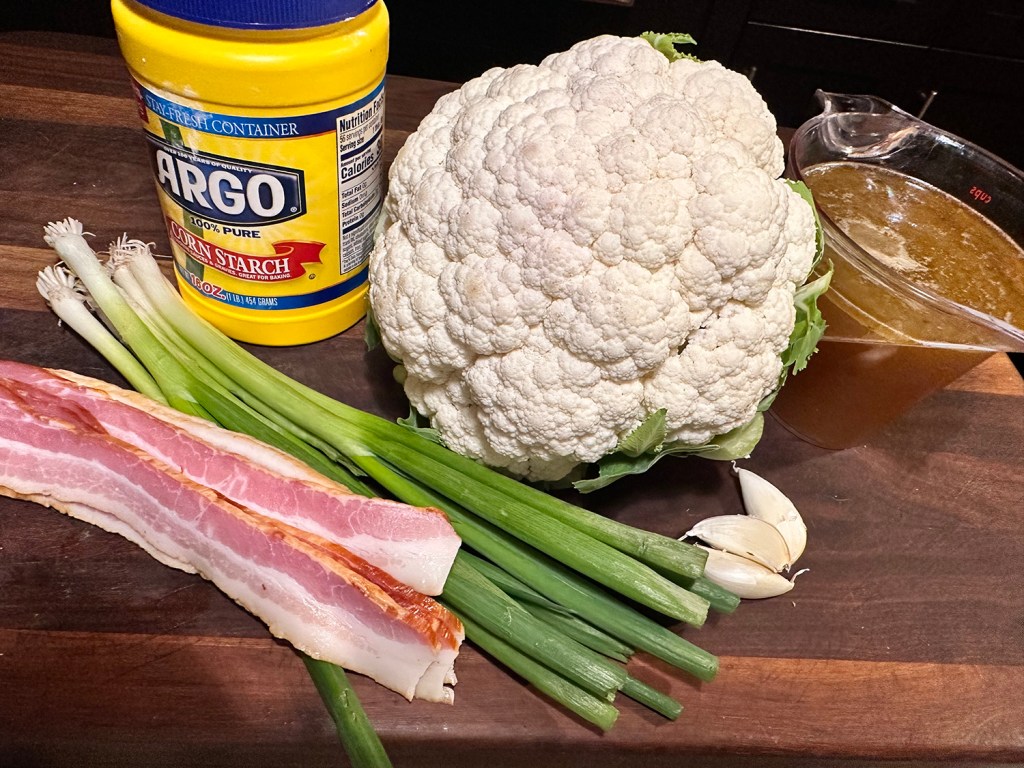
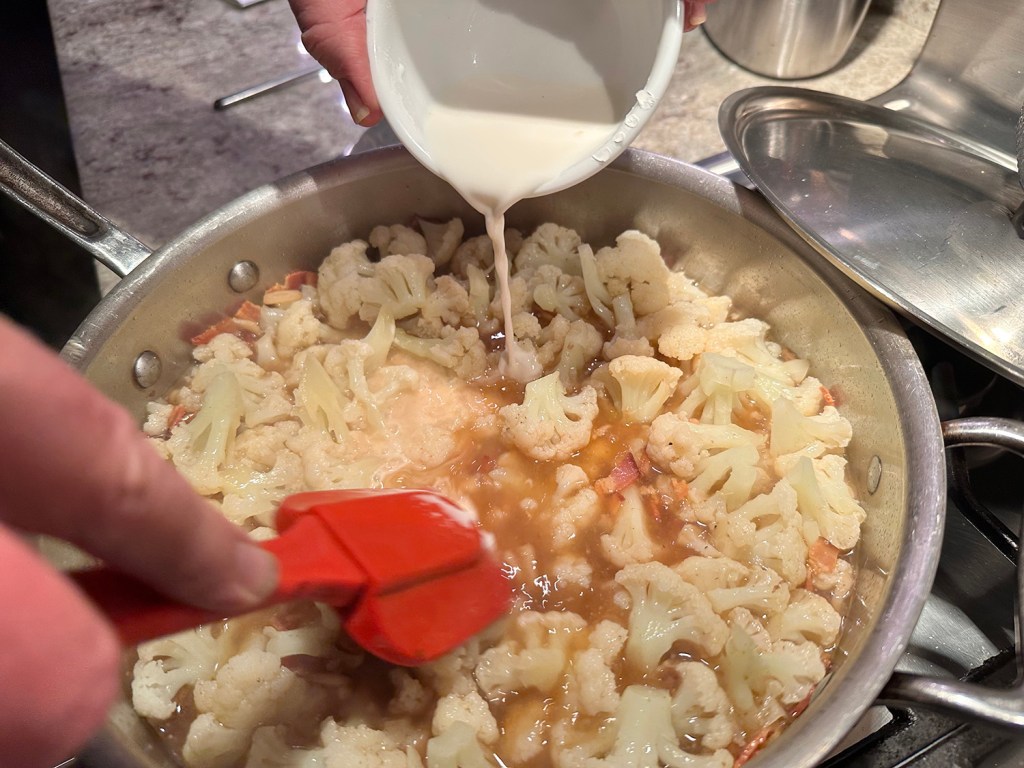
Here, salty, smoky bacon and lightly toasted garlic bring loads of flavor to cauliflower simmered in chicken broth. At the end of cooking, the broth is thickened with a cornstarch slurry to create a velvety sauce. A full bunch of scallions, thinly sliced and stirred in to finish, adds punchy allium flavor.

According to Milk Street, this method gently—and quickly—cooks the chopped veggie, ensuring the pieces are toothsomely tender. As the ingredients mingle, complex layers of savory, sweet and vegetal permeate all the nooks and crannies of the florets. To finish the dish, a smattering of chopped scallions rounds out the flavors, balancing the savory notes with oniony freshness.

In the end, while the flavor profile was spot on, we both thought that it was too liquidy, more soupy if you will. The ingredients list below is adjusted to reflect cutting back the amount of broth and corn starch by half. This should give the cauliflower more of a glaze than a broth.

Braised Cauliflower with Garlic and Scallions

  • Servings: 4
  • Difficulty: easy
  • Print

Ingredients

  • 4-6 oz. thick-cut bacon, cut crosswise into ½-inch pieces
  • 3 medium garlic cloves, thinly sliced
  • 1 2- to 2½-lb. head cauliflower, trimmed and cut into 1-inch florets
  • 1 cups chicken broth, preferably homemade
  • 1 Tbsp. cornstarch
  • Kosher salt and ground black pepper
  • 1 bunch scallions, thinly sliced on the diagonal
  • Optional garnish: Chili oil OR hot sauce

Directions

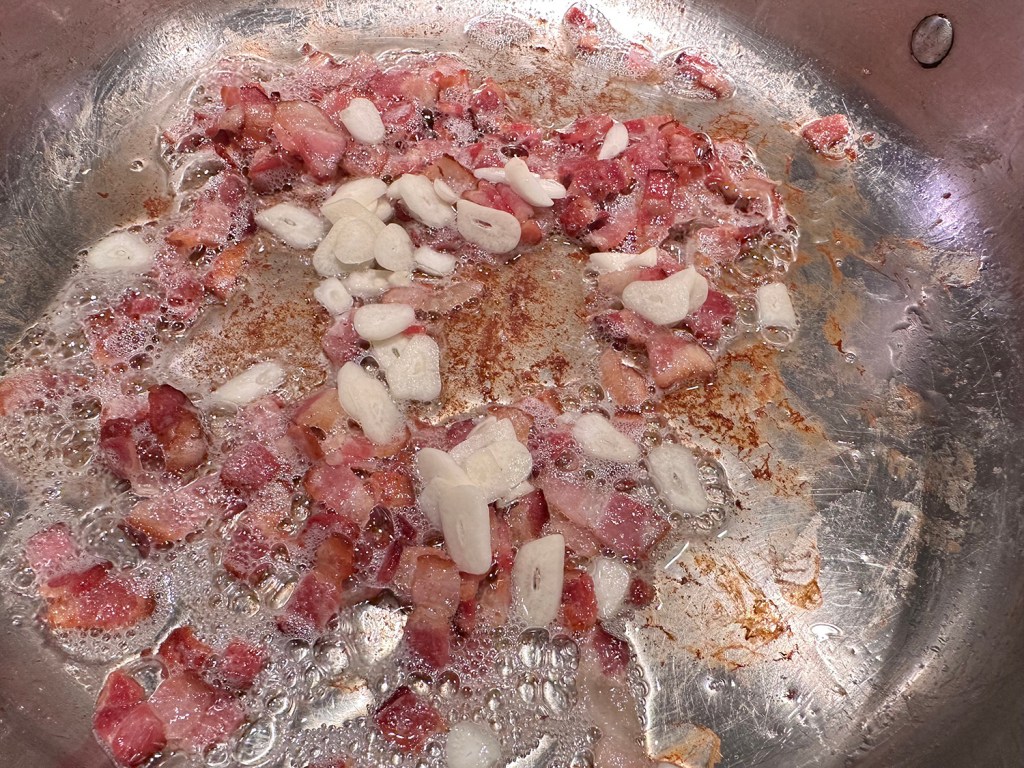
  1. In a 12-inch skillet, cook the bacon, stirring occasionally, until browned and crisp. Add the garlic and cook, stirring, until lightly browned.
  2. Stir in the cauliflower and broth. Cover, bring to a simmer and cook until the florets are tender.
  3. In a small bowl, whisk together the cornstarch and 1 tablespoon water. Stir the cornstarch slurry into the cauliflower mixture and cook, stirring, until the sauce returns to a simmer and has thickened.
  4. Season with salt and pepper, then stir in the scallions.

http://www.lynnandruss.com

Recipe by Calvin Cox for Milk Street

Greek Tomato Salad

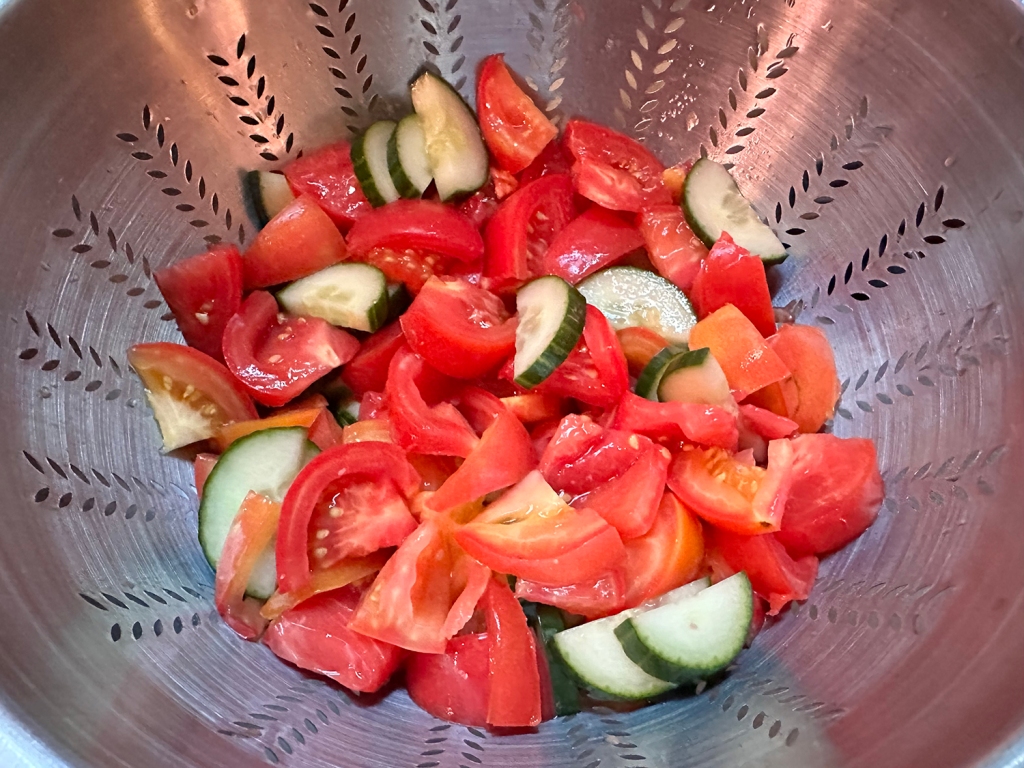
This was a last minute decision after realizing our leaf lettuce had seen better days. Not in the mood to run to the food store, The Hubs did a quick online search to find a salad that would utilize on-hand ingredients. We were after a vibrant salad full of ripe, juicy tomatoes; crisp cucumbers; and lots of herbs. To prevent the cukes and tomatoes from getting soggy, the trick is to salt the vegetables in a colander, which helps draw out excess moisture and seasons them at the same time.

Sliced pepperoncini and shallot were briefly marinated in a pungent vinaigrette before tossing in the seasoned vegetables, torn fresh mint, and chopped fresh oregano. A sprinkling of salty, briny feta is the perfect finishing touch. 

Feeling that the finished salad was a bit too mint-forward, we reduced the amount of mint and increased the amount of oregano. Use your own judgement as to how much of each herb to use based on your family’s preferences.

Greek Tomato Salad

  • Servings: 4-6
  • Difficulty: easy
  • Print

Ingredients

  • 1 ½ lbs. ripe tomatoes, cored
  • ½ English cucumber, halved lengthwise and sliced crosswise ⅛ inch thick
  • 1 ½ tsp. table salt, divided
  • 5 Tbsp. extra-virgin olive oil
  • 2 Tbsp. red wine vinegar
  • 1 Tbsp. lemon juice
  • ½ tsp. pepper
  • ⅓ cup thinly sliced pepperoncini
  • 1 shallot, sliced into thin rings
  • 1 Tbsp. fresh mint leaves, torn
  • ¼ cup chopped fresh oregano
  • 4 oz. feta cheese, crumbled (1 cup)

Directions

  1. Cut tomatoes into ½-inch-thick wedges, then cut wedges in half crosswise. Toss tomatoes, cucumber, and 1 teaspoon salt together in bowl; transfer to colander and let drain for 30 minutes.
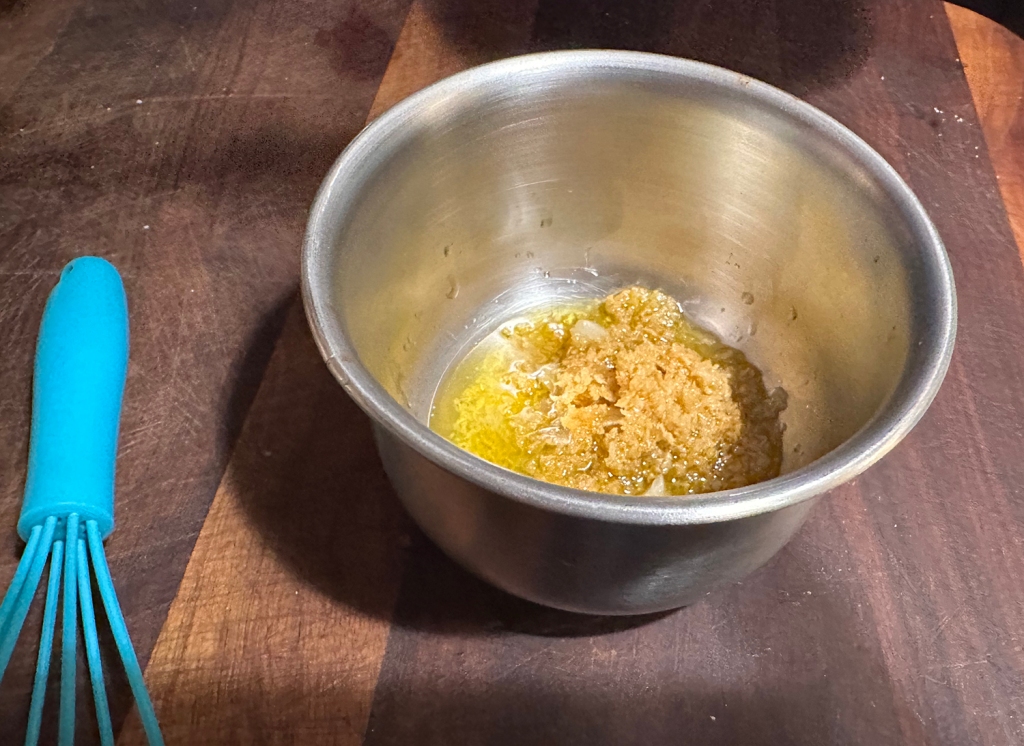
  2. While vegetables drain, whisk oil, vinegar, lemon juice, pepper, and remaining ½ teaspoon salt together in large bowl. Add pepperoncini and shallot and let sit until slightly softened, about 15 minutes.
  3. Add mint, oregano, and drained vegetables to bowl with dressing and toss to combine. Season with salt and pepper to taste. Transfer to platter and sprinkle with feta. Serve.

http://www.lynnandruss.com

Recipe by America’s Test Kitchen

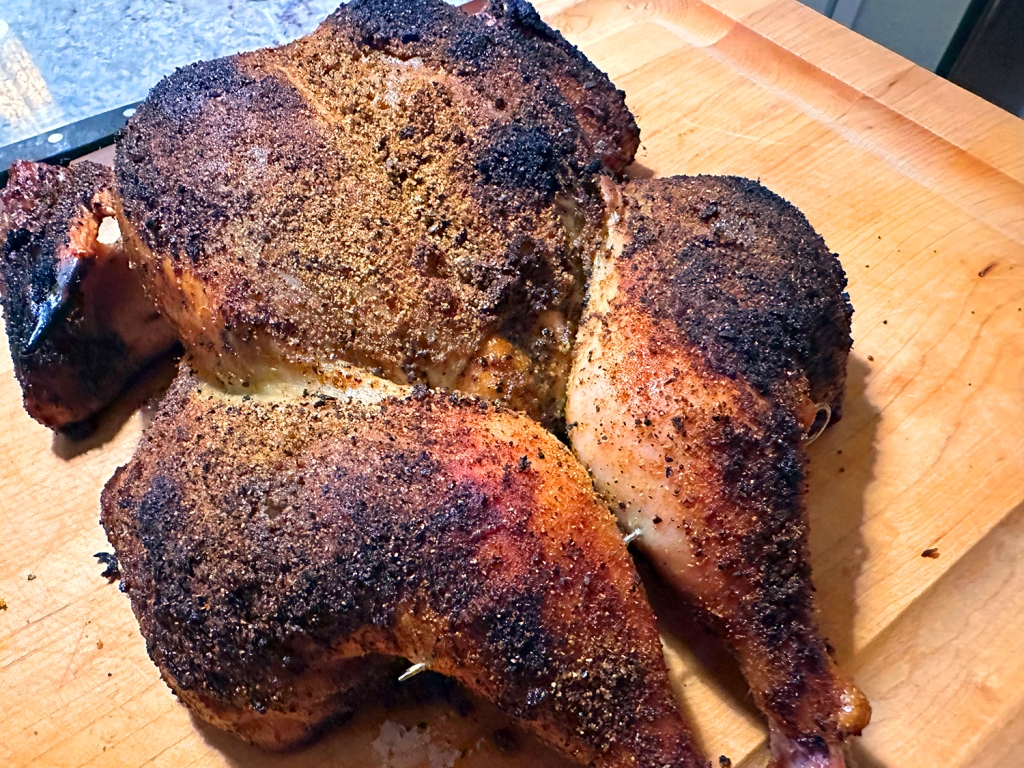
Iraqi-Spice Crusted Chicken

This just sounded delicious from the moment we started reading the recipe. To shorten the very long list of spices that typically make up the aromatic rub for traditional Iraqi grilled chicken, Milk Street reached for both curry powder and garam masala. These two Indian seasoning blends add up to about a dozen different spices at play in this recipe.

Ground sumac in the rub lends the chicken earthy, citrusy notes and, along with the paprika, a deep, brick-red hue. Spatchcocked and grilled, the bird cooks in under an hour and is rich and complexly flavored, with smokiness from the grill.

Well, ours started on the hot grill but within 15 minutes of placing the bird on the grates, Mother Nature came roaring in with a wicked storm. Plan B, of roasting the chicken in a 450° oven was the second method of choice. It still ended up super juicy and bursting with flavor. To complete the meal we served fresh corn on the cob and a tomato salad.

Many supermarkets now carry ready-to-cook spatchcocked chickens. So if you are a little hesitant to do it yourself, save yourself a bit of aggravation and buy one. We like to get the whole bird for the extra body parts (neck, back, hearts, etc.) to make homemade chicken stock.

One step not in the original recipe, but ensures juicy white meat, is brining the chicken in a mixture of water, salt and sugar in a ziploc bag for 2, or up to 4 hours. See instructions below.

BTW, don’t forget to open the grill vents, both on the bottom of the grill and on the lid, if you’re using charcoal. This is will allow airflow so the fire does not extinguish during the covered cooking time.

Iraqi-Spice Crusted Chicken

  • Servings: 4
  • Difficulty: easy
  • Print

Ingredients

  • 2½ Tbsp. extra-virgin olive oil, divided
  • 3 medium garlic cloves, grated
  • 1 Tbsp. ground sumac
  • 2 tsp. ground coriander
  • 2 tsp. curry powder
  • 1 tsp. garam masala
  • 1 tsp. sweet or hot paprika
  • ¾ tsp. ground cumin
  • ½ tsp. ground cardamom
  • Kosher salt and ground black pepper
  • 1 whole chicken, about 4 lbs.
  • Lemon wedges, to serve

For Brine

  • 1 qt. cold water
  • 6 Tbsp. table salt
  • 6 Tbsp. white sugar

Directions

  1. In a small skillet over low, combine 1½ tablespoons of oil and the garlic. Cook, stirring frequently, until fragrant and sizzling, but not browned, about 2 minutes. Transfer to a small bowl and set aside. In another small bowl, stir together the sumac, coriander, curry powder, garam masala, paprika, cumin, cardamom, 1 tablespoon salt and 1 teaspoon pepper. Add 2 tablespoons of the spice mixture to the garlic oil and stir to form a paste.
  2. To Spatchcock: Place the chicken breast down on a cutting board. Using sturdy kitchen shears, cut along both sides of the backbone, from top to bottom; remove and discard the backbone (or save to make broth).
  3. To Brine: Stir sugar and salt into water until dissolved. Brine spatchcocked chicken in mixture for 2-4 hours. Drain, rinse, and dry chicken with paper towels before cooking.
  4. Open up the chicken, then turn it skin up. Use the heel of your hands to press down firmly on the thickest part of the breast until the wishbone snaps. Loosen the skin over the chicken’s breasts and thighs by gently working your fingers between the skin and the flesh. Using your fingers, evenly distribute the garlic-spice paste under the skin and rub it into the flesh. Sprinkle the remaining spice mixture evenly on both sides of the chicken, patting gently to help it adhere. Let stand uncovered at room temperature for about 45 minutes.
  5. Prepare a grill for indirect, high-heat cooking. For a charcoal grill, spread a large chimney of hot coals evenly over one side of the grill bed; open the bottom grill vents and the lid vent. For a gas grill, turn all burners to high. Heat the grill, covered, for 5 to 10 minutes, then clean and oil the cooking grate.
  6. Insert an 8-inch metal or wooden skewer laterally through one of the chicken’s drumsticks and into the other to hold the legs in place. Tuck the wing tips to the back. If using a gas grill, leave the primary burner on high and turn off the other burners. Set the chicken skin up on the cooler side of the grill, legs facing the heat. Cover and cook for 25 minutes.
  7. Using tongs, rotate the chicken to bring the breast side closest to the heat. Cover and cook until the thickest part of the breast reaches 160°F and the thighs reach 175°F, another 25 to 35 minutes.

http://www.lynnandruss.com

Recipe by Milk Street
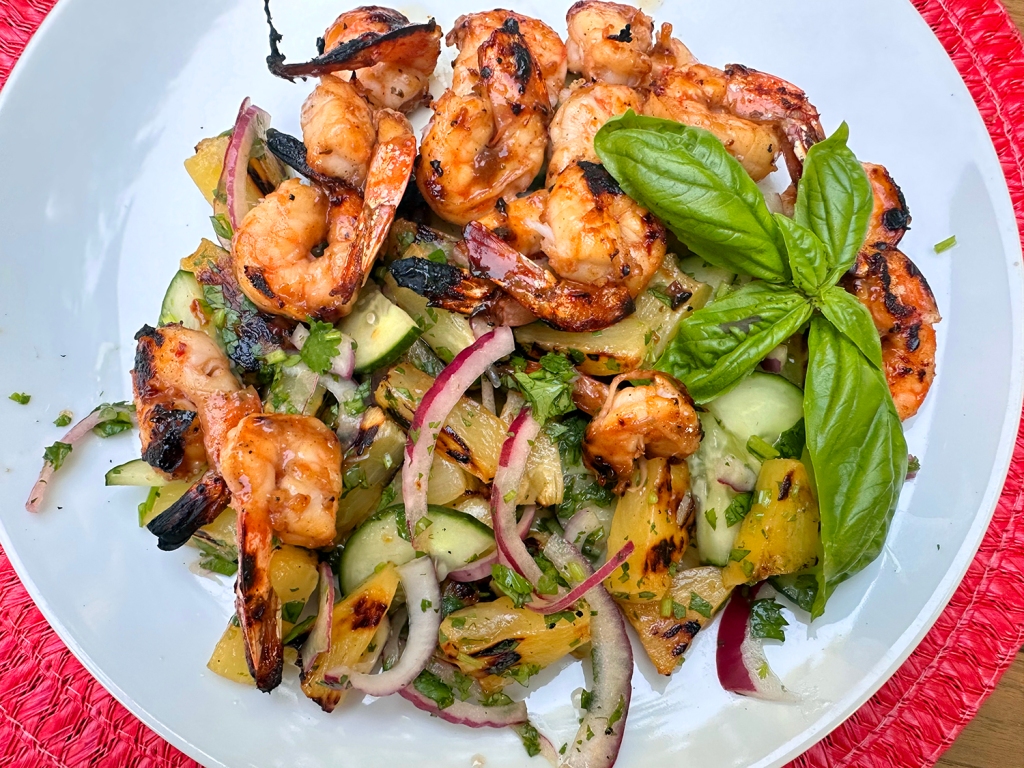
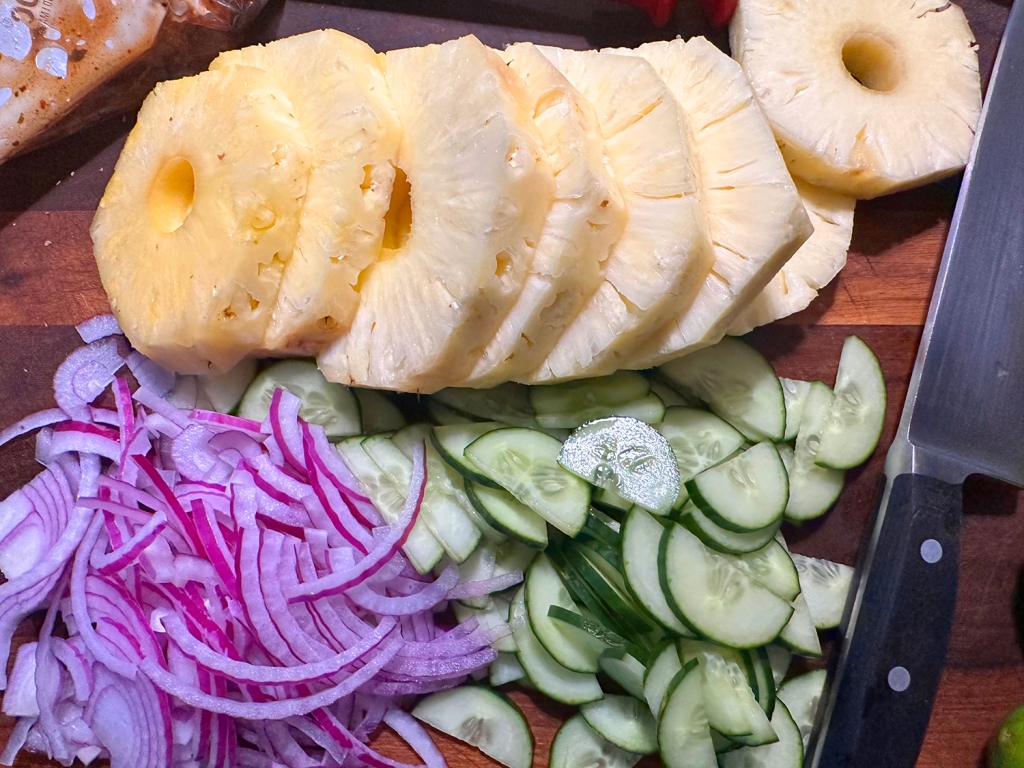
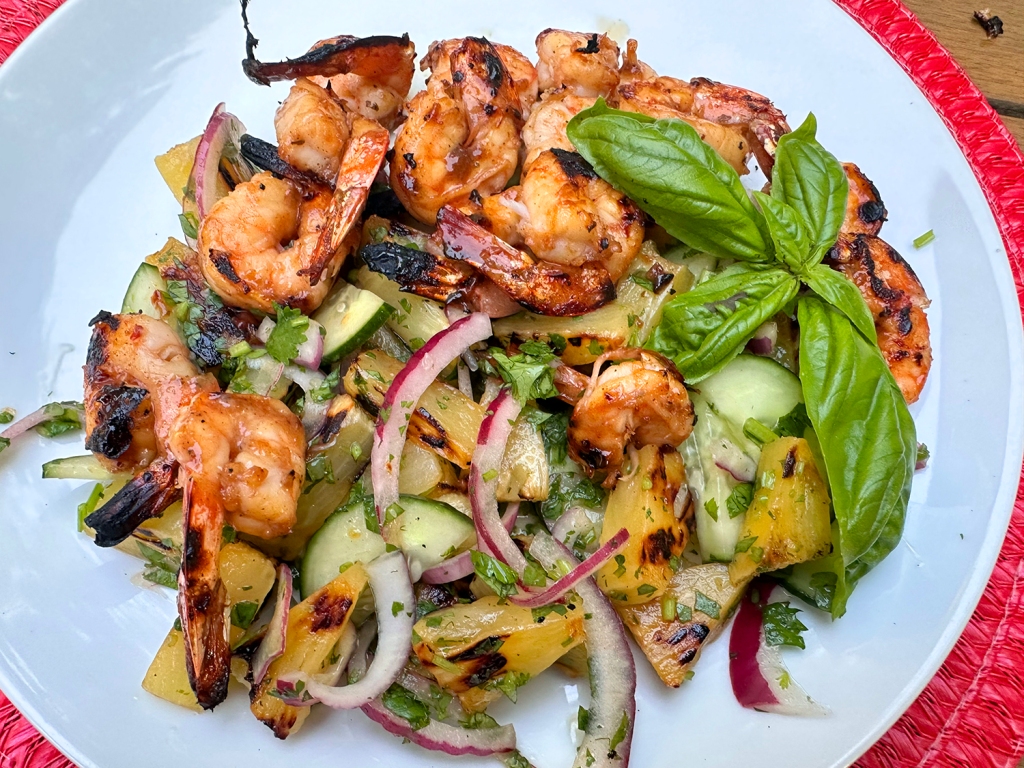
Jerk Shrimp with Pineapple Salad

If you have ever been to the Caribbean islands, then you must have had an encounter with jerk seasoning. Commonly recognized as a hallmark of Caribbean cuisine, jerk shrimp stands alongside jerk chicken as one of Jamaica’s signature dishes.

According to the Bon Appétit article, many recipes for this bright, summery grilled shrimp dinner start with a homemade jerk seasoning marinade (a mixture of puréed Scotch bonnet peppers, allspice, ginger, and a host of other aromatics that might include bell peppers, habaneros, soy sauce, jalapeños, brown sugar, fresh thyme, and more).

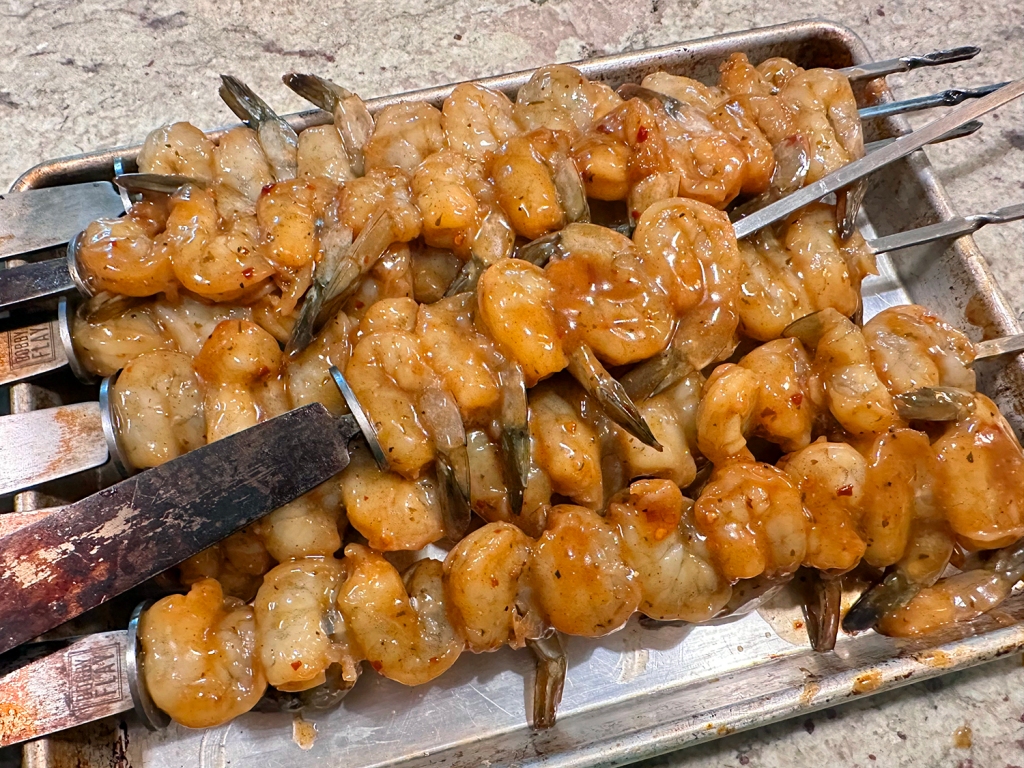
Others may rely on a premade spice blend with an equally long list, including cayenne pepper, garlic powder, and paprika. This Jamaican jerk shrimp recipe, however, comes together quickly thanks to a scoop of store-bought jerk seasoning paste, which acts as an instant flavor enhancer for the seafood. Not able to source the paste easily, we bought a liquid jerk marinade, and reduced it down to a thicker consistency.

You can use fresh (highly recommended) or frozen shrimp for this dish; if buying fresh, look for large or jumbo deveined shrimp, and if using frozen, thaw the shrimp in the refrigerator overnight. Marinate the raw shrimp for at least 30 minutes (and up to 8 hours; any longer and the shrimp will start to get mushy).

To balance the heat, pair the jerk shrimp with a citrusy, herbaceous pineapple salad. No fresh pineapples to be found? Opt for a mango salsa. Serve as is, or tuck everything into tortillas for shrimp tacos, or pile onto a plate with grilled vegetables. Add a colorful salad to round out the meal, and you have one fancy, flavorful, nutritious healthy dinner!

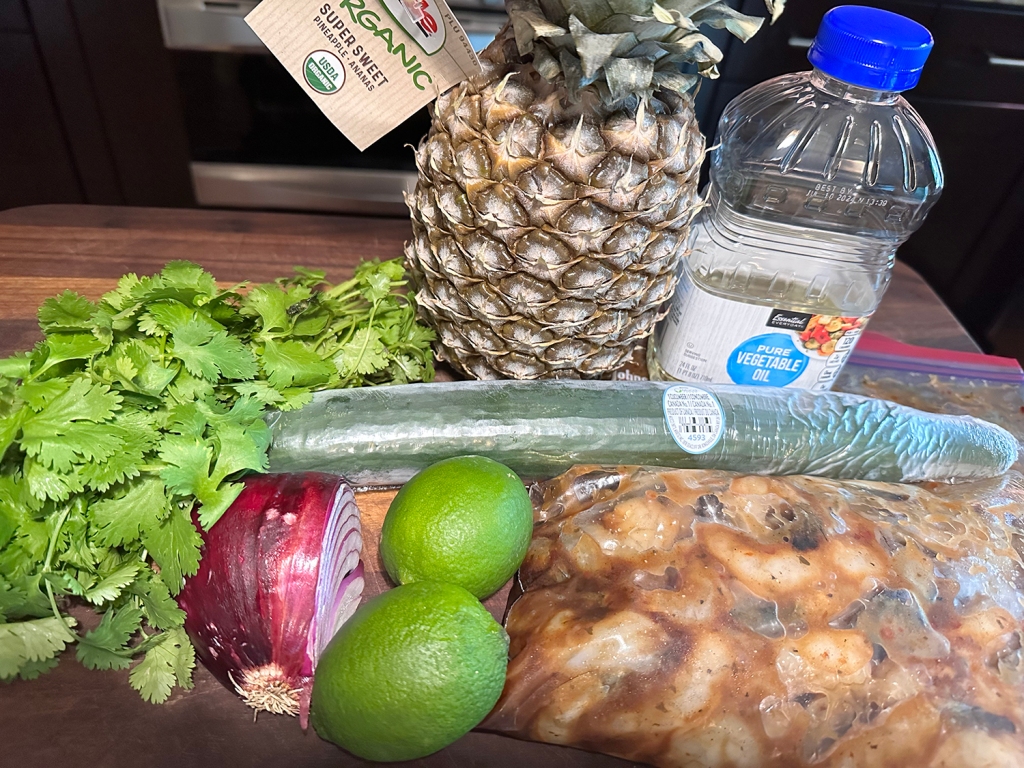
OK, let’s talk about the elephant in the room. That would be cilantro in this case, and the recipe calls for a full cup. According to recent statistics, a whopping 10% of the population can’t stand and/or tolerate cilantro. So the obvious switch out is fresh basil.

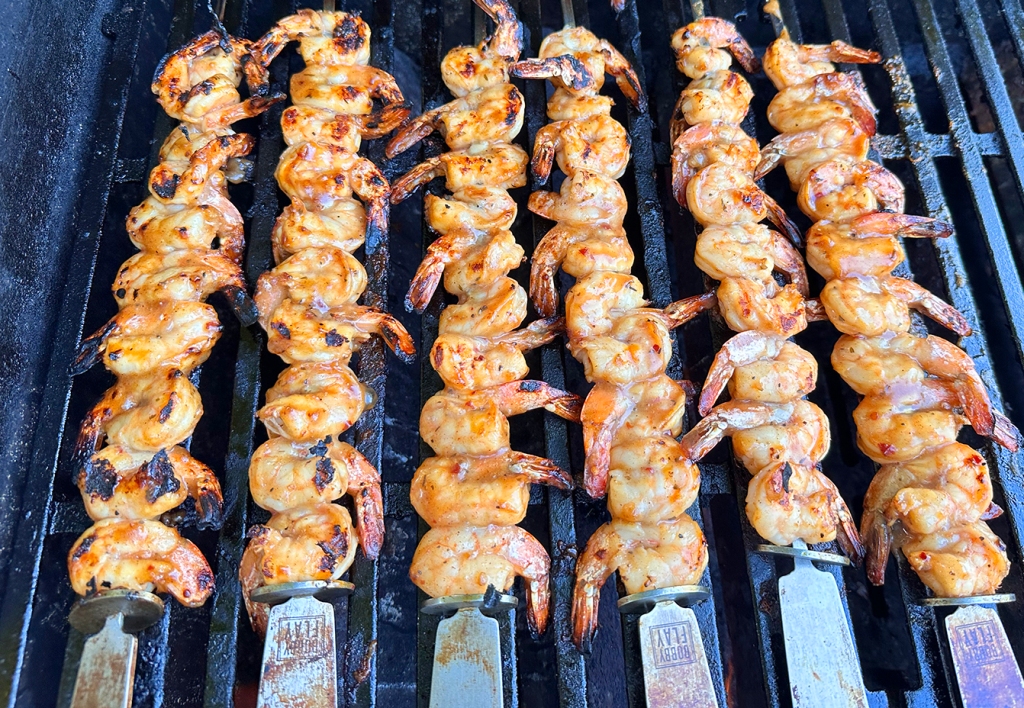
And while it is visually more attractive to leave the shrimp tails on, they are a bit of mess to remove once they are grilled and on your plate. So we say, just get rid of them before you throw the shrimp in with the jerk seasoning.

Jerk Shrimp with Pineapple Salad

  • Servings: 4
  • Difficulty: easy
  • Print

Ingredients

  • ¼ cup mild jerk seasoning paste
  • 1 Tbsp. vegetable oil, plus more for grill
  • 2 lb. large shrimp, peeled, deveined
  • 1 tsp. Diamond Crystal or ½ tsp. Morton kosher salt, plus more
  • Freshly ground pepper
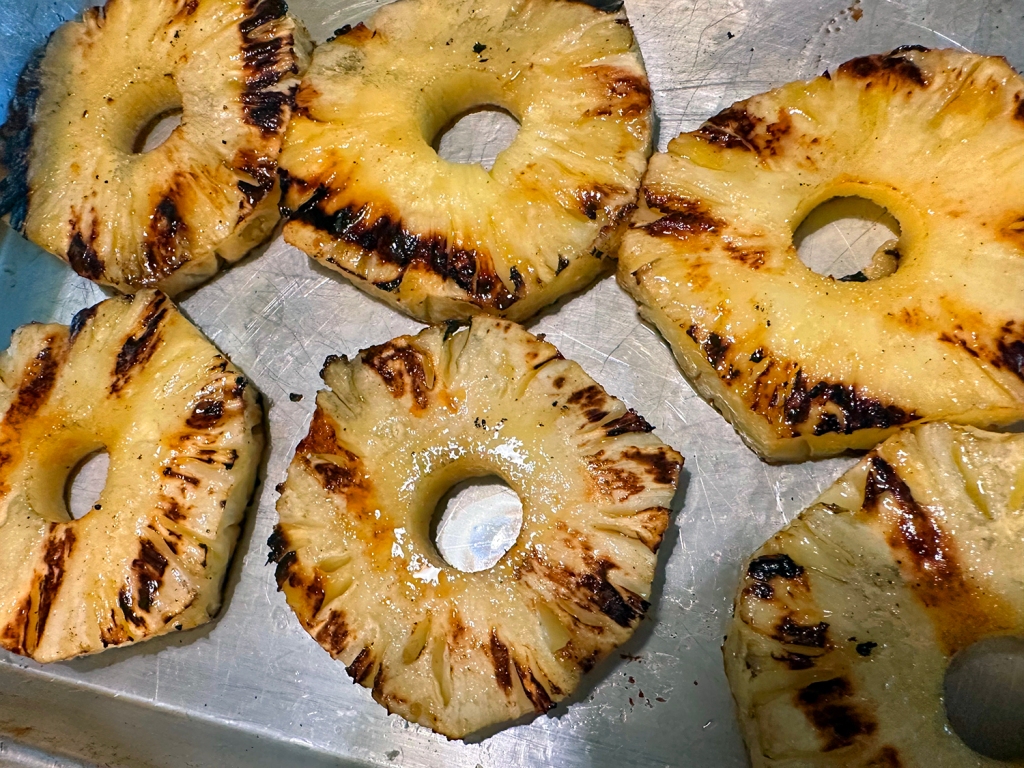
  • 1 medium pineapple, peeled, cored, sliced into ½”-thick rounds
  • ½ medium red onion, thinly sliced
  • 1 Persian cucumber, halved, thinly sliced
  • 1 cup finely chopped cilantro; or fresh basil
  • ⅓ cup fresh lime juice, about 3 limes

Directions

  1. Whisk ¼ cup mild jerk seasoning paste and 1 Tbsp. vegetable oil in a medium bowl. Add 2 lb. large shrimp, peeled, deveined, and lightly season with kosher salt and freshly ground pepper; toss to coat. Cover and chill at least 30 minutes and up to 8 hours.
  2. Meanwhile, prepare a grill for medium heat; oil grate. Grill 1 medium pineapple, peeled, cored, sliced into ½”-thick rounds, turning halfway through, until tender and there are deep brown marks on both sides, about 4 minutes. Transfer to a cutting board and let cool slightly.
  3. Cut pineapple into ¼” pieces; place in a large bowl. Add ½ medium red onion, thinly sliced, 1 Persian cucumber, halved, thinly sliced, 1 cup finely chopped cilantro, ⅓ cup fresh lime juice, and 1 tsp. Diamond Crystal or ½ tsp. Morton kosher salt; toss well.
  4. Thread shrimp onto skewers. Cook shrimp on grill until opaque and lightly charred, 3–4 minutes per side.
  5. Spoon pineapple salad onto plates with a slotted spoon, then top with shrimp. Spoon any juices left in bowl over shrimp.

To make without a grill: Heat broiler. Spread marinated shrimp out on one side of a rimmed baking sheet (do not skewer); arrange pineapple on other side. Broil, turning halfway through, until shrimp are opaque and pineapple is blistered in spots, about 5 minutes.
http://www.lynnandruss.com

Recipe by Inés Anguiano for Bon Appétit

Steak with Preserved-Lemon-Marinated Tomatoes

Toss peak heirloom tomatoes in a simple preserved lemon, soy sauce, and chile marinade while you sear off a nice, well-marbled steak for a dinner for two in no time. The rich, fatty meat is just the right counterpoint to the punchy salad. Returning to this recipe off-season? Opt for cherry tomatoes instead of heirloom.

The Hubs used ghee instead of olive oil in the cast iron pan. Toward the end of searing the steak, he spooned the juices over the meat numerous times. An optional flavor booster was including one large smashed garlic glove and a sprig of fresh rosemary to the scalding skillet, discarding them when steak is ready.

OK, most home cooks are not going to have preserved lemons on hand. We pretty much always do. Preserved lemons are one of those ingredients that sound exotic and hard-to-find but are actually really easy to make. However they do take a few weeks, so if you don’t have the time, there are some good preserved lemon substitutes.

If you have a few hours, you can make a quick, substitute. Just squeeze the juice from a lemon, keeping it for another use. Then finely slice the lemon skins and toss in plenty of fine salt. The finer you slice, the quicker they will ‘preserve’. Stand for at least an hour (preferably longer) then use as per your recipe.

A little lemon zest will add a different type of lemony fragrance to your dish. It will be much milder but better than nothing. But plan ahead, and do try to have the real McCoy preserved lemons for the best results.

Steak with Preserved-Lemon-Marinated Tomatoes

  • Servings: 2-3
  • Difficulty: easy
  • Print

Ingredients

  • 1, 1-lb. New York strip steak (1″–1¼” thick)
  • Kosher salt, freshly ground pepper
  • 2 red Thai chiles or 1 red Fresno or jalapeño chile, halved
  • 2 Tbsp. soy sauce
  • 2 Tbsp. thinly sliced preserved lemon, plus 2 tsp. brine
  • 2 Tbsp. extra-virgin olive oil, divided
  • 2 lb. assorted heirloom tomatoes, halved, cut into wedges if large

Directions

  1. Season one 1-lb. New York strip steak (1”–1¼” thick) all over with kosher salt and freshly ground pepper and let sit 15 minutes.
  2. Meanwhile, whisk 2 red Thai chiles or 1 red Fresno or jalapeño chile, halved, 2 Tbsp. soy sauce, 2 Tbsp. thinly sliced preserved lemon, 2 tsp. lemon brine, and 1 Tbsp. extra-virgin olive oil in a large bowl to combine. Add 2 lb. assorted heirloom tomatoes, halved, quartered if large, and toss to coat. Chill tomato mixture until ready to use.
  3. Heat a dry large cast-iron skillet over medium-high until very hot. Drizzle remaining 1 Tbsp. extra-virgin olive oil over steak; rub all over to coat evenly. Cook, turning every 2 minutes or so, until deeply browned and an instant-read thermometer inserted into the thickest part registers 120°, 8–10 minutes for medium-rare. Transfer to a cutting board, tent with foil, and let rest 10 minutes.
  4. Slice steak against the grain ¼” thick. Add steak to marinated tomato mixture and toss to coat. Using a slotted spoon, transfer steak and tomatoes to a platter and drizzle some of the marinade remaining in bowl over (discard the rest). Season with pepper.

http://www.lynnandruss.com

Recipe by Zaynab Issa for Bon Appétit

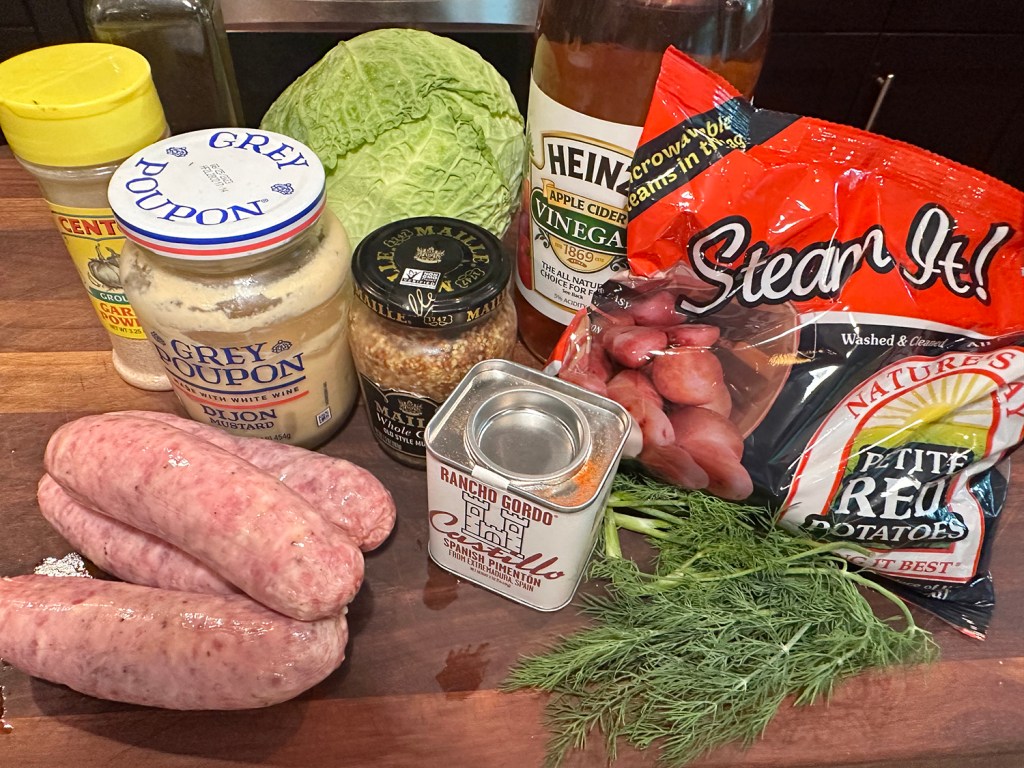
Mustardy Grilled Cabbage and Kielbasa

Mustard and sausage lovers, this one’s for you. Smoky kielbasa and charred-but-still-crisp cabbage, all drizzled with a bright mustardy dressing, become a full, bulked-up meal thanks to seasoned small potatoes.

When wrapped in a foil packet, the potatoes become perfectly tender in just under half an hour on the grill, making them a simple addition to any dinner you’re already lighting a fire for. Don’t be shy about showering on dill at the end—the herb brings some welcome freshness to the plate.

In place of kielbasa, we used Butifarra which we had on hand. In order not to burn items to a crisp, if you have a hot grill like we do, keep it at medium heat. We also increased mayo-mustard mixture by 50%, and flipped the potato package halfway through grilling.

*In the end, the cabbage was still a bit tough. For a softer experience, quarter the head of cabbage thru core. Put the quarters in a bowl with some water, cover and microwave on high for 3-4 minutes to soften. Then, cut into wedges…

Mustardy Grilled Cabbage and Kielbasa

  • Servings: 4
  • Difficulty: easy
  • Print

Ingredients

  • Vegetable oil (for grill)
  • 1 lb. small red potatoes, halved, quartered if larger
  • 1 tsp. Diamond Crystal or ½ tsp. Morton kosher salt
  • ½ tsp. garlic powder
  • ½ tsp. smoked paprika
  • 4 Tbsp. plus 1 tsp. extra-virgin olive oil, divided
  • Freshly ground pepper
  • 1 Tbsp. mayonnaise
  • 1 Tbsp. Dijon mustard
  • 3 Tbsp. whole grain mustard, divided
  • 1 small head of savoy cabbage, cut through core into 2”–3”-thick wedges (*see above head note)
  • 12-oz. kielbasa links, halved lengthwise
  • 3 Tbsp. apple cider vinegar
  • Torn dill (for serving)

Directions

  1. Prepare a grill for medium-high heat; oil grate with vegetable oil. Combine 1 lb. small red potatoes, halved, quartered if larger, 1 tsp. Diamond Crystal or ½ tsp. Morton kosher salt, ½ tsp. garlic powder, ½ tsp. smoked paprika, and 3 Tbsp. extra-virgin olive oil in a medium bowl, season generously with freshly ground pepper, and toss to combine. Scrape out onto a large sheet of foil; reserve bowl. Bring foil edges together to make a packet; crimp to seal tightly. Place on grate; cook potatoes until tender, 25–28 minutes, turning halfway through.
  2. Whisk 1 Tbsp. mayonnaise, 1 Tbsp. Dijon mustard, 1 Tbsp. whole grain mustard, and 1 Tbsp. extra-virgin olive oil in reserved bowl to combine. (We suggest you increase this mixture by 50%) Rub mayonnaise mixture over 1 small head of savoy cabbage, cut through core into 2″–3″-thick wedges, working between leaves; reserve bowl. Grill cabbage, turning halfway through, until tender and both cut sides have deep brown marks, 7–9 minutes. Transfer to a platter.
  3. Grill kielbasa, turning halfway through, until charred in spots, about 10 minutes. Transfer to same platter.
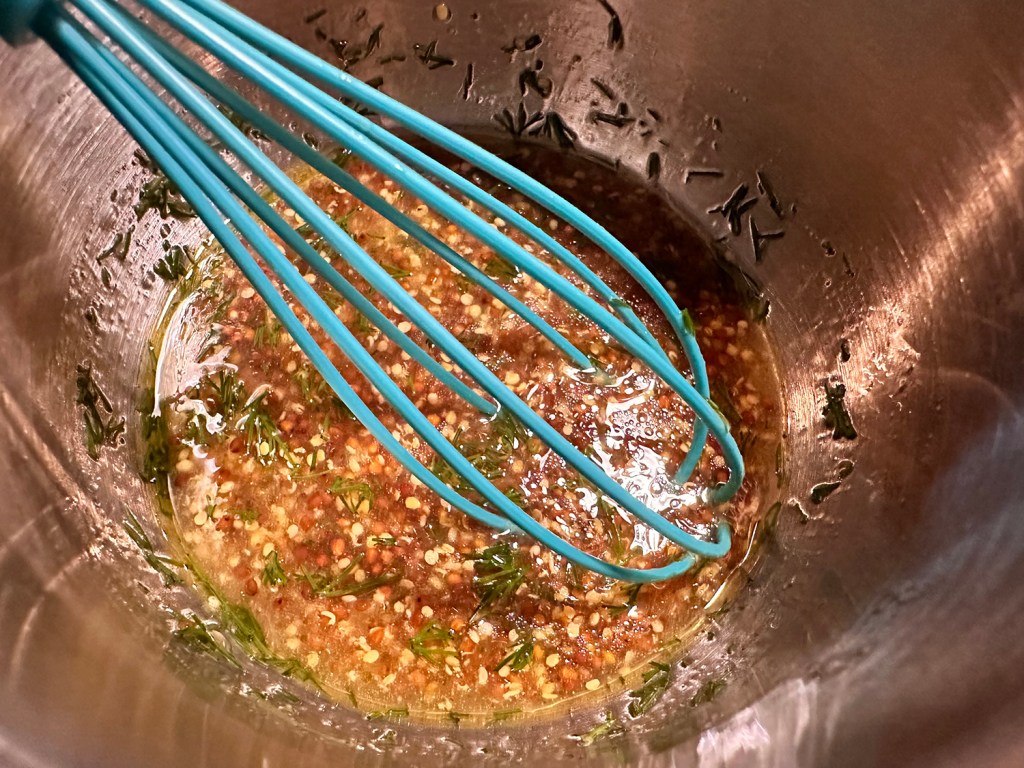
  4. Whisk 3 Tbsp. apple cider vinegar, remaining 2 Tbsp. whole grain mustard, and remaining 1 tsp. extra-virgin olive oil in reserved bowl. Set dressing aside.
  5. Arrange potatoes on top of kielbasa and cabbage. Drizzle reserved dressing over. Scatter torn dill on top and season with more pepper.

To make without a grill: Preheat oven to 400°. Spread seasoned potatoes out on a foil-lined rimmed baking sheet; roast until just tender enough to pierce with a knife, 25–30 minutes. Remove from oven. Heat broiler. Add dressed cabbage and kielbasa to baking sheet with potatoes; broil, turning halfway through, until cabbage is tender and charred in spots and kielbasa is browned, 10–14 minutes.

http://www.lynnandruss.com

Adapted from a recipe by Kendra Vaculin for Bon Appétit

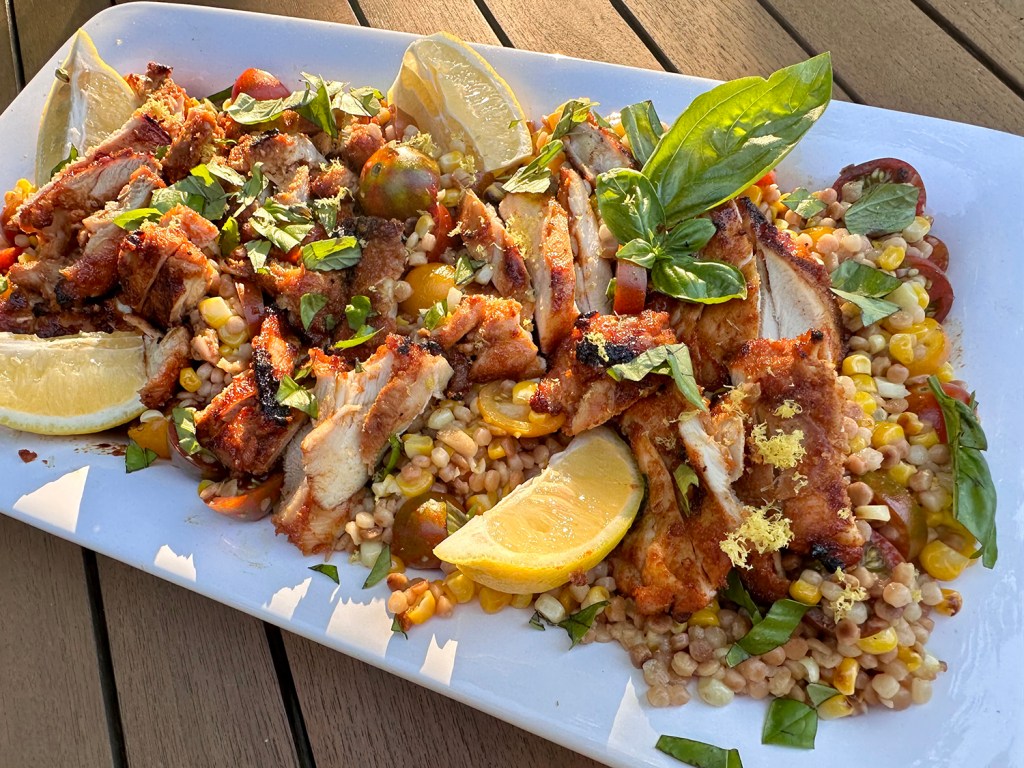
Sweet-and-Tangy Chicken Thighs and Couscous

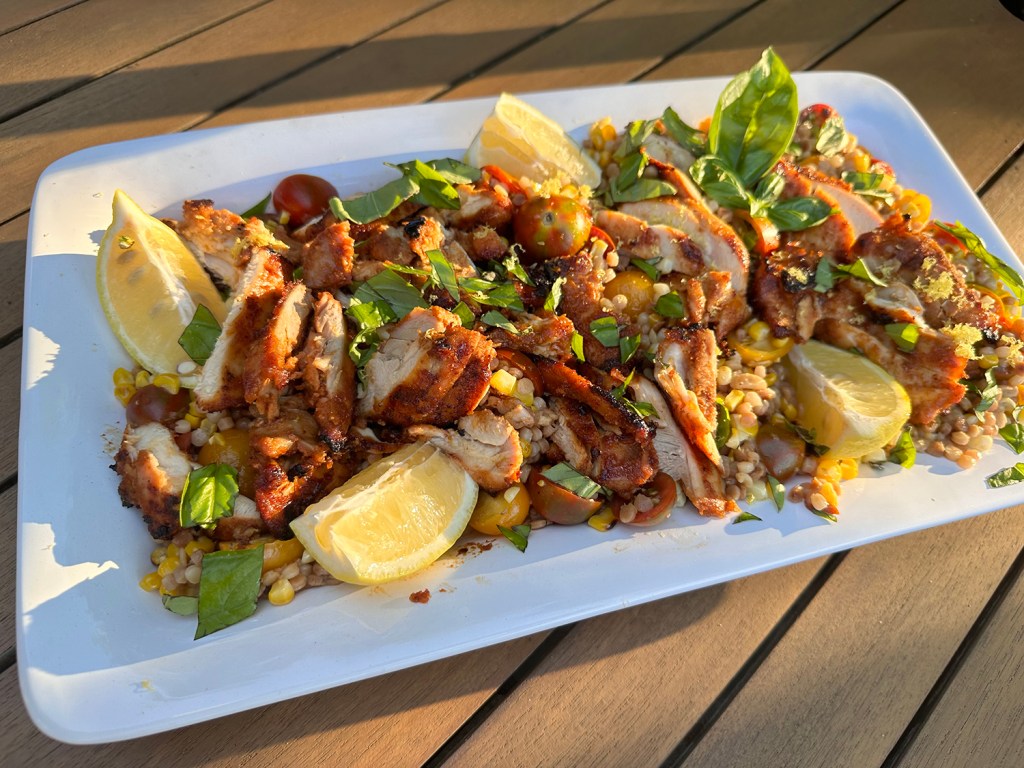
The perfect dinner, using the freshest garden ingredients, with a real WOW factor! We are talking the ultimate summer on a platter meal. We all could use a back-pocket chicken recipe, and this pantry-friendly version lives up to its name. The vinegary marinade leans on spice-cabinet stalwarts to make a quick brine that delivers juicy meat with a sweet-and-tangy finish in just 15 minutes (even better if you have time for an overnight soak).

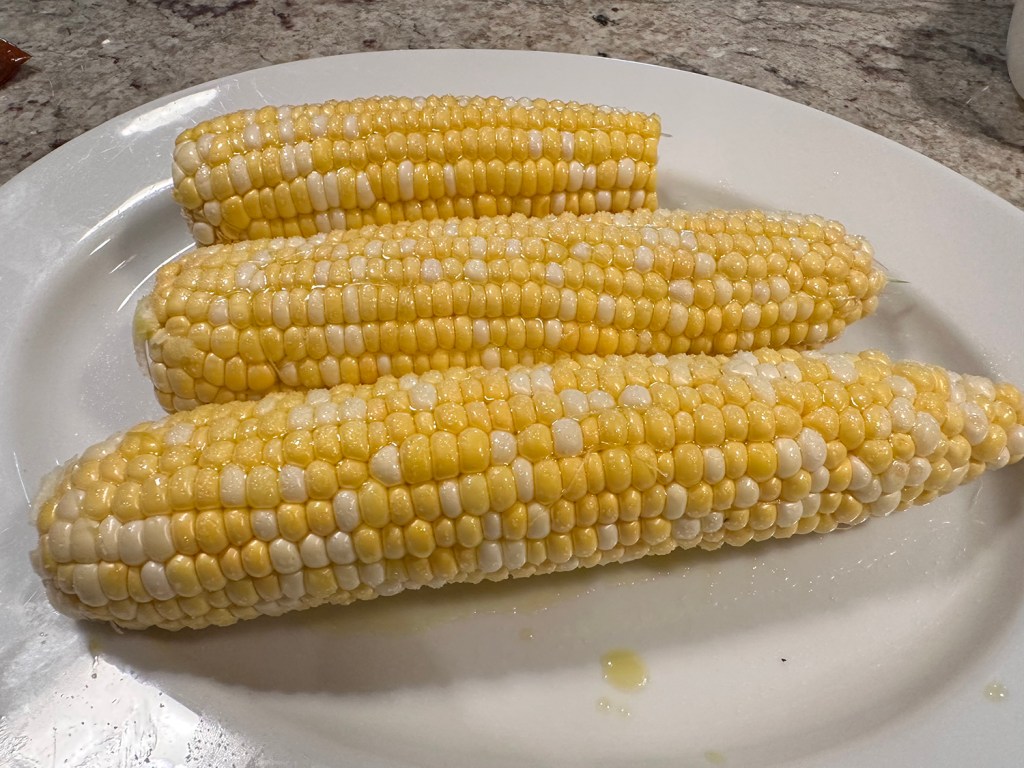
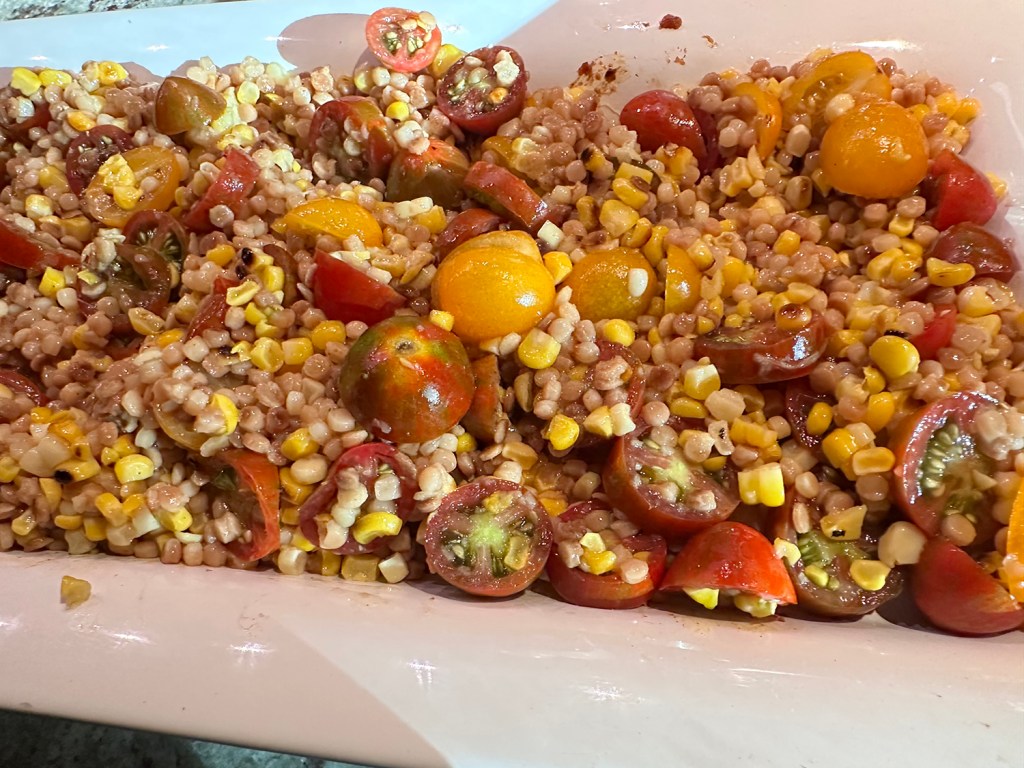
You can get started on a simple seasonal Israeli couscous salad while the marinade does its thing. The grill takes care of both the corn and chicken here, but Bon Appétit says if you don’t have access to a grill (or would like to enjoy this year-round), your trusty broiler can achieve the same char for both ingredients. However you cook the chicken, be sure to give the thighs some time to rest before slicing.

As several reviewers claimed that the couscous was too bland, we added flavor by using homemade chicken stock in place of water. And a time saver during dinner prep, make marinade the night before and add the chicken to the marinade the morning of.

Sweet-and-Tangy Chicken Thighs and Couscous

  • Servings: 4
  • Difficulty: easy
  • Print

Ingredients

  • 3 Tbsp. sugar
  • ¼ cup plus 1 Tbsp. apple cider vinegar or red wine vinegar
  • 1 Tbsp. plus ½ tsp. Diamond Crystal or 2 tsp. Morton kosher salt, divided, plus more
  • 1 Tbsp. onion powder
  • 2 tsp. garlic powder
  • 2 tsp. paprika
  • 3 Tbsp. extra-virgin olive oil, divided, plus more for brushing
  • 1½ lb. skinless, boneless chicken thighs (about 6)
  • 1 cup Israeli couscous
  • 1 1⁄4 cups chicken or vegetable stock, preferably homemade
  • Vegetable oil (for grill)
  • 2-3 medium ears of corn, shucked
  • 12-15 oz. cherry tomatoes, halved
  • Freshly ground pepper
  • 1 lemon
  • Basil leaves, for serving

Directions

  1. Whisk 3 Tbsp. sugar, ¼ cup apple cider vinegar or red wine vinegar, and 1 Tbsp. Diamond Crystal or 1¾ tsp. Morton kosher salt in a small bowl until sugar and salt are mostly dissolved. Whisk in 1 Tbsp. onion powder, 2 tsp. garlic powder, 2 tsp. paprika, and 1 Tbsp. extra-virgin olive oil.
  2. Pour marinade into a large resealable plastic bag. Add 1½ lb. skinless, boneless chicken thighs (about 6), close bag, and turn to coat. Let sit at room temperature 15 minutes, or chill, turning occasionally, up to 12 hours.
  3. Meanwhile, heat 1 Tbsp. extra-virgin olive oil in a medium saucepan over medium-high. Add 1 cup Israeli couscous and cook, stirring to coat, until golden brown, 1–2 minutes. Carefully pour in 1¼ cups water (or preferably homemade chicken or vegetable stock) and add ½ tsp. Diamond Crystal or ¼ tsp. Morton kosher salt; stir well. Bring to a boil; immediately reduce heat to low and cover. Simmer until tender, 8–10 minutes. Remove lid, gently fluff, and let sit to allow excess moisture to evaporate.
  4. Meanwhile, prepare grill for medium-high heat; oil grate with vegetable oil. Brush 2 or 3 medium ears of corn, shucked, with olive oil; grill, turning often, until tender and charred in spots, 3 minutes per side turning 4 times total. Transfer to a cutting board and let cool. Cut kernels from corn cobs in a small rimmed baking sheet.
  5. Remove chicken from marinade, letting excess drip back into bag. Grill, reducing heat or moving to a cooler spot if charring too quickly, until cooked through and well browned, about 5 minutes per side. Each time you turn the chicken, brush with leftover marinade. Transfer to cutting board and let rest 10 minutes.
  6. Add cherry tomatoes, halved, and corn to pot with Israeli couscous and toss to combine. Drizzle in remaining 1 Tbsp. apple cider vinegar or red wine vinegar and 1 Tbsp. extra-virgin olive oil, season with salt and freshly ground pepper, and toss again. Transfer couscous salad to a platter. Finely grate zest from 1 lemon over, then cut lemon into wedges. Season salad with more pepper.
  7. Slice chicken and arrange over salad. Top with basil leaves and serve with lemon wedges.
  8. To make without a grill: Heat broiler. Place a wire rack inside a foil-lined rimmed baking sheet. Brush rack with vegetable oil. Place corn on rack; broil until tender and charred in spots, 8–10 minutes. Transfer to cutting board; let rest. Remove chicken from marinade, letting excess drip back into bag, and arrange, smoother side up, on same rack. Broil, turning once, until golden brown, 12–14 minutes.

http://www.lynnandruss.com

Adapted from a recipe by Hana Asbrink for Bon Appétit