Monthly Archives: January 2019

Creamy Cod and Leek Chowder

This chowder is perfect when it’s cold outside—or make that downright frigid, as it is with the current Polar Vortex rearing its ugly head again. Here, fresh dill and cod take the place of parsley and clams, making this pottage taste deliciously different from the popular summer stalwart. For a soup so rich and satisfying, it comes together surprisingly quickly.

Our stock of fresh herbs consisted of everything except thyme, and as noted, the weather outside was no where near gardening season so I had to resort to using dried, which wasn’t a big deal. And while dill is probably my least favorite herb (although it has been growing on me lately), I strongly recommend that you purchase the fresh dill called for when you buy your fish because the flavor was perfect and not overwhelming.
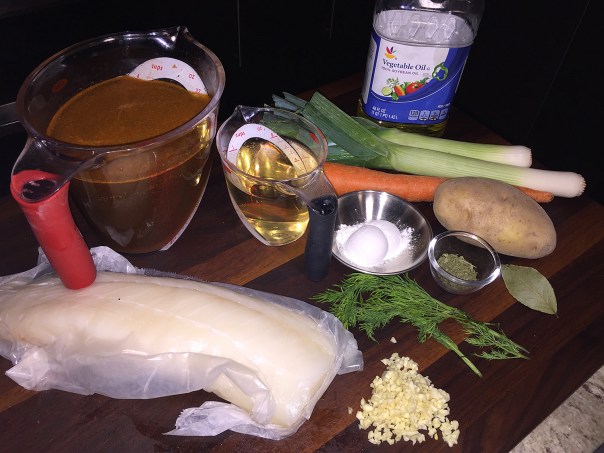
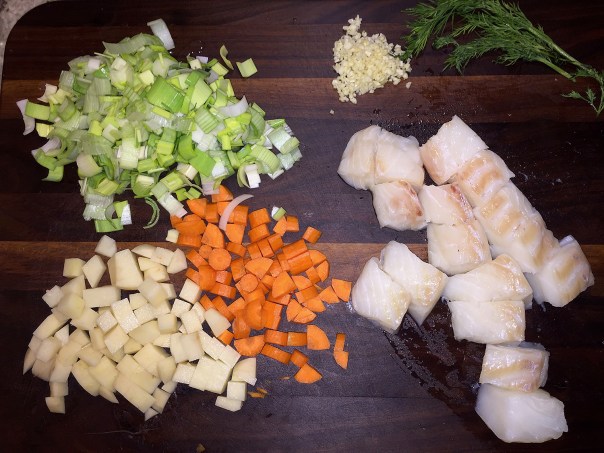
img_0972

img_0973

Prep all of your ingredients first to ensure an easy flow while preparing the chowder. Keep in mind homemade seafood stock will provide so much more flavor than canned or boxed. If you don’t have any, try purchasing some at a local seafood mart. If you live near me, there is Madara’s (no relation to my Ex) Seafood at the Newtown Farmer’s Market. If all else fails, use clam juice.

We were thrilled that there was enough leftover for each of us to have lunch the following day.

Creamy Cod and Leek Chowder

  • Servings: 4
  • Difficulty: easy
  • Print

Ingredients

  • 3 Tbs. unsalted butter, softened
  • 2 Tbs. all-purpose flour
  • 1 Tbs. vegetable oil
  • 1 large carrot, coarsely chopped (about 1 cup)
  • 1 large russet potato, peeled and cut into 1/2-inch cubes (about 2 cups)
  • 1 large leek, trimmed, white and light-green parts halved lengthwise, then cut crosswise into 1/4-inch slices (about 2 cups)
  • 1 Tbs. finely chopped garlic
  • 1 cup dry white wine
  • 1 quart good-quality seafood stock
  • 1/2 cup heavy cream
  • 1 large bay leaf
  • 1 large sprig fresh thyme
  • Kosher salt and freshly ground black pepper
  • 1-1/2 lb. cod loin, cut into 2-inch pieces
  • 1 Tbs. chopped fresh dill, plus sprigs for garnish
  • Flaky sea salt, for garnish

Directions

  1. In a small bowl, combine 2 Tbs. of the butter with the flour and set aside.
  2. Heat the remaining 1 Tbs. butter and the oil in a 5- to 6-quart pot over medium-high heat. Add the carrot and cook, stirring occasionally, for 2 minutes, then add the potato and leek and cook, stirring occasionally, until the leek begins to brown, another 5 minutes.
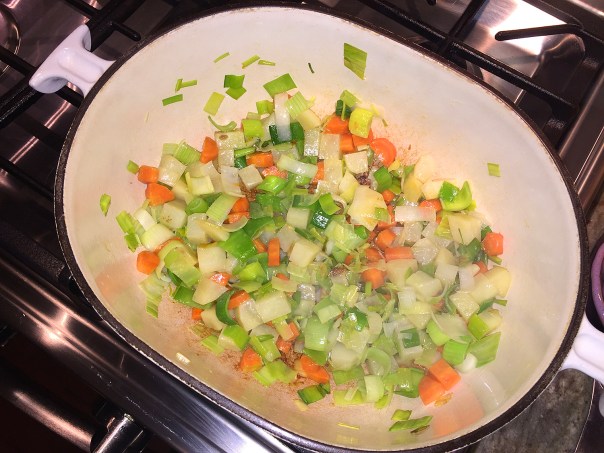
    img_0977
  3. Add the garlic and cook, stirring, until fragrant, about 30 seconds.
  4. Add the wine and cook until absorbed and evaporated, 7 to 10 minutes.
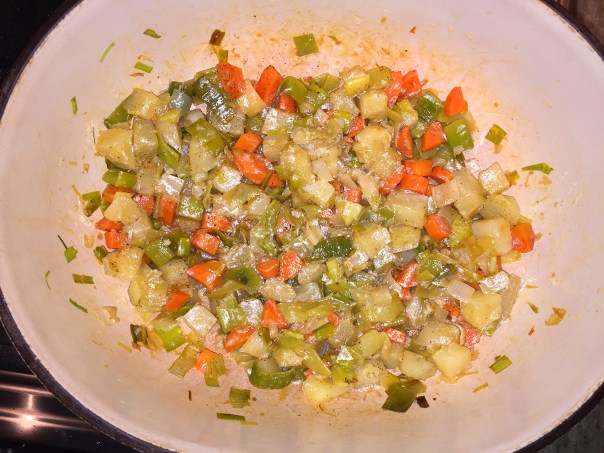
    img_0979
  5. Lower the heat to medium low. Add the stock, cream, bay leaf, thyme, 1/2 tsp. salt, and 1/4 tsp. pepper, and bring to a low simmer.
  6. Gradually add the flour-butter mixture, stirring after each addition, until slightly thickened, about 4 minutes.
    img_0982
  7. Add the cod and chopped dill, and simmer lightly until the cod is cooked through, about 5 minutes.
    img_0986
  8. Remove the bay leaf and thyme, season to taste with salt and pepper, and serve garnished with the dill sprigs and flaky sea salt.
    img_0987

http://www.lynnandruss.com

Recipe by Ronne Day from Fine Cooking

Pork Medallions with Roasted Baby Bok Choy and Butternut Squash

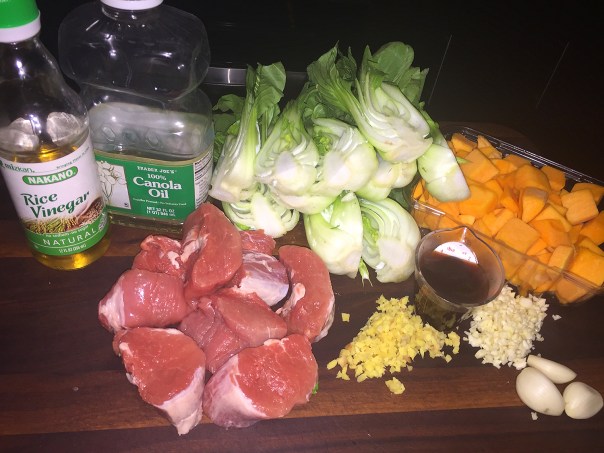
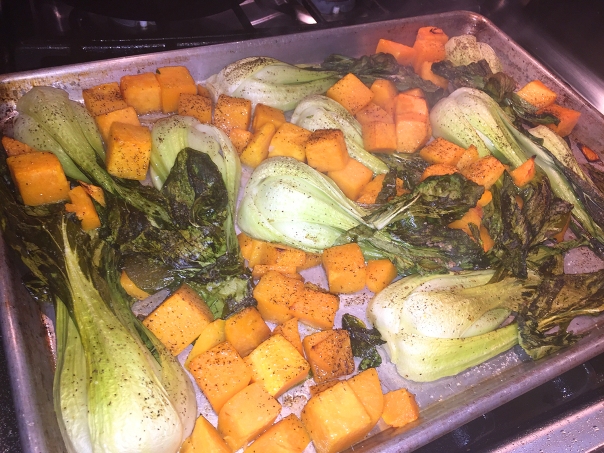
An intriguing combination to be sure, roasting bok choy and butternut squash together on a sheet pan makes for easy prep and interesting texture. If you buy the squash already diced you’ll save yourself time and frustration because peeling the hard skin off of squash is no easy task.

But unfortunately I added extra steps and time because we were out of store-bought Teriyaki sauce, and I didn’t realize this error until dinner prep time. I quickly Googled a recipe for Teriyaki sauce and made a 1-cup batch, more than required, but it’s something I could refrigerate for later use.

Inevitably pork tenderloin comes packaged with two strips of meat, so since this only calls for one, freeze the other for later use. It’s almost a given that we’ll increase the amount of garlic called for in a recipe, and this one was no exception. Use as little, or as much as, your preference tolerates.

img_0867

Pork Medallions with Baby Bok Choy and Butternut Squash

  • Servings: 3-4
  • Difficulty: easy
  • Print

Ingredients

  • 1 lb. baby bok choy, cut in half lengthwise
  • 1 lb. diced butternut squash (about 1-1/2 cups)
  • 7 Tbs. grapeseed or canola oil
  • Kosher salt and freshly ground black pepper
  • 1/4 cup store-bought teriyaki sauce
  • 2 Tbs. plain rice-wine vinegar
  • 1 heaping Tbs. finely chopped fresh ginger
  • 4 cloves garlic, 2 finely chopped and 2 peeled and left whole
  • 1-1/2 lb. pork tenderloin, trimmed and sliced crosswise into 8 medallions
  • 2 Tbs. finely chopped fresh cilantro, plus leaves for garnish

Directions

  1. Position a rack in the center of the oven, and heat the oven to 400°F.
  2. Toss the bok choy and squash with 2 Tbs. of the oil on a large rimmed baking sheet. Season with salt and pepper, and spread in a single layer.
    img_0869
  3. Roast, flipping once, until golden in spots, about 25 minutes.
    img_0878
  4. In a small bowl, whisk 3 Tbs. of the oil, the teriyaki sauce, vinegar, ginger, and the chopped garlic.
    img_0872
  5. Heat the remaining 2 Tbs. of oil in a large skillet, preferably cast iron, over medium-high heat. Press the pork medallions lightly to flatten a bit, then season with salt and pepper.
    img_0874
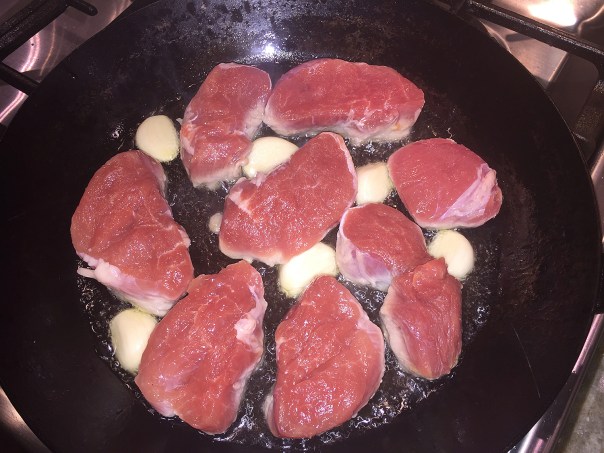
  6. Add the medallions and whole garlic cloves, and cook, flipping once, until browned on both sides, about 8 minutes total. Turn the heat off, but leave the medallions in the pan for a couple of minutes.
    img_0877
  7. Divide the boy choy and squash among 4 plates. Top with the pork, drizzle with some of the sauce, sprinkle with the chopped cilantro, and garnish with the extra leaves. Serve any remaining sauce at the table.
    img_0882

http://www.lynnandruss.com

Recipe by Deborah Reid from Fine Cooking


Only the Best at Robin’s Nest

Oooo la la! We were about to embark on an interesting, eclectic culinary experience peppered with a French-American flair at Robin’s Nest in Mount Holly, NJ. This gem of a restaurant is uniquely situated in a beautifully restored Victorian building filled with antiques; and, located in the heart of downtown Mount Holly overlooking the Rancocas Creek.

It was a few weeks after the Winter holiday season had given up the ghost when we made our grand appearance with my former coworker Francis Paixao and his wife Jane. Our original date with them was to have been four weeks earlier but due to the ever-increasing demands of pre-holiday planning, they had to postpone for a month. Yet once there, the holiday decor was still ever-present, as shown below.

all four of us

Luckily we had a reservation because the joint was hopping, as I understand is usually the case. We were shown to a cozy four-top in a quiet corner of one charming room outfitted in maroon walls and period decor. Then, in addition to the regular menu we were offered an additional list of nightly specials.

img_0696

Selections are creative and delicious with Robin’s Nest offering lunch and dinner entrées that are heart friendly, vegetarian and gluten-free.

crowbarpicAbove and below are a few stock photos showing the interior spaces sans diners.diningroom

After placing drink orders, we finally settled on sharing a couple of starters. We were all intrigued by the Truffle Brussels Sprouts which came as a healthy portion of deep fried Brussels sprouts tossed in white truffle oil, sprinkled with an aged parmesan cheese and topped with crumbled crispy bacon. OMG, they were surprisingly light but packed with flavor. (Since bacon doesn’t usually agree with me, I tried to avoid most of it.)

img_0700

Our other appetizer was the amazingly scrumptious Butternut Squash Cakes. Comprised of roasted butternut squash with rice, and pepper jack cheese they were also deep fried to perfection over goat cheese cream sauce topped with NJ cranberry chutney and toasted pumpkin seeds. Consensus was, these were probably the favorite, although it was a close race. I almost never eat deep fried food, but neither of these options were greasy in the least.

img_0698

For entrées, Francis chose the Stuffed Pork Loin consisting of two lean pork loin medallions stuffed with traditional sourdough sage apple NJ cranberry stuffing wrapped in bacon, pan seared to perfection, and finished with a bourbon glaze. They were served with mashed potatoes and a vegetable medley of carrots, cauliflower, zucchini and broccoli. Did he like it? By the looks of the clean plate, I’d say the answer was an astounding yes!

img_0707

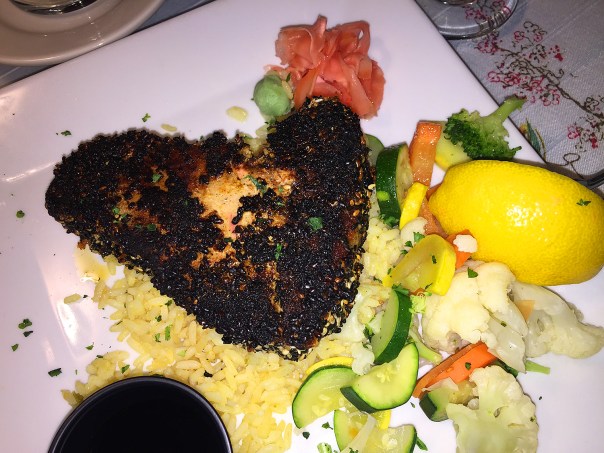
Jane and I seemed to be on the same page with our Blackened Tuna entrée. The combination of Ahi tuna, coated in cajun seasoning and sesame seeds, was pan seared to order (in our cases, medium), served with wasabi, pickled ginger, soy sauce, rice and the same aforementioned vegetable medley. Some of the accoutrements were a bit spicy for Jane who didn’t hesitate to give me her wasabi paste. Alas, we both surrendered halfway through and took home doggie bags of the leftovers.

img_0705

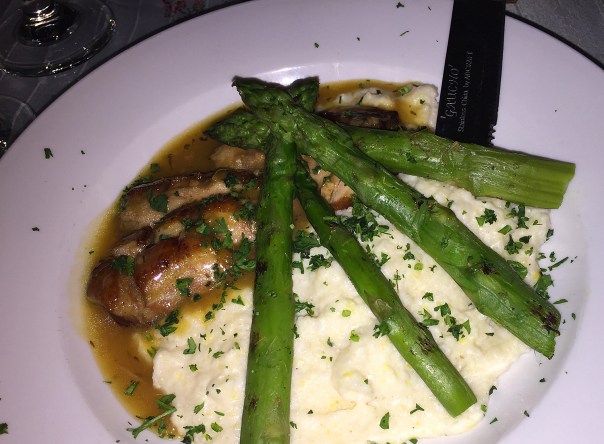
Russ was excited to see one of their nightly specials was a Duck entrée (we can’t remember the tile). However, while it was served with a delicious polenta and perfectly cooked asparagus spears, in the end he was disappointed in the overcooked meat which he had ordered medium-rare, bathing in a sweet sauce, which for him was a bit cloying. This was the only pitfall of the evening.

img_0703

img_0709

Robin’s Nest is known for their large selection of delicious desserts so some of the gang was gung-ho to venture there. Jane and Francis opted to share the Chocolate Soufflé Roll with coffee liqueur cream filling topped with a swirl of whipped creme and a sprinkle of edible gold enhancements.

img_0711

Not realizing the size of the dessert, Russ was a bit overwhelmed with his large glass of Chocolate Mousse topped with whipped creme and dark chocolate curls. Although it was very good, he said had he known, he would not have ordered it.

In addition to all of the wonderful delicacies, Robin’s Nest also offers live music inside and out (weather permitting), comedy nights, catering services, special events and psychic readings by Diana! We can’t wait to go back—possibly in warmer weather to dine al fresco…

Cracklin’ Crispy Chicken

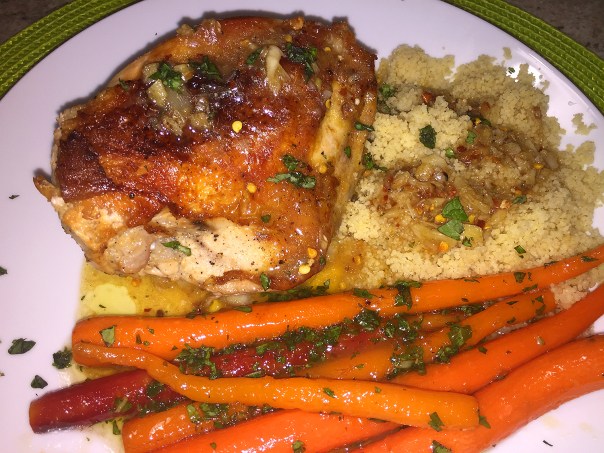
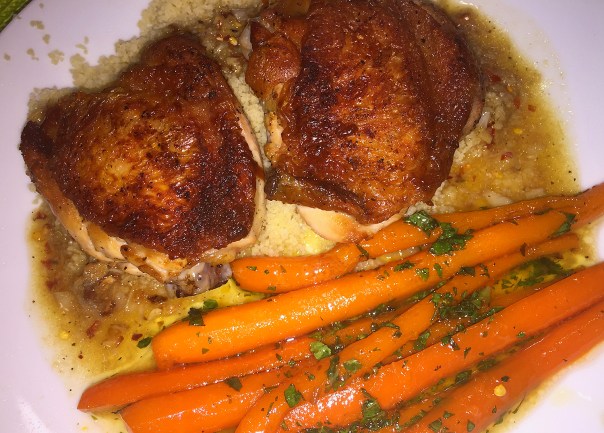
Chicken thigh’s dark meat translates to reliable juiciness, but I prefer the white meat, so we added a couple of breasts along with the thighs to this crazy-good tasting Lemon Chicken Thighs dinner. No matter your choice of meat, their delectable skin will get as crispy as cracklin’ over a hot fire.

Capping off this one-skillet method is a punchy and bittersweet lemon vinaigrette built on the brown bits left in the skillet. And trust me when I tell you, that’s what you’re going to want to drag each bite of chicken through. Oohing and aahing all during dinner, we love-love-loved this meal!

img_0861You can see the breast skin got just as crispy as the thighs did. We served ours with lemony baby carrots (recipe below) and a side of couscous which was cooked with homemade chicken stock instead of water for even more flavor.
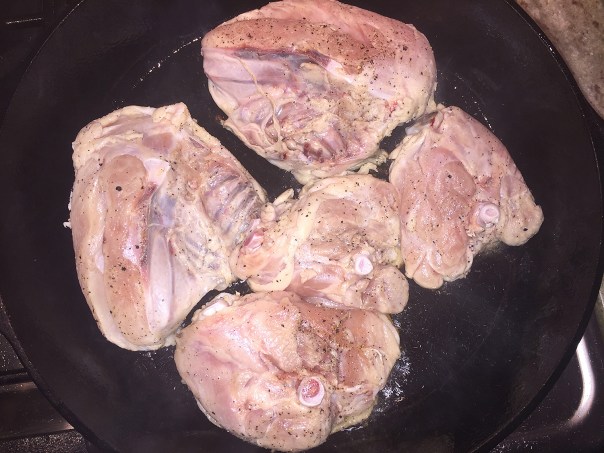
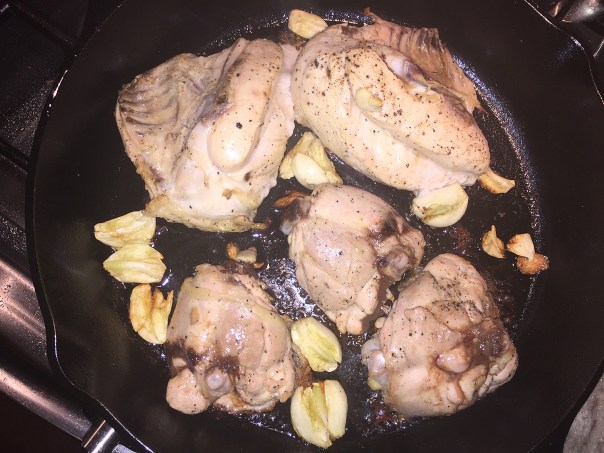
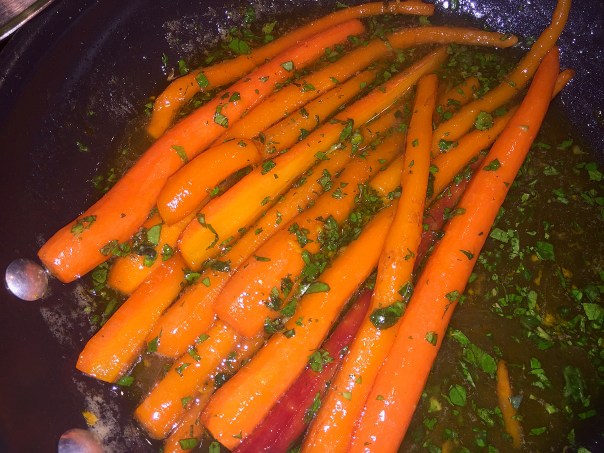
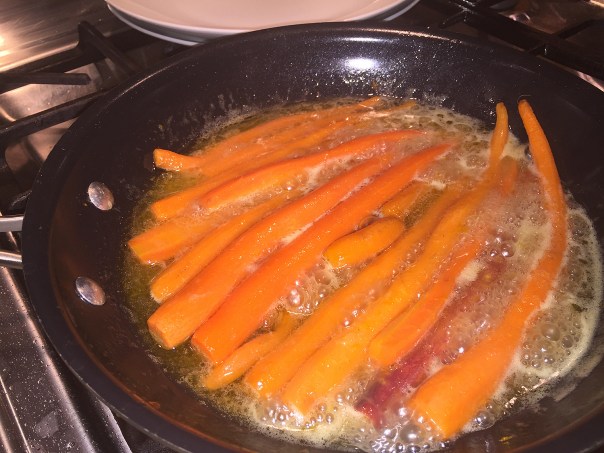
Both the poultry and the carrots are treated with lemons. In the case of the vegetables, make sure to use Meyer lemons, which are a cross between a citron and a mandarin—a hybrid citrus fruit native to China. The fruit is rounder than a true lemon, deep yellow with a slight orange tint when ripe, and has a sweeter, less acidic flavor.

And don’t skip the charring of the regular lemons in the chicken dish. Not only does the process help loosen them up to release their juices, but renders them bright and citrusy, and removes the bitterness. No reason why you couldn’t use Meyer lemons here too.

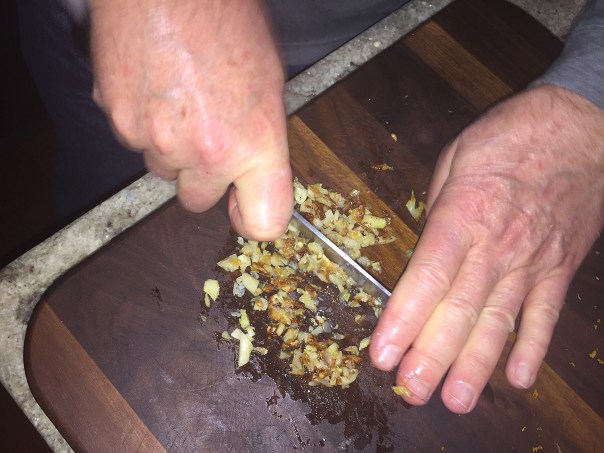
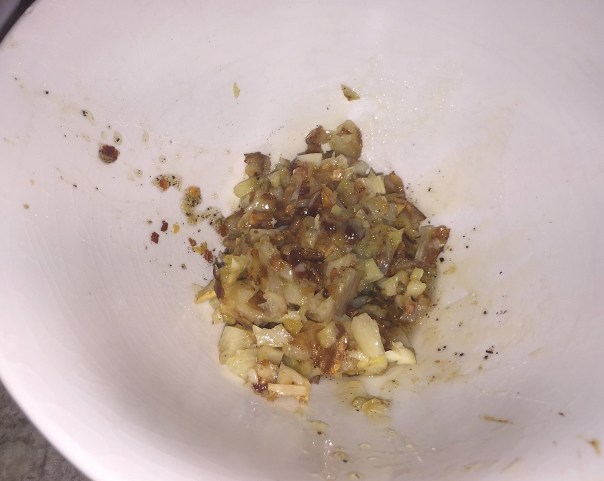
A few minor adjustments we made to the chicken directions included increasing the number of cloves and then chopping up the cooked garlic before adding it to the sauce. Also please note, depending on the size of your poultry pieces, you may have to add a few more minutes cooking time in the oven. Numerous reviewers admitted to cooking the chicken twice as long as the preparations call for, but ours were done in the original allotted time.

Lemon Chicken Thighs

  • Servings: 2-4
  • Difficulty: easy
  • Print

Ingredients

  • 4 skin-on, bone-in chicken thighs (white meat too if you prefer)
  • Kosher salt, freshly ground pepper
  • 1/4 cup white wine vinegar
  • 4 (or more) garlic cloves, crushed
  • 2 lemons, halved
  • 1 1/2 tsp. honey
  • 1/2 tsp. Aleppo-style pepper (or red pepper flakes)
  • 3 Tbsp. extra-virgin olive oil

Directions

  1. Pat chicken thighs dry and season well with salt and black pepper. Place in a large resealable plastic bag and add vinegar. Seal bag and gently massage chicken to ensure all thighs are coated in vinegar. Chill 1 hour, turning once after 30 minutes.
  2. Preheat oven to 400°F. Remove chicken thighs from bag and pat dry with paper towels. The drier the skin, the crispier it will be when cooked.
  3. Place chicken thighs, skin side down, in a dry large cast-iron skillet and set over medium heat. Cook undisturbed until they easily release from the pan, about 4 minutes.
    img_0842
  4. Continue to cook, moving chicken around occasionally to ensure the skin is cooking evenly, until golden brown, 8–10 minutes.
    img_0844
  5. Add garlic and transfer skillet to oven. Bake until chicken is cooked through, 10–12 minutes (longer if needed). Transfer chicken and garlic to a plate. When slightly cooled, chop garlic and add to sauce.
    img_0848
    img_0849
    img_0852
  6. Set skillet over medium-high heat and cook lemons, cut side down, until edges are deeply charred (they should be almost black), about 5 minutes. Transfer to plate with chicken and garlic and let cool slightly.
    img_0853
  7. Squeeze lemon juice into a small bowl; add chopped garlic, honey, and Aleppo-style pepper and whisk to combine. Whisk in oil and any accumulated juices on plate with chicken. Season vinaigrette with salt and black pepper.
    img_0854
    http://www.lynnandruss.com
img_0858
  • Drizzle half of vinaigrette on a platter and set chicken on top. Serve with remaining vinaigrette alongside.
    img_0865I mean, look at how beautiful this meal is! And it’s even more delicious than gorgeous, if that’s possible…
  • http://www.lynnandruss.com

    [/recipe]

    Adapted from Recipe by Molly Baz at Bon Appétit

    Baby Carrots with Meyer Lemon, Honey, Basil, and Mint

    img_0860

    These carrots may quite possibly be the BEST cooked carrots we’ve ever eaten!

    Baby Carrot with Meyer Lemon, Honey, Basil and Mint

    • Servings: 4-6
    • Difficulty: easy
    • Print

    Ingredients

    • 1-1/4 lb. baby carrots, trimmed
    • 6 Tbs. unsalted butter
    • Kosher salt
    • 1 tsp. finely grated Meyer lemon zest, more for garnish
    • 6 Tbs. Meyer lemon juice (from about 2 lemons)
    • 2 Tbs. honey
    • 1 Tbs. chopped fresh basil
    • 1 Tbs. chopped fresh mint
    • Flaky sea salt, for serving

    Directions

    1. Put the carrots, butter, 1 tsp. salt, and 1/2  cup water in a wide, shallow sauté pan, and cover with the lid slightly ajar. Bring to a boil over high heat, and cook for 5 minutes.
    2. Remove the lid, and add the lemon zest, juice, and honey. Lower the heat to medium-high, and cook until the liquid forms a glaze, about 5 minutes more.
      img_0846
    3. Meanwhile, combine the basil and mint. Serve the carrots garnished with the chopped herbs, small mint leaves, more lemon zest, and a little flaky sea salt.

    http://www.lynnandruss.com

    Recipe by Deborah Reid from Fine Cooking

    Soup and Salad in One?

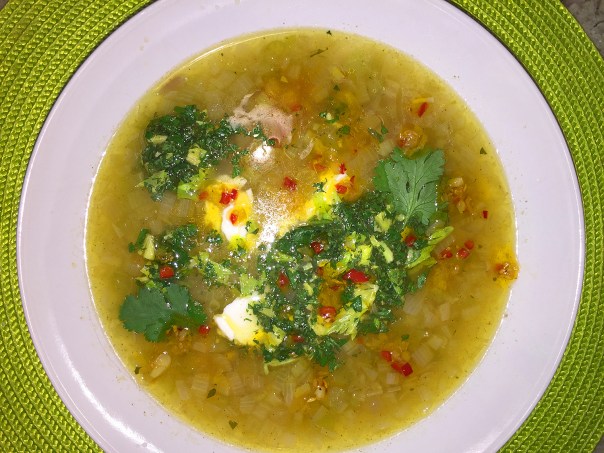
    You’re familiar with the soup and salad deal, right? Well, how about combining the two into one dish? This Chickpea and Celery Soup with Chile-Garlic Oil recipe transforms the ordinary combo of celery, onion, and chickpea into something delicious!

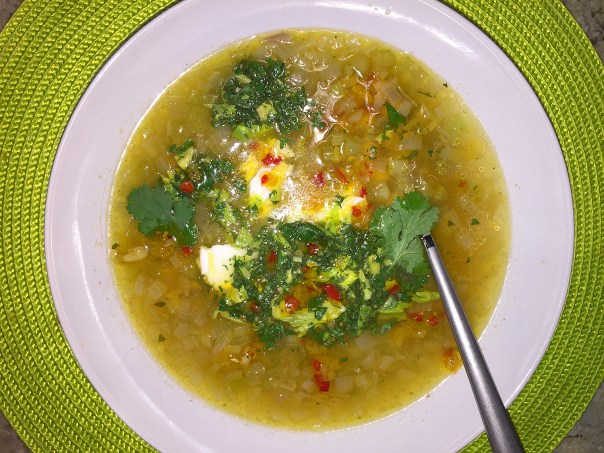
    The celery/chickpea soup by itself is kind of boring, BUT with the addition of the garlic-chile oil and salted greek yogurt, it is elevated to the next level. There’s a complexity in the flavors that is really unlike any other soup. I had my doubts at first, but once I had a few spoonfuls, I was a convert.

    img_0826

    And the fact that you can make this in about 20 minutes, well, need I say more? As far as ingredients, sometimes there are instances when forced to make substitutions, case in point with the onion. We used up our entire stock of onions during the week, but had shallots on hand. When cooked, they have a similar flavor profile.

    Other times, due to personal preferences, you may change the amount of an ingredient, like we did with the chickpeas. The recipe only calls for 15.5 ounces but we purposely bought the larger 19 ounce size, and agreed the soup could stand to have even more of the healthy legumes, also known as garbanzo beans.

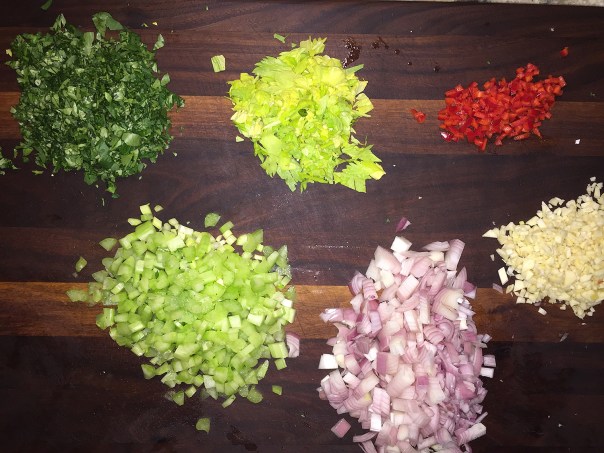
    img_0818Make sure to prep all of your ingredients ahead of time.
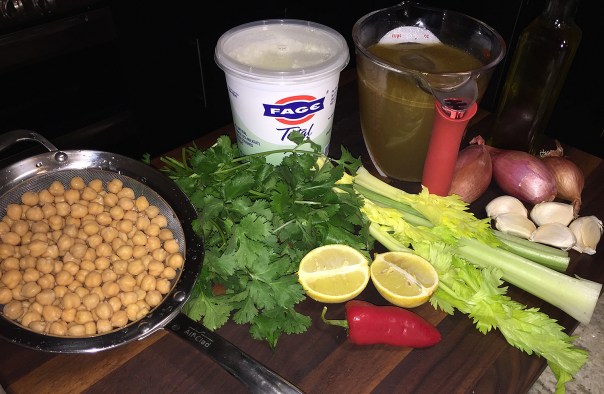
    My other tweaks included increasing the garlic to five huge cloves (you know how that goes), and extra celery stalk, 2% Greek yogurt, and homemade chicken stock, as opposed to store-bought. If you want to make this vegetarian, use vegetable broth instead. All-in-all, it’s hardy enough to be considered a meal in itself. Slurp up!

    img_0815

    Chickpea and Celery Soup with Chile-Garlic Oil

    • Servings: 3-4
    • Difficulty: easy
    • Print

    Ingredients

    • 6 tablespoons extra-virgin olive oil, divided
    • 1 red chile (such as Fresno), seeds removed, finely chopped
    • 3 garlic cloves, finely chopped
    • Kosher salt
    • 1 medium onion, finely chopped
    • 2 celery stalks, finely chopped, plus celery leaves from 1 bunch
    • 4 cups chicken stock, preferably homemade
    • 1 15.5-ounce can chickpeas, rinsed, drained
    • ½ cup whole-milk Greek yogurt, room temperature
    • 1 cup cilantro leaves with tender stems
    • 1 lemon, halved

    Directions

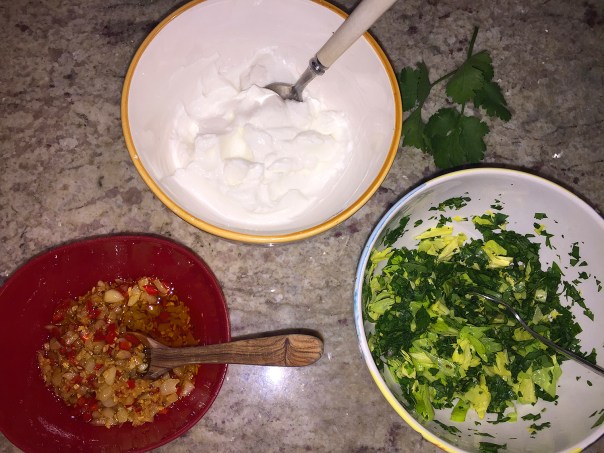
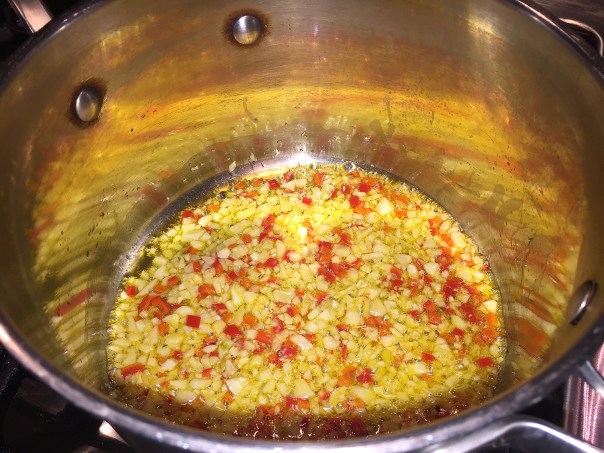
    1. Heat 3 Tbsp. oil in a medium pot over medium. Cook chile and garlic, stirring often, until garlic is golden brown and crisp, 3–5 minutes. Transfer to a small bowl (with oil). Season with a pinch of salt; set aside.
      img_0823
    2. Wipe out pot. Heat remaining 3 Tbsp. oil over medium. Add onion and celery stalks, season with salt, and cook, stirring occasionally, until softened but not browned, 5–7 minutes.
      img_0824
    3. Add stock, increase heat to medium-high, and bring to a boil. Reduce heat to medium-low, bring to a simmer, and add chickpeas. Continue to cook until chickpeas are warmed through and creamy but not mushy (this won’t take long since the chickpeas are already cooked), about 5 minutes. Season with salt.
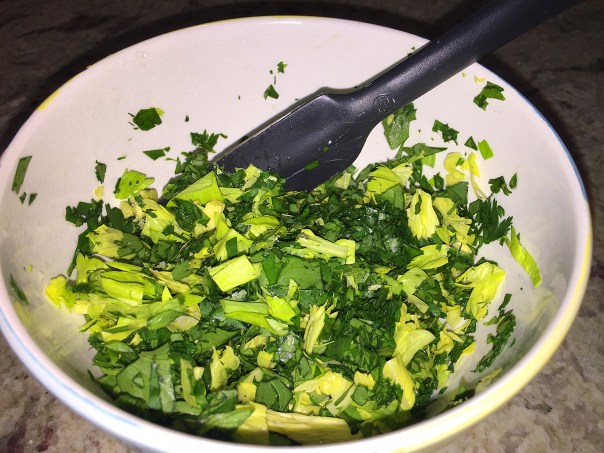
    4. Meanwhile, stir yogurt and a big pinch of salt in a small bowl. Mix cilantro and celery leaves in a medium bowl and squeeze lemon halves over. Season with salt and toss to coat.
      img_0820
    5. Divide soup among bowls. Add a dollop of yogurt, then top with cilantro-celery salad and reserved garlic-chile oil.
      img_0825
      img_0830

    http://www.lynnandruss.com

    Recipe by Andy Baraghani from Bon Appétit Healthy-ish

    Glazed Vegetables Extraordinaire!

    Glazing vegetables is a sure-fire way to make them sing and impress your dinner guests. Here are two recipes that caused some buzz and are worth the additional effort.

    Cider-and-Bourbon-Glazed Shallots

    img_0766

    I don’t know about you, but we just adore shallots. So I got my freak on (in a good way) when I came across this Bon Appétit Cider-and-Bourbon-Glazed Shallots recipe with it’s sweet, salty, umami flavor profile. Now thats a way to make these tasty alliums shine! For those unfamiliar with them, a shallot—a type of onion—looks like a small, elongated onion but has a milder flavor with a hint of garlic.

    The benefits shallots bring to heart health is becoming more widely appreciated. And did you know that they help by reducing bad cholesterol levels and prevent accumulations of plaque in the arteries? Such artery blockages count as one of the most common heart problem triggers. Also, shallots contain allicin and quercetin antioxidants. Studies show that the presence of these compounds with their strong anti-hypertensive properties lowers the risks of heart damage.

    In some recipes, it is hard to determine whether the entire shallot bulb is needed or if the number count in the ingredient list refers to the number of shallot cloves. In general, if the recipe calls for one shallot, use all the cloves within that single shallot bulb. To me, the more, the merrier! Since it doesn’t have the same bite as onion, raw shallot is ideal in a salad or dressing, and won’t overpower more delicate dishes.

    You can substitute shallots for onions, just follow the general rule of thumb that, for every small onion, use three small shallots. What may happen more often is that your recipe calls for shallots but you only have onion. Unfortunately, this swap only works if the shallots are to be cooked—raw onion tastes nothing like raw shallot.

    This recipe is so easy and uses very few ingredients but delivers in spades when it comes to flavor. My only complaint with the recipe was in Step 3 which indicates liquid evaporation should occur after 5 minutes. I knew by looking at the amount of water and other liquids, along with previous reviewers comments, that was not going to happen. In fact, it took more than 6 times longer than that at over 30 minutes! I think you could probably get away with using only 1 cup of water instead of two…

    img_0753

    Cider-and-Bourbon-Glazed Shallots

    • Servings: 6-8
    • Difficulty: easy
    • Print

    Ingredients

    • 2½ pounds shallots, peeled
    • ⅔ cup (or more) apple cider vinegar
    • 6 tablespoons unsalted butter
    • ¼ cup bourbon
    • ¼ cup pure maple syrup
    • ¼ teaspoon kosher salt, plus more
    • Freshly ground black pepper
    • 2 cups water (perhaps only 1 cup?)

    Directions

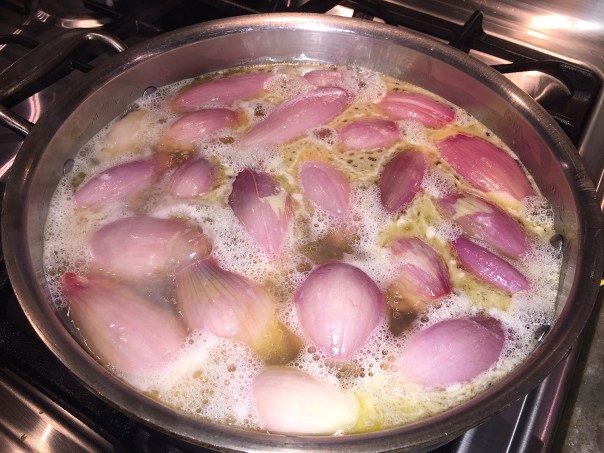
    1. Bring shallots, vinegar, butter, bourbon, maple syrup, ¼ tsp. salt, and 2 cups water to a boil in a large skillet over medium-high heat.
      img_0759
    2. Cover, reduce heat, and simmer, adding water by the tablespoonful if needed, until shallots are crisp-tender and liquid is partly evaporated, 25–30 minutes.
    3. Uncover shallots and cook until liquid is evaporated and shallots begin to brown, about 5 minutes. (This step actually took 30 minutes!)
      img_0763
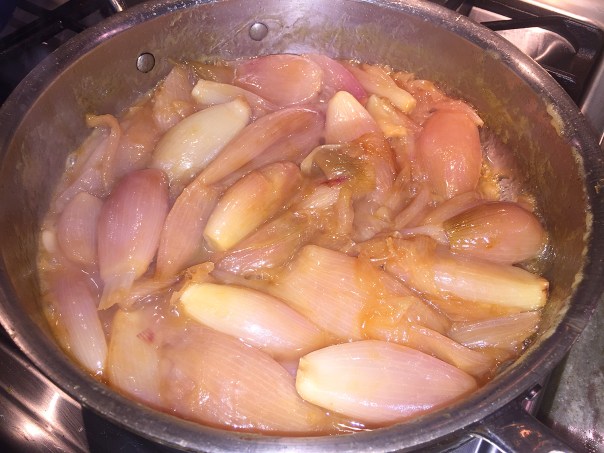
    4. Continue to cook, swirling pan often, until shallots and surface of skillet are covered in a rich brown caramel, about 6 minutes.
      img_0765
    5. Add ¼ cup water to skillet and stir to deglaze caramel and coat shallots. Season with salt and pepper. Transfer to a microwave-safe bowl and let cool.
    6. To reheat, cover bowl with plastic wrap and microwave on high in 30-second intervals, tossing in between, until heated through, about 2 minutes.
    7. Taste and adjust seasoning with salt, pepper, and vinegar if needed.

    Do Ahead: Shallots can be made 1 day ahead. Cover and chill.

    http://www.lynnandruss.com

    Party Carrot Coins

    img_0647

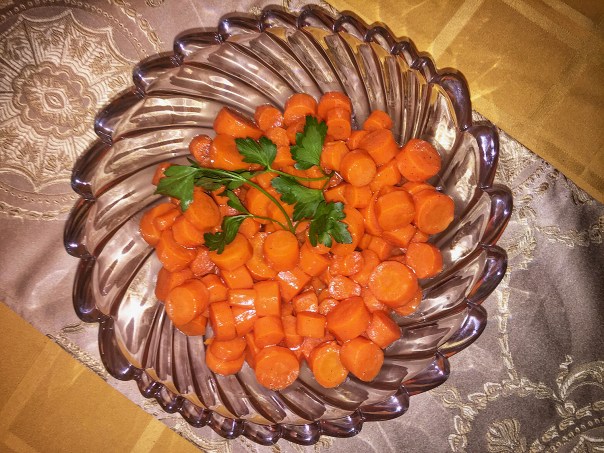
    Usually a side of cooked carrots is a rather mundane affair, but with this award-winning recipe, adapted from one found online by Helen Bethel, these glossy carrots, flavored with orange juice, cinnamon and ginger, are impressive enough for a special occasion.

    Along with a spiral-baked ham and a cheesy potato au gratin, they were a perfect accompaniment to our potluck party for a dozen folks. Super easy to assemble, they can be cooked, cooled and refrigerated up to a day ahead, then gently reheated just before serving.

    img_0637

    img_0638

    Party Carrot Coins

    • Servings: 10-12
    • Difficulty: easy
    • Print

    Ingredients

    • 6 Tbsp. butter
    • 6 Tbsp. brown sugar
    • 6 Tbsp. orange juice
    • 3/4 tsp. salt
    • 3/4 tsp. ground ginger
    • 3/8 tsp. ground cinnamon
    • 12 large carrots (about 2 lbs.), peeled and cut into 1/2-inch rounds

    Directions

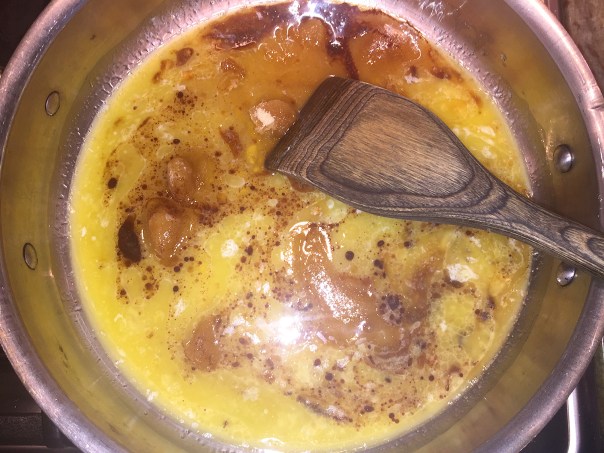
    1. In a large skillet, melt butter over medium heat.
    2. Stir in the brown sugar, orange juice, salt, ginger and cinnamon.
      img_0639
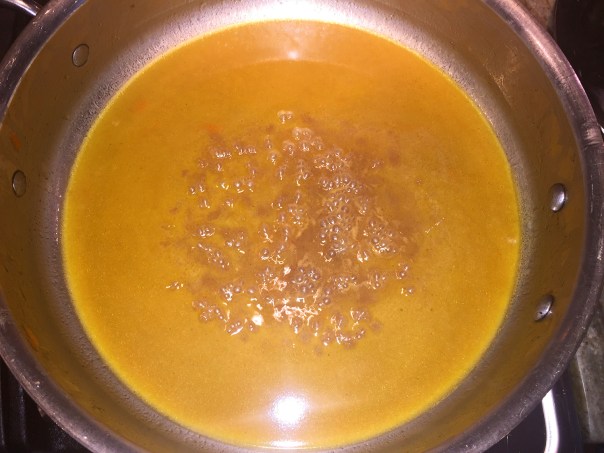
    3. Add the carrots; cover and cook for 30 minutes or until tender, stirring occasionally.
      img_0640
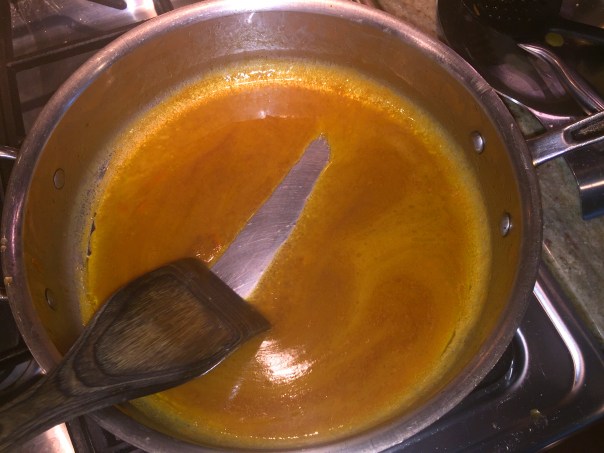
    4. Uncover, remove carrots to a warm serving bowl and tent with foil. Reduce the sauce over medium-high heat until the consistency of a thicker glaze, about 10 minutes more.
      img_0641
      img_0645
    5. Pour glaze over carrots and serve.
      img_0647

    http://www.lynnandruss.com


    Red Wine-Braised Brisket

    How could it be that the two of us—avid and accomplished home chefs—had never cooked a brisket before? It actually dumbfounded us, and felt we needed to remedy this omission in our culinary repertoire. A Red Wine-Braised Brisket recipe from Bon Appétit, gave us a jumping off point.

    img_0762

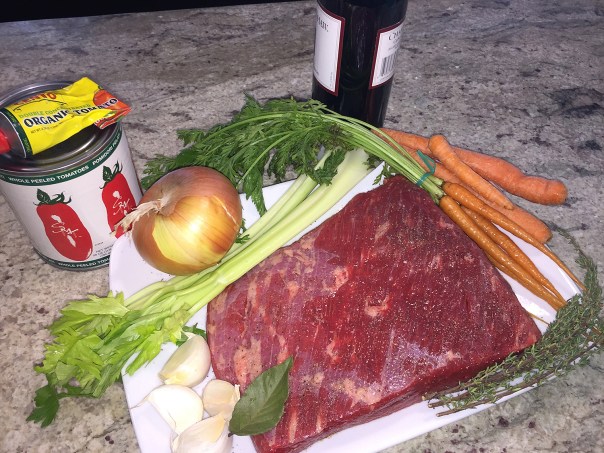
    Mind you, their recipe called for a 5-pound brisket, way too big for the two of us. Instead we chose one half that size at 2 1/2 pounds and made numerous adjustments to most of the other ingredients, all of which are incorporated in our new recipe below.

    You know those dishes that everyone says taste even better if you make them ahead of time? This is a perfect example. The flavors continue to deepen as the braise sits, and it’s that much easier to skim the surface when the sauce has a chance to chill—although there was no fat for us to skim! So go ahead and make it when you have a good chunk of time on your hands and then serve it during the week when you’re short on time, your family will thank you.

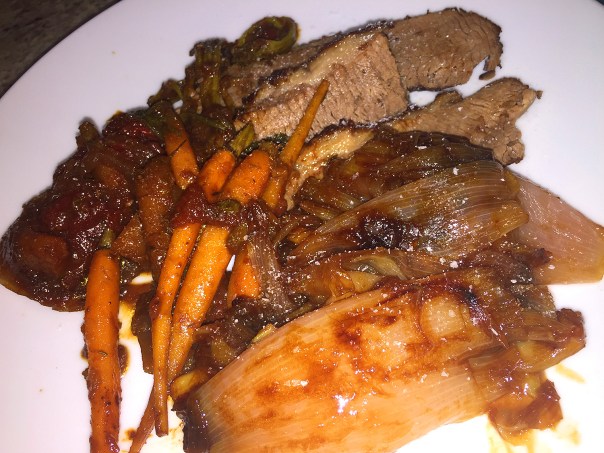
    The depth of flavor was out of this world, and served with our side of Cider-and-Bourbon-Glazed Shallots, well it did temporarily transplant us to another universe, yes the meal was THAT good!

    img_0776

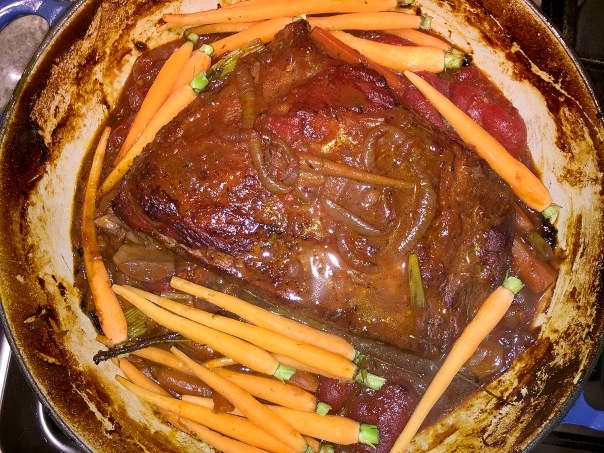
    You may notice in one of the photos that I added the carrots in Step 3, instead of waiting until the last 30 minutes of braising. It wasn’t until three hours into the process that I realized my mistake and figured the carrots would turn to mush so I prepped a few more bunches of baby (and I mean tiny) carrots and nestled them in as noted in Step 5. Interestingly, the original additions weren’t mushy at all, and I was glad we had the extra carrots for our leftovers later in the week.

    img_0722

    Red Wine-Braised Brisket

    • Servings: 4-6
    • Difficulty: easy
    • Print

    Ingredients

    • 2 1/2-lb. untrimmed flat-cut brisket
    • Kosher salt, freshly ground pepper
    • 2 tablespoons vegetable oil
    • 1 large onion, thinly sliced
    • 2 celery stalks with leaves, cut into 3″ pieces
    • 5 garlic cloves, smashed
    • 3 sprigs thyme
    • 1 bay leave
    • 1 14-oz. can whole peeled tomatoes
    • 1 tablespoon tomato paste
    • 1/2 bottle full-bodied red wine (375 ml)
    • 12-16 small carrots

    Directions

    1. Preheat oven to 350°. Season brisket with salt and pepper.
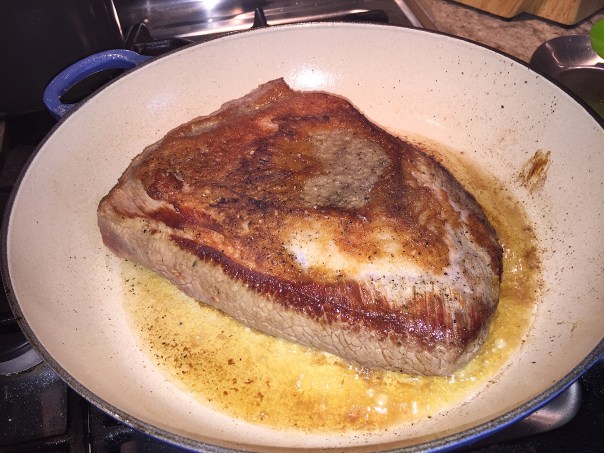
    2. Heat oil in a large ovenproof pot over medium-high. Cook brisket, turning occasionally, until browned all over, 8–10 minutes; transfer to a plate. Pour off fat from pot; discard.
      img_0727
    3. Place onions, celery, garlic, thyme, bay leaves, tomatoes, tomato paste, and wine in pot and stir to combine; season with salt and pepper. Place brisket on top, fat side up.
    4. Cover and braise in oven, spooning juices, onions, and tomatoes over brisket every 30 minutes, until meat is fork-tender, 3–3 1/2 hours.
      img_0738
    5. Uncover pot, nestle carrots around brisket, and cook until carrots are tender, top of brisket is browned and crisp, and sauce has thickened, about 30 minutes.
      img_0756
      img_0760
    6. Skim fat from surface of sauce; discard.
    7. Remove brisket from pot and slice against the grain to serve.
      img_0773
    8. Remove and discard thyme sprigs and bay leaf from sauce. Arrange sliced meat on serving plates and ladle sauce over each portion.
      img_0774

    NOTE: If not serving immediately, transfer brisket to a large bowl and pour braising liquid over; let cool in sauce. Cover and chill, at least 4 hours and up to 4 days. To serve, preheat oven to 325°. Skim fat from surface of sauce; discard. Cover and reheat brisket in sauce, 1 to 1 1/2 hours.

    http://www.lynnandruss.com

    Whole Wheat Apple Pecan Bread

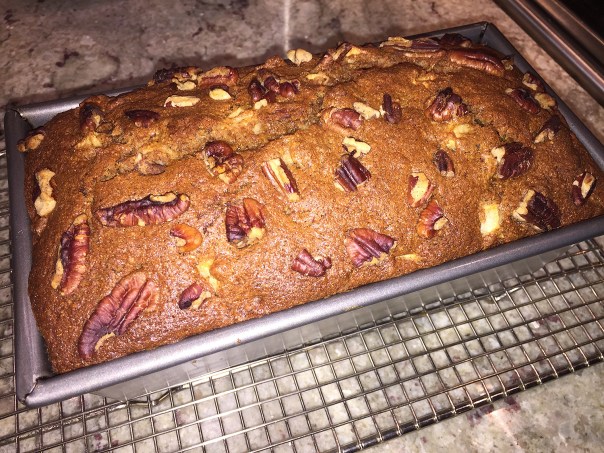
    Apples with walnuts are the more common pairing, but The Mr. detests them, claiming walnuts taste like soap. I personally like them especially in baked goods, but to keep the peace, pecans became the nut of choice for this recipe. And they do have some redeeming health benefits, such as monounsaturated fats which help reduce the risk of heart disease.

    img_0783

    In addition, since pecan nuts are fiber-packed, they improve digestion; are rich in magnesium which is known for its anti-inflammatory benefits; and are an excellent source of vitamin-E, vitamin-A, zinc, folate and phosphorous which play an important role in maintaining good skin. And let’s face it, they taste darn good too!

    While on the subject of health, I incorporated whole wheat flour. When baking, you can replace part, but not all, of the all-purpose with whole wheat. Blending equal parts whole wheat flour with all-purpose flour lightens the finished product while maintaining the nutritional benefits of whole wheat. The end product has a slightly coarser texture and less volume, which I prefer.

    img_0779

    One slice with a schmear of butter (or maybe apple butter?) with your cuppa joe—or green tea in my case—makes for a perfect start on a busy morning…

    img_0734

    Whole Wheat Apple Pecan Bread

    • Servings: 1 loaf
    • Difficulty: easy
    • Print

    Ingredients

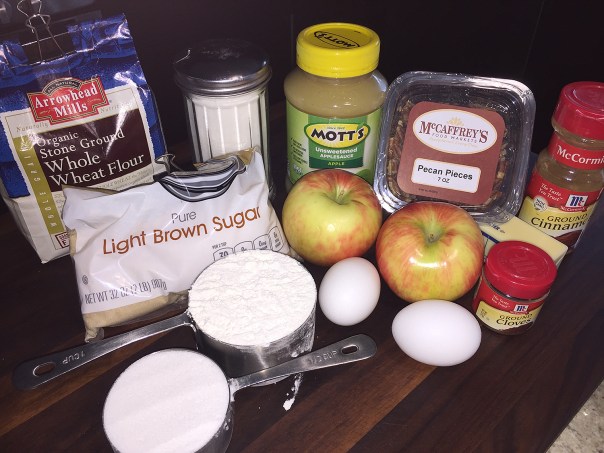
    • 2 Honeycrisp apples, peeled and chopped (yields about 2 cups)
    • 2 eggs
    • 1/2 cup white sugar
    • 1/2 cup brown sugar
    • 2 tsp. vanilla extract
    • 1/4 cup melted unsalted butter (melted and cooled)
    • 3/4 cup unsweetened applesauce
    • 1 cup whole wheat flour
    • 1 cup all purpose flour
    • 1/2 tsp. salt
    • 1 tsp. baking soda
    • 1/4 tsp. baking powder
    • 1 Tbsp. ground cinnamon
    • 1/2 tsp. ground cloves
    • 1 cup pecans, chopped and divided

    Directions

    1. Preheat oven to 375 degrees.
    2. Grease a loaf pan and set aside.
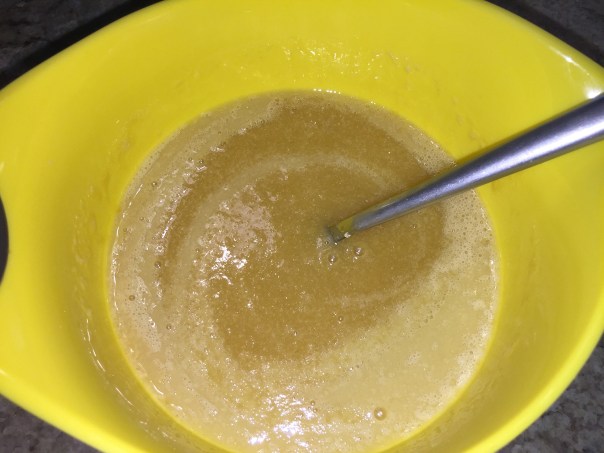
    3. In a small mixing bowl add the eggs, vanilla extract, melted butter and applesauce. Stir until completely combined. Mix in the sugars. Stir until combined.
      img_0740
    4. In a large mixing bowl add the flours, salt, baking powder, baking soda, cinnamon, and cloves. Stir with a fork to combine. Pour the wet ingredients into the dry ingredients and stir to combine.
      img_0737
      img_0741
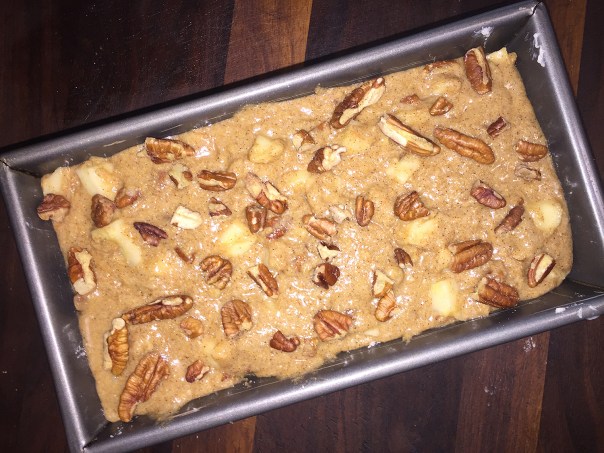
    5. Add in the chopped apple and 3/4 cup of the pecans, stir.
    6. Pour dough into prepared loaf pan. Sprinkle remaining 1/4 cup pecans on top.
      img_0743
    7. Bake for 45 minutes, top should be golden brown. Insert a toothpick in the center to test for doneness. The toothpick will come out clean with no dough stuck on it when it’s finished. If it doesn’t, continue baking for another 5 minutes and check again.
      img_0750
    8. Allow bread to cool in pan for about 10 minutes. Turn upside down and remove bread loaf from pan and allow to cool completely on wire rack.
      img_0777

    NOTE: You can store covered at room temperature for four days. Afterward, store any leftovers in tightly sealed wrapping in the refrigerator. Slice and warm as needed.


    Meatballs in Almond Sauce

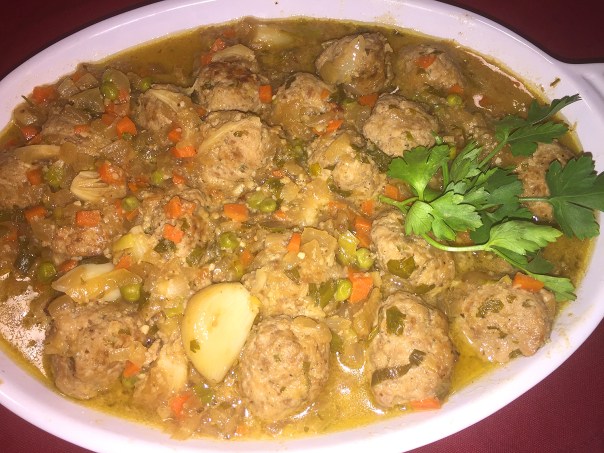
    Meatballs in Almond Sauce is a great party food served with little plates, or a substantial main course for six people. Taken from “Tapas” by Penelope Casas, the sauce of ground almonds in this dish creates a dense, flavorful coating, almost thick enough to eat with a fork.

    According to Penelope, these meatballs come from Santa Maria del Paular, a hotel on the grounds of a Benedictine monastery. Guests are told to “respect the silence of the grounds” with this enclave being a welcome respite from the hectic world of Madrid, some 40 miles away. But you don’t have to travel to Spain to enjoy this wonderful Albondigas en Salsa de Alemendra tapa, just make them at home.
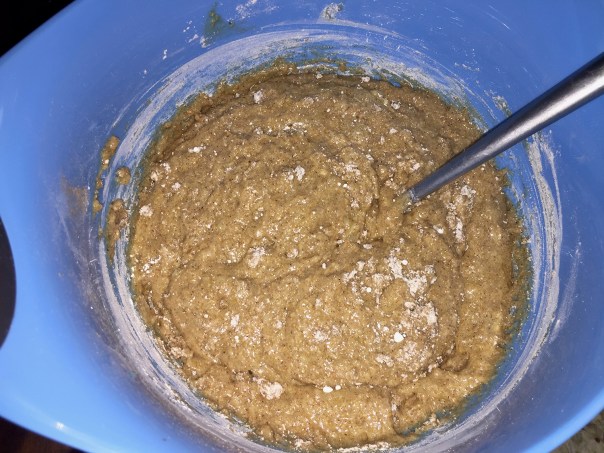
    In the final step the sauce is supposed to thicken. Well that didn’t seem to be happening for me, I’m guessing it was because I used Spanish Marcona almonds (go figure), which tend to be a bit oilier than regular blanched almonds. So I removed the meatballs from the pot, added in some ground blanched almonds and boiled it for a few minutes to reduce the mixture. Luckily that worked and I slipped the meatballs back in.
    The dish was our contribution to a party of eight about 25 minutes away. We placed them in an oven-safe serving dish wrapped with tinfoil, and gently reheated them upon arrival.

    IMG_0524

    Meatballs in Almond Sauce

    • Servings: 6-8
    • Difficulty: moderate
    • Print

    Ingredients

    • 3/4 cup bread crumbs
    • 1 1/4 cup dry white wine
    • 13 cloves garlic, peeled
    • 3/4 lb. ground beef
    • 3/4 lb. ground pork
    • 3/4 lb. ground veal
    • 2 eggs
    • 5 Tbsp. minced parsley
    • 2 1/2 tsp. salt
    • freshly ground pepper
    • 2 Tbsp. olive oil
    • 1 onion, finely chopped
    • 1 carrot, peeled and finely chopped
    • 1 cup slivered blanched almonds
    • 1 3/4 cup beef broth
    • 1/2 cup fresh or frozen peas
    • 1 bay leaf
    • 2 scallions, chopped

    Directions

    1. Soak the bread crumbs in 1/4 cup of the white wine.
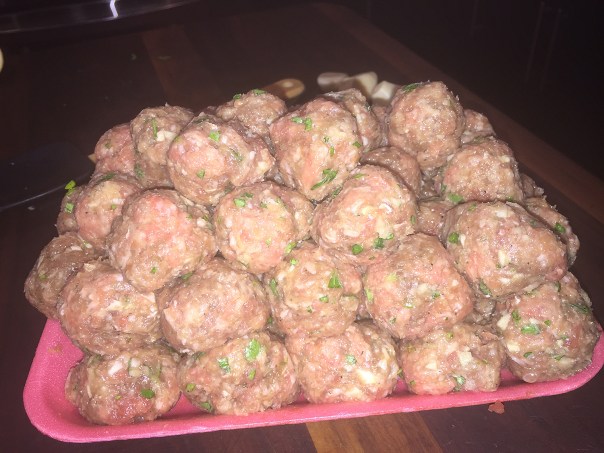
    2. Finely chop 3 cloves of garlic and combine with the bread crumbs, meat, eggs, 3 tablespoons of parsley and the salt and pepper. Form into ping-pong sized balls.
      IMG_0536
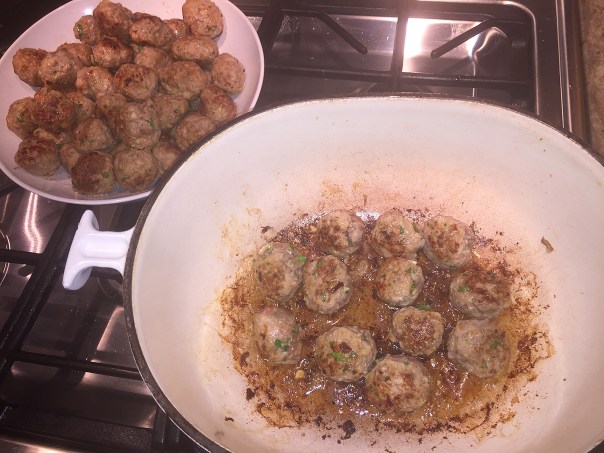
    3. Heat the oil in a large shallow casserole. Sauté the meatballs until well browned on all sides. Remove to a warm platter.  (You may have to do this in several batches).
      IMG_0542
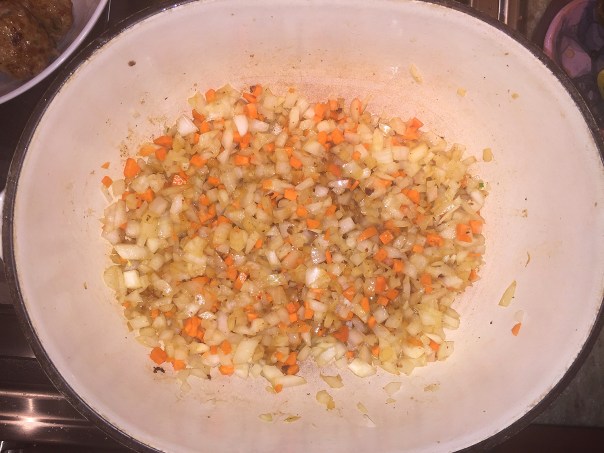
    4. Add the onion and carrots to the casserole and sauté until the onion is wilted (add more oil if necessary).
      IMG_0544
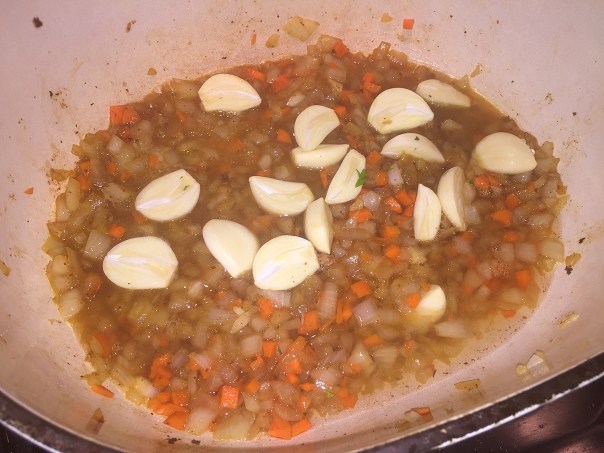
    5. Stir in the remaining cup of white wine and the other 10 cloves of garlic (halved if very large) and boil until most of the liquid has evaporated.
      IMG_0545
    6. Meanwhile in a food processor grind the almonds as finely as possible.
      IMG_0537
    7. With the blade running, pour in the beef broth very gradually. When well-mixed, add this mixture to the casserole, bring to a boil and add the remaining parsley, peas, bay leaf, scallions and more salt and pepper as needed.
      IMG_0549
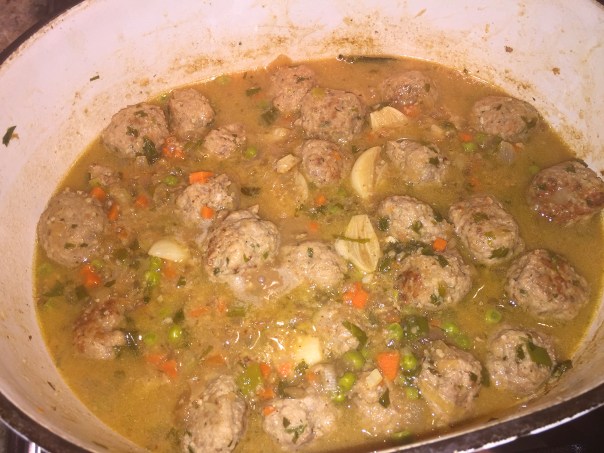
    8. Slip in the meatballs, gently mixing them around so they are coated with the sauce.  Cover and cook slowly for 45 minutes.
      IMG_0551

    These may be prepared ahead and gently warmed before serving.

    http://www.lynnandruss.com

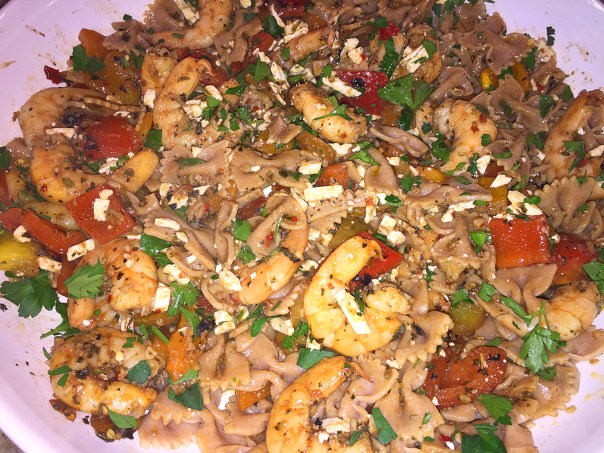
    Whole-Grain Farfalle with Spicy Shrimp and Roasted Peppers

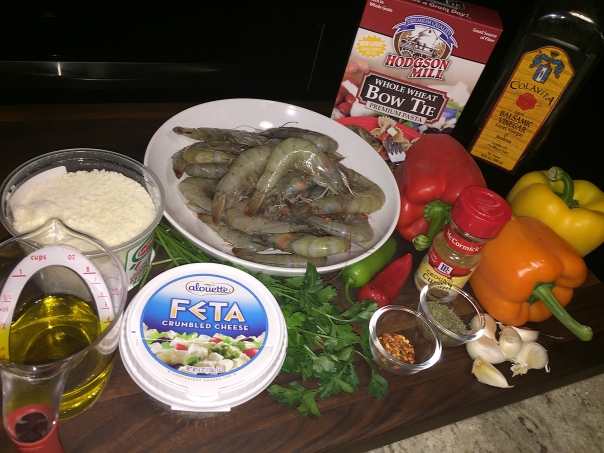
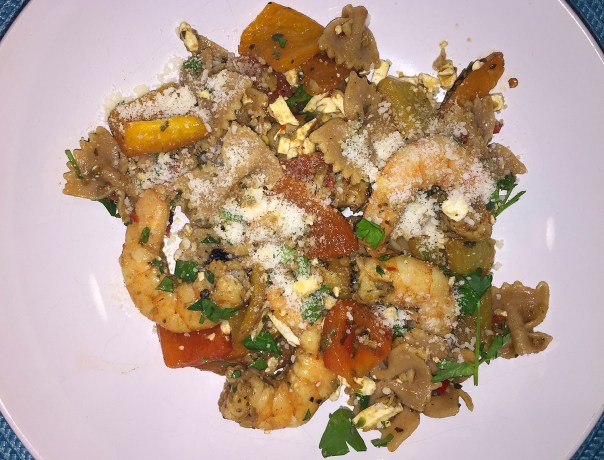
    We love pasta and using a whole-grain variety somehow makes one feel a little bit better about consuming it. Here, the rustic pasta is enhanced with the mild sweetness of roasted peppers and shrimp, and the kick of a spicy garlic marinade. You can use jarred roasted peppers, if you like, but roasting your own will make the pasta tastier, especially if you make them a day ahead.

    IMG_0199

    To roast the peppers you can do so on a grill, under a broiler, or directly over a burner on a gas stove like I did. Once blackened all around, seal them in a ziploc bag for about 15-20 minutes, this will loosen the skin so you can easily sloth it off. Our box of whole-grain farfalle was only 8 ounces as opposed to 12, but it was more than enough for two of us with plenty of leftovers.

    IMG_0191
    IMG_0192

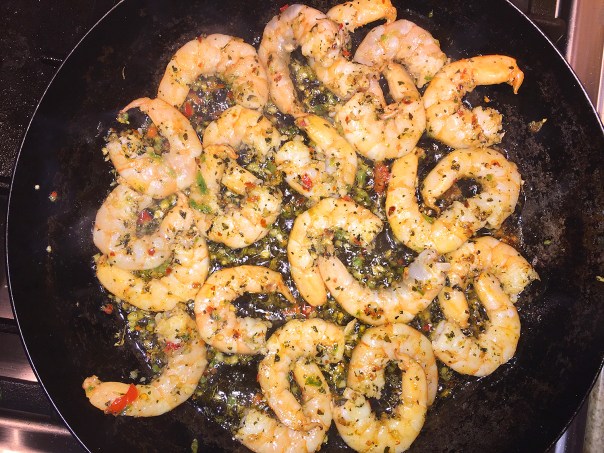
    I’ve mentioned many a time, that our broiler is sub-par and I wasn’t confident it would sear the shrimp properly so I used a skillet method (noted in the directions below). Doing this, I didn’t have to remove the shrimp from the marinade or pat them dry, lending more of the spicy flavor to the dish. Plus, the reserved pasta water wasn’t needed, saving yet another step. It is also much easier to flip the shrimp in a skillet then under a hot broiler, just sayin’ 😉

    IMG_0184

    Whole Grain Farfalle with Spicy Shrimp and Roasted Peppers

    • Servings: 4-5
    • Difficulty: easy
    • Print

    Ingredients

    • 5 medium cloves garlic, peeled and crushed
    • 2 Fresno or other small fresh red chiles, cut into a few pieces (remove seeds and ribs for less heat)
    • 1/2 cup extra-virgin olive oil; more as needed
    • 2 tsp. crumbled dried oregano
    • 2 tsp. Aleppo pepper or 1/2 tsp. red pepper flakes; more to taste
    • 3/4 tsp. ground cumin
    • Fine sea salt
    • 3 red bell peppers or a mixture of red and yellow, roasted, peeled, seeded, and cut into 1-inch pieces
    • 1 Tbs. balsamic vinegar
    • 1 lb. extra-large shrimp (26 to 30 per lb.), preferably wildcaught, peeled and deveined
    • 12 oz. whole-grain farfalle
    • 4 oz. (1 cup) crumbled mild feta, preferably sheep’s milk
    • 1/2 cup lightly packed chopped fresh flat-leaf parsley
    • 1 to 1-1/2 oz. (1 to 1-1/2 cups) finely grated Parmigiano-Reggiano

    Directions

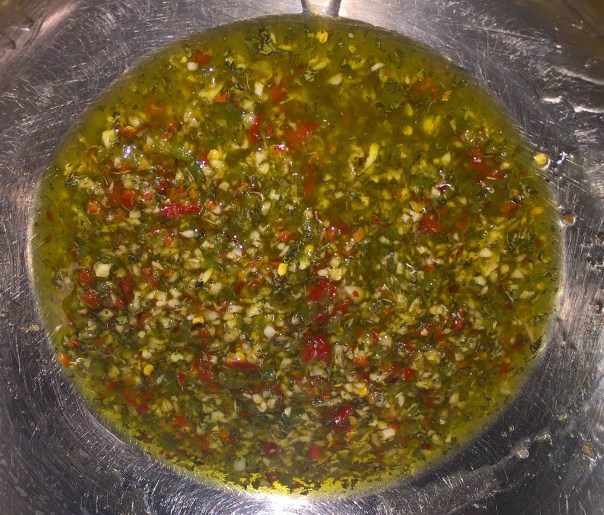
    1. In a food processor, pulse the garlic and chiles until finely chopped. Transfer to a medium bowl, and add the oil, oregano, Aleppo, cumin, and 1/2 tsp. salt; stir well with a fork to combine.
      IMG_0187
      IMG_0188
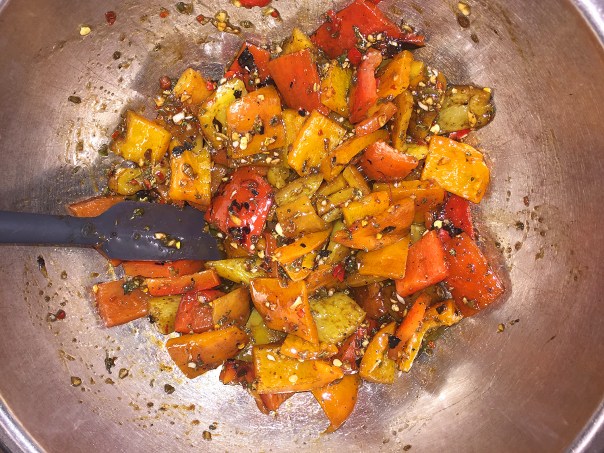
    2. Transfer half of the mixture to another medium bowl and stir in the roasted peppers and vinegar.
      IMG_0194
    3. Add the shrimp to the remaining marinade, gently toss to coat, and set aside to marinate for 15 minutes.
      IMG_0195
    4. Meanwhile, position a rack 4 inches from the broiler element, and heat the broiler on high. Bring a large pot of well-salted water to a boil, and cook the pasta according to package directions until al dente.
    5. While the pasta cooks, lightly grease a large rimmed baking sheet with olive oil. Remove the shrimp from the marinade, gently pat dry with paper towels, and place on the baking sheet. Broil, flipping once, until opaque throughout, 3 to 4 minutes total.
      OR Lynn’s Version: Heat a heavy-duty cast-iron or carbon steel skillet on medium-high and when hot, toss the shrimp, marinade and all into the pan. No need to add additional oil. Sear both sides of shrimp until opaque, turning once, 2-3 minutes total. I then aded everything to the skillet—minus the reserved pasta water, it wasn’t necessary—gently tossed and heated for another minute.
      IMG_0198
    6. Reserve 1/2 cup of the pasta cooking water. Drain the pasta and transfer to a large heated serving bowl. Add the peppers with the marinade, feta, parsley, and 1/4 cup of the pasta water. Gently toss with a large serving spoon for 1 minute to warm the feta, adding a bit more pasta water as needed to loosen the sauce. Season to taste with salt.
    7. Divide the pasta among heated shallow bowls. Sprinkle generously with the Parmigiano, and place 4 to 5 shrimp on top of each serving. Serve, passing more cheese at the table.
      IMG_0203

    http://www.lynnandruss.com

    Adapted from a recipe by Maria Speck from Fine Cooking

    Fudgy Layered Irish Mocha Brownies

    It was the holidays so of course I had to raise the bar on dessert, right? Which is exactly what I did for a dinner we were invited to just days before Christmas. I usually bring an appetizer, but I was in the mood to take a walk on the sweet side of life with these Fudgy Layered Irish Mocha Brownies.

    IMG_0296

    But I elevated their status another tier or two with the green colored mocha layer—after all the name includes “Irish” and it was Christmas. Plus, a smattering of dark chocolate chips on top of the ganache takes it over the top, especially for chocolate lovers like the hostess Barb.

    They are quite simple to make, but have to be assembled in three stages: the brownie layer, the mocha middle, and the ganache topping. Keep in mind, there is some refrigeration time after both the icing and the chocolate finale.

    If sweet is your thing, then these brownies are for you… If you have any left after a couple of days, wrap tightly and refrigerate. Bring to room temp before serving again.

    Fudgy Layered Irish Mocha Brownies

    • Servings: 16 brownies
    • Difficulty: moderate
    • Print

    Ingredients

    • 2/3 cup all-purpose flour
    • 1/2 teaspoon baking powder
    • 1/4 teaspoon salt
    • 1/3 cup butter
    • 6 tablespoons baking cocoa
    • 2 tablespoons canola oil
    • 1/2 teaspoon instant coffee granules
    • 1 cup sugar
    • 2 large eggs, beaten
    • 1 teaspoon vanilla extract

    FROSTING:

    • 2 cups confectioners’ sugar
    • 1/4 cup butter, softened
    • 3 tablespoons Irish cream liqueur
    • Dab of green food coloring (optional)

    GANACHE TOPPING:

    • 1 cup semisweet chocolate chips
    • 3 tablespoons Irish cream liqueur
    • 2 tablespoons heavy whipping cream
    • 1/2 teaspoon instant coffee granules
    • 1 oz. dark chocolate chips or shaved chocolate (optional)

    IMG_0303

    Directions

    1. Preheat oven to 350°.
    2. Sift together flour, baking powder and salt; set aside.
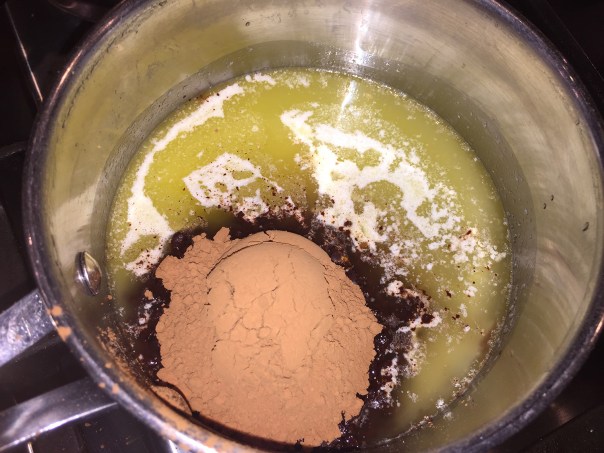
    3. In a small saucepan over low heat, melt butter. Remove from heat; stir in cocoa, oil and instant coffee granules.
      IMG_0251
      IMG_0252
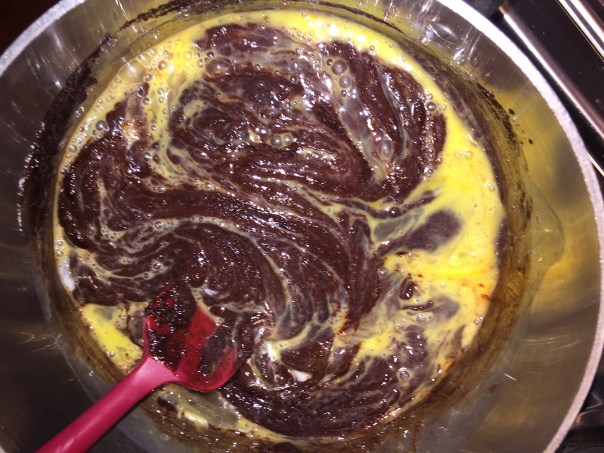
    4. Cool slightly; stir in sugar and beaten eggs.
      IMG_0253
    5. Gradually add flour mixture and vanilla; mix well.
      IMG_0255
      IMG_0256
    6. Spread batter into a greased 8-in. square pan; bake until center is set (do not overbake), about 25 minutes. Cool in pan on wire rack.
      IMG_0258
      IMG_0260
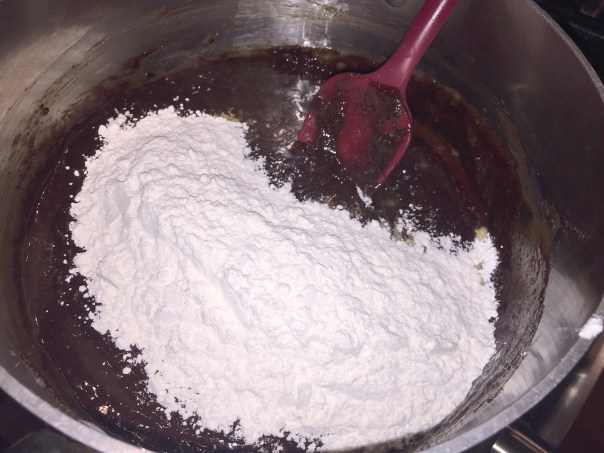
    7. For frosting, whisk together confectioners’ sugar and butter (mixture will be lumpy).
      IMG_0262
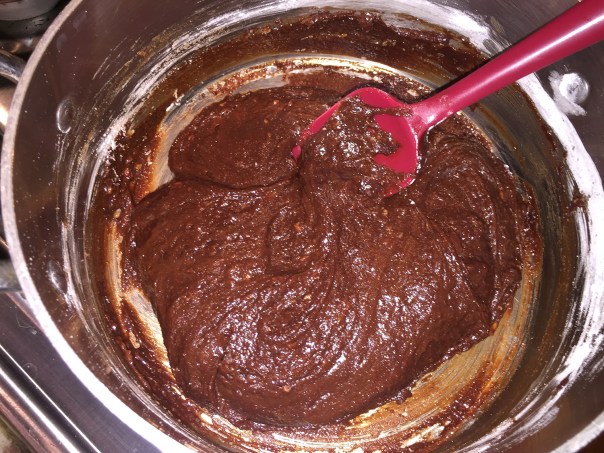
    8. Gradually whisk in Irish cream liqueur and green food coloring if using; beat until smooth. Spread over slightly warm brownies.
      IMG_0265
      IMG_0267
    9. Refrigerate until frosting is set, about 1 hour.
    10. Meanwhile, prepare ganache: Microwave all ingredients on high for 1 minute; stir. Microwave 30 seconds longer; stir until smooth. Cool slightly until ganache reaches a spreading consistency.
    11. Spread over frosting. Sprinkle on dark chocolate chips if using.IMG_0290
    12. Refrigerate until set, 45-60 minutes.
    13. Cut into 16 squares and serve plain or with ice cream.
      IMG_0309

    http://www.lynnandruss.com

    Recipe found on TasteOfHome.com


    Little Ears and Small Balls

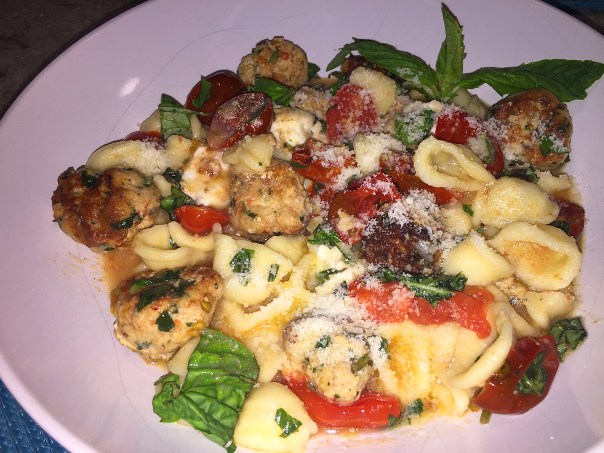
    Who doesn’t love meatballs, other than vegetarians of course? These little mini chicken meatballs will steal your heart not only because they are charmingly quaint and fit in your mouth in one easy bite, but also they taste fabulous! We have to thank Giada De Laurentiis for the Orecchiette with Chicken Meatballs recipe. (Orecchiette means “little ears” in Italian.)

    img_0633

    Now ground chicken can be somewhat difficult to handle. One trick I’ve learned is to keep a bowl of water at the ready so you can keep your fingers and palms moist as you roll the balls. If you have time or can make the mixture ahead, refrigerating it for a few hours can also make it easier, but it’s not necessary. I did not use any instrument other than my hands to form them—which made exactly 60 as the recipe indicated.

    The second time I made them I took the suggestion of another reviewer and used chili garlic sauce instead of ketchup, which gives an ever-so-slightly spicy component rather than a sweet one—but that’s a personal preference.

    The first go-around, the bocconcini mozzarella cheese ingredient was a bit of a mystery to us, as it was to the cheese monger at the store who also had never heard of it. So while we just bought a chunk of regular mozzarella, later we found out that Bocconcini, described by its Italian name which means small mouthfuls, are small mozzarella cheeses the size of an egg. We just diced our block into small cubes. The second time making this, I used the small mozzarella balls.

    In the end, it was such a nice change to have a light, brothy sauce instead of a heavy one. And of course it will make a noticeable difference if you can incorporate homemade chicken stock as opposed to the boxed or canned store-bought varieties. But it’s not a deal breaker if you don’t have any because there is a lot of flavor in the meatballs themselves.

    img_0614

    Orecchiette with Mini Chicken Meatballs

    • Servings: 4-6
    • Difficulty: intermediate
    • Print

    Ingredients

    • 1 pound orecchiette pasta
    • 1/4 cup plain bread crumbs
    • 1/4 cup chopped fresh flat-leaf parsley
    • 2 large eggs, lightly beaten
    • 1 tablespoon whole milk
    • 1 tablespoon ketchup (or chili-garlic sauce)
    • 3/4 cup grated Romano
    • 3/4 teaspoon salt
    • 3/4 teaspoon freshly ground black pepper
    • 1 pound ground chicken
    • 1/4 cup olive oil
    • 1 1/2 cups low-sodium chicken stock, hot
    • 4 cups cherry tomatoes, halved
    • 1/2 cup freshly grated Parmesan
    • 8 ounces bocconcini mozzarella, halved
    • 1/2 cup chopped fresh basil leaves

    Directions

    1. Bring a large pot of salted water to a boil over high heat. Add the pasta and cook until tender but still firm to the bite, stirring occasionally, about 8 to 10 minutes. (My orrechiette directions indicated 15-18 minutes, so go by your package instructions for al dente.)
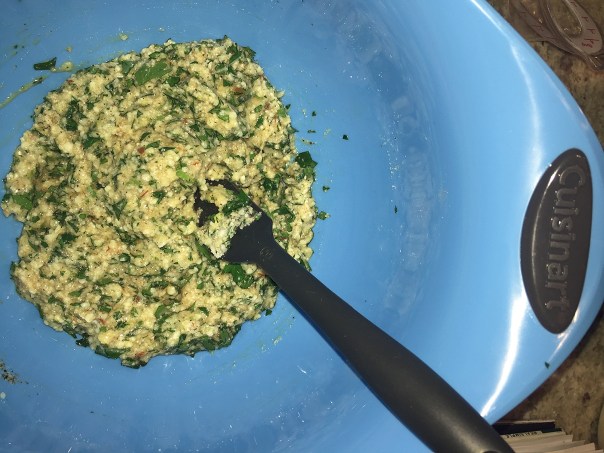
    2. In a medium bowl, stir together the bread crumbs, parsley, eggs, milk, ketchup, Romano cheese, and the salt and pepper. Add the chicken and gently stir to combine.
      img_0615
      img_0617
    3. Using a melon baller (or your hands), form the chicken mixture into 3/4-inch pieces. With damp hands, roll the chicken pieces into mini meatballs.
      img_0618
    4. In a large (14-inch) skillet, heat the oil over medium-high heat. Working in batches, add the meatballs and cook without moving until brown on the bottom, about 2 minutes. Turn the meatballs over and brown the other side, about 2 minutes longer.
      img_0620
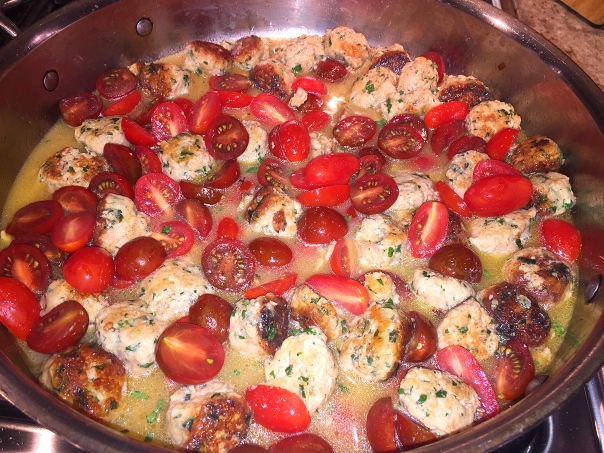
    5. Add the chicken stock and tomatoes. Bring to a boil. Using a wooden spoon, scrape up the brown bits that cling to the bottom of the pan. Reduce heat to low and simmer until tomatoes are soft and meatballs are cooked through, about 5 minutes.
      img_0622
    6. Drain the pasta, reserving about 1 cup of the pasta water. Transfer pasta to a large serving bowl and add the Parmesan.
      img_0624
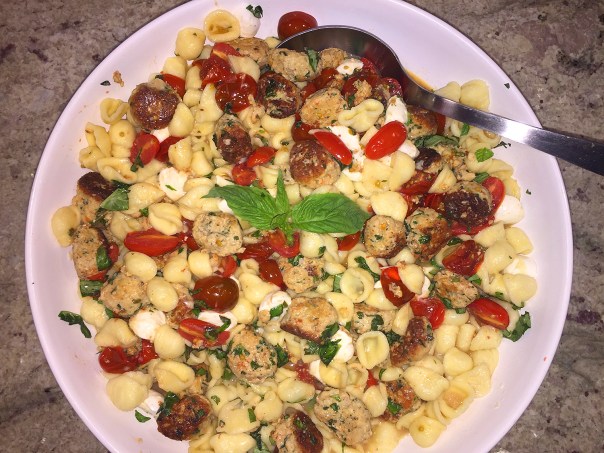
    7. Toss to lightly coat orecchiette, adding reserved pasta water, if needed, to loosen the pasta. Add the meatball mixture, mozzarella cheese, and 1/2 cup of the basil. Gently toss to combine. Garnish with the chopped basil.
      img_0628

    http://www.lynnandruss.com

    Adapted from a recipe by Giada De Laurentiis

    A Mexican Twist to Leftover Chicken

    Recently roast a chicken and have leftovers? Use the remaining meat, or buy a small rotisserie chicken at the supermarket—either way, you’ll have this Chicken Enchiladas with Salsa Verde dinner on the table in 30 to 45 minutes depending on your cooking method of choice.

    IMG_0216

    The following recipe details using the broiler, but as I’ve complained on numerous occasions, my broiler is a bit finicky to say the least, so I heated them in the oven at 400 degrees for about 20 minutes until the cheese just starts to brown. But if you’re confident in your broiler’s abilities, go ahead and use that route, it’ll save you about 15 minutes.

    Our cheese was a shredded Mexican mix with jalapeños and then I tossed in a bit of leftover shredded cheddar for an additional pop of color—and let’s face it, more cheese 😉 Meanwhile, you can make the side dish of Mexican Rice and Beans which take a total of 40 minutes to assemble. If you have any leftovers, it’s very good by itself reheated.

    IMG_0225

    Chicken Enchiladas with Salsa Verde

    • Servings: 5-6
    • Difficulty: moderate
    • Print

    IMG_0212

    Ingredients

    • Kosher salt
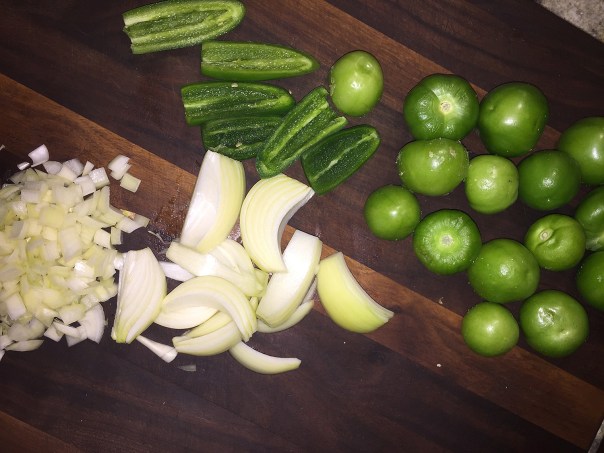
    • 1 lb. tomatillos (about 15 medium), husked and rinsed
    • 3 jalapeños, stemmed and halved lengthwise (seeded, if you like)
    • 1 large yellow onion, half cut into 4 wedges, half chopped
    • 2/3 cup roughly chopped fresh cilantro
    • 1-1/2 Tbs. canola oil
    • 2 tsp. ground cumin
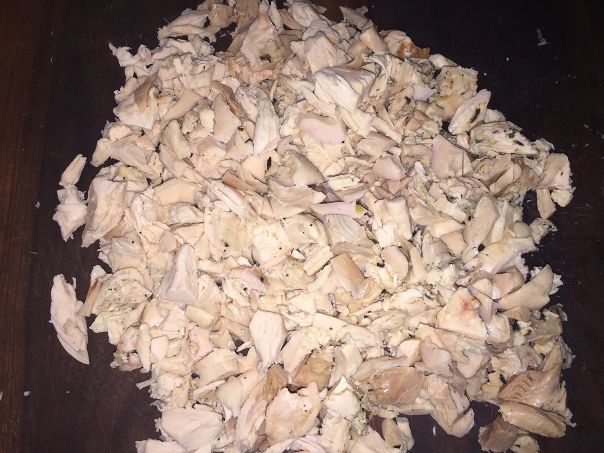
    • About 3 cups of leftover chicken meat, chopped
    • 8, 8-inch corn tortillas
    • 1-1/2 cups shredded Monterey Jack cheese

    Directions

    1. Bring a medium pot of salted water to a boil. Add the tomatillos, jalapeños, and onion wedges; cover and simmer until tender, about 10 minutes.
      IMG_0215
    2. Drain well and transfer to a blender along with 1/3 cup of the cilantro. Purée until just slightly chunky and season to taste with salt.
    3. Meanwhile, heat 1 Tbs. of the oil in a large skillet over medium-high heat. Add the chopped chicken, chopped onion, cumin, 1 tsp. salt, and 1/4 tsp. pepper and cook, stirring occasionally to break up the meat, until heated through, about 2 minutes.
    4. Stir 1/2 cup of the salsa verde into the chicken.
    5. Position a rack about 6 inches from the broiler and heat the broiler to high. Grease a 9×13-inch metal or ceramic baking dish with the remaining 1/2 Tbs. oil.
    6. Wrap the tortillas in a few slightly damp paper towels and microwave on high until warm, 30 to 45 seconds.
    7. Working with one tortilla at a time, spoon some of the chicken mixture down the center of the tortilla and sprinkle with 1 Tbs. of the cheese. Roll up snugly and transfer to the prepared baking dish, seam side down.
    8. Repeat with the remaining tortillas and beef mixture. Pour the remaining salsa verde over the enchiladas and sprinkle with the remaining cheese.
      IMG_4099
    9. Broil until golden brown and bubbly, 3 to 5 minutes. Garnish with the remaining cilantro and serve.
      IMG_0222

    http://www.lynnandruss.com

    Mexican Tomato Rice and Beans

    • Servings: 6-8
    • Difficulty: moderate
    • Print

    Ingredients

    • 1 cup uncooked medium-grain white rice
    • 1 14-1/2-ounce can diced tomatoes (preferably “petite-cut”)
    • 2 Tbs. extra-virgin olive oil
    • 6 medium cloves garlic, finely chopped
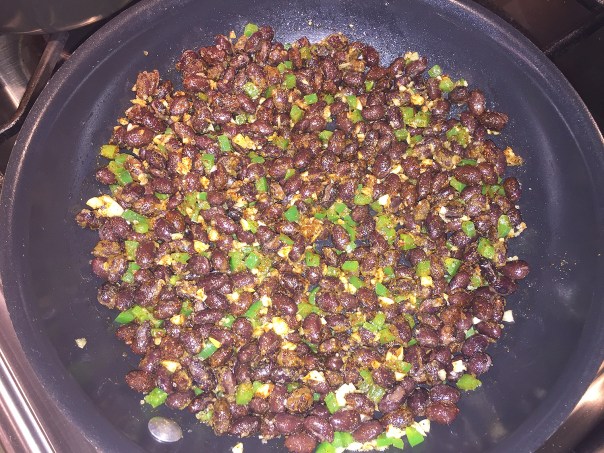
    • 1 medium fresh jalapeño, cored and finely chopped (if you like spicy foods, leave in the ribs and seeds; if not, remove them)
    • 1 15-oz. can black beans, drained and rinsed
    • 2 tsp. kosher or fine sea salt
    • 2 tsp. ground cumin
    • 1 tsp. chili powder
    • 1/4 cup finely chopped fresh oregano leaves and tender stems
    • 1/4 cup finely chopped fresh cilantro leaves and tender stems

    Directions

    1. In a 1-quart saucepan, combine the rice with 2 cups cold water. Bring to a boil over medium-high heat, cover, reduce the heat to low, and cook for 20 minutes. Remove from the heat and let the pan stand, covered, for another 5 minutes.
    2. While the rice steams, set a fine sieve in a bowl and drain the can of tomatoes. Pour the tomato juices into a 1-cup liquid measure. Add enough water to the tomato juices to equal 1 cup.
    3. Heat a 10- to 12-inch skillet over medium-high heat. Pour in the oil and stir-fry the garlic and jalapeño until the garlic browns and the jalapeño smells pungent, about 1 minute.
    4. Add the black beans, salt, cumin, and chili powder; stir two to three times to incorporate the mixture and cook the spices, about 30 seconds.
      IMG_4088
    5. Stir in the tomato juice and water mixture and bring to a boil. Adjust the heat to maintain a gentle boil and cook, stirring occasionally, until the beans absorb much of the liquid, 5 to 7 minutes.
    6. Add the tomatoes, oregano, cilantro, and cooked rice and cook, stirring occasionally, until the rice is warm, 1 to 2 minutes. Serve immediately.IMG_4093

    http://www.lynnandruss.com

    Prosciutto-Wrapped Pork with Apricot-Sage Stuffing and Bourbon-Mustard Glaze

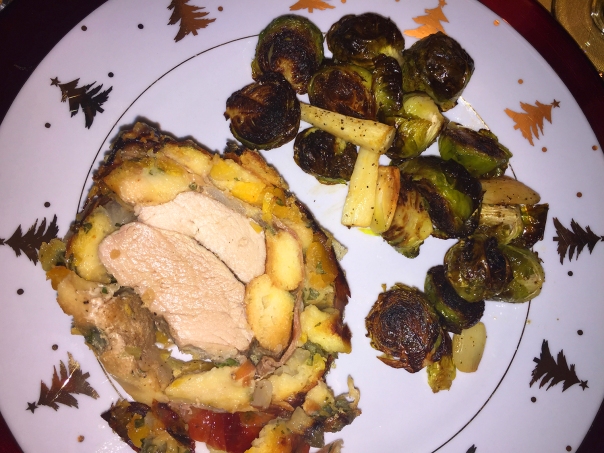
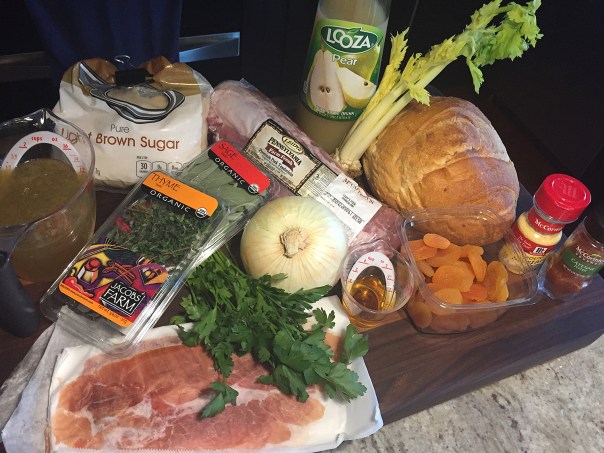
    WOW, the name alone gets my mouth watering! And paired with our Cauliflower, Pear and Fennel Soup and Roasted Brussels Sprouts and Parsnips side dish, what a meal it made! It’s a little time intensive and a bit tricky to wrap, but you’ll amaze yourself when you take the first bite.

    IMG_0466

    Initially I wanted to get one larger pork tenderloin, but it’s almost impossible to get just one from our grocery store, they always seem to come prepackaged with two. A one-pounder just didn’t seem like it was going to be enough for four of us (let alone 6-8 as the recipe describes), so we devised a way of overlapping the two, giving us nearly 2 pounds of meat. Well, let’s just say, there was a good bit leftover…

    Since we did enlarge our portion of meat, we doubled the amount of glaze, a smart move. My only critique would be to perhaps include a pan sauce or gravy to spoon over the slices when plated.

    Prosciutto makes a fantastic wrap, holding the bread stuffing in place and crisping up during roasting. If it’s a bit on the fatty side, the fat will melt away, revealing the stuffing underneath. A little cayenne in both the stuffing and the glaze balances the dish’s inherent sweetness.

    Here’s a step-by-step visual before the written directions:

    IMG_0414Gather your ingredients
    IMG_0419
    Sauté the onions and celery
    IMG_0420
    Toast the bread cubes
    IMG_0421
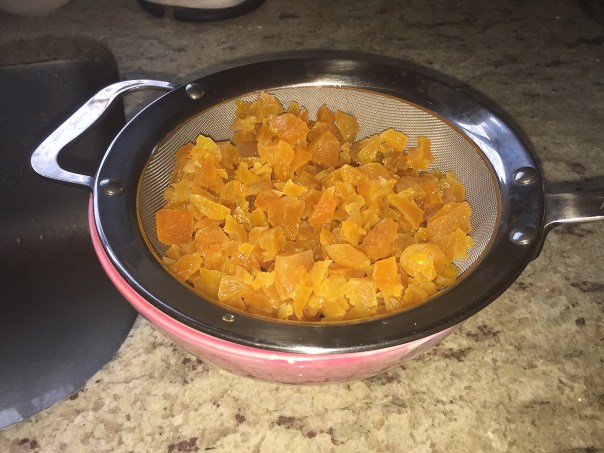
    Strain the apricots over a bowl, squeezing them to extract more liquid
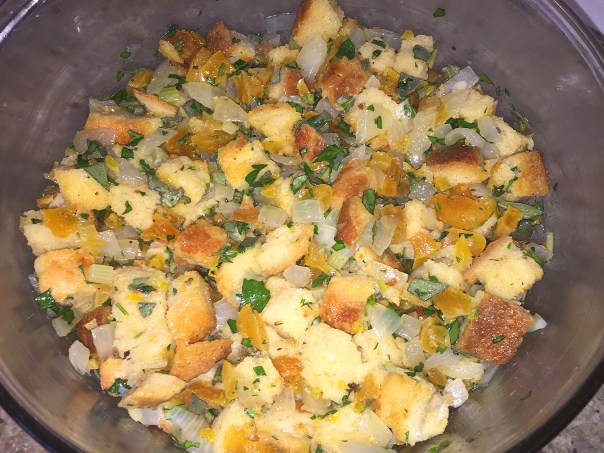
    IMG_0425
    Whisk the broth and eggs, and pour over the bread mixture, toss well
    IMG_0427
    Shingle 2 rows of prosciutto to roughly make a 14×14-inch square
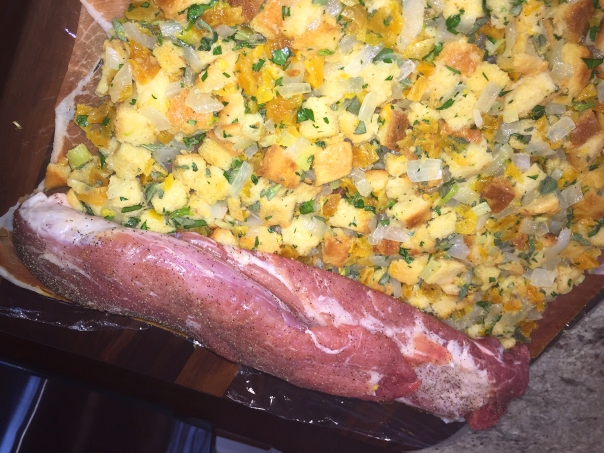
    IMG_0431
    Use your hands to lightly press the stuffing mixture into an even layer, leaving a border on top and bottom and on each side
    IMG_0432
    Position the pork across the center of the stuffing
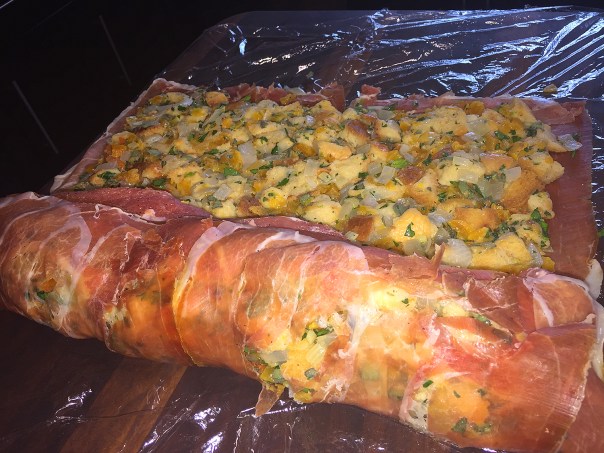
    IMG_0433
    IMG_0434
    Lift the plastic to help wrap the prosciutto and stuffing around the pork, and continue to roll up like a sushi roll, encasing the pork with the stuffing and prosciutto
    IMG_0436
    Tuck in the ends of the prosciutto, then wrap the roll tightly in the plastic wrap, twisting the ends to tightly compress the roast
    IMG_0457
    Remove the plastic wrap from the pork and place the pork seam side down in the center of the rack

    Prosciutto-Wrapped Pork with Apricot-Sage Stuffing and Bourbon-Mustard Glaze

    • Servings: 6-8
    • Difficulty: moderate
    • Print

    Ingredients

    For the stuffing

    • 10 oz. sourdough bread, cut into 1/2-inch cubes (about 8-1/2 cups)
    • 2 Tbs. bourbon
    • 4 oz. dried apricots, finely chopped (about 2/3 cup)
    • 1 Tbs. vegetable oil
    • 1 large sweet onion, cut into 1/2-inch dice (about 2-3/4 cups)
    • 1 medium celery rib with leaves, cut into 1/2-inch dice (about 3/4 cup)
    • 1/4 cup coarsely chopped fresh flat-leaf parsley
    • 2 Tbs. coarsely chopped fresh sage
    • 1 Tbs. fresh thyme leaves
    • 1 tsp. dry mustard
    • Kosher salt and freshly ground black pepper
    • 1/8 tsp. cayenne
    • 1-1/2 cups lower-salt chicken broth
    • 2 large eggs

    For the pork

    • 1 pork tenderloin, trimmed (1 to 1 1/2 lb.)
    • Kosher salt and freshly ground black pepper
    • 16 thin slices prosciutto

    For the glaze

    • 1 Tbs. reserved apricot soaking liquid (from above) or water
    • 3 Tbs. light brown sugar
    • 1 tsp. Dijon mustard
    • Pinch cayenne
    • Kosher salt and freshly ground black pepper

    Directions

    Make the stuffing

    1. Position a rack in the center of the oven and heat to 350°F. Arrange the bread in a single layer on a large rimmed baking sheet and toast until crisp, about 15 minutes. Cool to room temperature.
    2. In a small bowl, combine the bourbon with 2 Tbs. water. Add the apricots and soak until soft, about 20 minutes. Strain the apricots over a bowl, squeezing them to extract more liquid. Reserve any liquid—it won’t be much—to add to the glaze, and set the apricots aside.
    3. Heat the oil in a large skillet over medium heat. Add the onion and celery, and cook, stirring occasionally and adjusting the heat as necessary, until very soft but not browned, about 8 minutes. Transfer to a large bowl. Add the bread, apricots, parsley, sage, thyme, mustard, 1 tsp. salt, 1/4 tsp. pepper, and the cayenne.
    4. In a small bowl, whisk the broth and eggs, and pour over the bread mixture. Toss well, let sit for 5 minutes, and toss again. cover and chill for at least 30 minutes and up to 1 day.

    Wrap the pork

    1. Pat the pork tenderloin dry and season well with salt and pepper.
    2. Lay some plastic wrap on a work surface so that it measures at least 20×20 inches; overlap a couple of pieces of plastic wrap as needed.
    3. Shingle 2 rows of prosciutto, using 6 to 8 slices for each row to make a 14×14-inch square.
    4. Spoon the stuffing mixture onto the prosciutto, then use your hands to lightly press it into an even layer, leaving a 1-1/2-inch border on top and bottom and a 1-inch border on each side. Position the pork across the center of the stuffing.
    5. Lift the plastic to help wrap the prosciutto and stuffing around the pork, and continue to roll up like a sushi roll, encasing the pork with the stuffing and prosciutto.
    6. Tuck in the ends of the prosciutto, then wrap the roll tightly in the plastic wrap, twisting the ends to tightly compress the roast. Tuck the ends under the roast to keep snug.
    7. Chill for at least 30 minutes and up to 1 day. Longer is better as it helps the stuffing to firm up.

    Roast and glaze the pork

    1. Position a rack in the center of the oven and heat to 375°F. Set a rack in a roasting pan lined with parchment.
    2. In a small saucepan, combine the reserved apricot soaking liquid with the brown sugar and mustard over medium heat. Simmer, stirring occasionally, until smooth, about 2 minutes.
    3. Add the cayenne, and season to taste with salt and pepper. if too thick to brush easily, thin with a little water.
    4. Remove the plastic wrap from the pork and place the pork seam side down in the center of the rack. Roast, brushing the prosciutto with the glaze during the last 10 minutes of cooking, until cooked (135°F), 55 to 65 minutes.
      IMG_0461
    5. Let rest for 15 minutes, then slice the roast with a very sharp knife into thick slices.
      IMG_0463

    http://www.lynnandruss.com

    Best Bang for the Buck in the “Burbs”…

    …. According to Zagat… And Fayette Street Grille is among the recipients of the 2017 Experts’ Choice Award—fewer than 2% of restaurants worldwide receive this honor! Who can argue with these accolades? Opened in 1998, Fayette Street Grille has proven their worth with consistently providing high-quality food and attentive service. The BYO with a three-course prix fixe dinner menu, an open kitchen, and a casually elegant atmosphere was perfect for an evening out.

    Our friends Karen and Ed Mortka chose the establishment—somewhere between our two places of residence, because they had been there before to celebrate their anniversary, and loved it. And we’re always up for trying new restaurants, especially BYOs with great ratings. We were more than willing to make the 35-minute road trip.

    Located in a small brick building in the heart of Conshohocken on Fayette Street, arriving practically at the same time, we found street parking directly in front. Since it was on the early side (for us anyway), inside there were many unoccupied tables and a smattering of high tops, but as the night wore on the place filled up, and the noise-level rose quite a few decimals.

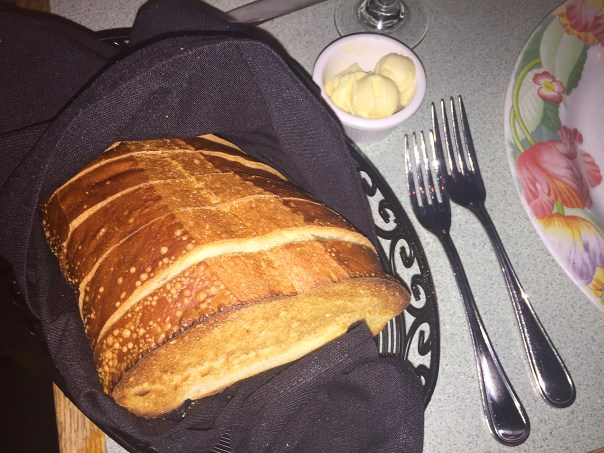
    It had been a while since the four of us got together so we chatted and sipped wine for about a half hour before we put in our food orders. Their three-course meal includes a half dozen choices under each header beginning with Starters, followed by Entrées and ending with Desserts. Once we made our choices, a basket of warm, crusty, toasted bread (always a good sign of things to come) arrived at the table and we continued the conversations.

    IMG_0485

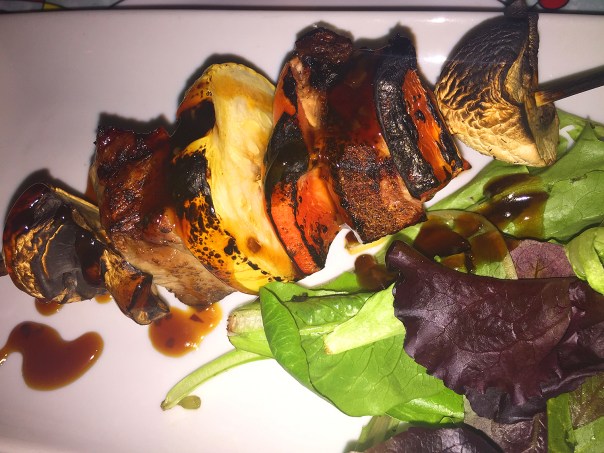
    All of the listings were tempting so it took a while to finalize our choices. Ed and I were on the same page with Starters as we both chose the Beef Kabobs skewered with seasoned, grilled medium-rare beef cubes, bell peppers, mushrooms and yellow squash then topped with a sesame-wasabi vinaigrette and microgreens. While I did think the kabob was good, the dish wasn’t over-the-top thrilling for me.
    IMG_0487

    But Russ and Karen couldn’t say enough about their selection of Mushroom and Crab Ragout containing seasonal mushrooms, crab claw meat, chopped garlic and fresh parsley tossed in a roasted vegetable veloute and gorgeously plated in a phyllo dough cup with a pop of microgreens.

    IMG_0488

    For entrées we all went a different direction, although it wasn’t an easy choice for any of us because everything sounded delicious. However, I pretty much knew Russ would get the Port Wine Braised Shank of Lamb which was accompanied by braised red skin potatoes and braising vegetables plated on a bright yellow dish. Did he love it? You betcha!

    IMG_0503

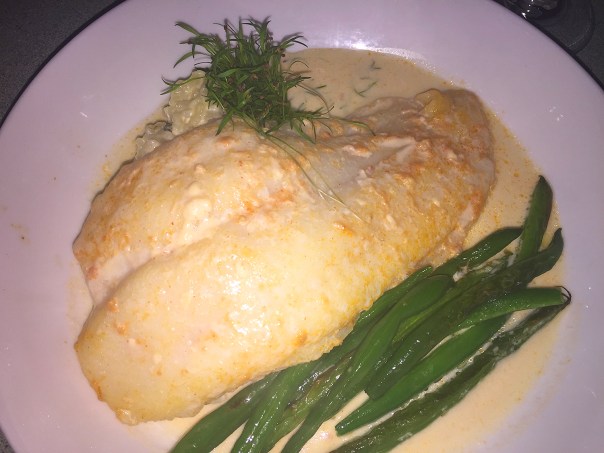
    The Mediterranean Bass Blanco was calling my name, and I am sooo glad to have chosen it as it was one of the most sublime pieces of fish I’ve ever eaten—no doggie bag for me! The shallow poached bass was served over a pillowy lemon-thyme risotto, and finished with a seafood bechamel and a side of roasted green beans. OMG, I think I died and went to heaven!

    IMG_0499

    Karen elected to try the Seared Ahi Tuna, something she said she’d never had before. The ample portion was seared rare and placed onto a pineapple and sage risotto with those same roasted green beans, then all finished with an orange-sesame vinaigrette. Let me just say, that we all cleaned our plates, with no leftovers what-so-ever…

    IMG_0505

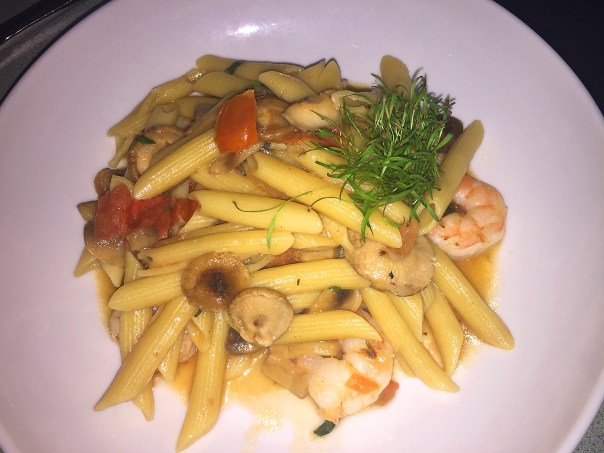
    Not to be outdone, Ed ordered the Shrimp Monsignor (now how did it get that name?) which was sautéed with shiitake mushrooms, diced tomato and basil, ladled over a bowl of penne in a light seafood broth. The added microgreens did not thrill him, so wife Karen was the recipient of that ingredient.

    IMG_0501

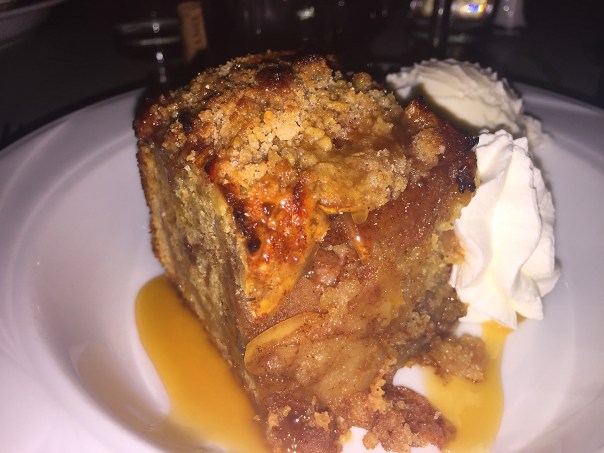
    Since dessert came with the meal, everyone ordered, although I took my Chocolate Gateau served with Mint Creme to-go. (We hosted a brunch for 7 the next morning and everyone had a taste.) As with the Starter, both Russ and Karen chose the same Apple Crisp served with Vanilla Ice Cream. Ed on the other hand opted for the Saint Louis Butter Cake with Strawberries. BTW, all desserts are prepared in-house.

    IMG_0516

    IMG_0510

    IMG_0508

    IMG_0512

    The pace was very leisurely and we never felt rushed. In fact, even after dessert we continued chatting and before we knew it, it was over 3 1/2 hours since we sat down! While it is not exactly in our back yard, we know for sure we’ll be making another road trip to Fayette Street Grill.