Monthly Archives: June 2020

Grilled and Stuffed Flank Steak Pinwheel Lollipops

One of, if not THE, most popular posts on this blog over the course of its 6 1/2 year history is this Flank Steak Pinwheel Lollipops recipe. In the past month alone it garnered over 17,000 impressions on my Pinterest Board Casa “H” Culinary Creations! Even though they may look complicated in structure, they’re not, and folks love them, as did our recent dinner guests Pat and Charlie.

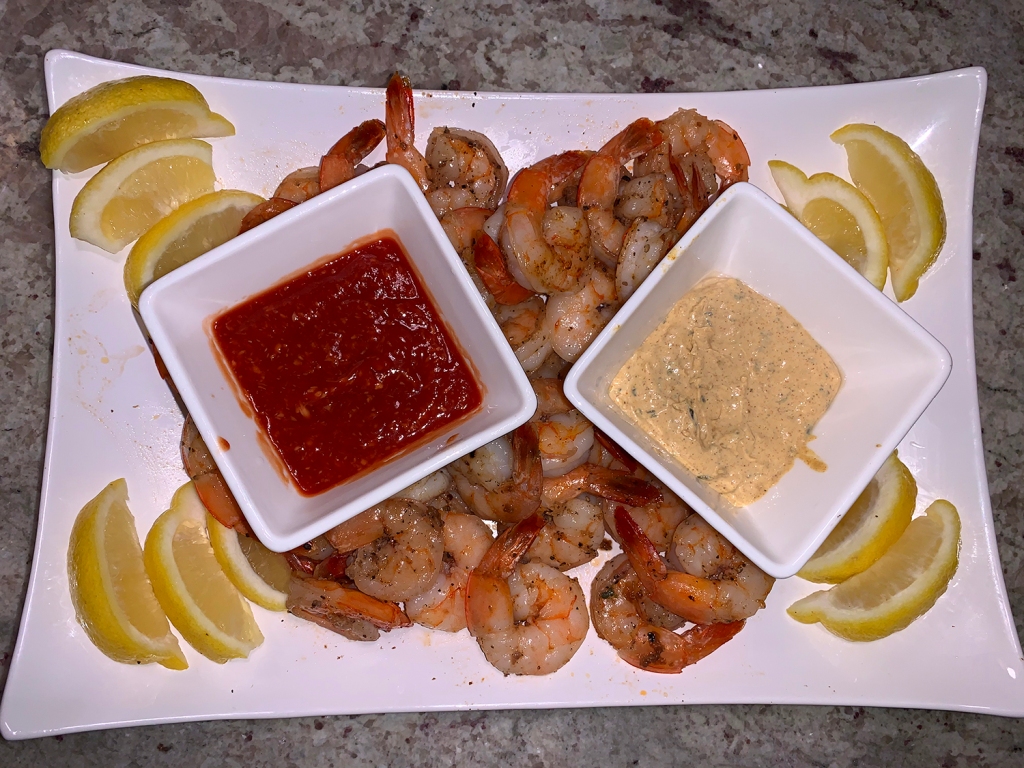
To start the evening, Pat and Charlie (shown below), brought a lovely shrimp appetizer with two dips. One was a spicy homemade cocktail sauce; and the other an unusual combination that Charlie said at first tasted like spackle. Not so in the end. Apparently they were trying to find an avocado dip but after visiting numerous stores, only found a quasi avocado/spinach combo. Thanks to some clever additions, their concoction ended up being quite tasty indeed.

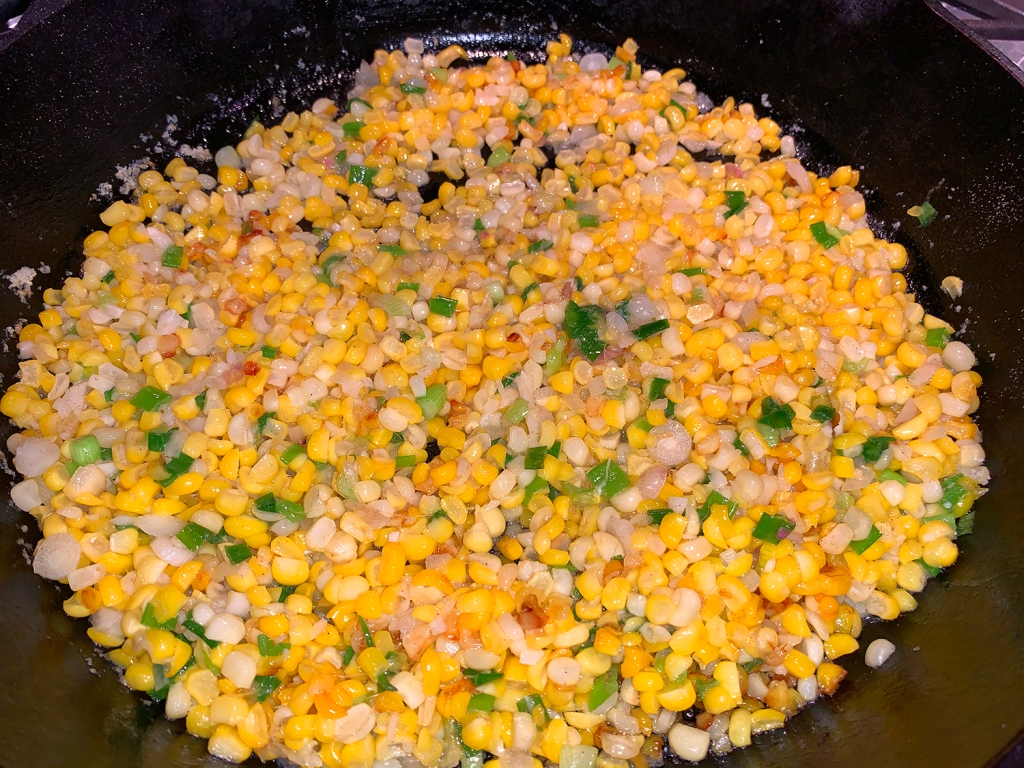
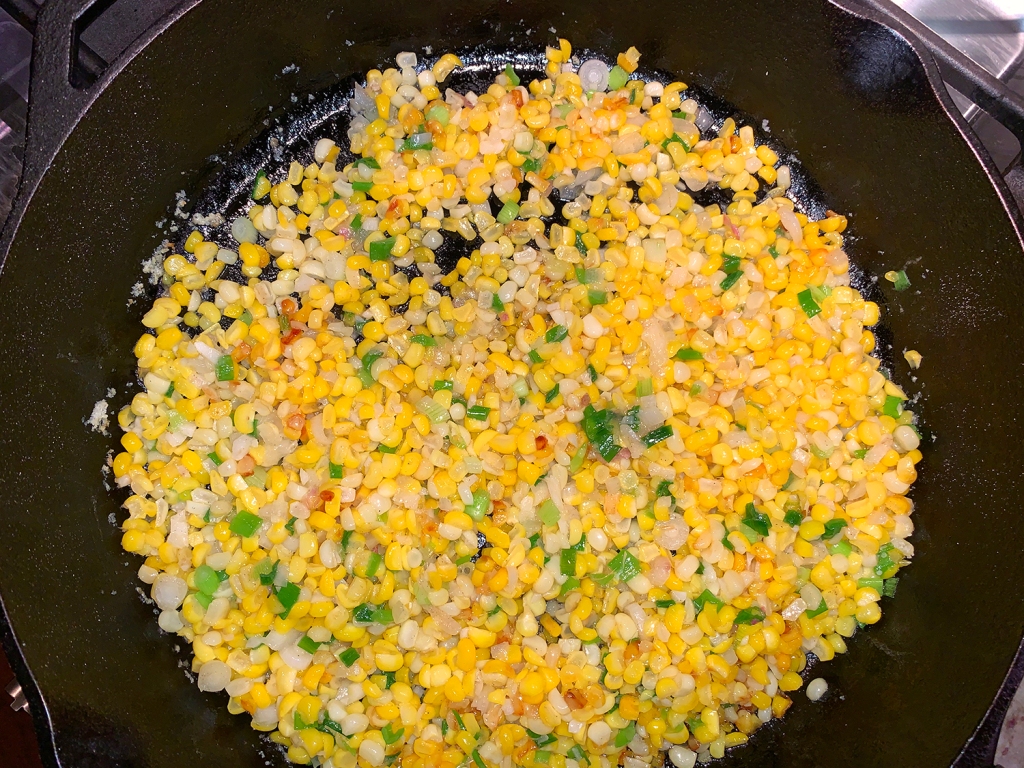
Can’t have a summer BBQ without a couple of good side dishes, and what screams summer more than fresh corn and tomatoes? I’ve included the Summer Sweet Corn Sauté recipe below. It couldn’t be more simple, is super quick, and oh so tasty. And if you’ve never had a Caprese Salad with heirloom tomatoes, I urge you to whip one together real soon.

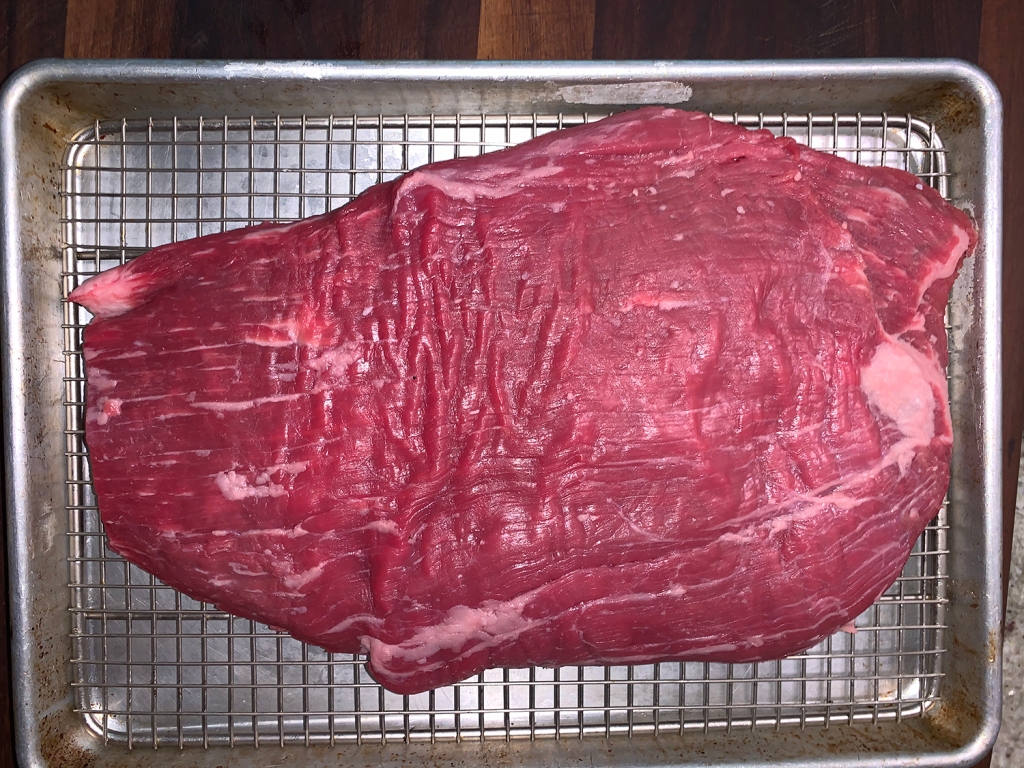
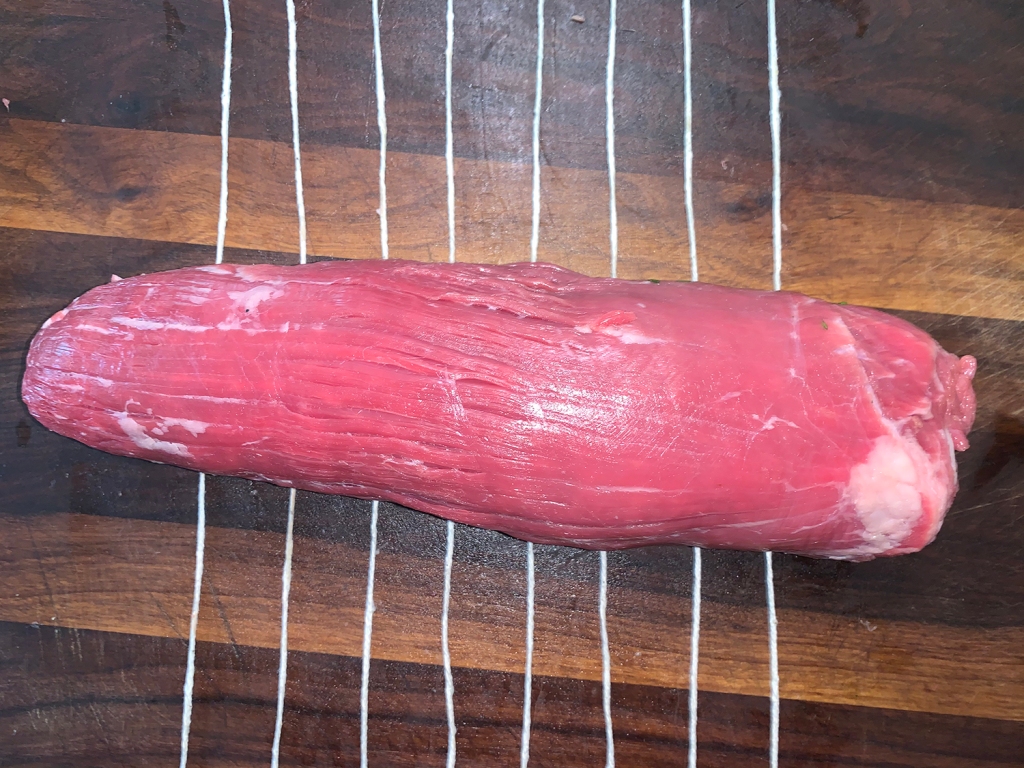
Back to that main entrée. It is difficult to find a large enough, 2 to 2 1/2 pound, flank steak. Do yourself a favor and call the butcher several days ahead of time and reserve one. Even doing so, the largest I could get was just over 2 pounds, but it sufficed to feed four people with one lollipop left over.

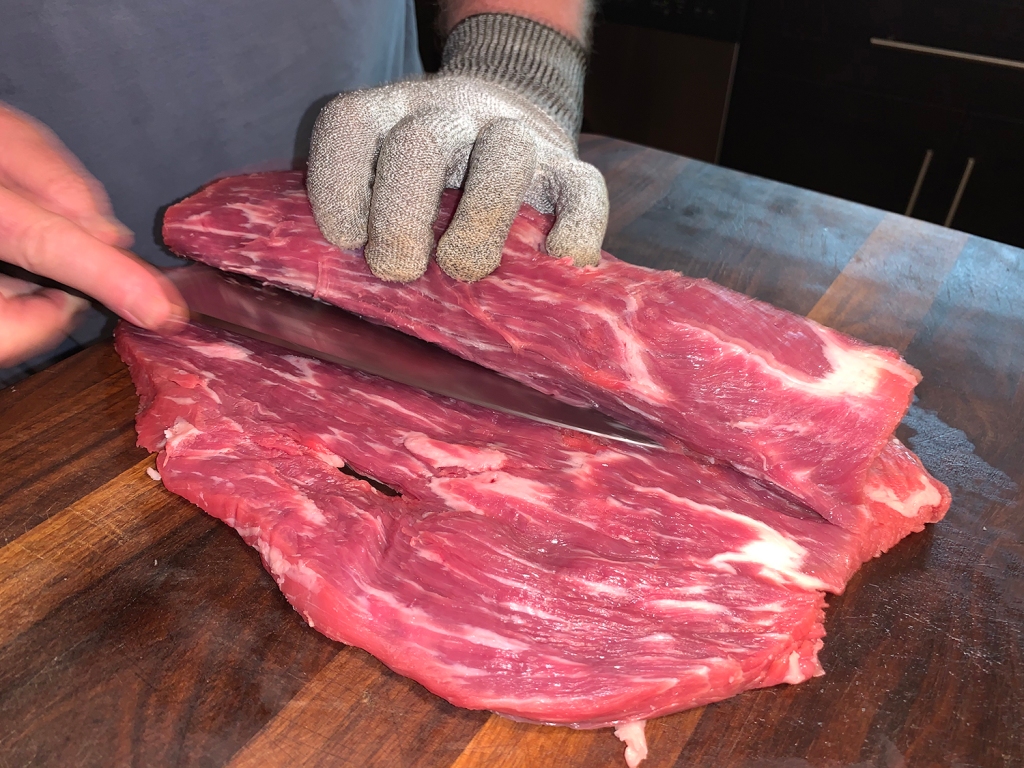
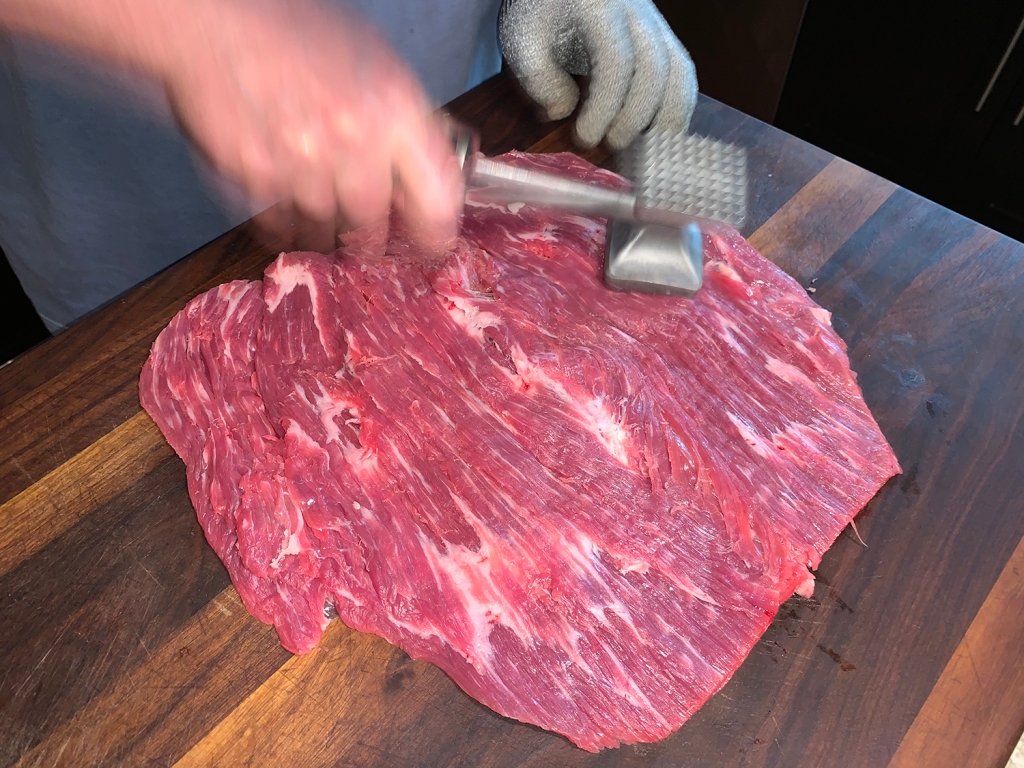
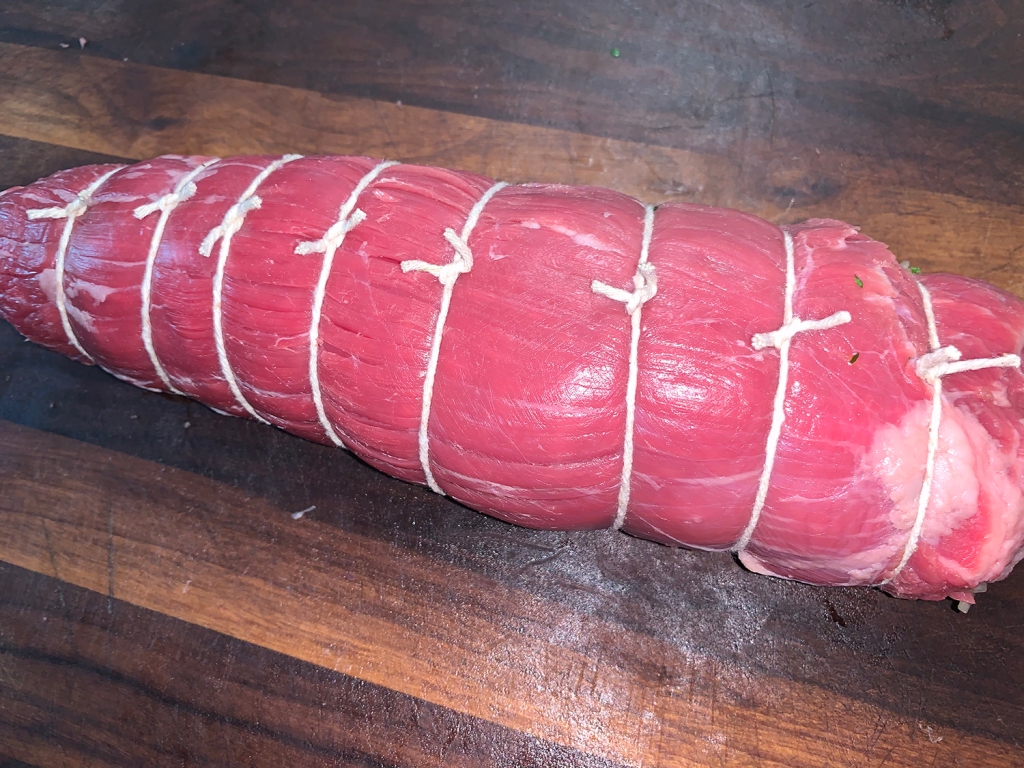
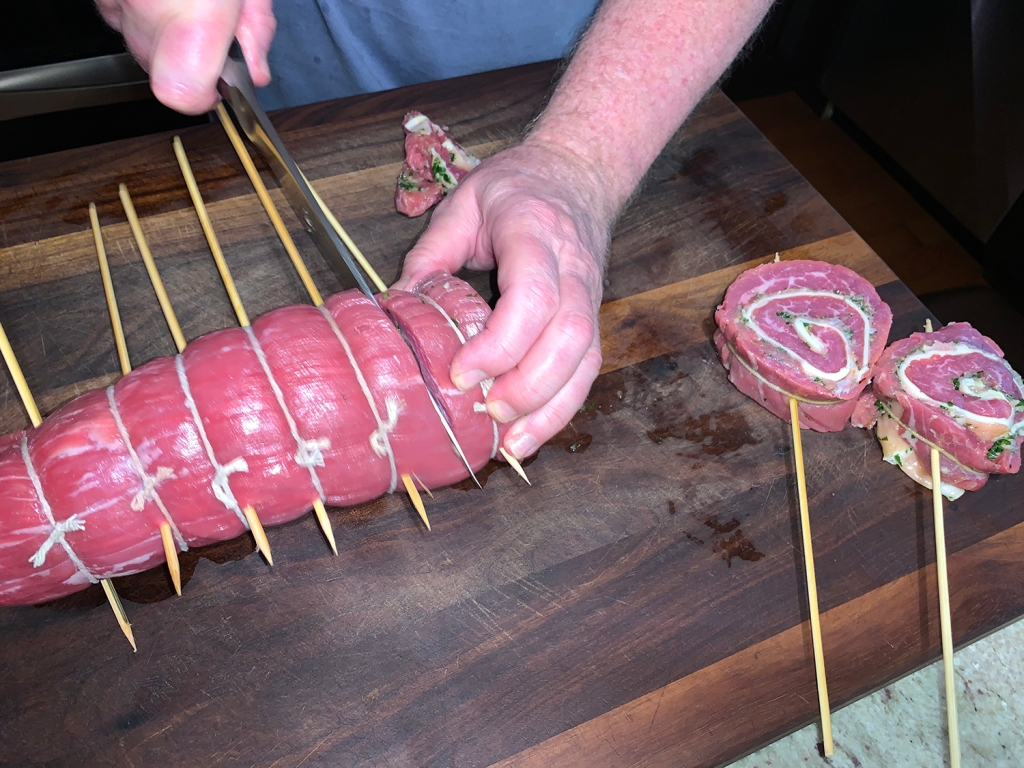
To get the filling to stay put in the stuffed flank steak, first freeze the meat for about 30-45 minutes, butterfly the steak, then split it horizontally and open it like a book. Use a food mallet to pound it down to an even thickness, being careful not to tear holes in it. Once stuffed and rolled, the meat holds up well on the grill when you use both skewers and twine to secure the layers.

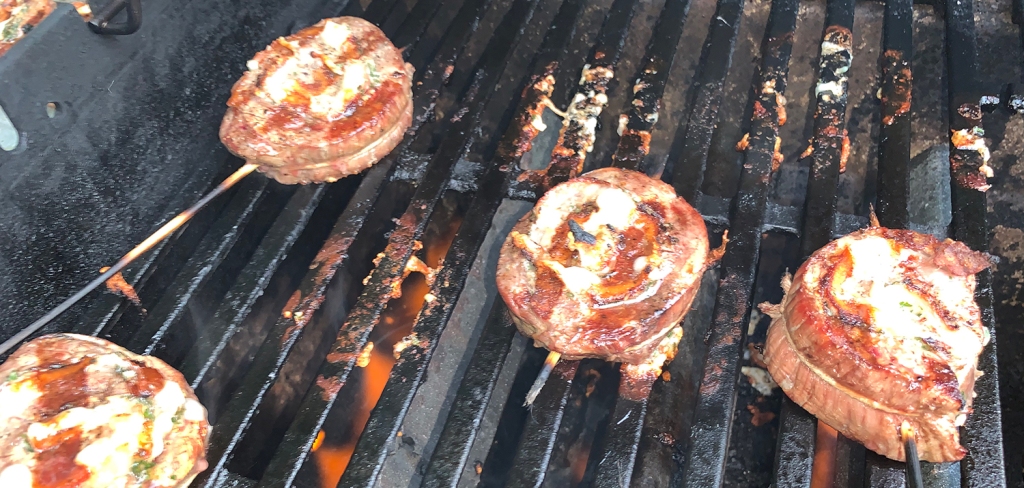
Don’t break a sweat if some of the wooden skewers catch fire while grilling, ours did and we had soaked them all day! Just blow out the flames as needed. You’ll be removing them and the twine before you serve your guests anyway.

Grilled and Stuffed Flank Steak Pinwheel Lollipops

  • Servings: 8-12 pinwheels
  • Difficulty: easy
  • Print

Ingredients

  • medium garlic cloves, minced or pressed through garlic press (about 2 teaspoons)
  • small shallot, minced (about 2 tablespoons)
  • Tbsp. fresh parsley leaves, finely minced
  • tsp. sage leaves, finely minced
  • Tbsp. olive oil, plus extra for oiling grate
  • flank steak (2- to 2 ½-pounds)
  • oz. thinly sliced prosciutto
  • oz. thinly sliced provolone
  • 8 – 12 skewers soaked in water for at least 30 minutes
  • Kosher salt and ground black pepper

Directions

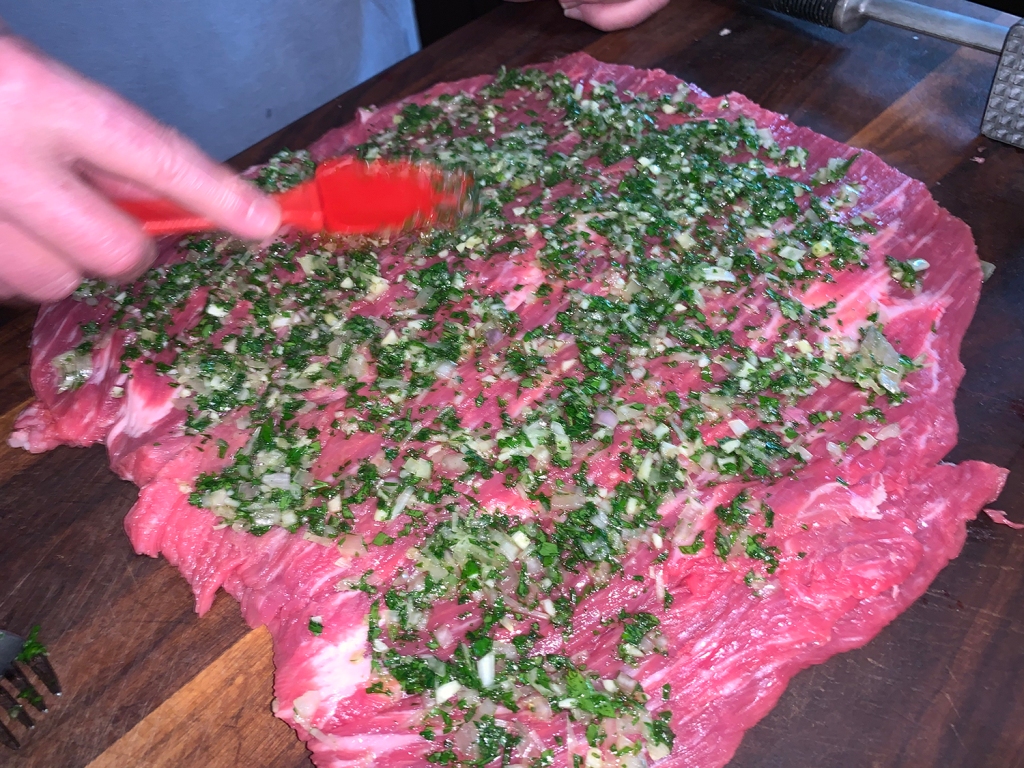
  1. Combine garlic, shallot, parsley, sage, and olive oil in small bowl. Butterfly and pound flank steak into rough rectangle.
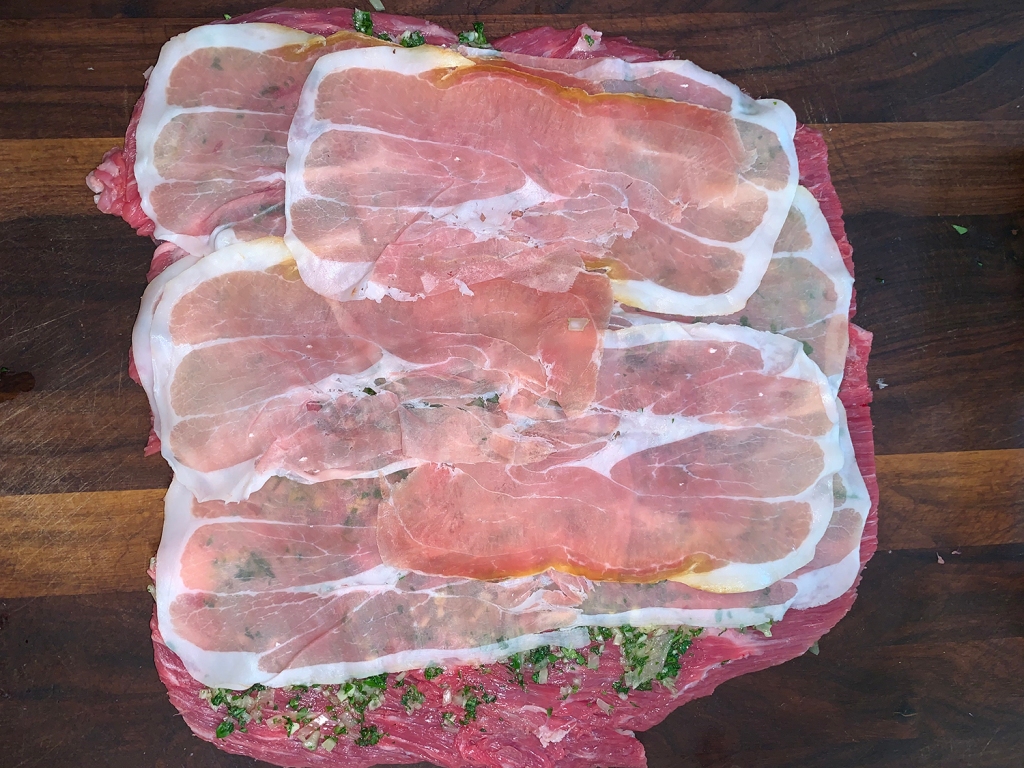
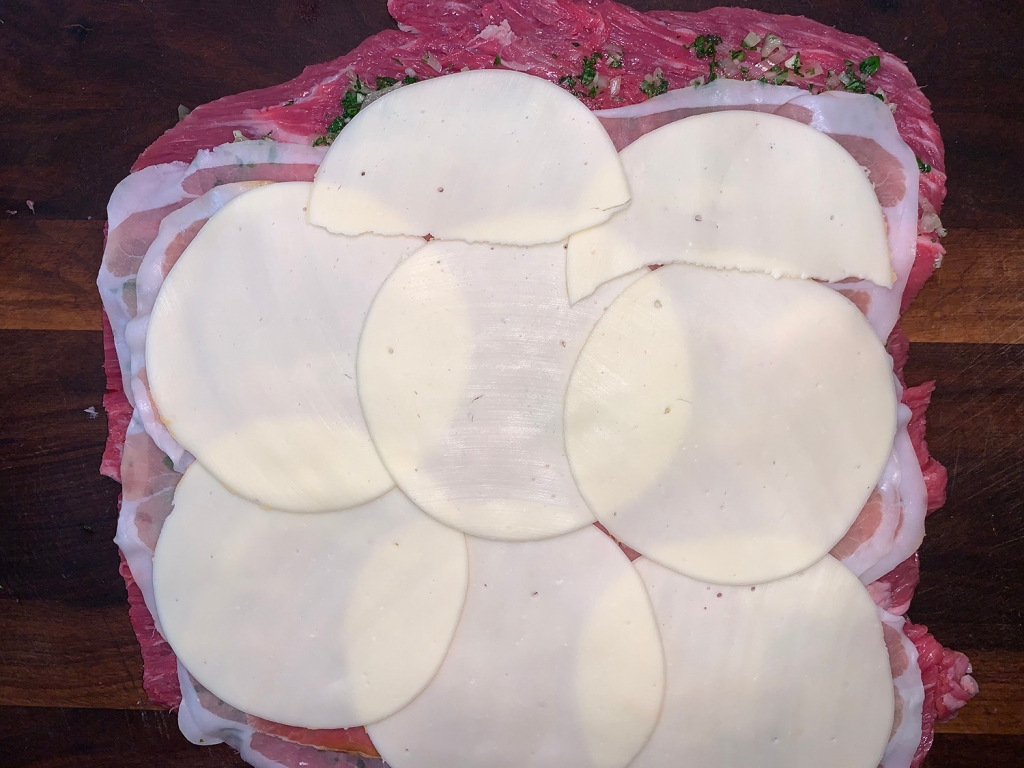
  2. With steak positioned so that grain runs parallel to edge of counter and opened side faces up, spread herb mixture evenly over surface of steak. Lay prosciutto evenly over steak, leaving 2-inch border along top edge. Cover prosciutto with even layer of cheese, leaving 2-inch border along top edge.
  3. Starting from bottom edge and rolling away from you, roll beef into tight log and place on cutting board seam-side down.
  4. Starting ½ inch from end of rolled steak, evenly space 8 to twelve 14-inch pieces of butcher’s twine at 1-inch intervals underneath steak. Tie middle string first; then working from outermost strings toward center, tightly tie roll and turn tied steak 90 degrees so seam is facing you.
  5. Skewer beef directly through outermost flap of steak near seam through each piece of string, allowing skewer to extend ½ inch on opposite side. Using chef’s knife, slice roll between pieces of twine into 1 1/4 inch thick pinwheels. Season pinwheels lightly with kosher salt and black pepper.
  6. Turn all burners to high and heat with lid down until very hot, about 15 minutes. Scrape grate clean with grill brush. Dip wad of paper towels in oil; holding wad with tongs, wipe cooking grate. Leave primary burner on high and turn off other burner(s).
  7. Grill pinwheels directly over hot side of grill until well browned, 3 to 6 minutes. Using tongs, flip pinwheels; grill until second side is well browned, 3 to 5 minutes longer.
  8. Transfer pinwheels to cooler side of grill, cover, and continue to cook until center of pinwheels registers 125 degrees on instant-read thermometer, 1 to 4 minutes (slightly thinner pinwheels may not need time on cooler side of grill).
  9. Transfer pinwheels to large plate, tent loosely with foil, and let rest 5 minutes. Remove and discard skewers and twine and serve immediately.

http://www.lynnandruss.com

Adapted from Cook’s Illustrated

Sweet Summer Corn Sauté

  • Servings: 4-6
  • Difficulty: easy
  • Print

Summer Sweet Corn Sauté

Ingredients

  • 4 Tbsp. unsalted butter
  • 6 ears sweet corn, kernels cut off from cob
  • 4 scallions, thinly sliced
  • 1 small shallot, minced
  • 3 cloves garlic, minced
  • Kosher slat and freshly ground pepper
  • 8-10 large basil leaves, rolled and thinly sliced

Directions

  1. Melt the butter in a large cast iron skillet over medium heat.
  2. Once melted, add the corn kernels and cook undisturbed for 8-10 minutes (or longer if needed). The corn should be lightly browned and caramelized on one side.
  3. Add the scallions, shallot and garlic and continue cooking for another 4 minutes.
  4. Turn off the heat. Stir in the basil chiffonade and transfer to a serving bowl and serve.

http://www.lynnandruss.com

Dry-Brined Filet Mignon with Sautéed Garlic Mushrooms

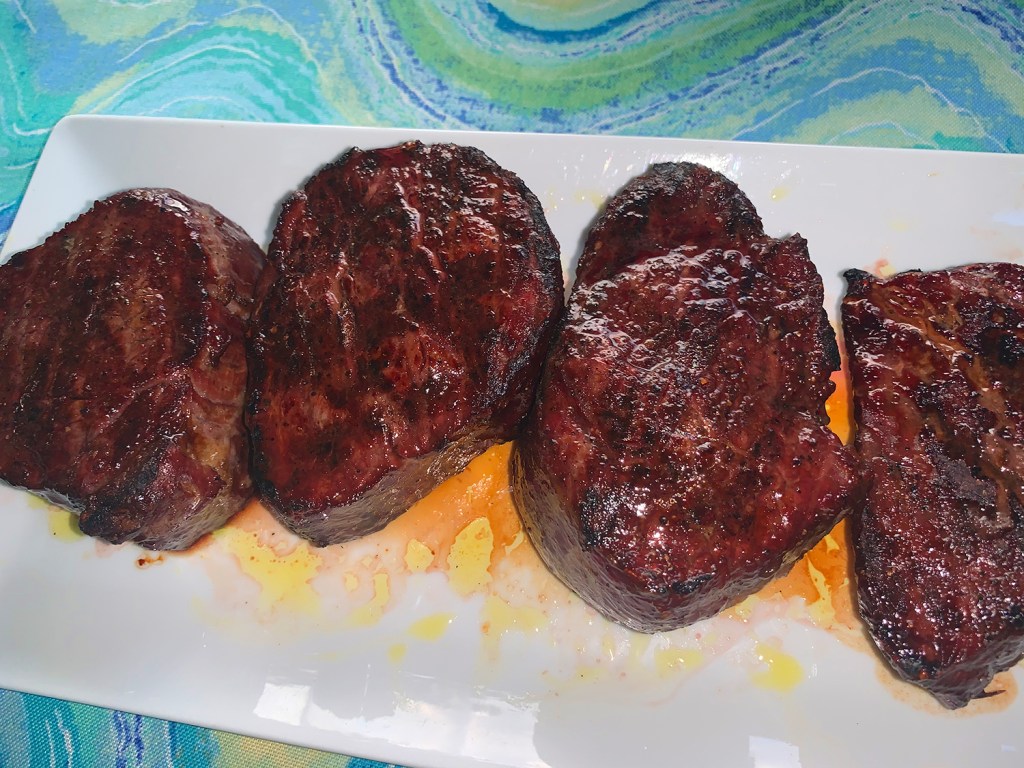
Father’s Day and grilled steak go together like peanut butter and jelly, ham and cheese, or any number of iconic pairings that you can think of. So when youngest son David and girlfriend Vikki said they’d be paying us a visit on Dad’s Day, we immediately thought of grilled steak to celebrate.

A win-win for the three of us, but the issue was Vikki who maintains a mostly plant-based diet. However, she did say she’ll eat an occasional filet mignon, and wouldn’t you know, I had just picked up a 7-pound tenderloin that we cut down into an array of filets. Perfect!

It is undeniable that the most tender, buttery, luscious steak on a cow is the filet. The perfect filet mignon will have a tender, juicy interior with a flavorful, crisp exterior, exactly what we were trying to achieve here.

The tenderloin was butchered the day before our gathering so that we could season and dry-brine the filets over night. Brining, once a means of food preservation, is now prized for the flavor and moisture it brings. And if you’ve been following my blog recently, you know I’ve been singing it’s praises as of late.

Of course, you don’t need to wait until next Father’s Day to make this special combo meal. To me, any occasion is a good enough reason to treat myself and my loved ones.

Dry-Brined Filet Mignon with Sautéed Garlic Mushrooms

  • Servings: 4
  • Difficulty: easy
  • Print

Ingredients

  • 4 Filet mignon steaks, each 2″ thick
  • Kosher salt and fresh cracked pepper

Directions

  1. Arrange the filets mignons on a rack in a rimmed baking sheet. Generously salt and pepper each on both sides.
  2. Dry-brine the steaks in the refrigerator overnight, uncovered.
  3. Heat your grill for the indirect method. Once at 250°, add the filets to the cool side and close the lid.
  4. After 25 minutes, using an instant read thermometer, check to see if they are registering 125° for medium-rare.
  5. Move them over to the direct heat side of the grill, turn up the burners to high, and sear each side for a couple of minutes. The final internal temperature of your steak should be 135°F for medium-rare and 145°F for medium. The sear will give your steaks the rich golden brown color and enhanced flavor that is typically associated with grilled steaks.

Sautéed Mushrooms with Garlic Butter

The important thing in making these gems really shine is sautéing the mushrooms in just the right way. You want to get them nice and golden brown because this is where the flavor comes from. Caramelization is key.

Do not be afraid of turning up the heat. In order to accomplish a nice sear on these mushrooms, start by sautéing them in olive oil, which has a higher smoke point. (If you use butter at a high heat like this, it could burn.) When they’re nice and golden brown, that’s when you’re going to add the butter to create a silky, shiny coating on the mushrooms.

Sautéed Mushrooms with Garlic Butter serves 4-6 and takes only 15 minutes.

Ingredients

  • 1 Tbsp. olive oil
  •  1 lb. cremini mushrooms, washed and cut in half
  •  1/2 tsp. kosher salt
  •  1/4 tsp. ground black pepper
  •  3 Tbsp. unsalted butter
  • 2-4 cloves garlic, minced; OR 1 Tbsp. roasted garlic paste
  •  1 Tbsp. chopped fresh thyme

Directions

  1. In a large sauté pan (you want the mushrooms to fit in a single layer), heat olive oil over medium-high heat. Add mushrooms and season with salt and pepper. Toss to coat all mushrooms with the oil and then spread them into a single layer.
  2. Cook for four minutes on medium-high heat without stirring. Stir and cook for 2 more minutes without stirring.
  3. Reduce heat to medium-low and add butter and garlic. Cook for 3-4 more minutes, stirring frequently, until mushrooms are fully cooked, butter is melted, and garlic is fragrant.
  4. Remove from heat, stir in parsley and serve immediately.

http://www.lynnandruss.com

Vietnamese Grilled Lemon Grass Pork Skewers

This recipe borders on being a sort of Vietnamese taco or lettuce wrap, if you will. We found it on Milk Street whose staff, while in Vietnam, learned to make grilled lemon grass pork, or thịt nướng, as part of the dish called bún thịt nướng. It’s a salad that combines slender rice noodles with grilled pork, pickled and fresh vegetables, tons of herbs and a savory-sweet sauce (nước chấm).

To simplify, Milk Street focused on the pork along with the pickles and sauce, and accompaniments that are perfect complements to the rich, smoky pork. If you must choose between making either the sauce or pickles, opt for the former. The pork for thịt nướng is not always skewered, but doing so makes it easier to manage the thinly sliced meat on the grill. Lettuce leaves are ideal for wrapping the pork and pickles (dip into the nước chấm before taking a bite) or serve the skewers, sauce and pickles with steamed jasmine rice.

Don’t be afraid to pack the pork tightly onto the skewers. This helps prevent overcooking. If using a gas grill, make sure to allow it to heat covered for about 15 minutes before cleaning and placing the skewers on the grate. The sweet, sour and crunchy condiments balance the charred meat nicely.

It’s messy eating, but boy are they good!

Vietnamese Grilled Lemongrass Pork Skewers

  • Servings: 4-6
  • Difficulty: moderate
  • Print

Ingredients

  • 2 Lbs. boneless pork shoulder, trimmed of surface fat
  • 5 Medium garlic cloves, smashed and peeled
  • 2 Medium shallots, quartered
  • 2 Stalks lemon grass, trimmed to the lower 5 or 6 inches, dry outer layers discarded, thinly sliced
  • 1 Serrano chili, stemmed and roughly chopped
  • 1 tsp. chinese five-spice powder
  • Kosher salt and ground black pepper
  • 2 Tbsp. grapeseed or other neutral oil
  • 1 Tbsp. soy sauce
  • 1 Tbsp. fish sauce
  • 1 Tbsp. honey
  • Nước chấm (recipe follows)
  • Pickled carrots and daikon (recipe follows)
  • Lettuce leaves, to serve (optional)

Directions

  1. Place the pork on a large plate and freeze until the meat is firm and partially frozen, about 1 hour.
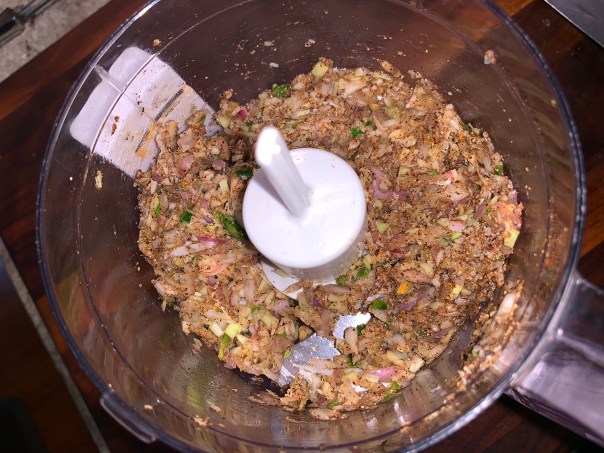
  2. Meanwhile, in a food processor, combine the garlic, shallots, lemon grass, chili, five-spice and 1½ teaspoons each salt and pepper. Process until finely chopped, about 45 seconds, scraping the bowl as needed.
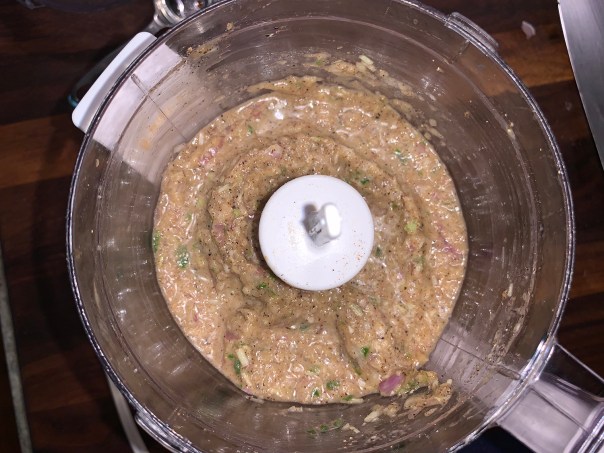
  3. Add the oil, soy sauce, fish sauce and honey, then process until smooth, 1 to 2 minutes, scraping the bowl as needed. Transfer to a large bowl; set aside.
  4. Using a chef’s knife, slice the partially frozen pork against the grain into pieces about ⅛ inch thick. The slices will be irregularly shaped; cut them into strips about 1-inch wide (it’s fine if the strips are not uniform). Add to the seasoning paste and toss, rubbing the paste into the meat.
  5. Thread the pork onto as many 10- to 12-inch metal skewers as needed, evenly dividing the meat and scrunching it together, packing it quite tightly. If some pieces are too wide, too wispy or awkwardly shaped, fold the meat or tuck in the edges as you skewer.
  6. Place on a rimmed baking sheet or in a large baking dish, cover and refrigerate while you prepare the grill.
  7. Prepare a charcoal or gas grill. For a charcoal grill, ignite a large chimney of coals, let burn until lightly ashed over, then distribute evenly over one side of the grill bed; open the bottom grill vents. Heat the grill, covered, for 5 minutes, then clean and oil the grate. For a gas grill, turn all burners to high and heat, covered, for 15 minutes, then clean and oil the grate.
  8. Place the skewers on the hot side of the grill (if using charcoal) and cook until lightly charred, about 3 minutes. Flip and continue to cook until the second sides are lightly charred, about another 3 minutes.
  9. Flip the skewers again and continue to cook, turning every couple of minutes, until well charred on both sides, about another 3 to 5 minutes.
  10. Transfer to a platter and drizzle with about ¼ cup of the nước chấm. Serve with the pickles and lettuce leaves for wrapping and with the remaining nước chấm for spooning on or dipping.

http://www.lynnandruss.com

Pickled Carrots and Daikon

Pickled Carrots and Daikon

  • Servings: Yields 2 cups
  • Difficulty: easy
  • Print

Ingredients
  • ⅔ cup unseasoned rice vinegar
  • 2 Tbsp. white sugar
  • Kosher salt
  • 2 medium, peeled
  • 8 oz. daikon, peeled
Directions
  1. In a medium bowl, combine the vinegar, sugar, 2 teaspoons salt and ⅓ cup water. Stir until the sugar and salt dissolve.
  2. Cut the carrots and daikon crosswise into 1½- to 2-inch sections. Cut each piece lengthwise into thin planks, then cut the planks into slender sticks.
  3. Stir the vegetables into the vinegar mixture. Cover and let stand at room temperature for 20 minutes or refrigerate up to 1 week.

http://www.lynnandruss.com

Nước Chấm

Nước Chấm

  • Servings: Yields 1 cup
  • Difficulty: easy
  • Print

In the Vietnamese kitchen, nước chấm is a multipurpose sauce/dressing. If you wish to moderate the spiciness, seed the chilies before mincing them. The flavors are best the day the sauce is made, but it will keep in an airtight container in the refrigerator for up to three days.

Ingredients
  • ⅓ cup fish sauce
  • 3½ Tbsp. lime juice
  • ¼ cup white sugar
  • 3 med. garlic cloves, minced
  • 1-2 serrano chiles, stemmed, seeded and minced
Directions
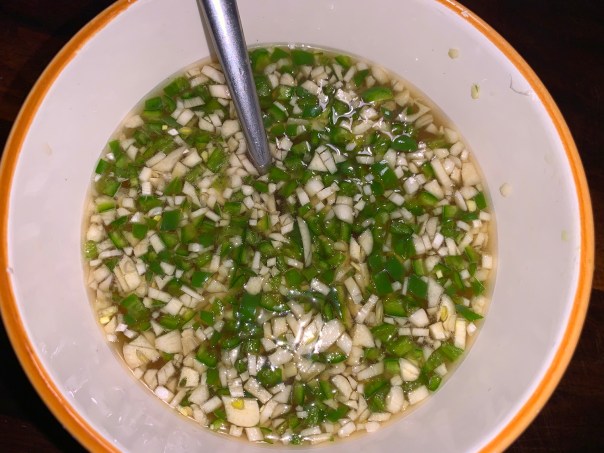
  1. In a small bowl, combine the fish sauce, lime juice, sugar and 6 tablespoons water. Stir until the sugar dissolves, then stir in the garlic and chilies.
  2. Cover and refrigerate up to 3 days; bring to room temperature before serving.

http://www.lynnandruss.com

Recipes adapted from Courtney Hill from Milk Street

This Sauce is Boss

Grilling season is the best, on so many levels. In many cases it’s quick, it’s easy, few pots or pans are used, and your meal screams summer. And this simple Skirt Steak with BA.1 Sauce fits all of that criteria to a T.

Sweet, salty, tart, and goosed with secret sources of umami, steak sauce may be the ideal foil for a sizzling slab of red meat. We… whipped up a signature steak sauce of our own. It’s big on flavor, free of weird preservatives, and comes together in about a minute flat. Welcome to the world, BA.1.

Bon Appétit

In some ways, the taste of this sauce resembles A1 Sauce, but without the processed taste, and it’s a bit lighter in consistency. I loved it so much, I also added it to my side of grilled asparagus.

Skirt Steak with BA.1 Sauce

  • Servings: 2-4
  • Difficulty: easy
  • Print

Ingredients

Sauce

  • 2 Tbsp. balsamic vinegar
  • 2 Tbsp. Worcestershire sauce
  • 2 Tbsp. ketchup
  • 1 Tbsp. extra-virgin olive oil
  • 1 Tbsp. vinegar-based hot sauce (such as Frank’s or Crystal)
  • 1 tsp. Dijon mustard
  • 1 tsp. honey
  • Kosher salt

Steak and Assembly

  • Vegetable oil (for grill)
  • 1½ lb. skirt steak, cut into thick slices
  • Kosher salt, freshly ground pepper
  • Flaky sea salt

Directions

Sauce

  1. Whisk vinegar, Worcestershire sauce, ketchup, oil, hot sauce, mustard, honey, and 1 Tbsp. water in a medium bowl to combine; season with salt.
  2. Do ahead: Sauce can be made 2 months ahead. Store airtight at room temperature.

Steak and Assembly

  1. Prepare a grill for medium-high heat; oil grate.
  2. Season steak generously with kosher salt and pepper.
  3. Grill, turning every 1–2 minutes and moving closer to or farther away from heat as needed to build even color, until nicely charred and an instant-read thermometer inserted into the thickest part of steak registers 125°(juices pooling on top of meat is a fairly good indicator that meat has reached medium-rare), 7–9 minutes.
  4. Transfer steaks to a cutting board and let rest 5–10 minutes before slicing against the grain.
  5. Transfer steak to plates and top with sauce. Crack some pepper over and sprinkle with sea salt.

http://www.lynnandruss.com

Recipe by Chris Morocco from Bon Appétit

Honey-Glazed Pepper Chicken

“A halved chicken is really easy to handle on the grill. Since it’s on the bone, it comes out super flavorful. There are nutrients and flavors in the bones.”

Brad Leone

Be aware, it’s crucial to dry-brine the chicken for at least eight hours, so plan ahead. This step seasons the meat and gives it time to absorb the floral kick of the mixed peppercorns. A fermented garlic-honey and vinegar glaze helps to mellow out the bite. You can make your own fermented garlic honey, but you will need to do this over a week ahead of time—time we didn’t have. You could also use regular honey or maple syrup instead.

Fresno chiles are similar, although a bit more fruity than jalapeños, but we had neither so we substituted a serrano, which tends to have more kick. It was near impossible to find pink peppercorns (another fallout from COVID-19??) so we used a blend of colored peppercorns that included some pink, red, green and black. Do not substitute all black peppercorns!

What’s the difference between black and pink? The most common variety, black peppercorns are just cooked green peppercorns that have then been left out to dry. They have the strongest, most pungent flavor. But the pink—which aren’t actually peppercorns at all—are berries that come from a South American shrub. Though they still have a peppery bite, they also have fruity and floral notes. 

To keep the meal lo-carb, colorful and healthy, we paired our chicken with a grilled vegetable medley of summer squash, cremini mushrooms, onion, bell peppers, garlic and rosemary. Cut everthing up into bite-sized pieces, marinate with some olive oil, herbs and spices in a ziploc bag for a couple of hours, then either thread onto metal skewers, or use a grill basket.

How the chicken looks after 24 hours uncovered in the fridge.

Honey-Glazed Pepper Chicken

  • Servings: 4
  • Difficulty: easy
  • Print

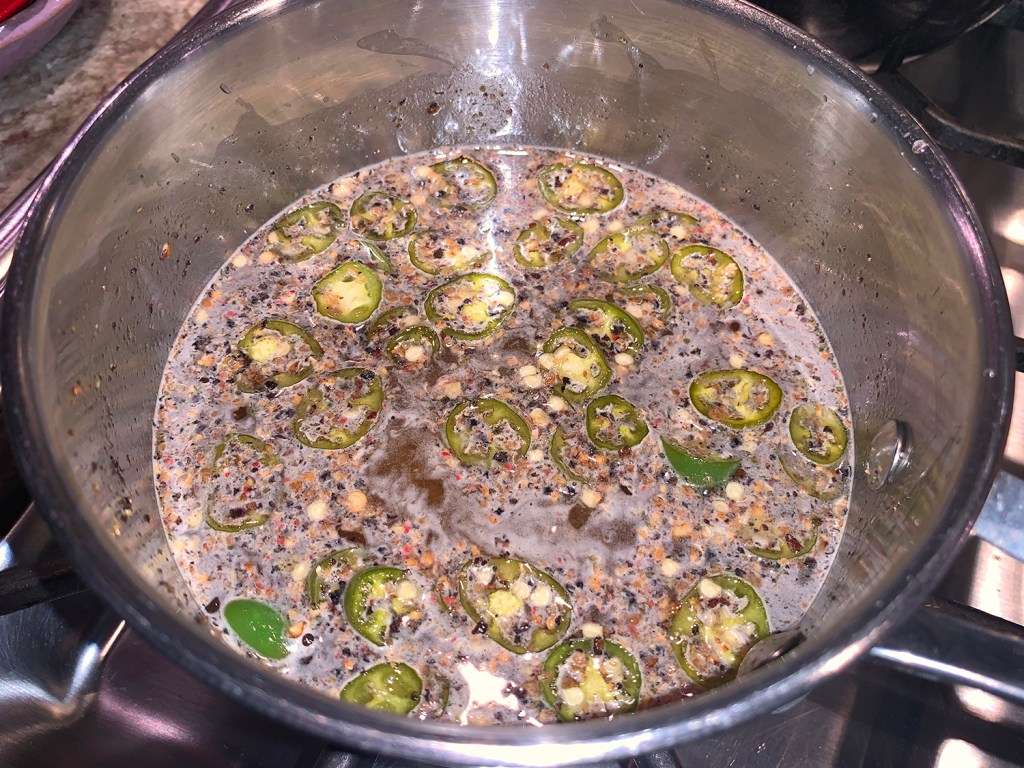
The honey pepper glaze gets reduced by about half.

Ingredients

  • 2 Tbsp. black peppercorns
  • 4 Tbsp. pink peppercorns, divided
  • 6 tsp. Diamond Crystal or 3¼ tsp. Morton kosher salt, divided
  • 1 3½–4-lb. whole chicken
  • 1 Tbsp. vegetable oil, plus more for grill
  • 2 medium Fresno chiles, thinly sliced
  • ½ cup fermented garlic honey, honey, or pure maple syrup
  • 3 Tbsp. Champagne vinegar or white wine vinegar

Directions

  1. Finely grind black peppercorns and 2 Tbsp. pink peppercorns in a spice mill or mortar and pestle. Transfer to a small bowl and mix in 5 tsp. Diamond Crystal or 2¾ tsp. Morton kosher salt; set seasoning aside.
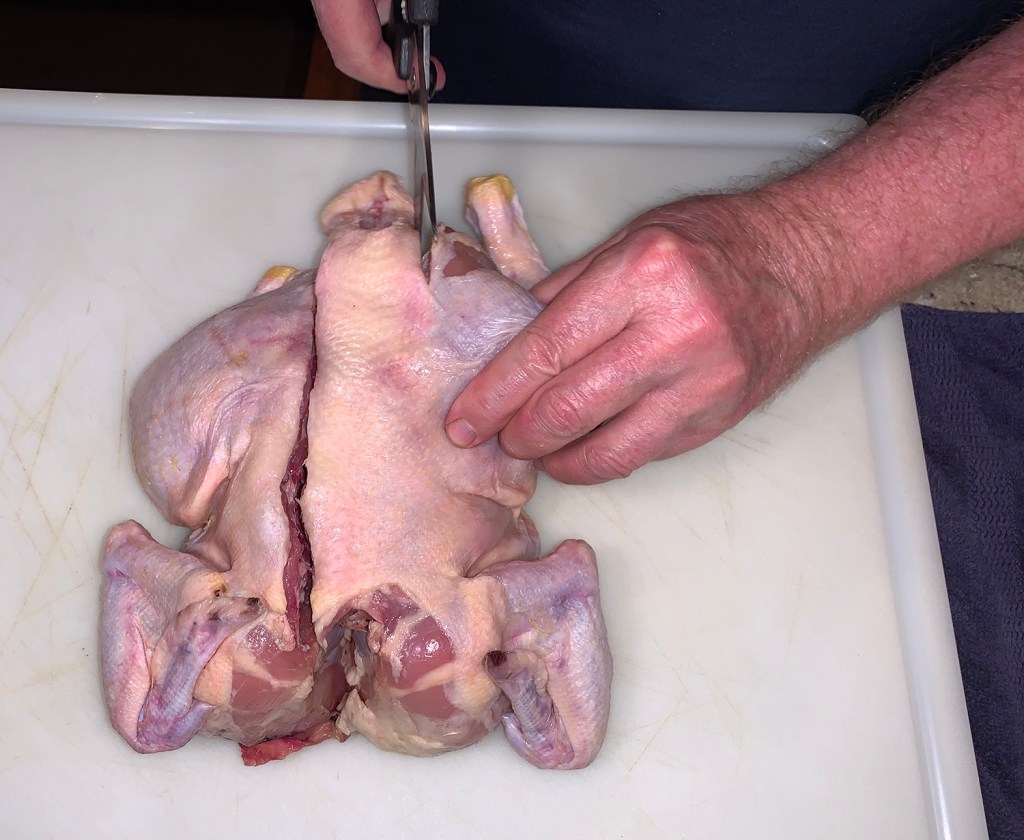
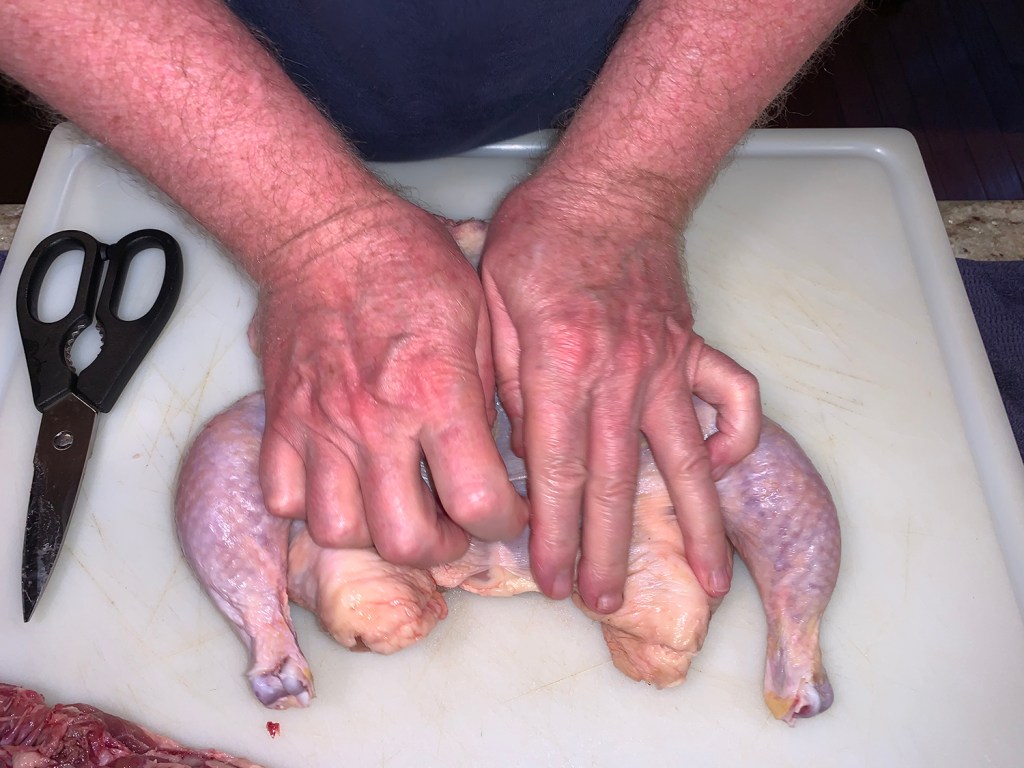
  2. Place chicken, breast side down, on a cutting board and use kitchen shears to cut along both sides of the backbone to remove (freeze and save it for stock!). Open chicken and turn skin side up. Press down on center of breast to flatten chicken—you should hear the breastbone crack.
  3. Using a chef’s knife or cleaver, split chicken in half through breastbone. Pat dry; rub all over with 1 Tbsp. oil. Sprinkle reserved seasoning all over, making sure to get into all the nooks and crannies.
  4. Place on a wire rack set inside a rimmed baking sheet. Chill, uncovered, at least 8 hours and up to 2 days.
  5. Coarsely grind remaining 2 Tbsp. pink peppercorns in spice mill or mortar and pestle.
  6. Cook chiles, honey, vinegar, and remaining 1 tsp. Diamond Crystal or ½ tsp. Morton kosher salt over medium heat, stirring occasionally, until mixture just turns amber in color and is reduced by about half (it should coat a spoon), 10–12 minutes. Stir in pink pepper and set aside.
  7. Prepare a grill for medium heat. Lightly oil grate.
  8. Set chicken on grate, cover, positioning vent over chicken if your grill has one, and grill, turning every 5 minutes, until an instant-read thermometer inserted into the thickest part of thighs registers 120°–130°, 15–20 minutes.
  9. Uncover and continue to grill, basting with honey mixture and turning chicken every 2–3 minutes, until an instant-read thermometer inserted into the thickest part of thighs registers 175° and 155° in the thickest part of breast, 10–15 minutes longer.
  10. Transfer to a cutting board and place skin side up. Let rest 30 minutes before carving.

http://www.lynnandruss.com

Adapted from a recipe by Brad Leone found in the 2020 Grilling issue of Bon Appétit

Cambodian-Style Rice Noodle Salad with Shrimp, Cucumber and Herbs

Cambodia is famous for its Kampot pepper—here a generous measure of ground black pepper plus a fresh chili are used to add multilayered spiciness to the savory-sweet dressing. The salad is best with a combination of cilantro, mint and basil—which we used—but it’s still delicious made with only one herb.

This noodle salad is a version of one that Milk Street staff tasted in Cambodia. Vegetables, herbs and chopped peanuts add tons of color and texture to tender rice vermicelli noodles. And if you like, omit the shrimp altogether or substitute 2 cups shredded cooked chicken.

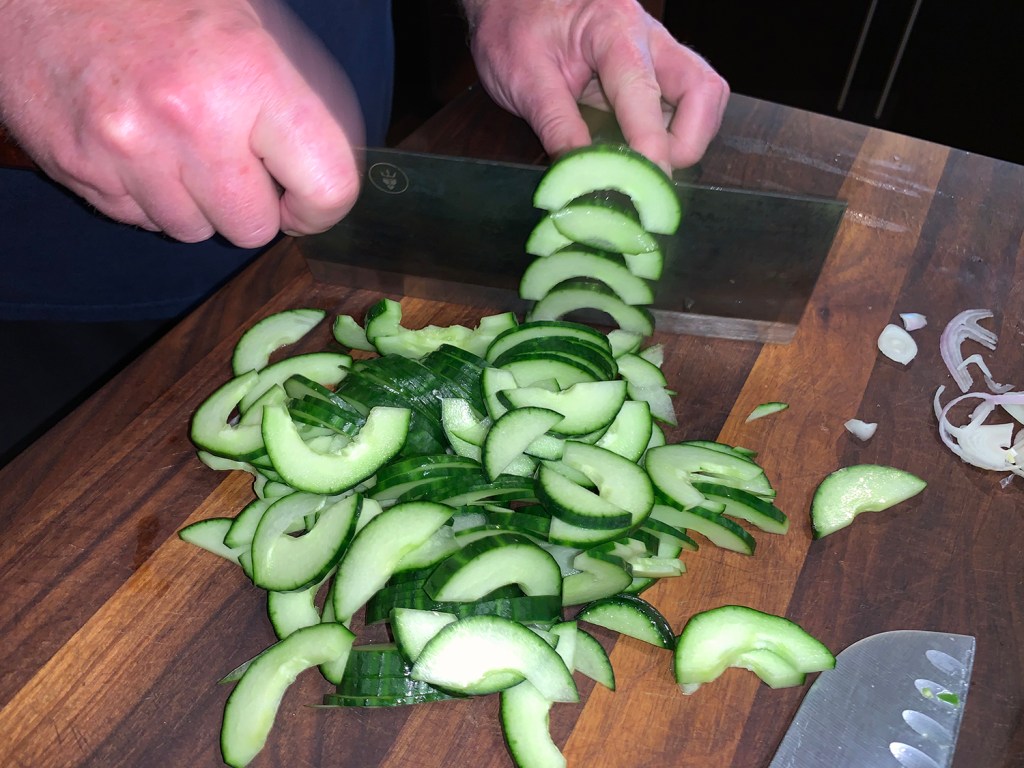
Don’t bypass the step of rinsing the noodles. It prevents them from sticking together and overcooking. It also cools them down quickly for the salad. If your noodles are long, use scissors to cut them down to a manageable size.

The Hubs compared this salad to an inside-out Asian spring vegetable roll. It was absolutely delicious both as a dinner, and for lunches the next day. It would make a welcome option for a hot, humid summer’s eve when the last thing you want to do is cook.

Cambodian-Style Rice Noodle Salad with Shrimp, Cucumber and Herbs

  • Servings: 4-6
  • Difficulty: easy
  • Print

Ingredients

  • 8 oz. rice vermicelli
  • 1 English cucumber, halved lengthwise, seeded and thinly sliced into half moons
  • 1 Medium shallot, halved and thinly sliced
  • Kosher salt and ground black pepper
  • 1 Cup roasted peanuts, finely chopped
  • 6 Tbsp. lime juice (about 3 limes)
  • 1 Fresno or thai chili, stemmed, seeded and minced
  • 3 Tbsp. fish sauce
  • 2 Tbsp. packed brown sugar
  • 1 Lb. cooked shrimp, roughly chopped
  • 1½ Cups chopped fresh cilantro, mint and/or basil

Directions

  1. Bring a large pot of water to a boil. Add the noodles and cook until tender, 2 to 3 minutes. Drain in a colander, then rinse under running cold water, tossing, until fully cooled. Drain again.
  2. Use kitchen shears to snip the noodles in several places to cut them into shorter lengths. Transfer to a large bowl; set aside.
  3. In the colander, toss the sliced cucumber and shallot with 1 teaspoon salt. Let drain in the sink for about 5 minutes.
  4. In a small bowl, stir together the peanuts, lime juice, chili, fish sauce, sugar and 2 teaspoons pepper.
  5. Add the cucumber-shallot mixture, shrimp and cilantro to the bowl with the noodles. Add the dressing and toss well.

http://www.lynnandruss.com

Recipe from Milk Street

SMASHED

Just let me put it out there. I am NOT a fast-food fan. In fact, it’s definitely been over four decades since I’ve had a fast-food burger. BUT, there’s been this resurgence of late among many of our revered culinary magazines (read Bon Apétit, Cook’s Illustrated, Fine Cooking) singing the praises of Smashed Burgers.

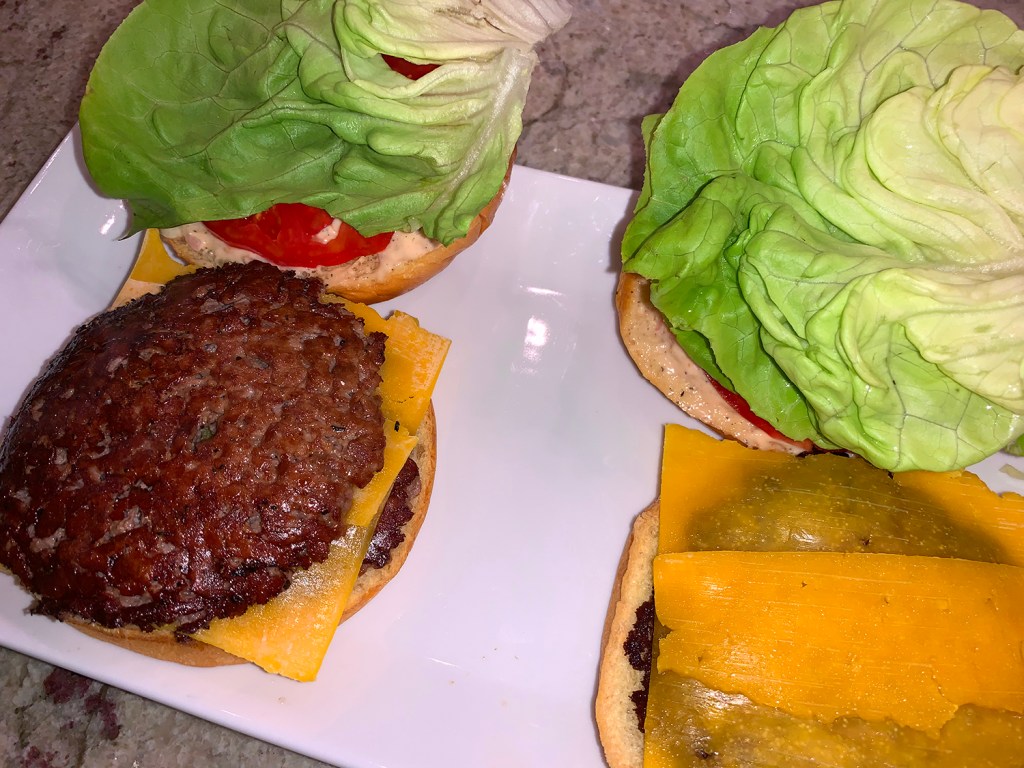
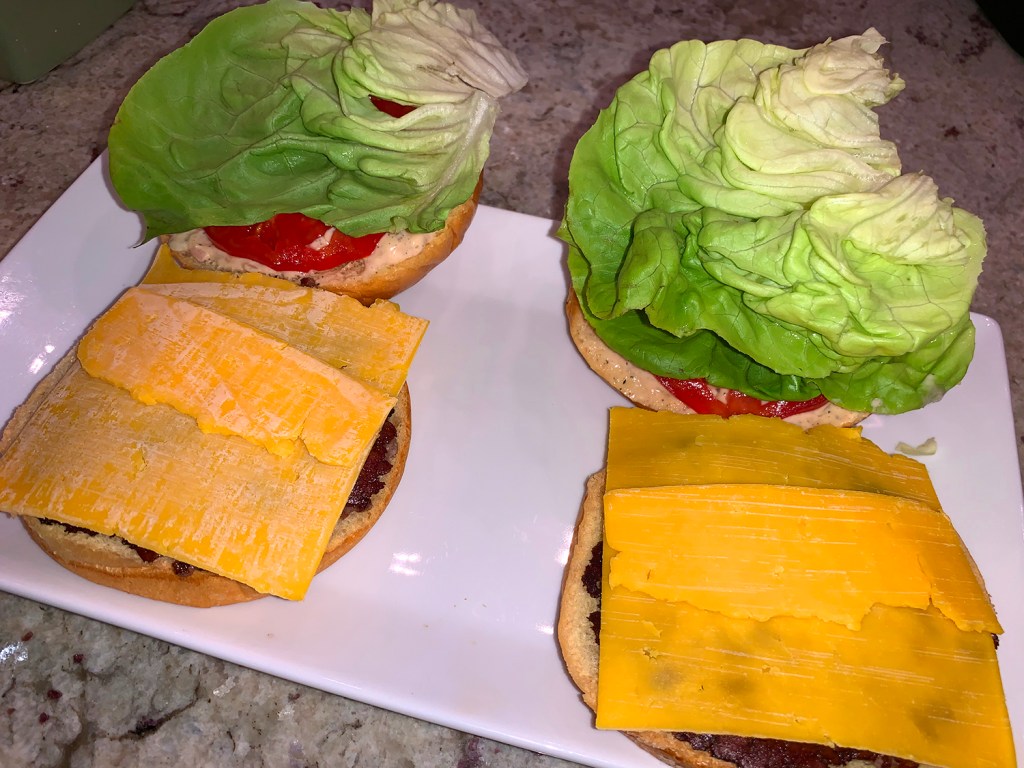
These diner icons share the same thin, verging-on-well-done profile as typical fast-food burgers, as well as their all‑American array of fixings: gooey American cheese; creamy, tangy burger sauce; crisp lettuce; thinly sliced tomato; and a soft bun. But with a smashed burger, extra-special attention is paid to making the brownest, crispiest, most savory crust.

Cook’s Illustrated

Now get this. Smashed burgers are fast and easy to make. Since the patty is thoroughly cooked and the crust delivers so much flavor, there’s no need to be choosy about the cut of beef or grind your own meat. In fact, commercial 80-percent lean ground beef makes better smashed burgers than home-ground chuck does because the former is more finely ground and thus stays more cohesive when it’s flattened. And to think I’m usually singing the praises of the latter.

You have to get the toppings just right, because smashed burgers—more than any other style of burger—rely on the condiments to deliver the moisture and tenderness that are sacrificed in pursuit of the ultimate crust. Along with that sauce, use a soft brioche bun to finalize the package.

The cheese resides between the 2 patties.

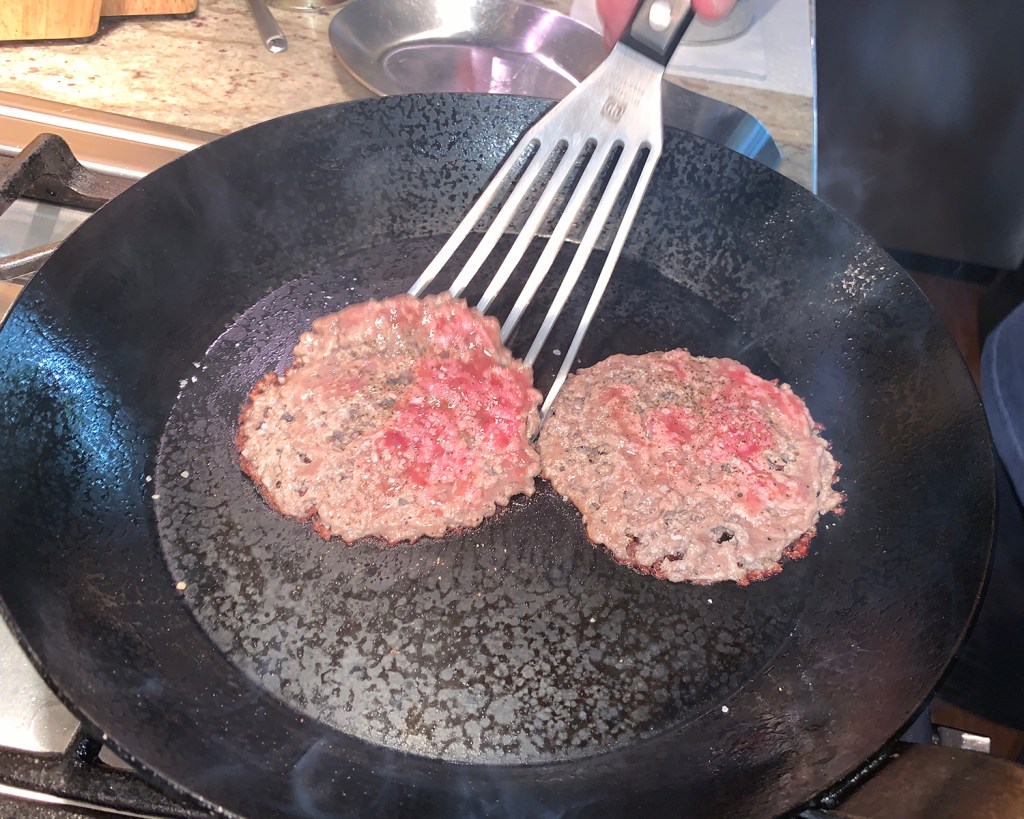
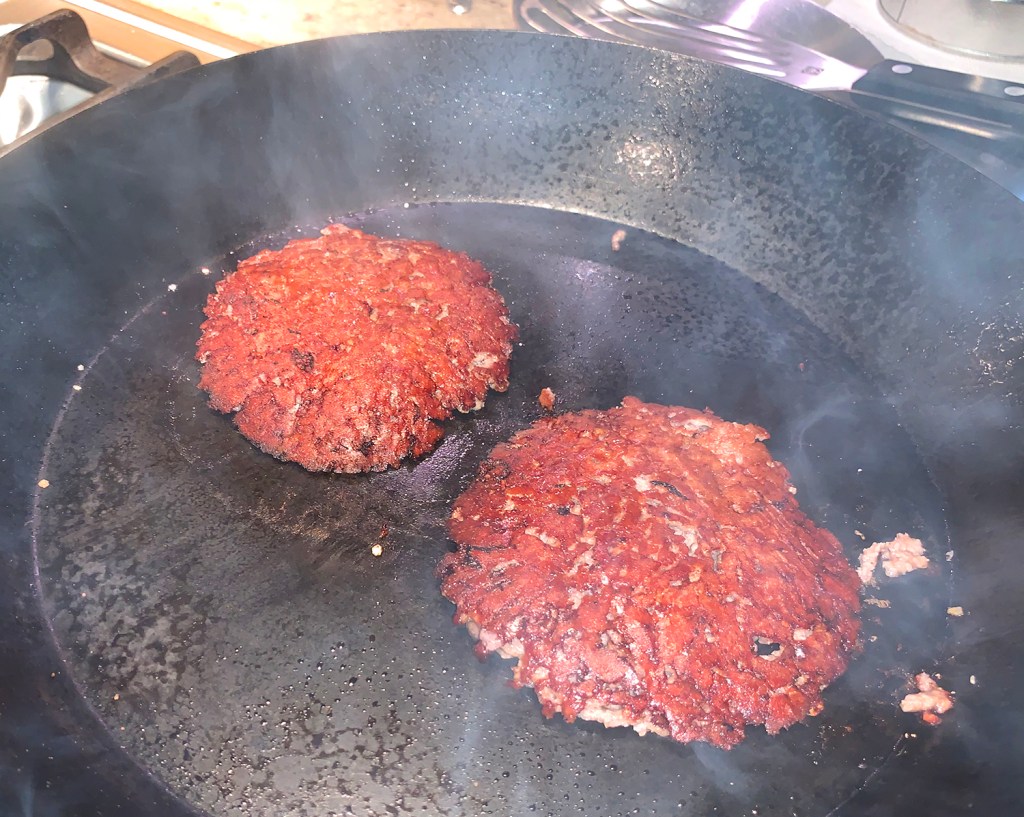
The sticking point? To flip the burgers, you’ll need to scrape them loose from the pan—and that’s a good thing. Sticking means that the meat has made full contact with the pan and browned deeply and uniformly. Burgers that don’t stick shrink and thicken, reducing the amount of brownable surface area and thus savory flavor. Make sure to use a thin metal spatula for best results.

Among family and friends, I am known for my homemade ultimate grilled burgers weighing in at nearly a half-pound each, with medium-pink juicy interiors that dribble down your chin. I knew not to expect that outcome with these smashed burgers, and was very pleasantly surprised with how good—and simple to make—they ended up.

Are smashed burgers our new replacement? No, but it’s always a good thing to have an arsenal of culinary varieties that you can fall back on depending on your circumstances. So the THIN versus FAT burger dilemma will have to go another round or two in our household. Might even venture to say there could be two winners…

Smashed Burgers

  • Servings: 2
  • Difficulty: easy
  • Print

Ingredients

Sauce

  • 2 tablespoons mayonnaise
  • 1 tablespoon minced shallot
  • 1 ½ teaspoons finely chopped dill pickles plus ½ teaspoon brine
  • 1 ½ teaspoons ketchup
  • ⅛ teaspoon sugar
  • ⅛ teaspoon pepper

Burgers

  • 2 hamburger buns, toasted if desired
  • 8 ounces (80 percent lean) ground beef
  • ¼ teaspoon vegetable oil
  • ¼ teaspoon kosher salt, divided
  • 2 slices American cheese (2 ounces)
  • Bibb lettuce leaves
  • Thinly sliced tomato

Directions

  1. FOR THE SAUCE: Stir all ingredients together in bowl.
  2. FOR THE BURGERS: Spread 1 tablespoon sauce on cut side of each bun top. Divide beef into 4 equal pieces (2 ounces each); form into loose, rough balls (do not compress).
  3. Place oil in 12-inch cast-iron or carbon-steel skillet. Use paper towel to rub oil into bottom of skillet (reserve paper towel). Heat over medium-low heat for 5 minutes.
  4. While skillet heats, wrap bottom and sides of small saucepan with large sheet of aluminum foil, anchoring foil on rim, and place large plate next to cooktop.
    OR, use the bottom of a 28-ounce can oiled with cooking spray, which we did.
  5. Increase heat to high. When skillet begins to smoke, place 2 balls about 3 inches apart in skillet. Use bottom of prepared saucepan (or 28-ounce can) to firmly smash each ball until 4 to 4½ inches in diameter. Place saucepan/can on plate next to cooktop.
  6. Sprinkle patties with ⅛ teaspoon salt and season with pepper. Cook until at least three-quarters of each patty is no longer pink on top, about 2 minutes (patties will stick to skillet).
  7. Use thin metal spatula to loosen patties from skillet. Flip patties and cook for 15 seconds. Slide skillet off heat. Transfer 1 burger to each bun bottom and top each with 1 slice American cheese.
  8. Gently scrape any browned bits from skillet, use tongs to wipe with reserved paper towel, and return skillet to heat. Repeat with remaining 2 balls and place burgers on top of cheese.
  9. Top with lettuce and tomato. Cap with prepared bun tops. Serve immediately.

http://www.lynnandruss.com

Rustic Pear Crostata

A work of art—and not by me. Recently we enjoyed a fabulous dinner at the home of friends Rosanne and Gary (Mr. and Mrs. Z, as you may recall). And the showstopper was the Rustic Pear Crostata, a recipe Mrs. Z. got from well-known chef Lidia Bastianich.

Now I know I’m not much of a dessert eater, but the crostata was a thing of beauty—and I’m sure those purple edible butterflies may have had something to do with the attraction. Yes, that’s correct, I did say edible butterflies. I was so intrigued, I questioned where Rosanne got them.

The answer? From http://www.DecoMachineLLC.com where they sell edible dessert toppers or, “pictures you can eat.” These are very thin and almost translucent (see through), similar to a “communion wafer” and are virtually tasteless, not sweet at all and, are sugar-free.

The Hubs LOVED his portion! He’s a pear man to begin with, and then served with a generous dollop of homemade whipped cream, you’d think he died and went to Heaven. He certainly didn’t decline the offer to take some of the leftovers home…

Couldn’t resist giving a shout out to my gal-pal for the fabulous dinner with the eye-catching finale! Drum roll please…

Rustic Pear Crostata

  • Servings: 8
  • Difficulty: moderate
  • Print

Ingredients

  • 1 ¼ cups all-purpose flour, plus more as needed
  • 2 Tbsp. sugar
  • ½ tsp. baking powder
  • ¼ tsp. kosher salt
  • 8 Tbsp. very cold unsalted butter, cut into small pieces
  • 1 Large egg

Ingredients for the filling:

  • ¼ cup apricot jam
  • 2 Tbsp. sugar, plus more for sprinkling
  • 3 Firm-ripe bartlett pears, peeled and sliced ¼ inch thick
  • 1 Tbsp. cornstarch
  • 1 tsp. grated lemon zest plus 1 tablespoon juice
  • 2 Tbsp. unsalted butter, cut into bits
  • 1 Large egg, beaten with a pinch of salt

Directions

  1. For the dough, combine the flour, sugar, baking powder, and salt in a food processor. Pulse just to combine. Scatter in the butter pieces and pulse until the butter is the size of peas. Combine the egg and 2 tablespoons cold water in a small bowl and pour over the flour. Pulse just until the dough comes together in loose crumbs. (Add a little more water if the dough is too crumbly or a little more flour if it is too wet.)
  2. Mound the dough on a work surface and knead a few times to make a cohesive dough. Wrap in plastic and flatten into a disk.
  3. Refrigerate at least 1 hour or up to overnight. Let rest on the work surface for 10 minutes before you begin to roll it out.   
  4. Preheat oven to 400 degrees F, with a baking stone, if you have one, on the bottom rack.
  5. For the filling, warm the jam in a small bowl in the microwave to thin it out, then stir in the sugar. Toss the pears, cornstarch, and lemon zest and juice until the cornstarch is absorbed. Drizzle with the jam mixture and toss to combine.  
  6. Roll the dough on a piece of parchment to a circle with a 13-inch diameter. Mound the pear mixture in the center, leaving a 2-inch border all around. Dot the top with the butter pieces.
  7. Fold the crust over the top of the fruit, pleating as you go. Slide the crostata, still on the parchment, onto a baking sheet. Brush the crust with the beaten egg and sprinkle with sugar.  
  8. Bake until the filling is bubbling and the bottom of the crust is crisp and golden, about 40 minutes. Remove to a rack and let cool at least 30 minutes.
  9. Serve warm or at room temperature. If desired, shake on some powdered sugar just before serving.

http://www.lynnandruss.com

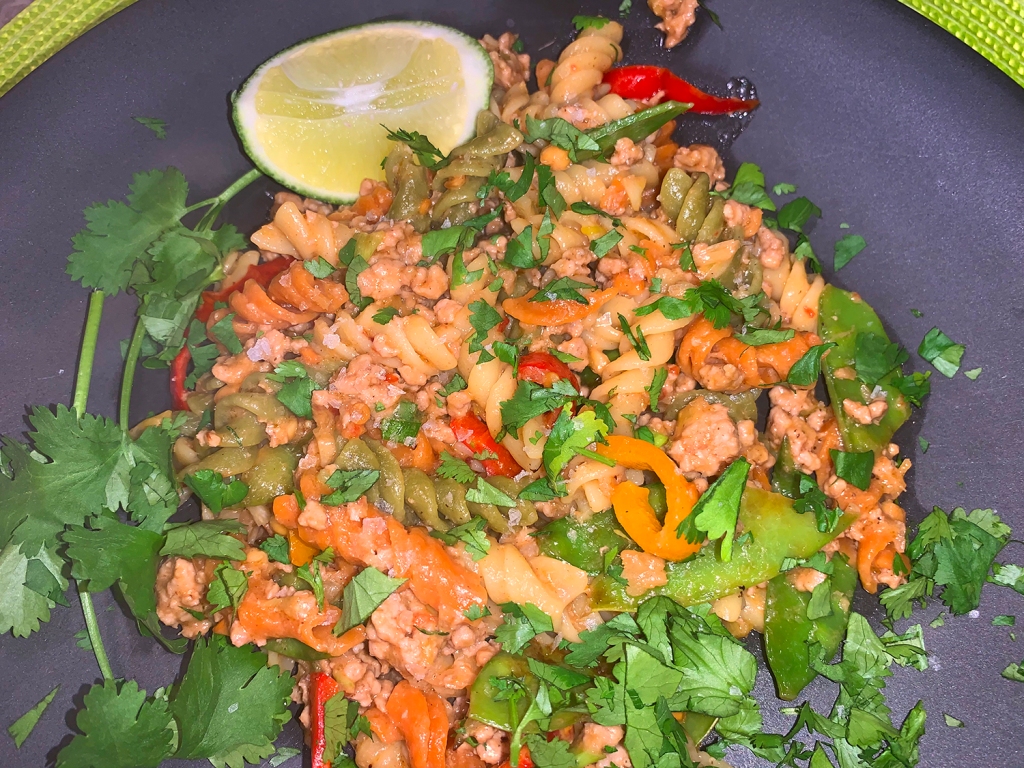
Rotini with Ground Pork and Spicy Peanut Sauce

Chitalian Fusion is what we dubbed this pairing of satay like flavors with pasta and green herbs. Flavorful, but not too hot. You may not expect bright, Asian-inspired flavors to be paired with Italian rotini pasta, but it’s a great choice for holding onto the sauce. Like Pad Thai, although easier to eat than with the long noodles—yet where are the veggies?

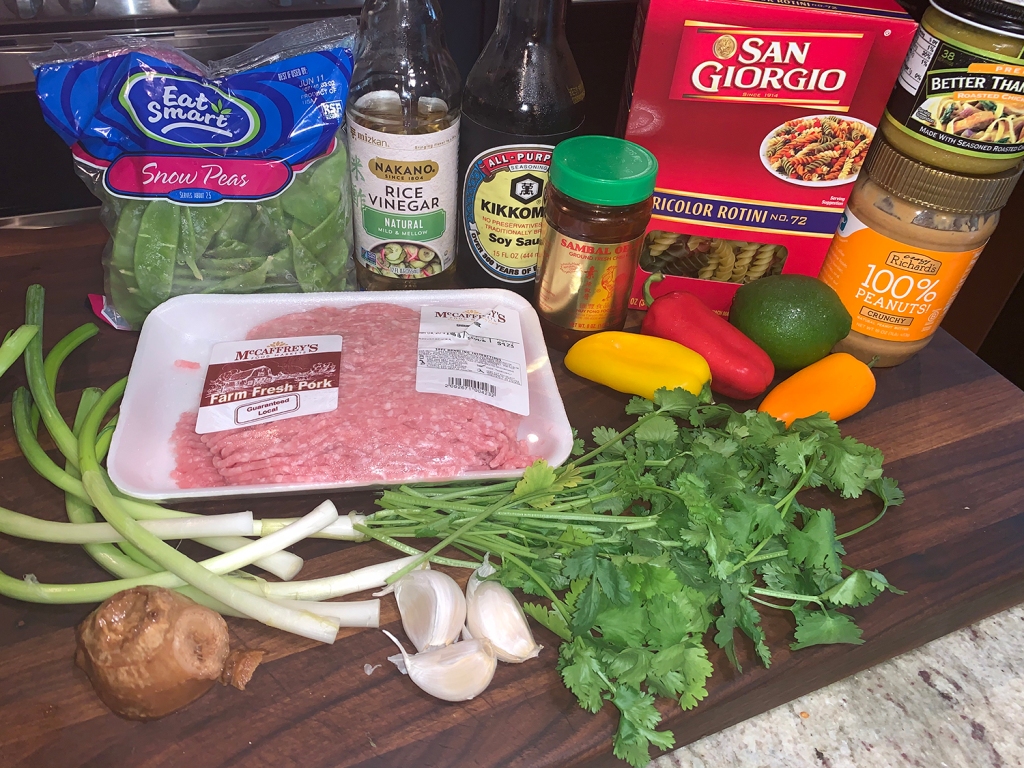
My initial issue was the overall drab color of the dish. Cooked pork, with regular pasta, peanut butter and scallions—where’s the color? So I started with tri-colored rotini, and added snow peas and three small, different colored baby bell peppers. Now it was a fiesta on a plate, visually appealing enough to want to dive in.

Rotini with Ground Pork and Spicy Peanut Sauce

  • Servings: 4-5
  • Difficulty: easy
  • Print

Ingredients

  • Kosher salt
  • 12 oz. tri-colored rotini
  • 1-1/2 Tbs. peanut oil
  • 8 oz. snow peas, strings removed, cut in half on a diagonal
  • 3 baby bell peppers, stems removed, seeded, cut in half lengthwise, then sliced into 1/4″ strips
  • 6 medium scallions, thinly sliced, whites and greens separated
  • 2 Tbs. minced fresh ginger
  • 2 medium cloves garlic, minced
  • 1 lb. ground pork
  • 3 Tbs. soy sauce
  • 2 Tbs. unseasoned rice vinegar
  • 1 Tbs. sambal oelek or other Asian chile paste; more to taste
  • 1 Tbs. granulated sugar
  • 1/2 cup crunchy peanut butter, preferably natural
  • 2/3 cup chicken broth
  • 1 Tbs. Asian sesame oil
  • 1 medium lime, cut into 4 wedges
  • 1/4 cup chopped fresh cilantro as garnish

Directions

  1. Bring a large pot of salted water to a boil. Add the rotini and cook according to package directions until al dente.
  2. Meanwhile, heat a 12-inch heavy-duty skillet over medium heat. Add the oil, when hot toss in the snow peas and bell pepper strips. Cook about 2 minutes and remove to another dish.
  3. Add the scallion whites to the hot pan. Cook, stirring, until softened, about 1 minute.
  4. Add the ginger and garlic and cook, stirring for 30 seconds.
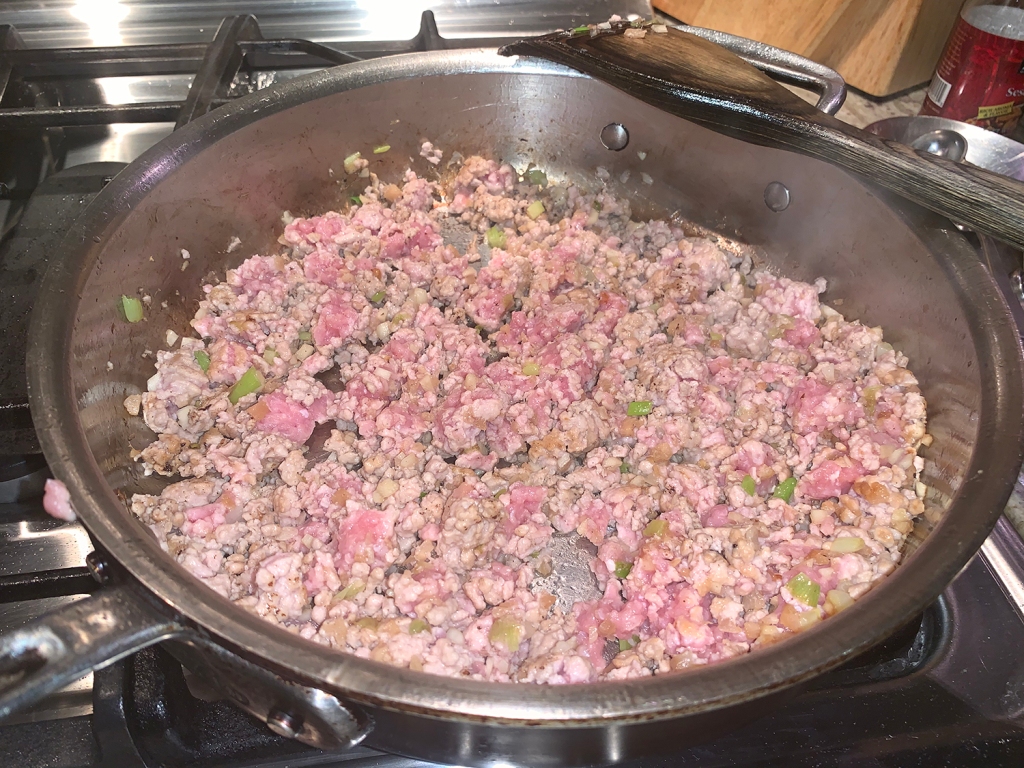
  5. Crumble in the pork and cook, stirring occasionally, until it loses its pink color, about 5 minutes.
  6. Stir in the soy sauce, vinegar, sambal oelek, and sugar and cook until bubbling. Add the peanut butter and stir until incorporated.
  7. Pour in the broth, stir well, and bring to a simmer. Cook for 2 minutes, stirring occasionally.
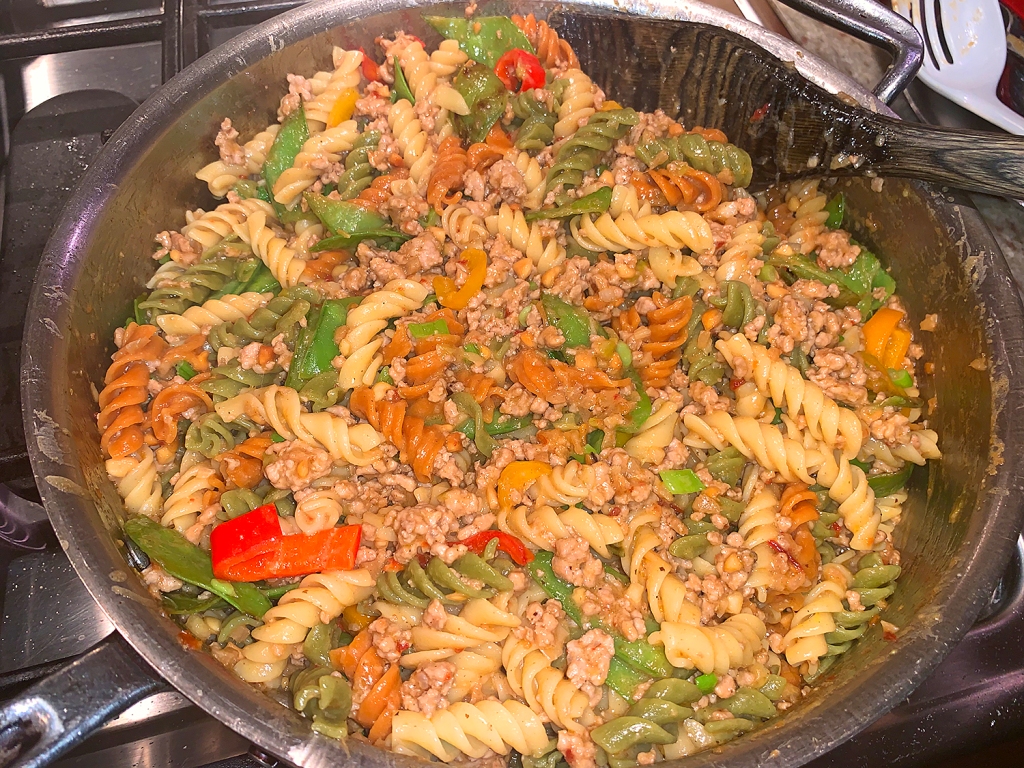
  8. Reserve 1/2 cup of the pasta water, drain the pasta. Add the pasta and the snow pea mix to the pork and scallions.
  9. Thin the sauce with the pasta water, if necessary. Divide among plates or bowls, squeeze a lime wedge over each serving, and top with cilantro.

http://www.lynnandruss.com

Adapted from a recipe by Bruce Weinstein, Mark Scarbrough from Fine Cooking

Dry-Brine, Reverse-Sear Sirloins with Argentinian Chimichurri Sauce

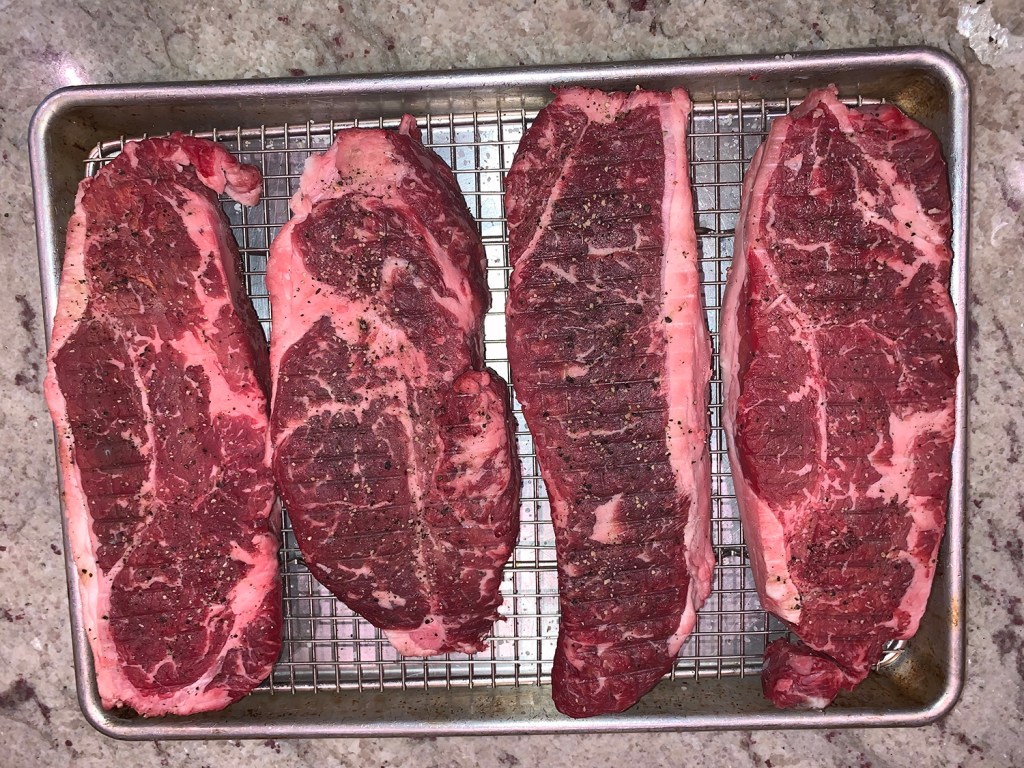
That title is certainly a mouthful, but want a perfect steak? This method for dry-brining steak, paired with reverse-sear cooking, will result in the tastiest steak you’ve ever made—as long as you don’t commit the cardinal sin. Don’t be a cheap-skate and try to get away with a sub-par piece of meat. No matter what you hear or read, this method will not transform a cheap steak into an expensive one, it will merely improve it.

You will definitely need a meat thermometer to do this correctly, so if you do not have an instant-read Thermapen, go get yourself one now. Plus, each piece of meat needs to be at least 1.5 inches thick for the reverse sear method to work. I started with a 3.6 pound strip roast and sliced it down into four equal steaks. The roast was on sale for 50% off, and I had it tucked away in the freezer for just such an occasion.

Did you know that with this method, the salt gets deeper into the meat than with conventional seasoning. The salt crystals draw out moisture, creating a slick watery surface on the steak that eventually dissolves the salt, then the process of diffusion draws this salty brine back into the meat. Voila!

Yes, the steaks do look somewhat smaller after the brining process, but the meat has a more intense beefy flavor. A word to the wise, you’re going to want to make sure there’s nothing with a strong odor left uncovered in the fridge which could work it’s way into the meat.

Now you might be saying to yourself that it takes longer to cook with reverse sear than other methods. Admittedly, some of the better things in life do take longer, but ultimately, the steaks are ready to eat immediately because you’ve rested them prior to the sear!

Along with an eye-opening chimichurri sauce (recipe follows), we paired the steaks with two recent 5-star side dishes, Russel’s Russets and Green Beans and Blistered Tomatoes.

Argentinian Chimichurri Sauce—This recipe from Milk Street can easily be halved, but you’ll find uses other than steak for this delicious condiment such as on grilled pork, fish and other seafood. Chimichurri can be stored in an airtight container in the refrigerator for up to a week; bring to room temperature before serving. Don’t substitute fresh oregano. The stronger flavor and texture of dried oregano is a hallmark of chimichurri.

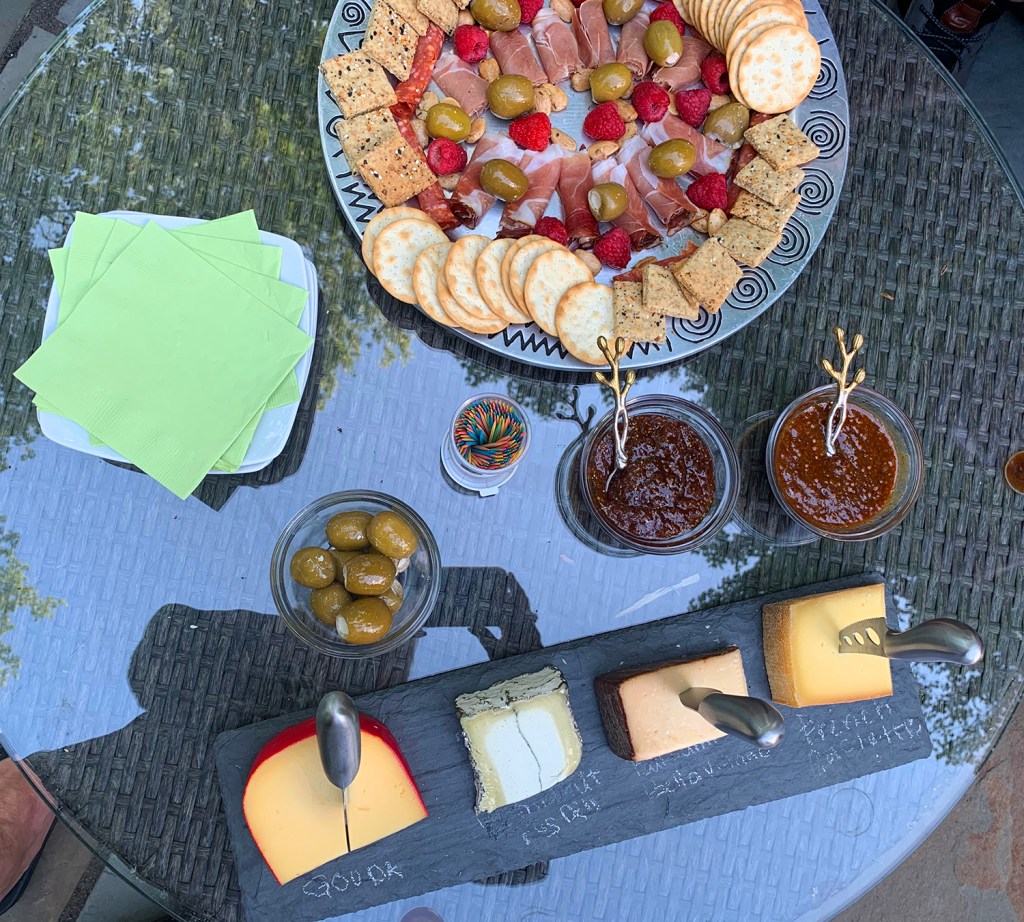
The evening got started when our guests, Paula and Mike toted in the appetizer, and WOW, they did not disappoint! Along with a slate of four scrumptious cheeses, they also supplied a platter of low-carb crackers (that Paula made from scratch), meats, stuffed olives, and mustard/honey and fig spreads. Which, BTW, went nicely with the chilled rosé that we were sipping.

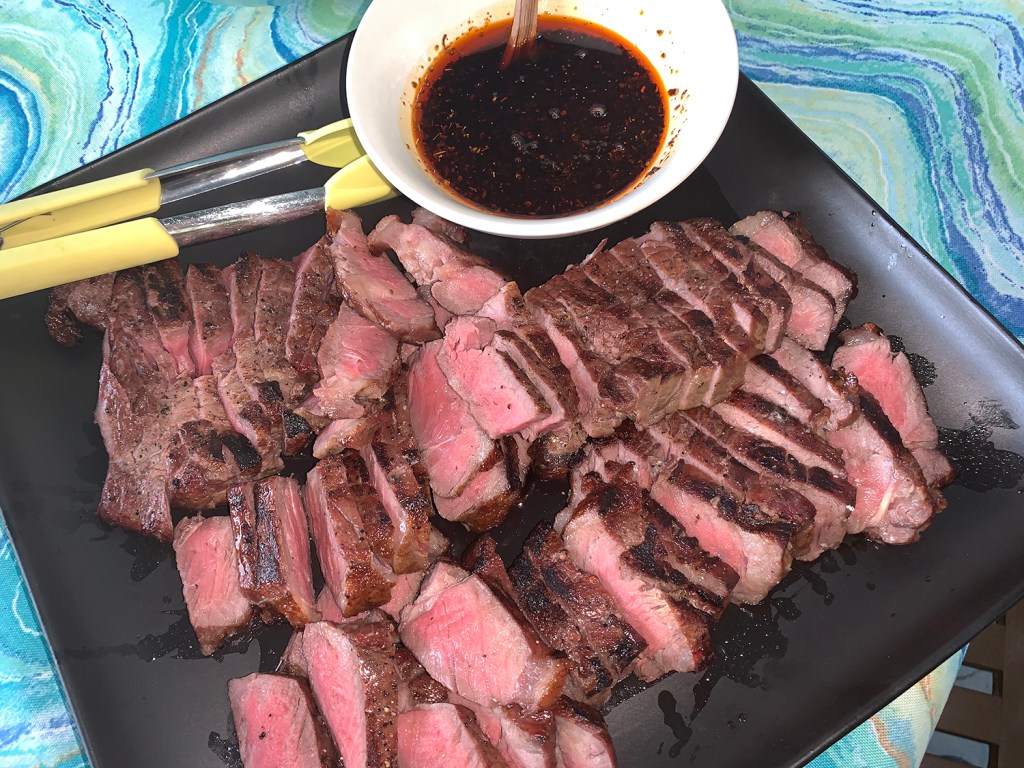
When it was time to start grilling, Russ transferred the rimmed baking sheet with rack and steaks from counter directly onto the indirect heated side of the grill. He kept it covered and maintained a temperature of 250°. After 45 minutes, he turned up the burners on the other side of the grill to high, oiled the grates and slapped the meat onto them for the final char.

Dry-Brine, Reverse-Sear Sirloins

  • Servings: 4-6
  • Difficulty: easy
  • Print

Ingredients

  • 3.5-4 lb. strip roast, cut into 4 steaks, fat trimmed
  • Kosher salt and fresh cracked pepper
  • Argentinian Chimichurri sauce (see recipe below)

Directions

  1. Cut the sirloin roast into 4 equal sized steaks. (Ours were 1 1/2″ each from a 3 1/2 pound roast.) Lay them on small rimmed baking sheet with rack. Generously salt and pepper each side.
  2. Place baking sheet uncovered into refrigerator for at least 24 hours, up to 3 days.
  3. Start up the grill using the indirect method. Turn on the burners on one side and cover until it reaches 250°. Place the steaks on the off side and close the lid. When the meat reaches 115°, they will be ready to sear over high heat. Our 1 1/2″ steaks took 45 minutes.
  4. Turn the burners to high and place the steaks over the direct heat to char the outsides, about 2 minutes per side, and the internal temp is 125° for medium-rare.
  5. Transfer steaks to a cutting board with a moat to catch any juices.
  6. Using tongs and a sharp knife, cut each steak into 1/2″ thick slices and pile all of the meat and any accumulated juices onto a platter along with a bowl of the chimichurri sauce.

Ingredients

  • ¾ cup grapeseed or other neutral oil
  • ¼ cup sweet paprika
  • ¼ cup red pepper flakes (you can reduce the amount if desired)
  • ¼ cup dried oregano
  • 2 medium garlic cloves, finely grated
  • ½ cup balsamic vinegar
  • Kosher salt

Directions

  1. In a small saucepan over low, combine the oil, paprika, pepper flakes and oregano. Cook, stirring occasionally, until the mixture begins to bubble, 5 to 7 minutes.
  2. Remove from the heat and stir in the garlic. Let cool to room temperature.
  3. In a medium bowl, combine the vinegar and 1 teaspoon salt, then stir until the salt dissolves. Slowly whisk in the cooled oil mixture.

http://www.lynnandruss.com

Poached Fish Fillets with Sherry-Tomato Vinaigrette

Super-moist, delicately cooked fish, this Poached Cod Fillets with Sherry-Tomato Vinaigrette recipe from Cook’s Illustrated (CI) was just the ticket for Meatless Monday. Any meaty white fish such as halibut, sea bass or snapper would also work, but cod tends to be the most economical—at least in our ‘hood.

The restaurant-style dish typically requires a pot of pricey olive oil. And even 3/4 cup may seem like a lot, but CI found that using a smaller skillet, dropping in half an onion, and flipping the fish halfway puts a nice dent in the supply needed. Plus they employed that same oil to crisp flavorful garnishes and finally blend into a creamy vinaigrette.

Speaking of garnishes, only four ounces of artichoke hearts seemed miserly at best, and many reviewers agreed. So I tripled the amount to 12 ounces, and patted myself on the back for doing so because they were the BOMB! That decision of course made it necessary to increase the volume of corn starch.

And we have been trying to locate frozen artichokes for months now, none of our local grocery stores carry them anymore—odd indeed. So if you find you’re in the same pickle, purchase the jarred version, but don’t get the marinated variety. It is essential that you drain them really well and blot them with paper towels before coating them with the corn starch. (Later found out Trader Joe’s carries frozen artichokes.)

A few other alterations included boosting the quantity of cherry tomatoes and an extra garlic clove (pretty much a staple move on our part). In addition, I placed the platter of covered, cooked cod into the turned-off oven along with the dish of artichokes to keep warm while we made the vinaigrette.

My changes are noted in the ingredients list below. And while serving the meal with couscous or steamed white rice is great to sop up all that luscious vinaigrette, we went low-carb and made a side of sautéed baby spinach.

IMG_3953

Poached Fillets with Sherry-Tomato Vinaigrette

  • Servings: 4
  • Difficulty: easy
  • Print

Ingredients

Fish

  • 1 1/2 lbs. skinless white fish fillets, 1 inch thick
  • Kosher salt
  • 12 oz. frozen artichoke hearts, thawed, patted dry, and sliced in half lengthwise
  • 2-3 Tbsp. cornstarch
  • ¾ cup olive oil
  • 4 garlic cloves, minced
  • ½ onion, peeled

Vinaigrette

  • 5 ounces cherry tomatoes
  • ½ small shallot, peeled
  • 4 teaspoons sherry vinegar
  • Kosher salt
  • ½ teaspoon pepper
  • 1 tablespoon chopped fresh parsley
  • 4 ounces cherry tomatoes, cut into 1/8-inch-thick rounds

Directions

FOR THE FISH:

  1. Adjust oven racks to middle and lower-middle positions and heat oven to 250 degrees. Pat fish dry with paper towels and season each fillet with 1/4 teaspoon salt. Let sit at room temperature for 20 minutes.
  2. Meanwhile, toss artichokes and cornstarch in bowl to coat. Heat 1/2 cup oil in 10-inch nonstick skillet over medium heat until shimmering. Shake excess cornstarch from artichokes (mine didn’t have any excess to shake off) and add to skillet; cook, stirring occasionally, until crisp and golden, 2 to 4 minutes.
  3. Add garlic and continue to cook until garlic is golden, 30 to 60 seconds. Strain oil through fine-mesh strainer into bowl. Transfer artichokes and garlic to an ovenproof plate lined with a paper towel and season with salt. Do not wash strainer.
  4. Return strained oil to skillet and add remaining ¼ cup oil. Place onion half in center of pan. Let oil cool until it registers about 180 degrees, 5 to 8 minutes.
    IMG_3964
  5. Arrange fish fillets, skinned side up, around onion (oil should come roughly halfway up fillets). Spoon a little oil over each fillet, cover skillet, transfer to middle rack, and cook for 15 minutes.
  6. Remove skillet from oven. Using 2 spatulas, carefully flip fillets. (Don’t sweat it if the fillets fall apart, it’s almost impossible to flip them completely intact.)
  7. Cover skillet, return to middle rack, and place plate with artichokes and garlic on lower-middle rack. Continue to cook fish until it registers 130 to 135 degrees, 9 to 14 minutes longer.
  8. Gently transfer fish to serving platter, reserving 1/2 cup oil, and tent fish loosely with aluminum foil. Turn off oven, place the platter of fish in oven while also leaving plate of artichokes inside.

FOR THE VINAIGRETTE:

  1. Process whole cherry tomatoes, shallot, vinegar, 3/4 teaspoon salt, and pepper with reserved 1/2 cup fish cooking oil in blender until smooth, 1 to 2 minutes. Add any accumulated fish juice from platter, season with salt to taste, and blend for 10 seconds. Strain sauce through fine-mesh strainer, pressing on solids to extract as much liquid as possible (discard solids).
  2. To serve, pour vinaigrette around fish. Garnish each fillet with warmed crisped artichokes and garlic, parsley, and tomato rounds. Serve immediately.
    IMG_3972

http://www.lynnandruss.com

Adapted from a recipe by Cook’s Illustrated

Simple Veal Chops Extraordinaire!

Veal chops are a rarity in our house, typically due to the high cost. I picked these up by mistake a while back, (I meant to get pork chops, go figure!) and put them in the freezer until such time we felt like treating ourselves. (Like every day since the lockdown went into effect.)

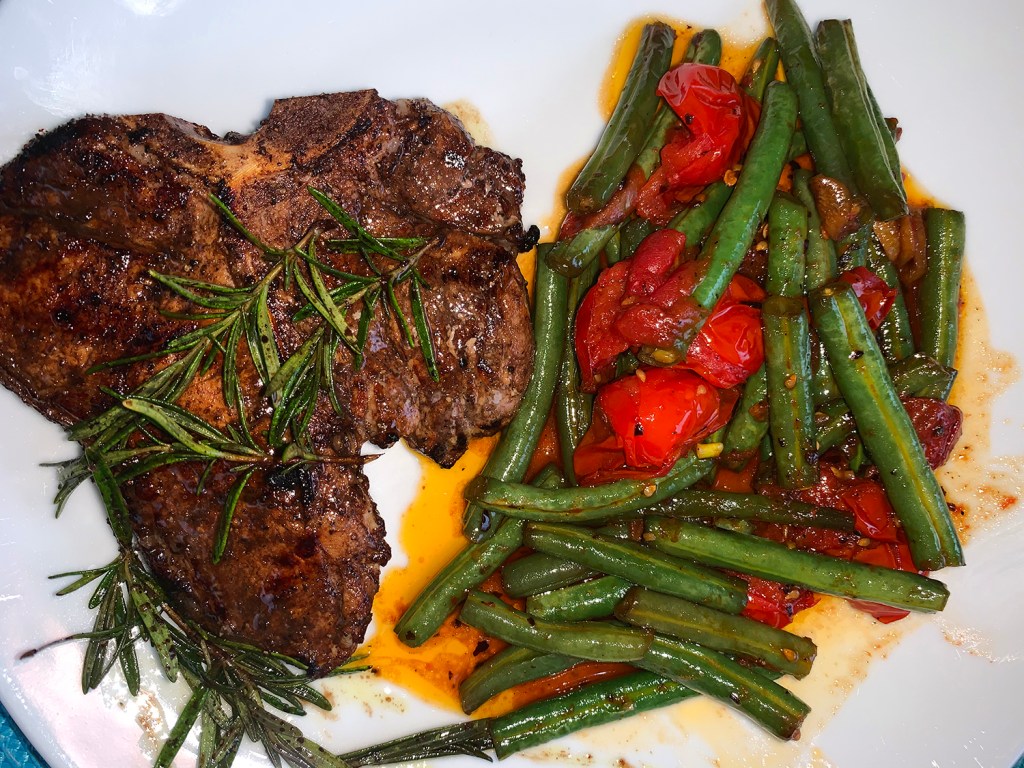
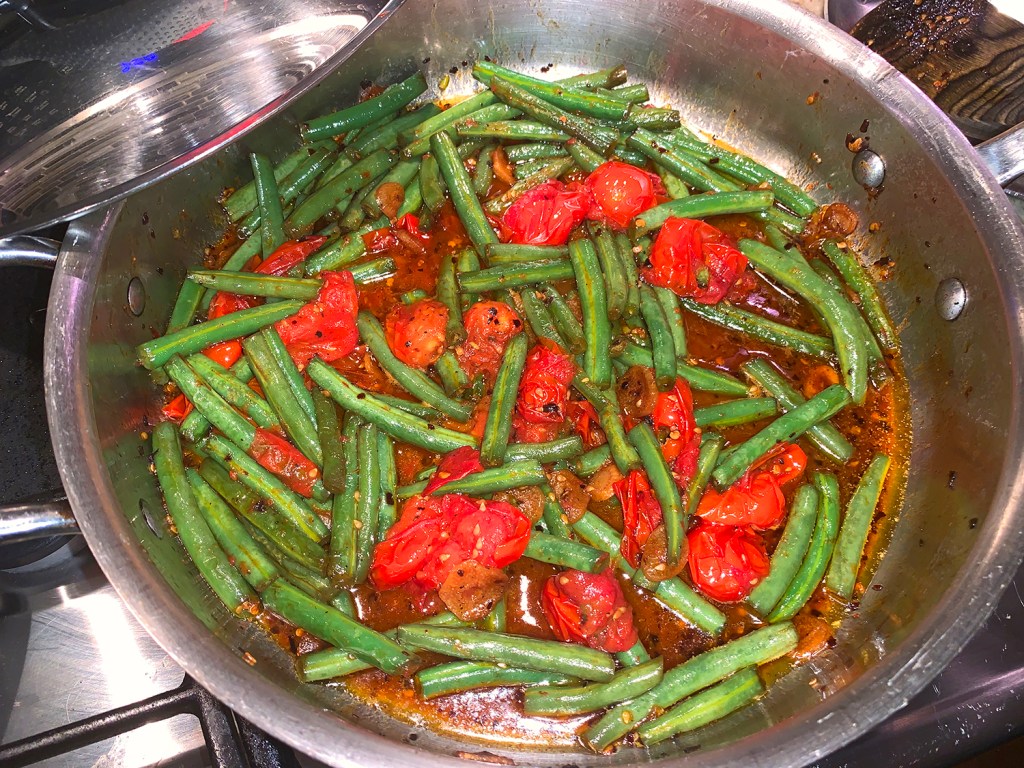
So on a recent Friday night—when in the good ol’ days we use to dine out—those veal chops came to mind as an “aha” moment. Grilled Veal Chops with Rosemary with Green Beans and Blistered Tomatoes, can’t even tell you how good this combo was; you’ll have to make them yourself.

While this dinner is meant for 6 people, with only two veal chops on hand, we cut the marinade recipe in half and bathed them in it for one hour (you can do up to 4 hours). The grilling was super quick; about 3 minutes per side because the thickness was less than 3/4″.

With little to do, you’ll have more time to enjoy company. In fact, the green bean side dish (absolutely divine BTW) can be made ahead and served at room temperature. Get the chops marinating before guests arrive, and all you’ll have to do is toss them on the grill for a few minutes when ready to eat. Dinner done.

Grilled Veal Chops with Rosemary

  • Servings: 6
  • Difficulty: easy
  • Print

Ingredients

  • 5 Tbsp. extra-virgin olive oil
  • 1/4 cup balsamic vinegar
  • 1 1/2 Tbsp. chopped fresh rosemary or 2 teaspoons dried
  • 2 large garlic cloves, pressed, or 1 Tbsp. roasted garlic paste
  • 1/2 tsp. salt
  • 1/2 tsp. ground black pepper
  • 6 8-oz. veal rib chops (3/4 to 1 inch thick)

Directions

  1. Whisk oil, wine, rosemary, garlic, salt and pepper to blend in 13 x 9 x 2-inch glass baking dish. Add veal chops to dish and turn to coat with marinade. Let stand at room temperature 1 hour or refrigerate up to 4 hours, turning veal occasionally.
  2. Prepare barbecue (medium-high heat) or preheat broiler.
  3. Remove veal from marinade, shaking off excess. Season veal with salt and pepper.
  4. Lightly oil grill. Grill or broil veal to desired doneness, about 4 minutes per side for medium-rare. Transfer to platter. Garnish with rosemary sprigs and serve.

http://www.lynnandruss.com

Green Beans and Blistered Tomatoes

Super easy to make and delicious served at room temperature, these green beans pack a ton of savory, spicy flavor. Next time however, we will reduce the “remaining 3 Tbs of coconut oil” by half.

Green Beans and Blistered Tomatoes

  • Servings: 4-6
  • Difficulty: easy
  • Print

Ingredients

  • 1-1/2 cups cherry tomatoes
  • 1/4 cup coconut oil, melted
  • Kosher salt and freshly ground black pepper
  • 1 tsp. crushed red pepper flakes
  • 3 medium cloves garlic, sliced
  • 1-1/2 lb. green beans, trimmed and cut into 21/2-inch pieces
  • 3 Tbs. soy sauce

Directions

  1. Position a rack in the center of the oven, and heat the oven to 400°F.
  2. On a small rimmed baking sheet, toss the tomatoes with 1 Tbs. of the oil, 1 tsp. salt, and 1/2 tsp. black pepper. Bake until the skins crack, about 15 minutes. Set aside.
  3. Heat the remaining 3 Tbs. oil in a large, deep skillet over medium heat until shimmering. Add the pepper flakes and stir. Add the garlic and cook, stirring, until fragrant, about 30 seconds.
  4. Reduce the heat to medium low. Add the green beans and soy sauce. Stir to coat the beans, cover, and cook for 5 minutes.
  5. Uncover and gently stir in the tomatoes. Cook until the beans are crisp-tender, about 5 minutes. Season to taste with salt and black pepper.
  6. Serve warm or at room temperature.

http://www.lynnandruss.com

Side dish recipe found on Fine Cooking by Samantha Fore

Cumin-Chile Lamb Kebabs

It was a beautiful late-Spring evening, just perfect for grilling—al fresco dining at its best with low humidity, a slight breeze and temps in the mid-70s. One of our favorite ways to roll when dining outside is kebabs. They can consist of a large variety of proteins, veggies, spices and even fruit. Pots and pans aren’t even part of the cooking equation, so clean-up is a breeze.

As I mentioned in a past blog, make sure to get the right cut of meat for the job. The key to a knockout skewer? Being choosy at the butcher counter. The ideal cuts are often (counterintuitively) boneless braising cuts. Full-flavored, well-marbled, and appealingly affordable, they welcome high heat and won’t dry out the way leaner cuts tend to.

Here we used a 2-pound leg of lamb cut into 2-inch cubes. (This is contrary to the original recipe of 1 1/4-pound lamb shoulder cut into 1-inch pieces); and I substituted roasted garlic paste in place of the grated clove for the yogurt sauce. We completed the meal with veggie skewers that included cherry tomatoes, zucchini, summer squash and red onion—and two small potatoes that were first microwaved, cut in half and added to the mix.

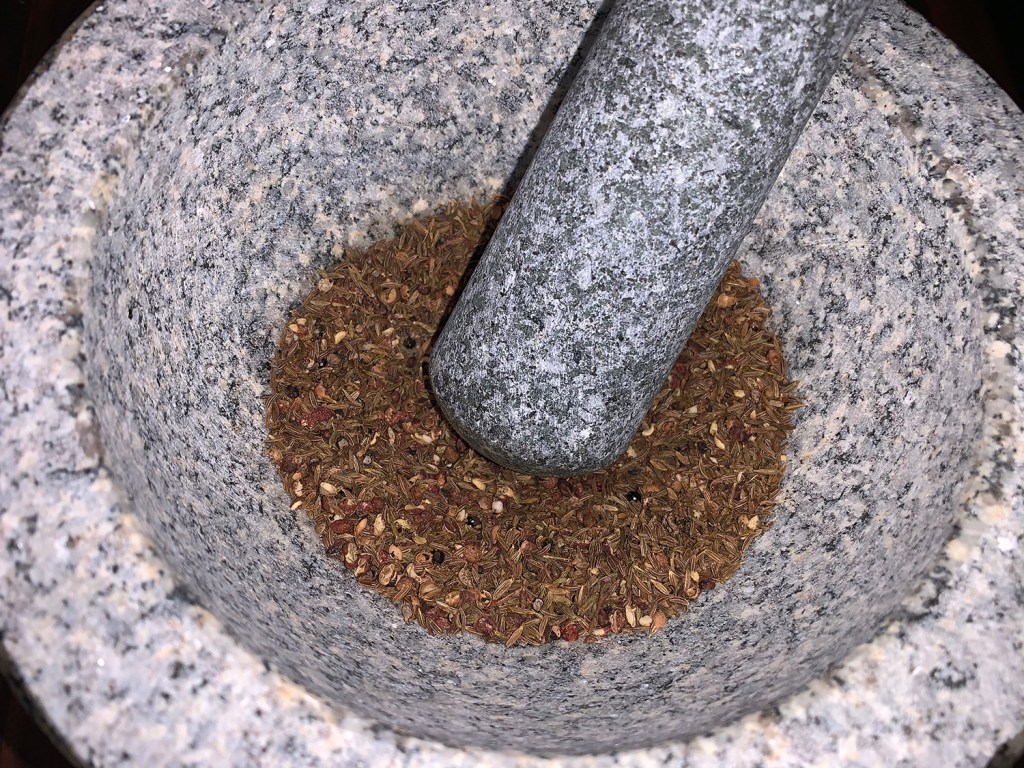
The directions indicate to dry rub the lamb after you skewer the meat. I put the seasoning on the cubes early in the morning to let them get happy all day and really permeate the lamb. A perfect cube is not essential, but try to get the lamb into roughly the same size pieces so they cook at the same rate.

Cumin-Chile Lamb Kebabs with Garlic Yogurt Sauce

  • Servings: 4
  • Difficulty: easy
  • Print

Ingredients

Garlic Yogurt

You can make the garlic yogurt sauce up to three days ahead.
  • 1 garlic clove, grated
  • ½ tsp. finely grated lemon zest
  • 1 Tbsp. fresh lemon juice
  • 1 cup plain Greek yogurt
  • Kosher salt, freshly ground pepper

Lamb and Assembly

  • 2 Tbsp. cumin seeds
  • 1 Tbsp. Sichuan peppercorns or 1 tsp. black peppercorns
  • 2 tsp. caraway seeds
  • 2 tsp. crushed red pepper flakes
  • 1 tsp. sugar
  • Vegetable oil (for grill)
  • 2 lbs. boneless leg of lamb, cut into 2-inch pieces
  • Kosher salt, freshly cracked pepper
  • Finely grated lemon zest (for serving)

Directions

Garlic Yogurt

  • Stir garlic, lemon zest, and lemon juice into yogurt in a small bowl to combine; season with salt and pepper.
  • Do Ahead: Yogurt can be made 3 days ahead. Cover and chill.

Lamb and Assembly

  1. Coarsely grind cumin seeds, peppercorns, caraway seeds, red pepper flakes, and sugar in spice mill or with mortar and pestle until only a few whole spices remain.
  2. Prepare a grill for medium-high, indirect heat (for a charcoal grill, bank coals on one side of grill; for a gas grill, leave one or two burners off). Oil grates.
  3. Thread lamb onto 3-4 skewers, leaving a small gap between each piece of meat. Season with salt, then sprinkle generously with spice blend, pressing it onto the meat with your hands to help it adhere if needed. OR, press the spice mixture onto the lamb cubes earlier in the day, cover and refrigerate, then skewer the meat just before grilling.
  4. Grill lamb over direct heat, turning every minute or so, until browned and beginning to char in spots, about 4 minutes. Move to cooler side of grill and continue to grill until lamb is cooked to desired doneness, about 4 minutes longer for medium-rare.
  5. Top garlic yogurt with cracked black pepper and a little lemon zest. Serve alongside lamb.

Do Ahead: Spice blend can be made 1 month ahead. Store airtight at room temperature.

http://www.lynnandruss.com

Adapted from a recipe by Chris Morroco of Bon Appétit.

One-Pot Chicken Thighs with Black Beans, Rice and Chiles

A real crowd pleaser, this true one-pot wonder is adapted from Diane Henry’s “From the Oven to the Table: Simple Dishes that Look after Themselves.” That title alone can put a busy home chef at ease. While there is a fair amount of prep, the meal does take care of itself once it’s assembled.

Truth be told, we were a little shy on the amount of chicken. Unlike days of yore (just a few months ago), folks don’t just run out to the store to pick up a few things anymore. Like most, our ventures into the COVID-infected world are planned ahead of time, so we often try to make do with what’s on hand. In this case, only five thighs weighing in at two pounds.

*Now the recipe specifically indicates using a 12-inch skillet here; a smaller or larger pan could result in under- or over-cooked chicken or rice. And God knows, we have enough pots and pans to feed an army, but we did NOT have an ovenproof 12-inch skillet. So I reasoned using our 11-inch ovenproof pan with one pound less chicken should suffice—and it did, just beautifully.

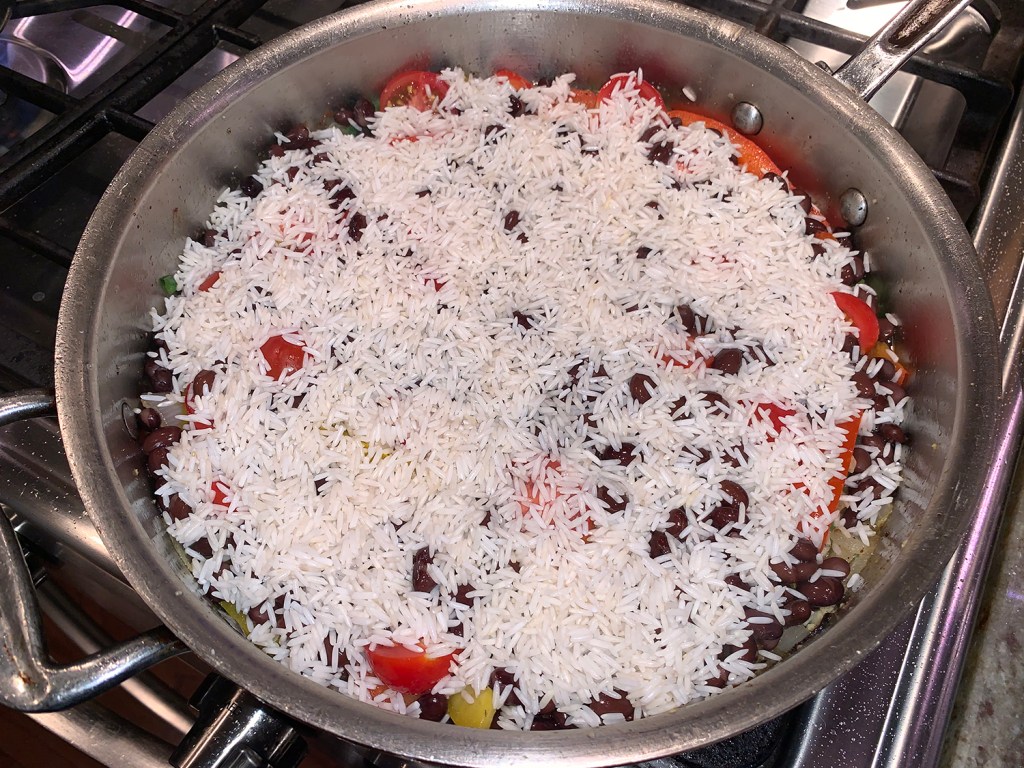
When assembling, it’s important that the black beans and tomatoes are beneath the rice and chicken. The rice will burn otherwise, and you’ll have to soothe the feathers of some unhappy diners.

The final dish had tons of flavor, although it was only mildly spicy—even with two large jalapeños. I did increase the amount of tomatoes from 1/3-pound to 1/2-pound; but keep in mind, they add more liquid, so you may want to scale back slightly on the amount of stock.

The Hubs, who loves all things Spanish, insisted on using a white Spanish onion instead of the yellow onion suggested in the original recipe. He also questioned the use of basmati rice, saying Latino dishes typically favor medium- over long-grained rice. But since I was the chef that night, I used the basmati.

Enchiladas made with the leftovers.

Oh and if you have any leftover, make enchiladas! In a large casserole dish, spread enchilada sauce (store-bought or homemade) across the bottom. Shred the chicken, stir it into the rice and beans mixture and ladle it into flour tortillas. (We had enough for six.) Add some shredded cheddar or Mexican style cheese, then fold and lay each tortilla seam-down. Repeat until dish is full. Ladle more enchilada sauce over the top followed by shredded cheese. Bake in a preheated 325° oven for about 35 minutes. Top with chopped cilantro.

One-Pot Chicken Thighs with Black Beans, Rice and Chiles

  • Servings: 4-6
  • Difficulty: easy
  • Print

Ingredients

  • 8 bone-in, skin-on chicken thighs, about 3 lbs.
  • Flaky sea salt and black pepper
  • 2 Tbsp. EVOO
  • 1 large white Spanish onion, chopped
  • 2 bell peppers (different colors), halved, seeded, and sliced2 1/2 cups chicken stock, preferably homemade
  • 2 jalapeños, halved, seeded, and chopped
  • 1 3-inch cinnamon stick, broken in half
  • 4 garlic cloves, finely minced
  • 1 tsp. ground cumin
  • 1 15-oz. can black beans, drained
  • 1/2 lb. cherry tomatoes halved
  • 1 cup basmati rice, rinsed in a sieve until the water runs clear
  • 3 Tbsp. chopped cilantro leaves
  • Garnish options: lime wedges, sliced avocado, pickled chiles, sour cream
Brown seasoned chicken thighs on both sides, about 5 minutes each.

Directions

  1. Heat the oven to 375°.
  2. Season the chicken on both sides with salt and pepper. Heat the oil in a 12-inch ovenproof skillet* over medium high.
  3. Brown the chicken on both sides about 5 minutes each to get good color. Transfer to a plate.
  4. Add the onion and bell peppers to the pan and sauté until just starting to soften, about 5 minutes. Season with salt and pepper.
  5. In a small sauce pan, bring the chicken stock to a boil.
  6. Meanwhile, add the jalapeños, cinnamon halves, garlic and cumin to the skillet with the peppers and cook for 2 minutes.
  7. Add the black beans and cherry tomatoes. Season generously with salt and pepper.
  8. Sprinkle the rice on top in an even layer, then add the stock carefully so as not to disrupt the rice too much.
  9. Add the chicken back to the skillet, skin side up.
  10. Bake uncovered for 40-45 minutes. The chicken will be a light golden color, the stock should be absorbed, and the rice tender.
  11. Sprinkle with cilantro. Serve with garnishes of choice.

http://www.lynnandruss.com

Adapted from a recipe by Margaux Laskey from The NY Times Cooking site

Turkey Sausage Skillet

Meet weeknight cooking at its best! Combining a few flavorful ingredients like turkey sausage, onions and garlic, with pantry staples such as crushed tomatoes and Italian herbs, then utilizing a simple cooking technique, this recipe builds flavor with every step. And it’s easy-peasy!

Yum and Yum!

Sliced onions and peppers are sautéed in the drippings left behind from cooking the sausage. Aromatic garlic and herbs get added toward the end, so they have time to bloom without getting overcooked. Acidic tomatoes help release any flavor stuck to the bottom of the pan after the other ingredients have been cooked, to the benefit of the entire dish.

So the end result is a single-dish dinner alive with richly spiced sausage, silky cooked vegetables, all bathing in a tomatoey pan sauce over a bed of egg noodles. To keep it low-carb, just nix the noodles.

Turkey Sausage Skillet

  • Servings: 4
  • Difficulty: easy
  • Print

Ingredients

  • 1 Tbsp. extra-virgin olive oil
  • 1 lb. Italian turkey sausage links, cut into 1-inch slices
  • 2 onions, peeled and sliced thin 
  • 2 bell peppers of different colors, halved, seeded, and cut into strips
  • 3 cloves garlic, chopped
  • 1 Tbsp. fresh oregano, chopped
  • 1 cup crushed tomatoes, undrained
  • 1/3 cup chopped fresh basil
  • 1/2 cup grated Parmesan cheese
  • 1 pkg. egg noodles, cooked according to package directions
After browning the sausage slices on both sides, transfer to a plate and cut into bite sized pieces. Sprinkle on chopped oregano and cover to keep warm.

Directions

  1. In a 12-inch nonstick skillet, heat oil over medium-high. Add sausage slices and cook for about 10 minutes, until no longer pink inside (165°).
  2. Leaving as much fat in the pan, transfer to a plate and chop into smaller pieces. Sprinkle on the chopped oregano, and cover to keep warm.
  3. Reduce heat to medium and add the onions, peppers and 1/2 teaspoon salt. Cook for 10-12 minutes, stirring occasionally until tender.
  4. Meanwhile, cook egg noodles according to package directions.
  5. To the skillet, stir in garlic and cook for 1 minute until fragrant.
  6. Stir in the crushed tomato and cooked sausage. heat to simmering while stirring occasionally. Reduce heat, cook uncovered for 8-10 minutes until completely heated through and piping hot.
  7. Serve over cooked egg noodles and garnish with fresh basil and Parmesan cheese.

http://www.lynnandruss.com