Monthly Archives: November 2017

Lidia B’s

When in Rome… but we weren’t; not even in Italy. We were in the Steel City on a Saturday evening for a Sunday night Steelers football game. Our residence for two nights was at Homewood Suites by Hilton in the “Strip District” just two miles shy of Heinz Field. It was an extended stay hotel with a fully equipped kitchen, except that we didn’t bring any food. Next best thing? Make a res, of course.

We feared that might be a bit of an issue because the area was packed with excited fans of both Pittsburgh and the opposing Green Bay Packers teams, some of which were already donning their cheese heads! As Russ was scanning the Internet for possible eateries, I noticed the hotel had included a flyer promoting Lidia Bastianich’s restaurant, which was located conveniently right around the corner.

russ.steelers.tickets
Russ holding his coveted Steelers football tickets for great seats right near the 50-yard line!

Well, as not only Steelers fans, we are also fans of Lidia, so getting a coveted reservation at her esteemed establishment, was an additional coup for us. Luckily they were able to fit us in at the time slot we wanted, and we made the short walk in mere moments. And what an impressive place it is!

Lidia’s Pittsburgh opened in March of 2001, only two years after Lidia Bastianich and her son Joseph Bastianich opened the popular Lidia’s Kansas City, their first venture outside of Manhattan. Acclaimed New York architect David Rockwell designed the interior to reflect an open-warehouse atmosphere nestled in the heart of the strip district. Lidia’s Pittsburgh menu concept is a combination of the New York restaurants, Felidia and Becco.

IMG_1407

IMG_1411

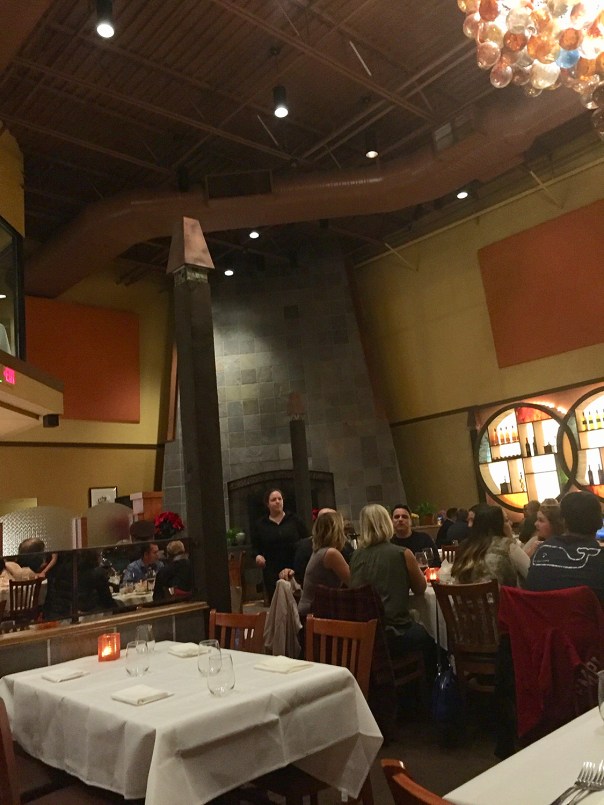
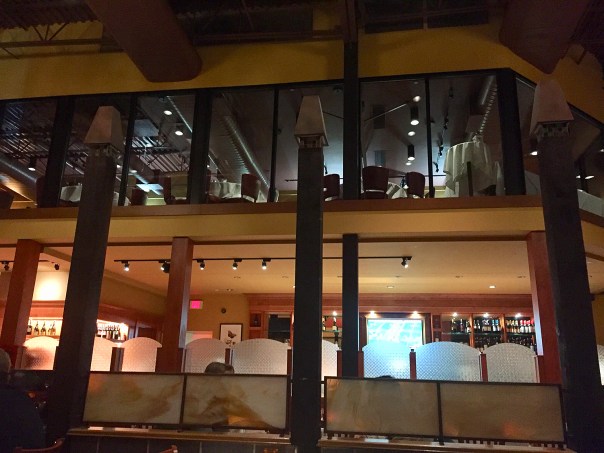
The environment is friendly enough to dine with family and kids, as well as quiet enough to have a lovely evening as a twosome. The classy Italian atmosphere is very warm and welcoming with a warehouse-modern decor. Soaring ceilings, a massive stone fireplace, huge baubled chandeliers, eye-catching stained glass circles, and a second story dining area all tie together for a stunning ambience.

IMG_1412

IMG_1410

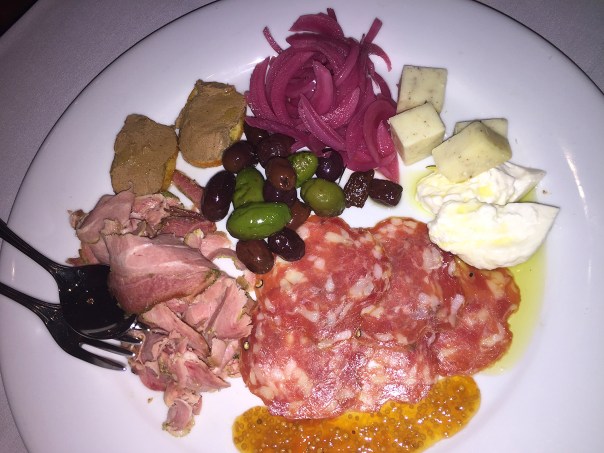
Our starter was the ANTIPASTI—Chef’s Selection of Salumi, Cheese, and Seasonal Vegetables. Not a fan of either salumi or paté, Russ got those all to himself, but I did enjoy the pickled onions, herbed olives, buffalo mozzarella and white truffle cheeses, and the smoked pork.

IMG_1415

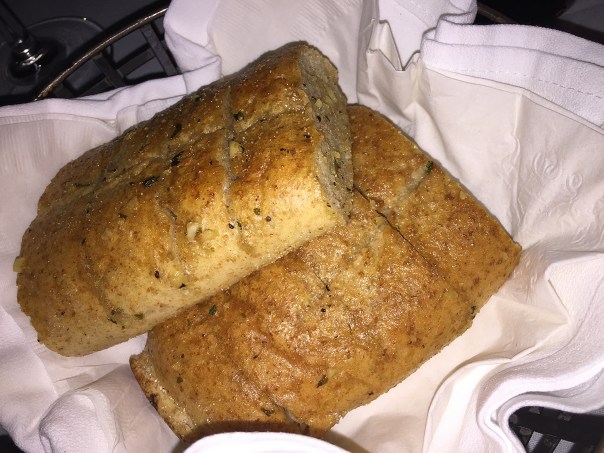
Along with our shared appetizer, a bread basket appeared with a plate of house-made bean and basil pesto spread, an olive spread, and an olive oil for dipping. The spreads were creamy, well-seasoned, and delicious. And included with two types of freshly baked bread were the most amazingly delicious parmesan bread sticks! In fact, when our waitress packed up the leftovers, we asked her for the remaining breadsticks—of which, lucky for us, she tripled!

IMG_1414

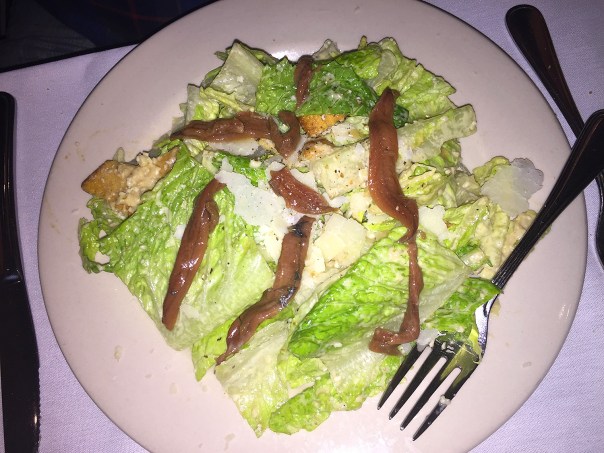
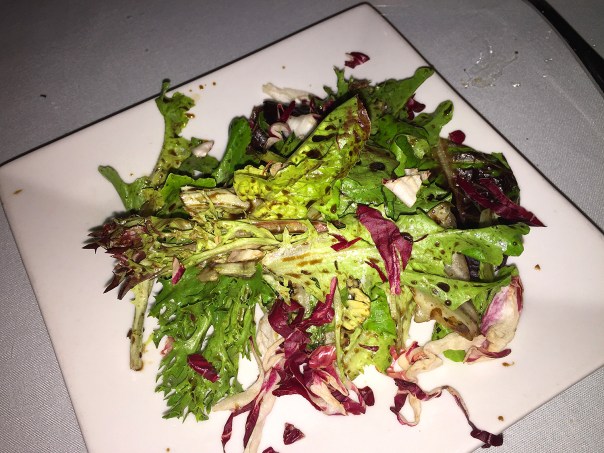
Prior to entrées we each chose a salad, with Russ getting his usual Caesar, and me the Rucola consisting of arugula, gorgonzola, walnuts and pear slices. Russ is always thrilled when he can get whole anchovies. Mine was lightly dressed, which is how I prefer salad, and the large chunks of gorgonzola “peared” well with the other ingredients.

IMG_1418

IMG_1417

IMG_1422
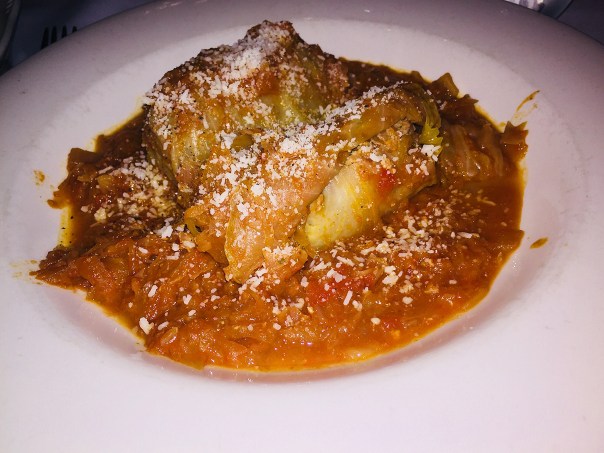
Knowing Lidia hailed from northern Italy near Austria, Russ was drawn to the SARME—Beef and pork stuffed cabbage rolls braised in sauerkraut, and served with a large crock of mashed potatoes. He shared a taste of that luscious meat stuffing which was a savory, melt-in-your-mouth bite!

IMG_1420
I went with one of my usuals, the SALMONE—A perfectly cooked grilled salmon fillet, accompanied by roasted Yukon potatoes and string beans, all nestled in a delicate mustard sauce. The portion was more than ample and I remembered our full-sized refrigerator back at the hotel which would accommodate my doggie bag.

Along with an all-you-can-eat sampler of three different house-made pastas that change daily, the menu entrées are mostly very traditional with pastas like cannelloni and lasagna, and meat dishes such as chicken parmigiana and Osso Buco. If we ever get to the Strip District again, we’ll make a point to revisit Lidia’s.

*************************************************

Lidia Bastianich is the chef/owner of four acclaimed New York City restaurants — Felidia, Becco, Esca & Del Posto, as well as Lidia’s Pittsburgh & Lidia’s Kansas City. Together with her son Joseph, she produces award-winning wines at their Bastianich Vineyards in Friuli. 2007 signified a true benchmark in Lidia’s career, as she had the esteem honor of cooking for His Holiness Pope Benedict XVI during his travels to New York. In fall of 2010, Lidia released her first children’s book, soon to be a holiday classic, Nonna Tell Me a Story: Lidia’s Christmas Kitchen. Perhaps the single most important quality that Lidia shares is her belief that it’s not only the food on the table that makes the meal, it’s the people who join around the table who bring the meal to life. Her signature line: “Tutti a tavola a mangiare!” means “Everybody to the table to eat!”

Salad You’ll Want to Eat—Even on a Cold Day

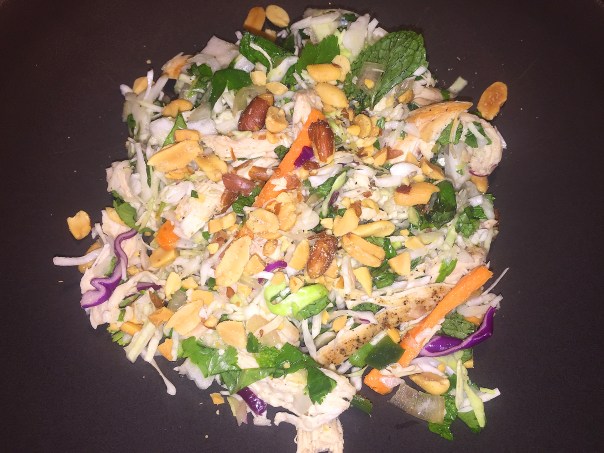
There may be periods when you probably munch on some (or a lot!) of not-so-good-for-the-diet meals and snacks. Don’t beat yourself up, just counter-balance that approach by dressing up cooked chicken breasts with bright Asian flavors. This Vietnamese-Style Chicken Salad is built off of a packaged coleslaw mix, enhanced with fresh mint and cilantro, crunchy peanuts, and a sweet-and-salty dressing of fish sauce and rice vinegar.

img_9383

Super fast, super easy and super tasty, the recipe provides a flipside to all of that rich food and is perfect for a working weeknight. It’s even more expedient if you use some leftover chicken or a store-bought rotisserie bird. Of course, instead of packaged coleslaw you could make your own from green Napa and purple cabbages and shredded carrots allowing more control over the amounts of each and overall color distribution.

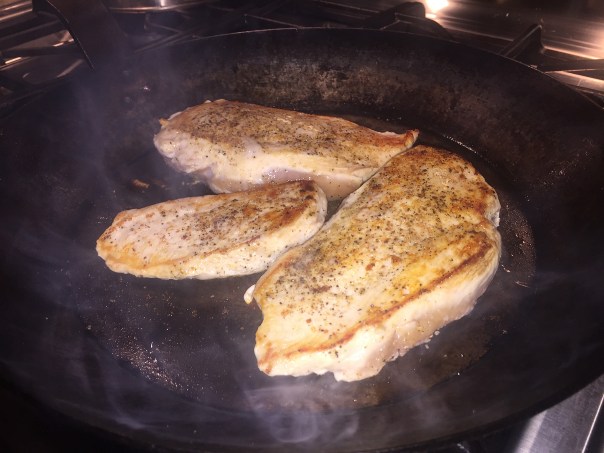
It was a cold Winter’s night when I made this, so grilling chicken breasts outside was not an option I dared consider. (You may have an indoor grill option.) Alternatively, I seared the seasoned meat in a hot skillet for one-and-a-half minutes each side, then popped the entire oven-proof pan into a 400 degree preheated oven for another 12 minutes total.* After allowing them to cool for about 15 minutes, they were easy to pull apart with my fingers into long thin strips.

We loved the salad just the way it was. But next time we’ll probably include two jalapeños (without stripping the veins) to increase the spiciness more to our liking. But please don’t omit the fresh mint and cilantro as they contribute an added dimension of flavor and perk up the salad.

img_9371

Ingredients

  • 3 small shallots, coarsely chopped (1/2 cup)
  • 1 jalapeño, chopped (seed first if you want less heat)
  • 1 Tbs. granulated sugar
  • Freshly ground black pepper
  • 1/4 cup rice vinegar
  • 3 Tbs. fish sauce
  • 1 lb. boneless, skinless, thin-sliced (1/4 to 1/2 inch thick) chicken breast cutlets
  • Kosher salt
  • 6 oz. package coleslaw mix
  • 1 cup fresh mint leaves, torn if large
  • 1/4 cup fresh cilantro leaves
  • 1/4 cup salted peanuts, coarsely chopped

img_9375
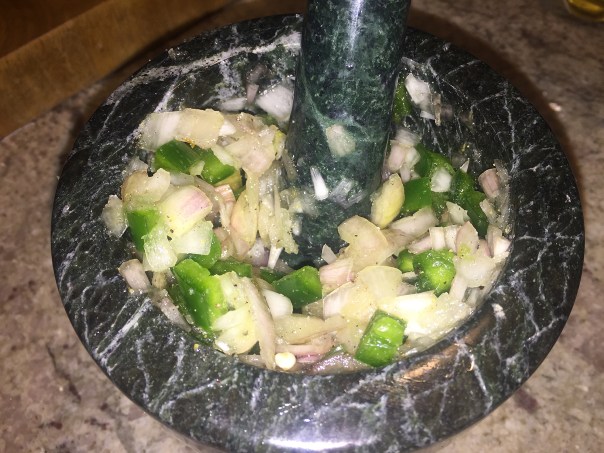
Shallots, sugar and jalapeño are mashed in mortar and pestle to release the juices.

img_9378
I seared our chicken breasts in a hot skillet then finished them off in a 400 degree oven.

img_9380Once cool enough to handle, shred the chicken along its natural grain with your hands.

Directions

  1. Prepare a medium grill fire. If you don’t have a grill, you can cook the chicken indoors on a ridged grill pan over medium-high heat for the same amount of time. *Or see my method above.
  2. With a mortar and pestle, pound the shallots, jalapeño, sugar, and 1/8 tsp. pepper until the shallots are very soft (but not pureed) and liquid is released. Transfer to a large serving bowl and stir in the vinegar and fish sauce.
  3. Season the chicken with 1/4 tsp. salt and 1/8 tsp. pepper and grill, turning once, until just cooked through, about 2 minutes per side. Let cool and then shred the chicken with your fingers into long thin strips, pulling the meat along its natural grain.
  4. Toss the coleslaw mix into the vinegar mixture. Add the chicken, mint, and cilantro and combine well. Top with the peanuts and serve at room temperature.

img_9388

by Lori Longbotham from Fine Cooking

Easily Turn a Side Into a Main

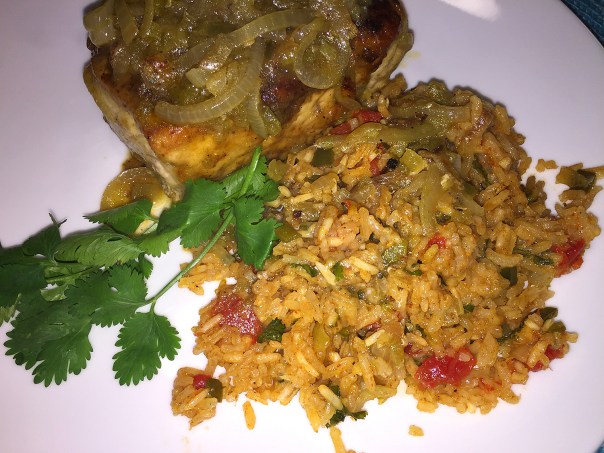
Lovely and colorful, this Southwestern Rice Pilaf side dish is a welcome change to regular rice and/or potatoes. While we didn’t consider this very spicy, it did have a kick to it. If you prefer low-spicy foods, leave out the diced jalapeño at the end.

IMG_1318

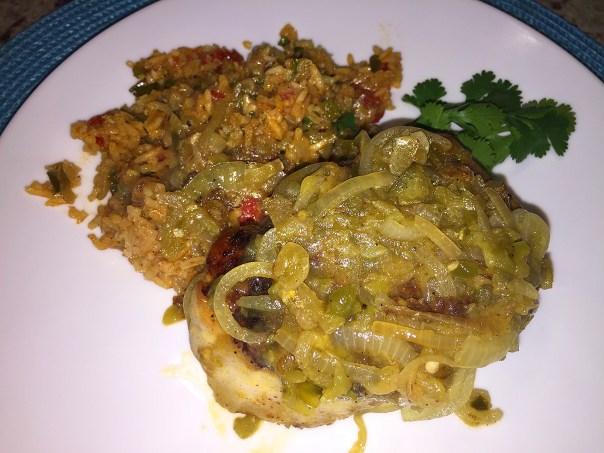
We served ours with a Pork Chops with Green Chiles and Onions entrée but this dish would also make a delicious accompaniment to steak or chicken fajitas. Or, to simplify things, simply shred a rotisserie chicken or some cooked sausage, fold into the rice, and Voila, a ready-made meal!

IMG_1283
Always a good idea to prep all ingredients prior to cooking.
IMG_1286

Ingredients

  • 2 Tbs. extra-virgin olive oil
  • 1 medium onion, medium diced (1-1/2 cups)
  • 1 medium poblano, stemmed, seeded, and finely diced (1/2 cup)
  • 4 large cloves garlic, minced (2 Tbs.)
  • 1-1/2 tsp. chili powder
  • 1 tsp. ground cumin
  • 1-1/2 cups long-grain white rice
  • 1 tsp. kosher salt; more as needed
  • 2-1/2 cups chicken broth, preferably hoemmade
  • 1 14-oz. can diced tomatoes, drained well
  • 1 lime
  • 1/2 cup coarsely chopped fresh cilantro
  • 1 jalapeño, stemmed, seeded, and minced

Directions

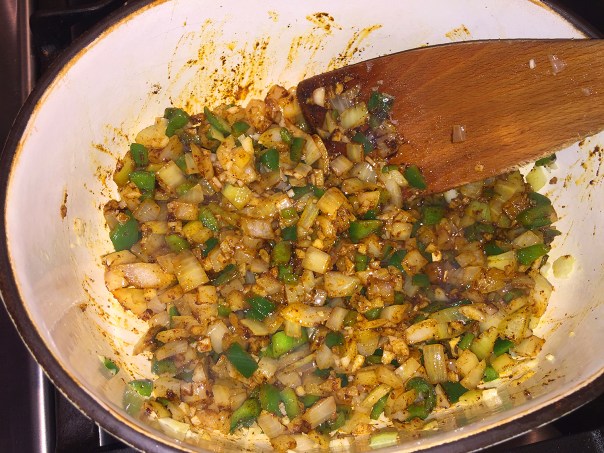
  1. In a heavy-based 3-qt. saucepan with a tight lid, heat the oil over medium heat. Add the onion, poblano, and garlic, and reduce the heat to medium low. Cook for 3 minutes, stirring occasionally.
    IMG_1287
  2. Add the chili powder and cumin and cook, stirring frequently, until the onion is softened and the spices are very fragrant, about 3 minutes.
    IMG_1288
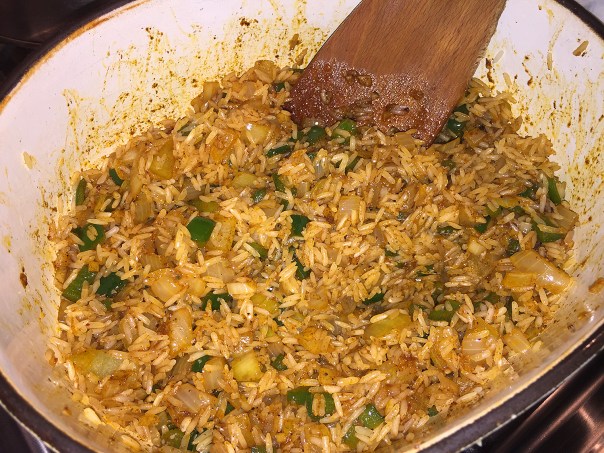
  3. Add the rice and salt, and stir well to coat each grain with oil. Toast for a full 5 minutes, stirring regularly to keep the grains separated and to prevent them from sticking to the bottom of the pan (the rice may turn opaque before 5 minutes is up, but keep going). Reduce the heat to low if there are any signs of scorching.
    IMG_1291
  4. Add the chicken broth and tomatoes, stir once, and bring to a boil over medium heat.  Cover, reduce the heat to low, and cook for 18 minutes.
    IMG_1292
  5. Remove from the heat and let the pilaf sit, still covered, for 5 minutes. Meanwhile, finely grate 1 Tbs. zest from the lime, and then cut the lime into wedges.
    IMG_1298
  6. Once the pilaf has rested, remove the lid and fluff the rice with a fork. Using the fork, gently fold in the cilantro, jalapeño, and lime zest. Season to taste with salt. Serve with the lime wedges for spritzing over the rice.
    IMG_1300

Recipe by Ris Lacoste from Fine Cooking

Pork Chops with Green Chiles and Onions

It may be past time to dance to a new tune with pork chops… And if you like a little spice in your life, then you must try these Pork Chops with Green Chiles and Onions. A double dose of chile—canned and powder—adds pleasant heat to this quick skillet braise. The peppers’ light green hue fades slightly as they simmer, but their spicy essence intensifies into a delicious sauce.

IMG_1315

I always keep a jar of pickled jalapeños in the fridge for nacho toppings, so they came in handy for this recipe. These jalapeños are so much better than canned and do not contain preservatives or artificial colors. The mixture of vinegar and salt act as a natural preservative (no canning needed) and help keep the jalapeños good in the fridge for up to two months—although, I’ve had them last much longer. *See recipe below.

The directions indicate to cook the chops another 5 minutes once they’re nestled back into the onion mixture. Because ours were closer to 1 1/2″ thick, they took an additional 3-4 minutes. If perchance you plate them too soon and they seem a bit too pink, you can always zap them in the microwave for a couple of minutes.

Now kick up your heels and shake those maracas!

maracas.jpg

Ingredients

  • 1 tsp. ground cumin
  • 1 tsp. pure ancho chile powder or chili powder
  • Kosher salt and freshly ground black pepper
  • 4 center-cut boneless pork chops, about 1 inch thick (about 1-1/2 lb. total)
  • 3/4 cup chicken broth; more as needed
  • 1 4-oz. can chopped green chiles
  • 3 Tbs. chopped jarred jalapeños (from about 12 slices)
  • 1 Tbs. cider vinegar
  • 3/4 cup all-purpose flour
  • 3 Tbs. olive oil
  • 1 medium yellow onion, thinly sliced

Directions

  1. In a small bowl, combine the cumin, chile powder, 1-1/4 tsp. salt and 3/4 tsp. pepper. Sprinkle on both sides of the pork and set aside.
    IMG_1294
  2. In a blender or food processor, purée the chicken broth, green chiles (with their liquid), jalapeños, and vinegar until smooth.
    IMG_1302
  3. Put the flour in a pie plate and dredge the pork chops, shaking to remove any excess. Heat a 12-inch skillet over medium-high heat for 1 minute. Pour in 2 Tbs. of the oil and heat until shimmering hot, about 1 minute. Add the pork chops and cook, without moving, until they’re brown around the edges and release easily from the pan, 2 to 3 minutes.
    IMG_1303
  4. Reduce the heat to medium, flip, and cook the other side until browned, about 2 minutes more. Transfer to a large plate.
    IMG_1306
  5. Over medium-high heat, add the remaining 1 Tbs. oil and the onion to the skillet. Sprinkle with 1/2 tsp. salt and cook, stirring occasionally, until wilted and golden, about 4 minutes.
    IMG_1309
  6. Add the green chile mixture and bring to a boil. Reduce to a simmer and cook, stirring, until the mixture thickens slightly and the onions are completely tender, 2 to 3 minutes more; add a splash of chicken broth if the mixture seems dry. Season to taste with salt and pepper.
    IMG_1311
  7. Return the chops to the pan, nestling them into the onions. Cover and simmer gently until the pork is fairly firm to the touch with just a little give, 3 to 5 minutes. With a paring knife, make a nick in a thicker chop to make sure it’s only just a little pink.
    IMG_1312
  8. Serve the pork chops topped with the sauce.
    IMG_1317

By Tony Rosenfeld from Fine Cooking

Pickled Jalapeños

Ingredients

  • 1 cup white vinegar
  • 1 cup water
  • 2 cloves garlic, smashed
  • 2 tablespoons sugar (or less)
  • 1 tablespoon salt
  • 7-8 jalapeño peppers, thinly sliced

Directions

  1. Combine the vinegar, water, garlic, sugar, and salt in a medium pot and bring to a boil. Add jalapeño slices, stir, and remove from heat.
  2. Let sit for at least 8 minutes then use tongs to remove the jalapeños from the pot to a jar; cover with the brining liquid to fill the jar.
  3. Store in the fridge for up to two months (sometimes longer.)
""

Skirt Steak with Mushrooms and Shallots

The classic combination of steak and mushrooms (think beef Stroganoff) comes together quickly in this simple weeknight meal. Most of the working class crave a good dinner after a long day’s work but certainly don’t want to make MORE work for themselves at the end of the day. From Fine Cooking’s Make-It-Tonight series, this Skirt Steak with Mushrooms and Shallots is elegant yet requires little effort on your part.

Let’s dwell on those ‘shrooms for a moment, shall we? Cremini mushrooms (also spelled crimini) are a nutrition powerhouse with the potential to ward off disease. They are small, button-shaped, earthy tasting, rich brown mushrooms that are also called “baby bellas” because they are mini-Portabellas. An impressive group of minerals, vitamins and other ingredients are packed into each three- to four-calorie mushroom.

Cremini-Mushroom

Mushrooms are low in carbohydrates, calories, and sodium and are cholesterol- and fat-free. When you choose cremini mushrooms, you get all those dietary benefits plus more. Criemini mushrooms are an excellent source of selenium, which helps to fight cancer. Other minerals in cremini mushrooms are copper, potassium, phosphorus and zinc. Potassium is the mineral best known for bringing down your blood pressure and reducing your risk of stroke.

Cooking is where cremini mushrooms have an advantage over other types of mushrooms. They are the chef favorite because they provide a bolder, richer flavor and texture. Fresh cremini mushrooms have a slightly brown skin and should be used ideally within three days of purchase. You can boil, sauté, chop, and dice and slice these delicious foods to add to your favorite dishes, such as this one!

Back to the recipe.

Our steak was pretty thin in some parts and preferring medium-rare, I only cooked the meat in the cast-iron skillet for 4 1/2 minutes total. To keep the meal low-carb, we paired the meat and mushrooms with a side of roasted broccoli.

If you don’t happen to have a bottle of white wine on hand, go ahead and use a dry red, after all, it’s only a 1/4 cup’s worth. It’s main purpose is to deglaze the pan and make sure to dislodge and incorporate all of those luscious browned bits from the meat and mushrooms. Now go ahead and eat like royalty…

IMG_1180

Ingredients

  • 1-1/4 lb. skirt steak, trimmed and cut crosswise into 4 pieces
  • Kosher salt and coarsely ground black pepper
  • 5 Tbs. olive oil
  • 3/4 lb. cremini mushrooms, cut into 1/4-inch-thick slices (about 4-1/2 cups)
  • 1 large shallot, finely chopped (1/4 cup)
  • 2 tsp. chopped fresh thyme
  • 1/4 cup dry white wine
  • 1-1/4 cups lower-salt chicken broth
  • 2 Tbs. cold unsalted butter, cut into 4 pieces

Directions

  • Pat the steaks dry and season with salt and pepper. In a heavy-duty 12-inch skillet (preferably cast iron), heat 2 Tbs. of the olive oil over high heat until shimmering hot.
    IMG_1183
  • Cook the steaks in a single layer, flipping with tongs halfway through, until an instant-read thermometer inserted in the thickest part of the steak registers 130°F for medium rare, 5 to 7 minutes total (if necessary, lower the heat to medium high to finish cooking the thicker pieces). Transfer to a plate and let rest, loosely covered with foil, while making the sauce.
    IMG_1184
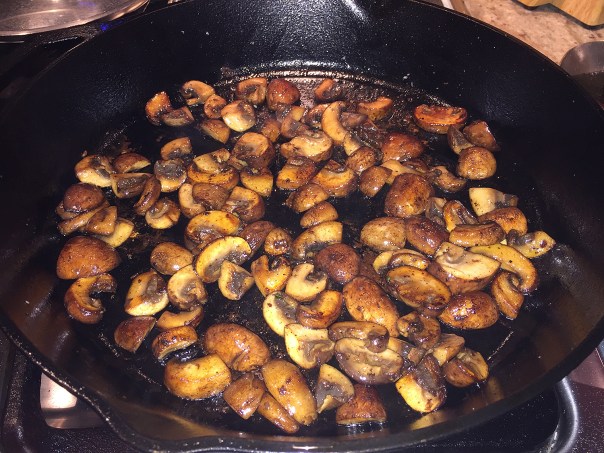
  • Heat 2 Tbs. of the olive oil in the skillet over medium-high heat until shimmering hot. Add the mushrooms and a generous pinch of salt and cook, stirring occasionally with a wooden spatula, until golden-brown, 6 to 8 minutes. Transfer to a bowl and keep warm.
    IMG_1188
  • Lower the heat to medium, add the remaining 1 Tbs. olive oil, the shallot, and thyme and cook, stirring, until the shallot is slightly browned, about 1 minute.
    IMG_1189
  • Add the wine and cook, stirring and scraping the bottom of the pan to dissolve any browned bits, until the liquid has almost evaporated, about 1 minute.
  • Add the chicken broth. Raise the heat to high and boil, adding any juice that has accumulated from the steak and mushrooms, until the sauce is reduced to about 1/3 cup, about 7 minutes.
    IMG_1191
  • Remove the pan from the heat and whisk in the butter. Stir in the mushrooms and season the sauce to taste with salt and pepper.
  • Thinly slice the steaks diagonally across the grain and serve topped with the mushroom sauce. Use a large serving spoon to drizzle the juices over each plate.
    IMG_1193

IMG_1196
We served ours with a side of roasted broccoli florets.

Recipe by Tasha DeSerio from Fine Cooking

Simple. Scrumptious. Shrimp.

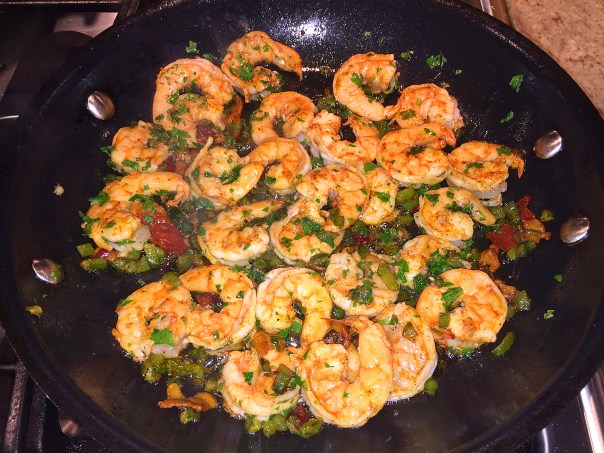
If you’re a fan of shrimp that’s slightly spicy and you want it quick, this Sautéed Shrimp and Pancetta with Cheese Grits is for you. Russ double-starred this recipe it was so good. It all comes together in about 15 minutes—unless of course you have to behead, shell and devein the shrimp as I did. But we buy them whole on purpose so that we have the makings for seafood stock sometime in the future. Just bag the stuff and freeze until ready to make homemade stock—you won’t regret it.

If you can’t find quick-cooking grits, you can use quick-cooking polenta instead—just be sure to follow the package’s instructions for the correct cooking time and the amount of liquid needed. With an inclination for polenta over grits, that’s what we made. And since I had a few ounces of two different cheddars, I incorporated both a white and yellow cheese.

The one instruction that baffled us was cutting the pancetta into 1″ strips. First of all it doesn’t stay in strips and we think a more uniform dice would distribute the pork more evenly around the dish. Truly doesn’t matter, the taste is there…

IMG_1173
Serve with a side of collard greens or sautéed spinach.

Ingredients

  • 3 Tbs. olive oil
  • 2 small leeks (white and light-green parts only), halved lengthwise, thinly sliced, and rinsed (1-1/2 cups)
  • Kosher salt
  • 2 medium cloves garlic, minced
  • 3-1/2 cups chicken broth, preferably homemade
  • 1 cup quick-cooking grits (not instant)
  • 4 oz. extra-sharp Cheddar, coarsely grated (about 1 cup)
  • Freshly ground black pepper
  • 2 oz. 1/8-inch-thick sliced pancetta, cut into 1/8 x1-inch strips
  • 1-1/2 lb. jumbo shrimp (21 to 25 per lb.), peeled and deveined
  • 1/4 tsp. cayenne
  • 1/2 large green bell pepper, seeded and finely diced (3/4 cup)
  • 1 Tbs. finely chopped fresh flat-leaf parsley

Directions

  • In a heavy-duty 4- to 5-quart pot, heat 2 Tbs. of the oil over medium heat. Add the leeks and 1/4 tsp. salt and cook, stirring occasionally, until softened, 4 to 5 minutes.
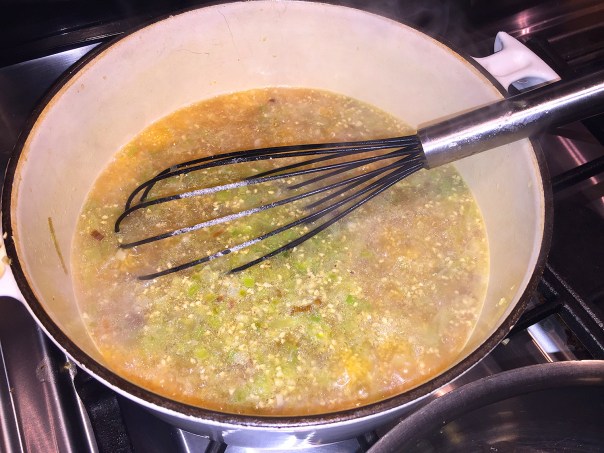
  • Add the garlic and cook, stirring, for another 30 seconds. Add the chicken broth and 1/2 tsp. salt, cover, and bring to a boil over high heat.
    IMG_1162
  • Whisk in the grits, return to a boil, then reduce the heat to medium low and cook, partially covered, stirring frequently, until the broth has been absorbed and the grits are thick, about 5 minutes.
    IMG_1163
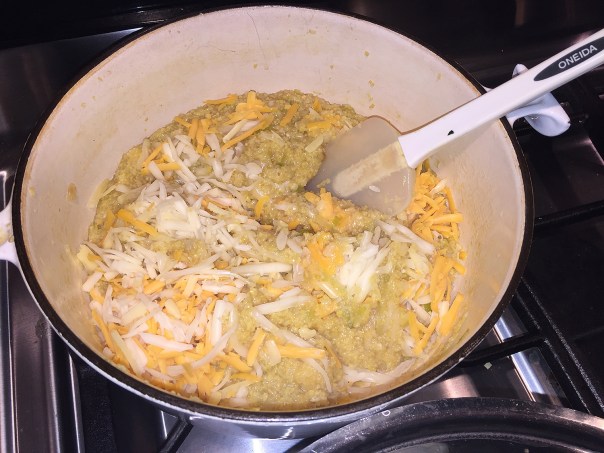
  • Add the cheese and stir to melt. Season to taste with salt and pepper, remove from the heat, cover,  and keep warm.
    IMG_1165
  • In a 12-inch nonstick skillet, cook the pancetta in the remaining 1 Tbs. oil over medium-high heat, stirring occasionally, until golden and starting to crisp, about 5 minutes.
    IMG_1164
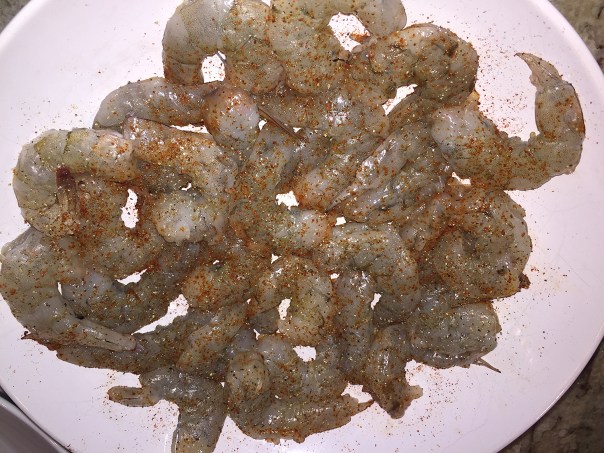
  • Meanwhile, pat the shrimp dry and put them in a large bowl. Sprinkle with the cayenne and 1/4 tsp. black pepper and toss to combine.
    IMG_1166
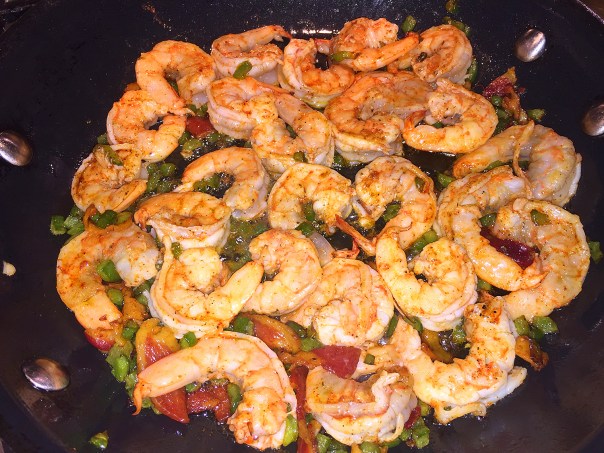
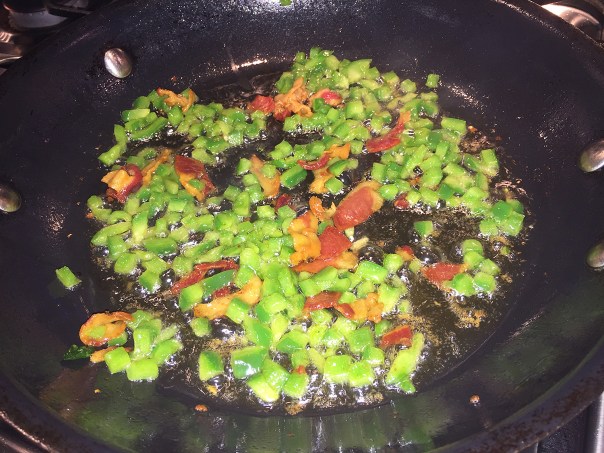
  • Add the green pepper to the skillet and cook, stirring, until softened, 3 to 4 minutes. Add the shrimp and cook, stirring occasionally, until pink and just cooked through, 2 to 3 minutes.
    IMG_1167
    IMG_1169
  • Stir in the parsley. Distribute the grits among 4 shallow bowls and serve the shrimp mixture over the grits.
    IMG_1170

Recipe by Nadia Arumugam from Fine Cooking

Tight and Tiny—Yet Tremendous!

Always game to try new restaurants, especially those with an avid fan base, friend and fellow foodie Rosanne turned us on to d’floret, a minuscule treasure in downtown Lambertville, NJ. It had been a while since the four of us connected over dinner, so we were more than ready to try a new adventure.

It was a chilly November Saturday night when we were going to rendezvous at d’floret for our 8:15 reservation. A group of folks huddled outside as we neared the front door and when I asked if they were waiting to be seated, they replied that they were just leaving and that we would NOT be disappointed with the food. Now that’s encouraging.

Knowing the place was touted as small, we weren’t prepared for the nonexistent waiting area—yet about 8 of us were crammed into a tight, tiny space right in front of the draped entranceway—and more people kept flowing in! Apparently they have only two seatings, so everyone for the 8:15 was trying to stay out of the way until tables opened up, which thankfully didn’t take that long.

IMG_1221
Gary and Rosanne get comfy as we sip our wine. 

We were shown to a four-top in a cozy corner (although the entire 28-seat restaurant is pretty much a cozy corner) by the large front window. The ceiling is dominated by a ginormous draped disc light fixture casting a warm glow replicating a modern, elegantly lit stage. (We all thought they could use some acoustic panels on the ceiling to help absorb the noise level.)

D’floret features an open kitchen and adjoining dining room that exhibit the chef’s dual passions: Chef Foy’s paintings and his culinary mastery. The wall by the bathroom is accented by a floor-to-ceiling black walnut Nakashima panel; lighting is by Ayala Serfaty, the Israeli artist; and modern Classic chairs designed by Arnie Jacobsen, for a sleek finish.

IMG_1222
Lynn and Russ sunk down into the cushy banquet seat with fluffy pillows—about a half-foot lower than the chairs Gary and Rosanne were sitting in..

If you’re in a hurry, this place may not be for you as the pace is very leisurely in it’s approach, and everything is lovingly cooked to order. Our waitress, Tara, was in charge of the entire booked room, while a busboy attended to opening wine and clearing dishes. After listening to the night’s specials, we were disappointed to learn that a few items were no longer available, to point, the Rack of Lamb for Russ, and the Grilled Jumbo Shrimp with Tuscan beans and fennel for Lynn and Rosanne.

IMG_1231

But let’s talk starters first. Three of us chose the Sautéed Tian of Crab with thyme plated with a large schmear of aioli. Believe me when I tell you, it was top-notch. Lumps of crab formed a large, moist patty crafted with a few choice herbs that all but melted in your mouth.

IMG_1227

Gary, the odd man out, opted for the Warm Goat Cheese Tart with tomato confit dressed with chive oil and balsamic vinaigrette. It came layered with a breadcrumb crust topping that, let’s just say there was nary a crumb left on the plate! Gary was true-to-from in his entrée selection of the Classic Veal Bolognese with a parmigiano-reggiano. It was brimming with meat sauce over homemade pasta.

IMG_1233

IMG_1234

One of the night’s specials was a Grilled Red Snapper, which was Lynn’s second choice and prompted Rosanne to also order it as she had never had snapper before. Nestled underneath the fish was a bed of freshly made ratatouille. This was one time that I didn’t need a doggie bag to bring home leftovers, because I practically licked the plate clean.

IMG_1236

Russ went a bit rogue with his choice of Gateau Langoustine comprised of shrimp, peas and mushrooms delicately perfumed with tarragon and vanilla on an open-faced biscuit with a light gravy.

IMG_1239

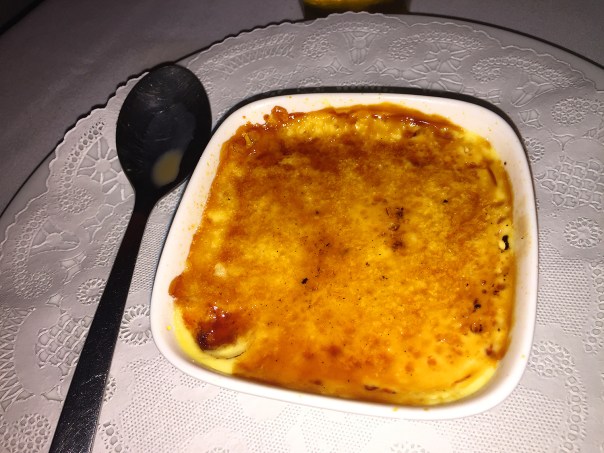
The guys still had room for homemade dessert and both chose the Crème Brûlée, a rich custard base topped with a contrasting layer of hard caramel. After which it was time to say goodbye, at nearly 10:30 at night! Time flies when you’re enjoying good company with great food, while sipping fine wine…

On our way out, I asked Estelle if they plan on enlarging or relocating to a bigger facility, but she gave me an adamant “NO, we like it here just fine.” So if you plan on making a reservation at d’floret, no need to arrive early or you’ll be tightly crammed into the only open spot directly in the path of the door and the kitchen.

namesake.ceiling.light

About the Chef

Chef Foy culinary training began at the Tarragon Tree with his brother John, followed by a series of estages over the years in great American restaurants, such as the “21” Club, “La Cote Basque”, under Jean Jacques Rachou, and with Jean Blanchet of “Le Francais” in Wheeling, Illinois. Foy estages include Michelin Three Star Chef Michel Guerard of “Les Prés d’Eugénie”, “les Freres Troisgros” of Roanne, and “L’Espérance” Marc Meneau restaurant in St Pere, Veseley, France.

Foy is the legendary chef who interpreted and transformed a “petit boite” in Chatham NJ and in the process placed New Jersey on the national culinary map. Foy is also the source of the culinary lineage for a majority of the Garden State’s top chefs, having establishing a series of restaurants on both sides of the Hudson to great acclaim. Three generations of Great New Jersey Chefs, and a host of restaurants directly related to Chef Foy’s inspired vision.

Husband and wife team, Dennis Foy and Estella Quinones are committed restaurateurs, who counterbalance each other’s exacting artistic standards. Estella’s passion for design and Dennis’s interest in painting clearly reflects this sensibility.

Stracotto with Garlic and Pancetta

Here’s a recipe that will warm you to the core by our favorite braising author, Molly Stevens. Her Stracotto with Garlic and Pancetta from All About Braising, is so chockfull of flavor that you won’t mind the effort put into making the meal. The marinating time for this dish is 24 to 36 hours and braising time is about 3 hours, so you must plan accordingly.

IMG_1142

If you want an early Sunday supper, I suggest you start the marinating process Friday evening or Saturday morning, if at all possible. I didn’t get the meat in the fridge until 4:30 on Saturday afternoon, but luckily we gained an hour that weekend due to the roll back of Daylight Savings Time. Sunday dinner wasn’t until 7:30, so the roast marinated at the minimum of 24 hours.

The word stracotto literally translates to “overcooked,” which is not necessarily appetizing terminology, but don’t let it fool you. It is a Tuscan-inspired cooking method with a beef roast in a sauce made from good dry red wine and vegetables over low heat for an extended period and creates a mouth-watering dish that is both fork tender and full of flavor.

I had to tie two 2-pound roasts together because the supermarket didn’t have a 4-pounder available. The only drawback there is the meat didn’t get browned on one flat side. Did it matter? Not in the least. Next time however, I’ll try to remember to contact the butcher ahead of time to reserve a 4-pounder.

IMG_1126
Getting the brandy, broth and pancetta ready. We had to laugh that the store labeled this extra-lean pancetta!

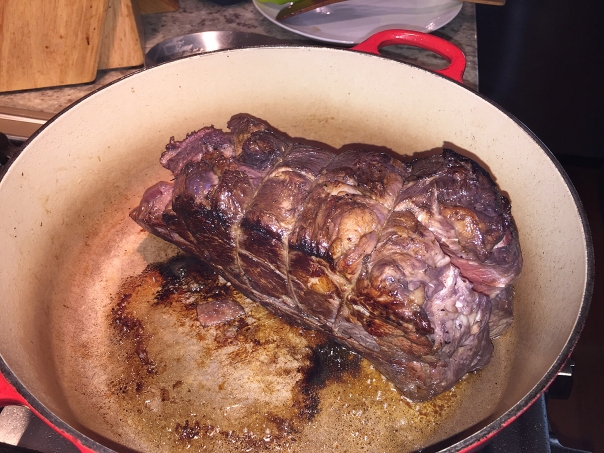
Browning the meat in a separate skillet seemed unnecessary so I used our cast-iron dutch oven, Big Red, to do all of the steps, thus preventing another pan to clean and containing all the browned bits directly in the braising pot. Then as a finish, we thickened the sauce with a corn starch slurry. The sauce was heaven-on-earth, and we’re darn glad we had leftovers for another meal.

IMG_1080

Stracotto with Garlic and Pancetta

  • Servings: 6-8
  • Difficulty: time intensive
  • Print

Ingredients

  • 1 3 1/2 to 4 lb. boneless beef chuck roast, tied together
  • 5 tablespoons extra-virgin olive oil
  • 2 celery stalks
  • 2 medium onions
  • 1 medium carrot
  • 1 large head garlic, cut crosswise
  • 2 bay leaves
  • 2 sprigs fresh rosemary
  • 1 750-ml bottle dry red wine such as Valpolicella, Chianti or Montepulciano
  • 1/4 cup grappa or brandy
  • 1 cup beef or veal stock, preferably homemade
  • 1/2 lb. pancetta in one piece, about 1″ thick
  • Kosher salt and freshly ground black pepper

Directions

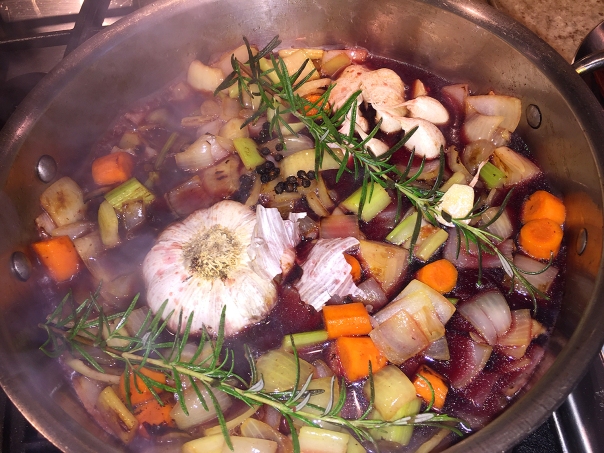
Marinade: Marinade for at least 24 to 36 hours. Coarsely chop celery, onion, carrot and mince garlic. Heat 2 tablespoons olive oil in large pan. Add celery, carrot and onion and sautée until soft about 8 minutes. Add garlic, bay leaves, rosemary and freshly ground black pepper. Pour in entire bottle of red wine and bring to boil. Simmer for 5 minutes to infuse wine and vegetables. Set aside to cool.

IMG_1082

IMG_1084

IMG_1090

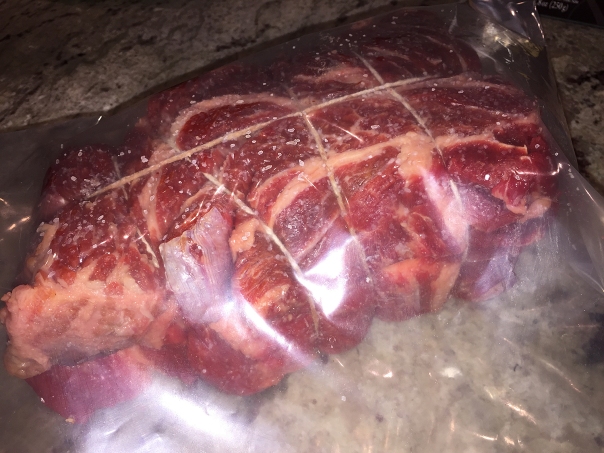
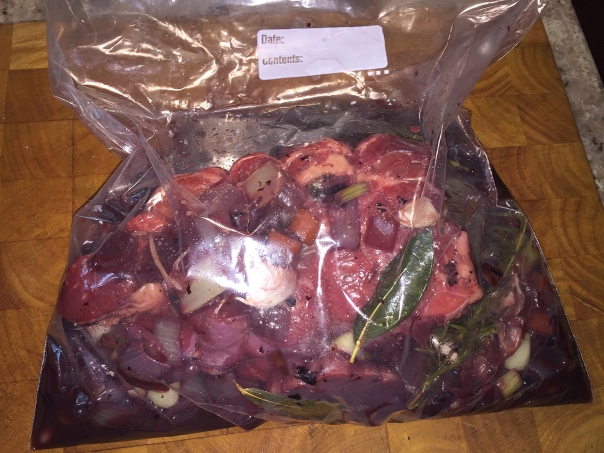
Using kitchen string, tie beef into a neat snug shape. Season with about 1 teaspoon kosher salt and place in a gallon zip-lock bag or in a deep baking dish. Pour cooled marinade over and refrigerate. Turn the meat a couple of times while it marinates.

IMG_1089

IMG_1092

IMG_1094

Braise: Heat oven to 300. Keep the liquid, but remove meat from marinade and place it on a rack over a platter to drain. Wipe the meat dry with a paper towel.

IMG_1124

Heat 2 tablespoons olive oil in a large pan. When hot, add meat and sear it on all sides, using tongs to turn,  about 20-25 minutes total until deep mahogany brown. Note: Because of the wine marinade, the meat will turn a much darker color of brown. Transfer to a dutch oven or heavy lidded casserole. (We used only the dutch oven for all of these steps.)

IMG_1129

Pour off fat from pan. Place back on the burner and turn to medium-high. Add grappa or brandy (stand back because it may ignite.) Bring to a boil and scrape any bits from the bottom of the pan. Continue to boil for about 5 minutes until reduced to about 2 tablespoons, 3-4 minutes.

Strain reserved marinade into the pan, keeping all vegetables and bring to a boil. Boil for about 15 minutes, until reduced down by half. Add beef stock and boil again to reduce by half another 15 minutes. Remove from heat.

IMG_1133

Tuck pancetta under and alongside roast. Scatter over reserved vegetables and seasonings, pour over reduced braising liquid and cover pot with a sheet of parchment paper, pressing down so that the paper nearly touches the meat and extends about 1 inch over pot. Cover tightly and braise gently until the roast is fork-tender about 2 1/2 to 3 hours. Turn once halfway through braising.

IMG_1135

IMG_1137
The meat is turned halfway through the braising process.

Finish: Lift beef from liquid and transfer to a platter. Strain liquid into a sauce pan, reserving only pancetta and garlic (some cloves may have been lost.) Skim any fat from the liquid and bring to a boil and let simmer vigorously for about 10 minutes. Add salt and pepper to taste. Tear pancetta into small shreds and add to sauce.

Meanwhile make the garlic paste. Squeeze the garlic from the open cloves into a small bowl. Smash to a paste using the tines of a table fork.

IMG_1138
The smashed roasted garlic doesn’t look all that appealing, but boy is it good!

Snip strings from roast, cut on a angle into 1/2-inch-thick slices. Spoon sauce over each serving and top with a small spoonful of garlic paste.

http://www.lynnandruss.com

IMG_1141
You will want to serve this dish with a side of garlic mashed potatoes, or on a bed of soft polenta to enjoy the flavorful sauce. 

Manhattan-Meets-Lambertville

“The hippest restaurant, in the oldest bar, in the smallest city, in the USA… where you can feast on traditional Italian with passion and style.” So says the website, and so say we…

First introduced to DeAnna’s Restaurant by my cousin Tom and his wife Jacqui, it’s now been nearly 5 years (where has the time gone?) since we last patronized the place with other friends, Ira and Beth. Way past time to make an appearance, so that’s exactly what we did on a recent Saturday evening. Lucky for us, they had a last minute cancellation, and we got the reservation.

deannas

Twenty years ago, DeAnna’s began as a cozy 30-seat restaurant then grew to include a bar and expanded seating at the larger current location, with all the original ambience intact. Their food is straightforward, authentic Italian cuisine. Chef-owner DeAnna considers herself a traditionalist but brings an original style and passion to her menu. They have a bar, full liquor license and a well-thought-out wine list.

They offer locally grown organic greens and produce whenever possible, and include a handful of creative daily additions to the menu that always incorporate fish and meat selections—but they specialize in homemade pasta and ravioli. DeAnna’s is able to meet most dietary requests such as vegetarian and gluten-free.

IMG_1097

Famous for their ever-changing themed decor, we arrived a few nights post-Halloween but it was still festooned with holiday ornamentation. After just a couple minute wait—in an almost nonexistent waiting area—we scored a quieter corner table. Oddly, though the weather wasn’t too cold outside, I was freezing in my seat. Within minutes however, I realized someone had raised the window under the blind, which I quickly closed. Crisis averted.

IMG_1101
After a while, a family vacated the seats right next to us. When they left we noticed the entire wall had sofa seating.

IMG_1098
The whole grain garlic bread was worth a taste and melted in your mouth.

With a bottle of tempranillo on the way, and an order of garlic bread getting happy, we both decided to share the most interesting Fried Cheese appetizer (pecorino romano) with seasonal fruit—in this case grapes, blueberries, blackberries, strawberries and orange slices topped with mint and a balsamic reduction. Fantastico!

IMG_1099

IMG_1102
Our entrées each came with a side salad.

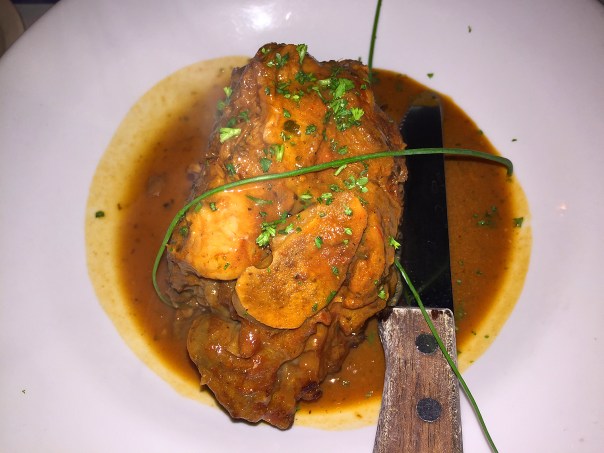
For entrées we both decided on specials of the night, with sides of steamed broccoli as opposed to pasta since we’d already indulged in some of that top-notch garlic bread. For Russ it was all about the Pork Osso Buco which came plated larger than life swimming in a bowl of sauce. It must have been delicious because he devoured it in it’s entirety.

IMG_1107

IMG_1110

I was in a seafood kind of mood and chose the Mediterranean Swordfish cooked perfectly medium in a tomato sauce with capers, black olives, fresh chives,  a sprig of fresh thyme and adorned with a gorgeous edible red flower.

IMG_1105
Too big to finish, the swordfish made for a great lunch a few days later.

deannas.sign

DeAnna’s is devotedly managed by her partner, Lisa Nichols, who maintains the beautiful decor, coordinates daily operations and parties and who bakes all of the scrumptious desserts. She is the idea person and aesthetic police. It’s the perfect combination, Lisa in the front of the house with DeAnna creating culinary magic in the kitchen.


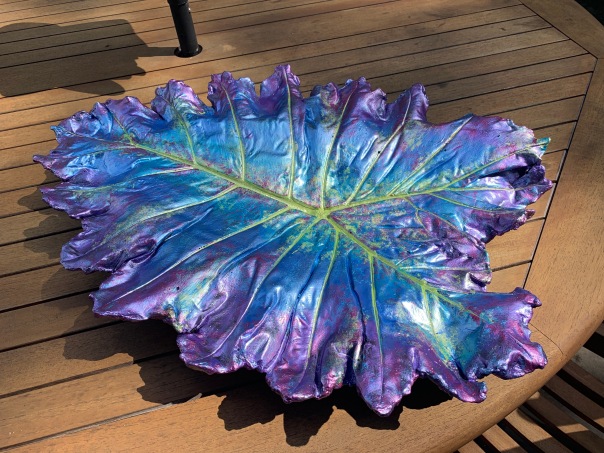
Leaf Cast Bird Bath—Because Birds Have To Drink Too!

Yes, I know this is a food blog but one that encompasses “all things food and drink” so I’m stretching the parameters here to embrace leaf cast birdbaths—after all, our feathery friends need to drink too!

My maiden foray happened in the fall of 2015, with the assistance of my husband and his friend Earle who was in visiting from Colorado. (Hey, those bags of cement and sand are quite heavy!) Initially my husband was shocked that I was starting with such a big frond. He thought I should begin with a smaller candidate such as a hosta or hydrangea leaf. Go BIG, or go home, I say!

IMG_0677
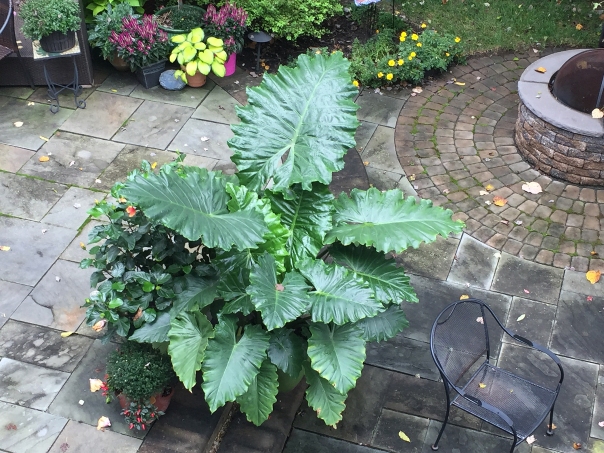
I grow a few potted elephant ears each season which gives me some choices in the Fall.

earle.russ.measuring
Earle and Russ help measure the proper mix of ingredients for my first-ever casting.

lynn.earle.concrete
Lynn and Earle add water to the mix of sand and cement to a consistency of toothpaste. This is obviously not the venue to be a fashionista!

elephant.ear#1
My first leaf casting was too deep for birds; and I didn’t level the base which caused it to tip forward. It now resides in Michigan with my younger sister as an outdoor dog bowl…

IMG_1156
Because I had some leftover wet mixture, I actually did create a few small leaves, above and below. I thought they’d make good practice samples when testing paint colors.

IMG_1153

A few weeks later I attempted my second elephant ear, all on my own, and had great results, after learning what “not to do” from the first go-round. In my first attempt, I made the casting too deep. Creating the “ideal” depth of a bird bath is kind of like trying to figure out whether McDonald’s, Burger King or Wendy’s has the best fast food. Some birds prefer it one way, and other birds prefer it another way. However, most common backyard bird baths have a depth at less than 2 inches at its lowest point (usually the middle), which works for many species.

elephant.ear#2.10.9.15
The second casting sat properly but was a bit too shallow, and the paint job was too shiny—as was the first. Although they appealed to my love of color.

Keep in mind when choosing your leaves, smaller songbirds will go in depths at about 1 inch. Preferably you’ll end up with some flexibility because your structure likely won’t be the same depth throughout the entire surface. Larger baths have slopes that give the shape various depths—ideally accommodating larger and smaller birds.

The basic process of making a leaf casting involves covering the back side of a leaf with a cement/sand/water mixture, letting it dry and harden, then removing the leaf to reveal the shape and design of the leaf in concrete. Since there’s no mold, every casting is unique, and, of course, coloring the casting allows for endless possibilities. It is a creative and exciting project, and the results can be artistically stunning.

FYI: cement is the raw material consisting of clay and limestone; concrete is the final product that results when cement is mixed with sand and water.

As far as positioning your bird bath, the bird brain is picky! Most birds prefer a bath that is partially exposed with very low vegetation under it but wanting a tree or shrub nearby so they can hop or fly a short distance to the bath, or fly from the bath quickly to the tree if danger approaches. Last of all, be patient! It takes a while for the birds to become accustomed to the bath. They won’t use it for at least a couple of weeks, until they know they aren’t going to be in harm’s way… It won’t hurt to hang a bird feeder nearby either 😉

TIP: If you’re keeping the casting outdoors, it’s a good idea to paint a sealer product used for tile over the entire surface—top and bottom.

Another project was in mid-October, 2017, and I was going to fly solo again. Even though two years had passed since my last endeavor, I was surprised how easy and quickly the venture progressed. It only took about one hour’s time from start to finish, until the drying process—which takes days! Third time’s the charm, right?

GONK!

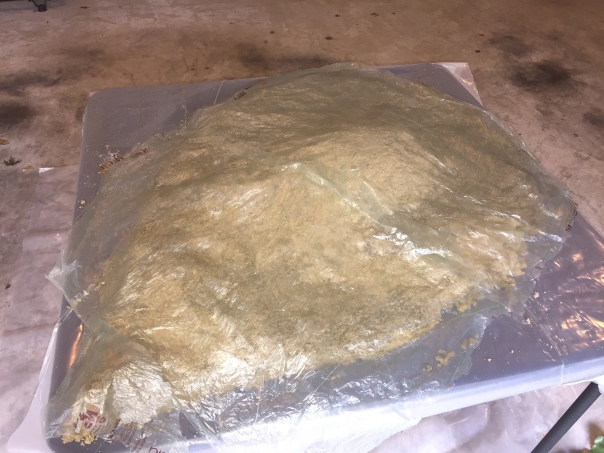
After three full days the concrete was still quite wet and easily crumbled when I pinched the edges. At day 5, when the concrete was still not hard, I broke it into pieces and began again. Not completely sure where I went wrong, I was a little more careful in measuring the amounts of cement and sand, making sure to err on the side of more cement and acrylic fortifier.

This time success! I let it dry face down on the sand for 3 days (removing the collar after 24 hours) before bringing it in the house, flipping it over, and removing the real elephant ear leaf, allowing the top side to thoroughly dry before I painted it. In fact, I was out of the country on vacation so it had a full two weeks of drying time.

Here is a step-by-step pictorial. (The list of needed items and process directions follow the photos.)

IMG_0688
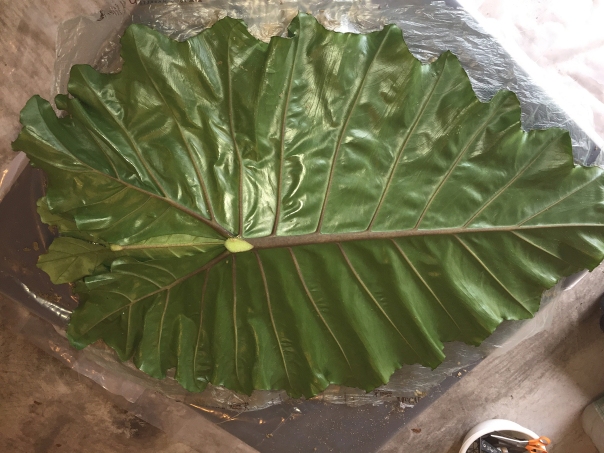
Choosing my leaf from a potted patio elephant ear plant. You can see my second casting sitting in a plant stand at mid-right.

IMG_0690
With heavy-duty tape, seal over any holes on the top side of the leaf.

IMG_0692
A smaller elephant ear was taped over the back edge to cover the back opening.

IMG_0687
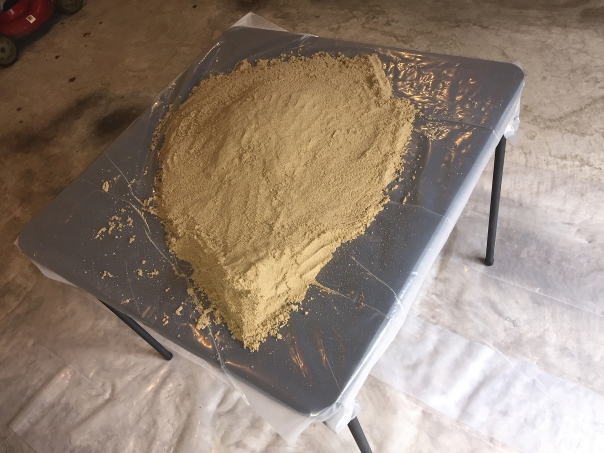
I mounded wet sand in the middle of a thick-plastic covered card table in a well-ventilated area.

IMG_0691
My leaf measured just over 39 inches long, barely fitting the card table.

IMG_0693
After positioning the leaf over the sand, I had to add more to increase the overall width to accommodate my large elephant ear.

IMG_0695
The moist sand is covered with a thin sheet of plastic like that from a dry cleaner bag.

IMG_0696
The leaf is put upside down over the plastic. The sand is then adjusted to push the leaf tip up so that it will have a natural curl downward when finished. Also to undulate the curling edges for a natural look.

IMG_0697
Once your leaf is positioned, start mixing the cement, sand, acrylic sealer and water.

IMG_0707
Scoop a small blob of the mixture at a time, forming it into a thin patty, and pressing it onto the back of the leaf, starting at the midrib and working outward. It’s best if you can stop the mixture just before the edge of the leaf. You’ll get a cleaner edge in the end.

IMG_0709
Add a plastic ring over the stem area, and level it, to create a base for insertion in a plant stand. You can smooth out the back and edges of the leaf while the concrete is still wet. Now be patient, it will take days to dry…

About 24 hours into the drying process I removed the plastic ring before the concrete got too hard, and to hasten the drying of the base.

IMG_0882
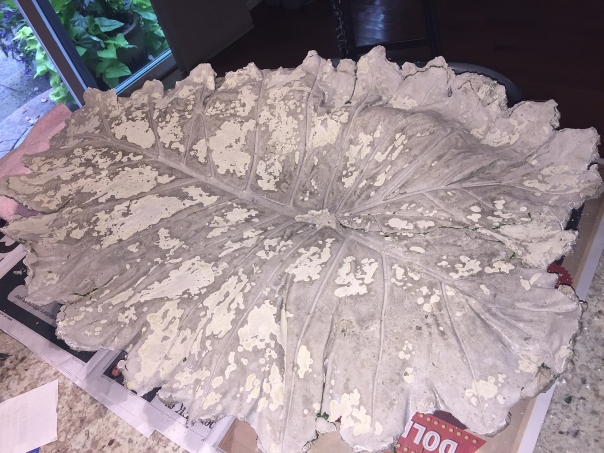
The dried casting was moved indoors for another 10 days while I was away. The lighter areas seem to be a result of some of the mixture not being thoroughly mixed together, but it ended up working in my favor. I used a dremel rotary tool to smooth the leaf edges and to remove the softer lighter areas that then provided a rougher surface for the birds.

IMG_1073
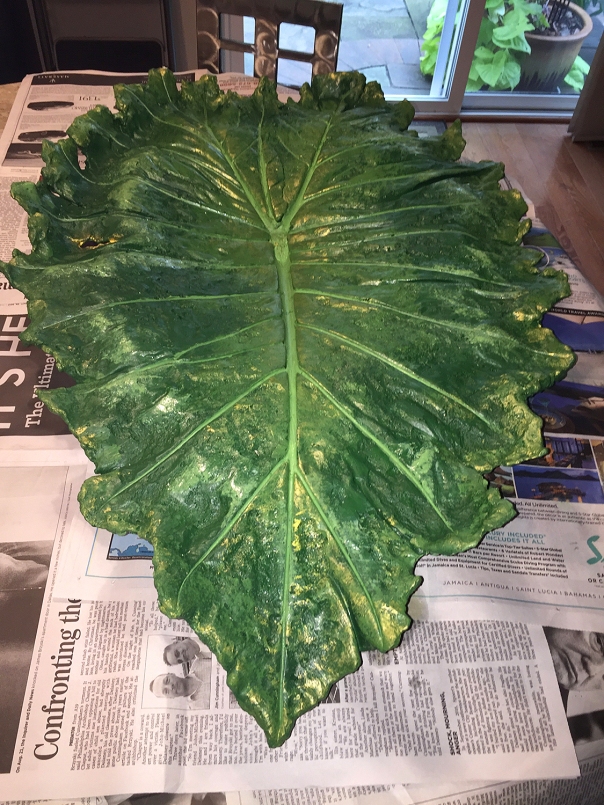
The base coat of paint goes on and I used the actual elephant ear plant as inspiration. Once dry, I painted the underside the same base color. 

IMG_1115
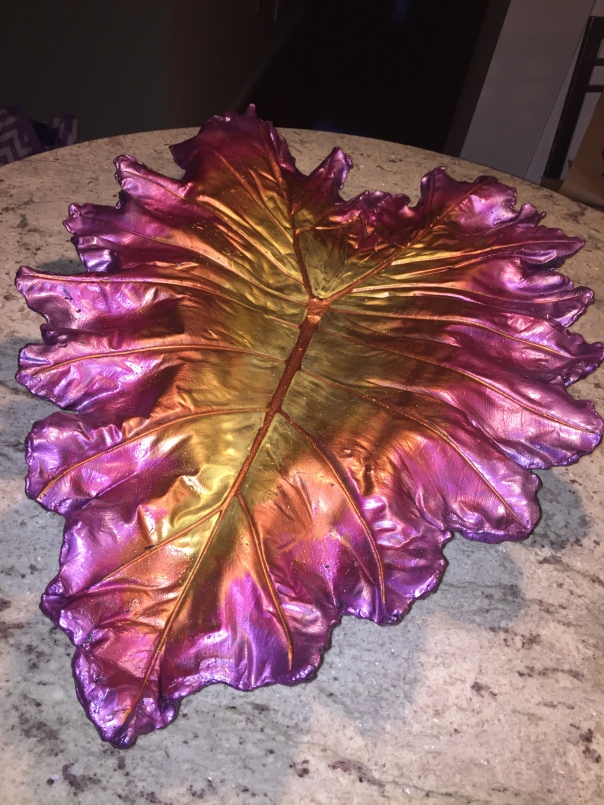
Next I colorized the veins. Then my “bling gene” surfaced and I just couldn’t help adding some pops of gilded color—as highlights in a lighter shade, above; and shadows with a purplish tint, below—although I did so with restraint 😉 

IMG_1117
IMG_1118

IMG_1143
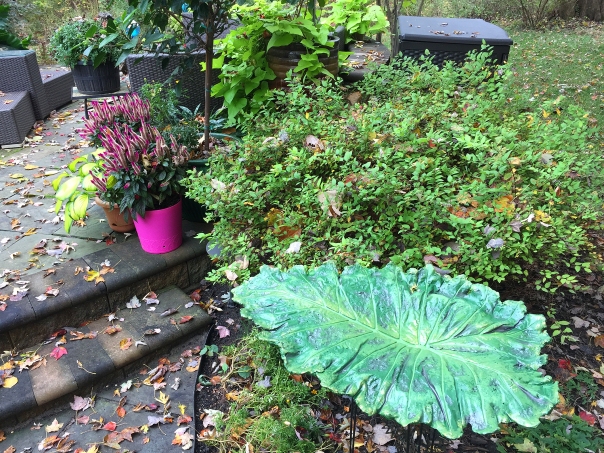
Finally, two coats of a flat sealant are spray painted on both sides. Once dry, it is positioned in place in a plant stand in the garden… Now to wait for the birds to enjoy it…
IMG_1145

blue bird bath 9:19.jpgI could not restrain my “bling gene” in September 2019 when I colorized this bird bath!

both in one
Brought back the bling yet again in 2020.

Items Needed:

  • Portland cement type 1 (grey or white)
  • sandbox sand
  • concrete acrylic fortifier
  • acrylic or latex paint
  • 8-inch plastic round “collar”
  • tile sealer
  • water
  • plastic tub without corners (where cement can hide) for mixing cement
  • thin plastic bags for making casting
  • large, thick sheet of plastic for covering container of cement
  • waterproof rubber or latex gloves: thick ones for mixing cement, thinner ones for making casting
  • face mask for mixing cement
  • goggles for mixing cement
  • freshly cut leaves to cast. Choose ones with pronounced veins and interesting margins, such as hosta, rhubarb, Dutchman’s Pipe, ligularia, gunnera, rodgersia—and my favorite, elephant ears

Process:

  1. Set up a work table in a cool, well-ventilated area out of direct sun. Cover the table with a sheet of plastic. Mix some sand with enough water to dampen it, and make a mound of sand on the table that’s larger than your leaf. Cover the sand with a thin plastic bag such as a dry cleaner bag.
  2. Cut off the stem so that it is level with the leaf. Cover any holes with heavy duty tape on the right side of the leaf. If you are going to use it as a bird bath, you will also need to tape a much smaller elephant ear over the back leaf opening so that it will contain water when finished.
  3. Lay the leaf upside down on top of the plastic-covered sand and gently move the sand around underneath the leaf so it supports all parts of the leaf. You may need to remove the leaf a couple of times to form the sand into a mound that will better support the leaf. Make the bottom tip of the leaf point upward so when the casting is finished and turned over, the tip will have a natural-looking downward curl.
  4. To mix the cement, don face mask and thick gloves and mix 3 parts Portland cement and 3 parts sandbox sand in the plastic tub. Mix 1/4 cup concrete acrylic fortifier into 1 cup of water and add to the cement/sand mixture a little at a time. Continue adding plain water until cement is the consistency of toothpaste. The mixture should hold together if you squeeze it. If you add too much water, add more cement—not sand—to thicken it. Mix slowly to avoid incorporating air, which will make bubbles in your casting. Keep the mixture covered to keep it from beginning to set in the container.
  5. With your hands protected by thin gloves, scoop a small blob of the mixture at a time, forming it into a thin patty, and pressing it onto the back of the leaf, starting at the midrib and working outward. Aim for a thickness of about 1/4 to 3/8 inch over the entire back, making the midrib extra thick to give the leaf support. If possible, stop just short of the outer edge of the leaf (so you can peel the leaf away.)
  6. To make the plant stand platform, position a 1 1/2-to-2″-high plastic ring (I cut out a section of an old plastic flower pot) approximately where the stem was and fill it with the cement mixture, using a level to make sure it is not crooked.
  7. To get a more finished edge, use a small paintbrush to brush the cement mixture towards the edges. Just don’t make the edges too thin or they may break off.
  8. For large castings that need more strength, you can sandwich a layer of overlapping drywall mesh tape in between two layers of cement mixture. I haven’t tried this but I’ve seen directions online.
  9. When you’re finished, lightly cover the casting with a plastic bag or plastic wrap to hold in the moisture so it will dry more slowly.
  10. Immediately wash the concrete tub outside with a garden hose so the cement mixture won’t set and ruin the tub.
  11. Let the leaf casting sit for a few days. The longer the curing time, the stronger the final concrete casting will be. The concrete will dry faster at warmer temperatures than at cool temperatures.
  12. Small leaves may be dry after only 2 days, larger leaves will take longer. The concrete will turn light-colored when it’s dry. Then gently lift the casting off the sand and turn it over. Let it sit another couple of days before handling it. The real leaf will be stuck to the casting, so peel it off, using needle nose pliers, if needed, to carefully remove the leaf from deep veins without chipping the casting.
  13. Once completely dry, I use a dremel tool to clean up any rough edges.
    IMG_1177
  14. Painting: I used water-based acrylic paint on the leaves, adding different colors in layers. (AC Moore and Michaels carry a large variety of colors.) Watered down paint makes a wash that leaves hints of color. You can apply the paint with an almost dry natural sponge, apply it with a paintbrush and then wipe it lightly with a damp sponge, or use an air brush. You can use a smaller paintbrush to add color to the veins, or sponge on color so it seeps into the veins and then lightly wipe the leaf with a damp sponge to remove most of the color on the raised portions of the leaf. Let your creative juices flow and try different techniques.
    IMG_0149

Appetizers—as Easy as 1, 2, 3

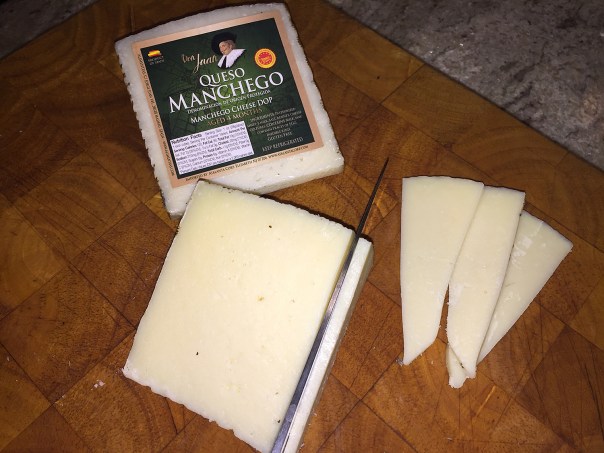
Manchego Cheese Canapés with Olives and Piquillo Peppers is an extremely easy tapas to assemble, no cooking required and can be served at room temperature. It comes straight from El Corregidor, the most delightful bar and restaurant in the La Mancha region of Spain. “It is where Manchego cheese is made and windmills from the times of the errant knight Don Quixote still stand.”

In early October, I started my Master Gardener’s Certification course which meets every Thursday evening for 6 months. We were required to sign up for appetizer duty on at least one of those evenings, and I chose the fourth class.

IMG_1064

A few years back, Russ had made this tapa for a party and everyone loved them, so I decided the three-step recipe was easy to make ahead of time and transport via car for the 40 minute ride. QUESO MANCHEGO con ACEITUNAS y PIQUILLOS comes from one of our coveted cookbooks, La Cocina de Mamá by Penelope Casas—a great home-cooking chef author from Spain.

Counting the class instructors, there are 30 people at each session, so I bought two wedges of cheese which sliced down to 16 wedges each. Since I doubled the cheese, I thought I should increase the olives, peppers and anchovies by about 50%—which ended up unnecessary, as there was a lot left over. (Although it added boatloads of flavor to a pasta sauce a few nights later!)

We usually always have a jar of piquillo peppers imported from Spain on hand, but apparently ran out without realizing it. The grocery store only had jarred piquillo pepper tapenade, so I went with that. It worked our perfectly, but I omitted adding any additional olive oil since the tapenade already had some in it.

Ingredients

  • 1/2 pound wedge manchego cheese
  • 30 cured black olives, pitted and chopped
  • 3/4 cup chopped piquillo peppers or pimentos
  • 6 anchovy fillets
  • 1 tablespoon extra-virgin olive oil
  • Minced fresh parsley for garnish

Directions

  1. Cut the wedge of Manchego lengthwise into 1/8-inch triangular slices.
    IMG_1061
  2. In a mortar, mash olives, peppers, anchovies, and oil to a paste (or use a mini-processor as shown below.)
    IMG_1058
  3. Spread about teaspoon of the paste on each cheese slice and sprinkle with parsley.

IMG_1065

To counter balance the savory Manchego wedges, I also made another slightly sweet tapa. About a year ago I blogged this recipe for Dried Fig, Goat Cheese and Candied Pecan appetizers. As I mentioned then, they’re fashionable, easy to construct, and require no cooking. For a final flourish, drizzle with a balsamic glaze, or perhaps honey, and Voila you just made and elegant and easy appy.

figs.cropped

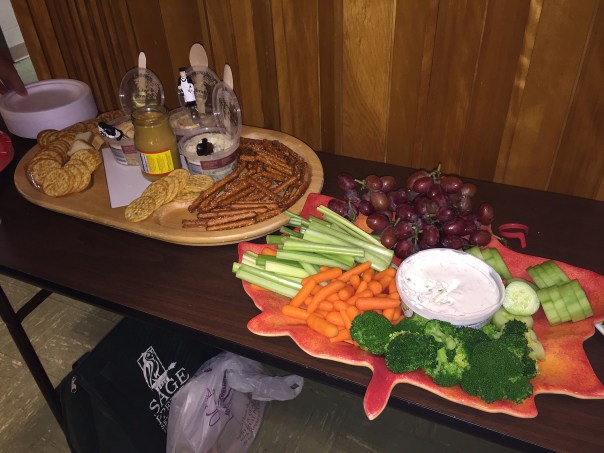
I also want to give a shout out to my classmate George, who also had to bring in some edibles. He delivered a beautiful presentation with a crudité platter and another with an assortment of spreads, crackers and pretzels. There was nary a crumb left on any of our platters. I think we may have raised the bar for the following group 😉

IMG_1067

The Leftover Apple Cider Dilemma

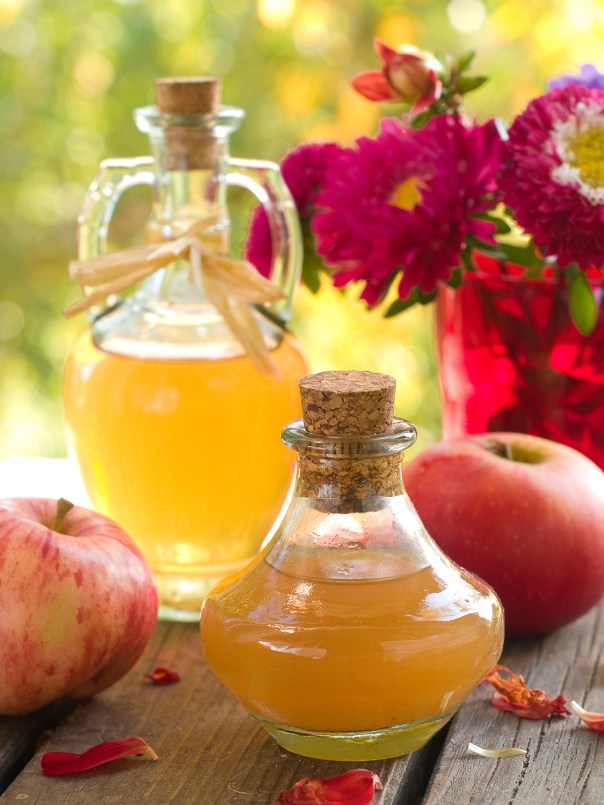
If like us you find yourself with some leftover apple cider after making a recipe that called for only a portion of the container, try some of these easy, novel ideas instead of throwing it out. Yes, go ahead and drink it if you’re so inclined, but if not, these nifty recipes enhance an entire spectrum of food items, and are simple to boot.

shutterstock_111918245

For a Tangy Homemade Vinaigrette to toss over salads or in with pasta dishes, first grab 1 lemon. Finely grate the zest into a bowl and squeeze in the juice. Whisk in a 1/3 cup apple cider, 1 tablespoon dijon mustard, 1 tablespoon honey and 1 finely grated garlic clove. Whisking constantly, slowly drizzle in 1/3 cup extra virgin olive oil and salt and pepper to taste.

shutterstock_137668649

Here’s an Easy Autumnal Glaze for meat and veggies. In a medium saucepan combine 1 cup apple cider, 2 tablespoons cider vinegar, 1 finely grated garlic clove and 2 tablespoons whole-grain mustard. Bring to a boil and cook until reduced to about 1/4 cup and coats the back of a spoon, 5 to 7 minutes. remove from heat and stir in 2 tablespoons butter, and salt and pepper to taste.

shutterstock_554841658

And what about dessert? Who couldn’t resist a Cider Caramel Sauce to drizzle over almost anything? (OK, so maybe this one is a little more labor-intensive.) In a medium sauce pan, bring 2 cups apple cider to a boil and cook until reduced to a 1/2 cup, nearly 20 minutes. Next, reduce the heat to medium-low and add 1/2 cup white sugar and a 1/2 cup light brown sugar with 5 tablespoons heavy cream, 1/2 teaspoon kosher salt,1/2 teaspoon ground cinnamon, and 1/4 teaspoon ground nutmeg, mix to combine.

shutterstock_604170194

Simmer until the caramel thickens and becomes rich brown in color, 12 to 15 minutes. Remove from the heat and stir in 1/2 teaspoon pure vanilla. Let cool to room temperature. Use or refrigerate for up to one week. Makes 1 1/2 cups. To reheat, microwave in 30-second increments, stirring after each, until desired consistency is achieved.

shutterstock_684839422Finally, an apple cider cocktail goes perfect with the season, and a few simple ingredients will transform a classic fall drink into a festive treat. While there are endless possibilities, how about a Cider-Bourbon Cocktail? Fill a cocktail shaker with ice. Add 3/4 cup apple cider, 1/3 cup bourbon2 tablespoons freshly squeezed lemon juice, and 2 (2 1/2-inch-long) thin slices fresh peeled ginger; shake to combine. Strain cocktail into 2 cups. Garnish with thin apple or orange slices. Get a cozy fire going, and sit back and relax…

shutterstock_117490048


Resort-Style Dining South of the Border

From year one, when Russ and I started dating, we took an annual vacation to the Cancun / Riviera Maya area of Mexico. Our last trip there was around 2009, and we excitedly had the opportunity to return this Fall. Each time we chose a different all-inclusive through Apple Vacations, and this trip was no different. You really can’t beat the prices! (This blog may look lengthy, but it’s mostly photos.)

A six golden-apple resort, NOW Jade Cancun is situated directly on the Caribbean just south of Puerto Morelos, less than a half hour’s ride from the Cancun international airport. Nearly everything (excluding motorized sports and excursions) is included: airfare, transport, all the food and drinks you could possibly consume, a fullscale spa and fitness center, and endless entertainment for adults and kids… all wristband-free! Spacious rooms and suites are graciously appointed and luxuriously equipped with amenities.

beach.view.huts
An expansive view of the beach from Carnival’s veranda. The colors are so vivid!

bedroom
Our room included a step-down living area and balcony. The bathroom was fabulous too! BTW, maid service comes twice a day: in the morning to do a thorough cleaning, and in the evening while you’re dining to turn down the bed and leave chocolates.

lobby
The main entrance lobby at night where live guitarists occasionally played serenating music.

About the food. 24-hour service is available at the Cocoa Cafe, or delivered directly to your room. But half the fun is meeting folks from all over the world, and/or just people-watching. Breakfast for us usually started with an expansive view overlooking the Caribbean at the Carnival International Buffet, with endless culinary options that address anyone’s preferences or diet restrictions.

carnival.veranda
Our view every morning as we ate breakfast.

bag.carousel
Most of their restaurants will give you a bag carousel so you don’t have to plop them on the floor. The first day when our room wasn’t ready, we had our carry-ons with us, so the carousel was very convenient. 

A late lunch could be as casual as getting nachos or burgers at the Poolside or Barefoot Grills without having to wear a cover-up; or a bit more upscale and out of the sun at Castaways with a larger than life menu delivered to your table on an easel with a Spanish menu on one side, or for us gringos, in English on the other side.

castaways
Castaways offers a more extensive menu than the poolside grills, along with shade.

castaway.menu
The ginormous menu at Castaways.

castaway.fajitas
One afternoon our lunch of choice was a Chicken Fajita.

On top of the five gourmet restaurants that serve dinner (other than the Carnival Buffet), there are seven bars and lounges where you can swim up for a cocktail or get down on the dance floor. But this blog will concentrate on their featured ethnic restaurants—at which BTW, you don’t have to make reservations, as many other all-inclusives require. (Although we found that this feature also had its drawbacks…) They were all wonderfully and artistically appointed, much to my delight!

Our first night we decided to dine at Spice, featuring Asian-style cuisine in an open-air romantic setting surrounded by water and mango groves, with a choice of hibachi-style dining, or a regular sit-down option with full menu—our choice. After speaking with the hostess, we learned it would be awhile before a table would open up, so they gave us a neon beeper to contact us, apparently a common practice.

Fine with us, there’s lots to explore in the meantime such as international shopping, vendors displaying their wares in the open-air courtyard, live performers, or enjoying an upscale cocktail in the Moments lounge where people-watching is at its finest, and a larger-than-life TV screen broadcasts current world sports events. With Russ being a die-hard Pittsburgh fan, we got to see a good bit of the Sunday night football game when the Steelers beat the Lions. (An Eagles fan, I was glad to see that they also won earlier in the day.)

IMG_E0897
We had our waiter open the window shade so that we had a view onto the water surrounding the restaurant—and wondered why the other diners didn’t ask for the same?

IMG_0902
The Thai Salad was interestingly presented and included steamed veggies with shrimp and a Thai dressing.

IMG_0903
One appetizer was the Nem of Saigon, two crispy rolls with vegetables, beef, shrimp and a sweet-spicy sauce. 

IMG_0904
Russ chose a spicy tuna sushi roll to nibble on.
IMG_0906
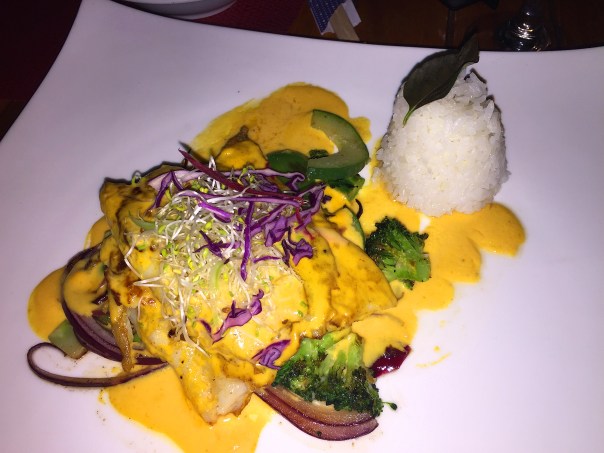
Years ago I feasted on a King Fish dinner on the beach in St. Thomas and never forgot how fabulous it was. This King Fish version with marinated ginger and lime juice came with sautéed vegetables and a delicious spicy coconut sauce, and was perhaps a bit more upscale than in St. Thomas.

IMG_0908
Russ had the Crispy Pork with sweet and sour, ginger and pineapple. While his was good, we both thought mine was a better match for our palettes. 

We enjoyed Spice so much, we patronized the restaurant again on our fifth night, this time with a view overlooking one of the hibachi tables where the master chef performed his jaw-dropping knife skills for a crowd of eight. We both agreed, he was the most skilled artist we ever saw, although the picture below doesn’t show the knives flying in the air.

IMG_0996

Before reporting on the other ethnic restaurants, here are pics of what we ate on our second night at Spice:

IMG_0985
The fantastic Curry Shrimp was plated with a yellow curry and coconut sauce surrounded by a vegetable stack topped with shredded carrots.

IMG_0986
We split the Malaysian-Style Chicken Satay with peanut sauce.

IMG_0987
A hot little skillet brimming with just the right amount of Pad Thai with rice noodles, egg, peanuts, chicken and vegetables.

IMG_0989
The Curry Shrimp entrée was artistically plated in a yellow curry sauce with coconut milk and a side of white rice.

IMG_0993
Dessert was a Trio of Chocolate Truffles with gilded touches and fresh berries.

Our second evening’s choice for dinner was the authentic Mexican establishment Tamarindo. Again, we were given a beeper because they said there would be around an hours wait (that’s why we ate late lunches.) The crazy thing about it though, when we were called back and seated, the vast majority of the tables were empty!?

IMG_0922
Russ wonders where the heck everyone is since we had to wait an hour to be seated!

IMG_0920
While waiting for a glass of wine and reviewing the menus, they delivered a sconc           e of nacho chips and some very good guacamole and salsa.

IMG_0924
Lynn enjoyed the appetizer Tacos de Camaron al Ajillo: garlic-roasted shrimp, avocado salsa, fresh cheese and shredded lettuce.

IMG_0926
Russ drooled over his amazing tasting Salbutes de Cochinita Pibil stuffed with pork shoulder with pickled onion, radishes, tomato, avocado, a toasted pumpkin seed sauce and hot pepper with lemon. 

IMG_0928
We chose to spilt the Parrillada for Two as our entree. WOW, was it good, and just the right amount without going overboard.

IMG_0931Russ just can’t pass up a good Churro and these were dressed with melted chocolate and a side of vanilla ice cream.

The most upscale restaurant was touted to be the French Mercure and we decided to enjoy our third dinner there. Of the five ethnic options, both Mercure and Cin-Cin, the Mediterranean spot (closed for a couple of nights), require more formal dress and men have to wear long pants.

Again knowing we would probably have to wait, we sought out the host and got our names on the list, but did not get the aforementioned beeper this time. When we inquired how we were supposed to know when our table would be ready, they told us to check back in an hour! Not a very expedient system in our opinions, and not a very good first impression.

There did indeed happen to be a bit of a mix up when we checked back, along with several other irritated customers, but before long we were seated. All-in-all our food was good, but not the top-notch place Mercure was lauded to be.

IMG_0947
Russ looks at the menu while I take in the interesting decor.

IMG_0957
My Scallops Au Gratin with Gruyere Cheese appetizer while attractive, was way too chewy. Not a good omen…

IMG_0958
However, my Endive Salad with nuts and roquefort cheese made up for the disastrous scallops and was perfectly plated.

Russ’s appetizer, the Le Foie Gras duck liver was served on lettuce and fresh brioche bread, was sooo small, he swallowed it before I could even take a picture of it!

IMG_0959
We both opted for the Grilled Fillet Mignon with Béarnaise Sauce accompanied by sautéed vegetables on whipped potatoes as our main entree. Unfortunately my steak was sooo rare I had to send it back. They did bring me an entire new portion which was done to my liking.
IMG_0962
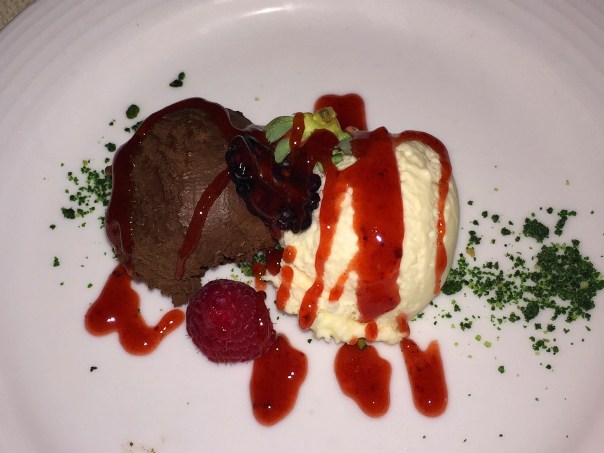
The dessert course for Russ was the beautifully plated White and Dark Chocolate Mousse served with raspberry sauce.

Dinner on the fourth evening was at the Italian trattoria Capers. Expecting a long wait as had been the case the other few nights, we stopped at the hostess station at 7:00 and were stunned when they seated us immediately! Go figure…

It was a good beginning when they delivered an eclectic basket of bread and a small amuse-bouche to get the party started…

IMG_0969

IMG_0970
We each received an Amuse Bouché of papaya, cheese spread topped with kiwi and a blackberry.

IMG_0971
The Portobello Mushroom with provolone cheese called my name for the appetizer round.

IMG_0974
Russ had the Carpaccio appetizer with thin slices of raw beef, parmesan reggiano, arugula and white truffle oil.

IMG_0975
As the main entree Lynn opted for the Baked Salmon Fillet in fine herbs served with grilled onions, asparagus peppers in a white wine sauce.
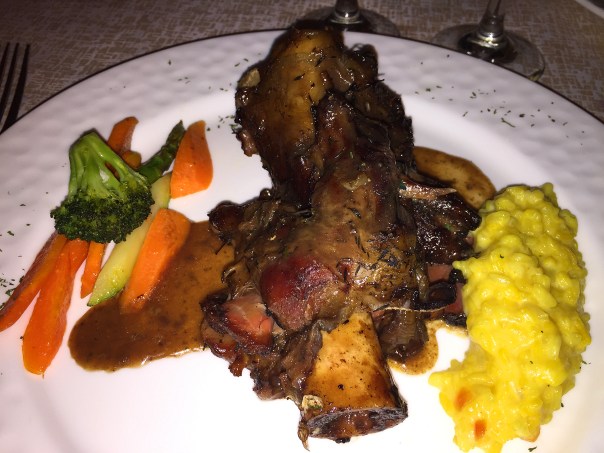
IMG_0979For Russ it was all about the Veal Osso Buco braised in Barolo wine sauce over risotto Milanese and a side of steamed veggies.

IMG_0980
Russ ended with a Gelato Duo with a scoop each of vanilla and chocolate topped with an amaretto chocolate drizzle. 

Often after dinner, we’d go to the beach bar where Russ would practice his already fluent Spanish with the bartender Oskar. It is here that we first met a couple from St. Louis, Bobby and Michelle, who were at NOW Jade for a family wedding. In fact, there were at least one or two destination weddings on the grounds per day!

lynn.russ.on.swings
At the beach bar on swing seats.

IMG_4010
Michelle and Bobby were also fellow foodies.

IMG_2065

IMG_2064

Our final two nights we dined at Cin-Cin, the upscale Mediterranean restaurant that had been closed the past two evenings. The first time we sat inside and enjoyed the meal so much, we asked Bobby and Michelle to join us again on our last night. They had actually already eaten there twice previously, but had no qualms eating there again. We all agreed, Cin-Cin was our favorite (interior shown below.)

IMG_1008

In no particular order, here are some of the options we chose for appetizers, mains and dessert over the course of two nights:

IMG_1010
Serrano Ham Falafel with crispy chickpeas and a warm honey, lemon and mint sauce.

IMG_1021
Spanakopita, a Greek Pie filled with spinach, feta cheese and served with sundried tomato sauce.

IMG_1011
A to-die-for soup, Fassolada, a typical white bean soup with pancetta slices.
IMG_1012
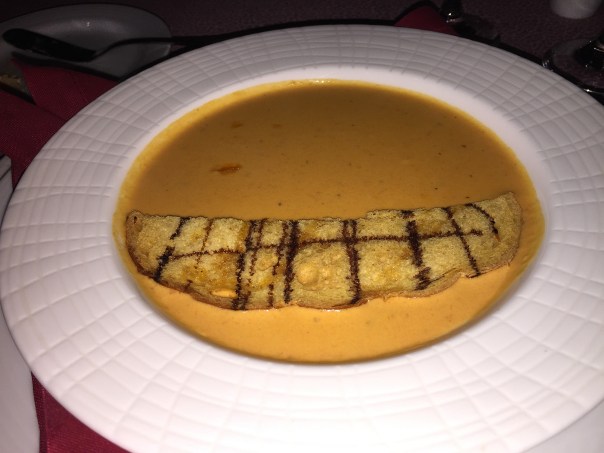
Another winning soup, Garlic & Tomato Cream served with a crusty bread drizzled with au balsamic oil.

IMG_1013
Tapenade Salmon came plated with creamy olive sauce, roasted eggplant and oregano.

IMG_1015
The Grouper Fillet was a fave and was candied in olive oil and served with steamed vegetables and potato slices.

IMG_1023
A take on traditional Greek salad, this Horiatiki Salata was sprinkled with feta cheese.

IMG_1025
Perhaps everyone’s favorite entrée was the Cilantro Shrimp Risotto with thyme over creamy cilantro risotto served with leek oil.

IMG_1028
I tried a smidgen of Russ’ Basil Mousse dessert and it was exquisite.

IMG_1029
This lovely dessert was the Margarita Pie with a swipe of rum sauce topped with a chocolate confection.

IMG_1030
This Lemon Pie served with berries was very well-liked by those who indulged.

Just imagine if you had to pay for all of these meals and drinks plus add a tip? It would have cost a fortune! And if you didn’t like an entrée, you’d simply send it back and choose something else. So for one very reasonable price, you can get it all and indulge yourselves for as little, or as long as you want.

IMG_1031

We made one final pit stop at the beach bar to say good-bye to Oskar, Bobby and Michelle with promises to meet up sometime in the future. Until then, Adios Amigos!

Better Than the BEST? You Take the Test.

Remember my recent blog titled “Simply the BEST Roasted Chicken” (shown below) from a few weeks ago? Well, here’s a sister recipe that’s just as simple and perhaps even a bit tastier—if that’s possible, and to Russ it was. Me? I may have to grudgingly admit this one may have been a skooch tastier.
IMG_0789

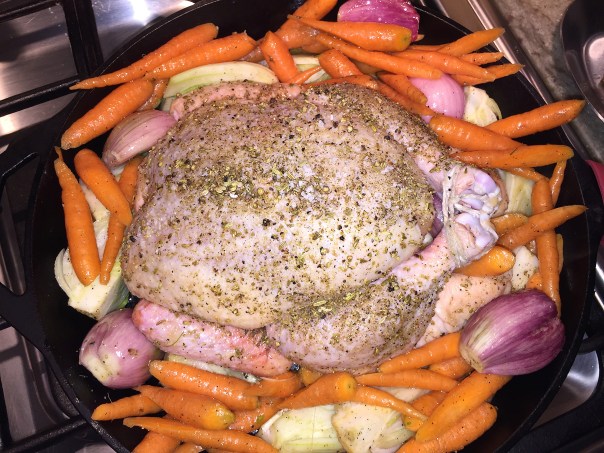
The process is the same, but the dry rub and surrounding vegetable ingredients are different. This time I didn’t have the luxury to let the salted chicken sit uncovered in the fridge overnight, but it did get 4 hours (the minimum is one hour.) AND, being huge fans of the allium family, a major addition I made was include 4 large shallots to the fennel and baby carrots.

IMG_1049

Two other minor changes that I did was roast the bird for 1 1/2 hours total because it weighed a bit over 4 pounds, then let it rest for 45 minutes to recirculate and release the juices. Which BTW, make sure to spoon over your meat and veggies. OMG, it was super tasty and succulent. The veggies practically melted in my mouth! Afterward, we were both enthusiastically holding two thumbs up and purring…
IMG_1057

TIP: You may want to save some of the fennel fronds to add as garnish on your meat and/or veggie platters for a bright pop of color.

IMG_1038

Ingredients
  • 1 3½–4-pound whole chicken
  • Kosher salt
  • 3 tablespoons olive oil, divided
  • 2 small fennel bulbs, trimmed, cut into 6 wedges each; saving fronds for garnish if desired
  • 1 pound small baby carrots, scrubbed and diagonally cut into 4″-long pieces
  • 4 large shallots, halved (optional)
  • Kosher salt and freshly ground black pepper

Dry Rub:

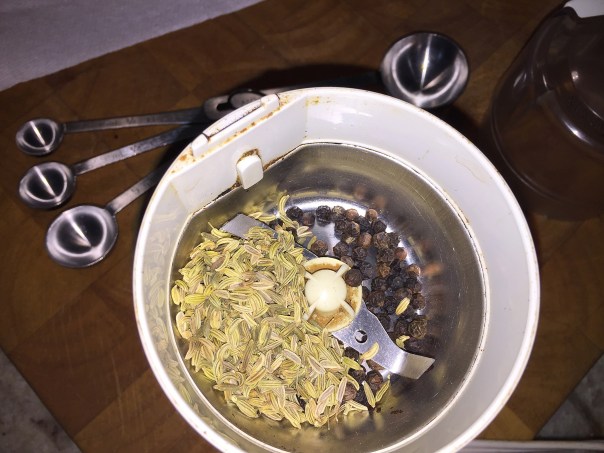
  1. 1 Tbsp. fennel seeds
  2. 1 tsp. black peppercorns

Directions

  1. Pat chicken dry with paper towels and season generously with salt, inside and out. (Use 1 tsp. Diamond Crystal or ½ tsp. Morton kosher salt per lb.) Tie legs together with kitchen twine. Let sit 1 hour to allow salt to penetrate, or chill, uncovered, up to 1 day ahead.
  2. Place a rack in upper third of oven and set a 12″ cast-iron skillet (or 3-qt. enameled cast-iron baking dish) on rack. Preheat oven to 425°.
    IMG_0776
  3. Take chicken out of fridge.
  4. Meanwhile, grind dry rub ingredients in a spice grinder.
    IMG_1036
    IMG_1037
  5. Toss fennel wedges, carrots and shallots (if using), and 2 Tbsp. oil in a large bowl to coat; season with salt and pepper.
  6. Once oven reaches temperature, pat chicken dry with paper towels (especially the underside) and lightly coat with half of remaining 1 tablespoon oil; sprinkle with dry rub.
    IMG_1041
  7. Drizzle remaining oil into hot skillet (this helps keep the chicken from sticking and tearing the skin.) Place chicken in the center of skillet and arrange fennel mixture around.
    IMG_1042
  8. Roast until vegetables are golden brown and tender and an instant-read thermometer inserted into the thickest part of breasts registers 155°, 50–60 minutes (temperature will climb to 165° as chicken rests.) Let chicken rest in skillet at least 20 minutes and up to 45 minutes. Baste some of the juices over the chicken and veggies while it rests.
    IMG_1047
  9. Transfer chicken to a cutting board and carve. Serve with vegetables.
    Do not carve until the bird has rested for at least 20 minutes.
    IMG_1057

Adapted recipe from Chris Morocco from Bon Appétit

A Matter of Taste

Spicy sausage paired with summer squash gives this quick Rigatoni with Summer Squash, Spicy Sausage and Goat Cheese pasta dish a mild kick, and the goat cheese brings the flavors of the pasta together while adding its own rich nuance. Not into spicy? Switch out the hot sausage for mild and sweet or turkey sausage.

But just looking at the ingredients I knew I had to increase the quantities of some to forge a better balance with the amount of pasta. Unfortunately we couldn’t locate gluten-free rigatoni so we substituted penne, a barely noticeable switch.

IMG_4047
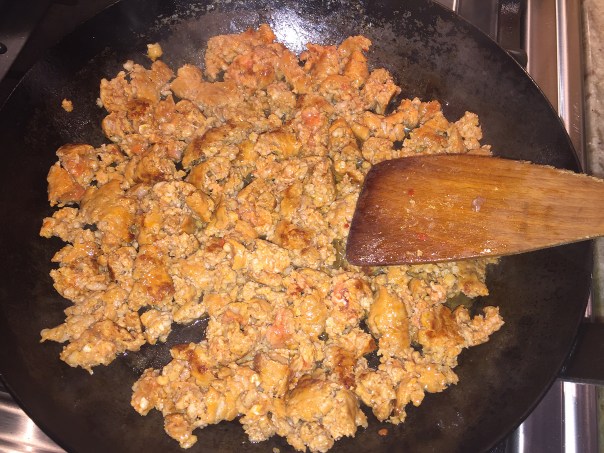
The supermarket wasn’t carrying bulk sausage so I bought the links, removed the casings, and browned the exteriors before breaking into pieces with a spatula.

In addition to increasing the sausage to 1 pound, the goat cheese to 4 ounces, the shallots to more than a 1/2 cup; I also minced up a small banana pepper that I had wallowing in the fridge, adding another pleasant flavor component. Once the yellow summer squash and zucchini were diced, they measured somewhere in the range between 3 and 4 cups as opposed to 2 cups; and the chopped parsley registered closer to 3 tablespoons, both amping up the veggie quotient.

The trick is in how much pasta water to add at the end. Too little and the dish can be a bit dry, too much and it could end up watery. In that case, a hefty sprinkle of grated Parm would help tighten the dish.

It’s all a matter of taste and preference, so don’t be afraid to adjust to your own liking.

IMG_4045

Ingredients

  • Kosher salt
  • 1 lb. dried rigatoni
  • 3 Tbs. extra-virgin olive oil
  • 3/4 lb. bulk hot Italian sausage (or links, casings removed)
  • 1/3 cup finely chopped shallots (about 3 medium)
  • 2 cups 3/4-inch-diced yellow and green summer squash
  • 3 oz. fresh goat cheese, crumbled (about 3/4 cup)
  • 2 tsp. finely chopped fresh flat-leaf parsley
  • Freshly ground black pepper
  • 1/4 cup grated Parmigiano-Reggiano (optional)

Directions

  • Bring a large pot of well-salted water to a boil over high heat. Put the rigatoni in the boiling water and cook until just shy of al dente, about 10 minutes.
  • While the pasta cooks, heat 1/2 Tbs. of the oil in a 12-inch skillet over medium-high heat. Add the sausage and cook, breaking it into pieces with a spatula or spoon, until it’s almost cooked through, 3 to 5 minutes. Using a slotted spoon, transfer the sausage to a bowl. Pour the fat out of the skillet but do not wipe it clean.
    IMG_4048
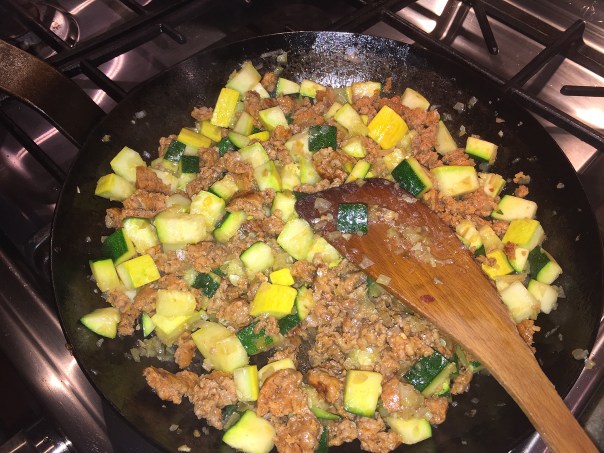
  • Heat the remaining 2-1/2 Tbs. oil in the skillet over medium heat and cook the shallots (I also added the minced banana pepper here) until they begin to soften, about 1 minute.
    IMG_4049
  • Raise the heat to medium high and add the squash. Cook, stirring frequently, until the squash is barely tender, 3 to 5 minutes.
    IMG_4050
  • Reserve 1/2 cup of the pasta-cooking water and drain the rigatoni. Return the rigatoni to its cooking pot and add the sausage, the squash mixture, and 2 Tbs. of the reserved pasta water. Toss over medium heat until the sausage is cooked through and the rigatoni is perfectly al dente, about 3 minutes. Add more of the pasta water as necessary to keep the dish moist.
    IMG_4052
    IMG_4054
  • Remove from the heat, add the goat cheese and parsley, and toss until the cheese melts and coats the pasta. Season to taste with salt and pepper, transfer to warm shallow bowls, and top each serving with some of the grated Parmigiano, if using.
    IMG_4057

Adapted by a recipe from Steve Conant of Fine Cooking