Monthly Archives: March 2019

Black Bean Soup

Often on Sundays, especially during the cooler months, my husband is known to whip up a “Russified” version of some soup. Recently it was an adaptation of Black Bean Soup courtesy of Cook’s Illustrated (CI). With a potage in mind that would incorporate the remaining quart of our homemade ham stock, the culinary journey began, even though CI’s recipe calls for chicken broth.

Unlike the recipe below, Russ soaked the black beans overnight with a couple of ham hocks to give them flavor, while adding some shredded leftover ham at the end, eliminating the need for a ham steak as described below by CI.

A couple of other alterations included substituting pimentón picante in place of red pepper flakes, and using dry sherry instead of lime juice. Trying to avoid using corn starch as a thickener, the soup was still too thin even after processing some in a blender, so he bit the bullet and added it.

For a black bean soup recipe that produces an attractive, dark-colored soup full of sweet, spicy, smoky flavors, use dried beans, which release flavor into the broth as they cook—unlike canned beans. Dried beans tend to cook unevenly, so be sure to taste several beans to determine their doneness in Step 1.

Though you do not need to offer all of the garnishes listed below, do choose at least a couple; garnishes are essential for this soup as they add not only flavor but texture and color as well. We preferred pickled red onion (as opposed to raw), sour cream and cilantro as toppers.

IMG_1989

Black Bean Soups

  • Servings: Yields 9 cups
  • Difficulty: easy
  • Print

Ingredients

Beans

  • 1 pound dried black beans (2 cups), rinsed and picked over
  • 4 ounces ham steak, trimmed of rind
  • 2 bay leaves
  • 5 cups water
  • ⅛ teaspoon baking soda
  • 1 teaspoon table salt

Soup

  • 3 tablespoons olive oil
  • 2 large onions, chopped fine (about 3 cups)
  • 1 large carrot, chopped fine (about 1/2 cup)
  • 3 ribs celery, chopped fine (about 1 cup)
  • ½ teaspoon table salt
  • 5 – 6 medium cloves garlic, minced or pressed through garlic press (about 1 1/2 tablespoons)
  • ½ teaspoon red pepper flakes
  • 1 ½ tablespoons ground cumin
  • 6 cups low-sodium chicken broth
  • 2 tablespoons cornstarch
  • 2 tablespoon water

Garnishes

  • 2 tablespoons lime juice, from 1 to 2 limes
  • lime wedges
  • minced fresh cilantro leaves
  • red onion, finely diced
  • avocado, diced medium
  • sour cream

Directions

IMG_1976
1. FOR THE BEANS: Place beans, ham, bay, water, and baking soda in large saucepan with tight-fitting lid. Bring to boil over medium-high heat; using large spoon, skim scum as it rises to surface. Stir in salt, reduce heat to low, cover, and simmer briskly until beans are tender, 1 1/4 to 1 1/2 hours (if necessary, add another 1 cup water and continue to simmer until beans are tender); do not drain beans. Discard bay. Remove ham steak (ham steak darkens to color of beans), cut into 1/4-inch cubes, and set aside.

IMG_1980
IMG_1981
2. FOR THE SOUP: Heat oil in 8-quart Dutch oven over medium-high heat until shimmering but not smoking; add onions, carrot, celery, and salt and cook, stirring occasionally, until vegetables are soft and lightly browned, 12 to 15 minutes. Reduce heat to medium-low and add garlic, pepper flakes, and cumin; cook, stirring constantly, until fragrant, about 3 minutes. Stir in beans, bean cooking liquid, and chicken broth. Increase heat to medium-high and bring to boil, then reduce heat to low and simmer, uncovered, stirring occasionally, to blend flavors, about 30 minutes.

IMG_1983
IMG_1985
3. TO FINISH THE SOUP: Ladle 1 1/2 cups beans and 2 cups liquid into food processor or blender, process until smooth, and return to pot. Stir together cornstarch and water in small bowl until combined, then gradually stir about half of cornstarch mixture into soup; bring to boil over medium-high heat, stirring occasionally, to fully thicken. If soup is still thinner than desired once boiling, stir remaining cornstarch mixture to recombine and gradually stir mixture into soup; return to boil to fully thicken. Off heat, stir in lime juice and reserved ham; ladle soup into bowls and serve immediately, passing garnishes separately.

http://www.lynnandruss.com

Breaded Chicken Cutlets with Orange Salsa

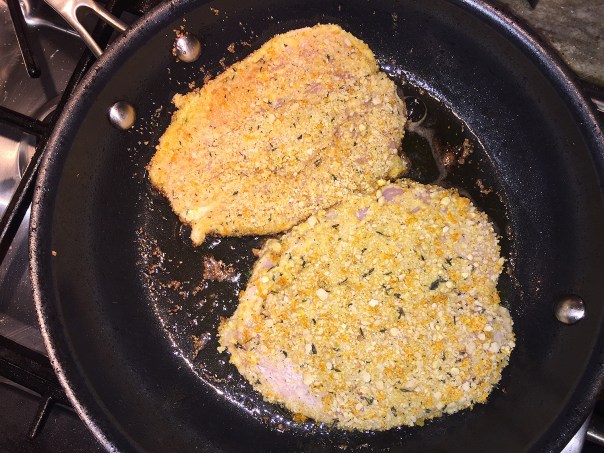
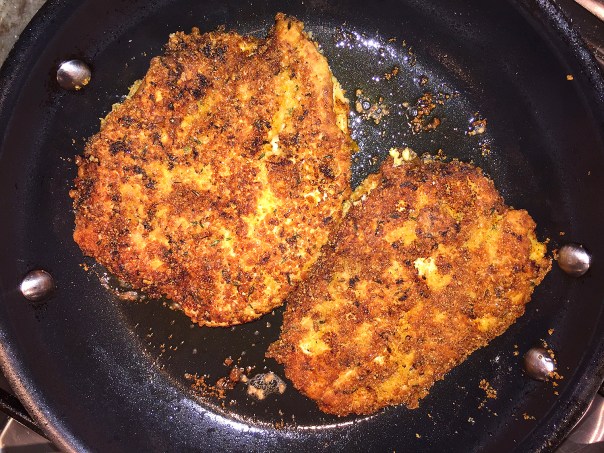
Not normally a fan of breaded and fried, I was still eager to try this Breaded Chicken Cutlets with Orange Salsa meal because the topping sounded delicious, and you only use a minimum amount of oil to “fry” the meat.

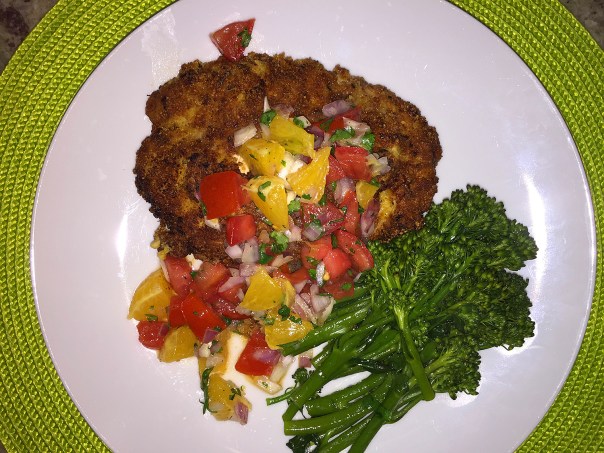
I know many of you can’t resist a crisp fried cutlet. You’ll enjoy that both the meat and the breading are infused with the delicate flavors of orange and thyme, while the fruity, colorful salsa complements the rich crust. (If you prefer, you can substitute veal or pork cutlets for the chicken.)

IMG_1936

Ten minutes just didn’t seem long enough in which to marinate the chicken in fresh orange juice, so I took it a step further and let them get happy in the ziploc for a full hour. On the other hand, two full cups of panko (gluten-free in our case) seemed excessive so I pared it down to about 2/3 cup while retaining the amount of orange zest and thyme. Spot on!

Concensus was—VERY good! I only made two cutlets for us but did not cut back on the salsa ingredients. And due to the fact that our chicken pieces were on the large size, after flipping them in the skillet and letting the other side brown a few minutes, I covered the pan with a lid for several more minutes to make sure they were cooked through, resulting in very tender and juicy chicken.

Served with a side of steamed broccolini, we enjoyed a low-carb, colorful and tasty meal.

IMG_1920

Breaded Chicken Cutlets with Orange Salsa

  • Servings: 4
  • Difficulty: easy
  • Print

Ingredients

  • 2 cups dried breadcrumbs, such as panko
  • 2 oranges (about 9 oz. each)
  • 1 tsp. chopped fresh thyme
  • Kosher salt and freshly ground black pepper
  • 4 thin-cut chicken breast cutlets (about 1 lb.)
  • 1 medium tomato, cored and cut into medium dice (about 1 cup)
  • 2 Tbs. finely chopped red onion
  • 1 Tbs. finely chopped fresh cilantro; more to taste
  • 2 tsp. extra-virgin olive oil
  • 1-1/2 tsp. fresh lime juice; more to taste
  • 1 egg
  • 1/4 cup unbleached all-purpose flour
  • 1/4 cup vegetable oil; more as needed

Directions

  1. Put the breadcrumbs in a wide shallow bowl or rimmed plate. Using a rasp-style grater, finely zest the oranges into the breadcrumbs.
    IMG_1924
  2. Add the thyme, 1 tsp. salt, and 1/2 tsp. pepper, and toss to combine, breaking up any clumps of zest.
  3. Squeeze the juice of one of the oranges into a wide bowl or large zip-top bag. Add the cutlets, turn to coat if necessary, and marinate for (at least) 10 minutes.
    IMG_1923
  4. Meanwhile, segment the remaining orange as directed, cut the segments into a few pieces, and toss with the tomato, onion, and cilantro.
  5. Add the olive oil, lime juice, and a pinch each of salt and pepper. Toss and season to taste with more cilantro, salt, and pepper.
    IMG_1927
  6. Crack the egg in another wide shallow bowl and beat lightly. Put the flour on a rimmed plate and season with 1/2 tsp. salt and a healthy grind of black pepper.
  7. Lift a cutlet from the juice and shake off the excess liquid. Dip it first in the flour, coating both sides well and shaking off any excess flour. Then dip in the egg, letting the excess run back into the bowl, then into the breadcrumbs, making sure both sides are well coated.
    IMG_1930
  8. In a 12-inch skillet, heat the oil over medium-high heat until the oil erupts into lots of bubbles when you dip in a corner of a cutlet. Fry the cutlets, in batches if necessary, flipping once, adding more oil and adjusting the heat as necessary to maintain a steady bubbling action, until cooked through and golden brown on both sides, 3 to 5 minutes per side.
    IMG_1932
    IMG_1934
  9. Serve topped with some of the salsa.
    IMG_1941

http://www.lynnandruss.com

Adapted from recipe by Jamie Schler from Fine Cooking

Divide and Conquer: Melt-in-Your Mouth Corned Beef and Cabbage

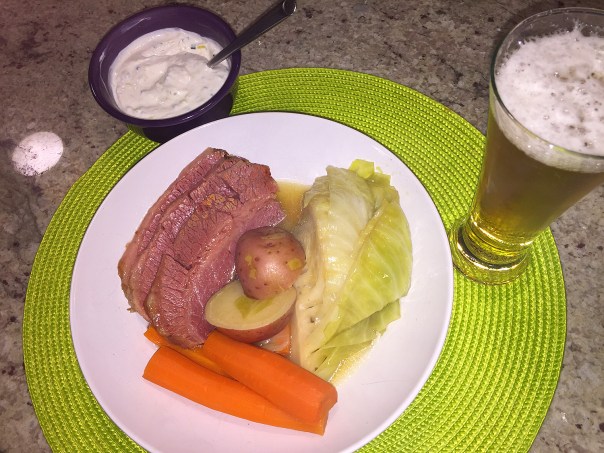
It was St. Paddy’s Day and as a rule we generally serve a Corned Beef and Cabbage dinner—although it’s typically not my favorite meal. After a little online research, The Hubster found a promising new technique from Cook’s Country that ensures the meat will not be unbearably salty, fatty, dry, and rubbery—my main complaints.

Cooking the corned beef the night before, then refrigerating it overnight, not only allows easier access to removal of extra fat, but makes slicing it a breeze, and also renders it melt-in-your mouth tender. And the veggies cooked separately come out full of flavor, and soft but not mushy.

When cooked with the stale spice packet that often gets packaged with the meat, it’s flavorless at best, right? Plus, the accompanying vegetables are usually mushy, greasy, and monotone in flavor. To solve the dry, stringy meat texture, CC got rid of the typical stovetop simmer and moved a covered pot into a low-temperature oven for gentler cooking over a long period of time.

To help flavor the meat, they replaced some of the water with chicken broth and added celery, carrot, and onion, along with peppercorns, allspice, a bay leaf, and thyme, to the cooking liquid. For the cabbage, carrots, and potatoes typically served with the corned beef, CC strained and defatted the cooking liquid and then cooked the vegetables separately in stages––potatoes first, then carrots and cabbage. A little butter added to the pot helps flavor the vegetables.

NOTE: Use flat-cut corned beef brisket, not point-cut; it’s more uniform in shape and thus will cook more evenly. When slicing the cabbage, leave the core intact or the cabbage will fall apart during cooking.

For another level of flavor and texture, The Hubster also made a Dill Pickle-Horesradish Cream as a topper. St. Paddy’s Day may have come and gone for this year, but don’t feel you have to wait until next March to try this impressive version of Corned Beef and Cabbage.

IMG_2001

Corned Beef and Cabbage

  • Servings: 6-8
  • Difficulty: easy
  • Print

Ingredients

  • 1 (4- to 5-pound) corned beef brisket roast, rinsed, fat trimmed to 1/4 inch thick
  • 4 cups low-sodium chicken broth
  • 4 cups water
  • 12 carrots, peeled (3 chopped, 9 halved crosswise)
  • 2 celery ribs, chopped
  • 1 onion, peeled and quartered
  • 3 bay leaves
  • 1 tablespoon whole black peppercorns
  • 1 tablespoon minced fresh thyme
  • 1 teaspoon whole allspice
  • 3 tablespoons unsalted butter
  • 1 ½ pounds small red potatoes
  • 1 head green cabbage (2 pounds), cut into 8, 2″ wedges
  • pepper
    IMG_1994

Directions

  1. Adjust oven rack to middle position and heat oven to 300 degrees.
  2. Combine beef, broth, water, chopped carrots, celery, onion, bay leaves, peppercorns, thyme, and allspice in Dutch oven. Cover and bake until fork slips easily in and out of meat, 4½ to 5 hours.*
  3. Transfer meat to 13 by 9-inch baking dish. Strain cooking liquid through fine-mesh strainer into large bowl, discard solids, and skim fat from liquid. Pour 1 cup cooking liquid over meat. Cover dish tightly with aluminum foil and let rest for 30 minutes.
    2.IMG_1974
  4. Meanwhile, return remaining cooking liquid to Dutch oven, add butter, and bring to simmer over medium-high heat.
  5. Add potatoes and simmer until they begin to soften, about 10 minutes.
  6. Add carrot halves and cabbage, cover, and cook until tender, 10 to 15 minutes.
    3.IMG_1996
  7. Transfer vegetables to serving platter and season with pepper to taste.
  8. Transfer beef to carving board and slice against grain into ¼-inch-thick slices.
    IMG_1993
    4.IMG_1997
  9. Serve with vegetables.

*TO MAKE AHEAD: Prepare corned beef through step 2. Refrigerate moistened beef and cooking liquid separately for up to 24 hours. To serve, adjust oven rack to middle position and heat oven to 350 degrees. Transfer meat to carving board and slice against grain into ¼-inch-thick slices and return to baking dish. Cover dish tightly with foil and bake until meat is heated through, about 25 minutes. While meat is heating, proceed with Step 3.

IMG_2003

Dill Pickle-Horesradish Cream

  • 1 cup sour cream
  • 1 Tbsp. chopped fresh chives
  • 6 Tbsp. prepared horseradish, drained
  • 1 Tbsp. finely chopped dill pickle (or dill relish)

Combine the ingredients in a small bowl. Cover and refrigerate for at least 2 hours, or up to 2 days.

http://www.lynnandruss.com


Aleppo Pepper and Dill Roast Chicken

On the one hand, I adore spices with a kick, on the other hand, dill is my least favorite herb—although it’s been gaining my affections recently. So when I came across this Aleppo Pepper and Dill Roast Chicken by Geoffrey Zakarian, it gave me pause. Then after reading the list of other ingredients, I confidently added it to that weeknights meal rotation.

Yes, you can make it on a weeknight, keeping in mind that the chicken needs to roast at least an hour, then rest for 25 minutes (although I believe you could shorten that time frame to 15 minutes). Then, while it cooks and rests, you’re free to do other things. The poultry roasts on a bed of potatoes and fennel, while the Aleppo pepper, herbs, and butter melt into the vegetables, flavoring them and making them downright irresistible, seriously.

IMG_2067

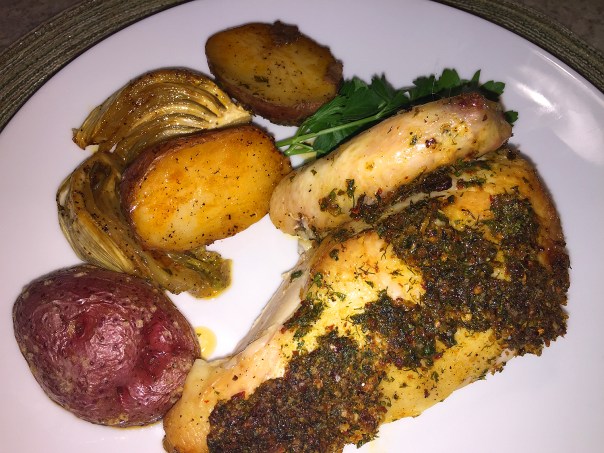
When it came time to make the butter mixture, I found it a bit difficult to blend it with a spatula until well-combined so I threw the ingredients into a small food processor. But then I had a heck of time rubbing the mixture all over the bird resulting in lumpy patches, which as the butter melted left clumps of herbs clinging to the skin. Thus the skin was not rendered as crispy as we would have preferred. But damn, it tasted good!

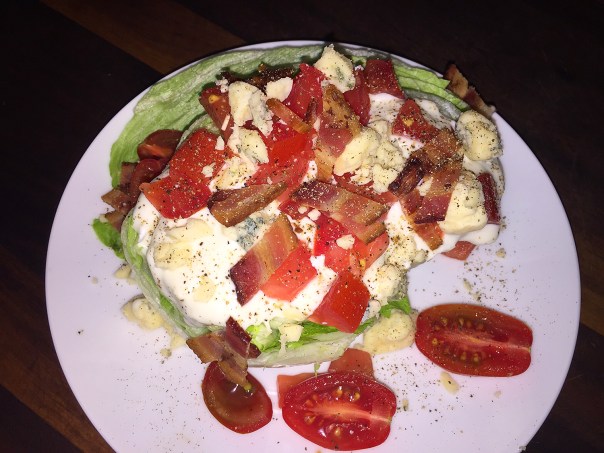
To me, that was a LOT of butter mixture and we had quite a bit leftover so you may want to cut it back by only using 8 ounces of butter and 1/3 less of the other ingredients. And how about a wedge salad on the side? I mean, when was the last time you indulged in one of those babies?

IMG_2063

IMG_2053

Aleppo Pepper and Dill Roast Chicken

  • Servings: 4
  • Difficulty: easy
  • Print

Ingredients

  • 1 3- to 3-1/2-lb. whole chicken
  • Kosher salt and freshly ground black pepper
  • 6 oz. (12 Tbs.) unsalted butter, at room temperature
  • 1-1/2 Tbs. lemon zest, from 2 medium lemons
  • 1-1/2 Tbs. Aleppo pepper
  • 1 Tbs. minced garlic
  • 1/2 cup finely chopped fresh flat-leaf parsley
  • 1/2 cup finely chopped fresh dill
  • 2 lb. small new potatoes, halved
  • 1 medium fennel bulb, cut into 8 wedges, core intact (about 1 lb.)
  • 1 Tbs. olive oil

Directions

  1. Position a rack in the lower third of the oven, and heat the oven to 375°F.
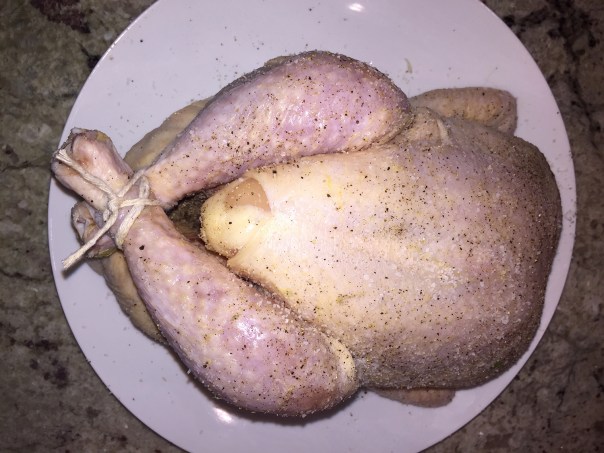
  2. Pat the chicken dry inside and out with paper towels. Season the cavity with 1 tsp. salt and 1/2 tsp. black pepper. Tuck the wings behind the back, and truss the legs with kitchen twine.
    IMG_2056
  3. Put the butter, zest, Aleppo pepper, garlic, and chopped herbs in a medium bowl, and blend with a silicone spatula until well combined. (Or use a mini food processor.)
    IMG_2057
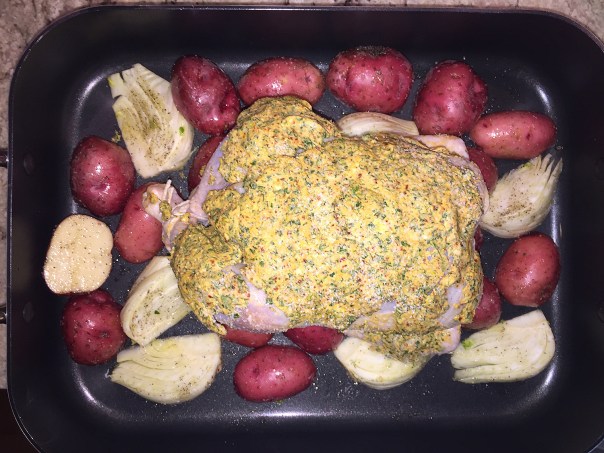
  4. Reserve 1/4 cup of the butter mixture. Rub the rest over the chicken, and season with 3/4 tsp. salt and 1/2 tsp. pepper. Let stand at room temperature for 20 minutes.
  5. Meanwhile, in a medium bowl, toss the potatoes and fennel with the oil, 1-1/2 tsp. salt, and 1/2 tsp. pepper. Pour the vegetables into a medium roasting pan.
    IMG_2059
  6. Put the chicken breast side up on top of the vegetables. Transfer to the oven, and roast until an instant-read thermometer registers 160°F in the thickest part of the thigh and the chicken is golden-brown, 1 to 1-1/2 hours. If the chicken browns too quickly, tent loosely with foil.
    IMG_2060
    IMG_2066
  7. Remove the chicken from the oven, tent with foil, and let rest for 25 minutes. Season the vegetables to taste with salt and pepper. Serve the carved chicken and vegetables with the reserved butter.
    IMG_2069

http://www.lynnandruss.com

Odd Combination, Winning Taste!

Fine Cooking’s Pasta with Roasted Cauliflower, Arugula and Prosciutto is a wonderful example of layering flavors and texture. The sweet grape tomatoes paired with the salty bits of prosciutto, slight crunch of the cauliflower and peppery arugula is a mouthful of yumminess. The additions of the garlic, sage, and Parmigiano-Reggiano round out the impressive combination.

Now what did I do differently? For starters, I wanted a better balance between veggies and starch so I cut back the amount of pasta from 12 ounces down to 8, after all, there were only two of us and we still had plenty of leftovers. Then I increased the amount of cauliflower by using the entire head (albeit it was a smaller one); and added an extra clove of garlic.

Weighing in at slightly over a pound, I also used multi-colored grape tomatoes for more color. What do I wish I HAD done? Roughly chopped the baby arugula so that it wouldn’t be so stringy to eat (here’s a heads up for you). The task of removing the stems altogether would be near impossible, so chopping them is a good alternative.

Don’t forget to reserve a cup of the pasta water. An easy reminder is to put a measuring cup into the colander, this way you can’t drain the orecchiette unless you’ve already removed the cup. I only needed about 1/3 cup of the water to obtain the correct amount of moisture.

All-in-all, it was extremely tasty and The Mr. was duly impressed, admitting it was a lot more tasty than he had anticipated—I concur.

IMG_1765

Pasta, Cauliflower, Arugula and Prosciutto

  • Servings: 4-5
  • Difficulty: easy
  • Print

Ingredients

  • Kosher salt
  • One-half medium head cauliflower, cored and cut into 3/4-inch florets (3-1/2 cups)
  • 1 pint grape tomatoes
  • 3 Tbs. extra-virgin olive oil
  • Freshly ground black pepper
  • 9 large fresh sage leaves
  • 4 large cloves garlic, peeled
  • 4 oz. thinly sliced prosciutto
  • 12 oz. dried orecchiette
  • 5 oz. baby arugula (5 lightly packed cups)
  • 3/4 cup grated Parmigiano-Reggiano

Directions

  1. Position a rack in the lower third of the oven and heat the oven to 425°F. Bring a large pot of well-salted water to a boil.
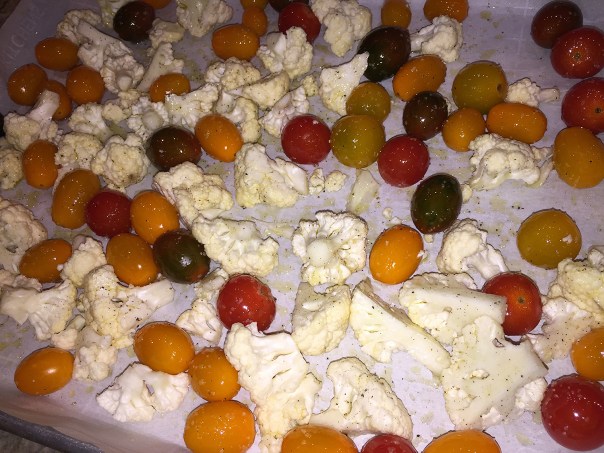
  2. Toss the cauliflower, tomatoes, oil, 3/4 tsp. salt, and 1/2 tsp. pepper on a rimmed baking sheet; spread in a single layer.
    IMG_1768
  3. Roast, stirring once or twice, until the cauliflower begins to turn golden and tender, about 15 minutes.
  4. Meanwhile, pulse the sage and garlic in a food processor until minced. Add the prosciutto and pulse until coarsely chopped.
    IMG_1770
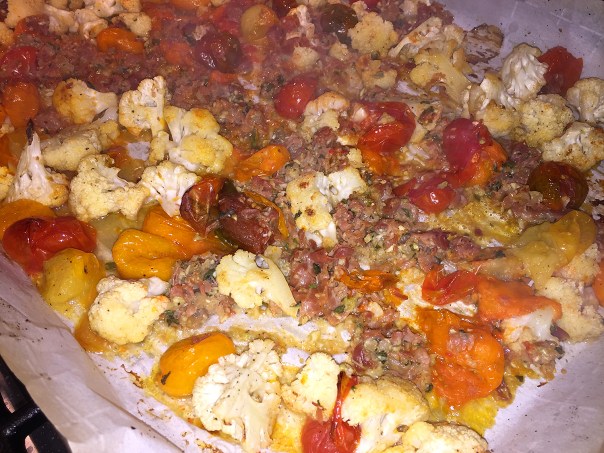
  5. Once the cauliflower is golden, toss the herb mixture into the vegetables and continue to roast until fragrant and the cauliflower is golden brown, 5 to 7 minutes.
    IMG_1780
    IMG_1783
  6. Boil the orecchiette until al dente, 9 to 10 minutes. Reserve 1 cup pasta-cooking water. Drain the pasta and return it to the pot. Stir in the roasted cauliflower mixture, arugula, cheese, and enough pasta water to moisten. Season to taste with salt and pepper.
    IMG_1788

http://www.lynnandruss.com

By Pamela Anderson of Fine Cooking

Chicken with Salsa, Olives and Limes

A saucy, delicious chicken dinner that comes together in 20 minutes? That’s what Real Simple Magazine (RS) promised in their latest issue of “Easy Dinners.” There are definitely times when you need a recipe with some built in time-saving steps like store-bought pico de gallo. Instead of chopping onions, tomatoes, jalapeños, and herbs—it’s all ready to go in a convenient package.

Pico de Gallo is usually found in the refrigerated, prepared foods section of your grocery store. Choose mild or hot depending on your spice tolerance. In an atypical move, I bought the mild, which for us was probably too low key.

RS claimed that “braising” chicken breasts in the flavorful mixture of pico de gallo (aka fresh salsa), salty green olives, and tart capers ensures tender, not rubbery, meat. I have to disagree on two counts. First, “braising” is a long slow process and this definitely is not. And real braising results in mouth-watering tender and juicy meat, while we thought the breasts were a bit rubbery.

IMG_0042

In the end, I did add some chopped fresh cilantro which helped add another flavor component. And instead of serving with tortillas, we spooned ours over rice steamed in homemade chicken broth, which again upped the flavor quotient.

All-in-all, the meal was light, fresh and colorful which would pair better with warmer climates than mid-Decmber in the Northeast U.S. Oh well, you live and learn. We would probably make it again when the temps are balmy, but choosing a salsa with more depth of flavor—or make our own.

Oddly enough, when we both had it a couple of days later, we thought the flavor profile improved, as did the chicken. I guess the added time allowed the flavors to further develop. Maybe it’s a good idea to make it one day, and serve it the next…

Chicken with Salsa, Olives and Lime

  • Servings: 4
  • Difficulty: super easy
  • Print

IMG_0034

Ingredients

  • 2 tablespoons olive oil
  • 4 boneless, skinless chicken breasts
  • 1 teaspoon kosher salt
  • ½ teaspoon freshly ground black pepper
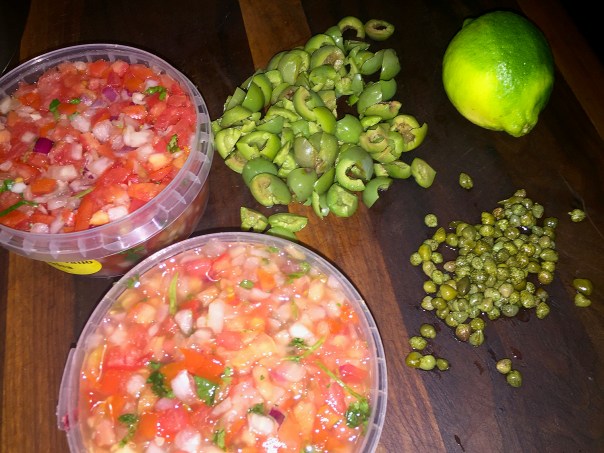
  • 4 cups refrigerated pico de gallo
  • ½ cup chopped green olives (such as Castelvetrano)
  • 2 tablespoons drained capers
  • Tortillas and lime wedges, for serving

Direction

  1. Heat oil in a large skillet over medium-high. Season chicken all over with salt and pepper.
  2. Add chicken to skillet and cook until golden brown on both sides, flipping halfway through, about 4 minutes per side.
    IMG_0035
  3. Add pico de gallo, olives, and capers and bring to a simmer. Simmer until chicken is cooked through and sauce is slightly thickened, about 5 minutes.
    IMG_0039
    IMG_0041
  4. Serve chicken with tortillas (or over rice) and lime wedges.
    IMG_0048

http://www.lynnandruss.com

Pasta with Sausage, Radicchio and Green Olives

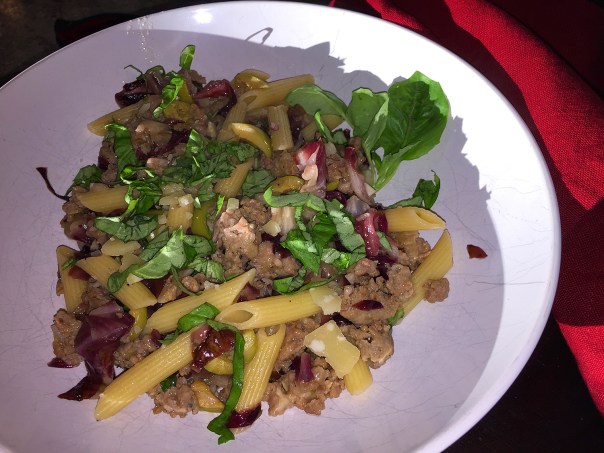
There are as many pasta combinations as your imagination allows. This one from Fine Cooking’s “Make It Tonight” series throws together an unusual mix of ingredients for a flavorful creation. While cocktail olives give this pasta welcome bursts of sweet and briny, they also perfectly balance the subtle bitterness of the radicchio.

For our pasta, even though I would have selected cavatappi, we had an open box with half a pound (8 ounces) of penne. Which was fine because we prefer a ratio of less pasta with more of the other ingredients.

I suppose you could use regular balsamic vinegar, but make an effort to get the white, you’ll thank yourself. And don’t cheap out on the cheese, a block of aged Parmigiano-Reggiano or Grana Padano solidifies the grandness of this meal.

Wowser, this was good! There was enough leftover for the Hubby to take to work for lunch the next day. When he got home, the first thing he said was “OMG, that pasta was so good, we’ definitely have to make this again—soon!”

IMG_1893

Pasta with Sausage, Radicchio and Green Olives

  • Servings: 4
  • Difficulty: easy
  • Print

Ingredients

  • Kosher salt
  • 1 Tbs. olive oil
  • 12 oz. sweet Italian sausage, casings removed
  • 1/4 cup white balsamic vinegar
  • 1 medium head radicchio, quartered, cored, and cut crosswise into 1/2-inch strips (about 3 cups)
  • 3 oz. pimento-stuffed green olives, chopped (about 1/2 cup)
  • 4 medium cloves garlic, finely chopped (about 1 Tbs.)
  • Freshly ground black pepper
  • 12 oz. short pasta, such as cavatappi, farfalle, or penne
  • 1/3 cup plus 1 Tbs. thinly sliced fresh basil
  • 2 oz. Parmigiano-Reggiano or Grana Padano, shaved and then crumbled (about 3/4 cup)

Directions

  1. Bring a large pot of well-salted water to a boil.
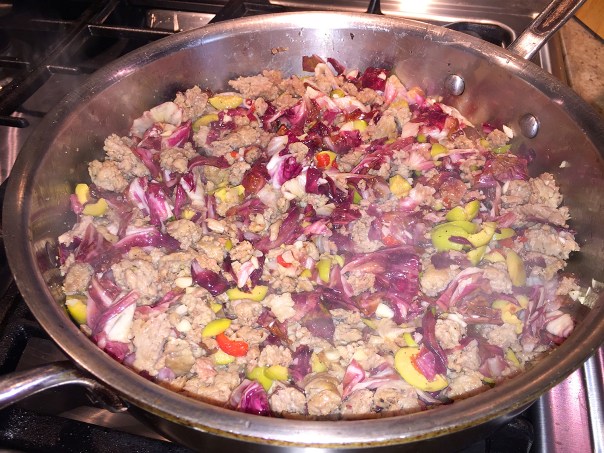
  2. Meanwhile, heat the oil in a 12-inch skillet over medium-high heat. Add the sausage and cook, stirring and breaking it into small pieces, until no longer pink, about 5 minutes.
  3. Add the vinegar and cook, stirring occasionally, until slightly reduced, about 1 minute.
  4. Add the radicchio, olives, garlic, 1/2 tsp. salt, and 1/2 tsp. pepper, and cook, stirring occasionally, until the radicchio is wilted, 2 to 3 minutes.
    IMG_1897
  5. Cook the pasta according to package directions until al dente. Reserve 1 cup of the cooking water, drain the pasta, and return to the pot.
  6. Toss the sausage mixture with the pasta, 1/3 cup of the basil, and most of the cheese. add enough cooking water to moisten, and serve topped with the remaining cheese and basil.
    IMG_1900

http://www.lynnandruss.com

Recipe by Ronne Day from Fine Cooking

Cauliflower Tikka Masala

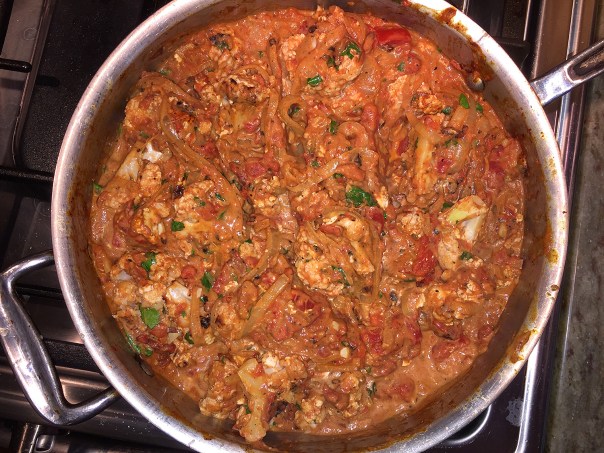
At only 230 calories per serving, this flavor-packed vegetarian meal is truly impressive! Canned fire-roasted tomatoes add slow-cooked depth to this quick weeknight dish (in a pinch, you could substitute regular tomatoes). And roasting the cauliflower florets in a hot oven ensures even more depth of flavor.

Not familiar with garam masala? It’s a blend of ground spices used extensively in Indian cuisine, and available at most supermarkets. There is no single garam masala recipe; the ingredients differ according to the region as well as each chef’s individual preferences. But for the most part, it will include coriander, cumin, cardamom, cloves, black pepper, cinnamon, and nutmeg.

In other variations, ingredients may include turmeric, saffron, fennel seeds, ginger, garlic, mustard seeds, mace, star anise, tamarind, fenugreek, bay leaves or Malabar leaves. I also added a pinch of Aleppo pepper to the dish for a slightly spicier kick. As garam masala simply means “spices with varying levels of heat,” you have a lot of leeway when it comes to mixing up your own garam masala, or if you need a substitute.

IMG_1874

Here’s a simple recipe for garam masala by Danilo Alfaro. If you make yours this way, starting with whole seeds which you toast and grind yourself, your garam masala will be much more fragrant and flavorful than anything you buy in a jar at the store.

  • 3 tbsp. coriander seeds
  • 2 tbsp. cumin seeds
  • 2 tbsp. cardamom seeds
  • 2 tbsp. black peppercorns
  • 1 tsp. whole cloves
  • 1 tsp. freshly grated nutmeg
  • 1 whole cinnamon stick

Place everything but the nutmeg in a dry skillet and toast for about ten minutes over medium-high heat, stirring from time to time to keep everything cooking evenly. When the ingredients have darkened slightly and give off a rich, toasty aroma, remove them from the pan and let them cool.

Grind in a spice grinder or coffee grinder, and mix in the freshly grated nutmeg. Store in an airtight container away from heat.

IMG_1858

”Cauliflower

  • Servings: ”4”
  • Difficulty: ”easy”
  • Print

Ingredients

  • 1 medium head cauliflower (about 2 lb.), florets cut into 2-inch pieces
  • 1/2 cup plain yogurt, whole milk or low fat (not fat-free)
  • 1 Tbs. olive oil
  • Kosher salt
  • 1/2 Tbs. unsalted butter, olive oil, or ghee
  • 1 large yellow onion, thinly sliced
  • 1/4 cup tomato paste
  • 3 medium cloves garlic, minced
  • 1 Tbs. finely minced or grated fresh ginger
  • 1 Tbs. garam masala
  • 1 28-oz. can diced fire-roasted tomatoes
  • 3/4 cup heavy cream; more as needed
  • 1/2 cup coarsely chopped fresh cilantro
  • Pinch sumac (optional)
  • Basmati rice or naan, for serving

Directions

  1. Position a rack in the center of the oven and heat to 425°F.
  2. Toss the cauliflower with the yogurt, olive oil, and 1/4 tsp. salt in a medium bowl.
    IMG_1860
  3. Spread the cauliflower on a large rimmed baking sheet. Roast, flipping once, until tender and browned in spots, 22 to 25 minutes.
    IMG_1867
  4. Meanwhile, melt the butter in a large skillet over medium heat. Add the onion and cook until softened and beginning to brown, 5 to 7 minutes.
    IMG_1859
    I advise you cut the onion in half along the equator first, then slice. It’ll be both easier to cut, and to eat—which I will do next time…
    IMG_1862
  5. Stir in the tomato paste, garlic, ginger, garam masala, and 1/2 tsp. salt. Cook until the garlic and spices are very fragrant, about 1 minute.
    IMG_1863
  6. Add the tomatoes with their juice, and scrape up any browned bits from the bottom of the pan. Bring to a boil, then lower the heat and simmer while the cauliflower roasts.
    IMG_1865
  7. Add the cauliflower, cream, and half of the cilantro to the sauce. Continue cooking until the sauce begins to bubble, 1 to 2 minutes. Season to taste with salt.
    IMG_1869
    IMG_1870
    IMG_1872
  8. If you’d like a milder sauce, add more cream; spicier, add some Aleppo pepper or red pepper flakes. Serve sprinkled with the remaining cilantro and some sumac, if using.

http://www.lynnandruss.com

Recipe by Emma Christensen from Fine Cooking

Honey-Shellacked Pork Chop

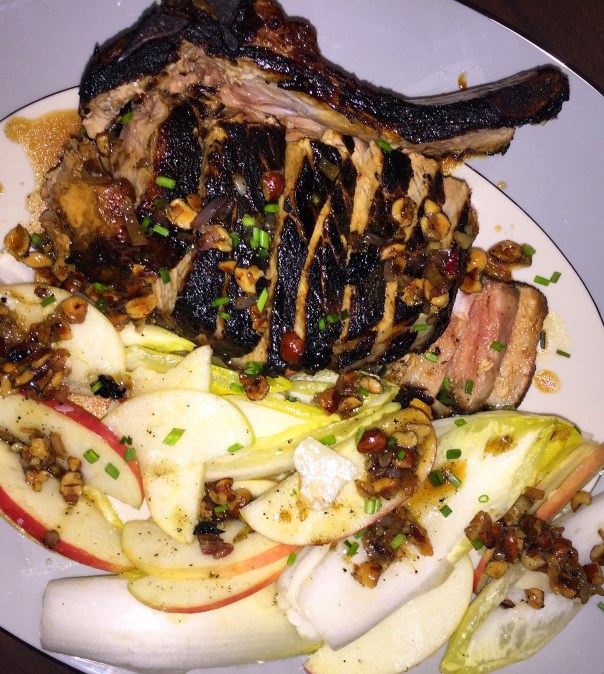
Otherwise known as the Date Night Pork Chop, rubbing a little honey across the surface of the meat before searing guarantees a shiny, caramelized crust—and a kiss of sweetness 😉 Then pair that with a lemony endive and apple salad, and you’ve got the ultimate dinner for two.

IMG_1731

You want to season your 1-pound, 1½” thick pork loin chop in advance and let it sit out at room temperature (it cooks much more evenly that way). Pat chop dry with paper towels and place on a plate. Season generously on both sides with salt and pepper, turning with tongs; set aside while you do your prep (it can sit at room temperature up to 1 hour, but prep won’t take you that long).

Our chop was a hefty boy, nearly 2 1/2″ thick, so we had to alter the preparations a tad. I did follow the searing steps, including the fat cap. After that, I placed the cast iron skillet with chop directly into a 400° oven for an additional 12 minutes. And truth be told, even though I checked the temp with an instant read thermometer, and we let it rest for 10 minutes, the very center was still a bit too rare. We just nuked those few slices in the microwave.

The hazelnut mixture added wonderful flavor and texture to both the meat and the salad. You may think a starch was missing, but the meal completely satisfied and we didn’t feel deprived whatsoever.

Yes dear, we’ll go on this date again…

IMG_1718

Honey-Shellacked Pork Chop

  • Servings: 4
  • Difficulty: easy
  • Print

Ingredients

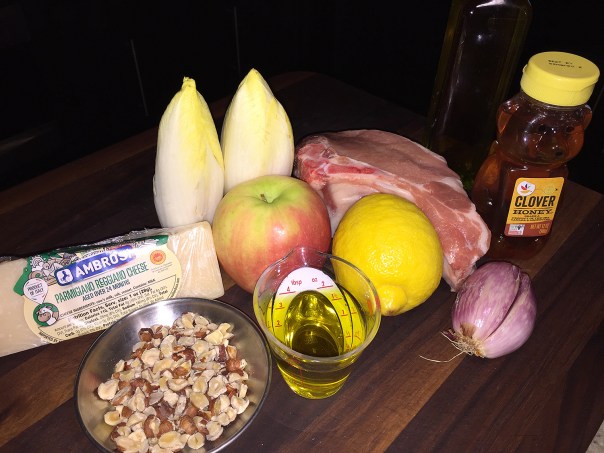
  • 1 lb. bone-in pork loin chop, 1–1½” thick
  • Kosher salt
  • Freshly ground black pepper
  • 1 oz. Parmesan
  • 3 Tbsp. raw unblanched hazelnuts
  • 1 medium shallot
  • 1 large or 2 small Belgian endive
  • 2½ tsp. honey, divided
  • 4 Tbsp. extra-virgin olive oil, divided
  • 1 lemon

Directions

  1. Pat chop dry with paper towels and place on a plate. Season generously on both sides with salt and pepper, turning with tongs; set aside.
  2. Shave 1 oz. Parmesan cheese with a vegetable peeler, then use your fingers to break into small shards. Cover with a damp paper towel (to prevent it from drying out).
  3. Using the bottom of a medium skillet, preferably cast iron, smash 3 Tbsp. hazelnuts, a few at a time, on a cutting board, breaking into bits.
  4. Peel 1 shallot, then finely chop.
  5. Separate leaves from 1 large or 2 small endive, trimming from the bottom as you work your way to the core. Place in a medium bowl, cover with damp paper towel, and chill until ready to use.
  6. Preheat skillet you used to smash hazelnuts over medium heat. Drizzle ½ tsp. honey over one side of pork chop, then drizzle with 1 Tbsp. oil. Rub with clean hands all over surface of chop, then turn and rub second side with same honey-oil mixture to evenly coat (this will help the pork caramelize as you cook it).
    IMG_1719
  7. Lay pork in skillet and cook, leaving it be, until first side is dark brown and caramelized all over, about 3 minutes. Turn and cook second side until browned, about 3 minutes longer. Turn pork chop upright and hold on its side with tongs to sear fat cap; cook about 2 minutes.
    IMG_1722
  8. Turn heat to low and cook chop another minute on both sides. Transfer to cutting board and insert an instant-read thermometer into middle of chop, about ½” from bone. It should register about 130°. If it’s under, cook another minute or two, then let rest on cutting board 5–10 minutes. Remove skillet from heat.
    IMG_1723
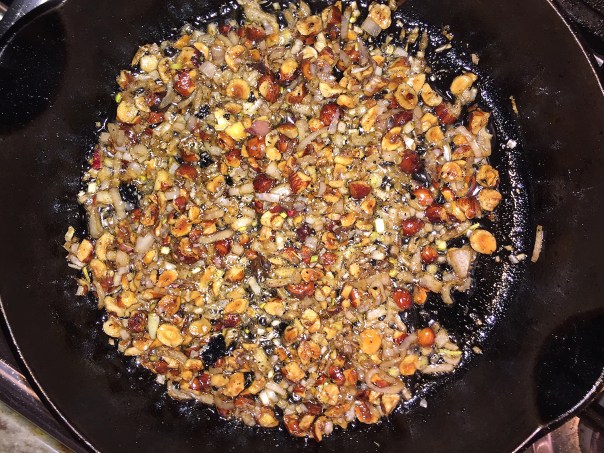
  9. Add hazelnuts and 2 Tbsp. oil to skillet. Cook over medium-low heat, stirring with tongs, until hazelnuts turn golden, about 3 minutes.
  10. Add shallots; season with salt and pepper. Cook, stirring often, until shallots are softened and browned and hazelnuts smell toasty, about 2 minutes.
    IMG_1727
  11. Stir in remaining 2 tsp. honey. Cut 1 lemon in half and squeeze juice from one half into skillet. Stir to combine, then remove from heat.
  12. Cut around core of 1 apple, removing flesh in 3 lobes. Thinly slice 2 of the 3 pieces, then snack on the remaining piece if you like.
  13. Remove bowl of endive from refrigerator and add apple and cheese; season with salt and pepper. Drizzle with remaining 1 Tbsp. oil, squeeze second lemon half over, and toss to coat.
    IMG_1725
  14. Cut bone away from chop and cut meat into ½”-thick slices. Place pork and bone on one side of a large plate and pour juices over; season with salt.
  15. Gently arrange salad next to chop. Spoon shallot-hazelnut mixture over salad and pork and serve.
    IMG_1729

http://www.lynnandruss.com

Recipe by Claire Saffitz from Bon Appétit

A Molly-fied Trifecta

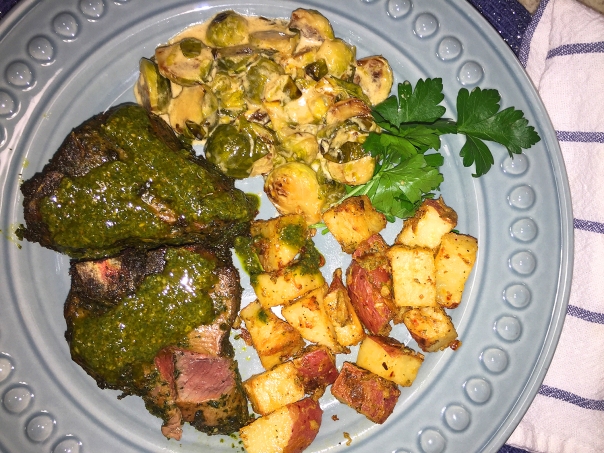
Molly Stevens is one of our go-to chef/authors when it comes to braising and roasting—a great way to spend a gloomy, early-March Sunday.  As I was thumbing through her All About Roasting cookbook, I was immediately drawn to the Basic Roasted Thick-Cut Lamb Loin Chops recipe because we had a packet in the freezer. Yes, we only had five chops and the recipe called for eight, but there was just the two of us—so no leftovers, I could live with that.

IMG_1662

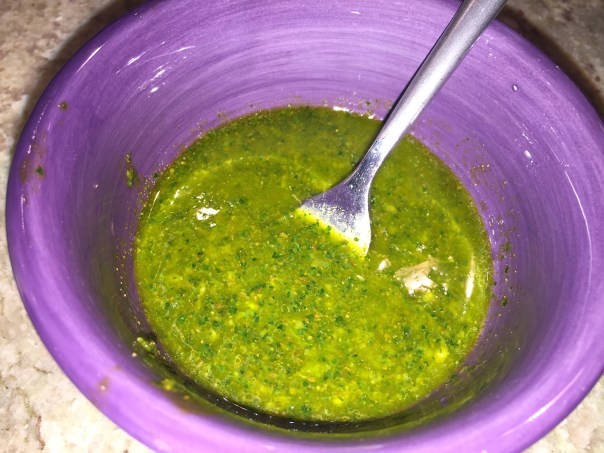
Now, even though it takes less than 15 minutes to cook, keep in mind you need to marinate the lamb anywhere from 4 to 24 hours (the amount of time we did), and then let the meat come to room temperature for about an hour before tossing in the oven. If you’re unfamiliar, the charmoula marinade is a zesty herb and garlic sauce from the Middle East.

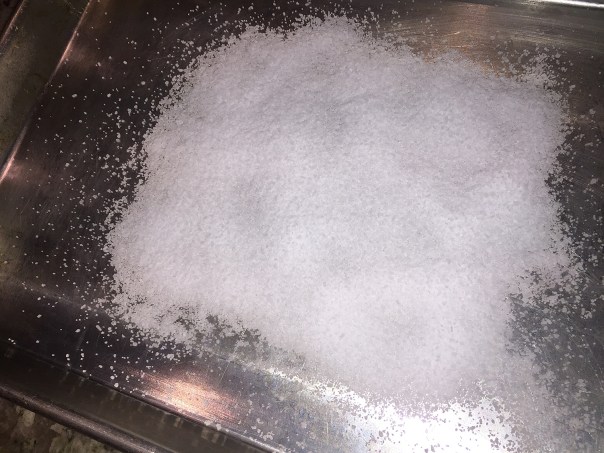
This recipe is so easy but produces incredible results and is a perfect entrée for entertaining because all of the prep is done in advance. When it’s time to roast the lamb, the recipe instructs you to arrange a 1/4″-thick-area of salt on a rimmed baking sheet, and set a rack above that on which you place the meat—never did that before. Our guess for the reason is because you don’t flip the chops, the salt intensifies the heat and actually helps brown the underside.

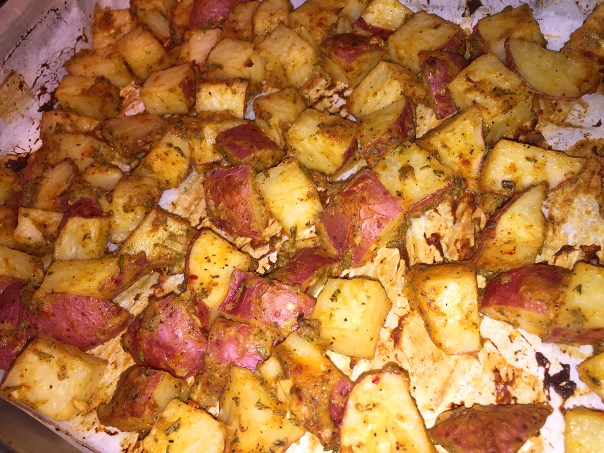
Now about those accompaniments. Another Molly winner from her roasting cookbook was the Mustard-Crusted Roast Potatoes. OMG, what delightful little devils! With lots of mustard and a splash of lemon juice you wonder how they result in a crunchy exterior. But despite all that liquidy goo, in addition to garlic, rosemary and crushed red pepper, the taters finish with a golden-brown crustiness and intriguing depth of flavor. A blue-ribbon winner in our minds!

IMG_1672

Rounding out the gastronomic trifecta was the Creamy Brussels Sprouts. Even if you’re a sworn Brussels sprouts hater, you should give these babies a try. The key to cooking them is to chop them into small pieces so they release their pungency; while using heavy cream as the braising liquid brings out their inherent sweetness even more. The cream will reduce itself into a thick, ivory-colored glaze that coats the sprouts. If you want to dress them up a bit, or add some texture, top with crumbled bacon or toasted hazelnuts.

Thanks Molly for a fabulous meal!

IMG_1684

Basic Roasted Thick-Cut Lamb Loin Chops

  • Servings: 4
  • Difficulty: easy
  • Print

Ingredients

  • 8 (1 1/4- to 1 1/2-inch-thick) lamb loin chops
  • 1 tablespoon cumin seeds
  • 1 1/2 cups (lightly packed) fresh Italian parsley leaves
  • 1/2 cup (lightly packed) fresh mint leaves
  • 1/2 cup (lightly packed) fresh cilantro leaves
  • 2 large garlic cloves
  • 1 tablespoon sweet smoked paprika (pimentón dulce) or sweet Hungarian paprika
  • 1 teaspoon coarse kosher salt
  • 1/4 teaspoon cayenne pepper
  • 6 tablespoons extra-virgin olive oil, divided
  • 1 tablespoon fresh lemon juice

Directions

For charmoula:

  1. Heat small skillet over medium heat. Add cumin seeds and toast until aromatic and slightly darker, stirring occasionally, about 2 minutes. Transfer to processor.
    IMG_1653
    IMG_1656
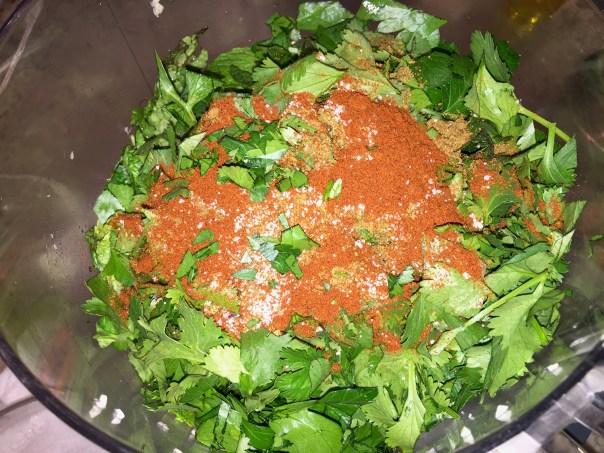
  2. Add parsley leaves and next 6 ingredients to processor. Using on/off turns, process until coarse paste forms.
    IMG_1657
  3. With machine running, gradually add 4 tablespoons oil. Transfer 2 tablespoons charmoula to small bowl; whisk in lemon juice and remaining 2 tablespoons oil.
    IMG_1658
    IMG_1659
  4. Cover and chill to serve with lamb.
    For lamb:
  1. Transfer remaining charmoula to large resealable plastic bag. Add lamb chops; seal bag and turn to coat well. Chill at least 4 hours and up to 24 hours.
    IMG_1660
  2. Let lamb and charmoula sauce in bowl stand at room temperature 40 minutes to 1 hour.
  3. Preheat oven to 500°F.
  4. Cover a 10″ x 6″ area of a heavy-duty rimmed baking sheet (salt does not have to cover entire sheet) with about 1/4″ layer of salt. Set rack over prepared baking sheet, place lamb on rack over salted area.
    IMG_1668
    IMG_1669
  5. Roast until thermometer inserted into center registers 135°F for medium-rare, about 13 minutes.
    IMG_1676
  6. Transfer lamb to platter. Tent with foil and let rest 5 minutes.

http://www.lynnandruss.com

Mustard-Crusted Roasted Potatoes

IMG_1663We cut the recipe in half for just the two of us, and there was still plenty leftover.

Mustard-Crusted Roasted Potatoes

  • Servings: 8
  • Difficulty: easy
  • Print

Ingredients

  • 1/3 cup Dijon mustard
  • 3 tablespoons extra-virgin olive oil
  • 1 Tbsp. fresh lemon juice
  • 2 garlic cloves, minced
  • 1 Tbsp. chopped fresh rosemary
  • 1/2 tsp. Aleppo pepper
  • Kosher salt and freshly ground black pepper
  • 2 pounds unpeeled red-skinned potatoes, cut into 1-inch cubes

Directions

  1. Position 1 rack in top third of oven and 1 rack in bottom third of oven and preheat to 425°F.
  2. Line rimmed baking sheet with parchment paper.
  3. In large mixing bowl, whisk together mustard, olive oil, lemon juice, garlic, rosemary, Aleppo pepper, and salt and pepper to taste.
    IMG_1665
  4. Add potatoes and toss to coat. Spread potatoes on prepared baking sheet into a single layer. With spatula, scrape the bowl for any leftover mixture and drizzle onto potatoes.
    IMG_1666
  5. Roast, tossing with a spatula a few times and shaking to restore a single layer until potatoes are crusty outside and tender throughout, about 50-55 minutes.
    IMG_1673
  6. Transfer potatoes to serving bowl.

http://www.lynnandruss.com

Creamy Brussels Sprouts

Creamy Brussels Sprouts

  • Servings: 4-6
  • Difficulty: easy
  • Print

Ingredients

  • 1 Lb. small Brussels sprouts
  • 3 Tbsp. unsalted butter
  • Coarse salt and freshly ground white pepper
  • 1 Cup heavy cream
  • 1/2 lemon

Directions

  1. Trim the sprouts, cut through the core into halves. If necessary cut again to make little wedges no more than 1/2″ across.
  2. Melt the butter in a large 12″ skillet over medium-high heat. When the foaming stops, add the sprouts and season with salt and white pepper.
    IMG_1670
  3. Cook, stirring occasionally, until the sprouts begin to brown in spots, about 5 minutes.
  4. Pour in the cream, stir, cover, and reduce to a slow simmer. Braise over low heat until the sprouts are tender enough to be pierced easily with the tip of a sharp knife, 30-35 minutes.
    IMG_1671
  5. Remove the cover, stir in a generous squeeze of lemon juice, and taste for seasoning. Let simmer uncovered for a few minutes to thicken the cream to a glaze that coats the Brussels sprouts. Serve hot.
    IMG_1674

http://www.lynnandruss.com


Sheet-Pan Chicken Meatballs and Charred Broccoli

This approachable weeknight dinner takes its cue from Japanese grilled chicken meatballs (tsukune), and the glossy, sweet-and-sour sauce that comes with it. And you have to love the fact that everything goes onto one sheet-pan and into the oven at the same temperature.

There are several differences in how we prepared this versus the Bon Appétit directions. For starters, we only used one head of broccoli instead of two, and I steamed the pieces for a few minutes in the microwave first before tossing them on the sheet pan with oil. Previously, I had the unpleasant experience of undercooked, hard broccoli when only roasting the florets for such a short time period—not a memory I cared to revive.

We also decided that instead of setting 1/4 cup of marinade aside for glazing, we thickened the entire batch and used that for the two basting steps. The remainder was used to spoon over the rice before topping with the finished meatballs and broccoli.

Have a wheat issue? Use gluten-free panko, you’ll never notice the difference. Some reviewers complained about too much ginger. I may have included slightly less than called for, but we loved the depth of flavor it provided.

I can see where you would need two heads of broccoli for four dinner guests, because between the two of us, we totally consumed it. Once divided, the meatball mixture makes a dozen 1 1/2″-sized balls. And whereas three meatballs was plenty for me, The Hubs easily ate five. So depending on how hungry your family members are, plan on an average of three per person, with some wanting more…

IMG_1704

Sheet-Pan Chicken Meatballs and Charred Broccoli

  • Servings: 3-4
  • Difficulty: easy
  • Print

Ingredients

Sauce

  • ⅔ cup ketchup
  • ¼ cup Worcestershire sauce
  • 2 Tbsp. rice cooking wine or water
  • 2 Tbsp. honey
  • 4 tsp. soy sauce
  • 1 ½” piece ginger, peeled, finely grated
  • ½ tsp. freshly ground black pepper

Meatballs and Assembly

  • 2 heads of broccoli (about 1½ lb.)
  • 2 Tbsp. vegetable oil, divided
  • 2½ tsp. kosher salt, divided
  • Crushed red pepper flakes (optional)
  • 1 lb. ground chicken
  • 1 large egg, beaten to blend
  • 4 scallions, thinly sliced
  • 2 garlic cloves, finely grated
  • 1 2″ piece ginger, peeled, finely grated
  • ⅓ cup panko (Japanese breadcrumbs)
  • 1 Tbsp. toasted sesame oil
  • ¼ tsp. freshly ground black pepper
  • Cooked rice and sesame seeds (for serving)

Directions

Sauce

  1. Mix ketchup, Worcestershire sauce, wine (if using), honey, soy sauce, ginger, and pepper in a small saucepan.
  2. Measure out ¼ cup mixture into a small bowl; set aside for glazing meatballs later.
  3. Bring remaining mixture to a simmer over medium-high heat, stirring occasionally and reducing heat if needed, until sauce thickens, about 5 minutes. Transfer sauce to a small bowl.

Meatballs and Assembly

  1. Place a rack in upper third of oven; preheat to 450°.
  2. Line a rimmed baking sheet with foil.
  3. Trim broccoli stems and remove from crown. Peel off tough outer skin; slice crosswise into ½” pieces. Cut florets into 2″ pieces. Toss on prepared baking sheet with 1 Tbsp. vegetable oil, 1 tsp. salt, and a few pinches of red pepper flakes (if using).
  4. Push to the edges of baking sheet to create a space for meatballs. Brush space with remaining 1 Tbsp. vegetable oil.
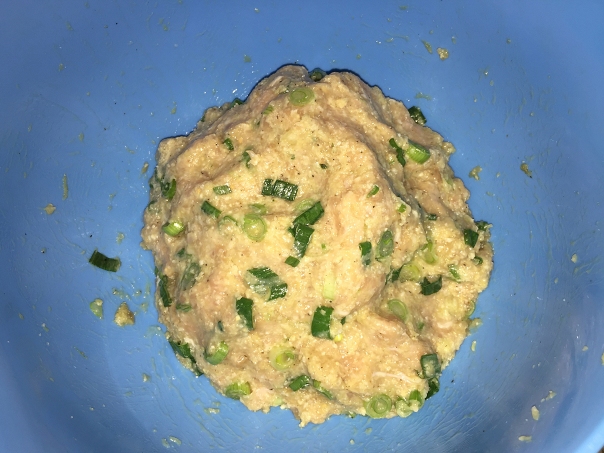
  5. Mix chicken, egg, scallions, garlic, ginger, panko, sesame oil, pepper, remaining 1½ tsp. salt, and ¼ cup water in a medium bowl. Using wet hands, form into twelve 1½”-diameter meatballs.
    IMG_1706
  6. Arrange on baking sheet; brush with some of the reserved glazing mixture. Bake until meatballs are cooked through, 14–18 minutes.
    IMG_1709
    IMG_1711
  7. Remove from oven; heat broiler. Brush meatballs with remaining glazing mixture; broil until broccoli is charred and meatballs are browned in spots, about 5 minutes.
  8. Spoon meatballs and broccoli over rice in bowl. Drizzle with sauce and sprinkle with sesame seeds.
    IMG_1712

http://www.lynnandruss.com

Recipe by Deb Perelman from Bon Appétit

Lighten Your Load, of Pasta That Is

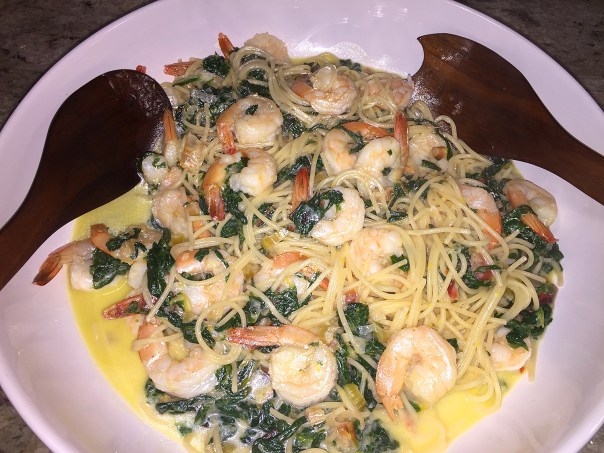
Pasta can be heavy, but this Spaghetti with Shrimp, Lemon, and Chard recipe lightens the load, AND, satisfies the craving. Here, silken Swiss chard replaces spinach in a delicious riff on shrimp Florentine. A good amount of lemon, in zest and juice forms, keeps things bright, while a bit of cream ties everything together.

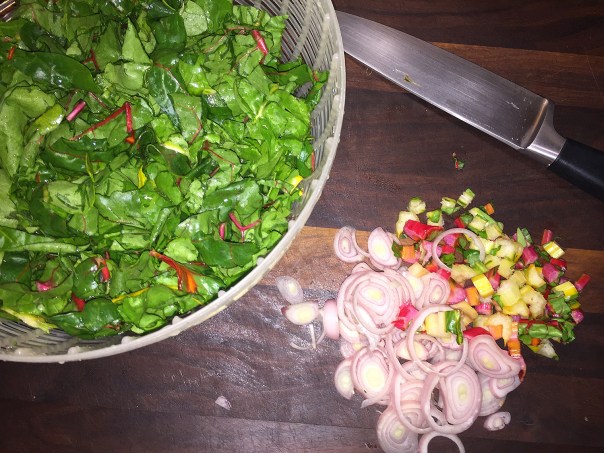
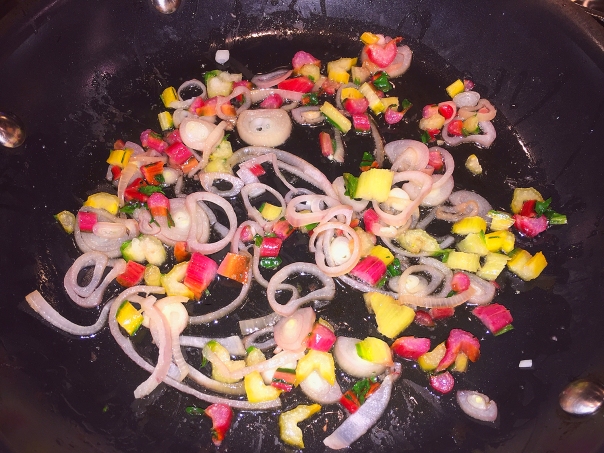
But of course we had to put our own stamp on this dish from Fine Cooking. First off, we reduced the amount of spaghetti from 12 ounces down to 8 for a better balance of ingredients. Then, instead of discarding the tasty and colorful chard stems, we diced them and added a sliced shallot which were both sautéed together before cooking the chard leaves. Our changes are reflected below.

Served with a side salad, you walk away from the table satiated, yet not stuffed and bloated.

img_0947

Spaghetti with Shrimp, Lemon and Chard

  • Servings: 3
  • Difficulty: easy
  • Print

Ingredients

  • 10 oz. Swiss chard, tough stems removed and diced, remaining stems and leaves cut crosswise 1/2 inch thick
  • 1 large shallot
  • 1/4 cup plus 2 Tbs. extra-virgin olive oil
  • Kosher salt
  • 1 lb. large shrimp (31 to 35 per lb.), peeled and deveined
  • 1/4 tsp. crushed red pepper flakes
  • 8 oz. spaghetti
  • 1 Tbs. finely grated lemon zest plus
  • 1/4 cup lemon juice (from about 2 lemons)
  • 1/4 cup heavy cream
  • Freshly ground black pepper

Directions

  1. Rinse and drain the chard, but don’t spin dry.img_0949
  2. Dice chard stems and thinly slice shallot.
  3. Bring a large pot of well-salted water to a boil.
  4. Meanwhile, in a large skillet, heat 2 Tbs. of the oil over medium-high heat. Add the diced stems and sliced shallot and cook until tender, about 3-4 minutes.
    img_0950
  5. Add the chard leaves, 3 Tbs. water, and a generous pinch of salt. Cook, stirring occasionally, until wilted, about 5 minutes.
    img_0951
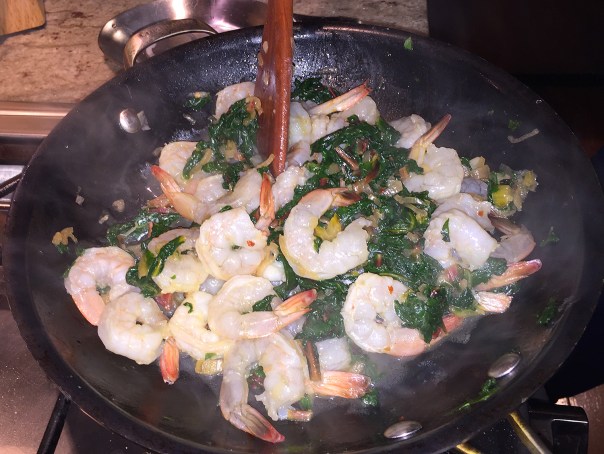
  6. Add the shrimp and pepper flakes; cook, stirring occasionally, until the shrimp is just cooked through, 3 to 4 minutes more. Remove from the heat and set aside.
    img_0953
  7. Boil the pasta according to package directions until al dente. Reserve 1 cup of the cooking water, then drain the pasta. Return the reserved cooking water to the pot.
  8. Add the remaining 1/4 cup oil, lemon zest, and cream. Bring to a boil, and cook until slightly thickened, about 2 minutes.
    img_0956
  9. Add the pasta, lemon juice, and 1/4 tsp. salt. Toss together and remove from the heat.
    img_0959
  10. Add the chard mixture and toss for about 1 minute to allow the pasta to absorb some of the sauce. Season to taste with salt and pepper, and serve.
    img_0960
    img_0967
    If desired, grate fresh parmesan over the individual serving dishes.

http://www.lynnandruss.com

Recipe by Mindy Fox from Fine Cooking

North African Spiced Salmon Over French Lentils

A dish of lentils and salmon is a classic in any French bistro. Lean, mellow lentils complement the richness of the fish. This version, found on FineCooking.com includes a Moroccan-inspired spice rub on the salmon. You can better distribute those aromatic spices throughout the dish by flaking the salmon into the lentils as you eat.

Did you know that French lentils are a variety of green lentils, and what sets them apart from standard green lentils is their slightly darker hue and smaller size? They’re about one third the size of standard green lentils. They hold their shape extremely well and are therefore an ideal contender in dishes when you’d rather they not turn to mush. Their flavor is also slightly different than other types—a bit nutty and peppery, with a slight mineral-like, earthy flavor.

img_0802

Not only are lentils a great source of protein, they are chockfull of health benefits too. These include include improved digestion, a healthy heart, diabetes control, cancer management, weight loss, prevention of anemia, and better electrolytic activity due to potassium.

But there’s also a downside. Although lentils are good for your health and are the best alternative for meat, poultry, and fish, they also have few disadvantages, which include risk of kidney stones. Therefore, individuals who have kidney stones should stay away from legumes and lentils.

NOTE: Puy lentils, or lentilles du Puy, are French lentils that have been grown in the Puy region of central France.

img_0785

North African Spiced Salmon over French Lentils

  • Servings: 4
  • Difficulty: easy
  • Print

Ingredients

  • 1 cup French lentils (lentils du Puy), rinsed
  • 1/3 cup dried apricots, finely diced
  • 2 Tbs. olive oil
  • 1 large onion, chopped (about 2 cups)
  • 1/4 cup chopped fresh flat-leaf parsley; more for serving, if you like
  • 1 Tbs. drained capers
  • 1/2 tsp. finely grated lemon zest
  • 1 Tbs. fresh lemon juice
  • Fine sea salt
  • 1/2 tsp. ground cumin
  • 1/2 tsp. paprika
  • 1/4 tsp. ground cinnamon
  • 1/4 tsp. ground ginger
  • 1/4 tsp. ground turmeric
  • 1/8 tsp. ground allspice
  • 1/8 tsp. cayenne
  • 4 6-oz. salmon fillets, skinless or skin on
  • Lemon wedges, for serving

Directions

  1. In a 4-quart saucepan, bring the lentils and 3 cups water to a boil over medium-high heat. Reduce to a simmer, add the apricots, and gently simmer until the lentils are tender but still hold their shape, 35 to 45 minutes. Drain.
    img_0790
  2. Meanwhile, heat 1 Tbs. of the oil in a 12-inch skillet over medium heat. Add the onion and cook, stirring occasionally, until soft and golden, 6 to 8 minutes.
    img_0791
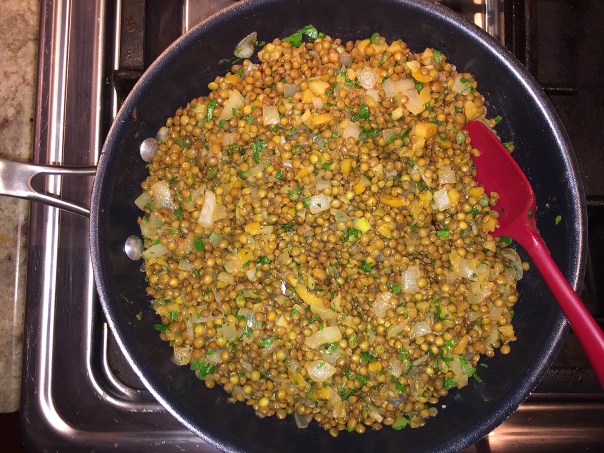
  3. Add the lentils, parsley, capers, lemon zest and juice, and 1/4 tsp. salt, and stir to combine. Keep warm over low heat.
    img_0794
  4. Combine the cumin, paprika, cinnamon, ginger, turmeric, allspice, cayenne, and 1/2 tsp. salt in a small bowl. Pat the spice mix onto the salmon.
    img_0787
  5. Heat the remaining 1 Tbs. oil in another 12-inch nonstick or cast-iron skillet over medium-high heat. Add the salmon, flesh side down, and cook until golden brown, 3 to 4 minutes.
    img_0797
  6. Turn and cook to your liking, another 2 to 3 minutes for salmon that’s barely opaque in the center.
  7. Serve the salmon over the lentils, garnished with more parsley, if you like, and with the lemon wedges.
    img_0801

http://www.lynnandruss.com

Recipe by Marge Perry from Fine Cooking