Monthly Archives: November 2018

Cider-Glazed Chicken Thighs

Go dig out your EASY button because Cider-Glazed Chicken Thighs couldn’t be simpler: just roast the chicken until cooked through, brush with a three-ingredient glaze, and broil until golden-brown. Roasted sweet potato and onion wedges make a fabulous accompaniment.

With just the two of us for dinner, I only cooked 4 thighs as opposed to eight, but kept the amount of the other ingredients the same. And OMG, our side dish, Roasted Sweet Potatoes with Apples and Maple-Sage Butter was super delicious!

img_9015

There is a 50° difference between the oven temp for the chicken and that of the sweet potato recipe. If you don’t have double ovens, preheat the oven to 450° with the racks far enough apart to accommodate the different baking sheets of ingredients. You will probably have to cook the potatoes several minutes longer so keep an eye on them.

Cider-Glazed Chicken Thighs

  • Servings: 4
  • Difficulty: easy
  • Print

Ingredients

  • 8 bone-in, skin-on chicken thighs, trimmed
  • 1 Tbs. extra-virgin olive oil
  • Kosher salt and freshly ground black pepper
  • 3/4 cup apple cider
  • 1 Tbs. honey
  • 1-1/2 Tbs. cold unsalted butter, cut into 1/4-inch pieces

img_8997
Chicken thighs are tossed with the oil, salt, and pepper, put on a baking sheet and arranged skin side up on the rack.

img_9010
The thighs are brushed with the cider-glaze several times through out the cooking process.

Directions

  1. Position a rack 6 inches from the broiler and heat the oven to 450°F. Line a large rimmed baking sheet with foil.
  2. In a large bowl, toss the chicken thighs with the oil, 1 tsp. salt, and 1/2 tsp. pepper. Put a rack on the baking sheet and arrange the chicken thighs skin side up on the rack. Roast until the thighs are lightly golden and an instant-read thermometer inserted in the thickest part without touching the bone registers 165°F, about 20 minutes.
  3. Meanwhile, in a small saucepan, bring the cider and honey to a boil over high heat. Reduce the heat to medium and simmer vigorously until the mixture has reduced to 1/2 cup, 8 to 10 minutes. Remove from the heat and whisk in the butter.
  4. Turn the broiler to high, brush the chicken thighs with the cider glaze, and broil for 1 minute. Brush with more glaze and broil again until deep golden-brown, 2 to 3 minutes. Remove the chicken from the oven, brush with more of the glaze, and serve.

http://www.lynnandruss.com

by Melissa Pellegrino from Fine Cooking

Roasted Sweet Potatoes with Apples and Maple-Sage Butter

Roasted sweet potatoes have a lush, tender texture and concentrated flavor. When paired with maple syrup and apples, they make a deliciously sweet side that works with anything from pan-seared steak to cider-glazed chicken thighs.

Use a firm, tart Granny Smith apple or try a crisp, slightly sweeter Pink Lady (a cross between a Golden Delicious and a Lady Williams.) We used two Granny Smiths instead of one because I wanted a more balanced ratio with the potatoes.

img_8993

Roasted Sweet Potatoes with Apples and Maple-Sage Butter

  • Servings: 4-6
  • Difficulty: easy
  • Print

Ingredients

  • 1-1/2 to 2 lb. sweet potatoes, peeled, halved crosswise, and cut into 3/4-inch-thick wedges
  • 2 Tbs. olive oil
  • Kosher salt and freshly ground black pepper
  • 2 Tbs. unsalted butter
  • 1 medium-large tart green or red apple, quartered, cored, cut into 16 wedges, wedges halved crosswise (we used two apples)
  • 1 Tbs. chopped fresh sage
  • 1-1/2 tsp. fresh lemon juice
  • 1 tsp. pure maple syrup

img_8995
Toss the sweet potato wedges in olive oil, salt an pepper.

img_8999
Spread the potatoes in a single layer on a large, rimmed baking sheet.

img_9002Core the apple(s) into 16 wedges, then cut them in half crosswise.

img_9008
Add the apples in a single layer and brown on both sides, then add the sage and stir until wilted.

img_9012

Directions

  1. Position a rack in the top third of the oven and heat the oven to 475°F.
  2. In a large bowl, toss the sweet potatoes with the oil, 1 tsp. salt, and a few grinds of black pepper. Spread the potatoes in a single layer on a large, rimmed baking sheet. Roast for 10 minutes; then flip the potatoes and continue roasting until tender and browned in spots, about 5 minutes more.
  3. While the potatoes roast, heat the butter in a 12-inch skillet over medium-high heat until melted and beginning to brown, 1 to 2 minutes. Add the apples in a single layer and brown on both sides, 1 to 2 minutes per side. Add the sage and stir until wilted, about 30 seconds. Off the heat, stir in the lemon juice and maple syrup. With a spatula, scrape the apples and butter into the bowl used for tossing the potatoes.
  4. When the potatoes are done, add them to the apples and gently combine with the spatula. Season to taste with salt and pepper, and serve.

http://www.lynnandruss.com

by Jennifer Armentrout from Fine Cooking

Rise and Dine

Crème Brûlée French Toast, Waffles with Strawberries and Whipped Cream, Syrupy Pancakes, yes, we’ve made all of these sweet dishes for company breakfast, but what about us folks who sit staunchly in the camp of the savory? Which is me, of course. Sugary foods tend to make me sluggish—not a positive start to my day.

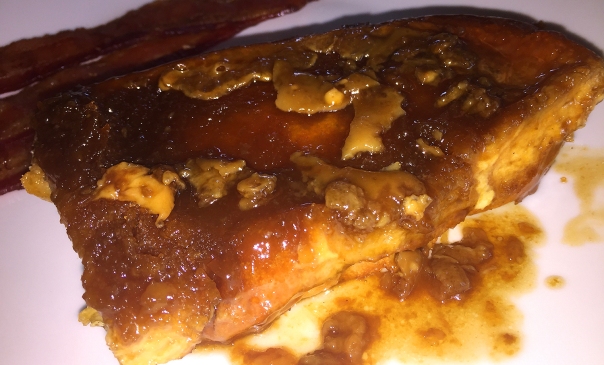
french toastA slice of the beautiful-to-behold Crème Brûlée French Toast with a side of bacon.
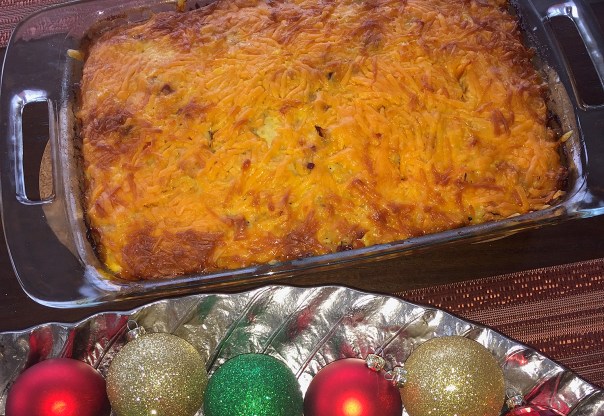
To address this issue, there are omelets, fritattas, and quiches, all of which satisfy my desire for a savory, over sweet, breakfast. Now I can add this Hash-Brown Casserole recipe, found in our latest Fine Cooking Magazine, to my arsenal. The bell peppers, onion, ham, and cheese in this dish call to mind a Denver omelet. But instead of serving the hash browns on the side, they’re combined with the eggs for an easy, hearty breakfast bake that serves 6 to 8 people. Woohoo!

After 45 minutes in the oven, we did cover the casserole loosely with tin foil because it was nicely browned on top at this point but still too loose inside. Away visiting family when we made this, there was no scale access to weigh the ham, and we just know there was more than 8 ounces for sure (leftover from our Thanksgiving feast.)

IMG_9245

In addition, we added about a half cup of shiitake mushrooms which bulked up the volume even more so the total cooking time was 15 minutes longer than expected. Yes, there is a bit of prep involved, but then you can sit back and leisurely enjoy your cup of Joe with company (or not) for an hour or more.

Perfect for your stay-over family and friends during the long holiday season. Let me tell you, there was nary a crumb left between the six of us! And yes, you can also serve something sweet if you’re so inclined 😉 Stepdaughter Julia baked a few loaves of pumpkin bread which were a great accompaniment.

IMG_9283

Hash-Brown Casserole

  • Servings: 6-8
  • Difficulty: moderately easy
  • Print

Ingredients

  • 2 Tbs. olive oil; more for the baking dish
  • 1 medium yellow onion, diced
  • Kosher salt
  • 2 medium red bell peppers, cored, seeded, and diced
  • 8 oz. ham, diced (about 1-1/2 cups)
  • 2 tsp. chopped fresh thyme leaves
  • Pinch red pepper flakes
  • 1 20-oz. bag frozen shredded potatoes (do not thaw)
  • 10 large eggs
  • 1 cup whole or 2% milk
  • 2 Tbs. Dijon mustard
  • Freshly ground black pepper
  • 8 oz. shredded extra-sharp Cheddar (about 2 cups)
  • Hot sauce (optional)

Directions

  1. Position a rack in the center of the oven, and heat the oven to 375°F. Lightly coat a 9×13- inch baking dish with oil.
  2. Heat 2 Tbs. of oil in a large skillet over medium heat. add the onion, season with salt, and cook, stirring occasionally, until tender, about 8 minutes.
    IMG_9271
  3. Add the bell peppers, ham, thyme, and pepper flakes, and cook until heated through, about 2 minutes. Transfer to a large bowl.
    IMG_9272
  4. Add the potatoes, breaking up any large clumps, and 1 tsp. salt to the bowl, and stir to combine.
    IMG_9274
  5. Transfer to the baking dish, and spread in an even layer. Combine the eggs, milk, mustard, 3/4 tsp. salt, and 1/4 tsp. pepper in the same bowl, and whisk until smooth.
  6. Evenly pour over the vegetable mixture.
    IMG_9279
  7. Sprinkle with the cheese.
    IMG_9281
  8. Bake until the top is light golden brown and a knife inserted into the center comes out clean, about 1 hour. (Check after 45 minutes. if the casserole is browning too quickly, cover loosely with aluminum foil.)
  9. Let cool for 5 minutes before slicing. Serve warm with hot sauce on the side, if you like.
    IMG_9288

http://www.lynnandruss.com


Basic Parmesan Pomodoro

Now that the drama of Thanksgiving dinner is behind you, it’s nice to get back to a simple meal, and a basic pasta dish fits that ticket. But did you ever realize how much sugar—or even evil, high fructose corn syrup—is in jarred pasta sauces? Not necessarily a good thing so why not make your own. Here’s a Basic Parmesan Pomodoro recipe from Giada De Larentiis that eliminates any doubt.

With no sugar in it, a single carrot will provide the perfect sweetness while also lending a more rich, complex flavor. This recipe has you toss in large chunks of carrot, but if you so desire, you can grate or finely chop it up and leave in the sauce throughout the cooking process. Then up the ante even more by using whole grain penne instead of 100% flour pasta.

Parmesan rinds are easy to find at your local grocery store in the cheese section, but why not start your own collection. We save our parm rinds in a ziploc bag in the freezer and just pull out what we want to use as needed, they last for months and months! About those canned cherry tomatoes, I have yet to find them, so go ahead and use whole plum tomatoes if that’s all you have access to.

Basil was only available in those small plastic containers which don’t include the stems, but not to worry, the leaves alone added plenty of herby flavoring and aroma.

IMG_8940

Basic Parmesan Pomodoro

  • Servings: 5-6
  • Difficulty: easy
  • Print
Ingredients 

  • 1/3 cup plus 2 tablespoons extra-virgin olive oil
  • 5 cloves garlic, peeled and smashed
  • 3 large, full stems basil
  • Three 14-ounce cans peeled cherry tomatoes
  • 1 carrot, peeled and halved
  • 8 ounces Parmigiano-Reggiano rind, cut into 3-inch pieces
  • Kosher salt
  • 1 pound penne rigate pasta
  • 1/2 cup grated Parmigiano-Reggiano, plus more for serving
  • 3 to 4 tablespoons butter

Directions

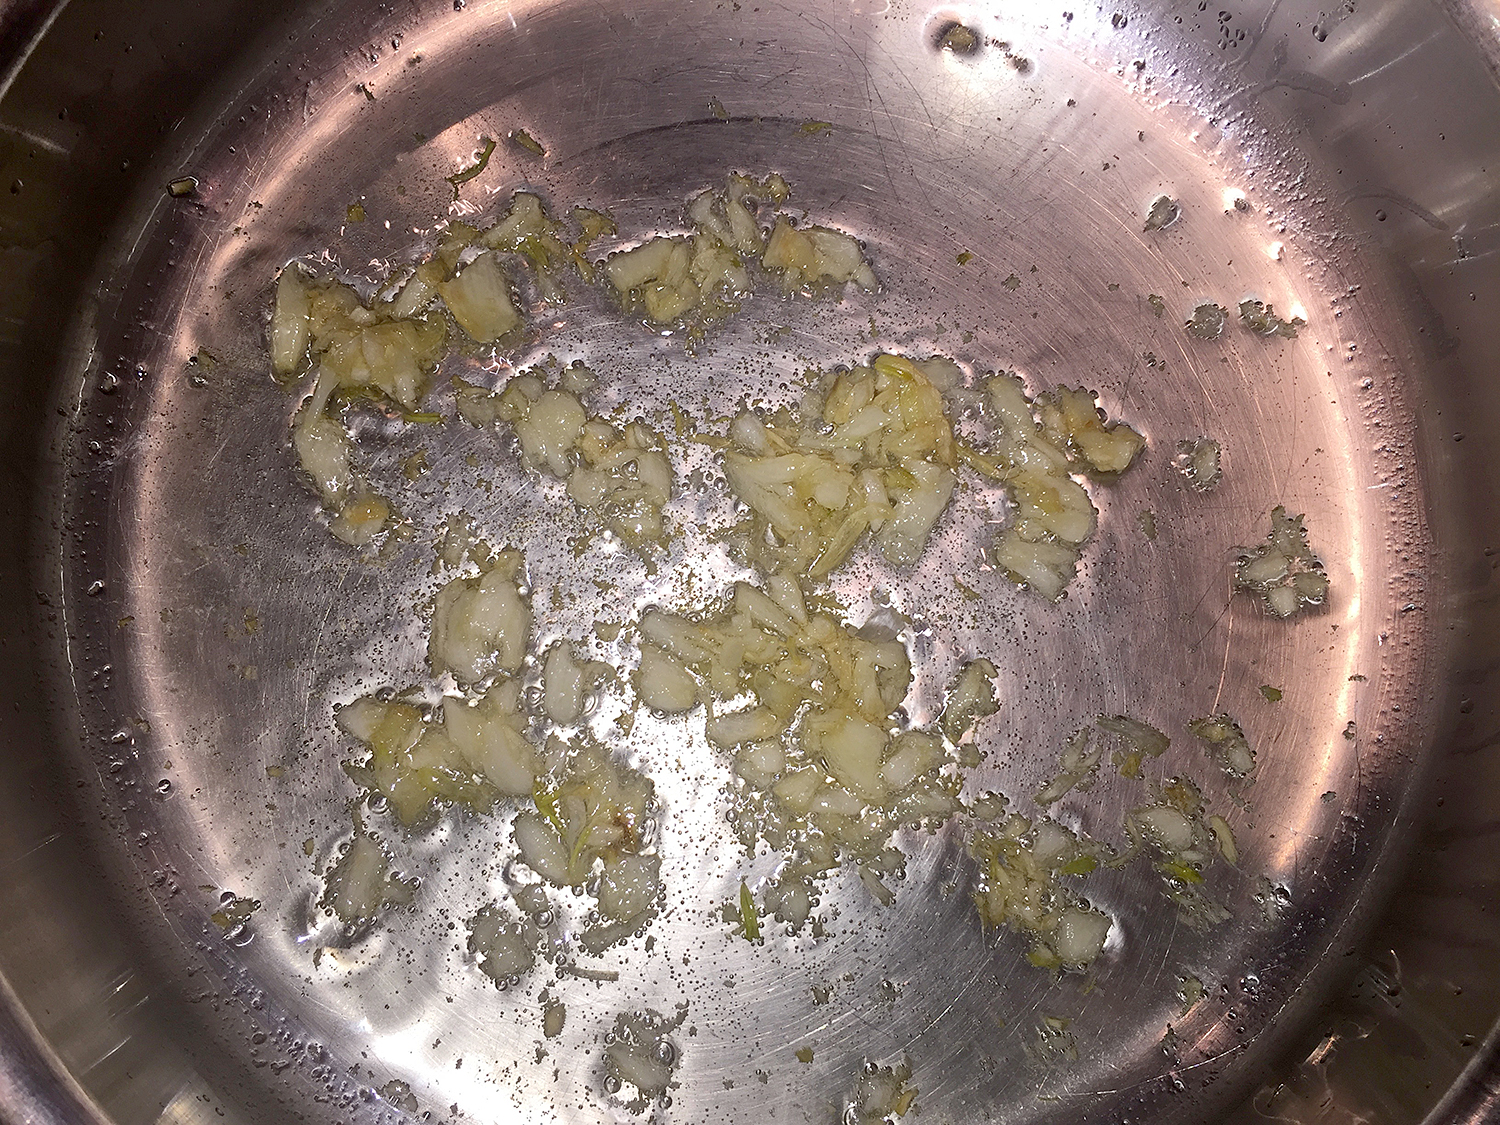
  1. Heat a medium nonreactive saucepan over medium-high heat. Add 1/3 cup of the oil and the garlic, and reduce the heat to medium. Cook the garlic, stirring often and mashing gently with a wooden spoon, until golden brown and beginning to soften, 5 minutes. IMG_8943
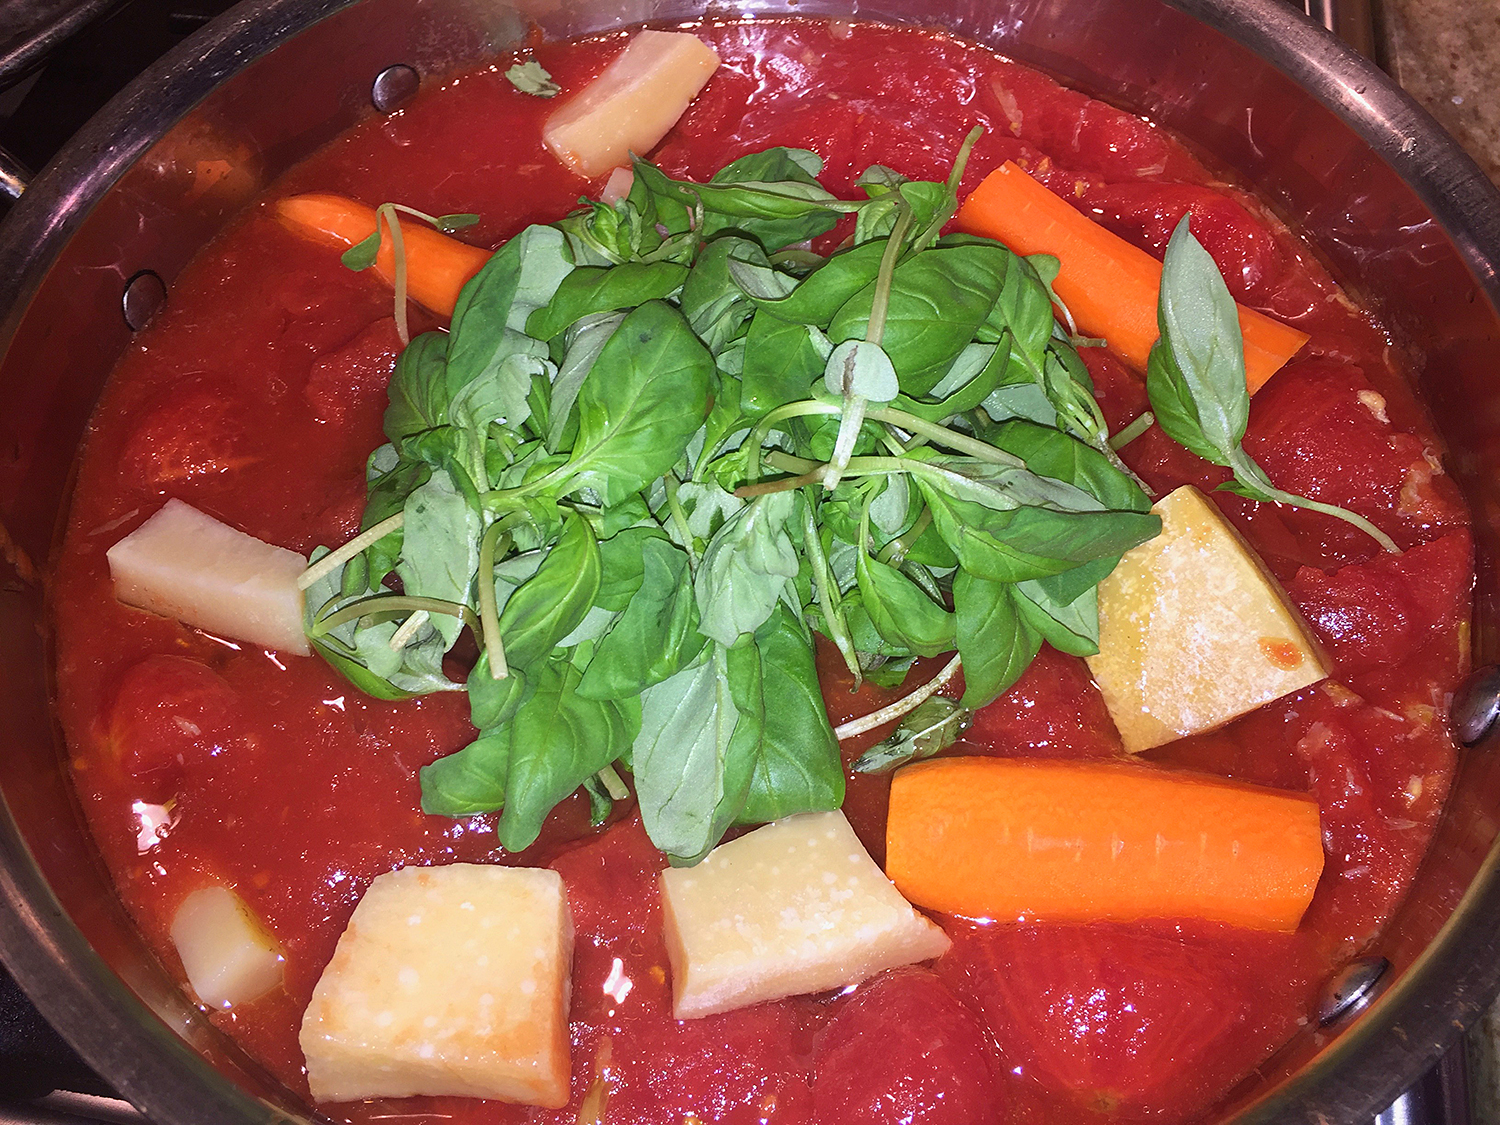
  2. Add the basil, tomatoes and their juices, the carrots and cheese rinds. Stir with a wooden spoon to combine. Bring to a simmer and adjust the heat to maintain a simmer. Cook for 35 minutes stirring occasionally to prevent sticking. Add 1 teaspoon of the salt. Remove from the heat and cool slightly. IMG_8945 IMG_8947
  3. Remove the rinds, carrots and basil. At this point you can use an immersion blender to puree slightly or leave it as a chunky sauce (I prefer chunky). IMG_8949 It’s OK if some of the basil leaves remain in the sauce. IMG_8950
  4. Bring a large pot of salted water to a boil. Cook the penne 2 minutes less than the package directions.
  5. Meanwhile, rewarm the sauce in a large, straight-sided skillet set over medium heat. Using a spider, strain the pasta from the water and add it directly into the pan with sauce, reserving 1/2 cup of the pasta water. IMG_8952
  6. Before stirring, sprinkle the pasta with the grated cheese. Toss the pasta, cheese and sauce together.
  7. Add the butter, the remaining 2 tablespoons olive oil and the reserved pasta water and continue to cook until the sauce is creamy and the pasta is al dente. IMG_8956
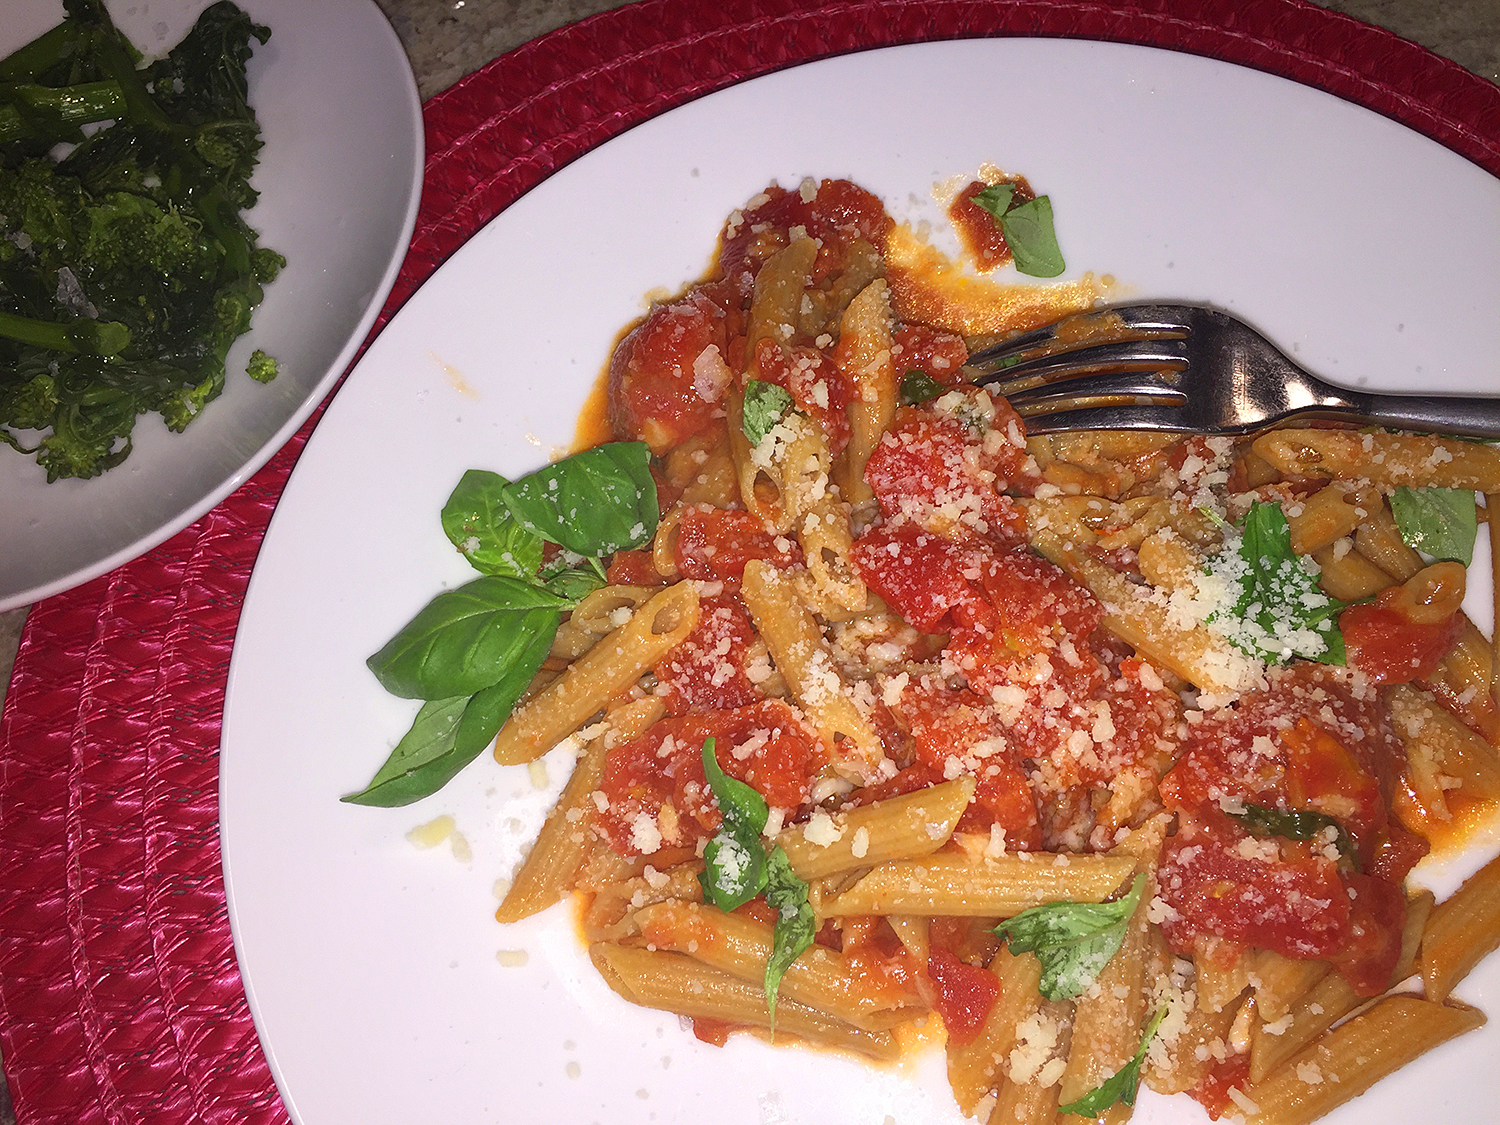
  8. Serve topped with more cheese if desired. IMG_8961

http://www.lynnandruss.com

Recipe courtesy of Giada De Laurentiis

Quick Skillet Chicken Pot Pie

I’m not a pot-pie person, but the Mr. just loves them. While flipping through my FB newsfeed, I came across a Bon Appétit post highlighting a Chicken Pot Pie with Acorn Squash. It was intriguing enough to entice me to take a peek. Turns out: It ain’t hard, but it does require that you add a new skill to your arsenal—making the the optimally flaky, thin dough stretched across the top of the skillet stew. Nope, I’d never done that—until now.

Believe it or not, a bit of sauerkraut was their new secret flavoring weapon. According to BA, it added a little bit of acid and funk, proving there was another use for it other than a hot dog topping, or the traditional pork and sauerkraut dinner. Plus I adored the idea of including some acorn squash in the creamy interior.

IMG_9077

OK, I might be a little hard-pressed to call this a quick and easy weeknight meal, but on the other hand, it’s not an all-afternoon project either. Perhaps making a homemade crust seems intimidating? Certainly my first thought. To ease your trepidation, you could use 1 sheet of puff pastry and a store-bought rotisserie chicken (or how about some of that leftover T-Day turkey?), which will shave off 30 minutes. But if you’re feeling ambitious (and would rather not shell out for the pre-made dough, which can be pricey), attempt the crust; it’s a skill worth learning. Yes it was!

IMG_9069

You can do Steps 8-11 ahead of time. I made my crust the day prior using a dough cutter as opposed to my fingers to massage the flour and butter. The dough is quite dry when you are kneading it, but it does finally come together. To keep overnight, lay it on parchment on an unrimmed cookie sheet and cover it with plastic wrap. Take out of the fridge the next day about an hour ahead of time to come to room temp.

Of course I added quite a bit more ingredients to the filling, using 1 3/4 pounds chicken, an entire baby acorn squash, the whole onion, and added a 1/2 cup peas. As always, to amp up flavor I replaced the water with 1 cup of homemade chicken stock. Because of the increases, I wished I’d doubled the sauerkraut too… next time…

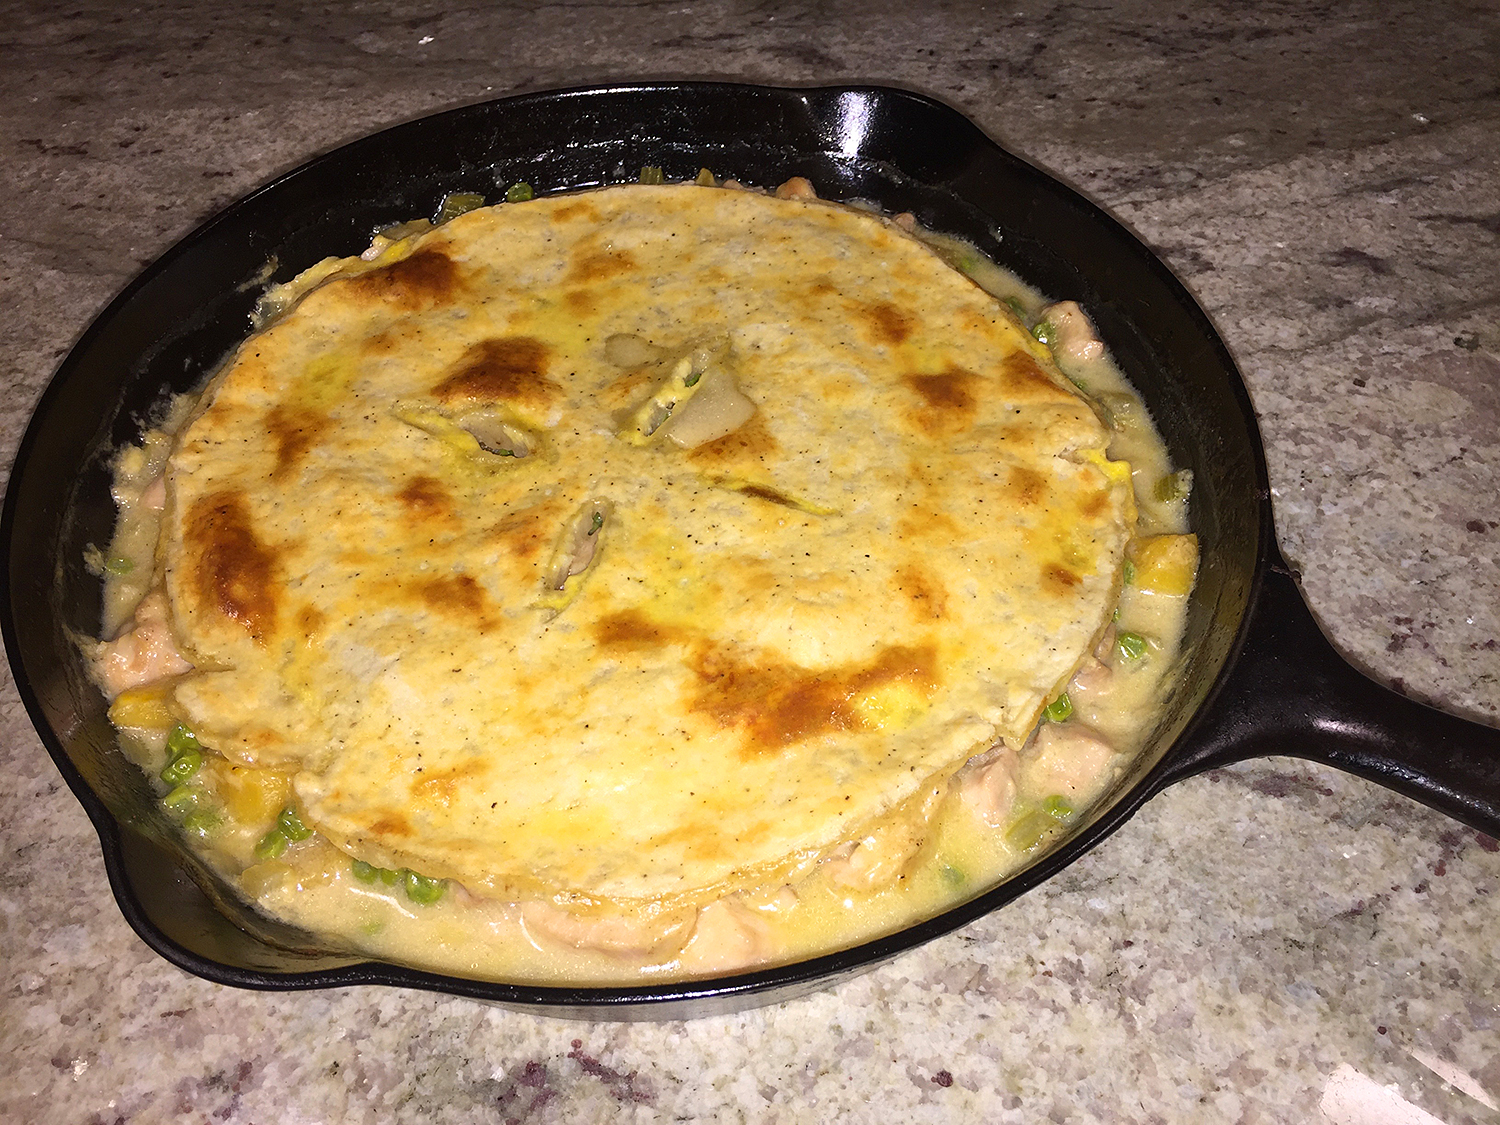
My cast iron skillet was 10″ at the bottom but flared out to 11″ at the top. Even though I tried to stretch the crust beyond 10″, it was a bit shy of covering the top completely, and even shrunk a tad in the cooking process. Serves 4 as written below; 5-6 with all of the added ingredients.

Um, yes, I think I might now be a fan of pot pies—at least this one…

Chicken Pot Pie with Acorn Squash

  • Servings: 4
  • Difficulty: moderate
  • Print

Ingredients

  • ½ cup (1 stick) chilled unsalted butter, divided
  • 1 pound skinless, boneless chicken thighs, cut into ¾-inch pieces
  • ¾ medium onion, chopped
  • 2 celery stalks, chopped
  • ½ teaspoon kosher salt, plus more
  • ¼ teaspoon freshly ground black pepper, plus more
  • ¼ cup sauerkraut
  • ¼ acorn squash, seeds removed, peeled, cut into ¾-inch pieces
  • 1/2 cup frozen peas, thawed (optional)
  • 2 tablespoons plus 1 cup all-purpose flour; plus more for surface
  • 1 cup plus 2 tablespoons whole milk
  • 1 cup chicken stock, preferably homemade (use instead of water)
  • 1 large egg yolk

Directions

  1. Preheat oven to 450°.
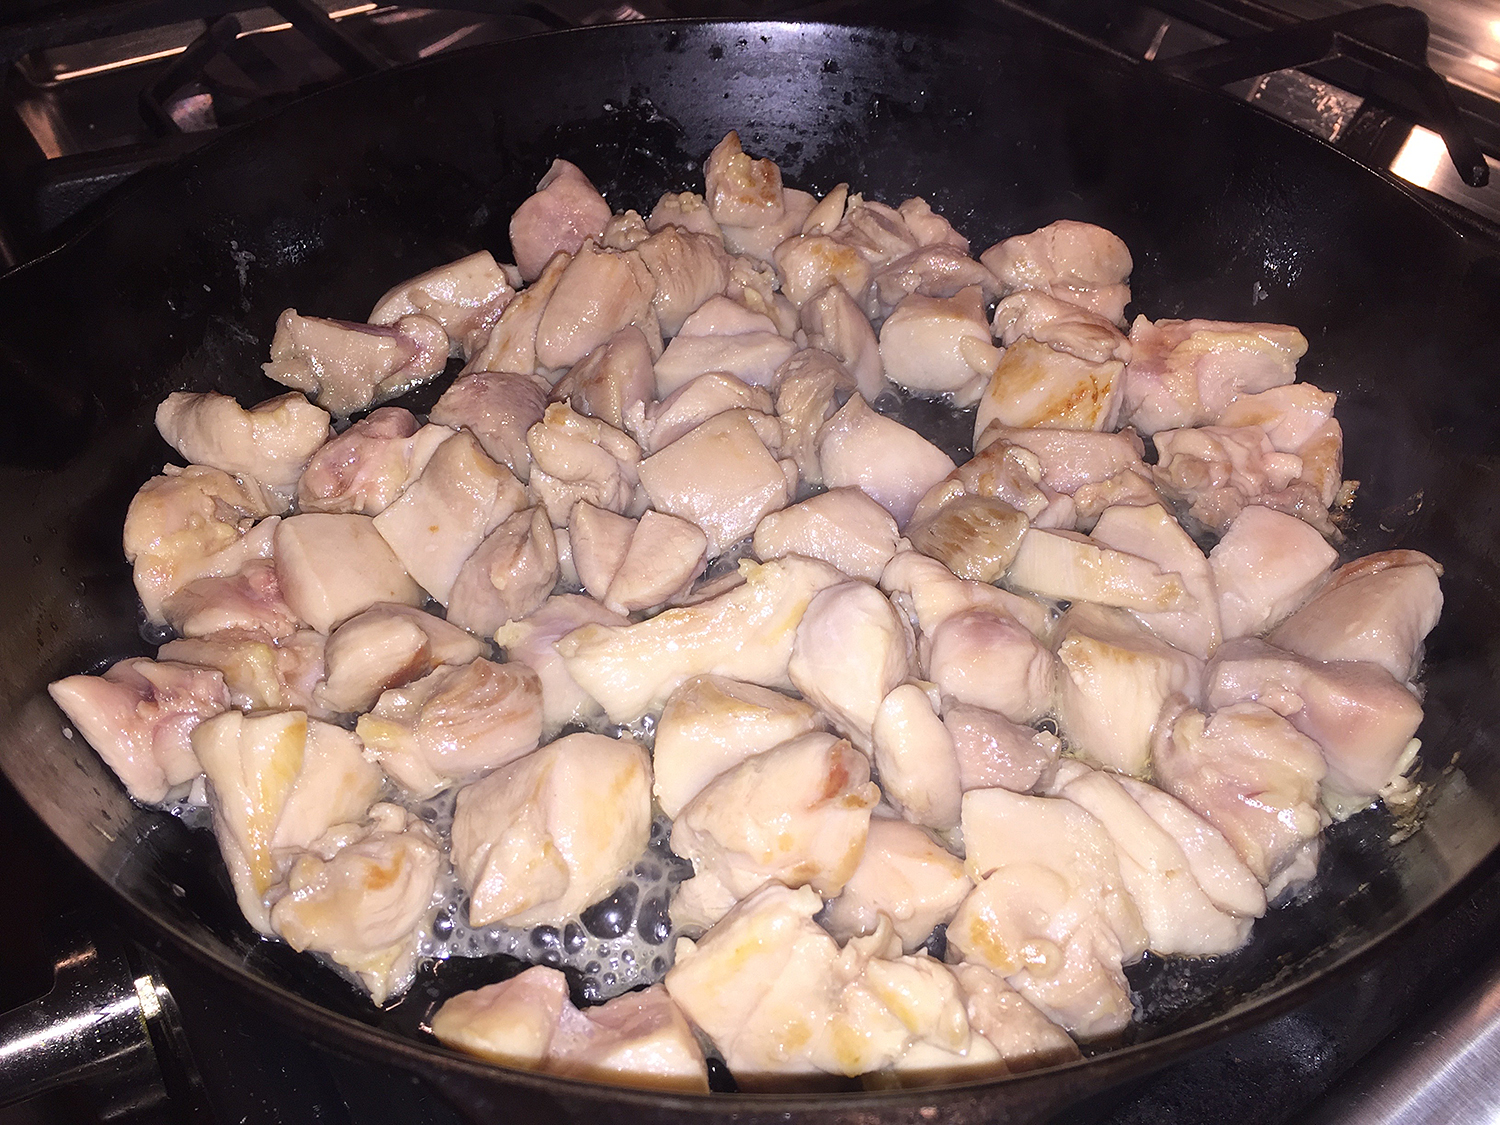
  2. Melt 2 Tbsp. butter in a medium skillet over medium-high heat. Cook chicken, stirring occasionally, until just beginning to brown, 5–6 minutes. Transfer to a medium bowl with a slotted spoon.
    IMG_9054
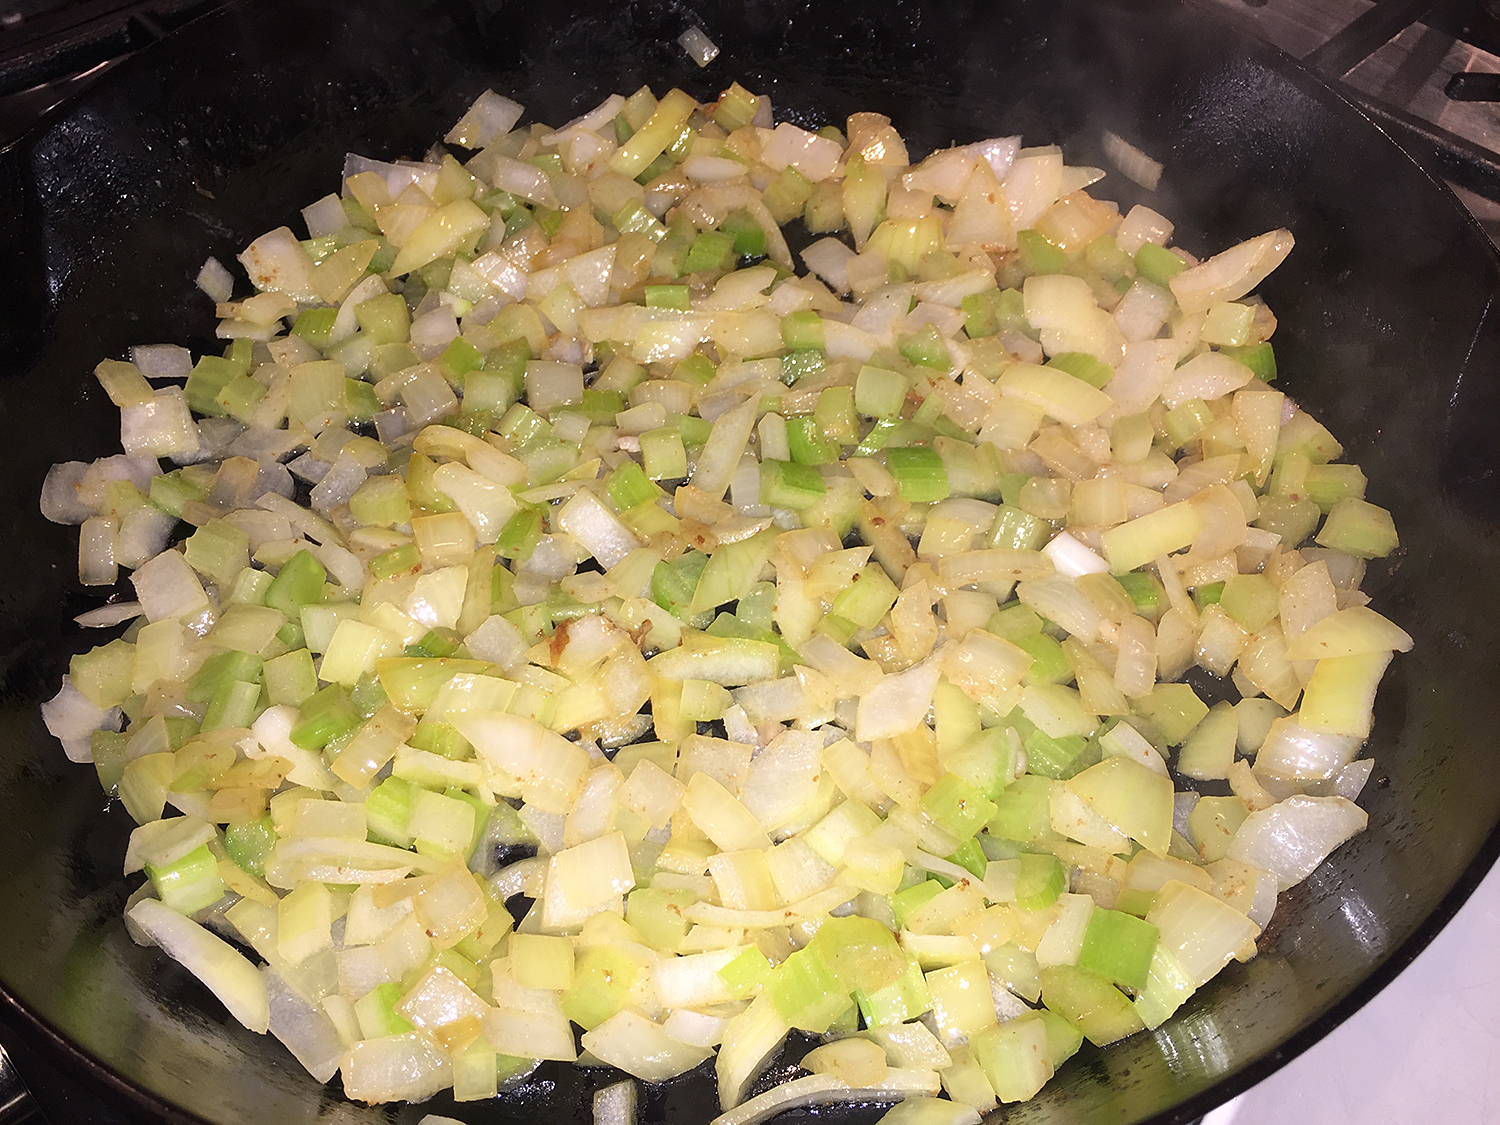
  3. Melt 1 Tbsp. butter in same skillet over medium heat. Cook onion and celery, stirring occasionally and scraping up any browned bits from bottom of pan (the good stuff), until vegetables are beginning to soften, 6–8 minutes; season with salt and pepper.
    IMG_9055
  4. Add sauerkraut and cook until liquid is evaporated, about 1 minute.
  5. Add squash and cook, tossing occasionally, until slightly softened, about 5 minutes. (It took 10 minutes for my squash.)
    IMG_9057
  6. Return chicken and any accumulated juices, and add peas to skillet and sprinkle with 2 Tbsp. flour; toss to coat. Cook, stirring occasionally, until heated through, about 1 minute.
  7. Stir in 1 cup milk and 1 cup chicken stock and cook, stirring occasionally, until thickened to the consistency of heavy cream, about 10 minutes.
    IMG_9061
  8. Meanwhile, cut remaining 5 Tbsp. butter into small pieces (it should be cold). Whisk 1 cup flour, ½ tsp. salt, and ¼ tsp. pepper in a medium bowl. Toss butter in flour mixture to evenly coat.
  9. Working quickly, rub butter into flour with your fingertips (or use a dough cutter) to create large, shaggy pieces of dough (the idea is to smash the butter into the flour, creating a mix of flat and thin pieces).
    IMG_9012
  10. Drizzle remaining 2 Tbsp. milk over and knead until dough starts to come together, pressing to incorporate shaggy edges (it will still look a little dry).
    IMG_9013
  11. Turn dough out onto a lightly floured piece of parchment paper, waxed paper, or foil. Roll out to a 10″ circle, trimming any shaggy edges.
    IMG_9018
    IMG_9019
  12. Using parchment to help you, carefully invert dough over filling in skillet, covering it completely.
  13. Beat egg yolk and 1 Tbsp. water in a small bowl just to blend—congratulations, you just made egg wash. Cut 4 slits in dough to allow steam to escape and brush with egg wash.
    IMG_9065
  14. Bake pot pie until crust is golden brown and filling is bubbling around the edges, 14-17 minutes. Let cool 10 minutes before serving.
    IMG_9071IMG_9072Slice through crust with a sharp knife and use a large spoon to ladle the contents into shallow bowls.
    IMG_9077

Do Ahead: Dough can be made 3 days ahead; keep chilled, or freeze up to 1 month.

http://www.lynnandruss.com

Adapted from a recipe by Elyssa Goldberg of Bon Appétit

Let the Good Times Swirl

Pumpkin Spice Cupcakes with Cream Cheese Frosting, the perfect dessert for Thanksgiving whether you are hosting or traveling to places near or far. Not only do they taste divine, but with the festive frosting approach, they’re sure to impress too. And the recipe makes two dozen, so you can even hold some back for yourself 😉

My incentive here was to find a seasonal cupcake for an upcoming art show/fundraiser for Artists of Yardley where I am a current member. Since joining, I have been donating something sweet for the Bake Sale portion of the November event; last year it was my decorated Santa Hat Sugar Cookies, shown below.


This year my creative juices flowed in another direction with cupcakes on my brain. I found this tempting recipe on TasteOfHome.com that possessed those warm, comforting flavors of Fall with cinnamon and pumpkin. And who the heck doesn’t salivate over cream cheese frosting?

IMG_9112

Of course I had to put my own spin on them—literally—by frosting with a tandum-hued swirl. The technique is pretty simple, and you could even take it a bit further by using three, or even four colors at once. But I was going for understated, not over the top. OK, maybe not totally understated as I had to sprinkle on a bit of white edible glitter for that finishing touch; and add maple extract instead of vanilla.

IMG_9106

I was always under the impression that any dairy product needed to be refrigerated, and cream cheese is dairy right? But according to one website, if you’re going to eat the cupcakes in the next day or two and your house stays around 70 degrees or cooler, they should be fine to sit on the counter—even if it is cream cheese frosting, which of course this is. So if you plan to make the cupcakes the day before you plan to share them, it’s okay to go ahead and frost them. In fact, you should, because the icing helps to keep them moist.

But just to be safe, I did store mine in the fridge inside of their decorative boxes before I transported them to the bake sale. I figure they’ll come to room temp when on display. Since I’m not into eating sweets for the most part, The Mr. was my taste tester… a drum roll please… he LOVED them!!

Pumpkin Spice Cupcakes with Cream Cheese Frosting

  • Servings: 2 Dozen
  • Difficulty: moderately easy
  • Print

Ingredients

  • 3/4 cup butter, softened
  • 2-1/2 cups sugar
  • 3 large eggs
  • 1 can (15 ounces) solid-pack pumpkin
  • 2-1/3 cups all-purpose flour
  • 1 tablespoon pumpkin pie spice
  • 1 teaspoon baking powder
  • 1 teaspoon ground cinnamon
  • 3/4 teaspoon salt
  • 1/2 teaspoon baking soda
  • 1/2 teaspoon ground ginger
  • 1 cup buttermilk

FROSTING:

  • 1 package (8 ounces) cream cheese, softened
  • 1/2 cup butter, softened
  • 4 cups confectioners’ sugar
  • 1 teaspoon vanilla (or maple) extract
  • 2 teaspoons ground cinnamon

Directions

  1. Preheat oven to 350°.
  2. In a large bowl, cream butter and sugar until light and fluffy. Add eggs, one at a time, beating well after each addition. Add pumpkin.
    IMG_9085
    IMG_9087
  3. Combine flour, pie spice, baking powder, cinnamon, salt, baking soda and ginger, whisk together until well blended; add to creamed mixture alternately with buttermilk, beating well after each addition.
    IMG_9088
    IMG_9090
  4. Fill 24 paper-lined muffin cups three-fourths full. Bake 25* minutes or until a toothpick inserted in the center comes out clean. (*Mine actually took 27-30 minutes.)
    IMG_9095
  5. Cool 10 minutes before removing from pans to wire racks to cool completely.
    IMG_9093
  6. For frosting, in a large bowl, beat cream cheese and butter until fluffy. Add confectioners’ sugar, vanilla and cinnamon; beat until smooth.
     

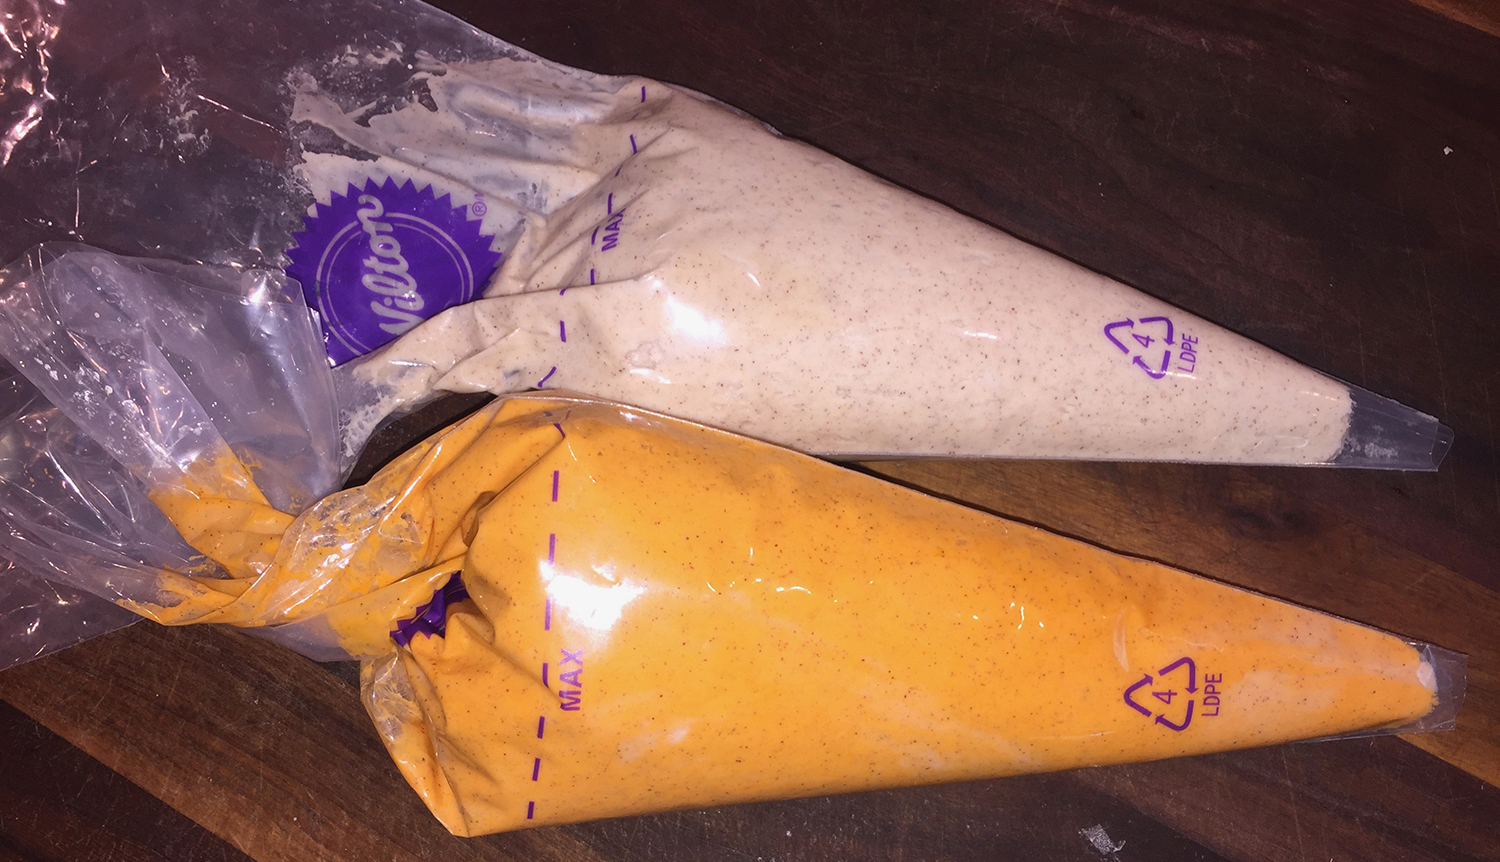
  7. If you want a multicolored effect, divide the icing into equal portions and add coloring to each, mix well. Put each color into a separate 6-8″ throw-away piping bag, then insert both (or all) of them into one large 12-16″ piping bag with a large star tip. You may have to do this a couple of times, depending on bag sizes.
    IMG_9103
  8. Starting in the center, squeeze the large piping bag to make a star on the top of the cooled cupcake, then move out to the edge while continuing to squeeze the bag. Circle around the outer edge first then continue to move inward until you reach the center and pull up. Repeat with each cupcake.
  9. Refrigerate leftovers (if you have any).

IMG_9114

Test Kitchen Tips

  1. For tender baked goods like muffins and cakes, the key is to mix gently. It also helps to whisk your dry ingredients well first, before combining them with any wet ingredients.
  2. These are bursting with autumn flavor, but if you want to take it over the top, try adding a little maple syrup to your frosting or a touch of maple extract to the cupcakes.
  3. It’s very easy to adjust the frosting consistency to your preference. Too stiff? Add milk a teaspoon at a time until the frosting is perfectly spreadable. Too thin? Beat in confectioner’s sugar 1/4 cup at a time until thickened.

http://www.lynnandruss.com

Adapted from a recipe found on TasteOfHome.com

Autumn Awesomeness

Knock me naked, this astounding company-worthy Cider-Sage Pork Loin with Potatoes and Apples dinner screams Autumn, where apple cider in a brine for pork loin imparts nuance and sweetness. Here, the cider does double duty, also starring in a flavorful pan sauce that gets drizzled on the finished dish. It is sooo good, you may want to double the amount…

IMG_9048

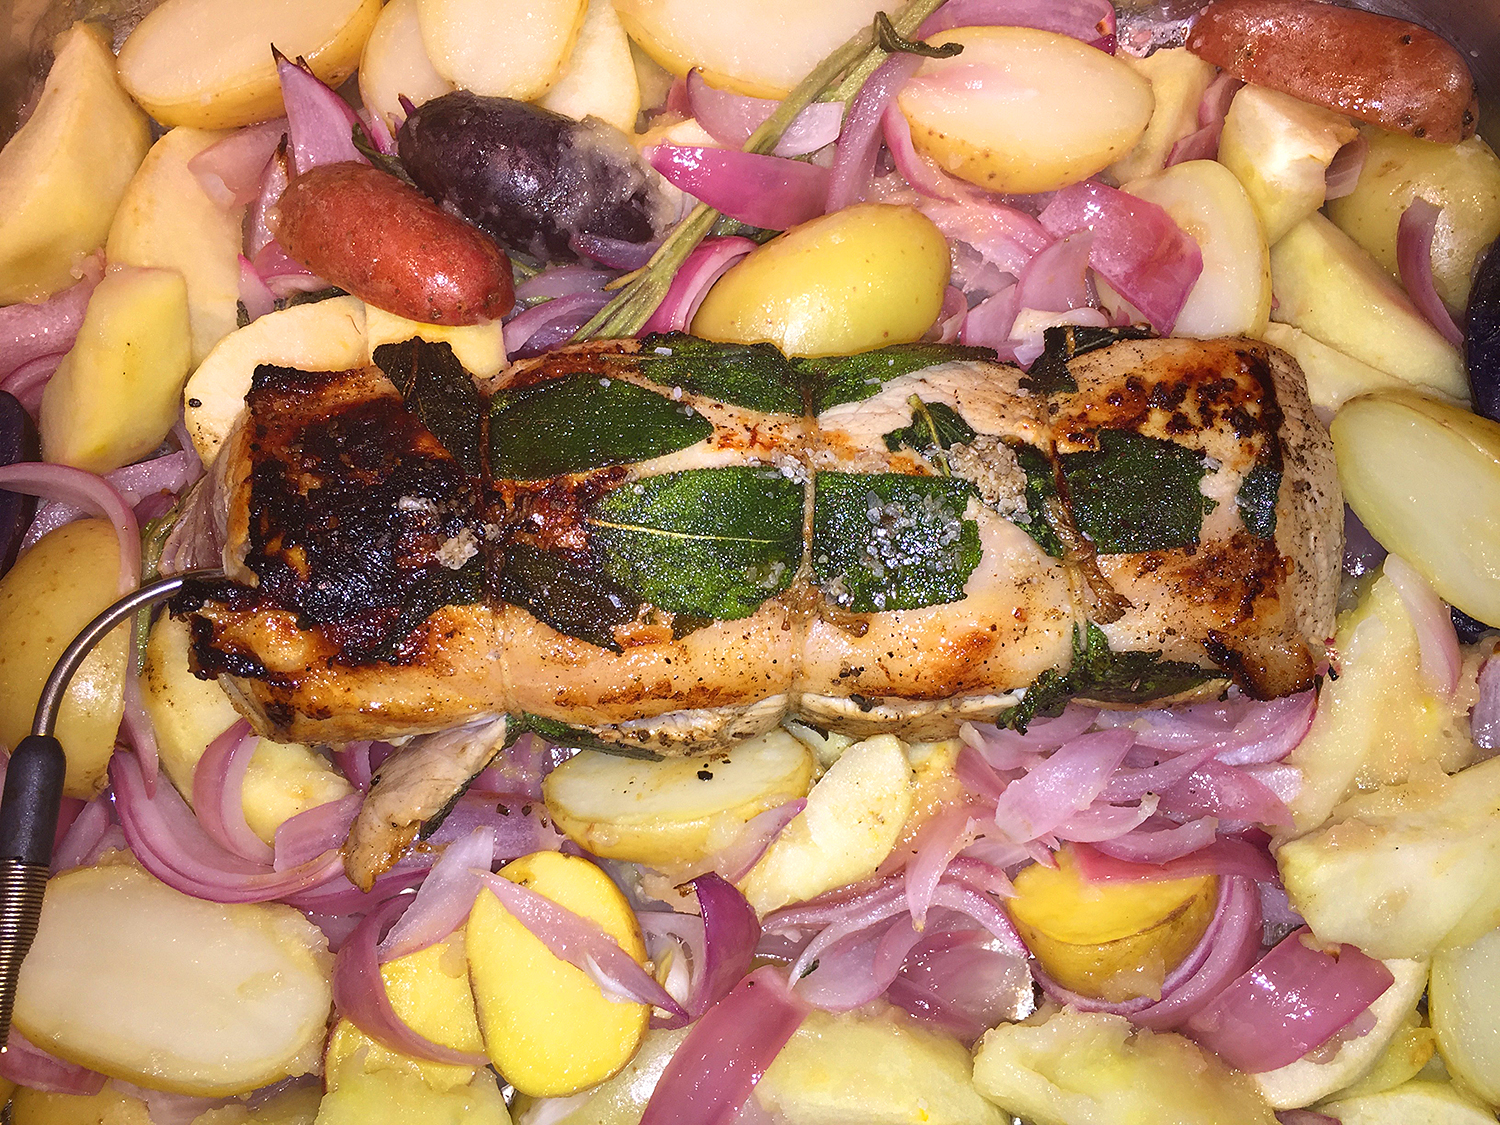
Several reviewers complained that the apple wedges got too mushy. Well yes, they did, but in a positive way. Once cooked into submission, they enveloped the other ingredients with an amazing blanket of tart sweetness, if you will. After all, Granny Smith’s are baking apples.

We had a small pork loin on hand that weighed just over half the size the recipe called for, but because we wanted all of that luscious sauce and veggies, we didn’t reduce the amount of the other ingredients. In fact, I added an additional red onion. And I included the sage stems with smaller leaves into the pan of roasting potatoes, apples and onions to impart even more sagey goodness—an herb that we just adore, especially in cool weather meals.

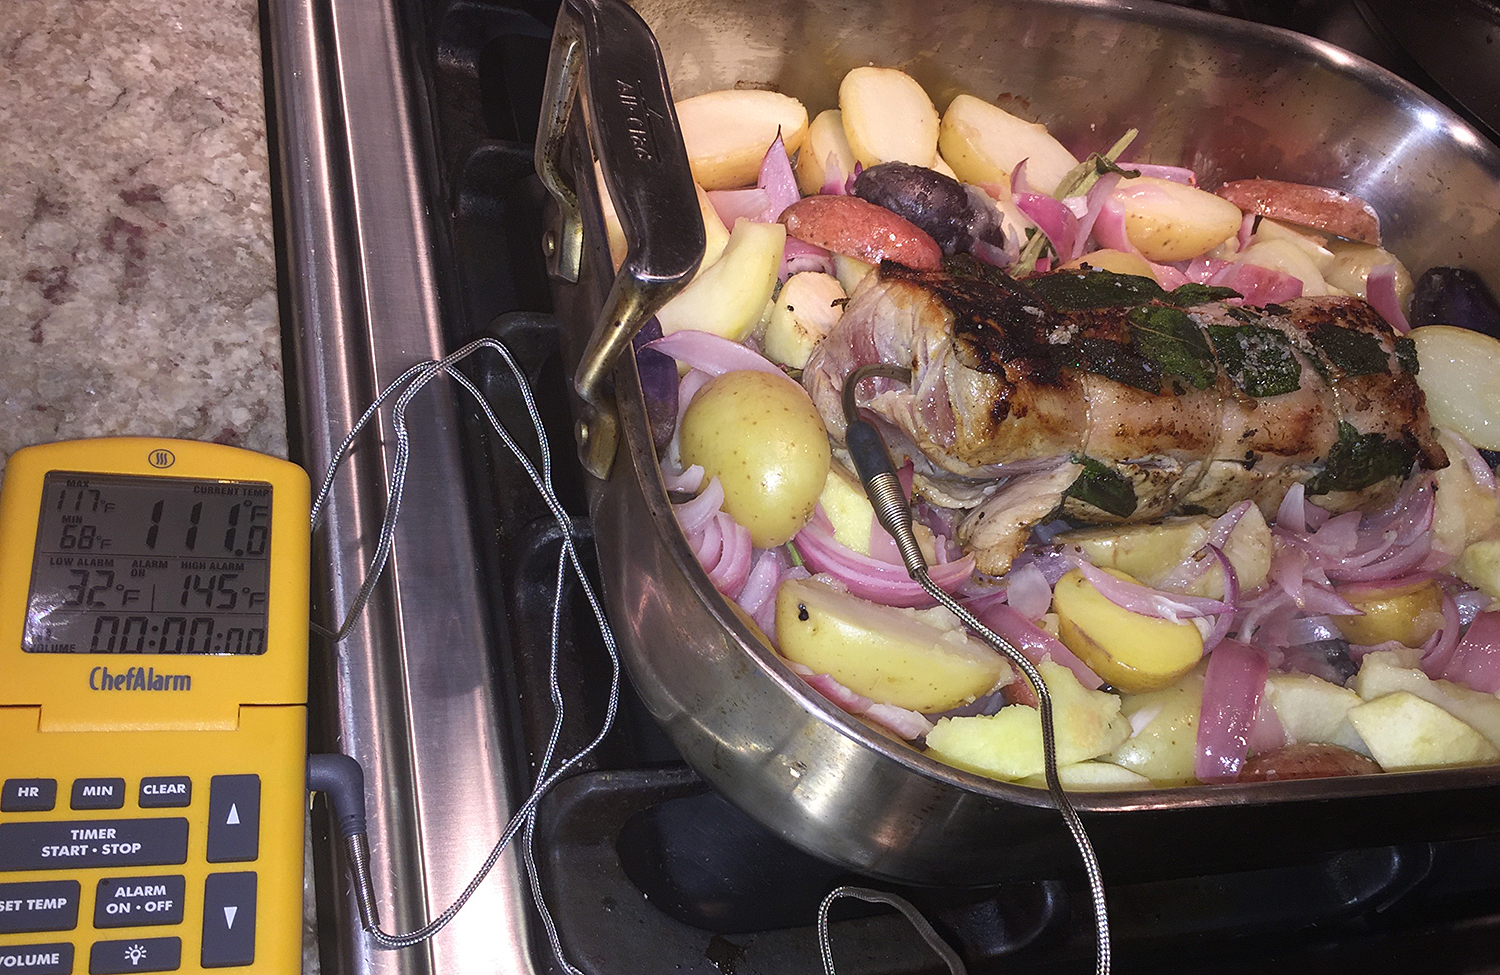
Because our pork loin was much smaller, it reached temperature in only 40 minutes. If at all possible, use a digital probe (such as a Thermoprobe ChefAlarm) that’s stays in the meat while it roasts. This way an alarm goes off exactly when it reaches 145° and alleviates any guesswork.

After it rests, and you slice it down, make sure to add any meat juices from the cutting board into that scrumptious sauce.

Cider-Sage Pork Loin with Potatoes and Apples

  • Servings: 6-8
  • Difficulty: easy
  • Print

Ingredients

For the brine

  • 4 cups apple cider
  • 1/2 cup granulated sugar
  • 1-3/4 oz. kosher salt (about 1/3 cup Diamond Crystal)
  • 3 cloves garlic, cut in half
  • 3 lb. center-cut pork loin
    IMG_9007

For the pork

  • 16 leaves fresh sage, 4 torn into large pieces
  • Freshly ground black pepper
  • 3 large Granny Smith apples (about 3-3/4 lb.), peeled and cut into 2-inch wedges
  • 1-1/2 lb. small creamer potatoes, such as Yukon Gold, halved
  • 1 large red onion (about 1 lb.), cut into 1/2-inch wedges (I added 2 onions)
  • 3 Tbs. olive oil
  • Kosher salt
  • 2 Tbs. unsalted butter
  • 2 Tbs. all-purpose flour
  • 1-1/2 cups apple cider

Directions

  1. BRINE: Put 2 cups of the cider in a small saucepan over medium-high heat. Bring to a simmer, and whisk in the sugar, salt, and garlic, adjusting the heat to maintain a simmer.
  2. Once the sugar and salt dissolve, remove the pan from the heat, add the remaining 2 cups cider, and let cool to room temperature.
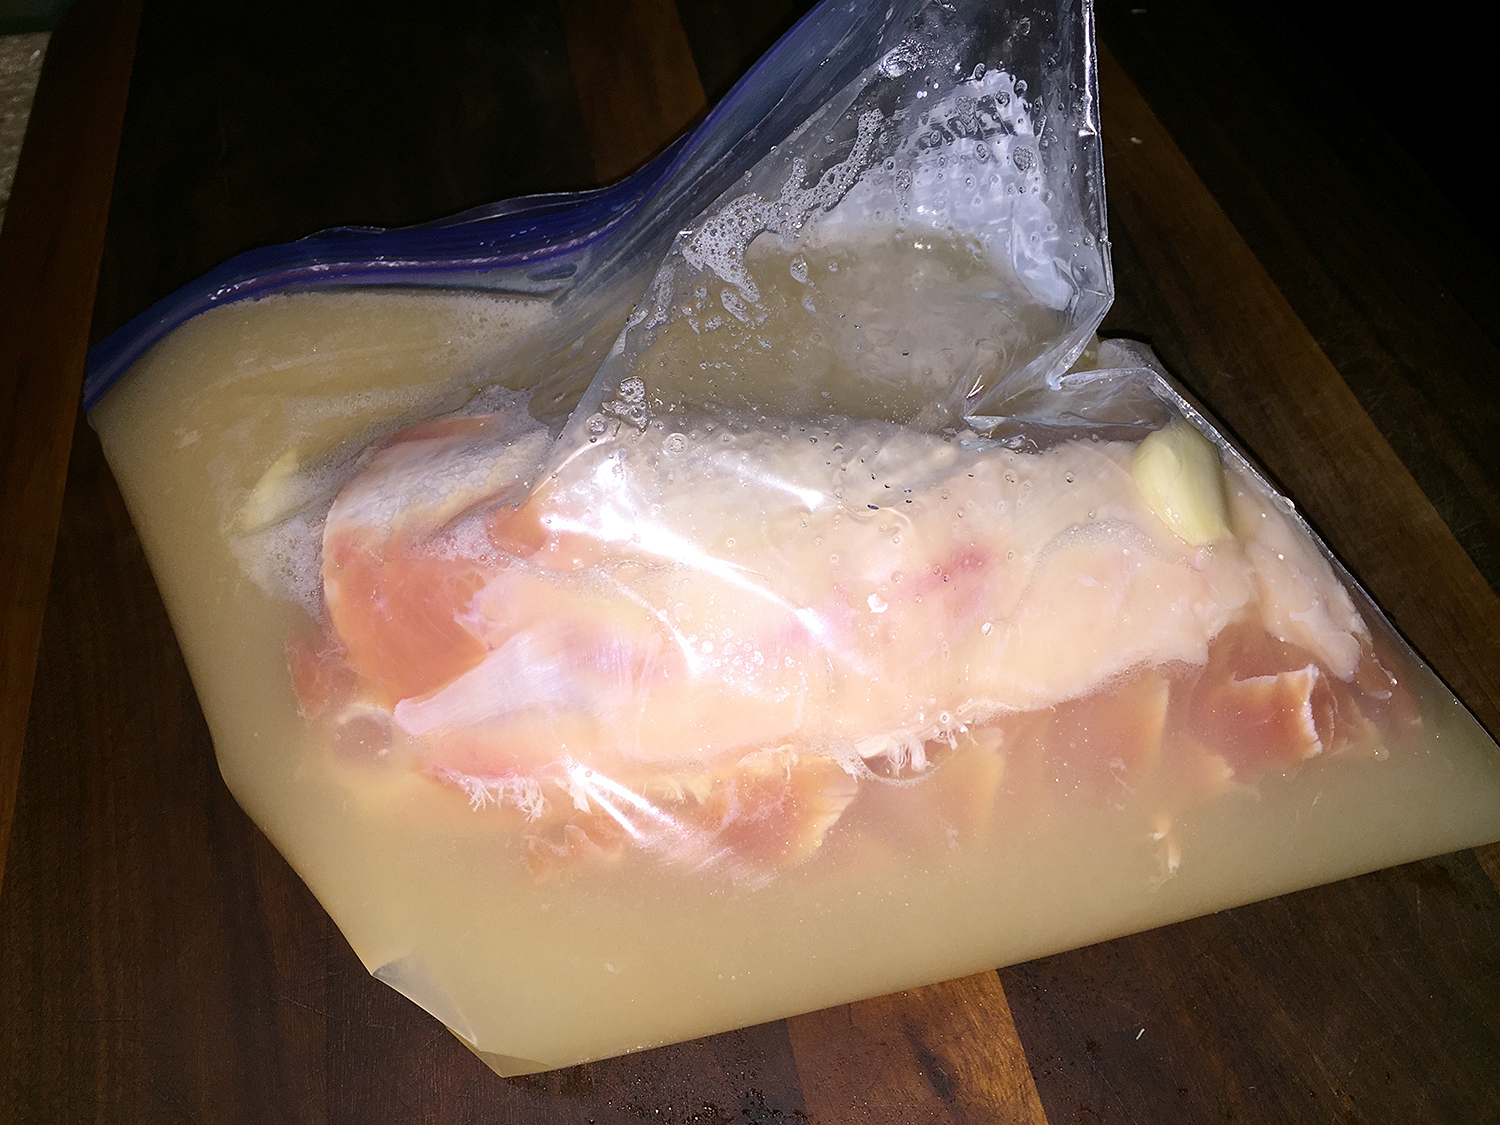
  3. Transfer the loin to a large bowl or zip-top bag, pour in the brine, cover with plastic wrap or seal the bag, and refrigerate for 8 hours or overnight.
  4. PORK: Position a rack in the center of the oven, and heat the oven to 425°F. Remove the pork from the brine, and transfer to a large plate lined with paper towels. Discard the brine, and pat the loin dry.
    IMG_9010
  5. Using kitchen twine, tie the loin in three places at even intervals. Slip the 12 whole sage leaves between the twine and meat, and season with 1 tsp. pepper.
    IMG_9027
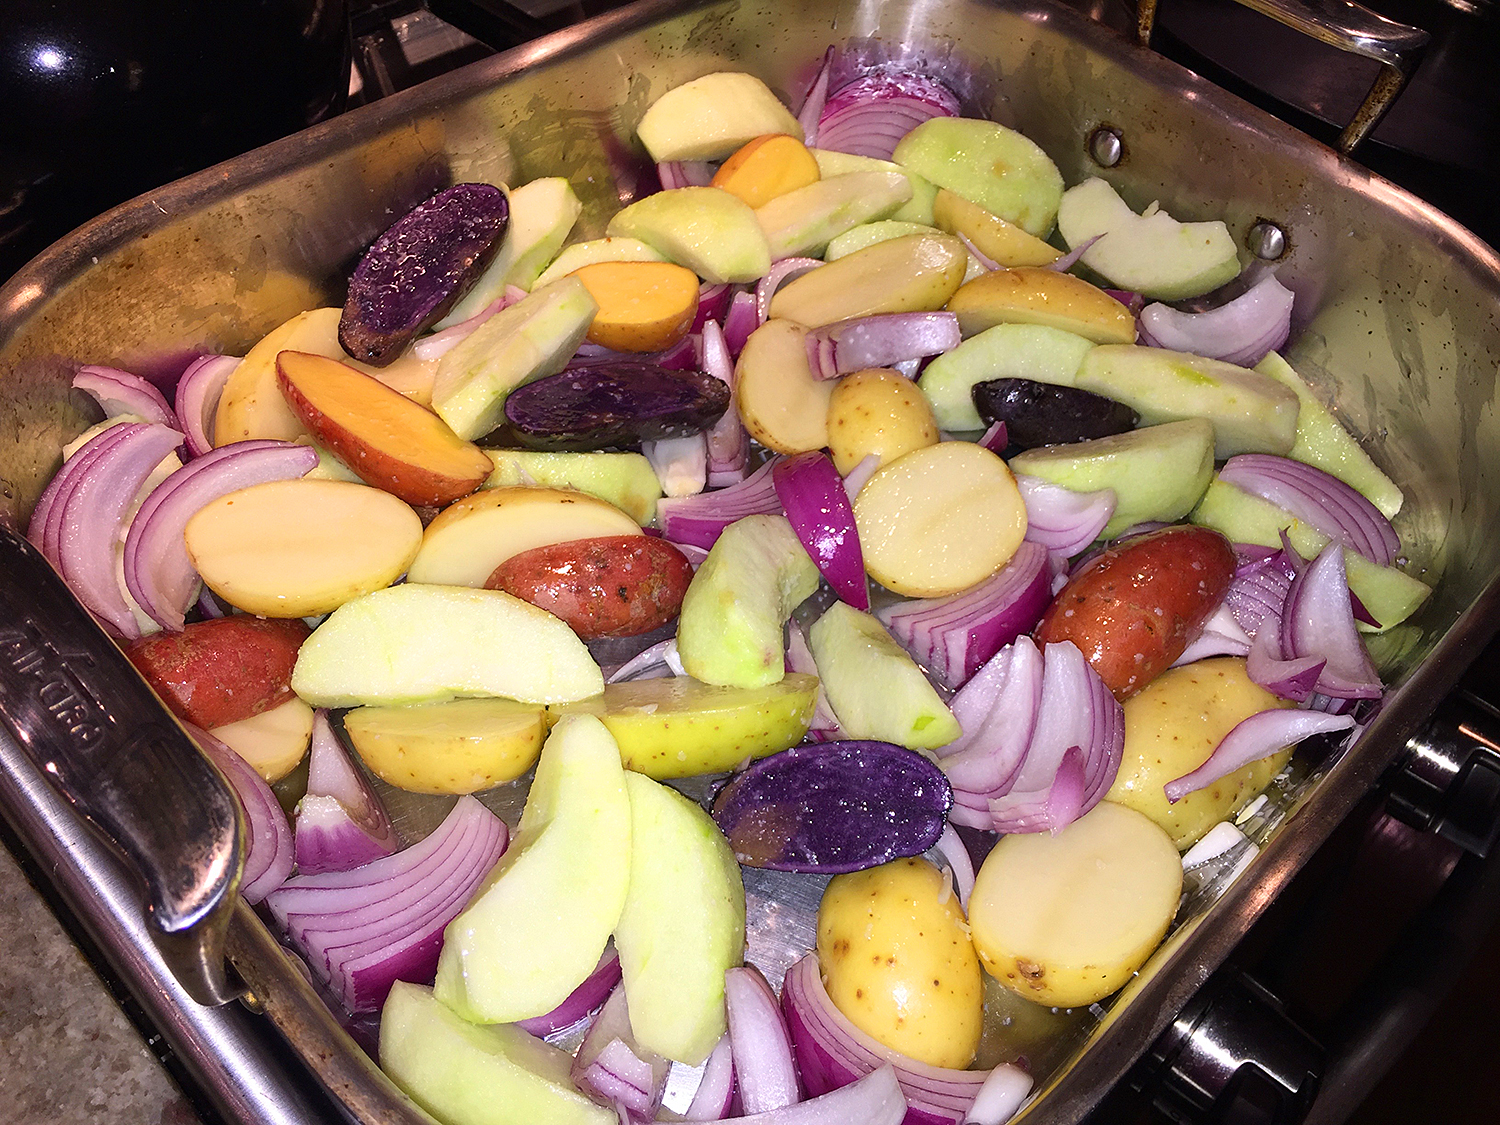
  6. In a large roasting pan, toss the apples, potatoes, and onion with 1-1/2 Tbs. of the oil and 1 tsp. salt. Roast until mostly tender, about 25 minutes.
    IMG_9023
  7. Meanwhile, set a large heavy-duty skillet over medium-high heat. Add the remaining 1-1/2 Tbs. oil, and heat until shimmering. Set the loin in the skillet fat side down. Sear, undisturbed, until the meat browns and easily releases from the pan when you lift an edge with tongs, 2 to 3 minutes.
  8. Reduce the heat to medium, and sear the remaining sides, about 1 minute per side, or 6 minutes total. Set the skillet aside.
    IMG_9029
  9. Put the pork on top of the apples, potatoes, and onion in the roasting pan. Insert digital probe with alarm if you have one.
    IMG_9033
    IMG_9031
  10. Reduce the oven temperature to 350°F. Roast until an instant-read thermometer inserted into the thickest part of the roast registers 145°F, about 80 minutes; start checking after about 60 minutes (or sooner if preparing a smaller roast). Remove from the oven, and let rest for 15 minutes.
  11. While the pork is resting, make a pan sauce. Pour off and discard any fat from the skillet, and set the pan over medium-high heat.
  12. Add the butter, flour, and torn sage leaves. Cook, stirring to scrape up any brown bits on the bottom of the pan, until the flour is lightly browned, about 1-1/2 minutes.
    IMG_9041
  13. Add the cider, and bring to a boil, stirring constantly. Reduce to a simmer and cook, stirring until thickened, about 5 minutes. Season to taste with salt and pepper.
    IMG_9043
  14. Remove the twine from the roast, and thinly slice the pork. Serve with the apples, potatoes, onion, and a generous drizzle of the sauce.
    IMG_9046
    IMG_9052

http://www.lynnandruss.com

Recipe adapted from Tony Rosenfeld from Fine Cooking

Russ’ Seafood Soup

With ample homemade shellfish stock in the freezer, and blustery late-Autumn winds swirling outside, the Mr. figured it was a good day to make seafood soup. With its base of stock and tomatoes, rather than roux and cream, it’s a lighter and healthier soup than cream-based varieties. With bacon and potatoes you might even consider it a chowder.

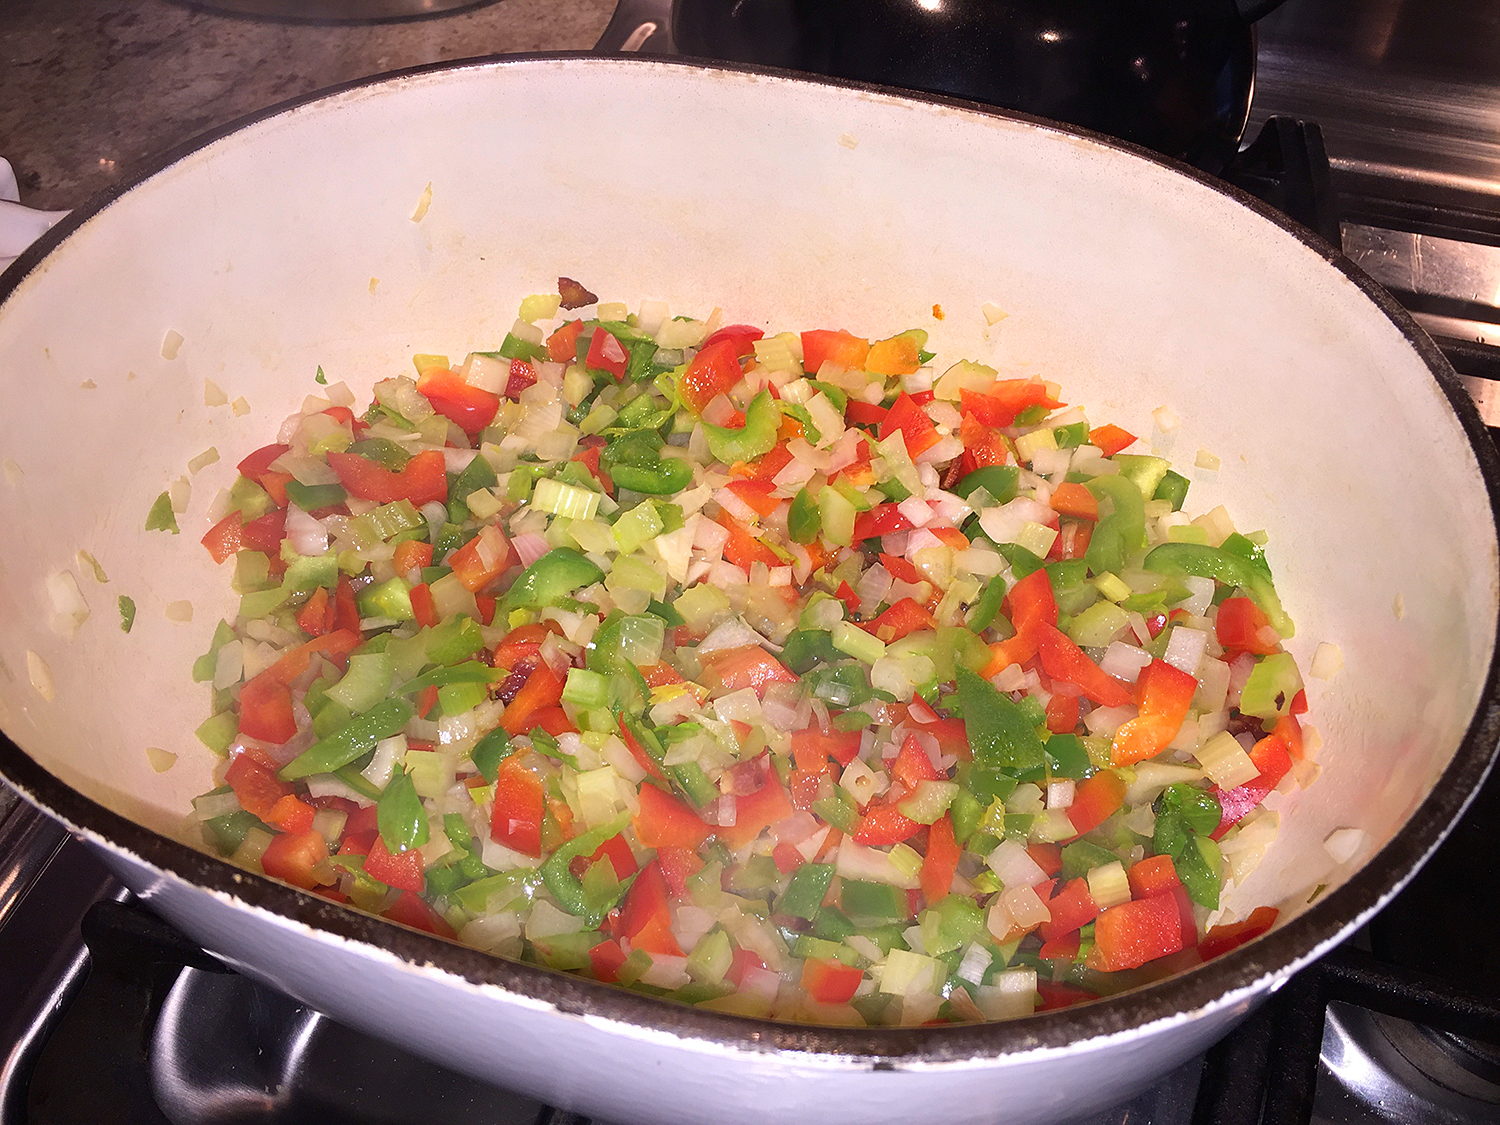
IMG_8989Russ preps the veggies. Then while those are simmering, he starts chopping the seafood.
IMG_8994

Personally I am not a clam fan, so Russ will often make this soup with small bay scallops in place of them, but the supermarket was only carrying the large sea scallops. As a substitution, I almost bought jumbo lump crab meat, but the price was so prohibitive that I succumbed and bought the baby clams.

The following day when we each enjoyed a small serving, it seems I hit the jackpot and got nearly 2 dozen clams in my portion while Russ barely got any. He was thrilled when I spooned them out and dropped them into his bowl. Yes, I’m a good wife… He even reciprocated with a few shrimp pieces into my bowl. Yes, he’s a good husband 😉

While the list of ingredients may seem a bit daunting, it’s actually quite easy to make, especially if you have the homemade seafood stock on hand. (Using a pressure cooker, you can make stock in a little over an hour.) In fact, not only did Russ make this soup, he also made homemade chicken stock and ham stock, all in one afternoon! Makes my heart ❤ proud—and my stomach happy 😉

Russ' Seafood Soup

  • Servings: 4 Quarts
  • Difficulty: easy
  • Print

Ingredients

  • 2 strips bacon, finely diced (chill for 10 minutes in the freezer to make it easier to cut; about 1/4 cup)
  • 2 Tbs. vegetable oil
  • 1 large yellow onion, finely diced
  • 1 large Spanish onion, finely diced
  • 1 large carrot, peeled and finely diced
  • 2 ribs celery, finely diced
  • 2 medium bell peppers, 1 red and 1 green, stemmed, seeded, and finely diced
  • 2 cloves garlic, minced
  • 1 28-oz. can crushed tomatoes
  • 1 bay leaf
  • 1/2 tsp. chopped fresh thyme
  • 1/2 lb. russet potatoes, peeled and cut into 1/2-inch dice
  • 4 cups shellfish stock, preferably homemade
  • 1 8-oz. can clam juice
  • 1 10-oz. can baby clams in juice (or 1/2 lb. bay scallops)
  • 1/2-lb. uncooked shrimp, shelled and roughly chopped
  • 1/2-lb. cod, roughly chopped
  • 1-1/2 tsp. kosher salt
  • 1/2 tsp. celery salt
  • 1 tsp. freshly ground black pepper
  • 5 dashes Tabasco sauce, or to taste
  • 3 dashes Worcestershire sauce, or to taste

Directions

  1. Place a medium (6- to 8-quart), heavy soup pot over medium-high heat. When hot, add the bacon. When it starts to brown in spots, lower the heat to medium and continue to cook until most of the fat has been rendered and the bacon is almost crisp, about 4 minutes.
  2. Add the vegetable oil, onions, carrots, celery, and bell peppers. Sauté, stirring occasionally, until very soft, 10 to 15 minutes.

    IMG_8988

  3. Add the garlic and sauté for another 2 minutes.
  4. Add the crushed tomatoes, bay leaf, thyme, and potatoes.
  5. Add the stock and clam juice to the pot. Stir to mix well. Bring to a boil over high heat, and then lower the heat to a simmer and cook for 30 minutes, stirring occasionally, or until the potatoes are fork-tender.
    IMG_8993
  6. Add the cod, shrimp and clams with their juice and season with the kosher salt, celery salt and pepper.
    IMG_8996
  7. Add the Tabasco and Worcestershire. Bring back to a simmer for several minutes until the seafood is opaque.
    IMG_9001
  8. Ladle into bowls and serve hot.

http://www.lynnandruss.com

Identity Crisis? Not in Flavor!

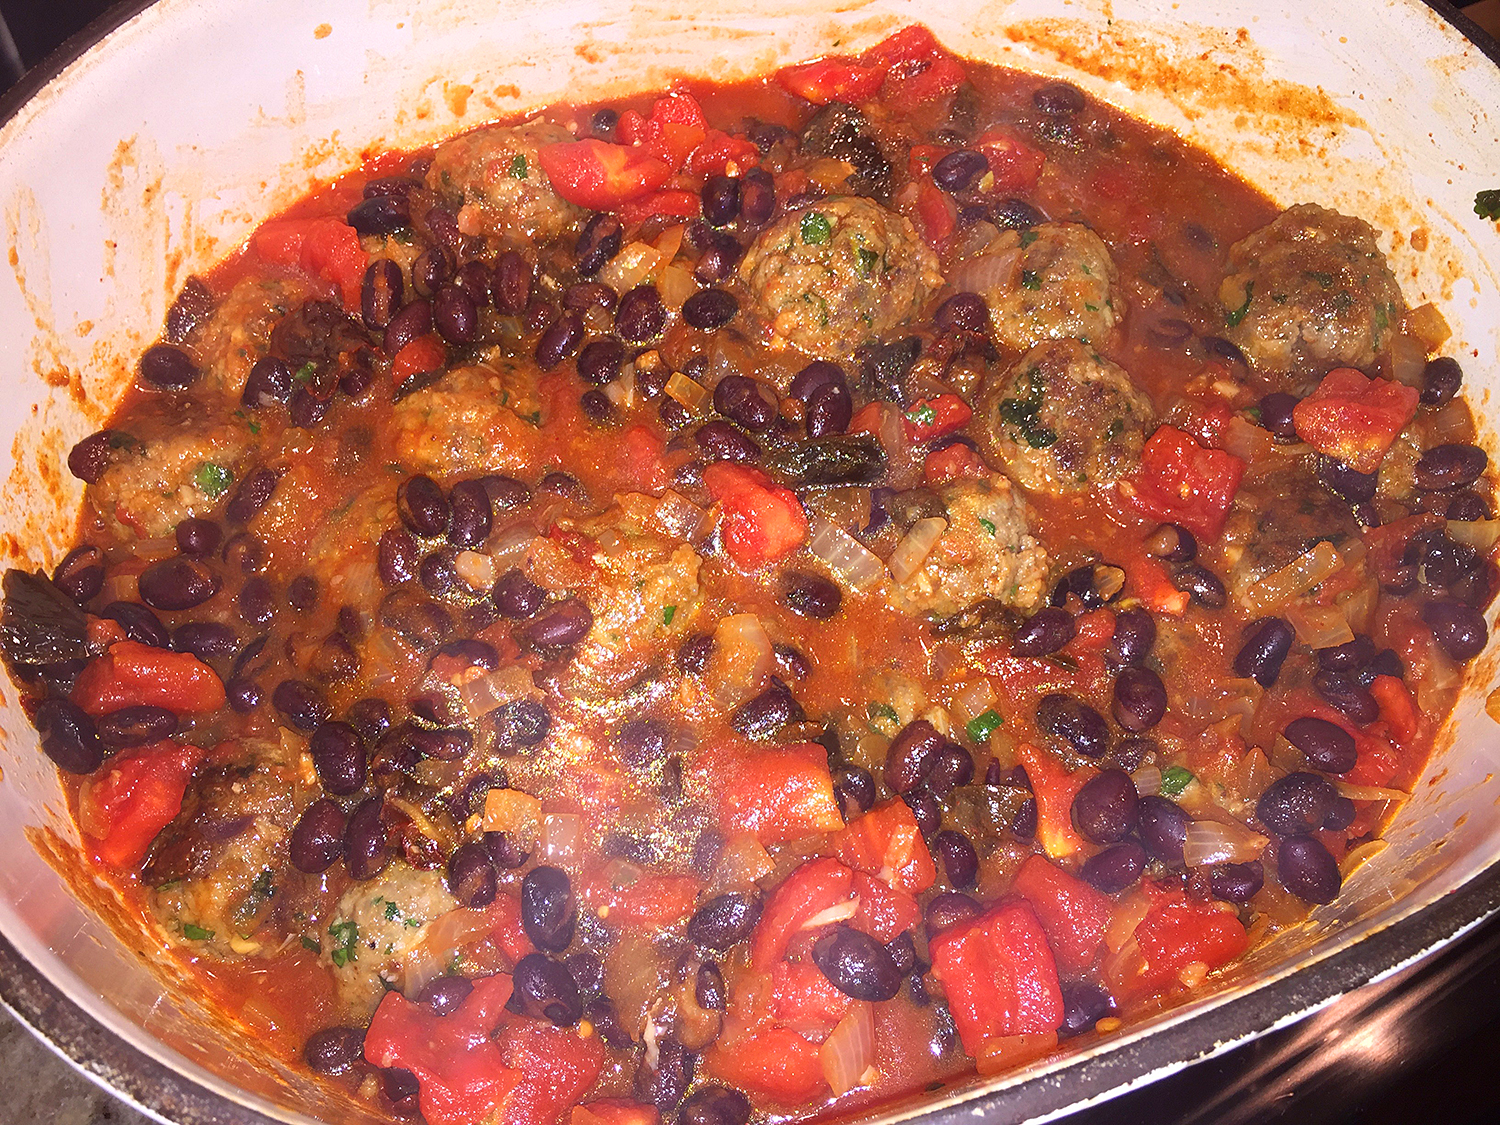
Is it chili… meatballs… stew? This mash-up implies an identity crisis, but no way José, Chili Meatballs in Black Bean and Tomato Sauce is jam-packed with flavor and melds together seamlessly. It’s a rich and warming Mexican take on meatballs and is perfect fare for cool weather dining—which is exactly what Mother Nature was dishing out on the raw and nasty day(s) I concocted this meal.

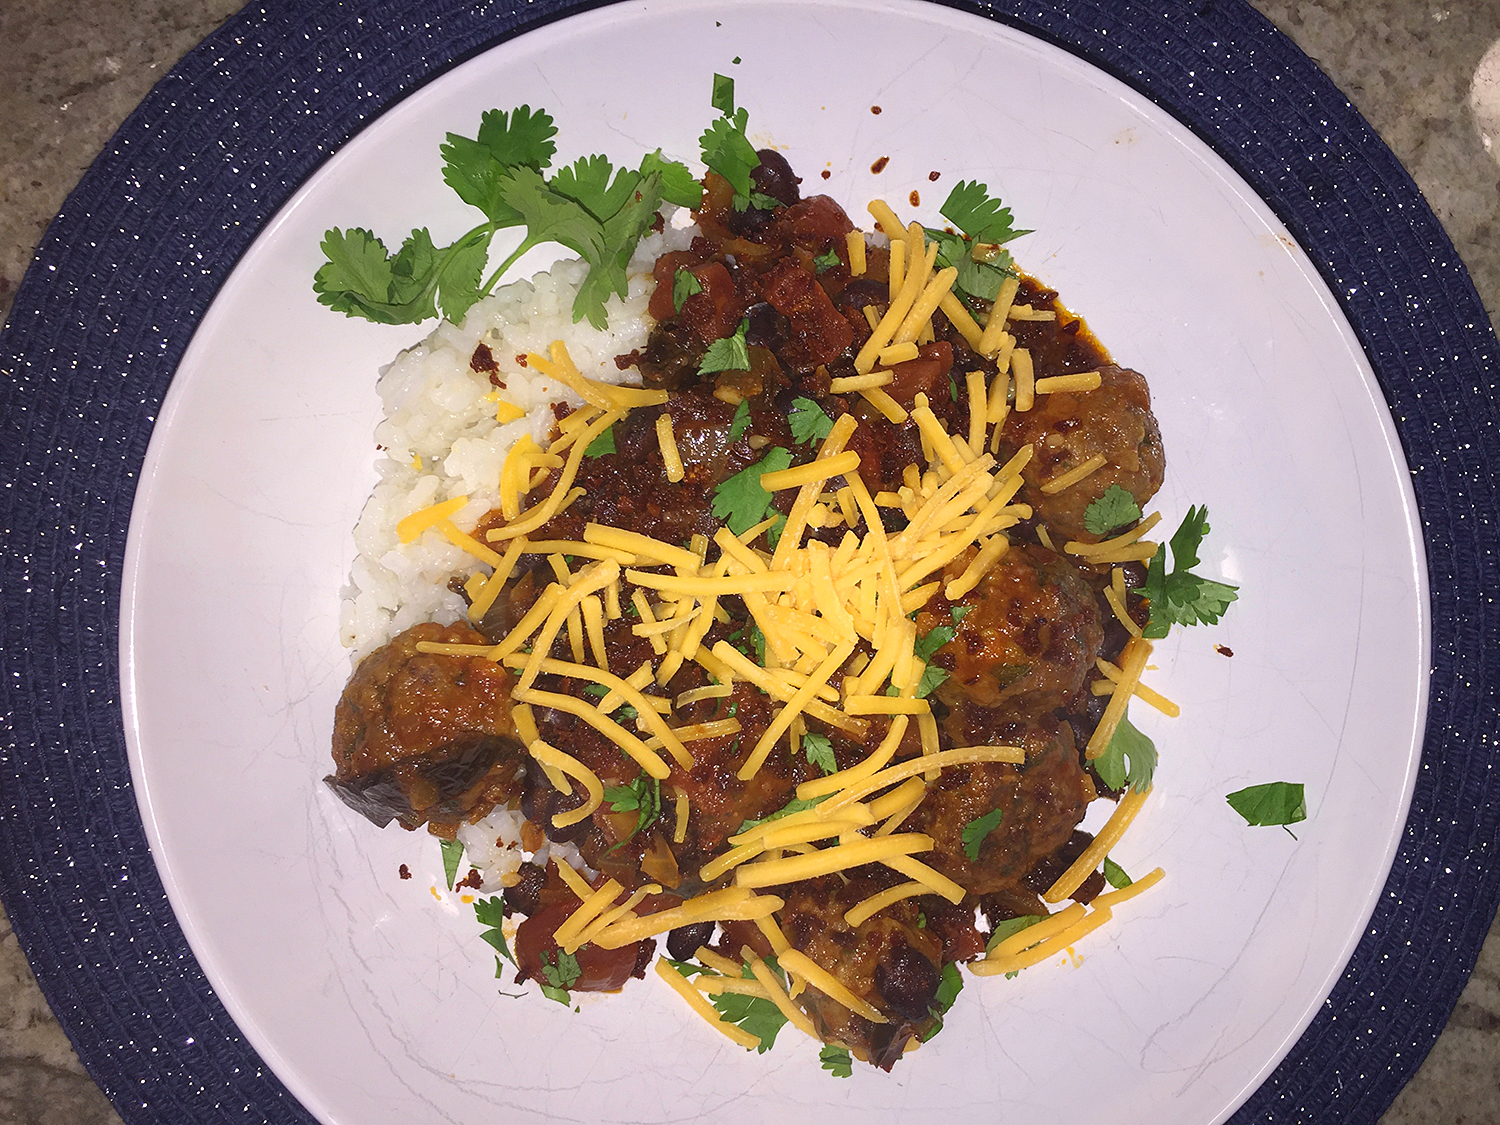
IMG_8929Instead of topping with sour cream (which I didn’t have on hand), I added shredded sharp cheddar.

Like other legumes, such as peanuts, peas, and lentils, black beans are prized for their high protein and fiber content. They are a real powerhouse and in addition to this meal tasting fantastic, the beans add some health benefits which include the prevention of cardiovascular diseases and a reduced risk of certain types of cancer.

Consuming black beans can also aid in digestion and the regulation of the body’s blood sugar levels. They can be beneficial for various nervous system functions, can reduce the chances of birth defects, neutralize the negative effects of sulfites, and even prevent impotence in men—hey, just sayin’.

Based on a few reviewers comments about the flavor profile of the meatballs themselves, I included a teaspoon of ground cumin to the mix (noted below). And even though we own multiple types of vinegars, malt wasn’t one of them so I substituted red wine vinegar. Then for garnish, instead of sour cream, I added shredded sharp cheddar, why not, it’s part chili, right? We also have at least a half dozen types of rice in the pantry so hubby suggested we appropriately use the Valencian Spanish short grain variety.

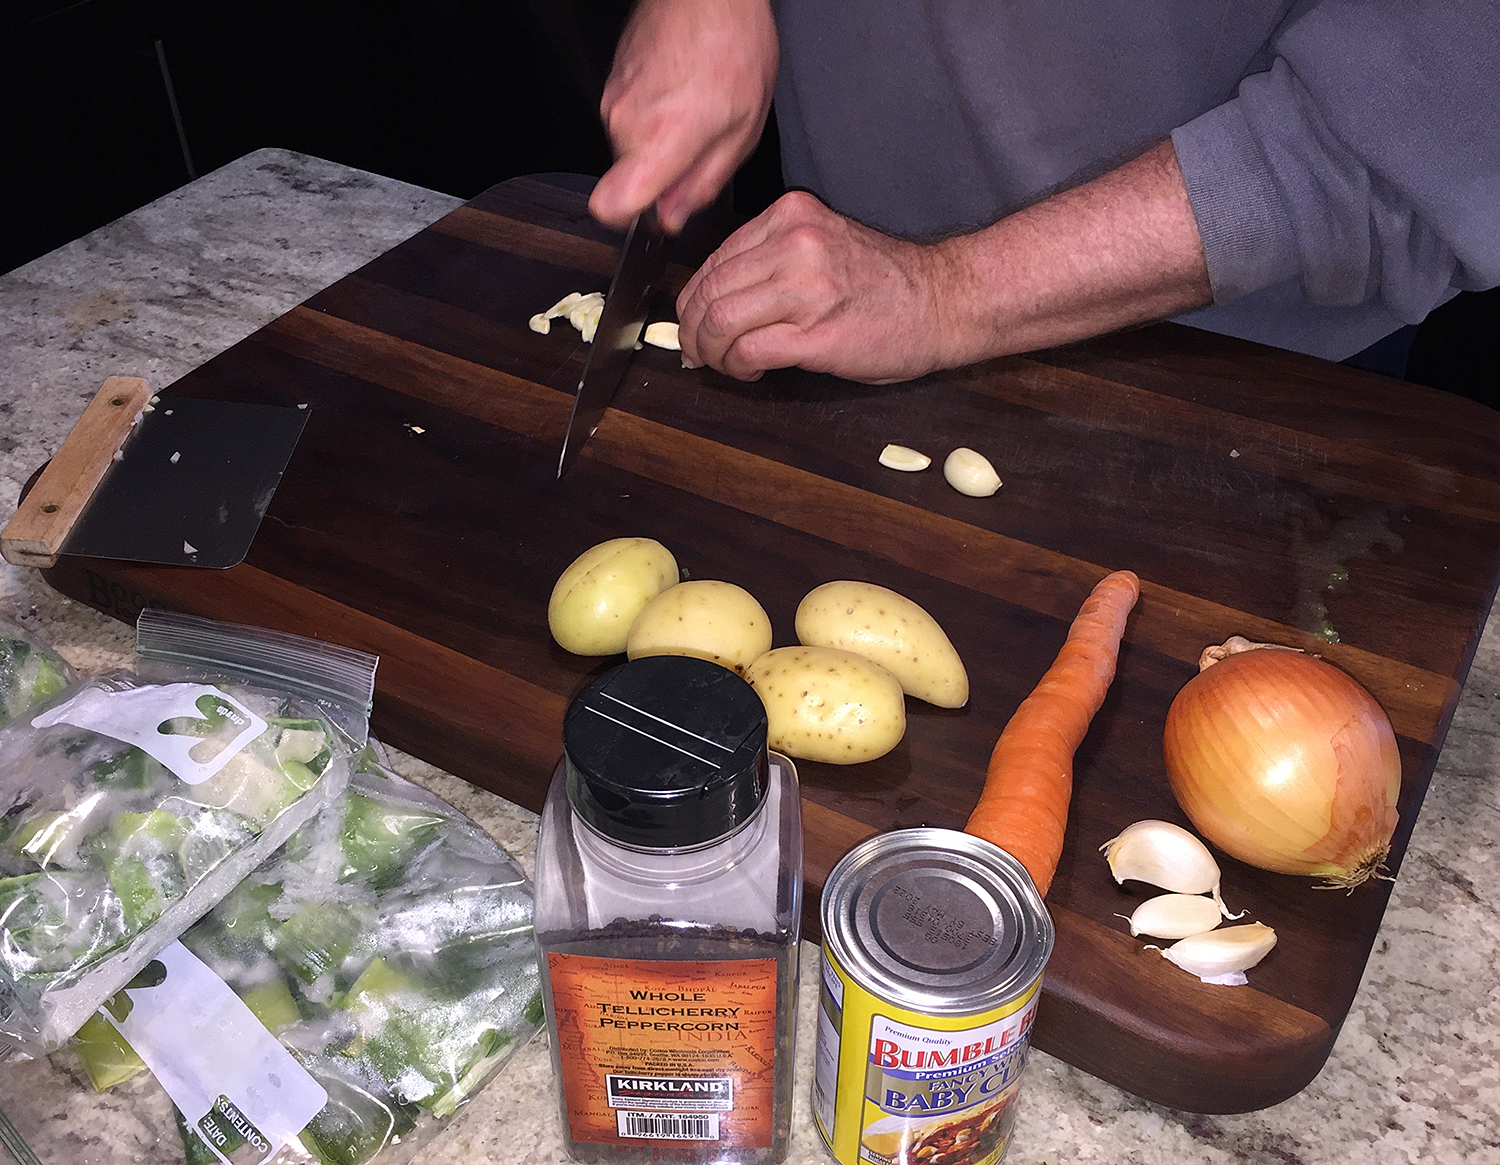
Since it is a bit time consuming, go ahead and prep the meatballs the day before if possible. Once rolled into balls, refrigerate until ready to cook. On meal day, I found it simpler to brown the meatballs in a skillet, and once removed, you can use the same skillet (do not wipe clean) to crisp the ground chorizo. Sauté the onion and garlic and remaining ingredients in a separate large, oven-proof, heavy pot that will go into the oven in Step 8.

All-in-all, definitely worth the effort. And just like most chilis and stews which tend to be even better when reheated, we were thrilled to have leftovers!

IMG_8883

Chili Meatballs in Black Bean and Tomato Sauce

  • Servings: 4-6
  • Difficulty: moderate
  • Print

Ingredients

  • 1 ounce dried ancho or other large dried red chiles
  • 1/2 cup boiling water
  • 1 cup fresh white breadcrumbs
  • 1/3 cup milk
  • 1 pound ground beef
  • 1 egg
  • 4 cloves garlic, divided
  • 1/2 cup cilantro leaves, finely chopped
  • 1 teaspoon ground cumin
  • 2 teaspoons ground coriander seeds
  • Sea salt and cracked black pepper
  • 1/4 cup extra-virgin olive oil
  • 1 yellow onion, finely chopped
  • 2 tablespoons tomato paste
  • 1 tablespoon brown sugar
  • 1 tablespoon malt vinegar (substitute red wine or apple cider vinegar)
  • 1/2 cup beef stock
  • 28-ounce can chopped tomatoes
  • 28-ounce can black beans, drained and rinsed (or 2, 14-ounce cans)
  • 1 tablespoon smoked paprika
  • 7-ounces dried chorizo, skin removed and roughly chopped
  • Steamed rice and sour cream, to serve

Directions

  1. Preheat oven to 400°F.
  2. Place the ancho chiles and boiling water in a bowl and allow to stand for 10–15 minutes or until soft. Cool slightly, drain, remove seeds and roughly chop the chiles, reserving the liquid. Set aside.
    IMG_8884
    IMG_8891
  3. Place the breadcrumbs and milk in a large bowl and mix well to combine. Set aside for 5 minutes or until the milk is absorbed.
  4. Add the beef, egg, half the garlic, cilantro, coriander seeds, cumin, salt and pepper and mix well to combine. Using wet hands, roll tablespoon-portions of the mixture into balls. Makes about 36 meatballs. (Can do Steps 1-4 up to a day beforehand.)
    IMG_8889
  5. Heat 1 tablespoon of the oil in a large, shallow, heavy-based ovenproof saucepan over medium heat. Cook the meatballs in batches, turning frequently, for 5–7 minutes or until browned.
    IMG_8915
  6. Remove the meatballs from the pan and set aside. Add 1 tablespoon of the oil, onion and remaining garlic to the pan and cook for 5–7 minutes or until lightly golden.
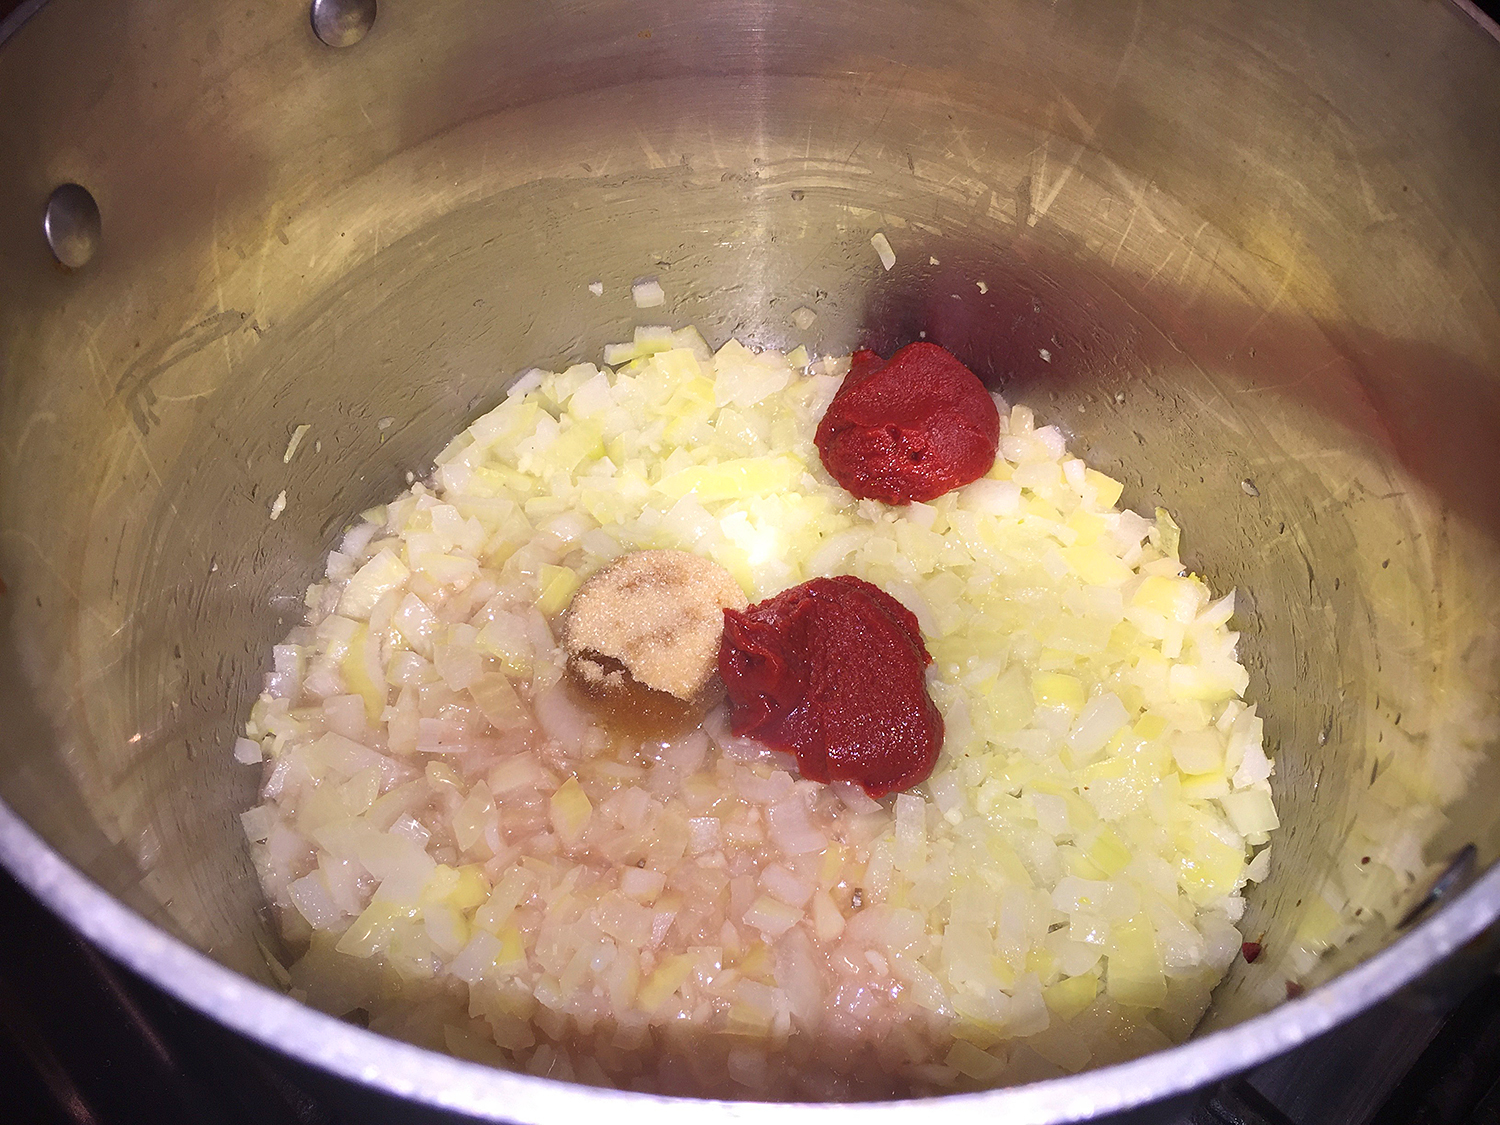
  7. Add the tomato paste, sugar and vinegar and cook for 1 minute.
    IMG_8909
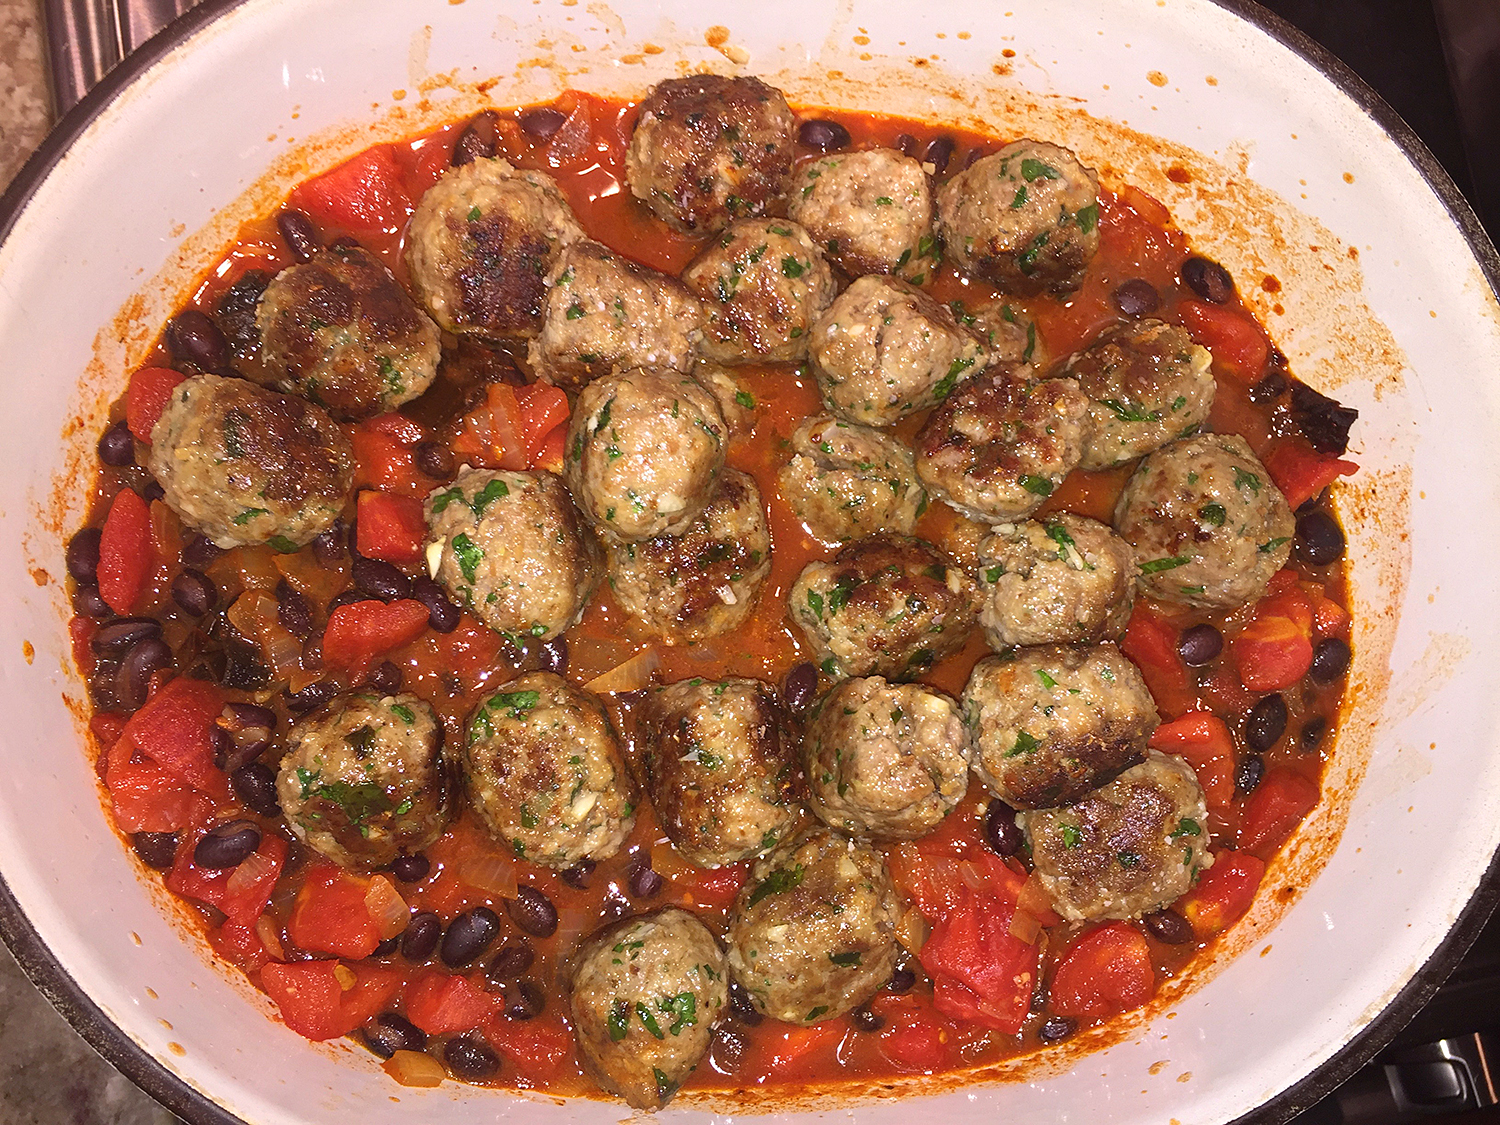
  8. Add the beef stock, tomatoes, beans, reserved chopped chile, reserved soaking liquid, paprika, salt and pepper. Bring to a boil, return the meatballs to the pan and transfer to the oven.
    IMG_8921
  9. Bake uncovered for 20 minutes or until the sauce is reduced and the meatballs are cooked through.
    IMG_8922
  10. Meanwhile, place the chorizo in a food processor and process until finely chopped.
    IMG_8917
    IMG_8918
  11. Heat the remaining oil in a medium non-stick frying pan over high heat. Add the chorizo and cook, stirring frequently, for 5–6 minutes or until crispy.
    IMG_8925
  12. Serve the meatballs over steamed rice and top with the crispy chorizo and sour cream. Or, as in our case, some shredded sharp cheddar.
    IMG_8928

http://www.lynnandruss.com

Recipe adapted from one on Epicurious.com by Donna Hay


A Healthier Pad Thai

No need to feel guilty when eating Pad Thai. By making a few simple changes, you’ll enjoy a tasty and healthier version with the recipe below. Part of the plan is to bulk up the serving size of Pad Thai by adding in lots of healthy veggies like matchstick carrots, snap peas and scallions. And swap out ground chicken for the typical beef; then look for whole-grain brown rice pad Thai noodles to add an additional 3 grams of fiber to each serving.

IMG_8478

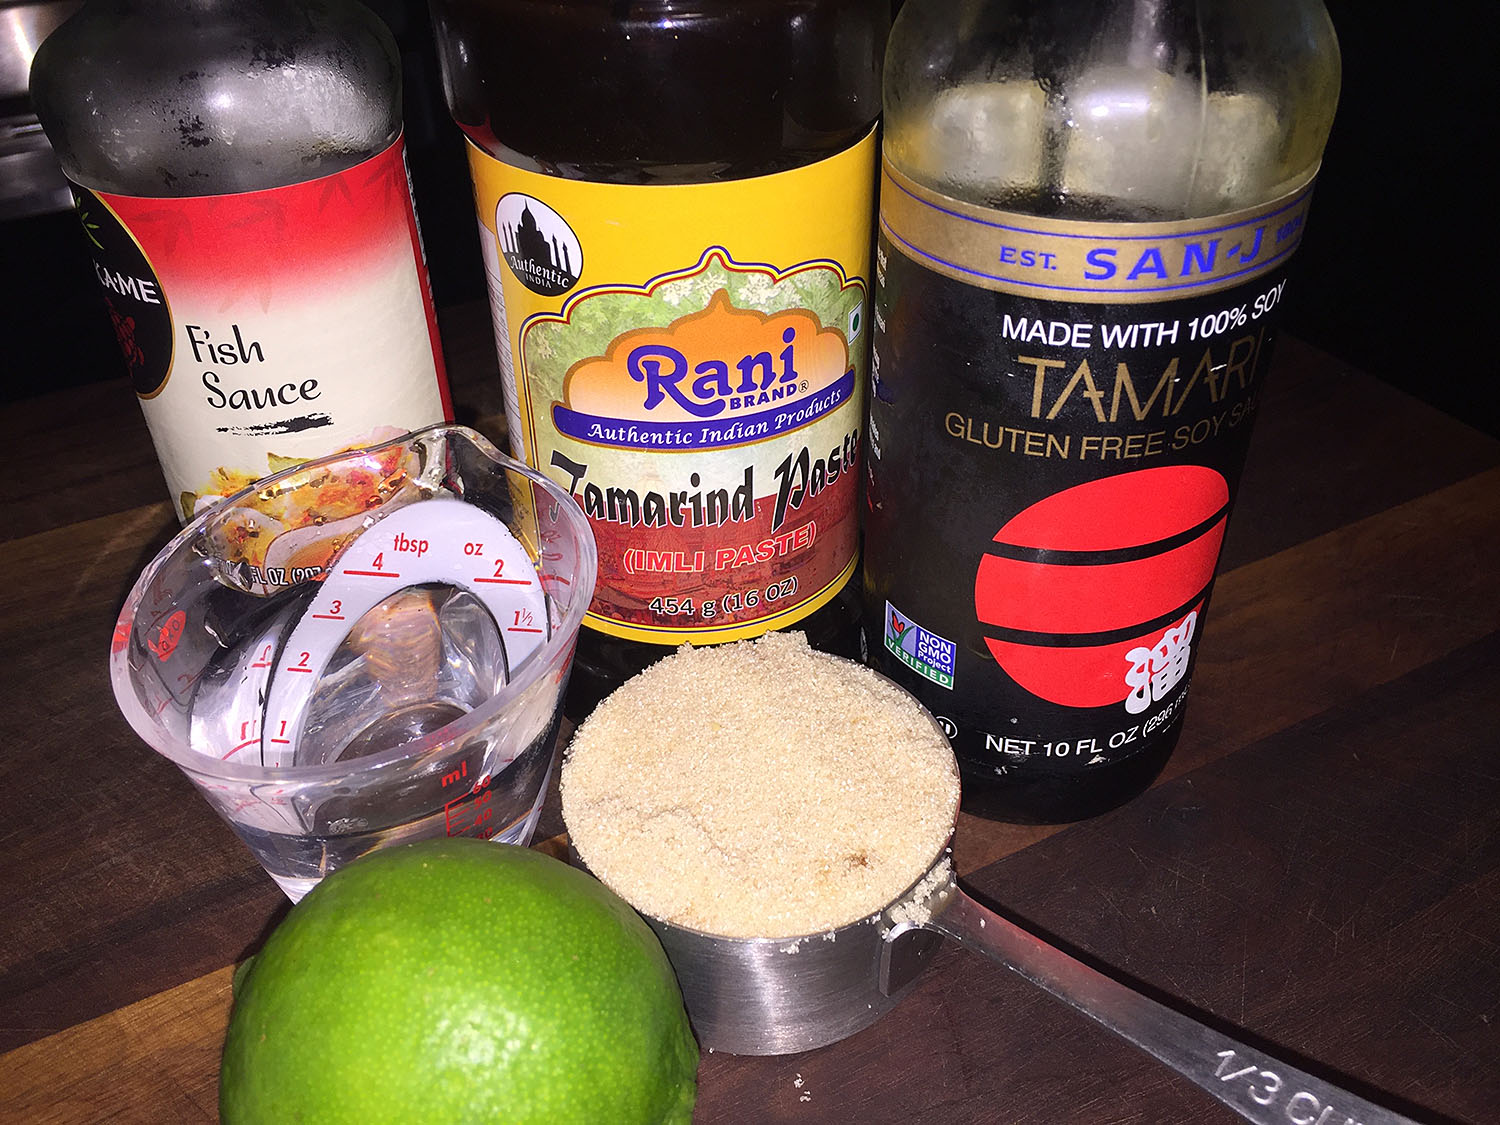
You have a choice of using store-bought Pad Thai sauce or making it yourself, which you can adjust to your own preferences. It might be a bit difficult to find at your regular grocer store, but check out an Asian Mart or order online ahead of time. With just a few clicks on the computer I was able to order a jar of Tamarind paste and it was delivered to my doorstep 2 days later. I liked the fact that I could make it to my own liking—and it didn’t disappoint!

IMG_8471

Healthier Chicken Pad Thai

  • Servings: 4-5
  • Difficulty: easy
  • Print

Ingredients

  • 8 ounces pad Thai rice noodles, preferably brown rice noodles
  • 2 teaspoons canola oil
  • 1 pound lean ground chicken, preferably organic
  • 2 cups matchstick carrots
  • 2 cups stringless snap peas
  • ½ cup chopped scallions
  • ½ cup pad Thai sauce, store bought or home-made*
  • Chopped peanuts and lime wedges for serving

Directions

  1. Bring a pot of water to a boil. Cook noodles in boiling water according to package instructions until al dente.
  2. Reserve 1 cup cooking liquid and drain the noodles.
  3. Meanwhile, heat oil in a large nonstick skillet over medium-high heat. Add ground chicken, and cook, crumbling with a wooden spoon until browned, 4 to 5 minutes.
  4. Add snap peas, carrots and scallions, and cook, stirring often, until the peas are bright green, 2 to 3 minutes.
    IMG_8476
  5. Add sauce, the noodles and about half of the reserved cooking liquid; stir with tongs to coat. Reduce heat to medium-low and simmer, adding more of the reserved cooking liquid to moisten if necessary.
  6. Cook, stirring occasionally, until the vegetables are crisp-tender, 2 to 3 minutes longer. Serve hot with chopped peanuts and lime wedges.
    IMG_8477

*Making your own Pad Thai sauce:

IMG_8465

Ingredients (makes 1 1/2 cups)

  • 1 cup Tamarind paste
  • ¼ cup water
  • ¼ cup fish sauce
  • 1 Tbsp soy sauce
  • ⅓ cup brown sugar
  • Lime zest, optional

Directions

  1. Combine all ingredients in a small saucepan over medium heat. Simmer until the brown sugar is dissolved, 2 to 3 minutes. (Do not let it reduce any further once the sugar is dissolved or it won’t be the right consistency for making Pad Thai.)
    IMG_8467
  2. IMPORTANT: At this point, you need to taste the sauce and adjust it to fit your taste. Some people like their sauce a bit more sweet, so if that’s you, add a bit more sugar and simmer for another minute. If you prefer a bit more salty/umami flavor, add a bit more soy or fish sauce. You can also add a bit of lime zest if you like a more pronounced citrus flavor.
  3. Store in an airtight container in the refrigerator for 3 weeks.

http://www.lynnandruss.com

Flip the Script

Creamy cannellinis studded with olives and chile flip the script on baked beans (though you can use chickpeas or butter beans instead of cannellini). Roast Cod with Cannellini Beans and Green Olives is one of those throw-together dinner recipes that relies on staples like canned beans and lemons; all you have to do is purchase some fish. You could cook said fish in less time on higher heat, but slow-roasting provides the best insurance against overcooking.

IMG_8830

That being said, the original recipe indicated you should cook the fish for 25-35 minutes at only 300°, but after reading several Bon Appétit reviews, many cooks said the temp was too low and the time not nearly long enough. So I took heed of their comments and cooked the cod at 325° for about 45 minutes. It was perfect! (My changes are indicated in the recipe below.)

But I think one of the main flavor boosts came from using homemade fish stock in place of the half cup of water. If you don’t have any, use chicken or vegetable broth, either of which will provide more depth of flavor than just water. And don’t omit those chiles. They add just enough heat and a pop of color to complete the dish.

Using a mandoline (which I should have used) will assist in getting those razor thin slices for the shallot, lemon and chiles. I had to slice down two lemons to cover—with an overlapping pattern—the entire length of the cod; plus my shallots were slightly too thick.

IMG_8834

When you go to plate individual servings, drizzle some very good extra-virgin olive oil over everything to bring it all together, lending a creamy silkiness to the dish. To complete the meal we paired ours with sautéed baby spinach with roasted garlic.

IMG_8816
IMG_8818

Roast Cod with Cannellini Beans and Green Olives

  • Servings: 4
  • Difficulty: easy
  • Print

Ingredients

  • 4 sprigs oregano
  • 2 15.5-oz. cans cannellini (white kidney) beans, rinsed
  • ½ cup Castelvetrano olives, pitted, torn
  • Kosher salt
  • 1½ lb. whole skinless cod fillet (substitute haddock, or halibut)
  • 1/2 cup homemade fish stock (substitute vegetable or chicken broth)
  • 2 small shallots, thinly sliced into rings
  • 1 Fresno chile, seeded, very thinly sliced into rings
  • 2 lemons, divided
  • 5 Tbsp. extra-virgin olive oil

Directions

  1. Preheat oven to 325°.
  2. Combine oregano, beans, olives, and ½ cup fish stock in a shallow 3-qt. baking dish; season lightly with salt.
    IMG_8819
  3. Place fish on top and nestle into beans; season fish generously with salt. Scatter shallots and chile slices over cod and beans.
    IMG_8820
  4. Very thinly slice 1 lemon and wriggle out seeds. Arrange slices, slightly overlapping, over surface of fish.
  5. Drizzle everything with oil and roast until fish is opaque throughout and flesh in the center flakes when gently pressed, 35-45 minutes, depending on the type and thickness of the fish. (Start checking at 35 minutes just to be sure.)


    IMG_8829

  6. Let rest, occasionally pressing beans down into the liquid so they don’t dry out, 5–10 minutes.
  7. Cut remaining lemon into wedges and serve alongside fish and beans for squeezing over.
    IMG_8832

http://www.lynnandruss.com

Adapted from a recipe by Claire Saffitz from Bon Appétit

Mushroom Ragoût with Cheese Ravioli

Great as a side dish or the main course, Mushroom Ragoût with Cheese Ravioli is sure to win over fungi lovers, like us. Though delicious made with cremini mushrooms alone, this one-pan sauce is even more spectacular if you use a mix of mushrooms (wish I would have thought of that before I food shopped.) FYI: All mushrooms are fungi, but not all fungi are mushrooms.

IMG_8553

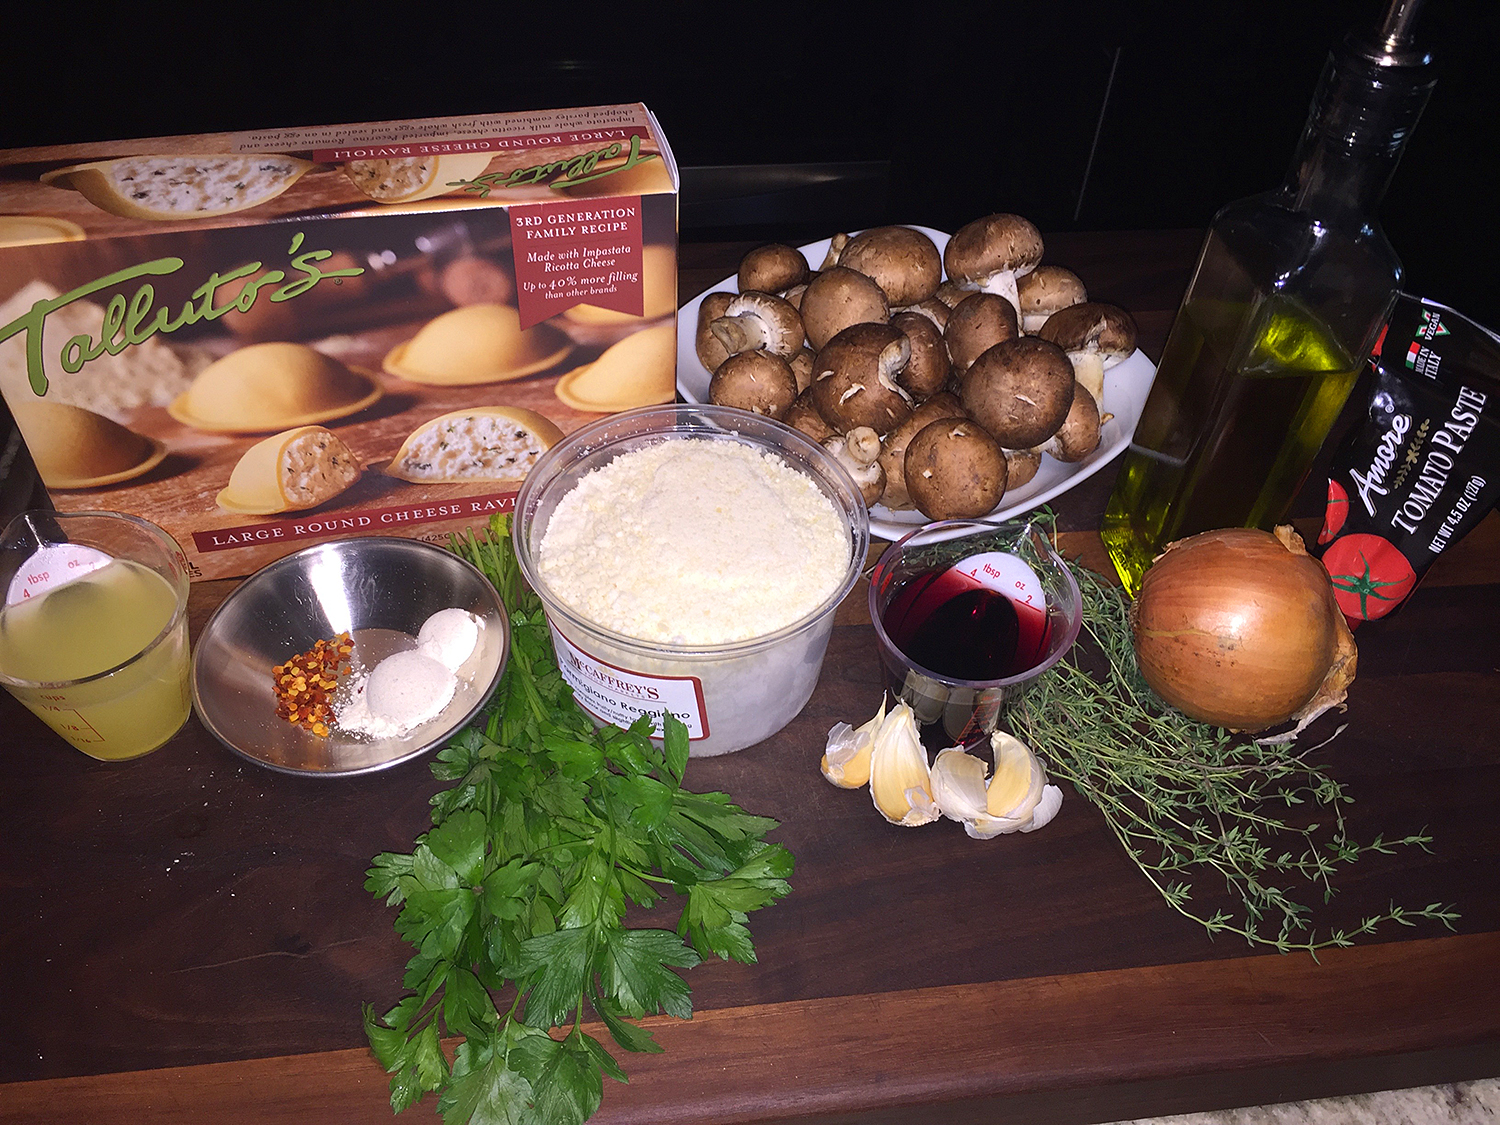
Our package of frozen ravioli totaled 15 ounces, 50% more than the 10 ounces the recipe called for! It came with 12 large round raviolis, and with four per person, I don’t see how only ten ounces could provide dinner for four diners! Anyway something to keep in mind when making it for your family.

IMG_8559A plate of four large ravioli with mushroom ragoût constituted one serving.
And while the taste was fabulous with an earthy depth of flavor, we wished there had been more mushroom ragoût. In the future, I will definitely double all of the other ingredients to produce more balance between pasta and sauce—but the recipe below is the original.

IMG_8539

Mushroom Ragoût with Cheese Ravioli

  • Servings: 3-4
  • Difficulty: easy
  • Print

Ingredients

  • Kosher salt
  • 2-1/2 to 3 Tbs. extra-virgin olive oil; more as needed
  • 12 oz. cremini mushrooms, sliced about 1/4 inch thick
  • Freshly ground black pepper
  • 1 small yellow onion, chopped
  • 3 cloves garlic, minced
  • 1-1/2 tsp. tomato paste
  • 1-1/2 tsp. all-purpose flour
  • 1-1/2 tsp. chopped fresh thyme leaves
  • Pinch crushed red pepper flakes
  • 1/4 cup dry red wine
  • 1/4 cup lower-salt vegetable or chicken broth
  • 10 oz. fresh or frozen cheese ravioli or other cheese-stuffed pasta
  • 1 Tbs. chopped fresh flat-leaf parsley
  • Grated Parmigiano-Reggiano or Grana Padano

Directions

  1. Bring a large pot of well-salted water to a boil.
  2. Heat 1-1/2 Tbs. of the oil in a large skillet over medium-high heat. Add the mushrooms, 1/4 tsp. salt, and a few grinds of black pepper. Stir to combine, then spread the mushrooms out in the pan and cook, undisturbed, until well browned on one side, about 3 minutes.
    IMG_8541
  3. Stir and continue to cook until well browned all over and any liquid has evaporated, about 3 minutes. (If the mushrooms are dry and the pan begins to scorch, add a drizzle of oil.) Transfer the mushrooms to a plate.
  4. Add 1 Tbs. of the remaining oil in the same pan over medium heat. Add the onion and cook until translucent, about 2 minutes.
  5. Add the garlic and cook until fragrant, about 30 seconds. Add the tomato paste and cook, stirring, for 1 minute.
    IMG_8543
  6. Return the mushrooms and any liquid to the pan. Add the flour, thyme, and pepper flakes, and cook, stirring frequently, for 1 to 2 minutes.
  7. Add the wine, and stir until thickened.
  8. Add the broth, and simmer until the liquid reduces to a light sauce. Season to taste with salt and pepper.
    IMG_8545
  9. Meanwhile, cook the pasta in the boiling water according to package directions until al dente, drain, and add to the skillet with the mushrooms. Stir to coat over low heat. Serve topped with the parsley and cheese.
    IMG_8549

http://www.lynnandruss.com

IMG_8554

Original recipe by Lynne Curry from Fine Cooking

Cashew Chicken

Who doesn’t LOVE ❤ cashews? I pretty much love all nuts (even some of the human kind), but cashews have a special place in my heart. When I was quite young and my maternal grandfather was still alive, he owned and operated Eddie’s Bar. And in that bar he had this hotbox containing a treasure trove of warm roasted cashews. He knew I harbored a passion for them, so he would sneak me a large serving, along with an ice cold orange soda pop, whenever I’d stop in from playing outdoors. Yes, in those days it was OK for a young child to walk into a bar!

Now, many decades later, I still drool for salty roasted cashews, although I don’t traipse into a bar to get them (however I wouldn’t put it past me.) But I am tickled pink when I come across a recipe that calls for the luscious little fellows. This one however uses the unsalted variety, but because I could and I did, I incorporated the salty ones, and probably more than the half cup listed below 😉

IMG_8659

Likely one of the most beloved Chinese recipes in America, Cashew Chicken classically consists of dark meat chicken, sugar snap peas, carrots, and cashews in a light, silky sauce that barely clings to the chicken and that’s fragrant with ginger. Sadly, Cashew Chicken found at your local Chinese take-out is often nothing at all like it was intended to be, consisting rather of greasy, deep-fried chicken in a goopy gravy. Sound familiar? This simple stir-fry takes you squarely back to tradition, thanks to Grace Young.

Keep in mind, as with most stir-fries, make sure to have all of your ingredients prepped ahead of time, because when doing the actual stir-frying, there is no downtime and it goes crazy fast—about 5 minutes total. To add even more flavor, cook your rice with homemade chicken stock instead of water.

Overall, the quantity of veggies seemed a bit sparse so I increased the carrots, snap peas and celery all by about 50%. Being a cashew lover, this was a great week for me because just a few days prior we dined on Baingan Bharta, which also incorporated the delicious nuts!

yellow.red.fruit
Did You Know? The cashew fruit consists of two distinct parts: a fleshy stalk in the form of a pear—also called the cashew apple—with a brilliant yellow or red skin’ and a gray-brown colored nut (the cashew) in the shape of a kidney, which hangs from the lower end of the stalk or “apple.”

IMG_8646

Cashew Chicken

  • Servings: 2-3
  • Difficulty: moderately easy
  • Print

Ingredients

  • 1 pound skinless, boneless chicken thighs, cut into 1/2-inch cubes
  • 1 tablespoon minced garlic
  • 2 teaspoons soy sauce (for a richer tasting sauce, use dark soy sauce) 
  • 1 1/2 teaspoons cornstarch
  • 1 teaspoon plus 2 tablespoons Shao Hsing rice wine or dry sherry
  • 3/4 teaspoon salt
  • 1/8 teaspoon granulated sugar
  • 1/4 cup homemade chicken stock or canned chicken broth
  • 2 tablespoons peanut or vegetable oil 
  • 2 tablespoons minced ginger
  • 1/2 cup sugar snap peas (2 1/2 oz), strings removed
  • 1/2 cup carrots sliced 1/4 inch thick (or matchsticks)
  • 1/2 cup celery sliced 1/4 inch thick
  • 1/2 cup unsalted roasted cashews 

Directions

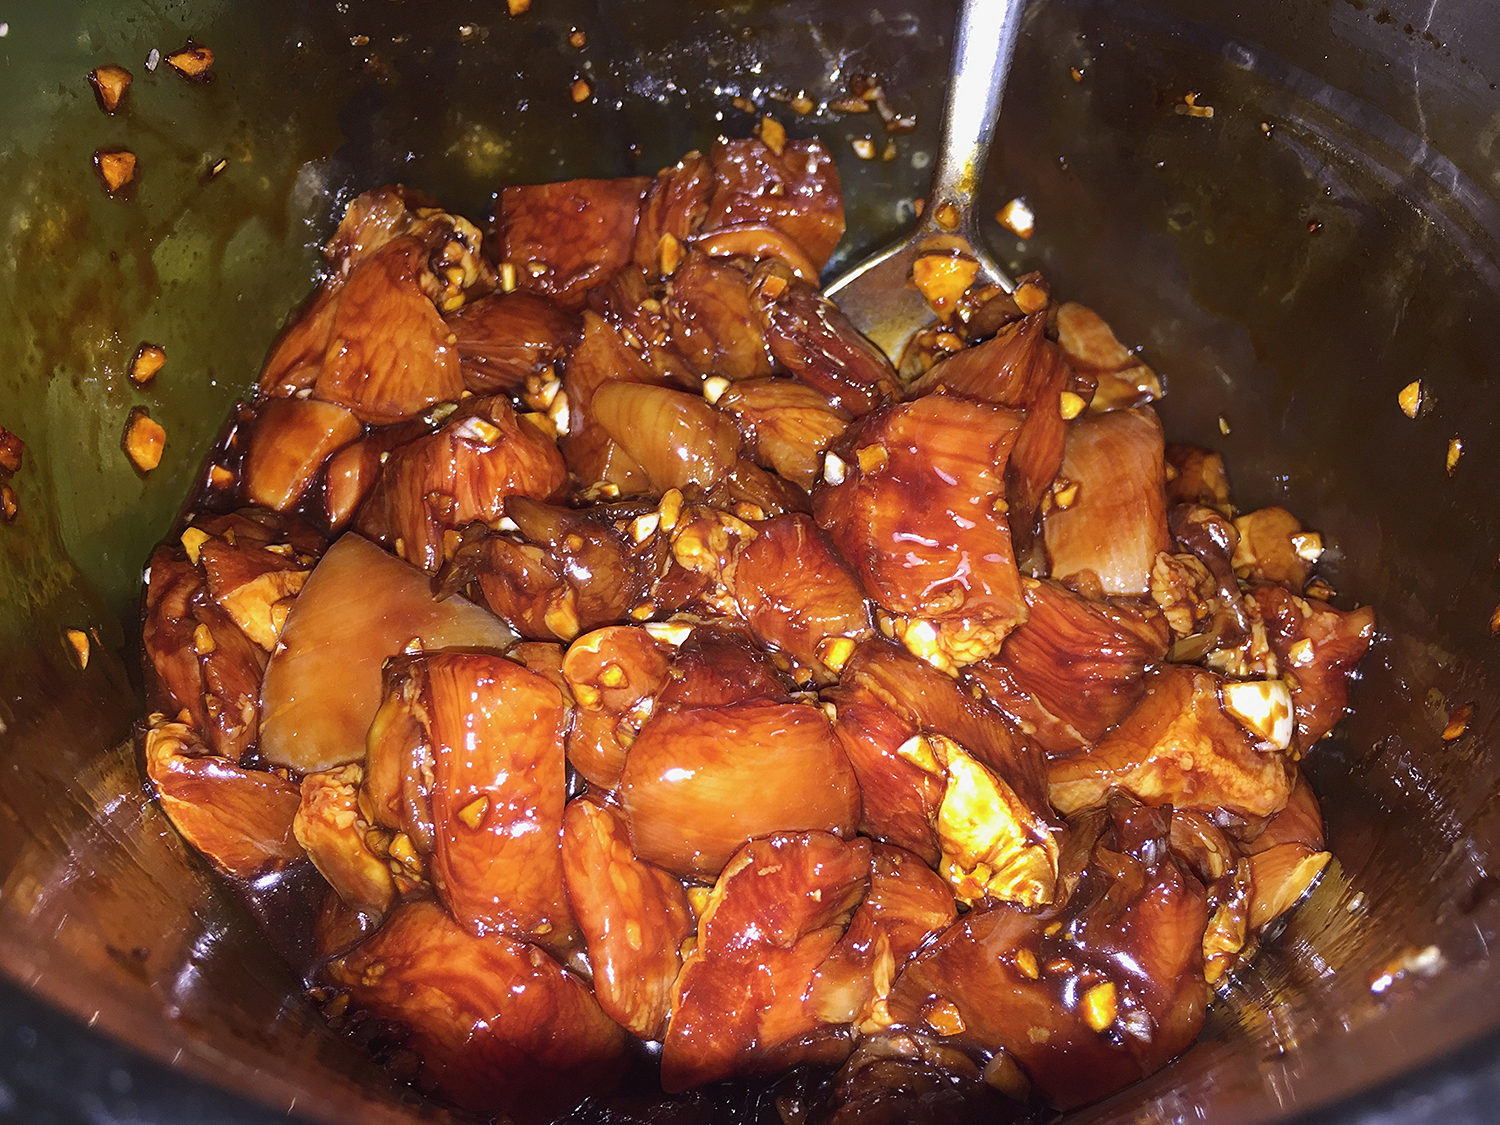
  1. In a medium bowl, combine the chicken, garlic, 1 teaspoon of the soy sauce, 1 teaspoon of the cornstarch, 1 teaspoon of the rice wine, 1/2 teaspoon of the salt, and sugar. Stir to combine.
    IMG_8648
  2. In a small bowl combine the broth, the remaining 1 teaspoon soy sauce, 2 tablespoons rice wine, and 1/2 teaspoon cornstarch.
  3. Heat a 14-inch flat-bottomed wok or a 12-inch skillet over high heat until a bead of water added vaporizes within 1 to 2 seconds of contact. Swirl in 1 tablespoon of the oil, tilting the wok to evenly coat the bottom of the pan.
  4. Add the ginger and, using a metal spatula, stir-fry until the ginger is fragrant, about 10 seconds. Push the ginger to the sides of the wok, carefully add the chicken mixture, and spread it evenly in a single layer. Cook the chicken, undisturbed, for 1 minute. Then stir-fry until the chicken is lightly browned but not cooked through, about 1 minute.
    IMG_8650
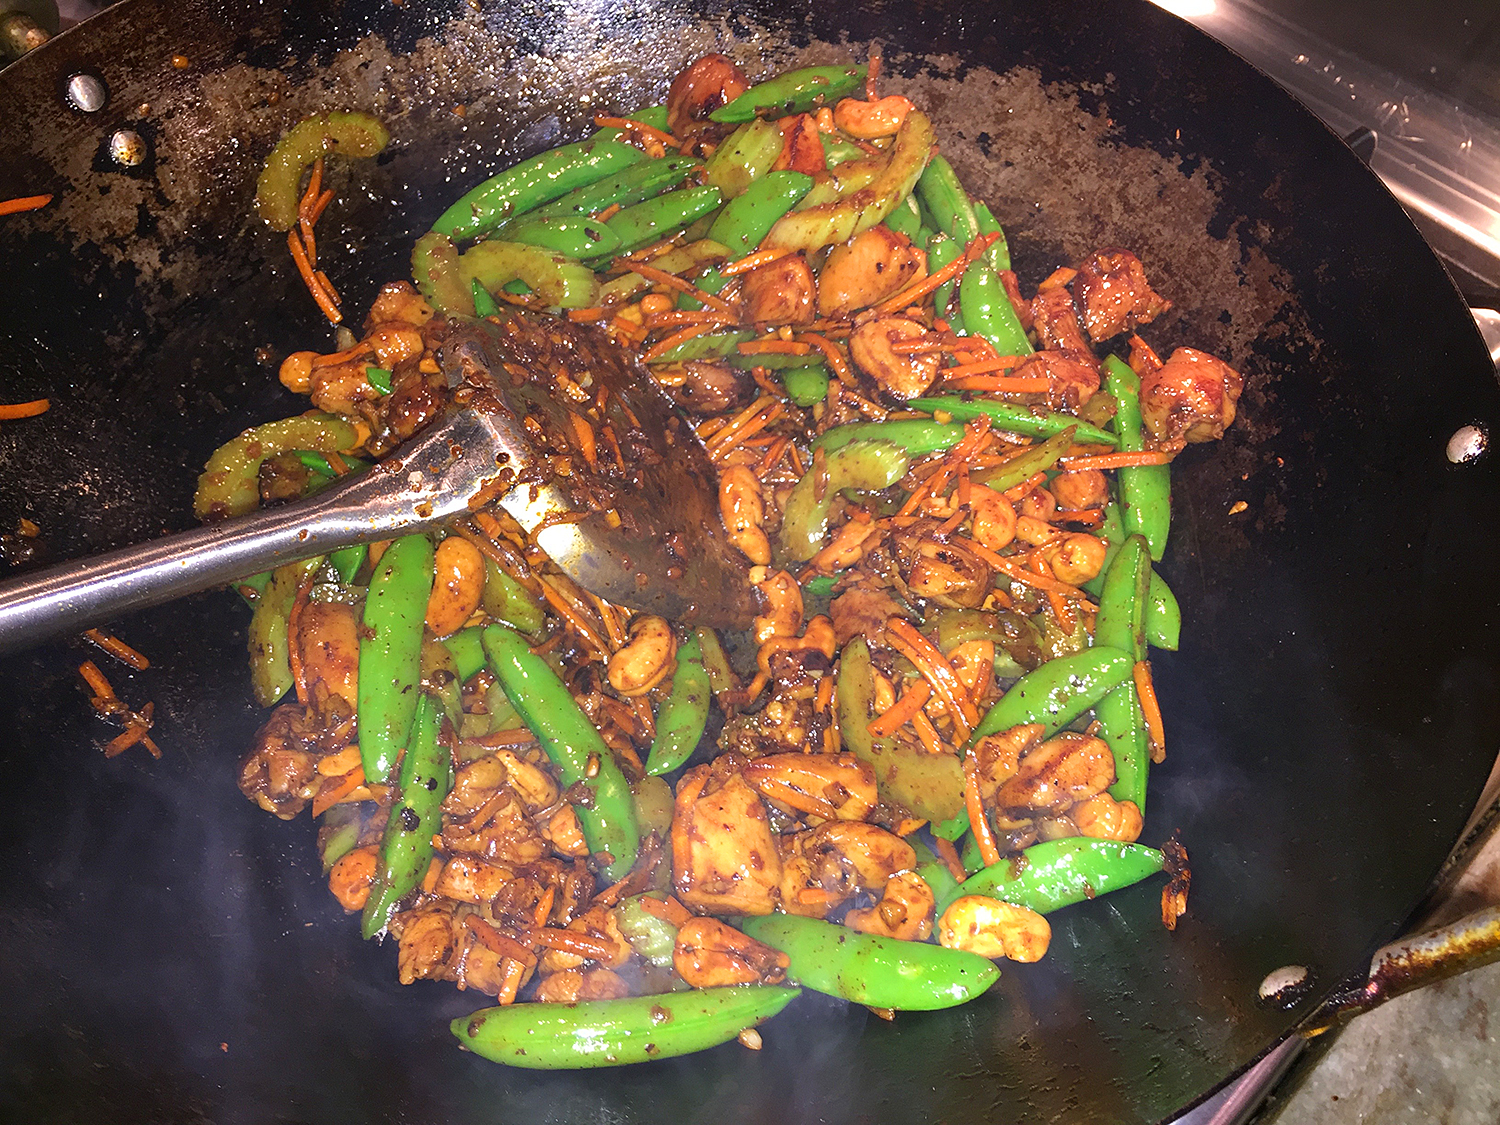
  5. Swirl the remaining 1 tablespoon oil into the wok, add the sugar snaps, carrots, celery, and cashews, and sprinkle with the remaining 1/4 teaspoon salt. Stir-fry just until the sugar snaps are bright green, about 1 minute.
    IMG_8655
  6. Restir the broth mixture and swirl it into the wok, adding it along the sides rather than into the middle. Stir-fry until the chicken is just cooked through, about 1 minute. Serve immediately over steamed rice, if using.
    IMG_8656

http://www.lynnandruss.com

IMG_8661

Recipe adapted from Grace Young