Monthly Archives: November 2016

Creamy but Lightened Up Turkey Tetrazzini

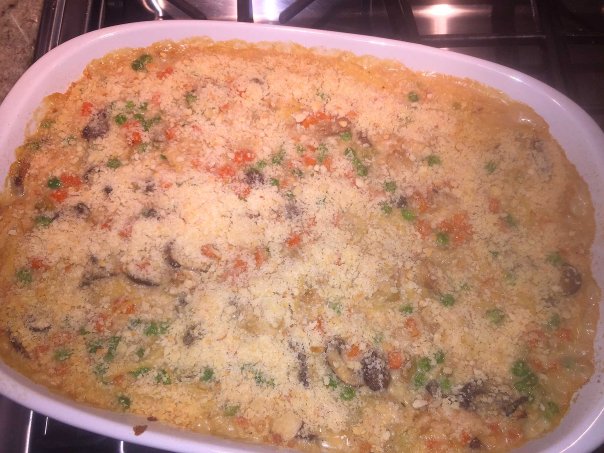
Other than turkey soup, one of the more popular dishes to use up your leftover bird is Turkey Tetrazzini. This delicious casserole combines leftover turkey meat and cooked pasta in a homemade creamy Parmesan cheese sauce. But my memory of indulging in this dish was decades ago and I recall it being heavy and not very diet-friendly. Russ has never had it, so when I mentioned that a coworker has a family tradition of making it on Black Friday, we both thought it might be time for us to give it a whirl.

Since Tetrazzini typically uses a lot of butter and heavy cream, I wanted to pare back on these caloric, fat-laden ingredients, but not lose the rich flavor. Plus I had to be cognizant of Russ’ wheat allergy, so I substituted gluten-free versions of the panko, spaghetti and flour. (You can also substitute chicken for both the turkey and broth.)

img_8951

Google can be your best friend when researching, so I looked up several recipes (Food Network, Epicurious, Emeril Lagasse, etc.) and combined what I liked from a few of them to concoct the following recipe. It includes very little butter, lite cream cheese, less pasta, more turkey and additional healthy vegetables. Of course our homemade turkey stock added more depth of flavor than any store bought broth could, so if you have the opportunity to make some ahead of time, you won’t regret it.

I made ours the Sunday of Thanksgiving weekend with the intention of having it on Monday evening after work. Therefore once it was cooled, I covered it with tinfoil and refrigerated it overnight. The next day, I knew the entire casserole would be way too much for the two of us, so I portioned enough out for dinner and reheated in a 400 degree oven for about 40-45 minutes (see the TIP below). With a side salad, it made for a great dinner and lunches during the week.

FYI: Although I don’t personally recommend it, shortcut recipes for home cooking sometimes use canned cream of mushroom soup or other cream soups.

img_8931

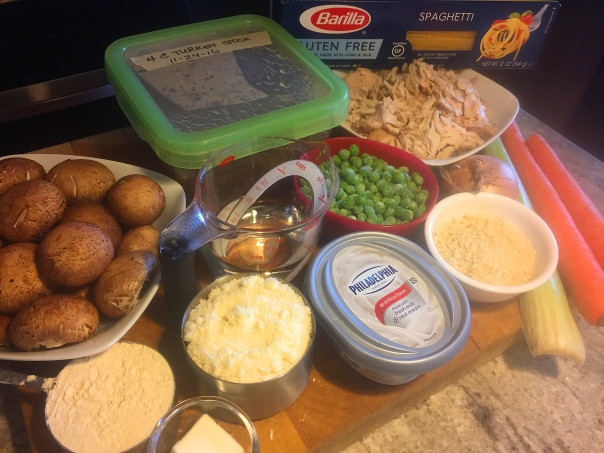
Ingredients

  • 1 tablespoon butter
  • 1cup onion, finely chopped
  • 34 cup carrot, finely chopped
  • 13 cup celery, finely chopped
  • 1teaspoon pepper
  • 1teaspoon salt
  • 3cup frozen peas
  • 8 ounces sliced white mushrooms
  • 12 cup white wine or sherry
  • 12 cup flour
  • 4 cups turkey broth (homemade if possible)
  • 4 ounces lite cream cheese, room temperature
  • 1 cup parmesan cheese
  • 3+ cups cooked turkey, shredded
  • 8 ounces thin spaghetti, cooked al dente
  • 12 cup panko breadcrumbs

img_8936
Finely chop the carrots, celery and onion and slice the mushrooms.

img_8939
Once the veggies are tender, add flour and stir to coat.

img_8942
Once the broth is added, bring to a boil then simmer for 5 minutes.

img_8944
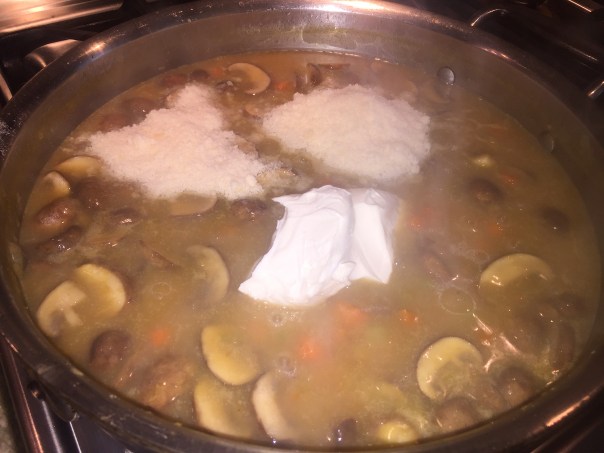
After done simmering, remove from heat and add the cream cheese and half of the parmesan.

img_8947
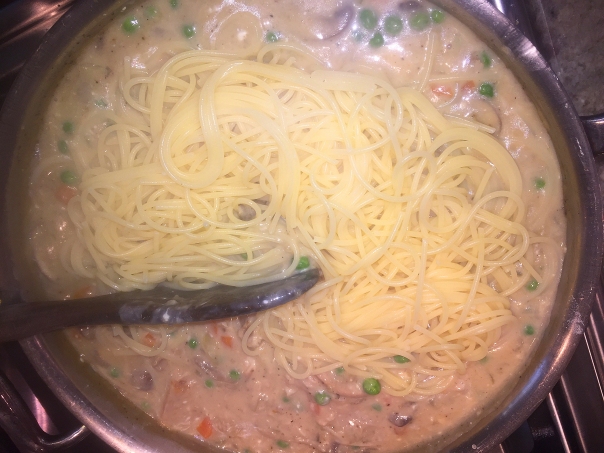
When the cheese has melted, add the turkey, peas and spaghetti and lightly mix.

img_8948
Pour the mixture into a prepared casserole dish and top with the combined panko and other half of parmesan.

Directions

  1. Preheat oven to 350.
  2. Melt butter in large sauté pan.
  3. Cook and stir onion, celery, carrots and mushrooms in butter in a large skillet on medium heat until tender.
  4. Add flour and stir until vegetables are coated.
  5. Add wine and stir quickly until flour is absorbed.
  6. Gradually add broth, stirring constantly.
  7. Bring to a boil, reduce heat and simmer for 5 minutes, stirring frequently.
  8. Remove from heat.
  9. Add cream cheese and 1/2 cup parmesan, stir until melted.
  10. Add the peas, turkey and cooked spaghetti.
  11. Mix lightly.
  12. Transfer to 13 x 9 inch baking dish.
  13. Combine panko and 1/2 cup parmesan; sprinkle evenly over top of casserole.
  14. Bake at 350º for 30 minutes until lightly browned.
  15. Let rest 15 minutes before serving.
Tips

  • Reheat: Preheat the oven to 400 degrees. Unwrap the foil, discard the plastic and re-cover with the foil. Bake until the center is warm, 30 to 35 minutes; uncover and bake for 10 to 15 minutes to recrisp the topping.
  • Freeze: Double-wrap (in plastic wrap and foil) the cooled dish and freeze for up to 2 weeks.

Broccoli Raab—A Veggie with Many Names

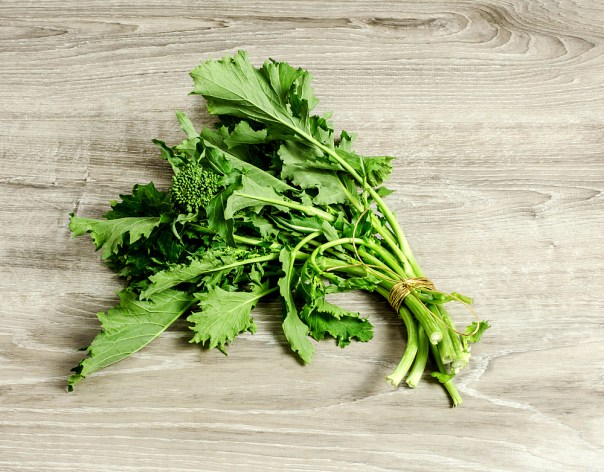
I don’t usually highlight a side dish over the entrée, but I’m making an exception in this case. We’re talking Broccoli Raab (rabe or rapini) which has many spiked leaves that surround clusters of green buds that resemble small heads of broccoli. The flavor of raab has been described as nutty, bitter, and pungent. It’s particularly popular in Italian cuisine, and best when sautéed or blanched to soften the stalks and leaves and alleviate the harshness.

broccoli-raab

broccolini

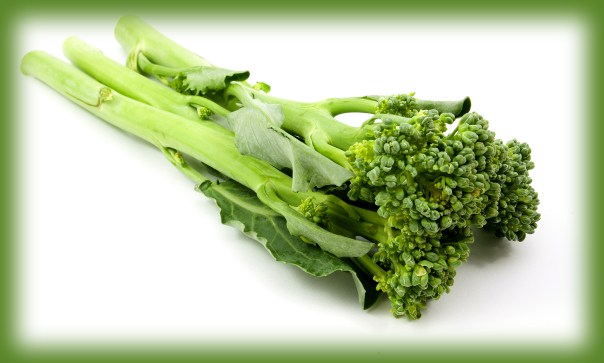
What is the difference between broccoli, broccoli raab (above top), broccolini (above bottom), and chinese broccoli? Despite their similar names, what sets these winter veggies apart is the plant family they belong to. While broccoli, broccolini, and Chinese broccoli are closely related to cabbage, interestingly, the closest kin to broccoli raab is turnips. (A few of the many other names are rapa, rapine, rappi, rappone, turnip broccoli, taitcat, Italian or Chinese broccoli, broccoli rape, broccoli de rabe, Italian turnip, and turnip broccoli.)

The stems are generally uniform in size (hence cook evenly) and need not be peeled. This vegetable is a good source of vitamins A, C, and K, as well as potassium. Rapini is available all year long, but its peak season is from fall to spring. To maintain crispness, refrigerate, unwashed, loosely wrapped in a plastic bag or wrap for up to 3 days.

Now about that recipe. Sautéed Broccoli Raab with Chile, Garlic and Lemon was part-and-parcel of our weekly “Make It Tonight” series from Fine Cooking. The assertive flavors and bright-green color of this side make it a perfect pairing for chicken or salmon (see our recipe below). It also goes well with starchy dishes like risotto and pasta. Some people delight in broccoli raab’s full, undiluted flavor; but we find that blanching tempers the bitter note to a more pleasing level and allows other flavors to have their say.

But what I didn’t notice in my haste at the supermarket was that I grabbed broccolini, not the raab! It has a similar look with small florets, long stalks, and a few small leaves (not the abundance of leaves in raab) — all of which are edible. Compared to the bitter flavor of regular broccoli, broccolini is milder, with a sweet, earthy taste.

Oh well, in the end, the side was delicious. Now you can go ahead and make it with either broccolini and/or raab…

img_8802

Ingredients

  • 3 Tbs. extra-virgin olive oil
  • 1 Tbs. minced garlic (2 to 3 large cloves)
  • Scant 1/4 tsp. crushed red pepper flakes (I of course used more)
  • Finely grated zest of half a lemon; plus fresh lemon juice to taste
  • Kosher salt and freshly ground black pepper
  • 1 lb. broccoli raab, rinsed, trimmed, and blanched

NOTE: To blanch, drop trimmed (but uncut) broccoli raab into boiling salted water. After two minutes (even if the water hasn’t returned to a boil), drain and refresh under cold water.

Directions

  1. Put the oil, garlic, and red pepper flakes in a 10- to 12-inch skillet over medium-low heat. Cook until the garlic is fragrant and starts to sizzle slightly, about 3 minutes.
  2. Reduce the heat to low if the garlic starts to brown. Stir in the lemon zest, 1/4 tsp. salt, and a few grinds of pepper.
  3. Raise the heat to medium high and add the broccoli raab, turning to thoroughly coat in the oil and spices. Turn frequently, until it is heated through, 2 to 3 minutes.
  4. Turn off the heat, sprinkle lemon juice over the broccoli raab, toss again, and season to taste with salt and pepper.

img_8807
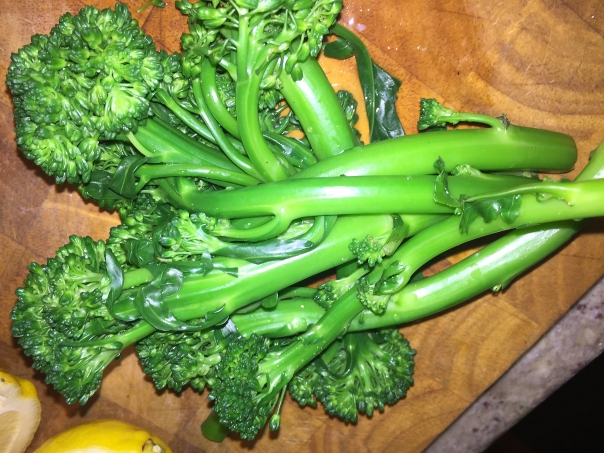
The broccolini turns a vibrant green after blanching and cooling under cold water.

img_8812
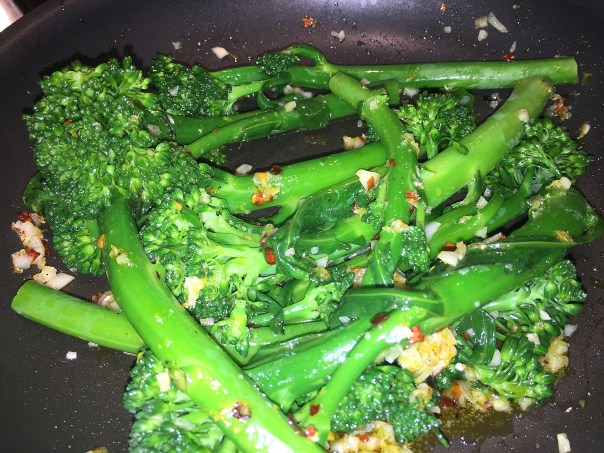
Cook the seasonings in oil for a few minutes before adding the greens.

img_8814
The vegetable gets all happy in the lemon, garlic, and red pepper flake mixture. You can make is as hot—or not—as you like by adjusting the amount of pepper flakes.

Broccoli Raab recipe by Ruth Lively from Fine Cooking

img_8818

Pan-Seared Arctic Char with Olives and Potatoes

Looking for a fish you can feel good about eating? Arctic char is a fast-reproducing fish that is a good, sustainable alternative to Atlantic salmon, which it resembles in flavor and texture.

However, when I went food shopping for this meal, the Artcic Char looked like it had seen better days. So I opted for salmon fillets, which being thicker, took a few minutes longer to cook through. The Broccoli Raab (OK, Broccolini) paired wonderfully with the fish dish!

img_8798

Ingredients

  • 4 small red potatoes (about 3/4 lb.), sliced 1/4 inch thick
  • Kosher salt and freshly ground black pepper
  • 4 skin-on arctic char fillets (about 5 oz. each), scaled
  • 3 Tbs. olive oil
  • 2 sprigs fresh rosemary, each about 3 inches long
  • 1/2 cup pitted Kalamata olives
  • 3 Tbs. roughly chopped fresh flat-leaf parsley
  • 1 Tbs. balsamic vinegar
  • 4 lemon wedges

img_8803
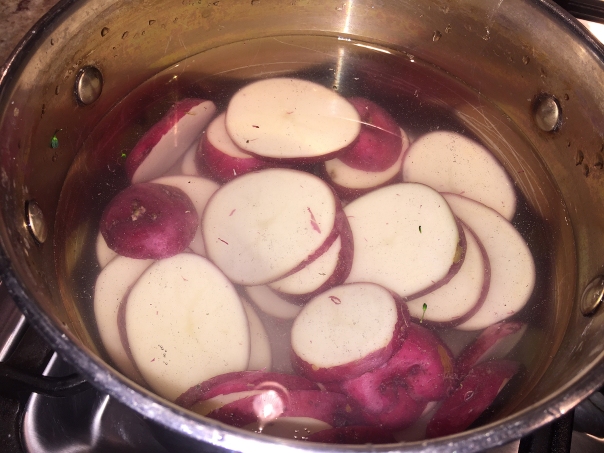
Bring the potatoes to a boil in enough salted water to cover them by 1 inch.

img_8806
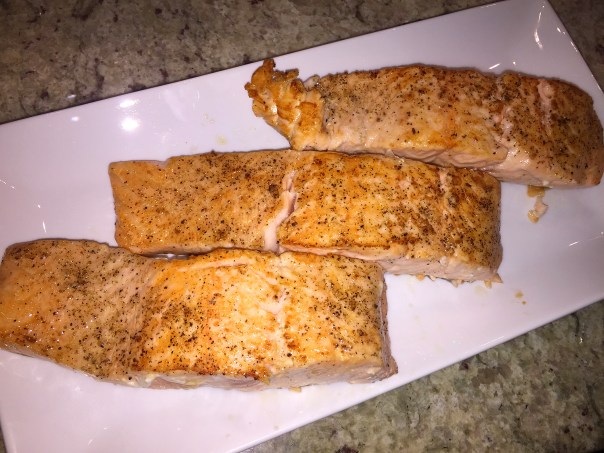
Sear the fillets skin side down in a hot skillet for several minutes.

img_8809
Turn the fish over to finish cooking on the other side.

img_8810
Remove the cooked fillets to a platter and cover with foil to keep warm while the potatoes finish cooking.

Directions

  1. In a medium saucepan over high heat, bring the potatoes to a boil in enough salted water to cover them by 1 inch. Reduce the heat to a brisk simmer and cook until tender but not falling apart, about 5 minutes. Drain. Set aside.
  2. Pat the fish dry and season with 1/2 tsp. salt and 1/4 tsp. pepper. Heat 1-1/2 Tbs. of the olive oil in a 12-inch nonstick skillet over medium-high heat until shimmering hot. Arrange the fish skin side down in the pan so the fillets fit without touching.
  3. Cook undisturbed for 3 minutes. Flip the fillets and cook until the fish is cooked through, an additional 2 to 3 minutes. With a slotted spatula, transfer the fish to a serving platter or plates.
  4. Add the remaining 1-1/2 Tbs. oil to the pan and heat until shimmering. Add the potatoes and rosemary and cook, flipping occasionally, until the potatoes are tender, 3 to 4 minutes.
  5. Add the olives, parsley, balsamic, and a pinch of salt and pepper and stir gently to heat. Arrange the potato mixture around the fish. Serve garnished with the lemon wedges.

by Jay Weinstein from Fine Cooking

img_8816After the potatoes are returned and cooked in the pan for several minutes, add the olives, parsley, balsamic vinegar, and a pinch of salt and pepper and stir gently to heat.

img_8819
Spoon the potato mixture on your plate and arrange the char (or salmon) on top followed by a generous portion of the broccoli raab.

Thanksgiving, Behind the Scenes

Let’s talk turkey, and, while we are at it, appetizers, soup, gravy, potatoes, side dishes, stuffing and dessert. Yes, Thanksgiving, the Superbowl of meals! Countless folks I know call it their favorite meal of the year—eagerly anticipated for months… But why wait an entire year to replicate it? The upcoming Winter holiday season is as good an excuse as any…

A few weeks ago I blogged about the benefits of dry-brining over a wet-brine, so I had to see for myself if the process was indeed superior. My research indicated most dry-brine methods call for putting the seasoned bird in the frig uncovered for at least part of the time, if not the entire time—generally 1-3 days.

img_8903

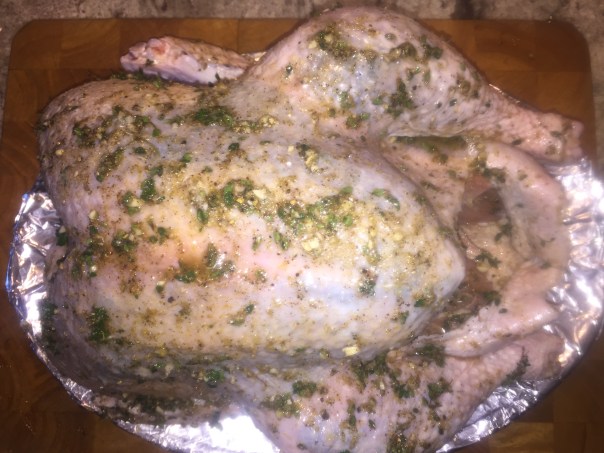
But the following recipe (which I chose because I liked the list of ingredients) instructs one to wrap your turkey tightly with plastic wrap after seasoning, which I was going to ignore. But then I started thinking about those other dry-brines and they used a 1/2 cup of kosher salt whereas this recipe only used 2 tablespoons. Maybe there was a reason to wrap it?

After a minor argument with myself, I decided to heed the instructions, and I prepped our 15-pounder on Wednesday morning, wrapped it with plastic wrap until Thursday morning when I removed the covering and left in the frig until one hour before roasting time. In essence, the bird experienced a bit of both worlds: wrapped and unwrapped—which is how I might have felt if I hadn’t created my to-do list ahead of time.

turkey-day-cooking-schedule

Yes, call me anal, but this check list worked out real well, and I’m going to keep it as a template for other upcoming feasts. (Joining us for the food fest were Russ’s two sons Dan and Dave, and our long-time friends Barb and Brad.) Of course, the guests had to put in their two cents. Dan noted that I actually did some of the tasks ahead of time and I explained that was OK, as long as each step was started by the time noted on the schedule. And Brad devilishly asked if I included a “photo op” on the outline, then couldn’t believe that I had! The only problem was toward the end, when the turkey was not at temperature by 5:30.

img_8896

img_8899

This was an odd turn of events because in previous years when cooking a fresh turkey it was always done ahead of time. And in an even odder twist, we had been getting phone calls and texts from daughter Julia who was cooking her first Thanksgiving meal down in Tennessee for her boyfriend’s family. She was a bit frantic that the breast was 30 degrees hotter than the legs and thighs. So dad and Dan provided the “Hartman Hotline” dispensing much needed advice and assurance throughout the afternoon.

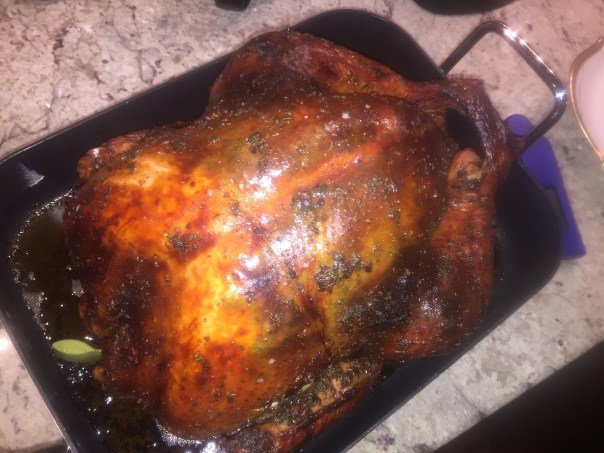
Shortly after Julia’s crisis, wouldn’t you know we were experiencing the same flippin’ issue? Mr. Bird was finally to temp about 45 minutes late, but it was browned beautifully! And consensus was it tasted as good as it looked, made even better by the gravy which was chock full of flavor from the pan drippings and the homemade stock.

img_8901

However the mashed potatoes were a huge disappointment. I got the idea to keep them warm in a crockpot after Julia mentioned she was making hers in a slow cooker—which sounded strange because she wasn’t adding any liquid to start with. But then a light bulb went off—what a great concept to boil the potatoes ahead of time and just keep the mashed spuds warm in the crockpot on a low setting until dinner was ready. Bad idea. While they were perfectly creamy when I first prepared them, they were no longer soft and fluffy by the time we ate. Never again…

img_8913
David gets a lessen from Dad on the proper way to carve a turkey.

We had a few hours to kill before dinner and the aromas were causing stomachs to growl. Luckily Barb saved the day with her two appetizers of kielbasa with a fabulous doctored up horseradish sauce and a lovely baked brie.

img_8888

img_8892

And what’s a feast without a dessert or two? Of all the guests, Russ was perhaps the only one who felt that you can’t have a Thanksgiving dinner without pumpkin pie. His dilemma was what to do about the crust with his wheat intolerance? He found the answer with Bobby Flay’s Throwdown Pumpkin Pie with a graham cracker crust. Luckily he scored on buying some gluten-free graham crackers. I must admit, it did smell fabulous—and everyone was impressed with the Bourbon Whipped Cream topping!

img_8846
Pumpkin pie before the whipped cream topping.

Knowing the rest of the group wasn’t into pumpkin pie, I asked Barb to bring another dessert. She truly dazzled with her ginormous homemade NY Cheesecake with Chocolate Chips.

img_8924
Barb’s homemade cheesecake.

img_8927
The boys couldn’t choose so they had a slice of each.

Lemon and Fennel Rubbed Turkey with Honey-Sage Brown Butter

img_8847

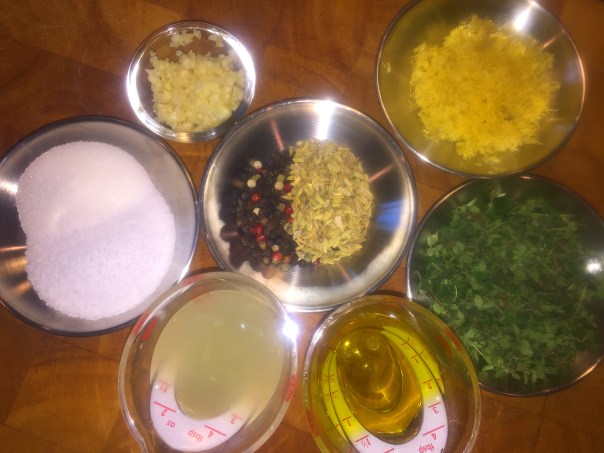
LEMON AND FENNEL RUB

  • 3 cloves garlic, peeled, pressed or finely minced
  • 2 tablespoons kosher salt
  • Zest from 2 lemons
  • 3 tablespoons lemon juice
  • 3 tablespoons olive oil
  • 3 tablespoons fresh thyme or 1 tablespoon dried
  • 1 tablespoon whole fennel seeds, freshly ground, or 2 teaspoons ground
  • 1 tablespoon whole black peppercorns, freshly ground, or 2 teaspoons ground
  • 1 tablespoon sugar

img_8853
I found using a spoontula made the task of loosening under the skin much easier.

img_8855
The rub is spread under and over the skin, plus in the cavity.

TURKEY

  • 1 fresh turkey (12 to 14 pounds) or frozen, thawed
  • 1 medium yellow onion, quartered
  • 5 sprigs fresh thyme
  • 1 lemon, quartered

IMG_8881.jpg
Making the sage brown butter.

SAGE BROWN BUTTER

  • 1/2 pound (2 sticks) unsalted butter, at room temperature
  • 1/4 cup finely chopped fresh sage
  • 1 tablespoon honey
  • 1 large garlic clove, finely chopped
  • Kosher salt and freshly ground black pepper

img_8884

img_8887
An hour and thirty minutes into roasting, the bird is basted again with the brown sage butter.

Directions:

  1. To prepare rub: In a medium bowl, combine garlic, salt, lemon zest, lemon juice, oil, 3 tablespoons fresh thyme (or 1 tablespoon dried), fennel, pepper and sugar.
  2. To dry-brine turkey: Remove and reserve giblets and neck for making giblet stock for gravy if desired. Thoroughly pat the turkey dry inside and out with paper towels. Place on a platter and loosen the skin of the breast and legs. Spread about one-third of the rub mixture under the skin, one-third on the outside and the remaining third inside the cavity. Wrap tightly with plastic wrap. Refrigerate for 24 hours.
  3. When ready to roast the turkey: Remove turkey from the refrigerator 1 hour before roasting. Transfer the turkey to a roasting rack set in a roasting pan. Place onion, lemon and thyme sprigs in the cavity. Tuck the wings under the body and tie the legs together.
  4. Position rack in bottom third of oven; preheat to 425 degrees.
  5. Meanwhile, make sage brown butter: In medium skillet, stir 6 tablespoons of butter over medium heat for about 4 minutes, or until it melts and turns nutty brown. Add sage and garlic and stir for about 1 minute.
  6. Pour butter into medium bowl and let cool. Add remaining 10 tablespoons butter to brown butter and blend well. Season to taste with salt and pepper. Place a few tablespoons of this butter under the skin.
  7. Roast the turkey until the skin starts to brown in spots, 20 to 30 minutes.
  8. Reduce oven temperature to 350 degrees and roast for 1 hour more. Brush with more of the browned butter.
  9. Turn the roasting pan 180 degrees and tent the breast with foil. Brush again with more butter. Continue roasting until an instant-read thermometer inserted into the thickest part of a thigh without touching bone registers 165 degrees, 45 minutes to 1 1/2 hours more.
  10. Carefully tilt the turkey so the juices from the cavity flow into the pan. Transfer the turkey to a clean cutting board and tent with foil. Let rest 40 minutes before carving. If desired, make gravy with pan drippings.

Adapted from Eating Well magazine, November/December 2016 issue.

Check out how to make homemade turkey stock for the bestest turkey gravy ever!

Silky Leek and Celery Root Soup

img_8910

We’ve made this soup in the past, and just love it! A perfect starter for any meal during the cooler months of the year. It’s topped with a swirl of crème fraîche, frizzled shallots and minced fresh chives.

Roasted Sweet and Spicy Acorn Squash

acorn-squash

Again, a dish we’ve made several times previously, only this time I cut the rounds in half which saved space when cooking on a baking sheet and plating on the dishes. Find the recipe here.

Julia Child’s Amended Stuffing

While I love the addition of the dried cranberries in the stuffing, the Hartman men not so much.

Ingredients

  • 1 ½ pounds hearty white sandwich bread, cut into ½-inch cubes
  • 1 tablespoon vegetable oil
  • 3 tablespoons unsalted butter
  • 3 onions, chopped fine
  • 6 celery ribs, minced
  • 2 tablespoons minced fresh sage
  • 2 teaspoons fresh thyme
  • 1 cup dried cranberries
  • 2 large eggs, beaten
  • 1 1/2 teaspoons ground black pepper
  • 3/4 cup turkey stock
Directions
  1. Adjust oven racks to upper-middle and lower-middle positions and heat oven to 300 degrees. Spread bread cubes in even layer on 2 rimmed baking sheets and bake until mostly dry and very lightly browned, 25 to 30 minutes, stirring occasionally during baking. Transfer dried bread to large bowl. Increase oven temperature to 425 degrees.
  2. Melt butter in 12-inch nonstick oven-safe skillet over medium heat. Add onions and cook, stirring occasionally, until softened, 10 to 12 minutes. Add celery, remaining 2 tablespoons sage, thyme, and 1½ teaspoons pepper; continue to cook until celery is slightly softened, 3 to 5 minutes longer. Transfer vegetables to bowl with bread and wipe out skillet with paper towels.
  3. Add cranberries and eggs to bread mixture and toss to combine (mixture will be dry). Add in 1/2 to 3/4 cup turkey stock. Transfer stuffing to 16 by 13-inch roasting pan and, using rubber spatula, pat stuffing into level 12 by 10-inch rectangle.
  4. When Julia spatchcock’s the turkey, she places the legs and breasts over  the stuffing  before transferring the pan to the oven for 30 minutes. This year we didn’t spatchcock our bird, so we added some stock to enhance with the turkey flavor.

Dorie Greenspan’s Pancetta Green Beans

Ingredients

  • 3/4 pound green beans, trimmed
  • 2 ounces pancetta, coarsely chopped
  • 1/2 Tbsp unsalted butter
  • Salt and freshly ground pepper
  • Walnut oil or extra-virgin olive oil

Directions

  1. Bring a large pot of salted water to boil, and fill a bowl with ice cubes and cold water.  Toss the beans into the boiling water and cook just until crisp-tender, about 5 minutes. Drain, transfer to the ice-water bath, and cool for 2 minutes; drain and pat dry.
  2. Heat a large skillet over medium heat. Add the pancetta and sauté until frizzled and crisp, about 2 minutes. Using a slotted spoon, transfer the pancetta to a plate lined with paper towels and pat dry. Drain all but 1 tbsp of fat from the skillet.
  3. Return the skillet to medium heat and add the butter. When the fat is hot, toss in the beans and cook, stirring until heated through. Remove from heat and drizzle the beans with a little oil. Season with salt and pepper.


Put the Hassle Back into Potatoes

The impressive Hasselback Yukon Gold Potato is by far the most imaginative spud to have the honor of calling itself a side dish. Yes indeed, a true potato dream all in one with the crispy edges of your favorite french fries, but with interiors as creamy as mashed potatoes — plus the added bonus of being, essentially, wholesome baked potatoes in clever disguise.

And to top it all off, despite their frilly fancy-pants appearance, they take just a bit more time and effort than your average baked potato, but nowhere near that of a gratin. As the potatoes cook, the slices fan out slightly for a show-stopping presentation. They are as beautiful as they are wonderful to eat.

img_8793

This particular style of potato, also known as Accordion Potatoes or Pillbug Potatoes was popularized as the namesake dish of the restaurant at the Hasselbacken Hotel in Stockholm, Sweden in the 1700s. But whatever you call them, the result is the same: a single potato, sliced into thin wafers, left joined at the bottom, and baked until the layers fan out into heavenly slits of crispy euphoria. (I hear the angels singing!)

They are fabulous with just a sprinkling of sea salt and a dash of chives. However, if you want to amp it up a notch or three, fill the crevices with some sour cream, crumbled bacon, shredded cheese, chopped herbs and/or spices like paprika. In fact, I can see any number of favorite baked potato toppings making their way into this dish… let me know which ones you add…

img_8750

Hasselback Yukon Gold Potatoes

Ingredients

  • 12 medium (about 3-inches in length) Yukon Gold potatoes
  • 2 tablespoons canola oil or olive oil
  • Kosher salt and freshly ground pepper, to taste
  • 4 to 6 tablespoons unsalted butter, melted
  • 3 bay leaves per potato
  • Fresh chopped rosemary, thyme or chives

img_8779
Put the spud between two wooden skewers or spatulas to stop you from cutting all the way through.

img_8782
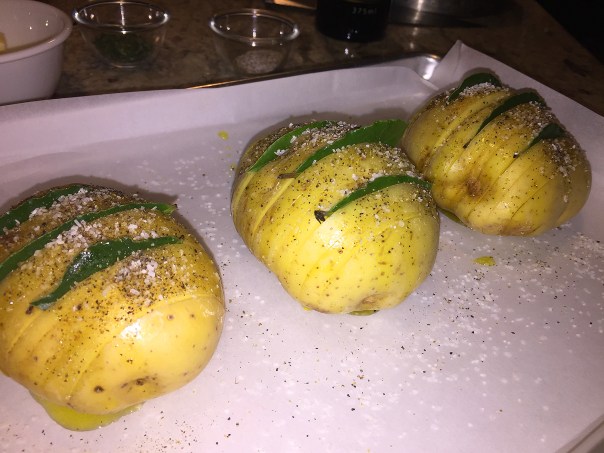
After drizzling the oil and seasoning with salt an pepper, insert 3 bay leaves per potato.

img_8783
Every 15 or 20 minutes, baste each potato with the melted butter and herbs of choice.

Directions

  1. Preheat the oven to 400 degrees. Line a sided baking sheet with parchment paper.
  2. Cut each potato crosswise into 1/8-inch slices, cutting only three-fourths of the way through the potatoes so they stay intact. It helps if you set the potato between two thick wooden skewers about 3 inches apart and parallel to each other. The skewers stop your knife from slicing all the way through.
  3. Place the potatoes, sliced side up, on the prepared baking sheet and fan the slices slightly so they are not completely touching. Drizzle with the oil and season generously with salt and pepper. Insert 3 bay leaves into various slots in each potato.
  4. Transfer to the oven and roast. Meanwhile, mix together the melted butter with herbs of choice (we used fresh thyme). After potatoes roast 15 minutes, baste with the melted butter.
  5. Continue roasting and basting occasionally with the melted butter, until the potatoes are browned on the outside and tender in the center, about 1 1/4 hours, depending on the size of the potatoes. (It took us the full 1 1/4 hours to obtain the crispy outer edges.)
  6. Garnish the potatoes with additional herbs, if desired, before serving.

NOTE: Since I was only making this for the two of us, I baked just three potatoes and cut back on the other ingredients.

Turkey Stock for the Bestest Gravy!

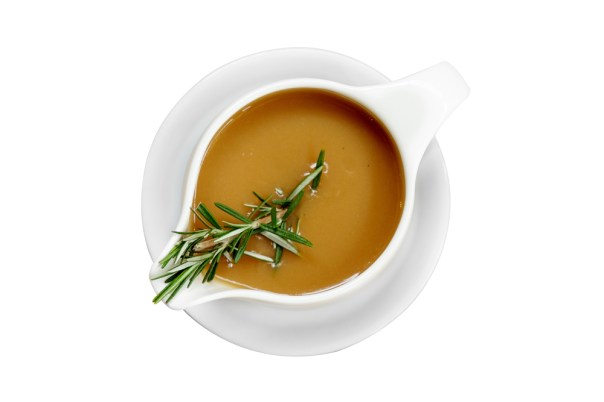
The countdown begins and the pressure is on—or at least it should be. Say what? Thanksgiving is the Holy Grail of family dinners where many of us go all out to make sure we serve the very best to our loved ones. Whether your favorite part of the meal is the stuffing, the sweet potato casserole, or the bird itself, one thing is for sure, the gravy better be damn good because it is such a key player in the overall success of the holiday repast. So I’m going to put the pressure on… with a pressure cooker that is!

shutterstock_499514185

To save time, many people just add boiling water to a regular stock cube, which is fine for convenience, but lacks any depth of flavor, and it’s likely that you will be left with a very salty liquid, which does not compare to a proper homemade tasty stock. Or perhaps you just open a jarred, store-bought gravy and toss in some pan drippings and call it a day. Trust me, I’ve been guilty of doing both of these options in the past…

Nowadays, we start from scratch and make homemade stock, which is an easier process and less time consuming because we own a pressure cooker. It speeds the process up quite a bit, and helps seal in flavor that otherwise boils off into the air as the stock simmers and steams.

What is the difference between stock and broth? For the purpose of this blog, they are the same thing. You can make stock out of just about any animal bones by simmering them in a pot with water and aromatics, which are the veggies, herbs and spices that you add to flavor your broth.

shutterstock_321830762

Since we’re talking turkey, start with around 4 pounds of turkey backs, wings and/or necks. We got ours from the Newtown Farmer’s Market when we put in our order for the T-day bird. And to obtain maximum flavor from the parts, hack them down with a meat cleaver into smaller pieces. This way when you brown them, all of the flavor from the bones seep out into the pot. The nutrition comes in part from the aromatics, but the biggest healing factor in stock is the minerals, collagen and gelatin that is leached from the bones.

A very basic stock is a pretty simple affair: it’s made with water, poultry, aromatic vegetables like onion, carrot, and garlic, and then herbs. The exact ingredients are up to the cook. If you don’t have access to fresh herbs you can use a large pinch of dried instead. You can also get creative! Use whatever root veggies or herbs that you have on hand and like the flavor of. The following ingredients are just what we used.

Once you learn how to make fresh stock, you’ll be hooked for life. So go forth with confidence and use your stock to make the bestest turkey gravy ever!

img_8760
Russ chops down the turkey parts into approximately 4″ pieces.

img_8765
The unpeeled veggies are also cut down to smaller pieces, and the garlic cloves are smashed.

Ingredients

  • 4 pounds turkey backs, necks, and wings
  • 2 large onions, unpeeled and quartered
  • 3-4 carrots, unpeeled and cut in chunks
  • 4 ribs celery, cut in chunks
  • 10 sprigs fresh thyme
  • 10 sprigs fresh parsley with stems
  • 3 bay leaves
  • 1 tablespoon peppercorns
  • 1 tablespoon kosher salt
  • 10-12 whole cloves garlic, peels left on
  • 1/2 cup white wine
  • 10 cups cold water (or up to the line in your pressure cooker)

img_8768
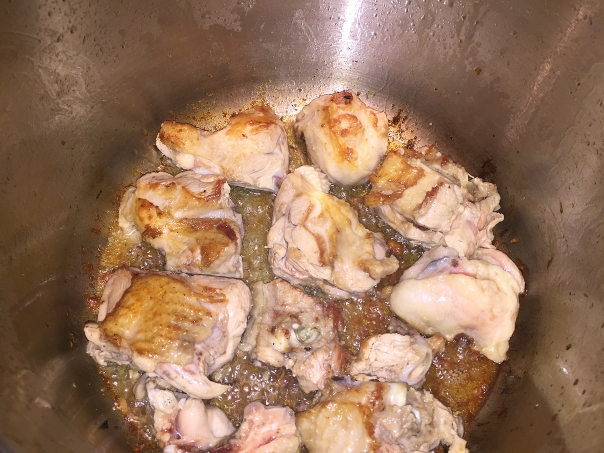
Brown turkey parts in batches in a little oil in the bottom of the pressure cooker.

img_8771
Pile the browned poultry parts onto a plate as you finish each batch.

img_8776
After scraping up browned bits with a little wine and a wooden spatula, add all of the ingredients and water.

Directions

  1. Brown the turkey parts: Heat the oil in the pot of your pressure cooker over medium heat. Add the raw turkey in a single layer and cook until lightly golden on all sides. All the poultry may not fit into the pot, so remove pieces as they are done, replacing them with a fresh raw piece. Note: You are not trying to cook the turkey all the way through; you are just browning the skin. You do not have to brown an already cooked bird, such as leftovers from a carcass.
  2. Brown the onion (optional): As you remove the browned chicken pieces from the pot, replace them with the onion quarters to brown them slightly. Adjust the heat to avoid burning any bits left on the bottom of the pot. Again, you do not want to cook the onions all the way through but just brown them. Remove from pot.
  3. Add the wine: With a wooden spatula, scrape up from bottom of pot any browned bits left from the bird parts and onion. (You could just use water if you don’t have wine.)
  4. Add the remaining aromatics and water: Add the browned turkey and onion, garlic, carrots, celery, salt, peppercorns, herbs and bay leaves. Then add remaining water up to the liquid limit line.
  5. Pressure-cook the stock: Cover and secure the lid. Raise the heat to high and bring the pot up to full pressure. This may take about 15 minutes. When your pot indicates that it’s at full pressure, lower the heat to maintain pressure and start timing. Cook for 45 minutes.
  6. Naturally release the pressure: After 45 minutes, turn off the burner and allow the pot to release pressure naturally. This will take about 15 minutes.
  7. Strain the stock: Place the sieve or colander over a large bowl and line with cheesecloth or fine mesh strainer. Carefully ladle the stock into the colander and strain. Discard the solids.
  8. Cool and place in refrigerator overnight. Remove solidified fat from surface of liquid and store in container with lid in refrigerator for 2 to 3 days or in freezer for up to 3 months. Prior to use, bring to boil for 2 minutes. Use as a base for soups, sauces and gravies.

img_8795
This is what the stock looks like after it cooks and before you strain off the solids.

img_8796
The strained stock cools before it goes into the refrigerator.

A Classic Italian Combo

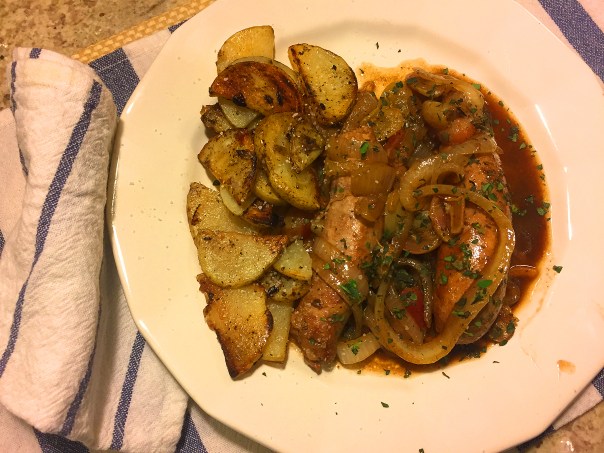
Meat and fruit. Like prosciutto and figs or melon, sausage and grapes is a fabulous and unexpected medley of flavors and textures. Sautéed Sausages with Grapes and Balsamic Glazed Onions consists of only a few ingredients, is simple to make, and tastes wonderful! What’s not to love? Definitely a dish you should try. And while it is bursting with flavor, it is not spicy at all.

img_8742

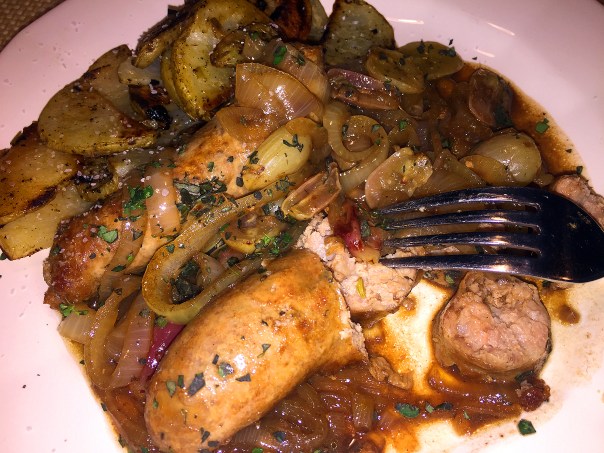
The addition of balsamic vinegar and caramelized onions turns this into a quick, warming braise—perfect for a late-Fall or Winter evening. Piercing the sausages with the tines of a fork will allow them to release some of their juices and infuse the broth. My imagination did not prepare me for the utter simplicity of the dish: beautifully browned sausages nestled on a bed of cooked grapes that were in varying stages of doneness. Bellissimo!

That being said, there were a few differences in our dish when compared to the directions. Our package of sausage was only 6 links and 1 1/4 pounds, but plentiful enough for two adults, with leftovers. And since our red grapes were on the small side, I sliced about 50 (instead of just 20, which seemed miserly).

Finally, in the last step, you’re supposed to leave it covered (slightly ajar) for the full 25 minutes. But in my humble opinion, the liquid was too thin and I wanted to reduce it down and thicken a tad so I uncovered for the last 12 minutes or so.

Polenta was the original intended side dish, but we had had it twice already that week, so I made some sliced skillet potatoes with diced shallots—and they were fabulous Dahling! To make it even more Italian, use a mix of red and green grapes.

img_8729

Sautéed Sausages with Grapes and Balsamic Glazed Onions

  • Servings: 4
  • Difficulty: easy
  • Print

Ingredients

  • 3 Tbs. olive oil
  • 8 links sweet Italian sausage (about 1-3/4 lb.), pricked with a fork
  • 1 large yellow onion, thinly sliced (about 2 cups)
  • Kosher salt
  • 2 Tbs. balsamic vinegar
  • 1/2 cup low-salt chicken broth
  • 20-50 seedless red grapes, halved
  • 2 Tbs. chopped fresh oregano

img_8737

img_8734

img_8738

img_8740

Directions

  1. Heat 1 Tbs. of the oil in a large (12-inch) sauté pan over medium heat until it’s shimmering. Add the sausages and cook, turning every couple minutes, until they’re browned all over, about 8 minutes. Transfer to a large plate.
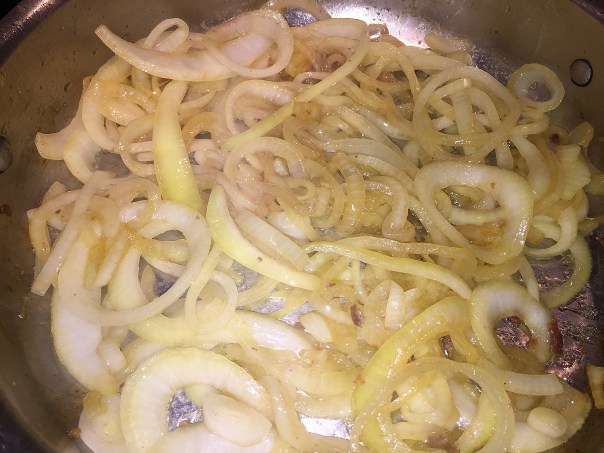
  2. Add the remaining 2 Tbs. oil and the onion to the pot, sprinkle with 1/2 tsp. salt, and cook, stirring occasionally, until the onion softens completely and starts to turn light brown, about 7 minutes. Add the balsamic vinegar and chicken broth, and scrape the bottom of the pot with a wooden spoon to incorporate any browned bits.
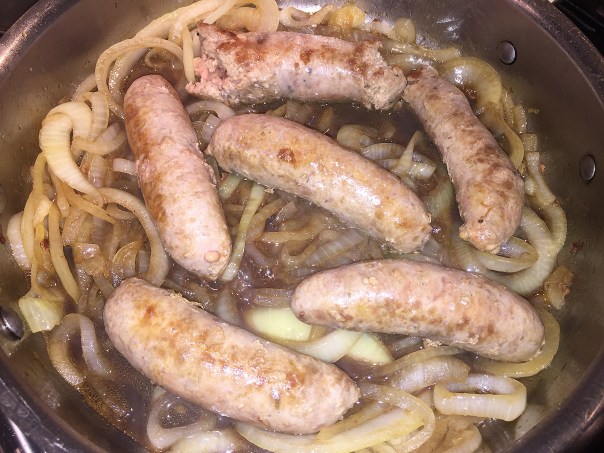
  3. Reduce to a gentle simmer (medium-low or low depending on your stovetop). Add the sausages and grapes, cover the pot with the lid ajar, and cook, stirring occasionally, until the sausages are cooked through (slice into one to check), about 25 minutes. Serve immediately, sprinkled with the oregano.

http://www.lynnandruss.com

Adapted from a recipe by Tony Rosenfeld from Big Buy Cooking

img_8746

Catching Up at Bernie’s

Even though Russ’s son David has worked at Bernie’s Pub for some time, we never got the chance to dine there until his daughter Julia flew into town. Due to a recent injury, she was unable to drive so the only opportunity to connect was picking her up at her mom’s in Glenside as we headed out for lunch. And serendipitously Bernie’s just happen to be nearby.

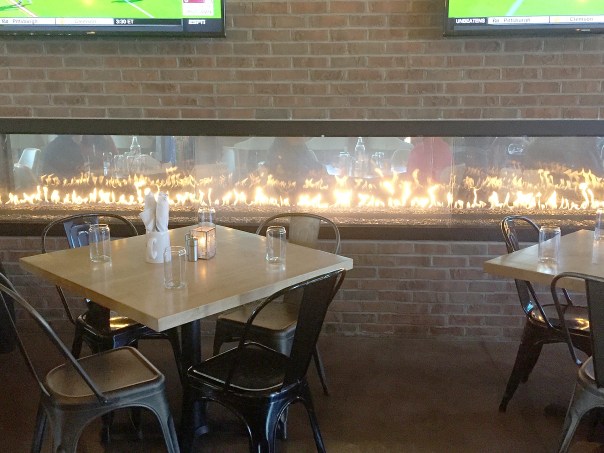
One is immediately struck by the cool, hip modern vibe from the straight-lined brick exterior with a spectacular outdoor patio, to the comfortable indoor dining room with an impressive 15-foot center fireplace wall and lots of large windows. Then you look up and hanging from the industrial ceiling are two immense light fixtures that really make a bold statement.

img_8643

img_8644

Known for their daily homemade soups, we were anxious to hear what the soup d’jour was. Unfortunately, it was early afternoon and we were informed it wouldn’t be ready for a while. OK, Plan B. (In hindsight, if we had known we’d be staying there for 3 1/2 hours, we could have fit soup into the itinerary after all.)

Julia chose Salmon Vera Cruz, topped with olives, white wine, onions, tomatoes and cilantro and served with a side of roasted garlic mashed potatoes and string beans. With her comprised dominant hand, she figured it would be an easier task to eat the salmon dish than trying to manage a salad. Her verdict? Loved the salmon and the garlicky mashed, but commented that the greens beans, although cooked perfectly, were unseasoned and bland.

img_8649

Lynn had the Crispy Chicken Salad with crisp mixed greens, panko-crusted chicken breast strips, apples, grapes, candied walnuts and honey mustard dressing. It was incredibly tasty and the tiny red grapes and thinly sliced apple pieces added an additional sweet note, although not cloyingly so.

img_8654

Russ opted for the Umami Burger which came topped with mushrooms, provolone cheese, bacon, fried egg, roasted garlic aioli, lettuce and tomato—although Russ asked to have it minus the bun and egg. It was accompanied by a serving of house cut fries which Russ said were very good and crispy on the outside, and creamy on the inside, often not the case with steak fries.

img_8650

All of their food is freshly prepared, and in addition to acclaimed menu items, Chef Raul does daily specials that complement their fine wines and extensive craft beer selections. But we stuck with water and iced tea since it was the early afternoon. When we come back for dinner, we’ll have to order from their pub.

Deciding to linger and chat, Russ and Julia both started eyeballing the dessert menu. In the end, Russ just got a bowl of Chocolate Ice Cream, BUT, he forgot to take into account the sensitivity of one tooth. The night prior, his temporary crown had somehow managed to come off, and being a weekend, he couldn’t get a dentist appointment until Monday. You can just imagine ice cream on a compromised tooth! Oy vay.

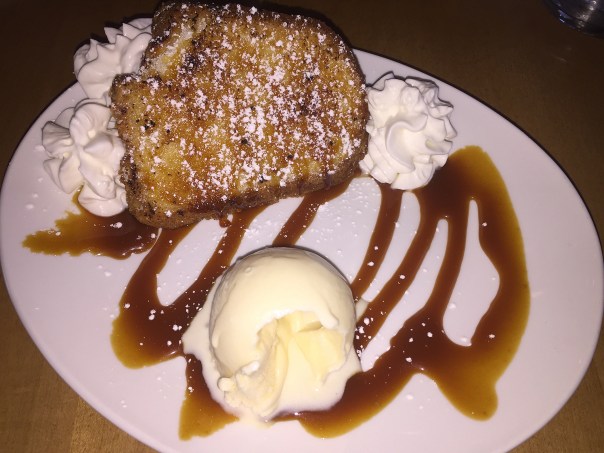
It took Julia a few moments to make a selection, but she finally zeroed in on the Toasted Pound Cake which was a house-made sour cream pound cake toasted and served with vanilla ice cream, salted caramel sauce and pralines. It was definitely picture-worthy and according to Julia, tasted as good as it looked.

img_8646

img_8656

Who is Bernie? Bernice Kretschman, a.k.a “Bernie” is the owner’s grandmother. She was the mother of four boys, all of whom grew up and remained in and around the Glenside and Roslyn areas with their families. Her signature family event was Sunday Dinners. While many extended families get together on holidays or birthdays, she hosted Sunday Dinner every week for 35 years at her house on Fairhill Avenue in Glenside. Attendance was required.

Looking for our next foray to Bernie’s, this time for dinner…

Amazingly Good Tuscan-Style Beef Stew

Tuscan beef stew (peposo), a stew made by the tilemakers of Florence’s famous Santa Maria del Fiore Cathedral Duomo, is a simple stew of beef braised in wine, with loads of peppercorns and a head of garlic cloves. My interest was piqued!

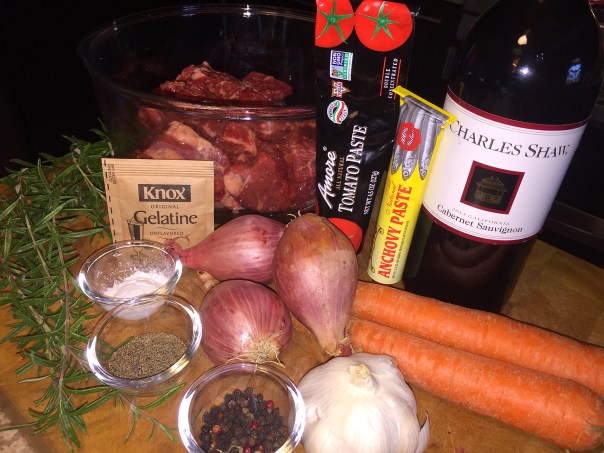
But Cooks Illustrated added their magic and improved the texture and flavor without veering too far from the original, by adding tomato paste and anchovies for meatiness, powdered gelatin for body, and shallots, carrots, and herbs for complexity. The sauce was so velvety smooth with luscious layers of flavor that Russ and I fast-tracked the recipe to top-shelf status.

img_8690

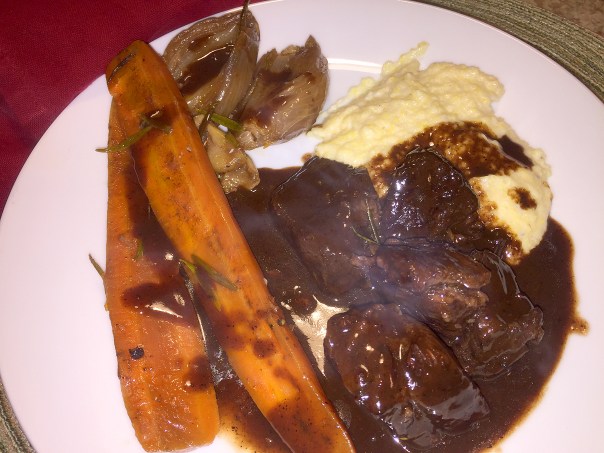
Though we made two very notable changes. First, the directions indicate to brown only half of the meat cubes. Why in the world would you do that? We seared them all. Secondly, we could not in good faith toss the veggies and garlic that simmered in that scrumptious sauce for hours so when the stew was done cooking in the oven, we saved them to a foil covered platter while finishing the sauce. In fact, I doubled the carrots from two large to four, producing 8 halves as a side dish with an accompaniment of cheesy polenta. Not a polenta fan? Try garlicky mashed potatoes or egg noodles.

Cooks Illustrated prefers boneless short ribs in the Tuscan-Style Beef Stew because they require very little trimming—however, they only carried bone-in short ribs at our supermarket the day we shopped. If you cannot find the boneless ones, do what we did and substitute a chuck roast. (The directions say to substitute a 5-pounder, but ours was less than 3 pounds, and was plenty sufficient for two people, with leftovers.) Trim the roast of large pieces of fat and sinew, and cut it into 2-inch pieces. If Chianti is unavailable, a medium-bodied wine such as Côtes du Rhône or Pinot Noir makes a nice substitute.

To ensure a full-bodied wine flavor, add some wine at the beginning of the long braise, more before reducing the sauce, and a small amount at the end. And do the same with the peppercorns: cracked pepper at the start, ground pepper toward the end, and more cracked pepper on serving. By adding some of the wine and pepper 15 minutes before finishing cooking, and the remainder of wine and pepper at the end, you are able to preserve more of the volatile and unstable compounds, capturing the most fleeting, bright, fresh flavors from both the wine and the pepper. Brilliant!

No need to be a wine snob and waste an expensive bottle of wine here, save that for yourself to drink with dinner. Cooks Illustrated said the stew made with the cheapest Chianti went over well with taste testers, and there was no discernible difference when using a pricey wine. We used a cheap Cabernet Sauvignon from Trader Joe’s—you know their “3-Buck Chuck” brand—and the sauce turned out divine!

img_8670

Tuscan-Style Beef Stew

  • Servings: 6-8
  • Difficulty: moderate
  • Print

Ingredients

  • pounds boneless beef short ribs, trimmed and cut into 2-inch pieces
  • Salt
  • tablespoon vegetable oil
  • (750-ml) bottle Chianti
  • cup water
  • shallots, peeled and halved lengthwise
  • carrots, peeled and halved lengthwise
  • garlic head, cloves separated, unpeeled, and crushed
  • sprigs fresh rosemary
  • bay leaves
  • tablespoon cracked black peppercorns, plus extra for serving
  • tablespoon unflavored gelatin
  • tablespoon tomato paste
  • teaspoon anchovy paste
  • teaspoons ground black pepper
  • teaspoons cornstarch

img_8667
Salted, cubed meat sits for 30 minutes at room temperature.

img_8673
Carrots are sliced horizontally, shallots are cut in half, and garlic cloves are smashed, leaving the skins on.

img_8676
Working in two separate batches, we browned all of the beef cubes.

img_8678
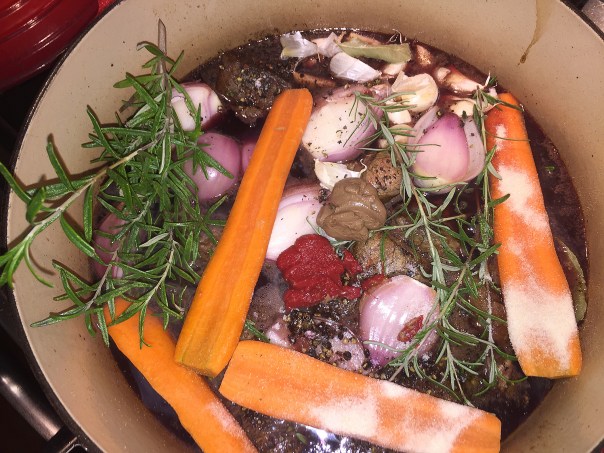
Most of the remaining ingredients are added to the pot before going into a 300 degree oven.

img_8679
After 2 1/4 hours, the pot is removed from the oven and the beef cubes are extracted from the stew.

Directions

  1. Toss beef and 1 1/2 teaspoons salt together in bowl and let stand at room temperature for 30 minutes. Adjust oven rack to lower-middle position and heat oven to 300 degrees.
  2. Heat oil in large Dutch oven over medium-high heat until just smoking. Add half of beef in single layer and cook until well browned on all sides, about 8 minutes total, reducing heat if fond begins to burn.
  3. Stir in 2 cups wine, water, shallots, carrots, garlic, rosemary, bay leaves, cracked peppercorns, gelatin, tomato paste, anchovy paste, and remaining beef. Bring to simmer and cover tightly with sheet of heavy-duty aluminum foil, then lid. Transfer to oven and cook until beef is tender, 2 to 2 1/4 hours, stirring halfway through cooking time.
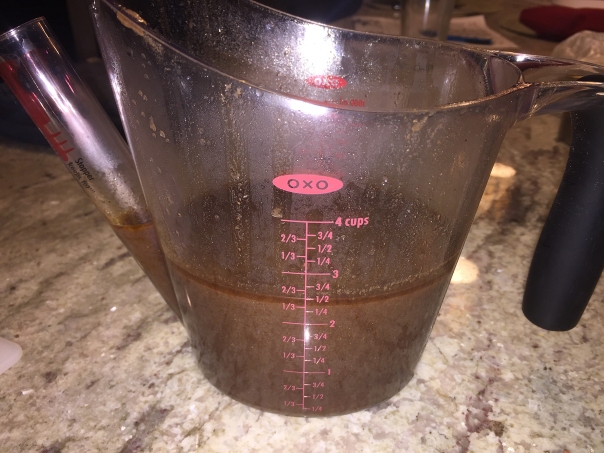
  4. Using slotted spoon, transfer beef to bowl; cover tightly with foil and set aside. Strain sauce through fine-mesh strainer into fat separator. Wipe out pot with paper towels. Let liquid settle for 5 minutes, then return defatted liquid to pot.
  5. Add 1 cup wine and ground black pepper and bring mixture to boil over medium-high heat. Simmer briskly, stirring occasionally, until sauce is thickened to consistency of heavy cream, 12 to 15 minutes.
  6. Combine remaining wine and cornstarch in small bowl. Reduce heat to medium-low, return beef to pot, and stir in cornstarch-wine mixture. Cover and simmer until just heated through, 5 to 8 minutes. Season with salt to taste. Serve, passing extra cracked peppercorns separately. (Stew can be made up to 3 days in advance.)

img_8683
Even though the directions don’t indicate to save the carrots, shallots and garlic, we plated them and covered with foil until the rest of the dinner was ready.

img_8684
The sauce is drained through a fine mesh strainer into a fat separator. However, as you can see, there was barely any fat to remove from our sauce.

img_8685
Corn starch is mixed with the last of the wine and added to the sauce before returning the meat back into the pot.

img_8687
After the sauce has thickened with the addition of the corn starch mixture, add the beef back in and simmer for another 8 minutes.

img_8692
The carrots, shallots and garlic made a great side dish for the stew and polenta.

http://www.lynnandruss.com

Wet or Dry-Brine? That is the Question.

The halloween festivities are but a not-so-distant memory and it’s too soon to break out the Christmas decor. So let’s talk turkey.

Several weeks prior to Thanksgiving I noted a lot of emphasis on the benefits of dry-brining as opposed to wet-brining your bird, so I started doing some research. I discovered the dry method delivers big flavor with less hassle—which excited me, and in turn, intrigued Russ. Suffice it to say, after our Thanksgiving feast, I think we will be converts.

A dry-brined turkey tastes like turkey that’s having a very good day, which means you will too! It is well-seasoned through and through, and has all the juiciness of your average wet-brined turkey, without its sometimes off-putting texture. Yes, a traditional wet-brine will plump up your turkey with moisture, but that moisture is mainly water, leading to a turkey that tastes watered down. A dry-brine, on the other hand, helps a turkey retain its natural moisture without adding any excess liquid, which results in more intense flavor and crispier skin. You with me?

shutterstock_37346254

The obvious advantage to dry-brining is that it doesn’t require the space that traditional wet-brining does. It’s a simpler process because you don’t have to contend with dissolving salt and sugar and measuring out enough water to completely submerge a turkey. Just add a salty rub and let it sit for a few days. Try to get the dry-brine under the skin where possible, but it isn’t necessary to pull away all the skin to get at the meat. As the dry-brine mixes with moisture from the turkey, it will work its way under the skin and throughout the bird.

kosher-salt

When salting, it may look like a lot, but keep in mind that the salt won’t remain on the outside of the turkey and there needs to be enough salt to penetrate the entire thickness of the bird. Also keep in mind, that it’s best not to stuff a brined turkey, because the juices will concentrate in the cavity and over-season your stuffing. Instead, cook your stuffing in a baking dish alongside the turkey. Russ and I are big fans of a stuffed bird (although many chefs frown on the practice), so it’s hard for us to get on board with this rule.

Cooking a turkey with stuffing is just a bad idea. If you’re going to cook it inside a turkey, you’re basically creating an edible envelope for the stuffing. It’s now about the stuffing because you need to make sure that it gets above the instant-kill temperature for salmonella. Getting the stuffing to reach this 165 degree mark usually means overcooking the meat.       ~Chef Alton Brown

BTW, the dry-brine method only works with a turkey that hasn’t been pre-seasoned—so avoid kosher birds, which are salted as part of the koshering process, or self-basting turkeys, which have been injected with a sodium-rich solution. Check the label if you’re not sure, and avoid anything that lists salt as an ingredient.

meat-thermometer

When is the turkey done, you ask? It’s time to get yourself a trusty instant-read thermometer and take the turkey’s temperature. Just insert a meat thermometer into the area where the thigh and breast meet — it should register 160 degrees F when it’s removed from the oven, and 165 degrees F after it has rested. You can also make an incision where the thigh and breast meet — if the juices run clear, not red, then the bird is done. Whatever you do, don’t rely on those plastic pop-up timers that are stuck in the bird.

OK, Thanksgiving is not that far away, and now that you are in the know, go ahead and give dry-brining a whirl…

The Basics of a Dry-Brine with Classic Herb Butter

  • The amount of salt you’ll need depends on the brand and the bird. For each pound of turkey, figure 1/2 to 1 teaspoon of Diamond Crystal kosher salt or 1/2 to 2/3 teaspoon of Morton kosher salt. Don’t use table salt, whose fine grains won’t work well for this purpose.
  • Keep it simple with plain salt, or combine with your favorite seasoning. Dried sage, thyme, rosemary, and marjoram add classic Thanksgiving flavors. (See flavor variations below.)
  • Plan for at least 1 hour per pound in the fridge, and up to three days. If you do the full three-day extravaganza, place the seasoned bird in a jumbo zipper-lock bag for the first two days.
  • Pat the turkey dry inside and out with paper towels. Carefully loosen the skin on the breast and legs, and rub a generous tablespoon of the salt onto the flesh of each side—go heavier on the breast, where the meat is thickest. Sprinkle remaining salt liberally all over the body and inside cavities. Refrigerate 18 to 36 hours. Give the bird a nice massage once a day to ensure an even distribution of flavor.
  • For the crispiest skin, 8-12 hours before you plan to roast it, remove the turkey from the bag, pat dry, and return to the fridge, uncovered. (Take care to clear enough space that your other foods don’t touch it.)
  • Mix 2 sticks unsalted softened butter, 2 tablespoons chopped fresh parsley, 1 tablespoon dried sage, 1 tablespoon dried thyme, 1 teaspoon pepper, 1/4 teaspoon paprika, and 1/8 teaspoon ground cloves until combined. Reserve 4 tablespoons of the butter, then rub the rest under the turkey skin on the breasts and legs. Rub 2 tablespoons of the reserved butter on the skin; chill and save the rest for your gravy.
  • Roast using your favorite method. One option: a low oven, 325°F, for approximately 15 minutes per pound. Because a dry-brined turkey produces relatively paltry drippings, add 1 or 2 cups of turkey or chicken stock to the roasting pan before it goes into the oven.

Bon Appétit offers a quicker dry-brine method:

  • Rub dry brine all over 12-14 pound turkey; chill uncovered, 6–7 hours.
  • Preheat oven to 425°. Rinse turkey under cold water; pat dry and place, breast side up, on a rack set in a large roasting pan. Stuff turkey with 1 medium quartered onion, 1 halved head of garlic, and 1-2 bunches of fresh herbs.
  • Working from neck end of turkey, gently loosen skin from breasts and rub ¼ cup (½ stick) softened, unsalted butter under skin and all over outside of bird. Tie legs together with kitchen twine, pour 2 cups (or more) low-sodium chicken (or turkey) broth into pan, and roast turkey 30 minutes.
  • Reduce oven temperature to 325° and roast, basting with pan juices every 30–40 minutes, adding more broth as needed to maintain some liquid in pan, and tenting with foil if skin is browning too quickly, until an instant-read thermometer inserted into thickest part of thigh registers 165°, 2½–3 hours.
  • Transfer turkey to a platter; tent with foil. Let rest at least 30 minutes before carving.

spices

Dry-Brine Flavor Variations:

Moroccan: Mix kosher salt with 2 teaspoons ground cumin, 2 teaspoons ground ginger, 2 teaspoons paprika, 1 1/2 teaspoons black pepper, 1 teaspoon cinnamon, 1 teaspoon coriander, 1 teaspoon allspice, 1/2 teaspoon cloves, and 1/2 teaspoon cayenne.

Chili-lime: Mix kosher salt with 3 tablespoons chili powder, 1/2 tablespoon cumin, 1/2 tablespoon dark brown sugar, 3/4 teaspoon garlic powder, 3/4 teaspoon onion powder, 3/4 teaspoon coriander, 1/4 teaspoon cayenne, the zest and juice of 1 lime, and 1 tablespoon olive oil.

shutterstock_322296077
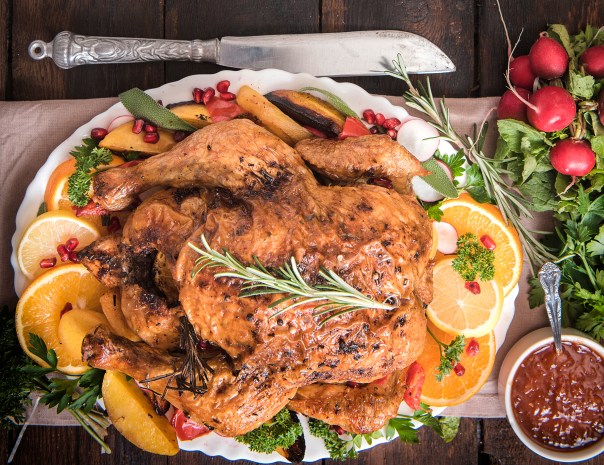
Surround the bird with an assortment of fresh herbs and fruits for an attractive presentation.

Innovation by the Sea

For most of my 32 years working at Mercer County Community College, I have belonged to a fabulous organization, the National Council for Marketing and Public Relations (NCMPR). Over those decades I have met some amazingly creative people especially from District 1 which includes a large swath of the Northeastern U.S. and beyond: Connecticut, Delaware, District of Columbia, Maine, Maryland, Massachusetts, New Hampshire, New Jersey, New York, Pennsylvania, Rhode Island, Vermont, the Canadian Provinces of New Brunswick, Newfoundland, Nova Scotia, Prince Edward Island, Quebec, and the United Kingdom.

Each Fall, District 1 varies the location of the regional conference and this year, the aptly titled “Innovation by the Sea” was held on Goat Island, a tiny, 20-acre island in Narragansett Bay of Newport, Rhode Island. With the distinction of being the only resort-style hotel in Newport, the Hyatt Regency Newport Hotel & Spa features three unique restaurants with indoor and outdoor food and drink service including the nationally recognized Pineapples on the Bay. (Great fodder for a food blog—if only it hadn’t been closed for the season 😦 )

hyatt-regency-newport-p166-lighthouse-newport-bridge-masthead-feature-panel-medium

Not only do I get to reconnect with colleagues from afar, the symposium sponsors an awards dinner affair that honors outstanding achievement in two-year college marketing, PR and communications. This year our inspirational theme centered on the Roaring Twenties/Gatsby era and many members donned period costume—including Yours Truly. Pictures follow, but I’m getting ahead of myself…

Our hotel was only a 15-minute stroll from the city’s cobblestone streets, bustling harbor, unique shopping, art galleries, and waterfront dining. The area is ripe with culture and our event kicked off with an afternoon tour of the famous Vanderbilt mansion, The Breakers, the grandest of Newport’s seaside summer “cottages,” depicting a world of exceptional elegance and inspiration in architecture, art, interior design and landscape. With aspirations of becoming a Master Gardner in retirement, I can only imagine their gardens must be phenomenal in the height of growing season!

img_8604
I’m awaiting entry onto the grounds of The Breakers mansion—a symbol of the Vanderbilt family’s social and financial preeminence in turn of the century America.

img_8541
The Breakers facade, a 70-room Italian Renaissance-style palazzo. Today, the house is designated a National Historic Landmark.

img_8559
Inspired by the 16th century palaces of Genoa and Turin, Allard and Sons of Paris assisted Richard Morris Hunt with furnishings and fixtures. Shown above and below is the music room.

img_8560

img_8557
A close-up of one of the many thick slab marble fireplaces throughout the mansion.

img_8552
Intricate details and gold leaf above the marble fireplace in the grand dining room.

img_8547
Carvings and fountain under the stairway where the children loved to play.

img_8575
The kitchen features a 21-foot long cooking top without burners that heats the entire way across.

img_8576
Date unknown, a French menu depicts a typical luncheon. Chaud means “hot ” while Froid is French for “cold.”

Segueing to the food portion of this blog… The afternoon excursion was followed by a bus trip to an off-site dinner on Thames Street at the Lamp Gas Grille (shown below) outfitted in an American pub vibe with street lamp decor. We had the entire upstairs to ourselves, but because we arrived earlier than the restaurant expected, we were “forced” to order “giggle water” and mingle. Our buffet was nothing extraordinary and included chicken and mushrooms, fish fillet, roasted potatoes and undercooked carrots—but the camaraderie was great and it was fun to meet some new members.

gaslampgrille-brittannytaylor26img_8580

Which brings us to the main focus of my blog—our dining experience at the Hyatt Regency Newport Hotel & Spa. Let me just say, it was top-notch for both the service and the food for every meal. We had breakfast twice and lunch once during the course of the conference, all of which were buffets that I thought offered a myriad of tasty choices meeting most dietary restrictions. The quality was excellent despite the fact it was served buffet style to a large group. I only heard one complaint, and that was that the Tomato Basil Soup, although tasty, was not hot enough.

For our Medallion Awards night dinner, members had to select their preferences prior to the symposium: Salmon for me and Prime Rib for Russ. But first we were served a New England Clam “Chowdah” which is not usually a favorite of mine because I’m not fond of clams, nor of cream-based soups. But I surprised myself, and Russ, when I ate the entire bowl—it was that good!

img_8620

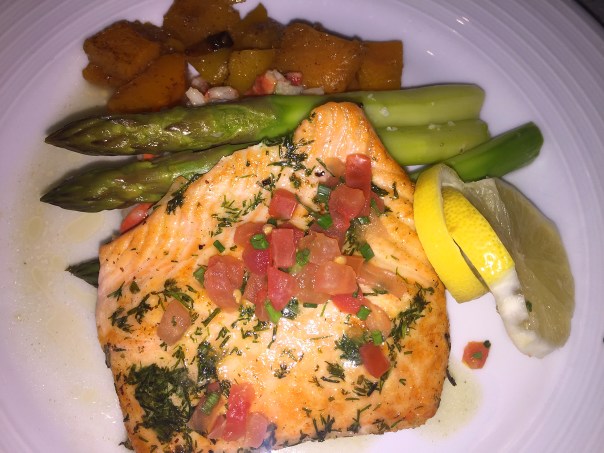
The seafood entrée came plated with stalks of crisp-tender asparagus atop a bed of luscious lobster risotto and a side of seasoned roasted potatoes. A generous slab of perfectly cooked prime rib sat in a warm pool of au jus and was also accompanied by the same vegetables. It was interesting to note, all of the eight women at our table dined on the salmon, while the two gentleman both chose beef.

img_8628

img_8630

Not being a dessert eater, I can’t vouch for the quality, but by the looks of all of the empty dessert plates, I’d venture to guess it was also a success. And I overheard that the cookies served during our conference breaks were top notch! All-in-all, I think this was one of the best food experiences at an NCMPR conference that I can remember, and I’ve been going to them for 30+ years!

img_8615
Most of the District 1 committee dressed in Gatsby-era costume gathered together prior to the awards dinner.

img_8623
Waiting for the dinner to begin are from left: Laurie Farrell, current district director; Jodi Neal, Medallions co-chair and Maryland state rep; and Mary DeLuca, past district director.

screen-shot-2016-11-09-at-2-15-22-pm
Also joining us and standing out in the crowd are Sally Chapman Cameron (red hat) and Kathy Corbalis (red boa), both previously very involved with NCMPR and now retired. I bet you can tell no one was having any fun… 

img_8634
Lynn and Russ hamming it up after the awards ceremony ended.

If you’ve never been, I suggest trying to book a long weekend in Newport, RI. It’s a great coastal town with lots of shopping (though I didn’t get the opportunity to do anything in that category), tons of restaurants, brewery and mansion tours, museums, cliff walks, and even an International Tennis Hall of Fame.

“It sure is the berries!”

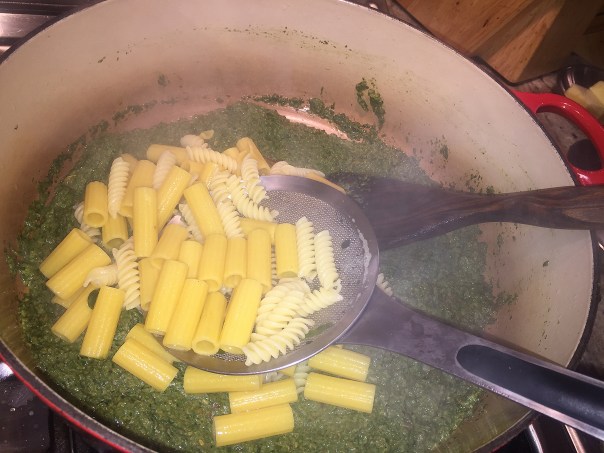
Fridge Dive Pesto Pasta

Ever do a dumpster dive? Although that doesn’t sound very appealing when discussing food, this recipe is a culinary version of said activity. On weekends, Russ often concocts a “clean-out-the-frig frittata” for breakfast; and on occasion I use a similar tactic for a regular pasta dinner. Bon Appétit featured the “Frig Dive” recipe recently and got me to thinking…

img_8220

This vegetarian pesto pasta recipe is the solution for any leftover hardy green, lettuce, or herb you don’t know what to do with. Who knew cleaning out your fridge could be so rewarding? To be even more eco-thrifty, you can also do a pantry raid like we did and combine a couple of partially-used pastas. The key is to use pasta shapes that have some ridges, waves or curls that will “cuddle” the pesto as opposed to flat strips like fettucine or spaghetti where it wouldn’t cradle it and thus fall off.

Using a large scale food processor to grind the tiny sesame seeds didn’t seem appropriate so I ground them in a small spice grinder first then transferred them to the larger food processor. To smash the garlic cloves, I gave a good whack to each one with a meat mallet—you could also achieve this effect with the side of a chef’s knife. While the cloves were browning in the heavy pot, I broke them apart a bit more using a wooden spatula.

img_8205
Smashing the garlic loves with a meat mallet.

img_8201
The sesame seeds were processed in a spice grinder.

For added toppings, I used toasted pine nuts in place of sesame seeds and a generous dose of crushed red pepper flakes along with the grated ricotta salata. After we made this, we thought why boil the tender herbs (we used parsley and marjoram) with the greens? To get their full flavor, we think it’s better to add them directly to the food processor along with the other ingredients; otherwise the flavor and aromas are boiled out of the herbs. So our directions below reflect the alterations.

img_8199
Ricotta Salata is easily grated on a box grater.

img_8196

Ingredients

  • ½ red onion, quartered through root end
  • 8 cups torn mixed greens and tender herbs
  • Kosher salt
  • ¼ cup toasted sesame seeds, plus more for serving
  • ½ cup grated ricotta salata (salted dry ricotta), divided
  • 3 tablespoons plus ¼ cup olive oil; plus more for drizzling
  • 8 garlic cloves, smashed
  • 12 ounces tripoline or mafaldine (wavy-edged ribbon pasta) or fusilli (spiral-shaped pasta)
  • 2 tablespoons unsalted butter

img_8203
In a food processor, add ground sesame, tender herbs and greens/onion mixture and ¼ cup ricotta salata and process until a coarse paste forms. (I forgot to boil the onions with the greens, so I threw them into the processor raw.)

img_8207
Cook onion and mixed greens in a large pot of boiling salted water until tender.

img_8208
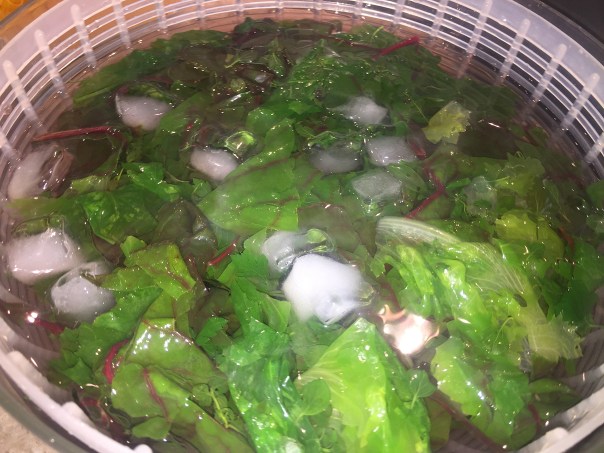
Using tongs, transfer to a bowl of ice water and swish around in the water to cool down as quickly as possible.

img_8209
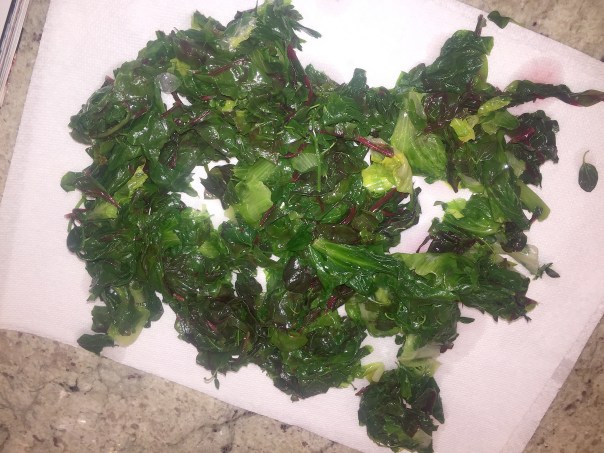
Drain and gently squeeze (or use a salad spinner) to remove excess liquid, then press between a double layer of paper towels.

img_8211
With motor running, stream in oil and process, adding water by the tablespoonful if needed to thin, until pesto is very smooth.

Directions

  • Cook onion and mixed greens in a large pot of boiling salted water until tender, about 2 minutes. Using a spider or tongs, transfer to a bowl of ice water and swish around in the water to cool down as quickly as possible (this helps retain the bright color). Drain and gently squeeze to remove excess liquid, then press between a double layer of paper towels to remove as much remaining liquid as possible. Reserve pot with greens cooking liquid.
  • Process ¼ cup sesame seeds in a food processor until finely ground. Add onion, tender herbs and greens mixture and ¼ cup ricotta salata and process until a coarse paste forms. With motor running, stream in 3 Tbsp. oil and process, adding water by the tablespoonful if needed to thin, until pesto is very smooth.
  • Heat ¼ cup oil in a large Dutch oven or other heavy pot over medium. Add garlic and cook, stirring often, until golden brown, about 5 minutes. Add pesto and cook, stirring, until sauce looks like most of the moisture has been cooked out, about 1 minute.
  • Meanwhile, bring reserved pot of greens cooking liquid to a boil and cook pasta, stirring occasionally, until very al dente, about 3 minutes less than package directions.
  • Using tongs, transfer pasta to pot with pesto and add ½ cup pasta cooking liquid. Cook, tossing, until each strand of pasta is coated. Remove from heat, add butter, and toss to combine.
  • Divide pasta among bowls. Top with more sesame seeds (or pine nuts) and remaining ¼ cup ricotta salata and drizzle with oil. If desired, shake on some crushed red pepper flakes.

img_8213
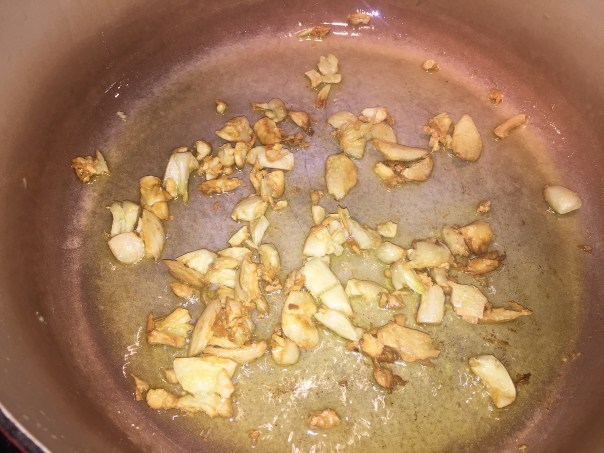
In a large Dutch oven, add garlic and cook, stirring often, until golden brown.

img_8214
Next, add pesto and cook, stirring, until sauce looks like most of the moisture has been cooked out.

img_8215
Using tongs or a slotted spoon, transfer pasta to pot with pesto and add ½ cup pasta cooking liquid.

img_8218
Remove from heat, add butter, and toss to combine.

Recipe adapted from Claire Saffitz of Bob Appétit


Can’t Get Much Lower (In a Good Way)

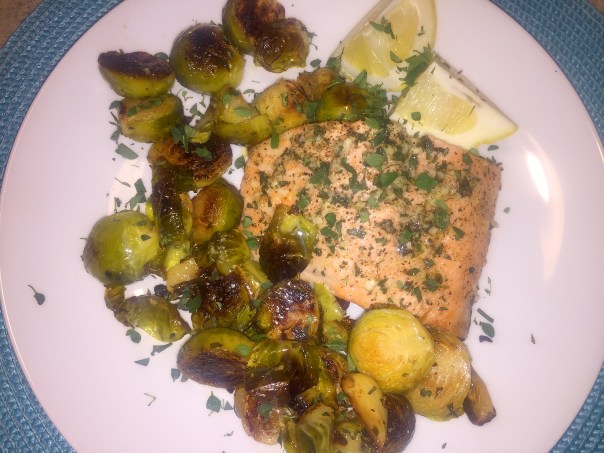
Roasting salmon on top of Brussels sprouts and garlic, flavored with wine and fresh oregano, is simple enough for a weeknight meal yet sophisticated enough to serve to company. For a heftier dinner of Garlic Roasted Salmon and Brussels Sprouts, you could consider serving with whole-wheat couscous.

img_8140
Make sure to drizzle some fresh squeezed lemon over the fish and sprouts.

And it checks a lot boxes in the healthy department. How low can you go? Low calorie, low carb/low GI, low saturated fat, low cholesterol and gluten-free; but high in flavor and fiber! Can’t argue there. And while we’re on the subject of health benefits, eating salmon increases your cardiovascular health, is an excellent source of vitamin D, and helps prevent cell damage. Not to mention, a total of only 45 minutes to prep and cook, plus dirtying only one pan—Somebody slap me!

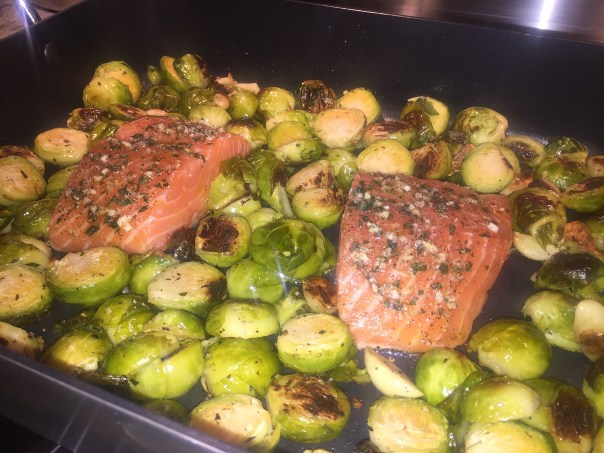
The recipe calls for a 2-pound piece of salmon, but we only had a 1-pound fillet, which I cut in half—plenty for just the two of us. A half-glass of wine added to the pan (and one for the chef of course) keeps the flesh moist while imparting intense flavor, so don’t neglect this step. With no Chardonnay on hand, I used a Pinot Grigio which happened to be open in the frig.

A definite keeper. While we had another meal’s worth of brussels sprouts leftover, we unfortunately did not have any extra salmon.

img_8120

Ingredients

  • 14 large cloves garlic, divided
  • 1/4 cup extra-virgin olive oil
  • 2 tablespoons finely chopped fresh oregano, divided
  • 1 teaspoon salt, divided
  • 3/4 teaspoon freshly ground pepper, divided
  • 6 cups Brussels sprouts, trimmed and sliced
  • 3/4 cup white wine, preferably Chardonnay
  • 2 pounds wild-caught salmon fillet, skinned, cut into 6 portions
  • lemon wedge

img_8121
Mince 2 garlic cloves and combine in a small bowl with oil, oregano, salt and pepper.

img_8123
Halve the brussels sprouts and remaining garlic cloves and toss into roasting pan.

img_8125
Use three tablespoons of sauce to coat the sprouts and garlic, then roast for 15 minutes.

img_8134
After the sprouts roasted for 15 minutes, stir the vegetables and nestle in the salmon fillets, add the wine and return to oven.

img_8135
Roasting another 15 minutes will caramelize the veggies and cook the salmon to a medium doneness.

Directions

  1. Preheat oven to 450°F.
  2. Mince 2 garlic cloves and combine in a small bowl with oil, 1 tablespoon oregano, 1/2 teaspoon salt and 1/4 teaspoon pepper. Halve the remaining garlic and toss with Brussels sprouts and 3 tablespoons of the seasoned oil in a large roasting pan. Roast, stirring once, for 15 minutes.
  3. Add wine to the remaining oil mixture. Remove the pan from oven, stir the vegetables and place salmon on top. Drizzle with the wine mixture. Sprinkle with the remaining 1 tablespoon oregano and 1/2 teaspoon each salt and pepper. Bake until the salmon is just cooked through, 5 to 10 minutes more. Serve with lemon wedges.

Low-Carb and Quick. Who’s Complaining?

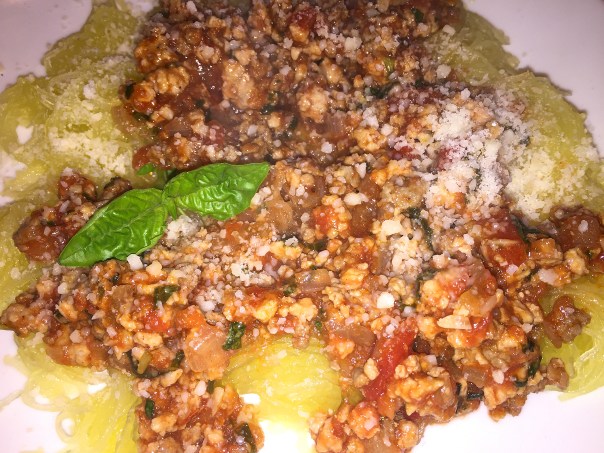
Squash is used like pasta to delicious effect in this low-carb Beef Ragù Over Spaghetti Squash. The recipe came compliments of our weekly “Make It Tonight” series from Fine Cooking. Oval shaped and yellow, spaghetti squash can be considered a summer or winter squash and is conveniently available year-round in most grocery stores.

spaghetti-squash

In the benefits department, spaghetti squash contains a wide range of vitamins and also several minerals that are vital to good health. It has a fair amount of fiber and with only 42 calories and 10 carbs in a 1-cup serving, this vegetable is a safe addition to any diet.

Talking with my younger sister Lolly recently, she told me a humorous story relating to this topic. She admitted cooking what she thought was spaghetti squash several times without ever achieving “spaghetti strands” when she raked a fork through the cooked flesh. Finally, after the third or so time without the desired results, she realized she had been cooking a butternut squash! All ended well when she eventually chose the correct cultivar. Hey, live and learn right?

With a few modifications, I altered the original recipe to fit our tastes. Instead of the ground beef, I used a meat combination of one-third each beef, pork and veal. Another good substitute would be ground turkey.

In Step 5, after draining the fat and adding the crushed tomatoes and basil, I omitted the 1/4 cup water preferring a thicker ragù. And to that end I also included one tablespoon of tomato paste to add substance. (BTW, it’s far more efficient to buy a tube of tomato paste so that when a recipe calls for a small amount, you don’t have to open an entire can.) Finally, for that kick I’m fond of, I incorporated about a half teaspoon of crushed red pepper flakes—optional of course!

img_8268

Ingredients

  • 1 small (2 1/2-3 lb.) spaghetti squash, halved lengthwise and seeded
  • 1 Tbs. extra-virgin olive oil
  • 1 lb. lean ground beef
  • 1 small yellow onion, finely chopped
  • One 15-oz. can crushed tomatoes
  • 1 Tbs. tomato paste
  • 1/2-1 tsp. crushed red pepper flakes (optional)
  • 1/4 cup coarsely chopped fresh basil
  • 1/4 cup freshly grated Parmigiano-Reggiano

img_8273
After the meat, onion and garlic have cooked, add the tomatoes, basil, and tomato paste; stir well and bring to a boil.

img_8274
Reduce the heat to medium low and simmer for 10 minutes (or longer.)

img_8275
Once the squash has cooled enough to handle, rake the squash flesh into strands with a fork.

Directions

  1. Arrange the spaghetti squash in a single layer in the bottom of a large, wide pot. (Don’t worry if the squash halves don’t lie completely flat in the pot.) Add 1/2 inch of water, cover the pot, and bring to a boil. Reduce to a simmer and cook until the squash is tender enough to shred when raked with a fork but still somewhat crisp, 15 to 20 minutes. Transfer the squash to a plate and set aside until cool enough to handle.
  2. While the squash cooks, heat the oil in a 12-inch skillet over medium-high heat. Add the beef, the remaining chopped garlic, onion, 1/2 tsp. salt, and 1/4 tsp. pepper; cook, stirring to break up the meat, until just cooked through, 5 to 6 minutes.
  3. Drain and discard the fat if necessary. Add the tomatoes, basil, and tomato paste; stir well and bring to a boil. Reduce the heat to medium low and simmer for 10 minutes. Season to taste with salt, pepper and if using, crushed red pepper flakes.
  4.  With a fork, rake the squash flesh into strands, transfer to plates, and season to taste with salt. Ladle the beef ragù over the squash and garnish with the grated Parmigiano. If desired, serve with garlic bread and a side salad.

Adapted from a recipe by Liz Pearson from Fine Cooking

img_8279

A New York State of Mind

“Some folks like to get away. Take a holiday from the neighborhood…”

Located on the banks of the scenic Hudson River, Overlook on Hudson is just minutes from West Point and less than one hour from New York City. First owned as a summer retreat by financier JP Morgan, the current structure was built on the original foundation of Morgan’s 1880 mansion with the fireplaces and expansive patios still part of this lovely B&B.

img_8306
Our view of the Hudson River as we arrived at the B&B during “Leaf Peeping” season.

During the 1970’s, Overlook on Hudson was home to world-renowned recording artist Billy Joel where he composed his popular song, “New York State of Mind.” Inspired by the sweeping views of the Hudson from the large window, “The Piano Man” composed and played a number of songs here, most famously his Songs in the Attic album.

You may recall that we booked this weekend getaway back in early September when visiting Merry Sue and Fred at their “Baum Shelter.” Our initial intentions centered on a long weekend in the Finger Lakes, but because folks are very serious about their Fall foliage “Leaf Peeping” in the Northeast, everything in the area was booked solid through Thanksgiving!

Not wanting to give up on the idea, I suggested looking at places along the Hudson River, and that’s how we discovered Overlook on Hudson. While researching the B&B, we noted every review was rated 5 out of 5—can’t beat that! With only five guest rooms for rent, the atmosphere lends a cozy and tranquil vibe, just what we were looking for.

img_8309
Our room the “Eagles Nest” had a great view of the river.

img_8310

Russ and I booked the “Eagle’s Nest” with spectacular views overlooking the pool and the river valley—although late October is certainly NOT pool-weather in New York. The Baum’s chose the charming “Cadet Room” boasting of historical art works and memorabilia representative of life as a cadet in the United States Military. There are even photos of the Army/Navy “goat stealing,” a tradition dating back to the Fall of 1953.

russ-back-patio
Russ stands on the back patio with a cup of coffee.

Upon our arrival mid-afternoon on a Friday, owner and proprietor of the B&B, Roxanne Donnerly (along with husband Jim) gave us a quick tour of the beautifully appointed rooms, where it was obvious the utmost attention had been paid to every detail, right down to fluffy towels and robes. And we all breathed a sigh of relief when we heard breakfast is served at the humane hour of 9 a.m. (We had visions of having to rise at 6:00, because after all, West Point is only minutes away, and many military families are known to frequent their establishment.)

img_8314
img_8313
Views of the formal living room showcasing the original JP Morgan fireplace and tiles that survived the 1952 fire because they were in the basement.

img_8506
eggsbenedict
img_8509
img_8510
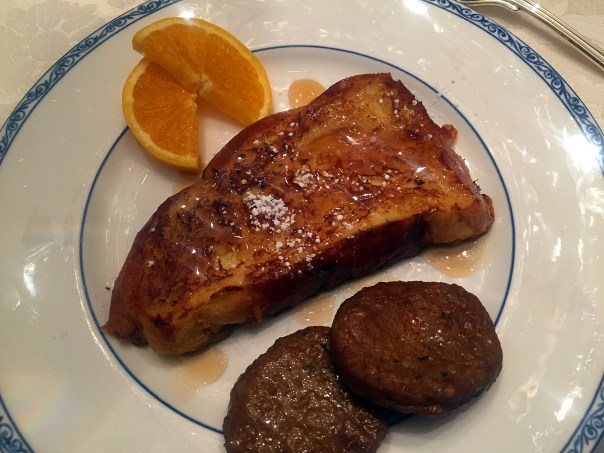
Husband Jim was breakfast chef, while Roxanne graciously served guests several courses on beautiful Ralph Lauren china with sterling silver cutlery. They even made accommodations to the menu based on Russ’s wheat intolerance.

For dinner on our first night we planned a casual feast in Harriman, NY at Angelo’s Sicilian Trattoria, a family-owned and operated BYO. As we pulled up curbside, Merry Sue uttered an audible “Oh no” because we saw absolutely no one in the dining room. But after we disembarked from our vehicle we could see the other half of the restaurant was in fact, jam-packed! Luckily Merry Sue had made reservations and our corner table awaited us.

img_8316

Brightly saturated walls in several different hues, were lined with a chair railing made of split wine corks. The atmosphere was cozy, yet loud, but the waitstaff were all friendly and very attentive. Yes, because everything is made fresh and to order, there is a bit of a wait for your meals—with a few missteps along the way such as forgetting our side salads until asked, an extra cup of ice until asking for twice, and another iced tea. But given the ginormous sizes of all our delicious entrées at reasonable prices, all was forgiven—not to mention a ton of leftovers!

img_8319
img_8318
For starters Lynn and Russ shared a fabulous appetizer of Eggplant Rollatini. Merry Sue and Fred made quick work of their Meatballs in Grandma’s Gravy selection.

img_8324
img_8326
img_8329
img_8323
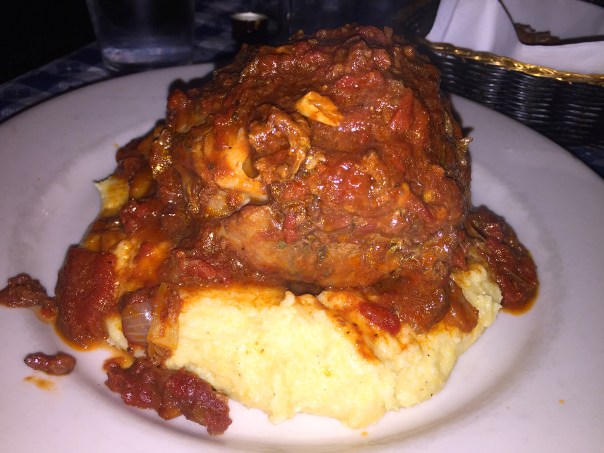
Our entrees were Spaghetti with White Clam Sauce (with extra clams) for Merry Sue, Eggplant Parmigiana for Fred, the Pork Osso Buco with polenta special for Russ, and Chicken Marsala for Lynn.

Saturday morning was spent in New Windsor, NY roaming the grounds of the well-known Storm King Arts Center highlighting large sculptural pieces by such acclaimed artists as Alexander Calder, Dennis Oppenheim and Maya Lin. They are sited across 500 acres of fields, hills and woodlands against the backdrop of Storm King Mountain.

img_8383
img_8381
img_8388
img_8374

The Hudson River Valley and Orange County, NY have one of the oldest wine country areas in America. Our Saturday afternoon excursion was to Brotherhood, which has the unique distinction of being “the” oldest winery in the U.S. After our wine tasting and consequent wine purchases, we were ready for lunch at their Vinum Cafe which occupies the ground floor of the original winery building circa 1839. While the food was more than passable, the wait and service left a lot to be desired!

img_8433
img_8473
Fred snaps a photo of the three of us during the wine tasting; then Merry Sue and Fred pose in front of a large wine casket.

img_8480
img_8492
img_8483
img_8485
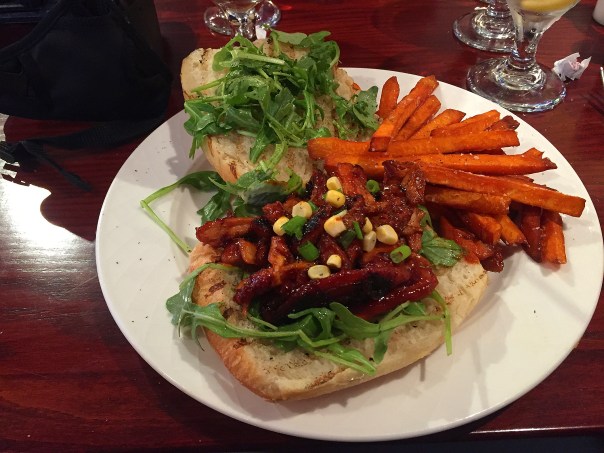
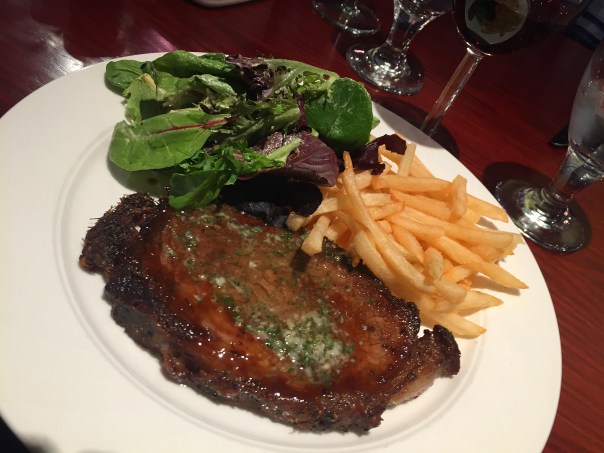
Late lunches at the Vinum Cafe included an Imported Cheese Platter, BBQ Pulled Chicken sandwich on a ciabatta roll with sweet potato fries and arugula, Steak Frites Salad, and a Crab Cake with cajun remoulade, mesclun salad and sliced cucumbers.

We relaxed back at Overlook for several hours with books, naps, and/or a game of scrabble before heading out to dinner at the Hudson House River Inn. Built in 1832 and operated as a hotel since then, it is located on the serene waterfront approximately one hundred feet from the Hudson River in the quaint, antique shopping village of Cold Spring; and is currently on the National Register of Historic Places.

Overall the food was very good with a few exceptions. Russ and Fred loved their Rack of Lamb special, and Merry Sue thought her roasted garlic crusted Diver Sea Scallops dinner was superb. I ordered from the “Price Fixe” menu thinking it would be a better deal than selecting a steak a la carte. And while my Certified Angus Sirloin topped with bordelaise sauce was cooked perfectly medium-rare, the size was underwhelming, especially considering the hefty price tag with a $4 upcharge. At that cost, I would have appreciated taking home some ample leftovers.
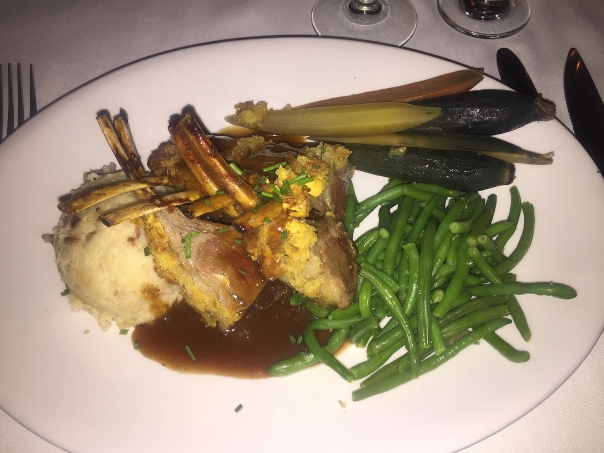
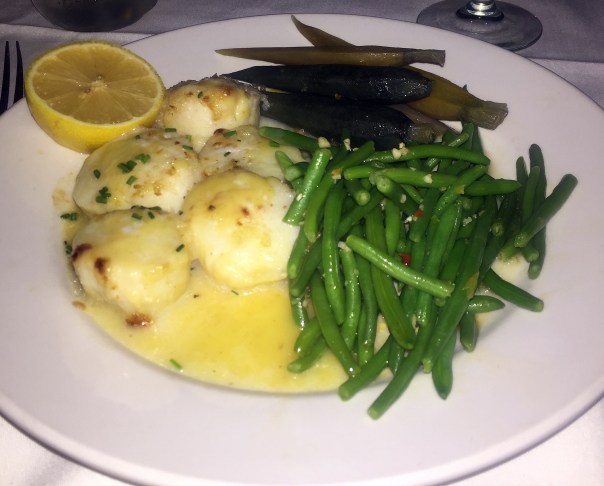
img_8502
img_8503
img_8500
From the top: the Rack of Lamb entrées for Fred and Russ, Diver Sea Scallops for Merry Sue, and my meager, overpriced Certified Angus Sirloin.

But the biggest complaint centered on the totally undercooked, tasteless carrots and rubbery green beans that we all speculated had been frozen prior to reheating. It’s always a telling sign to us—and not necessarily a good one—when every entrée comes paired with the exact same sides. Where is the creativity in that? On the other hand our waitress was extremely friendly…

I’d be remiss if I didn’t mention the Lobster Bisque that Fred and Russ enjoyed as appetizers, and a tasty Arugula and Golden Beet Salad I chose as part of my three course offerings. Merry Sue was the lucky recipient of my last course—dessert. Since I don’t indulge in dessert, she was more than happy to oblige and chose the New York Cheesecake with raspberry coulis; savoring every morsel and gave it three thumbs up!

img_8505

A side note: a young couple also staying at the Overlook, and with whom we had shared breakfast that morning, came in and were seated at the table next to us. From our vantage point Russ and I could see—and hear—that they were having a major spat all through dinner.

On the last day of our visit, that aforementioned young couple occupying the top floor were obviously in the throws of a break up and left very early and unexpectedly. Seizing the opportunity, we asked if Roxanne would show us the famous Billy Joel Suite. (The Billy’s Nest with queen bed, is only available when coupled with the Billy Joel Room to become the perfect private suite for family and friends.)

According to Roxanne, back in the 70’s when the Piano Man and his first wife Elizabeth rented the house for two years, Billy had his piano “in the attic” which the Donnerly’s later fixed up into a charmingly outfitted suite decorated with numerous artifacts referencing the legendary rocker. Thus the title of his well-known album “Songs in the Attic” which ranks among his very best work.

img_8512
The panoramic view from the Billy Joel Room upstairs window.

img_8513
A framed Baby Grand hung on musical themed wallpaper.
img_8514
The music theme continues on a tea set.
img_8520
A collection of framed Billy Joel album covers.

img_8518
A planter was crafted from old LPs with titles from various Piano Man songs.

Overlook on Hudson is situated in Highland Falls, NY, and is referenced in lyrics from another song on that album “Summer, Highland Falls.” You may be familiar with “They say that these are not the best of times. But they’re the only times I’ve ever known…”
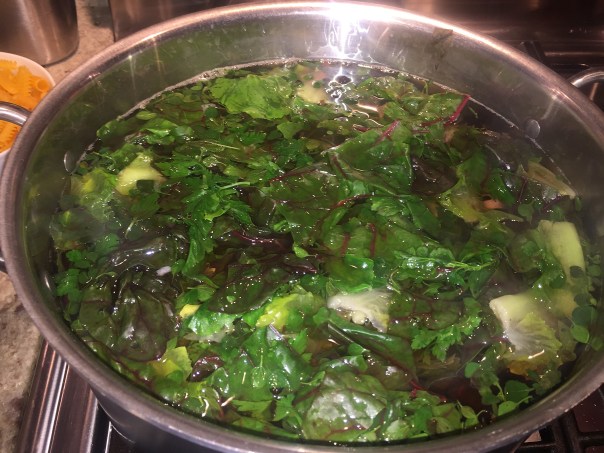
Well, they were certainly some of the best of times for the four of us. So when visiting the area, don’t “overlook” this gem on the Hudson!