Monthly Archives: March 2021

A South Asian Curry

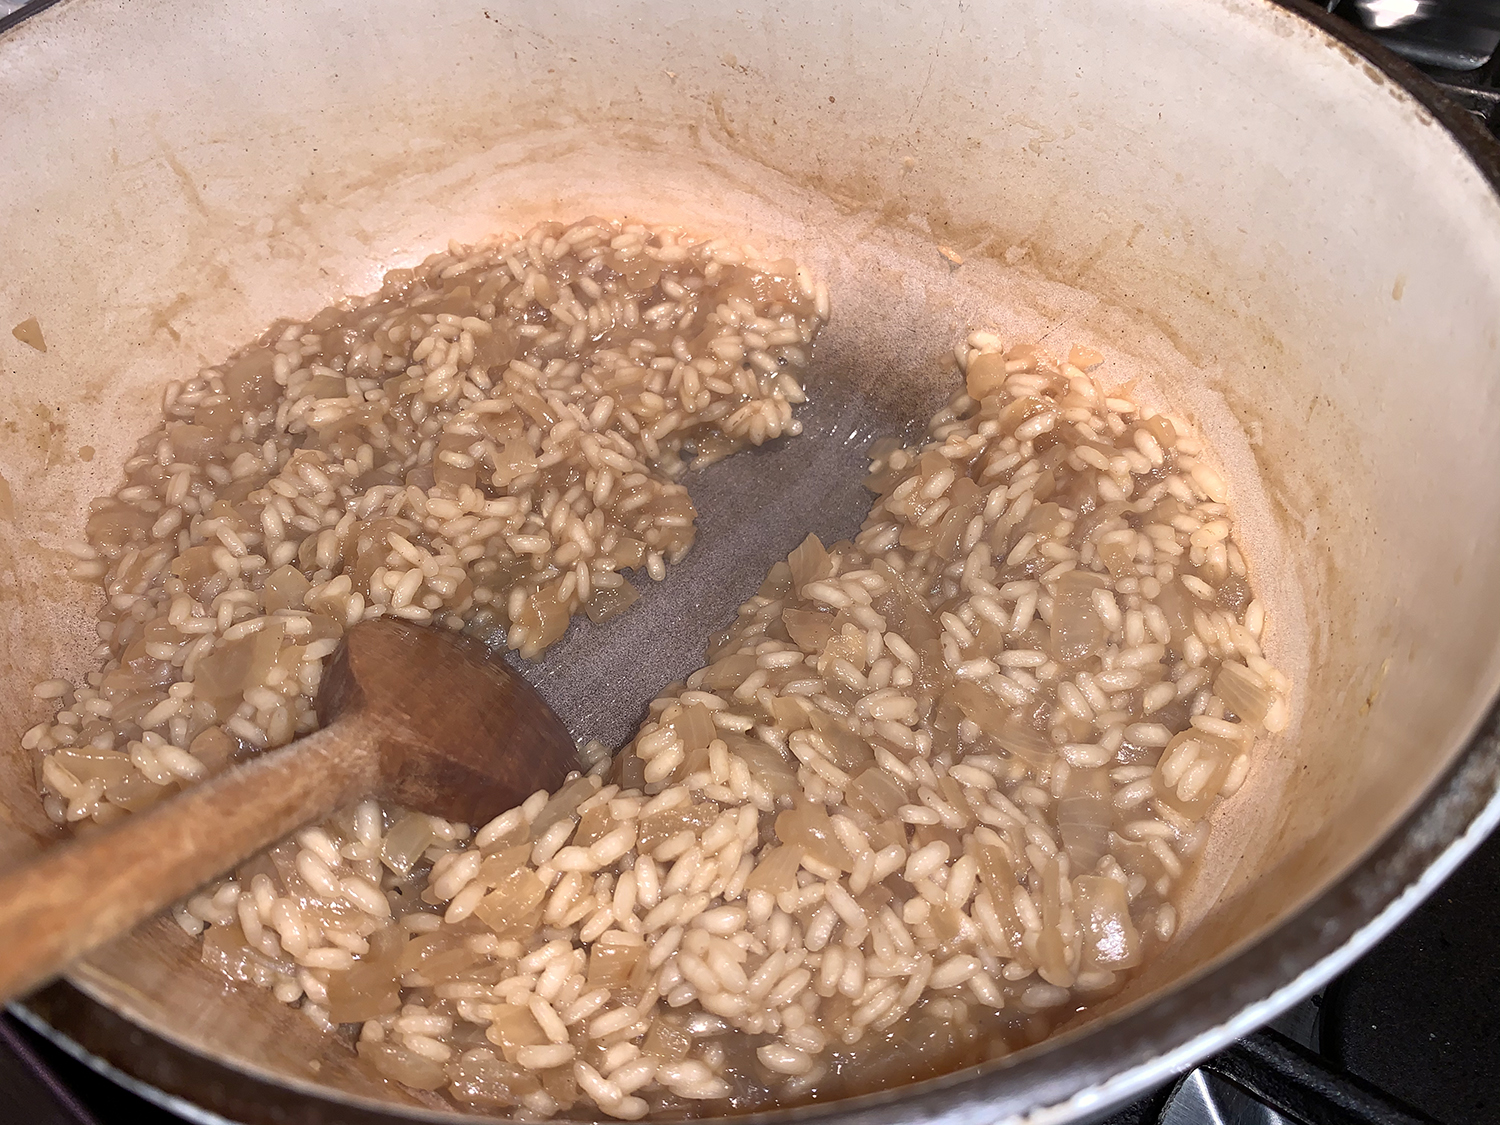
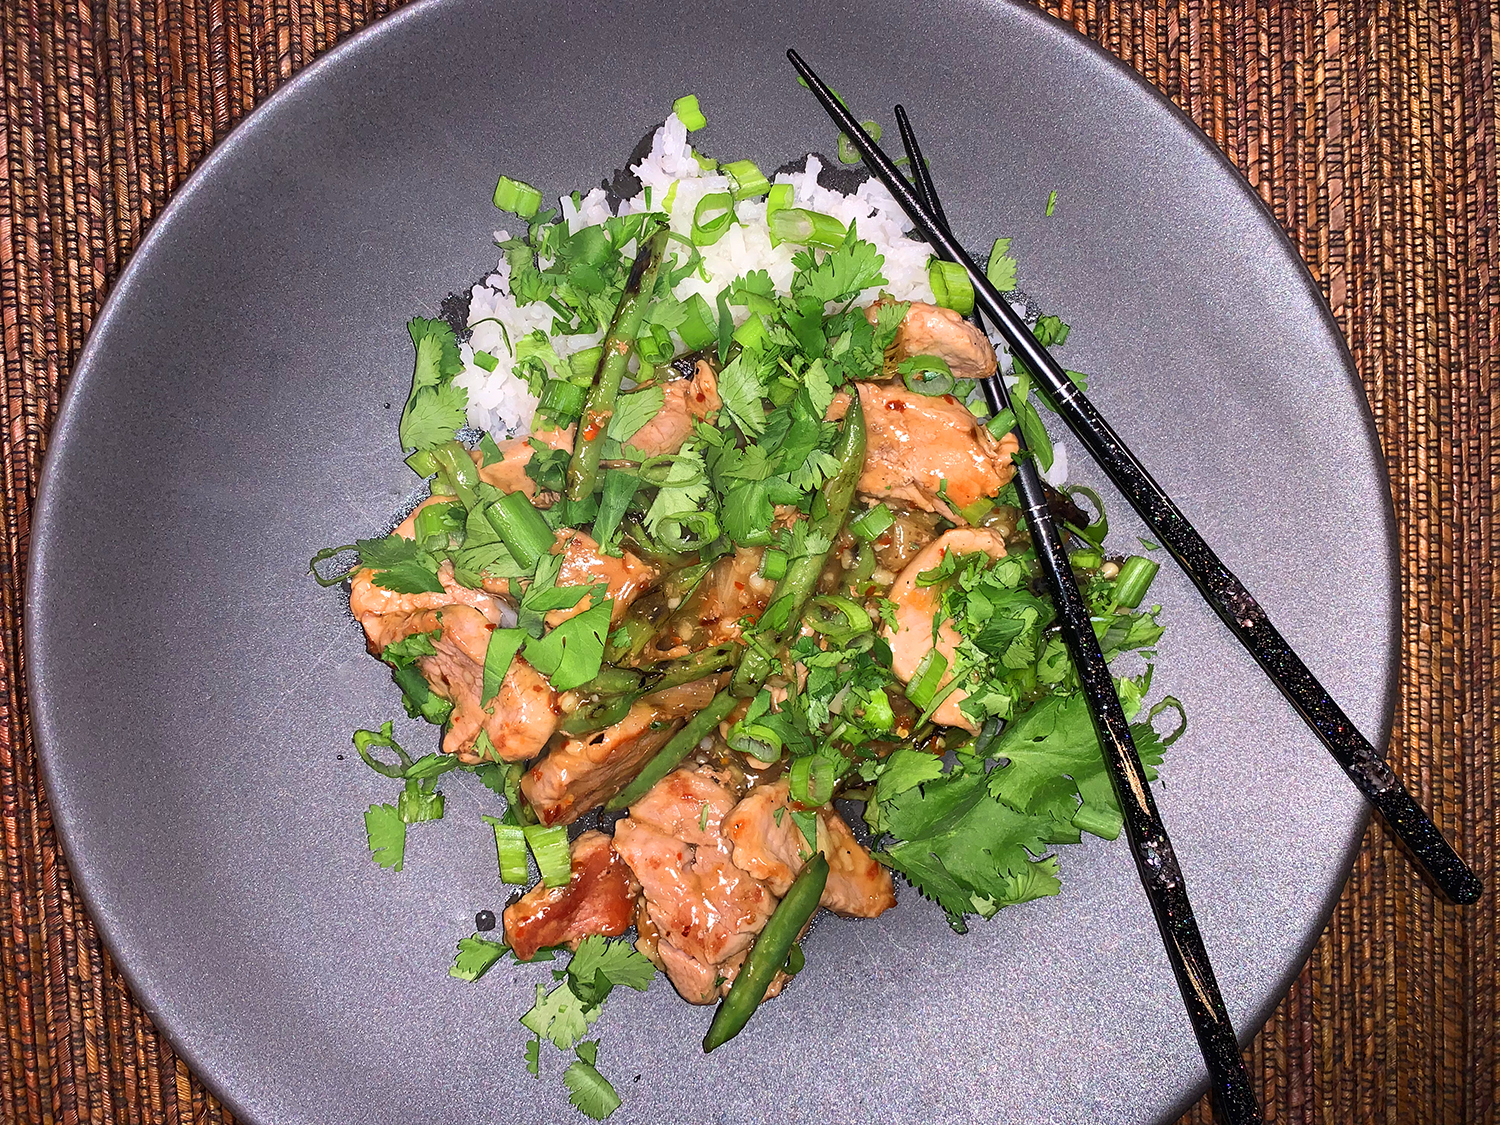
Ginger-Cumin Beef Curry — Bhuna is a type of South Asian curry that’s especially intense and flavorful because the aromatics and a generous amount of spices are fried in oil and only a little liquid is added to simmer the meat. This version we found in a recent issue of Milk Street.

Over the course of cooking, the liquid is allowed to reduce, resulting in deep, bold, concentrated flavors and a thick, rich sauce. According to some sources, the term bhuna refers to the cooking technique employed to make the dish. The Instant Pot is well-suited to making bhuna-style beef curry: the pressure cooker function cooks the meat without any added liquid at all and the slow cooker function simmers it gently and steadily with only a small amount of added moisture.

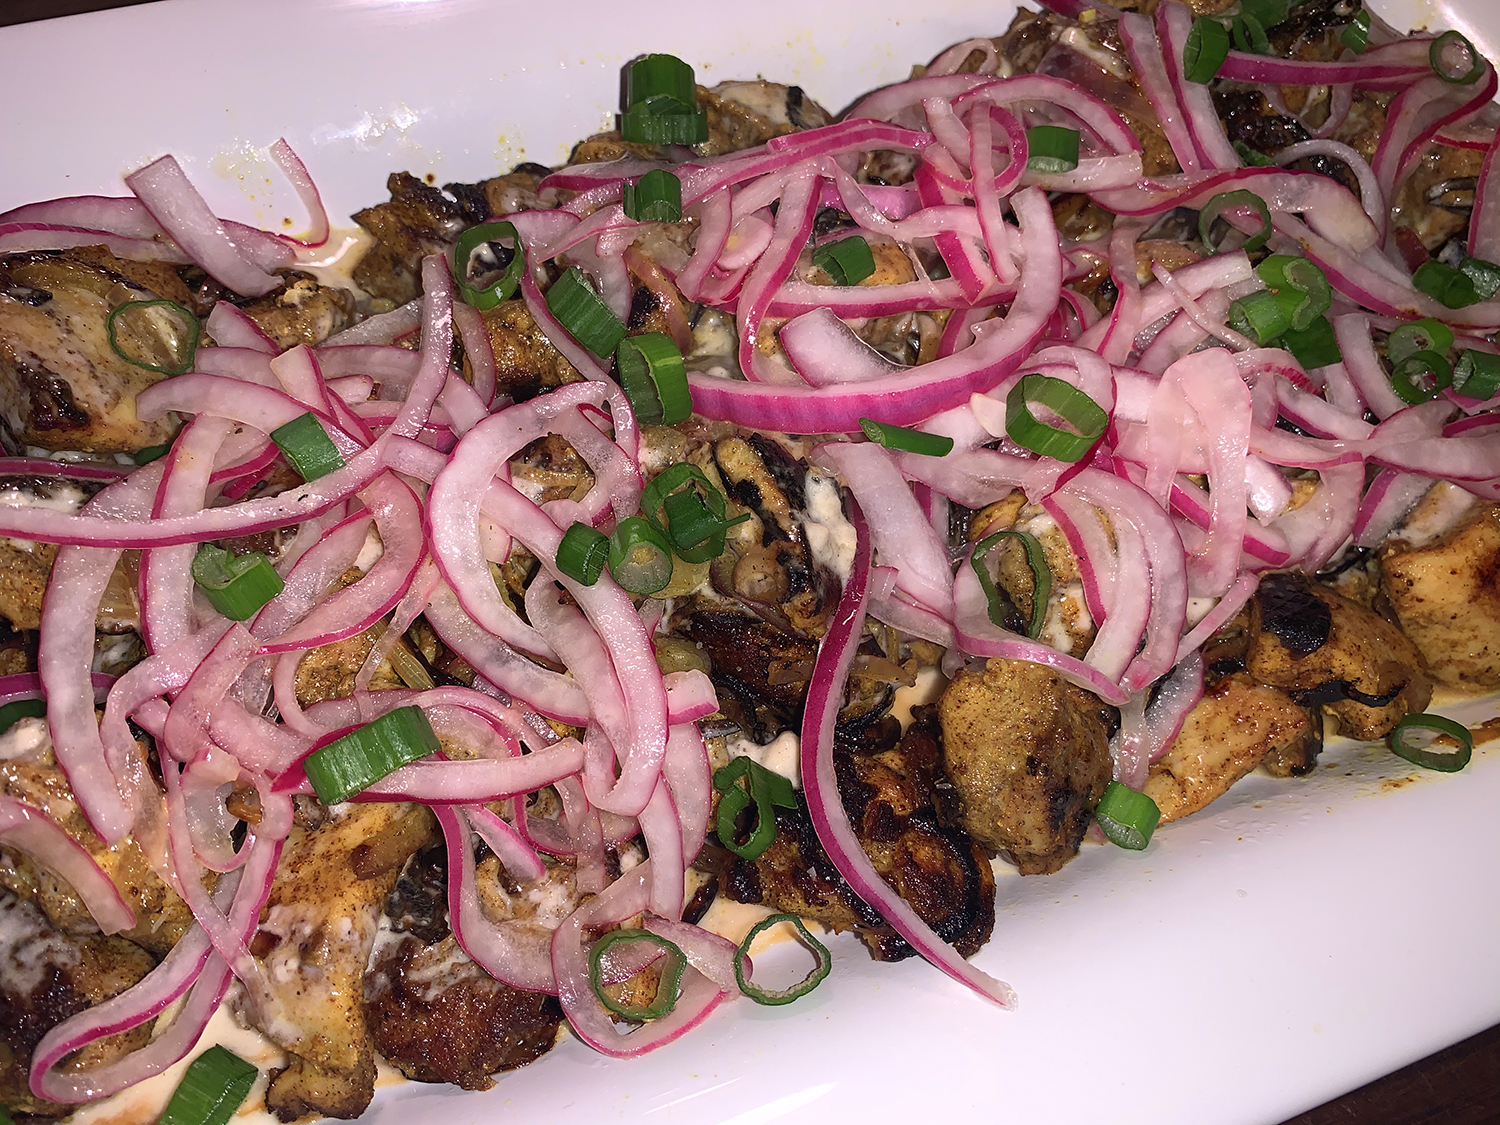
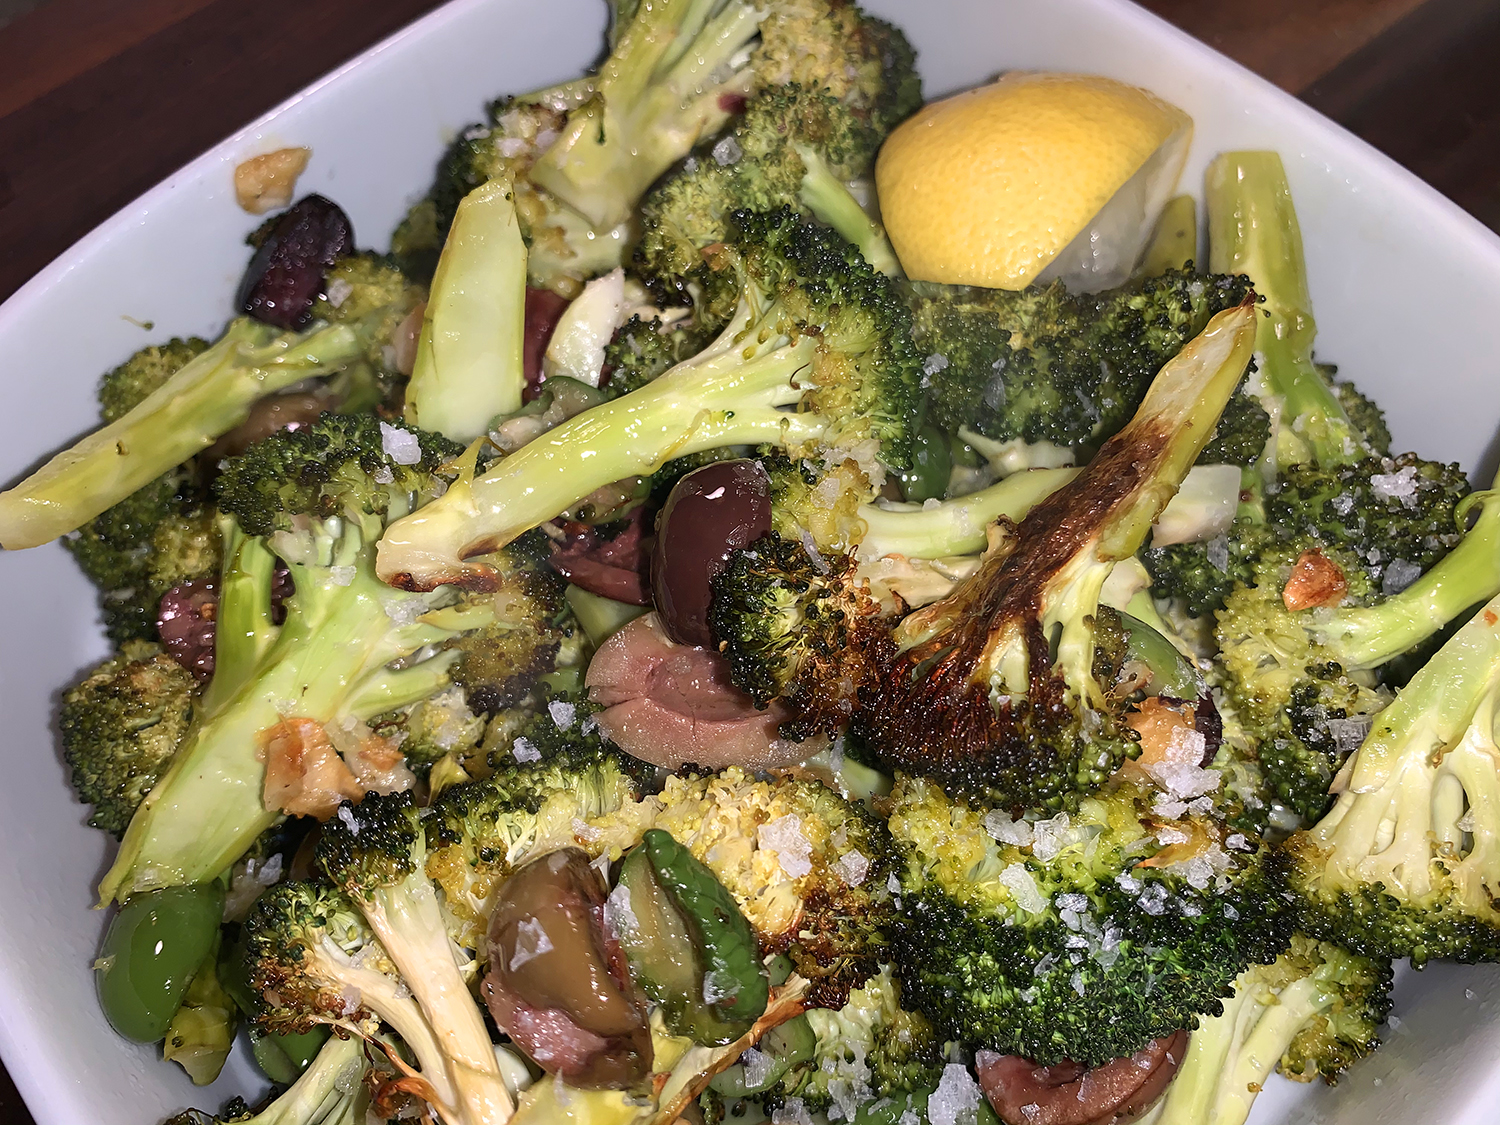
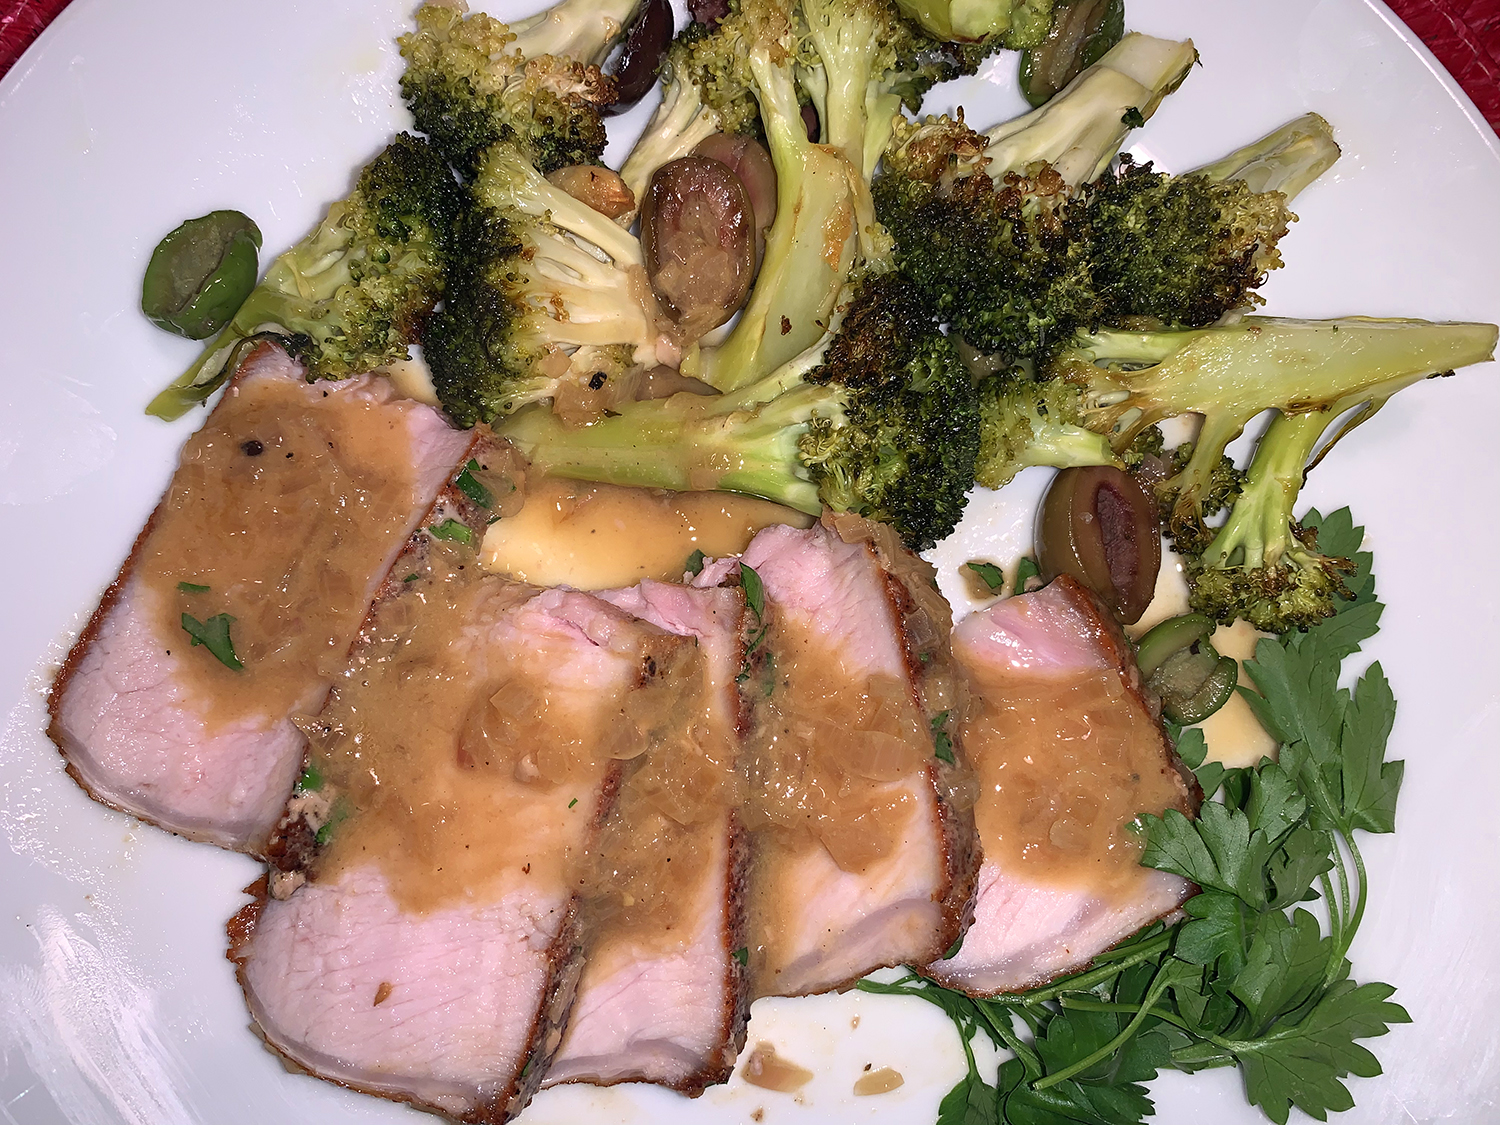
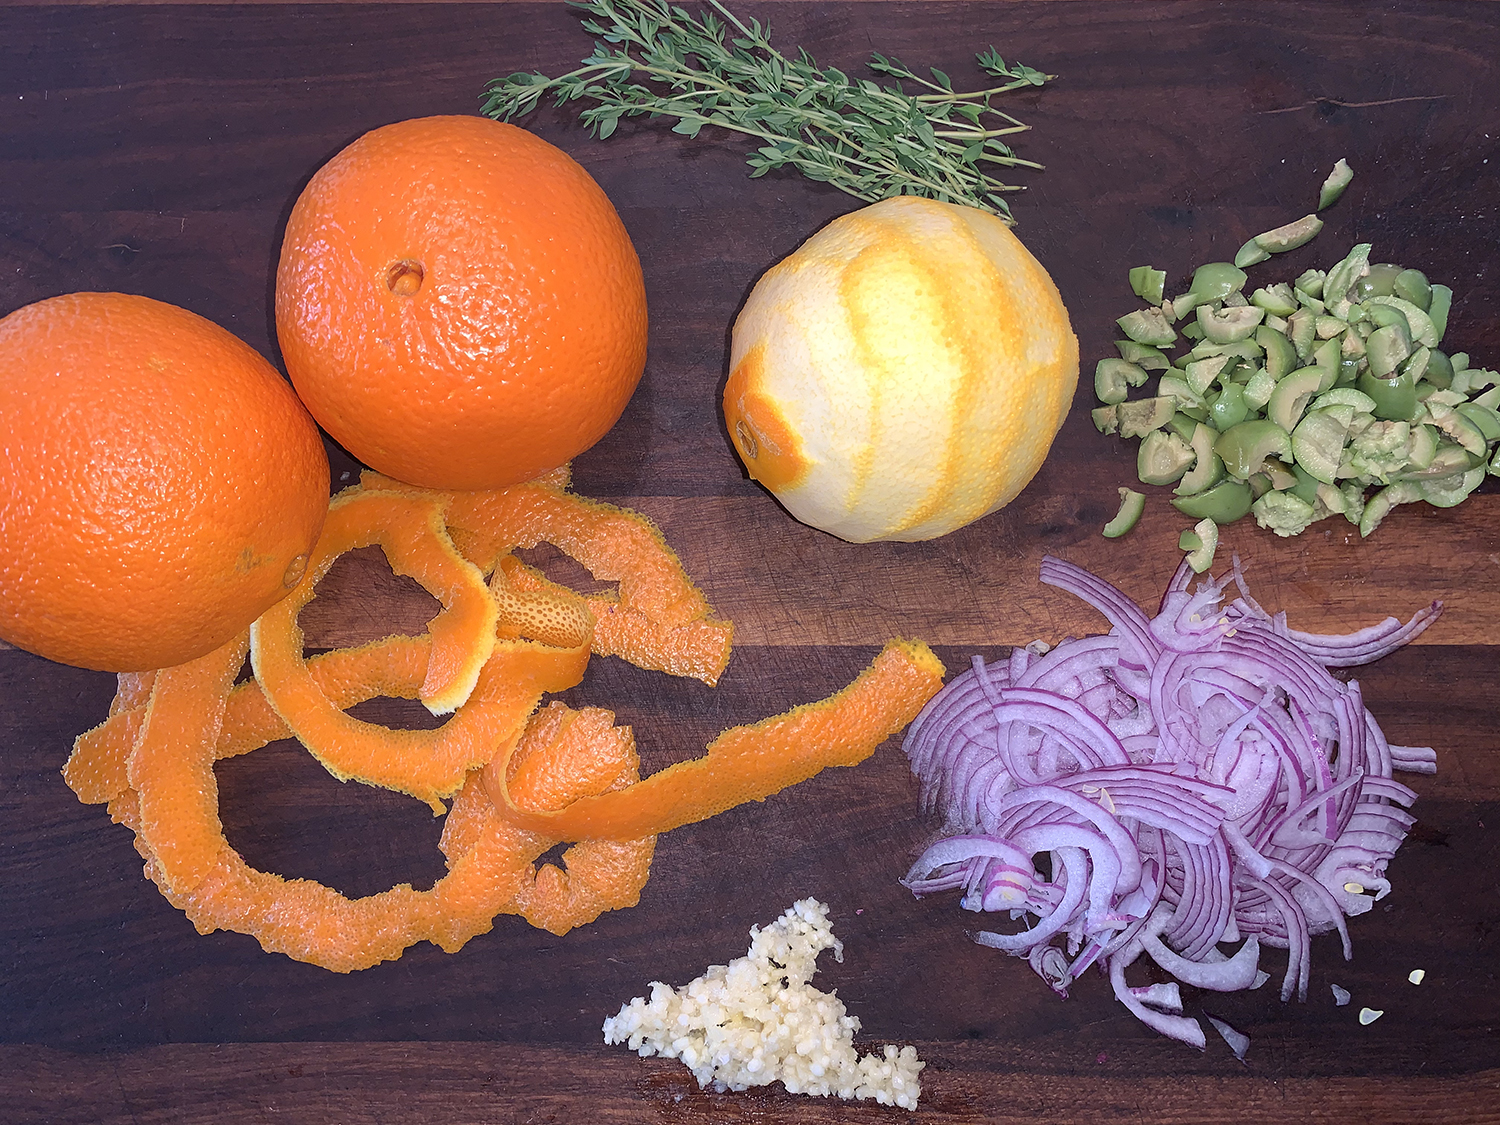
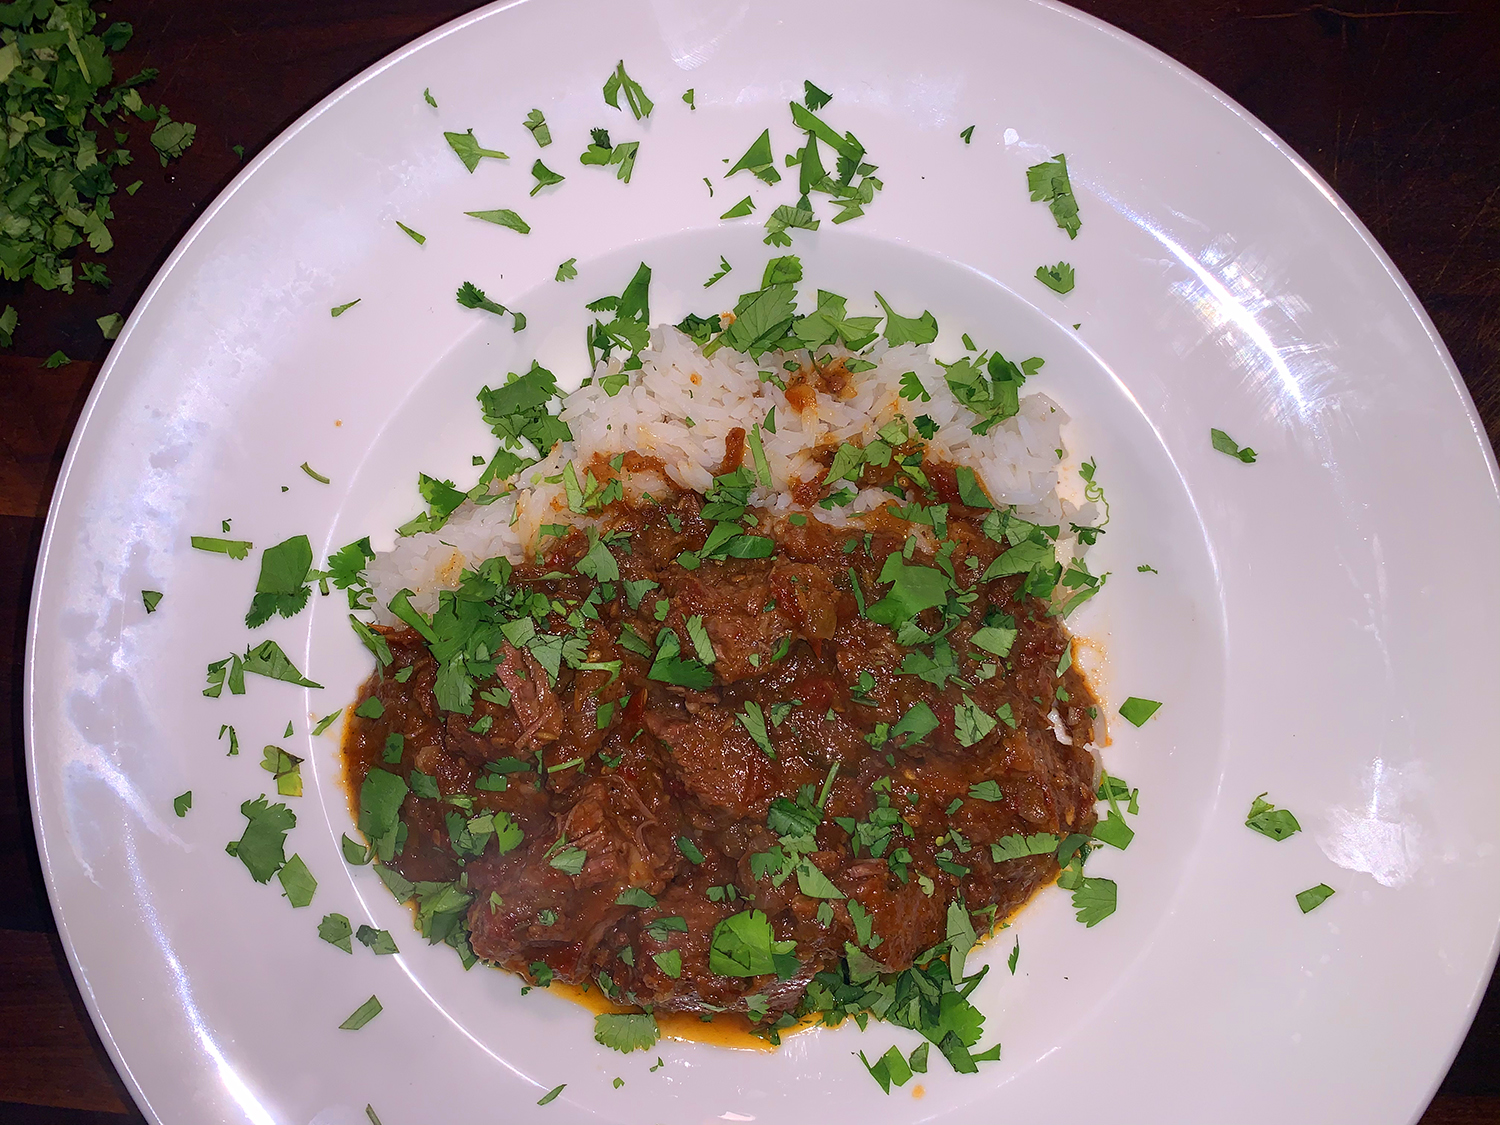
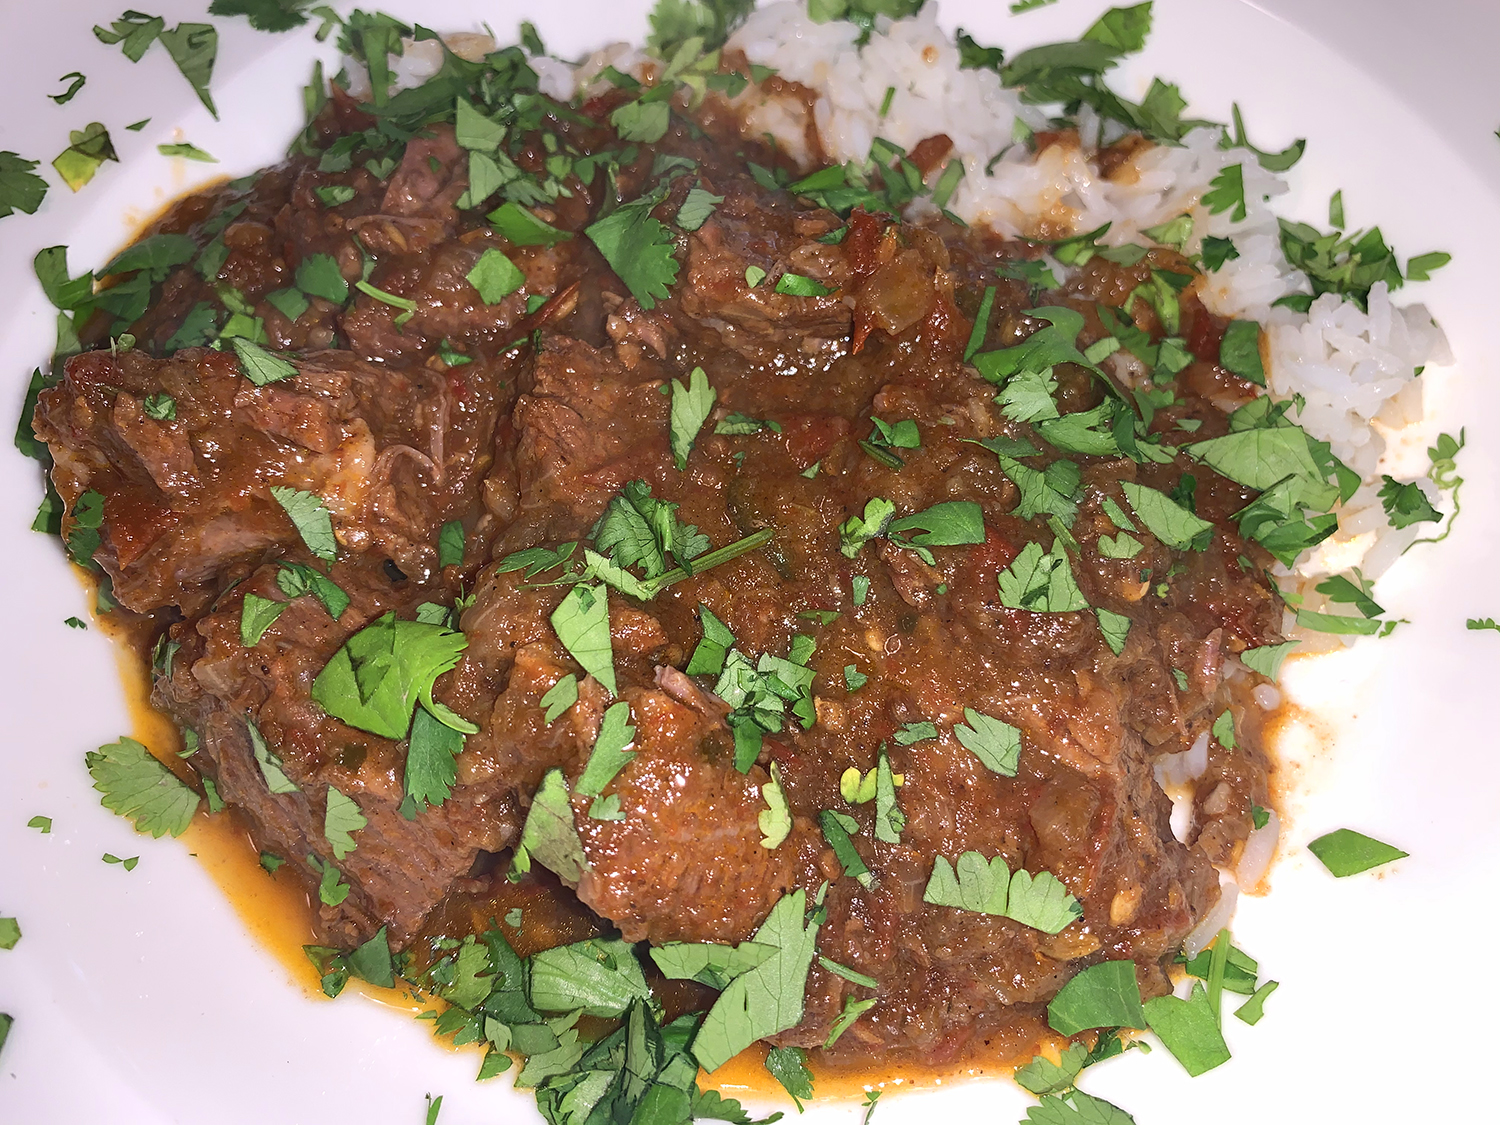
If you prefer more vegetables, you could incorporate carrots and/or broccoli. We simply paired ours with a side salad. Serve the curry garnished with thinly sliced red onion and with basmati rice on the side.

Don’t forget to add ⅓ cup water if slow-cooking. The liquid, added just before the pot is sealed, helps the beef mixture come to temperature more quickly, for a slightly shorter overall cooking time. The water is not needed if using the pressure-cooker function.

Ginger-Cumin Beef Curry

  • Servings: 4-6
  • Difficulty: easy
  • Print

Ingredients

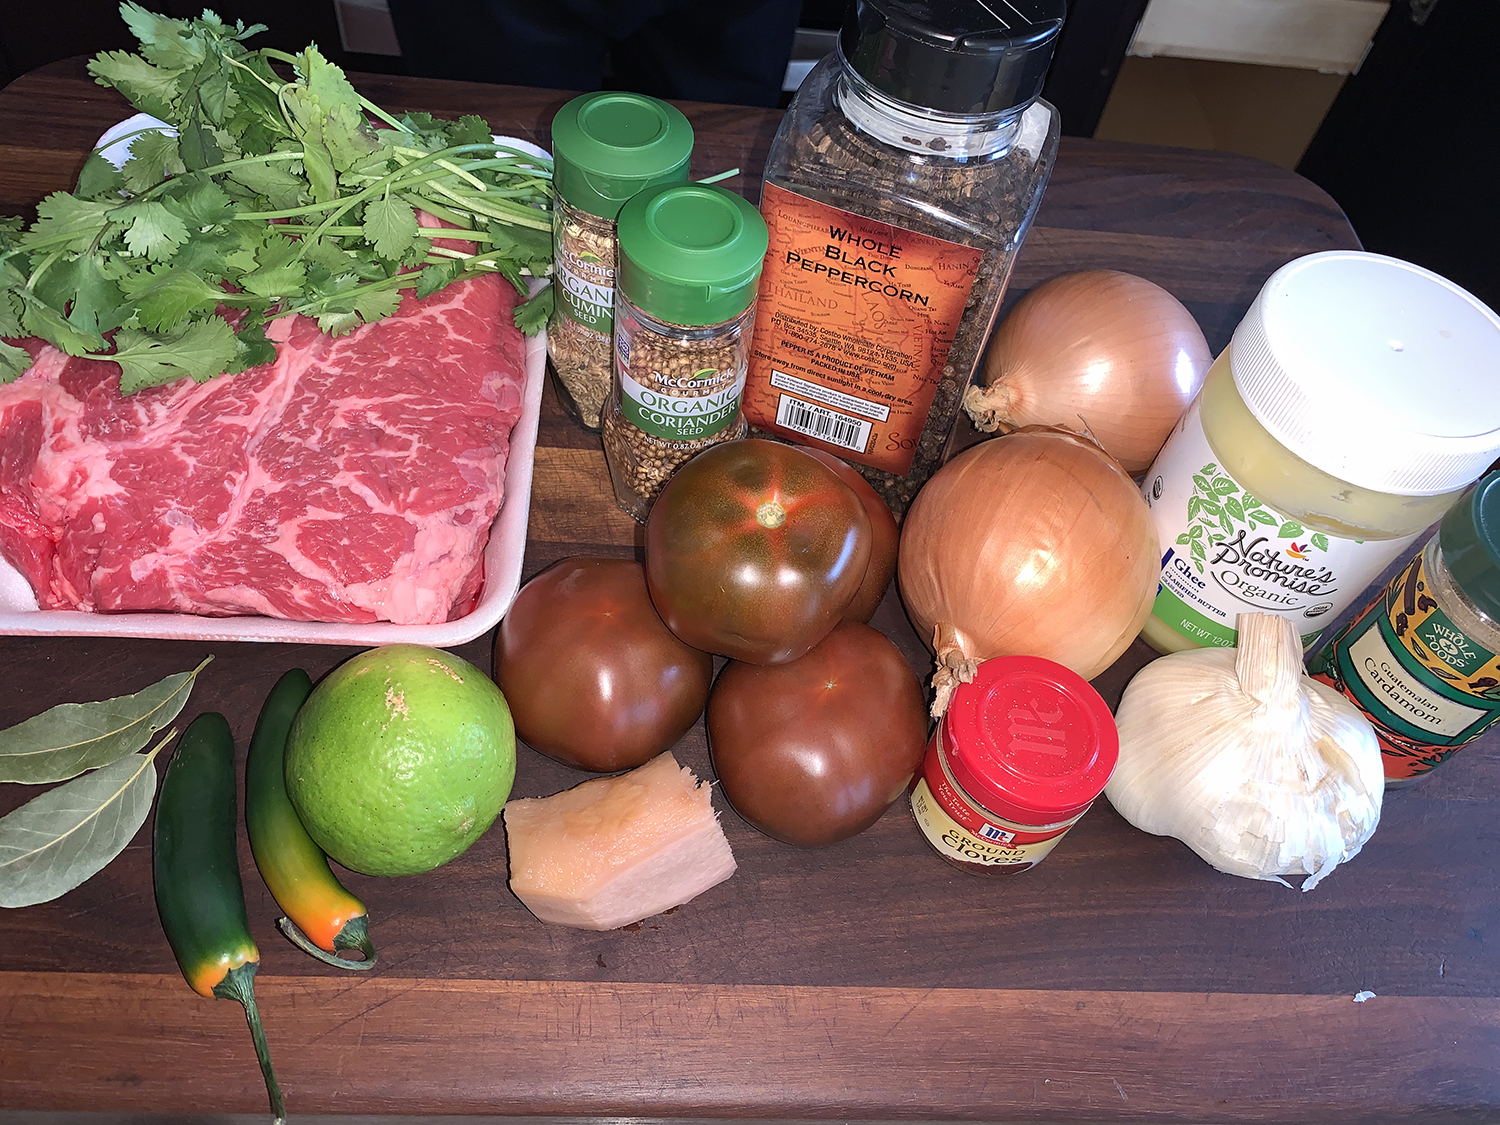
  • 3 Tbsp. ghee or neutral oil
  • 2 medium yellow onions, finely chopped
  • 2 Tbsp. finely grated fresh ginger
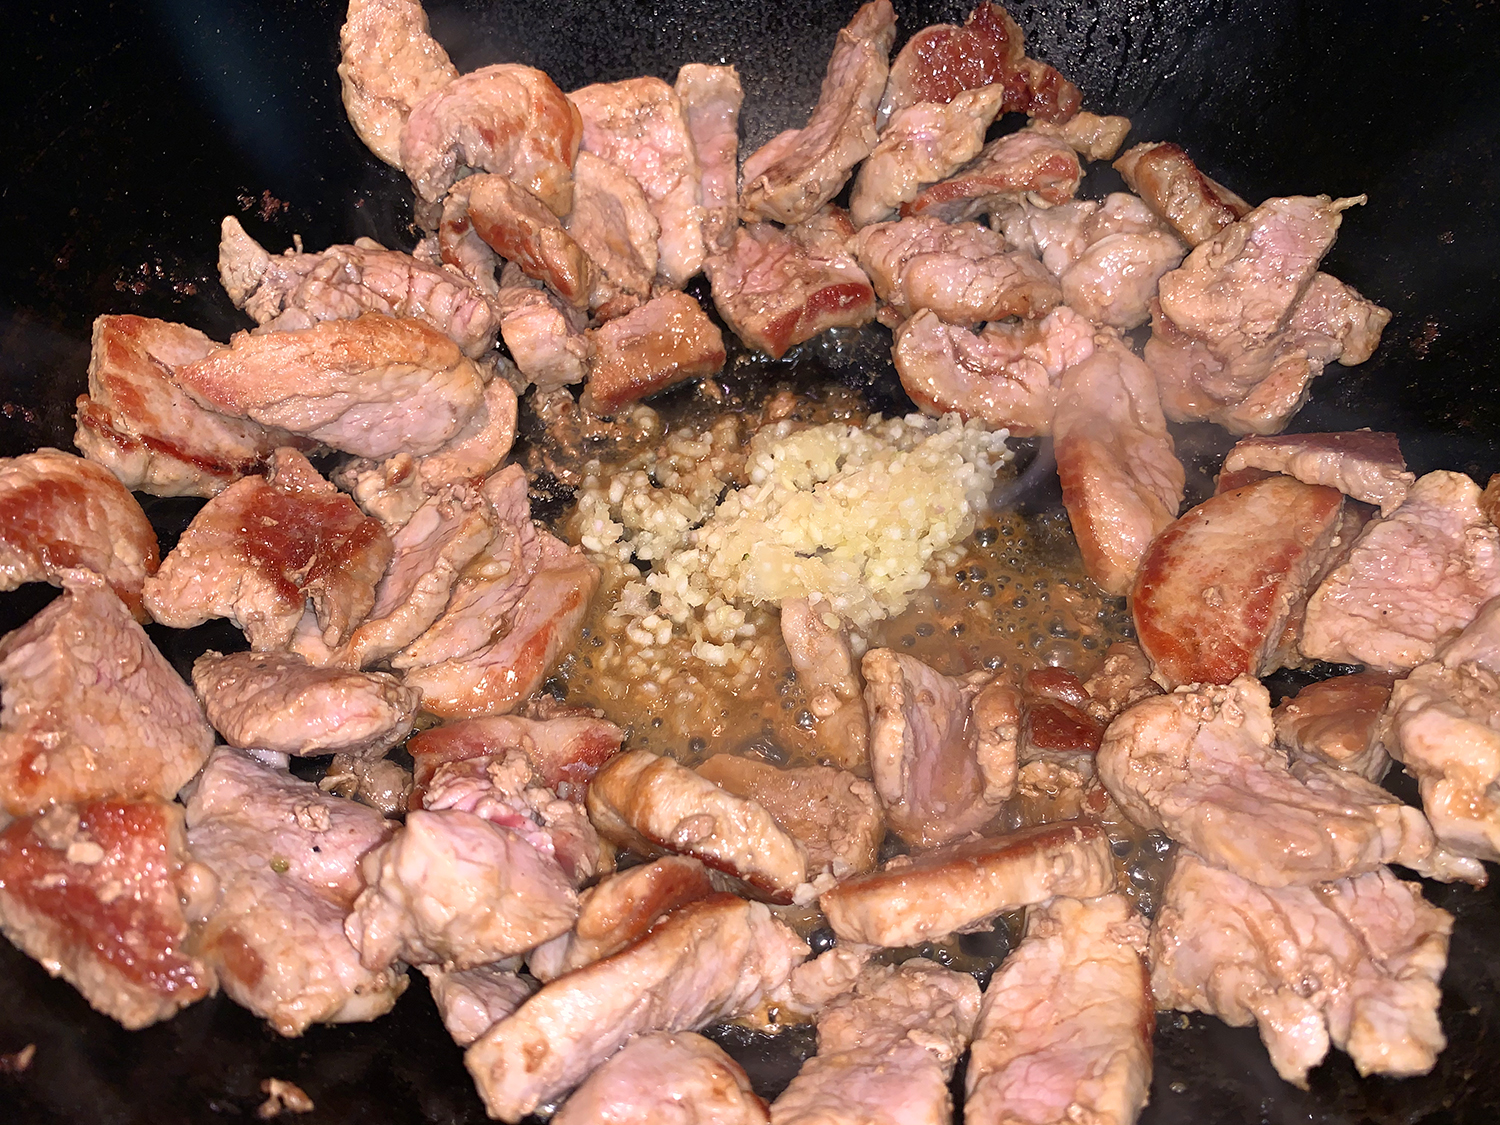
  • 4 medium garlic cloves, finely grated
  • 1 tsp. ground cardamom
  • 1 tsp. cumin seeds
  • 1 tsp. coriander seeds
  • ½ tsp. ground cloves
  • ½ tsp. whole black peppercorns
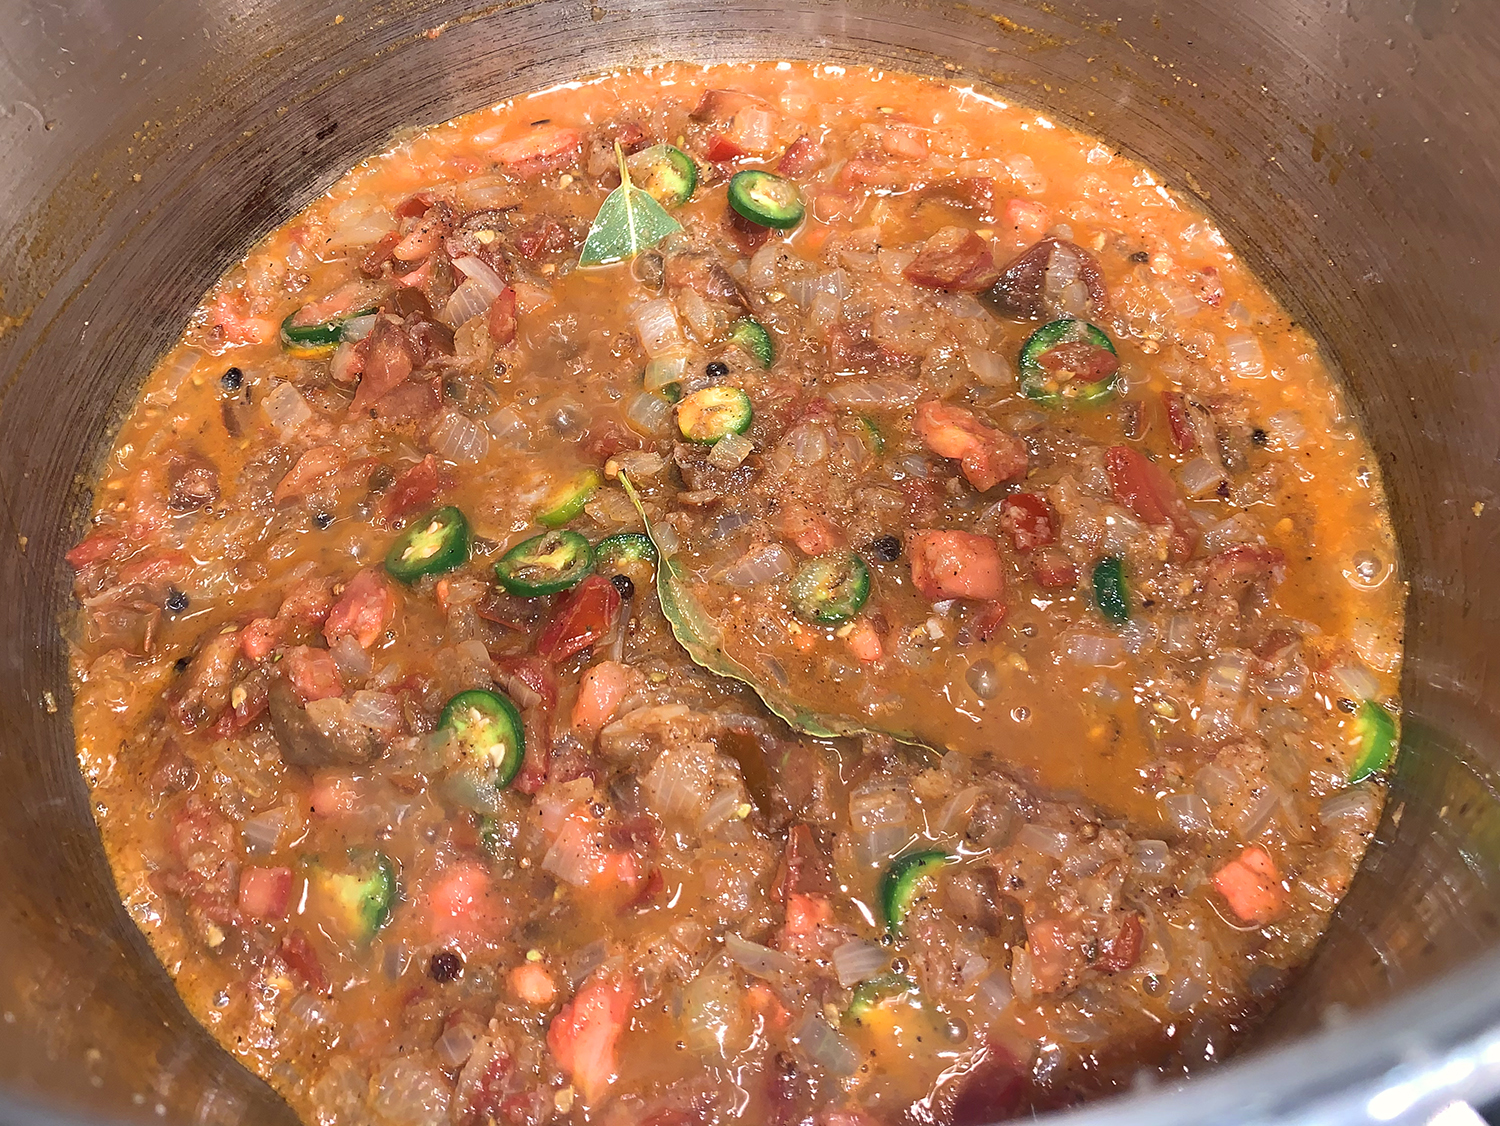
  • 2 bay leaves
  • 2 medium ripe tomatoes, cored and chopped
  • 2 serrano chilies, stemmed and sliced into thin rings
  • Kosher salt and ground black pepper
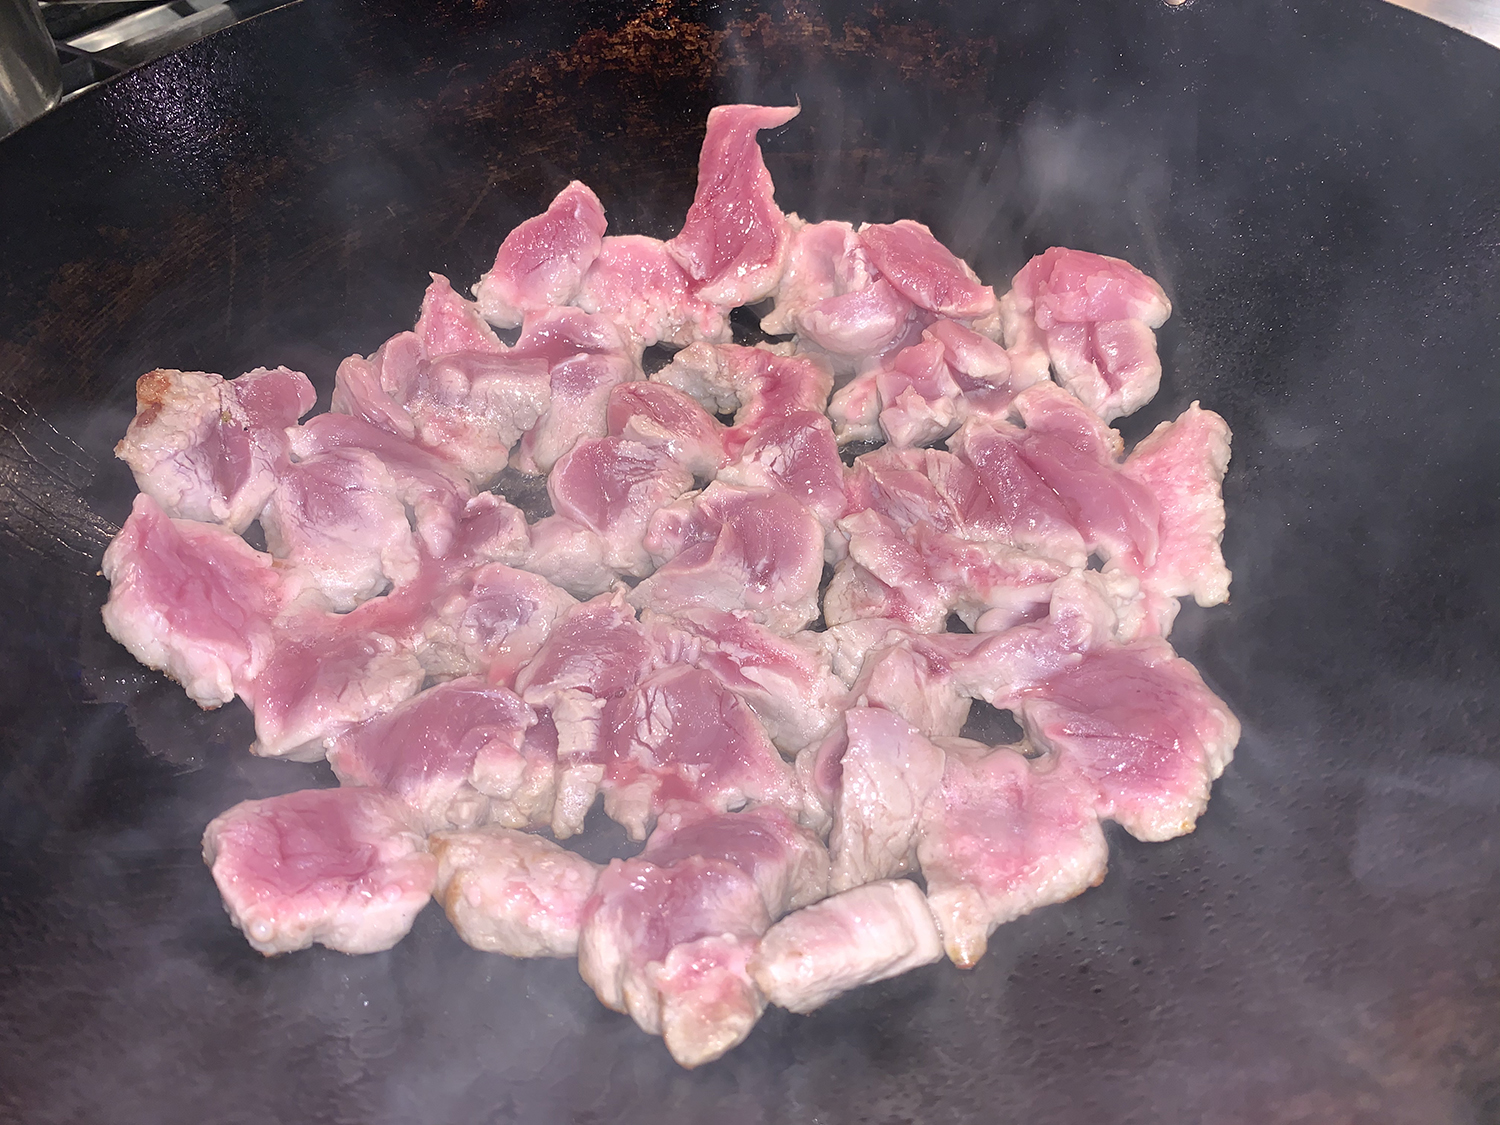
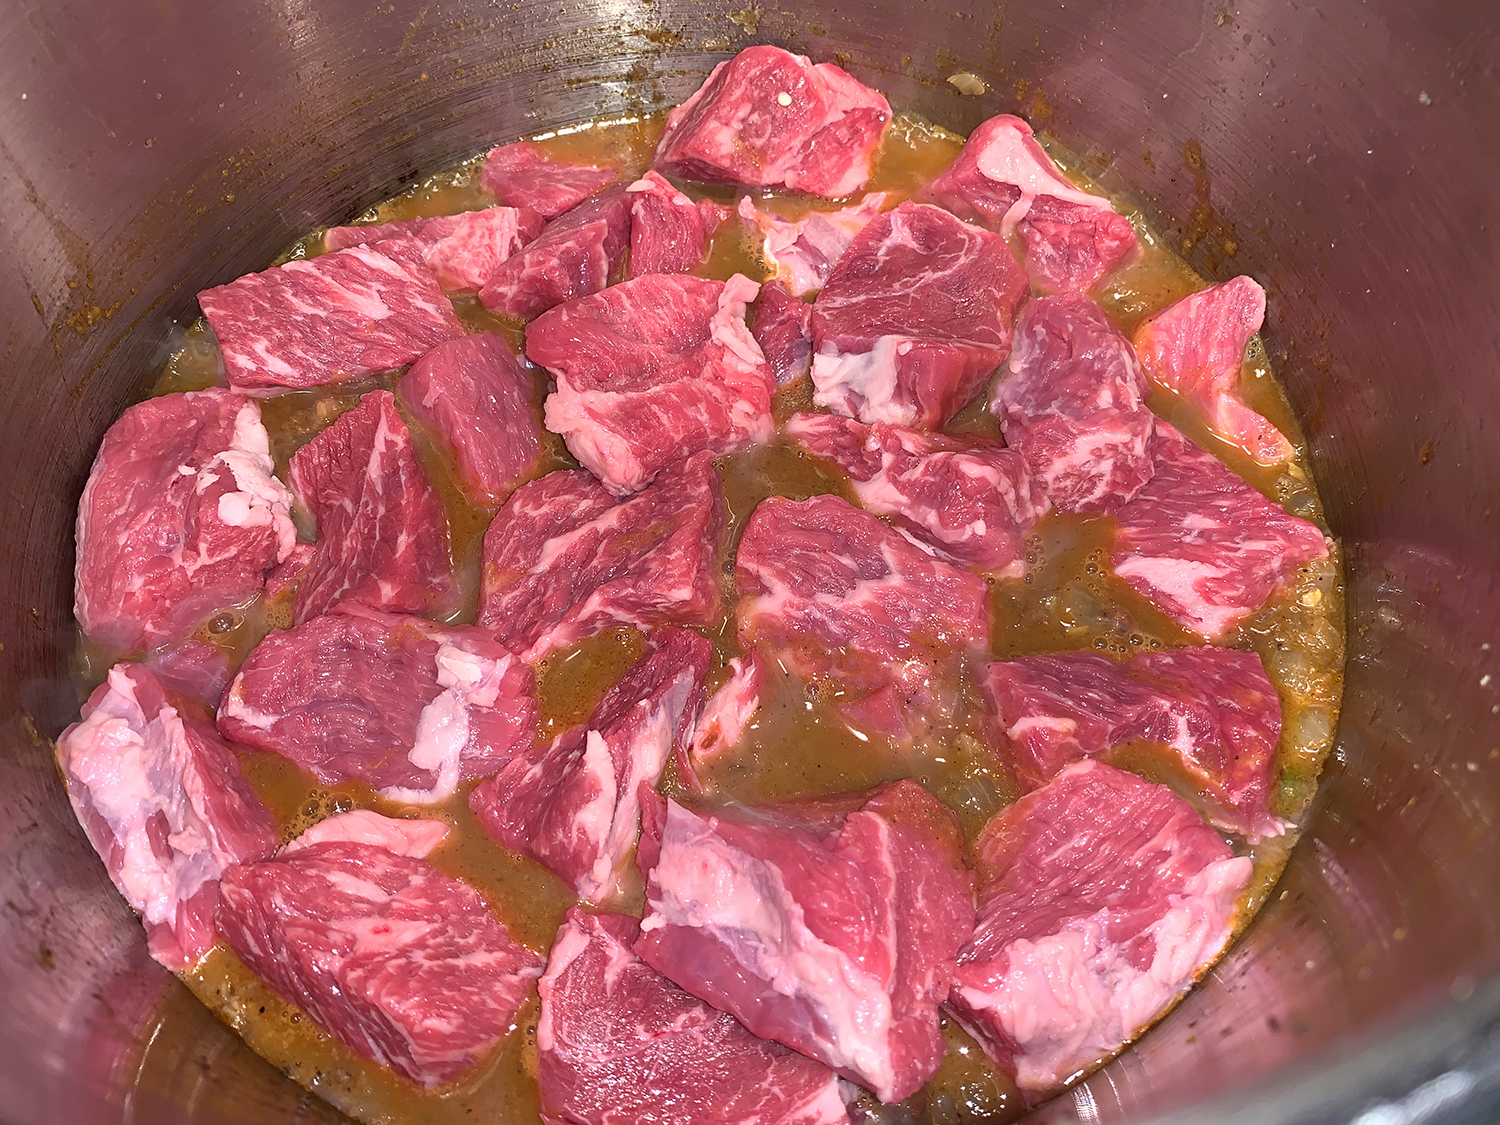
  • 2½-3 lbs. boneless beef chuck roast, trimmed of fat and cut into 1½- to 2-inch chunks
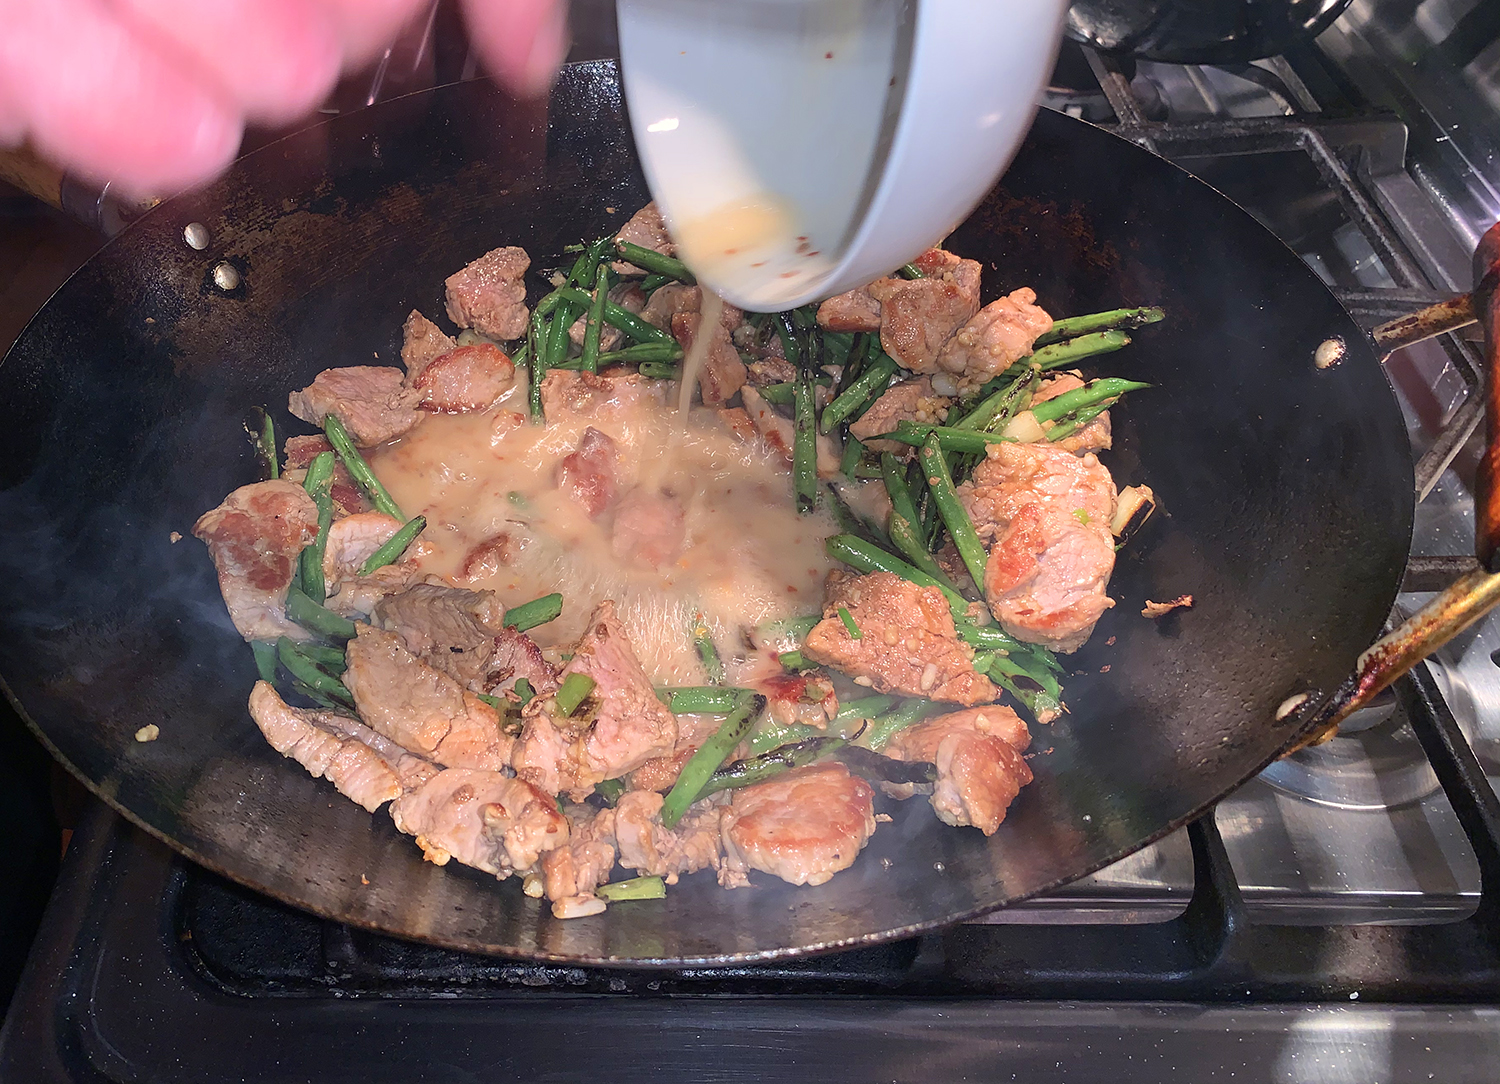
  • 1/3 cup water (unless using a stove-top pressure cooker)
  • 2 Tbsp. lime juice
  • ½ cup lightly packed fresh cilantro, chopped

Directions

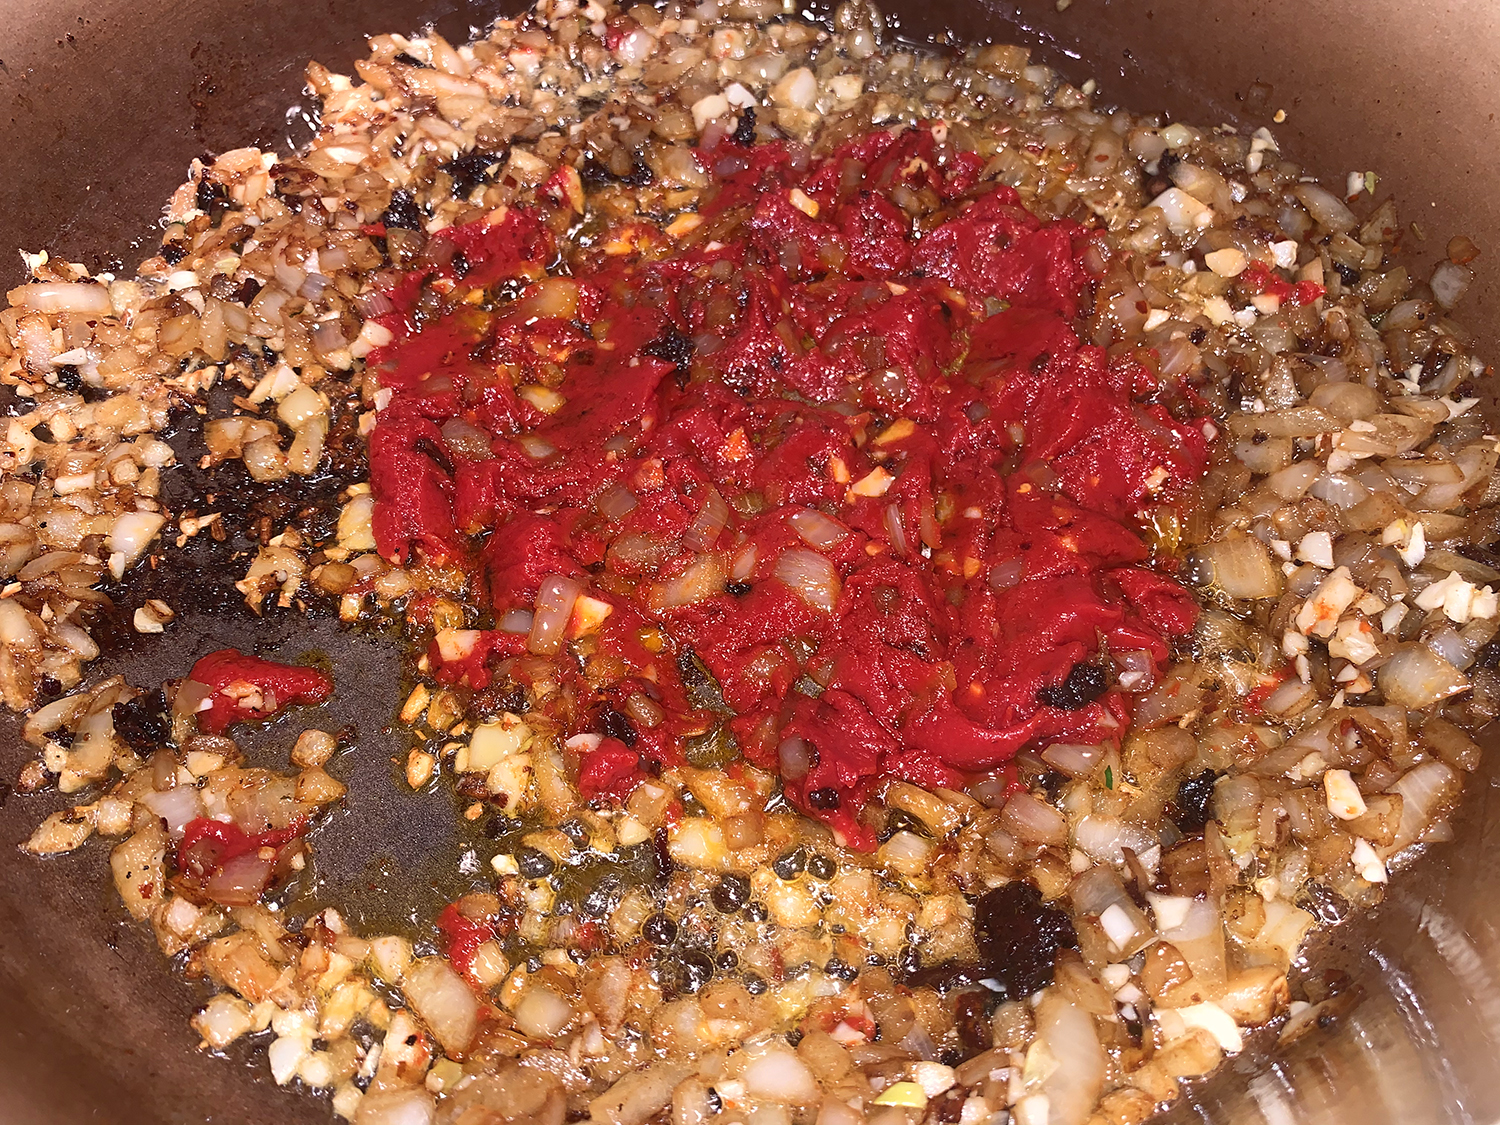
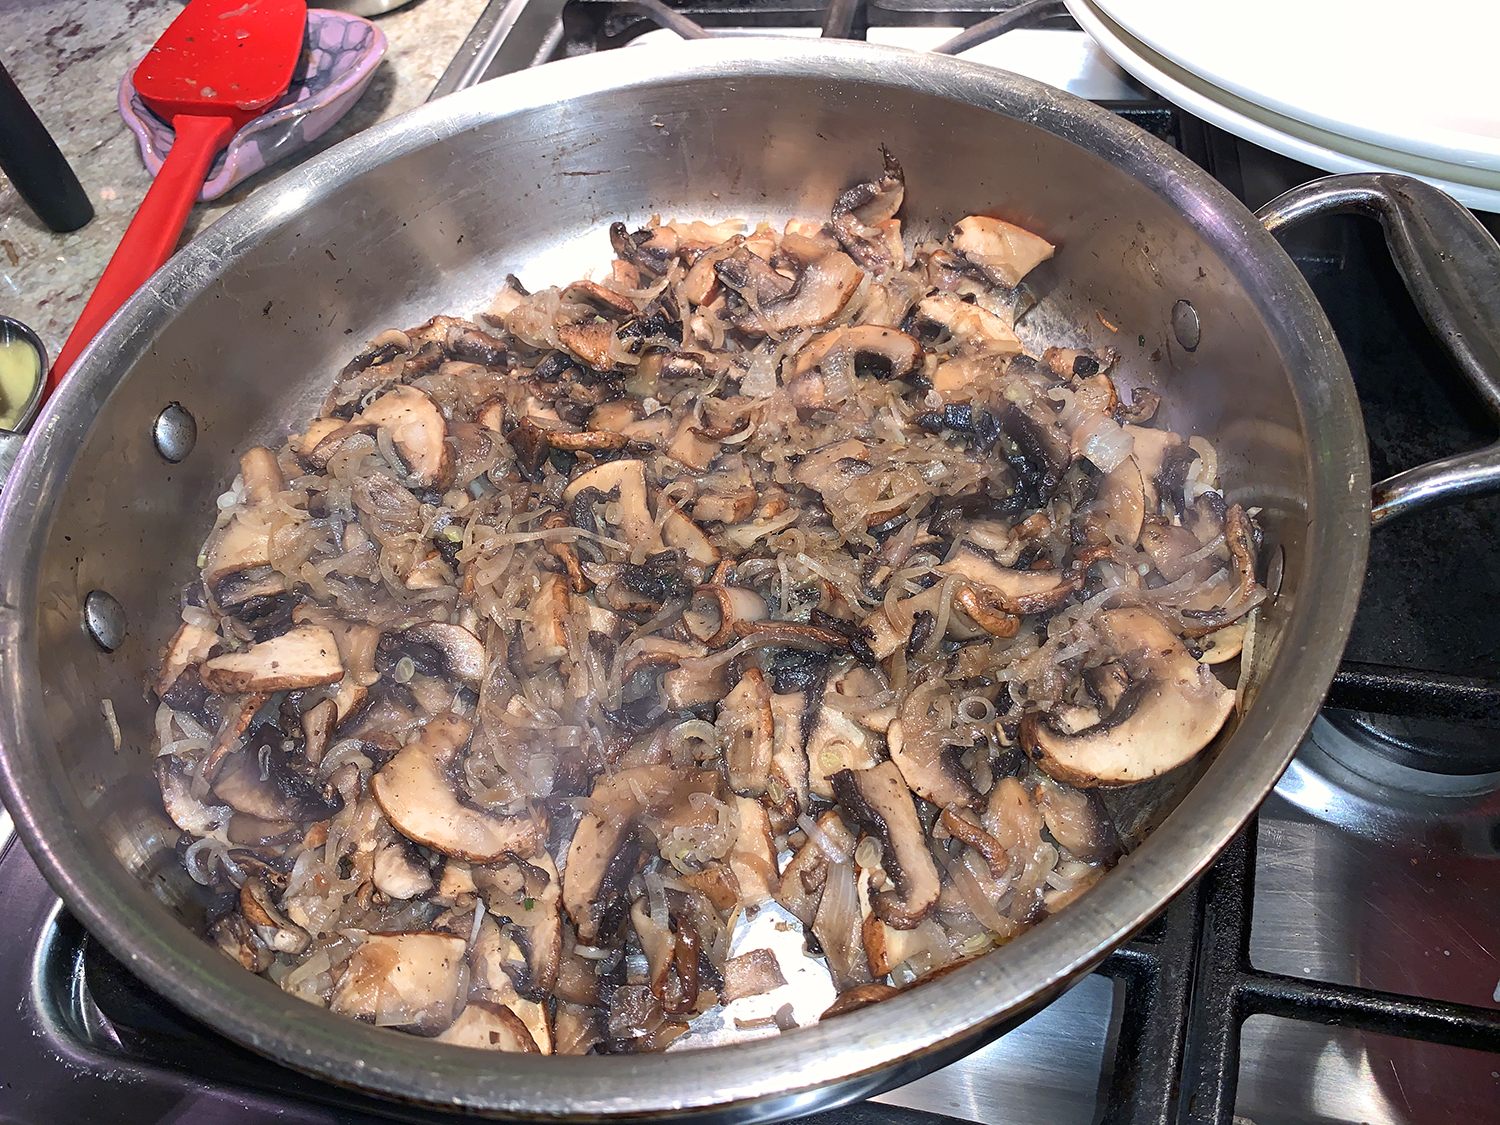
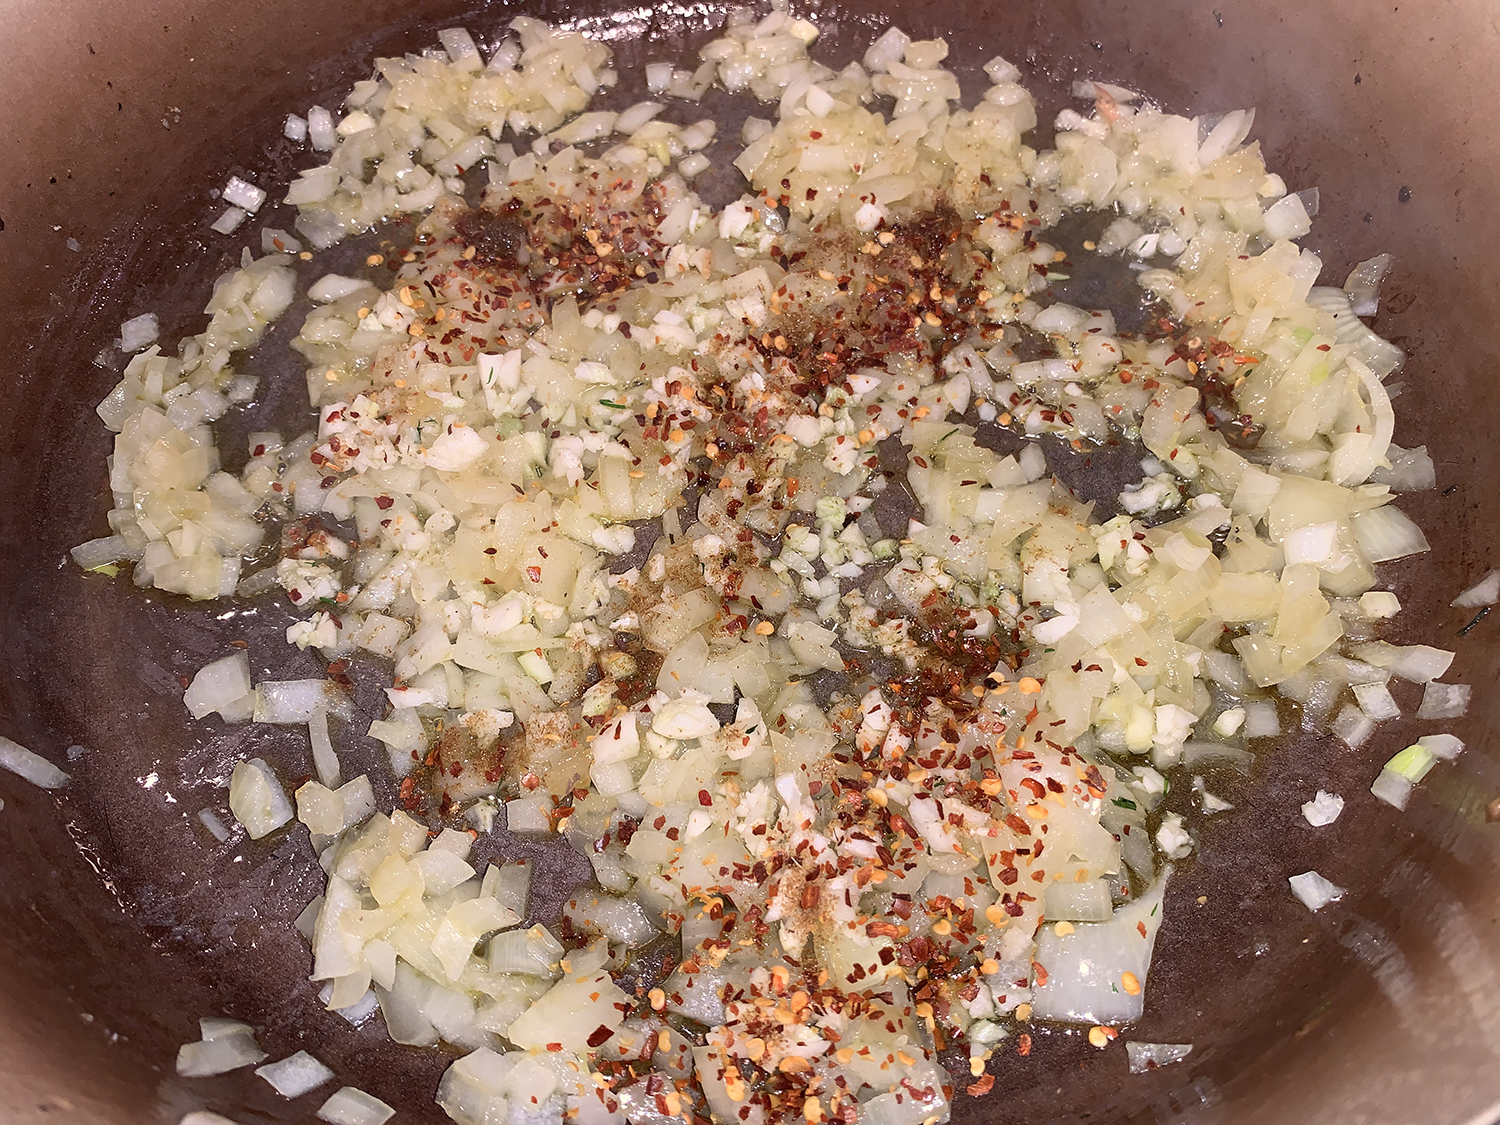
  1. On a 6-quart Instant Pot, select More/High Sauté. Heat the ghee until shimmering, then add the onions. Cook, stirring occasionally, until softened and browned, 10 to 12 minutes.
  2. Add the ginger, garlic, cardamon, cumin, coriander, cloves, peppercorns and bay, then cook, stirring, until fragrant, 1 to 2 minutes.
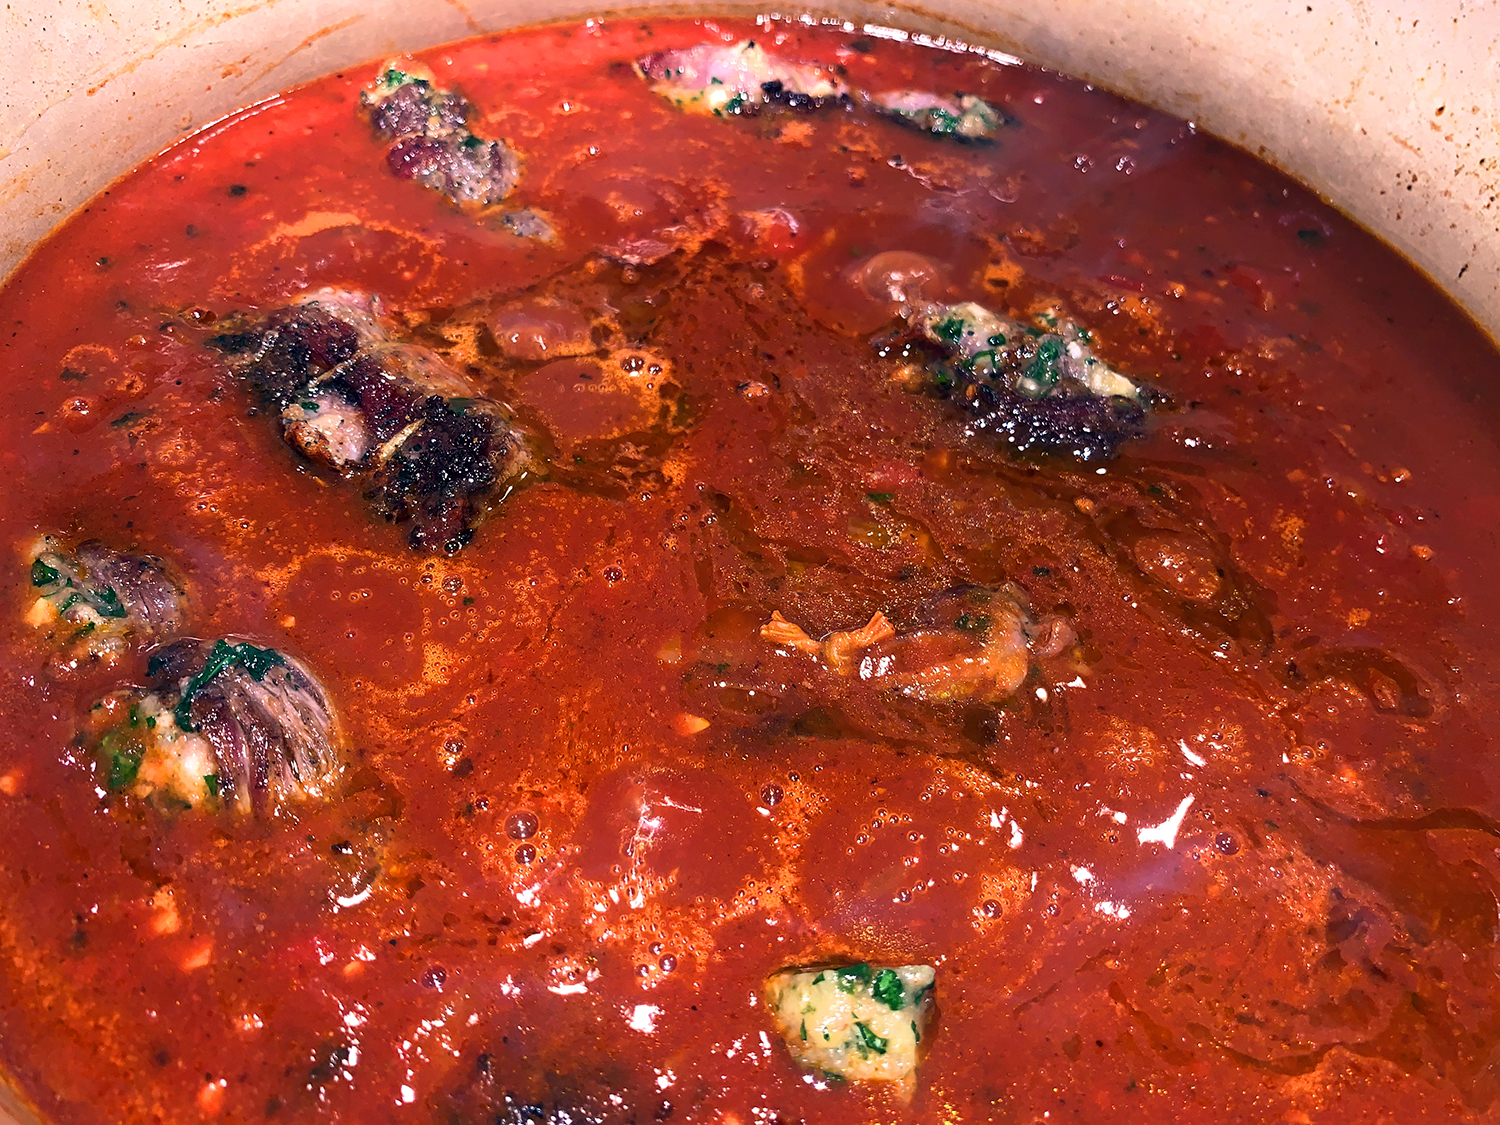
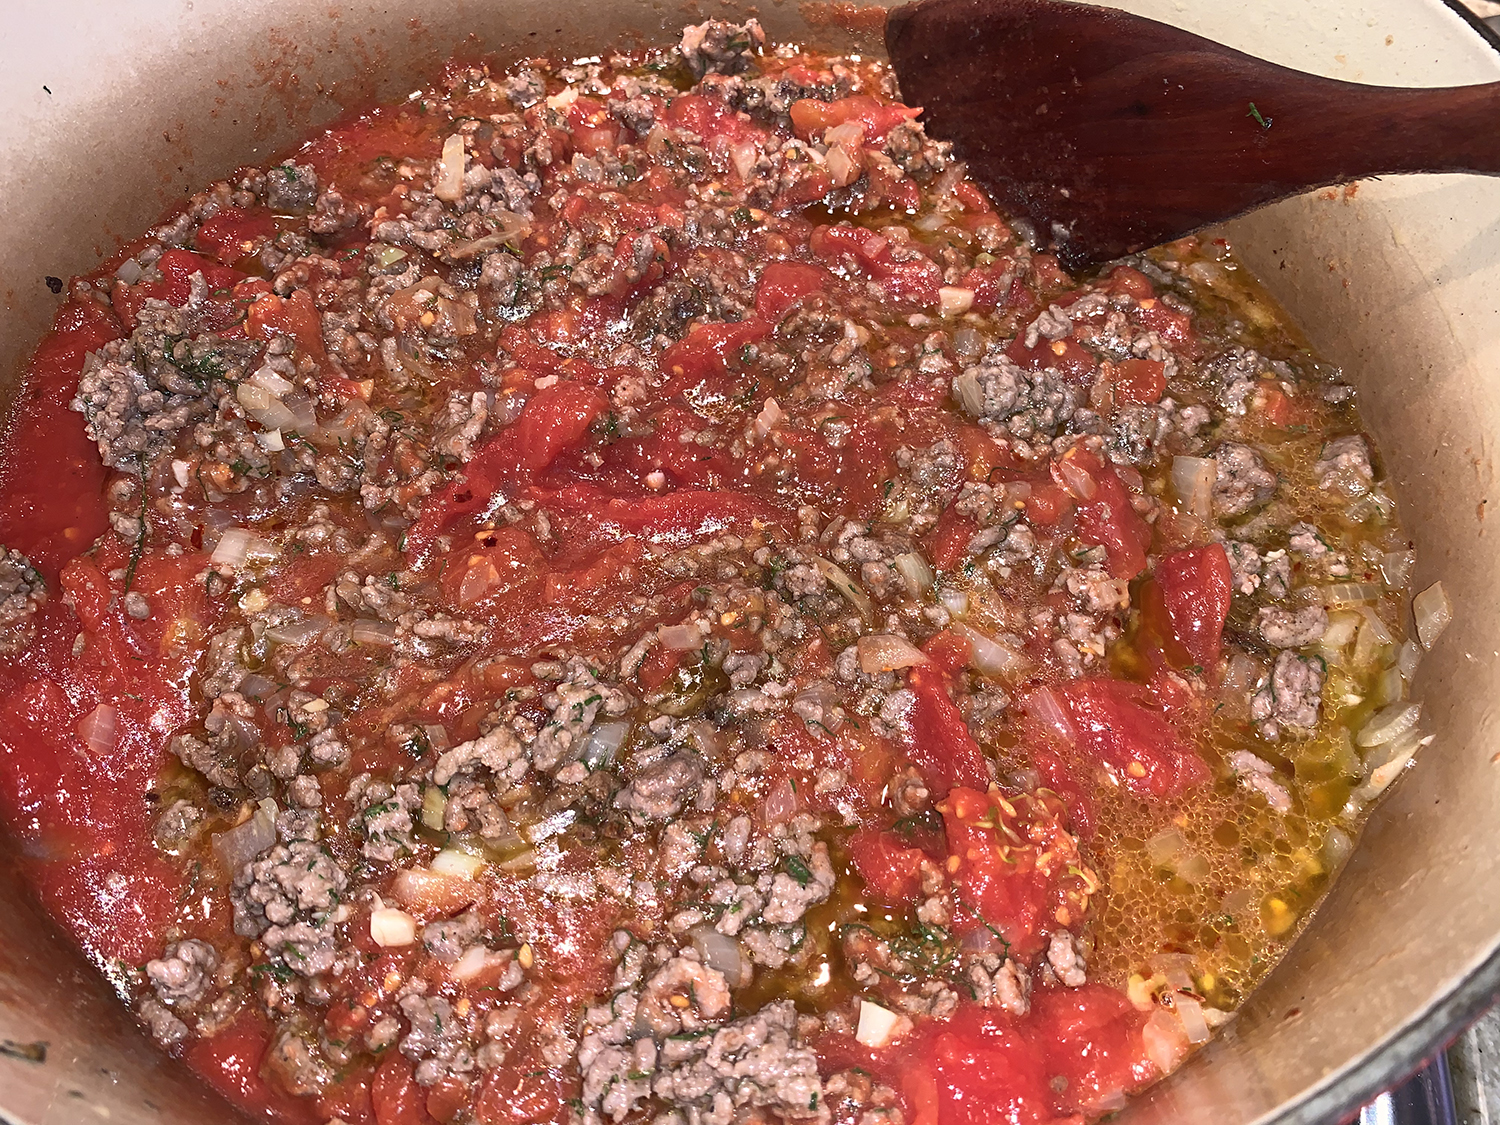
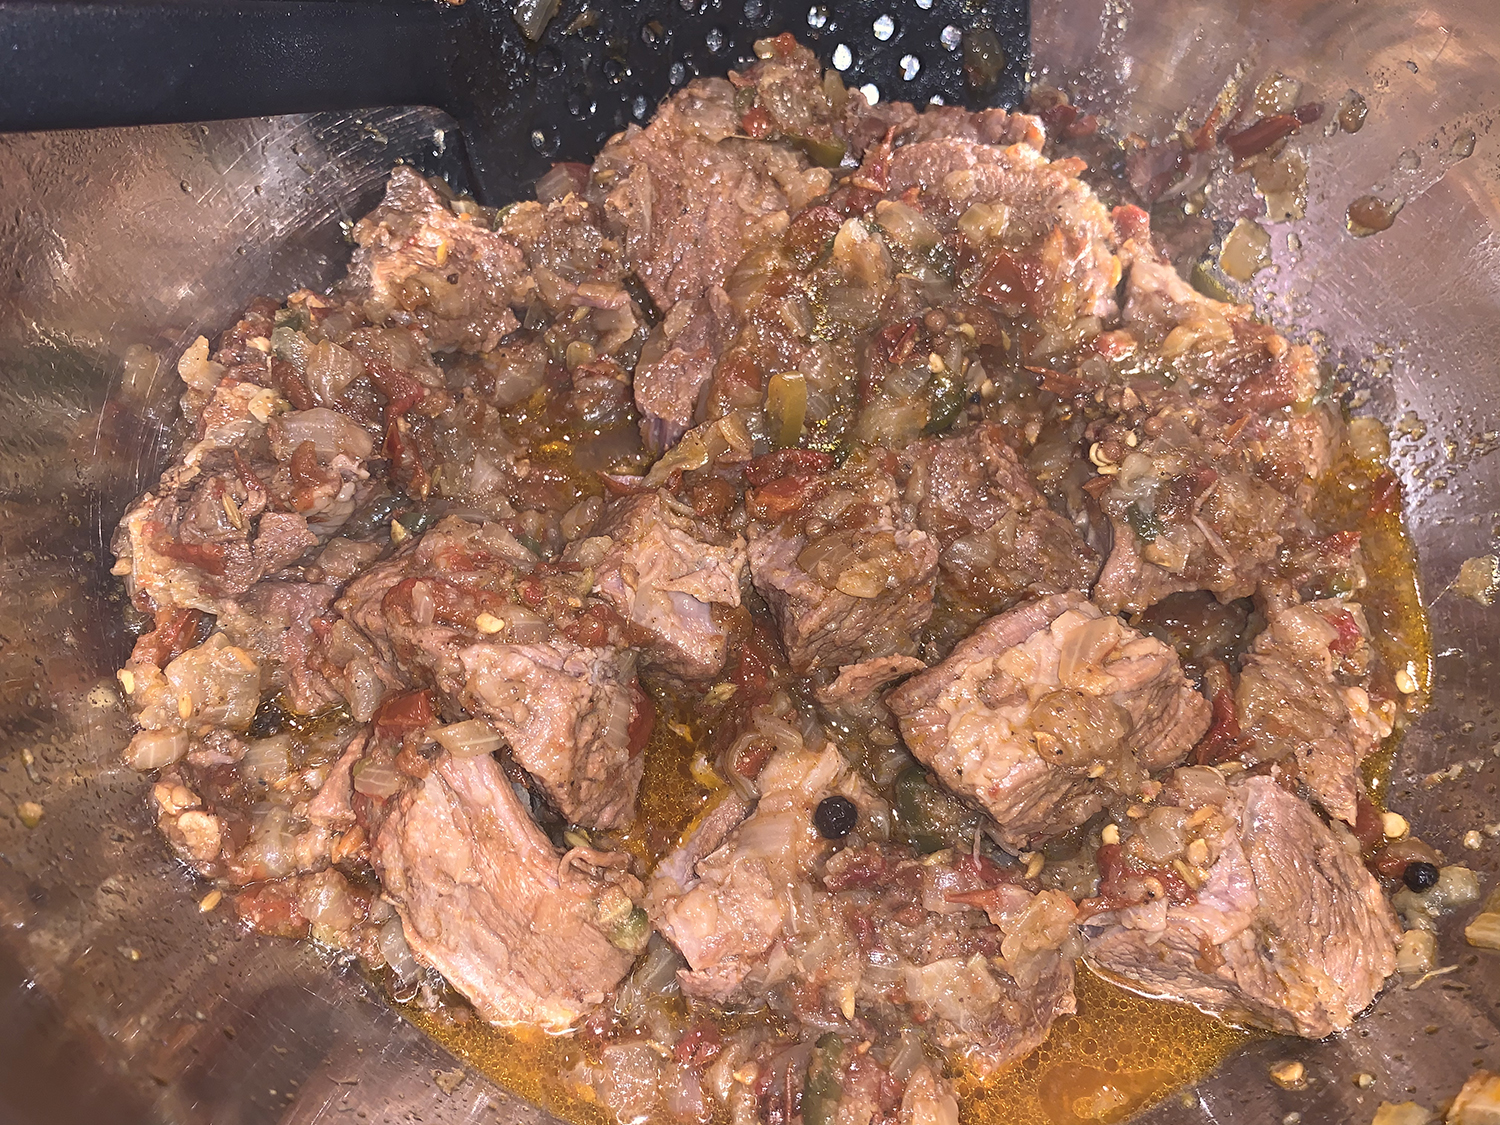
  3. Add the tomatoes, chilies and ½ teaspoon each salt and pepper. Cook, scraping up any browned bits, until the tomatoes begin to release their liquid, 2 to 3 minutes. Add the beef and distribute in an even layer.
  4. Press Cancel, lock the lid in place and move the pressure valve to Sealing. Select Pressure Cook or Manual; make sure the pressure level is set to High. Set the cooking time for 40 minutes. When pressure cooking is complete, let the pressure reduce naturally for 15 minutes, then release any remaining steam by moving the pressure valve to Venting. Press Cancel, then carefully open the pot.
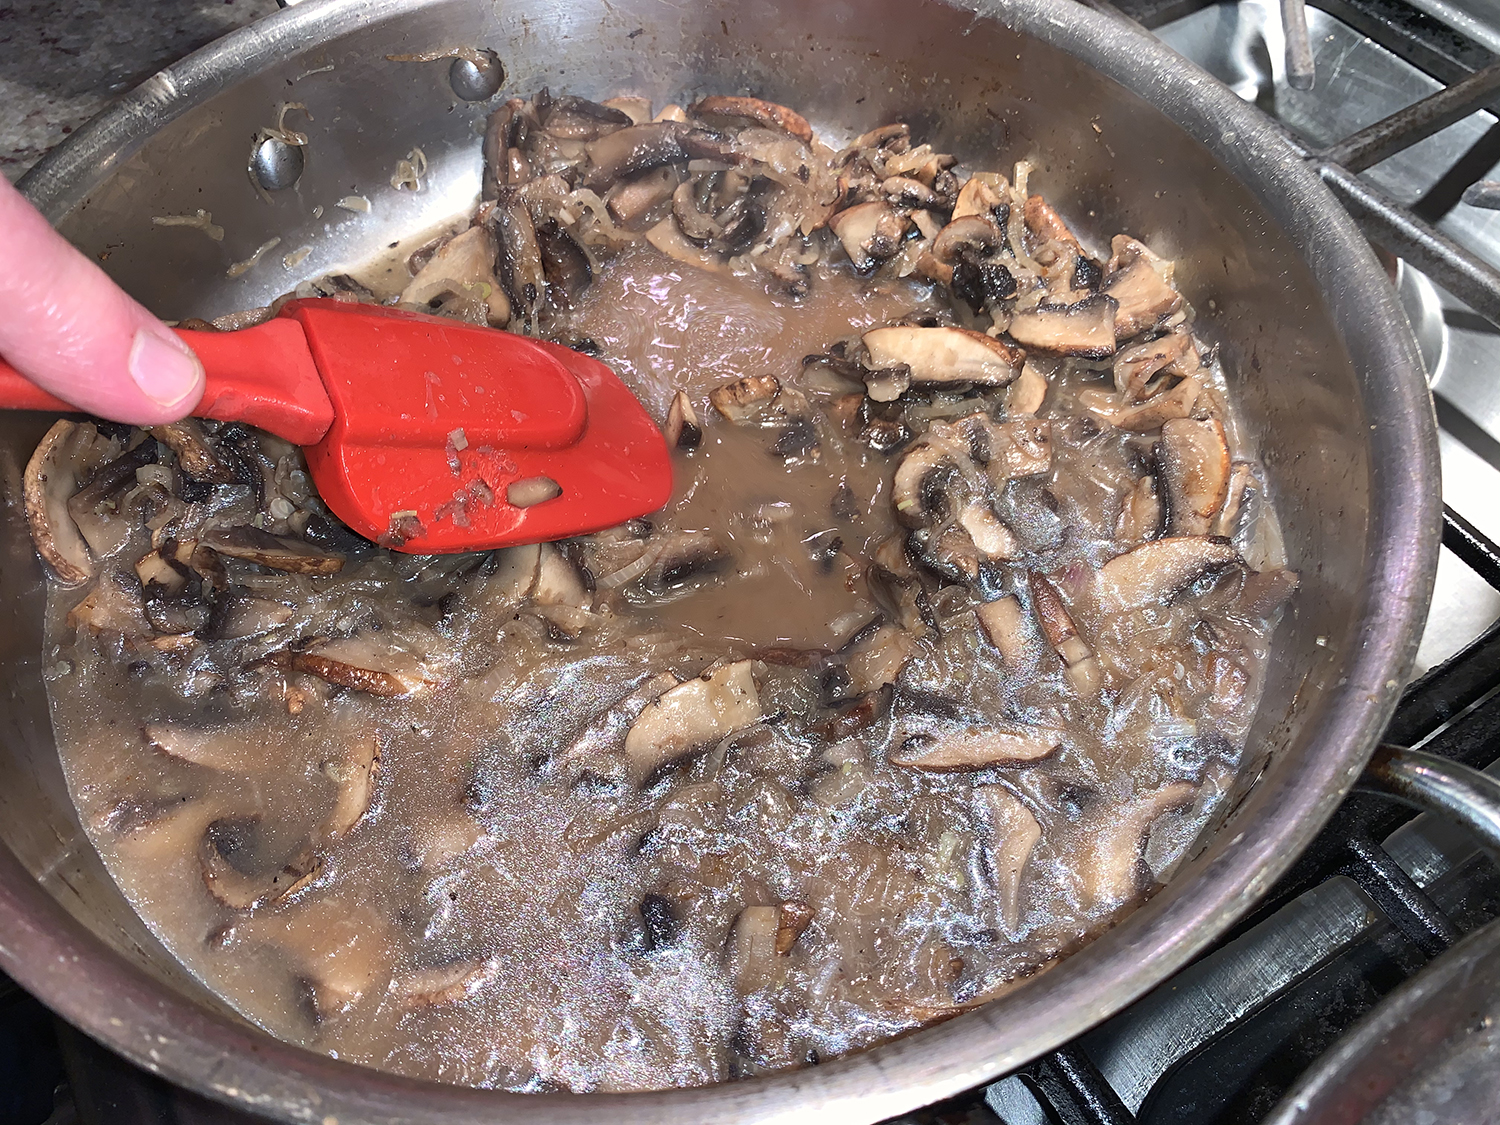
  5. Using a slotted spoon, transfer the solids to a medium bowl. Remove and discard the bay. Using a large spoon, skim off and discard the fat from the surface of the cooking liquid (or use a fat separator).
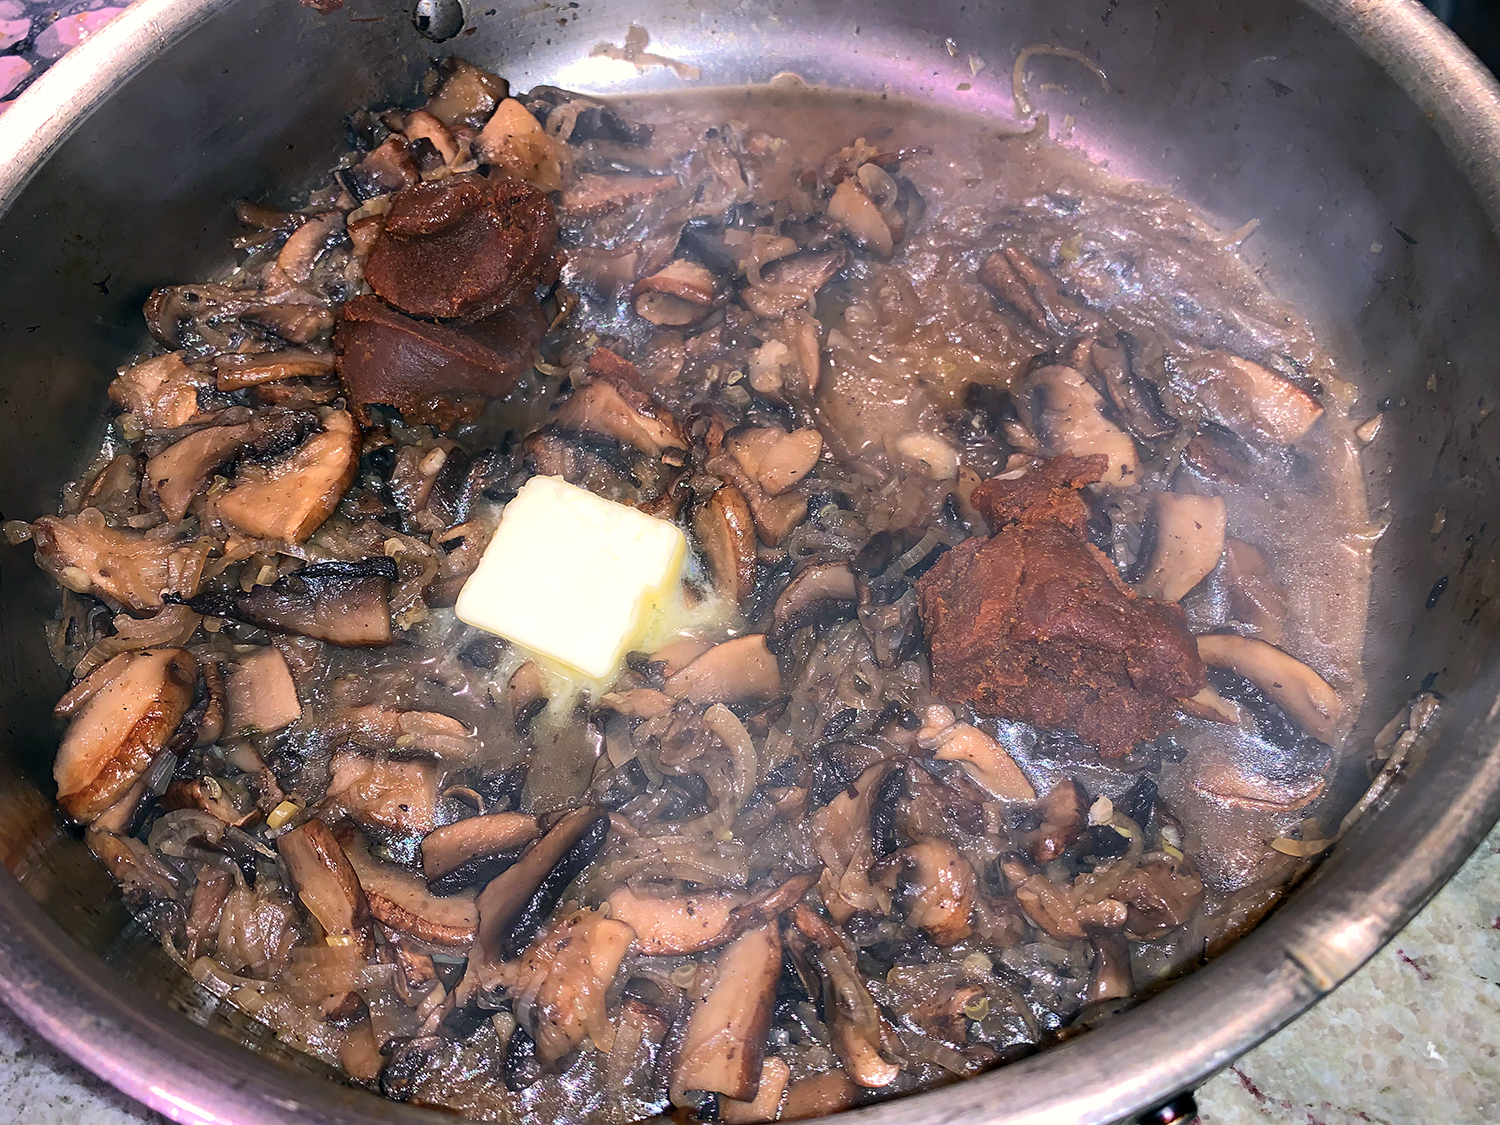
  6. Select More/High Sauté, bring the liquid to a simmer and cook, stirring occasionally, until thickened and reduced to about 1 cup, 15 to 20 minutes. Return the meat to the pot and cook, stirring occasionally, until heated through, 2 to 3 minutes. Press Cancel.
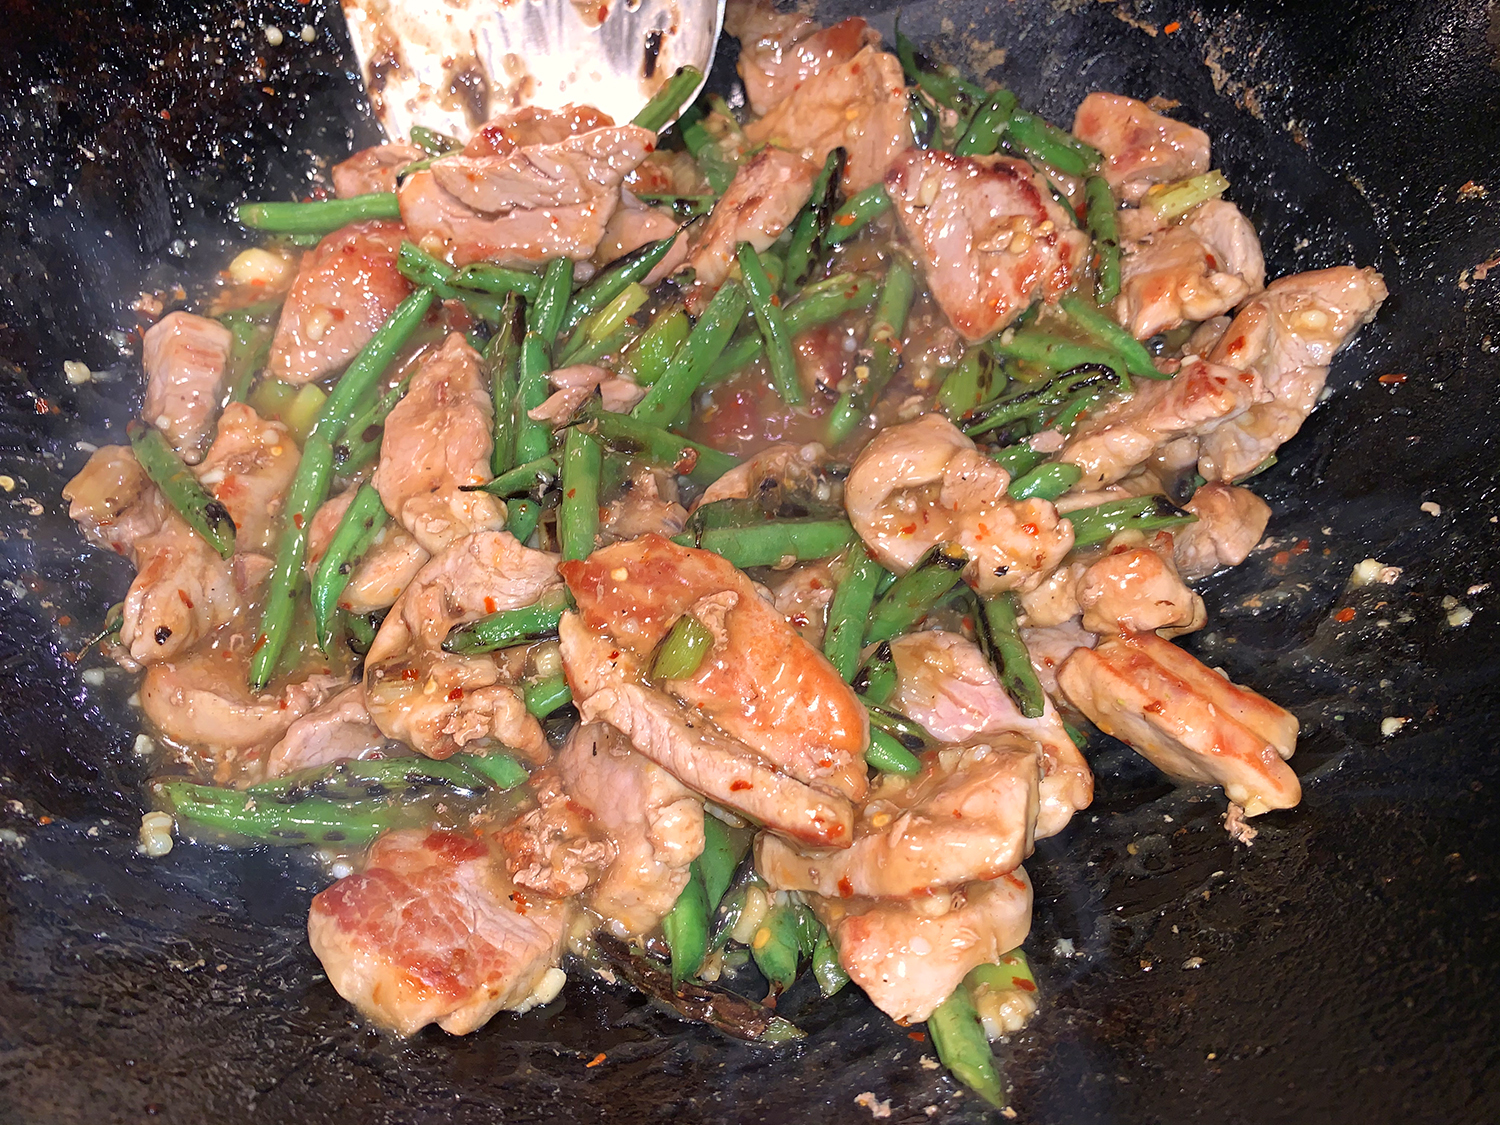
  7. Stir in the lime juice, then taste and season with salt and pepper. Serve sprinkled with cilantro.

http://www.lynnandruss.com

Recipe from Milk Street

Jerusalem-Style “Mixed-Grill” Chicken

Milk Street, where this recipe hails from, explains that Jerusalem mixed grill is a popular Israeli street food, one that is said to originate in Jerusalem’s Mahane Yehuda market. The term “mixed” refers to the sundry ingredients that go into the dish—chicken meat, hearts, spleen and liver, along with bits of lamb, plus onions and spices. Now don’t get all squeamish over the innards because…

…To re-create a simplified mixed grill at home, Milk Street (MS) borrowed from chef Daniel Alt’s version at The Barbary and Omri Mcnabb’s take on it at The Palomar, two London restaurants that serve up modern Levantine and Middle Eastern cuisine. MS then limited the meat to boneless, skinless chicken thighs and seasoned them assertively with select spices. You can now let out a collective sigh.

In place of a grill, a nonstick skillet on the stovetop is used. Amba, a pickled mango condiment, is commonly served with mixed grill to offset the richness of the meat. Here however, quick-pickle sliced red onion offers a similar acidity and brightness. Nutty, creamy tahini sauce is non-negotiable, and a necessary requirement for the full experience. Serve the chicken with warmed pita.

Be mindful NOT to stir the chicken-onion mixture too often while cooking; doing so disrupts browning. Intermittent stirring—no more than every 2 to 3 minutes—allows the chicken to develop nice, deep, flavor-building char.

Jerusalem-Style Mixed-Grill Chicken

  • Servings: 4
  • Difficulty: easy
  • Print

Ingredients

  • ¼ cup white vinegar
  • ½ tsp. white sugar
  • Kosher salt and ground black pepper
  • 1 large red onion, halved and thinly sliced
  • ⅓ cup tahini
  • 4 Tbsp. lemon juice, divided
  • 3 Tbsp. extra-virgin olive oil, divided
  • 1½ tsp. ground coriander
  • 1 tsp. ground allspice
  • 1 tsp. ground turmeric
  • ¾ tsp. ground cinnamon
  • 2 lbs. boneless, skinless chicken thighs, trimmed and cut into 1½-inch chunks
  • Multi-grain pita pickets, warmed in oven wrapped in tinfoil, (optional)

Directions

  1. In a small bowl, stir together the vinegar, sugar and ¼ teaspoon salt until the sugar and salt dissolve. Stir in 1 cup of sliced onion; set aside. In another small bowl, mix together the tahini and 2 tablespoons of lemon juice, then whisk in 6 tablespoons water. Season to taste with salt and pepper; set aside.
  2. In a medium bowl, stir together 2 tablespoons of oil, the coriander, allspice, turmeric, cinnamon and ½ teaspoon each salt and pepper. Add the chicken and the remaining sliced onion, then stir until evenly coated.
  3. In a 12-inch nonstick skillet over medium-high, heat the remaining 1 tablespoon oil until barely smoking. Add the chicken mixture in an even layer and cook, uncovered and stirring only every 2 to 3 minutes, until the chicken is well browned all over and no longer is pink when cut into, 10 to 12 minutes.
  4. Off heat, stir in the remaining 2 tablespoons lemon juice, then taste and season with salt and pepper. Transfer to a serving dish, drizzle lightly with some of the tahini sauce and top with the pickled onion. Serve the remaining tahini sauce on the side.
Yes, these are something to write home about!

http://www.lynnandruss.com

Recipe adapted from 177 Milk Street

Scallop Nirvana!

At nearly $30 per pound for sea scallops, you want to ensure that the end result is going to be worth your hard-earned dollars. On top of being quick-cooking and easy, there’s little more than a handful of ingredients. Plus, you’ll enjoy a crisp sear on the outside and tender, juicy insides with this Lemon Scallops recipe. And trust us, you’ll be wanting for more—we bought one pound and ate them all!

Make sure to cook in at least two batches so that you don’t crowd the pan and risk not getting that golden crisp sear on the exteriors. The recipe indicates this should take about 2 minutes per side, but in our case it was closer to 1 1/2 minutes per side. For the smoothest, velvety sauce, strain it through a fine-mesh sieve to eliminate blackened bits and/or garlic chunks before adding the butter.

Paired with a Citrus Couscous Salad, it was a perfect dinner to kick off the Spring season. We both agreed, they were among the BEST scallops we’ve ever eaten—even taking into account upscale seafood restaurants!

Lemon Scallops

  • Servings: 2-4
  • Difficulty: easy
  • Print

Ingredients

  • 1 – 1.5 lbs. sea scallops
  • Kosher salt and freshly ground black pepper
  • 2 Tbsp. vegetable oil
  • ½ cup dry white wine
  • ¼ cup chicken broth
  • 3 Tbsp. fresh lemon juice
  • 2 cloves garlic, minced
  • 2 Tbsp. butter 
  • Chopped fresh mint

Directions

  1. Pat scallops dry. Season generously with salt and pepper. Place on a plate. Chill, uncovered, for 2 hours. Remove and let stand 30 minutes.
  2. Heat a heavy 12-inch skillet over medium-high heat. To check when hot enough, add a large drop of water (1/8 teaspoon) to the skillet. When it rolls around the pan like a bead of mercury, it is ready. This will take 2 to 3 minutes.
  3. Remove skillet from heat; add oil. Swirl to coat bottom of skillet. Return to medium-high heat. Add scallops, half at a time (don’t crowd the pan). Cook for 2 minutes or until a crust forms (be patient; the scallops will release when they’re ready to be turned). Turn and cook for 2 minutes more or until scallops are crusted on the second side and turn opaque.
  4. Remove scallops from skillet to a plate; cover loosely. Remove skillet from heat. Carefully add wine, broth, lemon juice, and garlic (mixture will spatter). Return to heat. Bring to boiling, stirring to scrape up browned bits. Boil gently, uncovered, 5 minutes or until reduced by about half. Remove from heat.
  5. Strain over a fine mesh sieve to remove any blackened bits and garlic chunks, then whisk in the butter for a velvety sauce.
  6. Spoon sauce over scallops to serve. Sprinkle with mint.

http://www.lynnandruss.com

Adapted from a recipe by Colleen Weeden for Better Homes & Gardens

Roasted Broccoli and Olives

If you want an easy, yet different side dish, try this unique combination. The original recipe is listed below, although I made a few changes such as using pitted olives. I mean, who wants to stop after every bite and fish pits out of your mouth, especially in front of others! This allowed me to cut them in half before roasting.

With only two of us at the dinner table, I scaled back some on the amount of broccoli because it wouldn’t all fit on the baking sheet in one layer, and it just seemed excessive for the both of us.

Then when it comes to smashing the garlic together with the salt, it’s just easier with a mortar and pestle, if you happen to have one.

Roasted Broccoli and Olives

  • Servings: 6-8
  • Difficulty: easy
  • Print

Ingredients

  • 6 cloves garlic, peeled and gently crushed
  • 1 tsp. kosher salt, divided
  • ¼ cup extra-virgin olive oil, plus more for drizzling 
  • 2 ¼ – 2.5 lbs. broccoli, washed, drained, and patted dry
  • ½ cup mixed unpitted olives
  • Flaked sea salt
  • ½ lemon

Directions

  1. Preheat oven to 425ºF. Line a 15x10x1-inch baking pan with a silicone baking mat or parchment; set aside.
  2. In a small bowl combine garlic and 1/2 tsp. of the kosher salt. Using the back of a spoon, muddle garlic and salt until garlic begins to release its oil. (Or use a mortar and pestle like I did.) Let stand 5 to 10 minutes. Stir in olive oil. Set aside.
  3. Trim broccoli stems; cut stalks lengthwise into halves and/or quarters. Place in prepared baking pan. Pour garlic oil and olives over; toss well. Sprinkle with remaining 1/2 tsp. kosher salt. Roast 20 to 25 minutes, tossing occasionally, until tender but al dente. Transfer to a serving dish.
  4. To serve, sprinkle with flaked sea salt; drizzle with additional olive oil. Squeeze lemon juice over.

http://www.lynnandruss.com

Adapted from a recipe by Scott Peacock for Better Homes & Gardens

Citrus Couscous Salad

The temps are warming here in southeastern PA, which starts our craving for brighter tasting food. This Citrus Couscous Salad recipe was spotted in Fine Cooking Magazine, but originated in Better Homes & Gardens from what I can surmise. Doesn’t really matter, we made numerous changes to make it our own.

Orange zest, juice, and segments brighten up this fresh take on a “pasta” salad recipe. Despite popular belief that couscous is a type of whole grain (it does have a rice-like appearance), it is actually a pasta made of semolina and wheat flour that is moistened and tossed together until it forms little balls. (Sorry keto-friendly dieters.)

Not only does couscous cook quickly—a plus for most home cooks—it is an excellent main or side dish that pleases almost anyone’s palate. While the original recipe used 6 oranges, and fed as many, the ingredients list here was halved for the most part. Although, the thyme and olive quantities remain the same, pine nuts were swapped out for the hazelnuts.

Because it can sit at room temperature, it would be a great asset at any pot luck or picnic.

Citrus Couscous Salad

  • Servings: 3-4
  • Difficulty: easy
  • Print

Ingredients

  • 3 large Cara Cara, navel, or other oranges
  • 3 Tbsp. extra-virgin olive oil 
  • 1⁄2 cup Israeli couscous
  • 3⁄4 cup chicken broth or vegetable broth
  • 2 cloves garlic, minced
  • 1 Tbsp. chopped fresh thyme
  • 1⁄2 cup very thinly sliced red onion
  • 2 Tbsp. pinenuts, toasted
  • ¼ cup coarsely chopped, pitted Castelvetrano olives or Manzanilla olives
  • 1 Tbsp. red wine vinegar
  • ¼ tsp. coarse salt
  • ⅛ tsp. freshly cracked black pepper
  • Crushed red pepper (optional)

Directions

  1. Using a vegetable peeler remove strips of zest from one orange, being careful not to remove the white pith; set aside.
  2. In a medium saucepan with a tight lid heat 1 tablespoon olive oil over medium heat. Add couscous; cook 2 minutes or until lightly toasted, stirring often. Add two orange strips, broth, and 1/4 teaspoon salt. Bring to boiling over medium-high heat; reduce heat. Cover; cook 12 to 15 minutes or until couscous is tender and all liquid is absorbed. Let cool; discard strips.
  3. Meanwhile, using a paring knife, remove peel and pith from the other two oranges. Working over a small bowl to catch juices, cut out each segment from membranes. (Or slice into wheels.)
  4. For citrus oil: Chop enough of the remaining orange strips to get 1 tablespoon In a 10-inch skillet combine chopped strips, remaining 2 tablespoons olive oil, the garlic, and thyme. Heat over low heat 5 minutes or until warm; set aside.
  5. To serve, on a platter combine orange segments and juices, couscous, red onion, pinenuts and olives. Drizzle with red wine vinegar. Spoon citrus oil over top. Sprinkle with salt and black pepper, and, if desired, crushed red pepper.

http://www.lynnandruss.com

Adapted from a recipe by Better Homes and Gardens

Lush, Velvety Risotto

Lemon and Shrimp Risotto with Fresh Basil is a lovely dish that becomes even more flavorful if you use your own homemade shellfish stock. Don’t fret however if you don’t have any, you can always create a flavorful broth for simmering the risotto by steeping the shrimp shells and strips of lemon zest in water, as suggested in the directions below.

Another option, bring two 8-ounce bottles clam juice, 3 cups water, ½ teaspoon salt and the zest strips to a simmer in the saucepan and cook, covered, for 10 minutes to infuse, then strain as directed.

Milk Street’s version of the Italian risotto di limone is finished with an egg yolk and cream that enrich a lush, velvety risotto brightened with lemon zest and juice. For citrus notes that register at every level, stir in bright, puckery lemon juice and floral, fragrant grated zest just before serving.

Our notes: We increased the amount of shrimp from 12 ounces to 1 pound, and used a large yellow onion instead of a small one. It’s up to you how much shrimp and the size of the onion to incorporate. You might even consider using only 4 cups of liquid as opposed to 5, because it was still a bit too soupy for our liking — although the next day, the leftovers had thickened.

Don’t uncover the pot for at least 5 minutes after adding the shrimp. Lifting the lid releases some of the residual heat that’s needed to cook the shrimp.

Lemon and Shrimp Risotto with Fresh Basil

  • Servings: 4
  • Difficulty: easy
  • Print

Ingredients

  • 2 lemons
  • 2 tsp. plus 2 Tbsp. extra-virgin olive oil, divided, plus more to serve
  • 1 lb. extra-large shrimp, peeled (shells reserved), deveined and patted dry
  • Kosher salt
  • 1 yellow onion, finely chopped
  • 1 cup Arborio rice
  • ½ cup dry white wine
  • 1 large egg yolk
  • 2 Tbsp. heavy cream
  • ½ cup loosely packed fresh basil, roughly chopped

Directions

  1. Using a vegetable peeler, remove the zest from 1 of the lemons in long, wide strips; try to remove only the colored portion of the peel, not the bitter white pith just underneath. Using a rasp-style grater, grate the zest from the remaining lemon; set aside separately. Halve the lemons and squeeze ¼ cup juice; set the juice aside.
  2. In a medium saucepan over medium, heat 2 teaspoons oil until shimmering. Add the shrimp shells and cook, stirring constantly, until pink, 1 to 2 minutes. (If you are using your own homemade shellfish stock, you can omit this step.)
  3. Add 5 cups water (or your own shellfish stock), the zest strips and 1 teaspoon salt, then bring to a simmer. Cover, reduce to low and cook for 10 minutes.
  4. Pour the broth through a strainer set over a medium bowl; rinse out the pan. Press on the solids to extract as much liquid as possible, then discard. Return the broth to the pan, cover and set over low to keep warm.
  5. In a large Dutch oven over medium-high, heat 1 tablespoon of oil until shimmering. Add the onion and ½ teaspoon salt, then cook, stirring occasionally, until softened, 6 to 7 minutes.
  6. Add the rice and cook, stirring, until the grains are translucent at the edges, 1 to 2 minutes.
  7. Add the wine and cook, stirring occasionally, until the pan is almost dry, about 3 minutes.
  8. Add 3 cups of the hot broth and cook, stirring often and briskly, until a spoon drawn through the mixture leaves a trail, 10 to 12 minutes.
  9. Add the remaining broth and cook, stirring, until the rice is tender, 8 to 10 minutes. Remove the pot from the heat and stir in the shrimp. Cover and let stand until the shrimp are opaque throughout, 5 to 7 minutes.
  10. Stir in the remaining 1 tablespoon oil, the lemon juice, egg yolk, cream, basil, and the grated zest. The risotto should be loose but not soupy. Taste and season with salt. Serve drizzled with additional oil.

http://www.lynnandruss.com

Adapted from a recipe for Milk Street

Moroccan Lamb Stew with Chickpeas and Lentils

According to a recent issue of Milk Street Magazine, this aromatic Moroccan dish, called harira, is traditionally served during Ramadan to break the daily fast. It’s sometimes vegetarian, other times meaty, and depending on the cook, its consistency may be thick and hearty or light and brothy.

This recipe calls for lamb, but you could substitute an equal amount of boneless beef chuck. Note that the chickpeas require soaking, which we did, to cook at the same rate as the meat. For convenience, however, you can skip the dried chickpeas and simply stir some drained canned chickpeas into the stew at the end.

Speaking of those chickpeas, we felt that only 1/3 cup for those and the lentils was way too few in the end. We advise tripling both to 1 cup each to help thicken the base, which we deemed too thin. These larger amounts are noted in the ingredients list below.

We opted for the Fast version here, but Milk Street also offers directions on a Slow method if you prefer. Don’t forget to serve with lemon wedges which add a bright note, and a drizzle of grassy extra-virgin olive oil. If not counting carbs, offer crusty bread for soaking up the broth.

Don’t use brown or regular green lentils in place of the lentils du Puy. Though those varieties do hold their shape, they cook up with a softer, more yielding texture than Puy lentils, which stay quite firm and offer textural contrast to the stew.

Moroccan Lamb Stew with Chickpeas and Lentils

  • Servings: 4
  • Difficulty: easy
  • Print

Ingredients

  • 1 cup dried chickpeas
  • Kosher salt and ground black pepper
  • 2 Tbsp. extra-virgin olive oil, plus more to serve
  • 6 medium celery stalks, sliced ½ to ¾ inch thick
  • 1 medium yellow onion, roughly chopped
  • 6 medium garlic cloves, smashed and peeled
  • 3 Tbsp. finely chopped fresh ginger
  • ¾ tsp. ground cinnamon
  • ½ tsp. sweet paprika
  • 14½ oz. can whole peeled tomatoes, crushed by hand
  • 2 lbs. boneless lamb shoulder or beef chuck, trimmed and cut into ¾- to 1-inch chunks
  • 1 cup lentils du puy
  • 1 cup lightly packed fresh cilantro, flat-leaf parsley or a mixture, chopped, plus more to serve

Directions (for the fast version)

  1. In a small bowl, stir together 2 cups water and 1½ teaspoons salt. Add the chickpeas and soak at room temperature for at least 12 hours or up to 24 hours. Drain and set aside.
  2. On a 6-quart Instant Pot, select Normal/Medium Sauté. Add the oil and heat until shimmering. Add the celery, onion, garlic, ginger and 2½ teaspoons salt. Cook, stirring occasionally, until the vegetables are softened, about 5 minutes.
  3. Add the cinnamon, paprika and 1½ teaspoons pepper, then cook, stirring, until fragrant, about 10 seconds.
  4. Stir in the tomatoes and 4 cups water, scraping up browned bits. Add the lamb, lentils and chickpeas; stir to combine, then distribute in an even layer.
  5. Press Cancel, lock the lid in place and move the pressure valve to Sealing. Select Pressure Cook or Manual; make sure the pressure level is set to High. Set the cooking time for 15 minutes.
  6. When pressure-cooking is complete, let the pressure reduce naturally for 15 minutes, then release the remaining steam by moving the pressure valve to Venting. Press Cancel, then carefully open the pot.
  7. Taste and season with salt and pepper, then stir in the parsley and/or cilantro. Serve sprinkled with additional herbs and drizzled with oil

http://www.lynnandruss.com

Adapted from a recipe for Milk Street

Roast Chicken with Bacon and Root Vegetables

Go ahead and make this cozy one-dish meal the centerpiece of your Sunday supper. Hailing from Molly Stevens cookbook All About Roasting, it’s not meant to be fancy or elegant—just tasty and very satisfying; and Molly doesn’t disappoint.

For the full effect you want to use a large 5-to-6 pound chicken, sometimes labeled as oven-roasters. If unable to find large chickens, use two, three-pounders, however your cooking times will be less, so cut your veggies smaller. Molly uses a unique technique to keep the breast from drying out by sneaking some diced bacon under the skin. As the bacon slowly renders its fat, it moistens the breast while imparting some smoky goodness.

Then for even more flavor, the bird gets brushed with melted butter mixed with honey and balsamic vinegar. This tangy-sweet glaze turns the breast a rich caramelly-varnish color, even though it’s roasting in a moderate oven. Make sure to use a low-sided roasting pan or gratin dish which allows more of the bird to get browned.

You can choose your own hardy root vegetables for the mix. We used carrots, parsnips and celery root, although you could substitute any of that with potatoes (sweet or regular), turnips, beets, etc. The veggies will soak up plenty of savory juices as they roast.

Roast Chicken with Bacon and Root Vegetables

  • Servings: 4-6
  • Difficulty: easy
  • Print

Ingredients

  • 1, 5-6 lb. chicken
  • 1 medium-thick slice of bacon, diced
  • Kosher salt and freshly ground black pepper
  • 2 1/2 to 3 lbs. mixed root vegetables such as carrots, parsnips, potatoes, beets, turnips, celery root and/or rutabaga, trimmed, peeled and cut into 1 1/2 to 2 inch pieces
  • 2 Tbsp. extra-virgin olive oil, plus more as needed
  • 1 Tbsp. dried herbes de Provence, plus more as needed
  • 1 1/2 Tbsp. unsalted butter
  • 1 1/2 tsp. balsamic vinegar
  • 1 tsp. honey
  • 1 medium onion. ends cut off, cut into 1/2-inch-thick rounds

Directions

  1. Trim and Season the Chicken — Over the sink, remove the giblets and discard or reserve for another use. Drain off any liquid and dry the chicken inside and out with paper towels. Pull off and discard any large deposits of fat form the neck or body cavity opening. Use your fingertips to gently loosen the skinover the chicken breast, starting at the cavity opening, and push the diced bacon under the skin, doing your best to spread it evenly over the breast. Season the chicken generously all over with salt and pepper. Let the chicken stand for one hour.
  2. Heat the Oven — Position a rack in the center of the oven and heat 375°F (350° convection).
  3. Season the Vegetables — Place all of the vegetables (except red beets if using) in a large mixing bowl. If using red beets, place them in a separate bowl so they don’t stain the other veggies. Drizzle with 2 tablespoons oil and season with 1 tablespoon herbes de Provence, salt, and pepper, tossing to coat.
  4. Make the Glaze — Melt the butter in a small saucepan. Whisk in the vinegar and honey and set aside in a warm place.
  5. Roast the Chicken and Vegetables — Arrange the onion slices in a single layer in the center of a low-sided (important) roasting pan or dish (approx. 15″ x 12″). Set the chicken breast side up on the onions and tie the legs together using kitchen twine.
    Arrange the veggies all around . They should be a dense single layer if possible. Slide the chicken into the oven, preferably with the legs facing away from the door. After 25 minutes, brush the breast and drumsticks with some of the glaze and nudge the vegetables around with a metal spatula to promote even cooking. Don’t worry if you can’t stir them thoroughly, it’s nice to have some more browned than others.
    Continue roasting, brushing on additional glaze, and stirring the veggies at 20-minute intervals, until an instant-read thermometer inserted into the thickest part of the thigh (without touching bone) registers 170 degrees.If at any point the chicken seems to be getting darker on one side than the other, rotate the pan in the oven.
  6. Rest, Carve and Serve — Transfer the chicken to a carving board (preferably one with a trough to catch the juices, and let it rest for about 20 minutes. Leave the sliced onions in the pan with the other vegetables, and give them all a good stir with the metal spatula, scraping up any browned bits and coating the pan with the juices.
    Poke a few different vegetables with the tip of a knife to be sure they are nice and tender; if not, return the pan to the oven for at least another 10 minutes to finish roasting while the chicken rests.
    Carve the chicken and add any accumulated juices to the vegetables, giving them all a good stir before serving.

http://www.lynnandruss.com

Recipe from Molly Stevens cookbook All About Roasting

Yucatán Chicken and Lime Stew (Sopa de Lima)

Absolutely delicious, this Sopa de Lima is a classic Mexican soup from the Yucatán Peninsula. Brothy, spicy and usually chicken-based, the juice of limas counts as a key ingredient, or Mexican bittersweet limes, a variety of citrus that is difficult to find here in the U.S.

So in a clever twist to approximate the flavor of limas, Milk Street used a combination of freshly squeezed grapefruit juice and standard lime juice. They tell us the credit for this substitution goes to J. Kenji López-Alt of Serious Eats. To keep the flavors clear and bright, add the citrus juices at the very end after cooking is complete. Warm spices add complex flavor and aroma to this version using cinnamon, allspice and cumin, along with dried oregano.

Simmering bone-in chicken thighs in store-bought chicken broth yields a deeply flavorful base for the soup, however, we included our homemade chicken stock which amped up that flavor base even more! But before simmering, you need only to brown the skin side of half of the chicken thighs; which will develop enough caramelization to build depth of flavor but spares the time and mess of browning both sides of all 3 pounds of thighs.

Once the requisite amount of chicken thighs were browned, we chopped them in half. This multi-pronged approach released the marrow from the bones, plus quickened the heating process once in the pot, then the cooling down process just before shredding the meat.

Sopa de lima is garnished with strips of fried corn tortillas that, when lightly soaked with broth, take on an appealing chewy-crunchy quality that adds textural appeal to the soup. For simplicity, however, we used tortilla chips.

Yucatán Chicken and Lime Stew (Sopa de Lima)

  • Servings: 6
  • Difficulty: easy
  • Print

NOTE: It is highly suggested that you don’t use grapefruit juice that’s not freshly squeezed. Pasteurized juice or juice from concentrate lacks the peppiness that the soup requires. (Although since we had some already on hand and opened, we did use it.) Any variety of grapefruit—pink, red or white—works well. You will likely need 1½ grapefruits to get ¾ cup juice.

Ingredients

  • 2 Tbsp. grapeseed or other neutral oil
  • 3 lbs. bone-in, skin-on chicken thighs, trimmed and patted dry
  • 2 large white onions, halved and thinly sliced
  • Kosher salt and ground black pepper
  • 8 medium garlic cloves, finely grated
  • 1 jalapeño chili, stemmed and finely chopped
  • 2 tsp. dried oregano
  • 1 tsp. ground cumin
  • ½ tsp. ground allspice
  • ½ tsp. ground cinnamon
  • 1 bunch cilantro, stems minced, leaves roughly chopped, reserved separately
  • 28 oz. can whole tomatoes, crushed by hand
  • 2 qts. low-sodium chicken broth
  • ¾ cup grapefruit juice
  • 3 Tbsp. lime juice, plus more as needed
  • Tortilla chips, to serve

Directions

  1. In a large Dutch oven over medium-high, heat the oil until barely smoking. Add half the chicken, skin side down, and cook without disturbing until well browned on the bottom, 8 to 10 minutes, then transfer to a plate. Pour off and discard all but 2 tablespoons fat from the pot.
  2. Chop both the browned and and raw chicken thighs in half, set aside.
  3. Return the pot to medium-high, add the onions and ½ teaspoon salt, then cook, stirring occasionally, until golden brown, about 10 minutes. Add the garlic, jalapeño, oregano, cumin, allspice, cinnamon and cilantro stems. Cook, stirring, until fragrant, about 1 minute.
  4. Stir in the tomatoes with juices, then the broth. Bring to a boil, scraping up any browned bits. Add the raw chicken and the browned chicken, along with any accumulated juices, then bring to a simmer. Cover, reduce to low and cook, adjusting the heat as needed to maintain a simmer, until a skewer inserted into the chicken meets no resistance, about 45 minutes.
  5. Remove the pot from the heat. Using tongs, transfer the chicken to a large plate and set aside. When cool enough to handle, use 2 forks or your hands to shred the chicken into bite-size pieces; discard the skin and bones. Add the shredded meat to the pot and bring the soup to a simmer over medium, stirring occasionally.
  6. Off heat, stir in the grapefruit and lime juices, then taste and season with salt, pepper and additional lime juice (if desired). Ladle into bowls and top with tortilla chips and cilantro leaves.

http://www.lynnandruss.com

Original recipe compliments of Milk Street

Hearty Beef Braciole

If you’re not familiar with Beef Braciole (I had never heard of it until I moved out East in my early twenties), it’s a classic Italian dish with many variations. It can be made with thin, individual slices of beef such as round or as one large roll using flank steak. It can also be made with pork and it always has a savory filling. But first, get the pronunciation right: [brah-chee-oh-ley, brah-choh-; Italian brah-chaw-le].

For this take on stuffed beef rolls, Cook’s Illustrated chose flank steak rather than top or bottom round because its loose grain makes it easier to pound thin and its higher fat content means that it emerges from the oven tender and moist. And that it did!

This filling is on the bold side, with the inclusion of umami-rich ingredients such as prosciutto; anchovies; and fontina, a good melter that also brings much-needed fat to the dish. In addition, a gremolata-inspired mix added to the filling provides a jolt of flavor and freshness. Right up our alley! Finally, beef broth is added to the tomato sauce to integrate the beef and the sauce into a unified whole.

This is not your quick weeknight meal. It takes the better part of 4 to 5 hours before you will be serving it on the dinner table, so plan accordingly.

And below is a bonus Roasted Broccoli Rabe recipe to accompany the main dish; this recipe hailing from Milk Street. It takes about 30 minutes max, so you can make it just as the braciole is getting done.

NOTES: Before you begin, cut sixteen 10-inch lengths of kitchen twine. You can substitute sharp provolone for the fontina, if desired. For the most tender braciole, be sure to roll the meat so that the grain runs parallel to the length of the roll. Serve the braciole and sauce together, with pasta or polenta, or separately, as a pasta course with the sauce followed by the meat.

Hearty Beef Braciole

  • Servings: 6-8
  • Difficulty: moderate
  • Print

Ingredients

  • 7 Tbsp. extra-virgin olive oil, divided
  • 10 garlic cloves, minced, divided
  • 3 anchovy fillets, rinsed and minced
  • 2 tsp. grated lemon zest
  • ⅓ cup plus 2 Tbsp. chopped fresh basil, divided
  • ⅓ cup minced fresh parsley
  • ⅓ cup grated Pecorino Romano cheese, plus extra for serving
  • ⅓ cup plain dried bread crumbs
  • 3 oz. fontina cheese, shredded (3⁄4 cup)
  • (2- to 2½-pound) flank steak
  • 8 thin slices prosciutto
  • 1 tsp. kosher salt
  • ½ tsp. pepper
  • 1 large onion, chopped fine
  • ¼ tsp. red pepper flakes
  • ¼ cup tomato paste
  • ¾ cup dry red wine
  • (28-oz.) can crushed tomatoes
  • 2 cups beef broth
  • Your choice of pasta, optional

Directions

  1. Adjust oven rack to lower-middle position and heat oven to 325 degrees.
  2. Stir 3 tablespoons oil, half of garlic, lemon zest, and anchovies together in medium bowl. Add ⅓ cup basil, parsley, Pecorino, and bread crumbs and stir to incorporate. Stir in fontina until evenly distributed and set aside filling.
  3. Halve steak against grain to create 2 smaller steaks. Lay 1 steak on cutting board with grain running parallel to counter edge. Holding blade of chef’s knife parallel to counter, halve steak horizontally to create 2 thin pieces. Repeat with remaining steak.
  4. Cover 1 piece with plastic wrap and, using meat pounder, flatten into rough rectangle measuring no more than ¼ inch thick. Repeat pounding with remaining 3 pieces. Cut each piece in half, with grain, to create total of 8 pieces.
  5. Lay 4 pieces on cutting board with grain running parallel to counter edge (if 1 side is shorter than the other, place shorter side closer to you). Distribute half of filling evenly over pieces. Top filling on each piece with 1 slice of prosciutto, folding to fit, and press firmly. Keeping filling in place, roll each piece away from you to form tight log. Tie each roll with 2 pieces kitchen twine to secure. Repeat process with remaining steak pieces, filling, and prosciutto. Sprinkle rolls on both sides with salt and pepper.
  6. Heat remaining ¼ cup oil in large Dutch oven over medium-high heat until shimmering. Brown rolls on 2 sides, 8 to 10 minutes. Using tongs, transfer rolls to plate.
  7. Add onion to pot and cook, stirring occasionally, until softened and lightly browned, 5 to 7 minutes. Stir in pepper flakes and remaining garlic; cook until fragrant, about 30 seconds. Stir in tomato paste and cook until slightly darkened, 3 to 4 minutes.
  8. Add wine and cook, scraping up any browned bits. Stir in tomatoes and broth. Return rolls to pot; bring to simmer. Add parchment paper to cover the entire pot opening, then cover tightly and transfer to oven. Braise until meat is fork-tender, 2½ to 3 hours, using tongs to flip rolls halfway through braising.
  9. Transfer braciole to serving dish and discard twine. If there is a lot of fat on the surface of the sauce, skim off as much as you can with a large spoon.
  10. Meanwhile, if serving pasta, cook according to package directions.
  11. TIP: If your sauce reduced too much (ours did), add up to a cup of the pasta water to thin it. Stir remaining 2 tablespoons basil into tomato sauce and season with salt and pepper to taste. Pour sauce over braciole and serve, passing extra Pecorino separately.

http://www.lynnandruss.com

Recipe courtesy of Cook’s Illustrated

Roasted Broccoli Rabe with Fennel and Chili Flakes

The high heat renders the stems and florets tender while the leaves crisp around the edges, like kale chips with a spicy broccoli bite. Make sure not crowd the pan or everything will steam rather than roast. In the end, they may not look real pretty, but they are fantastic in the taste category!

If possible, use whole toasted fennel seed then grind it down yourself either with a spice grinder or mortar and pestle. There was a sweet-and-sour mint dressing that was also part of this recipe, but we omitted it. And in a word, the rabe was “Delish!”

Roasted Broccoli Rabe with Fennel and Chili Flakes

  • Servings: 4
  • Difficulty: easy
  • Print

Ingredients

  • 1 lb. broccoli rabe, ends trimmed, well dried
  • 1/2 cup olive oil
  • 1 Tbsp. ground fennel seed
  • 1 tsp. Kosher salt
  • 1 tsp. ground black pepper
  • 1 tsp. red pepper flakes

Directions

  1. Heat oven to 500°F. Line a rimmed baking sheet with foil.
  2. In a large bowl, toss broccoli rabe with olive oil, fennel, salt, black pepper and red pepper flakes.
  3. Transfer the broccoli rabe to the baking sheet and roast until just beginning to brown, stirring halfway through, 12 to 15 minutes total.

http://www.lynnandruss.com

Recipe courtesy of Milk Street

Stir-Fried Pork and Green Beans

Sweet, Sour and Hot… no, this is not a romantic novel review. Hitting all the right notes, this quick and easy stir-fry, packs in savoriness from fish sauce and garlic, sweetness from a little sugar and spicy heat from pepper flakes. Thin slices of ultra-tender pork contrast the crisp snap of green beans, preferably haricot verts.

We took it a step further and added a bunch of scallions, the white and light green parts were stir-fried with the green beans, and the dark green slices were added as a garnish along with the chopped cilantro. Next time we intend to toss in some red bell pepper strips too, which will add a nice pop of color along with extra nutrients.

In addition, we doubled the sauce, which at first we thought might have been too much. But in the end, it was the perfect amount to coat the pork and veggies. I made the adjustments in the list of ingredients below. Serve with steamed rice, and if you like, additional fish sauce at the table.

Caution, don’t stir the beans and pork too often. Stirring just once or twice during cooking allows them to char and develop flavor. Also, don’t forget to stir the sauce mixture just before adding it to the skillet, as the cornstarch settles to the bottom upon standing. In our opinion, we feel using a wok is a much better vehicle for getting a good char when stir-frying.

Stir-Fried Pork and Green Beans

  • Servings: 4
  • Difficulty: easy
  • Print

Ingredients

  • 1/4 cup fish sauce
  • 1/4 cup unseasoned rice vinegar
  • 2 Tbsp. cornstarch
  • 1 Tbsp. + 1 tsp.white sugar
  • 1 tsp. red pepper flakes
  • 2 Tbsp. peanut oil, divided, plus more as needed
  • 8 oz. green beans, cut on the diagonal into 2-inch pieces
  • 1 bunch scallions, sliced thinly, white and light green parts divided from dark green
  • 1 red bell pepper, stemmed, seeded, halved and cut into 1/4″ slices (optional)
  • 1¼ pounds pork tenderloin, trimmed of silver skin, halved lengthwise and cut into ¼-inch slices
  • 5 medium garlic cloves, minced
  • ¼ cup lightly packed cilantro, chopped

Directions

  1. In a small bowl, whisk together the fish sauce, vinegar, cornstarch, sugar, pepper flakes and ¼ cup water. Set aside.
  2. In a 12-inch skillet over high, heat 1 tablespoon of oil until barely smoking. Swirl to coat the pan, then add the beans and scallion whites and light green slices. Cook, stirring once or twice, until charred, 3 to 4 minutes. Transfer to a bowl and set aside.
  3. If you are using red bell pepper, stir-fry them next as you did the green beans. When slightly charred, add to same bowl as beans.
  4. In the same pan over medium-high, heat the remaining 1 tablespoon oil until barely smoking. Swirl to coat the pan, then add the pork in an even layer. Cook, stirring once or twice, until lightly browned, about 4 minutes. Return the beans (and red pepper, if using) to the pan, add the garlic and cook, stirring, until fragrant, about 30 seconds.
  5. Whisk the fish sauce mixture to recombine, then add to the pan and reduce to medium. Cook, scraping up any browned bits, until the sauce thickens slightly and clings to the meat, about 60 seconds. Off heat, stir in the cilantro. Garnish with scallion greens.

http://www.lynnandruss.com

Adapted from a recipe from Courtney Hill for Milk Street

Chiringuito Seafood Paella

Chiringuitos are humble seaside establishments that are to the Spanish coast what clam shacks are to New England; thus the name of this recipe. According to Anya von Bremzen’s cookbook “The New Spanish Table” there is usually a pretty terraza with a view of the sea and a menu that revolves around salt-baked fish, fried baby squid, clams, and invariably a simple mixed seafood paella like this Chiringuito Seafood Paella recipe.

Well, it was Christmas eve in our Bucks County home, so there was no terraza with a seaside view, let alone salt-baked fish or baby squid. But, The Mr. has made many a paella on both his outdoor paella grill and on the stovetop, which happened to be our only choice on that particular night. Yes, the Winter holidays have come and gone, but no need to wait for a major holiday to treat yourself with this elegant meal.

You know my mantra, use homemade stock if at all possible. If you can manage to make a stock from shrimp shells (save them in a plastic bag in the freezer when you peel shrimp), it is even better. But bottled clam juice diluted with some water, can work too. 

The original recipe called for monkfish and baby squid, neither of which we included (I can’t stand squid). However, eight large sea scallops made the ingredients list, and I love them! The rest of the seafood consisted of shrimp, little neck clams (half of which did not open much to Russ’s chagrin), and a sprinkling of crabmeat leftover from our starter course of Crab Louie, recipe below.

TIP: If you’re making the recipe for a dinner party, you can prepare it up to the point just before you transfer the paella to the oven; just remove it from the heat and leave it on top of the stove up to a half hour, until you’re ready to proceed. That leaves you with 15 minutes baking time after you press the seafood into the rice and 10 minutes for it to rest.

Chiringuito Seafood Paella

  • Servings: 4, as a main course
  • Difficulty: moderate
  • Print

Ingredients

  • 5 cups homemade shellfish broth, OR make from diluting 3 1/2 cups bottled clam juice with 1 1/2 cups water
  • 1/4 tsp. saffron
  • 5 Tbsp. olive oil, divided
  • Sea or kosher salt
  • 8 large dry-packed sea scallops
  • 8 medium garlic cloves, crushed with a garlic press
  • 2 large ripe tomatoes, cut in half and grated on the medium holes of a box grater, skins discarded
  • 1 1/2 tsp. sweet (not smoked) paprika
  • 1 3/4 cups short-grain rice such as Arborio or Bomba
  • 1/2 cup minced flat-leaf parsley
  • 12-18 small clams, such as Manila or littlenecks, scrubbed
  • 12 jumbo shrimp, peeled and deveined, tails left on
  • 2 lemons, cut into wedges

Directions

  1. Heat the oven to 425 degrees Fahrenheit. Place the shellfish broth in a saucepan and bring to a simmer over medium heat. Crumble the saffron between your fingers and drop it into the broth. Keep it at a slow simmer until you’re ready to use it.
  2. Place 3 tablespoons of the oil in a 15- or 16-inch paella pan set over a burner and heat on medium heat until it starts to smoke. Add the scallops and cook until barely seared, 1 to 2 minutes, seasoning it lightly with salt. Using a slotted spoon, transfer them to a bowl and set aside. Add the shrimp to the pan, stirring, until just seared, about 2 minutes, seasoning it with salt. Transfer shrimp to the bowl with the scallops and cover with foil.
  3. Add 1 tablespoon of the olive oil to the center of the pan. Add the crushed garlic and cook until fragrant, less than 15 seconds. Add the tomatoes to the center of the pan, reduce the heat to low, and cook, stirring the tomatoes several times, until they are thickened and reduced, 5 to 7 minutes. Season lightly again with salt. Add the paprika and stir for a few seconds.
  4. Add the rice to the paella pan and stir it gently to coat with the pan mixture. Pour in 3 1/2 cups of the simmering stock (5 cups if using Bomba rice), keeping the remaining stock simmering in case it is needed later. Stir in the parsley and a sprinkling of salt, and shake the pan gently to distribute the rice evenly. Cook over medium-high heat for 5 minutes. Periodically move and rotate the pan so that the liquid boils evenly. 
  5. Press the clams into the top of the rice and cook until the cooking liquid is almost level with the rice but the rice is still rather soupy, another 2 to 3 minutes, again moving and rotating the pan periodically to keep the liquid boiling evenly. If the liquid is absorbed too fast and the rice still seems too raw, sprinkle on some more stock. (NOTE: At this point you can turn off the heat and set it aside for up to half an hour, if you like.)
  6. Transfer the paella pan to the oven and bake until the clams open and the rice is tender but still a little al dente, about 15 minutes. Check the paella a few times and sprinkle more stock over the rice if it seems too al dente. Remove the paella from the oven and discard any clams that have not opened. Distribute the shrimp and scallops over the paella, cover the pan with aluminum foil, and let stand for 5 minutes. Uncover the pan and let stand for another 5 minutes (the rice gets better as it stands).
  7. To serve, arrange the lemon wedges around the edge of the paella pan and decorate the top with the shrimp. Serve the paella straight from the pan, along with allioli if desired, for stirring into the rice. 

http://www.lynnandruss.com

Adapted from a recipe in “The New Spanish Table” by Anya von Bremzen

Crab Louis Salad

Crab Louie

  • Servings: 4
  • Difficulty: easy
  • Print

Ingredients

  • 1 cup mayonnaise
  • 1/4 cup ketchup-based chili sauce
  • 1/4 cup minced scallion
  • 2 Tbsp. minced green olives
  • 2 tsp. fresh lemon juice
  • 1 tsp. Worcestershire sauce
  • 1 tsp. bottled horseradish
  • Salt and pepper to taste
  • 1 1/2 lbs. jumbo lump crabmeat
  • Bibb lettuce leaves, washed, dried and divided
  • Capers
  • Tomato wedges
  • Hard-boiled egg
  • Lemon

Directions

  1. Whisk scallions, mayonnaise, chili sauce, lemon juice, horseradish, Worcestershire sauce, salt, and pepper in a small bowl. (You will most likely have leftover dressing.)
  2. Line four salad plates with Bibb lettuce leaves and top with crab meat, avocado, and tomatoes. Drizzle dressing over, then top with capers and parsley.
  3. Garnish with capers and wedges of tomato, hard-boiled egg, and lemon. Serve with additional dressing alongside.

http://www.lynnandruss.com

Recipe from epicurious.com

Tagliatelle with Portobellos and Chive Ricotta

In this hearty vegetarian dish borrowed from Milk Street, an umami-rich mushroom sauce combines with tarragon-tossed tagliatelle pasta. Red miso and mild portobellos ground the flavors in earthy richness that contrasts well with a finishing spoonful of chive-seasoned ricotta cheese. It is rich and filling, so a simple side salad makes a nice accompaniment.

Tagliatelle, which oddly enough we were unable to find, is an egg noodle similar in shape to fettuccine, but with a finer texture and richer flavor. Dried versions are often sold bundled in nests. In its place, we substituted pappardelle, where the only difference is in dimension—pappardella is one and a half wider than tagliatelle and slightly thicker (although Cipriani is a very thin pasta).

Milk Street notes that the time table for this recipe is 30 minutes. It took us double that even though our brand of pasta took only 4 minutes for al dente. Not sure why, maybe the prep took longer?? Just want to give you a heads up on that possibility.

TIP: The mushroom gills will give the sauce a murky appearance if left on, so make sure to scrape them off.

Tagliatelle with Portobellos and Chive Ricotta

  • Servings: 4
  • Difficulty: easy
  • Print

Ingredients

  • 1 cup whole-milk ricotta cheese
  • 1/4 cup finely chopped fresh chives
  • Kosher salt and ground black pepper
  • 8 oz. dried tagliatelle
  • 4 Tbsp. salted butter, divided
  • 2 lbs. portobello mushroom caps, gills removed, quartered and sliced ¼ inch thick
  • 2 medium shallots, halved and thinly sliced
  • 1 cup dry white wine
  • 3 Tbsp. red miso
  • 1/2 cup fresh tarragon leaves, finely chopped
  • Extra-virgin olive oil, to serve

Directions

  1. In a small bowl, whisk together the ricotta, chives and ¼ teaspoon each salt and pepper. Set aside. In a large pot, bring 4 quarts of water to a boil. Add the pasta and 2 tablespoons salt and cook until al dente.
  2. Reserve 2 cups of the cooking water, drain the pasta and return it to the pot. Add 1 tablespoon of the butter and ½ cup of the reserved cooking water; toss to coat.
  3. Meanwhile, in a 12-inch skillet over medium-high, heat 2 tablespoons of the butter until foaming.
  4. Add the mushrooms, shallots and ¼ teaspoon each salt and pepper. Cook, stirring, until the mushrooms have released their moisture and are well browned, about 10 minutes.
  5. Pour in the wine, scrape up any browned bits and simmer until almost evaporated, about 5 minutes.
  6. Pour in the remaining 1½ cups reserved cooking water, bring to a simmer and cook over medium-high until the mixture has thickened, about 10 minutes.
  7. Off heat, stir in the miso and remaining 1 tablespoon butter. Taste and season with salt and pepper.
  8. Add the tarragon to the pasta and toss, then transfer to a serving bowl. Spoon the mushroom mixture over the pasta. Serve dolloped with the ricotta mixture and drizzled with olive oil.

http://www.lynnandruss.com

Recipe courtesy of Milk Street

Mozzarella Mushroom Stuffed Chicken

If chicken breasts brimming with lots of flavor is one of your goals, then this recipe is for you. Golden, crusty chicken on the outside; juicy and buttery on the inside; filled with two different types of cheeses, with the most delicious garlic butter mushrooms.

If there is not enough butter left in the pan after making the mushrooms, heat 1 tablespoon of butter in the pan and when it is done foaming, sear two breasts at a time for about 3 minutes per side. Repeat with the other two pieces of poultry.

And if you so choose, there’s an additional Garlic Parmesan Cream Sauce to take it over the top, which we opted not to make. Rather, we deglazed the pan with dry vermouth (wine) when finished browning the stuffed breasts. Before the wine fully evaporates, add the poultry back into the pan with accumulated juices, cover and cook for the allotted 20 minutes.

Most likely, you will have some seepage of cheese oozing out into the pan, as you can see on the right-most two pieces in the top photo. But don’t waste it, use that along with the brown juices to pour over over your platter of chicken.

And because we couldn’t possibly stuff any more ingredients into the slits after the mozzarella and mushrooms, we saved the grated parm for a topping. Sprinkle equal amounts over each breasts, return to the oven for two minutes, then top with a few leftover mushroom slices. We paired ours with a homemade rice pilaf and steamed green beans with a garlic butter finish.

Mozzarella Mushroom Stuffed Chicken

  • Servings: 4
  • Difficulty: easy
  • Print

Ingredients

Mushrooms:

  • 4 Tbsp. butter
  • 8 oz. brown mushrooms, sliced
  • 4 cloves garlic, minced
  • 2 Tbsp. fresh parsley chopped
  • Salt and pepper, to taste

Chicken:

  • 4 chicken breasts, skinless and boneless
  • Salt and pepper, to season
  • 1 tsp. onion powder
  • 1 tsp. dried parsley
  • 2 Tbsp. butter, divided
  • 8 slices mozzarella cheese
  • 1/4 cup fresh grated parmesan cheese
  • 1/4 cup dry vermouth or white wine, optional
  • 12 toothpicks to seal the stuffed breasts

Garlic Parmesan Cream Sauce:

  • 1 Tbsp. olive oil
  • 2 large cloves garlic minced or finely chopped
  • 1 Tbsp. Dijon mustard
  • 1-1/2 cups half and half or use reduced fat cream or evaporated milk*
  • 1/2 cup finely grated fresh Parmesan cheese
  • Salt and pepper, to your tastes
  • 1/2 tsp. cornstarch cornflour mixed with 2 teaspoons of water, optional
  • 2 Tbsp. fresh chopped parsley

Directions

Chicken:

  1. Preheat oven to 400°F.
  2. Melt butter in a large oven proof pan or skillet over medium heat. Add garlic and sauté until fragrant, about 1 minute. Add in mushrooms, salt and pepper (to your tastes), and parsley. Cook while stirring occasionally until soft. Set aside and allow to cool while preparing your chicken.
  3. Pat breasts dry with a paper towel. Season with salt, pepper, onion powder and dried parsley. Rub each piece to evenly coat in seasoning. 
  4. Horizontally slice a slit through the thickest part of each breast to form a pocket. Fold and place 2 slices of mozzarella into each breast pocket. 
  5. Divide the mushroom mixture into four equal portions and fill each breast with the mushroom mixture (leave the juices in the pan for later. If there are any left over mushrooms, don’t worry. You’ll use them later). Top the mushroom mixture with 1 tablespoon of parmesan cheese per breast. Seal with two or three toothpicks near the opening to keep the mushrooms inside while cooking.
  6. Heat the same pan the mushrooms were in along with the pan juices (the garlic butter will start to brown and take on a ‘nutty’ flavor). Add the chicken and sear until golden. Flip and sear on the other side until golden; about 3 minutes per side. You may have to do this in two batches so that the meat sears instead of steams.
  7. OPTIONAL: With pan empty, add 1/4 cup dry vermouth or white wine into hot pan and stir to loosen fond and browned bits. Return chicken and any accumulated juices to the pan.
  8. Cover tightly and continue cooking in preheated oven for a further 20 minutes, or until completely cooked through the middle and no longer pink.
  9. Move to serving platter and remove toothpicks. Serve, with pan juices and any remaining mushrooms, on top of pasta, rice or steamed vegetables.
  10. To make the optional cream sauce, transfer chicken to a warm plate, keeping all juices in the pan.

Sauce:

  1. Fry the garlic in the leftover pan juices until fragrant, about 1 minute. Reduce heat to low heat, and add the mustard and half and half (or cream)
  2. Bring the sauce to a gentle simmer and add in any remaining mushrooms and parmesan cheese. Allow the sauce to simmer until the parmesan cheese has melted slightly. If the sauce is too runny for your liking, add the cornstarch/water mixture into the center of the pan and mix through fast to combine into the sauce. It will begin to thicken immediately.
  3. Season with a little salt and pepper to your taste. Add in the parsley and the chicken back into the pan to serve.

http://www.lynnandruss.com

Adapted from a recipe by Karina of cafedelites

Cabbage Roll Casserole

LOVE this main dish inspired by classic Eastern European cabbage rolls. The super-cozy bake from recipe developer Asha Loupy takes a spin from the lasagna handbook—a Polish Lasagna if you will. Blanched cabbage leaves are stacked with spiced beef ragù and lemony herbed rice for a casserole that’s chock-full of all the flavors of cabbage rolls, without the rolling.

Asha shows us two tricks for the perfect cabbage roll casserole—no mushy rice or soggy bottoms here, thank you. First, reduce the tomatoes until they reach a thick, almost paste-like consistency. This ensures that you’ll get neat slices, without a runny, liquidy sauce. Second, parboil the rice (as you would for tahdig or biryani) and sprinkle it lightly between the layers. This gives the grains room to cook to fluffy perfection while baking.

It took both of us two full hours from start to finish, so it’s not necessarily a quick, easy weeknight meal. However, some make-aheads are the meat sauce, parboiling the rice, and blanching the cabbage leaves up to three days ahead. Cover and chill separately. Then when ready, assemble the casserole just before baking.

If you are not a red meat eater, switch out the ground beef for ground turkey or even plant-based meat to make it vegetarian.

Cabbage Roll Casserole

  • Servings: 8
  • Difficulty: moderate
  • Print

Ingredients

  • 1 large bunch dill (save some fronds for garnish)
  • 3 large garlic cloves, minced
  • 1½ lbs. ground beef; or plant-based meat, or ground turkey
  • 3 tsp. Diamond Crystal or 1½ tsp. Morton kosher salt, divided
  • ½ tsp. freshly ground black pepper
  • 3 Tbsp. extra-virgin olive oil, divided, plus more for pan
  • 1 large onion, finely chopped
  • ½ tsp. crushed red pepper flakes
  • ¼ tsp. ground cinnamon
  • 1 28-oz. can whole peeled tomatoes
  • 1/2 cup water
  • 1 large head of savoy or green cabbage
  • 1¼ cups long-grain rice (such as basmati)
  • 1 lemon, zested over cooked rice (see Step 7)
  • 8 oz. crème fraîche
  • 8 oz. shredded, low-moisture mozzarella

Directions

  1. Heat oven to 400°. Start by prepping the beef filling. Coarsely chop 1 large bunch dill (you should get about ¾ cup), then crush and finely chop 3 large garlic cloves. Transfer a third of dill and a third of garlic to a large bowl. Add 1½ lb. ground beef or plant-based meat, 1½ tsp. Diamond Crystal or ¾ kosher salt, and ½ tsp. freshly ground black pepper and mix with your hands to incorporate. Set remaining dill and garlic aside separately.
  2. Heat 1 Tbsp. extra-virgin olive oil in a large Dutch oven or other heavy pot over medium-high until shimmering. Add half of beef mixture, dropping into pot in small clumps. Cook, undisturbed, until deeply browned underneath, about 5 minutes (or about 3 minutes if using plant-based meat). Stir and continue to cook 1 minute (it’s okay if the meat is not fully cooked through, it’ll finish cooking in the sauce). Using a slotted spoon, transfer beef to a plate. Repeat with remaining beef mixture. Wipe out pot.
  3. While the meat is cooking, finely chop 1 large onion.
  4. Heat 2 Tbsp. extra-virgin olive oil in same pot over medium. Add onion and remaining 1½ tsp. Diamond Crystal or ¾ tsp. Morton kosher salt. Cook onion, stirring often with a wooden spoon, until softened and starting to turn golden, 6–8 minutes. Add ½ tsp. crushed red pepper flakes, ¼ tsp. ground cinnamon, and reserved garlic, and cook, stirring, 30 seconds.
  5. Return beef mixture to pot and add one 28-oz. can whole peeled tomatoes. Break up meat and tomatoes into smaller pieces with spoon. Add ½ cup water and bring to a simmer. Reduce heat to medium-low and cook, stirring occasionally, until most of the liquid is cooked off and mixture is just a little looser than tomato paste, 20–25 minutes.
  6. While the sauce is cooking, line a large rimmed baking sheet with kitchen towels and bring a medium pot of generously salted water to a boil. Using a paring knife, cut about 1″ deep circle around core of 1 large head of savoy or green cabbage. Gently pull off 16–20 cabbage leaves, cutting away from core if needed. (Save any extra cabbage for another use.) Cut a small V in the bottom of each leaf, about ½” big, to remove the thickest part of the fibrous stalk. Working in batches of 3–4 leaves at a time, cook cabbage until just pliable, 10–15 seconds. Transfer to prepared baking sheet with tongs. Pat leaves dry.
  7. Return water to a boil, add rice, and cook, stirring occasionally, until barely al dente, about 5 minutes. Drain rice and rinse under cold running water to stop the cooking. Shake rice well to remove most of the water, then transfer to a medium bowl. Finely grate zest of 1 lemon on Microplane over rice and add reserved dill; mix well to combine.
  8. Rub bottom and sides of a 9×13″ deep lasagna dish with oil. Cover bottom of dish with a single layer of cabbage leaves, overlapping slightly. Set ½ cup sauce aside and spread half of remaining sauce over cabbage. Sprinkle half of rice mixture evenly over sauce. Top with another layer of cabbage leaves, then remaining half of sauce, and remaining rice. Top with a final layer of cabbage leaves.
  9. Spread 8 oz. crème fraîche evenly over cabbage. Dollop reserved sauce on top. Grate 8 oz. low-moisture mozzarella on the large holes of a box grater and sprinkle over. Cover dish with foil and set on a large rimmed baking sheet. Bake 20 minutes. Uncover dish and increase oven temperature to 425°. Continue to bake until cheese is golden brown and bubbling, 18–20 minutes. Let cool 10 minutes before serving. Garnish lightly with dill fronds.
  10. Any leftovers can be cooled, sliced into squares, packed in lock-n-locks with a tight lid and refrigerated for up to 5 days.

Do ahead: Meat sauce can be made, rice can be parboiled, and cabbage leaves can be blanched 3 days ahead. Cover and chill separately. Assemble casserole just before baking.

http://www.lynnandruss.com

Recipe by Asha Loupy for Bon Appétit