Monthly Archives: August 2020

Lamb Marinade—No Matter How You Cook It

Years ago, The Mr. came up with this marinade for lamb which can easily be doubled, or even tripled depending on the amount of meat you’re marinating. In this case, we were grilling a small lamb-top weighing in at just over a pound, however the recipe below yields a 1/2 cup and would cover up to about three pounds worth.

You can substitute any vinegar of your choice in place of the lemon juice. If you don’t have fresh rosemary, substitute 2 teaspoons of dried. It is highly recommended that you use a large mortar and pestle (even to the point of buying yourself a set says The Mr.), otherwise, a mini-processor can work to make the garlic, salt and rosemary paste.

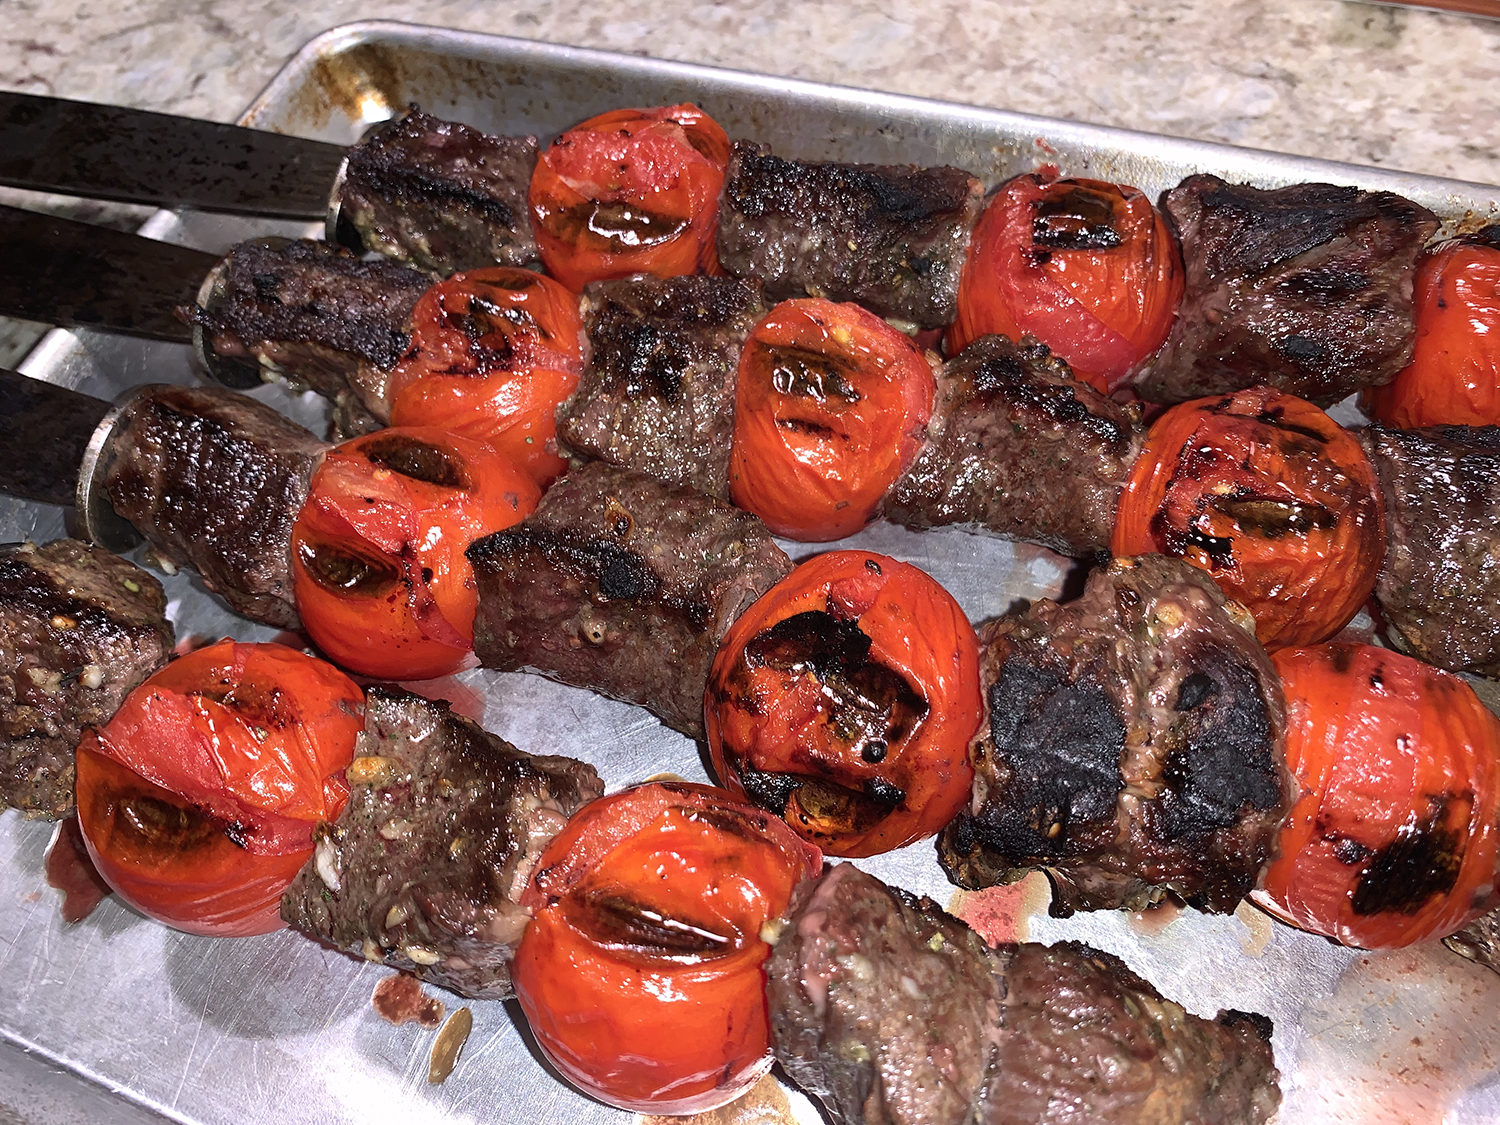
Our lamb was grilled to an internal temperature of 125° for medium-rare. Make sure to have an instant read thermometer to check for doneness. We expected our meat to be finished sooner than it did, but because it was vacuum-packed it actually puffed up once out of the package and became thicker! And of course it needs to rest for 5-10 minutes so the juices redistribute.

The sides of grilled vegetable medley and hot fresh corn on the cob were perfect accompaniments for the summer meal. There will be extra marinade after you put the lamb on the grill, so if you’re so inclined, you can baste the meat with it or, like we did, mix some in with your grilled veggies as they cook. (Psst, it is equally as tasty on chicken and pork.)

Lamb Marinade

  • Servings: Yields 1/2 cup
  • Difficulty: easy
  • Print

Ingredients

  • 3 cloves garlic, smashed and peeled
  • 1 tsp. Kosher salt
  • 1/4 tsp. freshly ground black pepper
  • 2 Tbsp. fresh rosemary leaves, coarsely chopped
  • 2 Tbsp. Dijon mustard
  • 2 Tbsp. lemon juice (or vinegar of your choice)
  • 1 Tbsp. soy sauce
  • 1/4 cup extra-virgin olive oil

Directions

  1. Place the garlic cloves in a mortar and add the salt. Pound the garlic into a paste, then add the rosemary and 1 teaspoon EVOO and continue pounding into a homogenous paste.
  2. Scrape the mortar mixture into a bowl deep enough for whisking and add the black pepper, mustard, lemon juice (or vinegar), soy sauce, and the remaining olive oil. Whisk until mixture is emulsified.
  3. Pour the marinade over the lamb if using for a leg or other large cut. Otherwise, place the lamb in a large resealable bag, add the marinade, seal, and massage to coat all of the meat.
  4. Refrigerate for at least 1 hour, up to 24 hours.

http://www.lynnandruss.com

Dak Naengchae

If you’re not fluent in Korean, the title translates to “Korean Chicken Salad (with Pine Nuts). And best news of all, it uses a supermarket precooked rotisserie chicken (at least my version). Other than a bit of chopping and measuring, you only have to use the stovetop to blanch the beans for a few minutes. I’ll toast to that!

Light, creamy, nutty,
and tangy

This Korean chicken salad is made with a traditional pine nut dressing—no mayonnaise. It is light, creamy, nutty, and tangy, and certainly a healthier option for you. Always toast the nuts lightly to bring out the flavor, and then either finely chop or, as in this recipe, grind them in a blender. The gochujang and mustard add robust flavors, while the acidity from lemon juice ties everything together, brightening the taste of the dressing.

A handheld mandoline makes quick work of shredding the
cucumber and cabbage into uniform-sized slices.

The original recipe indicates adding yellow mustard, but I went ahead and used Dijon. Other variations incorporate hot mustard, so it’s up to you which way to go. The Hubs thinks mixing Coleman’s brand hot mustard powder with vinegar would make a good acidic choice.

Korean Chicken Salad with Pine Nuts

  • Servings: 4
  • Difficulty: easy
  • Print

Ingredients

  • 8 oz. green beans, trimmed
  • 1/2 cup + 4 Tbsp. pine nuts, divided
  • 1/4 water
  • 2 Tbsp. yellow mustard
  • 1 Tbsp. gochujang
  • 2 Tbsp. lemon juice
  • 1 1/2 tsp. kosher salt, divided
  • 3 cups cooked chicken, shredded from a rotisserie chicken
  • 3 cups red cabbage, shredded
  • 1 cup cherry tomatoes
  • 1/2 English cucumber, halved lengthwise, thinly sliced crosswise
  • 2 scallions, thinly sliced on a diagonal

Directions

  1. Cook the green beans in a medium sauce pan of boiling salted water until bright green and crisp tender, about 3 minutes.
  2. Drain, then chill in a bowl of ice water for 1 minute. Drain, then pat dry, cut in half and set aside.
  3. Meanwhile, in a dry skillet, toast the pine nuts over medium heat for a couple of minutes, stirring occasionally until lightly browned. Let cool.
  4. In a blender, process 1/2 cup plus 1 tablespoon of the toasted pine nuts to a coarse paste, scraping sides as needed, about 20 seconds.
  5. Add water, mustard, gochujang, lemon juice and 3/4 teaspoon salt. Blend until smooth and pourable, about 30 seconds.
  6. In a medium bowl, toss together shredded cabbage, green beans, cherry tomatoes, cucumber slices, the remaining dressing and 3/4 teaspoon salt.
  7. Transfer the vegetables to a serving platter, spoon the chicken over the center and sprinkle with the remaining pine nuts and scallion slices.

http://www.lynnandruss.com

Recipe compliments of Milk Streets “Tuesday Nights” series

Honey-Mustard Turkey Cutlets with Arugula, Carrot, and Celery Salad

Tarragon is the secret ingredient in the honey-mustard coating for these quick-cooking turkey cutlets. It adds lovely licorice notes that elevate without overwhelming.

Our turkey cutlets were obtained at Zook’s Meats in the Newtown Farmer’s Market. Inquiring at their meat counter if they had any turkey cutlets, the woman showed Russ a fresh boneless, skinless breast and suggested she could cut it down for us however we wanted. And she did just that at no extra cost.

IMG_5311
Each cutlet was placed between saran wrap and pounded thin.

IMG_5315
Once the cutlets were pounded, I realized they were too big and cut them in half.

I did still pound them down to about an 1/8″ thick. Then they were so large I cut each of three cutlets in half, producing six total. Unfortunately, I also had to make 50% more of the mustard marinade because the original amount only covered 4 pieces. We had enough tarragon growing in our herb garden so it was no bother to go out and cut some more.

To plate, we arranged a larger bed of the salad before placing the turkey cutlet on top. After which we crowned the meat with a smaller helping of salad. I knew I was going to like this dish based on the ingredients, but I wasn’t prepared for how much I did actually like it!

We had three cutlets left over, so the following evening (our usual leftovers night) I made more of the same arugula salad (love the peppery bite), slightly reheated the meat, and we had an instant dinner.

IMG_5309
Ingredients are prepped to make the salad.

IMG_5307
A mustard vinaigrette consists of whole-grain mustard, olive oil, honey, lemon juice, and tarragon.

IMG_5318
After dredging through flour, each cutlet is then washed in the mustard vinaigrette.

IMG_5322
The cutlets are browned for a few minutes on each side in a hot skillet.

IMG_5324
We plated ours with the salad on top and bottom of the meat.

Honey-Mustard Turkey Cutlets with Arugula, Carrot and Celery Salad

  • Servings: 4
  • Difficulty: easy
  • Print

Ingredients

  • 1/4 cup all-purpose flour
  • Kosher salt and freshly ground pepper
  • 4 Tbs. extra-virgin olive oil
  • 1/4 cup whole-grain mustard
  • 1 Tbs. honey
  • 3 Tbs. fresh lemon juice
  • 1 Tbs. finely chopped fresh tarragon
  • 4 6-oz. turkey cutlets, pounded to 1/8 inch thick
  • 2 Tbs. canola oil; more as needed
  • 1/4 tsp. ground cumin
  • 2 oz. baby arugula (2 packed cups)
  • 2 medium celery ribs, trimmed and sliced 1/8 inch thick on the diagonal
  • 1 medium carrot, thinly shaved with a vegetable peeler

Directions

  1. Combine the flour, 1/2 tsp. salt, and 1/4 tsp. pepper in a shallow bowl. In another shallow bowl, whisk 2 Tbs. of the olive oil, the mustard, honey, 2 Tbs. of the lemon juice, and 2 tsp. of the tarragon.
  2. Dredge each turkey cutlet in the flour mixture and then the mustard mixture. Transfer to a wax-paper- or parchment-lined baking sheet or tray.
  3. Heat 1 Tbs. of the canola oil in a 12-inch nonstick skillet over medium heat until shimmering hot. Add two cutlets and cook, flipping once, until golden brown and just cooked through, 5 to 6 minutes total.
  4. Transfer to a clean plate and tent with foil to keep warm. Wipe out the skillet and repeat with the remaining 1 Tbs. canola oil and the remaining cutlets.
  5. Whisk the remaining 2 Tbs. olive oil, 1 Tbs. lemon juice, cumin, 1/4 tsp. salt, and 1/8 tsp. pepper in a small bowl. In a large bowl, combine the arugula, celery, and carrots; toss with enough of the dressing to lightly coat.
  6. Serve the cutlets topped with the salad, sprinkled with the remaining tarragon, and drizzled with any remaining dressing.

http://www.lynnandruss.com

Recipe by Ronne Day from Fine Cooking

Mexican-Style Grilled Steak with Red Chile Salsa

To create a recipe for a carne asada platter that satisfies like the original, Cook’s Illustrated started with skirt steak. Alas, our supermarket was not carrying skirt steak at the time, but had some nice flank steaks, so that’s what we went with. Adapt and prosper, right?

Here, a dry salting promotes faster browning on the grill. Afterward you give the steak a squeeze of fresh lime before serving for an added dimension of flavor. To speed up charring even more and create a large enough area of concentrated heat to cook all four steaks at once, Cook’s Illustrated cut the bottom from a disposable aluminum roasting pan and used it to corral the coals. Not us. We didn’t even pound down the meat to a 1/4″. Just gas-grilled them after refrigeration and got a beautiful medium-rare after 4-5 minutes on each side to reach 130°.

Mexican-Style Grilled Steak

For heady garlic flavor, treat the cooked steaks like bruschetta, rubbing their rough crusts with a smashed garlic clove. And don’t forget to make the smoky, earthy guajillo Red Chile Salsa—it’s the perfect accompaniment to the steak. If you can’t locate the guajillos at your grocery store or specialty ethnic market, they are easily ordered online.

In addition, we made Simple Refried Beans from a can of pinto beans, chopped onion and garlic. Even though the instructions indicate to start with a nonstick skillet, we didn’t because the potato masher could mar the surface of the pan.

Mexican-Style Grilled Steak (Carne Asada)

  • Servings: 4-6
  • Difficulty: easy
  • Print

Ingredients

  • 2 tsp. kosher salt
  • ¾ tsp. ground cumin
  • (2-lb.) skirt steak, trimmed, pounded 1/4 inch thick and cut with grain into 4 equal steaks
  • (13″ x 9″) disposable aluminum roasting pan (if using charcoal)
  • 1 garlic clove, peeled and smashed
  • Lime wedges

Directions

  1. Combine salt and cumin in small bowl. Sprinkle salt mixture evenly over both sides of steaks. Transfer steaks to wire rack set in rimmed baking sheet and refrigerate, uncovered, for at least 45 minutes or up to 24 hours.
  2. Meanwhile, if using charcoal, use kitchen shears to remove bottom of disposable pan and discard, reserving pan collar.
  3. FOR A CHARCOAL GRILL: Open bottom vent completely. Light large chimney starter filled with charcoal briquettes (6 quarts). When top coals are partially covered with ash, place disposable pan collar in center of grill over bottom vent and pour coals into even layer in collar. Set cooking grate in place, cover, and open lid vent completely. Heat grill until hot, about 5 minutes.
    FOR A GAS GRILL: Turn all burners to high, cover, and heat grill until hot, about 15 minutes. Leave all burners on high.
  4. Clean and oil cooking grate. Place steaks on grill (if using charcoal, arrange steaks over coals in collar) and cook, uncovered, until well browned on first side, 2 to 4 minutes.
  5. Flip steaks and continue to cook until well browned on second side and meat registers 130 degrees, 2 to 4 minutes longer.
  6. Transfer steaks to carving board, tent loosely with aluminum foil, and let rest for 5 minutes.
  7. Rub garlic thoroughly over 1 side of steaks. Slice steaks against grain into 1/4-inch-thick slices and serve with lime wedges.

http://www.lynnandruss.com

Recipe adapted from Cook’s Illustrated

Red Chile Salsa

Fire-roasted tomatoes are the secret ingredient in this salsa. They add smoky depth without adding extra work. Dried guajillo chiles are toasted and ground for rich, deep flavor. Vinegar and spices round out the mixture for a salsa that is smoky, spicy, and slightly tart.

A guajillo chile (in Spanish, meaning big pod) is the second-most commonly used dried chili in Mexican cuisine after poblanos (ancho). There are two main varieties that are distinguished by their size and heat factors. The guajillo puya is the smaller and hotter of the two. In contrast, the longer and wider guajillo has a more pronounced, richer flavor and is somewhat less spicy, which is what we used here.

Red Chile Salsa

  • Servings: makes 2 cups
  • Difficulty: easy
  • Print

Ingredients

  • 1 ¼ oz. dried guajillo chiles, wiped clean
  • (14.5-oz.) can fire-roasted diced tomatoes
  • ¾ cup water
  • ¾ teaspoon salt
  • 1 garlic clove, peeled and smashed
  • ½ tsp. distilled white vinegar
  • ¼ tsp. dried oregano
  • ⅛ tsp. pepper
  • Pinch ground cloves
  • Pinch ground cumin

Directions

  1. Toast guajillos in 10-inch nonstick skillet over medium-high heat until softened and fragrant, 1 to 2 minutes per side.
  2. Transfer to large plate and, when cool enough to handle, remove stems and seeds.
  3. Place guajillos in blender and process until finely ground, 60 to 90 seconds, scraping down sides of blender jar as needed.
  4. Add tomatoes and their juice, water, salt, garlic, vinegar, oregano, pepper, clove, and cumin to blender and process until very smooth, 60 to 90 seconds, scraping down sides of blender jar as needed. (Salsa can be stored in the refrigerator for up to 5 days or frozen for up to 1 month.)

http://www.lynnandruss.com

Simple Refried Beans

A couple of slices of bacon fat gives the beans meaty depth. Onions and garlic provide savory notes, while the rich canning liquid from pinto beans helps to create a silky texture and a rich flavor. Mash the beans with a potato masher for a partly smooth, partly chunky texture.

Ingredients

  • bacon, 2 slices
  • 1 small onion, chopped fine
  • 2 garlic cloves, minced
  • 1 15-oz. can pinto beans (do not drain)
  • 1/4 cup water

Directions

  1. Heat bacon in 10-inch nonstick skillet over medium-low heat until fat renders and bacon crisps, 7 to 10 minutes, flipping bacon halfway through. Remove bacon and reserve for another use (or eat as a snack while finishing dinner 😉 ).
  2. Increase heat to medium, add onion to fat in skillet, and cook until lightly browned, 5 to 7 minutes.
  3. Add garlic and cook until fragrant, about 30 seconds.
  4. Add beans and their liquid and water and bring to simmer. Cook, mashing beans with potato masher, until mixture is mostly smooth, 5 to 7 minutes.
  5. Season with salt to taste, and serve.

http://www.lynnandruss.com

[/recipe]

Salsa and beans recipes are both from Cook’s Illustrated

Grilled Chile-Spiced Pork Tenderloins and Grilled Corn Salad

The beauty of this meal is that you’re going to use your grill for both components, the meat and the corn salad. For the non meat eaters in the crowd, they can enjoy the full-bodied Grilled Corn & Avocado Salad with Creamy Feta Dressing as their entrée.

But for those who indulge in meat, this pork recipe couldn’t be much simpler. Butterflied and pounded thin, the pork tenderloins are first marinated in a lively mix of lime, chile and spices then cooked quickly over a hot grill.

It’s a good idea to grill your veggies first, so that while they cool and you assemble the salad, the meat can be grilled and rested for 5 minutes. We happened to have a head of Bibb lettuce that needed to be used up so it only made sense to use that instead of running out to the store for a head of romaine—and it worked perfectly.

With only two of us for dinner, I decided not to cut the second avocado until the next day and therefore only dressed half of the salad to be eaten with dinner, saving the remainder for lunch on the following day. The extra dressing was put in small containers and topped the salad, along with leftover strips of pork, when ready to eat.

Our luncheon salad the next day.

NOTE: Next time we would double the amount of scallions. Once cooked down and charred, six scallions didn’t have nearly enough presence. Use an entire bunch!

Grilled Chile-Spiced Pork Tenderloin

  • Servings: 4-6
  • Difficulty: easy
  • Print

Ingredients

  • 2 Tbs. ground chile powder, such as ancho, California, or New Mexico
  • 2 tsp. finely grated lime zest
  • 2 Tbs. fresh lime juice
  • 1 Tbs. olive oil; more for the grill
  • 1 Tbs. finely chopped jalapeño
  • 2 cloves garlic, chopped
  • 1/2 tsp. ground cumin
  • 1/2 tsp. dried oregano
  • Kosher salt
  • 2 pork tenderloins (2 to 2-1/2 lb. total)
  • Chopped fresh cilantro, for serving
  • Lime wedges, for serving

Directions

  1. In a small bowl, combine the chile powder, lime zest and juice, oil, jalapeño, garlic, cumin, oregano, and 1 tsp. salt to form a paste.
  2. Butterfly the tenderloins by making a lengthwise slit down each, taking care not to cut all the way through to the opposite side.
  3. Open each tenderloin, cover with a sheet of plastic wrap, and gently pound the meat with a meat pounder to an even thickness of about 1/2 inch.
  4. Generously rub the chile paste all over, and let sit at room temperature for 1 hour (or refrigerate, wrapped in plastic, for up to 1 day). Ours marinated for 10 hours.
  5. Meanwhile, prepare a medium (350°F to 375°F) gas or charcoal grill fire.
  6. Lightly oil the grate and grill the tenderloins, flipping once, until just firm to the touch, 2 to 3 minutes per side.
  7. Transfer to a warm platter, cover loosely with foil, and let rest for 5 minutes. Slice o a moated cutting board to catch any juices. Serve with the cilantro and lime wedges.

http://www.lynnandruss.com

Grilled Corn & Avocado Salad with Creamy Feta Dressing

Grilled Corn & Avocado Salad with Creamy Feta Dressing

  • Servings: 4-6
  • Difficulty: easy
  • Print

Ingredients

  • 6 ears corn, shucked and silk removed
  • 1 bunch scallions, trimmed
  • 1 jalapeño, stemmed, halved lengthwise, and seeded
  • 3 Tbsp. olive oil
  • Kosher salt and freshly ground black pepper
  • 4 ounces feta cheese, crumbled
  • 1/3 cup buttermilk
  • 1 tsp. freshly grated lemon zest
  • 1 Tbsp. freshly squeezed lemon juice
  • 1 garlic clove, grated
  • 1/4 cup sliced fresh chives
  • 1/4 cup finely chopped fresh parsley
  • 1 med. head romaine lettuce, cut or torn into bite-size pieces
  • 2 avocados, sliced

Directions

  1. Heat a grill or grill pan over medium-high.
  2. Brush corn, scallions and jalapeño with the oil and season with salt and pepper.
  3. Arrange on the grill and cook, turning occasionally, until corn kernels are browned in spots and the scallions and jalapeño are charred all over and tender, about 10 minutes, a little longer for the corn.
  4. Transfer vegetables to a cutting board and let cool slightly.
  5. When cool, remove charred jalapeño skin (wasn’t necessary for us.) Finely chop.
  6. In a medium bowl, using a fork, mash the feta into a coarse paste. Whisk in buttermilk, lemon zest and juice and garlic, then stir in chives, parsley, and charred jalapeño. Season with salt and pepper.
  7. In a large bowl, toss lettuce with half the feta dressing and arrange on a platter or salad bowl.
  8. Cut corn kernels off the cob and slice scallions into bite-size pieces.
  9. Arrange avocado slices, corn and scallions on top of the lettuce. Serve with remaining dressing or add additional dressing, as desired.

http://www.lynnandruss.com

Recipe adapted from The New York Times, contributed by Sue Li

Grilled Shrimp Satay and Cantaloupe Salad

We’ve been posting a lot of grilled skewer recipes lately and here’s one more, this time for you shrimp lovers. There are myriad versions of Southeast Asian satay, which are grilled skewers of seasoned meats or seafood. This simplified version, complements of Milk Street, is a Singapore-style shrimp satay mainstay.

A fragrant blend of cashews and coconut milk gave the shrimp richness and cloaked them with wonderful bold flavors. The pungent shallot-vinegar dipping sauce created a perfect accent and was the icing on the cake. While we figured it was going to be good based on the ingredients, we weren’t quite prepared for just how fabulous it was!

As for the shrimp themselves, we bought jumbo sized because they were on sale and they don’t dry out as quickly. Consequently it took another minute or so to grill them. Yes, some of the marinade will fall off into the grill, but as you can see from the photos, a good portion remains clinging to the shrimp.

A couple of DONT’S: Don’t use shrimp smaller than the size specified (although you can go larger like we did). They will overcook before they have a chance to take on any the flavorful char that is a hallmark of satay. And don’t use light coconut milk. The fat from regular coconut milk is needed for flavor.

Along with the shrimp satay, our meal consisted of steamed rice,
and cantaloupe salad.

Grilled Shrimp Satay

  • Servings: 4
  • Difficulty: easy
  • Print

Ingredients

  • 1½ lbs. extra-large (21/25 per pound) shrimp, peeled and deveined, tails left on
  • ½ cup roasted cashews, plus 2 tablespoons finely chopped roasted cashews
  • 5 Tbsp. coconut milk, divided
  • 1 oz, fresh ginger, peeled and roughly chopped
  • 4 med. garlic cloves, smashed and peeled
  • 1 Tbsp. grated lime zest
  • 2 serrano chilies, stemmed, halved and seeded, divided
  • 3 Tbsp. packed light or dark brown sugar, divided
  • 4 tsp. fish sauce, divided
  • 2 med. shallots, finely chopped
  • ½ cup unseasoned rice vinegar

Directions

  1. In a food processor, combine the ½ cup cashews and 3 tablespoons of coconut milk. Process until almost smooth, about 1 minute, scraping the bowl as needed.
  2. Add the ginger, garlic, lime zest, 2 chili halves, 1 tablespoon of sugar and 2 teaspoons fish sauce; process until finely chopped, 1 to 2 minutes.
  3. Transfer to a medium bowl. Add the shrimp, rubbing to coat them thoroughly. Marinate at room temperature while you make the sauce and prepare the grill.
  4. Thinly slice the remaining 2 chili halves and add to a small bowl along with with the remaining 2 tablespoons sugar, the remaining 2 teaspoons fish sauce, the shallots and vinegar. Stir until the sugar dissolves; set aside.
  5. Prepare a charcoal or gas grill for direct, high heat cooking.
  6. While the grill heats, thread the shrimp onto eight 10- to 12-inch skewers, dividing them evenly. Skewer each shrimp in a C shape, piercing through two points.
  7. When the grill is ready, brush one side of the skewered shrimp with some of the remaining 2 tablespoons coconut milk. Place the skewers brushed side down on the grill (directly over the coals if using charcoal) and cook until the shrimp are well charred, 2 to 3 minutes.
  8. Brush the skewers with the remaining coconut milk, then flip and cook until the second sides are well charred and the shrimp just turn opaque, about another 2 minutes.
  9. Sprinkle with chopped cashews and serve with the dipping sauce.
Prepare the dipping sauce before you start grilling the shrimp.

http://www.lynnandruss.com

Recipe from Milk Street

Cantaloupe Salad with Olives and Red Onion

If like me, you crave melon during the warm summer months, it may be psychological. Apparently we are drawn to water-rich foods in hot weather because they keep us hydrated and require less energy to digest. This recipe kicks the mundane cubes/slices up a notch with more texture and savory flavors.

To counter the abundant water contributed by the cantaloupe, make an intense dressing with assertive ingredients such as lemon juice, red onion, and ground dried Aleppo pepper, but skip the oil, which would only be repelled by the water on the surface of the cantaloupe. Instead, add richness with oil-cured olives, which—when chopped fine—adhere to the surface of the cantaloupe pieces and hold onto the dressing. 

Taste your melon as you cut it up: If it’s very sweet, omit the honey; if it’s less sweet, add the honey to the dressing. 

Cantaloupe Salad with Olives and Red Onion

  • Servings: 4-6
  • Difficulty: easy
  • Print

Ingredients

  • ½ red onion, sliced thin
  • ⅓ cup lemon juice (2 lemons)
  • 1 – 3 tsp. honey (optional)
  • 1 tsp. ground dried Aleppo pepper
  • ½ tsp. table salt
  • 1 cantaloupe, peeled, halved, seeded, and cut into 1½-inch chunks
  • 5 Tbsp. chopped fresh parsley, divided
  • 5Tbsp. chopped fresh mint, divided
  • ¼ cup finely chopped pitted oil-cured olives, divided

Directions

  1. Combine onion and lemon juice in large bowl and let sit for 5 minutes.
  2. Stir in honey, if using; Aleppo pepper; and salt.
  3. Add cantaloupe, ¼ cup parsley, ¼ cup mint, and 3 tablespoons olives and stir to combine.
  4. Transfer to shallow serving bowl. Sprinkle with remaining 1 tablespoon parsley, remaining 1 tablespoon mint, and remaining 1 tablespoon olives and serve.

http://www.lynnandruss.com

Recipe from Cook’s Illustrated

Salmon Burgers with Pickled Cucumbers

These Salmon Burgers with Pickled Cucumbers paired with a side of Honeydew Salad with Peanuts and Lime were a match made in Heaven. Even though they came from two different sources, the fact that they shared common ingredients ensured they’d make a perfect couple. To make it gluten-free, either omit the bun altogether (which we did for the leftovers the next day), or use a gluten-free variety.

I’ll preface the recipes by saying there is a bit of prep work for both, so it comes in handy to have a cooking partner to speed up the process. As far as the herb watercress topping, we scaled back the amount of herbs from 2 cups to 1/2 cup, which when mixed with the watercress was plenty for 4 servings.

The original recipe indicated to use three Persian cucumbers. Well we can never find them in our area, so we bought a long, seedless English cucumber, using only half of it. The half was then cut crosswise into two more pieces and shaved very thin using a hand-held mandoline.

The food processor is your friend when making these salmon burgers, but the key is to make sure the salmon isn’t too smooth when processing so the patties can hold their shape. The patties stayed together perfectly, the rice flour gave a golden, crispy crunch and the flavors were a perfect combination. Now we both love salmon, but several reviewers said even some family members who typically avoid salmon, loved these!

Salmon Burgers with Pickled Cucumbers

  • Servings: 4
  • Difficulty: easy
  • Print

Ingredients

  • 1½ lbs. boneless, skinless center-cut salmon, patted dry
  • 5 scallions, green parts finely chopped, white parts thinly sliced
  • 1 1-inch piece ginger, peeled, finely grated
  • 1 garlic clove, finely grated
  • 2 Tbsp. plus ⅔ cup mayonnaise
  • Kosher salt
  • 1 tsp. toasted sesame oil
  • 4 tsp. unseasoned rice vinegar, divided
  • 1/2 large English cucumber, shaved very thin lengthwise
  • ½ serrano chile, very thinly sliced crosswise
  • 1 tsp. sugar
  • ¼ cup (or more) vegetable oil
  • ½ cup rice flour
  • 2 cups tender herbs, such as torn mint and/or cilantro leaves with tender stems
  • ¾ cup trimmed watercress
  • 2 tsp. toasted white sesame seeds (optional)
  • 4 brioche buns, lightly toasted

Directions

  1. Cut salmon into 2″ pieces. Transfer one-third of salmon (about 8 oz.) to a food processor and process, scraping down sides, until mixture is very smooth and paste-like. Add remaining salmon and pulse 4–5 times until pieces are no bigger than ¼” (be careful not to make it too smooth). Transfer to a large bowl.
  2. Mix in scallion greens, ginger, garlic, 2 Tbsp. mayonnaise, and 1 tsp. salt; toss to combine. Form mixture into 4 patties about ¾” thick. Transfer to a parchment-lined rimmed baking sheet and cover with plastic wrap. Chill at least 1 hour or up to 3 (you’ll want to chill the patties so that they hold their shape before getting cooked).
  3. Meanwhile, mix sesame oil, 1 tsp. vinegar, remaining ⅔ cup mayonnaise, and a pinch of salt in a small bowl; set aside until ready to use.
  4. Toss cucumbers with a pinch of salt in another small bowl. Massage with your hands for a few minutes, squeezing lightly to expel water; discard cucumber liquid. Add chile, sugar, and 2 tsp. vinegar to bowl; toss to coat. Chill until ready to assemble burgers.
  5. Heat oil in a large nonstick skillet over medium-high until oil begins to shimmer. Remove salmon patties from fridge right before cooking and sprinkle with flour just to coat the outside (you won’t need all of it). The patties will be a little loose but you can always pat them back together with your hands before they hit the pan. Working in batches if necessary, and adding more oil in between batches if needed, cook patties until golden brown, about 3–4 minutes on each side (you don’t want to overcook).
  6. Toss herbs, watercress, sesame seeds, if using, scallion whites, remaining 1 tsp. vinegar, and a pinch of salt in a medium bowl. Build burgers with buns, patties, reserved special sauce, herb mixture, and pickles.

http://www.lynnandruss.com

Recipe by Andy Baraghani from Bon Appétit

Honeydew Salad with Peanuts and Lime

Melon salads are ideal hot-weather fare, but they’re prone to some common pitfalls: namely, watered-down dressings and garnishes that slide to the bottom of the salad bowl. Because honeydew melons vary in sweetness, start by tasting your melon to determine how much sugar to incorporate into the dressing. Ours was so sweet we didn’t need any sugar.

To counter the abundant water contributed by the melon, this makes an intense dressing with assertive ingredients such as lime juice, fish sauce, shallot, and Thai chiles, but no oil, which would only be repelled by the water on the surface of the melon. Instead richness is added with dry-roasted peanuts, which—when chopped fine—adhere to the surface of the melon pieces and hold on to the dressing.

Honeydew Salad with Peanuts and Lime

  • Servings: 4-6
  • Difficulty: easy
  • Print

Ingredients

  • ⅓ cup lime juice (1 1/2 to 3 limes)
  • 1 shallot, sliced thin
  • 2 Thai chiles, stemmed, seeded, and minced
  • 1 garlic clove, minced
  • ½ tsp. table salt
  • 1 – 2 Tbsp. sugar (optional)
  • 1 Tbsp. fish sauce
  • 1 honeydew melon, peeled, halved, seeded, and cut into 1½-inch chunks (6 cups)
  • 5 Tbsp. chopped fresh cilantro, divided
  • 5 Tbsp. chopped fresh mint, divided
  • 5 Tbsp. salted dry-roasted peanuts, chopped fine, divided

Directions

  1. Combine lime juice and shallot in large bowl. Using mortar and pestle (or on cutting board using flat side of chef’s knife), mash Thai chiles, garlic, and salt to fine paste. Add chile paste; sugar, if using; and fish sauce to lime juice mixture and stir to combine.
  2. Add honeydew, ¼ cup cilantro, ¼ cup mint, and ¼ cup peanuts and toss to combine. Transfer to shallow serving bowl. Sprinkle with remaining 1 tablespoon cilantro, remaining 1 tablespoon mint, and remaining 1 tablespoon peanuts and serve.

http://www.lynnandruss.com

Adapted from a recipe by Cook’s Illustrated

Grilled Chicken Salmoriglio, Diliziusu!

With only 5 ingredients plus the poultry pieces, pretty much anyone can tackle this super flavorful grilled chicken. We just oohed and ahhed while savoring every juicy bite. Once you taste it, I’m betting you’ll add it to your regular rotation.

Extra-virgin olive oil, lemon, garlic and herbs comprise salmoriglio, a sauce/marinade from southern Italy (specifically, Calabria and Sicily). This version is made with grated zest; some of the mixture is used for marinating bone-in chicken parts, then the juice from grilled lemon halves is added to finish the sauce just before serving.

Grilling the lemons before juicing them mellows their sharpness and acidity, adding a subtle sweetness to the sauce. We used a mixture of bone-in chicken breasts and thighs (can also include drumsticks or leg quarters). Keep in mind that the white meat is done at 160°F and the dark meat at 175°F, so the breasts may finish ahead of the dark meat. Our white meat actually took longer because one of the pieces was quite thick, so it’s good to have an instant read thermometer on hand.

If using white meat, cut the breasts halves in half again to make the pieces more uniform in size with the dark meat. Don’t use a fork to move the chicken pieces on the grill. A fork creates holes that allow juices to escape, resulting in drier meat. Use tongs instead—oh, and don’t forget protective gloves especially when squeezing those charred lemon juices into the salmoriglio sauce, they are HOT!

As sides, we served ours with a wedge salad and Patates a la Sal (Wrinkly Potatoes). They are cooked in very salty water—like the sea. By the time they are cooked through, the salt water evaporates and the potato skins become wrinkled with a white dusting of salt. They are especially tasty with a roasted garlic aioli.

Diliziusu!!

Grilled Chicken Salmoriglio

  • Servings: 4
  • Difficulty: easy
  • Print

Ingredients

  • 2 lemons
  • ½ cup extra-virgin olive oil
  • 2 medium garlic cloves, finely grated
  • 1 tsp. dried oregano, crumbled
  • Kosher salt and ground black pepper
  • 3 lbs. bone-in, skin-on chicken parts, trimmed
  • ¼ cup chopped fresh flat-leaf parsley

Directions

  1. Grate 2 teaspoon zest from the lemons, then halve the lemons crosswise and set aside.
  2. In a small bowl, stir together the zest, oil, garlic, oregano, 1¼ teaspoons salt and ½ teaspoon pepper. Transfer ¼ cup of the mixture to a large bowl, add the chicken and turn to coat. Marinate at room temperature while preparing the grill.
  3. Prepare a charcoal or gas grill for indirect cooking.
  4. Place the chicken skin side up on the cooler side of the grill. Cover and cook for 15 minutes. Using tongs, reposition the chicken so that the pieces furthest from the fire are now closest; keep the chicken skin-side up. Re-cover and continue to cook until the thickest part of the breast, if using, reaches 160°F or the thickest part of the thighs and drumsticks, if using, reach 175°F, another 5 to 10 minutes.
  5. Using tongs, flip the chicken skin-side down onto the hot side of the grill. Cook until the skin is lightly browned and crisp, 1 to 2 minutes, moving the chicken as needed to avoid flare-ups. Transfer the chicken skin side up to a platter and let rest for about 5 minutes.
  6. While the chicken rests, cut each lemon in half and grill the lemon halves cut side down on the hot side of the grate until grill-marked, 2 to 3 minutes.
  7. Squeeze 2½ tablespoons juice from 1 or 2 of the grilled lemon halves, then stir the juice along with the parsley into the reserved garlic-lemon oil to make the salmoriglio.
  8. Transfer the chicken skin side up to a platter and let rest for about 5 minutes.
  9. Serve the sauce and the remaining grilled lemon halves with the chicken.
After the chicken is plated, serve the sauce
as a topping for the meat.

http://www.lynnandruss.com

Recipe by Laura Russell from Milk Street

Garlic-Rosemary Burgers with Taleggio Sauce • Mm-mm Good!

What’s summer without a great burger now and again? And how about an upgrade that puts you in adult territory by incorporating a rich taleggio cheese. When combined with the other ingredients, the ground meat patties become light and airy allowing all of those flavors to dance a jig on your taste buds.

These deeply savory burgers were inspired from a recipe by Ignacio Mattos, chef of Estela in New York and author of a book by the same name. Instead of using fish sauce like Mattos, Courtney Hill from Milk Street opted for similarly salty and umami-rich Worcestershire sauce. It is mixed with rosemary and garlic to create a rich base. These seasonings, combined with a simple, yet sinful, taleggio cheese sauce, make these burgers richer, more elegant and far more flavorful than your average cheeseburger.

Look at that bed of luscious creamy cheese smeared on both halves of the bun!

As far as buns, brioche buns or Kaiser rolls are recommended, as they better resist turning soggy than standard hamburger buns. Keep it simple with toppings using only sliced tomato and/or pickled red onions to balance the burgers’ richness. We used both although I never got around to pickling those onions.

We found that our cheese sauce was silky smooth after simmering with the heavy cream and therefore did not need to be strained. Instead of adding black pepper, we used white to keep that creamy color.

Don’t put the cheese sauce directly onto the cooked patties because it will slide off. A better approach is to spoon the sauce onto the cut sides of each bun and allow the bread to slightly soak it in.

Garlic-Rosemary Burgers with Taleggio Cheese

  • Servings: 4
  • Difficulty: easy
  • Print

Ingredients

  • ½ cup heavy cream
  • 8 oz. taleggio cheese, rind removed, cut into ½-inch chunks
  • ¼ cup worcestershire sauce
  • 4 medium garlic cloves, finely grated
  • 2½ Tbsp. fresh rosemary, minced
  • 1½ pounds 85 percent lean ground beef
  • Kosher salt and ground black pepper
  • 1 Tbsp. grapeseed or other neutral oil
  • 4 buns, split and toasted

Directions

  1. In a small saucepan over medium, heat the cream until just simmering. Stir in the cheese, cover and remove from the heat. Let stand until the cheese is softened and partially melted, about 20 minutes, quickly stirring once halfway through.
  2. Meanwhile, in a small bowl, stir together the Worcestershire sauce, garlic and rosemary. In a medium bowl, combine the beef with 1 tablespoon of the Worcestershire mixture and ½ teaspoon each salt and pepper, then mix gently until the seasonings are evenly incorporated.
  3. Divide the meat into 4 portions and shape each into a patty about 4½ inches in diameter and about ½ inch thick.
  4. In a 12-inch cast-iron or other heavy skillet over medium-high, heat the oil until lightly smoking. Add the patties and cook for 3 minutes, spooning 1 teaspoon of the Worcestershire mixture over each.
  5. Using a wide metal spatula, flip the patties and continue to cook for another 3 minutes, again spooning 1 teaspoon of the sauce onto each.
  6. Continue to flip and cook, brushing with the remaining sauce mixture, until the patties are well browned on both sides and the centers reach 125°F for medium-rare or 130°F for medium, another 2 to 4 minutes.
  7. Transfer to a plate and let rest for 5 minutes.
  8. (This step may not be necessary if your cheese mixture is velvety smooth like ours was.) While the burgers rest, set a fine mesh strainer over a medium bowl. Stir the cream-cheese mixture thoroughly, then pour through the strainer, pressing with a silicone spatula to force the cheese through; the sauce should be smooth and creamy after straining. Stir in ¼ teaspoon pepper.
  9. Spoon about 1 tablespoon of cheese sauce onto the cut sides of both halves of each bun. Place a burger on each bottom bun half, then cover with the toppings.
  10. Serve the remaining cheese sauce on the side.

http://www.lynnandruss.com

By Courtney Hill from Milk Street

Espetadas—Portuguese Beef Skewers

Espetadas are Portuguese-style skewers most often using beef tenderloin, a very traditional dish, especially in the islands of Madeira. They are seasoned with typical Portuguese ingredients and cooked on open flames for the perfect amount of smokiness and flavor. Here however, we will used a gas grill.

We happened to have some filet mignon strips leftover from a large beef tenderloin that was cut into steaks. And coincidentally, just as we were figuring out the best way to use them up, Russ remembered an article from our most recent Milk Street magazine Espetada-Style Grilled Garlic and Bay Beef Skewers.

The secret of espetadas on the island of Madeira lies not in the meat, but rather the skewer itself, which are freshly cut laurel branches—the same type once used to crown athletes in ancient Rome and Greece. Today, Europe’s largest remaining laurel forest sits on Madeira. However, one needs to know which to cut because 4 of the 5 varieties are toxic! We’ll stick with wooden or metal skewers, thanks.

In this recipe, don’t use fresh bay leaves, they won’t grind down to a fine powder. Also, no need to use a top-shelf Madeira here, an inexpensive non-vintage bottle will do just fine. As far as marinating the meat, you can do so anywhere from 1 to 24 hours. By the time we thought to make this, we only had about 4 hours but that was enough to permeate the beef with all of that goodness.

Along with the beef cubes (of which we only had 1 pound), we decided to marinate some cremini mushrooms, skewer and grill them too. Our other sides included heirloom caprese tomato salad and freshly picked sweet corn on the cob steamed with fresh thyme.

To save a little time later on, after we prepared the marinade and tossed the mushrooms and beef chunks in, we went ahead and made the sauce up to the point of adding the butter. It can sit at room temperature for several hours then be reheated with the addition of butter when the skewers come off the grill and rest.

The next time we made them, we added cocktail tomatoes to the skewers.

Portuguese Beef Skewers

  • Servings: 2-4
  • Difficulty: easy
  • Print

Ingredients

  • 1 1/2-2 lbs. beef tenderloin, cut into 1 1/2″ cubes
  • 6 garlic cloves, finely grated
  • 10 dried bay leaves, plus fresh for skewers* if desired
  • 1/2 cup Madeira wine
  • 1 Tbsp. + 2 tsp. extra-virgin olive oil
  • Coarse sea salt and pepper to taste
  • 2 Tbsp. salted butter, cut into 2 pieces and chilled
  • 4 Portuguese bread buns, or other bread, optional
  • Wooden or metal skewers

Directions

  1. In a spice grinder, combine the bay leaves, 2 teaspoons salt and 1 teaspoon pepper, then pulverize to a fine powder.
  2. In a medium bowl, combine 2 teaspoons of that bay salt, 1 tablespoon of grated garlic and 1 tablespoon EVOO, using a fork to mash until well combined.
  3. Add the cubes of beef and coat them well with the marinade.
  4. Let it marinate covered in the refrigerator for at least 1 hour or up to 1 day.
  5. Meanwhile, in a small saucepan over medium, heat the remaining 2 teaspoons oil and bay salt, stirring until fragrant and sizzling, about 3 minutes.
  6. Add the remaining 1 1/2 teaspoons garlic and cook, stirring until fragrant and sizzling, about 10 seconds.
  7. Add the Madeira and bring to a simmer, then reduce to low and cook, stirring occasionally until reduced to 2 tablespoons. Cover and set aside off the heat.
  8. When ready to cook, thread the cubes of meat onto the skewers (*alternating with a fresh bay leaf if desired.)
  9. Place skewers on hot side of grill. Cook uncovered until the beef is lightly charred on both sides and the center of the thickest piece reaches 125° for medium-rare, 8-10 minutes total.
  10. Transfer to a platter, tent with foil, and let rest while you finish the sauce.
  11. Set the pan containing the Madeira reduction over medium and heat uncovered just until steaming. Remove from the heat, add the butter and swirl the pan until the butter is melted and the sauce is emulsified.
  12. Remove meat from the skewers and drizzle with the sauce.

http://www.lynnandruss.com

Recipe adapted from Rebecca Richmond from Milk Street

Crushed it.

I’m going to sing the praises of some unusual libations here. First is the Cucumber Basil Martini that I had on vacay at the Talkative Pig on Cape Cod. Made with vodka, muddled cucumber and fresh basil, and the fennel based liqueur Finocchietto, it was the perfect pre-dinner cocktail devoid of cloying sweetness.

To educate, Finocchietto has a bold, bright fennel flavor, one that’s light and balanced, rather than the aggressive anise hit that spirits can bring. It reminded us how fresh and vibrant fennel can be. According to history, Roman gladiators flavored their food with Finocchietto, believing it to be a source of strength. It is a fine savory digestif and a cooking staple in many Neapolitan kitchens today.

Problem is, no liquor store in the great state of PA carries it—it has to be special ordered according to one state store manager. And he told me it would not come in in time for our house party only days away. Bumhead 😦 I’ll continue to be a liqueur sleuth until I score…

But here’s where I CRUSHED it—almost. Ever hear of Hpnotiq? It’s a refreshing blend of premium French vodka, exotic fruit juices and a touch of cognac. Sounds very adult-like, right? Well I had a full, unopened bottle of Hpnotiq and decided to make a Blue Crush for the house drink. All I needed was lemonade and blueberry vodka.

Simple enough mission. Just send The Hubs to the liquor store where they sell every fruit-flavored vodka imaginable, plus oddities like cucumber and basil, and peanut to name a few. But no friggin’ blueberry! Are you kidding me? After some discussion via our mobiles, we decided to go with Blue Raspberry vodka, at least it contained the word “blue” and was made from berries.

Blue Crush Cocktail

  • Servings: 2
  • Difficulty: easy
  • Print

Ingredients

  • 4 oz. Hpnotiq
  • 2 oz. Premium blueberry vodka
  • Splash of lemonade in each glass

Directions

Shake hpnotiq and blueberry vodka with ice and strain over ice in a rocks glass. Add lemonade to taste. Garnish with fresh blueberries and mint.

http://www.lynnandruss.com

To dress up this wonton woman of a drink, we added a spear of the largest, sweetest blueberries we’ve ever been fortunate to get our hands on; and a sprig of fresh chocolate mint snipped directly from our herb garden. Now she was ready to get the party started!

These were the most gorgeous and tasty blueberries ever!
My new summer love ❤

This next drink involves blood orange, and you know how I have a fetish for those. (It’s in writing under the Food Fetish tab.) While at the aforementioned liquor store, The Hubs eyeballed some Effen Blood Orange Vodka (gotta love that name!) and remembered a drink we imbibed while on another vacation in the Poconos in early July—the Blood Orange Aperol Spritzer.

Our first taste of a Blood Orange Aperol Spritzer was served in a
plastic cup at a beach bar on Boulder Lake.

If you’re not familiar with Aperol, it is an Italian aperitif with the flavor and aroma of orange so the blood oranges go perfectly in this cocktail. It has a nice blend of bitterness and sweetness—again, very adult-like. Our version, tastes like a creamsicle without any cream. It’s best garnished with a sprig of fresh rosemary and a slice of blood orange. Problem is, blood oranges are only available in the late fall/early winter months around here. I guess you could use a slice of navel orange or tangerine in a pinch.

Apparently there are numerous versions in concocting this libation. Several use Prosecco instead of club soda, and/or orange juice in place of the blood orange vodka. But once we had a taste of that EFFEN vodka, there was no turning back…

Blood Orange Aperol Spritzer

  • Servings: 2
  • Difficulty: easy
  • Print

Ingredients

  • 4 oz. Premium Blood Orange Vodka, such as Effen
  • 2 oz. Aperol Liqueur
  • Splash of club soda in each glass
  • Rosemary sprig and blood orange slice for garnish

Directions

In a shaker, shake vodka and aperol with ice and strain over ice in an 8-oz. glass. Add club soda to taste. Garnish with fresh rosemary sprig and blood orange slice.

http://www.lynnandruss.com

Moroccan Cod Tagine for Two

The bright colors and flavors literally pop off the plate in this lovely, healthy fish tagine. And with a few tweaks, we bolstered that brightness by doubling the amount of carrots and green olives. Pairing it with a side of tricolored couscous to help soak up the luscious sauce didn’t harm the color palette either!

For a bright, flavorful fish tagine, start by salting chunks of cod to season the flesh and help it retain moisture. Coat the fish in chermoula, a flavorful herb-spice paste of cilantro, garlic, cumin, paprika, cayenne, lemon juice, and olive oil, just before cooking to season its exterior.

Softening bell pepper, onion, and carrot before adding the tomatoes and fish ensures that the vegetables will be soft and tender by the time the fish has cooked through. Preserved lemon and olives add acidity, complexity, and salty punch to the broth. To produce moist, flaky cod, turn off the heat once the broth is bubbling at the bottom of the pot and allow the fish to cook in the residual heat.

You can substitute red snapper or haddock for the cod as long as the fillets are 1 to 1½ inches thick. Picholine or Cerignola olives work well in this recipe. Serve this dish with flatbread, couscous, or rice.

Moroccan Cod Tagine for Two

  • Servings: 2
  • Difficulty: easy
  • Print

Ingredients

  • 12 ounces skinless cod fillets (1 to 1½ inches thick), cut into 1½- to 2-inch pieces
  • ½ teaspoon table salt, divided
  • ¼ cup fresh cilantro leaves, plus 2 tablespoons chopped
  • 2 garlic cloves, peeled
  • ¾ teaspoon ground cumin
  • ¾ teaspoon paprika
  • ⅛ teaspoon cayenne pepper
  • 2 teaspoons lemon juice
  • 3 tablespoons extra-virgin olive oil, divided
  • ½ onion, sliced through root end ¼ inch thick
  • ½ green bell pepper, cut into ¼-inch strips
  • 1 small carrot, peeled and sliced on bias
  • ¼ inch thick¾ cup canned diced tomatoes
  • 3 tablespoons pitted green olives, quartered lengthwise
  • 1 tablespoon finely chopped preserved lemon

Directions

  1. Place cod in bowl and toss with ¼ teaspoon salt. Set aside.
  2. Pulse cilantro leaves, garlic, cumin, paprika, and cayenne in food processor until cilantro and garlic are finely chopped, about 12 pulses. Add lemon juice and pulse briefly to combine. Transfer mixture to small bowl and stir in 1½ tablespoons oil. Set aside.
  3. Heat remaining 1½ tablespoons oil in large saucepan over medium heat until shimmering. Add onion, bell pepper, carrot, and remaining ¼ teaspoon salt and cook, stirring frequently, until softened, 5 to 7 minutes. Stir in tomatoes and their juice, olives, and preserved lemon. Spread mixture in even layer on bottom of saucepan.
  4. Toss cod with cilantro mixture until evenly coated, then arrange cod over vegetables in single layer. Cover and cook until cod starts to turn opaque and juices released from cod are simmering vigorously, 3 to 5 minutes. Remove saucepan from heat and let stand, covered, until cod is opaque and just cooked through (cod should register 140 degrees), 3 to 5 minutes. Sprinkle with chopped cilantro and serve.

http://www.lynnandruss.com

Adapted from a recipe by Cook’s Illustrated

Flank Steak with Salsa Verde Salad

This summery dinner salad is perfect for the dog days of August. While the list of ingredients may seem a bit lengthy, the salsa verde made with scallions, mint, cilantro (or parsley), capers and garlic becomes the marinade for both the steak and the dressing for the greens. A win-win in my book. If you’re following a low-carb diet, this baby is for you.

This meal was one of our Cape Cod vacation dinners for the two of us. (So yes, we had leftovers, yeah!) The NYTimes recipe originally called for skirt steak, but the local grocery store wasn’t carrying any—instead they had some beautiful flank steaks, a perfect substitute.

We also took it upon ourselves to grill the romaine quarters, even though the original recipe didn’t include this step. Slightly charring the romaine, which was brushed all over with olive oil, added an inviting addition to the flavor profile. And what the heck, the grill was still hot and the meat had to rest, after all…

And because when you are in vacation mode and need to adapt without fuss, we used cilantro in place of parsley, because, well, that’s what we had on hand and didn’t feel like making an extra trip to the supermarket. Some folks can’t stomach cilantro, so parsley is your best alternative. We happen to love the herb.

Flank Steak with Salsa Verde Salad

  • Servings: 4
  • Difficulty: easy
  • Print

Ingredients

  • 1 1/2 pounds flank steak
  • 1/2 cup extra-virgin olive oil, plus more for romaine
  • 1/4 cup red-wine vinegar
  • 1/4 cup thinly sliced scallions
  • 2 tablespoons capers, drained and roughly chopped
  • 1 tablespoon minced garlic (about 2 large cloves)
  • 1/2 teaspoon kosher salt, plus more to taste
  • 1/2 teaspoon black pepper, plus more to taste
  • 2 tablespoons chopped fresh cilantro (or parsley)
  • 2 tablespoons chopped fresh mint
  • 1/4 cup toasted pine nuts
  • 2 romaine hearts
  • 1/2 cup crumbled feta cheese

Directions

  1. If necessary, cut the steak crosswise into large pieces that will fit into a shallow, nonreactive dish such as glass. Transfer steak(s) to dish.
  2. In a large glass measuring cup, whisk together the olive oil, vinegar, scallions, capers, garlic, 1/2 teaspoon salt and 1/2 teaspoon pepper. Pour about 1/3 of dressing over the steak and turn to coat both sides.
  3. Add the cilantro (or parsley) and 1 tablespoon mint to the reserved dressing, stir, and set aside until ready to use. Cover and refrigerate for at least 3o minutes and up to 24 hours. (If marinating overnight, cover and refrigerate the reserved dressing.)
  4. In a small sauté pan over medium heat, toast the pine nuts, tossing often, until golden brown, about 3 minutes. Set aside.
  5. Set the grill to medium-high heat. Pat the steaks dry with a paper towel and grill 3 to 5 minutes on each side for medium-rare, 125°. Check with an instant read thermometer.
  6. Transfer tp a plate, sprinkle with salt, and allow to rest for 10 minutes.
  7. Meanwhile, cut the romaine hearts into quarters. Brush all over with olive oil and sprinkle lightly with kosher salt. Grill for a total of 5 minutes, turning once to char both sides lightly.
  8. Arrange romaine in one layer on a large platter, leaving room in the middle for the steaks.
  9. Slice the steak into 3″ pieces, then slice against the grain to cut the steak into wide strips. Place in center of platter pouring any accumulated juices over the meat.
  10. Sprinkle feta, pine nuts and remaining 1 tablespoon of mint over the romaine.
  11. Arrange the sliced steak on the platter, drizzle with reserved dressing over steak and lettuce. Serve immediately.

http://www.lynnandruss.com

Adapted from a recipe by Lidey Heuck from the NYTimes

Solstice

Solstice is a seasonally-focused and ingredient-driven modern-American restaurant. They feature fresh, craveable food paired with elevated service in a friendly and approachable environment. Their ingredient-driven menu features various preparations and techniques to bring out the richest, most complex flavors.

Not to mention the cool, hip ambience of the place with on-trend lighting fixtures. Food is juxtaposed with traditional preparations and modern plating with refined execution in their dynamic environment where you can enjoy the best ingredients of the season. And that we did!

Solstice first opened in Newtown, PA in early March 2020 (you probably know where this is going), and then promptly shuttered it’s doors one week later due to COVID-19. By the time they reopened in June and we finally had a chance to make a reservation, it was the very end of July. Better late than never, right?

They are no slouches when it comes to adhering to virus precautions. Masks are correctly worn on all staff; hand sanitizer stations are strategically placed; tables are situated with plenty of room in between; there are QR codes for menus (paper ones available if requested); white-gloved servers bring you food while black-gloved bussers remove table debris; and you pay your tab via mobile technology.

Their bar centers around creative, handcrafted cocktails, which are also updated seasonally. If you’re not in the mood for a spirited drink, they offer an extensive Zero Proof cocktail selection using vitamin-packed aloe juice as the spirit substitution.

We started with a bottle of red cab and chose a few appetizers before the entrées. In fact, while we were waiting for our first course, we were presented with an amuse bouche spoonful of pickled watermelon rind with a feta creme. Classy touch!

As an appetizer, Russ loved his Smoked Salmon Rillette which came plated with a caper-dill sour cream, plum mostarda and three toasted baguette slices. I had a bit, and yes it was delicious.

I was in a greens mode and selected their Solstice Salad comprised of thinly sliced watermelon radish, zucchini, shaved carrots, heirloom tomatoes, cucumber, focaccia croutons, parmesan, and egg all topped with a buttermilk-fermented garlic dressing. Just loved it!

The biggest hit of the night was Russ’ main course of Jumbo Lump Crab Cakes. For years we have been on the search to find a comparable crab cake to those we had at Brian’s in Lambertville many, many years ago. Our opinion, these were even better with hardly any filler and loads of lump sweet crab meat loosely formed into patties. The cakes came paired with a delicious kohlrabi coleslaw and a homemade remoulade sauce.

Russ had to call the waitress back because after he’d placed his order, he realized he wanted a side order of their Hand-Cut Fries served in a charming tin cup with two dipping sauces: roasted red pepper ketchup and loaded baked potato aioli. I had a few and must confess, they were the BEST fries in recent memory.

I had been eyeballing several entrées including those crab cakes but finally settled on the Seared Cape May Scallops. While there were only 3 scallops, they were huge, tender and flavorful, just enough for me. The one misstep of the night for me was the side of yellow corn risotto, it was bland and unmemorable. The sea bean salsa verde and passion fruit gelée added delightful hits of flavor.

Another classy touch was the mignardise, a bite-sized dessert served at the end of a meal. In this case, a corn madeleine topped with a white miso caramel. For dessert Russ chose a scoop of gellati and filled out the bottom of the menu card that asks you to describe your favorite seasonal dessert. We immediately thought of his lemon posset topped with fresh blueberries. Who knows, that may get us a future free dinner at Solstice

New England Lobstah Bake

OK, so the actual title is New England Clam Bake, but I don’t eat clams and the real star of the show here is, let’s face it, the LOBSTER! While I’ve participated in many a clam bake over the decades, I never actually made one. And the beauty of this is, no need for a beach. You concoct the entire meal in one large pot in-house—a genius alternative when cooking at the beach isn’t an option.

In our case, make that two large pots. We were on vacation in Cape Cod and were at the mercy of whatever the rental property provided pot-wise (and I’m not talking the smoking variety.) After rummaging around in cupboards we thought we struck gold with a ginormous steaming pot. Alas, while the outside looked brand-spanking new, the inside bottom was rusty and therefore unusable for the broth.

A chilled bottle of dry rosé paired perfectly with the meal.

However I have to credit some quick thinking by The Hubs. We steamed the crustaceans in that steam pot while cooking everything else in the second largest pot available, which would not have held the entire ingredients. The rental also coughed up two large plastic trays, perfect for serving purposes.

If you don’t count the cost of the rather expensive jumbo shrimp at $23-per-pound, the meal in itself was quite reasonably priced—and normally shrimp isn’t part of a lobster/clam bake anyway. We added them because, as I mentioned earlier, I don’t eat clams. I like clam broth, just not the consistency of the “meat”. Lobsters were running $9.99 per pound and we needed two 2-pounders. If the four of us (son David and girlfriend Vikki joined us) had dined out on this meal, the cost would’ve far surpassed the monetary output invested here.

Our rental was situated only about a quarter mile from Mac’s Chatham Fish and Lobster which provides not only fresh seafood for purchase, but also dine-in and take-out options. (We availed ourselves of all three over our two-week stay.) The Hubs got there shortly after opening to make sure our needs would be in stock.

NOTE: If you happen to be doing your clambake in a pot that’s set on a rack over an open grill, go ahead and instead toss the corn and the cut lemon directly on the rack to impart a slight smokiness to the final dish.

Don’t forget a loaf of good crusty bread to mop up the yummy broth.

When ready, tip the contents of the pot onto a table lined with newspaper or butcher paper. (Cut each lobster in half prior to serving.) Or in our case, because we wanted to preserve the broth for bread-dipping purposes, dump the contents onto rimmed trays. Sprinkle everything with the herbs and set out small bowls of melted butter along with some crusty bread and lemon wedges and dishes or small buckets so folks have a place to toss the spent shells. Don’t forget oo-gobs of napkins!

BTW—We did have quite a few potatoes and corn leftover. The remaining potatoes were sliced and fried for breakfast the next morning, and the corn was shaved off the cobs and made into a sauté a few days later.

New England Lobstah Bake

  • Servings: 4
  • Difficulty: easy
  • Print

Ingredients

  •  1 cup cold water
  •  2 cups dry white wine
  •  2 1/2 Tbsp. Old Bay Seasoning
  •  1 tsp. coarse sea salt
  •  4 garlic cloves, smashed
  •  1 red onion, roughly chopped
  •  2 pounds new potatoes, halved
  • 2, 2-pound lobsters
  •  2 dozen Manila clams
  • 1 1/2 lbs. jumbo shrimp
  •  4 ears fresh corn, cut into quarters
  •  Small bunch tarragon or flat-leaf parsley, roughly chopped
  •  2 sticks unsalted butter (8 oz), melted
  •  Crusty bread
  •  6 lemons, halved or cut into wedges

Directions

  1. In a ginormous pot, bring the water, wine, Old Bay, salt, and garlic to a boil.
  2. Toss the onion and potatoes in the pot, cover, and cook over medium-high heat for 15 minutes.
  3. Nestle the lobsters on the onion and potatoes, cover the pot again, and cook for 3 minutes.
  4. Add the clams and corn and continue to cook, still covered, until the clams have opened, 8 to 10 minutes. Add the shrimp (if using) 3 minutes before everything is done, you don’t want to overcook them.
  5. Carefully remove the pot from the heat and drain the cooking liquid (we saved it for bread dipping purposes). Remove and discard any clams that haven’t opened.
  6. With a large sharp knife, slice the lobsters in halve lengthwise.
  7. Tip the contents of the pot onto a table lined with newspaper or butcher paper or transfer to 2 large rimmed platters. Transfer broth into a separate bowl if desired.

http://www.lynnandruss.com

Adapted from a recipe found on leitesculinaria.com