Monthly Archives: November 2023

Spicy Roasted New Potatoes with Lemon and Herbs

Middle Eastern batata harra inspired these lightly spicy roasted potatoes. Tradition may inform much of Sami Tamimi’s cooking, but it doesn’t constrain it. His willingness to play is a delicious undercurrent to his book “Falastin,” a collection of stories and updated classic Palestinian recipes he wrote with Tara Wigley. In fact, nearly every recipe includes a note titled “Playing around.”

“After a while we realized that traditional recipes take a bit of time to do. Second, they’re not so pretty to look at,” says Tamimi. Taking the two things together he, and cookbook partner Tara decided to do something that both stayed true to the country but also something people will be able to do within the demands of having two kids when they get off work.
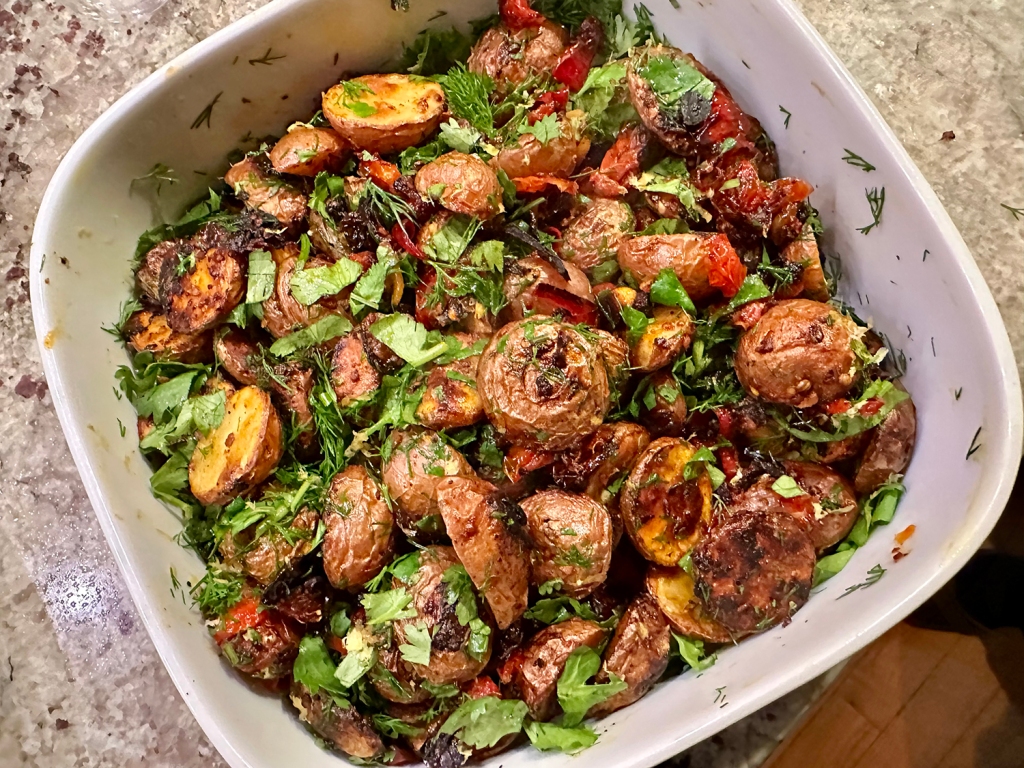
Typically, fried or roasted potatoes are tossed with olive oil, chili flakes, garlic and one or more spices, though variations abound depending on the region and even family. In North Africa, they’re doused in harissa and are quite spicy, whereas in Egypt they go heavier on the garlic and warm spices, such as turmeric, and have only mild heat.

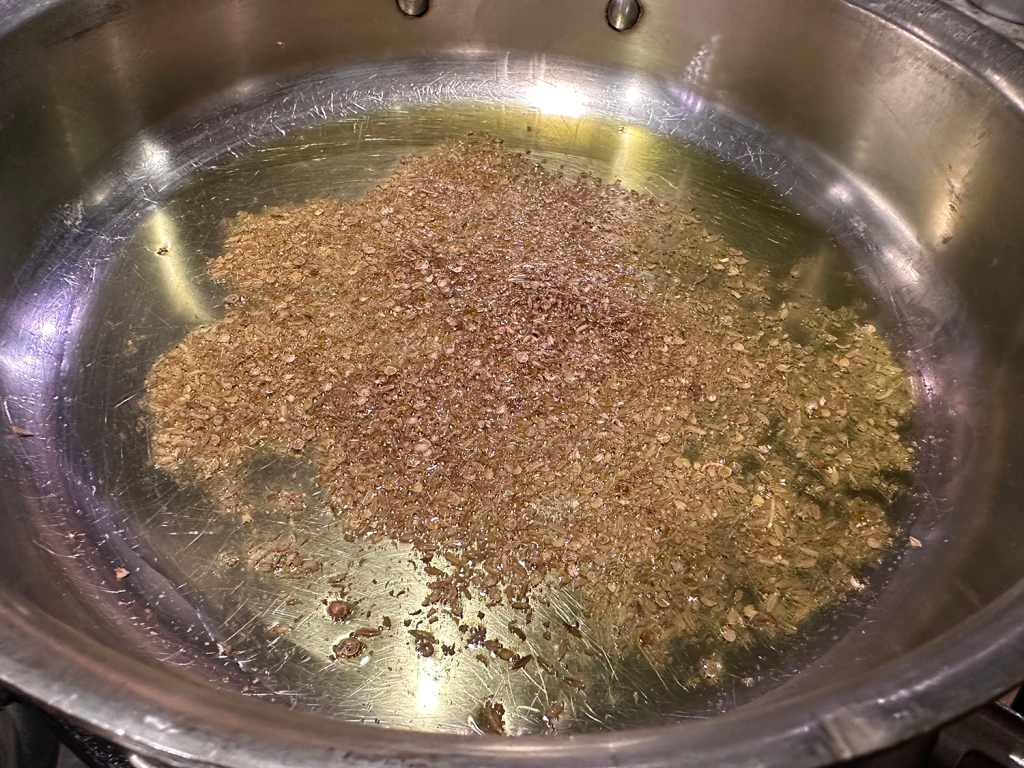
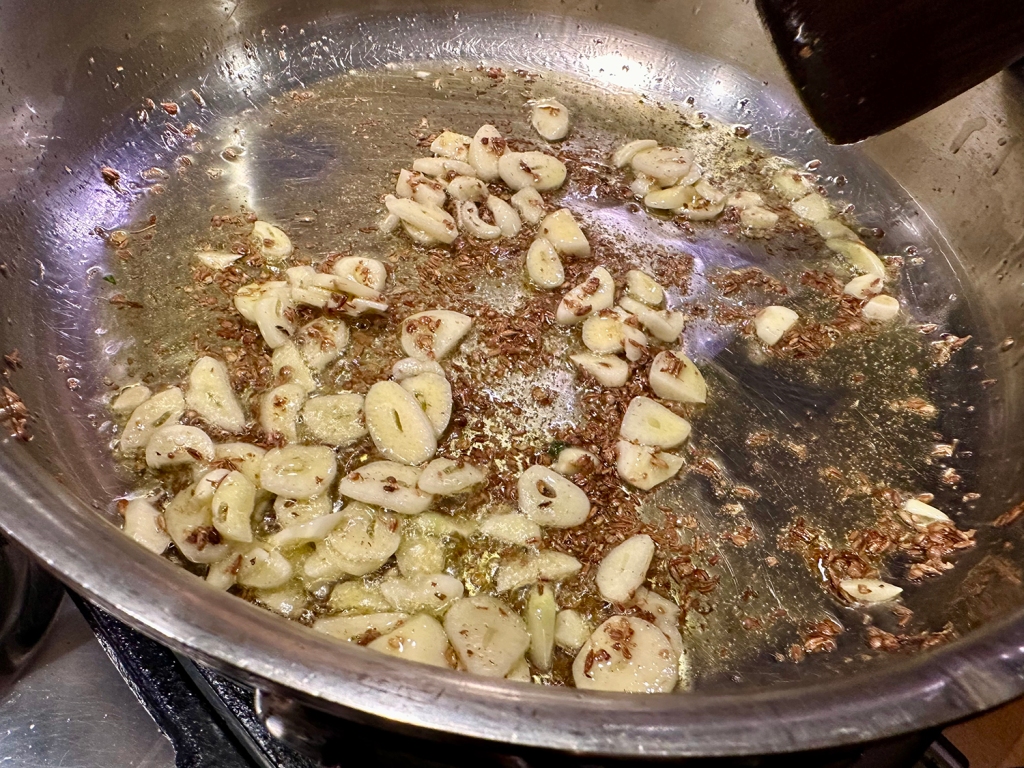
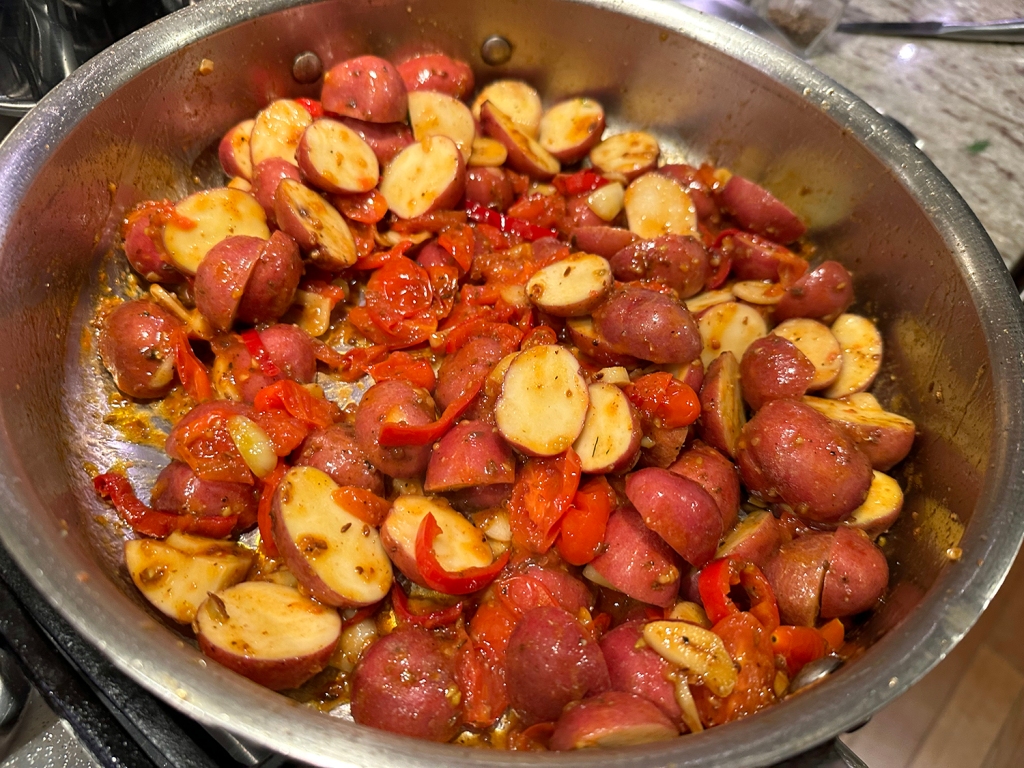
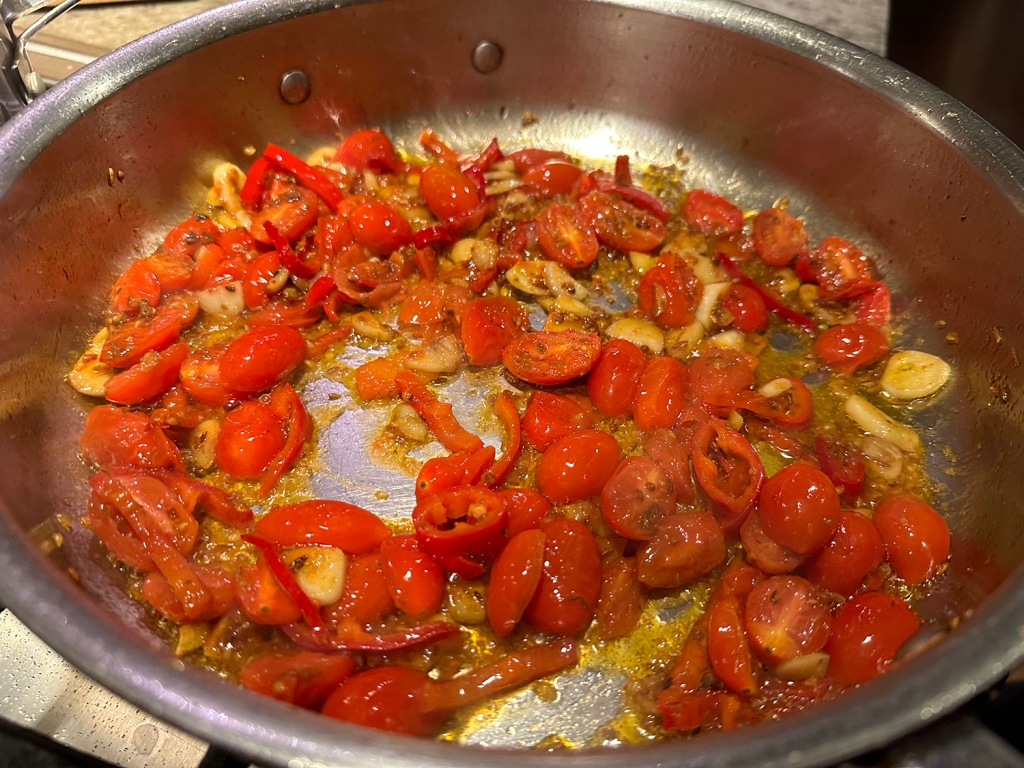
Tamimi’s approach, builds upon his mother’s recipe, and skews toward Gazan flavors, with fresh green chilies, fresh dill and cilantro, and crushed cumin and coriander seeds that add both texture and flavor. The crushed spices are bloomed with garlic in hot oil, similar to an Indian tarka, then cooked briefly with the chilies and cherry tomatoes. The seasoned mixture is combined with the potatoes and roasted together, then tossed with the herbs and lemon zest and juice. “If you look at the ingredient list, you say, ‘Oh, it’s so simple,’ but the end result is so surprising,” he says.

Combining the fresh and roasted ingredients yields a brighter, bolder take on roasted potatoes. But Milk Street found it difficult to get the desired crispy, browned texture, so the tomatoes were eliminated and the oven temperature raised to 475°F. Trouble was, the higher heat risked burning the spices.

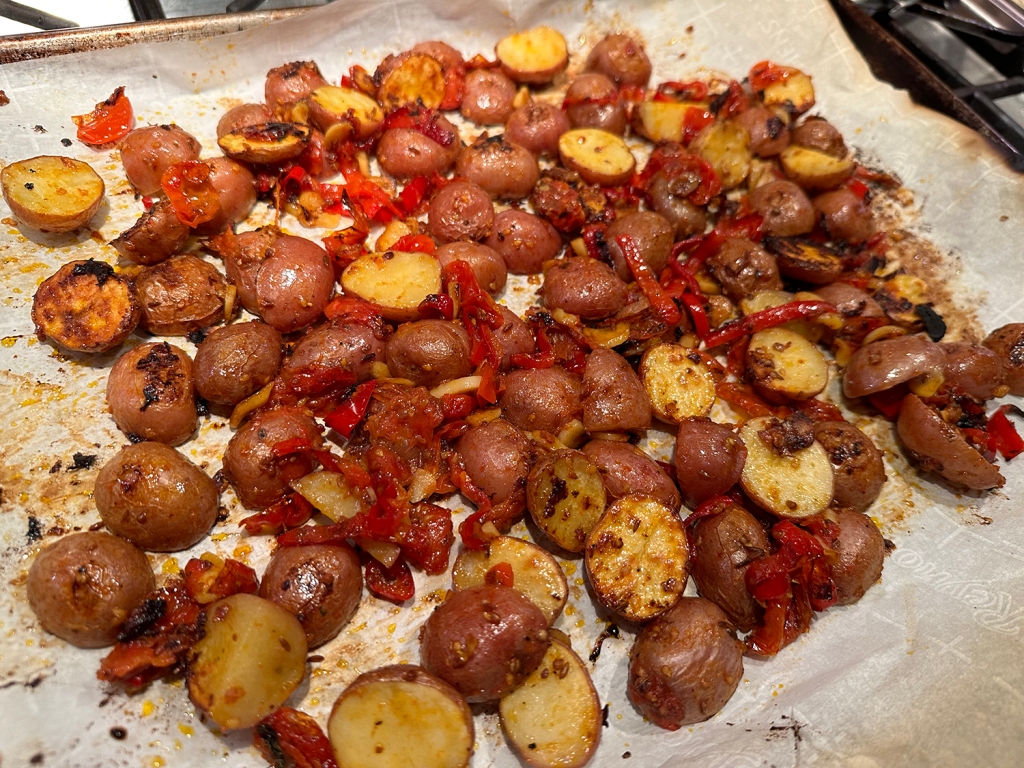
The fix was to first partially roast the potatoes with just oil, salt and pepper. Then combine more oil with the seasonings and let the flavors meld for a bit. When the potatoes are about two-thirds cooked, toss them with the flavored oil and return to the oven until golden brown and creamy. Fresh cilantro and lemon zest give the bright, balanced and crispy potatoes you want on your plate.

Don’t forget to oil the baking sheet with cooking spray to ensure the potatoes won’t stick to the surface.

Spicy Roasted New Potatoes with Lemon and Herbs

  • Servings: 4-6
  • Difficulty: easy
  • Print

Ingredients

  • 3 lbs. medium Yukon gold potatoes, unpeeled, quartered lengthwise then cut crosswise into 1-inch chunks. (Since our new potatoes were small, we just cut them in half.)
  • 3 Tbsp., plus ¼ cup extra-virgin olive oil, divided
  • Kosher salt and ground black pepper
  • 3-4 Fresno or jalapeño chilies, stemmed, halved lengthwise, seeded and thinly sliced crosswise
  • 8 medium garlic cloves, thinly sliced
  • 2 Tbsp. cumin seeds, crushed
  • 1 Tbsp. ground coriander
  • 2 Tbsp. grated lemon zest, plus lemon wedges to serve
  • ¼ cup finely chopped fresh cilantro
Directions

  1. Heat the oven to 475°F with a rack in the middle position.
  2. Mist a rimmed baking sheet with cooking spray and line with parchment paper. In a large bowl, toss the potatoes with 3 tablespoons oil and 1 teaspoon salt. Transfer to the prepared baking sheet, arranging the pieces cut side down in a single layer; reserve the bowl. Roast until light golden brown and a skewer inserted into the potatoes meets just a little resistance, about 20 minutes.
  3. Meanwhile, in the reserved bowl, stir together the remaining ¼ cup oil, the chilies, garlic, cumin and coriander.
  4. When the potatoes are almost tender, use a wide metal spatula to transfer them to the reserved bowl; leave the oven on. Gently toss the potatoes until well combined with the seasonings, then scrape the mixture back onto the baking sheet and distribute in an even layer.
  5. Roast until the garlic is light golden brown and a skewer inserted into the potatoes meets no resistance, another 10 to 15 minutes. Cool for about 5 minutes.
  6. Sprinkle the lemon zest and cilantro over the potatoes, then toss. Transfer to a serving dish. Serve with lemon wedges.

http://www.lynnandruss.com

Recipe by Sami Tamimi for Milk Street

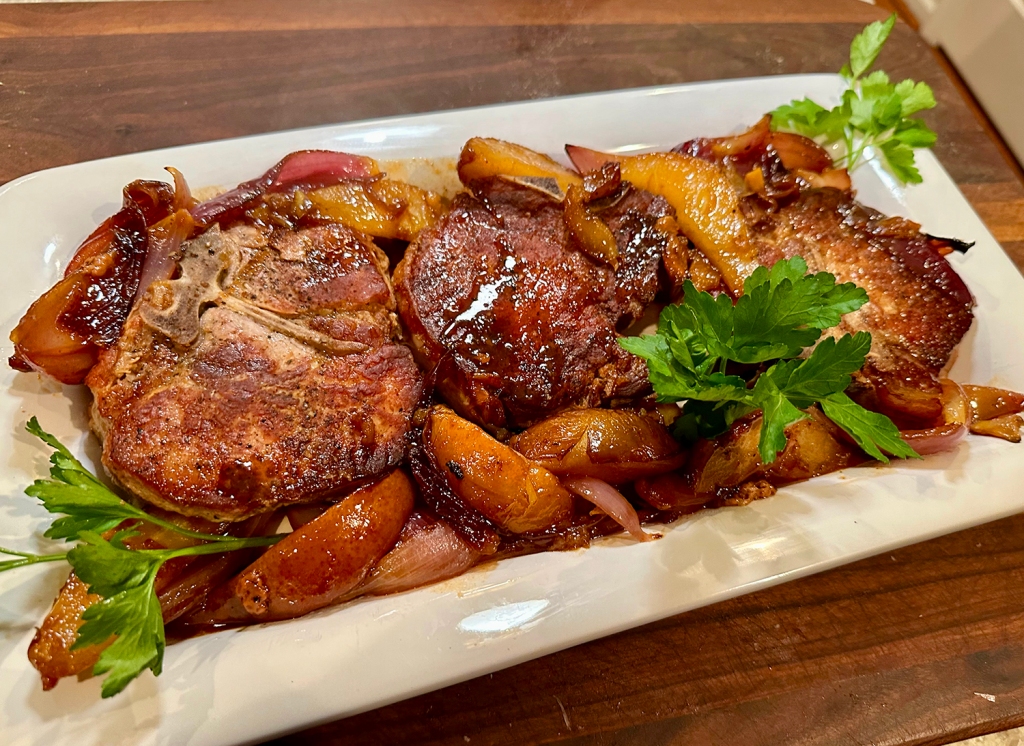
Oven-Braised Pork Chops with Red Onion and Pears

Oh, what a wonderful cool-weather meal. Here’s where you want to get thick, bone-in chops, and take the temperature starting after they’ve been roasting in the oven for 10 minutes. The chops will be ready at 135 F. If they have not reached that temperature, return the skillet to the oven and check the chops’ internal temperature every 5 minutes until they reach the desired temperature. You definitely don’t want them to dry out.

Once the chops are done, remove them to a platter and cover them with aluminum foil. Give the pears and onions a stir, return them to the oven, and cook them until they are tender and the juices are syrupy and dark brown, this could be anywhere from 10-20 minutes depending on how long it took the pork to reach temperature.

The sugar in the honey helps to caramelize the pork, onion, and pears as they oven-braise. It is a technique that works well with other roasted meats and birds as well. Just mix a little honey with the pan juices and baste or brush the roast with that during the last 10 minutes or so of roasting.

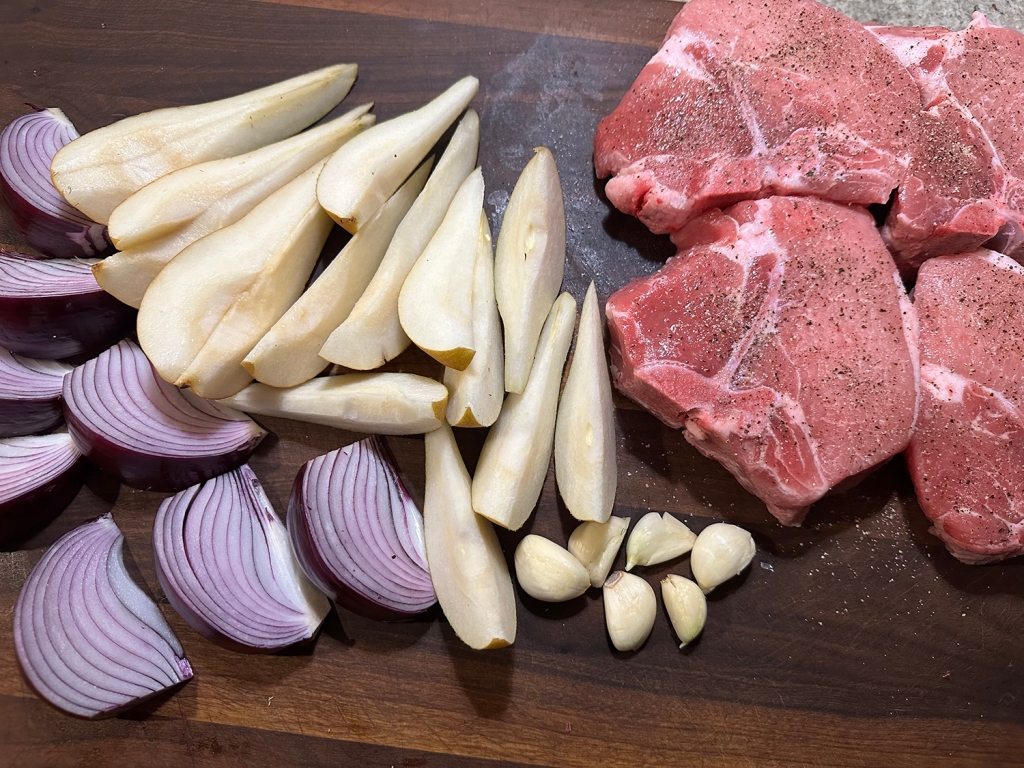
For some dishes, you want the onions cut fine, so they almost disappear. Here, cut the onions large—and the pears, too—so they keep their shape and don’t fall apart. Even when ripe, Bosc pears stay firmer than most, making them just right for this dish.

To ensure juicy results with today’s very lean pork products, use a dry brine before cooking them. For this recipe, pat the pork chops dry with a paper towel. Season the pork chops generously on all sides with sugar, a total of one tablespoon divided between all four. Then season them generously with salt to taste. Place them on a wire rack set in a rimmed baking sheet and refrigerate them, uncovered, for at least 8 hours and up to 24.

Oven-Braised Pork Chops with Red Onion and Pears

  • Servings: 4
  • Difficulty: easy
  • Print

Ingredients

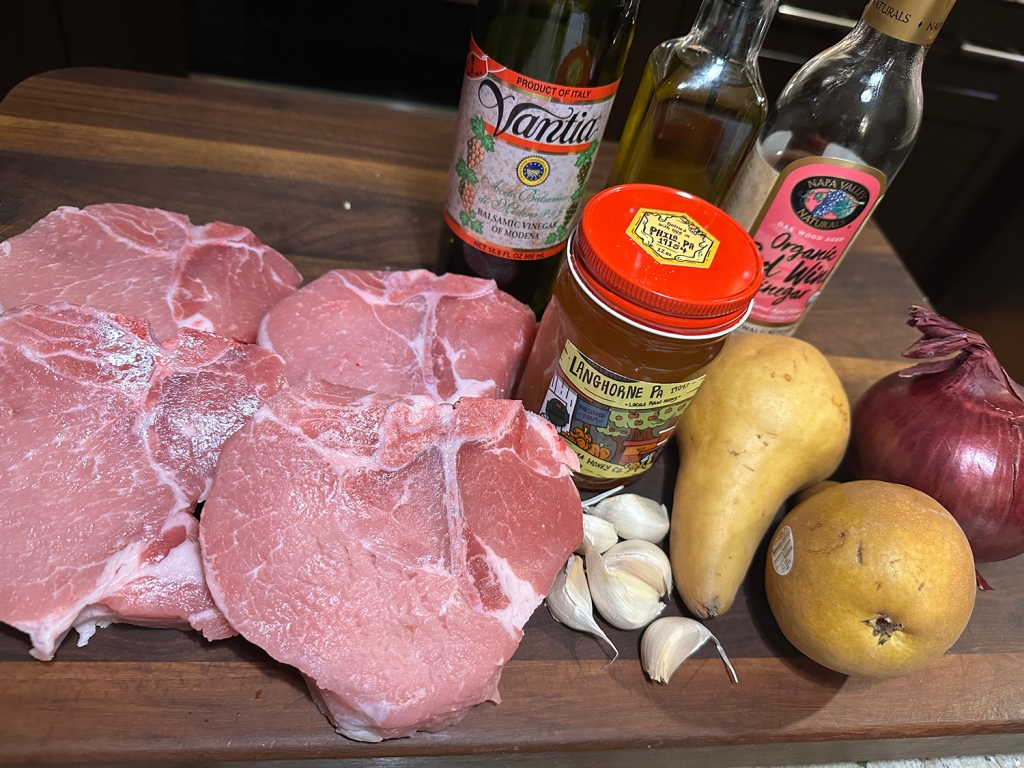
  • 2 cups balsamic vinegar
  • 4 Tbsp. extra virgin olive oil
  • 6 garlic cloves, peeled
  • 4 center-cut pork rib chops, each about 12 oz. and 1 1/4″ inch” thick
  • 1 large red onion (about 12 oz.), cut into 8 wedges
  • Salt
  • Freshly ground pepper
  • 2 ripe but firm bosc pears, peeled, cored and cut into 8 wedges
  • 1/4 cup red wine vinegar
  • 2 Tbsp. honey

Directions

  1. In a small saucepan, bring the balsamic vinegar to a boil over high heat. Adjust the heat to a gentle boil and boil until the vinegar is syrupy and reduced to about 1/2 cup. Set aside.
  2. Preheat oven to 425 degrees F. Season the chops well with salt and pepper on both sides. Heat the oil in a large, heavy skillet with a flameproof handle over medium-high heat. Whack the garlic cloves with the flat side of a knife and scatter them over the oil. Cook, shaking the skillet, until brown, about 2 minutes. Remove the garlic cloves and reserve.
  3. Lay the pork chops in and cook until the undersides are browned, about 5 minutes. Turn the chops and continue cooking them until the second side of the chops has browned, about 5 minutes. Remove the chops to a platter.
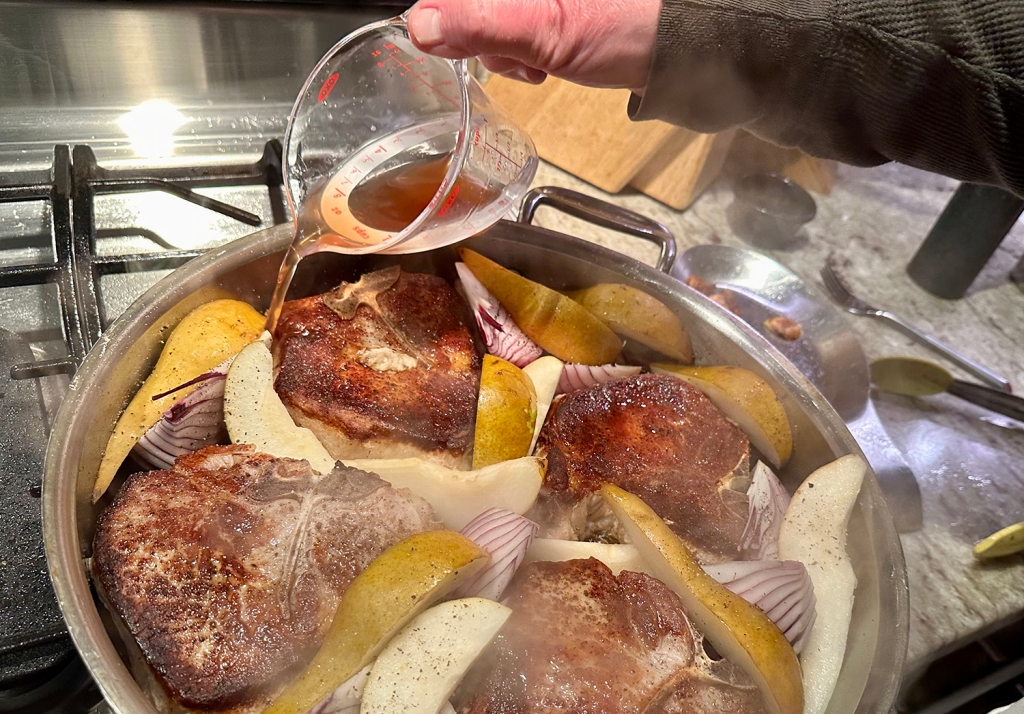
  4. Place the onion and pear wedges in the skillet with the cut side down. Once they are lightly browned, turn them over and brown the other side. Stir the red wine vinegar and honey together in a small bowl until the honey is dissolved. Pour the vinegar/honey mixture into the skillet and bring to a vigorous boil. Return the garlic cloves to the skillet.
  5. Return the chops to the skillet, placing them on top of the pears and onions. Place the skillet in the oven and roast for 10 minutes, then check the internal temperature of the pork chops. The chops will be ready at 135 F. If they have not reached that temperature, return the skillet to the oven and check the chops’ internal temperature every 5 minutes until they reach the desired temperature. Once the chops are done, remove them to a platter and cover them with aluminum foil. Give the pears and onions a stir, return them to the oven, and cook them until they are tender and the juices are syrupy and dark brown, this could be anywhere from 10-20 minutes depending on how long it took the pork to reach temperature.
  6. Remove the skillet from the oven. Return the chops to the skillet and turn to cover them in the pan juices. Place a chop in the center of each warmed serving plate. Check the seasoning of the onion-pear mixture, adding salt and pepper if necessary. Spoon the pears, onion, and pan juices around the chops. Drizzle the balsamic vinegar reduction around the edge of the plate.

http://www.lynnandruss.com

Recipe courtesy of Lidia Bastianich

Roasted Brussels Sprouts with Garlic

So easy, yet so elegant. This recipe for roasted Brussels sprouts from Mark Bittman is an ATK popular version and is perfect as a holiday side dish. If you haven’t yet figured out a go-to recipe, this simple preparation is the answer. It results in sweet caramelized Brussels sprouts which is sure to satisfy just about anyone.

  • Use oven-safe cast-iron pan, as noted above.
  • Getting sprouts brown is important to avoid bitter taste.
  • Smaller quantity of large, hand-selected sprouts is better than big bag of assorted sprouts.
  • Don’t cook more than can fit in pan with cut side down.

Roasted Brussels Sprouts with Garlic

  • Servings: 4-6
  • Difficulty: easy
  • Print

Ingredients

  • 1 lb. Brussels sprouts, trimmed
  • 4-6 Tbsp extra virgin olive oil, to coat bottom of pan
  • 5 cloves garlic, peeled salt and pepper to taste
  • 1 Tbsp. balsamic vinegar (maybe less, to taste)

Directions

  1. Heat oven to 400°F. Trim bottom of Brussels sprouts, and slice each in half top to bottom. Heat oil in cast-iron pan over medium-high heat until it shimmers; put sprouts cut side down in one layer in pan. Put in garlic, and sprinkle with salt and pepper.
  2. Cook, undisturbed, until sprouts begin to brown on bottom, and transfer to oven. roast for 10-20 minutes at 400°F with a few shakes of the pan in between..
  3. Taste, and add more salt and pepper if necessary. Stir in (CAREFUL, NOT TOO MUCH) balsamic vinegar, and serve hot or warm.

http://www.lynnandruss.com

Recipe by Mark Bittman for NYTimes Cooking

Sticky Oyster Sauce Chicken

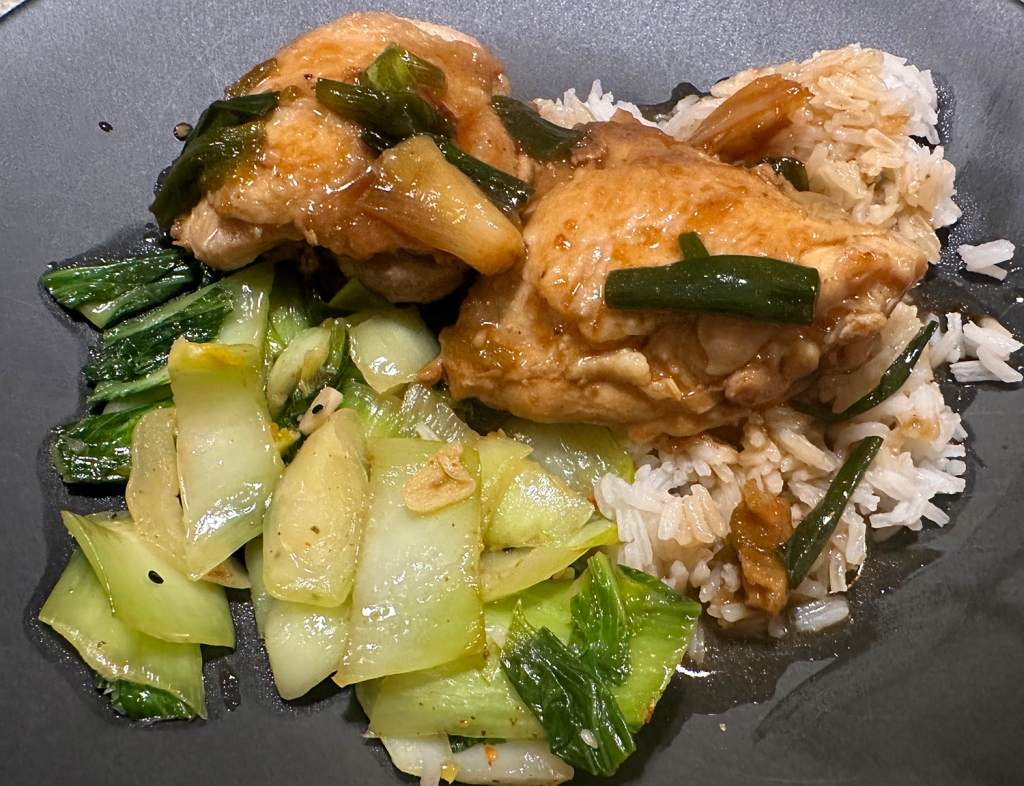
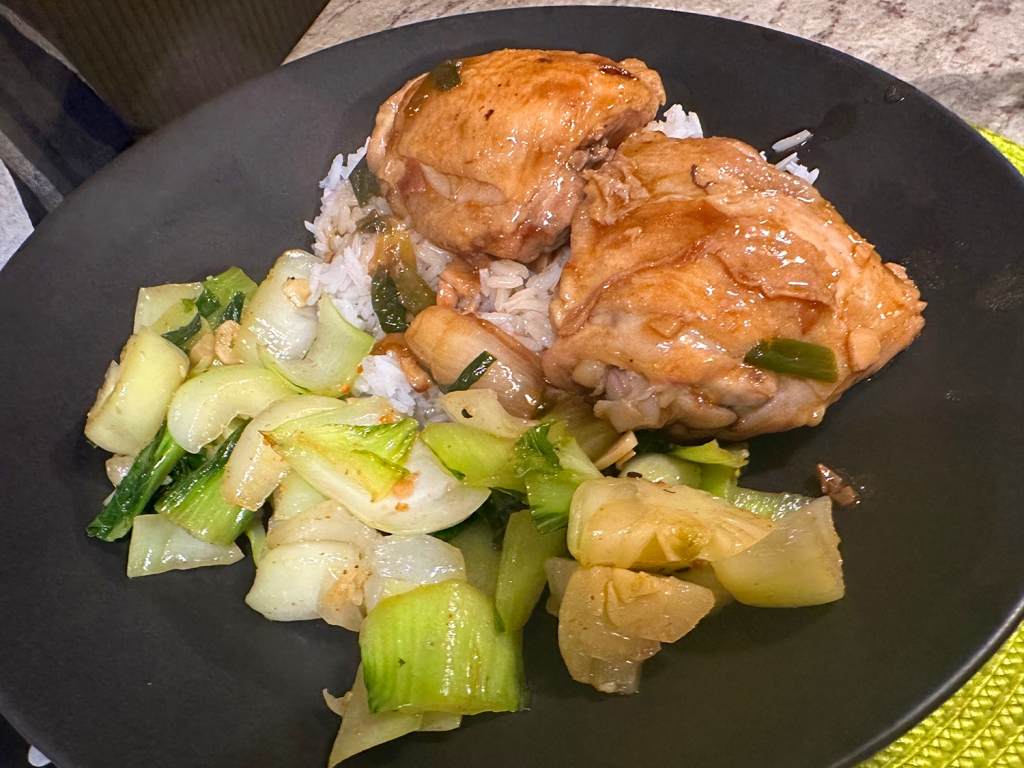
The chicken is infused with intense umami flavor thanks to oyster sauce and a classic trio of Chinese aromatics: scallion (also known as green onions), ginger, and garlic to make for a luxurious, yet simple chicken dish complete with sticky gravy.

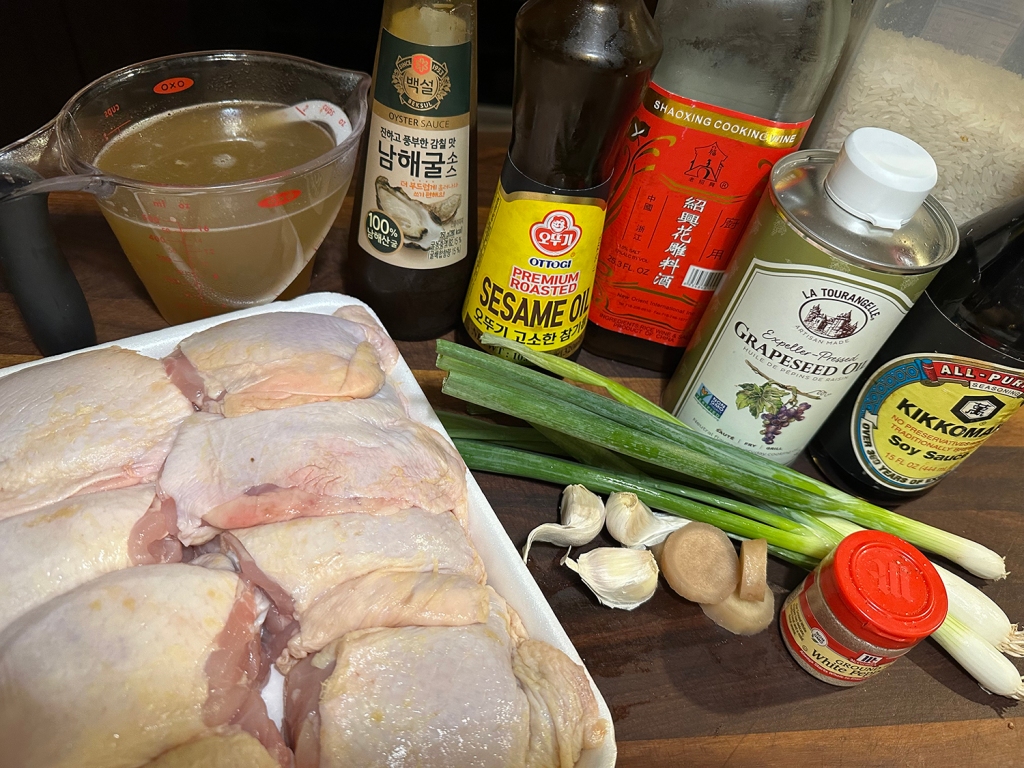
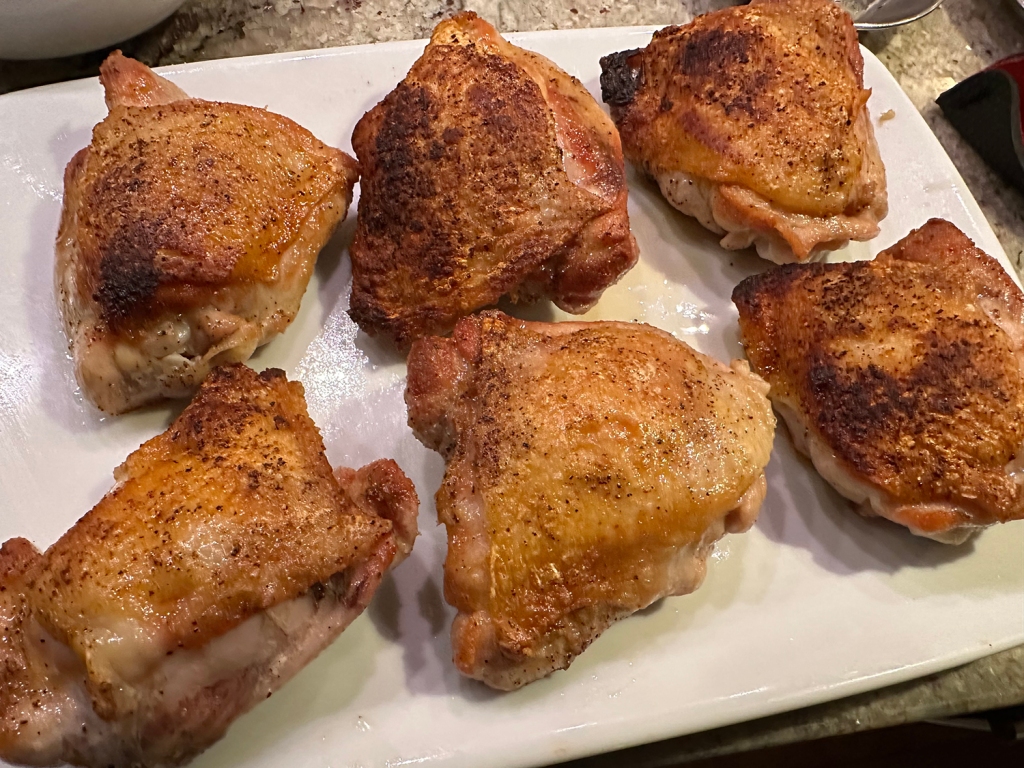
While this recipe calls for 4 whole chicken leg quarters—and I am not a fan—we used 8 bone-in chicken thighs. You may notice that the original recipe does not use cornstarch to thicken the sauce here. But if you simmer it for 5 to 10 minutes and it is still thin, add the cornstarch slurry (we needed to).

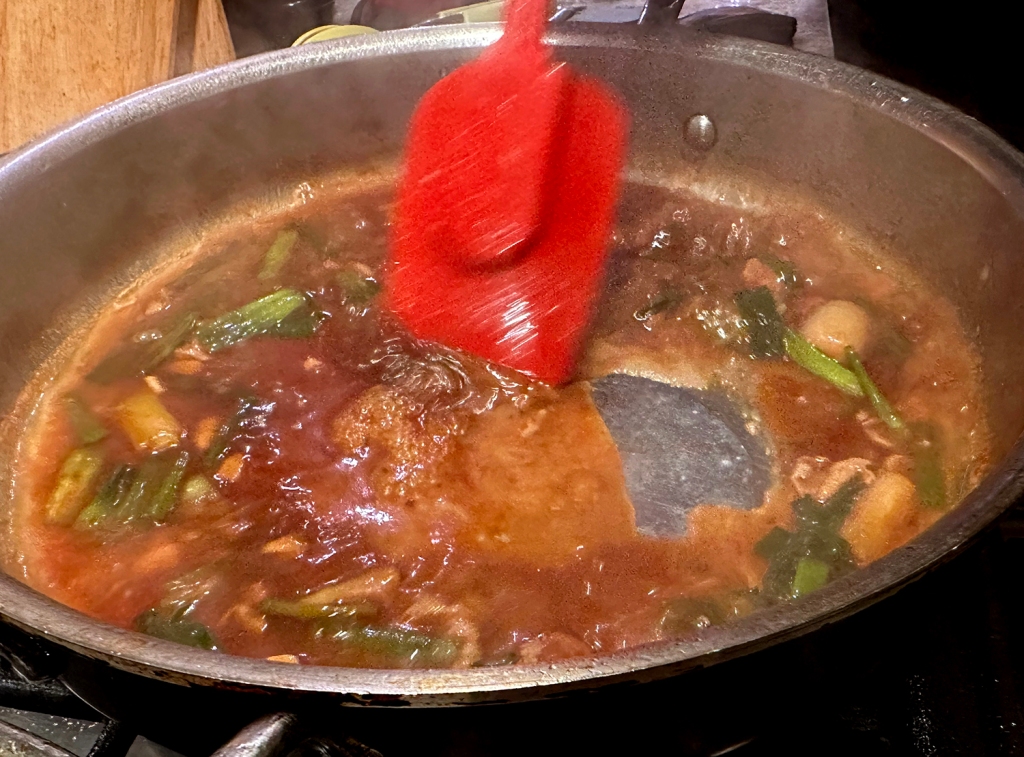
The skin-on chicken is key to getting that nice texture to the sauce. Turn the heat up to reduce the sauce if you like yours on the thicker side, as we do. 

Sticky Oyster Sauce Chicken

  • Servings: 4
  • Difficulty: easy
  • Print

Ingredients

  • 4 chicken leg quarters, or 8 chicken thighs
  • 2 Tbsp. neutral oil, such as vegetable, canola, or avocado oil
  • 4 slices fresh ginger, ¼-inch thick and smashed with the side of your knife
  • 3 cloves garlic, thinly sliced
  • 3 scallions, cut into 2-inch pieces, white and green portions separated
  • ¼ cup Shaoxing wine
  • 2 cups chicken stock, preferably homemade
  • 2 Tbsp. soy sauce
  • 3 Tbsp. oyster sauce
  • ¼ tsp. ground white pepper
  • ½ tsp. sesame oil

Directions

  1. Rinse the chicken and trim off any excess fat. This recipe calls for whole chicken leg quarters, but you can cut them into drumsticks and thighs for easier handling in the wok if desired.
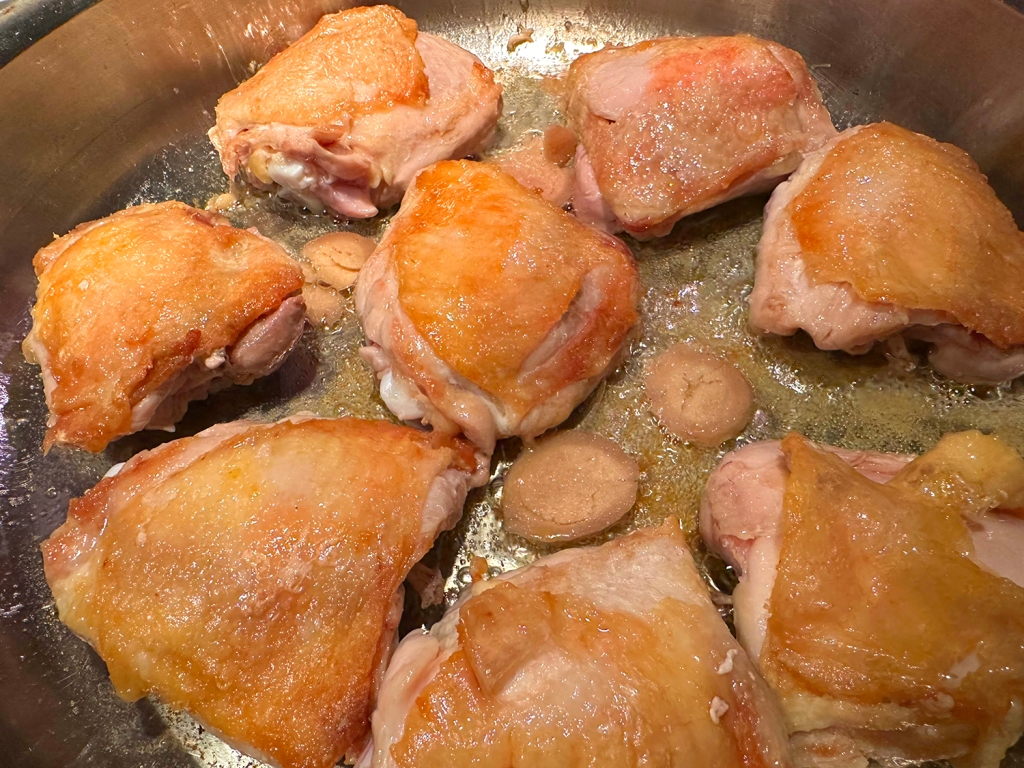
  2. Heat the neutral oil in your wok or a large frying pan over medium high heat, spreading the oil around to coat. Place the chicken skin-side-down in the pan carefully, and sear for about 3 minutes, or until golden brown.
  3. Next, flip the chicken and add the smashed ginger slices to the bottom of the pan. Let both sides of the ginger slices cook and caramelize in the oil for 1 to 2 minutes.
  4. Next, add the garlic slices and white portions of the scallions. Let fry in the oil for a minute. Use a metal spatula to ensure the chicken is not stuck to the wok, but be gentle so as to not break up the chicken skin.
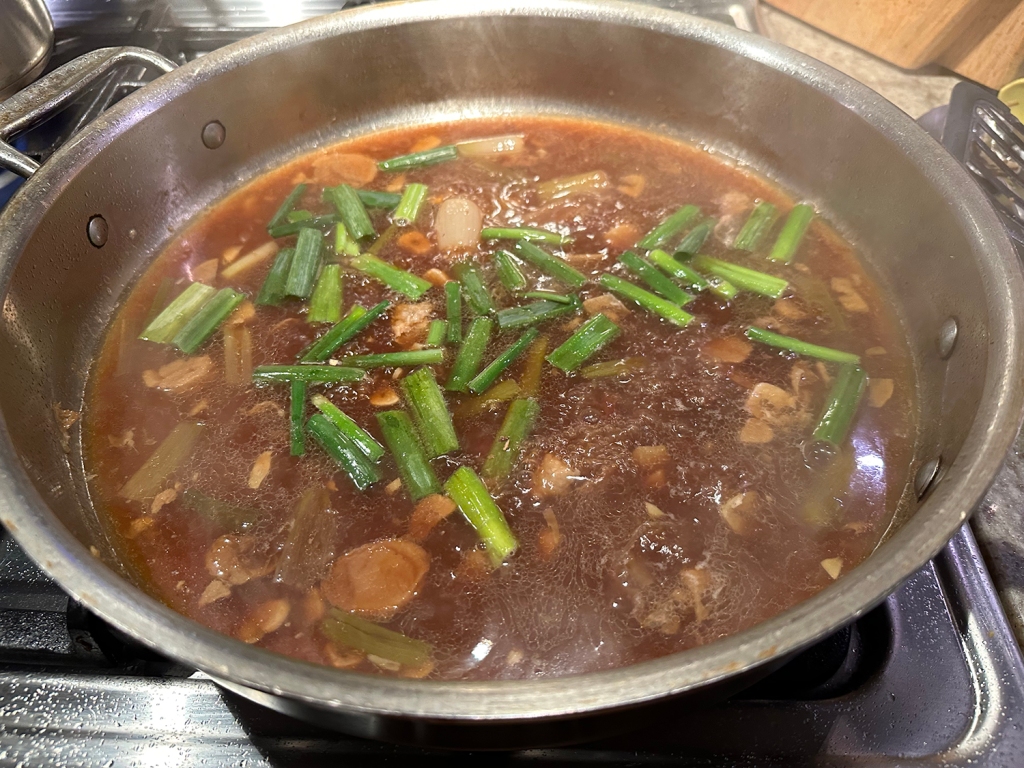
  5. Add the Shaoxing wine to deglaze the pan, and let cook for another 1 to 2 minutes. Add the chicken stock, soy sauce, oyster sauce, white pepper, and sesame oil. Stir until well combined and bring the liquid to a boil. Reduce the heat to a slow simmer. Cover and let cook for 15 minutes.
  6. Use tongs or chopsticks to turn the chicken quarters and let cook for another 15 minutes. There should be quite a bit of sauce in the pan.
  7. Next, uncover the chicken and check the temperature. Use a meat thermometer to check to make sure the internal temperature of the chicken is 165 degrees F. Alternatively, you can just poke the thickest part of the chicken leg quarter with a fork–the juice should run clear. If so, remove the chicken to a plate and cover with tinfoil.
  8. Add the green portions of the scallions to the sauce, and cook uncovered to reduce the liquid until it just begins to coat a spoon. At this point, you can be the judge of how thick or thin you want your sauce to be. Turn the heat up to reduce the sauce if you like yours on the thicker side. If necessary make a cornstarch slurry and add to the sauce to thicken. (It was necessary for us.)
  9. Once the sauce is thickened, add the chicken back to the skillet and cover for about 3-5 minutes.
  10. Serve the chicken, all of that luscious gravy, and the cooked down garlic, ginger, and scallions over a bed of white rice with your favorite veggies. Stir-fried bok choy or garlicky broccoli are great choices.

http://www.lynnandruss.com

Recipe from Bill for the WoksofLife.com

Rigatoni with Artichokes, Basil and Pecorino

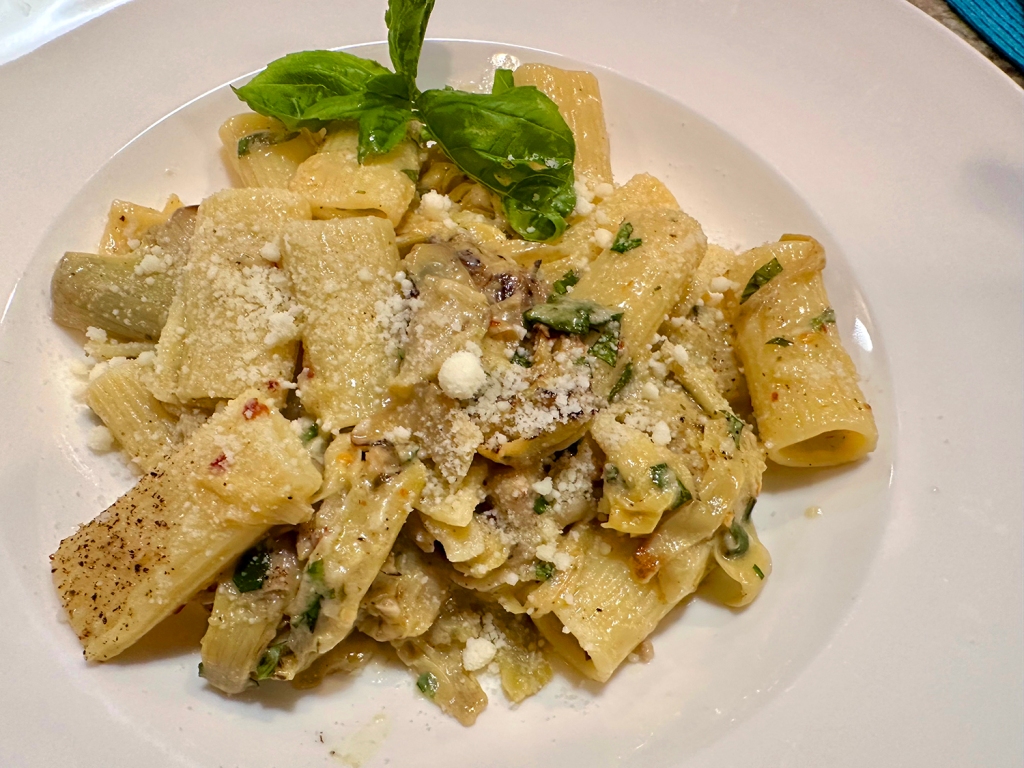
Akin to the dish of pasta fresca con carciofi e pecorino from Bari, Italy, Milk Street formulated this easy adaptation. It is a great weeknight meal with flavors that are bright and fresh, and the prep is a breeze (chopping the basil is as arduous as it gets here).

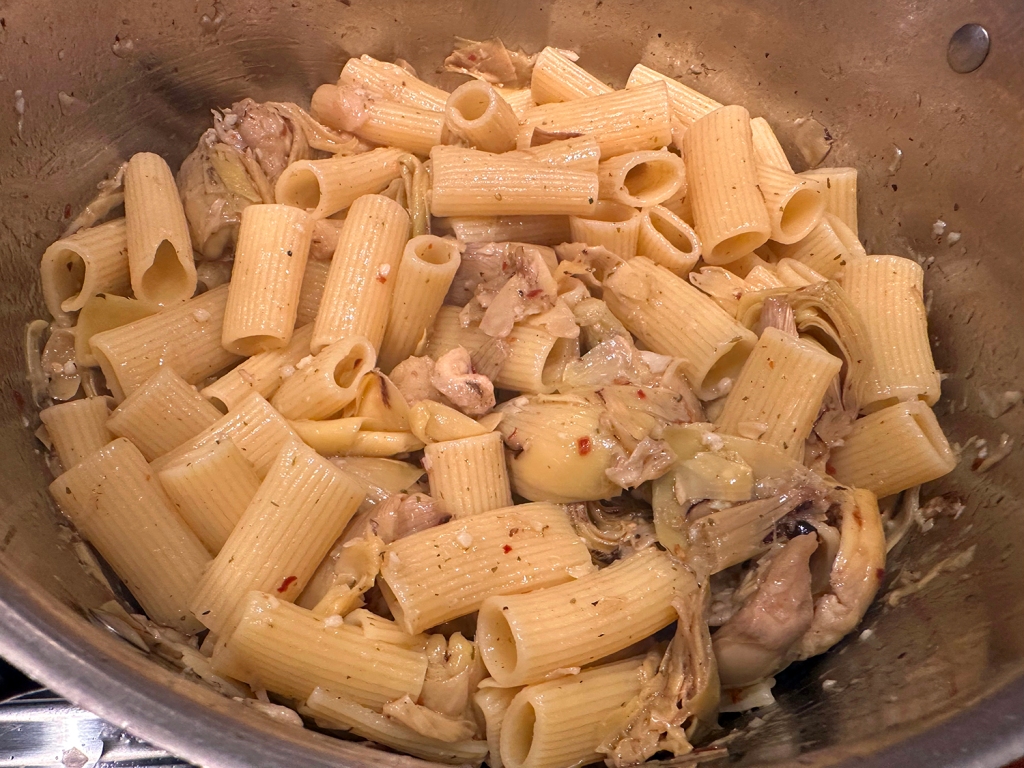
Be sure to purchase jarred marinated artichoke hearts—they offer much more flavor than canned or frozen. You will need three 12-ounce jars to get the 3 cups drained artichokes called for. The hearts usually are halved or quartered; there’s no need to chop them after draining, as they will break apart during cooking.

When draining the artichoke hearts, you may want to use the delicious seasoned oil from the jar in place of at least some of the olive oil.

Served with a side salad, it is a quick, healthy-ish weeknight meal.

Rigatoni with Artichokes, Basil and Pecorino

  • Servings: 4-6
  • Difficulty: easy
  • Print

Ingredients

  • 1 lb. Rigatoni
  • Kosher salt and ground black pepper
  • ¼ cup extra-virgin olive oil
  • 3 cups drained oil-marinated artichoke hearts, patted dry
  • 4 medium garlic cloves, finely grated
  • ½ tsp. red pepper flakes
  • 2 oz. pecorino Romano cheese, finely grated (1 cup)
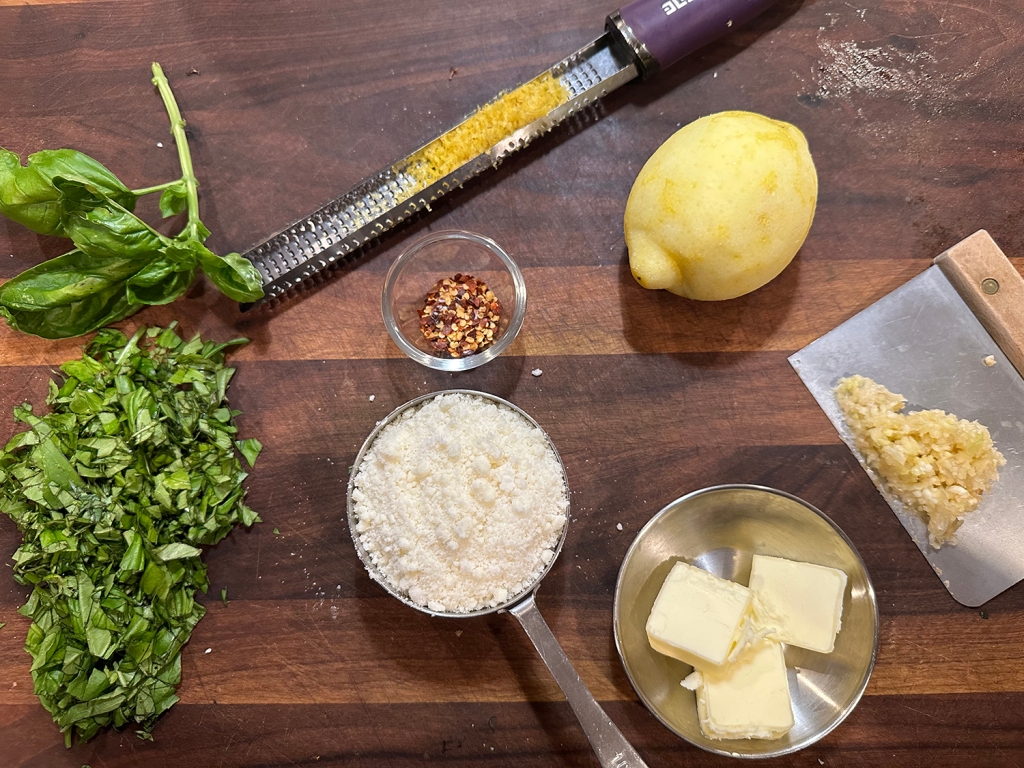
  • 1 Tbsp. grated lemon zest, plus 2 Tbsp. lemon juice
  • 1 cup lightly packed fresh basil, chopped
  • 3 Tbsp. salted butter, cut into 3 pieces

Directions

  1. In a large Dutch oven, bring 4 quarts water to a boil. Stir in the pasta and 1 tablespoon salt, then cook, stirring occasionally, until just shy of al dente. Reserve about 2 cups of the cooking water, then drain the pasta.
  2. Wipe out the pot, add the oil and heat over medium-high until shimmering. Add the artichokes and cook, stirring, until well browned, 5 to 7 minutes.
  3. Add the garlic and pepper flakes, then cook, stirring, until fragrant, about 30 seconds. Return the pasta to the pot, along with 1½ cups of the reserved pasta water. Cook, uncovered and stirring often, until the pasta is al dente and little liquid remains, 3 to 5 minutes.
  4. Remove from the heat. Add the pecorino, lemon zest and juice, basil and butter, then stir until the butter is melted. Stir in additional pasta water 1 tablespoon at a time until slightly saucy. Taste and season with salt and pepper.

http://www.lynnandruss.com

Recipe by Diane Unger for Milk Street
Pumpkin Dark Chocolate Chip Bars

Feeling a little decadent? Or need to create something out-of-the-ordinary for an open house or bake sale? Or just for you? In the Fall, pumpkin reigns king, so why not add a surprise companion with some dark chocolate?

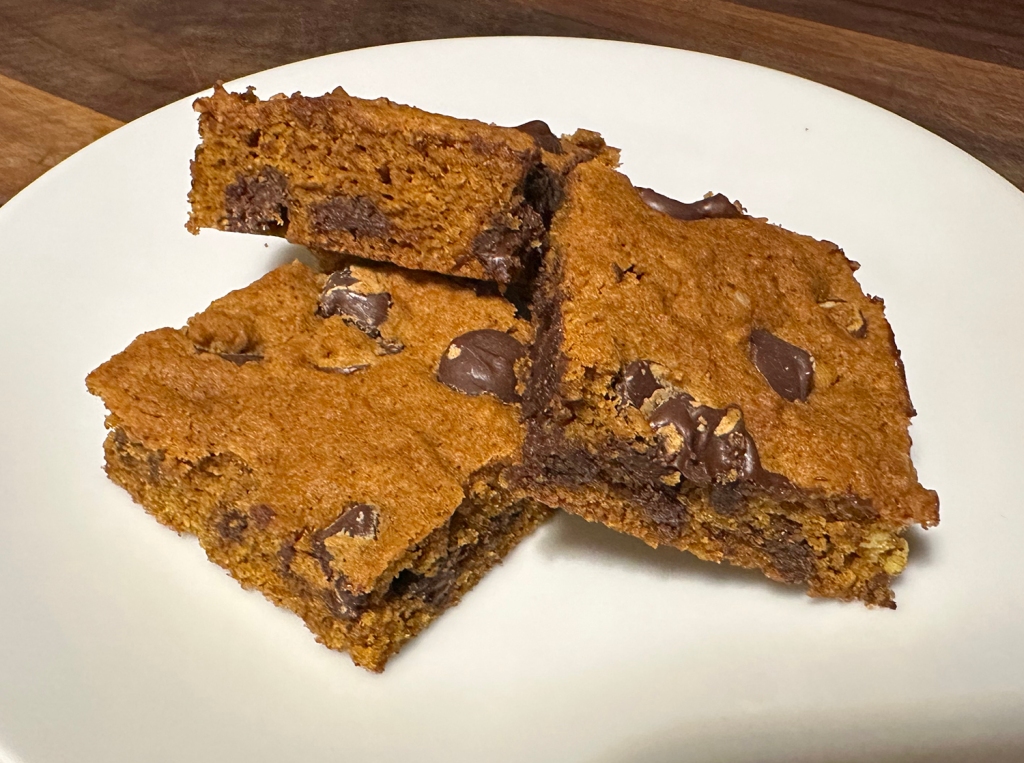
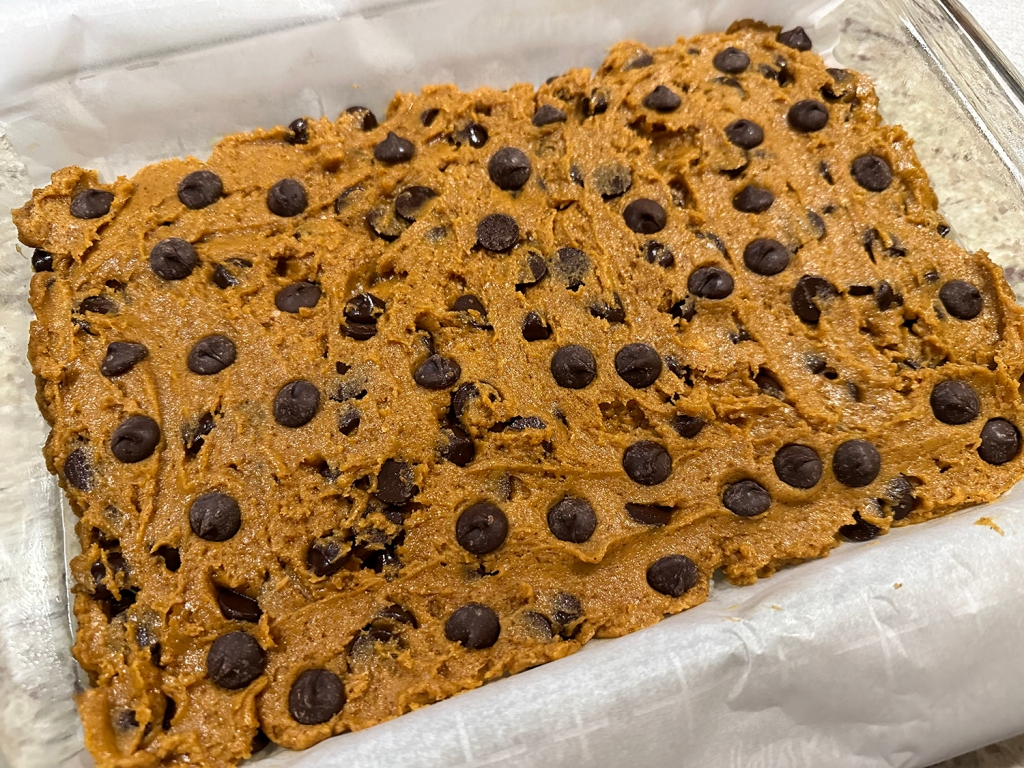
While most pumpkin cookies skew cakey, these bars are as rich and chewy as the center of a chocolate chip cookie. And who doesn’t love those? To counteract the added moisture from the pumpkin purée, this recipe has a few tricks up its sleeve: For starters, it completely ditches the eggs.

Browning the butter does double duty, removing water while also giving the dough a deeper flavor with nutty notes. Baking the bars at a low temperature keeps the edges soft, resulting in an impossibly chewy cookie texture with a warm pumpkin spice flavor and pockets of molten chocolate.

The chocolate pieces take several hours to harden, so you may not want to package them until several hours go by, But in the meantime, go ahead and nosh on a few while they are still warm and gooey.

Pumpkin Dark Chocolate Chip Bars

  • Servings: 24 bars
  • Difficulty: easy
  • Print

Ingredients

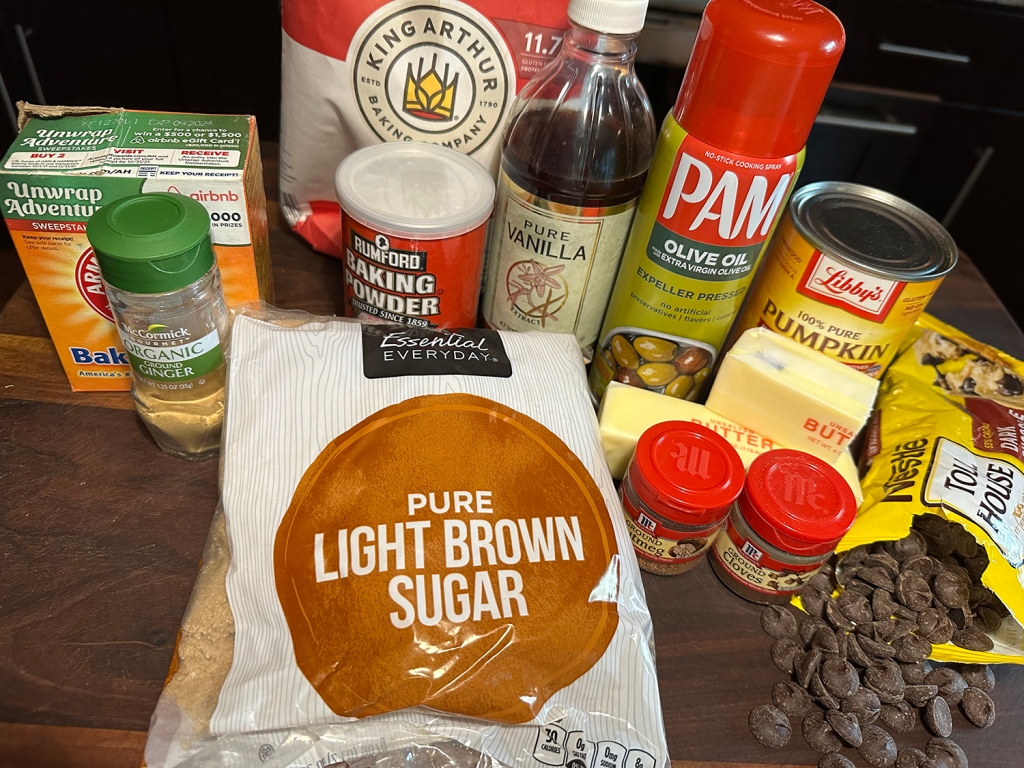
  • ¾ cup unsalted butter (1½ sticks)
  • Nonstick cooking spray or neutral oil
  • 1¾ cups packed light brown sugar
  • ¾ cup canned pumpkin purée (not pumpkin pie filling)
  • 2 tsp. vanilla extract
  • 2½ cups all-purpose flour
  • 2 tsp. ground cinnamon
  • 1 tsp. baking powder
  • 1 tsp. baking soda
  • 1 tsp. kosher salt
  • 1 tsp. ground ginger
  • ¼ tsp. ground cloves
  • ¼ tsp. ground nutmeg
  • 10 oz. bag of dark chocolate chips, save about a 1/2 cup for the topping

Directions

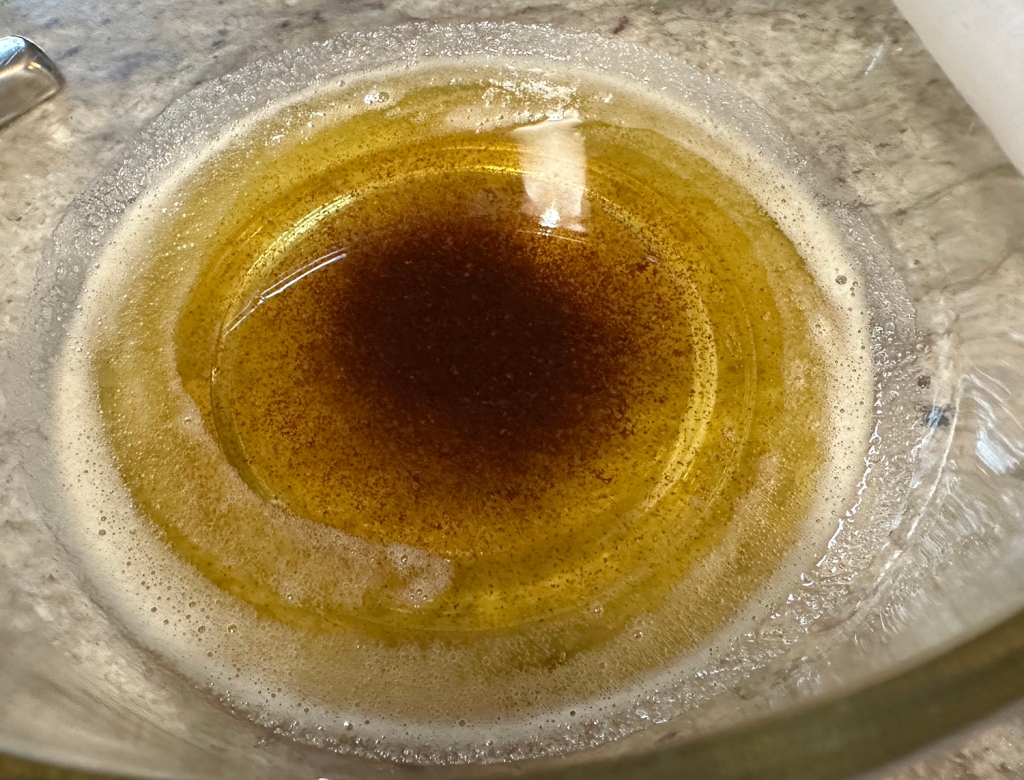
  1. In a small (preferably light-colored) saucepan, melt the butter over medium heat. Continue cooking, stirring constantly to prevent the milk solids from burning, until the butter foams, darkens into a light amber color and becomes fragrant and nutty, about 3 to 4 minutes more. (Watch closely to make sure the butter doesn’t burn.) Immediately pour the butter along with any of the browned milk solids into a large heatproof mixing bowl. Let cool for 20 minutes until warm but no longer hot.
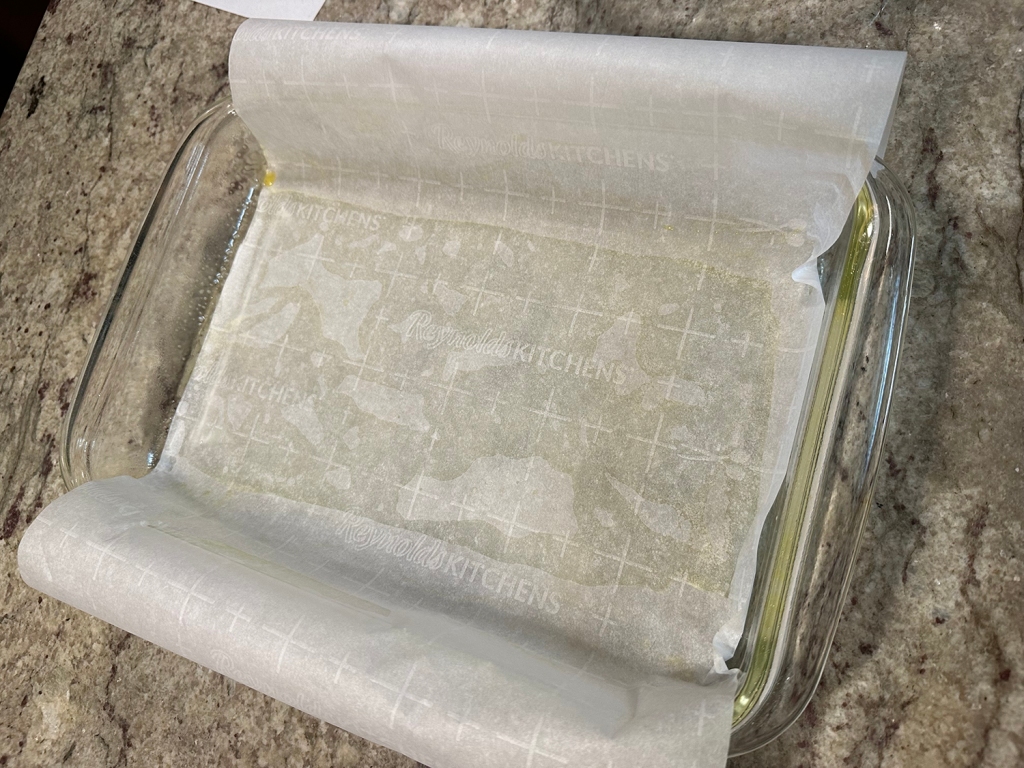
  2. While the butter cools, heat the oven to 325°F. Grease a 9-by-13-inch metal or glass baking pan with cooking spray or oil and line with a strip of parchment paper that hangs over the two long sides to create a sling.
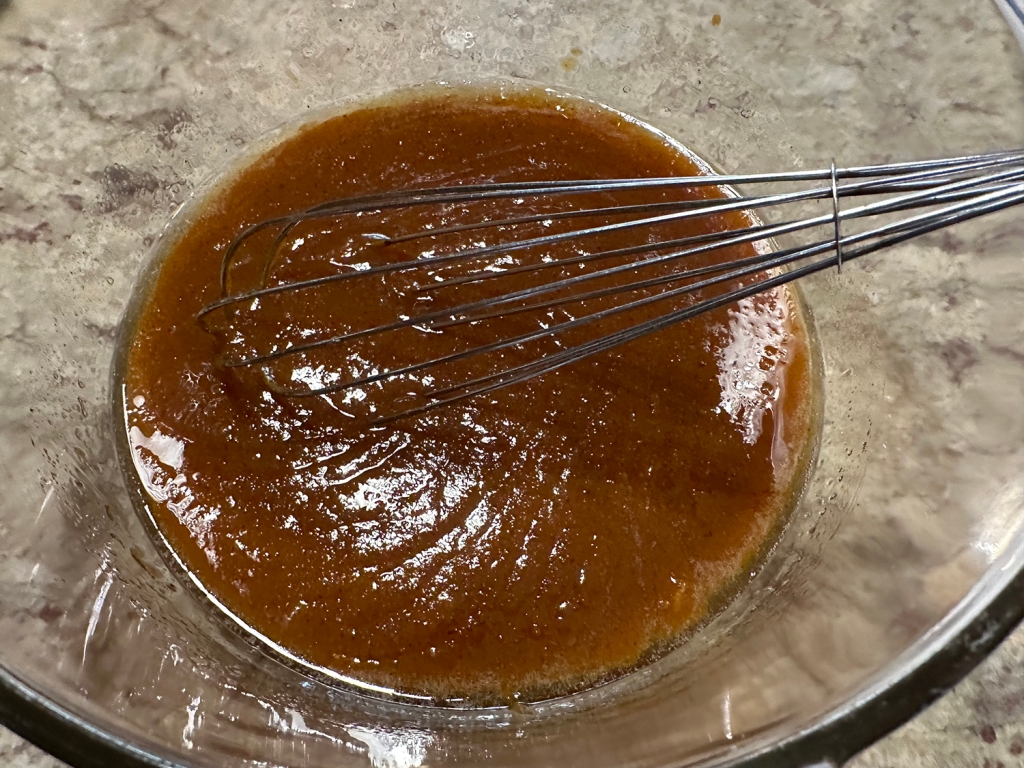
  3. Add the brown sugar, pumpkin purée and vanilla extract to the cooled butter and whisk until smooth and glossy. Add the flour, cinnamon, baking powder, baking soda, salt, ginger, cloves and nutmeg and stir with a spatula just until a soft dough forms with no pockets of unincorporated flour. (Try not to overmix.) Add most of the chocolate chips and stir to evenly distribute throughout the dough.
  4. Transfer the dough to the prepared baking pan and press into an even layer using a spatula. Sprinkle the top with the remaining chocolate chips, pressing them in slightly so they stick.
  5. Bake until the bars are puffed, the top is lightly browned and a skewer or knife inserted into the center comes out clean with just a few moist crumbs attached or with smudges of melted chocolate, 30 to 45 minutes. (Mine took the full 45 minutes.)
  6. Let the bars cool in the pan on a wire rack for at least 1 hour. (Even after cooling for over 2 hours, the chocolate pieces were still too soft to package.) Using the parchment paper, lift the bars out of the pan and cut into 24 squares. The cookie bars will keep in an airtight container at room temperature for up to 5 days.

http://www.lynnandruss.com

Adapted from a recipe by Jesse Szewczyk for NYTimes Cooking

Braised Chicken and Tomatoes with Garlic and Dried Fruits

This braised chicken dish was off-the-charts DELICIOUS! I must admit, the dried prunes and apricots gave us pause, but after their brandy bath, and combined with the sliced shallots, it all melded together with the other ingredients into this pool of yummy jamminess.

Pollo a la catalana, or chicken simmered with wine and dried fruits, is a classic cool weather dish in the Catalonia region of Spain. A contrast of savory flavors and sweet accents characterizes the elegant braise, but there are no hard and fast rules to preparing it. But before you go tweaking it, I suggest you try the recipe as written below.

Barcelona home cook Cali Caparrós Sanchez shared her version with Milk Street, which is studded with apricots and prunes and spiked with a good measure of brandy. Picada (not to be confused with the Italian piccata)—is a blended or pounded pesto-like mix of olive oil, herbs, nuts, garlic and a starchy element such as bread or crackers to act as a binder—is customarily stirred into the dish at the finish. We used a large mortar and pestle to make the picada.

Milk Street adapted her recipe in this version. A mix of olive oil, grated garlic, chopped parsley and chopped smoked almonds (roasted or Marcona almonds are good, too) to spoon onto the braise just before serving.

The sauce wasn’t as thick as we would have liked it when the chicken pieces were ready, so we removed the thighs to a platter, covered with tinfoil, and continued reducing the sauce until it was the consistency we wanted. A portion of the picada was stirred into the sauce, the chicken uncovered, the sauce placed around the thighs, and the picada spooned on. It made a gorgeous presentation!

The smoked almonds may be unconventional, but their smokiness adds depth similar to pimentón. This simpler approach allows the flavors of the braise to be clearer and brighter. Serve with crusty bread and a simple salad; or as we did, with polenta.

NOTE: Don’t cover the pot when simmering the chicken. Allowing evaporation concentrates the braising liquid for richer flavor and consistency in the finished sauce. That said, don’t simmer too vigorously or the liquid may over-reduce and the dish will be left with too little sauce. Adjust the heat as needed to keep the liquid bubbling steadily but not approaching a boil.

Braised chicken and Tomatoes with Garlic and Dried Fruits

  • Servings: 4
  • Difficulty: easy
  • Print

Ingredients

  • 3/4 cup brandy
  • 3/4 cup pitted prunes, quartered
  • 1/3 cup dried apricots, quartered
  • 3 lbs. bone-in, skin-on chicken leg quarters, thighs or drumsticks, trimmed
  • Kosher salt and ground black pepper
  • 1 Tbsp. plus ¼ cup extra-virgin olive oil, divided
  • 1 head garlic, outer papery skins removed, top third cut off and discarded, plus 1 medium garlic clove, finely grated
  • 3 bay leaves
  • 2 medium shallots, halved and thinly sliced
  • 1 cup dry white wine
  • 1 14½-oz. can diced tomatoes
  • 1 cup lightly packed fresh flat-leaf parsley, finely chopped
  • 3 Tbsp. smoked almonds (see headnote), finely chopped

Directions

  1. In a small bowl, combine the brandy, prunes and apricots; set aside. Season the chicken on all sides with salt and pepper. In a large Dutch oven, combine 1 tablespoon of the oil and the garlic head, cut side down. Cook over medium-high until the cut side of the garlic is golden brown, about 3 minutes. Using tongs, transfer the garlic to a small plate or bowl.
  2. Place the chicken skin side down in the pot and cook without disturbing until well browned on the bottom, 5 to 8 minutes. Flip the chicken and cook until the second sides are lightly browned, 3 to 5 minutes. Remove the pot from the heat and transfer the chicken to a large plate, keeping the pieces skin side up.
  3. Return the garlic head, cut side down, to the pot and set the pot over medium. Add the bay and shallots; cook, stirring but leaving the garlic cut side down, until the shallots are lightly browned, 30 to 60 seconds. Add the wine and ¼ teaspoon each salt and pepper; bring to a simmer, scraping up any browned bits. Cook until reduced by about two-thirds, 5 to 7 minutes.
  4. Stir in the tomatoes with juices, dried fruit-brandy mixture and 1¼ cups water, then bring to a simmer. Nestle the chicken skin-side up in the pot and pour in any accumulated juices; the pieces should not be fully submerged. Simmer, uncovered, until a skewer inserted into the largest piece meets no resistance, 30 to 35 minutes. Meanwhile, in a small bowl, stir together the remaining ¼ cup oil, the parsley, almonds and grated garlic; set aside.
  5. Transfer the chicken to a platter. Remove and discard the bay. Using tongs, remove the garlic head and squeeze the cloves into the pot; discard the skins. Stir the garlic into the sauce, then taste and season with salt and pepper. Spoon the sauce over and around the chicken and garnish with the parsley-almond mixture.

http://www.lynnandruss.com

Adaptation from Courtney Hill for Milk Street

Chile Relleno Casserole

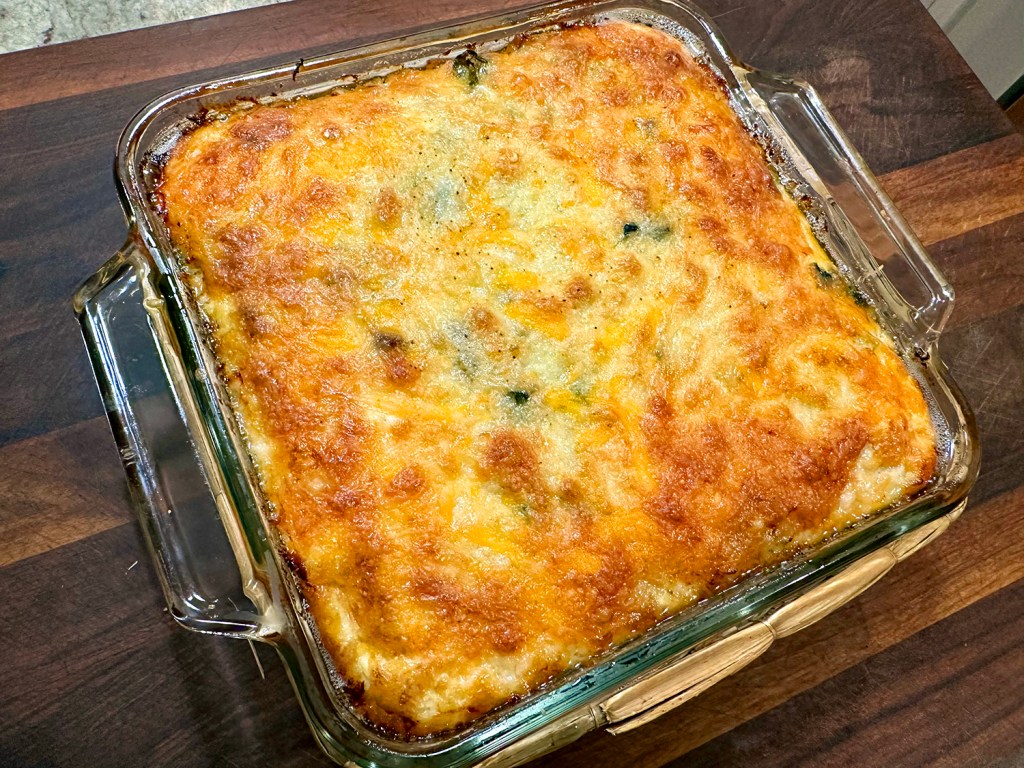
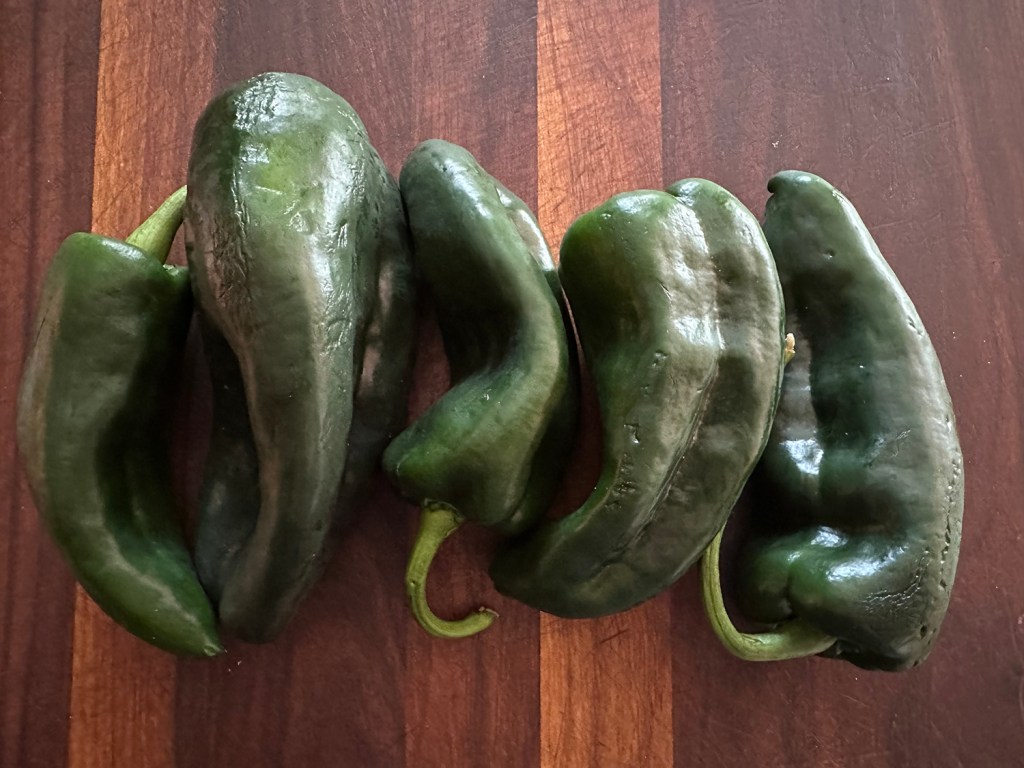
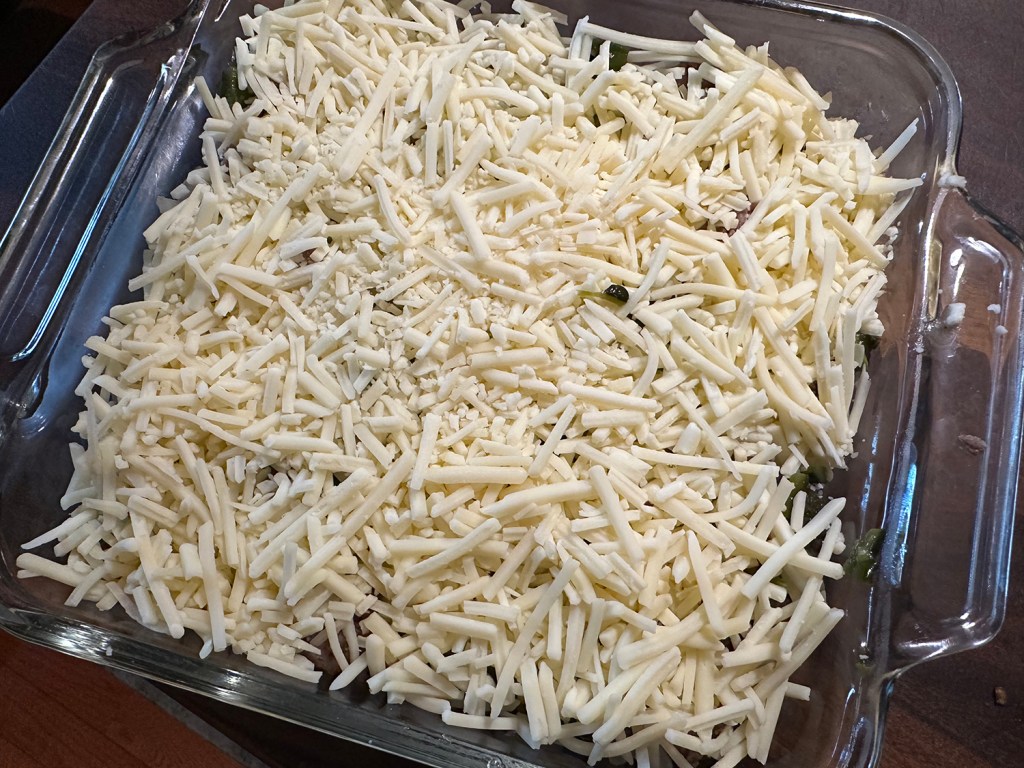
Here is a homey chile relleno casserole with layers of cumin-spiced beef, cheddar, eggs and canned poblano peppers. However, in our area, canned poblanos are impossible to source locally, but they are available online at a few places such as MexGrocer.com. You can use fresh poblanos (see NOTE below), it just will add about 30 more minutes to the prep.

The dish, while very flavorful, is not really spicy at all. If you choose to raise the level of heat, a couple of options would be to add a can of diced green chiles, and/or a few chopped chipotle chiles in adobo sauce stirred into the cooked meat mixture.

Once it comes out of the oven, let it stand for 10 minutes before cutting into it. We paired ours with a side of boxed rice and beans, and a side salad.

NOTE: To use fresh rather than canned poblanos, position an oven rack 4 to 6 inches from the oven’s broiler element; preheat to broil. Place the poblanos on a large, rimmed baking sheet and broil until they brown in spots and blister without charring, watching them carefully and turning them with tongs until they are blistered all over. Transfer them to a heatproof bowl and cover with a plate or pan lid to let them steam and cool enough to be handled, at least 10 minutes, probably longer. When the poblanos are cool enough to handle, use your fingers to carefully remove and discard their skins. Make a vertical slit from the stem end to the tip of each pepper. Gently remove the seeds and stems and open the peppers so the flesh lies flat.
Chile Relleno Casserole

  • Servings: 6
  • Difficulty: easy
  • Print

Ingredients

  • 1 lb. ground beef, preferably 90/10 blend
  • 1 cup (4 oz.) chopped yellow onion
  • 2 tsp. ground cumin
  • 1 tsp. fine salt, divided
  • 3/4 tsp. freshly ground black pepper
  • Unsalted butter, for greasing
  • 1 (27 1/2-oz.) can whole poblano peppers, drained (may substitute 6 large fresh poblanos; see Note)
  • 2 cups (8 oz.) shredded cheddar cheese
  • 1/4 cup all-purpose flour
  • 1 1/2 cups whole milk
  • 4 large eggs, beaten

Directions

  1. Position a rack in the middle of the oven and preheat to 375 degrees.
  2. In a large skillet over medium-high heat, cook the beef and onions, breaking up the meat with a wooden spoon and browning the beef until it just starts to turn crispy, about 10 minutes. Using a slotted spoon, transfer the mixture to a medium bowl, leaving behind as much fat as possible in the pan. Season the mixture with the cumin, 3/4 teaspoon of the salt and the black pepper.
  3. Grease a 9-inch square baking dish with the butter or the fat rendered from the beef. Gently remove the stems and seeds from the poblanos and open the peppers so the flesh lies flat. Line the bottom of the pan with the poblanos, skin side down, overlapping them some to cover completely. Chop any remaining poblanos and set aside. Layer the meat-onion mixture over the whole poblanos and top with the shredded cheese and the reserved chopped peppers.
  4. In a medium bowl, whisk together the flour and the remaining 1/4 teaspoon of salt. While whisking, gradually pour in the milk, breaking up any clumps of flour. Whisk in the eggs and pour the mixture evenly into the baking dish.
  5. Bake the casserole for 45 minutes, or until it has puffed and browned. Remove from the oven and let stand at room temperature before cutting into it.

Make ahead: The unbaked casserole can be assembled, covered tightly and refrigerated for up to 2 days. Rest it on a countertop for about 30 minutes; then bake as directed.

http://www.lynnandruss.com

Adapted from a recipe by Caroline Hatchett for the Washington Post

Smoky, Savory German Fried Potatoes

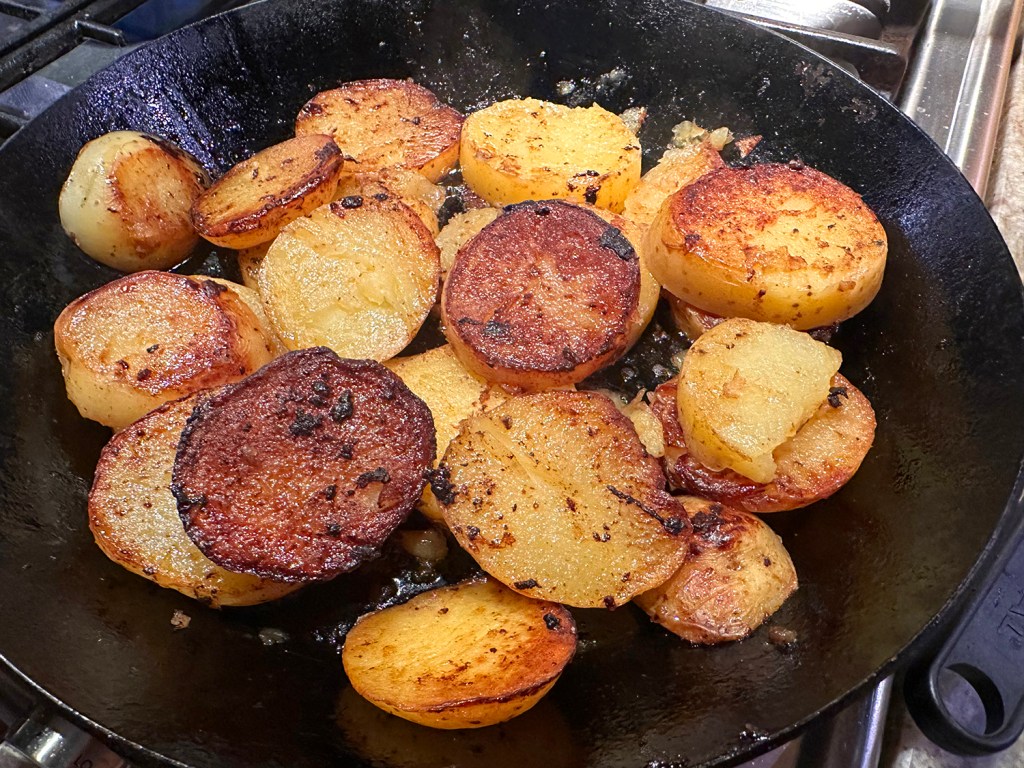
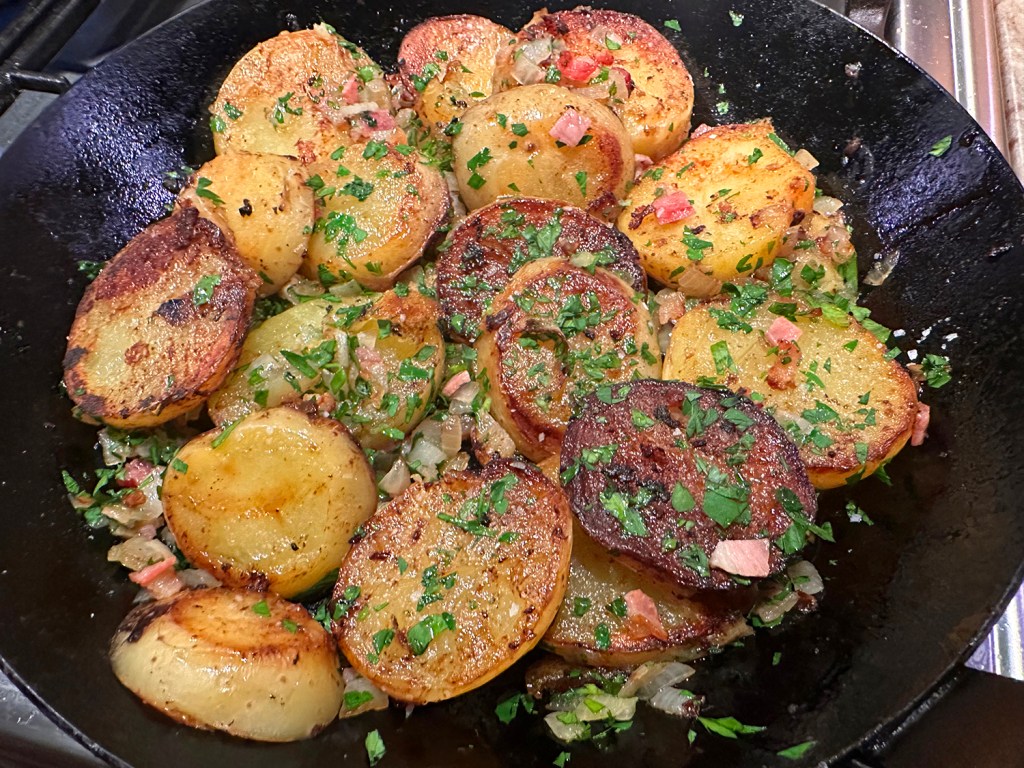
FYI, bratkartoffeln is a comforting German side dish of pan-fried potatoes, bacon, onions, and fresh herbs. For tender, golden-brown potatoes with slightly crisp edges, infuse them with smoky flavor from the bacon and slight oniony sweetness.

While the dish is typically made with leftover boiled potatoes, this recipe starts with raw, so the potatoes are cooked in a covered skillet, allowing them to steam and absorb flavor. When the lid is removed, the potatoes are allowed to brown and crisp around the edges.

Due to the fact that the potato slices did not fit in one layer in the skillet, they had to be jockeyed around several times (instead of just twice) while covered. And again with the lid off.

We left the potato skins on, even though the recipe instructs to peel them. The skins have additional nutritional value, plus it adds some texture to the dish. To peel, or not to peel, that is the question. That decision is up to you. Ours were served as a side dish, along with glazed carrots, for a sliced steak entrée.

Note from America’s Test Kitchen: For the most traditional flavor use a hickory-smoked bacon. If the bacon is difficult to chop, place it in the freezer for 10 to 15 minutes to firm it up. These rich, hearty potatoes pair nicely with bratwurst, schnitzel, or scrambled eggs.

Smoky, Savory German Fried Potatoes

  • Servings: 4
  • Difficulty: easy
  • Print

Ingredients

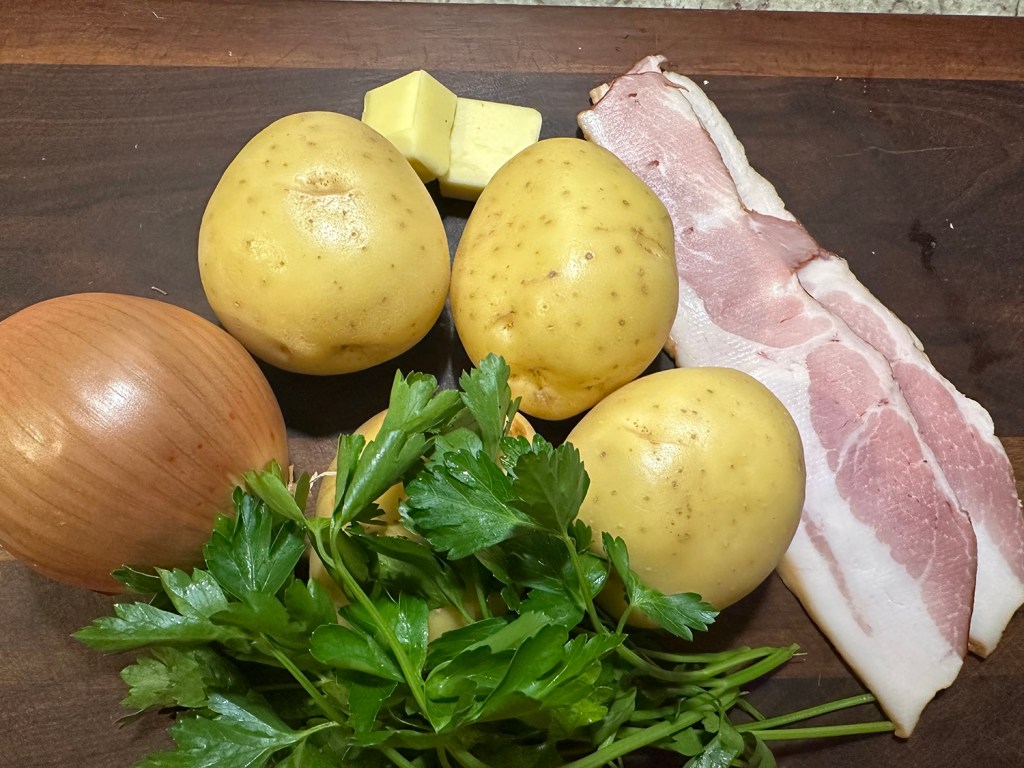
  • 3 slices bacon, chopped fine
  • ½ cup finely chopped onion
  • 2 Tbsp. unsalted butter
  • 2 lbs. Yukon gold potatoes, peeled and sliced crosswise ½ inch thick
  • ½ tsp. table salt
  • 1 Tbsp. chopped fresh parsley

Directions

  1. Cook bacon in 12-inch nonstick or carbon-steel skillet over medium-high heat until golden brown at edges and just starting to render, 3 to 5 minutes. Add onion and continue to cook until onion is soft and golden brown, 3 to 5 minutes. Using slotted spoon, transfer bacon and onion to bowl, leaving fat in skillet (you should have about 1 teaspoon).
  2. Add butter to bacon fat and melt over medium heat. Add potatoes and salt and stir to coat potatoes evenly with fat. Cover and cook, shaking pan occasionally, for 9 minutes. After 9 minutes, potatoes should be bubbling at edges; if there is no moisture around potatoes, lower heat slightly; if there is no or little sizzling around potatoes, increase heat slightly. Cover and continue to cook until potatoes can be easily pierced with tip of paring knife, 6 to 9 minutes.
  3. Remove lid and gently stir potatoes (it is OK if some potatoes break). Continue to cook, uncovered, gently stirring every 2 to 3 minutes until potatoes are golden brown (not all surfaces will be brown), about 10 minutes.
  4. Gently stir in bacon, onion, and parsley. Season to taste with salt and pepper, transfer to platter, and serve.

http://www.lynnandruss.com

Recipe by Erica Turner for Cook’s Illustrated

Tuscan Farro Soup with White Beans and Vegetables

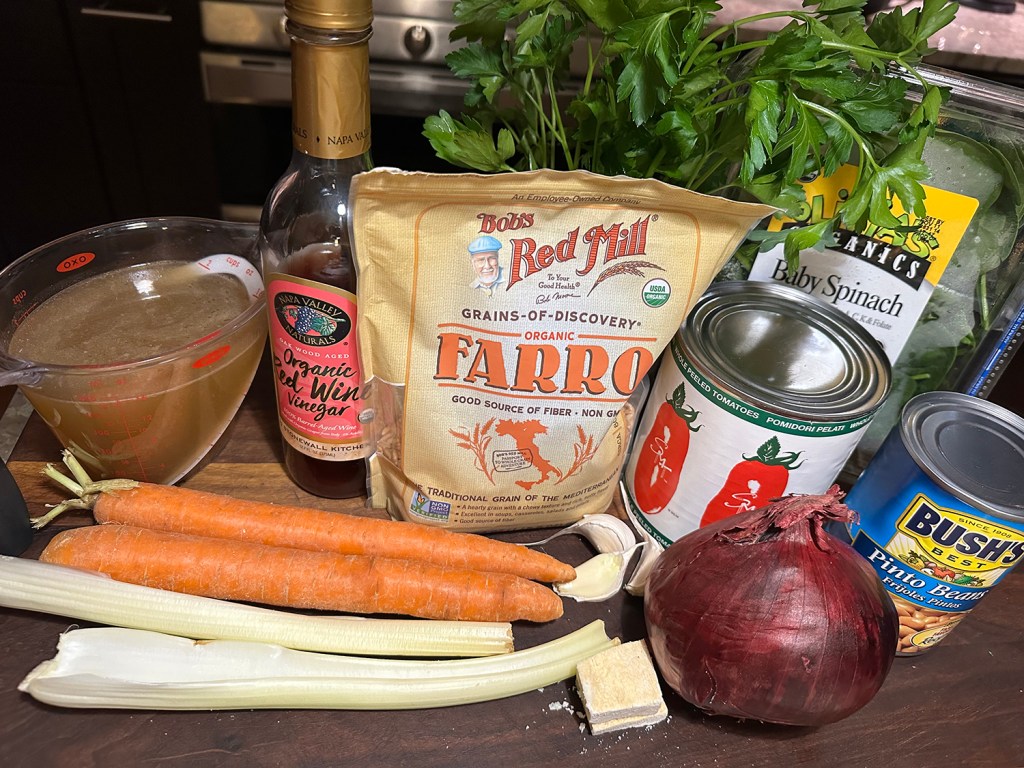
So tasty and so healthy! This warm-your-belly farro soup is quite easy to make; and it’s all done in one-pot which means fewer dishes. On a busy weeknight, this may be your ticket to something healthy, nutritious and pretty hands-off. To keep it vegetarian, use vegetable stock. That was not an issue for us so we used 6 cups of homemade chicken stock.

Farro soup with white beans and vegetables is a rich, hearty, and flavorful meal. Eat it on its own, pair it with crusty garlic bread or a simple salad and dinner is served! It’s like a hug in a bowl to keep you warm on chilly nights! And that is exactly the reaction we got.

We adapted the recipe slightly by including two cans of white beans instead of one. Since baby spinach is typically packaged in a 5-ounce clamshell, we included the entire thing instead of 2 cups. A nice toasted piece of garlic bread was the perfect companion!

Missing, or not fond of, some of the ingredients? Don’t worry, here are some substitutes:

  • Farro substitutes: While farro is traditional in this soup, you can use other grains like barley, spelt, freekeh, coarse bulgur, quinoa, or brown rice. Brown rice and quinoa are good ways to turn this soup into a gluten-free-friendly meal. 
  • Add mushrooms: Cut mushrooms of your choosing into bite-sized pieces and saute them along with the carrots, onion, and celery. From there, follow the recipe as written. 
  • Instead of spinach, you can use baby kale. Kale in general is tougher than spinach, and takes more time to wilt down. Baby kale is a bit softer, but will still likely have more body than spinach, even after sitting in the broth for a while. 
  • Vegan option: Use vegetable stock and omit the parmesan rind and cheese for a vegan alternative. Without the parmesan rind, you will lose some of the nutty, rich flavor. If you want to mimic this flavor, use a little nutritional yeast. You can add 2 to 3 teaspoons right after you add the stock. It will dissolve quite quickly. 

Tuscan Farro Soup with White Beans and Vegetables

  • Servings: 4
  • Difficulty: easy
  • Print

Ingredients

  • Extra virgin olive oil
  • 1 medium red onion, halved and thinly sliced
  • 1 to 2 carrots, peeled and sliced into ¼-inch thick rounds
  • 2 celery sticks, chopped
  • Kosher salt
  • 2 large garlic cloves, minced
  • 6 cups vegetable or chicken stock
  • 1 28-oz. can whole San Marzano tomatoes, crushed by hand
  • 2 15-oz. cans white beans, drained and rinsed
  • 1 cup farro, rinsed and drained
  • 1-inch Parmesan rind
  • 5 oz. fresh baby spinach
  • 1 cup chopped parsley
  • 2 Tbsp. red wine vinegar
  • Grated Parmesan for serving

Directions

  1. In a large Dutch oven or pot, heat 2 tablespoons extra virgin olive oil over medium heat until shimmering. Add the onions, carrots, and celery. Season with a little kosher salt and cook, tossing occasionally until the vegetables have softened.
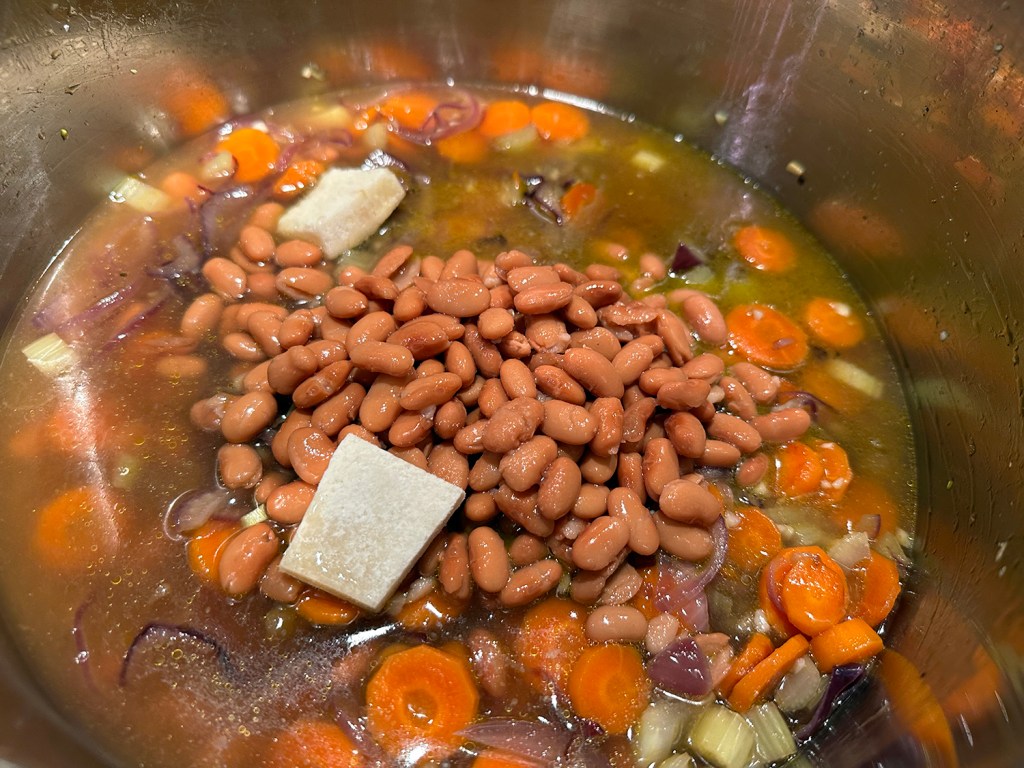
  2. Add the garlic and toss for 30 seconds or so, then add the tomatoes, stock, white beans, farro, and parmesan rind.
  3. Bring the liquid to a boil, then lower the heat watching for the steady, gentle simmer. Allow the soup to simmer until the farro is tender, about 30 minutes or so.
  4. Turn the heat off and remove the Parmesan rind (sometimes the rind will have dissolved into the soup). Stir in the spinach, parsley, and red wine vinegar.

http://www.lynnandruss.com

Adapted from a recipe by Suzy Karadsheh

A Fabulous Turkey Chili

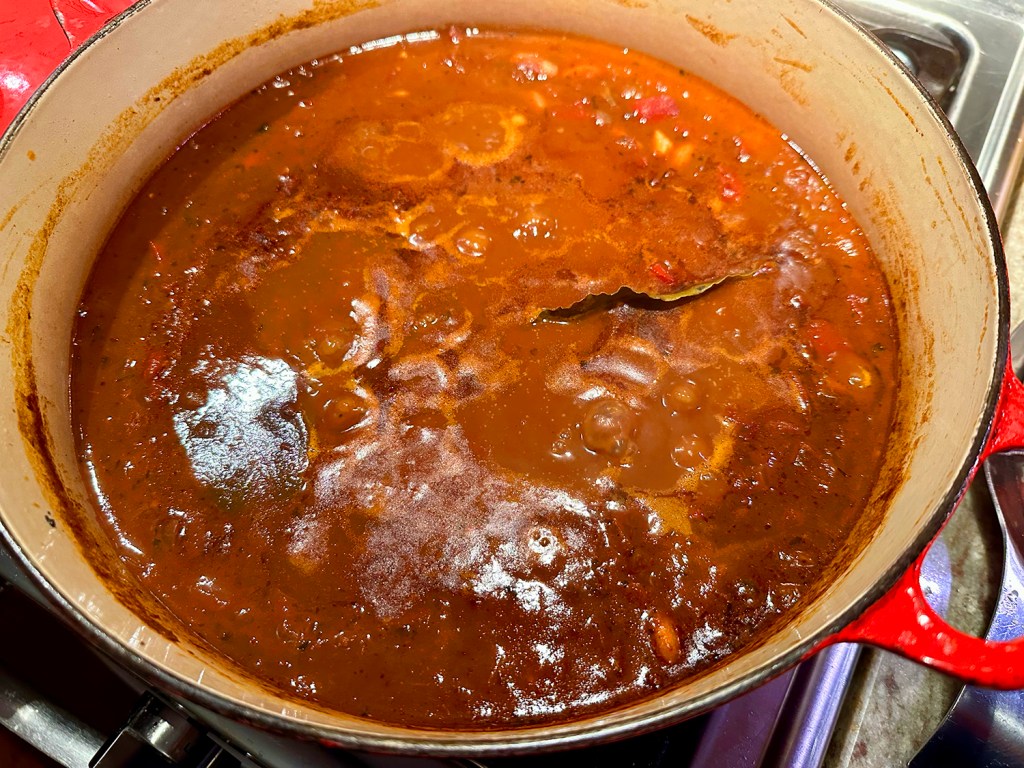
Cool weather, football season, toasty fireplaces, altogether signal chili season for us. So upgrade that vintage package of chili powder seasoning lurking in the back of your cabinet with something that takes a little more effort, but provides a welcome depth of flavor. Let this hearty turkey chili recipe guide you. To make it, you’ll blend a robust purée of dried chiles and canned chipotles to serve as the soup’s base. 

Building a custom chile blend allows you to create the chili of your dreams, which is to say: don’t worry too much if you can’t find the exact chiles that are recommend. Dark ancho chiles are smoky and have a raisiny sweetness; skinny, wrinkly pasillas a rich jamminess; and smooth-skinned guajillos bring bright red color and acidity. If you need to swap one out, aim for something around the same heat level. Feel free to make a double batch and stick half in the freezer (for up to 6 months) to make satisfying your next weeknight chili craving even easier. Of course, you’d need two large pots to pull that off.

Dark meat turkey is preferred for its richer flavor and fat content, but if all you have in the fridge is lean ground turkey or ground chicken, it’ll work. Brown it in batches to get a really good sear—the crusty fond that forms on the bottom of the pot is big-time flavor. When you sauté the onion, use a wooden spoon to scrape up all those bits (the steam from the veggies will help release them) and stir them into the mix. The flavor a bottle of hard cider or beer added to chili is preferred, but if you’d rather cook without alcohol, substitute fresh apple cider, a can of crushed tomatoes or tomato juice, or add a cup more water instead.

Round out the soup with creamy white beans, but any canned bean will be a good substitute such as red kidney beans, pinto beans, or black beans. Like many comfort foods, chili is personal: put out bowls of shredded cheddar cheese, thinly sliced green onion, or pickled jalapeños, if you like. Serve with broken tostadas or tortilla chips for scooping or cornbread for dunking.

With any leftovers, create another meal by filling sweet baked potatoes topped with shredded cheese of your choice, or how about a platter of nachos to go with that football game? While we’ve made (and posted) many a chili recipe, this one has now taken the top spot overall!

A Fabulous Turkey Chili

  • Servings: 6-8
  • Difficulty: moderate
  • Print

Ingredients

  • 4 cups chicken broth, preferably homemade
  • 3 large or 6 medium ancho chiles (we used dried)
  • 2 dried guajillo chiles
  • 2 dried pasilla chiles
  • 2 canned chipotle chiles in adobo
  • 4 Tbsp. vegetable oil, divided
  • 3 lb. ground turkey, preferably dark meat
  • Kosher salt
  • 2 onions, finely chopped
  • 5 garlic cloves, smashed
  • 1 Tbsp. ground cumin
  • 2 tsp. dried oregano
  • 2 Tbsp. tomato paste
  • 1 12-oz. bottle hard cider or lager-style beer
  • 1 3” cinnamon stick
  • 2 bay leaves
  • 2 15.5-oz. cans cannellini beans, drained, rinsed
  • 2 15-oz. cans of fire roasted diced tomatoes, undrained
  • 3 Tbsp. pure maple syrup
  • 2 Tbsp. fresh lime juice (from 1–2 limes), optional
  • Handful of cilantro leaves and stems, finely chopped
  • Freshly ground black pepper
  • Tostadas (for serving)

Directions

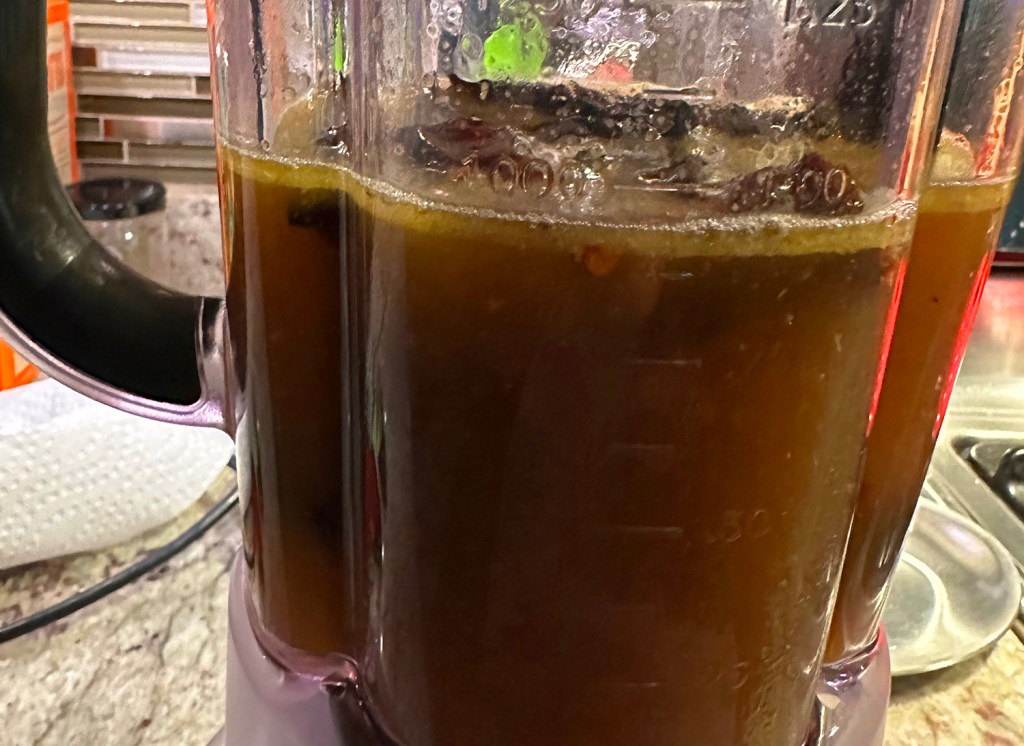
  1. Bring 4 cups low-sodium chicken broth to a simmer on stovetop in a large Dutch oven or other heavy large pot. Meanwhile, remove and discard stems from 3 large or 6 medium ancho chiles, 2 dried guajillo chiles, and 2 dried pasilla chiles. Tear flesh into a few pieces, letting seeds fall out. Transfer to a blender. Add hot broth and cover blender; let sit until chiles are softened, 25–30 minutes. Add 2 canned chipotle chiles in adobo and blend on high speed until smooth, about 1 minute; set aside.
  2. Warm 2 tablespoons oil in same pot over medium-high heat. Season turkey all over with salt. Add half of turkey to pot and smash down with a wooden spoon to flatten against surface of pot and break into smaller clumps. Cook, undisturbed, until underside is browned, top side is no longer pink, and most of the liquid is cooked off, 8–10 minutes. Using a slotted spoon, transfer to a plate. Repeat with remaining turkey, another 8-10 minutes.
  3. Heat remaining 2 tablespoons vegetable oil in same pot over medium. Add 2 white or yellow onions, finely chopped and 5 garlic cloves, smashed; season with kosher salt and stir to combine. Cover pot and cook, stirring occasionally, until onions are translucent, very soft, and starting to brown around the edges, 10–12 minutes. Add 1 tablespoon ground cumin and 2 tsp. dried oregano and cook, stirring frequently, until fragrant and sizzling, about 1 minute.
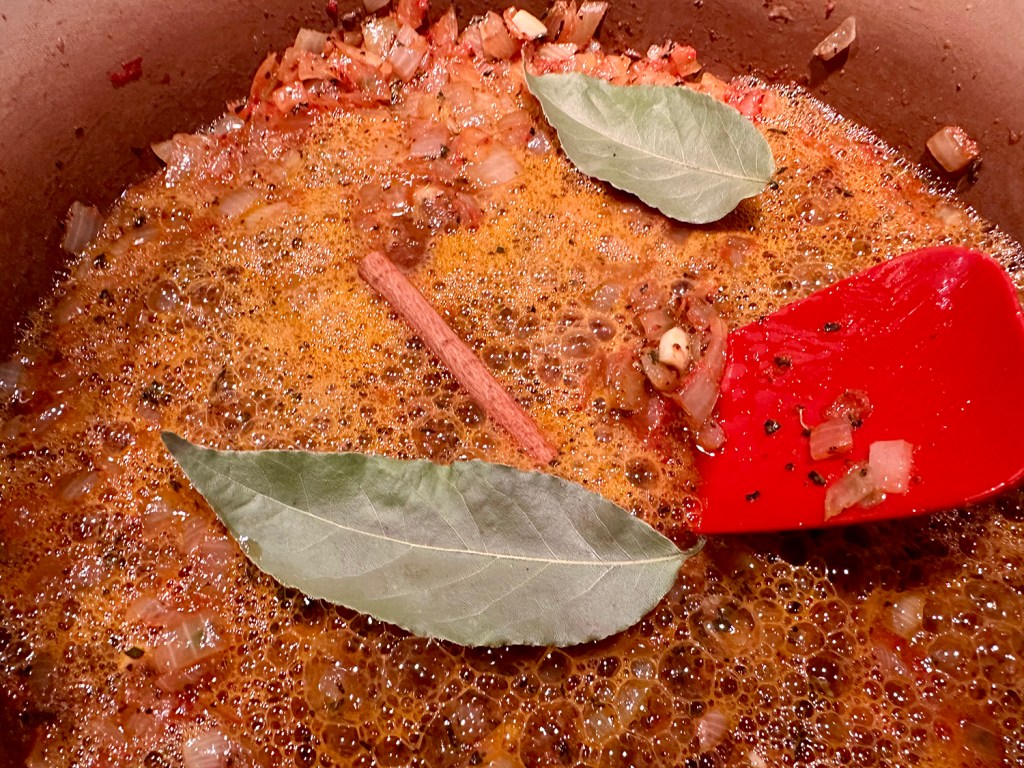
  4. Add 2 tablespoons tomato paste and cook, stirring to coat vegetables, until paste darkens slightly, about 1 minute. Add one 12-oz. bottle hard cider or lager-style beer, one 3” cinnamon stick, and 2 bay leaves and scrape up any brown bits stuck to bottom of pot. Bring to a lively simmer and cook, stirring occasionally, until liquid is mostly reduced, about 5 minutes.
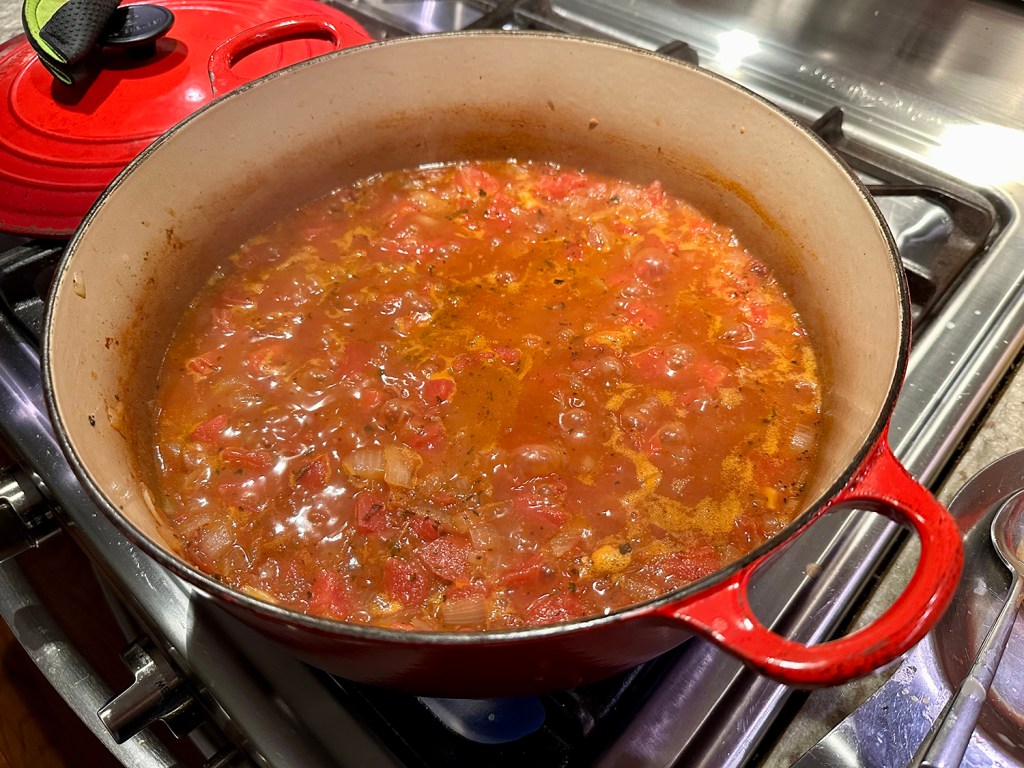
  5. Add reserved chile purée, two 15.5-oz. cans cannellini beans, drained, rinsed, cans of diced tomatoes with their juices, and 3 tablespoons pure maple syrup to pot. Add 1 cup water to blender, swish around to loosen any remaining purée, then pour into pot; season with salt. Bring to a boil, reduce heat to medium-low, and gently simmer, partially covered and stirring occasionally, until liquid is thickened and very flavorful, about 1 hour. Add turkey and simmer until flavors have melded, about 30 minutes longer.
  6. If desired, add 2 tablespoons fresh lime juice (from 1–2 limes), and a handful of cilantro leaves and stems, finely chopped as a garnish. Season to taste with salt.
  7. Taste chili and season with kosher salt and freshly ground black pepper if needed. Remove from heat and fish out cinnamon stick and bay leaves. Divide chili among bowls. Top with cilantro and lime juice, and some broken tostadas. 

Do ahead: Chili (without toppings) can be made 3 days ahead and tastes even better the next day. Transfer to an airtight container and chill. Reheat over medium-low.

http://www.lynnandruss.com

Adapted from a recipe by Carla Lalli Music

Not Too Shabby—Crabby Cakes

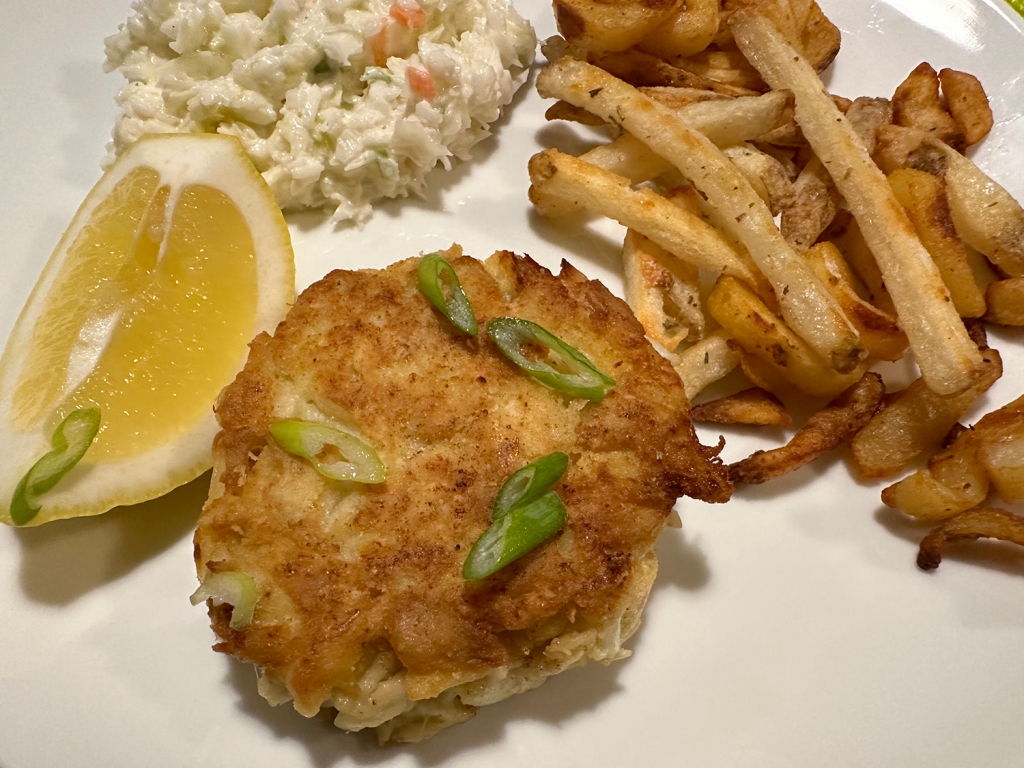
Seems like we are in unison with Chef Mark Bittman when it comes to good crab cakes, use this less-is-more approach. That being a ‘minimalist’ recipe which is heavy on the crab, and low on filler. The simplicity let’s the crab sing. And with the cost of crab meat in the stratosphere these days, you want to make sure the crustacean shines!

As Mark state, “Getting the most out of crab cakes often means putting the least into them. Since crab has the best texture and subtlest flavor of all crustaceans, the best crab cakes are those that showcase the crab, not another ingredient.”

The loose mix is best chilled before shaping, but it is essential to chill it again for a half-hour or so (longer is better) before cooking. When cold, the cakes will hold together, and once the egg, the binding agent, does its work, they will retain their shape until attacked with a fork.

Some reviewers substituted panko bread crumbs for the flour. Whatever appeals to you most, go ahead. The cakes are fancy enough that you can serve them with a luxurious dinner, or low-key with coleslaw and french fries like we did. One patty per person is a normal size portion.

Crabby Crab Cakes

  • Servings: 4
  • Difficulty: easy
  • Print

Ingredients

  • 1 lb. fresh lump crab meat
  • 1 egg
  • 1 Tbsp. Dijon mustard (optional)
  • Salt and freshly ground black pepper to taste
  • 2 Tbsp. flour, more for dredging
  • 2 Tbsp. extra-virgin olive oil or neutral oil, like canola or grape-seed
  • 4 Tbsp. butter (or use a total of 4 Tbsp. oil)
  • Lemon wedges

Directions

  1. Gently combine crab, egg, mustard, salt, pepper and 2 tablespoons flour. Cover mixture, and put in freezer for 5 minutes. Shape mixture into 4 hamburger-shaped patties. Line plate with plastic wrap, and put crab cakes on it. Cover crab cakes with more plastic wrap, and refrigerate them for about 30 minutes (or as long as 1 day), or freeze for 15 minutes.
  2. Put flour for dredging in a bowl. Combine oil and butter in 12-inch skillet, and turn heat to medium. When butter melts and its foam subsides, gently dredge a crab cake in the flour. Gently tap off excess flour, and add crab cake to pan; repeat with remaining crab cakes, and then turn heat to medium-high.
  3. Cook, rotating cakes in pan as necessary to brown the first side, 5 to 8 minutes. Turn, and brown the other side (it will take slightly less time). Serve cakes hot, with lemon wedges.

http://www.lynnandruss.com

Adapted from a recipe by Mark Bittman for NYTimes Cooking