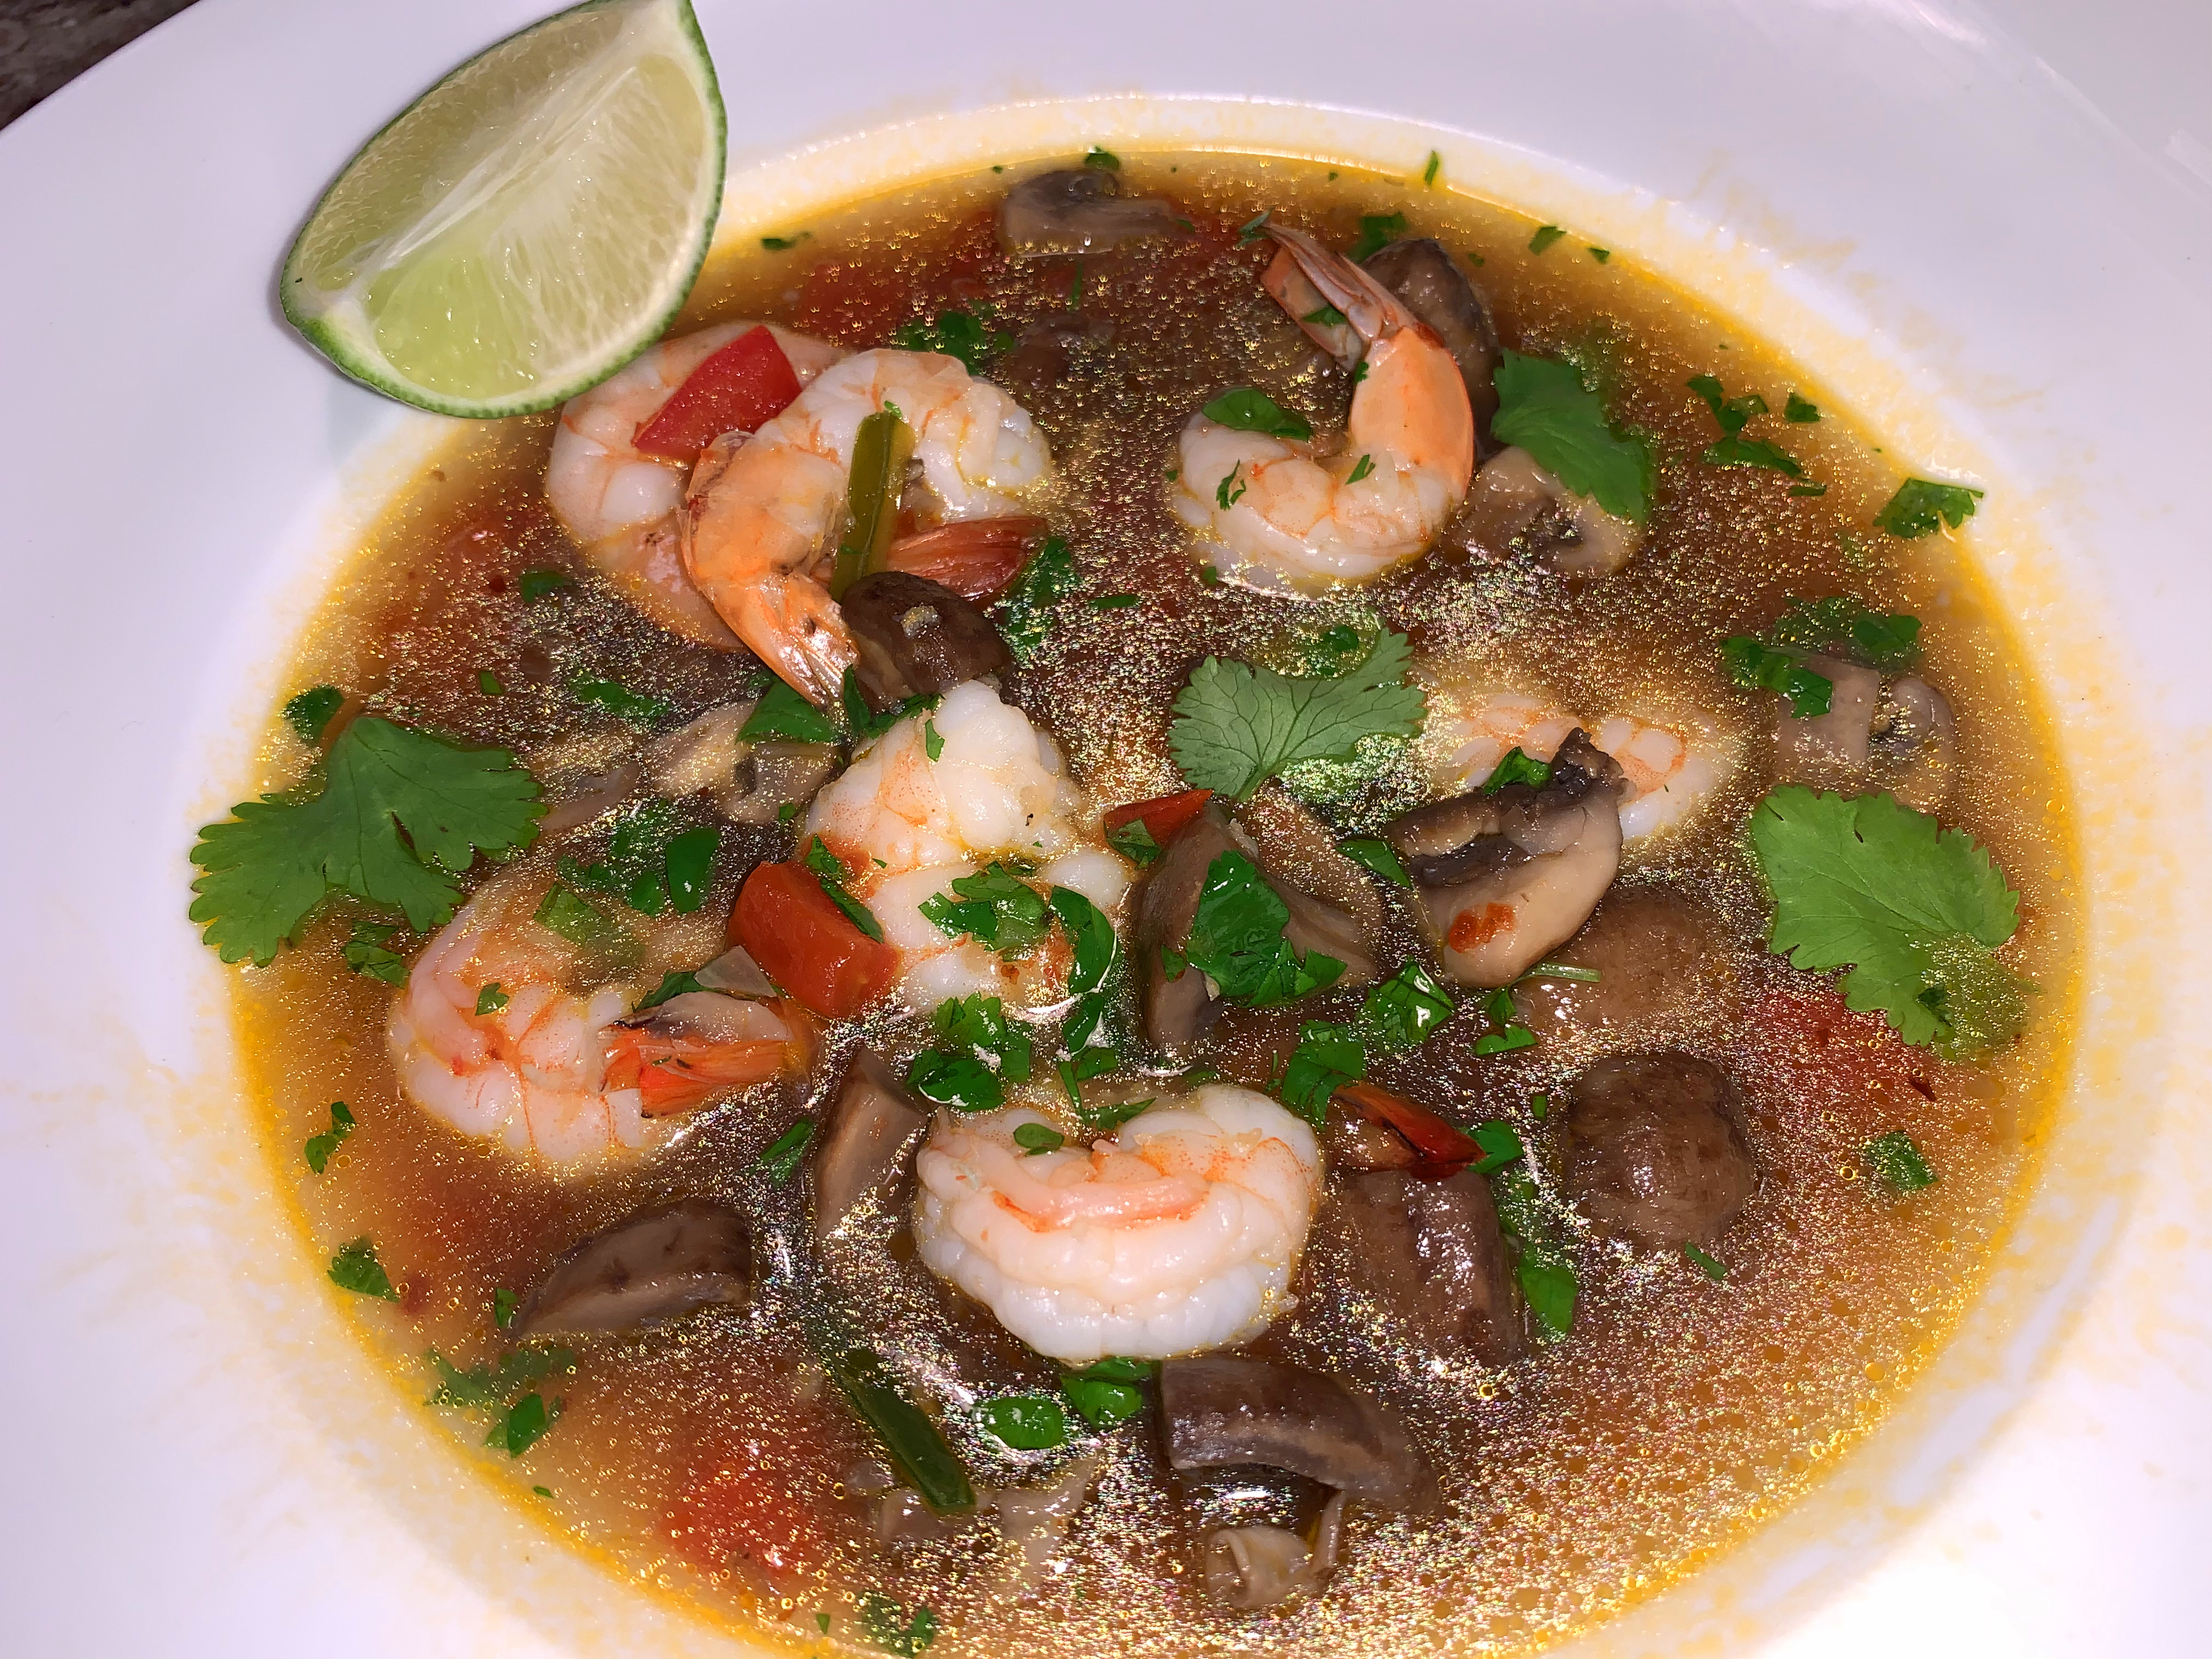
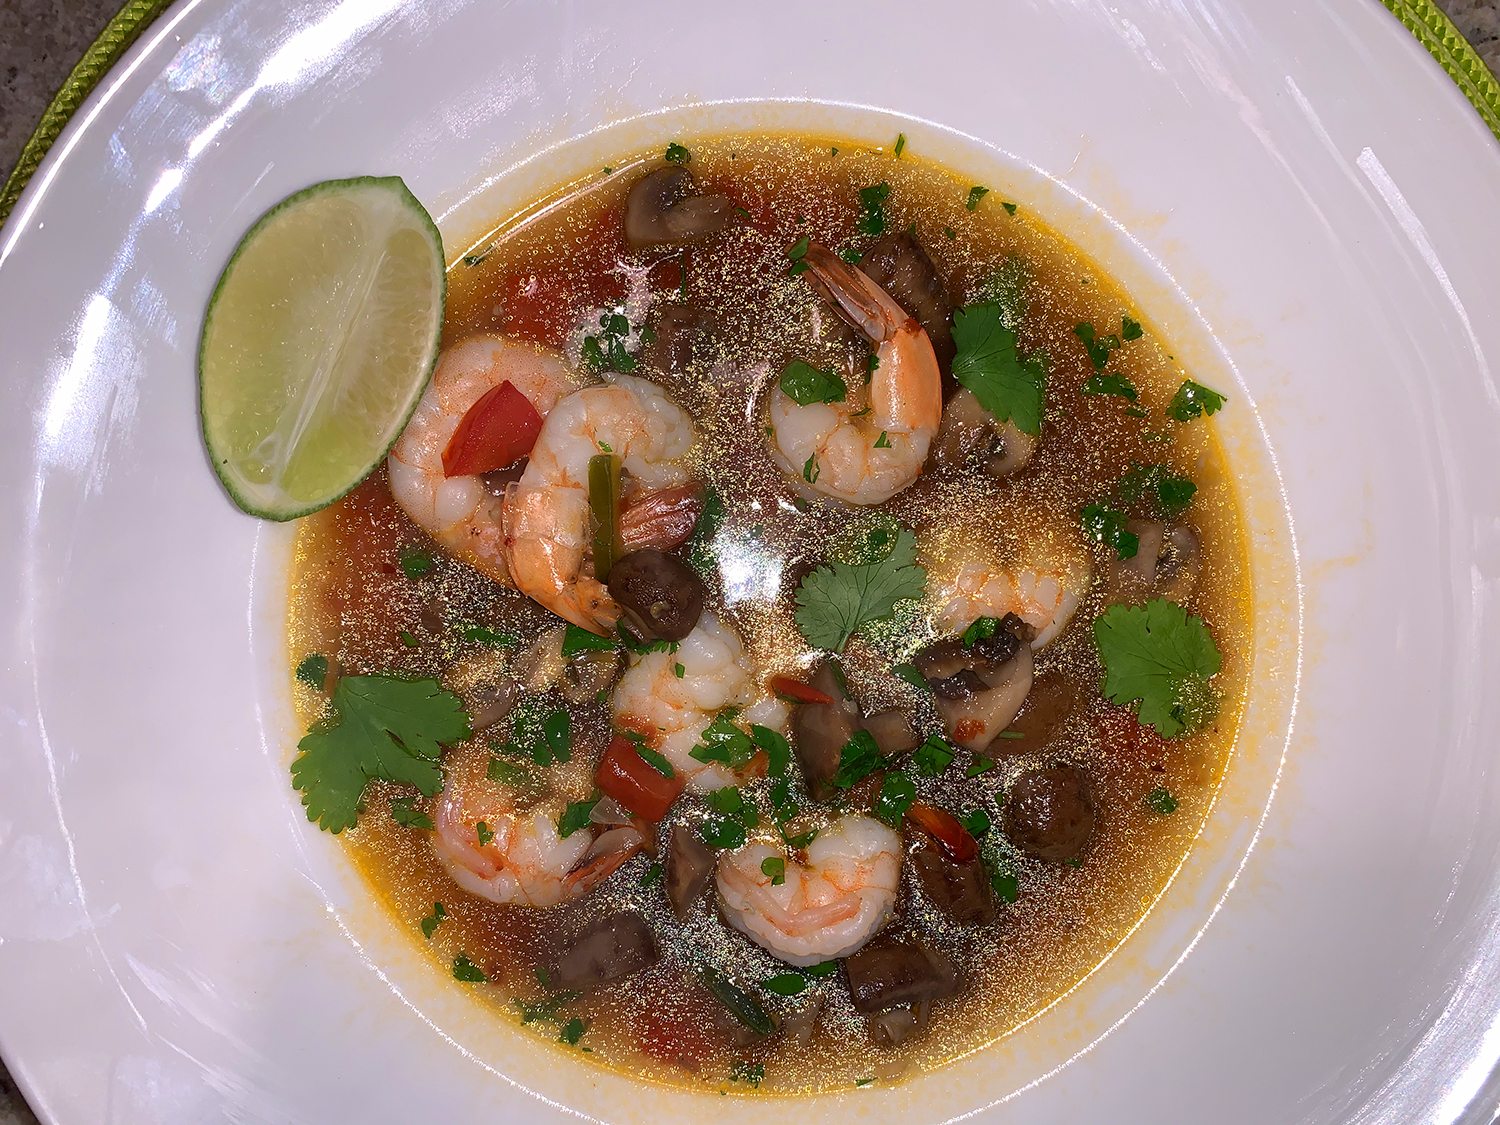
Originating in Thailand, this soup is a hot and sour bowlful of local ingredients like Thai chili peppers and lemongrass. These are available in Asian markets, but there are swaps that are easier to find in a pinch, if needed. We jokingly called it “Tom Oh-Yum” due to the fact it was St. Patty’s Day when we made it.
This soup usually begins with simmering shrimp shells to make the stock. For a shortcut, simmer lemongrass and galangal with boxed seafood stock; OR use your own homemade shellfish stock, like we did.
Pan-fried dumplings make a nice first course. Often available in the freezer section of supermarkets or Asian grocery stores.
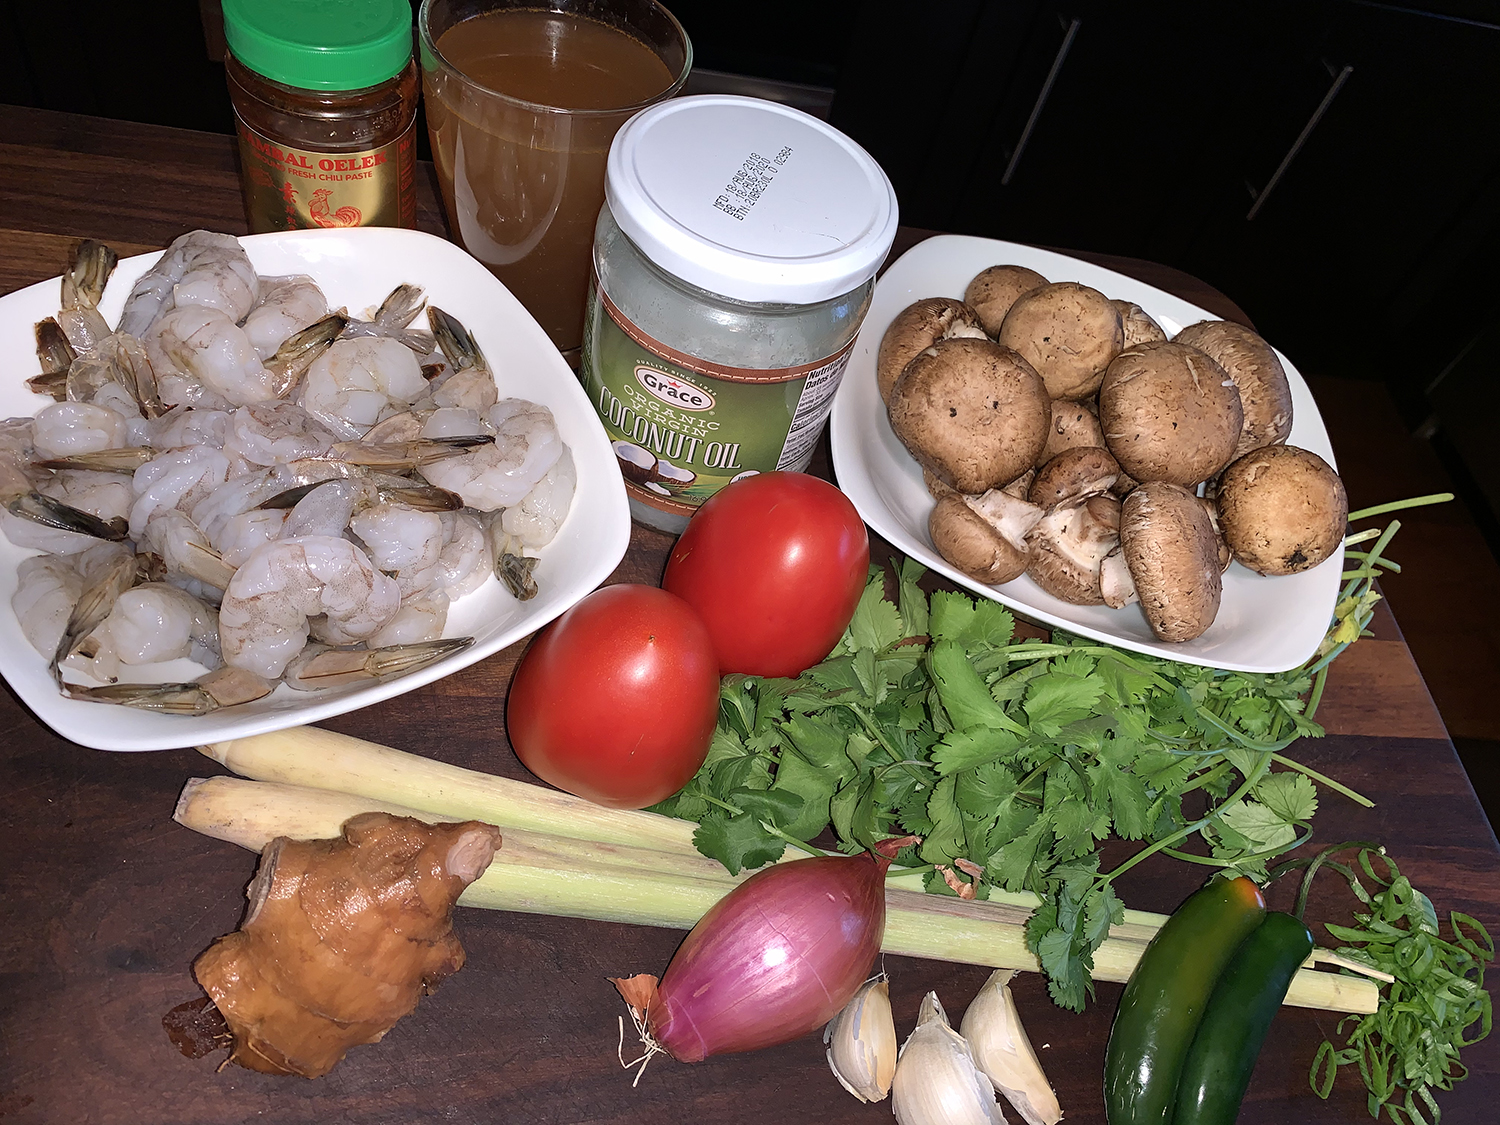
1, 3-inch piece fresh galangal or ginger, thinly sliced
2 stalks fresh lemongrass, trimmed and halved crosswise and lengthwise, or 1/2 tsp. lemon zest
1 Tbsp. refined coconut oil
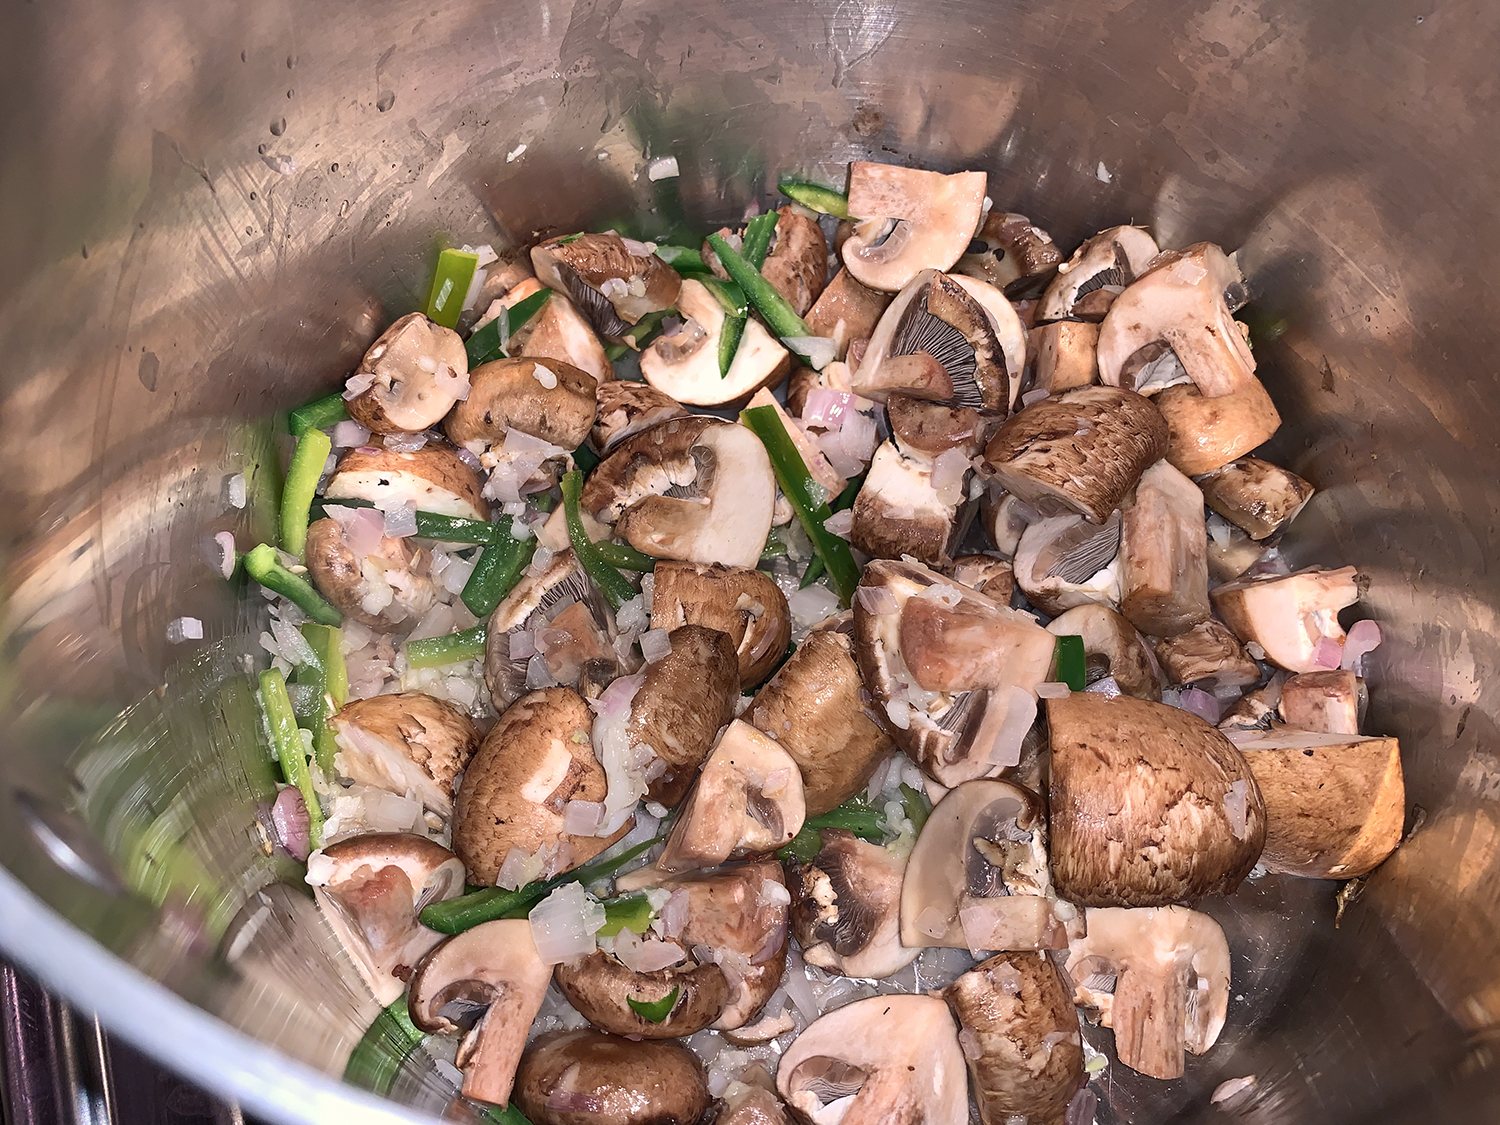
8 oz. fresh cremini mushrooms, quartered
½ cup chopped onion
2 medium fresh Thai or serrano chile peppers, thinly sliced lengthwise*
3 cloves garlic, minced
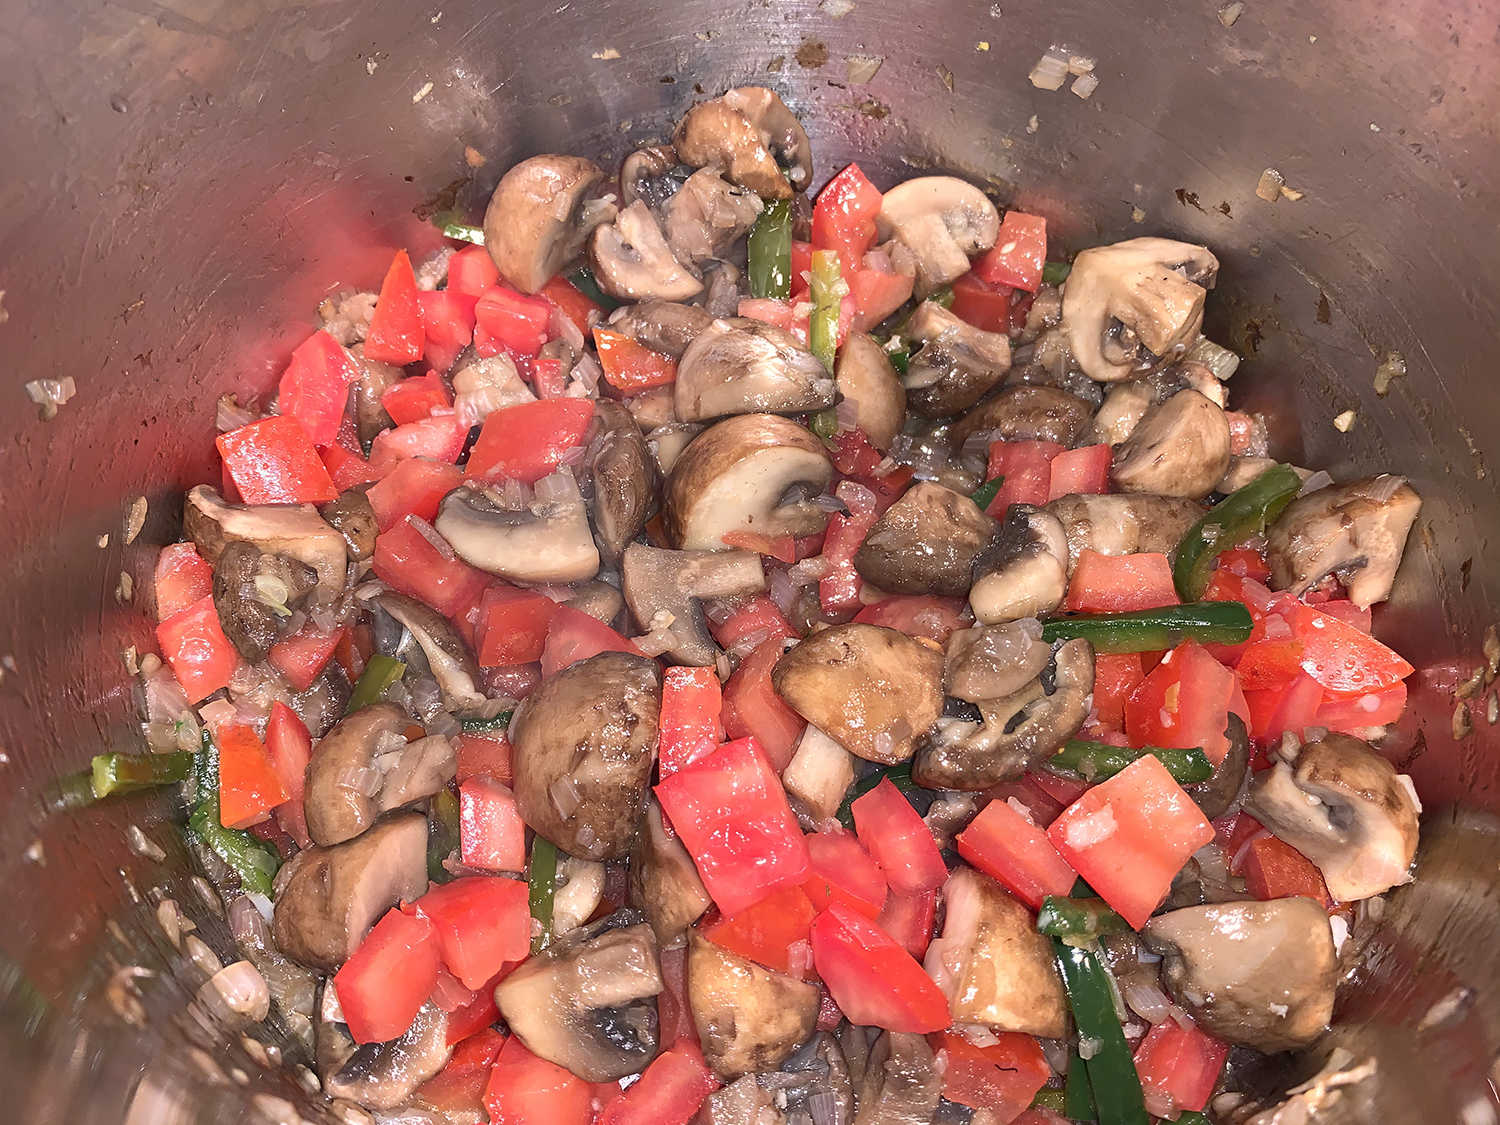
1 cup coarsely chopped roma tomatoes
1–2 tsp. Asian chili-garlic sauce
1 lb. fresh or frozen large shrimp in shells
½ cup chopped fresh cilantro
Keffir lime leaves (optional)
Lime wedges
Directions
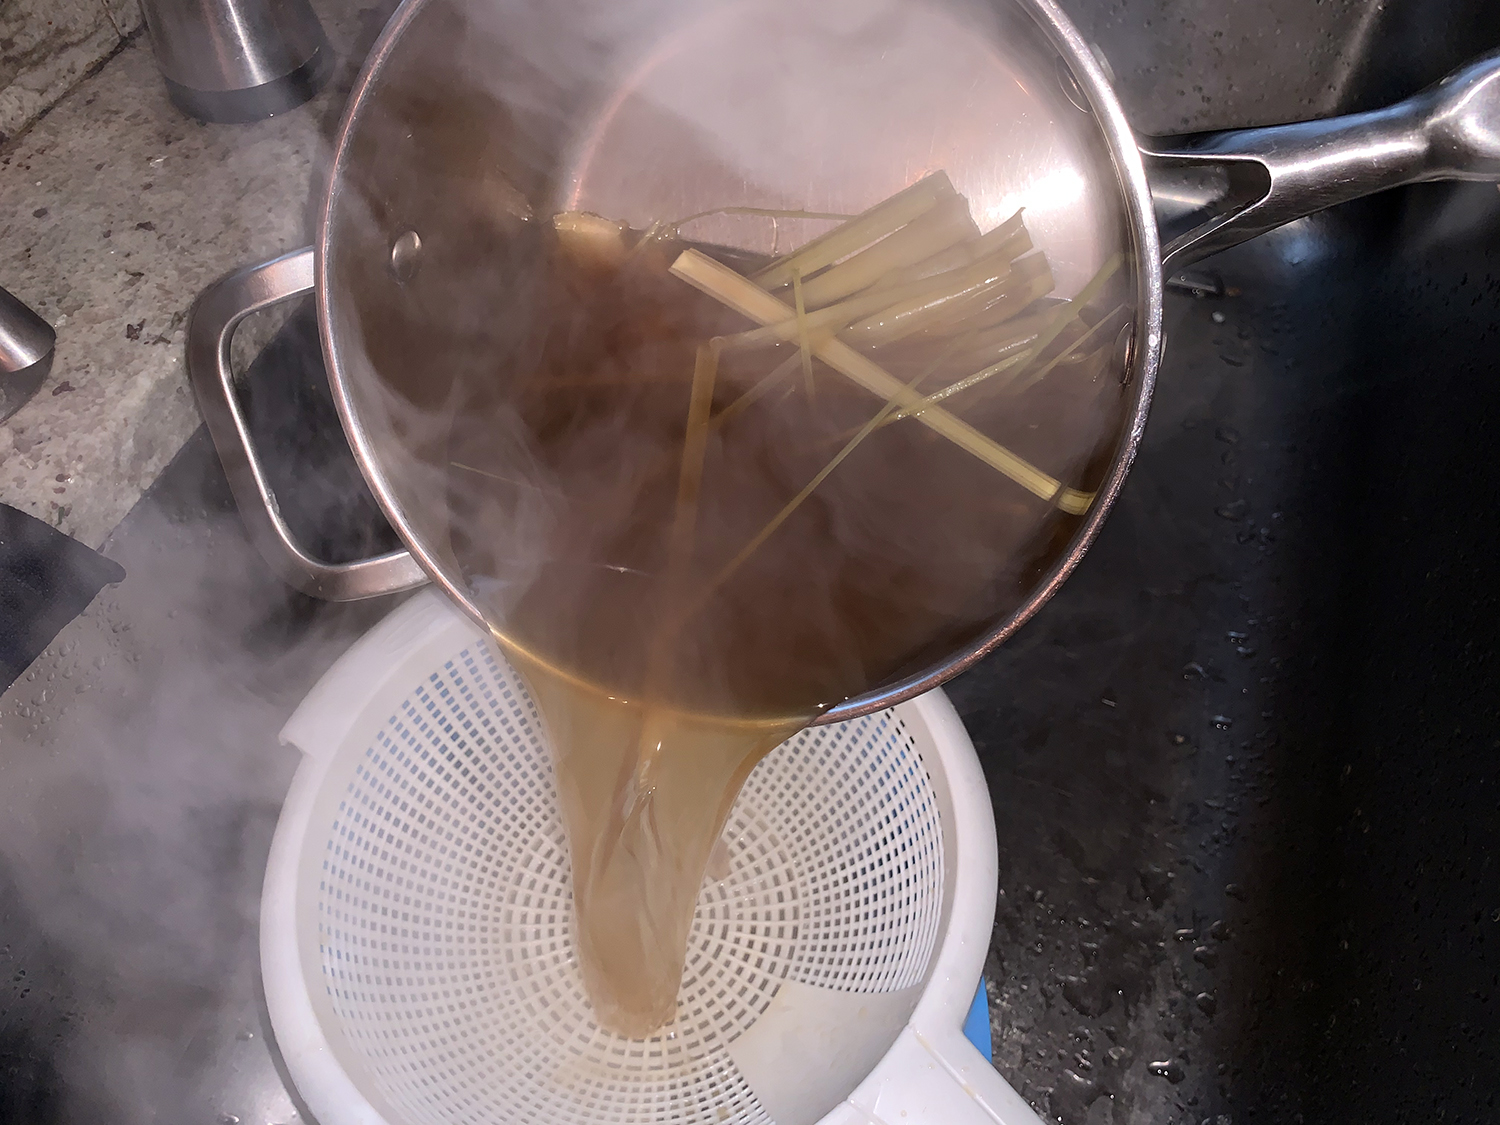
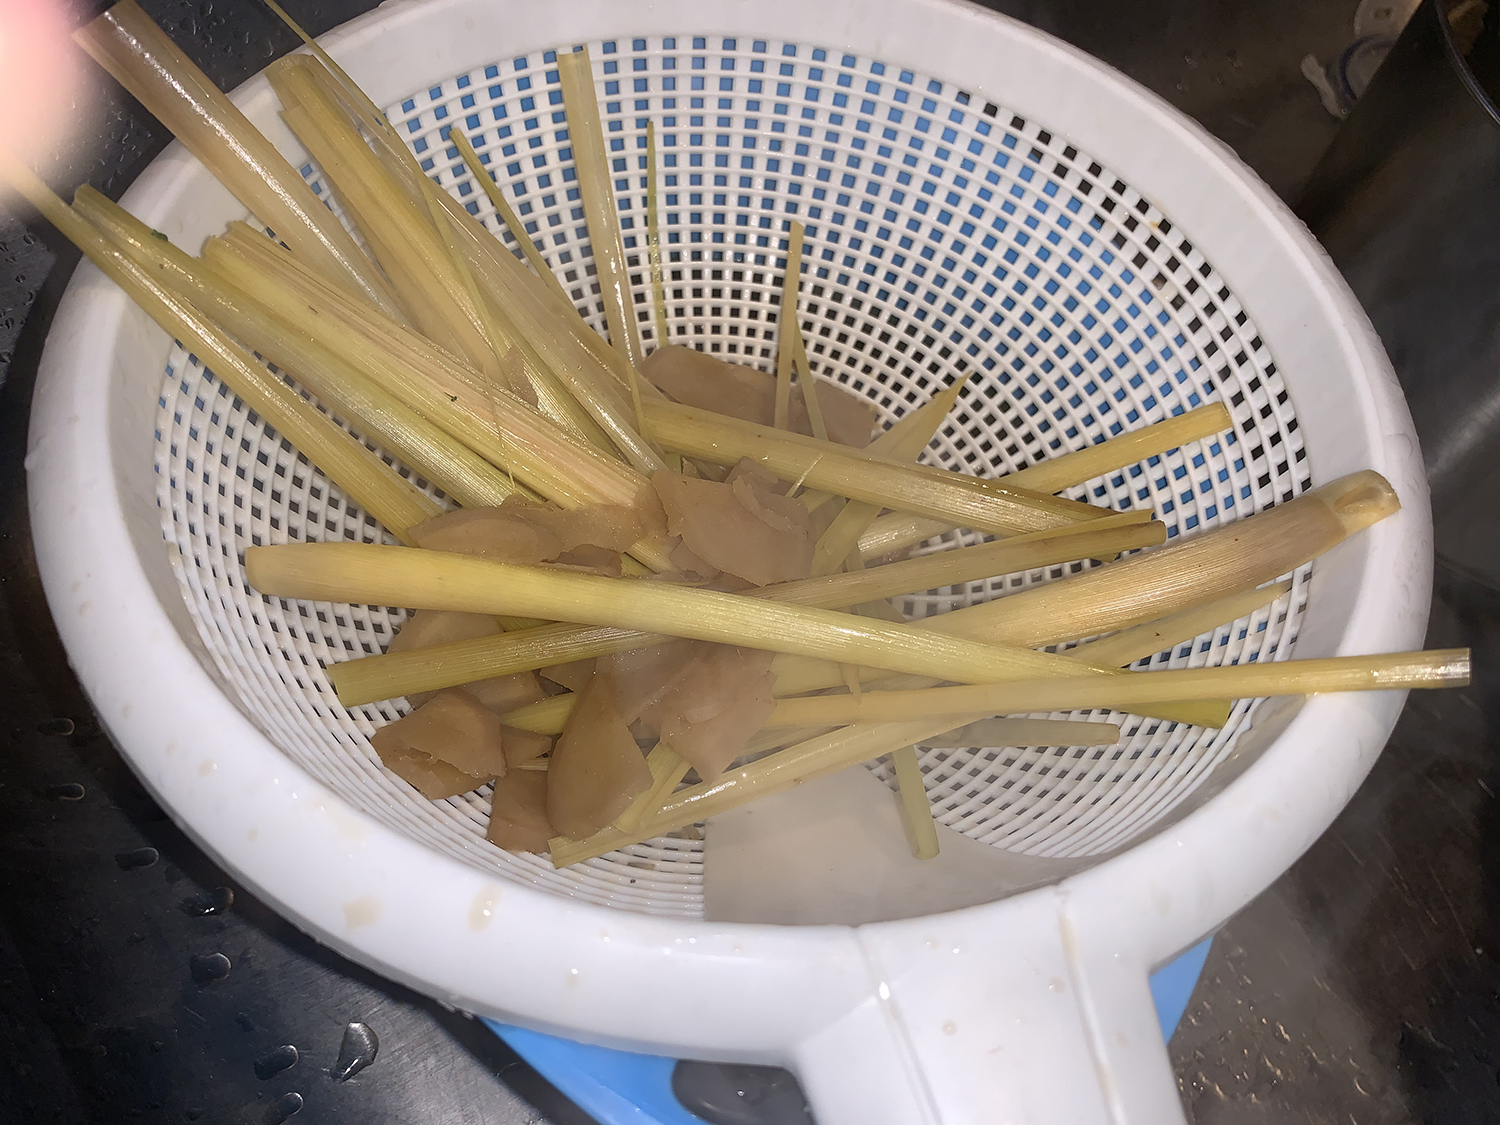
In a 5- to 6-qt. Dutch oven combine stock, galangal, and lemongrass. Bring to boiling; reduce heat. Simmer, covered, 20 minutes. Strain through a fine-mesh sieve into a bowl; discard solids.
In Dutch oven heat oil over medium. Add mushrooms, onion, chile peppers, and garlic; cook 5 minutes, stirring occasionally.
Add tomatoes; cook 2 minutes. Stir in chili-garlic sauce; return strained stock. Bring to boiling. Add shrimp; cook 2 to 3 minutes or until shrimp are opaque.
Top servings with cilantro and, if desired, lime leaves. Serve with lime wedges.
Adding fresh allium notes as well as bright green color to any dish, Vietnamese scallion oil, called mỡ hành, is used as a garnish or condiment on a number of different foods, here we are adding it to cooked asparagus.
This version from Milk Street includes savory fish sauce (or soy sauce), pungent ginger and a little sugar to build complexity. Try it on shrimp, steak, grilled pork chops, corn on the cob or steamed dumplings. Leftover scallion oil can be refrigerated in an airtight container for up to three days; return it to room temperature before serving.
For proper texture and flavor, the scallions should be chopped. Slice them first, then run the knife blade over them a few times to further break them down.
1 1⁄2 lbs. asparagus, trimmed and halved on the diagonal
3 Tbsp. water
Directions
In a medium heatproof bowl, combine the scallions, ¼ teaspoon salt and 1 teaspoon pepper. Using your fingers, gently rub the salt and pepper into the scallions until the scallions begin to wilt.
In a small saucepan over medium-high, heat the oil until shimmering, then pour the hot oil over the scallions; the scallions will sizzle. Stir, then stir in the fish sauce, ginger and sugar. Cool to room temperature.
In a 12-inch skillet over medium-high, heat 1 tablespoon neutral oil until barely smoking. Add asparagus and cook, stirring only a few times, until charred. Add 3 tablespoons water, then immediately cover. Reduce to low and cook, stirring just once or twice, until the asparagus is crisp-tender, 2 to 3 minutes. Serve with scallion oil spooned over.
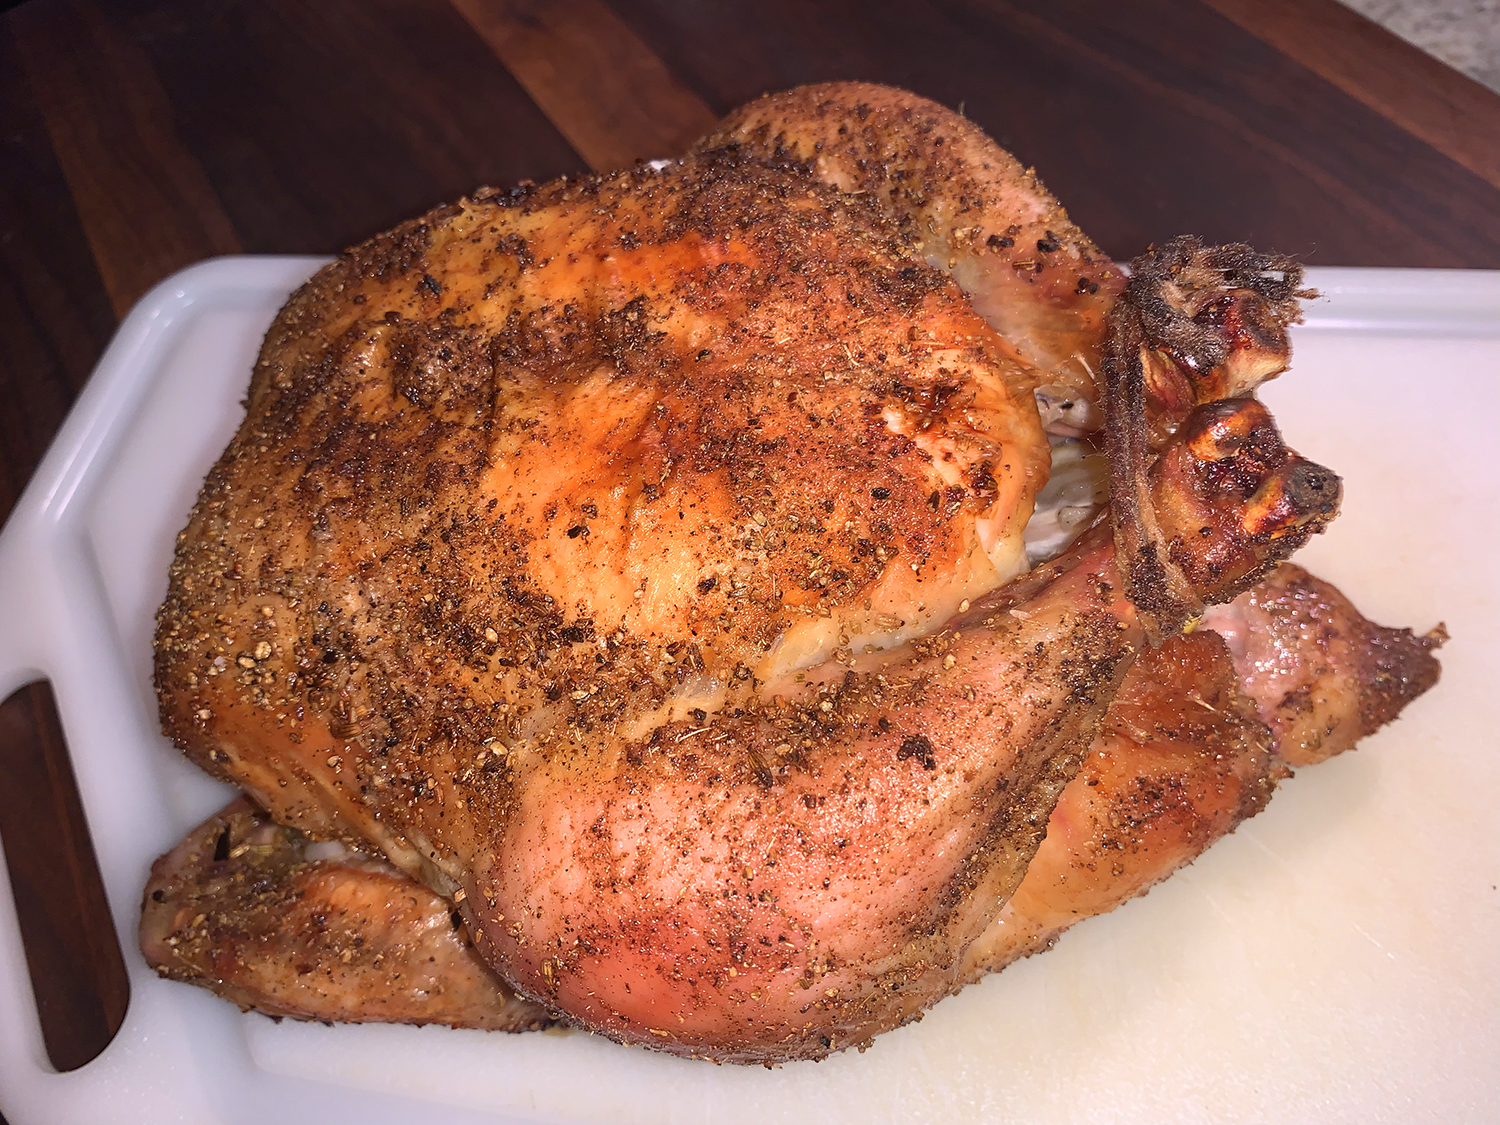
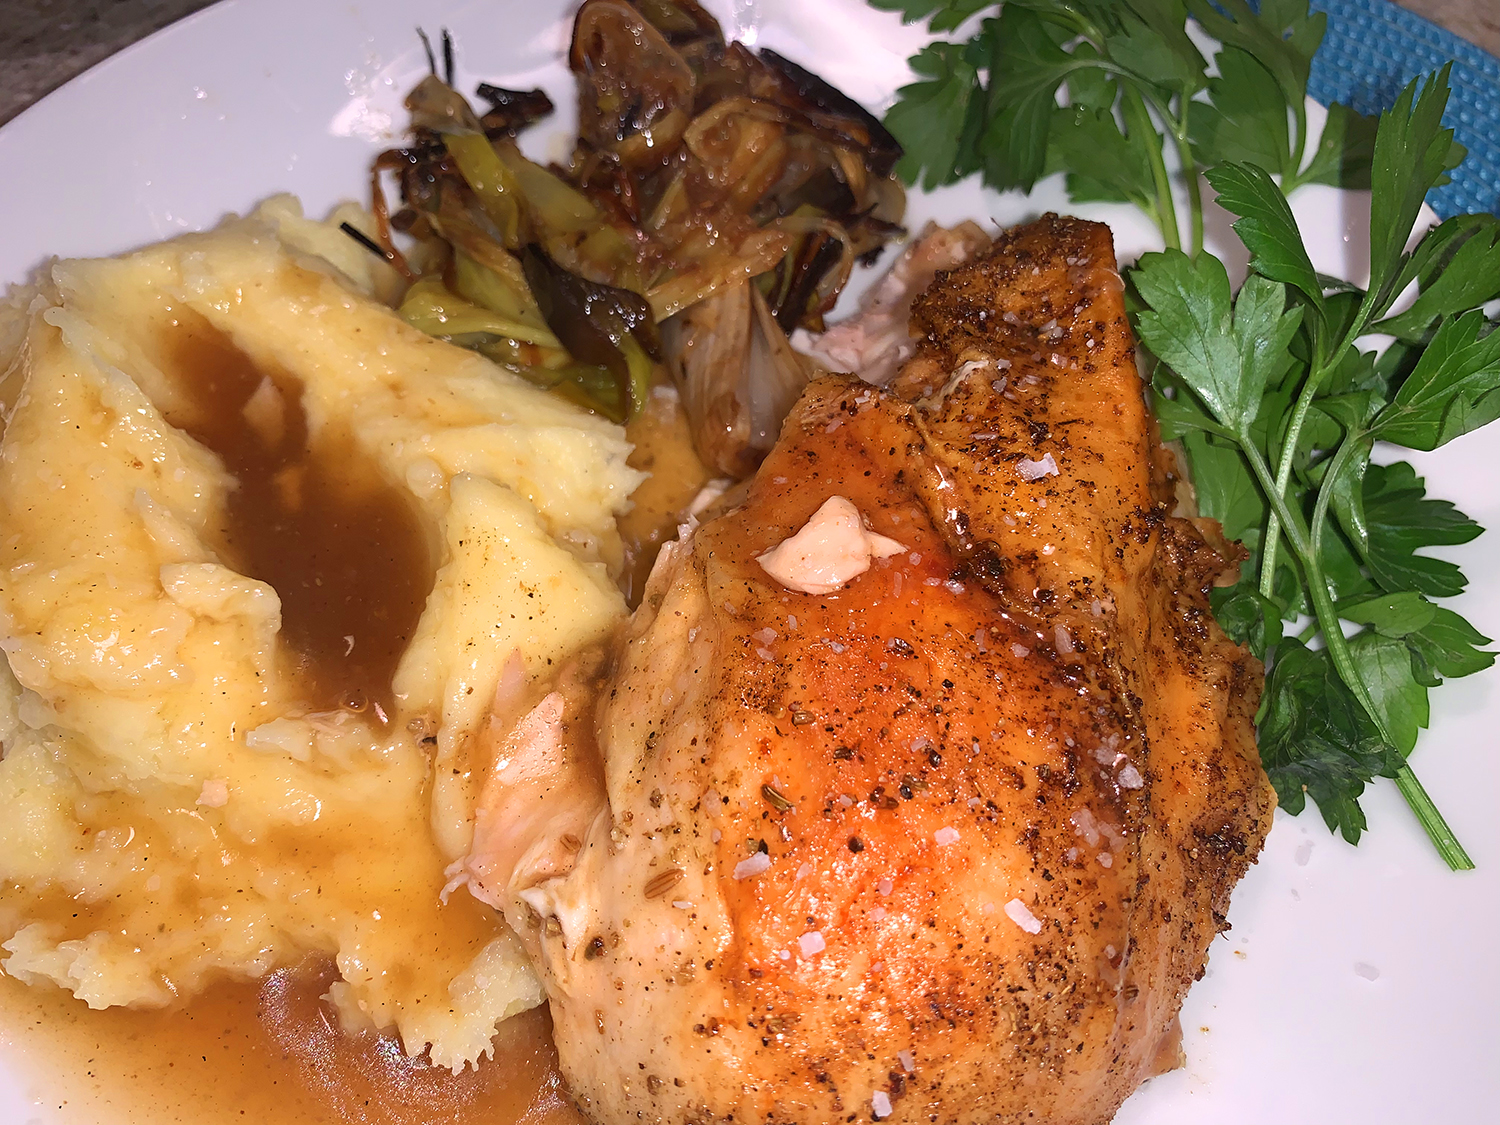
The honest to goodness truth about roasting a whole chicken? Whether it’s Tuesday night or Sunday supper, whether you’re cooking for two, like us, or a dozen, there’s nothing simpler, more delicious, or more comforting than a proper roast chicken (or two, or three). That, with a velvety pile of creamy mashed potatoes with pan gravy, and silky soft roasted leeks, and you have the ultimate comfort food meal.
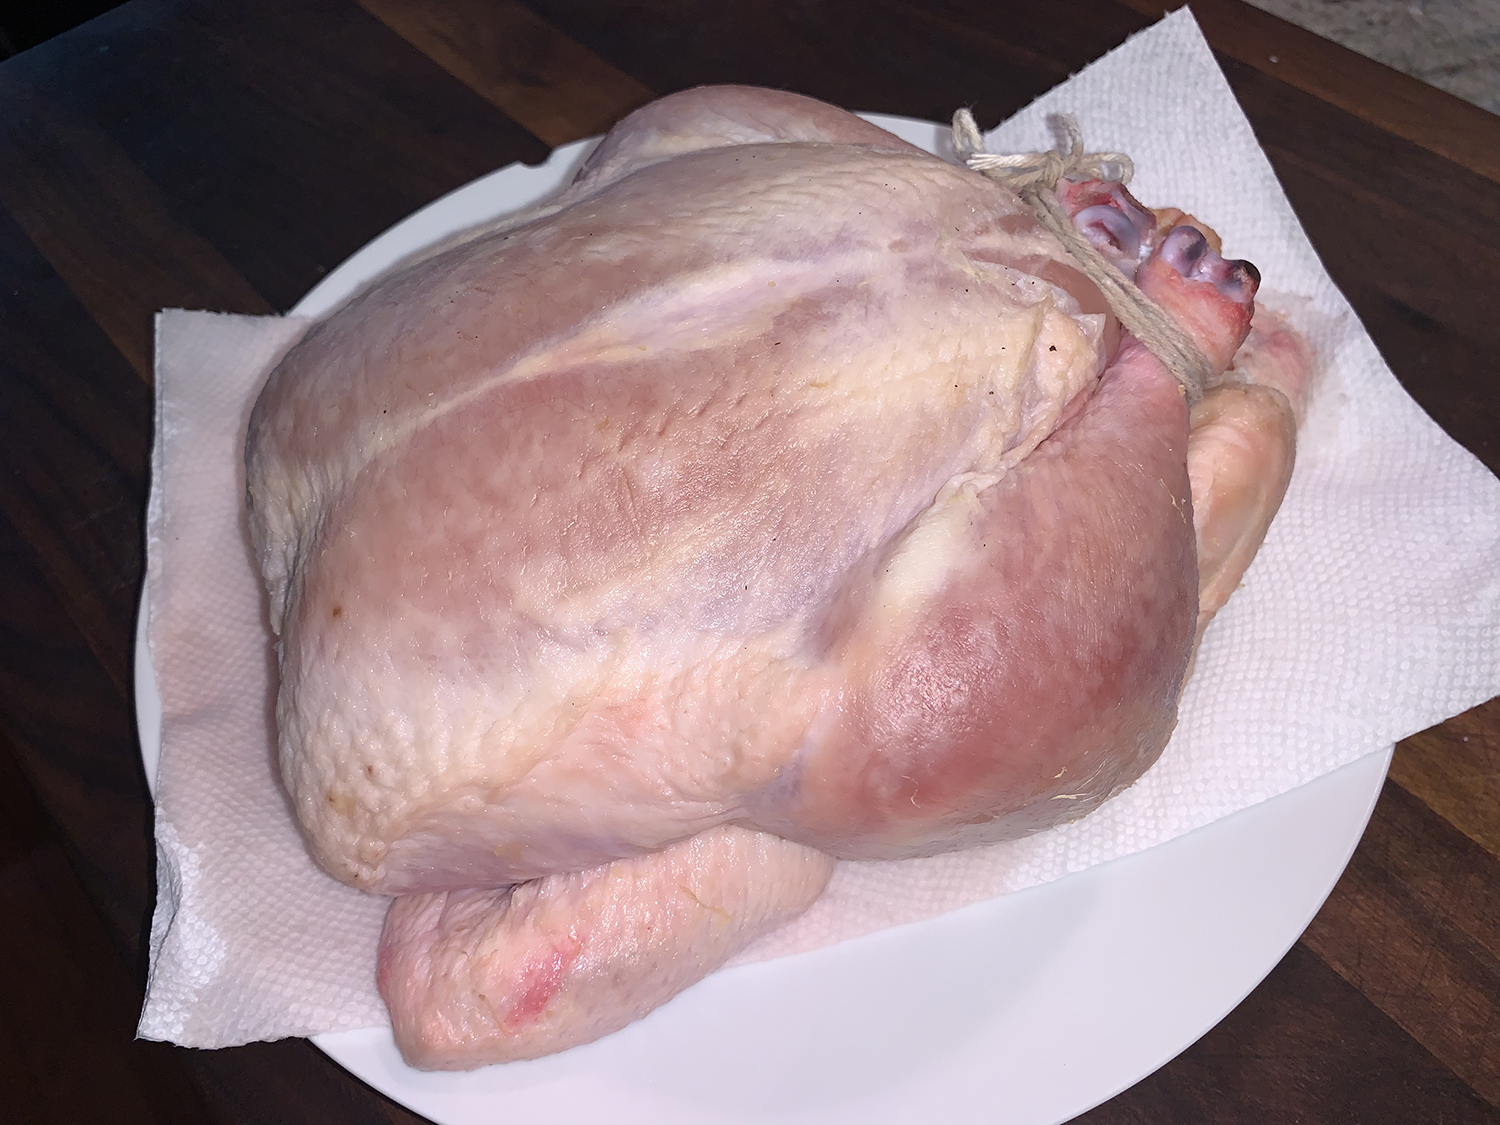
Now our chicken weighed in at 5 pounds, slightly larger than the recipe calls for, but we used our “roasting convection” option on the oven and it cooked perfectly in the same amount of time.
There are lot of theories out there about how to season a chicken—we know, we’ve done most of them! But as Bon Appétit claims, the only truly nonnegotiables are (a) being generous with the kosher salt inside and out and (b) letting the chicken sit out for at least an hour, which gives the seasoning time to work its way deep into the meat, meaning every bite is delicious through and through.
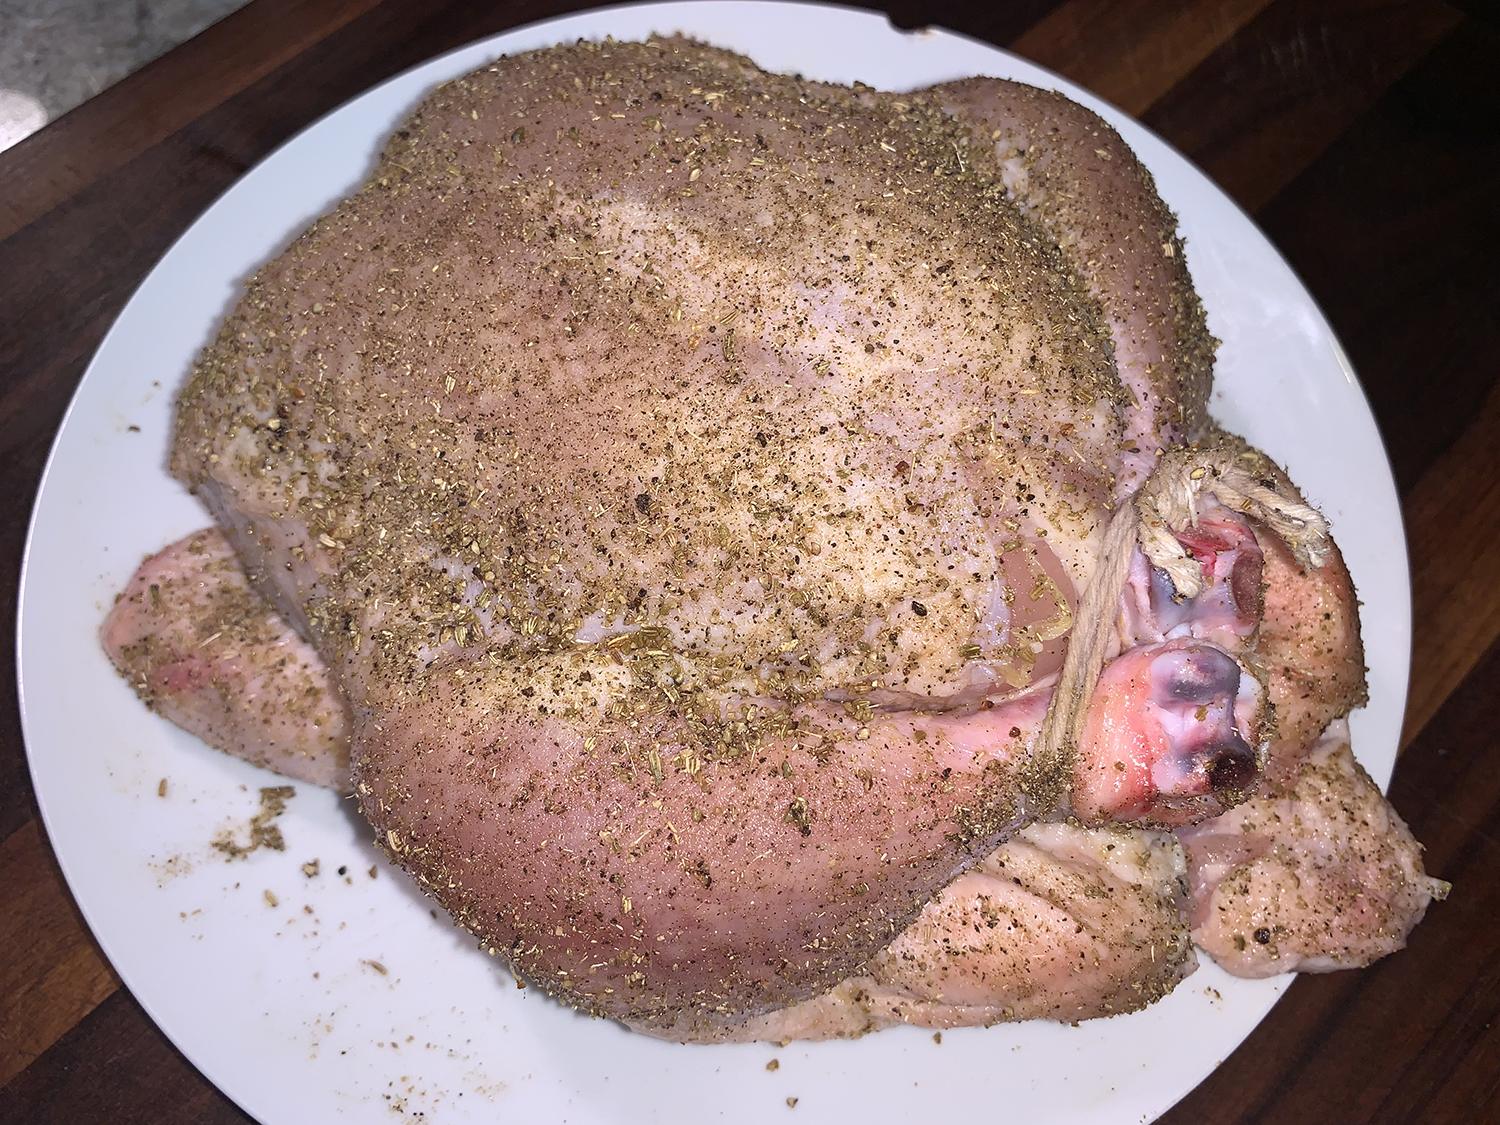
The magic begins to happen when you salt the bird inside and out, tie the legs and refrigerate uncovered for 24 hours. The next day, while the oven is preheating, lightly oil the bird, and then pat it all over with the dry rub. Lift the tied legs and insert the lemon quarters and rosemary sprig into the cavity. Now let the oven continue the magic…
Simple, Juicy, Roasted Dry-Rubbed Chicken with Leeks
Pat a 3½-4-lb. whole chicken dry with paper towels and season generously with kosher salt inside and out. Use 1 tsp. Diamond Crystal or ½ tsp. Morton kosher salt per lb.
Tie legs together with kitchen twin. Let sit 1 hour minimum. Salting the chicken ahead of time allows the seasoning to really penetrate the meat. An hour is great, but longer is even better. Chill the salted bird, uncovered, up to 1 day, which is what we did.
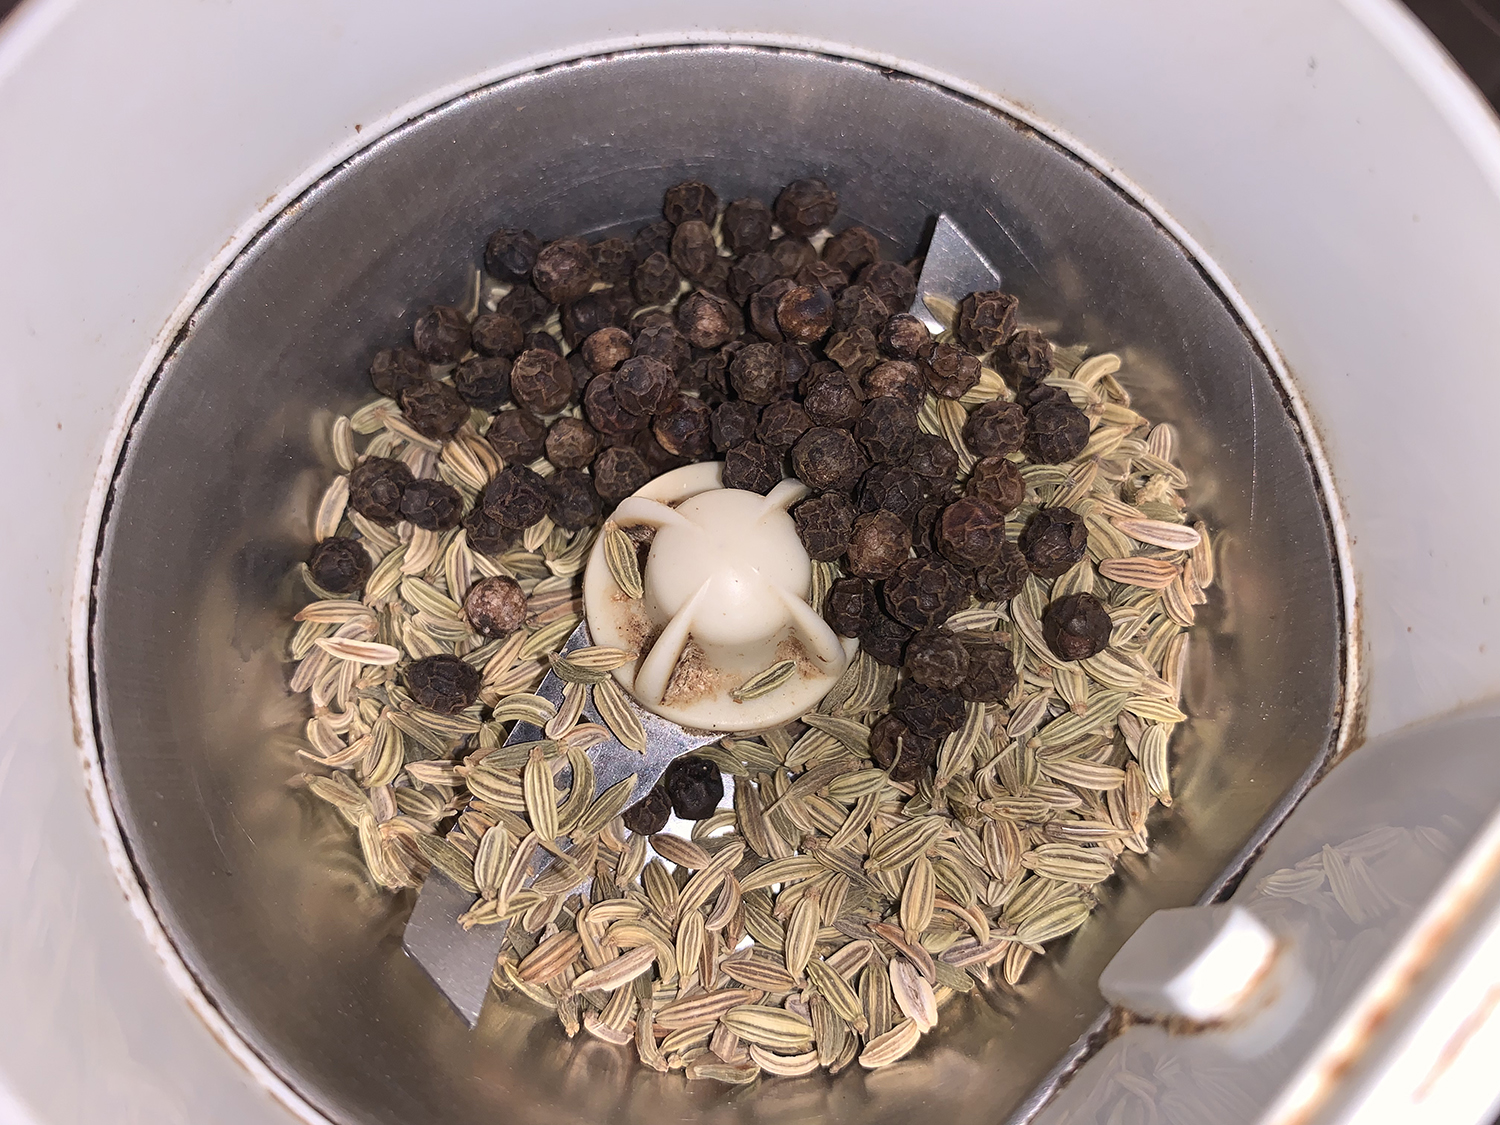
Meanwhile, to make the dry rub, grind the fennel seed and peppercorns in a spice grinder until fine.
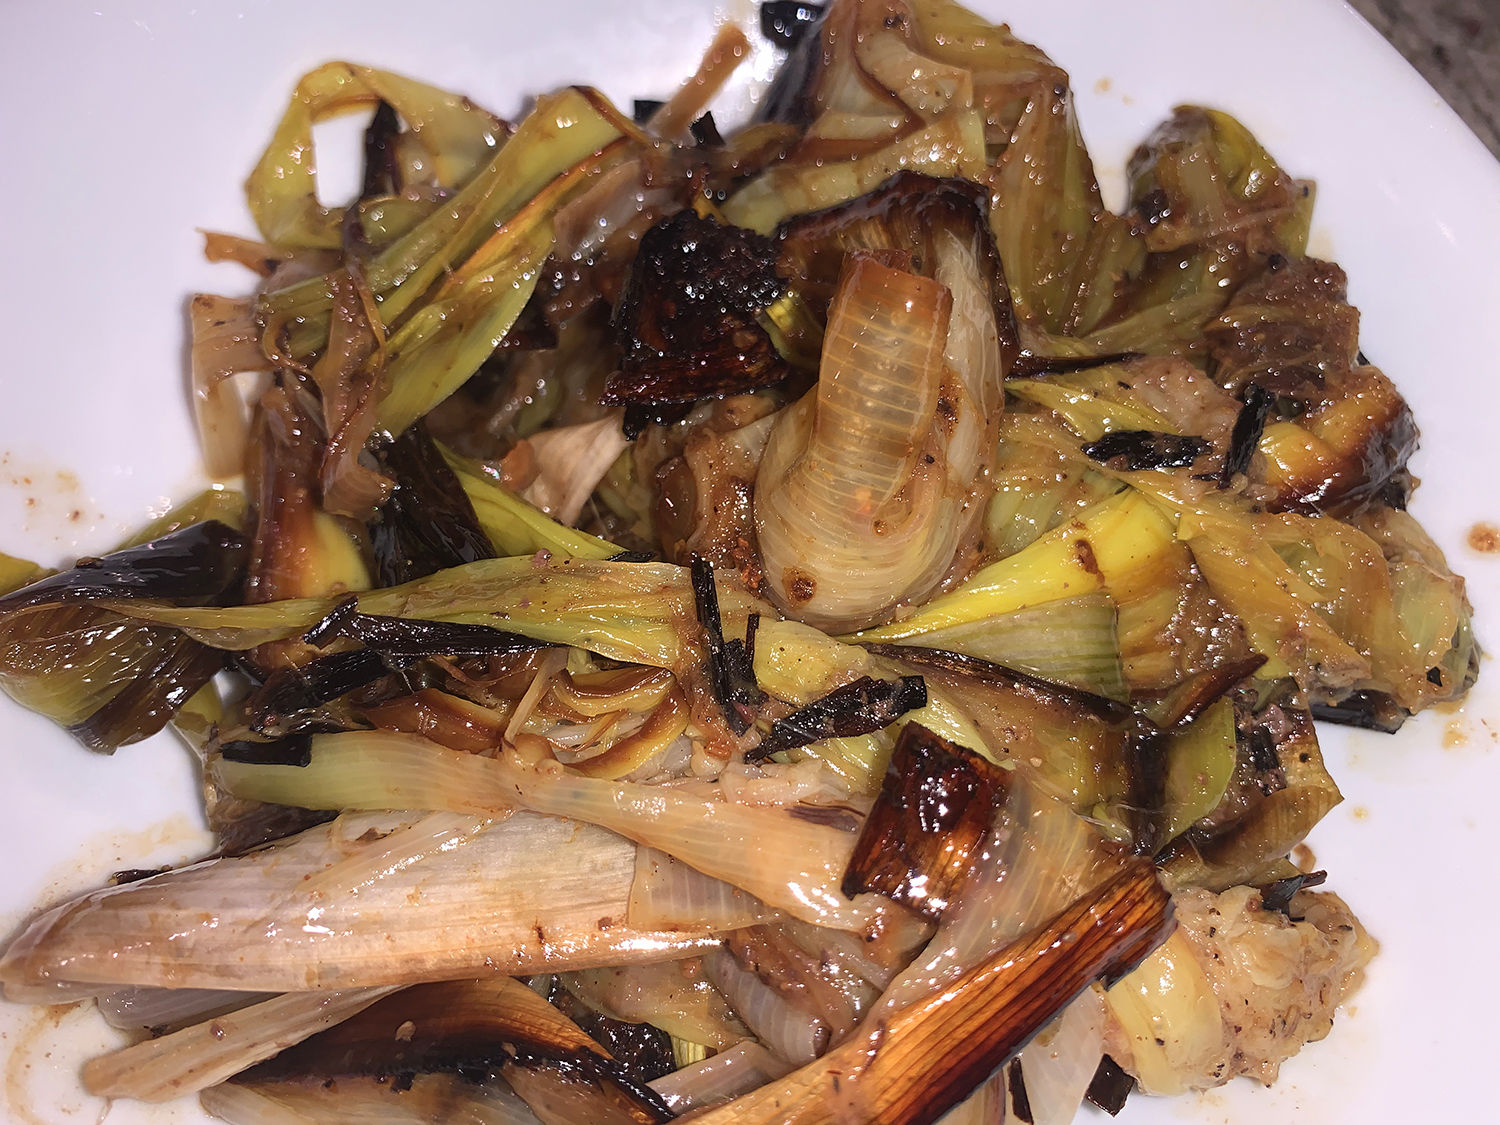
Slice off the dark green parts of the leeks, slice the light parts in halve lengthwise and wash thoroughly to remove all of the grit. Let dry.
Place a rack in upper third of oven and set a 12″ cast-iron skillet or a 3-qt. enameled cast-iron baking dish on rack.
Preheat oven to 425°. Once oven reaches temperature, pat chicken dry with paper towels again and lightly coat with olive oil. Now’s the time to sprinkle thedry rub all over the bird. Into the cavity, insert 3 or 4 of the lemon quarters and the rosemary sprig.
Drizzle a bit more oil into hot skillet. This prevents the chicken from sticking to the pan.
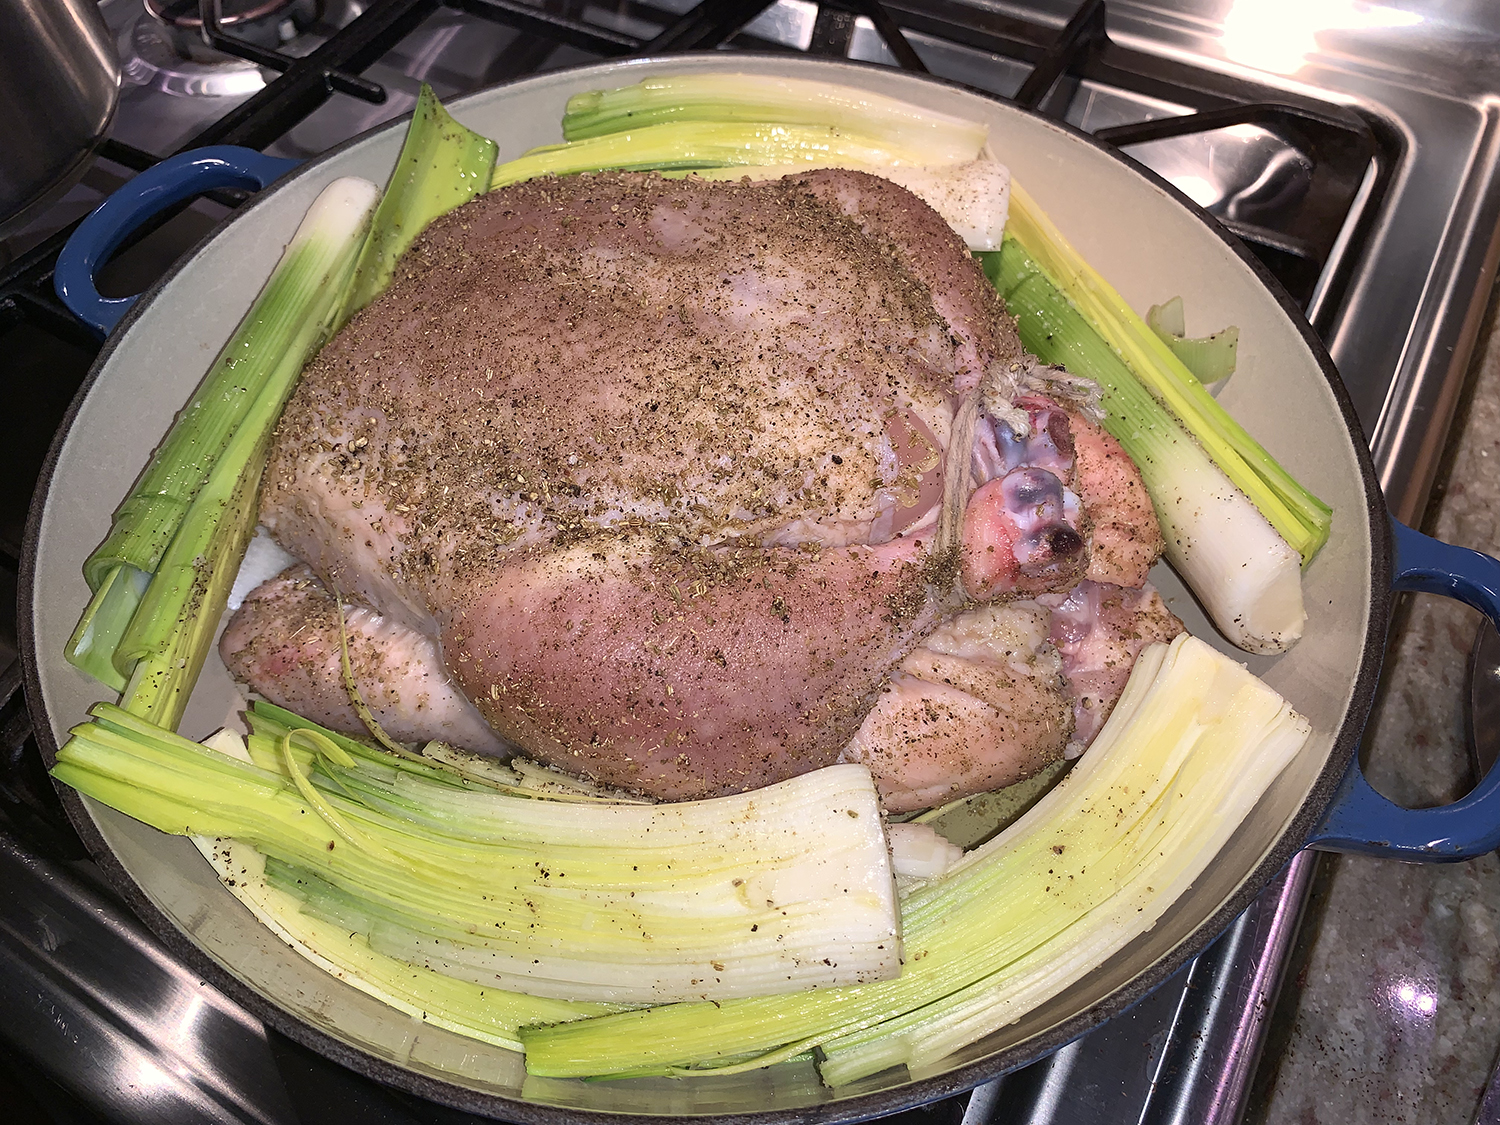
Place chicken in the center of the skillet. Arrange the leek halves around the bird for a built-in side dish.
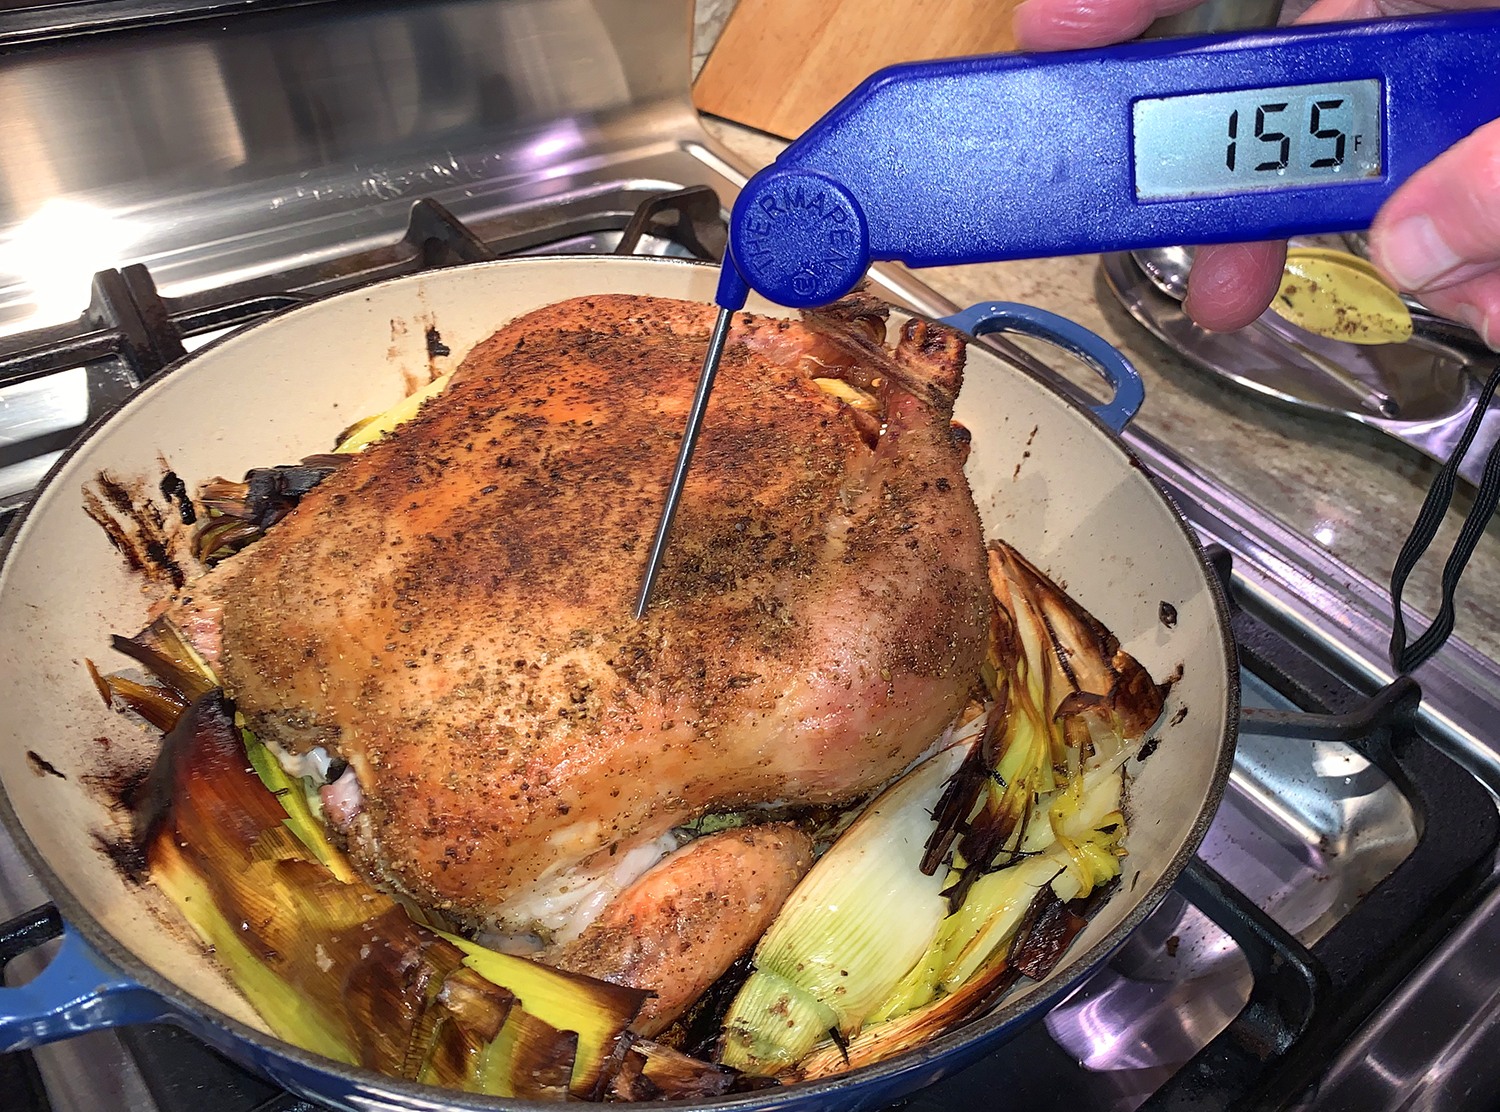
Roast for 50-60 minutes. An instant-read thermometer inserted into the thickest part of the breast should register 155°; it’ll climb to 165° as the chicken rests.
Turn the leeks at least once to prevent them from getting too dark. (We didn’t do this and some areas became charred.)
Lift the chicken and push the leeks under the bird so that they’ll absorb flavorful juices. Lightly tent with foil. Let rest in the skillet for at least 20 minutes, and up to 45 minutes.
When done resting, move the chicken to a cutting board with moat, transfer pan liquids to a fat separator to remove excess fat. Wipe out any charred bits from your pan then add back the juices without the fat. At this point we added 1 1⁄2 cups of homemade chicken broth, made a cornstarch slurry, and put back any accumulated juices from the resting chicken and made a pan gravy.
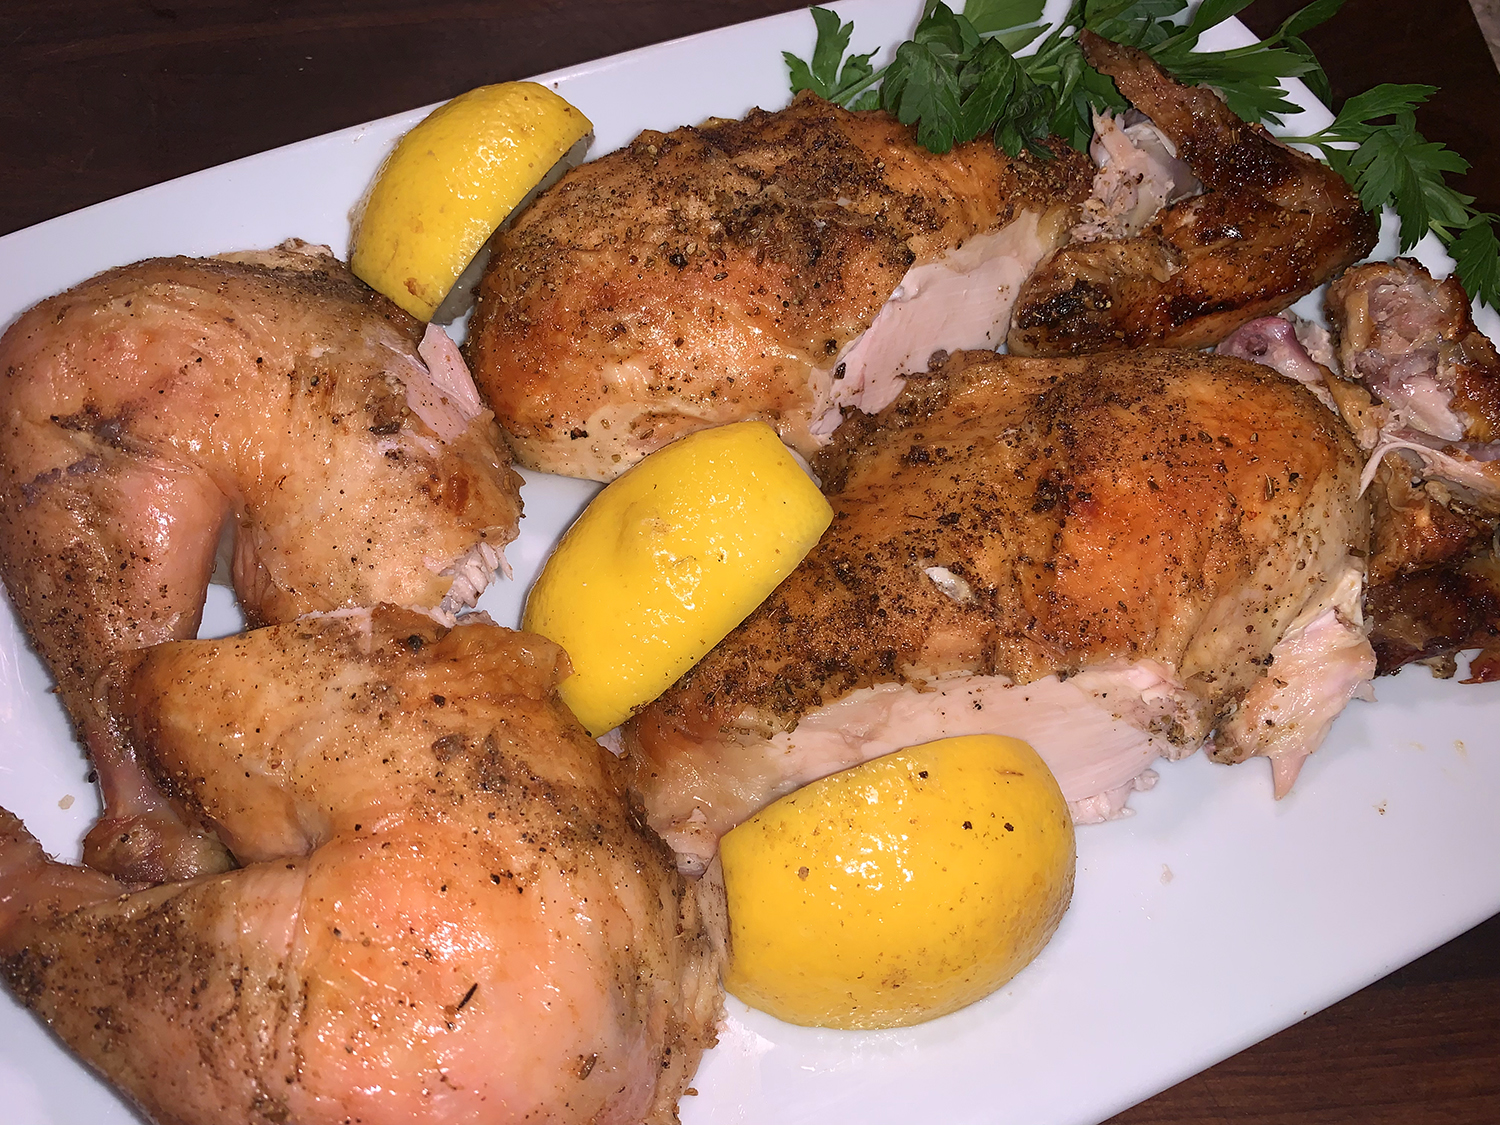
Carve the chicken into legs with thighs, breasts and wings, arrange on a platter and serve with your favorite sides.
A simple quick protein paired with an easy, delicious side dish of roasted chicories, simply fabulous! The marinated skirt steak recipe, compliments of Martha Stewart, can marinate for as little as 15 minutes, or overnight. We soaked ours for 1 hour and 30 minutes.
When we first made this, it was the beginning of December with cold temperatures, so our outdoor grilling option was off the table. But there are two other choices available. Finish the steak on a grill pan, like we did; or cook the steak in a cast iron skillet that had been preheated in a 500 degree oven with olive oil. Either way, it takes 5 minutes or less to cook to medium-rare. The directions below give you the steps for either option.
I was a little apprehensive about the one-pan chicories side dish. But once I tasted the finished product, I was blown away! It hit the right combination of flavors and textures with briny, sweet, bitter, creamy and crunchy. And you don’t even have to peel the squash!
If necessary, cut your piece of steak in half vertically in order to fit your grill pan.
In a resealable plastic bag or shallow dish, combine vinegar, sugar, garlic, rosemary, 1 teaspoon coarse salt, and 1/2 teaspoon pepper. Pierce meat all over with a fork; add to marinade, and turn to coat. Let marinate at room temperature at least 15 minutes, or cover and refrigerate up to 1 day.
Heat grill to high; oil grates. Remove steaks from marinade, allowing excess to drip off. Grill steaks 2 to 4 minutes per side for medium-rare. Transfer to a plate; cover loosely with aluminum foil, and let rest 5 minutes.
Alternatively: Cook the steak two minutes per side in a cast iron skillet that had been preheated in a 500 degree oven with olive oil. Result: caramelized edges and medium rare middle.
After resting, cut the meat against the grain at a diagonal in 1/2″ thick slices. Arrange on a serving platter and drizzle with any accumulated juices.
1 large delicata squash (about 1 1/2 lbs.), halved lengthwise, seeded, and cut into 3/4″ slices
Kosher salt and freshly ground black pepper
2 heads Belgian endive, halved lengthwise
1 small head radicchio, cut into sixths
3 Tbsp. unsalted butter
1 Tbsp. lemon juice
¼ cup drained capers
2 Tbsp. chopped Italian parsley
Directions
Preheat oven to 450°F. In a shallow baking pan toss bread cubes with 1 tablespoon oil. Spread in an even layer. Bake for 8 minutes or until toasted, stirring once. Sprinkle with Parmesan and finely chopped parsley; toss to coat. Transfer to a piece of foil to cool.
In the same baking pan arrange squash in an even layer; drizzle with 2 tablespoons of the oil. Season with salt and pepper. Bake for 20 minutes.
Add endive, radicchio, and 1 tablespoon oil and toss to coat. Season with additional salt and pepper. Bake for 10 minutes more or until vegetables are tender and browned.
Meanwhile, in a small saucepan heat the butter over medium-low heat until browned. Remove from heat. Stir in lemon juice and capers.
Arrange vegetable mixture on a platter. Drizzle with browned butter mixture and sprinkle with croutons and 2 tablespoons parsley.
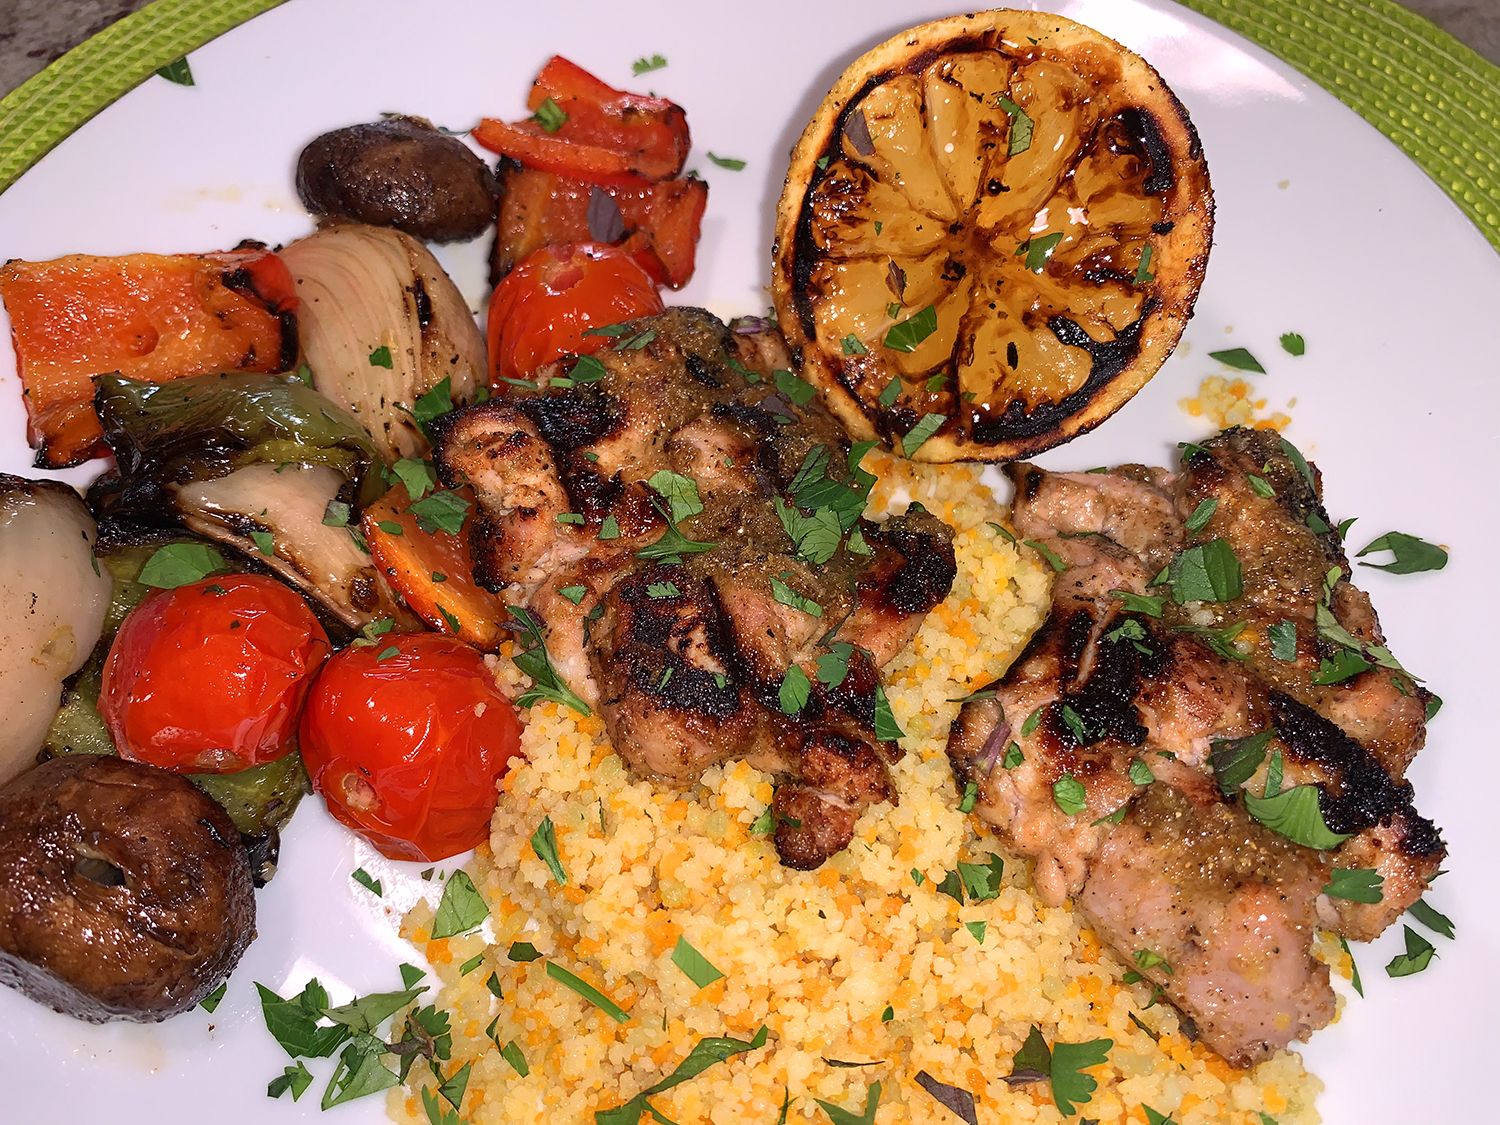
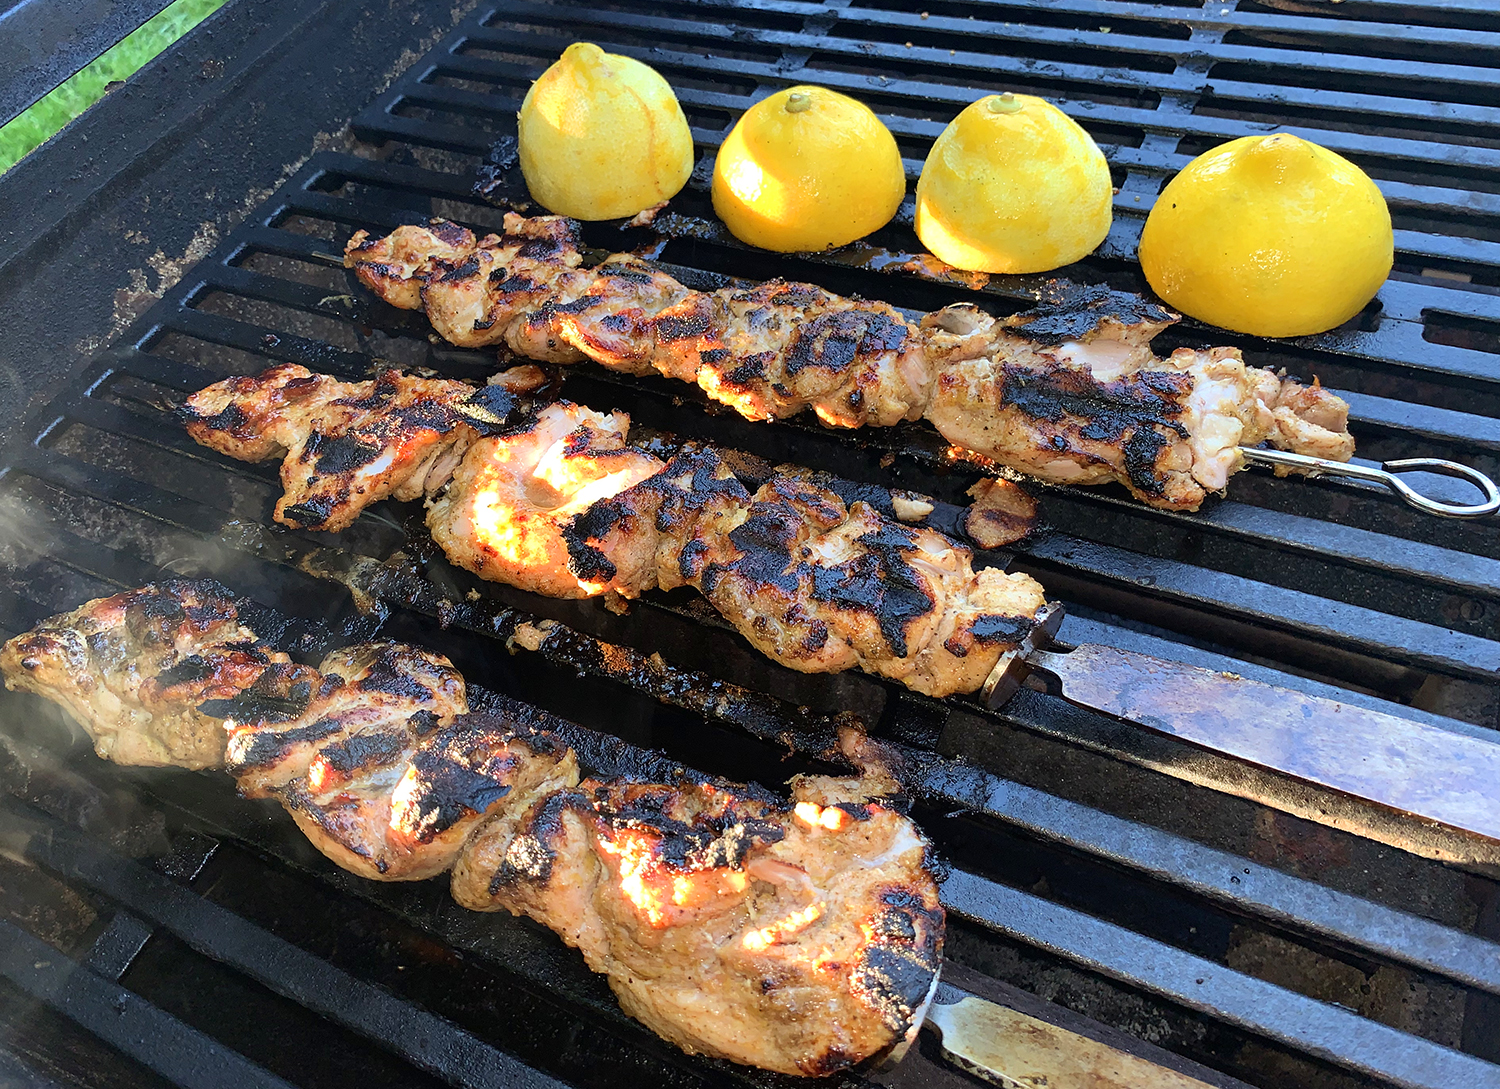
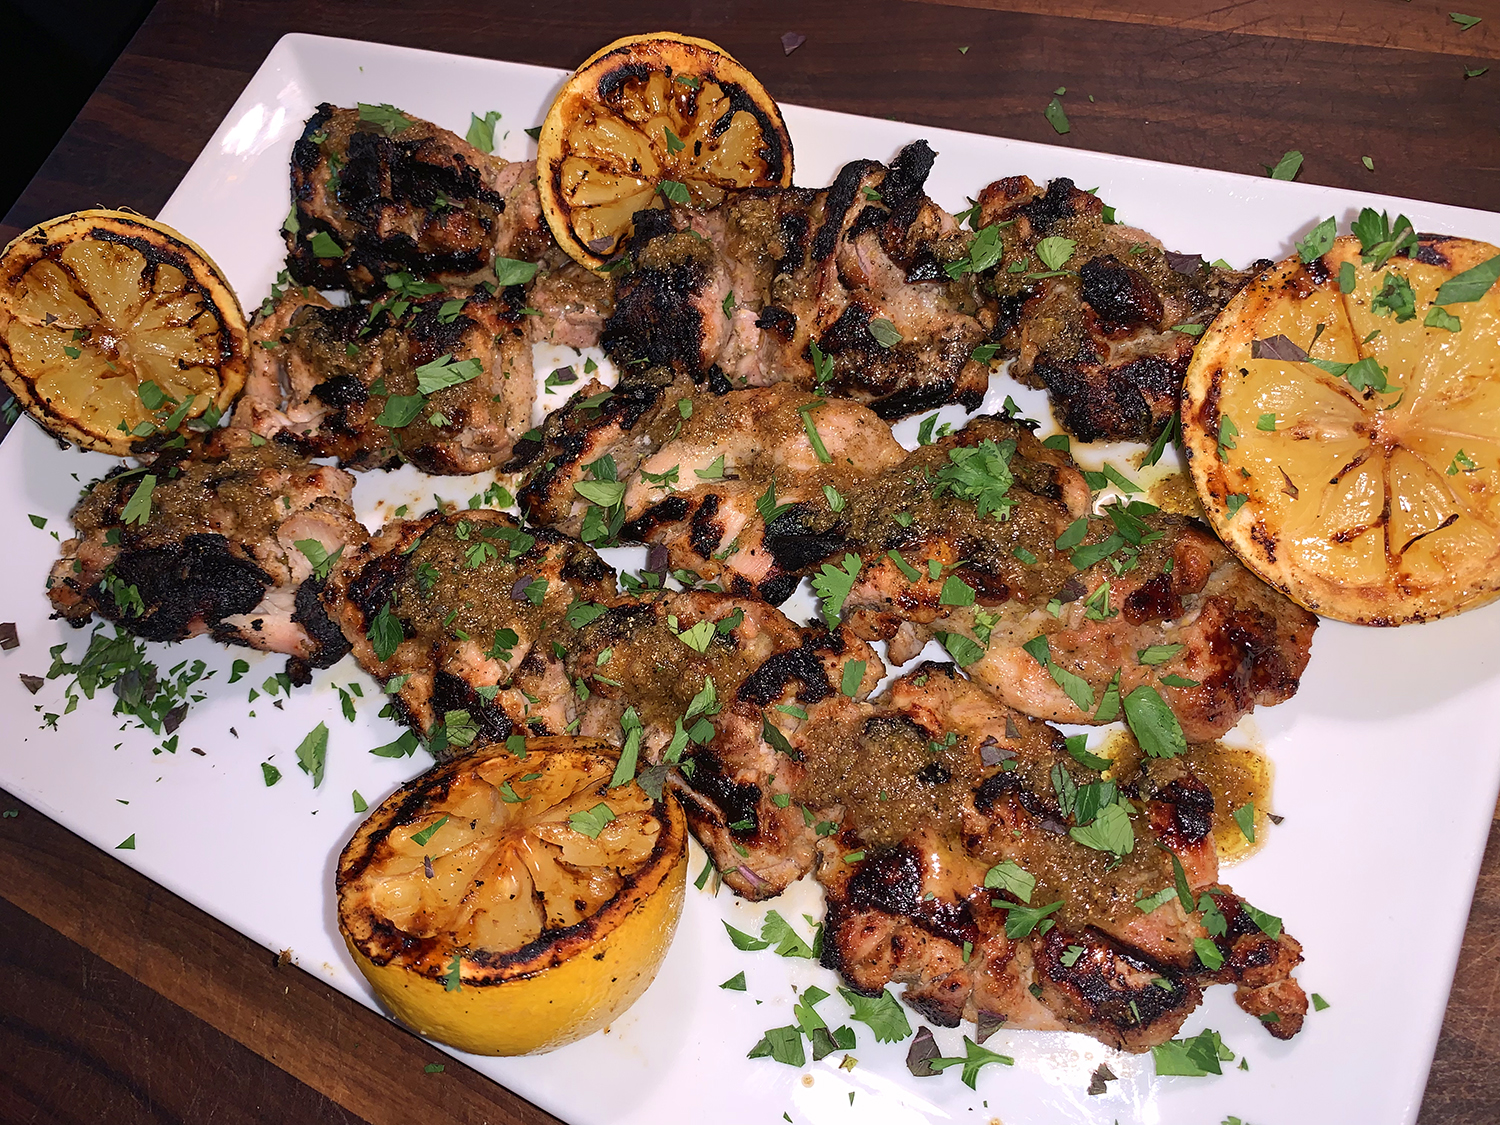
WOWSER, these were so friggin’ good! While the original Milk Street recipe broiled the skewers, we decided to grill them for a more enhanced char. The skewers are then finished with the juice of charred lemon halves that have been drizzled with honey, along with a sprinkle of fresh herbs. Cilantro, flat-leaf parsley or mint are good choices, alone or, as we did, in combination.
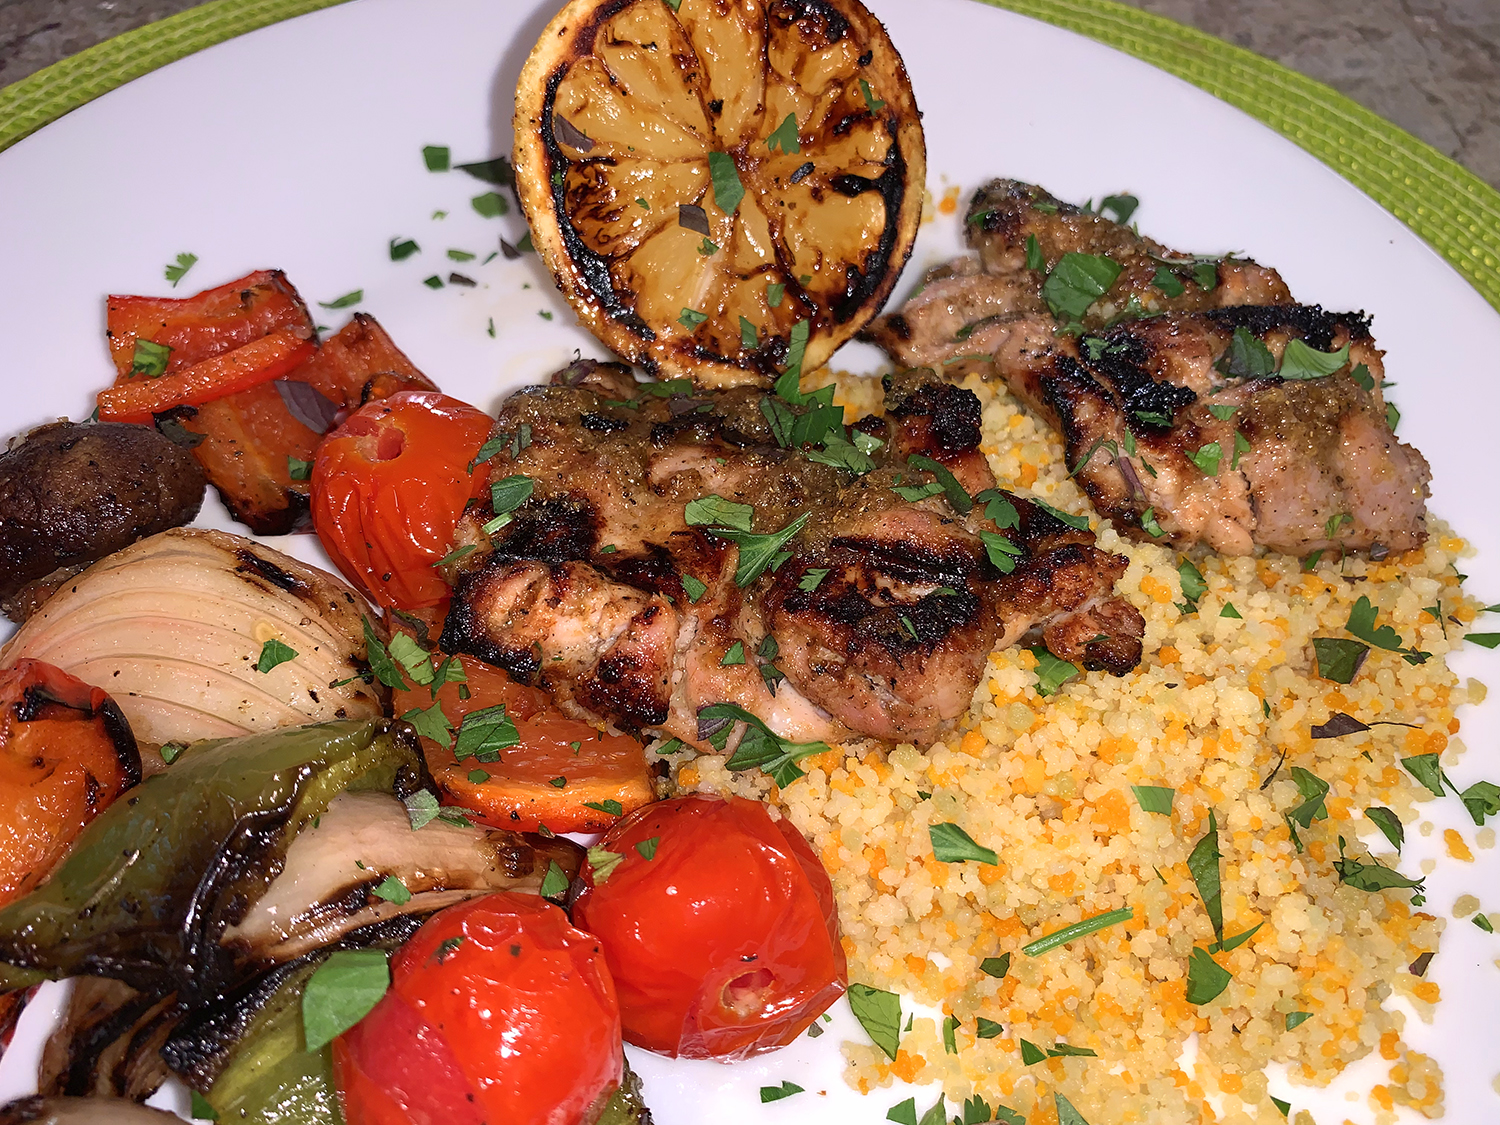
As a perfect accompaniment we also grilled vegetables tossed in EVOO, salt and pepper. Some skewers were laced with red and green bell pepper along with onion wedges; while others consisted of cherry tomatoes and mushroom caps. We purposely arranged them separately because the onion and pepper pieces took longer to cook. And if you’re not restricting carbs or gluten, tricolored couscous can round out the meal nicely.
Some reviewers commented that they used pomegranate molasses as a finishing drizzle with the herbs because it’s not as sweet as honey but still adds another interesting texture and taste. I think that’s worth a try!
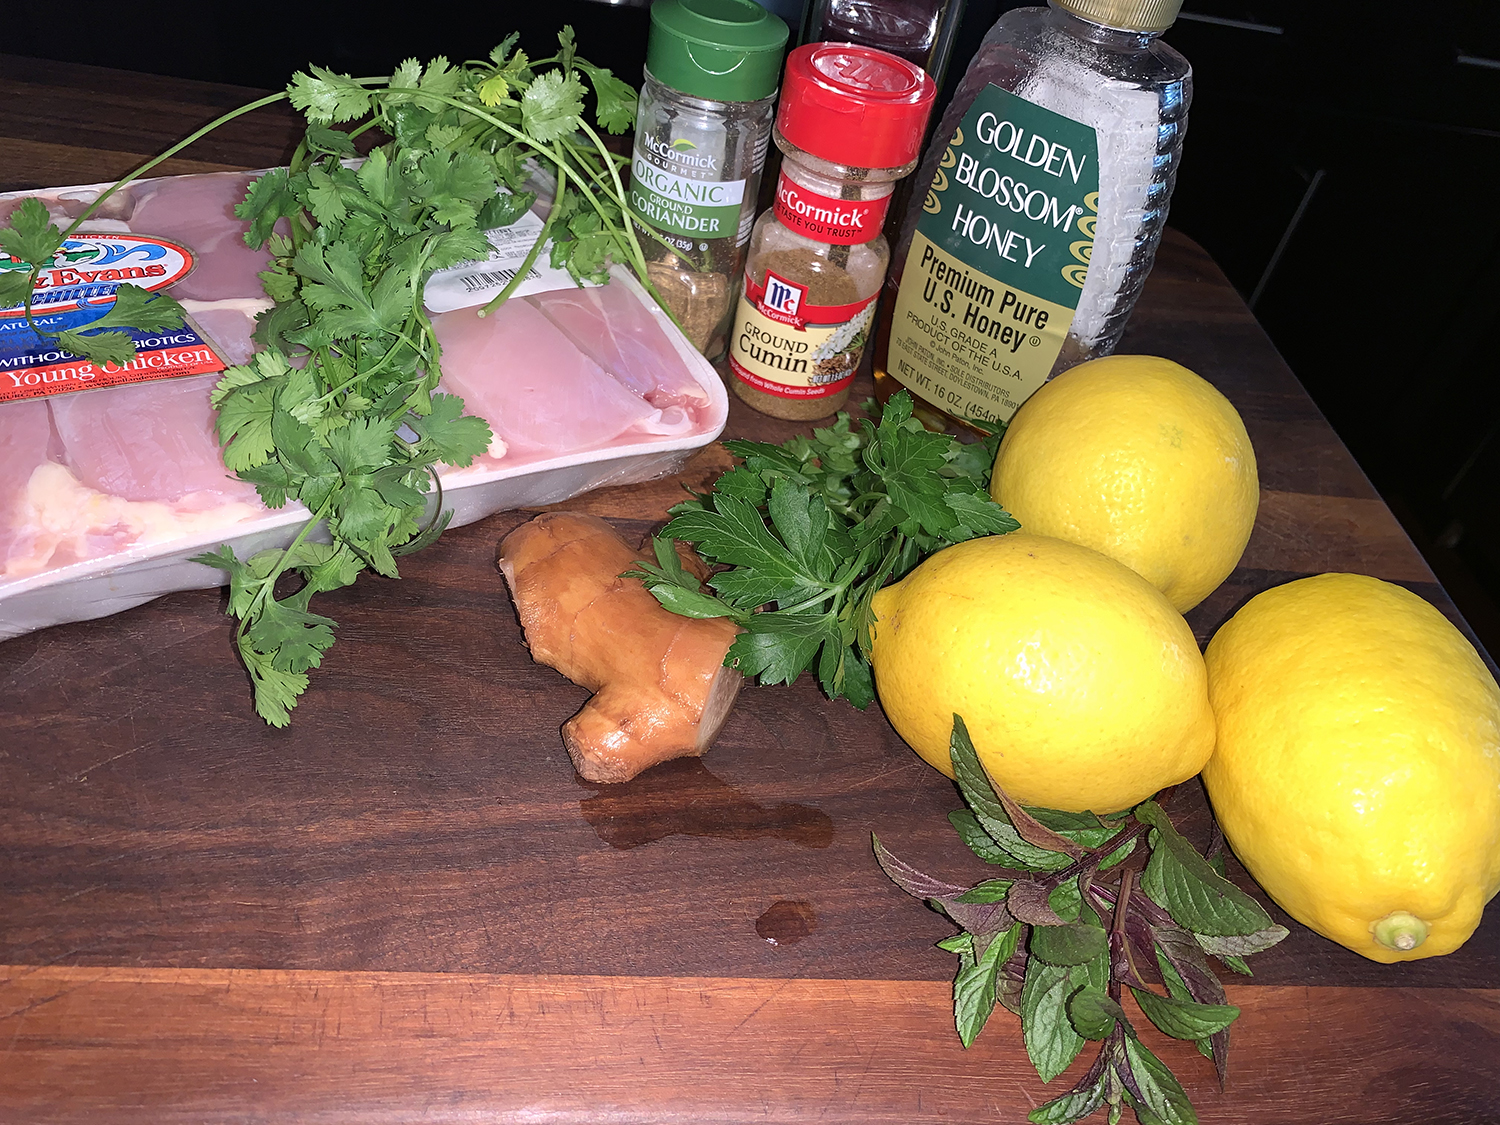
Grated zest and juice of 1 lemon, plus 2 lemons, halved
¼ cup extra-virgin olive oil
2 Tbsp. honey, plus extra to drizzle
1 Tbsp. finely grated fresh ginger
1 Tbsp. ground cumin
1 Tbsp. ground coriander
Kosher salt and ground black pepper
1½ lbs. halved boneless, skinless chicken thighs
Chopped fresh herbs
Directions
Preheat the grill for direct high heat.
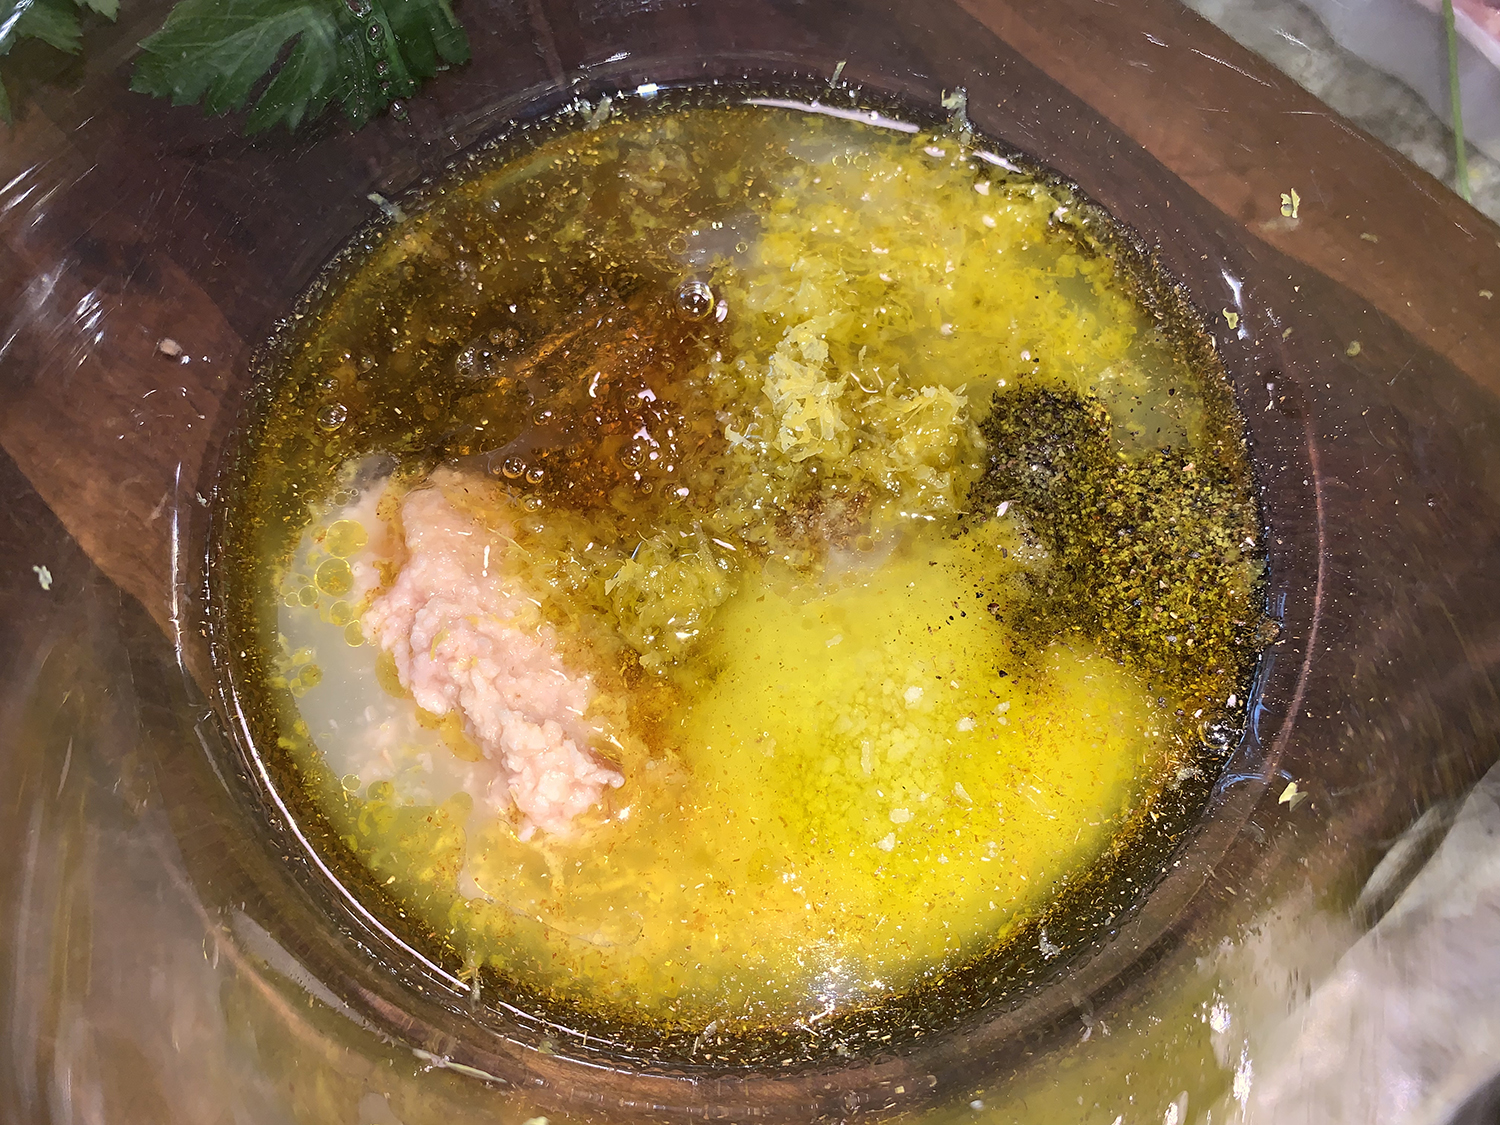
In a medium bowl, mix the lemon zest and juice, oil, honey, ginger, spices, 2 teaspoons salt and 1 teaspoon pepper; set aside 2 tablespoons.
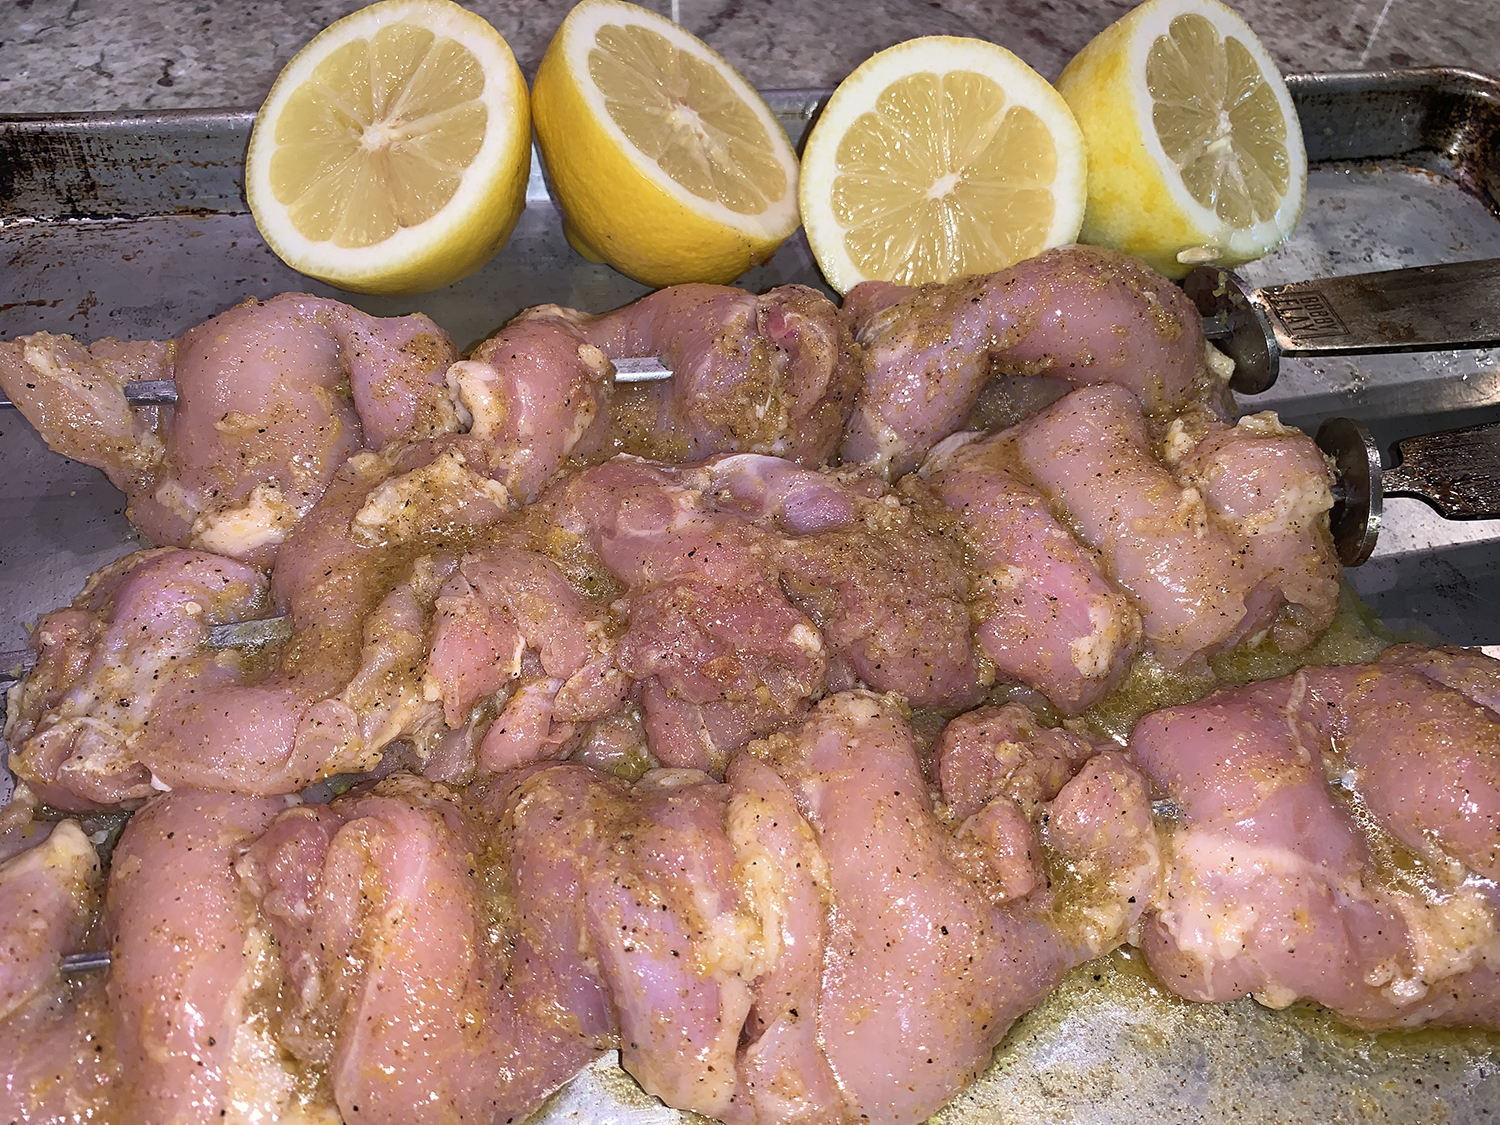
Toss the chicken with the remaining mixture. Scrunch the chicken onto metal skewers, then place on a foil-lined rimmed baking sheet. Add the 4 lemon halves.
Oil the grates and grill chicken and lemon halves until charred, about 12 minutes, flipping the chicken skewers halfway through.
Spoon the reserved lemon-oil mixture over the chicken. Sprinkle with herbs.
Drizzle the lemon halves with honey and serve alongside for squeezing over the chicken.
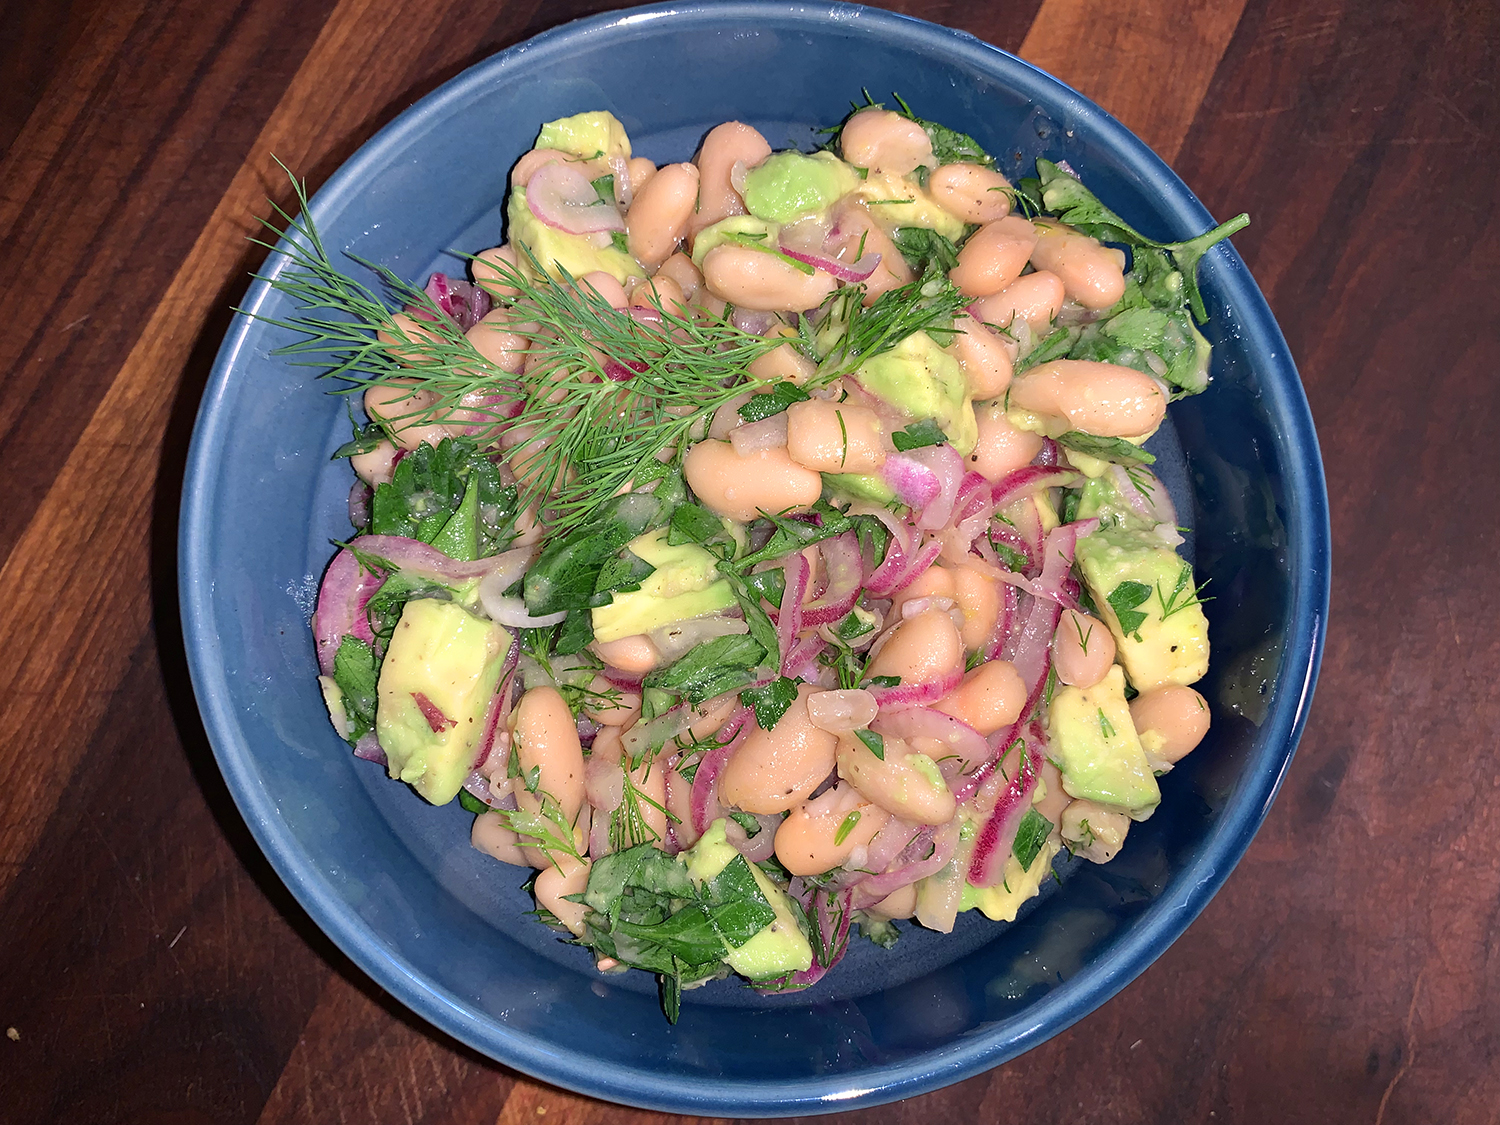
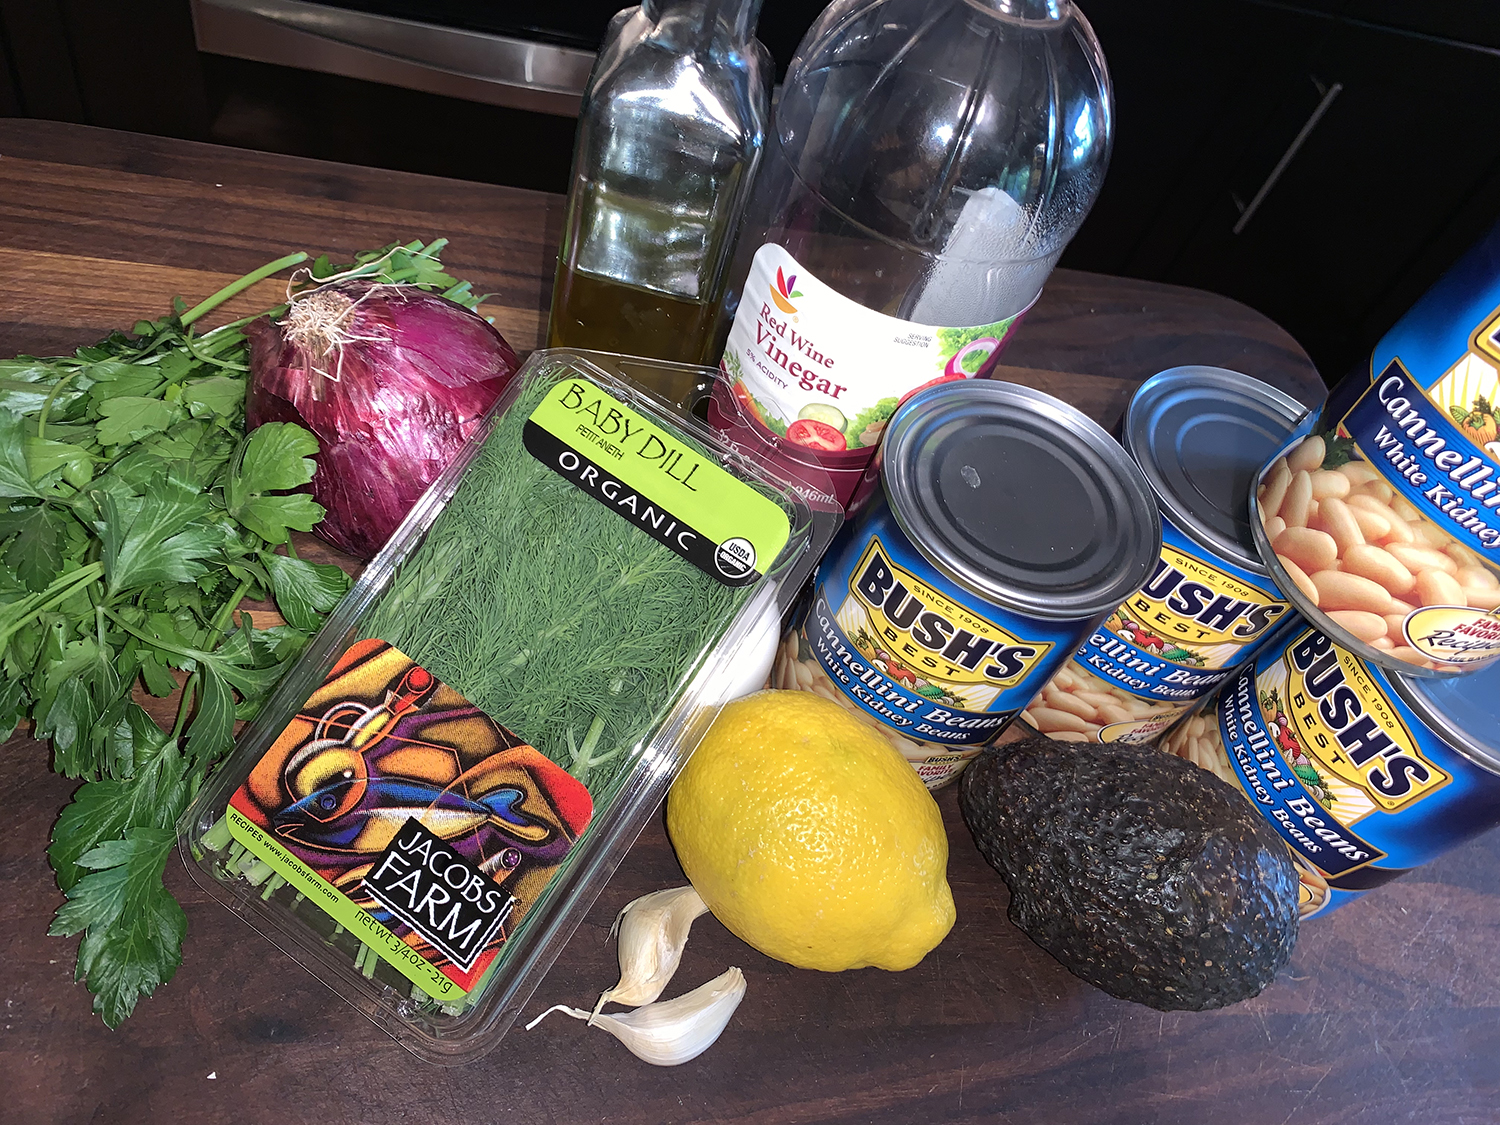
This delicious simple bean salad, Fasolia Piaz, was found in our Milk Street magazine and had the Mediterranean profile we were looking for. In Greece they typically use large, flat butter beans, but here, easier-to-find cannellinis are incorporated.
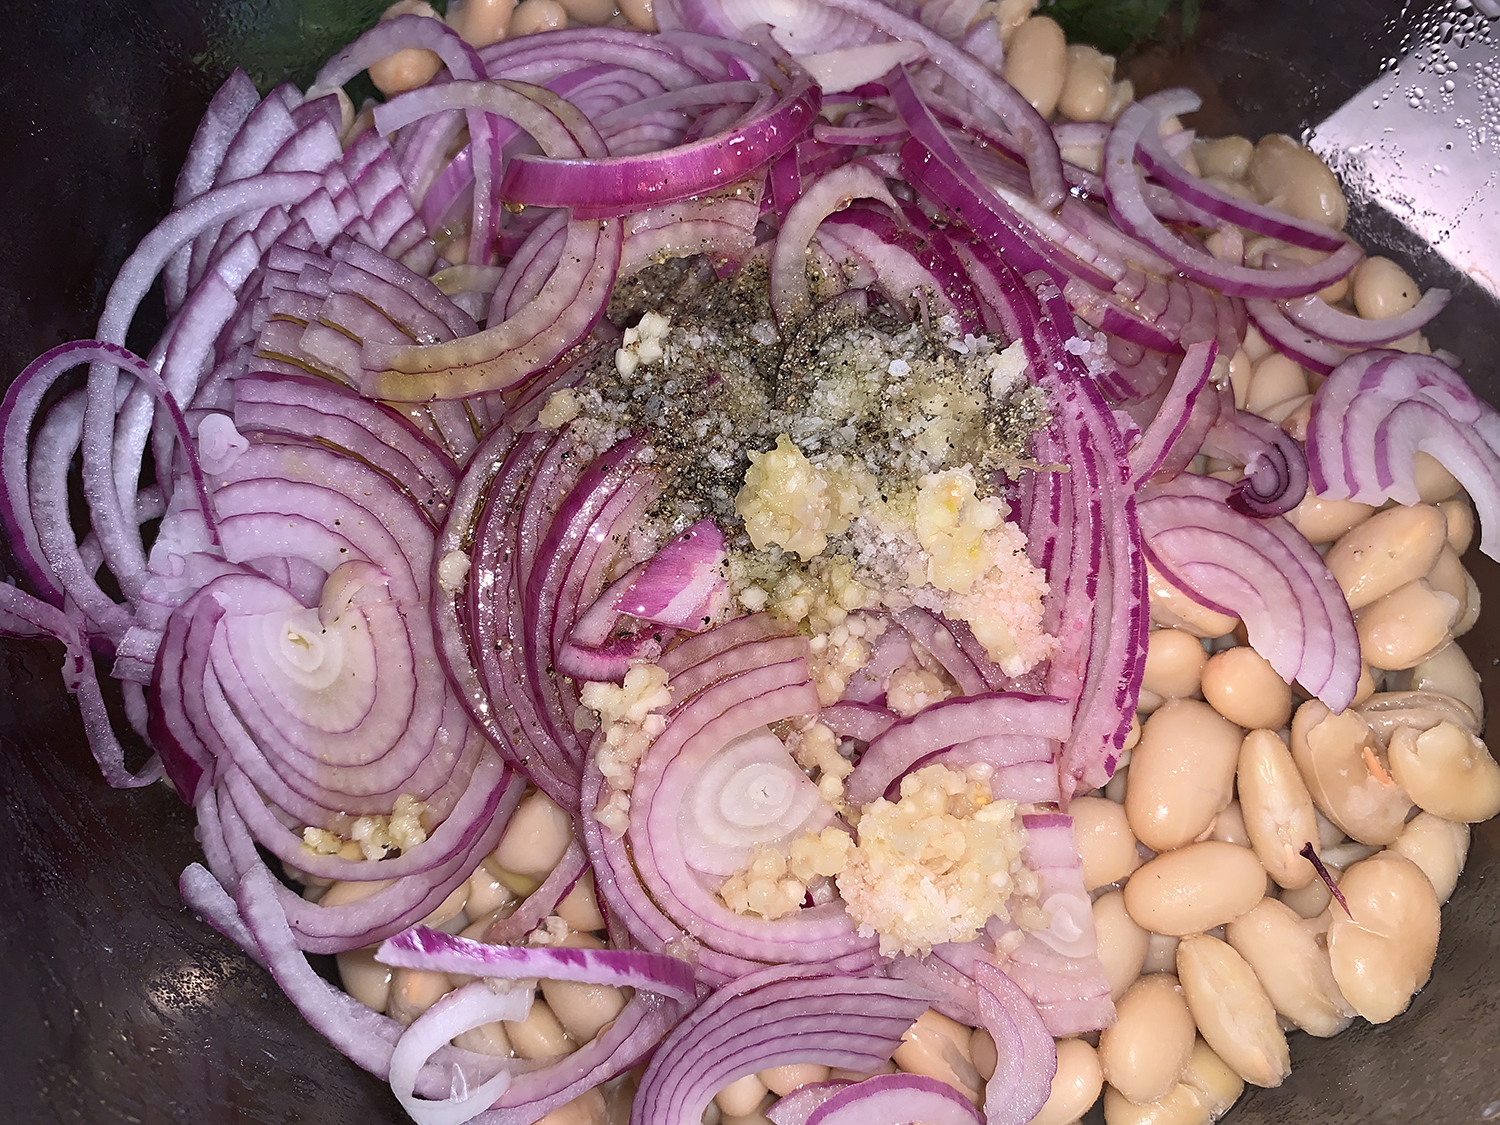
To compensate for canned beans’ blandness, they are heated in the microwave, then tossed while still hot with oil, vinegar and aromatics. As the beans cool, they absorb the seasonings, so they’re flavorful throughout.
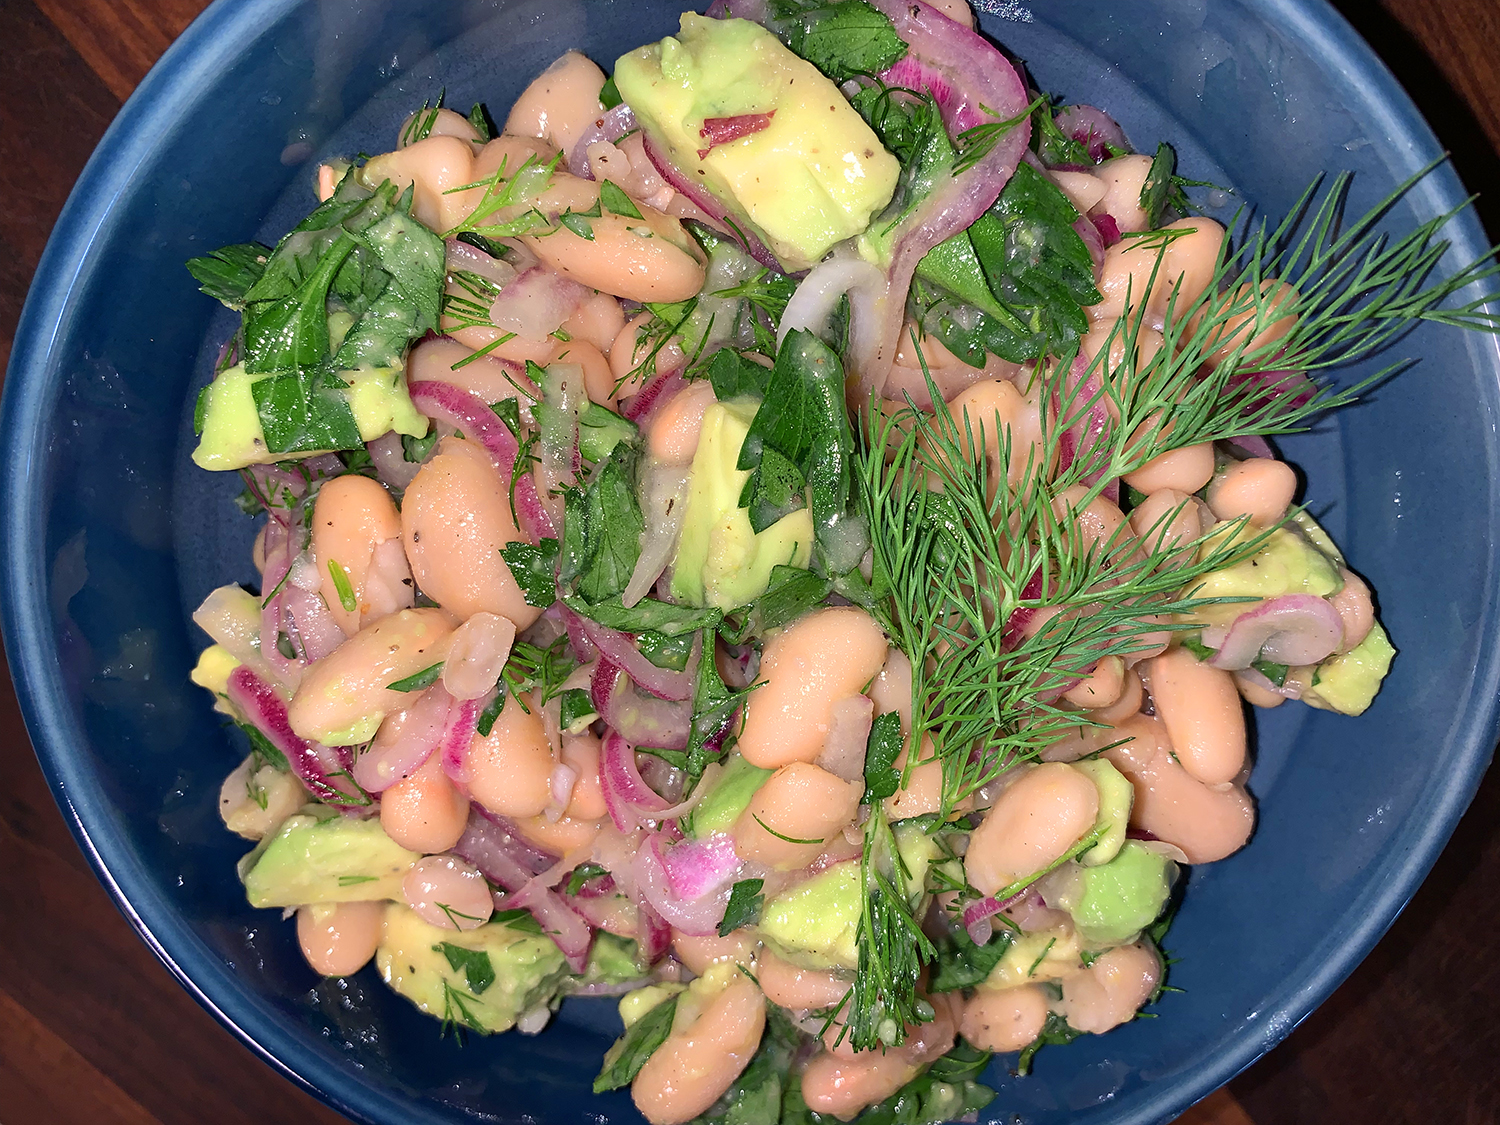
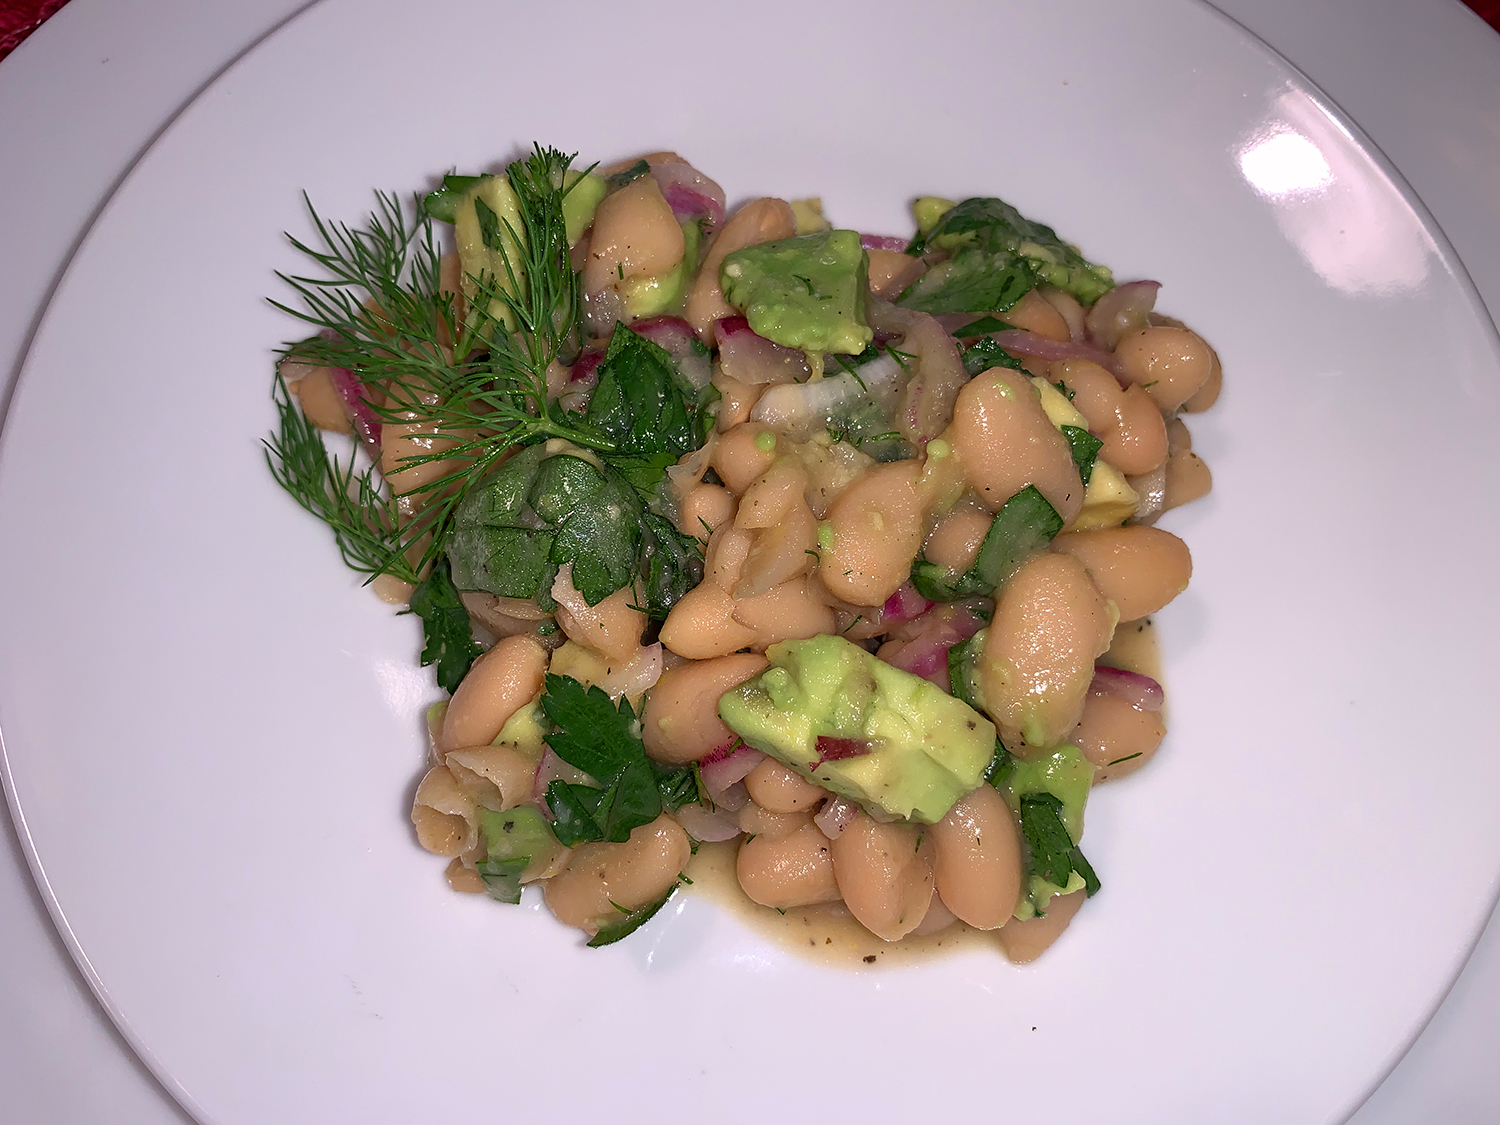
A bonus, the beans can be heated, dressed and refrigerated up to a day in advance; but bring the beans to room temperature before tossing with the avocado, herbs and lemon. However, even cold the salad is delicious. A great dish to serve at a picnic or potluck as a side for meat lovers, or as a main for plant-based followers.
Milk Street stresses not to skip the step of heating the beans in the microwave, and don’t allow the beans to cool before adding the oil, vinegar and aromatics. Dressing them while hot ensures they are fully infused with flavor. To keep the flavors and colors fresh and bright, don’t add the avocado and herbs until you’re ready to serve.
4 15½-oz. cans cannellini beans, rinsed and drained
Kosher salt and ground black pepper
2 medium garlic cloves, finely grated
1 small red onion, halved and thinly sliced
1/3 cup red wine vinegar
3 Tbsp. extra-virgin olive oil, plus more, to serve
1 ripe avocado, halved, pitted, peeled and chopped into ½-inch pieces
1 cup lightly packed flat-leaf parsley, torn if large
1/2 cup lightly packed fresh dill, chopped
1 tsp. grated lemon zest
1 tsp. lemon juice
Directions
In a large microwave-safe bowl, toss the beans with 1 teaspoon salt. Cover and microwave on high until hot, 3 to 3½ minutes, stirring once halfway through.
To the hot beans, add the garlic, onion, vinegar, oil, 2 teaspoons salt and ¾ teaspoon pepper; toss to combine. Let stand until cooled to room temperature, about 30 minutes, stirring once or twice.
Stir the beans once again, then stir in the avocado, parsley, dill and lemon zest and juice. Taste and season with salt and pepper. Transfer to a serving bowl and drizzle with additional oil.
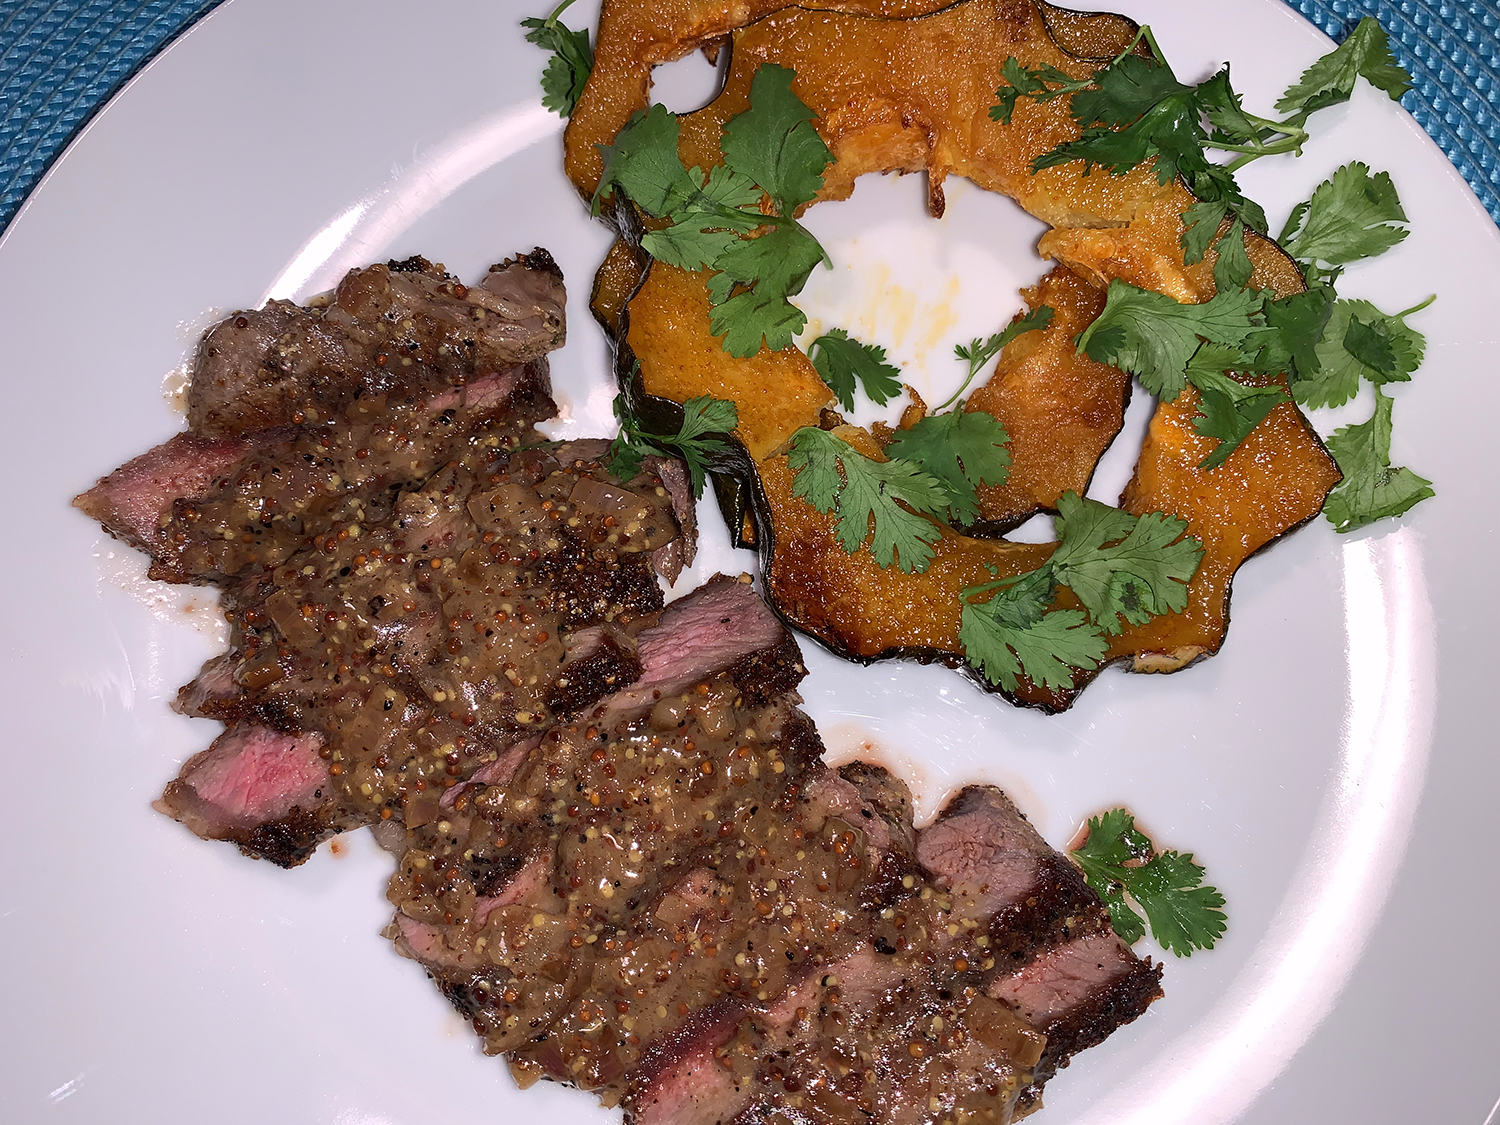
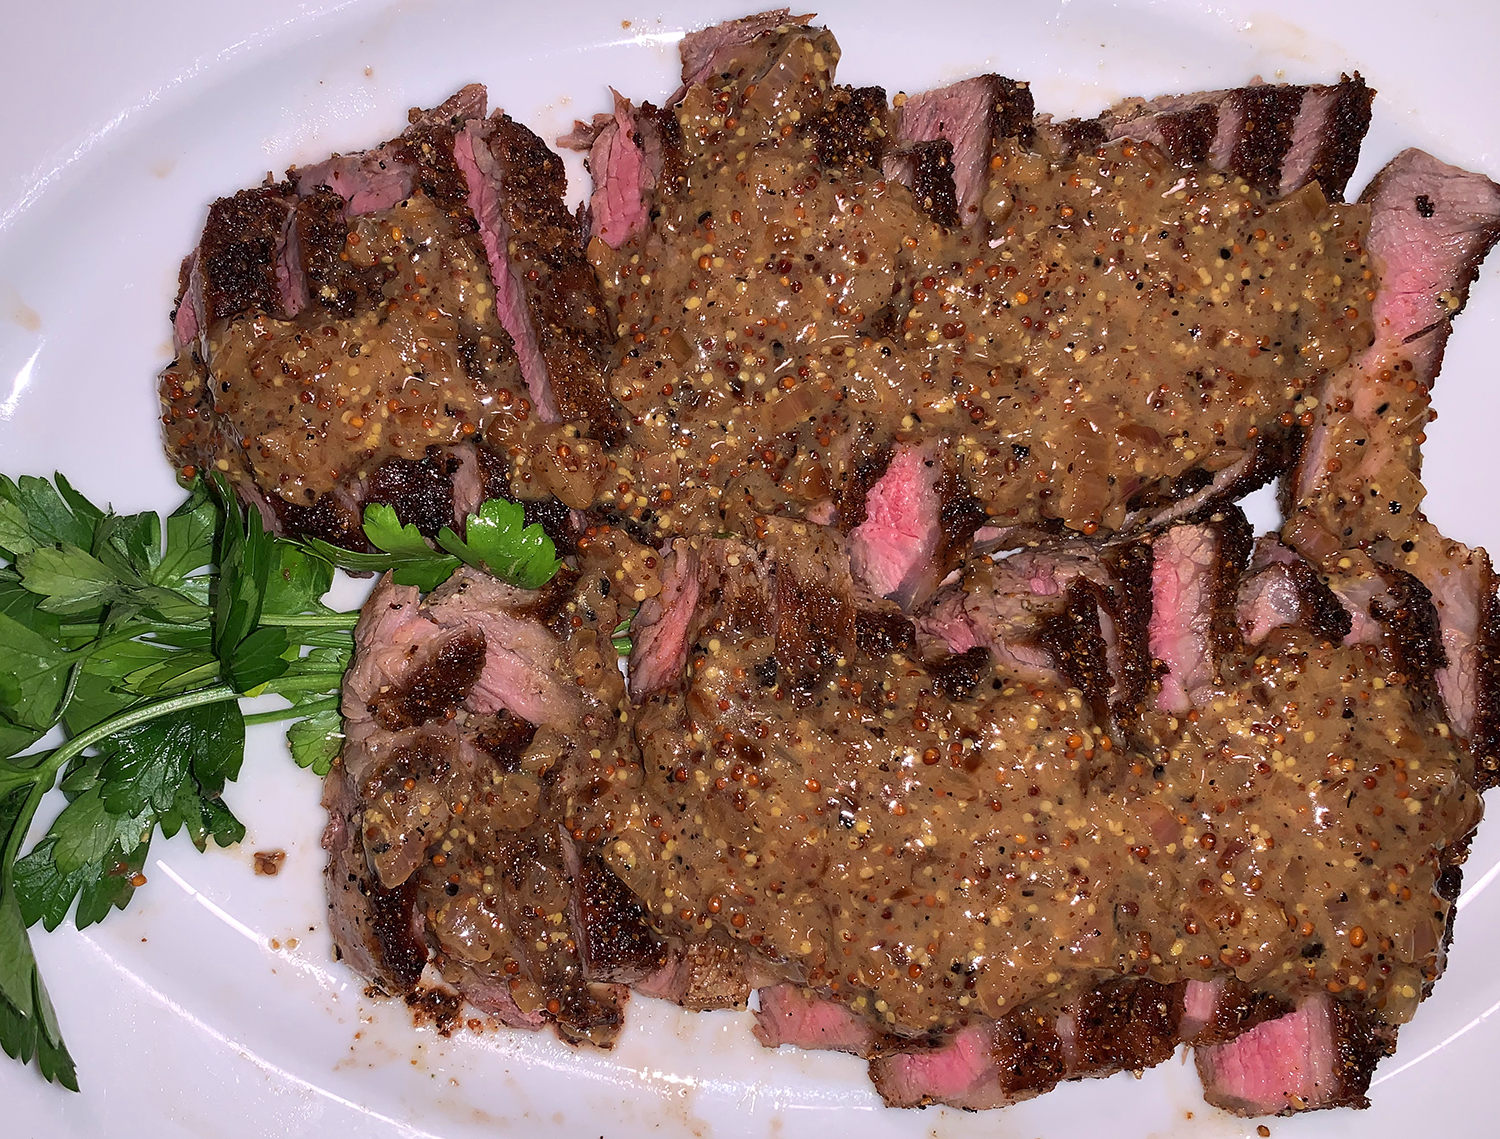
Super simple, and fabulously flavorful, this riff on pan-seared steak found in Milk Street magazine, is just the ticket to take a dinner from hum-drum to over-the-top! With Father’s Day coming up, it might be just the change your man is looking for. Of course, if he’s hell-bent on grilling, this recipe only works on the stove top because you need to make the fantastic sauce in a pan—which I guess you could improvise on an outdoor grill…
The secret is to build on the spicy mustard seed used as a steak seasoning by making that quick pan sauce with whole-grain mustard, plus a little shallot and butter. Cooking alert: Be sure the pan is off the burner when the butter is whisked into the sauce at the end so the butter doesn’t “break” and become watery. That would be a real bummer…
With our side of Roasted Sweet and Spicy Squash, another flavor-packed recipe, my man exclaimed this might be his new favorite steak meal!
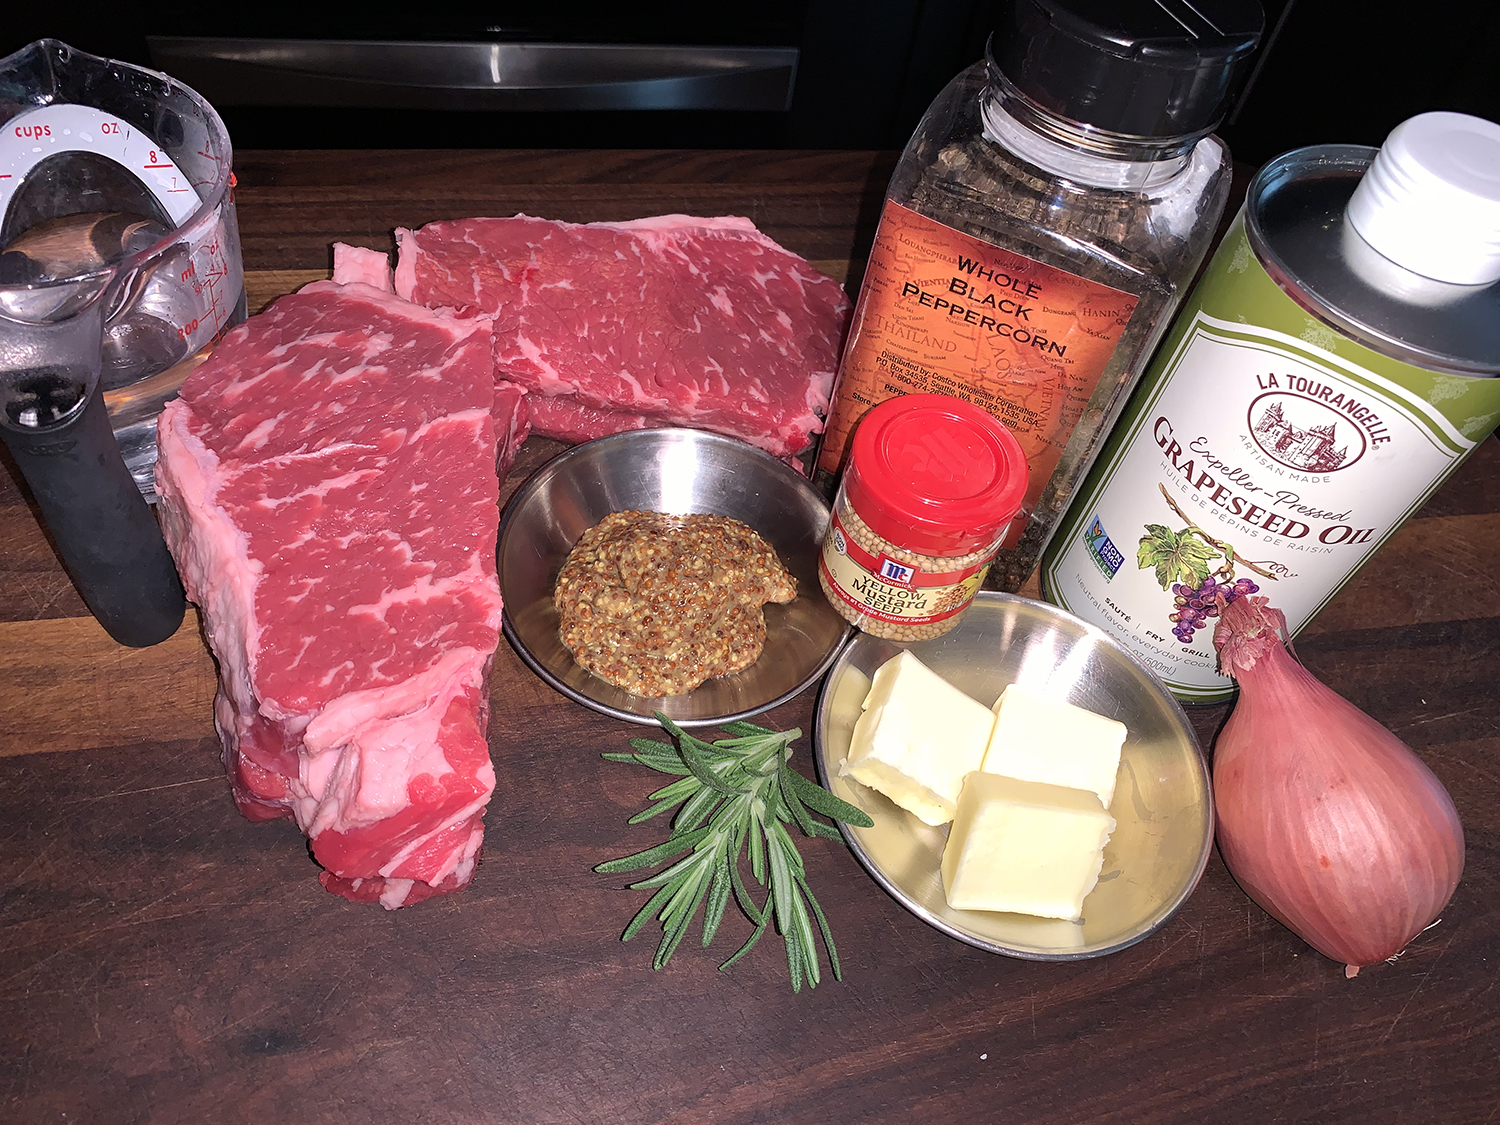
Pan-Seared Steak with Mustard Seeds, Black Pepper, and Rosemary
3 Tbsp. salted butter, cut into 1-Tbsp. pieces, divided
1 medium shallot, finely chopped
2 Tbsp. whole-grain Dijon mustard
Directions
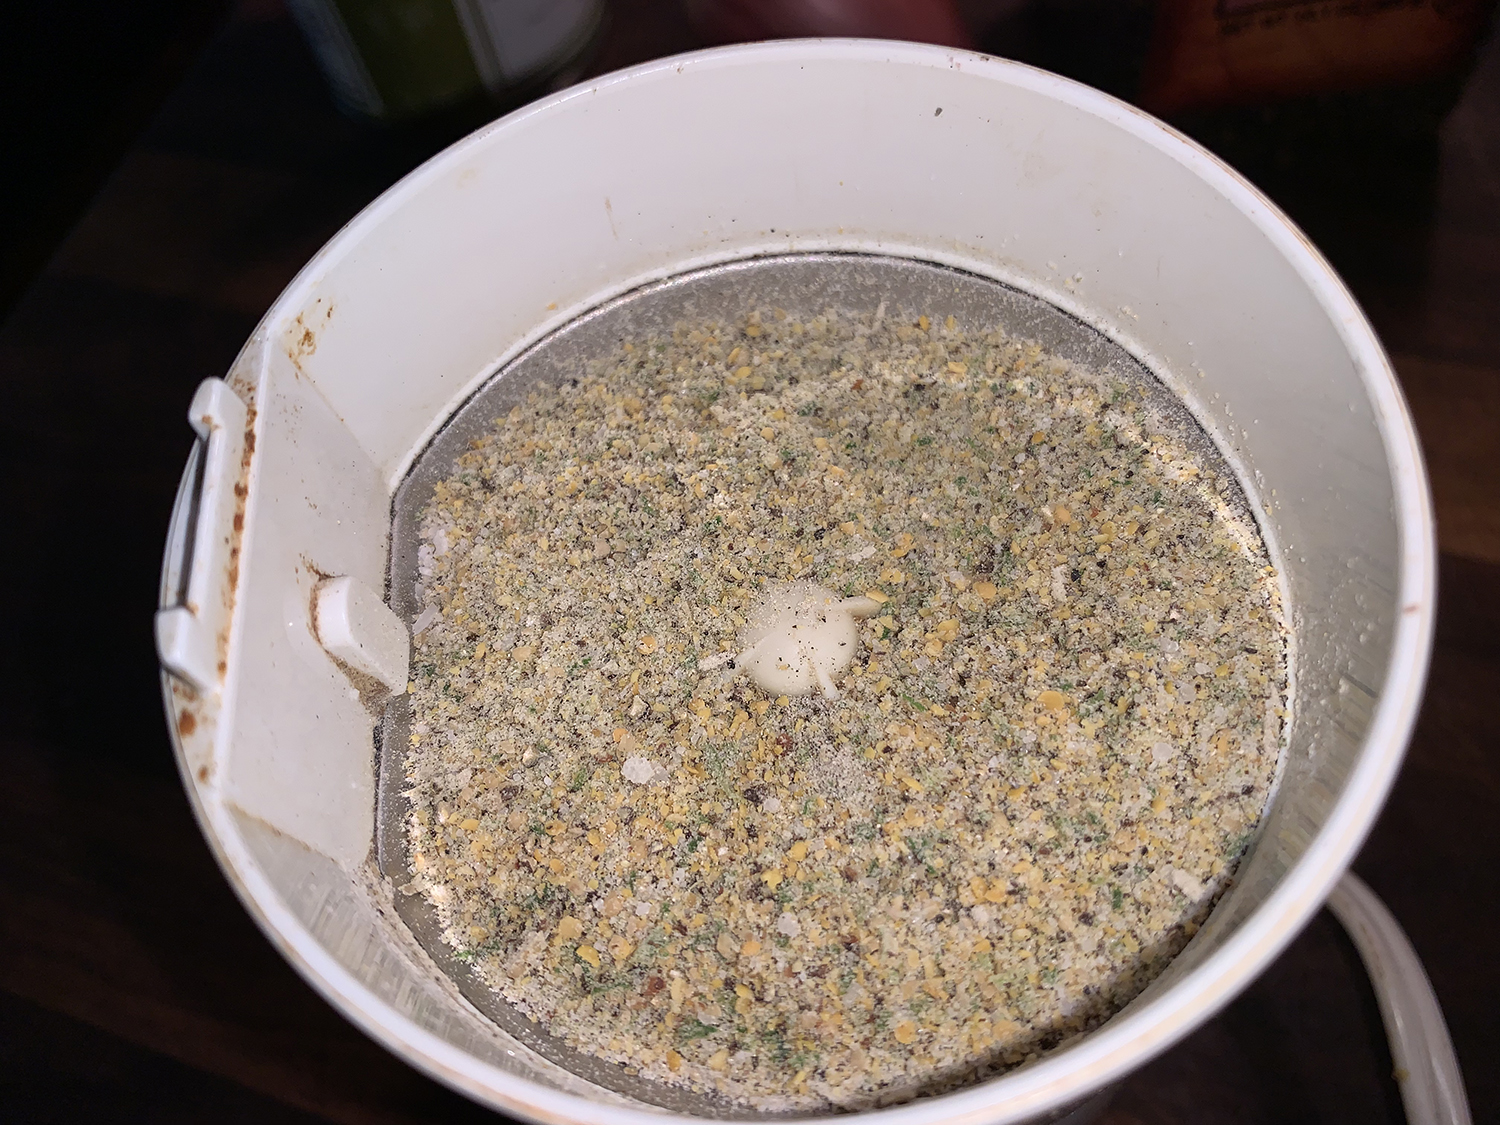
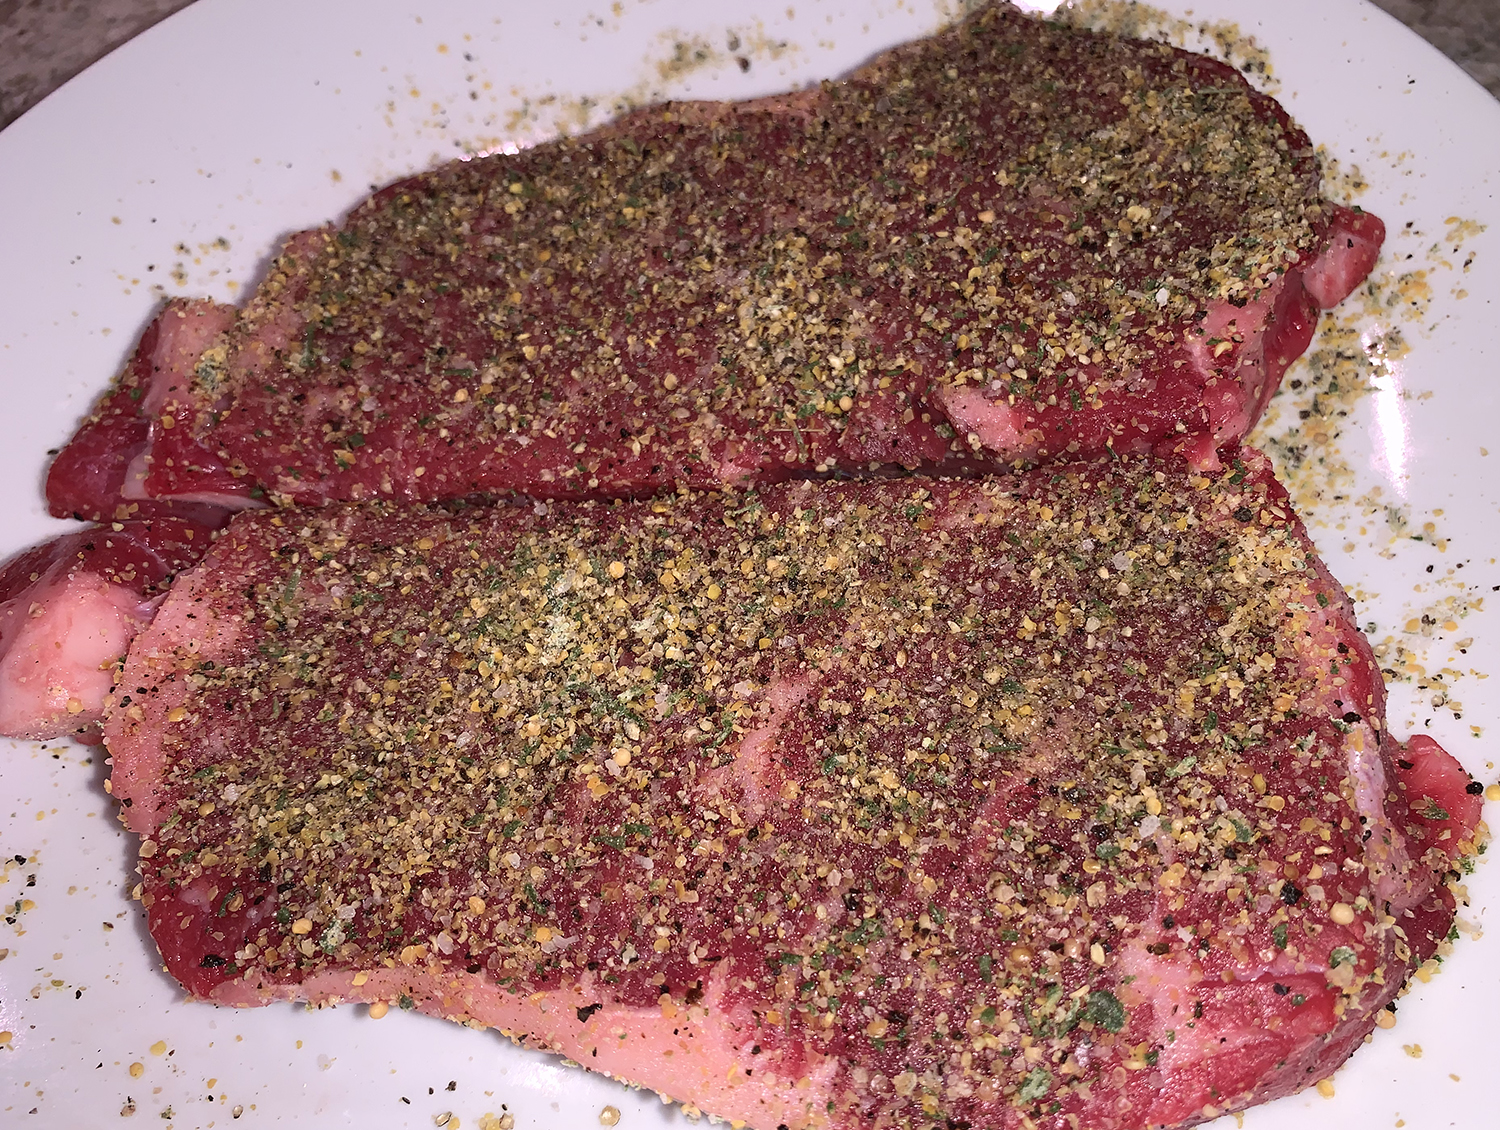
In a spice grinder, pulse the mustard seeds, peppercorns, rosemary and 1 tablespoon salt until coarsely ground. Season the steaks on all sides with the mixture.
In a 12-inch skillet, heat the oil over medium-high until barely smoking. Add the steaks and brown on both sides until the centers reach 120°F (for medium-rare). Transfer to a platter.
To the skillet, add 1 tablespoon of the butter and the shallot. Cook over medium, stirring, until the shallot is softened. Add ⅔ cup water and the Dijon mustard. Cook, stirring, until slightly thickened.
Off heat, whisk in the remaining 2 tablespoons butter and the accumulated steak juices. Taste and season with salt and pepper.
Slice the steaks, return to the platter and pour the sauce over them.
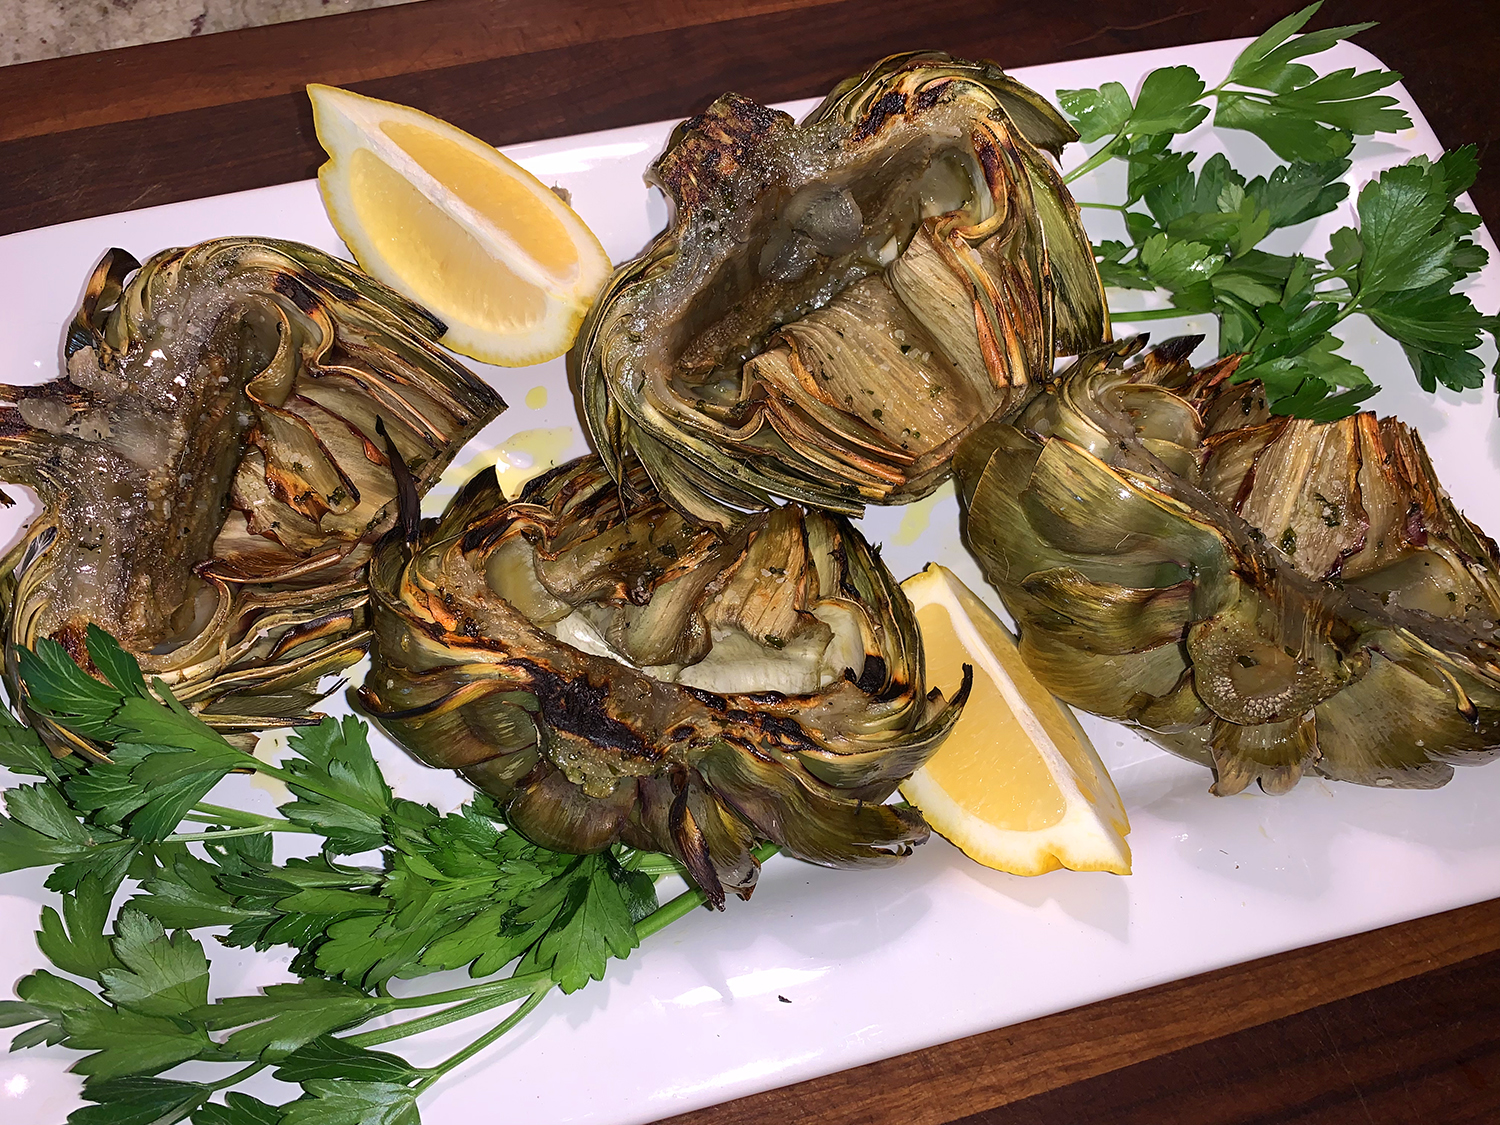
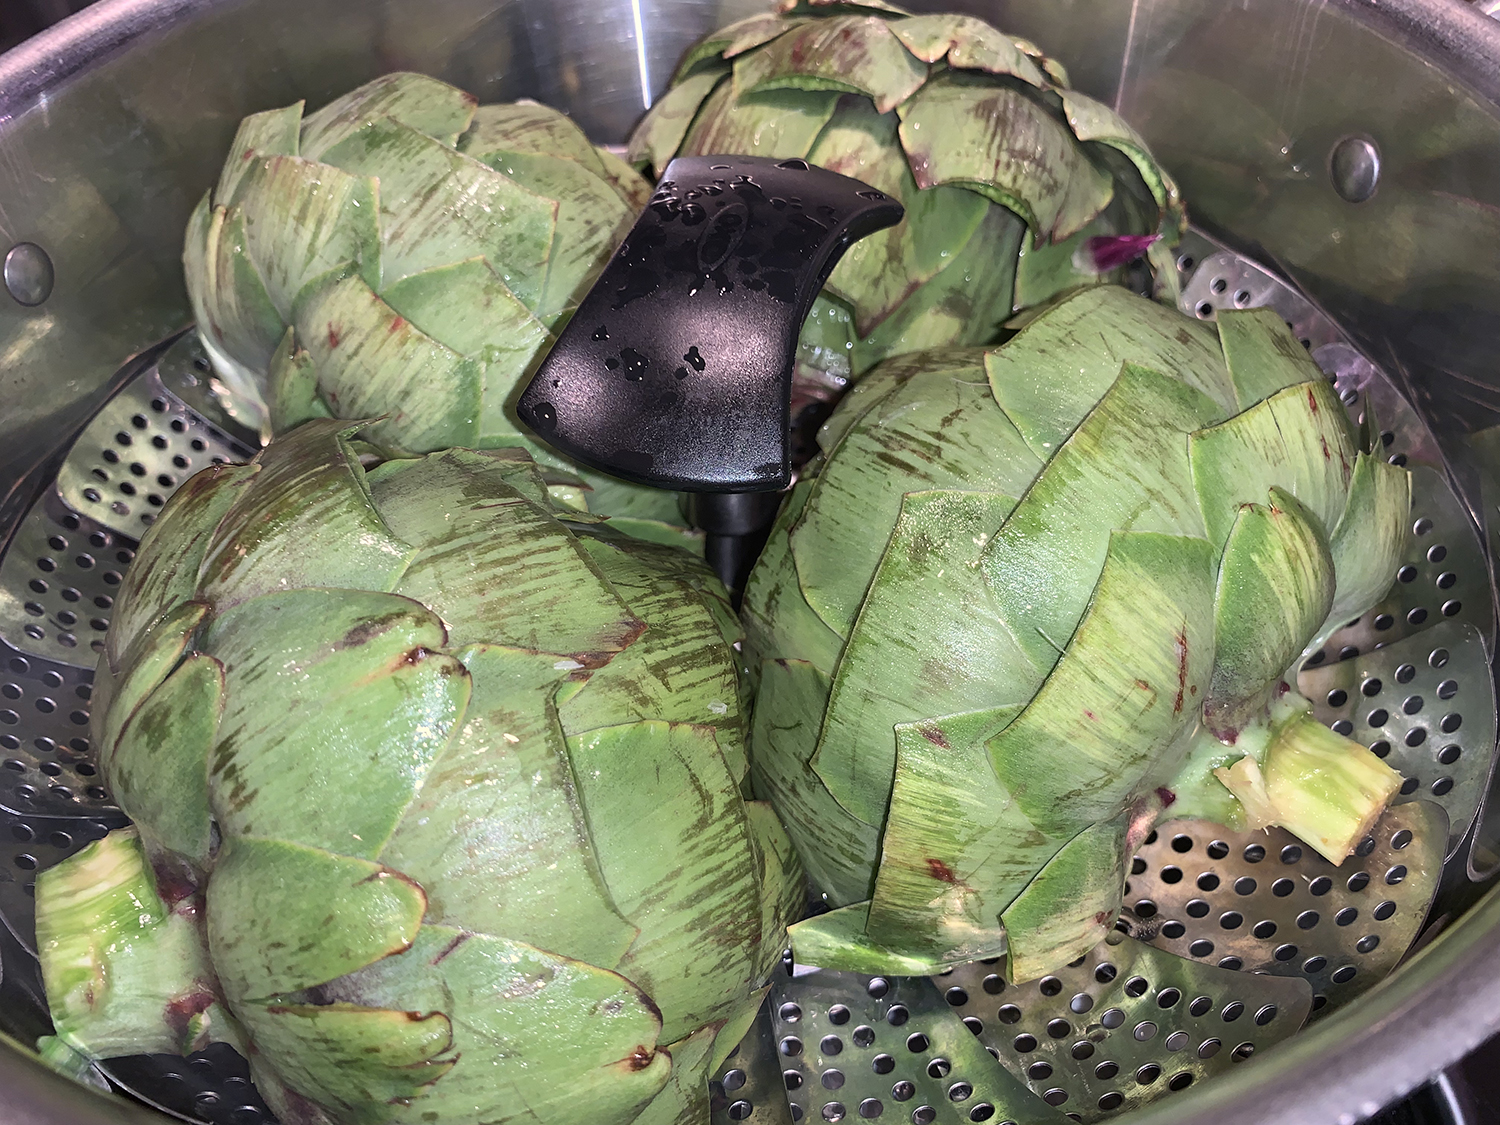
It’s odd, that even though we love artichokes, neither of us have ever cooked thistles. So this was our first foray, and we decided to grill them. After a bit of online research, we happened upon this approach from Simply Recipes. Apparently, the trick is to steam them first.
Artichokes take a long time to cook, and like moist heat, so it’s best to just grill them at the end for the grill marks and smoky flavor—which it did in spades! Steaming, instead of boiling, assures the artichokes don’t get too soggy from the water and they stay dry enough to get good browning on the grill.
After we brought them home from the grocery store I had to read up on how to store them for a few days. Well let me tell you, everybody seems to have their own opinion. But my first mistake was cutting a good portion of the stems off so that the large globes would fit into a plastic ziploc. That is a no-no, BTW.
According to Williams Sonoma, sprinkle artichokes with a few drops of water and store in a perforated plastic bag in the coldest part of the refrigerator for up to 1 week. If cooking them on the day you buy them, leave them at cool room temperature. Once opened, marinated artichoke hearts will keep refrigerated for up to 2 weeks.
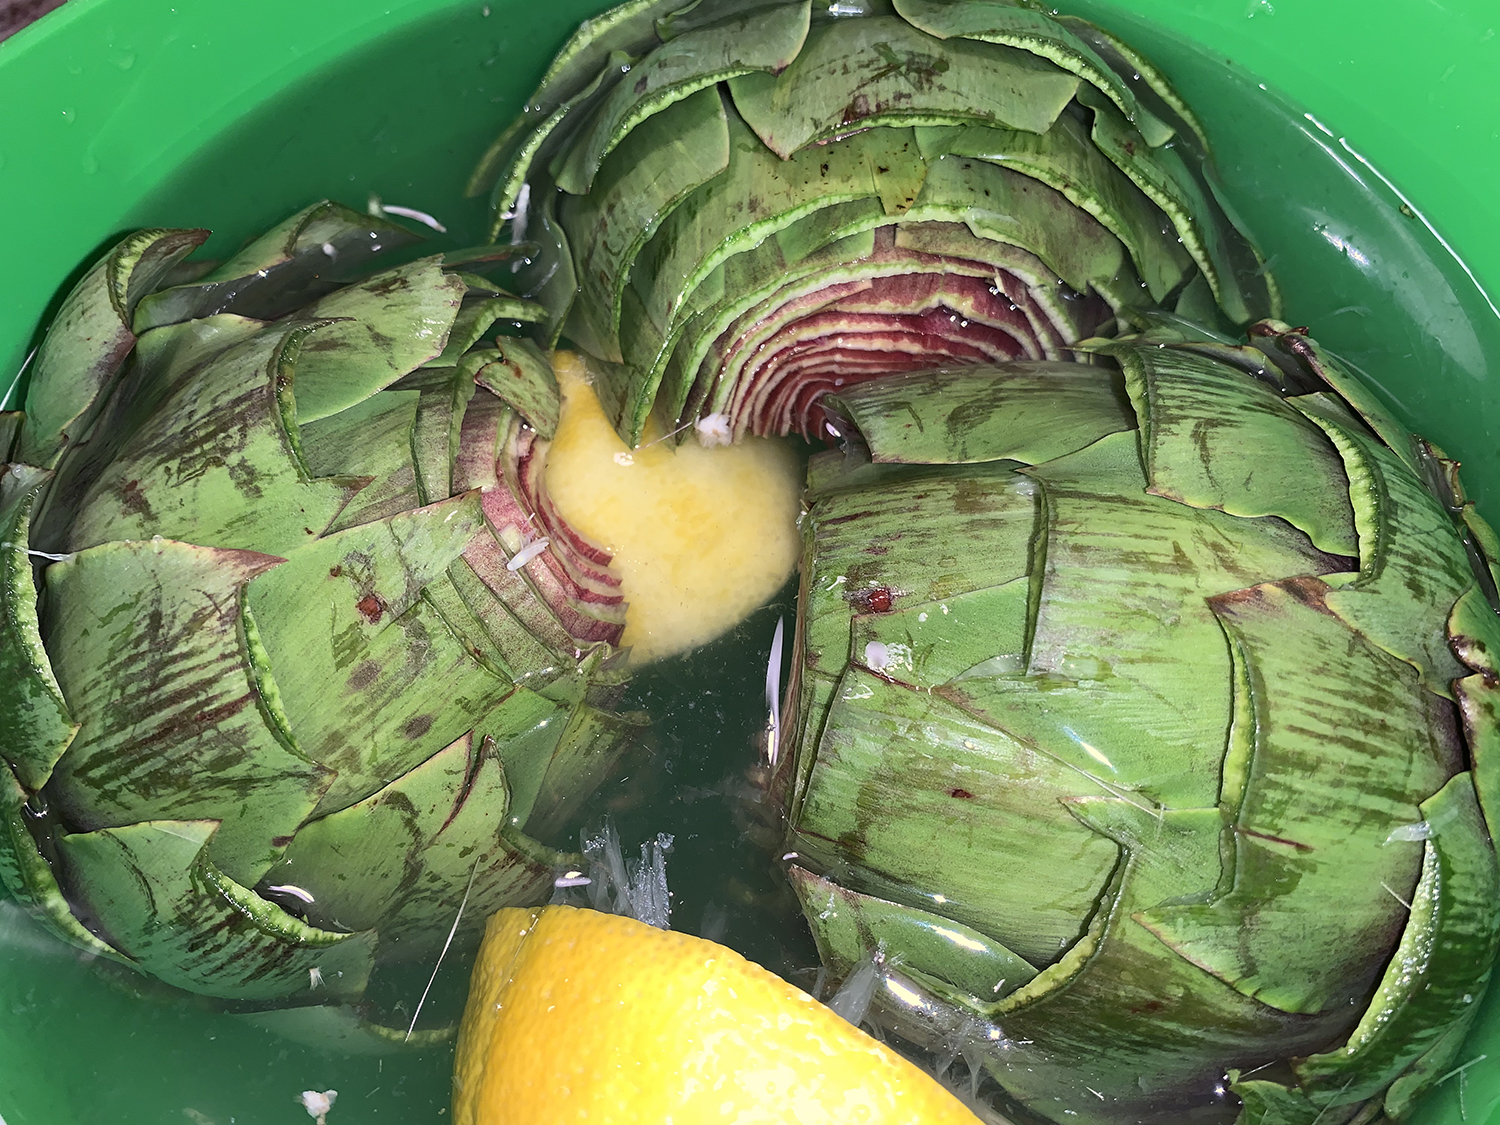
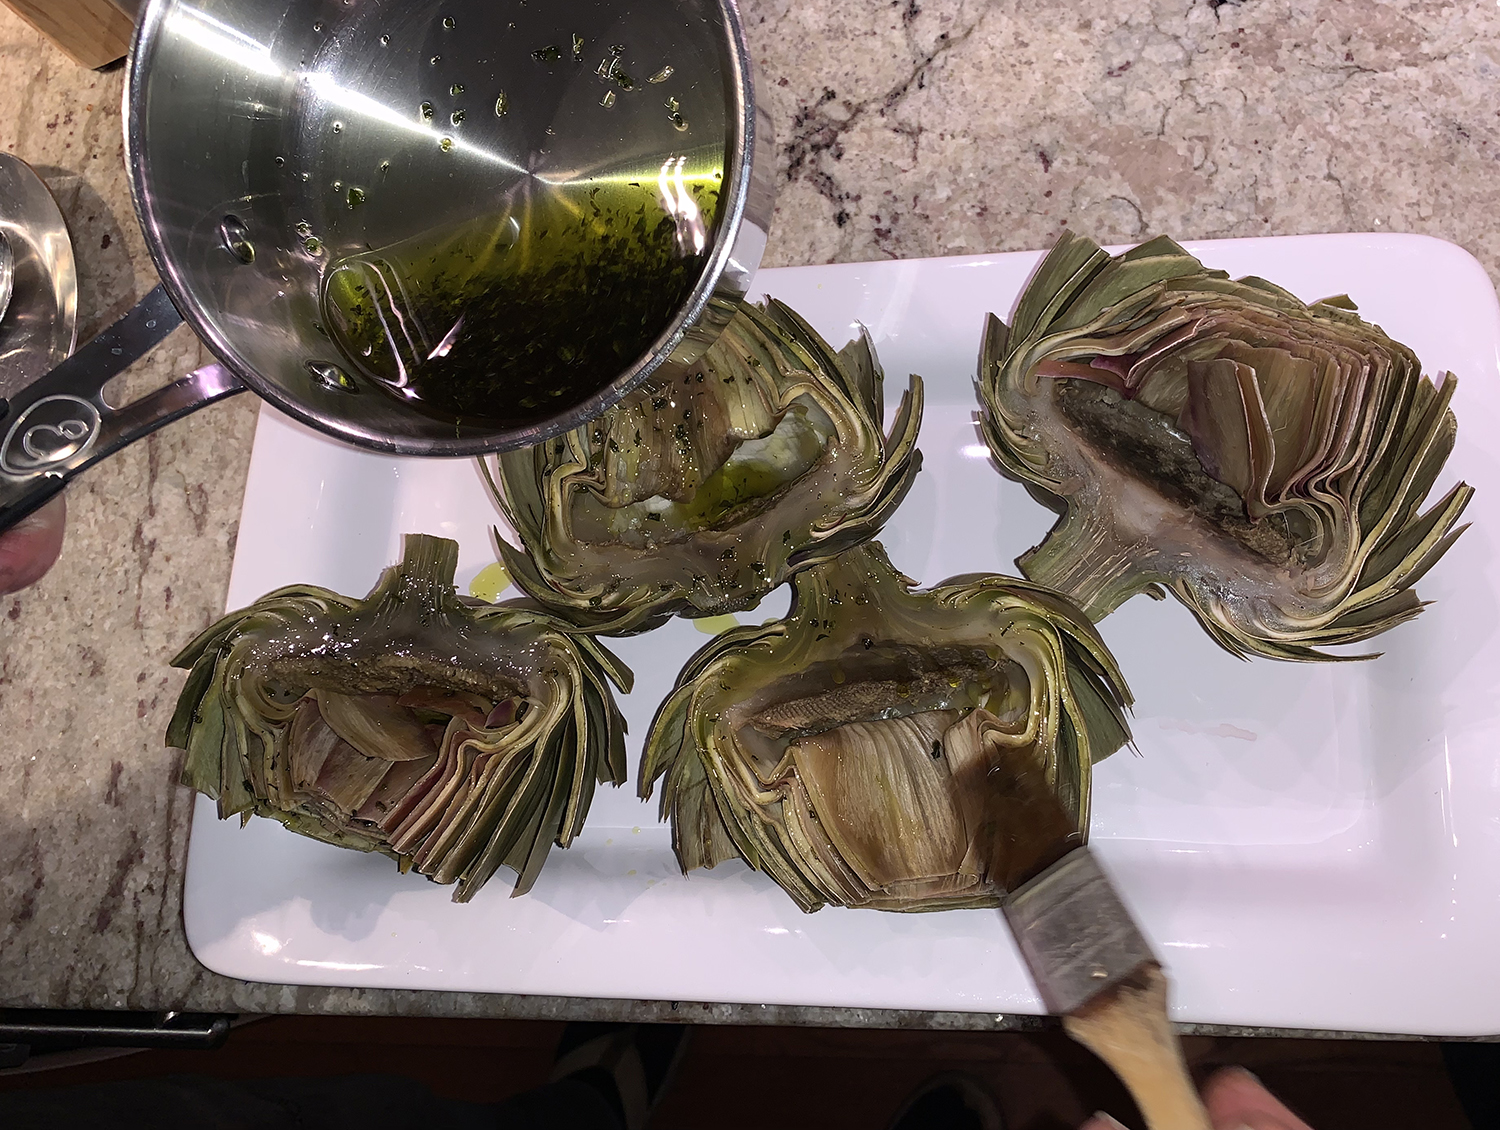
Let’s just say prepping these puppies was a little labor intensive, especially scooping out the fuzzy chokes. Instead of rubbing all of the cut areas, including each leaf to prevent the artichokes from turning brown, we acidulated them. This is done by filling a large bowl with 2 quarts of water, slicing a lemon in half, and squeezing the juice into the water, leaving the rinds submersed in the liquid.
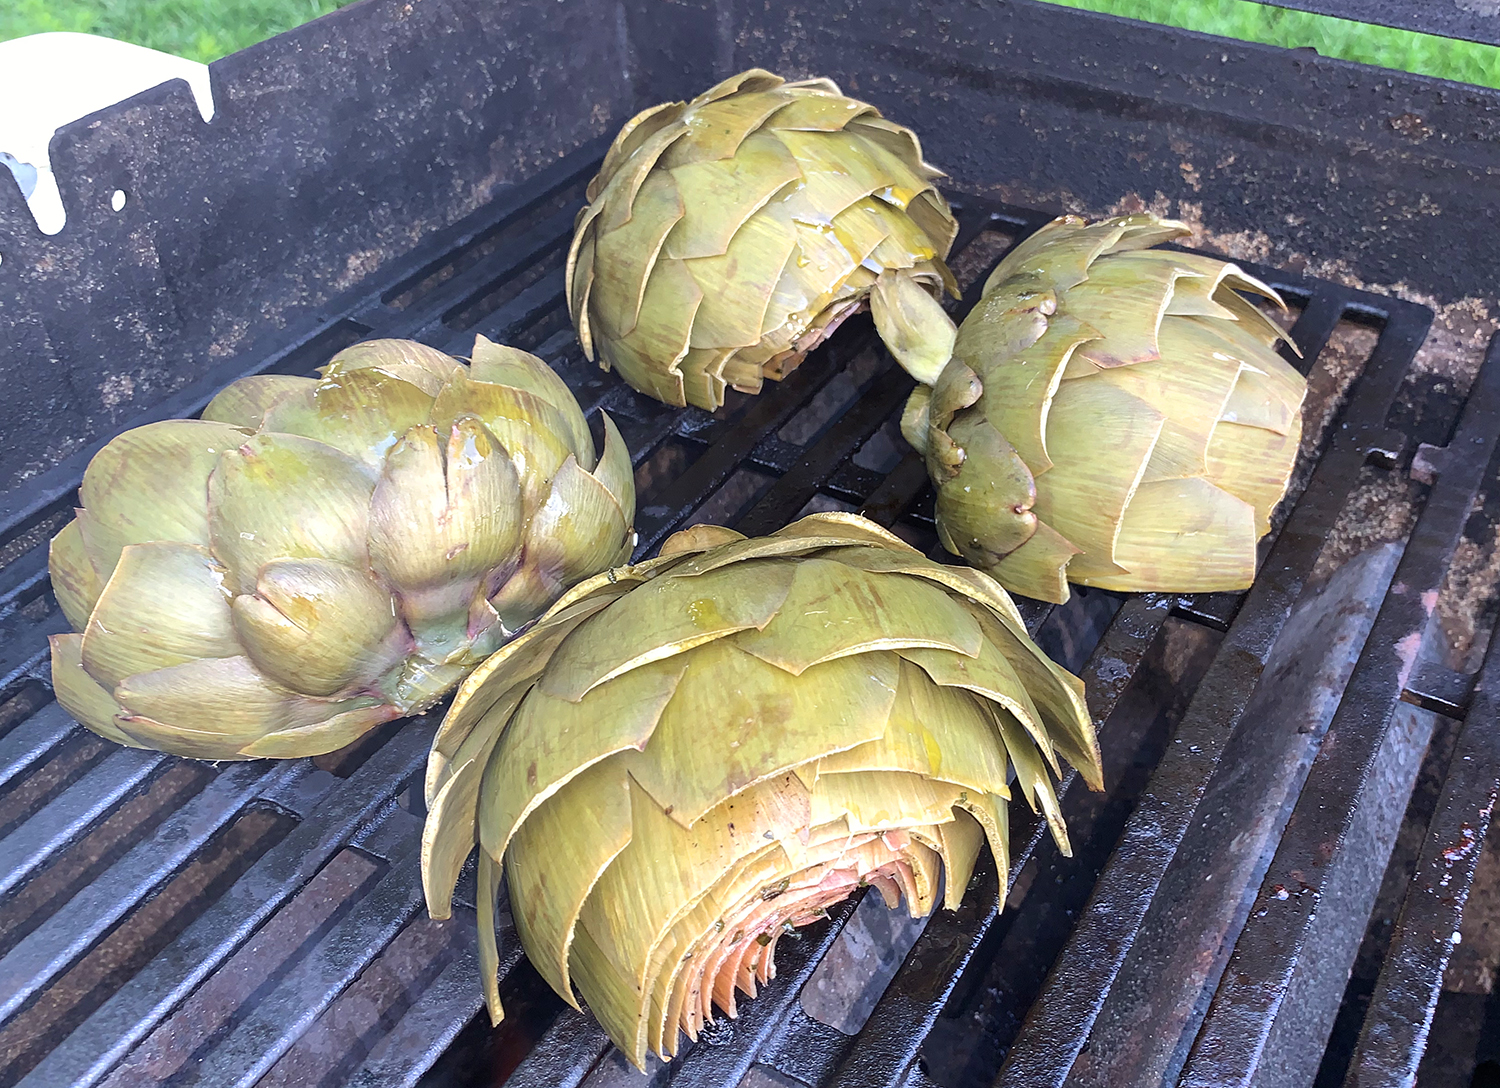
The grilling aspect is easy-peasy. Just prepare your grill for direct, high heat. Use a pastry brush to brush the artichoke all over with the herb infused oil, then sprinkle all over with salt. Place the artichoke halves cut-side-down on the grill grates, cover, and grill for 5 to 10 minutes, until you have nice grill mark on the cut sides of the artichokes. If desired, serve with mayonnaise, remoulade, or aioli.
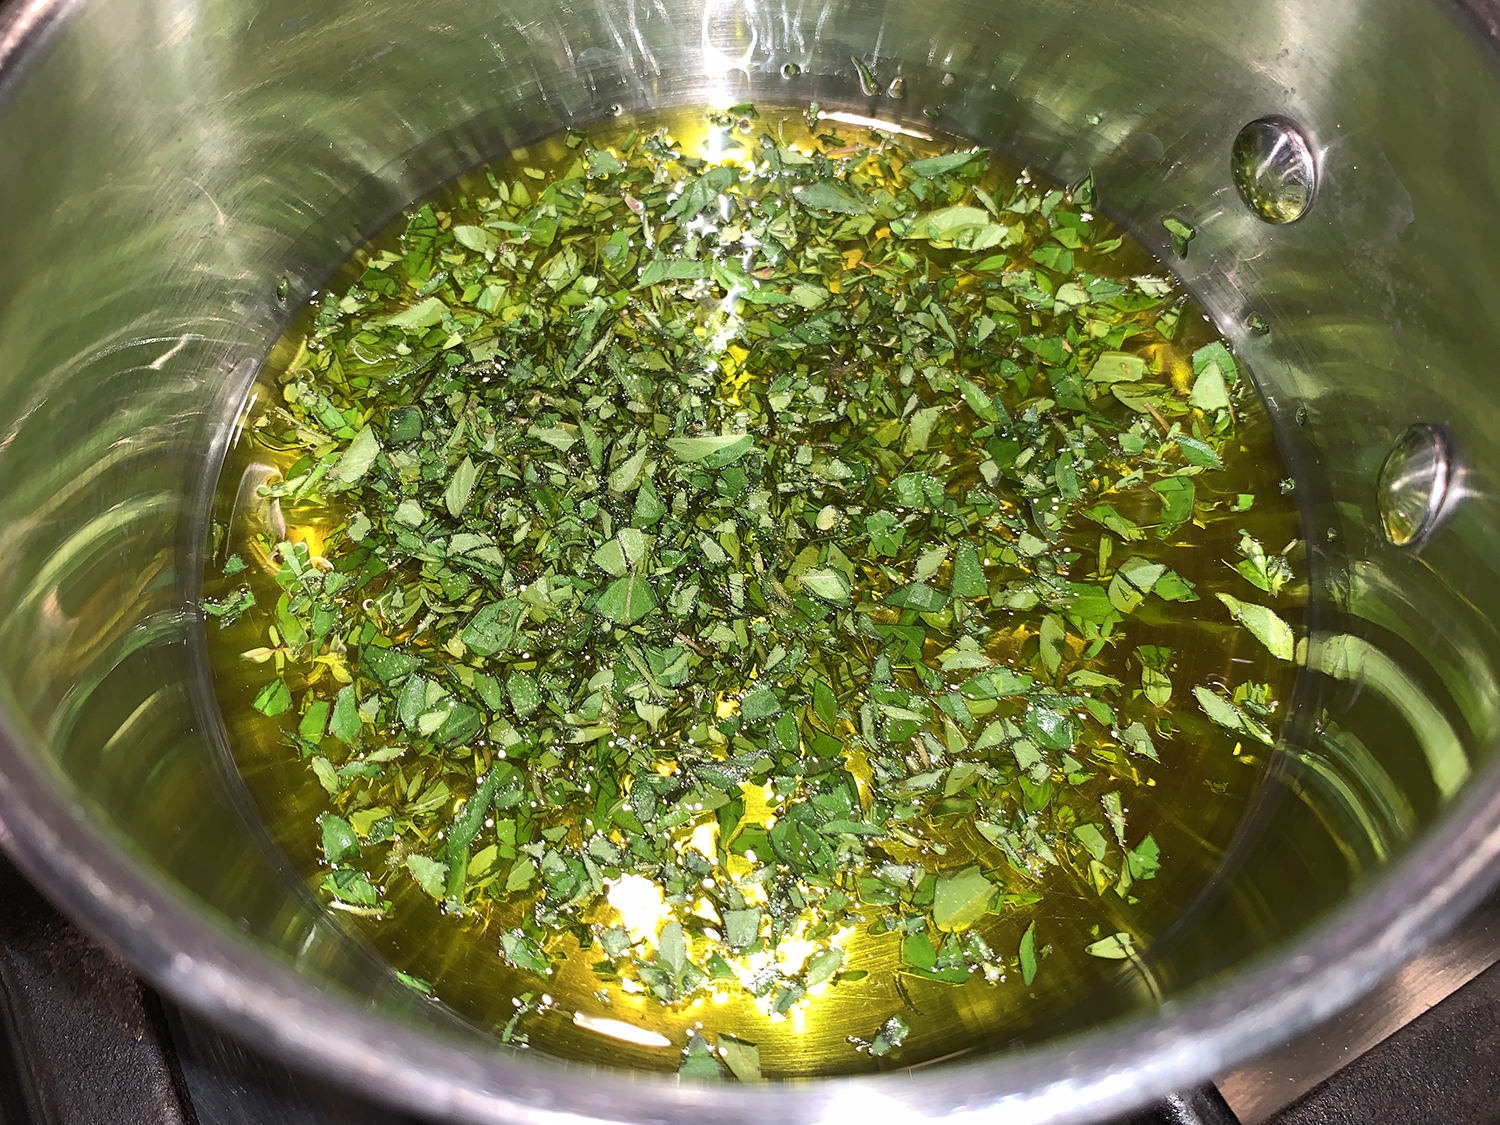
1 Tbsp. chopped fresh herbs such as rosemary, oregano, thyme
1/3 cup extra virgin olive oil
2 cloves garlic, cut in half (no need to peel)
1 bay leaf
1 lemon, cut into wedges
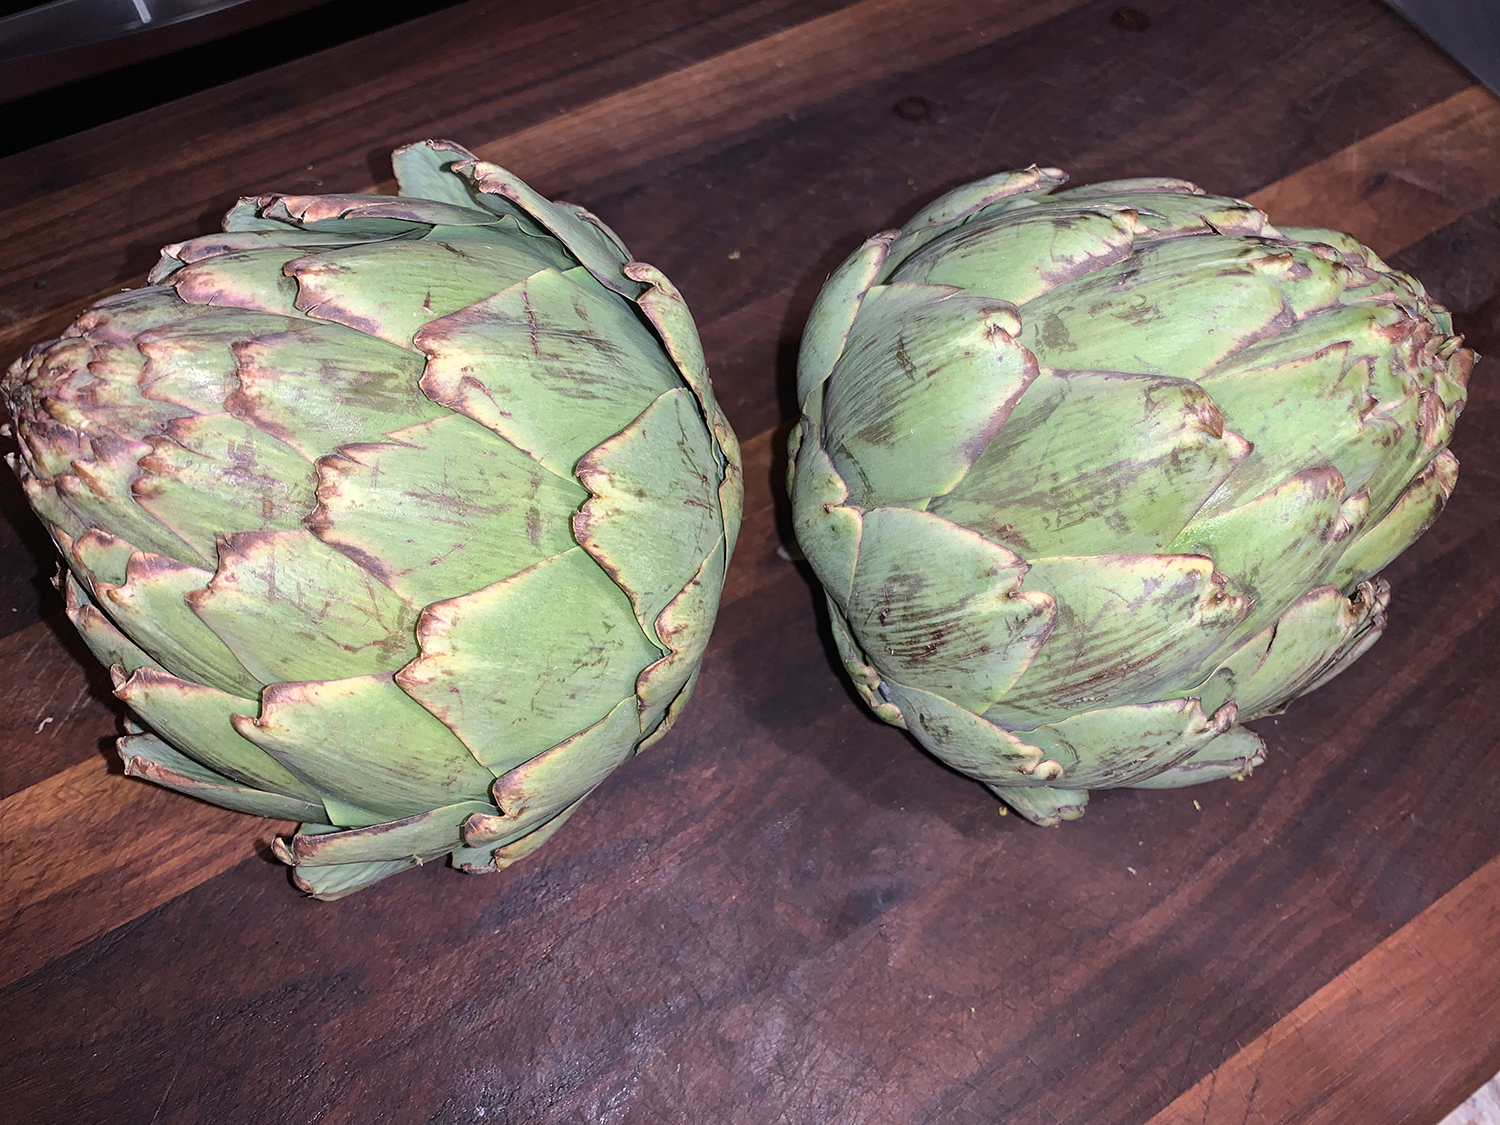
2 to 4 large globe artichokes
Salt
Directions
Steep herbs in warm olive oil: Place chopped fresh herbs in a small bowl (not the bay leaf), cover with olive oil. Microwave on high heat for 30 seconds (or heat oil and herbs on the stovetop until warm). Let the herbs steep in the warm olive oil while you prepare the artichokes.
Prep the artichokes: Prepare a large pot with an inch of water at the bottom. Add the cut cloves of garlic and the bay leaf, and place a steamer rack in the pot.
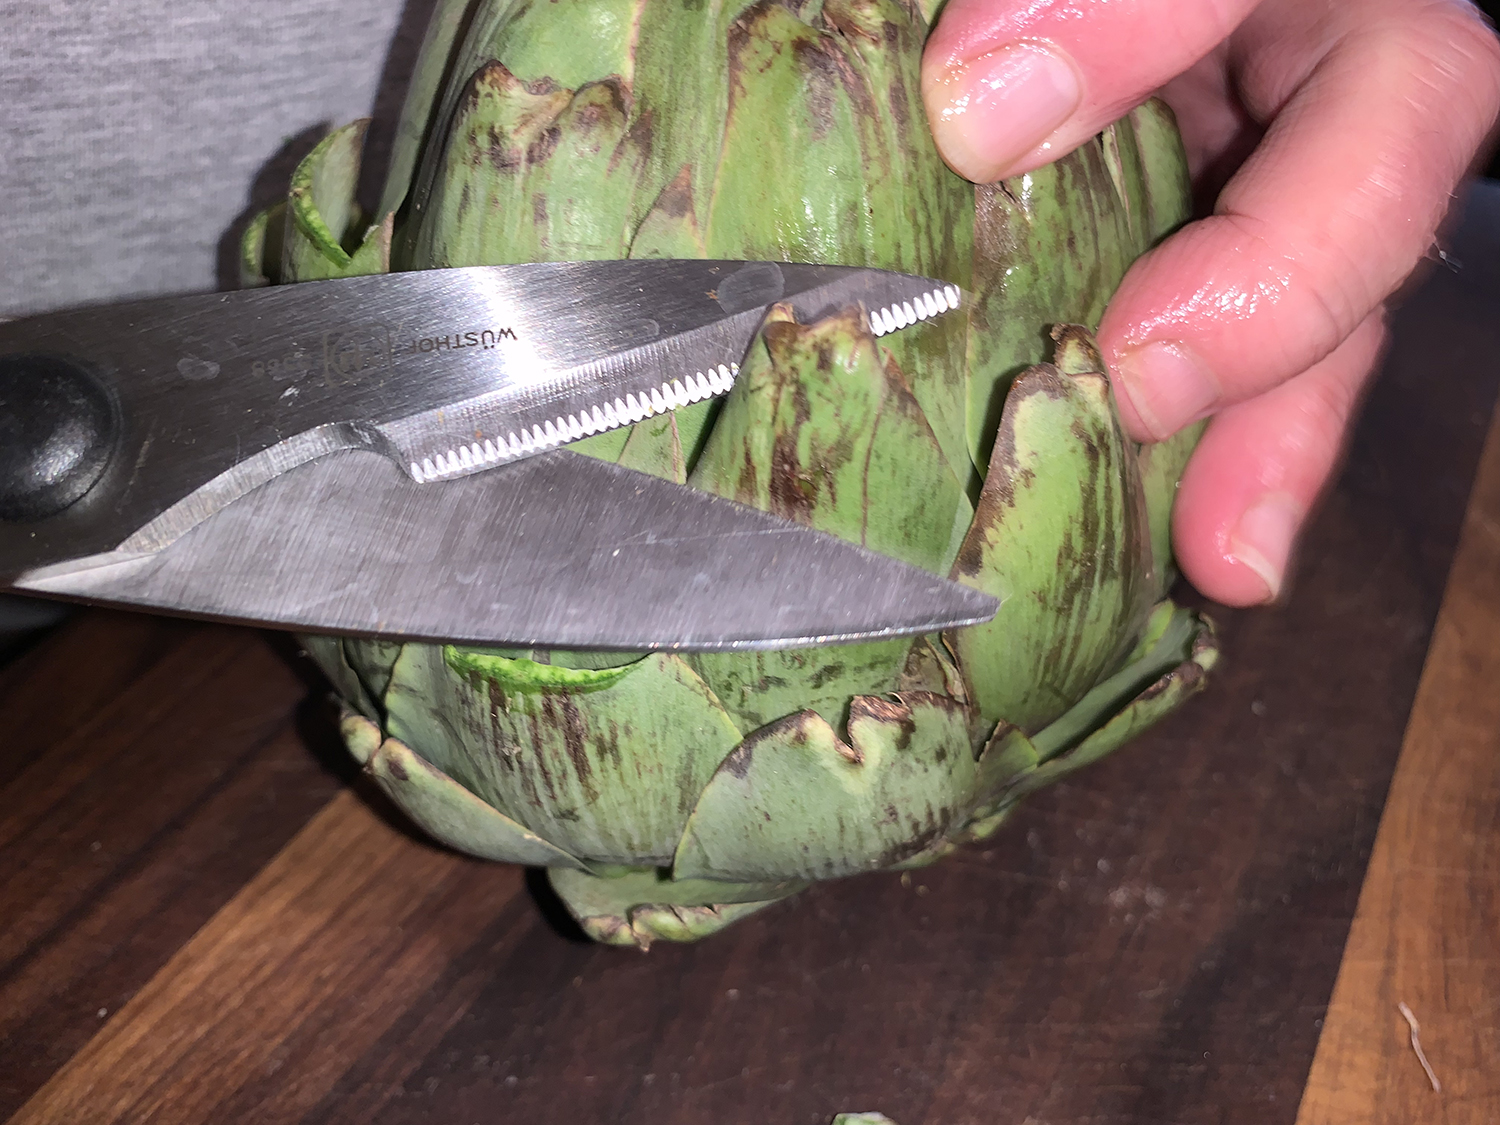
To prepare the artichokes, have lemon wedges ready. If you want a nice presentation, use scissors to snip away the pointy tips of the artichoke leaves. As you trim the artichokes, rub the cut areas with juice from the lemon wedges to prevent the artichokes from turning brown from oxidation.
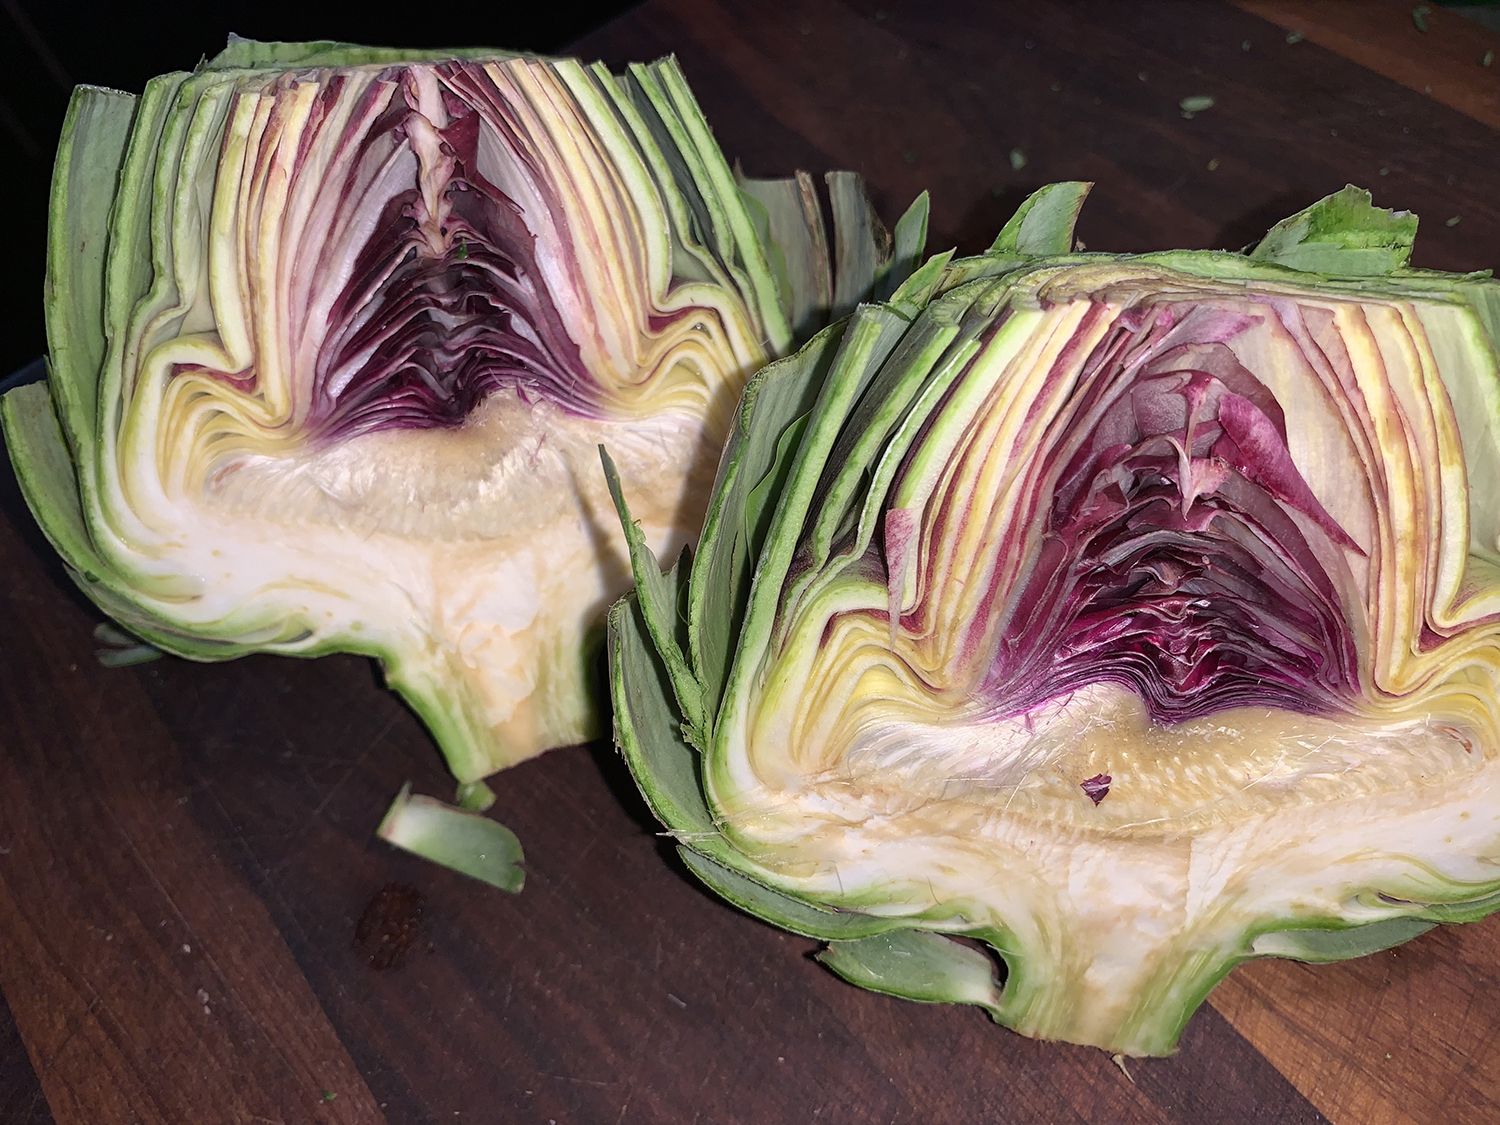
Use a vegetable peeler to cut away the thick outer layer of the artichoke stems. Trim the stems to 2 inches from the base of the artichoke. Cut off and discard the top 1/2 inch of the artichokes. Cut the artichokes in half.
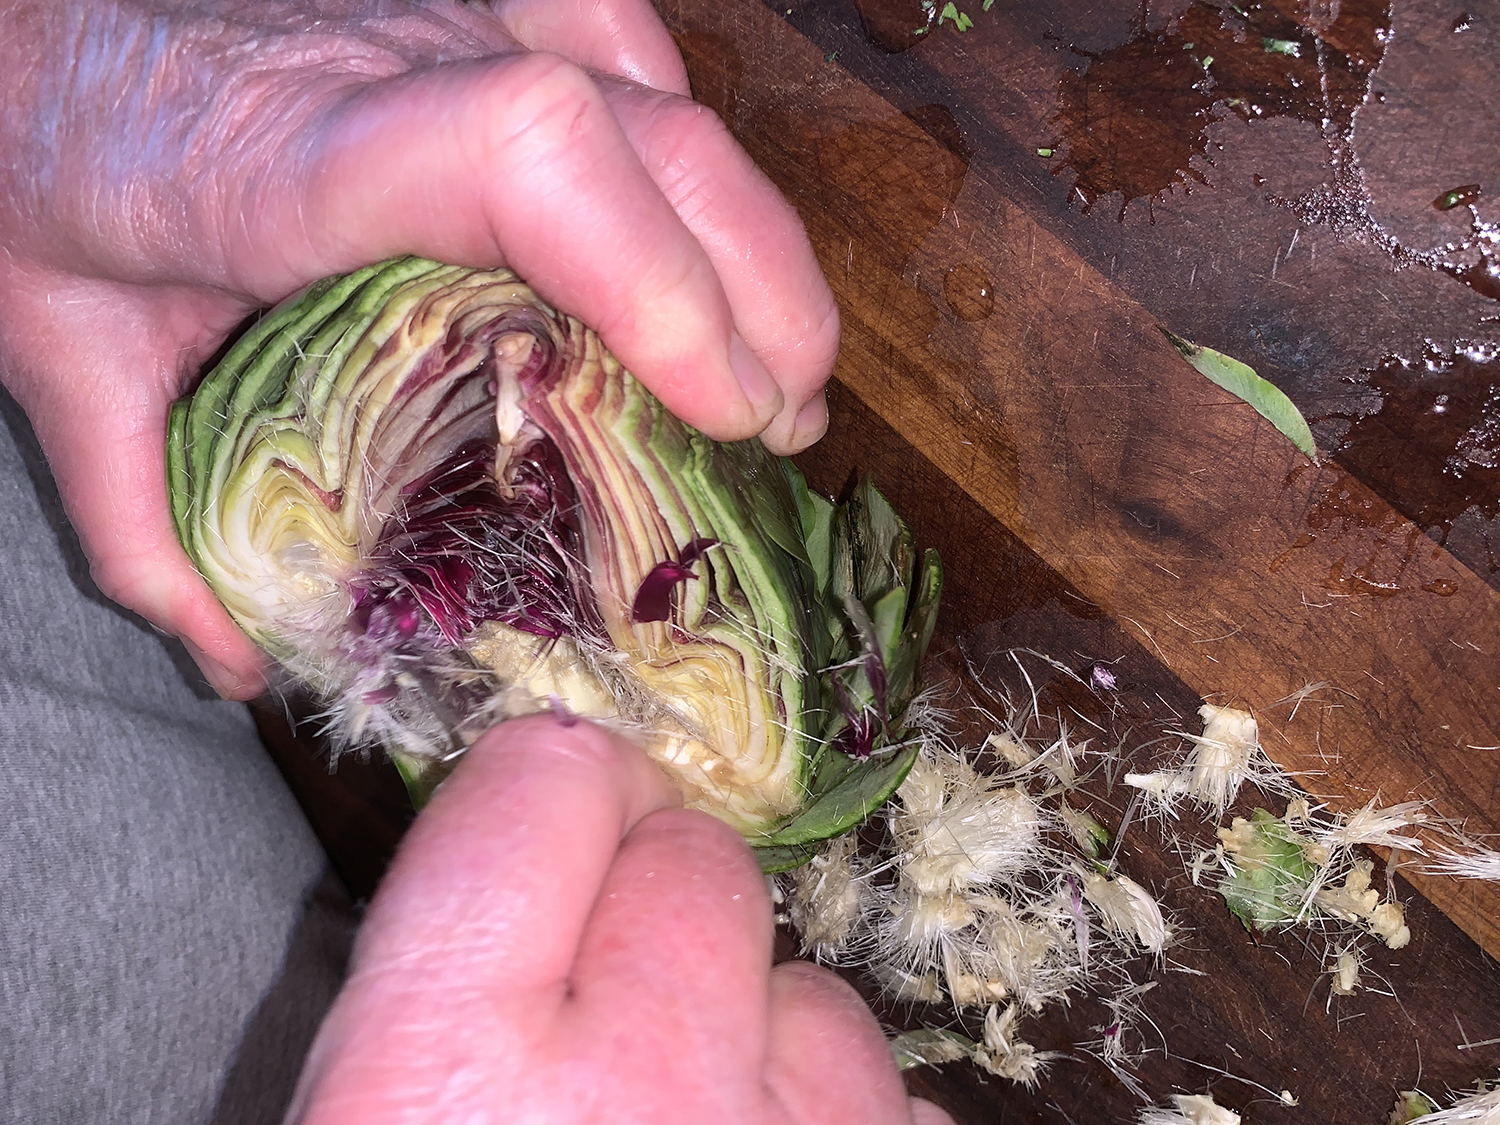
Scoop out the chokes and inner leaves: Use a strong metal spoon to scoop out the fuzzy chokes and the small inner artichoke leaves. Rub lemon juice all over the inside and exposed cut areas of the artichokes.
Steam the artichokes: Heat the water in the large pot with a steamer rack on high. When it comes to a boil, reduce the heat to medium high and place the artichoke halves, cut side down on the steam rack.
Cover. Steam for 20 minutes (less or more, depending on the size of the artichokes), until you can easily pull off the outer leaves, and you can pierce the heart easily with a knife.
The artichokes can be just a tiny bit less cooked than would be typically perfect for steamed artichokes, as you will be cooking them further on the grill.
Grill the artichokes: Prepare your grill for direct, high heat. Use a pastry brush to brush the artichoke all over with the herb infused oil. Sprinkle all over with salt.
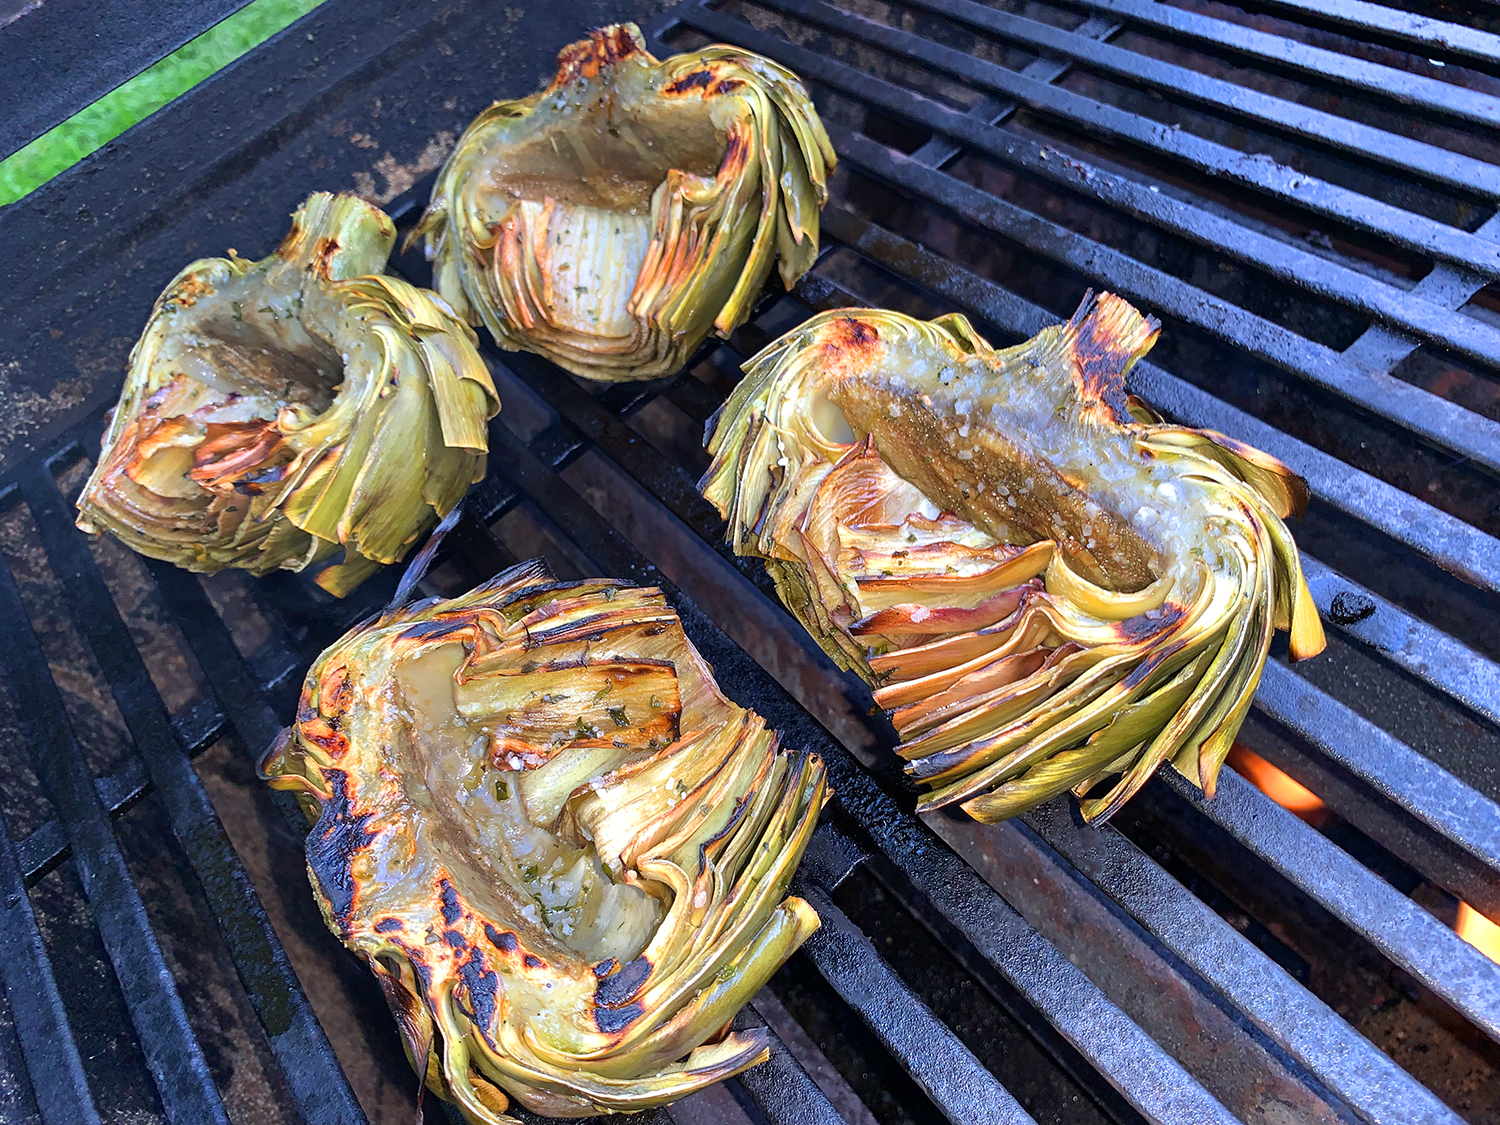
Place the artichoke halves cut-side-down on the grill grates. Cover, and grill for 5 to 10 minutes, until you have nice grill mark on the cut sides of the artichokes.
Serve: Sprinkle the cut sides with more lemon juice. Serve alone or with mayonnaise, remoulade, or aioli.
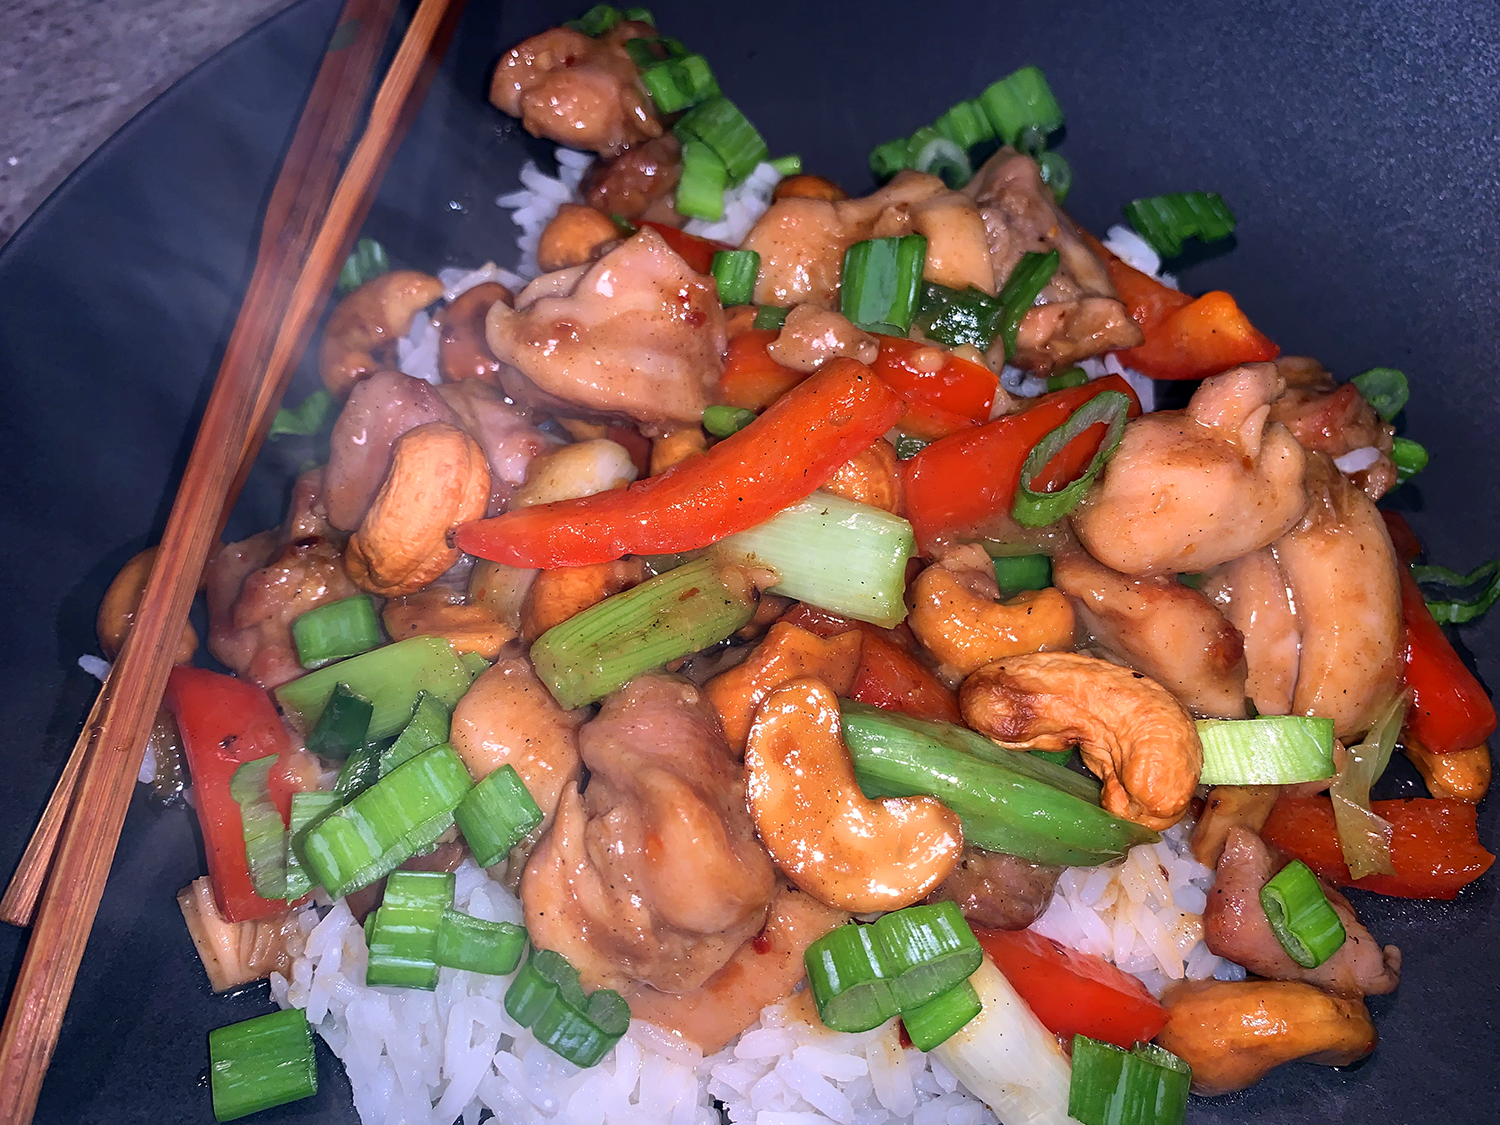
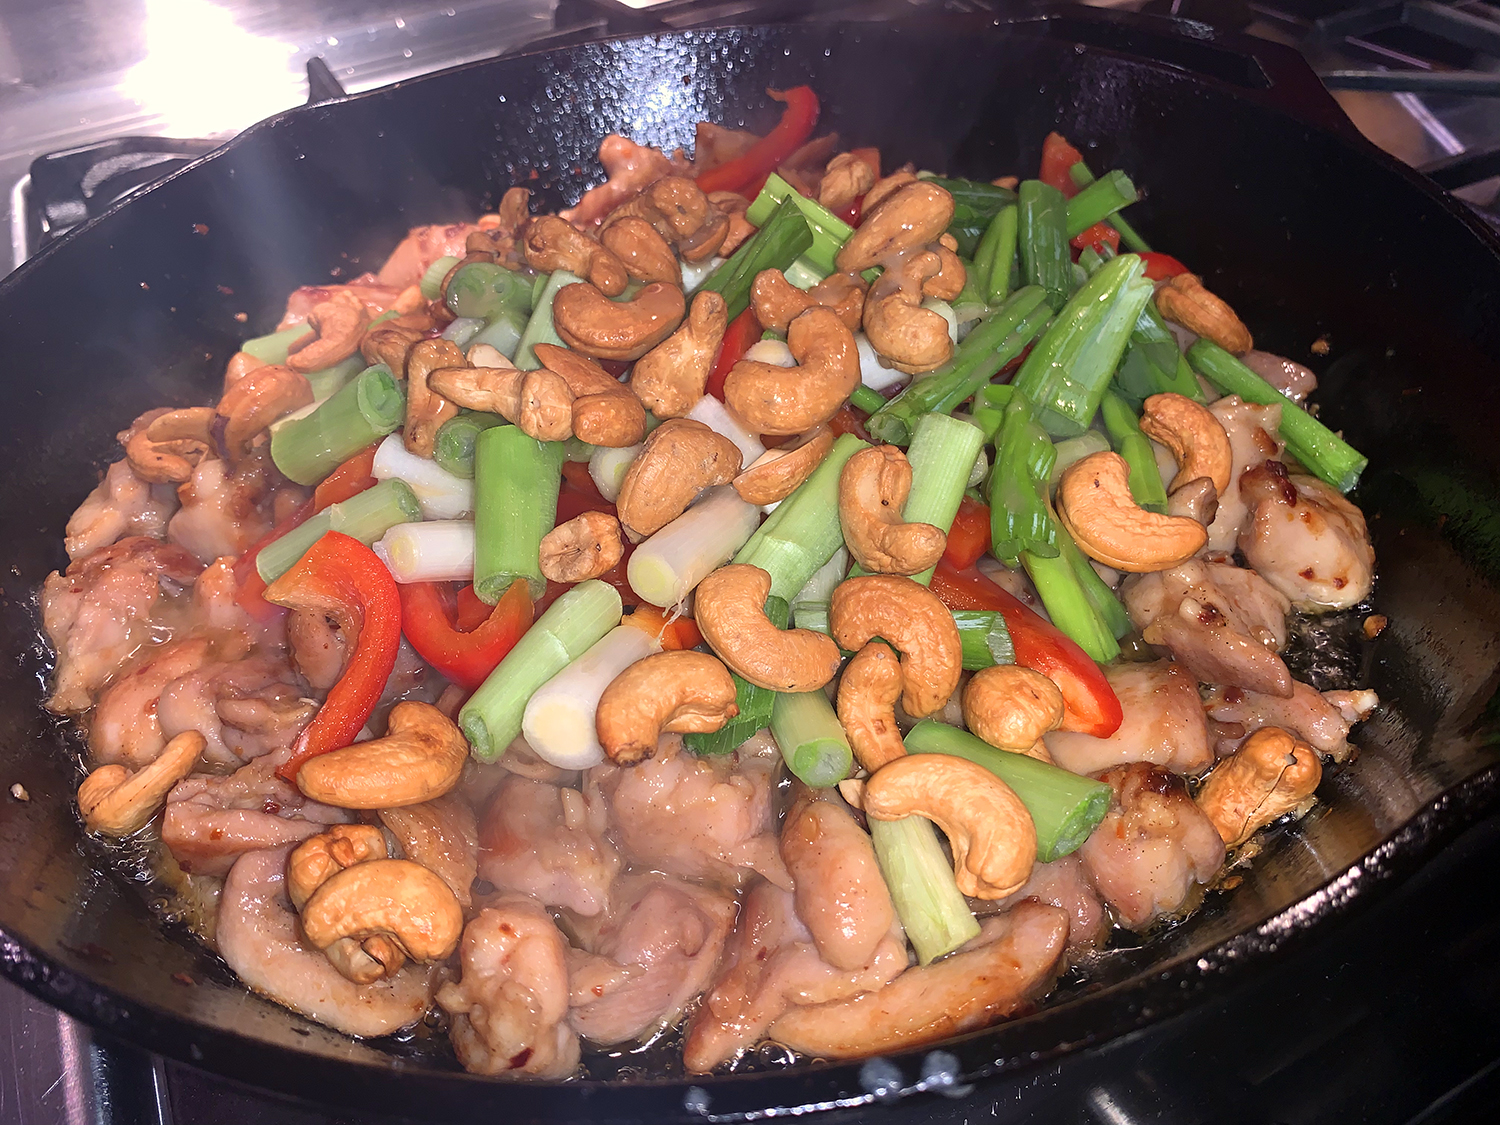
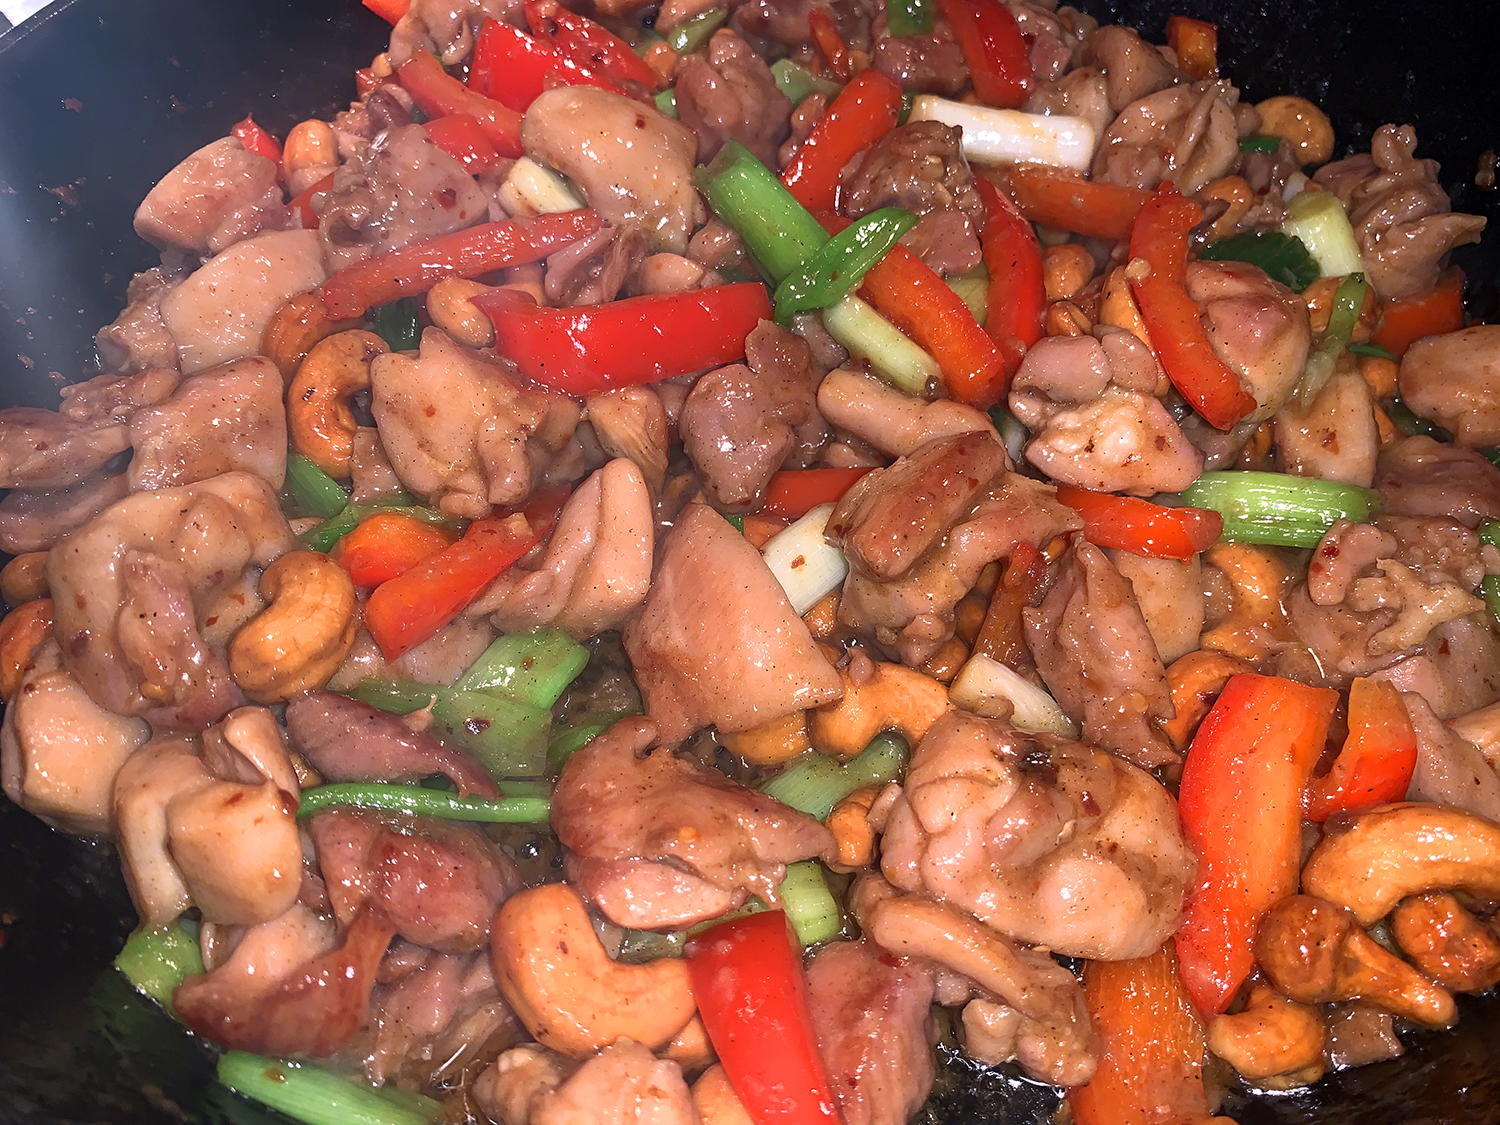
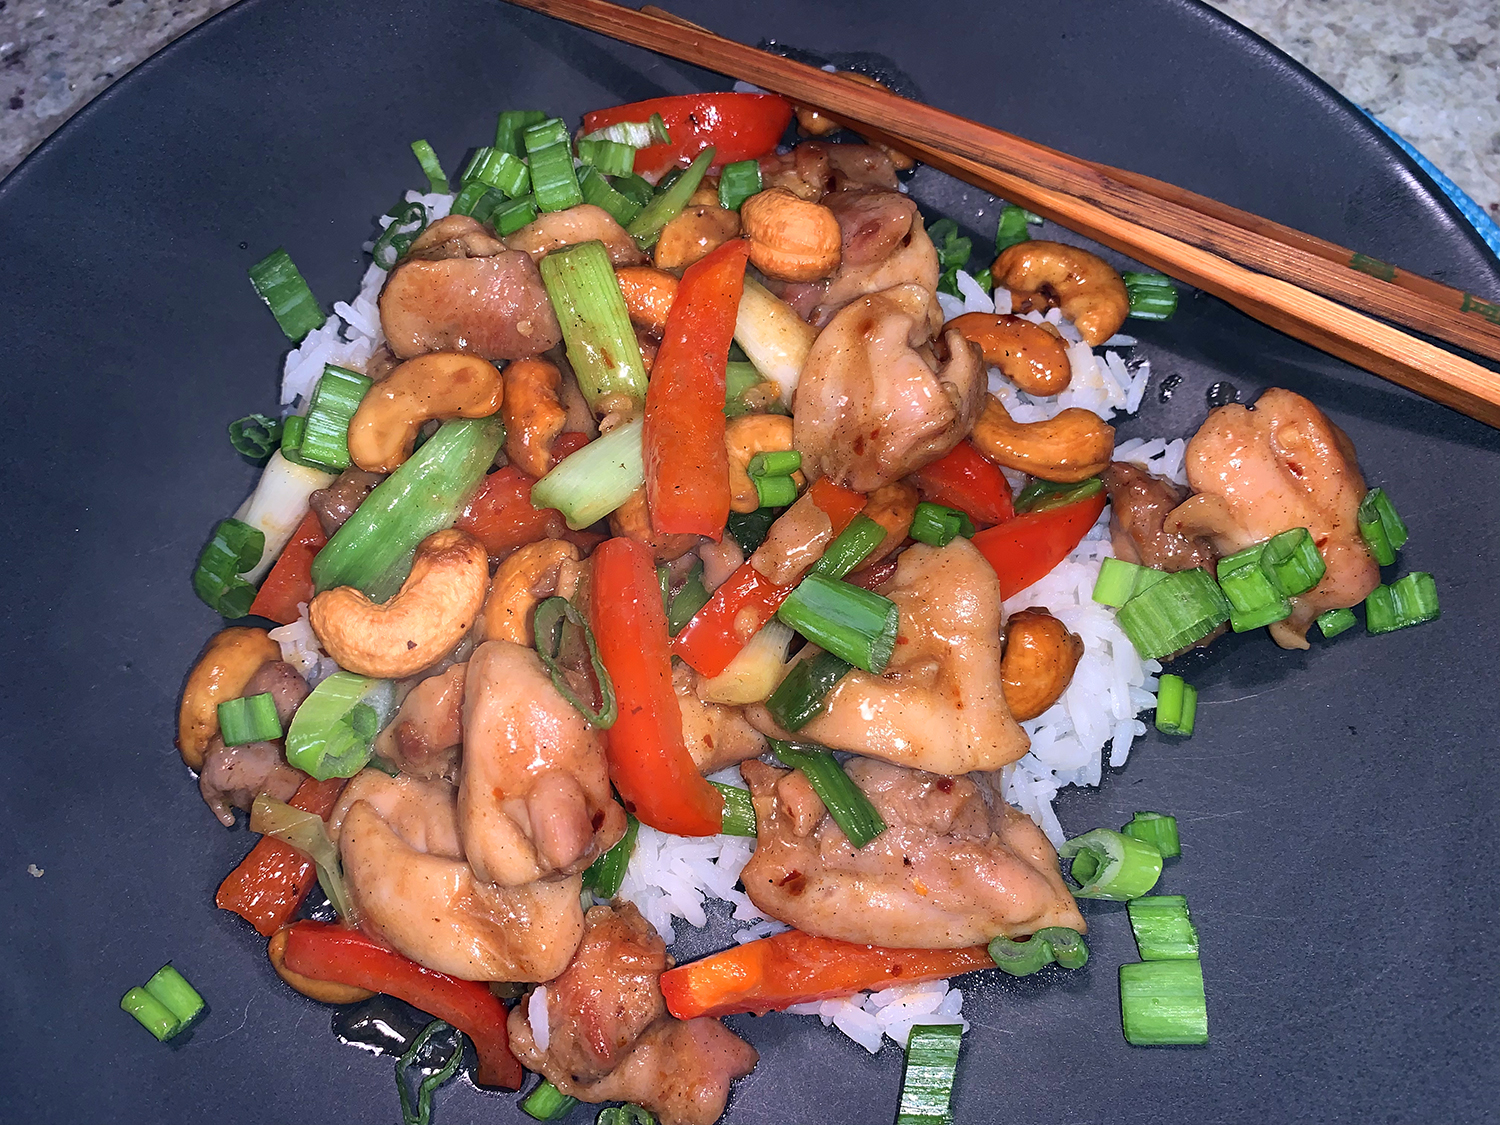
When it comes to Thai food, the cuisine ranks among the top of our ethnic food preferences. This classic from Milk Street, Thai Stir-Fried Chicken with Cashews raised the bar as the best version we’ve made at home. We pretty much followed the recipe to a T, except exchanging a medium-large red pepper in place of the small one. Oh, and of course we increased the amount of cashews 😉
Milk Street’s version uses mostly pantry staples and can be on the table in about 30 minutes. The chicken marinates for 15 minutes before cooking, and you can prep the bell pepper and scallions in the meantime. Serve the stir-fry with steamed jasmine rice.
Tip: Don’t discard the marinade after draining the chicken. It’s mixed with ¼ cup water and becomes a sauce that lightly coats the chicken and vegetables.
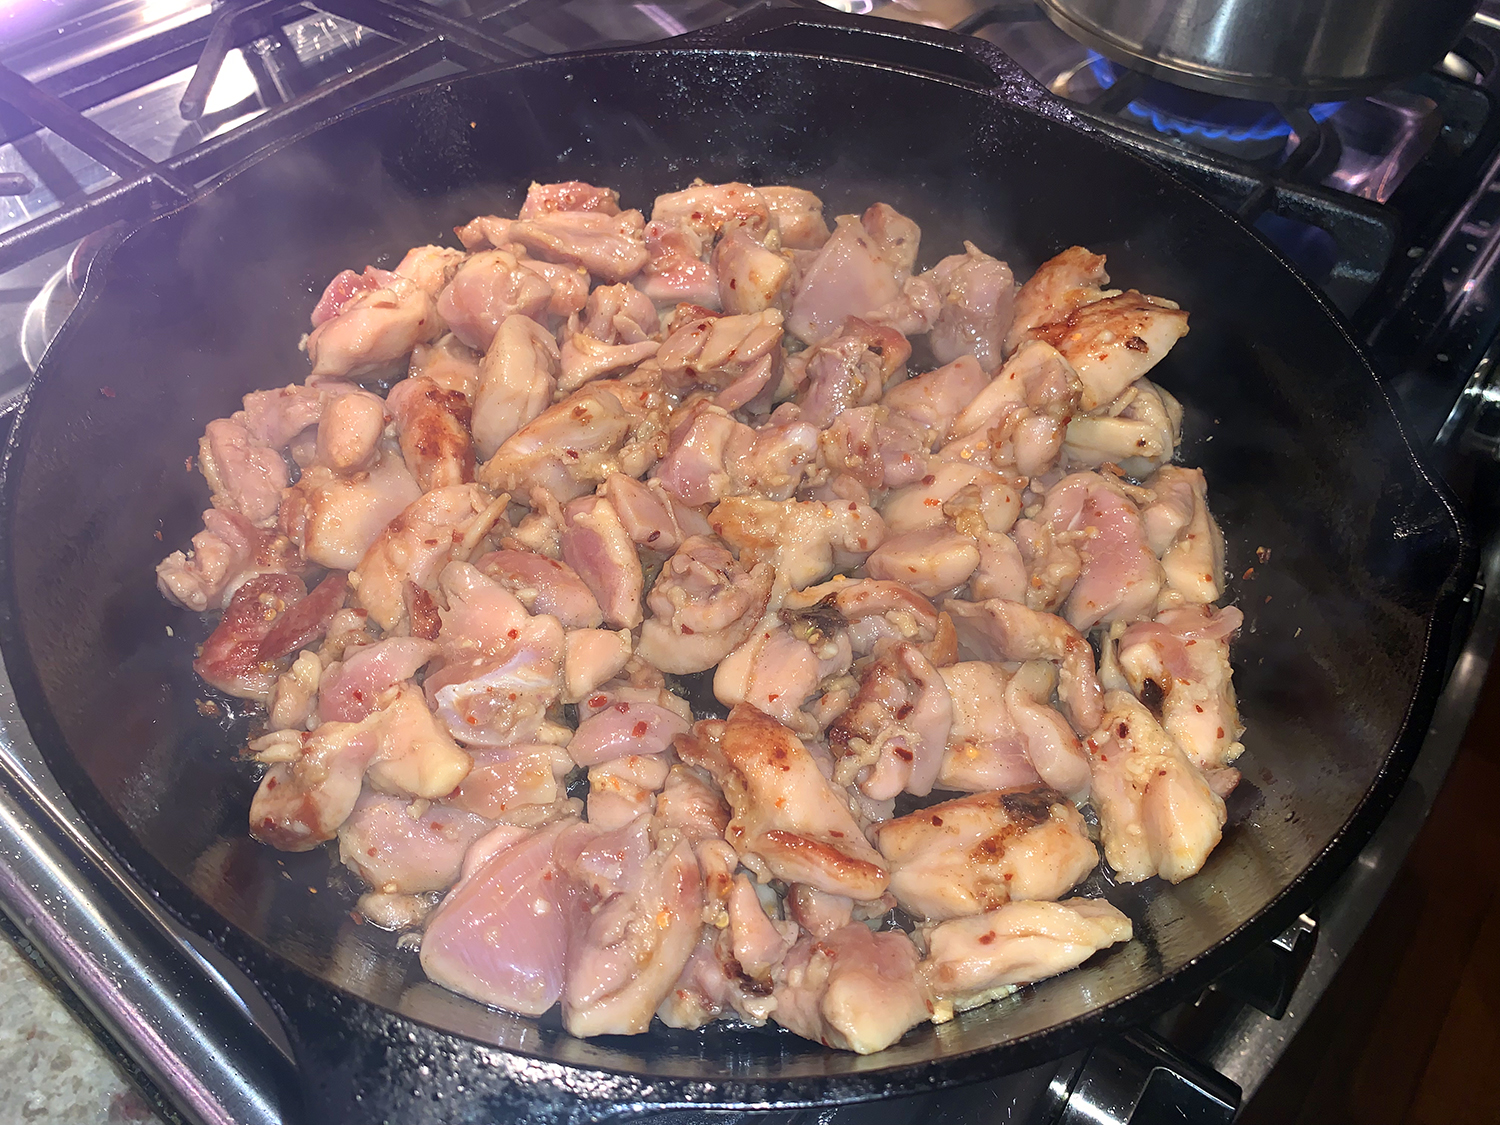
With stir-fries, most commonly we use our carbon steel wok, but our large cast-iron skillet happened to be sitting on the stovetop that evening, so it became the vehicle of choice. Choose your weapon—I mean skillet—according to your own preference, but don’t use a non-stick otherwise the chicken won’t brown well, if at all.
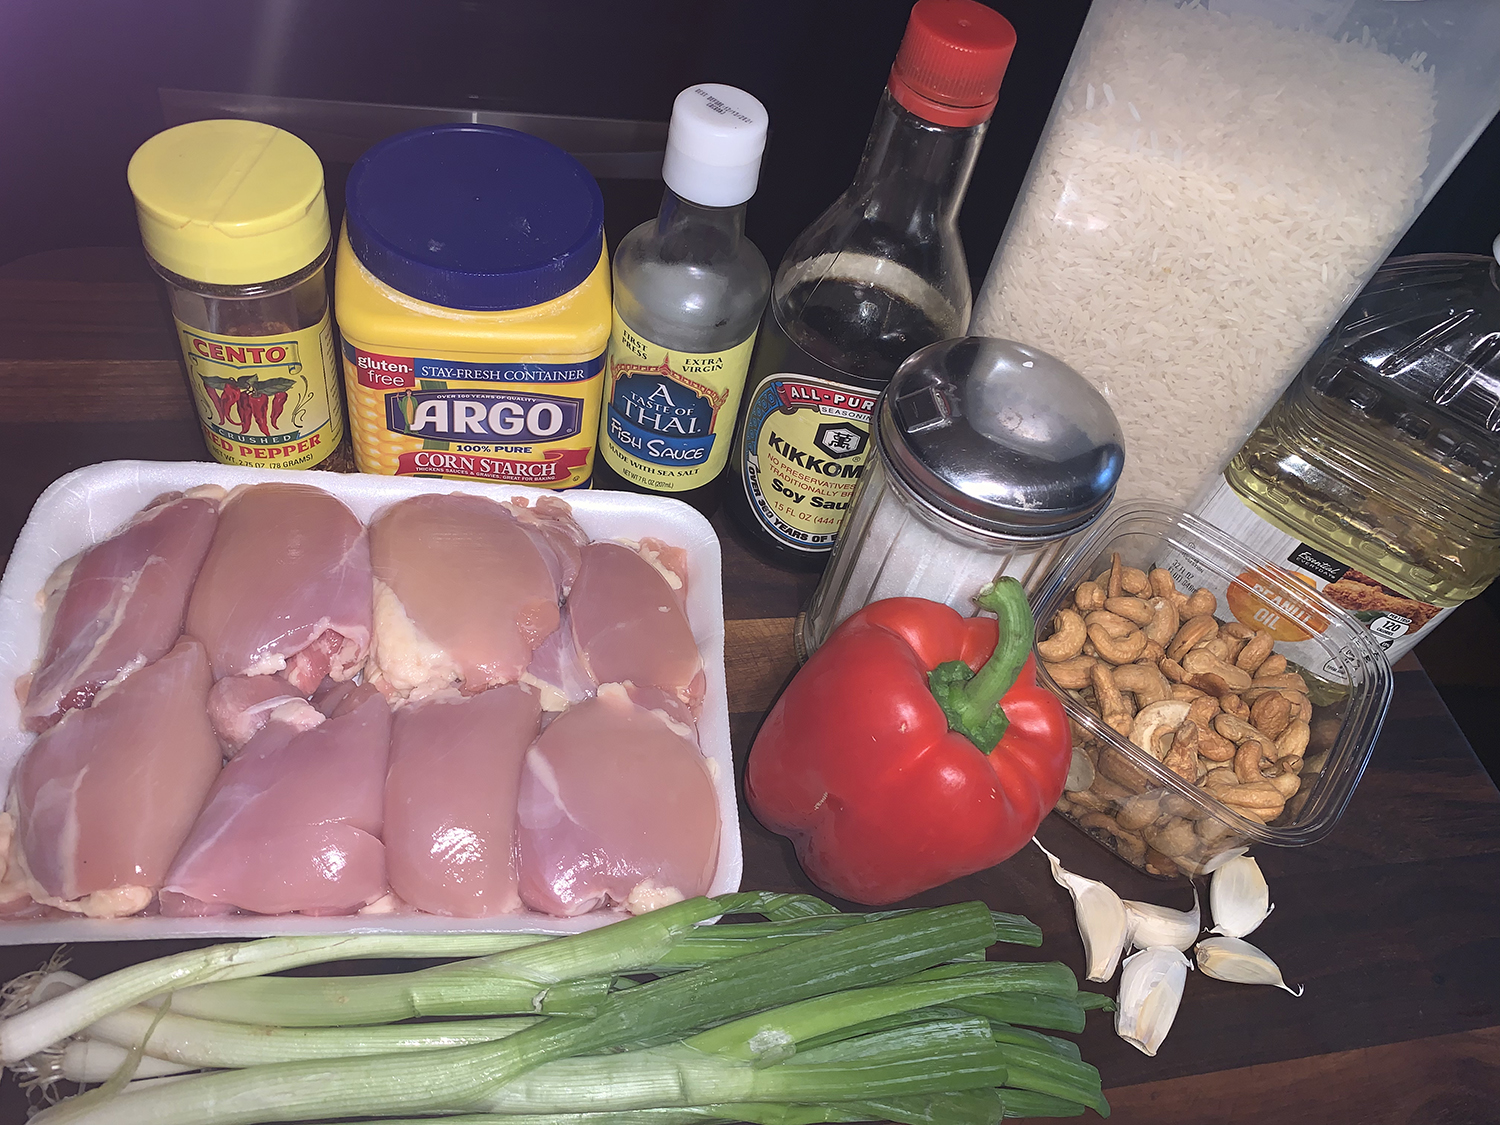
2 lbs. boneless, skinless chicken thighs, trimmed and cut into 1-inch pieces
¼ cup water
2 Tbsp. peanut oil
1 small red bell pepper, stemmed, seeded and sliced into thin strips
1 bunch scallions, cut into 1-inch lengths; save some thinly sliced greens for garnish
1/2 cup roasted cashews, more for garnish if desired
Directions
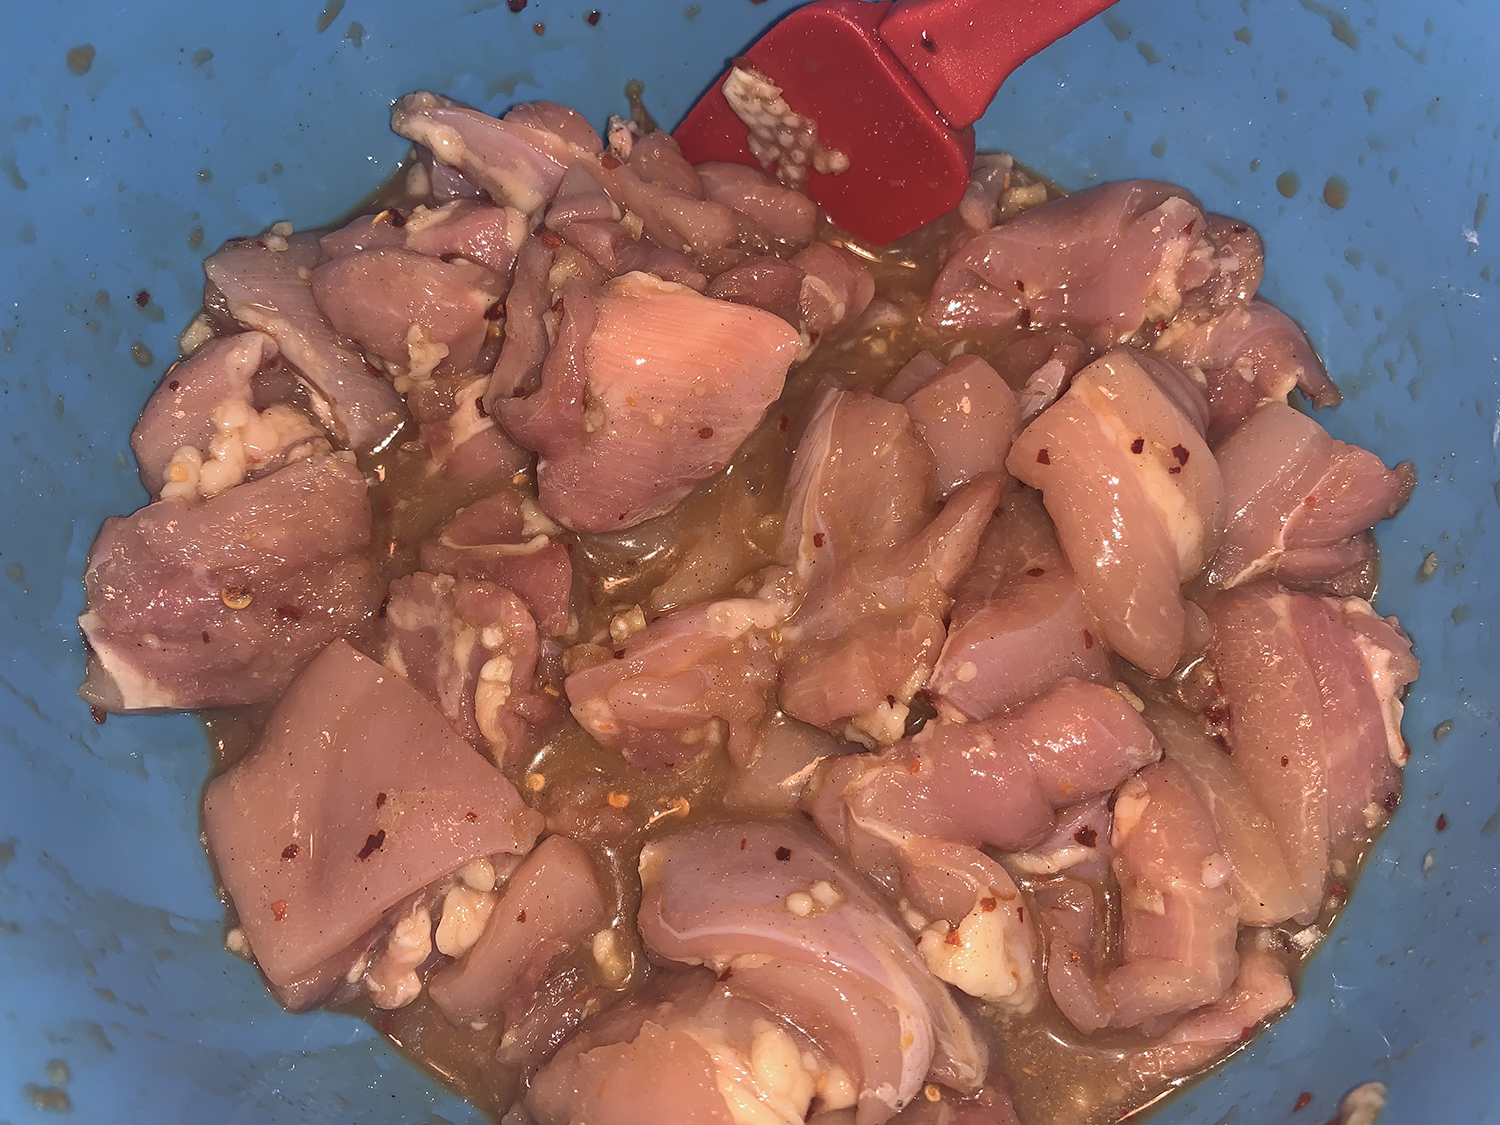
In a medium bowl, whisk together the garlic, fish sauce, soy sauce, sugar, cornstarch, pepper flakes and ¾ teaspoon white pepper. Stir in the chicken, then marinate at room temperature for at least 15 minutes.
Drain the chicken in a fine mesh strainer set over a medium bowl, pressing the chicken to remove excess marinade. Stir ¼ cup water into the marinade and set aside.
In a 12-inch skillet over medium-high, heat the oil until barely smoking. Add the chicken in an even layer, then cook, stirring occasionally, until golden brown, 8 to 10 minutes.
Stir in the bell pepper, scallions and cashews. Stir the marinade mixture to recombine, add to the pan and bring to a simmer, scraping up any browned bits. Cook, stirring often, until the liquid thickens and clings to the chicken, about 2 minutes.
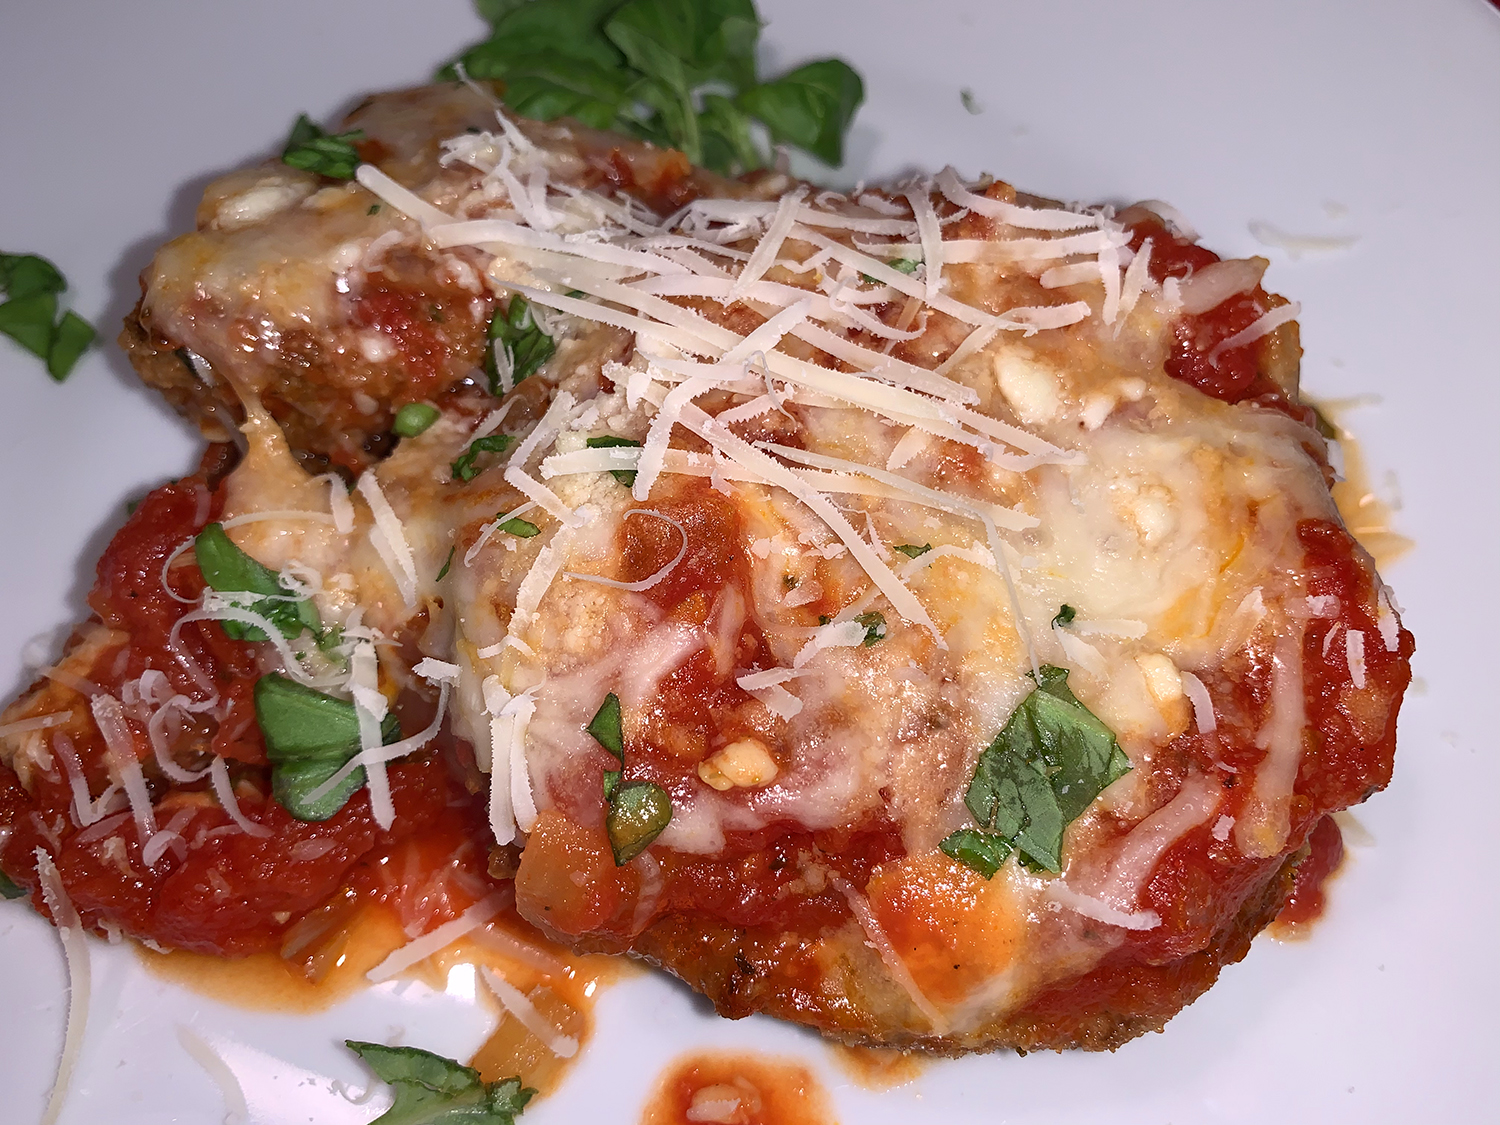
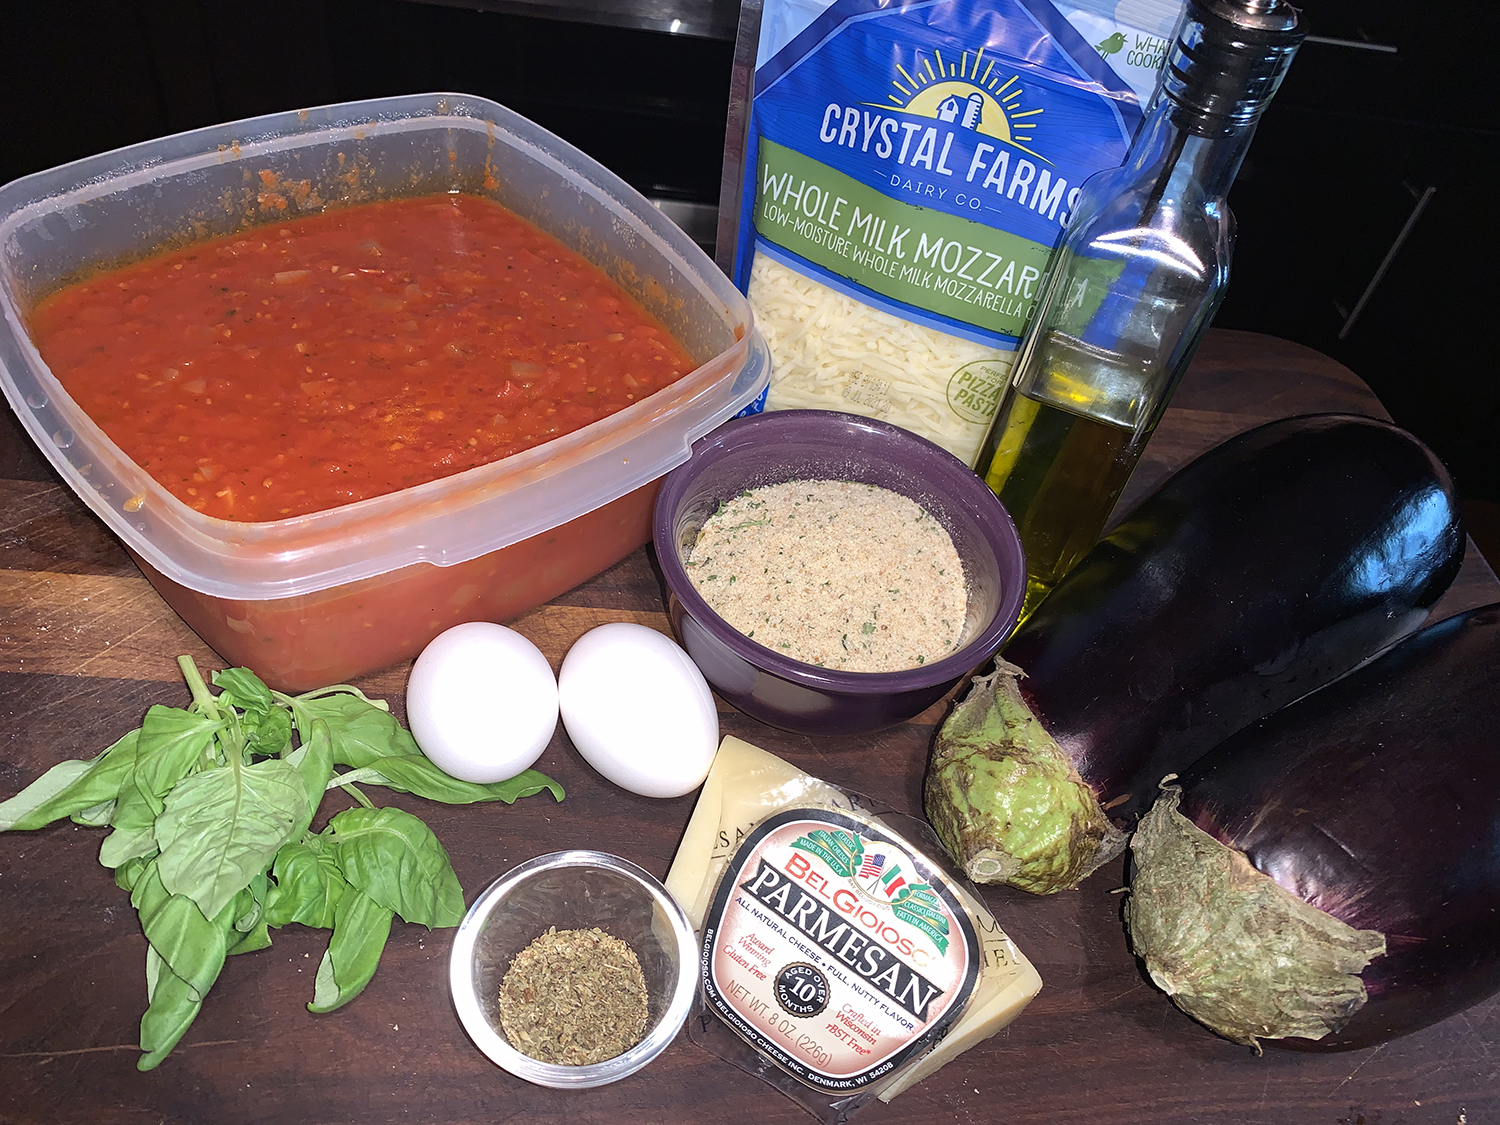
It’s not unusual that most of us would like to cut calories and fat where we can, but not loose flavor. With this riff on a Martha Stewart recipe, you bake rather than fry, for less mess and less fat. In addition, there is no salting of the eggplant to extract moisture—a process I’ve never grown fond of.
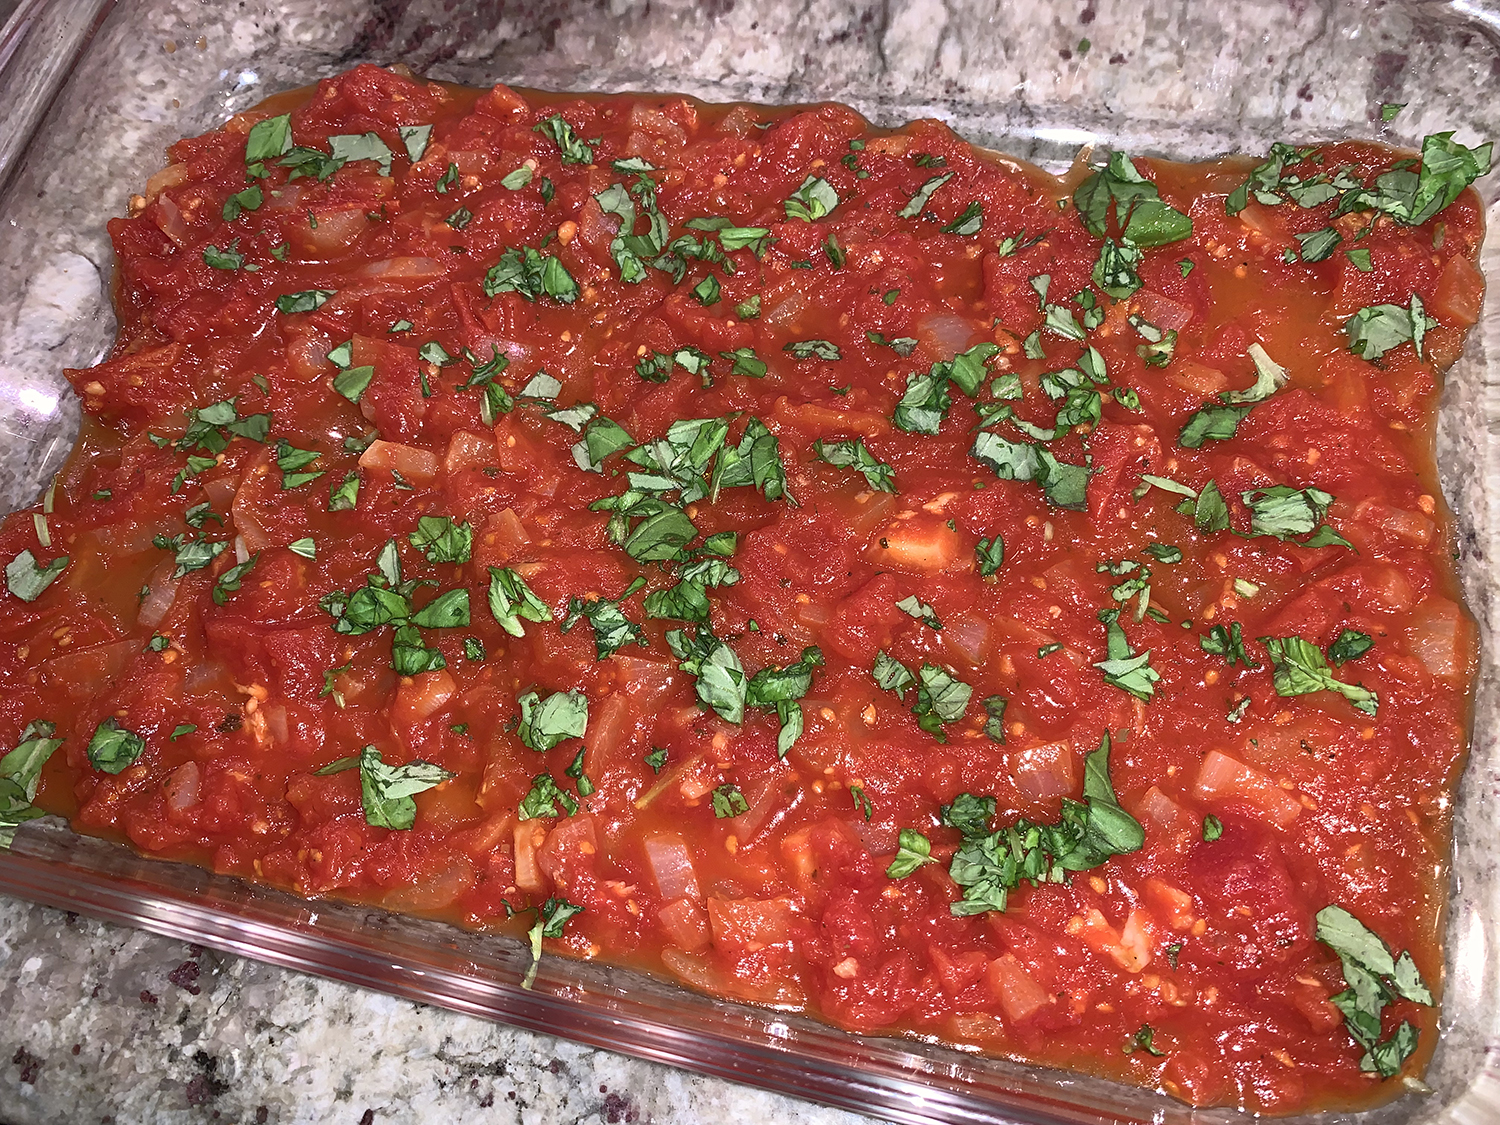
Another plus, make the chunky tomato sauce a day or two ahead and save time on dinner night. It only takes about 20 minutes total, then refrigerate in an air tight container, and you’re one step ahead of the game.
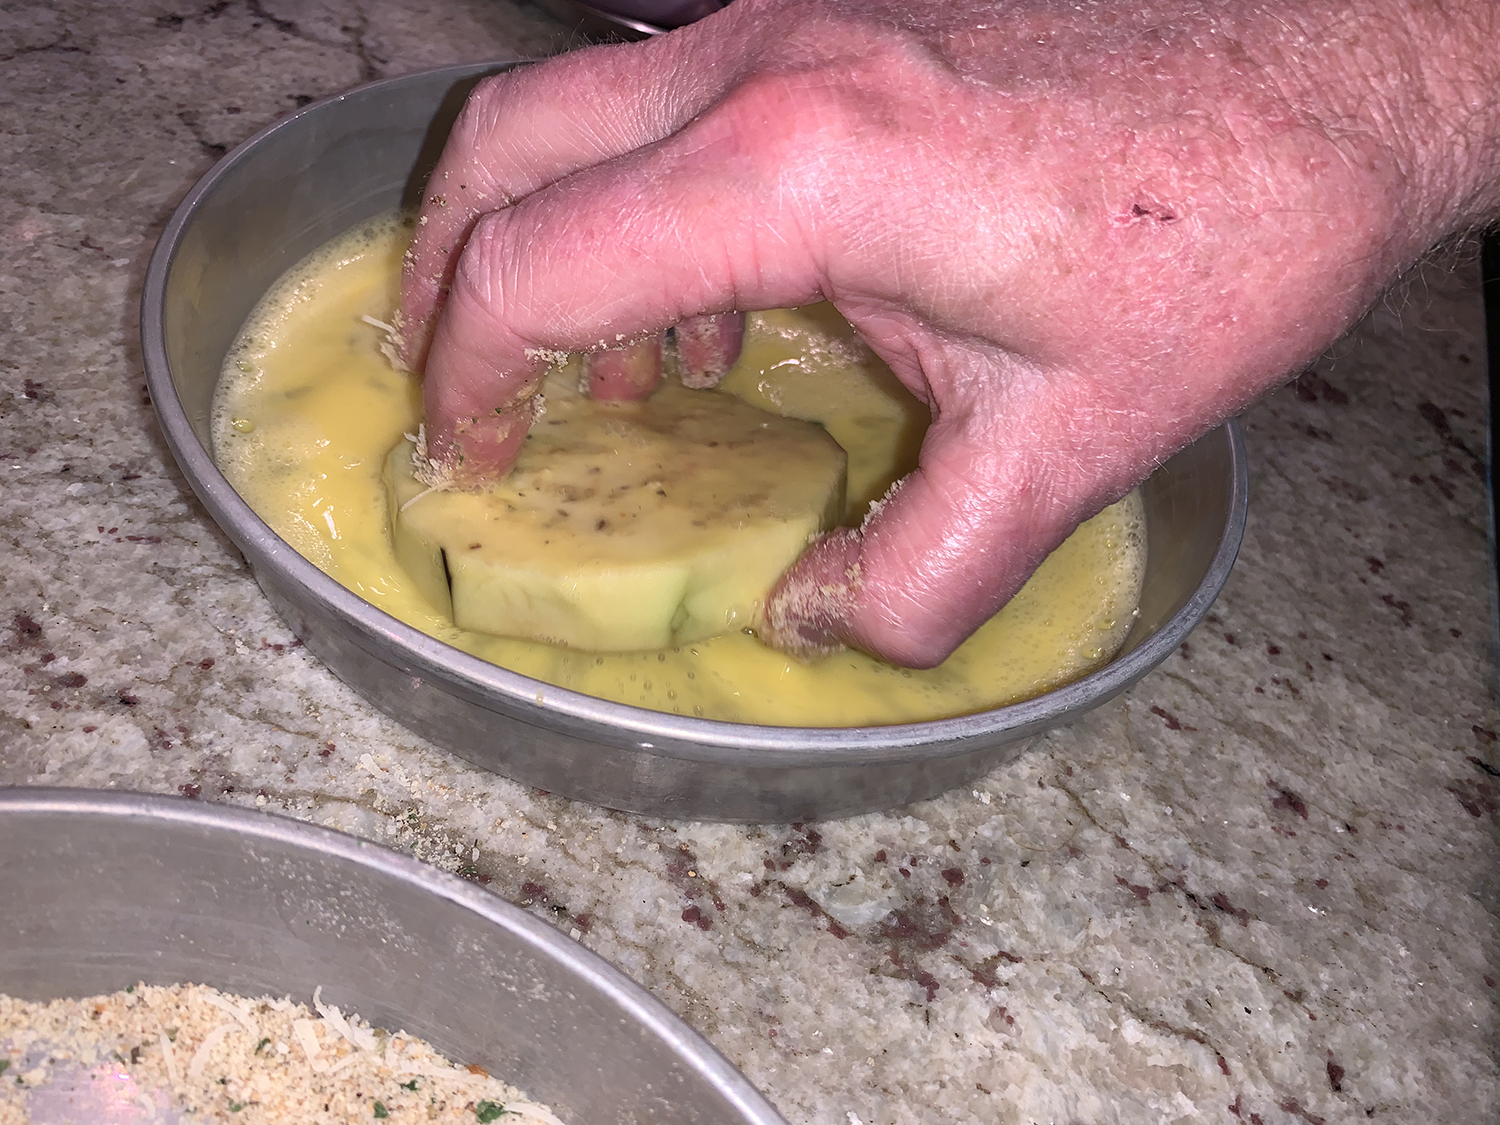
As we prepped the dish, we realized that a few tweaks to the recipe were needed. After coating the slices for one of the eggplants, we noted there would not be enough for all the remaining slices, so we quickly increased by about another 50%; while the amount of egg wash was spot on.
The shredded mozzarella was increased to 2 cups from 1 1/2, although we would even increase it more next time! The dried basil was swapped out for fresh, making sure to add it between layers as well as a garnish. One of those grocery store clamshells of basil is the perfect amount. These changes are noted in the ingredients below.
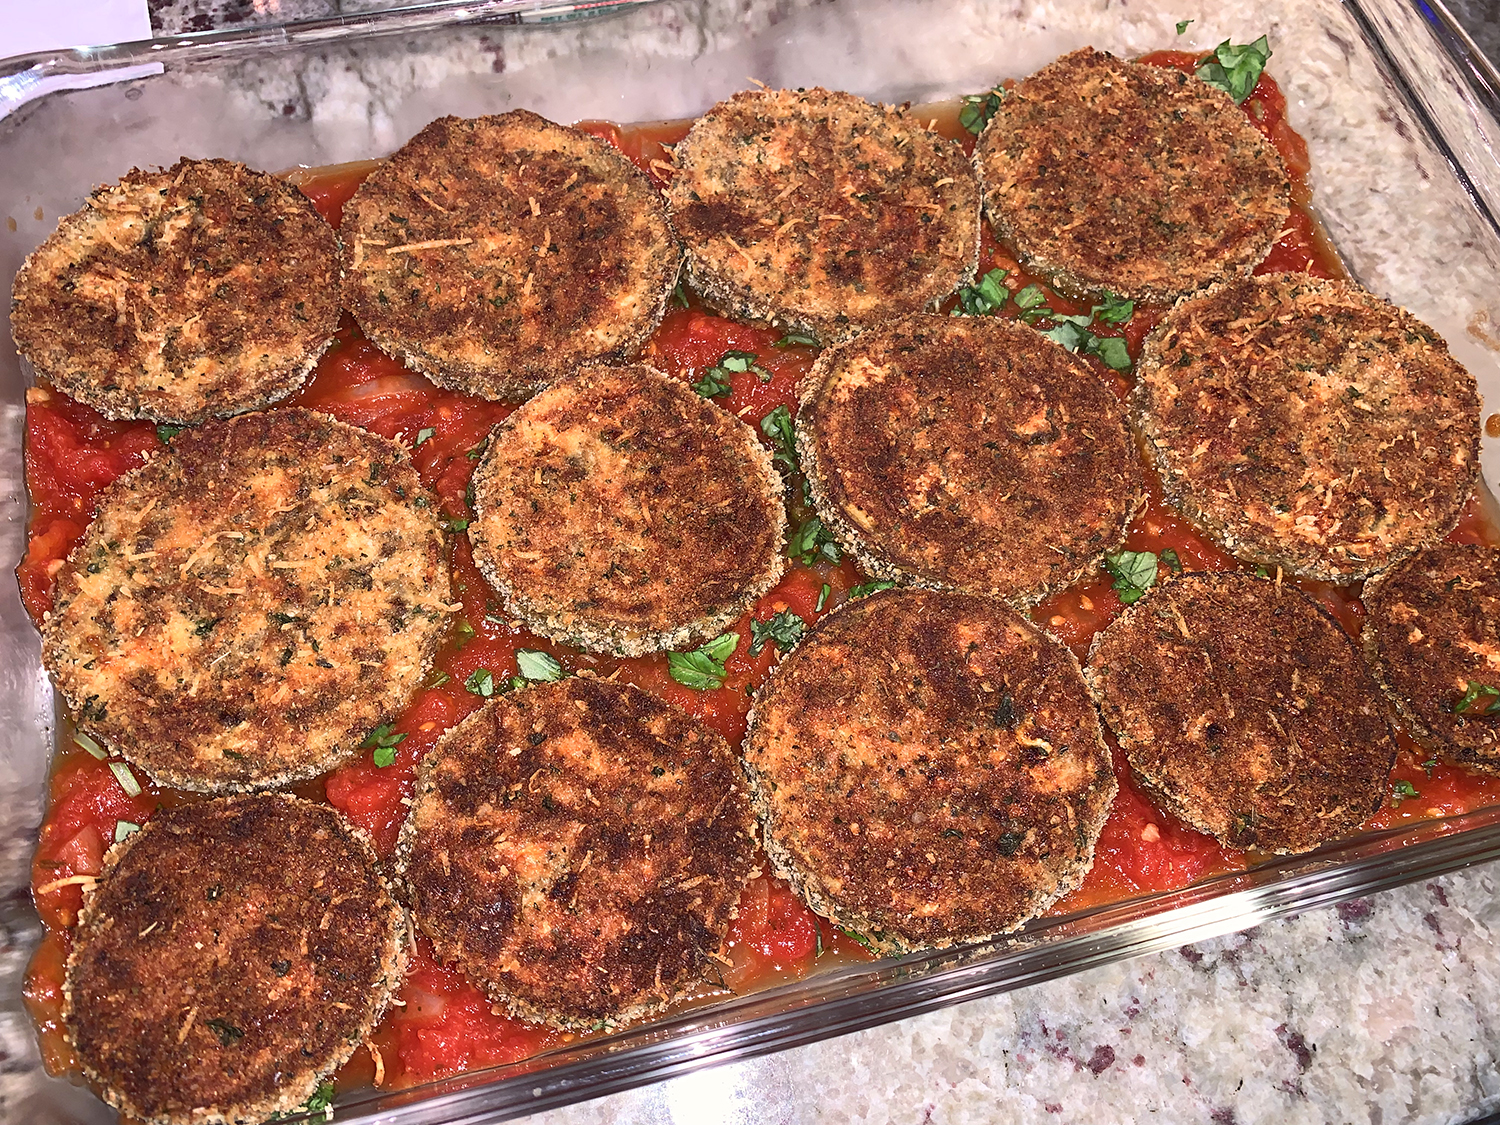
It was so light and tasty, The Hubs claimed it might be the best Eggplant Parm he’s ever had! Can’t wait to attack those leftovers… Serves 8 as a side dish, 6 as a main.
1 cup finely grated Parmesan, plus 2 Tbsp. for topping
1 1/2 tsp. dried oregano
Kosher salt and freshly ground pepper
1 oz. fresh basil, chopped to equal a loose 1/2 cup, save some whole leaves for garnish
2 large eggplants (2 1/2 lbs. total), peeled and sliced into 1/2-inch rounds
2+ cups shredded mozzarella
Directions
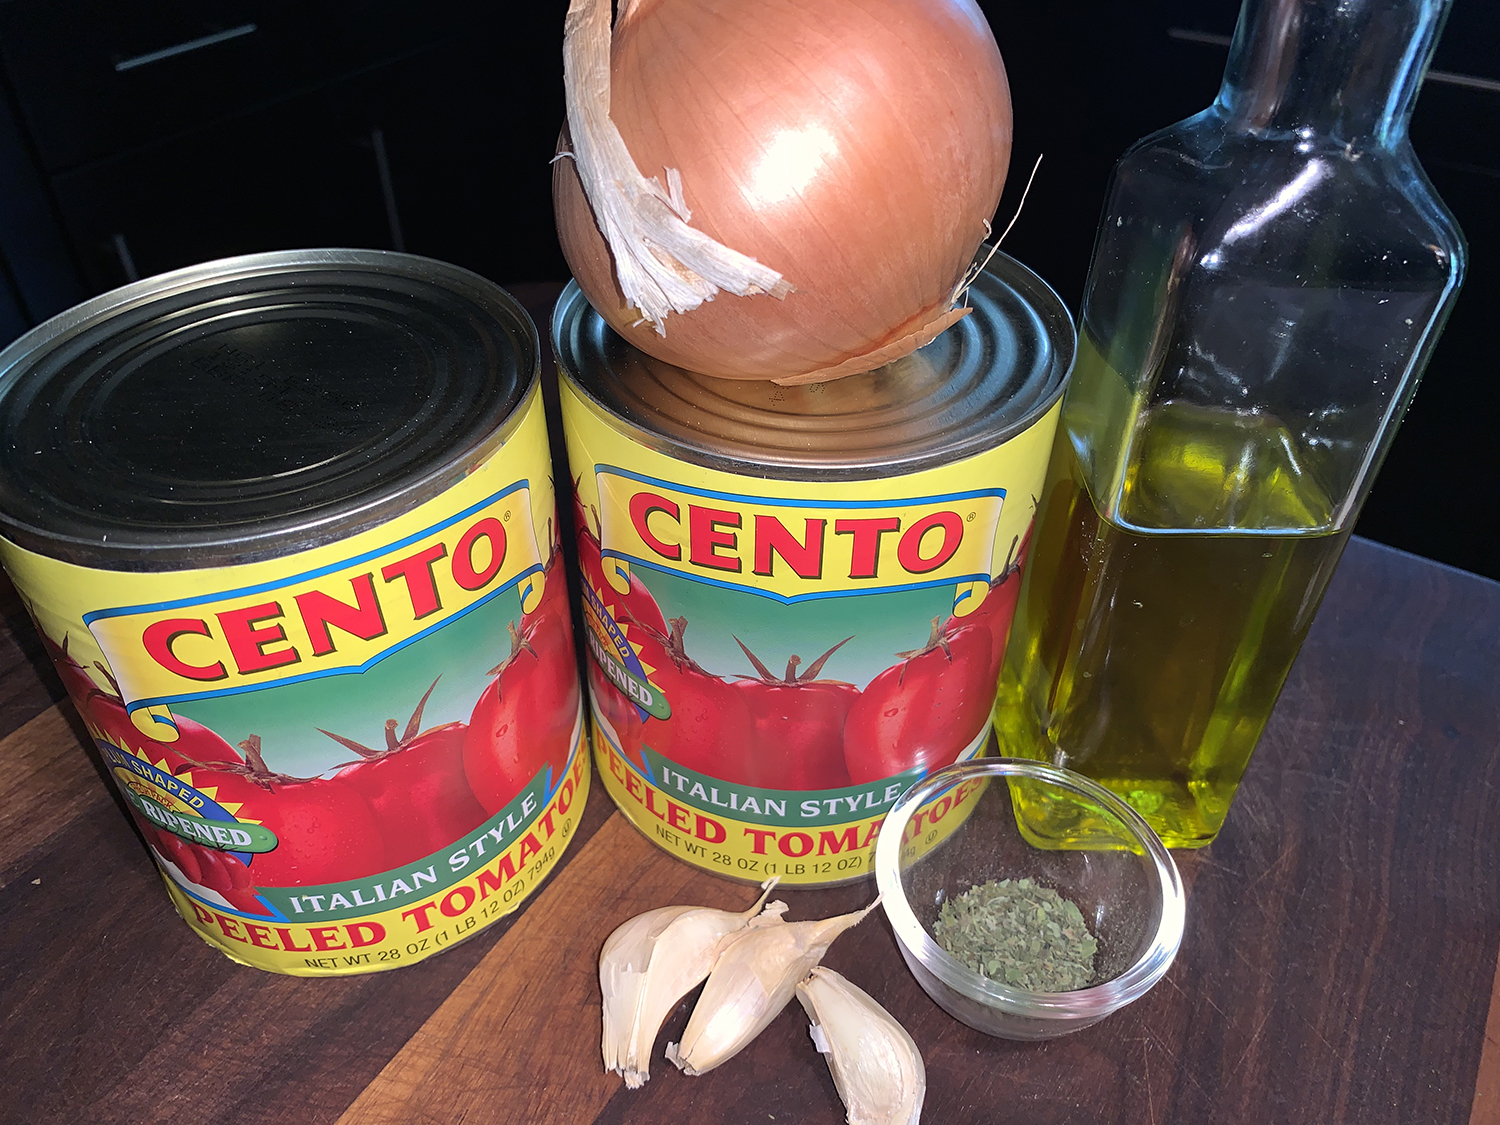
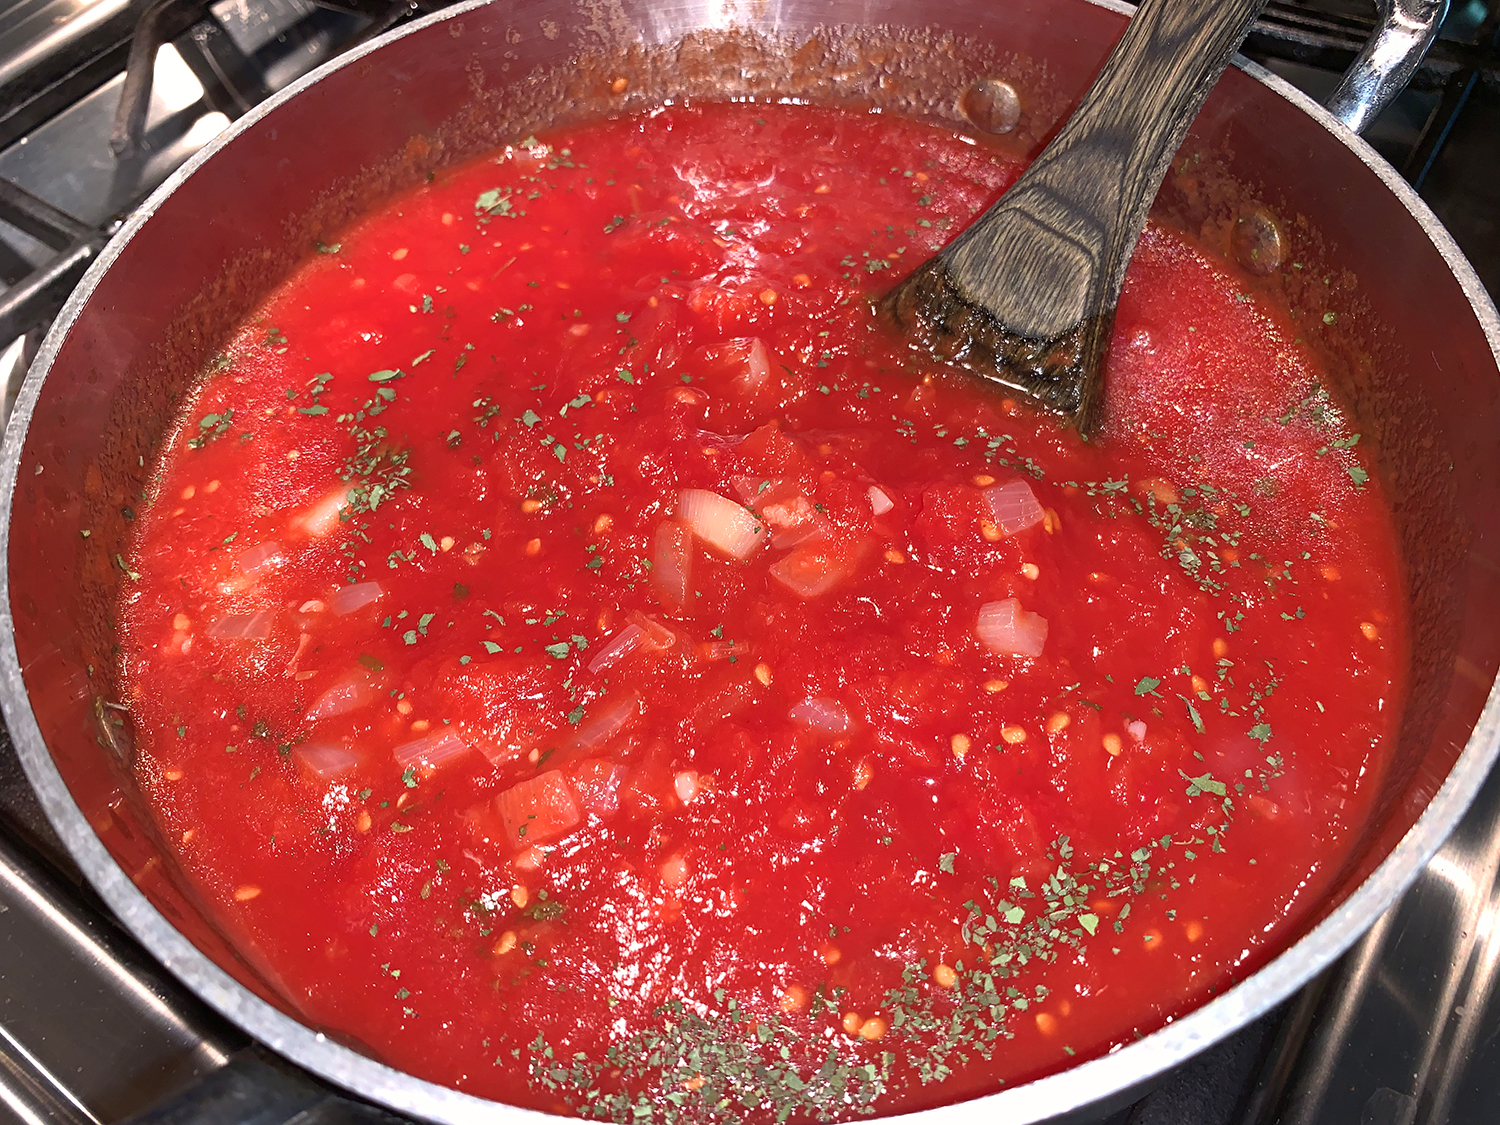
Tomato Sauce: In a medium saucepan, heat oil over medium. Cook onion and garlic, stirring frequently, until translucent, 2 to 4 minutes. Crush tomatoes into pan; add oregano. Simmer, stirring occasionally, until thickened, 15 minutes. Season with salt and pepper. Make up to 3 days ahead.
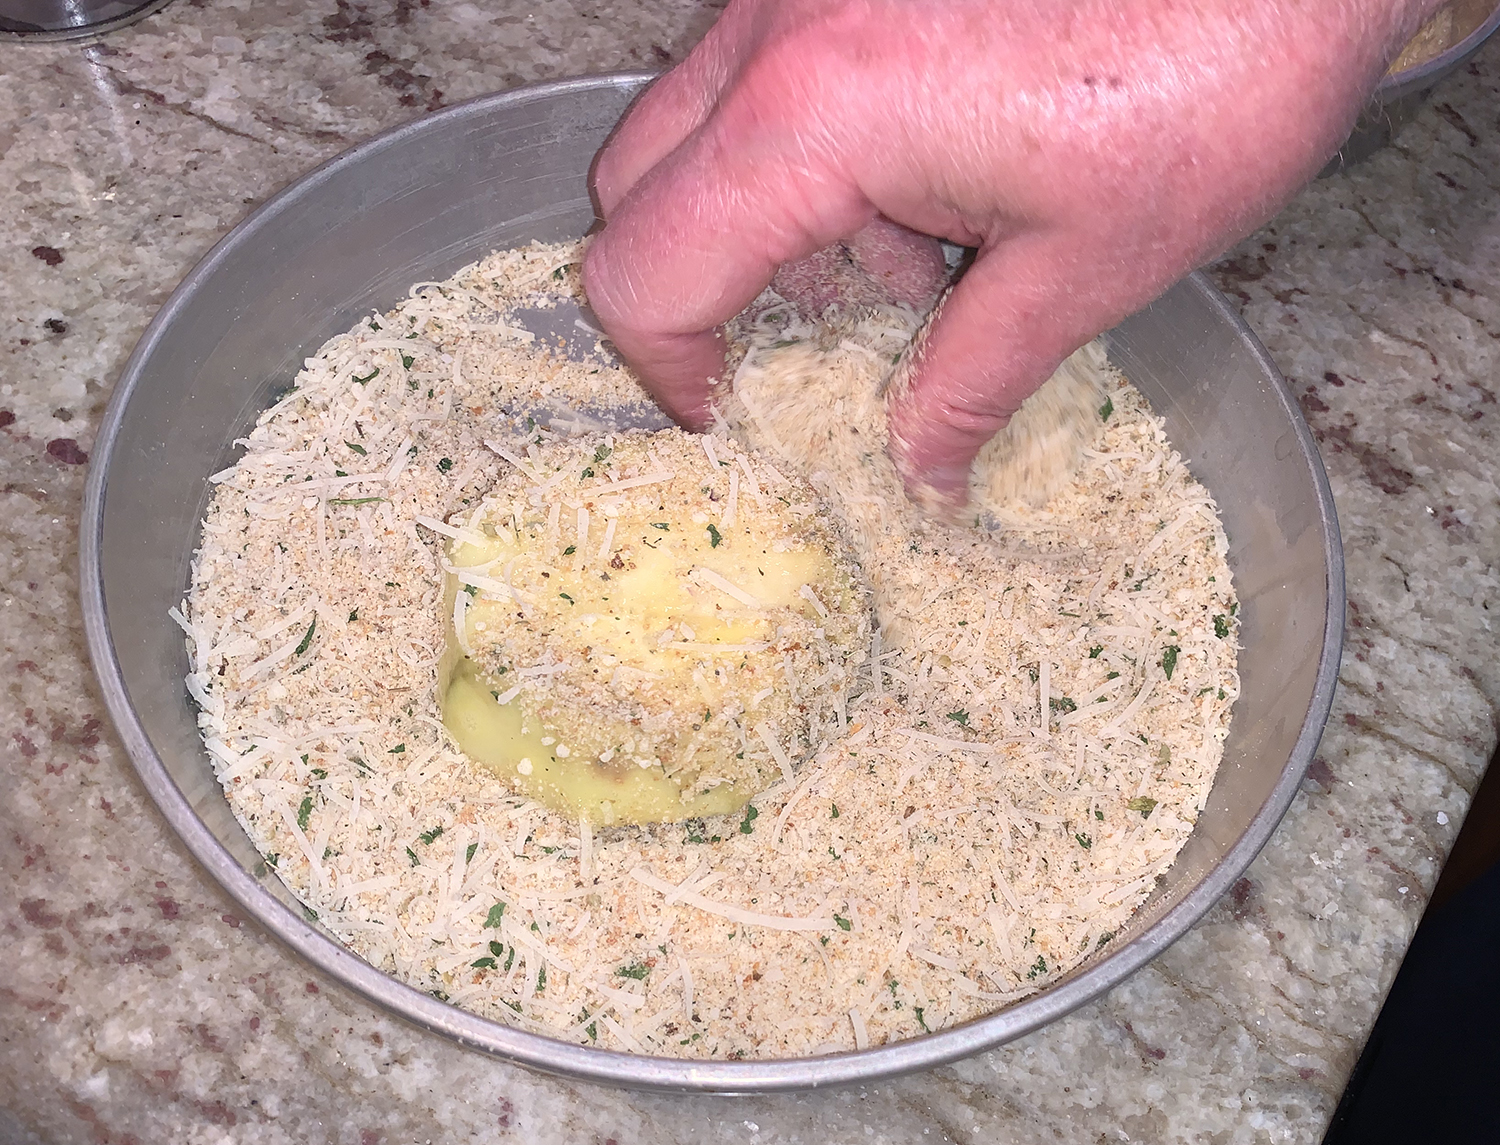
Eggplant Parm: Preheat oven to 375 degrees. Brush 2 baking sheets with oil; set aside. In a wide, shallow bowl, whisk together eggs and 2 tablespoons water. In another bowl, combine breadcrumbs, 1 cup grated Parmesan, and oregano; season with salt and pepper.
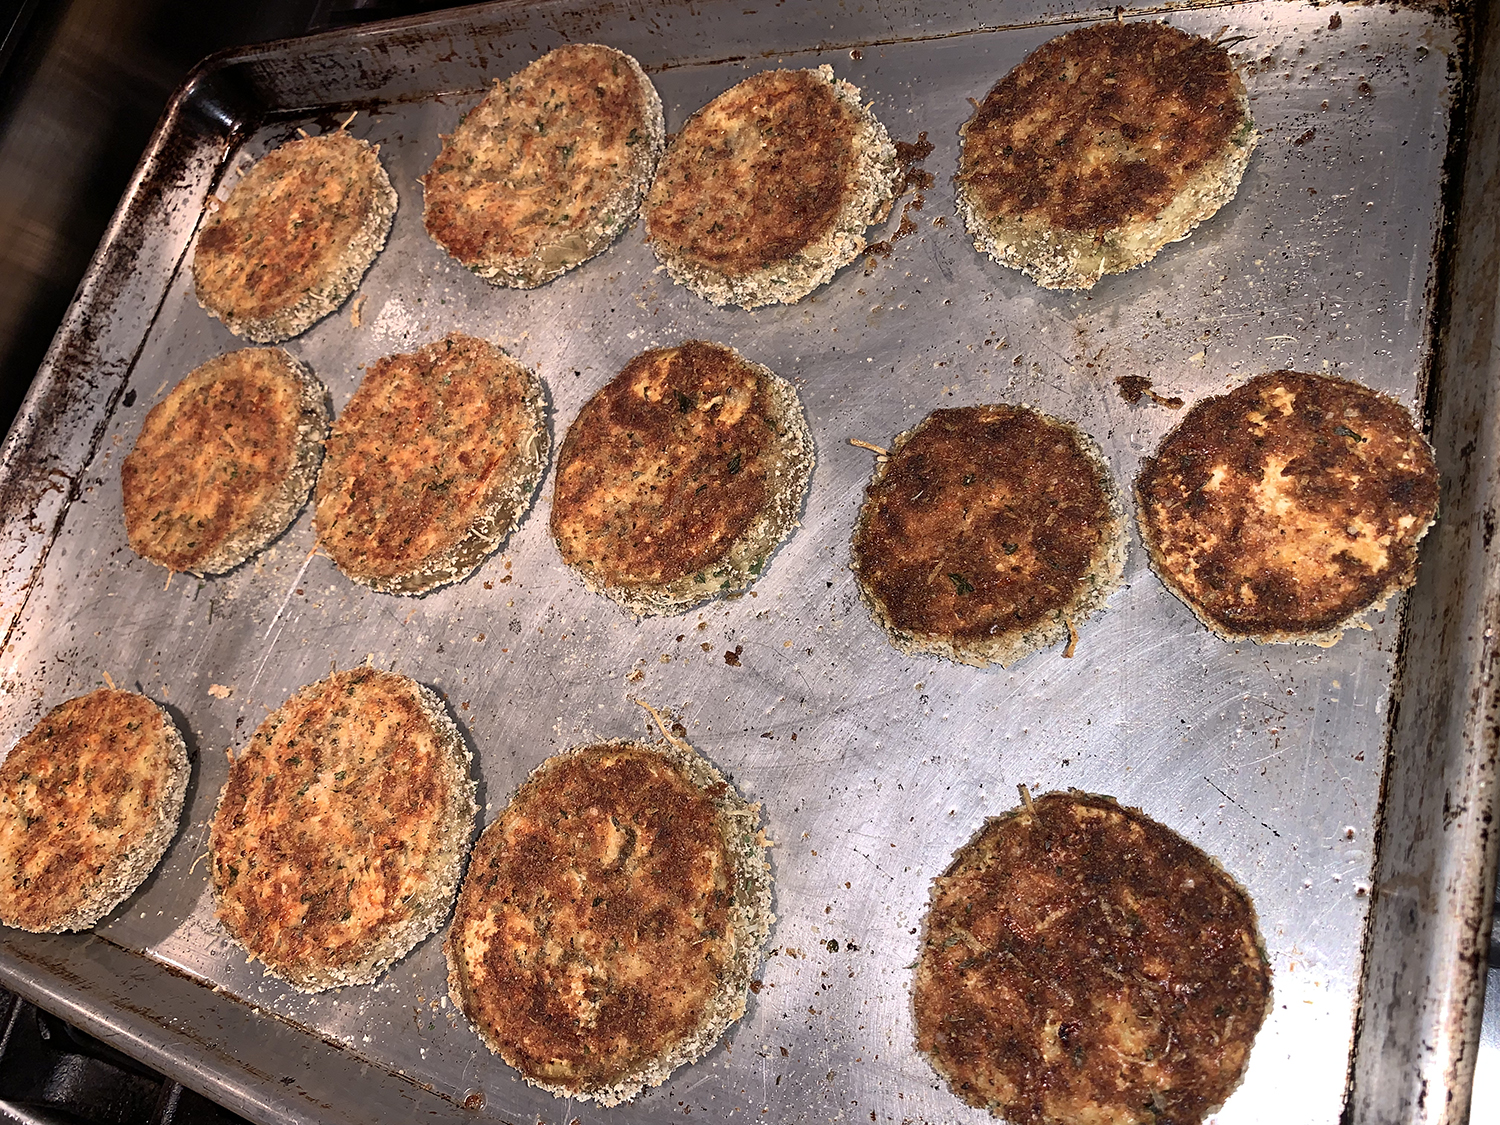
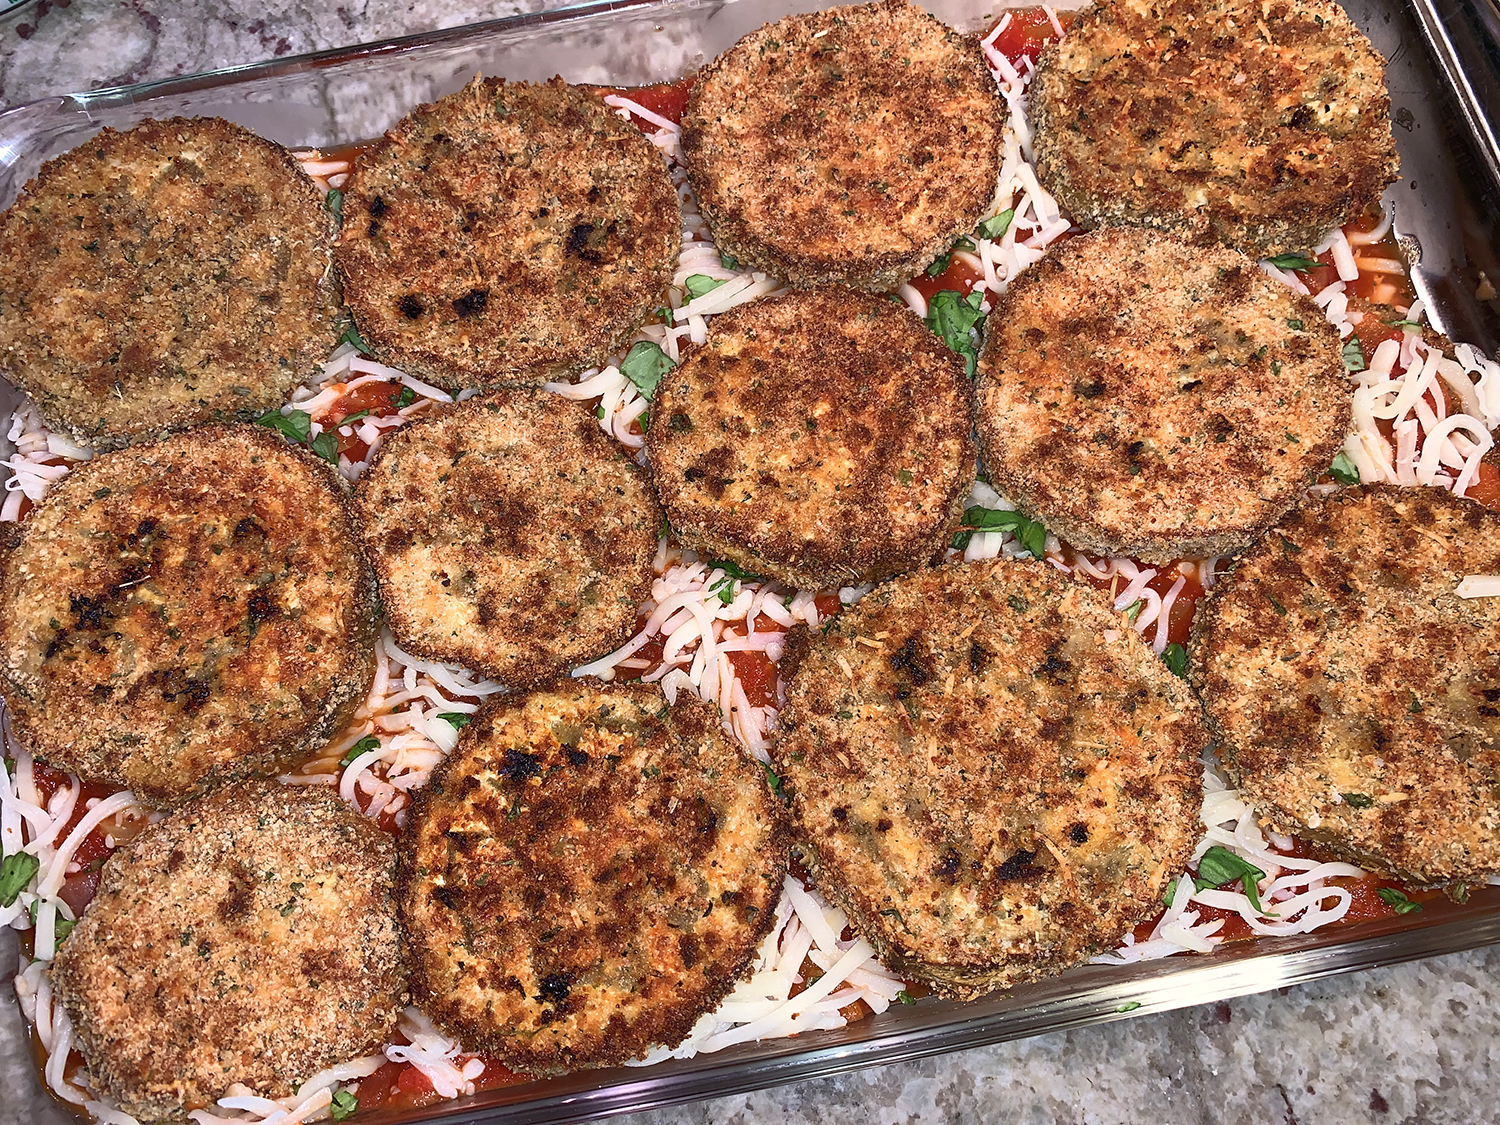
Dip eggplant slices in egg mixture, letting excess drip off, then dredge in breadcrumb mixture, coating well; place on baking sheets. Bake until golden brown on bottom, 20 to 25 minutes. Turn slices; continue baking until browned on other side, 20 to 25 minutes more. Remove from oven; raise oven heat to 400 degrees.
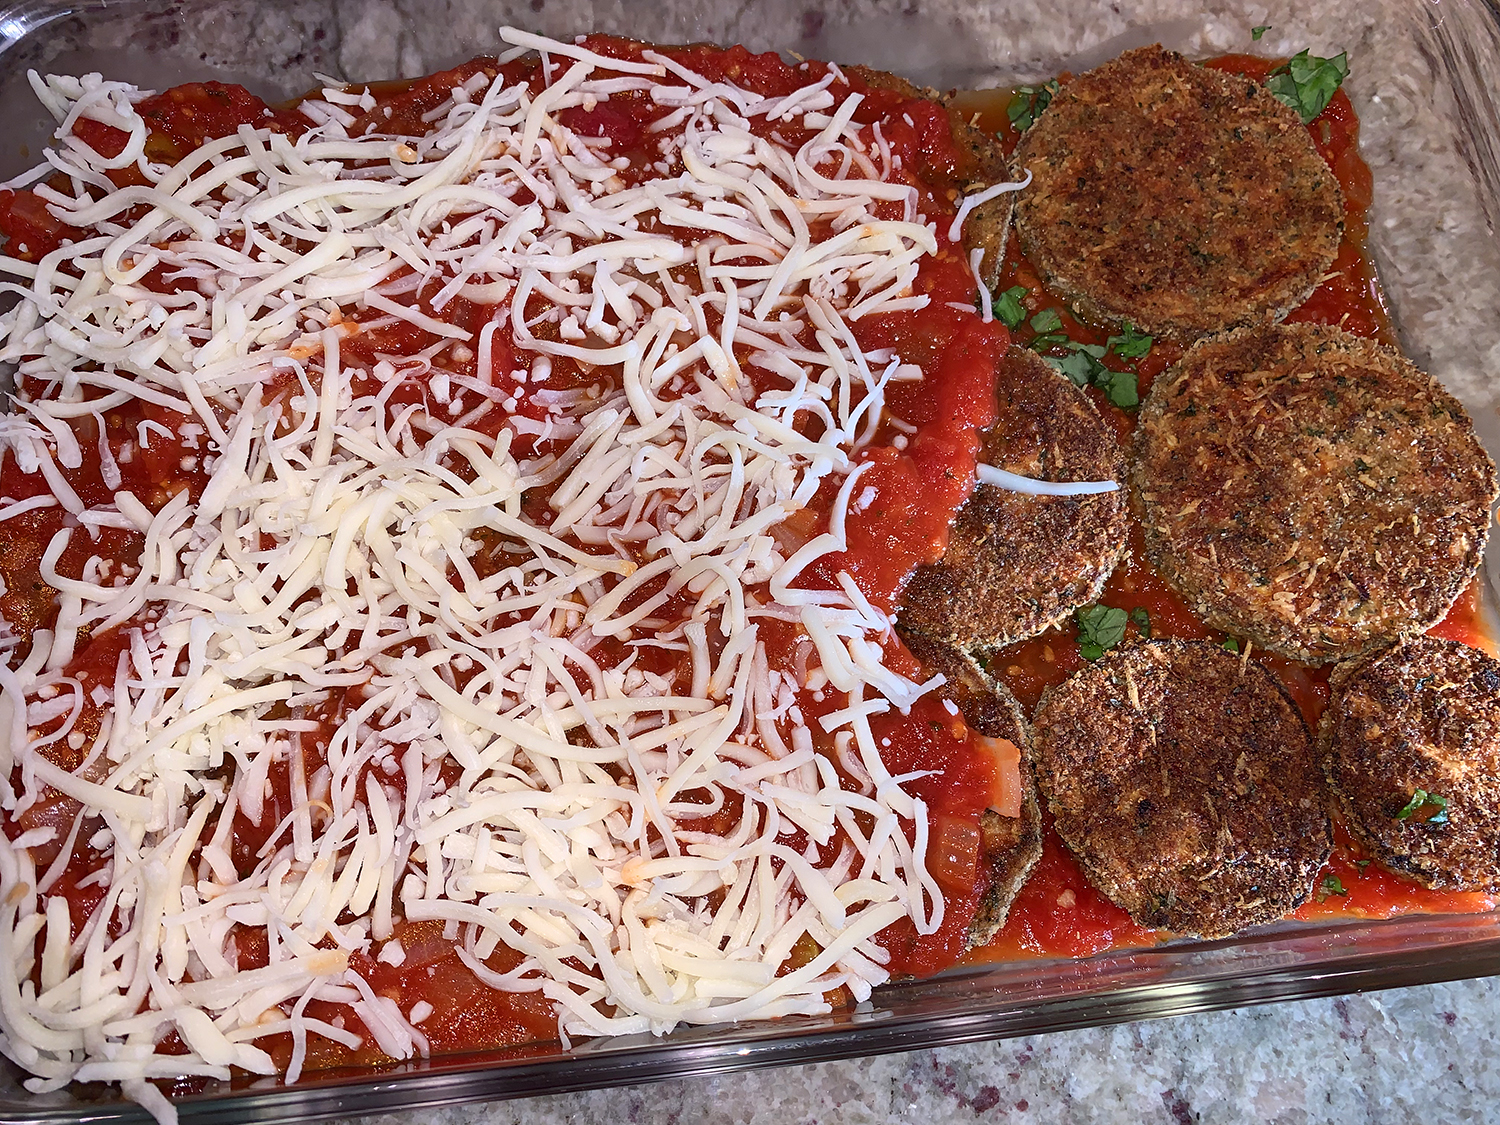
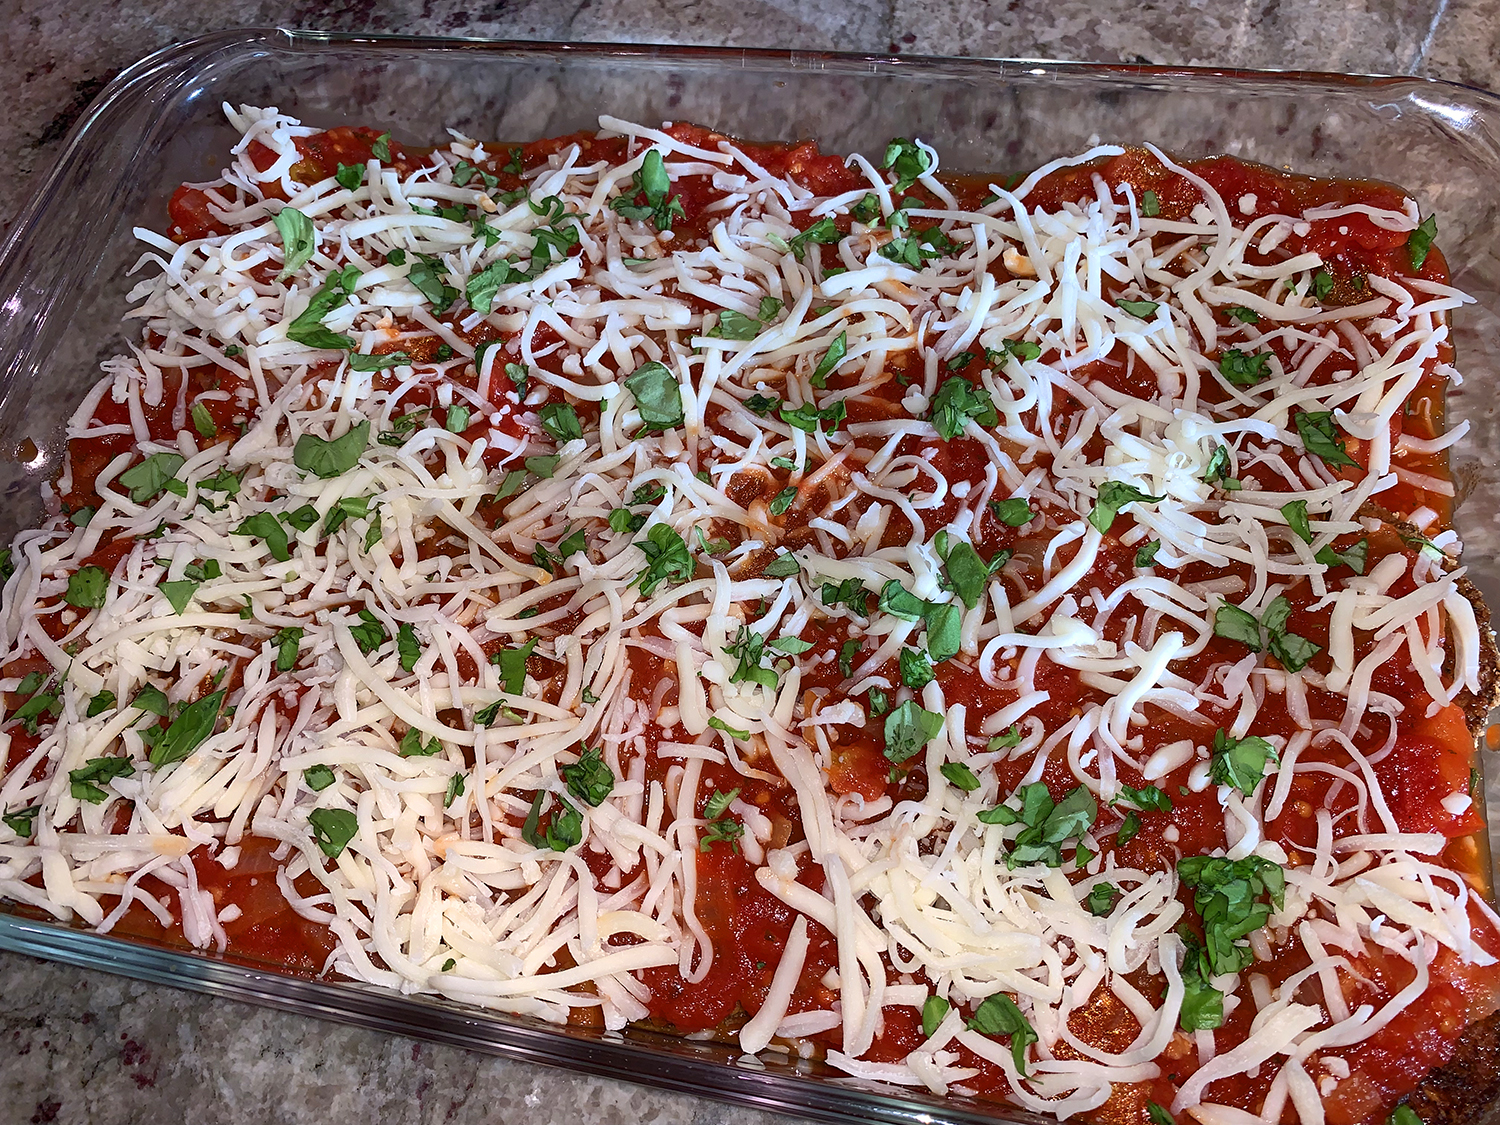
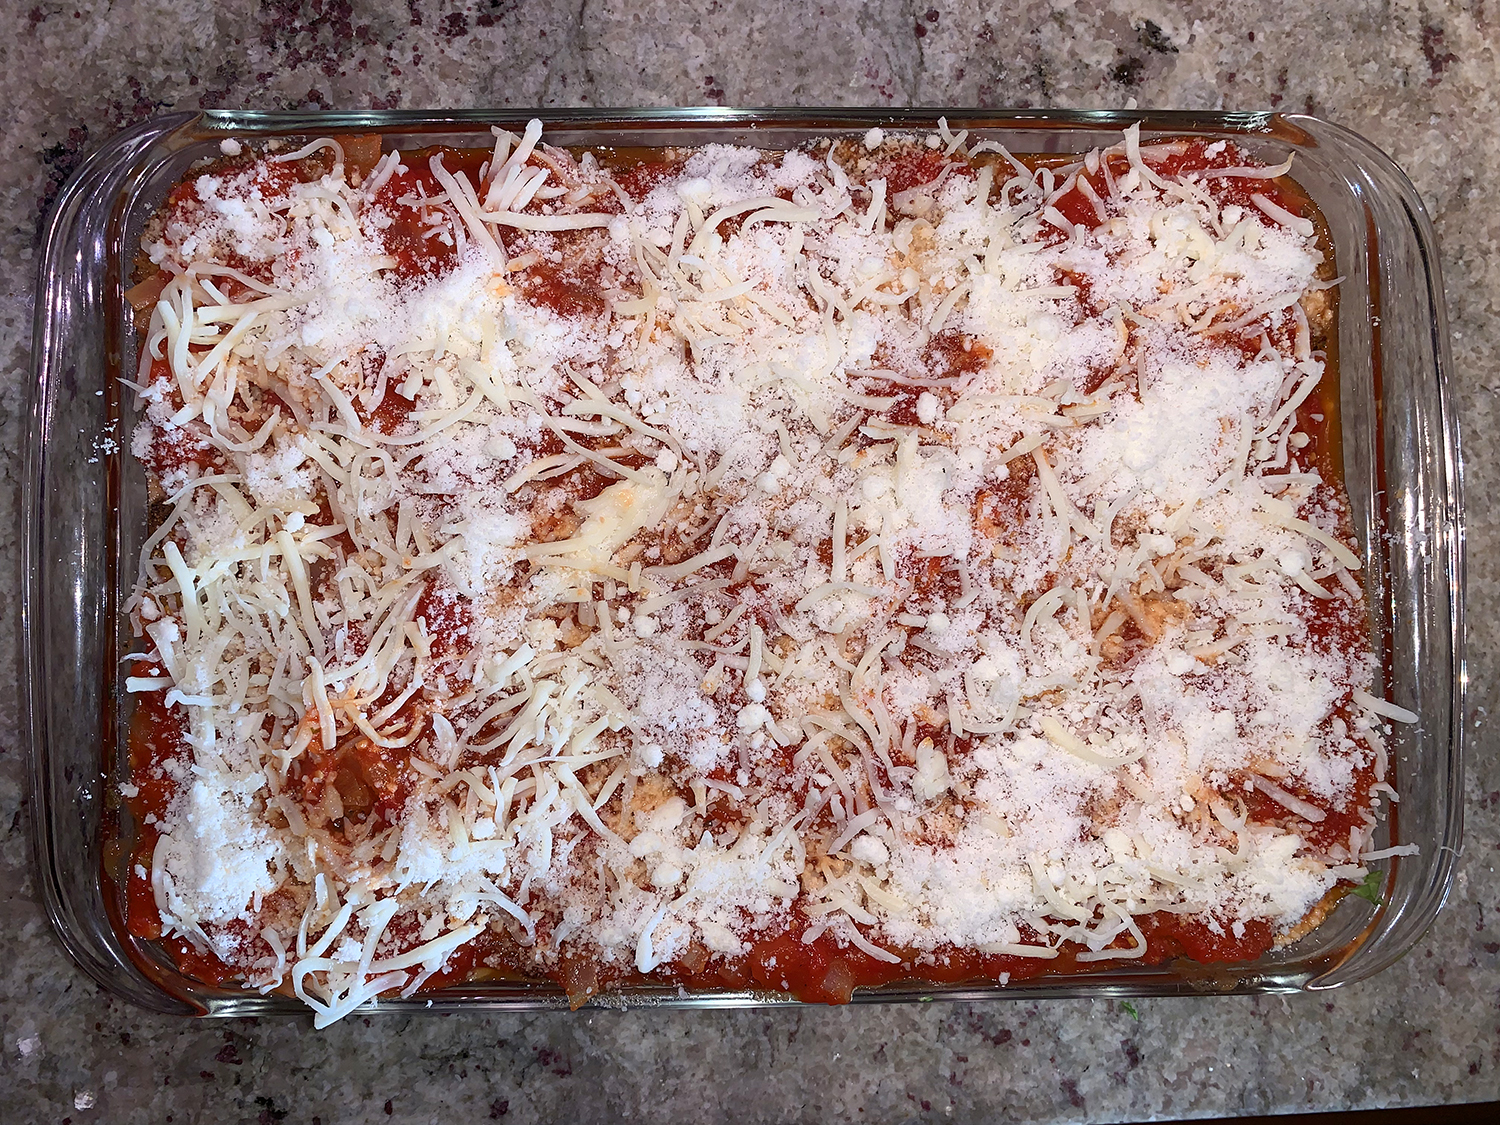
Spread 2 cups sauce in a 9-by-13-inch baking dish. Arrange half the eggplant in dish; cover with 2 cups sauce, then 1 cup mozzarella and 1/2 of the chopped basil. Repeat with remaining eggplant, sauce, mozzarella and basil; sprinkle with remaining 2 tablespoons Parmesan. Bake until sauce is bubbling and cheese is melted, 15 to 20 minutes. Let stand 5 minutes before serving.
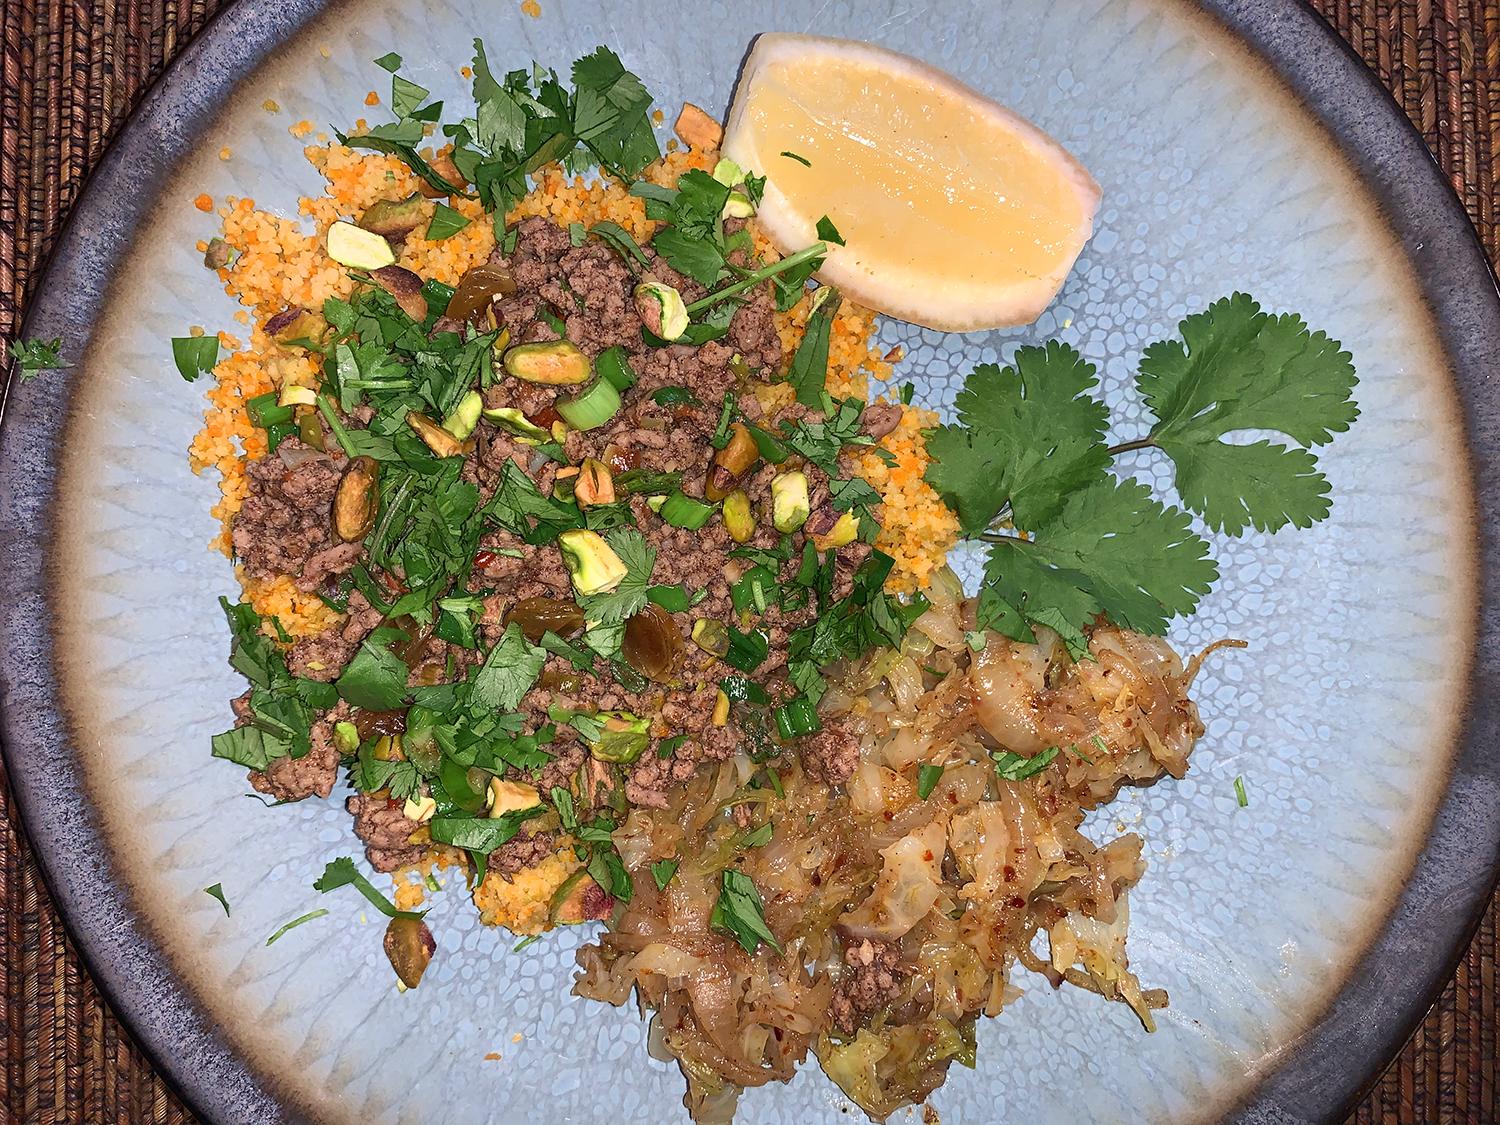
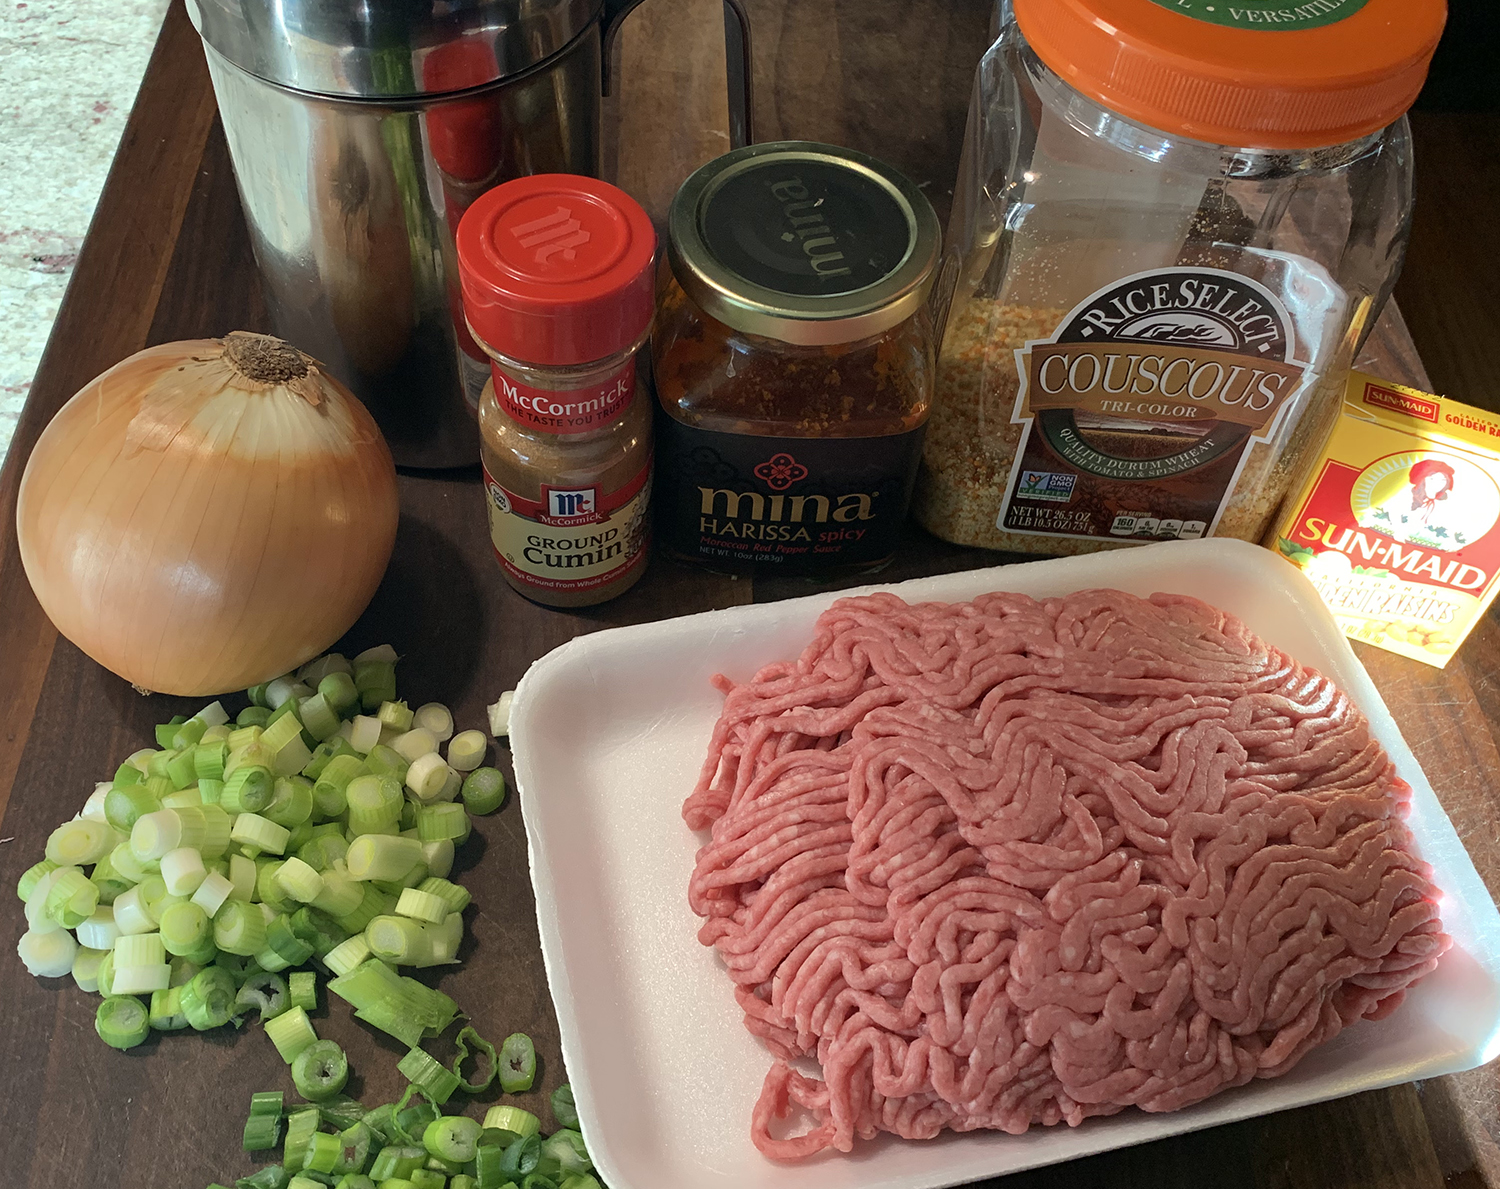
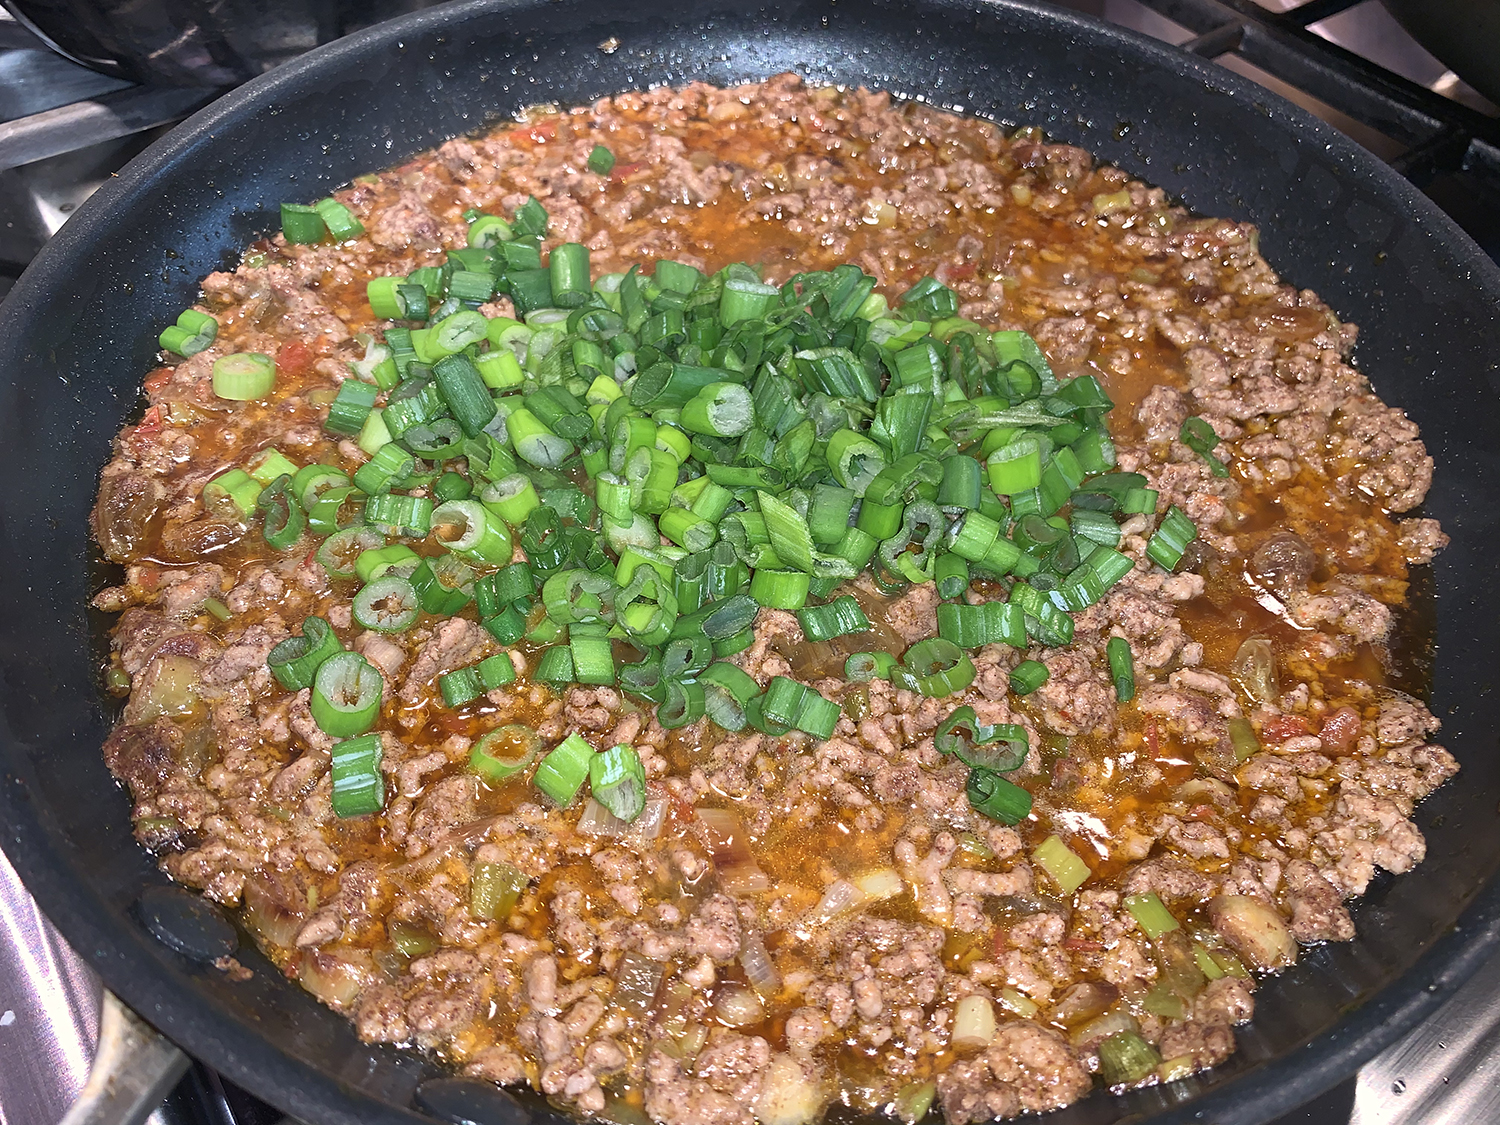
Harissa is a North African spice paste whichis used as the flavor base for this simple skillet-cooked meat sauce, as well as to season the couscous that’s served alongside. Scallions play a dual role in this dish—the whites are caramelized to lend depth of flavor to the sauce and the greens are sprinkled on as a garnish.
Dates (or golden raisins) lend sweetness that play off the spicy, savory notes. Neither of us are huge fans of raisins/dates in our savory dishes, so we only incorporated one ounce of golden raisins and to us, it was the perfect amount of sweetness.
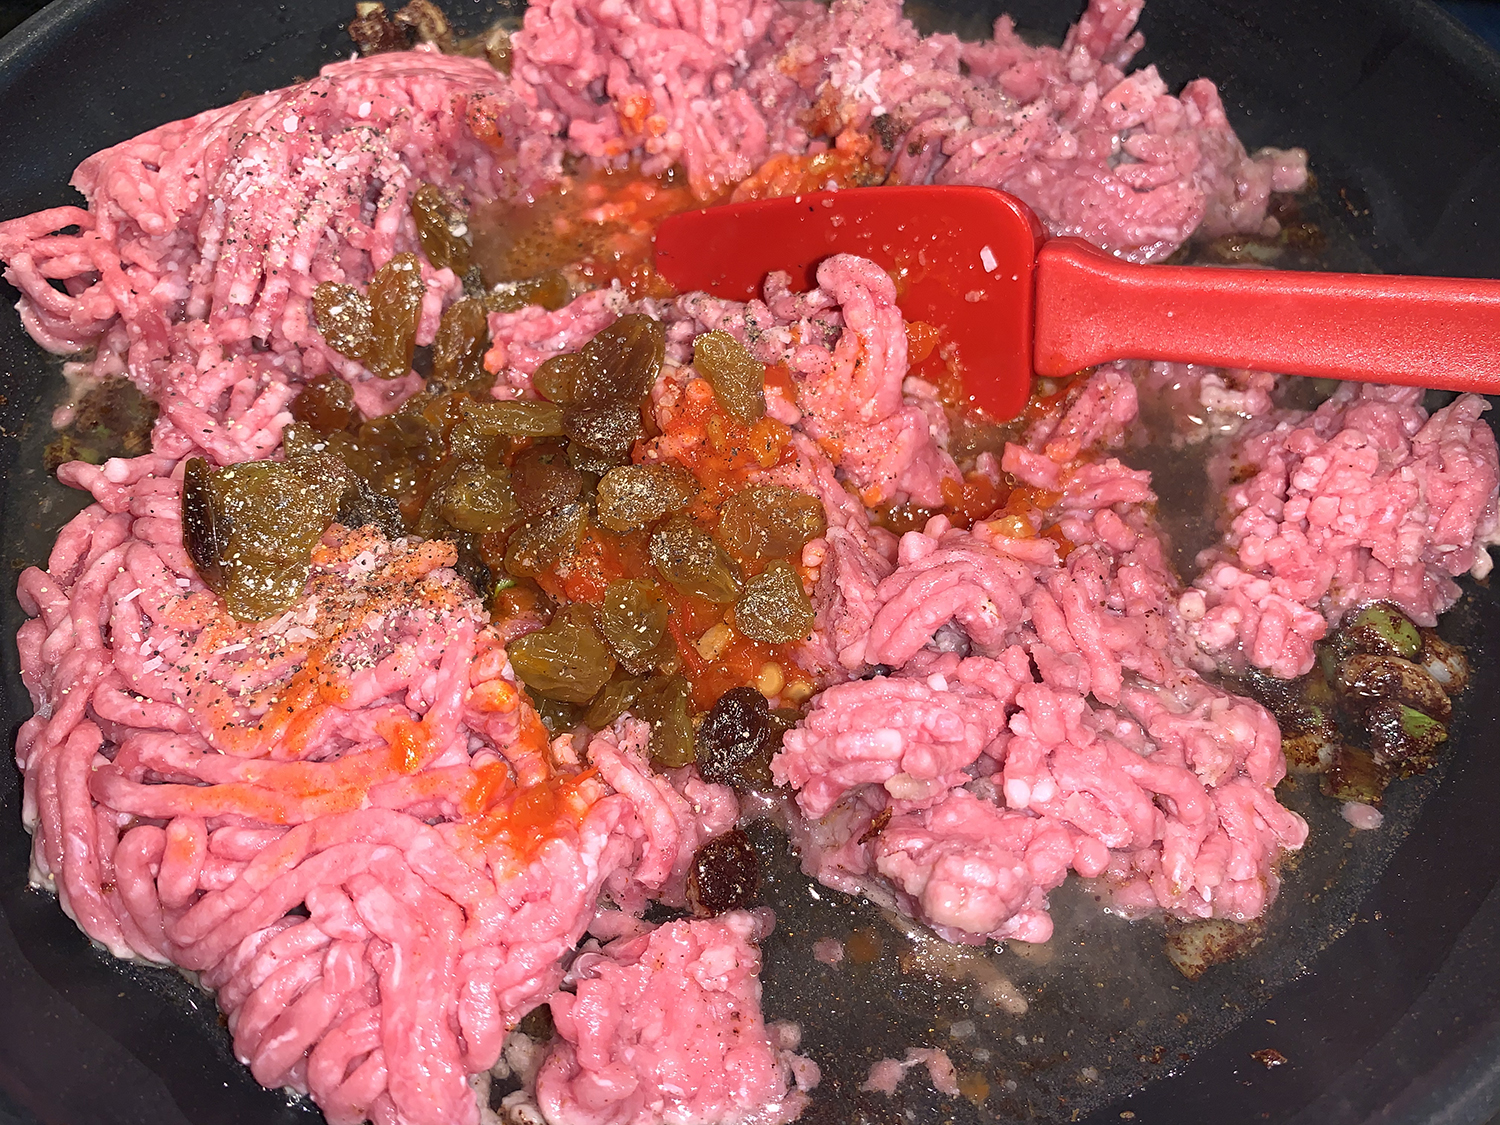
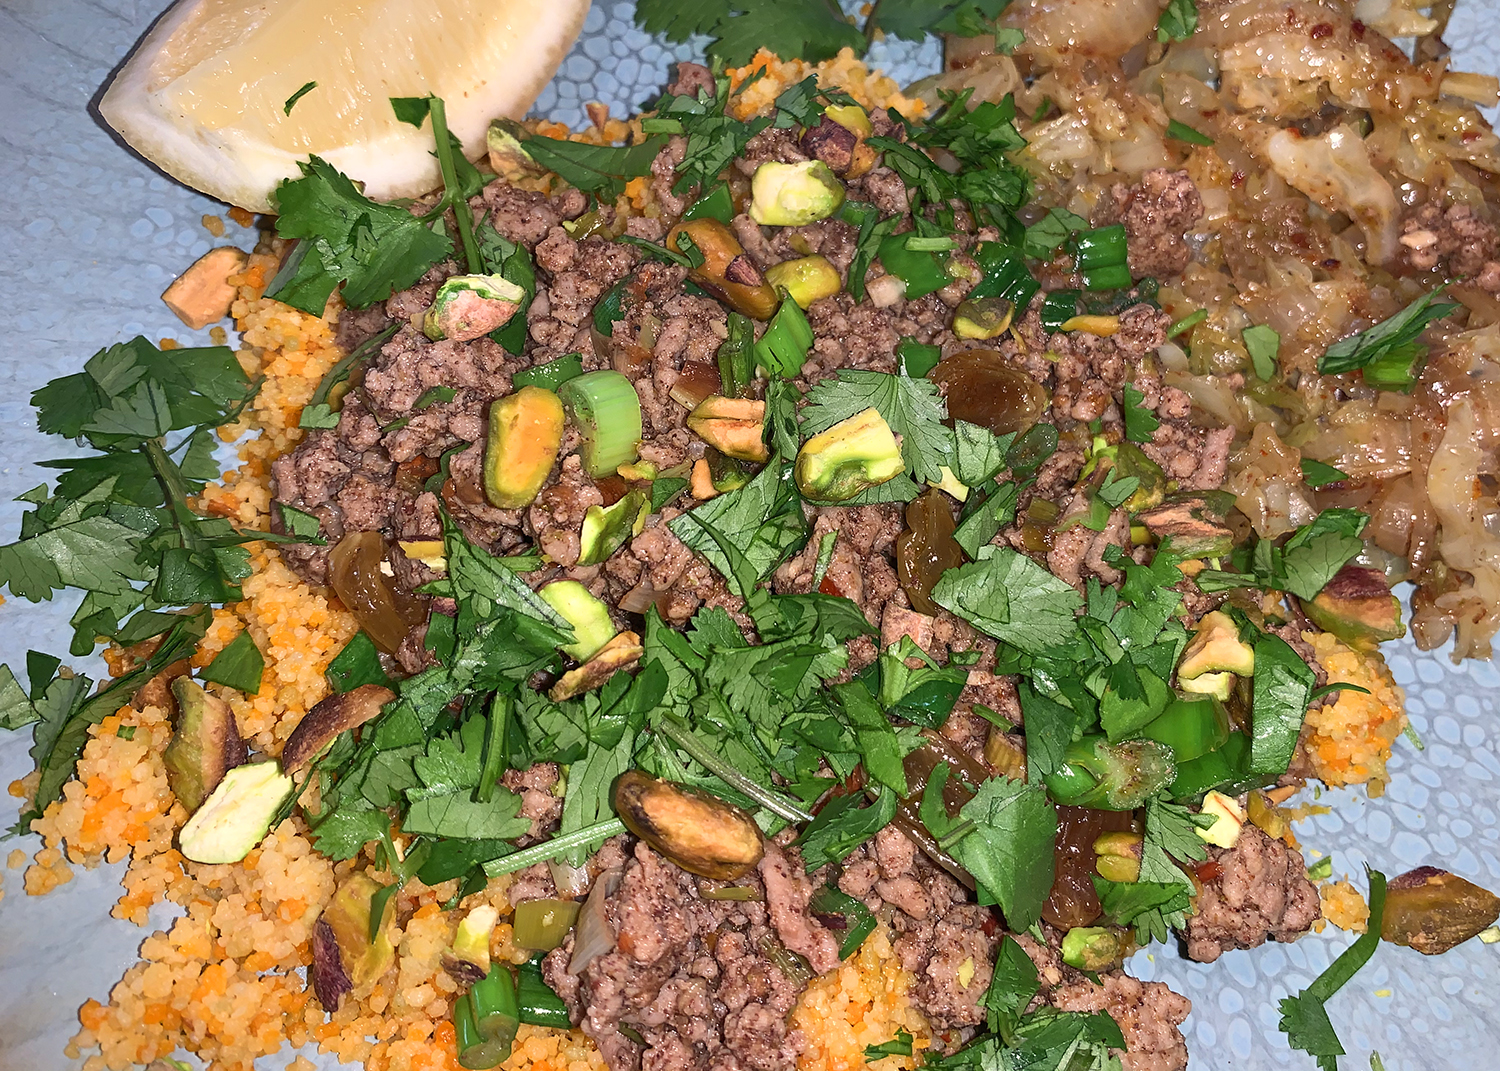
While the directions were followed as written, the next time we prepare this dish, we’ll brown the meat in the skillet first, remove it to a dish, wipe out the grease, and then cook the scallions as directed, adding back the cooked lamb afterwards. The original way leaves all of the fat in the pan.
The chopped pistachios, lemon wedge and cilantro all added welcome pops of flavor as garnishes.
In a large bowl, stir together the couscous, ¾ teaspoon salt and 1½ tablespoons each oil and harissa. Stir in the boiling water; cover and let stand while you prepare the beef.
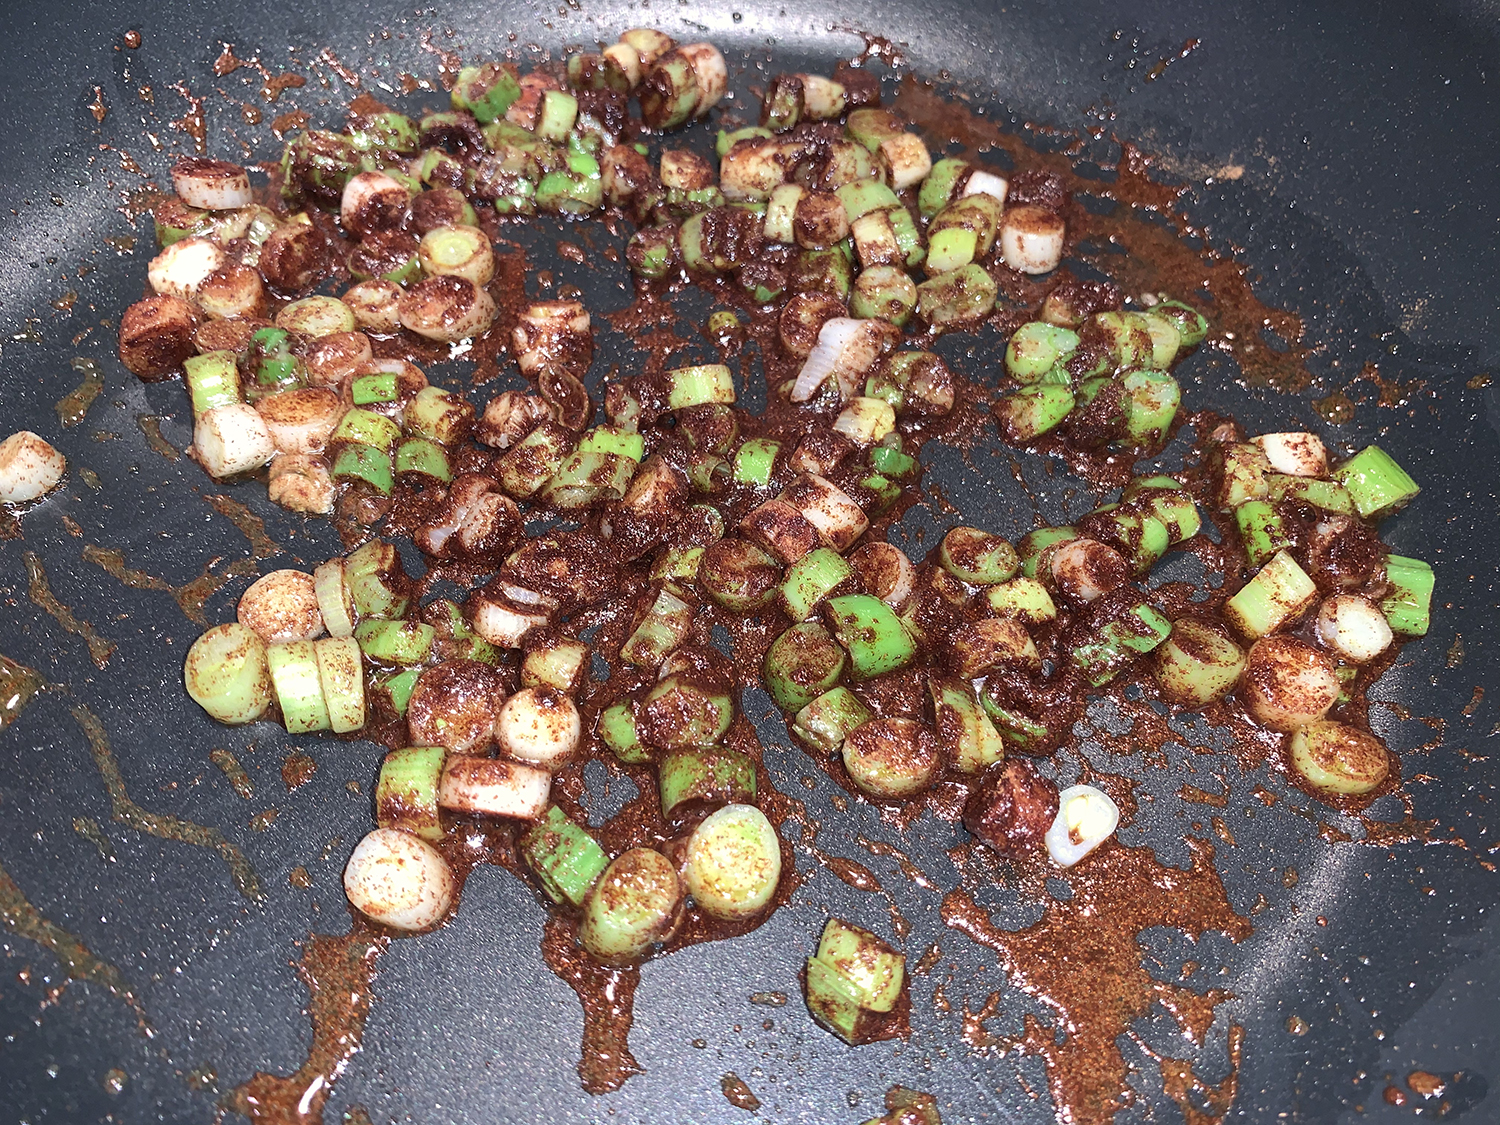
In a 12-inch nonstick skillet, cook the remaining 1½ tablespoons oil, the scallion whites and cumin, stirring, until the scallions brown.
Add the lamb (or beef), the remaining 1½ tablespoons harissa, the dates, ¾ cup water and a pinch each of salt and pepper. Simmer and cook, uncovered and stirring occasionally while breaking up the meat, until the mixture is saucy.
Stir in the scallion greens and season with salt and pepper. Serve over the couscous.
Pistachios are a borderline addiction for me (although I’m usually not picky when it comes to nuts of any sort). In fact, whenever we stop at Costco’s, it’s pretty likely we’ll pick up a 1.5-pound bag of the shelled, roasted/salted variety.
Did you know Sicily is famous for its pistachios, as well as for ricotta cheese? In this recipe, Milk Street blends the two, along with fresh basil and chives, to create a simple pesto to toss with al dente pasta.
There’s no need to grate the Parmesan—simply cut it into chunks and toss the pieces into the blender. The pesto is good on a wide variety of pasta shapes, but the hollow centers and surface ridges of rigatoni do a particularly good job of gripping the rich, creamy sauce. We used rotini whose spirals also made an easy job of grasping that sauce.
Milk Street advises NOT to use toasted or roasted pistachios because they claim, in this case, raw pistachios are best. Their bright color and natural sweetness lend a vibrant, full-flavored pesto. Well, as I mentioned, we had the roasted salted pistachios and went ahead and used them.
Now don’t forget to reserve some of the pasta water before draining the pasta. You’ll need some of the starchy seasoned liquid to thin out the pesto.
¾ cup raw pistachios, plus 2 Tbsp. finely chopped pistachios
2 Tbsp. extra-virgin olive oil, plus more to serve
2 oz. Parmesan cheese (without rind), cut into 4 or 5 pieces
½ cup lightly packed fresh basil
¼ cup roughly chopped fresh chives
Directions
In a large pot, bring 4 quarts water to boil. Stir in the pasta and 1 tablespoon salt, then cook, stirring occasionally, until al dente. Reserve 1½ cups of the cooking water, then drain the pasta and return it to the pot.
In a blender, combine the ricotta, the whole pistachios, oil, Parmesan, basil, chives, ½ teaspoon salt and ¼ teaspoon pepper. Add 1 cup of the reserved pasta water and blend until creamy, about 1 minute; the pesto should have a consistency similar to yogurt.
Pour the pesto over the pasta and stir, adding more reserved pasta water as needed so the sauce coats the noodles. Taste and season with salt and pepper. Serve drizzled with additional oil and sprinkled with the chopped pistachios.
Looking for a vibrant fish dinner combination? This Roasted Fish and Fennel with Grapefruit Salsa from Better Homes & Gardens caught our attention immediately. And if you lean toward low-carb, keto-friendly dishes, you may want to put this meal in your rotation.
Choose a firm whitefish option like cod, grouper, or hake. These varieties hold up well to oven-roasting—and topping with a tangy, refreshing fruit salsa. Our original intention was to purchase hake, but the local supermarket didn’t have it and we were to lazy to drive to the other side of town to the Asian fish market and get it, so cod it was.
The recipe calls for four fish fillets, but with only the two of us at the dinner table, we simply bought a one-pounder fillet and split it. As far as the fennel, once roasted, it not only dissipates the licorice flavor (which deters some people from eating it), but it takes on a subtle, sweet flavor, which makes a great counterpoint to the grapefruit salsa.
2 medium fennel bulbs, halved, cored, and cut into thin wedges, plus 2 Tbsp. chopped fronds
3 Tbsp. olive oil, divided
Coarse salt and freshly ground black pepper
4 1-inch thick firm white fish fillets, such as cod, grouper, or hake
1 large pink grapefruit, peeled and sectioned
2 Tbsp. coarsely chopped Italian parsley
2 Tbsp. finely chopped shallot
1 Tbsp. white wine vinegar
Directions
Preheat oven to 425°F. Line a shallow baking pan with foil. Add fennel wedges. Toss with 1 tablespoon olive oil; season with salt. Arrange in a single layer. Roast 12 to 15 minutes or until starting to brown.
Turn fennel and push to sides. Add fish. Drizzle with 1 tablespoon olive oil. Season with salt and black pepper. Bake 10 to 12 minutes or until fish flakes easily with a fork.
Meanwhile, in a small bowl combine chopped fennel fronds, grapefruit, parsley, shallot, vinegar, and 1 tablespoon olive oil; season with salt and black pepper. Serve fish with roasted fennel and the salsa.
A richly caramelized crust, juicy and flavorful interior, and a sauce so irresistible you’ll be tempted to eat it right out of the skillet. Take note, while the cooking portion is a mere 15 minutes or so, the seasoned poultry needs to be refrigerated uncovered for two hours, then sit at room temperature for another 30 minutes.
Why season and chill this chicken before cooking? That chilling time allows salt to penetrate the chicken and as the muscle fibers break down, it helps the meat reabsorb the juices. And no one enjoys a dried out piece of chicken!
Instead of just serving with plain steamed rice, we upped our game and made rice pilaf which also included a chipotle chile pepper. The other companion side served was glazed carrots.
1 chipotle chile pepper in adobo sauce, finely chopped
Chopped fresh cilantro
Directions
Season chicken generously with salt and pepper. Place on a plate. Chill, uncovered, for 2 hours. Remove from refrigerator and let stand 30 minutes.
Heat a heavy 12-inch skillet over medium-high heat. To check when hot enough, add a large drop of water (1/8 teaspoon) to the skillet. When it rolls around the pan like a bead of mercury it is ready. This will take 2 to 3 minutes.
Remove skillet from heat; add oil. Swirl to coat bottom of skillet. Return to medium-high heat. Add chicken (don’t crowd the pan). Cook for 5 minutes or until a crust forms (be patient; the chicken will release when it’s ready to be turned). Turn and cook for 5 to 7 minutes more—or until chicken is done at 165°F. Adjust heat as necessary.
Remove chicken from skillet to a plate; cover loosely. Remove skillet from heat. Carefully add broth, lime juice, and garlic to skillet (mixture will spatter). Return to heat. Bring to boiling, stirring to scrape up browned bits. Boil gently, uncovered, for 5 minutes or until reduced by about half. Remove from heat.
Whisk in butter, chipotle, and any juices from the chicken.
Spoon sauce over chicken to serve. Sprinkle with cilantro.
Southeast Asian curries combine Indian influences with regional ingredients such as lemon grass and star anise. For this one, Milk Street took inspiration from a recipe in “Best of Malaysian Cooking” by Betty Saw. Instead of calling for a long list of spices, this uses Indian curry powder as an easy flavor base; and sambal oelek, an Indonesian-style chili paste which adds bright heat to the meal.
The dish was delish, BUT, it took way longer than indicated. First, since we couldn’t locate boneless short ribs, we bought a chuck roast that was sliced in half lengthwise and popped into the freezer for 30 minutes. This allowed us to easily cut the beef into thin, 1⁄8-inch slices. And there was quite a bit of prep—at least 20 minutes worth—so there was no way this meal was going to be done in a half hour!
Then, the potato halves, which were supposed to be tender after 30 minutes, were still too firm after 45. I fished them out of the curry, and microwaved for several minutes before reuniting them with the other ingredients. For a pop of color, chopped cilantro was added as a final garnish.
It is suggested you serve over hot jasmine rice, yet we are not typically fans of both potatoes and rice in the same dish. Although it would be lovely over rice to help sop up the wonderful sauce, we would substitute sweet bell red and/or green peppers in place of the potatoes, cooking them first before the onions to reduce incorporating any more liquid into the curry.
Tips: Don’t forget to trim off any silver skin from the short ribs before slicing. The silver skin is stringy and fibrous unless the meat is cooking for a long time, and if left in place, it will cause the slices of beef to curl during simmering. Look for sambal in well-stocked supermarkets and Asian grocery stores; if it’s not available, chili-garlic paste is a good substitute.
1½ lbs. boneless beef short ribs (or chuck roast), trimmed and cut to ⅛-inch thick slices against the grain
Kosher salt and ground black pepper
2 Tbsp. grapeseed or other neutral oil
1 medium red onion, halved thinly sliced
3 medium garlic cloves, smashed and peeled
1½ Tbsp. finely grated fresh ginger
2 stalks fresh lemon grass, trimmed to the bottom 6 inches, dry outer layers discarded, bruised
2 Tbsp. curry powder
2 star anise pods
1 lb. small Yukon Gold potatoes (about 1½ inches in diameter), unpeeled, halved
14 oz. can coconut milk
1 Tbsp. sambal oelek or chili-garlic paste, plus more as needed
Cilantro, roughly chopped for garnish (optional)
Directions
Season the beef with salt and pepper; set aside. In a large Dutch oven over medium-high, heat the oil until shimmering. Add the onion, garlic, ginger, lemon grass, curry powder, star anise and 1 teaspoon salt. Cook, stirring often, until the onion begins to soften and the mixture is fragrant, about 3 minutes.
Add the beef, potatoes, coconut milk and sambal, then bring to a simmer, scraping the bottom of the pot. Reduce to medium-low, cover and cook, stirring occasionally, until a skewer inserted into the largest potatoes meets no resistance, about 30 minutes (or longer).
Off heat, taste and season with salt, pepper and additional sambal. Remove and discard the star anise and lemon grass. Garnish with chopped cilantro, if using.