Monthly Archives: August 2019

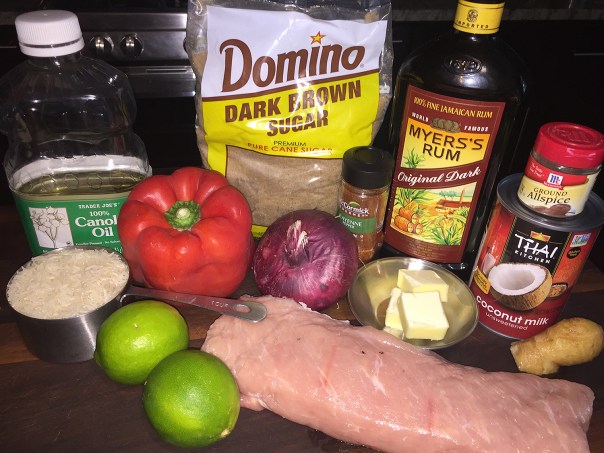
Rum-Glazed Pork Skewers with Coconut Rice, Yah Mon

There was a period of about 10-12 years that we annually visited some Caribbean island, or the Riviera Maya, during the long Winter months to ease that bleak period of time between the holidays and the start of Spring. And those fond memories include some of the best food. The flavors in this Rum-Glazed Pork Skewers with Coconut Rice recipe remind me of those blissful days.

Here, a Caribbean-accented spice rub and glaze boost the flavor of quick-cooking pork tenderloin pieces which are quickly grilled with fresh bell pepper and red onion. Rice cooked with coconut milk and a sprinkle of lime zest add to the tropical feel of the dish.

To amp up the nutrients and provide an additional splash of color, we served ours with a side of rainbow chard sautéed in olive oil and roasted garlic. Go ahead, dive into the Caribbean flavors…

IMG_4721

Rum-Glazed Pork Skewers with Coconut Rice

  • Servings: 4
  • Difficulty: easy
  • Print

Ingredients

  • 3 Tbs. unsalted butter
  • 1 Tbs. minced fresh ginger
  • 1 cup jasmine rice
  • 3/4 cup well-shaken unsweetened coconut milk
  • Kosher salt
  • 1/3 cup dark rum
  • 3 Tbs. packed dark brown sugar
  • 2 medium limes, finely grated to yield 1 tsp. zest and squeezed to yield 1/4 cup juice
  • 2 Tbs. vegetable oil; more for grill grates
  • 1 tsp. ground allspice
  • 1/8 tsp. ground cayenne
  • Freshly ground black pepper
  • 1 1- to 1-1/4-lb. pork tenderloin, cut into 1-inch cubes
  • 1 medium red bell pepper, cut into 1-inch squares
  • 1 red onion, cut into 1-inch pieces
  • Lime wedges for serving (optional)

Directions

  1. Melt 1 Tbs. of the butter in a 2-quart saucepan over medium heat. Add the ginger and cook, stirring, until fragrant, about 1 minute. Add the rice and stir until well coated.
  2. Add the coconut milk, 1-1/2 cups water, and 3/4 tsp. salt; bring to a simmer. Reduce the heat to low, cover, and cook until the liquid is absorbed, about 15 minutes. Fluff with a fork, cover, and set aside.
  3. Meanwhile, combine the rum, brown sugar, 2 Tbs. of the lime juice, and the remaining 2 Tbs. butter in a 1-quart saucepan. Bring to a simmer over medium heat and cook until syrupy, about 5 minutes (this took me more like 12 minutes). Stir in 1/8 tsp. salt and remove from the heat.
     

  4. In a medium bowl, combine the remaining 2 Tbs. lime juice with the oil, allspice, cayenne, 1-1/2 tsp. salt, and 1/2 tsp. black pepper. Add the pork and toss to coat.
    IMG_4723
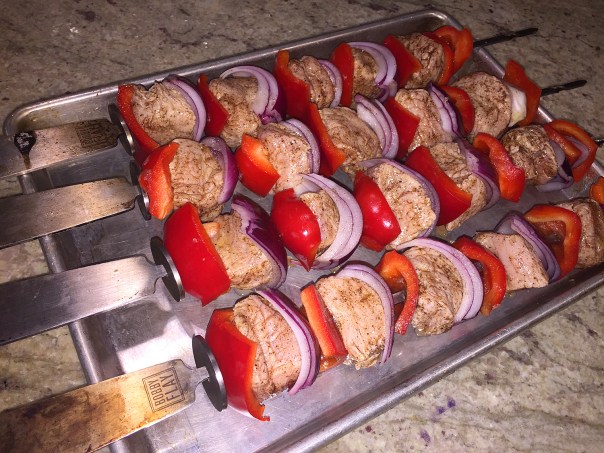
  5. Thread the pork, bell pepper, and onions onto four 12-inch metal skewers, alternating the meat and vegetables.
    IMG_4726
  6. Prepare a medium-high (400°F) gas or charcoal grill fire or heat a large grill pan over medium-high heat. Oil the grate or pan. Grill the skewers until seared on all sides, about 4 minutes total.
  7. Brush the skewers with the glaze and grill, turning occasionally, until the pork is browned on the outside but still slightly pink in the center, 2 to 4 minutes more.
    IMG_4730
  8. Add the zest to the rice and fluff. Brush the skewers with any additional glaze and serve with the rice and lime wedges, if you like.
    IMG_4736

http://www.lynnandruss.com

By Laraine Perri from Fine Cooking

Love At First Bite

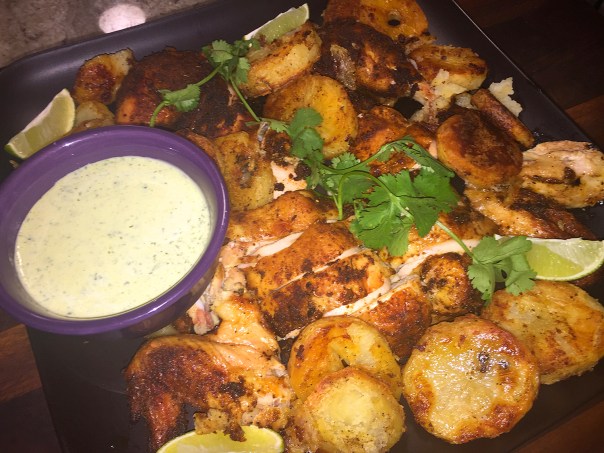
Another roast chicken recipe?? You betcha! Peruvian-Style Roast Chicken with Potatoes is a really tasty, juicy and rather easy one at that. Yes, you do need to plan on some extra time with the prep because the bird needs to get happy in the rub for at least one hour, or up to overnight. But once it’s in the oven, most of the work is done. And OMG, those potatoes, among the best I’ve ever had, seriously!

IMG_4707

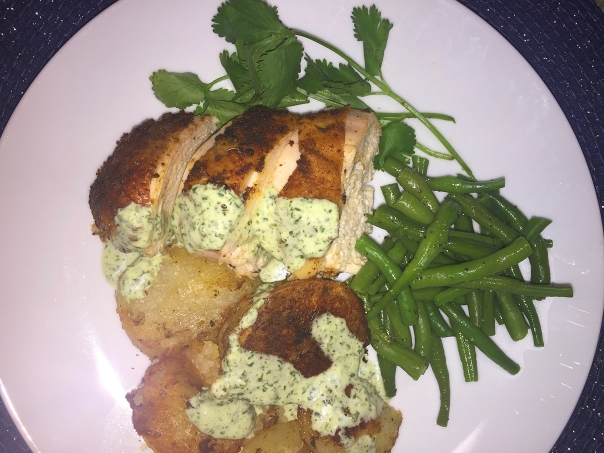
As I’ve come to learn, there are many variations on Peruvian-Style Roast Chicken, but the one thing they seem to have in common is a cumin- and paprika-spiced coating which gets added punch from an addictively tangy green sauce. Those crispy/creamy potatoes don’t suffer from a drizzle of that sauce either.

These directions have you cut only one side of the backbone, while I spatchcocked (removed backbone entirely) our chicken and added the back to our bag of “body parts” for making stock. And in lieu of the olive oil and grated garlic, I used a homemade concoction of our roasted garlic and EVOO and spread it all over the poultry before adding the spice mixture. Basically the same difference, it just saved me the step of grating garlic cloves.

Once that was done, I put into the fridge, covered with tinfoil, and let the mixture do its magic for 8 hours. If the aromas don’t having you swooning while dinner is roasting, just wait until you have your first taste—love at first bite.

Peruvian-Style Roast Chicken with Potatoes

  • Servings: 4
  • Difficulty: easy
  • Print

Ingredients

  • 1 Tbsp. ground cumin
  • 1 Tbsp.sweet paprika
  • 1 tsp. dried oregano
  • Kosher salt, freshly ground pepper
  • 1 whole chicken, 4-5 lbs.
  • 5 Tbsp. extra-virgin olive oil
  • 4 cloves garlic, 3 finely grated, 1 chopped
  • 2 1/2 lbs. russet potatoes (about 4)
  • 1/2 cup fresh cilantro leaves, plus more for garnish
  • 1 jalapeño, stemmed, seeded and chopped
  • 1/2 cop mayonnaise
  • 2 Tbsp. fresh lime juice, plus wedges for serving

Directions

  1. Preheat oven to 425°. Combine cumin, paprika, oregano, 1 Tbsp. salt and 1/2 tsp. pepper.
  2. With kitchen shears, cut chicken along its backbone along one side; open like a book. (Or remove backbone entirely and save for a future use such as homemade stock.) Place on a rimmed baking sheet, breast-side up; press down flat.
    IMG_4692
  3. Rub all over with 2 Tbsp. oil and grated garlic. Sprinkle with spice mixture. Let stand 1 hours (or refrigerate, covered for several hours or overnight).
    IMG_4696
  4. In a sauce pan, cover potatoes with 2″ of water and bring to a boil; add a generous amount of salt. Boil until just tender, 11 to 13 minutes.
  5. Drain and immediately return to pan; toss with remaining 3 Tbsp. of oil and season with salt and pepper. (Potatoes will break apart slightly.)
    IMG_4697
  6. Scatter potatoes around chicken on rimmed baking sheet. Roast until chicken is golden and a thermometer inserted into thickest part of breast registers 160°, 45 to 50 minutes. Transfer chicken to a cutting board, and let rest while potatoes continue cooking.
  7. Flip potatoes and continue to roast until golden and crisp, 5 to 10 minutes more.
    IMG_4706
  8. Meanwhile, purée cilantro, jalapeño, chopped garlic, mayonnaise, lime juice and 1 Tbsp. water. (If sauce is too thick, add more water 1 tsp. at a time.) Season with salt.
    IMG_4712
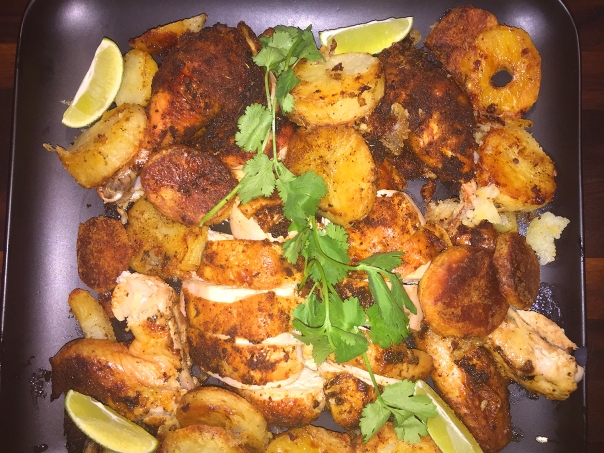
  9. Carve chicken and serve with potatoes and cilantro sauce, garnished with cilantro leaves and lime wedges.
    IMG_4714

http://www.lynnandruss.com

Adapted from a recipe by Martha Stewart Living

Summer Pasta Puttanesca

According to the NYTimes website, there are almost as many explanations for the origins of pasta puttanesca as there are ways to make it. Ostensibly a sauce invented and made by prostitutes, it was designed to lure customers with its powerful aroma. No need to patronize a bordello though, you can make this summer version in the confines of your own abode.

The basis is a garlicky tomato sauce which is brought to a high level of flavor by the addition of anchovies, capers and olives. Red pepper flakes make things even better. The whole process is ridiculously easy. Even if you’re not an anchovy fan, don’t omit them, they are a key component in the overall flavor profile.

Cook’s Illustrated’s version of fresh pasta puttanesca uses grape or cherry tomatoes, which are excellent in summer and among the best variety of tomato available year-round. To retain fresh tomato flavor, purée and drain them, after which their juices get cooked down briefly, while the pulp is added at the end of cooking.

I did make a few alterations. First and foremost, I reduced the amount of pasta by half, using only 8 ounces—we tend to prefer saucier finishes. In addition, I incorporated the mixed variety of grape tomatoes which resulted in a lighter colored sauce. Next, I increased the garlic and olives by about 50%; and added grated parmesan as a final topper. The dish was packed with flavor!

IMG_4616

Summer Pasta Puttanesca

  • Servings: 4
  • Difficulty: easy
  • Print

Ingredients

  • 3 tablespoons extra-virgin olive oil
  • 4 garlic cloves, minced
  • 1 tablespoon anchovy paste
  • ¼ teaspoon red pepper flakes
  • ¼ teaspoon dried oregano
  • 1 ½ pounds grape or cherry tomatoes
  • 1 pound campanelle pasta
  • Salt
  • ½ cup pitted kalamata olives, chopped coarse
  • 3 tablespoons capers, rinsed and minced
  • ½ cup minced fresh parsley
  • Grated parmesan for garnish, optional

Directions

  1. Combine oil, garlic, anchovy paste, pepper flakes, and oregano in bowl.
    IMG_4620
  2. Process tomatoes in blender until finely chopped but not puréed, 15 to 45 seconds.
  3. Transfer to fine-mesh strainer set in large bowl and let drain for 5 minutes, occasionally pressing gently on solids with rubber spatula to extract liquid (this should yield about 3/4 cup). Reserve tomato liquid in bowl and tomato pulp in strainer.
    IMG_4618
  4. Bring 4 quarts water to boil in large pot. Add campanelle and 1 tablespoon salt and cook, stirring often, until al dente. Reserve 1 cup cooking water, then drain campanelle and return it to pot.
  5. While campanelle is cooking, cook garlic-anchovy mixture in 12-inch skillet over medium heat, stirring frequently, until garlic is fragrant but not brown, 2 to 3 minutes.
    IMG_4621
  6. Add tomato liquid and simmer until reduced to 1/3 cup, 2 to 3 minutes. (This step took nearly 8 minutes in my case.)
    IMG_4623
  7. Add tomato pulp, olives, and capers; cook until just heated through, 2 to 3 minutes. Stir in parsley.
     

  8. Pour sauce over campanelle and toss to combine, adding reserved cooking water as needed to adjust consistency. Season with salt to taste; add grated parm if using. Serve immediately.
    IMG_4631

http://www.lynnandruss.com

Grilled Garlic-Herb Shrimp, Yes Please!

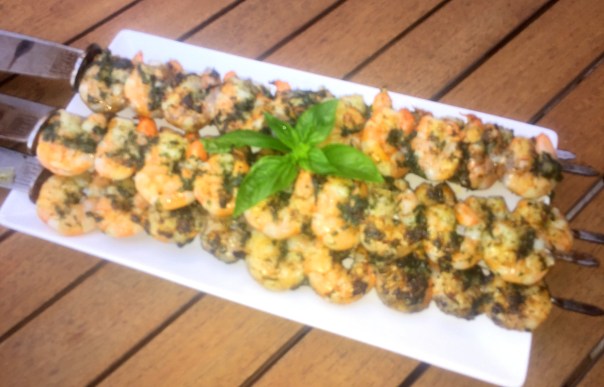
Not much time on your hands and love shrimp? Look no further, this uncomplicated recipe goes from grill to table in only 5 minutes, plus a bit of prep time. And it’s wildly versatile in that you can serve the shrimp on the skewers with crusty bread and a vegetable side, over couscous, rice or lo mein noodles, or slide them off the skewers and add them to grain bowls or leafy green salads.

A simple purée of fresh herbs, garlic and olive oil does double duty in this recipe. It first coats the uncooked shrimp as a quick marinade. Then, with a splash of lemon juice stirred in, it’s drizzled on as a sauce after cooking—and, can be used as a topper for your sides.

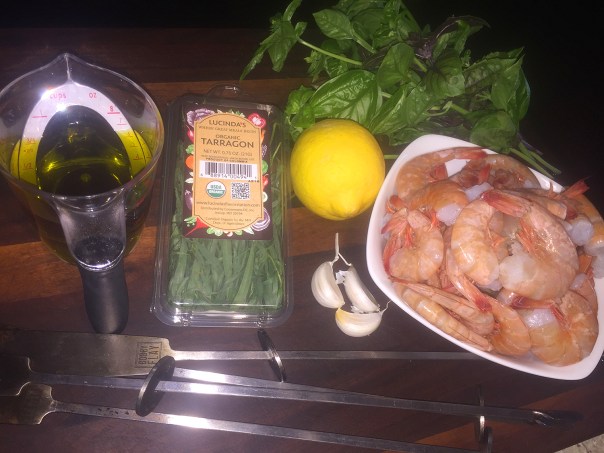
Don’t forget to pat the shrimp dry before coating them with the herb purée; too much moisture will prevent it from clinging to them. If you don’t have any growing in your herb garden, one large bunch or “clamshell” container of tarragon should yield the amount of tarragon leaves needed for this recipe.  We served ours over tricolored couscous with a side salad.

IMG_4475

Grilled Garlic-Herb Shrimp

  • Servings: 4
  • Difficulty: easy
  • Print

Ingredients

  • 1½ Lbs. jumbo shrimp (21/25 per pound), peeled, deveined and patted dry
  • 1 cup lightly packed fresh basil
  • ⅓ cup lightly packed fresh tarragon
  • 3 medium garlic cloves
  • 1½ tsp. grated lemon zest, plus 1 tablespoon lemon juice
  • Kosher salt and ground black pepper
  • ¾ cup extra-virgin olive oil

Directions

  1. Thread the shrimp onto eight 8- to 10-inch metal skewers, dividing them evenly; skewer each shrimp in a C shape, piercing through 2 points. Place the skewers on a rimmed baking sheet or in a large baking dish.
  2. In a blender, combine the basil, tarragon, garlic, lemon zest and ½ teaspoon each salt and pepper. Pulse until chopped. Scrape down the sides, add the oil and puree until bright green and almost smooth, about 30 seconds. Transfer to a small bowl.
    IMG_4477
  3. Prepare a charcoal or gas grill. For a charcoal grill, ignite a large chimney filled ¾ full of coals, let burn until lightly ashed over, then distribute the coals evenly over the grill bed; open the bottom grill vents and the lid vent. Heat the grill, covered, for 5 minutes, then clean and oil the cooking grate. For a gas grill, turn all burners to high and heat, covered, for 15 minutes, then clean and oil the cooking grate.
  4. In another small bowl, stir together ½ cup of the herb puree, 1 teaspoon salt and ½ teaspoon pepper, then slather onto one side of the shrimp. Place on grill marinated side down, then slather top side with mixture.
    IMG_4481
  5. Grill the skewers until the shrimp turn opaque and are lightly charred, 2 to 3 minutes. Flip and continue to cook until the shrimp are just opaque, about another 2 to 3 minutes.
     

  6. Transfer the skewers to a serving platter. Stir the lemon juice into the remaining herb puree and drizzle over the shrimp.
    IMG_4487

http://www.lynnandruss.com

Original recipe  

Hot Honey Butter Bath Corn

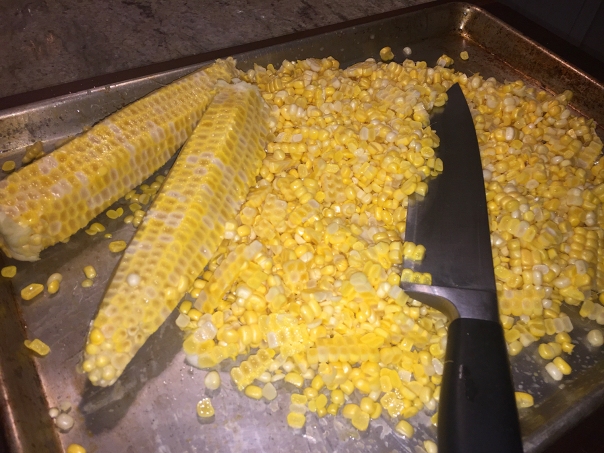
Fresh corn is just fabulous this year, so we’ve been on a streak with trying new recipes since early July. Recently we found this interesting Hot Honey Butter Bath Corn from thekitchn.com—with flavoring added right in with the water. It was an instant hit with dinner guests and paired perfectly with our BBQ of Carolina-Style Grilled Baby Back Ribs.

You might be appalled at using an entire stick of butter, but most of it gets left behind in the pot; plus it’s not necessary to put any more on the table for dredging purposes. I was somewhat dubious about the small amount of liquid used, it didn’t even cover all of the corn. To ensure every cob got bathed in all of the goodness, I moved them around every so often. In the end, they were perfect!

And since this was a laid-back affair, we simply put the entire pot right on the table with a set of tongs for guests to retrieve a cob or two as they pleased. No reason to stand on ceremony with this approach. Simple is, as simple gets.

corn bath

Hot Honey Butter Bath Corn

  • Servings: 6
  • Difficulty: super easy
  • Print

Ingredients

  • 4 cups water
  • 1 cup whole milk
  • 1 stick (8 tablespoons) unsalted butter
  • 1/2 cup honey
  • 1 teaspoon red pepper flakes
  • 1 teaspoon kosher salt
  • 6 ears corn, shucked and halved

Directions

  1. Add the water to a large pot and bring to a boil over medium-high heat.
  2. Add milk, butter, honey, red pepper flakes and salt.
  3. Carefully add corn and reduce the heat to medium. Boil the corn for 8 minutes.
  4. Use tongs to remove the corn from the butter bath and serve immediately.

http://www.lynnandruss.com

Chocolate Semifreddo with Strawberry Sauce

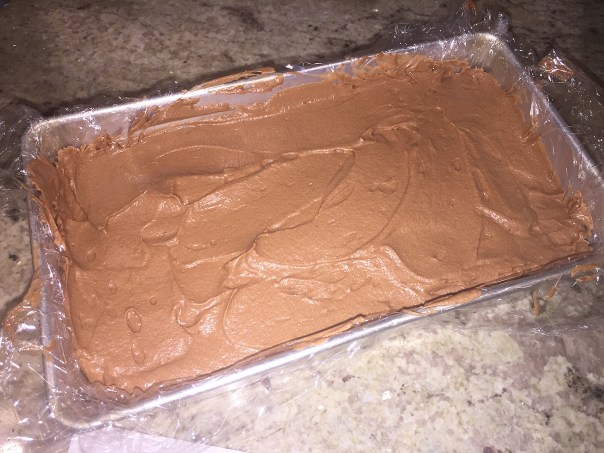
Need an elegant way to cap off an evening? Enter semifreddo, a classic Italian dessert that I describe as a frozen mousse. (Though it’s fully frozen, its name roughly translates as “half-frozen.”) Instead of being churned in an ice cream maker, semifreddo is lightened with whipped cream and/or beaten egg whites. Then it’s frozen in a loaf pan until solid, unmolded, and cut into neat slices.

Although we had heard of a semifreddo, neither one of us had ever eaten, or made, one. But we liked the fact that, unlike ice cream, it can sit out of the freezer for an extended period of time without melting, which makes it ideal for serving to company—the perfect balance of decadent and refreshing. Rich and satiny. Elegant. Deeply chocolaty. Make-ahead (you can even slice off a portion and freeze the rest for later). No ice cream maker required. Oh, and low-carb. Need I say more?

The semifreddo needs to be frozen for at least 6 hours before serving. You definitely want to use a high-end dark chocolate such as Ghirardelli 60% Cacao Bittersweet Chocolate Premium Baking Bar. And, make sure not to whip the heavy cream until the chocolate mixture has cooled.

IMG_4547

If the semifreddo is difficult to release from the pan, run a thin offset spatula around the edges of the pan or carefully run the sides of the pan under hot water for 5 to 10 seconds. If frozen overnight, the semifreddo should be tempered before serving for the best texture. To temper, place slices on individual plates or a large tray, and refrigerate for 30 minutes.

As a topper, try this simple, five-ingredient strawberry sauce which boasts a vivid color and a balanced combination of bright and sweet flavors. Time to plan another dinner party…

IMG_4583Add a sprig of chocolate mint for a pop of color.

Chocolate Semifreddo

  • Servings: 12
  • Difficulty: moderate
  • Print

Ingredients

  • 8 ounces bittersweet chocolate, chopped fine
  • 1 tablespoon vanilla extract
  • ½ teaspoon instant espresso powder
  • 3 large eggs
  • 5 tablespoons sugar
  • ¼ teaspoon salt
  • 2 cups heavy cream, chilled
  • ¼ cup water

Directions

  1. Lightly spray loaf pan with vegetable oil spray and line with plastic wrap, leaving 3-inch overhang on all sides. Place chocolate in large heatproof bowl; set fine-mesh strainer over bowl and set aside. Stir vanilla and espresso powder in small bowl until espresso powder is dissolved.
    IMG_4553
  2. Whisk eggs, sugar, and salt in medium bowl until combined. Heat ½ cup cream (keep remaining 1½ cups chilled) and water in medium saucepan over medium heat until simmering. Slowly whisk hot cream mixture into egg mixture until combined. Return mixture to saucepan and cook over medium-low heat, stirring constantly and scraping bottom of saucepan with rubber spatula, until mixture is very slightly thickened and registers 160 to 165 degrees, about 5 minutes. Do not let mixture simmer.
    IMG_4554
  3. Immediately pour mixture through strainer set over chocolate. Let mixture stand to melt chocolate, about 5 minutes. Whisk until chocolate is melted and smooth, then whisk in vanilla-espresso mixture. Let chocolate mixture cool completely, about 15 minutes.
    IMG_4556
  4. Using stand mixer fitted with whisk attachment, beat remaining 1½ cups cream on low speed until bubbles form, about 30 seconds. Increase speed to medium and beat until whisk leaves trail, about 30 seconds. Increase speed to high and continue to beat until nearly doubled in volume and whipped cream forms soft peaks, 30 to 45 seconds longer.
  5. Whisk one-third of whipped cream into chocolate mixture. Using rubber spatula, gently fold remaining whipped cream into chocolate mixture until incorporated and no streaks of whipped cream remain. Transfer mixture to prepared pan and spread evenly with rubber spatula. Fold overhanging plastic over surface. Freeze until firm, at least 6 hours.
    IMG_4561

    IMG_4567

  6. When ready to serve, remove plastic from surface and invert pan onto serving plate. Remove plastic and smooth surface with spatula as necessary. Dip slicing knife in very hot water and wipe dry. Slice semifreddo 1 inch thick, transferring slices to individual plates and dipping and wiping knife after each slice. Serve immediately. (Semifreddo can be wrapped tightly in plastic wrap and frozen for up to 2 weeks.)

    IMG_4582

Strawberry Sauce

Yields about 2 cups.

Ingredients

  • 12 ounces frozen strawberries
  • ¼ cup sugar
  • 2 tablespoons cognac
  • 1 ½ teaspoons cornstarch
  • 1 tablespoon lemon juice

Directions

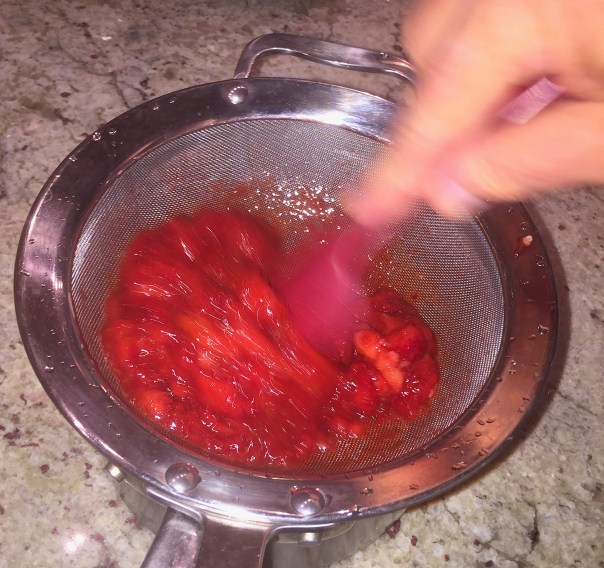
  1. Combine strawberries and sugar in bowl and microwave for 1½ minutes. Stir, then continue to microwave until sugar is mostly dissolved, about 1 minute longer. Combine cognac and cornstarch in small bowl.
    IMG_4548
  2. Drain strawberries in fine-mesh strainer set over small saucepan. Return strawberries to bowl and set aside.
    IMG_4550
  3. Bring juice in saucepan to simmer over medium-high heat. Stir in cognac mixture and bring to boil. Boil, stirring occasionally, until mixture has thickened and appears syrupy, 1 to 2 minutes. Remove saucepan from heat and stir in strawberries and lemon juice. Let sauce cool completely before serving. (Sauce can be refrigerated for up to 1 week.)
    IMG_4559

http://www.lynnandruss.com

Adapted from recipes by Cook’s Illustrated

Come to Mamma, You Zucchini-Chorizo Sweet Corn Bake, You

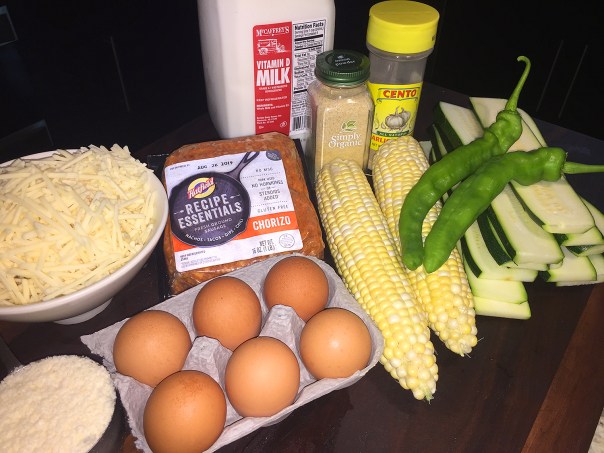
Gotta toot my horn over corn, corn, corn! While thumbing through my recent issue of Better Homes & Garden, I spotted a Zucchini-Chorizo Sweet Corn Bake recipe by fellow food bloggers Matt and Naomi Robinson, and decided then and there I needed to make this—with several alterations. With peak seasonal produce as the stars of the show, I figured you can’t go wrong.

And corn is one of those main characters. This year is outstanding for both the white and yellow varieties at our local farm stand. And at 5 for $1, it’s a steal! I’m trying to make as many recipes utilizing the sweet veggie (see recent posts Spicy Corn Chowder, Campanelle with Sweet Corn, Tomatoes and Basil) as possible while the getting is good.

IMG_4537

Plus, we all know zucchini is currently busting out of everyone’s garden, so here’s another unique way to incorporate it. If your zucchini aren’t the same width all the way from top to bottom, slice away the bulbous portions, then use a mandoline to make even slices. Each zucchini should yield 4 similar sized planks (minus the bulbous outer edges) and fit perfectly into two layers of an 8 x 8-inch square baking dish. Save any leftover pieces for another recipe.

I indicate to salt/blot both sides of the planks instead of just one. Yes, it adds an additional 20 minutes to your game plan, but this ensures removal of extra moisture to prevent your finished dish from being too runny—although there will be some pooling in the bottom of the casserole dish. (I reduced the amount of milk from 1 1/2 cups down to just one cup to additionally tighten the end product.)

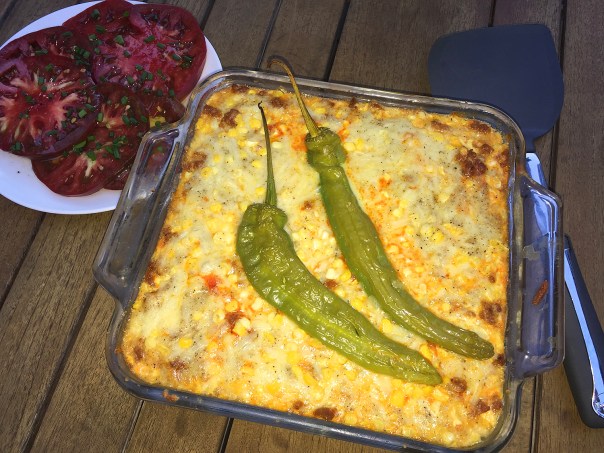
A bit of chorizo (OK, 1 pound) tilts the dish in a hearty direction, and the long hots make for a nice visual presentation. For those with more adventurous palettes (hello!), they can slice off as much as desired; and for the others, they can omit it altogether—a win, win.

This easily serves 4-6 as a main entrée, or 8-10 if served at a potluck. Toot, toot!

IMG_4523

Zucchini-Chorizo Sweet Corn Bake

  • Servings: 4-6
  • Difficulty: easy
  • Print

Ingredients

  • Butter, for baking dish
  • 2 large zucchini, sliced lengthwise into 1/4-inch-thick ribbons (8 planks)
  • 1 tsp. kosher salt, divided
  • 1 lb. uncooked ground chorizo
  • 4 eggs
  • 2 egg yolks
  • 1 cup whole milk
  • 1 tsp. garlic powder
  • 1 tsp. onion powder
  • ½ tsp. black pepper
  • 3 ears fresh corn off the cob
  • 8 oz. shredded sharp white cheddar cheese
  • ½ cup grated Parmesan cheese
  • 2 long hot peppers, make several small slits around the pepper

Directions

  1. Preheat oven to 350°F. Lightly butter a 2-quart square baking dish. Place zucchini on a rack in the sink or rimmed baking sheet. Sprinkle with 1/2 tsp. kosher salt. Let stand 20 minutes. Blot dry with paper towels. Turn each plank and repeat.
    IMG_4529
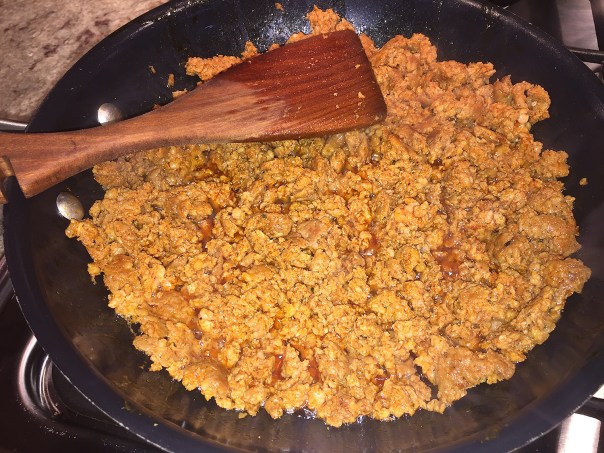
  2. Meanwhile, heat a 10-inch skillet over medium. Add chorizo. Cook and stir 5 to 7 minutes until cooked through. Drain on a paper towel lined plate.
    IMG_4527
  3. In a large bowl whisk together eggs, yolks, milk, garlic powder, onion powder, and 1/2 tsp. black pepper.
    IMG_4525
  4. Spread half of the chorizo in an even layer in buttered dish. Top with half the zucchini, corn, and cheeses. Pour half the egg mixture on top.
     

  5. Repeat layers. Top with 2 long hot peppers.
    IMG_4532
  6. Bake, uncovered, 40 minutes or until just set and top begins to turn golden brown.
    IMG_4538
  7. IMPORTANT: Let stand 10 minutes before serving.
    IMG_4540

http://www.lynnandruss.com

Grate Your Corn, Not Your Nerves

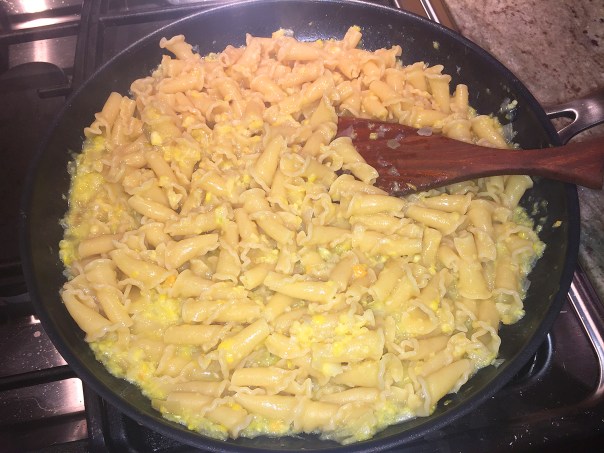
This may be one of our all-time favorite vegetarian dishes! WOW, how we gushed over the flavors with ooo-gobs of taste in every bite! With the ingredients at the height of their season, especially sweet corn, the time is NOW to make this tasty Campanelle with Sweet Corn, Tomatoes and Basil recipe from 177MilkStreet.com. The elements in this summery pasta dish are few, so fresh corn and ripe tomatoes are key.

The sauce is nice and creamy but made without cream because you grate the corn kernels from the cobs. To reinforce the corn flavor, the cobs are boiled in the water that is later used to cook the pasta. Brilliant!

Using a minimal amount of water—just 2½ quarts—means the flavors and starches are concentrated in the liquid, and then some of this liquid goes into in the sauce. Yellow corn gives the dish a golden hue, but white corn works, too. Whichever you use, make sure to remove as much of the silk as possible before grating.

Short, sauce-catching pasta shapes are best here—if you can’t find campanelle (a frilly, trumpet-like shape), look for penne rigate, fusilli or farfalle. However, the campanelle is just perfect for capturing the sauce and bits of corn, so really try to make an effort. I found it easy enough in our local supermarket.

Don’t fear the habañero chili in this dish. It does add a little heat (seeding the chili removes much of its burn), but it’s here mostly because its fruity notes are a nice complement to the corn, tomatoes and basil. If you have a delicate palette and are really sensitive to spicy heat, use just half of a habañero, but please don’t omit it altogether.

Although not necessary, add an extra flavor boost with a little grated parmesan as a garnish, it adds another salty/nutty note.

IMG_4494

Campanelle with Sweet Corn, Tomatoes and Basil

  • Servings: 4
  • Difficulty: easy
  • Print

Ingredients

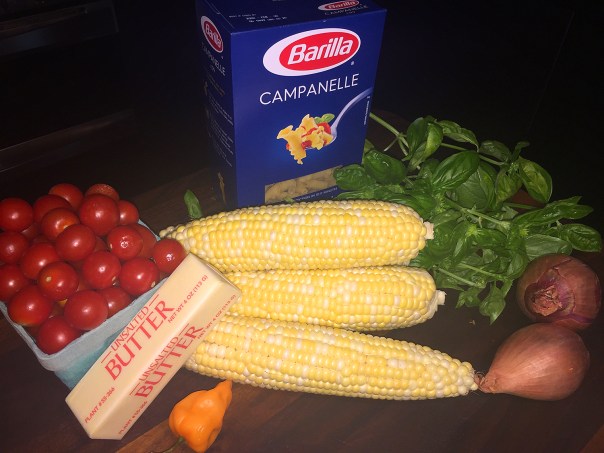
  • 1 Pint grape or cherry tomatoes, halved
  • Kosher salt and ground black pepper
  • 4 Ears corn, husked
  • 4 Tbsp. (½ stick) salted butter, cut into 4 pieces, divided
  • 2 Medium shallots, minced
  • 1 Habañero chili, stemmed, seeded and minced
  • 12 oz. campanelle or other short pasta
  • 1 cup chopped fresh basil
  • 2 1/2 qts. water (10 cups)

Directions

  1. In a small bowl, stir together the tomatoes and ½ teaspoon salt; set aside.
    IMG_4498
  2. Set a box grater in a rimmed baking sheet or pie plate. Using the grater’s large holes, grate the corn down to the cobs; reserve the cobs.
    IMG_4497
  3. In a large pot, bring 2½ quarts water to a boil. Add the corn cobs (cut them in half to fit in the pot better) and 1 tablespoon salt, reduce to medium and cook, covered, for 10 minutes. Using tongs, remove and discard the cobs, then remove the pot from the heat.
    IMG_4500
  4. In a 12-inch nonstick skillet over medium, melt 2 tablespoons of butter. Add the grated corn, shallots, chili and 1 teaspoon salt. Cook, stirring, until the shallots have softened, about 5 minutes.
    IMG_4503
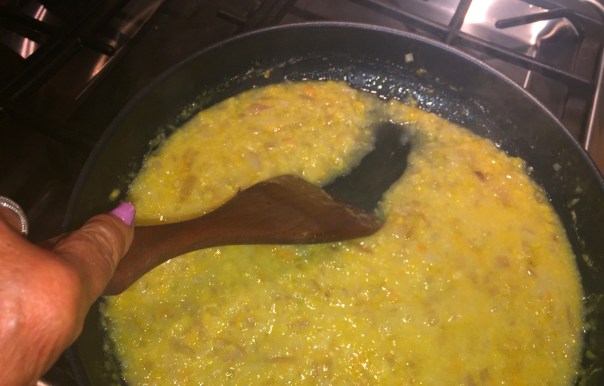
  5. Stir in 1½ cups of the cooking water. Cook over medium-low, uncovered and stirring occasionally, until slightly thickened (a spatula should leave a brief trail when drawn through the mixture), 10 to 15 minutes.
    IMG_4505
  6. Meanwhile, return the remaining corn-infused water to a boil. Add the pasta and cook, stirring occasionally, until al dente. Reserve 1 cup of the cooking water, then drain the pasta.
  7. Add the pasta to the skillet and cook over medium, stirring constantly, until the pasta is coated and the sauce is creamy, about 2 minutes; if needed, add the reserved cooking water 2 tablespoons at a time to reach proper consistency.
    IMG_4507
  8. Off heat, add the remaining 2 tablespoons butter, the tomatoes with their juices and the basil, then toss until the butter has melted. Taste and season with salt and pepper.
     

    IMG_4517

http://www.lynnandruss.com


Cool and Refreshing Tzatziki

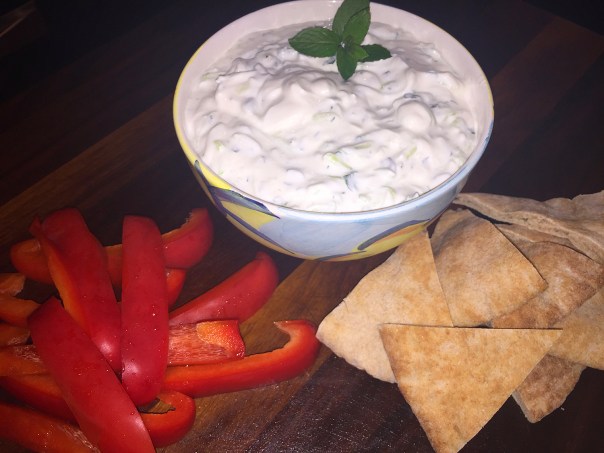
A Friday night, the official first day of summer, and we were heading to a party to get our Greek on. The hostess was serving Greek Chicken Kebabs as the main entrée and asked us to contribute an appetizer. I immediately thought of Tzatziki, a cucumber-yogurt dip that would also complement the skewers (if there was any leftover).

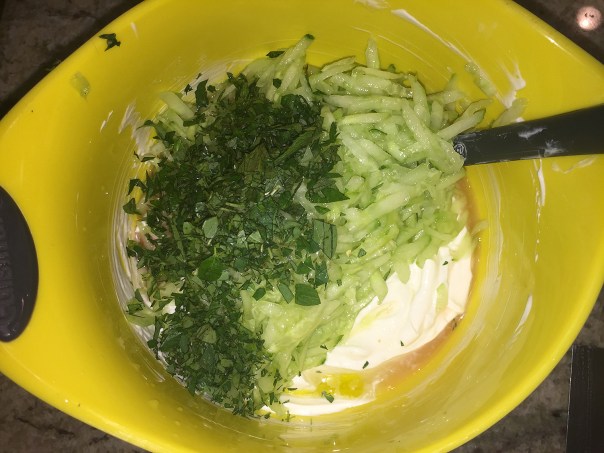
Often, in addition to chopped fresh mint, Tzatziki recipes also call for fresh dill—our least favorite herb. Here, we use a combination of freshly picked oregano with some mint instead. It is so simple to make, but keep in mind the dip needs to cool in the fridge for at least 4 hours before serving.

IMG_3637

Tzatziki

  • Servings: Yields 2 cups
  • Difficulty: easy
  • Print

Ingredients

  • Kosher or sea salt
  • 2 medium cloves garlic, mashed with salt
  • 1 cup plain Greek whole-milk yogurt (like Fagé)
  • 1/2 cup sour cream
  • 3/4 cup peeled seedless cucumber, grated
  • 1 Tbsp. fresh lemon juice
  • 1 tsp. red-wine vinegar
  • 2 tsp. chopped fresh mint
  • 2 tsp. chopped fresh oregano
  • 2 tsp. extra-virgin olive oil
  • Fresh mint leaves for garnish

Directions

  1. Put 3/4 tsp. salt in a mortar bowl. Peel the garlic, chop it and add to the mortar. Mash with pestle until it’s a coarse paste.
    IMG_3640
  2. Transfer the garlic and salt to a medium bowl and stir in the yogurt and sour cream.
  3. Grate the cucumber over some paper towels and squeeze as much liquid out of it as you can.
    IMG_3638
  4. Add the cucumber, lemon juice, vinegar, mint, oregano, and olive oil to the yogurt mixture. Stir to blend and season to taste with salt.
    IMG_3641
  5. Cover and chill for at least 4 hours before serving so the flavors meld. Serve cool, garnished with the mint leaves and accompanied by fresh pita wedges and red bell pepper strips.
    IMG_3642

http://www.lynnandruss.com

Pork Cutlets with Flavor Galore!

Don a sombrero and grab a margarita, it’s about time to get your Mexican on. This recipe starts with chili-garlic-infused oil, then is finished with a chipotle-lime sauce. Bigger flavor is built by breaking down a marinade.

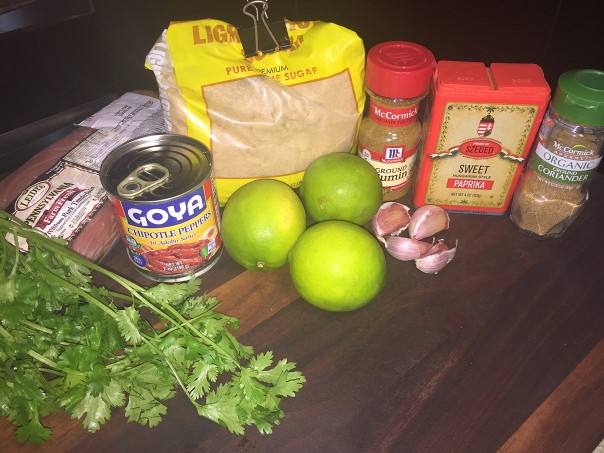
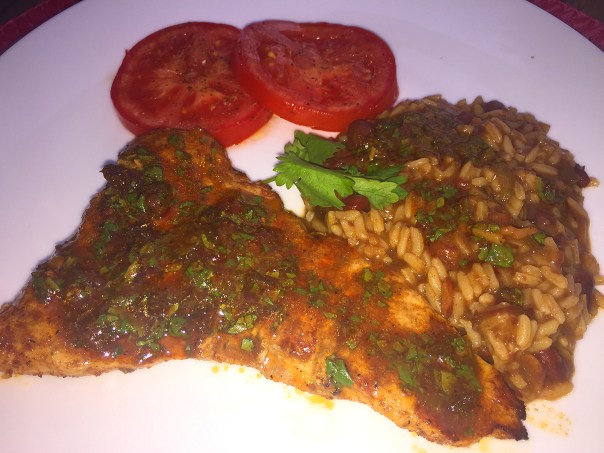
Mexican-Style Grilled Pork Cutlets use a chili-and-garlic-infused oil to season pork tenderloin cutlets before quickly grilling them. The remaining oil is made into a sauce/marinade to drizzle on afterward to add a fresh burst of flavor. We served ours with Mexican rice and red beans, but you could also slice into strips and nestle into warmed corn tortillas with chopped white onion, fresh cilantro for making tacos.

The directions say not to grill the second sides of the cutlets for more than about 1 minute or they will overcook. But I pounded our cutlets to a 1/4″ thickness as opposed to 1/8″ because we like ours a bit thicker, thus they take a minute or two longer—use an instant-read meat thermometer to test for doneness at 145°. Aim to get charring on only the first sides, then serve the pork charred side up.

¡Arriba, arriba! ¡Ándale, ándale!

IMG_4435

Mexican-Style Grilled Pork Cutlets

  • Servings: 4
  • Difficulty: easy
  • Print

Ingredients

  • ⅓ cup extra-virgin olive oil
  • 1 Tbsp. ground cumin
  • 1 Tbsp. sweet paprika
  • 2 Tsp. ground coriander
  • 2 Tsp. packed brown sugar
  • 4 medium garlic cloves, thinly sliced
  • 1¼ Lb. pork tenderloin, trimmed of silver skin
  • Kosher salt and ground black pepper
  • 2 chipotle chilies in adobo, chopped, plus 2 tablespoons adobo sauce
  • ⅓ cup fresh lime juice, about 2 limes
  • ¼ cup finely chopped fresh cilantro

Directions

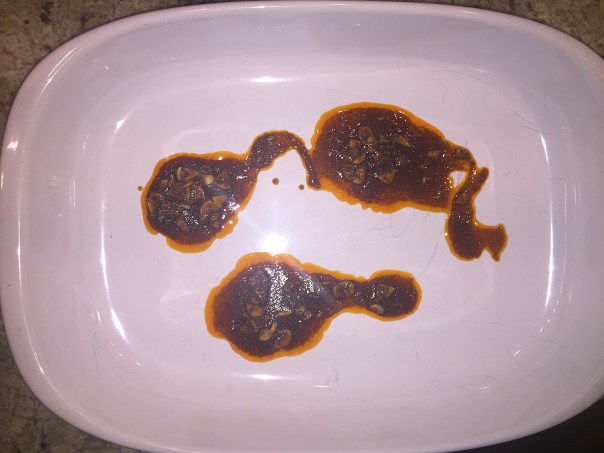
  1. In a microwave-safe bowl, combine the oil, cumin, paprika, coriander, sugar and garlic. Microwave on high until the garlic is softened, about 1 minute.
    IMG_4438
  2. Measure out 3 tablespoons of the seasoned oil, including some of the solids, into a large baking dish.
    IMG_4439
  3. Cut the tenderloin in half crosswise, then cut each piece in half lengthwise. Using a meat pounder, pound each piece to an even ⅛-inch thickness.
  4. Place in the baking dish, turning to coat on all sides with the oil mixture. Cover and refrigerate while you make the sauce and prepare the grill.
    IMG_4440
  5. Into the remaining oil mixture, whisk ¾ teaspoon salt, ½ teaspoon pepper, the chipotle chilies, adobo sauce, lime juice and cilantro. Set aside.
  6. Prepare a charcoal or gas grill. For a charcoal grill, ignite a large chimney of coals, let burn until lightly ashed over, then distribute evenly over one side of the grill bed; open the bottom grill vents. For a gas grill, turn all burners to high. Cover and heat the grill for 5 to 10 minutes for charcoal or about 15 minutes for gas, then clean and oil the cooking grate.
  7. Place the pork in a single layer on the hot side of the grill and cook until well browned, about 2 minutes.
    IMG_4442
  8. Using tongs, flip each piece and cook for 1 minute (or a bit longer if your cutlets are thicker).
    IMG_4443
  9. Transfer browned side up to a platter. Stir the sauce to recombine, then drizzle desired amount over each cutlet.
    IMG_4446
  10. Tent with foil and let rest for 5 minutes. Serve with your favorite sides and the remaining sauce.
    IMG_4450

http://www.lynnandruss.com

Original recipe by Diane Unger from 177milkstreet.com

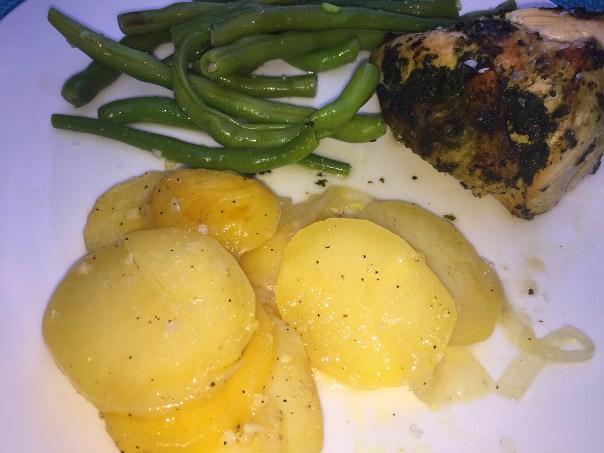
Spanish Potatoes with Olive Oil

With only a handful of ingredients, talk about simple, and simply delicious! Patatas Panaderas, an almost effortless, yet luxurious dish of thinly sliced potatoes accented with onions and garlic and baked in white wine and plenty of really good olive oil, is little known outside of Spain, but it deserves a place among the iconic potato dishes of Europe—trust me on this one.

In this version from Cook’s Illustrated, they cover the potatoes with a tight foil lid so that the potatoes soften. The wine is withheld for the first 40 minutes of cooking to prevent its acid from interfering with the softening of the potatoes. Loosening the foil for the last 20 minutes allows excess moisture to evaporate while keeping the potatoes moist, blond, and tender throughout.

For the best results, be sure to use a fresh, high-quality extra-virgin olive oil here. We used one imported directly from Spain: “Oro del Desierto” Organic Extra Virgin Olive Oil. Truly, don’t cheap out on this ingredient. I was going to throw in some fresh chopped thyme from our herb garden, but then forgot. A smattering of some fresh herbs would be a nice addition, although not needed.

IMG_4420

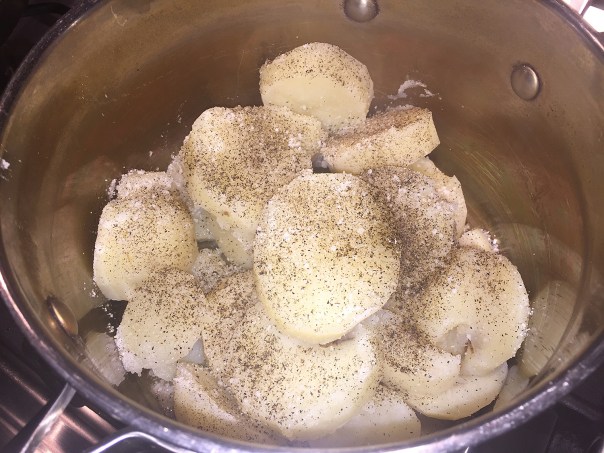
NOTES: This recipe uses Diamond Crystal kosher salt; if using Morton kosher salt, decrease the amount to 2⅝ teaspoons. To make peeling and slicing easier, choose larger potatoes. For slightly crispier potatoes, cook the last 20 minutes with the wine uncovered.

IMG_4422

Spanish Potatoes with Olive Oil

  • Servings: 6
  • Difficulty: easy
  • Print

Ingredients

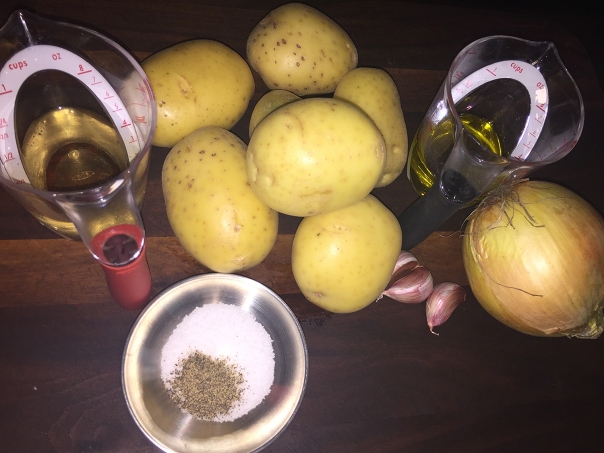
  • 2 ½ pounds Yukon Gold potatoes, peeled and sliced crosswise ¼-inch thick
  • ⅓ cup extra-virgin olive oil
  • 3 ½ teaspoons kosher salt
  • ¼ teaspoon pepper
  • 1 onion, halved and sliced thin
  • 2 garlic cloves, minced
  • ½ cup dry white wine

Directions

  1. Adjust oven rack to middle position and heat oven to 400 degrees.
  2. Stir potatoes and oil in large bowl until potatoes are evenly coated. Stir in salt and pepper until well distributed.
    IMG_4424
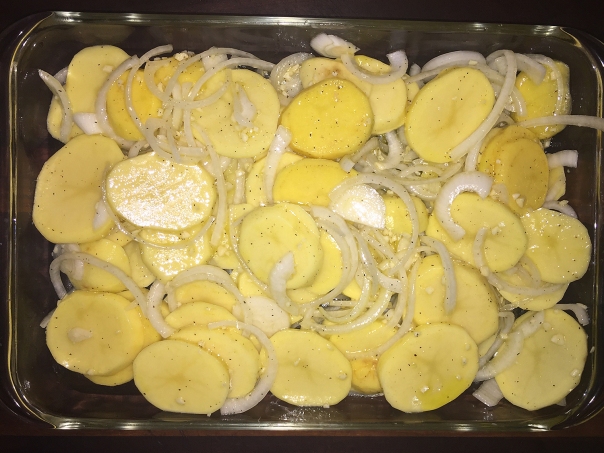
  3. Stir in onion and garlic. Transfer potato mixture to 13 by 9-inch baking dish and spread into even layer.
    IMG_4425
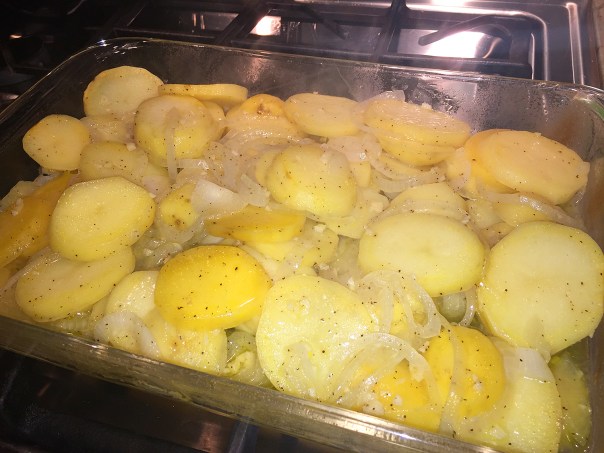
  4. Cover tightly with aluminum foil and bake until potatoes can be easily pierced with tip of paring knife, about 40 minutes.
    IMG_4427
  5. Reduce oven temperature to 350 degrees.
  6. Carefully remove foil and set aside. Pour wine evenly over potatoes. Lightly place reserved foil on top of dish, leaving sides open so moisture can escape, and return dish to oven.
  7. Bake until wine has evaporated or been absorbed (there will still be some oil bubbling around edges of dish), about 20 minutes.
  8. Carefully remove foil. Let cool for 10 minutes and serve.
    IMG_4429
    IMG_4431

http://www.lynnandruss.com

The Best of Times. The Worst of Times.

Vacations—we all dream of these respites from the hum-drum of everyday life. BUT, sometimes the Powers that be, alter your preconceived notions…

Chatham, Mass is often referred to as the elbow of Cape Cod in the area described as the lower portion of the peninsula. We were fortunate to rent a Cape Cod style cabin for a little over a week in late-July around my birthday time. Built in 1965, it is situated in a secluded tree-filled lot boasting an awesome expansive back deck—complete with views of shooting stars—overlooking Oyster Bay River which feeds into Nantucket Sound; just a short car ride to Hardings Beach (shown below).

IMG_4298.jpeg

Back home in Southeast PA, the forecasters warned of a dangerous heat wave that would engulf the area for days soaring well into the 100s just as we left for the Cape, where luckily for us, we were supposed to enjoy more moderate temps in the high-80’s, turning to the mid-70s later in the week.

So for the first four days, it was vacational bliss, lounging on the beach with cool breezes and dining at some of Chatham’s finest restaurants. BUT THEN, the cool front came roaring into town in the form of at least two strong F1 tornadoes touching down right near us.

It was a late Tuesday morning and aware that thunderstorms would be rolling in during the afternoon, we decided to take a car ride into town and check out shops, ogle some gorgeous mansions, and then head over to Harwich to see where our ferry ride was going to depart for Nantucket Island the following morning. (It departed, we didn’t.)

No sooner had we pulled into our driveway when both of our cell phones sounded tornado warnings to take cover immediately. Honestly, we weren’t too concerned because we had received similar notices over the past few months, so we just shrugged it off. WRONG! By the time we navigated the steep steps to the house, extremely gusty winds made it a struggle to get through the side door. I wondered out loud where we should take cover as there was no basement access, which was locked with the owner’s personal belongings.

Within seconds, huge trees were practically bending over backwards, debris was flying all around us, the front door blew open and we lost power. After 15 or 20 minutes the worst seemed to be over so we began to assess the damage. Not good. Our staircase exit from the cabin down to our vehicle was blocked with half of a tree. Russ navigated out to the street only to find the cross street blocked with more large branches and downed wires. On his way back to the house, a delayed dropping branch hit his car windshield, smashing it enough to render it undriveable. Now what?

In the meantime, my sister Lolly and her husband Paul had been traveling from Michigan with a camper and were scheduled to roll into town that very afternoon. We still had spotty text and cell phone access so we were able to communicate with them, as they sent us photos of the widespread destruction. Because of downed trees and wires, it took them hours longer to finally reach our street. But as mentioned, it was impassable, so we met them down at the end of the road.

3.blocked streetThe cabin is behind the downed trees and wires and up a hill. Lolly tries to get phone reception in order to find an operating campground with power to set up their camper.

What can I say? A stunning vacation had turned into a bit of a nightmare, but we squared our shoulders and decided to make the best of a bad situation. It was serendipitous that my sister and her husband toted a small portable generator with them. So once they settled in at camp, they came back, navigated through the mess to our cabin with the generator, cables, candles, a solar-powered light and a gas can in tow. Now we could at least keep the refrigerator and our tech hub going, plus see in the dark.

First on our minds? Something to eat of course! Their was a charcoal grill that we used the prior night, and with hamburgers and hotdogs on hand, we fashioned a simple dinner by candle light the first night without power; followed the next night by steak and baked potatoes (initially microwaved in their camper) the next evening.


Pre-tornado meals: My birthday breakfast on the back deck. A spatchcocked grilled chicken.


Grilled rib-eyes by candlelight. Paul, Lolly and I enjoy an after-dinner glass of vino.

Here’s a blow-by-blow pictorial of the meals enjoyed on the Cape:

First dinner was enjoyed at Bistro on Main where we started with a nice dry, chilled Rosé and some crusty bread with a melted garlic butter.


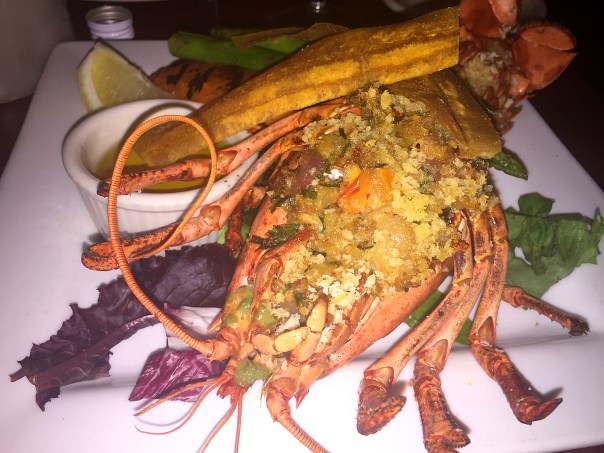
Russ chose a bowl of their absolutely delicious Clam Chowder, of which we both agree, probably the best we’ve ever had! Then he went all out with a night’s Special of Baked Stuffed Local Lobster, a 1 1/4-pounder brimming with clams, lobster, chorizo and herbs served on roasted fingerling potatoes with grilled vegetables and drawn butter.

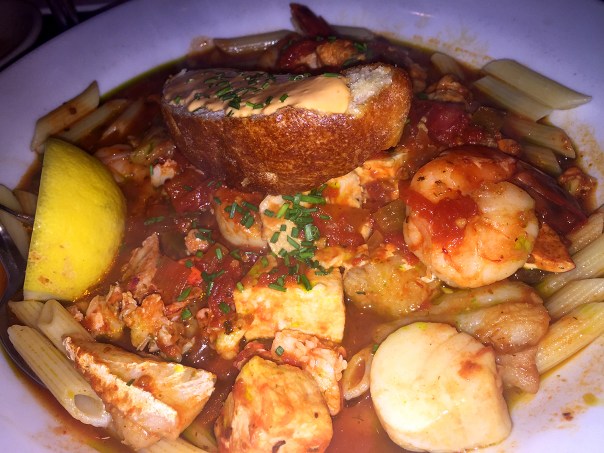
I was seafood all the way too with my choice of another Special, Seafood Penne Pasta Diablo. However, not a fan of clams (except in their chowder) or mussels, I asked them to substitute extra shrimp and scallops, which was not a problem. The ginormous bowl came laden with shrimp, scallops, lobster, salmon, cod, roasted vegetables and herbs, and a crostini slab smothered in a spicy red diablo sauce. (I doggie-bagged more than half of it home.) A perfect meal to start the vacay!!

IMG_4189

IMG_4194

IMG_4195

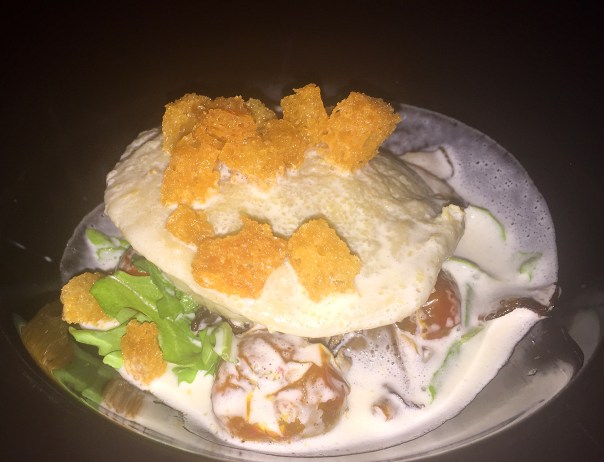
Our second night was a birthday celebration for me at the elegant Chatham Wine Bar & Grill. The evening commenced over a bottle of French Sauvignon and were treated to an amuse-bouche (below, top) along with crusty bread and a triangle of room temp butter topped with finishing salt.


Our first choices included, for me, Lobster Ravioli, forest mushrooms, heirloom tomatoes, parmesan foam and a sourdough crumb topping. Mr. Russ selected their Carpaccio Panzanella with Snake River Farms wagyu beef on herbed focaccia and blistered heirloom tomatoes. We were getting into the groove for sure…

IMG_4211
IMG_4216
IMG_4213

For main entrées we kept in theme with me choosing the Lobster and Scallops prepared with butter poached lobster tail, seared scallops, and broccolini over cavatelli with a garlic froth and lemon peel purée. And since Russ started with the wagyu beef, he continued with Wagyu Beef Duo consisting of Snake River Farms wagyu strip steak and braised short rib with rosti potatoes, onion, mustard and creamed kale. They were literally works of art on a plate! Even though it was my birthday, there was no room for dessert…

IMG_4217
IMG_4219

The next three nights we grilled at the cabin, two of which were out of necessity because of storm damage. During that time however, Lolly and Paul picked us up for lunch and drove us to a part of the Cape that dodged the bullet and still had restaurants up and running. That’s how we ended up at Land Ho in Orleans.


We arrived at the parking lot by 11:20 only to find out they don’t open until 11:30, but what’s 10 minutes when you’ve got all day? Apparently many others had the same idea because by the time they opened their doors, it was a packed house. To be honest, we were not sure why? While the interior was a visual trip of signs, license plates and chalkboards listing the day’s specials, the food was mediocre at best—except for my spinach salad with grilled chicken which was very good.

IMG_4279
IMG_4282


With electricity finally back two days later, the street now passable, and the temps in the mid-70’s with low humidity, Russ and I headed for the beach while Lolly and Paul decided to sightsee in town, with promises of meeting up for dinner at the Talkative Pig—like every other establishment, also located on Main Street, just in the other direction. It seems most of the restaurants in Chatham do not take reservations and this place was no exception, so we had about a 15 minute wait outside until our names were called.

Unfortunately, we’re not sure THEY had power back because it was quite hot inside. They must have been running their appliances on a back-up generator which didn’t have the capacity to also power the AC. Regardless, the place was packed.
IMG_4302

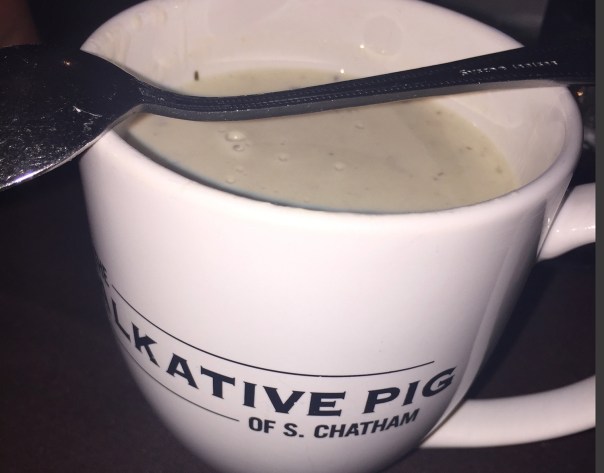
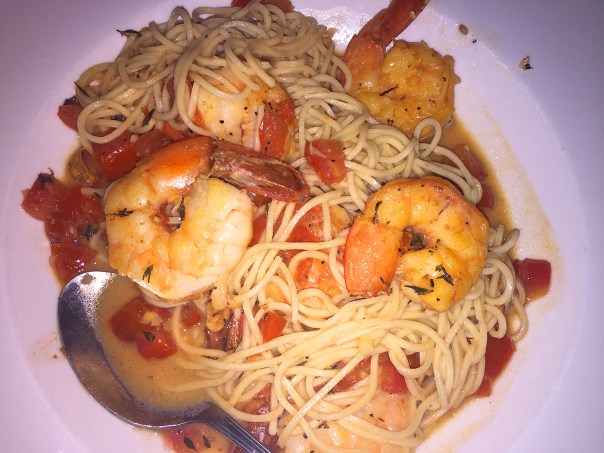
Our dining guests chose the beautifully plated Bruschetta as their appetizer, while Russ was on a mission to try yet more Clam Chowder. It seems each couple was on the same page as far as entrées with Lolly and Paul opting for the Shrimp Scampi and Russ and I splitting a Wood-Fired Pizza, with the seafood in this case being half anchovies for Russ.

IMG_4300
IMG_4304
IMG_4305

That evening we bid adieu to my sister and her husband as they were leaving the Cape early the next morning for adventures in other states as they made their way back to Pure Michigan. However, we welcomed Russ’ son Dan and his girlfriend Tina who trekked in from outside of Boston later that night.

After fetching our car, which had been towed off the Cape to Plymouth for repairs, we spent a lazy afternoon at Harding’s Beach. To celebrate Tina’s milestone birthday, we made a res at Pisces, which is located just across the street from The Talkative Pig. (The owner of our rental property highly suggested we dine there.)

We actually had made a reservation at Pisces for Tuesday evening with our other guests, but that’s the day the tornadoes hit, and most folks, and businesses were in survival mode so obviously that was a no-go.


However, so glad we got the chance to check it out—the food was fabulous!! After Dan and Tina ordered cocktails and Russ I selected a bottle of wine, we got down to business in making our appetizer and entrée selections. While doing so, we were served a basket of homemade focaccia accompanied by a delicious bean spread (which was so good we asked for seconds). 

IMG_4329

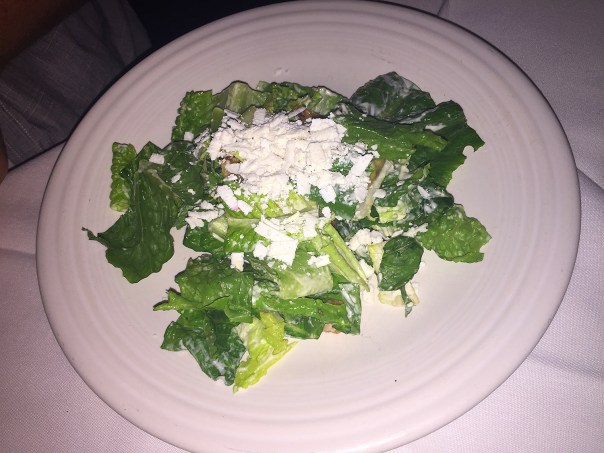
The Cheese Course was all that Tina needed to see. On a slab of slate were three handpicked cheeses each paired with an accompaniment, house made shortbread cookies and bruschettini. Dan was in a greens mode and chose The Pisces Salad, with crisp hearts of romaine tossed with house made Caesar dressing, toasted garlic croutons topped with marinated white anchovies and shaved ricotta salata.

IMG_4333

IMG_4330

Russ and I couldn’t resist the Fresh Maine Lobster and Corn Chowder finished with white truffle oil and chives. Simply Divine!

IMG_4331

Our main courses, in no particular order: Tina (not a seaffood fan) = Grilled Statler Chicken marinated in herbs and garlic, served with black truffle sachetti in a wild mushroom Madeira cream sauce and sautéed garlicky spinach. Dan = Oysterman’s Spaghettini consisting of freshly shucked oysters in a light parmesan cream with bacon, spinach tossed with thin spaghetti and finished with garlic and butter toasted panko.

IMG_4339
IMG_4336
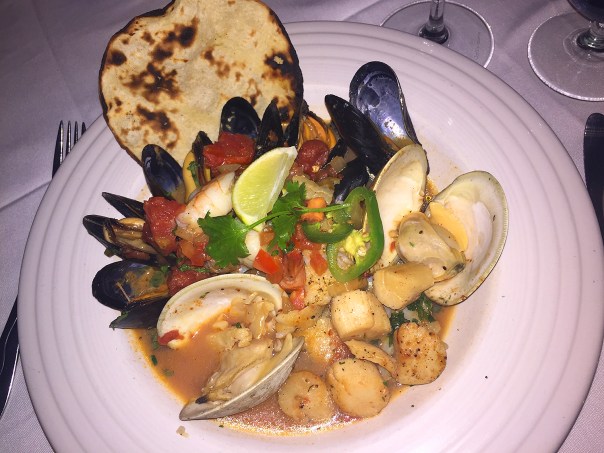
Russ = Mediterranean-Style Fisherman’s Stew brimming with sautéed shrimp, scallops, mussels, clams, scallops and cod in a spicy lobster broth, finished with cilantro and fresh lime, and served with garlic and butter toasted panko. Lynn = Pan Seared Atlantic Salmon and Sea Scallops with pumpkin and butternut squash ravioli in a Thai curry coconut sauce topped with fresh asparagus.
IMG_4342
IMG_4343

Our meals were outstanding! And when we got the tab, our waitress told us that the rental owner called Pisces in advance and graciously picked up quite a substantial amount toward the total. WOW, what a pleasant surprise that was!

Instead of dessert at Pisces, the group wanted to get ice cream at the infamous Buffy’s (way on the other end of town, on Main Street of course). Apparently you haven’t lived until you stood in the long line at Buffy’s then enjoyed your treat on the pink bench…

Also, I need to give a shout-out to Mac’s Chatham Fish and Lobster joint practically just around the corner (on Main Street no less) from where we were staying. On both our first Friday night in town, and last, we enjoyed some wonderful seafood both as eat-in and take out. However, it seems on that first Friday, the entire Cape had the same idea because it took nearly an hour to wait in line to the ordering counter—there is no waiter service whether you sit inside or out. You even had to stand in that line if you called in an order!

IMG_4171

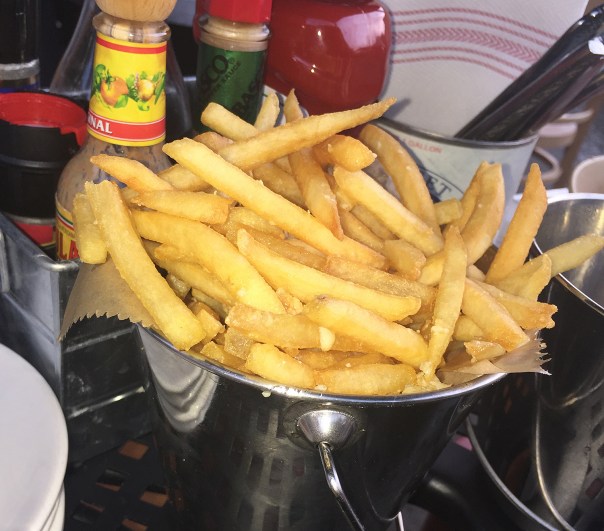
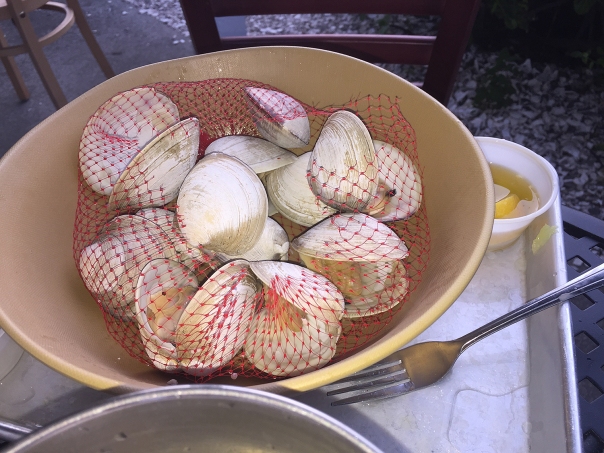
But the food is worth it. Some of our delicacies included Local Cape Littlenecks, the best clams Russ has ever eaten; Fried Oyster Cobb Salad, delicious Garlic Fries, Lobster Tostada (which I ordered both times!), Pulled Chicken Banh Mi (Tina), and Blackened Tuna Sandwich.
IMG_4176
IMG_4172
IMG_4173
IMG_4175

OK, so maybe a few tornadoes wasn’t that bad after all. That unexpected punch from Mother Nature was softened by the wonderful food and gorgeous weather (for most of the trip). If you ever get onto, or back to, the Cape, I hope I’ve inspired you to try out a few of these splendid eating establishments. Just keep in mind that the ones that do take reservations, make them well in advance; while the others, be prepared to shoot the breeze with your friends while waiting for seats…
Sometimes it’s OK to Cheat

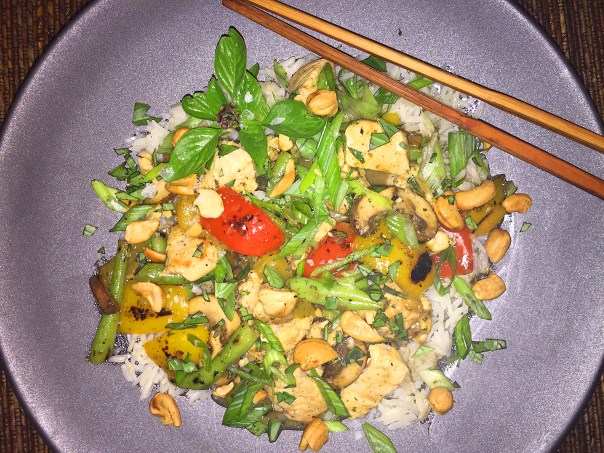
OK, “cheating” may be too strong of a word, but we all have (many) times when we cut corners and don’t make a meal from total scratch. Check out my version of a quick stir-fry using a store-bought simmer sauce that’s chock full of flavor and less time-consuming. So what’s to complain about?

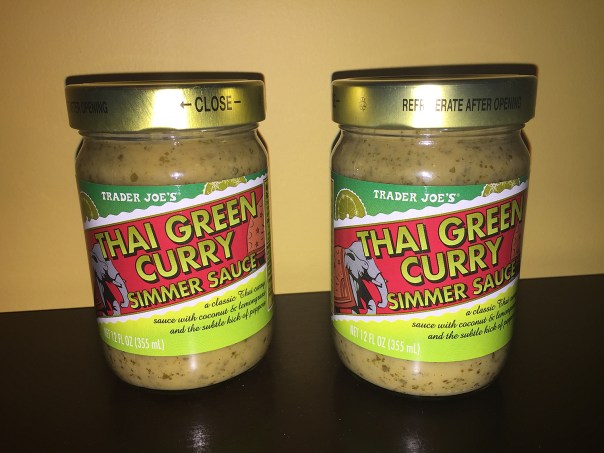
I don’t often promote specific brands in my food blog, but in this case, the “cheat” element is Trader Joe’s Thai Basil Green Curry Simmer Sauce—the basis of which contains coconut milk and lemongrass, two Thai staples—however, use whatever suits your fancy. As far as the produce, try to incorporate a mix of colors for both the visual impact and nutrient value.

IMG_4396

Our organic garden was bursting with herbs and green beans so I wanted to use a few of them in a stir-fry meal—and you all know I adore Thai cuisine. So the backbone for it started with our abundance of Thai basil and the beans, a jar of that sauce in our pantry, and removal of the chicken breasts from our freezer. A quick trip to the supermarket for the other veggies completed the list of ingredients.
My man Russ is the ultimate stir-fry machine. He can wok those veggies and meats around like nobody’s business. So when it comes to stir-fries, I act as sous chef prepping everything in advance (a must), and then he takes over and does his magic.

This recipe acts as a blueprint to adapt as you please, so feel free to alter your ingredient choices, but stick to the approximate amounts for balance.

IMG_4415

Lynn's Quick Thai Stir-Fry

  • Servings: 4-6
  • Difficulty: easy
  • Print

Ingredients

  • 3 Tbsp. peanut oil
  • 2 lbs. boneless, skinless chicken breasts, cut into 3/4″ pieces
  • 8 oz. cremini mushrooms, stemmed and cut into 1/4″ slices
  • 6 oz. fresh green beans, trimmed and cut into 1 1/2″ pieces
  • 1 yellow and 1 red bell pepper, seeded and cut into 3/4″ pieces
  • 3 large scallions, whites cut into 1″ pieces, greens thinly sliced at a diagonal for garnish
  • 2 Tbsp. Thai basil, roughly chopped and divided into two equal parts
  • 1 12 oz. jar Thai simmer sauce, like Trader Joe’s Thai Green Curry or a similar product
  • 1/4 cup roasted unsalted cashews, roughly chopped
  • Salt and Pepper
  • 2 Tbsp. water
  • Jasmine rice, preferably steamed with homemade chicken stock

Directions

  1. Heat a large wok over medium-high heat. In the meantime cook the rice according to package directions.
  2. Add 1 Tbsp. of peanut oil and swirl around wok.
  3. Add green beans, bell peppers and scallion whites to hot wok, stir continuously for about 4 minutes.
    IMG_4400
  4. Add 2 Tbsp. of water to wok and cover for about 4 minutes, stirring once, until veggies are crisp tender. Transfer to large bowl.
  5. Put another tbsp. of oil into wok and when hot, add mushrooms and a pinch of salt. Flip continuously for several minutes until starting to brown then transfer to bowl with other vegetables.
    IMG_4405
  6. Add last Tbsp. of oil to wok and when hot, add chicken pieces and season lightly with salt and pepper. Spread out into one layer and leave undisturbed for about 2 minutes, then turn continuously with spatula until opaque and cooked through.
    IMG_4408
  7. Lower heat and add jar of Thai sauce to chicken, stir and let sit for 1 minute. Add all of the veggies back to the wok with the chicken, stir in half of the basil and let reheat for 1 final minute.
  8. Divide rice into 4 to 6 bowls, ladle stir-fry over rice and garnish with scallion greens, chopped cashews and remaining basil. Add a sprinkle of finishing salt.
    IMG_4416

http://www.lynnandruss.com

Ultimate Summer Comfort Food

Every summer I look forward to fresh locally grown produce, and among my faves are tomatoes of every variety (especially heirlooms), and sweet corn on the cob. In this area of the country, we can get really good corn starting around the July 4 holiday through most of September.

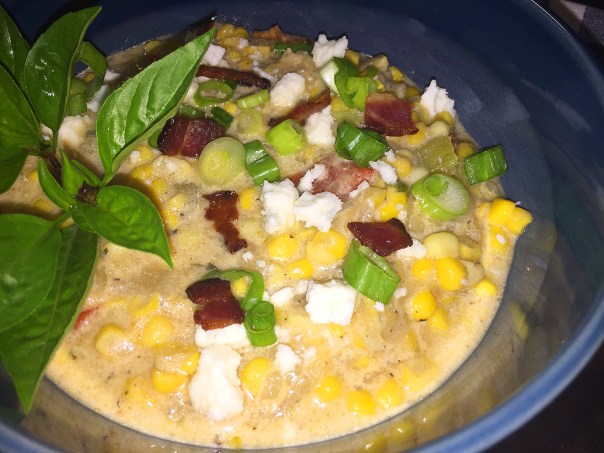
For this recipe, don’t even think about substituting frozen kernels because the flavor of this Spicy Corn Chowder depends on freshly cut kernels. The creamy soup has just the right amount of heat from the chipotle chili powder that compliments the sweetness of the corn. And for even more corn taste, “milk” the cobs and add it to the chowder when you mix in the kernels.

IMG_4373

Mother Nature decided to pull a fast one on me right in the middle of making this recipe. Just as I was adding the corn kernels, a powerful storm moved in and knocked out our electricity. Even though it was dark as night in the middle of the afternoon, I was luckily  able to continue the process with the aid of a flashlight and a few candles on my gas stove top.

IMG_4383

For a quick cooking chowder, it is jam-packed full of flavor! Yes, corn is KING in the summertime!

Spicy Corn Chowder

  • Servings: 4-6
  • Difficulty: easy
  • Print

Ingredients

  • 1/2 lb. thick-cut applewood-smoked bacon (6 slices), cut crosswise into 1/2-inch pieces
  • 1 medium yellow onion, cut into 1/2-inch dice
  • 3 scallions, thinly sliced
  • 2 celery ribs, cut into 1/2-inch dice
  • 1 red bell pepper, stemmed, seeded, and cut into 1/2-inch dice
  • 1 tsp. fresh thyme
  • 5 cups fresh corn kernels (from 10 medium cobs)
  • 1/2 tsp. pure chipotle chile powder
  • 2 cups half-and-half
  • 2 cups chicken broth, preferably homemade
  • 1 large russet potato, peeled and coarsely grated
  • Kosher salt
  • Crumbled queso fresco or grated Monterey Jack cheese, for garnish (optional)

Directions

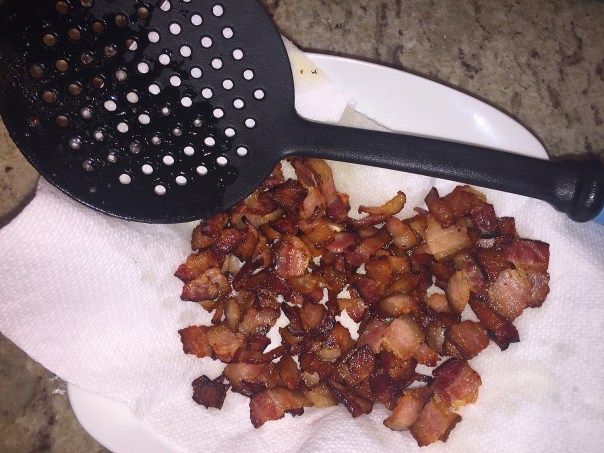
  1. Cook the bacon in a 5- to 6-quart Dutch oven or other heavy-duty pot over medium-high heat until browned and crisp, about 5 minutes.
  2. With a slotted spoon, transfer the bacon to a paper-towel-lined plate.
    IMG_4376
  3. Return the Dutch oven to medium-high heat and add the onion, half of the scallions, the celery, bell pepper, and thyme. Cook, stirring occasionally, until the vegetables begin to soften, about 5 minutes.
    IMG_4378
  4. Add the corn (and corn milk if using) and cook until softened, about 2 minutes.
    IMG_4379
  5. Stir in the chipotle powder and cook for 30 seconds.
  6. Add the half-and-half and chicken broth and bring to a boil.
  7. Add the grated potato, lower the heat to medium, and cook, covered, until the potato is cooked through, about 10 minutes.
    IMG_4380
  8. Season to taste with salt and transfer to 4 large (or 6 smaller) soup bowls. Garnish with the reserved bacon and scallions, and the cheese, if using, and serve.
    IMG_4384
    IMG_4392

http://www.lynnandruss.com

Original recipe by David Bloom of Fine Cooking