Monthly Archives: December 2016

A Grand Finale of Flavors and Textures

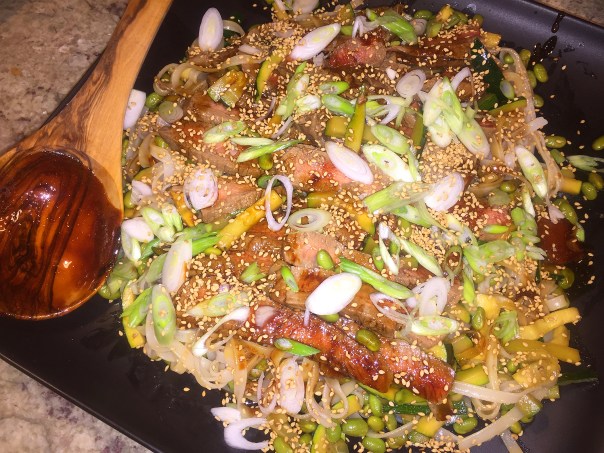
In the dreary doldrums of Winter we need a bit of sunshine, enter the deep flavor of flat iron steak which works really well with the umami-rich soy sauce and sesame oil featured in Flat Iron Steak with Zucchini, Edamame, and Soba Noodles. Unfortunately our supermarket butcher told us they rarely carry flat iron steak, only if notified ahead of time. So, if you can’t find flat iron, substitute rib-eye like we did.
img_9089

We had to make a few other alterations to the ingredients. The first was using rice noodles instead of soba noodles which contain wheat. The zucchini only came in large sizes so we just incorporated one, after all, it was just the two of us. Then, we opted for fresh edamame instead of frozen, but it was only an 8 ounce package, so next time I’ll make sure to add more because they not only taste good, they are rich in protein, dietary fiber, and micronutrients.

Finally, I cut back the amount of sugar from a 1/4 cup to just one tablespoon because the original amount just seemed like it would make a savory dish way too sweet. (And comments from reviewers verified that fact.) The recipe also calls for 3/4 cup of Mirin, an essential Japanese condiment similar to sake, but with a lower alcohol content and higher sugar content. The sugar content is a complex carbohydrate that forms naturally during the fermentation process (with no sugars added) but increases the sweetness of the dish.

As you know by now, we are way more into spicy and savory than sweet so when we make this again, we are going to add a couple of hot chiles during step two to add that spicy note and to counterbalance the sweetness.

As far as the meat, I was skeptical about poaching steak—who wouldn’t be? But by jove, it came out perfectly medium-rare after 12 minutes and was incredibly tender. Make sure you slice it thin and against the grain to preserve the suppleness.

Pickled ginger, scallions and toasted sesame seeds are all optional ingredients. I originally planned to incorporate all three of them to develop more layers of flavor, but had a senior moment and forgot the pickled ginger. However, Russ added the garlic cloves and ginger slices back into the sauce as he reduced it (Step 4) which we believe intensified the piquancy of the liquid.

Our reduced sauce thickened to a molasses-like consistency, so I can image if we had used the entire 1/4 cup of sugar, how thick it would have ended up! So based on your own penchant for sweet or spicy, you can adjust the aromatics, spices and sweetners to suit your own taste.
img_9069

img_9071
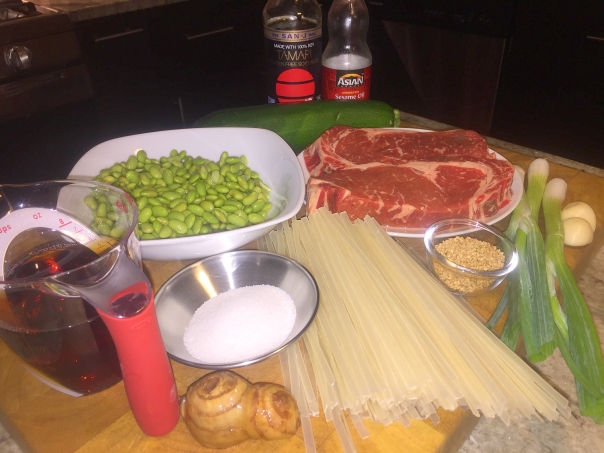
Two cloves of garlic are lightly smashed, ginger is sliced into three 1/4″ rounds, zuchinni is cut into match sticks, and the scallions are thinly sliced on the diagonal.

Ingredients

  • Kosher salt
  • 8 oz. dried soba noodles
  • 1 Tbs. Asian sesame oil
  • 3/4 cup soy sauce
  • 3/4 cup mirin
  • 1/4 cup granulated sugar (suggested you cut back to 1 Tbsp.)
  • 3 1/4-inch-thick slices peeled fresh ginger
  • 2 medium cloves garlic, peeled
  • 2 flat iron steaks (8 to 10 oz. each)
  • 1 lb. zucchini (2 medium), cut into 2-inch matchsticks
  • 1 12-oz. bag frozen shelled edamame, thawed (about 2 cups)
  • 1 Tbs. chopped pickled ginger (optional)
  • 2 small scallions, white and light-green parts, thinly sliced (optional)
  • 1 Tbs. toasted sesame seeds (optional)

img_9074
The steak is added to a combination of soy sauce, mirin, sugar, ginger, garlic, and water in a 10-inch straight sided sauté pan.
img_9076
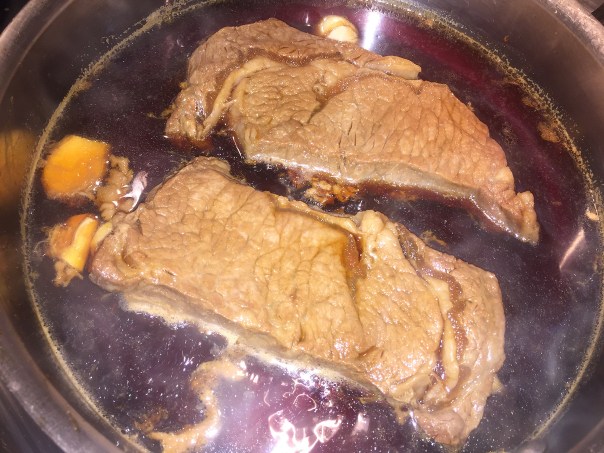
After 6 minutes simmering, the steaks are flipped and simmered for another 6 minutes.

img_9077
Once the steaks are removed from the cooking liquid, the zucchini and edamame are simmered for a couple of minutes.
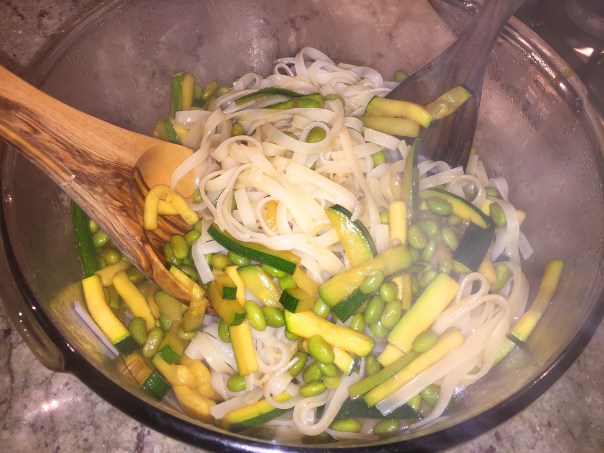
img_9080
The cooked veggies are added to the noodles which were combined with sesame oil and kept warm.

img_9082
To intensify flavors, Russ put the garlic and ginger back into the liquid as it reduced, but took them back out when reached to the correct consistency.

img_9083
Once everything else was ready, Russ sliced the steak into thin strips against the grain.

img_9088
The sauce reduction is partially spooned over the platter, while the rest was served for passing at the table.

img_9091
Finally, sliced scallions and toasted sesame seeds are tossed on top of the entire ensemble.

Directions

  1. Bring a large pot of well-salted water to a boil and cook the noodles until tender, about 4 minutes. Drain well, transfer to a large bowl, toss with the sesame oil, cover, and keep warm.
  2. Meanwhile, combine the soy sauce, mirin, sugar, ginger, garlic, and 1 cup water in a 10-inch straight sided sauté pan. Bring to a boil, and then add the steaks. Turn the heat down and simmer gently, flipping once, until medium rare (130°F), 12 to 16 minutes. Transfer the steaks to a cutting board, reserving the liquid in the pan. Discard the garlic and ginger.
  3. Return the liquid to a boil. Add the zucchini and edamame, return to a boil, and then lower to a simmer. Cook until the vegetables are just tender, about 2 minutes. Using a slotted spoon, transfer the vegetables to the bowl of noodles. Toss well, cover, and keep warm.
  4. Boil the cooking liquid until reduced by half, about 5 minutes.
  5. Thinly slice the steaks across the grain. Arrange the noodle mixture on a platter or divide it among 6 shallow bowls. Top with the beef and the pickled ginger, if using. Drizzle some of the sauce over the beef and garnish with the scallions and sesame seeds, if using. Serve, passing the rest of the sauce at the table.

img_9093
After plating into individual bowls, more sauce is spooned on top.

Adapted from Lynne Curry of Fine Cooking


Lip-Smackin’ Good

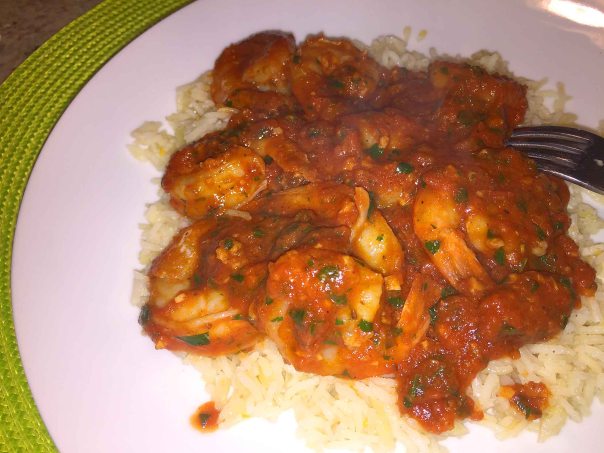
To all my shrimp loving friends, you’re gonna love Garlicky Shrimp and Tomatoes! The essence of the sauce is amazingly rich and delicious in this dish, and it ticks all of the boxes: tasty, healthy, easy, relatively quick, and company-worthy.

The combination of flavors in this robust dish is reminiscent of cioppino, San Francisco’s popular seafood stew. Unusual, but it’s not a mistake that raw garlic gets stirred into the sauce at the end of cooking—it provides a jolt of fresh flavor.

img_9258

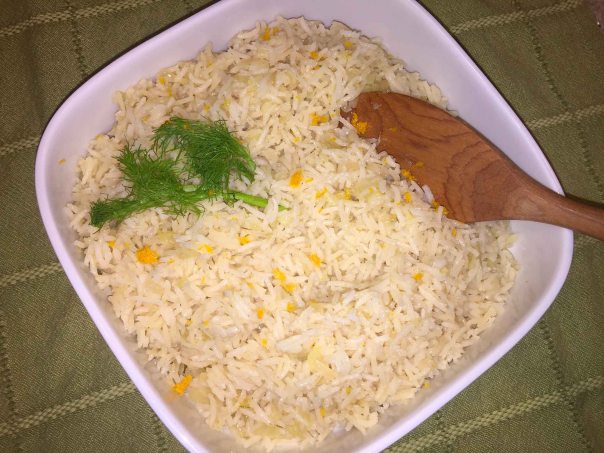
What a fabulous marriage it made with our side dish, Orange-Scented Rice Pilaf with Fennel, which was so light, fluffy and full of flavor. And since it can sit to up to 30 minutes, go ahead and make it first.

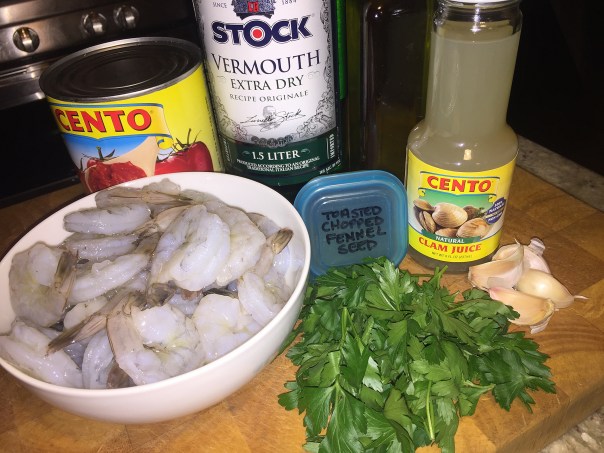
Russ happened to come home from work early (for him) that evening and inquired if I had opened the jar of clam juice yet. Since I had not, he suggested we use a couple cubes of our frozen shellfish stock, which I thought was brillaint and would add an additional depth of flavor.

I’m going to digress a minute here. When Russ makes homemade stock, of any kind, we’ve gotten into the practice of freezing some in our large ice cube trays. After they are frozen we pop them into a labeled ziploc and the individual cubes come in real handy when a recipe calls for a small amount.

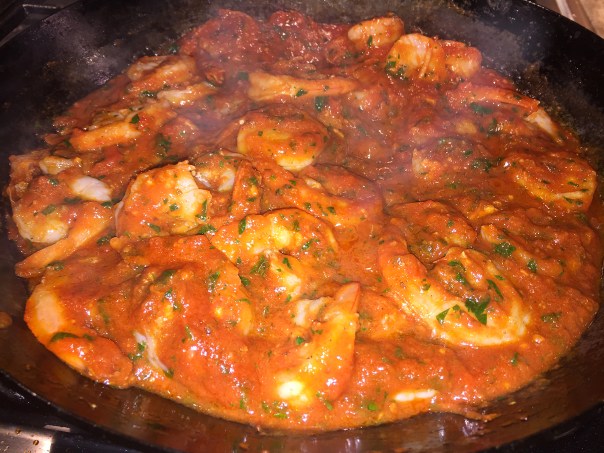
Back to the regular blogcast… We thickened the sauce an additional 3-4 minutes past the recommended 12 minute time frame. However you don’t want to go overboard on this step, especially if, like us, you prefer saucier dishes. Neither dish is spicy at all but rather brimming with lots of subtle flavors.

img_9228

Ingredients

  • 30 jumbo shrimp (21 to 25 per lb.), peeled, deveined, and patted dry
  • Kosher salt and freshly ground black pepper
  • 5 Tbs. olive oil; more as needed
  • 3 large cloves garlic, pressed or minced
  • 1-1/2 tsp. fennel seeds, coarsely crushed
  • 1-1/2 cups canned crushed tomatoes with purée (from a 15-oz. can)
  • 6 oz. (3/4 cup) bottled clam juice (or shellfish stock)
  • 3/4 cup dry white vermouth
  • 1/4 cup chopped fresh flat-leaf parsley

img_9235Two large frozen cubes of shellfish stock were unthawed in the microwave and used in place of bottled clam juice.

img_9238
Partially cook the shrimp over medium-high heat in an oiled skillet.

img_9240After the shrimp are transferred to a bowl, add the remaining oil and about two-thirds of the garlic and all of the fennel seeds and cook, stirring, until fragrant.
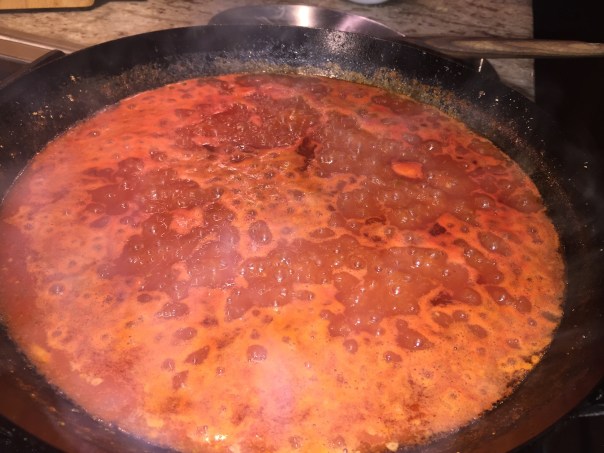
img_9242
Stir in the tomatoes, clam juice, and vermouth. Bring to a boil and cook until the sauce is reduced to about 2/3 cup, about 12-15 minutes.

img_9243
Turn the heat down to medium and stir in the remaining garlic and the parsley.

img_9247
Add the shrimp and accumulated juices and cook until the shrimp are cooked through, about 2 minutes.

img_9251
After the shrimp has fully cooked, season with salt and pepper to taste.

Directions

  1. Season the shrimp with 1/4 tsp. each salt and pepper. Heat 3 Tbs. of the oil in a 12-inch skillet over medium-high heat until shimmering hot. Add the shrimp and cook, stirring, until partially cooked, 3 minutes. Transfer the shrimp to a large bowl.
  2. Add the remaining 2 Tbs. oil to the skillet. Add about two-thirds of the garlic and all of the fennel seeds and cook, stirring, until fragrant, about 1 minute. Stir in the tomatoes, clam juice, and vermouth. Bring to a boil. Cook, stirring occasionally, until the sauce is reduced to about 2/3 cup, about 12 minutes.
  3. Turn the heat down to medium and stir in the remaining garlic and the parsley. Add the shrimp and accumulated juice and cook, stirring occasionally, until the shrimp are cooked through, about 2 minutes. Season to taste with salt and pepper and serve.

by Selma Brown Morrow from Fine Cooking

Orange-Scented Rice Pilaf with Fennel

img_9252

img_9231

Ingredients

  • 3 Tbs. unsalted butter
  • 3/4 cup finely chopped fennel (1/2 small bulb)
  • 1/2 cup finely chopped onion (1 small onion)
  • 1-1/2 cups long-grain rice, preferably basmati
  • 2-3/4 cups low-salt chicken broth
  • 2 strips orange zest
  • 1 bay leaf
  • 3/4 tsp. kosher salt
TIP: The rice can sit, covered, for up to 30 minutes before serving.
img_9237
Lay a kitchen towel over the pot after the rice absorbs the liquid, replace the lid, and let sit for anywhere from 5 to 30 minutes.
Directions
  1. Melt the butter over medium heat in a medium (3-qt.) saucepan. Add the fennel and onion and cook, stirring often, until softened, about 6 minutes.
  2. Add the rice and cook, stirring, until the grains are glossy and beginning to crackle, about 2 minutes.
  3. Add the broth, orange zest, bay leaf, and salt. Bring to a boil, cover, and lower the heat to a simmer. Simmer until the rice is tender and all the liquid has been absorbed, about 17 minutes.
  4. Off the heat, remove the lid, lay a kitchen towel over the pot, replace the lid, and let sit for 5 to 10 minutes. Fluff the rice with a fork and serve.

By Molly Stevens, one of our favorite chef-authors

Viva La Vault!

The holiday season is usually a time to socialize with family and friends and so it was that I reconnected with long-time friend (and past boating comrade) Eileen, below left. We’ve been meeting over lunch between Christmas and New Years for around 20 years, conceivably longer. Often her sister Barb will join us, as was the case this season.

img_9515

Wanting to patronize someplace different, I immediately thought of the Vault Brewing Company in Yardley because the sisters like a good beer! It opened in 2012 and the location was chosen due to historic Yardley Borough, its proximity to the Delaware River, and its neighboring towns of Washington Crossing, Newtown, New Hope, and my current place of residence, Langhorne. (Eileen hails from Wrightstown and Barb from Newportville.)

The original part of the building was constructed in 1889 for Yardley National Bank. The 8,000-pound vault door was installed prior to the construction of the building and no changes have been made to its design in over 125 years. The vault is now used as a beer-conditioning cellar, how cool is that! They provide an atmosphere more akin to the speakeasies of Philadelphia than to a traditional brew pub.

mg_7900

You enter through a “faux vault entryway,” and immediately notice that the entire brewery and wood-fired kitchen oven are completely open to view. The brewery sits directly behind the bar and the kitchen is adjacent to the dining tables. Their décor is a striking, unusual blend of regal bank, stark industrial, old-world, and modern.

Luckily Eileen, who arrived first, had the where-with-all to get our name on the wait list because for 2:00 on a Tuesday afternoon, it was packed! Barb arrived minutes after me, but we still had to wait for about 15 minutes before we were seated. On my way in I noticed they were adding an extension out back into the parking lot.

img_9521
Barb disliked her first choice of beer so I suggested asking for a small taste of her next beer before she committed. The waitress brought two samples.

img_9522
For their second choice, Eileen and Barb decided on a flight of 5 beers. It worked out well because if one sister didn’t really like one of them, the other seemed to. Me, I stuck to a glass of Merlot.

Their menu rotates seasonally and is intentionally focused yet varied with unique gastro-pub dishes. While not gigantic in scope, they offer a small selection of tapas, salads, sandwiches, pizzas, and desserts. Everything you find on the menu is either made in-house or sourced locally, nothing is ever frozen or reheated, and every “in-house” ingredient is made fresh daily.

I pretty much made up my mind right away and opted for the Chicken & Greens salad. My companions had a more difficult time selecting, but finally both chose the Buffalo Chicken Salad (although Barb nixed the bleu cheese). Barb initially contemplated a hamburger but was concerned over the doneness because our waitress didn’t make it sound like you could get it cooked to your liking, odd as that seems.

The menu only lists one burger, the Grass Fed Burger: an 8 ounce hand-formed patty, with white cheddar, butter lettuce, heirloom tomato, red onion, red pepper-garlic aioli, on a brioche. I noticed one male patron ordered that and it took all he could do to open his choppers wide enough to take that first bite!

img_9519

BUFFALO CHICKENRoasted chicken, arugula, pickled red onion, cucumber, celery, yellow pepper, blue cheese, creamy dill vinaigrette.

img_9517

CHICKEN & GREENS—Poached pesto chicken, chick peas, arugula, English cucumber, celery, haricot verts, heirloom cherry tomato, shaved parmesan, and roasted tomato vinaigrette.

I pretty much ate my entire salad and would definitely order it again. After Barb took her first bite, she was appalled that there might be mayo in it, and we figured it must be part of the creamy dill vinaigrette, so she more or less picked around it, not consuming most of the greens.

Around three years ago Russ and I had stopped in for lunch and split an appetizer order of the Buffalo Cauliflower consisting of buttermilk cauliflower, house buffalo sauce, sweet pickled celery, and chive sour cream, and as I recall we both really liked it. If I’m not mistaken our other choice was a Margherita Wood-Fired Pizza. They now seem to have more selections as far as the pizzas go.

According to their website, they brew twice a week with each batch rarely lasting more than a month. The beer lines that run directly from the serving tanks behind the bar may be served via draft (traditional CO2), nitro (think Guinness-style), or cask (low-carbonation, warmer temperature, English-style).

Some unique elements of the interior include:

  • The original vault repurposed as a beer-cellar
  • A giant safe repurposed as an illuminated wine display
  • Decorative wrought-iron fencing surrounding the brewery and copper-clad wood-fired open
  • A visually-striking painting that incorporates original deposit slips and paid checks from Yardley National bank dating over 100 years ago
  • Hand-dyed concrete bar tops that were poured and molded on-site
  • A huge rusted iron horse head above the urinal in the men’s room
  • An eclectic shoe rack display in the women’s room (although I’ve yet to visit the ladie’s room)

After three hours of kibitzing, we all needed to wrap it up and head home. And since it was now dinner/happy hour, the place was even more crowded with what looked like quite a wait line. Promises were made to continue our yearly tradition, with the possibility of meeting up during the rest of the year, but that never seems to happen…

Oh and thanks Eileen for treating us!

img_9524
A gentlemen customer offered to take our photo in front of the wine vault as we were leaving.

Christmas Magic

The magic here is not in the expediency of preparation, nor the low-cost of a standing rib roast, but rather the sumptuous final results of a fabulous meal that you will dream about long after Santa is back at the North Pole.

img_9471
Enjoying some holiday cheer by the fireplace with sons David and Dan.

img_9469
The guys are all enjoying a little holiday “nog.”

I first introduced you to chef Luke Thomas—Britain’s youngest head chef—in my Crispy Potato blog. Born in North Wales in 1993, Luke has committed himself to cooking since the tender age of 12—while most young lads only think about eating at that age!

He has appeared on a handful of television shows, including Junior MasterChef, Great British Menu, Russell Howard’s Good News and a BBC Three documentary entitled Britain’s Youngest Chef; plus has garnered a plethora of awards. With so many accolades, you just know his recipes will be worth the time and effort.

When he was 16, Thomas met grilling expert Adam Perry Lang and was inspired: “It was not only about a great piece of meat but how he prepared it before cooking and how he dressed it after.” Thomas has applied that lesson to this special roast, which he glazes with mustard before roasting, and then coats with a fresh-herb dressing after. (You can make the dressing early in the day or while the beef is roasting.)

Joining us for Christmas Eve dinner this year were Russ’s two sons Daniel and David, both self-avowed red meat fans. (Daughter Julia was down in Tennessee making new holiday traditions with her boyfriend Byron.) But before we got to the matter of preparing the main feast, one of the Hartman family traditions is serving Crème Brûlée French Toast for the holiday brunch, and one they continued this year.

img_9417

xmas-french-toast
Once the toast is turned over, you can see all of the ooey-gooeyness!

Brunch was certainly filling enough to satiate the crew until supper time. So after a lazy afternoon watching movies (or in my case, blogging), Dan helped us prep the vittles. Dinner had to start somewhere so why not with a Shrimp Cocktail with a sauce made from freshly grated horseradish. The guys even polished off the shrimp still in the frig!

img_9448

img_9432
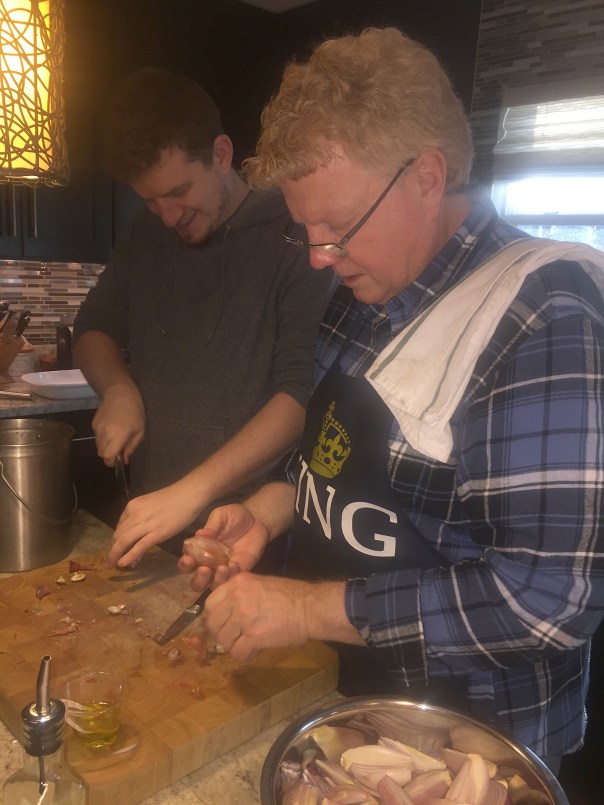
Dan and dad bond over making the onion surround for the roast.

img_9452
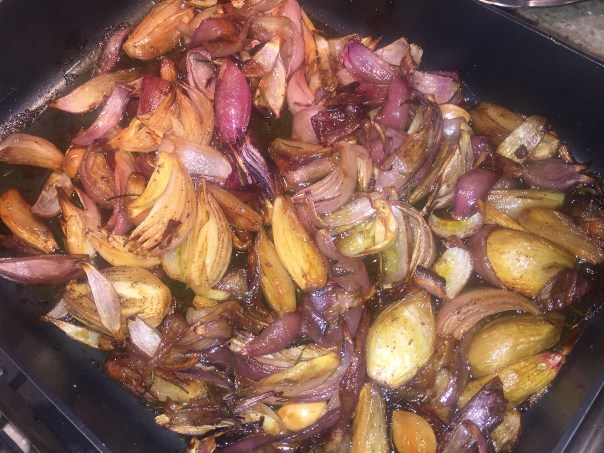
When done, these onions and shallots were exquisite! 

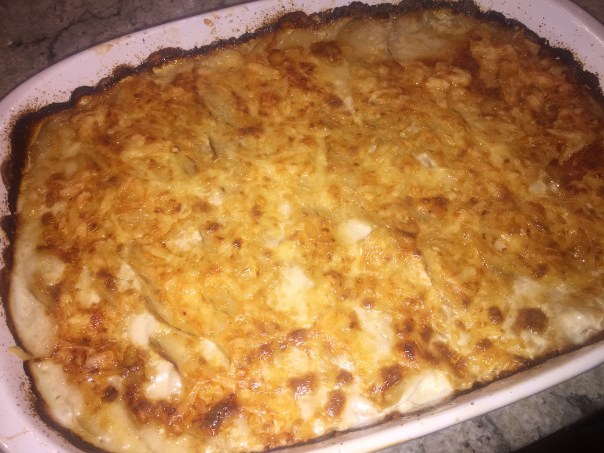
And because the philosophy for the Hartman’s on the holidays is a reprieve from any-and-all diets, to go with our decadent roast we had to have the calorie-busting Three-Cheese Potato Gratin by Molly Stevens—another family favorite. But Russ throws even more caution to the wind by doubling all of the cheese amounts!

img_9445
The potato gratin needs to sit for a half hour before you dig into it.

As so often is the case, Russ starts fretting about the roast not coming to temperature on time, and this one was giving him a run for his money. The meat thermometer was still many degrees below 120 a half hour after it should have been done. So he started checking it with an instant read thermometer and was getting temps all over the place, in some cases too well done.

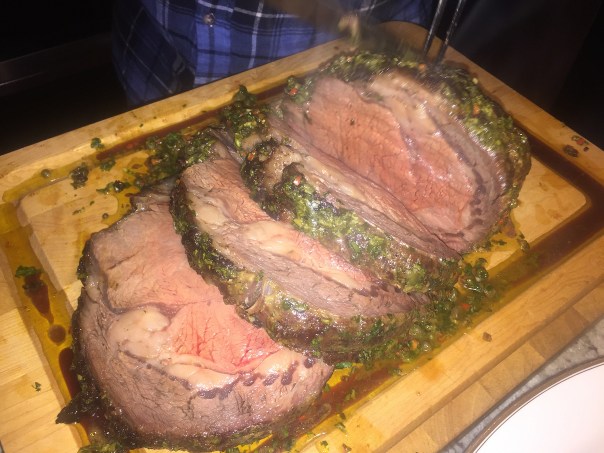
That did it, out the roast came and Russ was pretty sure it was going to be well-done, not a favored outcome in this household. We let it rest for the requisite half hour and when he sliced into it, we all rejoiced because it was a gorgeous medium-rare!

img_9460
Perfectly medium-rare on the interior.

After some gift opening the guys all decided they found a little room to indulge in a dessert of eggnog ice cream and homemade cookies.

img_9479

Luke Thomas’s Rib Roast with English Mustard and Fresh Herb Dressing

Ingredients

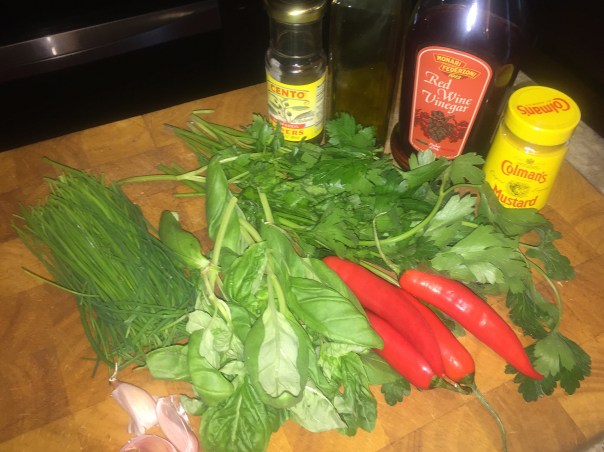
img_9410

For the herb dressing
  • 1 cup finely chopped fresh basil
  • 1 cup finely sliced fresh chives
  • 1/2 cup finely chopped fresh flat-leaf parsley
  • 4 small red chiles, such as Thai bird, seeded and finely chopped
  • 2 cloves garlic, finely chopped
  • 1 Tbs. plus 1 tsp. red-wine vinegar
  • 1 Tbs. plus 1 tsp. English mustard, such as Coleman’s
  • 1 Tbs. plus 1 tsp. capers, drained and rinsed
  • 3/4 cup extra-virgin olive oil
  • Kosher salt and freshly ground black pepper
For the roast
  • 1 4-bone standing beef rib roast (8 to 9 lb.)
  • 10 medium shallots, peeled and halved
  • 4 medium red onions, peeled and quartered
  • 4 cloves garlic, peeled
  • 12 sprigs fresh rosemary
  • 6 Tbs. olive oil
  • Kosher salt and freshly ground black pepper
  • 1/4 cup English mustard, such as Coleman’s

Directions

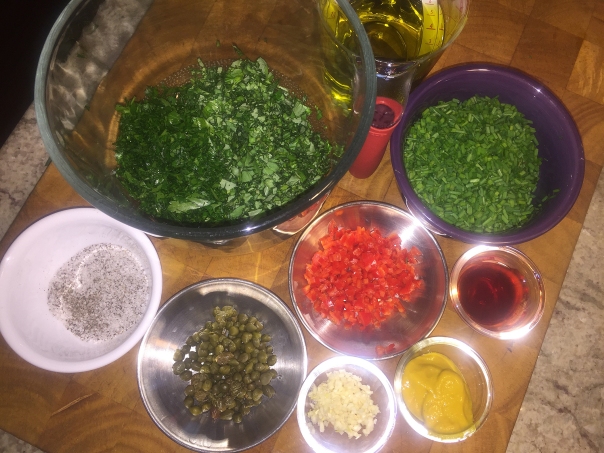
img_9412All of the herb dressing ingredients are prepped and measured.
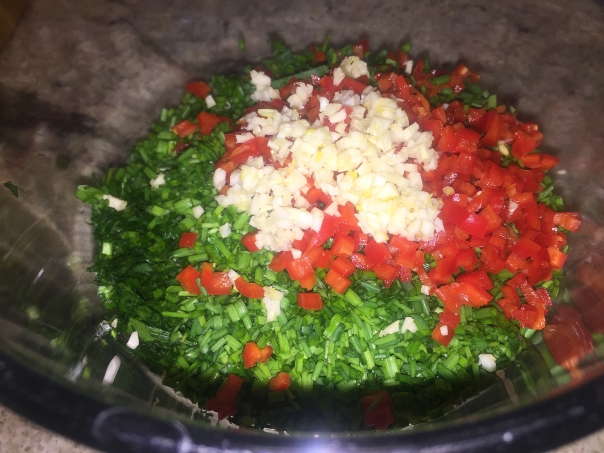
img_9414
The dressing ingredients are combined in a bowl—the colors perfect for a Christmas meal.

img_9415
Oil is whisked into the herb dressing to make a paste.

Make the herb dressing

In a medium bowl, combine the basil, chives, parsley, chiles, and garlic. Add the vinegar, mustard, and capers, and then whisk in the oil. Season to taste with salt and pepper. Cover with plastic wrap directly on the surface, and refrigerate if not using within a few hours.

Roast the meat
  1. Season the meat with salt and pepper, place on a rack and refrigerate, uncovered for 24 hours. (We added this step.)
  2. Trim the fat on the meat to about 1/4 inch, if necessary. Let the meat sit at room temperature for 1 hour.
  3. Position a rack in the center of the oven, and heat to 425°F.
  4. In a large bowl, toss the shallots, onions, garlic, and rosemary with 2 Tbs. of the olive oil. Season with 1 tsp. salt and 1/2 tsp. pepper.
  5. In a small bowl, combine the mustard and 3 Tbs. of the oil.
  6. Rub the meat with the remaining 1 Tbs. oil and season all over with 2-1/2 tsp. salt and 1-1/2 tsp. pepper. Place bone side down in a large heavy-duty roasting pan and roast for 15 minutes. Reduce the temperature to 350°F, brush the meat with some of the mustard mixture, and scatter the onion mixture in the pan around the beef. Roast, brushing the meat with the mustard mixture every 20 minutes or so, until a thermometer inserted into the center of the meat reads 120°F to 125°F, 2 to 2-1/4 hours more. (The roast will continue to cook with carry-over heat.)
  7. Reserving the onion mixture in the roasting pan, transfer the roast to a carving board. Using your hands, generously coat the meat with about half of the herb dressing; reserve the rest. Tent with foil and let rest for 25 to 30 minutes.
  8. Meanwhile, return the pan to the oven and continue roasting the onions and shallots until very tender, 15 to 20 minutes. Using a slotted spoon, transfer the mixture to a serving bowl.
  9. To carve, remove the meat from the bones by running a long, thin carving knife between the eye of meat and the bones along the interior curve of the bones. Slice the meat into thick (1/2 to 3/4 inch) slices. Serve with the onion mixture, and pass the reserved dressing at the table.

img_9422The roast comes out of the frig after dry-aging uncovered for 24 hours.

img_9434After roasting for 15 minutes at 425 degrees, baste the meat with the mustard sauce.
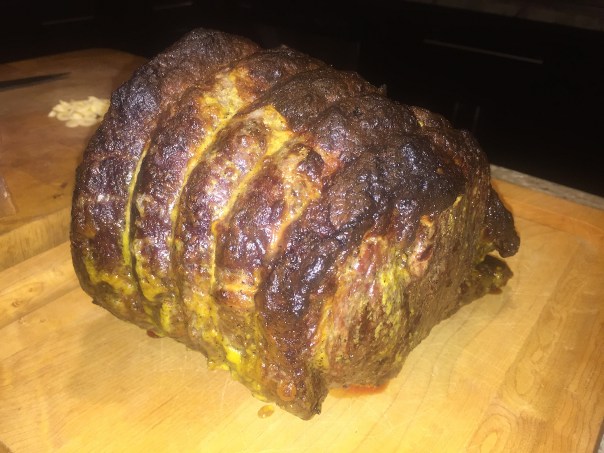
img_9437
The shallots, onions, garlic and rosemary go into the pan after basting the first time.

img_9447Once to temperature, let the roast rest for a half hour.
img_9455
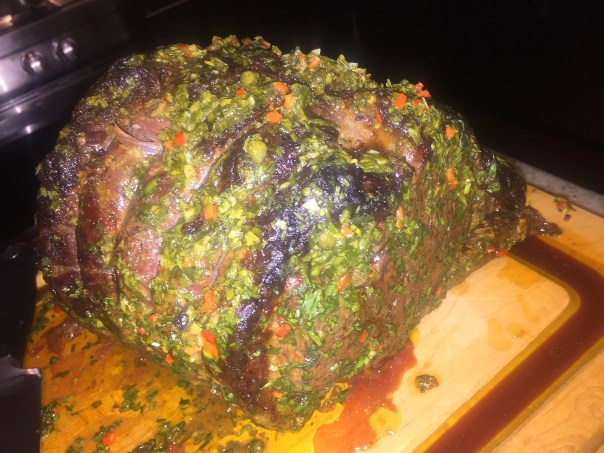
As soon as the roast comes out of the oven, spread some of the herb dressing all over it.

img_9465
More of the herb dressing is spooned over the sliced beef and served alongside.

While Christmas is now over, I don’t want to wait a whole year before we enjoy this fabulous roast again, it was truly magic!

Roast recipe by Luke Thomas from Fine Cooking

Crispy Exteriors Elevated to a Whole New Level

OMG, these spuds are unbelievable! So lusciously crispy on the outside and sooo creamy on the inside. Thanks Fine Cooking for introducing chef Luke Thomas and his grandma’s potatoes to us.

“My Nan always made the crispiest potatoes. She’d add a little bacon or beef drippings, which made it savory, too.”

In Luke’s version, the potatoes get coated in a deeply flavored paste made from anchovies, fennel, and rosemary that forms a delicious brown crust during roasting. They are definitely more time-intensive to make than a baked potato, but not nearly as tedious as preparing a gratin.

Even if you’re not a fan of anchovies (I’m a bit skittish about them, especially whole) you will love these taters, trust me. You’ll be hard-pressed to know there are anchovies in the recipe at all.

They were a perfect complement for our dinner of lamb shanks and ginger-glazed carrots (the best ever!) The recipe below serves eight, but with only two of us eating, we cut the ingredients in half, with enough for leftovers. Amen.

img_9347

Ingredients

  • 12 cloves garlic, coarsely chopped
  • 12 oil-packed anchovy fillets, coarsely chopped
  • 1-1/2 Tbs. finely chopped fresh rosemary
  • 2 tsp. fennel seeds, crushed
  • 3 tsp. finely grated lemon zest
  • Kosher salt
  • 4 lb. medium Yukon Gold potatoes, peeled and halved lengthwise
  • 1 cup vegetable oil

img_9349
I used a mini processor to make the anchovy paste.

img_9351
After roughing up the spuds in the colander, toss them in a bowl with the anchovy paste.

img_9352
The potatoes are carefully placed into the hot oil in the roasting pan. The paste will not cover the entire spud, so don’t be alarmed.

img_9363
After roasting for 20 minutes, turn the potatoes and roast for another 20 minutes. Place onto a platter or bowl and serve while they’re still hot.

Directions

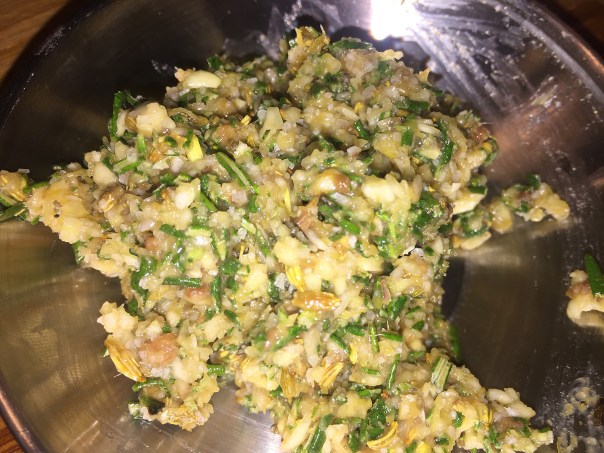
  1. Combine the garlic, anchovies, rosemary, fennel seed, and zest in a mini food processor and process to a paste. (Alternatively, mince the ingredients together on a cutting board, occasionally using the flat side of the knife to help mash the ingredients to a paste.) Season to taste with salt and set aside.
  2. Put the potatoes in a large (6- to 8-quart) pot with enough cool water to cover by at least 1 inch. Add 1 tsp. salt and bring to a boil. Cook until just tender, 8 to 10 minutes. Drain in a colander and then give them a good shake in the colander to rough them up; this is what will give them their lovely crisp bits.
  3. Position a rack in the center of the oven and heat to 400°F. Pour the oil into a large roasting pan, and transfer to the oven to heat for about 10 minutes.
  4. Toss the potatoes with the garlic and anchovy paste mixture. Remove the roasting pan from the oven, and carefully add the potatoes. Roast, flipping once after about 20 minutes, until the potatoes are tender with a well-browned crust, about 40 minutes.

by Luke Thomas from Fine Cooking

img_9370
This photo doesn’t do justice to just how creamy the interiors turn out.

Once Featured on Triple D; a Step Back in Time

Located between Newtown and New Hope PA, the historic Pineville Hotel was built in 1742, serving as the town’s major landmark. It’s front porch was a central gathering place for locals and the site of sales of public land, livestock and equipment. Since then, the tavern has seen many transformations from feed mill to general store to a hotel.

Pineville Tavern, the old coaching Bucks County pub appears to be a popular local hang out, which built their reputation on a tradition of fresh, homemade food. Having been there only sporadically since moving to Bucks County over 30 years ago, and spurred on by the fact that it was actually featured on Diners, Drive-Ins and Dives (Triple D) several years ago—one of my Food Network faves—I figured it was time to revisit. And Russ and good friends Barb and Brad were all-to-willing to join me in scoping it out on a recent Friday night.

pineville-tavern-t-shirt

Not taking reservations, we were told to call 20 minutes before arriving to get our names on the list. Once there, we were seated immediately at a four-top in the bar area which exuded an intimate vibe through dark coffered ceilings and a rich mahogany bar, both dating back decades. We had a chuckle over the dark red tiled floor because it brought back memories of Barb’s old house in Yardley and the basement from my childhood home in Michigan.

The extensive menu of elevated tavern fare is quite diverse and offers homemade dishes prepared from scratch with a wide variety of options ranging from appetizers, burgers, pizzas, pastas and sandwiches to soups and salads. They also serve a lengthy selection of draft, craft and bottled beers, and a limited array of wine by the glass—plus a full-service bar if you are so inclined.

While Guy Fieri of Triple D recommends the Snapper Soup with the “savory, gravy-like soup with chewy chunks of snapper turtle; and the perfectly balanced handmade ravioli and marinara sauce for pasta lovers;” we opted for other choices.

img_9268
The Patty Melt Burger on grilled rye was just the ticket for Brad.

img_9266
Barb thoroughly enjoyed her Corned Beef Reuben.

Brad, a self-avowed burger man, chose the Patty Melt Burger with Swiss Cheese and Fried Onions on Grilled Rye with a side of fries. Mrs. Brad (that would be Barb) wasted no time in zeroing in on the New York “Style” Corned Beef Rueben, also paired with french fries. Russ was the only one of us who went for an entrée selecting the Broiled Salmon with Chef’s Vegetables (in his case fries and green beans.)

img_9269Russ opted to have fries served wth his salmon.
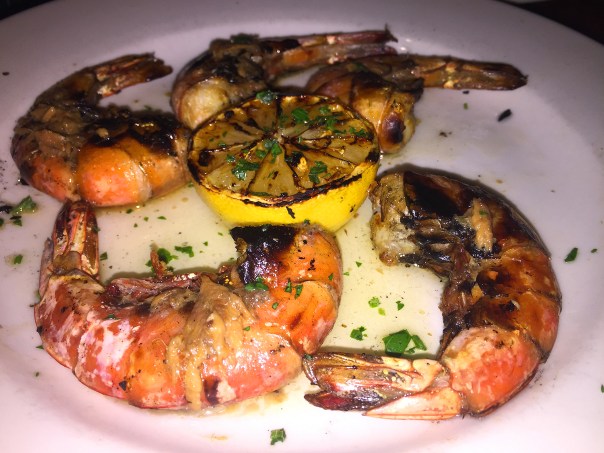
I had a hard time deciding, but I knew I wasn’t in the mood for either a sandwich or an entree; or pasta or pizza for that matter. Finally, it was two appetizers that appealed to me: Zucchini Fries with Homemade Ranch Dressing and Jim’s Shrimp. Both were thumbs-up delicious!

img_9272
This shrimp appetizer was so full of flavor!

img_9274
Zucchini fries were piping hot and crispy on the outside with creamy interiors.

While our food was good, and the drinks not too pricey, the service was not the best. But I do want to return, especially in the warmer weather when the outdoor patio opens back up.

img_9277Brad, Barb and Russ were kind enough to pose for a parting shot on the coldest night in 8 years!

The BEST. Carrots. Ever.

I’m always on the lookout for innovative recipes, especially when it comes to side dishes. One recent Sunday morning, in the newspaper Parade supplement on the Community Table page, was an article by Top Chef judge Graham Elliot. It featured Ginger-Glazed Carrots with Toasted Spices. Maybe you saw it too?

It’s a creative riff on glazed carrots, a comforting cool-weather veggie. We discovered toasting the spices lent depth while braising the carrots in carrot juice, along with honey, underscored their natural sweetness. An unexpected shower of chopped carrot tops added a peppery finishing touch for an upscale twist on this familiar side dish. I had never used the root greenery before, so I was intrigued, and pleasantly surprised by the outcome.

carrots-on-tray

Unfortunately our supermarket wasn’t carrying the mixed colors so we bought a bunch of the smaller fresh orange carrots. Make sure to give them a good bath because the fresh ones can be a bit gritty.

Since ours were small and tender, the cooking times varied a bit in Step 3. Instead of covering for 20 minutes, it only took ours 15. On the other hand, the 10 minute timeframe to cook uncovered was actually more like 13 for the sauce to reduce down to a nice caramelly syrup.

img_9366

They really complemented our meal of braised lamb shanks and crispy roasted potatoes. It could be a great addition to a fancy—or not—dinner that you are serving up over the holidays!

If you fall into the minority of people who don’t like cooked carrots, give these puppies a try, I bet you’ll change your mind…

img_9345
Somehow I staged a lemon in with the ingredients photo—it’s not supposed be there!

Ingredients

  • 1½ lb carrots (mix of orange, white, purple, red), with tops
  • 1 Tbsp coriander seeds
  • 1 tsp green cardamom seeds
  • 1 (1-inch) piece fresh ginger, crushed
  • 4 Tbsp butter
  • 1 cup carrot juice
  • ¼ cup honey
  • Salt and freshly ground black pepper, to taste

img_9353
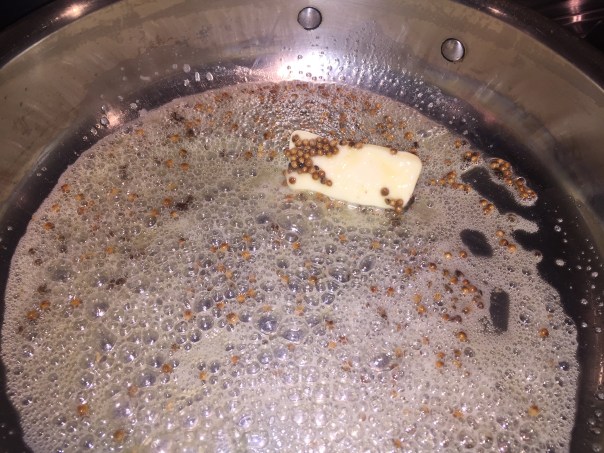
Toasting the cardamom and coriander seeds. If you have cardamom pods (like shown in the photo) make sure to crack them open to get at the seeds. You don’t want to throw the whole pod in!

img_9355Melt the butter with the toasted seeds.

img_9356After the butter melts, add the carrots and ginger; toss to coat. Stir in the carrot juice and honey and bring to a boil.
img_9360
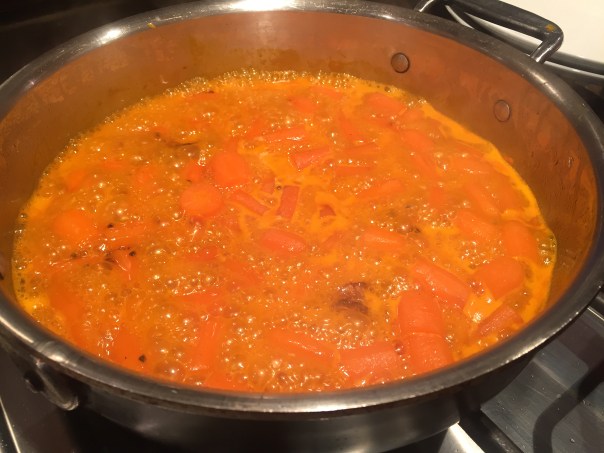
For the last 10 minutes (or longer), uncover the skillet and increase heat to medium-high and cook until carrots are tender and most of liquid has evaporated and is a bit syrupy.

Directions

  1. Remove tops from carrots; reserve. Peel carrots; cut into 1-inch pieces. Wash and dry carrot tops; chop enough to equal ⅓ cup.
  2. Heat a sauté pan over medium heat. Add coriander and cardamom; cook 1-2 minutes or until toasted. Add butter; melt. Add carrots and ginger; toss to coat. Stir in carrot juice and honey. Bring to a boil.
  3. Cover, reduce heat to low and cook 20 minutes. Uncover, increase heat to medium-high and cook 10 minutes or until carrots are tender and most of liquid has evaporated. Discard ginger. Stir in chopped carrot tops. Season to taste with salt and pepper.

img_9367
They make a beautiful presentation on the dinner plate.


Infuse Your Booze, If You So Choose

Booze infusions are so simple, they’re almost a snooze (couldn’t resist!) You just soak ingredients in a base alcohol until you like the taste. So start boning up because there’s no better way to hone your amateur bartending skills than with homemade liquor infusions. Most recipes call for cutting fresh fruits, herbs and spices and letting them soak in a jar of alcohol for anywhere from one day to a couple of weeks before blending, mixing or simply pouring over ice.

moscow-mule

What kind of liquor? Once it soaks up the flavors of your ingredients, any subtle aspects of its original essence—or refined lack thereof—will be lost, so there’s no reason to break the bank when you buy the alcohol. Top-shelf isn’t necessary, but no infusion ingredients will make rot-gut booze taste like anything other than a drain cleaning solvent, so find a comfortable middle ground of price and quality without going full-on bargain basement.

The fun thing about infusing spirits or concocting a liqueur is that there aren’t a lot of rules and complicated techniques. Most of the time it really is just mixing together things that sound like they’d taste good and seeing what happens. So ask yourself, what flavors appeal to you? The possibilities are limitless, so don’t be afraid to experiment.

shutterstock_531643546

Alcohol is very good at extracting flavors from herbs, vegetables, spices, and fruits. It takes a lot less time than you might think for an ingredient to flavor a spirit. Sometimes even three days is too much; some ingredients, like hot peppers or tea, only need an hour or two. Generally speaking, the more porous and intensely flavored the ingredients (coffee beans, fresh herbs), the quicker they will add flavor.

BOURBON/WHISKEY

The whiskies themselves offer a huge range of flavor, and it is recommended you work with the flavors natural to this family such as vanilla, caramel, spice and honey. Classic infusion flavors are nearly any fruit you’d put in a pie such as apple, cherry, plum, fig, peach or blueberry. And spices range from vanilla, chocolate, cookie spices, and coffee to nuts.

2-bourbon

I made a few of these for holiday gifts this year:

Apple Pie Bourbon

  • 2 granny smith apples, sliced
  • 2 cinnamon sticks
  • 2 vanilla beans, split
  • 1/2 teaspoon whole cloves
  • 3 cups bourbon whiskey

Add the ingredients to the bottom of a jar and pour the bourbon over top. Seal the jar with a regular lid and set in a cool place (preferably somewhere dark) for 2 weeks. Or stick in the fridge, just in case—but as long as it’s sealed tightly and not opened often, it will be fine. After 2 weeks, taste the bourbon and adjust the flavor accordingly. You can remove the cinnamon sticks or add more vanilla. If you’d like more flavor, infuse for another week and taste. If it tastes good to you after 2 weeks, strain the bourbon a few times. Place in a tightly sealed jar. When ready, pour over ice…. sip by a crackling fire…

VODKA

There are endless vodka infusion recipes ranging from hibiscus to cucumber-lime, fig, vanilla bean and cardamom, or bacon and habanero to name just a few. Another holiday gift I made was this Horseradish Vodka infusion which is dynamite in Bloody Marys or other cocktails that could stand a “kick in the pants,” or simply sipped over ice.

tomato-juice-chili-pepper

Horseradish-Infused Vodka

  • 2 oz. fresh horseradish root, 1/4″ rounds
  • 1 tsp. whole black peppercorns
  • 1 oz. fresh horseradish root, cut into matchsticks
  • 1 750-milliliter bottle of vodka

Slice two ounces horseradish root into 1/4-inch-thick rounds. Add horseradish rounds and one teaspoon whole black peppercorns to vodka. Steep for 24 hours. If it’s not quite to your liking, steep for another day. Strain, then decant. Slice remaining once ounce horseradish into matchsticks. Add 5 or 6 matchsticks and 3 or 4 peppercorns to each bottle before corking.

vodka-infusion

About that “kick in the pants.” Without thinking it through, I made the horseradish infused vodka about a week before I planned on gifting it. After two days, I thought I’d better check the intensity, and good thing I did, because another week would probably have rendered it undrinkable. So I strained the vodka into a carafe and put it in our downstairs frig.

Fast-forward four days and Hubby is making a homemade chicken stock and needed a half cup of white wine. We always keep some in the basement refrigerator, so when he came upon the carafe, he just “assumed” it was white wine. Without bothering to taste it first, he promptly added a half cup to the stock. You know what “assume” stands for right?

Apparently the aroma of the liquid gave him pause because next thing I knew he was calling upstairs (where I was writing my blog) to ask what was in the carafe. When I informed him, he got this blank look on his face and confessed to what he had done. Guess we were going to enjoy some soup with a true “kick in the pants.”

Seems there are two morals to this story. One, I should have labeled the container. Two, he should have tasted (or even smelled?) the contents before adding to a recipe. Live and learn…

One of my favorite vodka infusions is made with fresh rosemary and real lemons. You can get a fabulous one at Amada in Philly called Tie-Me-Up, Tie-Me-Down… just sayin’… I tried replicating it on two occasions and came close, but didn’t quite get there. Guess I have to keep on truckin’…

RUM

Rum or tequila lend themselves mainly to warm spices like cinnamon or clove, or tropical fruits like mango and lime. Russ’s favorite is to simply infuse his bottle of Bacardi Silver rum with fresh mint—then pour it over ice, add club soda and top with a lime wedge—basically a simplified version of a Mojito.

mojito

So to put it in a nutshell, add your infusion ingredients in the alcohol, cover tightly and store in a cool, dark place (a pantry or frig is great). If you’re using fresh fruits, veggies or herbs, be sure to thoroughly wash and dry those ingredients first—use organic if possible. Remove the ingredients after they’ve infused to your liking, then strain the booze into your desired jars or just keep in your original vessel to use at home. If you’re gifting these, it’s helpful to include a label with the actual ingredients and/or cocktail recipe, then jazz it up in some artsy packaging.

rum-mint2
A bottle of Bacardi Rum is infused with fresh mint, getting all happy for Russ.

Be forewarned: If you know you’re going to use up your infusion quickly, then strain with a fine-mesh sieve or cheesecloth. If you’re planning to store it for more than a week though, try straining twice through cheesecloth. It’s important to filter out as many stray bits as possible because over time they can create off flavors in your infusion.

CHEERS!

How Sweet It Is!

Creative pursuits have been the backbone of who I am as far back as I can remember, down deep in my DNA. My passions, to name a few, include gardening, cooking, home decorating, designing, painting, ceramics, and baking, a long-time treasured artistic outlet of mine much to the delight—or not—of certain family and friends.

img_9279

This holiday season I’m baking annual favorites along with some tasty newcomers. You may remember that last year, Russ and I made Golden Cashew-Curry Brittle that was out-of-this-world addicting and is now on our traditions short list, at least for the forseeable future. Although, after trying to refrain from munching on it, we may have to call the Brittle Addiction Hotline…

img_9282

3-decorated

One tradition I feel honor-bound to repeat every year is the Decorated Sugar Cookie from my childhood. And with each passing year, I try to finesse my icing and decor techniques bolstered by examples found in magazines and on the Internet—which never seem to measure up, but practice makes perfect, right?

You can find the recipe under the Sentimental Favorites tab (just scroll down a bit.) In fact, I’m a bit of a fanatic on this subject and nearly 10,500 pins—and counting—on my “Decorated Cookies” Pinterest board. Who knows, in my retirement with enough practice, you might see me on the Food Network TV show battling it out on Holiday Cookie Wars 😉

img_9169

It’s also not uncommon that we include M&M Cookies in the mix. But this year I tweaked the recipe a touch, using gluten-free baking flour so that Russ could enjoy them. For a colorful, festive approach and to brighten up the cookie array, I added the rainbow-colored dark chocolate M&M’s. But what a friggin’ disaster—and it wasn’t the gluten-free flour!

5-disaster
It took Herculean effort to scrape this mess off of the baking sheet.

On the list of ingredients I had previously written in the new amounts if I were to double or triple the recipe. Well, I must have been experiencing a severe senior moment because I screwed up and added some of the amounts from each column. When Russ got home and saw the baking sheet in the oven with one large flat blob of molten dough, he looked at the instructions and asked how much flour I added. Duh… it wasn’t only the flour that I miscalculated… and then the next batch I wondered what was taking so long and realized I had inadvertently turned off the oven!! That’s when I started questioning my own sanity…

4-bark

Another custom I began a few years ago was including some sort of Chocolate Bark to my stockpile of artisan holiday goodies. Last season it was Dark Chocolate Mint Bark with Famous chocolate cookie wafers sandwiched between two layers of luscious white (tinted green) and dark chocolate then topped with chopped Andes Creme De Menthe Thins—a crowd pleaser for sure. For a similar flavor composite, but with only two ingredients, this year I whipped up several batches of Magic Mint Chocolate Bark topped with roasted almonds—seriously, it can’t get any easier than this folks!

1-ganache

Joining us at the table this season were numerous batches of the show-stopper Peanut Butter and Chocolate Extravaganzas with Ganache Filling—with a holiday twist. This recipe is a mix of two classics: Peanut Butter Blossoms and thumbprint cookies. In this version, a little cocoa powder is added to the peanut butter cookies, and peanut butter is incorporated with the chocolate center—then topped with a red and a green M&M, how festive!

There aren’t many people I know (if any) who don’t like the peanut butter and chocolate combo. There’s something about that nutty, warm peanut butter mixing with a kiss of delicately sweet or dark chocolate. Why is it an irresistible favorite? Partly because about 90 percent of taste is the result of smell, and in the case of the peanut butter and chocolate partnership, the complex interplay of their odors works very well indeed.

Luckily I don’t have much of a sweet tooth otherwise I’d be 50 pounds heavier each January. Yes, I do taste some of most items, but in very small doses. The fun of it for me is in the creation and seeing the smiles on loved ones faces as they taste the holiday delights! Packaged all together they make great gifts for friends and family from afar, as well as those who stop by for a visit.
Wishing you all a happy, healthy and sweet New Year!

Magic Mint Chocolate Bark

Ingredients (for a single batch)

  • 1 2/3 cups (10-oz. pkg.) Nestle Toll House Dark Chocolate & Mint Morsels
  • 1/3 cup coarsely chopped oven roasted or toasted almonds

img_9136
After the morsels emerge from the oven, swirl the tip of a butter knife through all of the chocolate.

img_9137
You swirled sheet of chocolate should resemble this effect.

img_9140
While the chocolate is still warm sprinkle on the chopped roasted almonds and drop the baking sheet onto the counter so the nuts settle into the chocolate.

Directions

  1. PREHEAT oven to 325° F. Line small baking sheet with foil or parchment paper.
  2. POUR morsels onto prepared baking sheet. Arrange morsels so they are touching each other in a single layer (roughly an 11 x 9-inch rectangle).
  3. BAKE for 1 to 3 minutes or until morsels are shiny. Morsels will retain their shape. Remove from oven to wire rack. With tip of butter knife or wooden pick, immediately swirl morsels to create a swirled pattern.
  4. SPRINKLE with nuts. Hold baking sheet 3 inches above counter and drop to settle nuts into melted morsels. Refrigerate for 1 hour or until firm. Break into pieces. Store in airtight container in refrigerator.

VARIATION: Substitute broken pretzel pieces or another nut of choice for the almonds.

Peanut Butter and Chocolate Extrvaganzas

  • Servings: 3 Dozen
  • Difficulty: easy
  • Print

Peanut Butter and Chocolate Extravaganzas

img_9181

Ingredients

For the cookies:

  • 1 cup all-purpose flour
  • 1/4 cup plus 2 tablespoons natural unsweetened cocoa powder
  • 1/2 teaspoon baking soda
  • 1/2 teaspoon fine salt
  • 8 tablespoons unsalted butter (1 stick), at room temperature
  • 1/4 cup plus 2 tablespoons packed dark brown sugar
  • 1/4 cup plus 2 tablespoons granulated sugar
  • 1/3 cup natural-style creamy peanut butter (no sugar added)
  • 1 large egg, at room temperature
  • 1 teaspoon vanilla extract

For the ganache filling:

  • 3 ounces semisweet chocolate, finely chopped
  • 1 tablespoon plus 1 teaspoon natural-style creamy peanut butter (no sugar added)
  • 1/4 cup plus 1 tablespoon heavy cream

To garnish:

  • 1 each red and green M&M per cookie

Instructions

For the cookies:

  1. Heat the oven to 350°F and arrange the racks to divide the oven into thirds. Line 2 baking sheets with parchment paper and set aside.
  2. Combine the flour, cocoa, baking soda, and salt in a medium bowl and whisk to aerate and break up any lumps; set aside.
  3. Combine the butter and sugars in the bowl of a stand mixer fitted with a paddle attachment. Mix on medium speed until lightened in color and fluffy, about 3 to 4 minutes. Stop the mixer and scrape down the beater and sides of the bowl with a rubber spatula.
  4. Add the peanut butter, egg, and vanilla and mix on medium speed until smooth, about 1 minute. Reduce the speed to low, add the reserved flour mixture, and mix just until the dough comes together.
  5. Scoop 16 level tablespoons onto each prepared baking sheet. Roll each portion between your hands to form a smooth ball and place them back on the baking sheet about 1 inch apart.
  6. Bake both sheets for 8 minutes. Rotate the sheets from top to bottom and front to back and bake until the cookies are set around the edges but still soft in the center, about 6 to 7 minutes more.
  7. Remove the sheets to wire racks and immediately use the back of a round teaspoon or the end of a large-handled wooden spoon to make an indentation in the center of each cookie. Let the cookies cool completely on the baking sheets, about 10 to 15 minutes. Meanwhile, make the filling.

For the ganache filling:

  1. Place the chocolate and peanut butter in a medium heatproof bowl; set aside.
  2. Place the cream in a small saucepan over medium heat and bring to a simmer. Pour over the chocolate and peanut butter and let stand until the chocolate softens, about 5 minutes. Stir until evenly combined and smooth.
  3. Fill the indentation of each cookie with about 1 teaspoon of the ganache filling, top with one each red and green M&M, and let sit until set, about 1 hour.

http://www.lynnandruss.com

A Great “Pear”ing

In this Vinegar-Braised Chicken and Onions recipe, balsamic vinegar adds the sweetness needed to balance the sharp flavor of red wine vinegar. And speaking of vinegar, we were somewhat skeptical about 1 1/4 cups total, but in the end, we were converted. While the instructions don’t indicate to reduce the cooking liquid in the final step, we decided to do it and thicken the sauce. We suggest you do the same…

img_9209

Knowing this recipe was going to produce an ample amount of sauce, Russ made a Valencian rice as one of our sides (mashed potatoes, egg noodles or polenta would work well here also.) Our other dish was an intriguing vegetable recipe previously unbeknownst to us called Roasted Brussels Sprouts with Pears, an unusual combo to say the least.

Pears lend their sweetness to earthy Brussels sprouts in this simple and quick essence-of-fall accompaniment. It would also be good “pear-ed” with salmon or pork. Because we lean toward savory over sweet, we doubled the amount of Dijon mustard to two teaspoons but kept the amount of the maple syrup at one, and the result was just right.

Back to the chicken and onions. You might recall that we strained off some of the garlicky oil from our stuffed mushroom appetizer when visiting Mr. and Mrs. Z the other day. So while cooking the onions for this recipe, Russ used the leftover oil from that dish along with the rendered pancetta fat for a more complex flavor note.

After searing the onions, you add the chicken to the pot skin side down working in batches, and cook, turning until browned on all sides, about 10-15 minutes per batch. This is a very important step, so don’t omit it!

img_9188
The pearl onions were boiled and trimmed earlier in the day.

img_9192
Pancetta is transferred to a bowl with a slotted spoon.

img_9194
Pearl onions brown in pancetta fat and some garlicky oil.

I was busy crafting holiday cookies and candy, when Russ was forming the week’s menu. I didn’t realize until after our food shopping trip that he could have incorporated chicken breasts along with the thighs. I usually prefer the breast meat, so next time we make this, I want to be sure we use both parts of the chicken anatomy… although I have no complaints about the quality of these braised thighs.

Ingredients

  • 2 pounds cipolline or pearl onions
  • Kosher salt
  • 3 tablespoons olive oil
  • 8 ounces pancetta (Italian bacon), cut into 1/4-inch pieces
  • 4 garlic cloves, peeled, crushed
  • 5 pounds skin-on bone-in chicken pieces (breasts, thighs, and/or legs; breasts halved crosswise)
  • Freshly ground black pepper
  • 3/4 cup balsamic vinegar
  • 3/4 cup red wine vinegar
  • 2 cups low-sodium chicken broth
  • 1/2 cup golden raisins
  • 2 bay leaves

img_9191
Chicken pieces are generously seasoned with salt and pepper.

img_9197
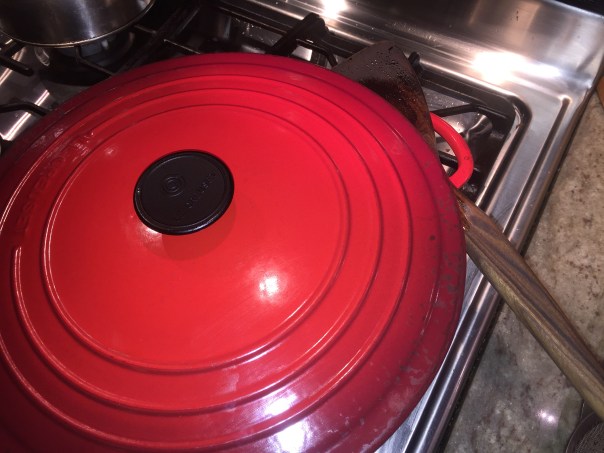
Chicken is simmered, partially covered, until tender. We use a wooden spatula to prop the lid slightly.

img_9204
After about 40 minutes the chicken is tender and ready to be moved from the pot so that the sauce can be reduced.

Directions

  1. Cook onions in a large pot of boiling salted water until tender, 5-8 minutes. Drain and let cool. Trim root ends; peel.
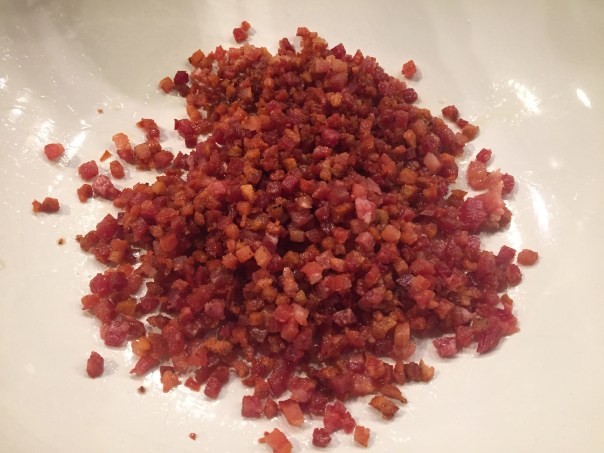
  2. Meanwhile, heat oil in a large heavy pot over medium heat. Add pancetta to pot and cook, stirring occasionally, until fat is rendered and pancetta is brown, 8-10 minutes. Using a slotted spoon, transfer pancetta to a large bowl.
  3. Add onions to same pot and cook, stirring occasionally, until beginning to brown, 8-10 minutes. Add garlic and cook, stirring often, until fragrant, about 3 minutes. Transfer onions and garlic to bowl with pancetta.
  4. Season chicken with salt and pepper. Working in batches, add chicken to pot skin side down and cook, turning, until browned on all sides, 10-15 minutes per batch; transfer to bowl with onions.
  5. Carefully drain fat from pot and return to medium-high heat. Add both vinegars to pot and bring to a boil, stirring and scraping up any browned bits from bottom of pot. Add broth, raisins, bay leaves, and reserved chicken, pancetta, onions, and garlic to pot. Bring to a boil, reduce heat, and simmer, partially covered, until chicken is fork-tender, 35-40 minutes.
  6. Using a slotted spoon, transfer chicken and onions to a large platter. Skim fat from cooking liquid and discard. Remove bay leaves, and season sauce with salt and pepper. Spoon sauce over chicken and onions.

Recipe found on Bon Appétit by Melissa Hamilton and Christopher Hirsheimer

img_9218
We ladled the thickened sauce over the chicken, veggies and rice.

Roasted Brussels Sprouts with Pears

img_9211

Ingredients

  • 1 large pear, cored and cut into 1-inch chunks
  • 1 lb. Brussels sprouts, trimmed and halved
  • 2 Tbs. extra-virgin olive oil
  • Kosher salt and freshly ground pepper
  • 1 tsp. apple cider vinegar
  • 1 tsp. pure maple syrup
  • 1 tsp. Dijon mustard

img_9196
Chunks of pear and halved sprouts are tossed with oil and seasonings.

img_9202
The pear and sprouts are roasted on a foil-lined baking sheet for about 25 minutes until they obtain a nice char.

Directions

  1. Heat the oven to 450°F.
  2. On a large rimmed baking sheet, toss the pear and Brussels sprouts with the olive oil and a pinch each of salt and pepper. Roast until tender, about 25 minutes.
  3. In a small bowl, combine the apple cider vinegar, maple syrup, and Dijon mustard. Toss with the sprouts and pears.

by Genevieve Ko from Fine Cooking

Z-licious!

There’s never a dull moment when visiting with the Zarrilli’s, and the trend continued at our most recent invitation to start the holidays a few weeks early with a festive Christmas themed dinner at their home in Hamilton, NJ. To start things off, Mrs. Z premade a pitcher of real tasty Pomegranate Cosmos concocted with Pama liqueur and some Grande Marnier among other ingredients. These are definitely finding their way to our cocktail short list!

img_9149Provisions are at the ready for cocktail hour.

Rosanne is so talented when it comes to crafting and decorating, and she pulls out all the stops with her holiday decor. I don’t think there’s a square foot that isn’t adorned with something, even the dining chandelier had snowflakes hanging from it!

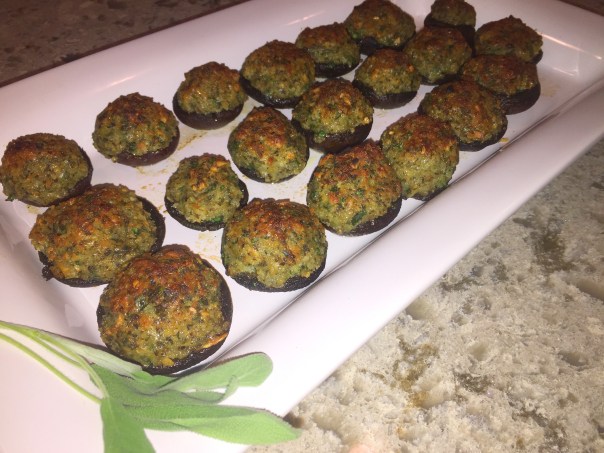
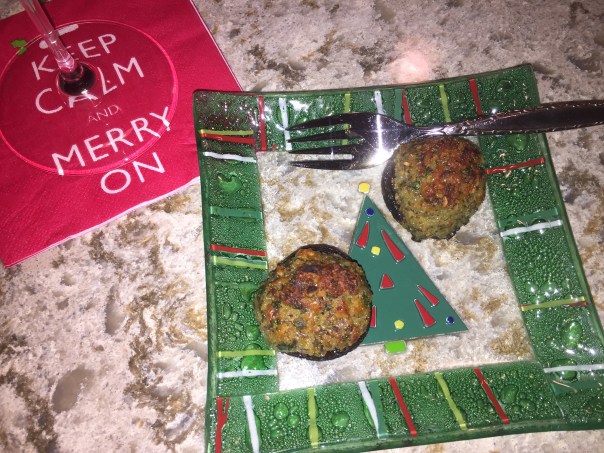
We offered to bring an appetizer and even though we hadn’t made them before, we took a chance and made this dish of garlic-stuffed mushrooms, which were enhanced with a little dry sherry and nutty Gruyère cheese. Between the four of us we polished them off in no time. Fair warning, they are brimming with lots of chopped garlic. (Recipe follows.)

img_9153

img_9154

Did you know that Gilroy, California is home to 90% of the American garlic crop? True fact. I believe the origins of this appetizer came from the Gilroy Garlic Festival. Well, you don’t have to go all the way to Cali to try these babies, just make a batch for yourself, they are delicioso… FYI, in Step 2, Russ added the entire 1/2 cup of oil initially, but then strained about half of that off because we thought it was too oily, so keep that in mind when making yours.

img_9155

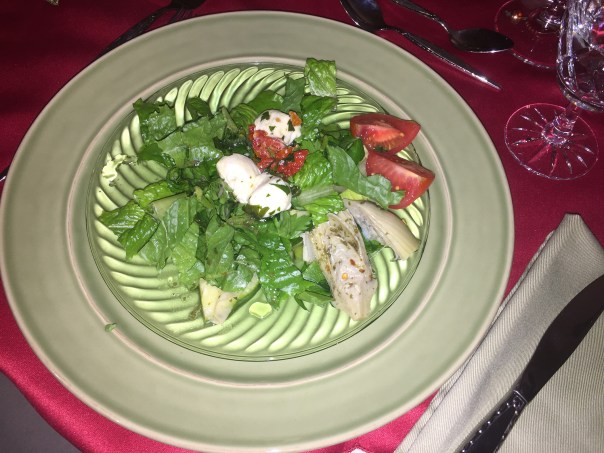
After enjoying cocktail hour, we meandered into the dining room where the festive salads were already plated. Wow, were they good! I did ask about the dressing, though I can’t remember exactly what it consisted of, I just know I really liked it! One can’t help but take note of the red and green theme continuing throughout the course(s) of the night.

But let’s talk about the star of the show which was Beef Bourguignon made with filet mignon, compliments of Food Network Chef Ina Garten—it was the bomb!! And paired with a cheesy polenta and roasted Brussels sprouts with pancetta, a winning combo that was comfort food on steroids! Russ loaded up my plate and I tried my darndest to finish, but had to relent in the end.

img_9164

img_9157

Then came dessert. I was definitely too full to indulge, but Russ was not going to miss out and had nothing but raves about it. Mrs. Z assembled egg nog ice cream with a blackberry compote—which fittingly turned red—that came swimmingly together in martini glasses for that added touch of class. And what’s a Yuletide meal without Christmas cookies? As an added bonus, a plate of assorted confections adorned with red and green Hershey Kisses also found their way to the table.

img_9165

img_9168

All-in-all, not a bad way to kick off the holiday season—absolutely Z-licious! And as the cocktail napkin denotes “Keep Calm, and Merry On.”

Garlic-and-Gruyère-Stuffed Mushrooms

Ingredients

  • 1⁄2 cup olive oil, plus more (we only used about 1/4 cup)
  • 20 large cremini mushrooms, stems roughly chopped
  • 10 cloves garlic, chopped
  • 1 small shallot, chopped
  • 1⁄4 cup dry sherry
  • 3 tbsp. chopped parsley
  • 2 tbsp. chopped sage
  • 1 egg white
  • 1 1⁄4 cups grated Gruyère
  • 1⁄2 cup panko bread crumbs

Directions

  1. Heat oven to 375°. Toss 2 tbsp. oil, the mushroom caps, salt, and pepper on a baking sheet. Arrange stem side down; bake until tender, 25–30 minutes.
  2. Heat oven broiler. Heat remaining oil and the garlic in a 12” skillet over medium; cook until garlic is golden, 4–6 minutes. Using a slotted spoon, transfer garlic to a paper towel to drain.
  3. Add chopped mushroom stems, shallot, salt, and pepper to skillet; cook until shallot is soft, 3–4 minutes. Add sherry; cook until evaporated, 2–3 minutes.
  4. Transfer to a food processor; add parsley, sage, and egg white, and pulse until coarsely ground. Transfer to a bowl; stir in reserved garlic, the Gruyère, and panko.
  5. Fill caps with 1 tbsp. filling; return to baking sheet. Drizzle with olive oil; broil until tops are browned, 2–3 minutes.


Salad, When It’s Freezing Out?

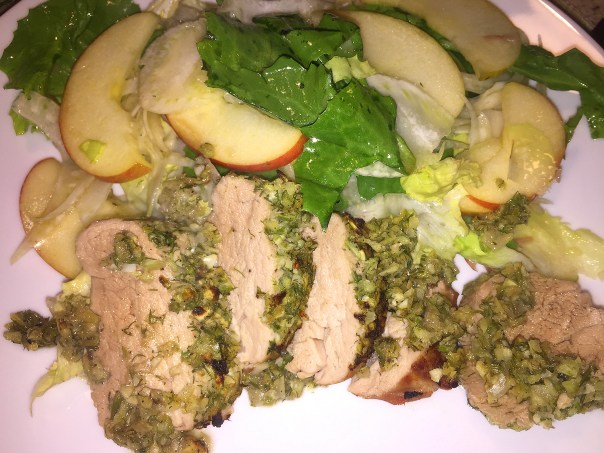
While salads don’t usually top our list when the outside temps are hovering around the freezing mark, this Fennel-Rubbed Pork Tenderloin with Escarole and Apple Salad will make you reconsider. Garlicky tenderloins of pork pair perfectly with a crisp escarole and apple salad in this easy supper.

The University of Michigan Heath System highlights pork tenderloin as a lean-meat option, providing a lower-fat alternative to other cuts, such as pork chops or bacon. Consume pork tenderloin, and you’ll introduce more vitamins, minerals and other nutrients into your diet.

It’s true: Pork really is the other white meat. Ounce for ounce, pork tenderloin has less fat than a chicken breast. So when you’re looking for lean protein to include in your diet, or when you simply crave some healthy meat, pork tenderloin is a good choice. Why? It’s low in fat, high in protein, a rich source of B vitamins and selenium, and is relatively low in calories; a 3-ounce portion contains just 93 calories.

img_9110

The tenderloin is cut from the center of the pig just below the ribs, which is a tender cut, as long as it’s not overcooked. However, you must cook it properly to kill bacteria. Cook the tenderloin to an internal temperature of 145 degrees Fahrenheit. Then, let it sit for five minutes before carving or serving the meat. Don’t skip the resting time, because it helps ensure that all harmful germs are destroyed and allows the juices to recirculate.

For the salad, it’s important that you shave your fennel bulb super-thin, so if you have a mandoline, it will make the job much easier and more precise. For the dressing, I incorporated only four tablespoons of olive oil as opposed to the recommended six—but that is certainly a personal choice.

I found that using a mini food processor for Step 3, created a meat rub consistency more condusive to staying on the pork. Plus you know how we enjoy intense flavors, so I added a full teaspoon of dijon mustard (noted in the directions) to the rub as opposed to just a measley half teaspoon.

So go ahead and add this cool-weather salad to your Winter menu repertoire!

img_9095

Ingredients

  • 4-6 Tbs. plus 2 tsp. extra-virgin olive oil
  • 3 Tbs. cider vinegar
  • 1 small shallot, finely chopped
  • 1 1/2 tsp. Dijon mustard
  • Kosher salt
  • 1 small head fennel, fronds and tender stems finely chopped together, bulb cored and very thinly sliced
  • 2 cloves garlic, finely chopped
  • Freshly ground black pepper
  • 2 small pork tenderloins (1-3/4 to 2 lb. total)
  • 1 head escarole (about 12 oz.), leaves torn into small pieces
  • 1 Pink Lady or other sweet-tart red apple, thinly sliced

img_9099
Cut off the fronds and thin stems then shave the bulb into very then slices.

img_9101
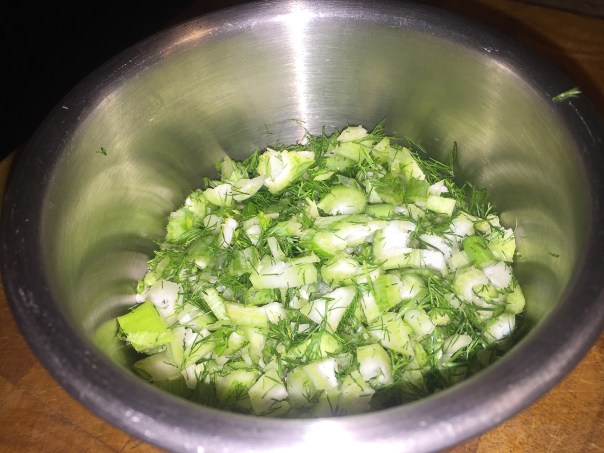
The fronds and stems are chopped.

img_9102
I wanted the rub consistency to be finer so I threw the stems, fronds, garlic and seasonongs into a mini food processor to get this texture.

img_9103
Both sides of the tenderloins are rubbed with the mixture.

Directions

  1. Position an oven rack 6 inches below the broiler and heat the broiler on high. Line a large rimmed baking sheet with foil.
  2. In a small bowl, whisk 6 (or less) Tbs. of the oil, the vinegar, shallot, 1 tsp. of the mustard, and 1/4 tsp. salt; set aside.
  3. In another small bowl, combine the fennel fronds and stems, the remaining 2 tsp. oil and 1/2 tsp. mustard, the garlic, 1/2 tsp. salt, and 1/2 tsp. pepper.
  4. Rub the pork all over with the fennel mixture. Transfer to the prepared baking sheet and broil, flipping once, until just cooked through (145°F), about 15 minutes. Transfer to a cutting board and let rest for 5 minutes.
  5. Meanwhile, in a large bowl, toss the fennel bulb, escarole, apple, 1/4 tsp. salt, and a pinch of pepper with half of the dressing. Slice the pork and drizzle with any juice. Serve with the salad, passing the remaining dressing at the table.

img_9105
After 15 minutes under the broiler, the pork should look like this.img_9107
Escarole, fennel and apple slices are tossed together with the dressing in a large bowl.

img_9114
Make sure to scrape up any of the scrumptious rub that fell of off the meat while slicing and add to your plate.

by Mindy Fox from Fine Cooking

Monday’s Coming, Gotcha Covered

Let’s face it, if you’re working, Mondays are probably not your favorite day of the week. So when it comes to cooking dinner, you want something that is not work- or time-intensive. To address these constraints we have been adhering (for the most part) to the “Meatless Monday” mantra, and our subscription to Fine Cooking’s “Make It Tonight” series offers at least one or two options per week.

A recent listing was their Broiled Salmon with a White Bean, Kale and Bacon Ragoût by Tony Rosenfeld. Not only did the components appeal to our culinary sensibilities, with the addition of steamed green beans, the meal was also chock-full of healthy ingredients. Yes, there is some bacon in the ragoût, so technically it is not totally meatless, but it plays a minimal role and adds maximum flavor.

img_8709

The high heat of a broiler adds flavor fast to the salmon, which is lightly drizzled with the bacon fat. Speaking of bacon, I rarely indulge because it doesn’t seem to agree with me. However, there is one exception and that is the double-smoked, thick cut fresh bacon obtained at the Newtown Farmer’s Market. It may be the lack of nitrates, but whatever it is, I am not adversely affected, at least when eaten in small amounts.

Before I made the meal, I noted several reviewers cut back on the amount of olive oil because of the fat rendered by the bacon itself. So I took heed and measured out two tablespoons instead of the recommended three, but then totally forgot to incorporate that! It just so happened the bacon provided enough fat to drizzle over the four salmon fillets. It left very little in the skillet, but the kale wilted just fine without all of that extra oil.

Because our gas oven broiler is not as efficient as an electric one, it took a bit longer than the suggested 7-10 minutes. In the end, the hearty ragoût rounds out the dish nicely and adds substance to the overall meal. Now go ahead and make your Monday a little easier…

img_8693

Ingredients

  • 1/4 lb. thick-cut bacon (about 4 thick slices), cut crosswise into thin strips
  • 3 Tbs. extra-virgin olive oil
  • 2 cloves garlic, minced
  • 3 cups packed thinly sliced kale leaves (stems removed)
  • 1-1/2 cups homemade or low-salt canned chicken broth
  • 15-1/2 oz. can cannellini beans, rinsed well and drained
  • 1-1/2 lb. skinless salmon fillet, cut into 4 uniform pieces
  • Kosher salt and freshly ground black pepper
  • 1 Tbs. chopped fresh thyme

img_8696
Four seasoned salmon fillets drizzled with a bit of bacon fat, are placed on a foil-lined baking sheet.

img_8699Once the bacon has rendered down, some minced garlic is added to the skillet.

img_8700On high heat, the sliced kale is wilted for a few minutes.

img_8703
The chicken broth and beans are brought to a boil, while reducing the heat to medium.

img_8705Depending on the strength of your broiler, the salmon will take 10 minutes or longer to cook.

Directions

  1. Set an oven rack 6 inches from the top element and heat the broiler to high.
  2. In a heavy skillet over medium heat, cook the bacon in the olive oil, stirring occasionally, until the bacon renders much of its fat and starts to brown, about 5 minutes. Use a spoon to remove 2 Tbs. of the bacon fat from the skillet and reserve in a small bowl.
  3. Add the garlic to the bacon in the skillet. Cook, stirring, until the garlic starts to sizzle, about 30 seconds. Raise the heat to high, add the kale, and sauté, stirring, until it starts to wilt, about 1 minute. Add the chicken broth and beans and bring to a boil. Reduce the heat to medium, cover the skillet, and cook for 5 minutes. Remove from the heat and keep warm.
  4. While the beans are cooking, line a heavy-duty rimmed baking sheet with foil and arrange the salmon, skin side down, on it. Drizzle the reserved bacon fat over the salmon and season with 1/2 tsp. salt and a few generous grinds of black pepper.
  5. Broil until slightly firm to the touch, 7 to 10 minutes for medium (the salmon will be dark pink in the middle). Sprinkle half of the thyme over the salmon. Stir the remaining thyme into the beans and kale and season with salt and pepper to taste.
  6. To serve, spoon equal portions of the beans and kale onto dinner plates and top each with a piece of salmon. Serve immediately with a simple salad.

Shank You Very Much

On a recent shopping trip to the Newtown Farmer’s Market, we noticed one of the Amish vendors featured pork shanks, something we’d never cooked before. Huge fans of braised lamb and veal shanks, pork shanks seemed like an intriguing option, and we promptly bought four. Who knew pork shanks could be so moist, supple, juicy and tasty? We didn’t, but we were soon to find out…

They come from the front leg of the pig and apparently can be chewy when cooked incorrectly. When prepared properly, however, they’re supposed to become succulent and flavorful. Therefore, as in other meat shanks, we figured the best way to cook them was in a long, slow braise without letting the liquid boil, which can toughen the meat.

img_9043

Truth be told, for most of my adult life I’ve shunned hunks of meat on large inedible bones with connective tissue and lumps of obvious fat being served to me on a plate—so for years shanks were a turnoff—until Russ converted me with the long, slow braise that melts away the fat and connective tissue, rendering the meat so beautifully tender and moist.

Hubby found this Braised Pork Shanks recipe on Food&Wine.com by a chef named Tim Love. The instructions below indicate to do the cooking entirely on the stove top, but as braising aficionados, we are more comfortable doing so in a low temperature oven using BIG RED, our Le Creuset cast iron cooking pot.

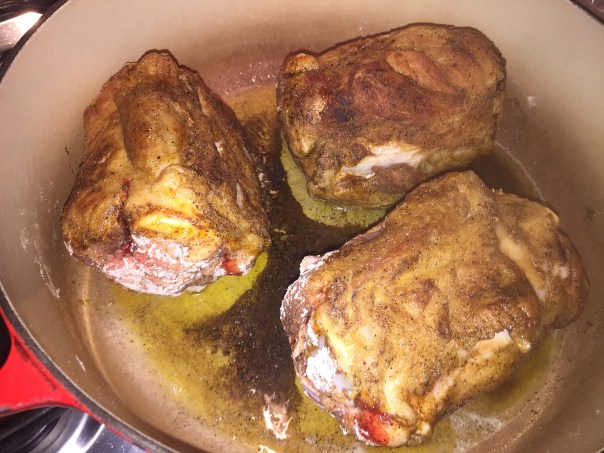
But first, the key to getting the shanks to release their full flavor potential is searing them on all sides until they get a nice, dark brown crust. So resist the urge to move them around, just let them sit there and develop that outside layer of goodness.

After braising in the 290 degree oven for 2 1/2 hours, our shanks were absolutely divine. The meat, and there was a lot of it on each shank, was fall-off-the-bone tender. We determined that the gravy, while vigorously boiled for a reduction, needed to be thickened by the addition of about 3 tablespoons of corn starch (mixed with a cool liquid first.)

img_9024
Add the pork shanks to the chile powder combination, one at a time, and shake to coat thoroughly.

img_9026
Once thoroughly coated, remove the meat from the plastic bag and add to shimmering oil in pot.

img_9025
Cook the pork over moderately high heat until browned all over, about 10 minutes.

img_9027
Russ browned the shanks directly in the dutch oven instead of using a separate skillet.

The recipe called for six shanks, but we only cooked four, necessitating a curtailment in our homemade chicken stock from 6 to 4 cups, and the wine to a 1/2 cup; all of the other ingredient amounts were kept the same. The scintillating aromas wafting through the house that afternoon gave promise of a delectable meal soon to be enjoyed.

And that meal included roasted Brussels Sprouts and parsnips with a side of polenta (mashed potatoes would be another good option.) It was a perfect dinner for a cool, late-fall evening. Pork shanks will definitely be finding their way to our dining table a lot more regularly now, I can guarantee you that!

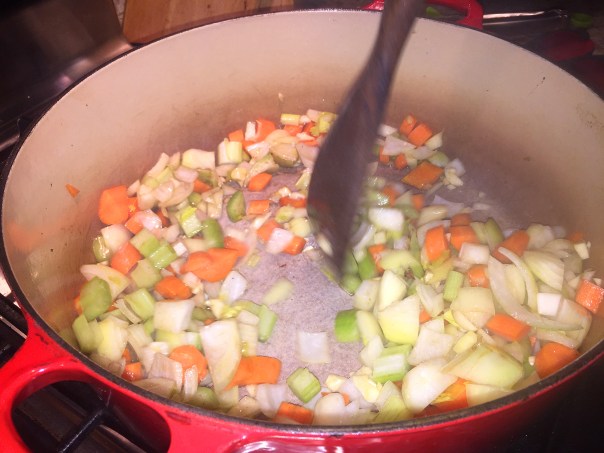
img_9022
Russ chops the celery, carrots, onion and garlic.

img_9023
It’s best to make them a uniform size if possible.

img_9029
Onion, carrots, celery and garlic are added to the skillet and cooked over moderate heat until softened, about 5 minutes.

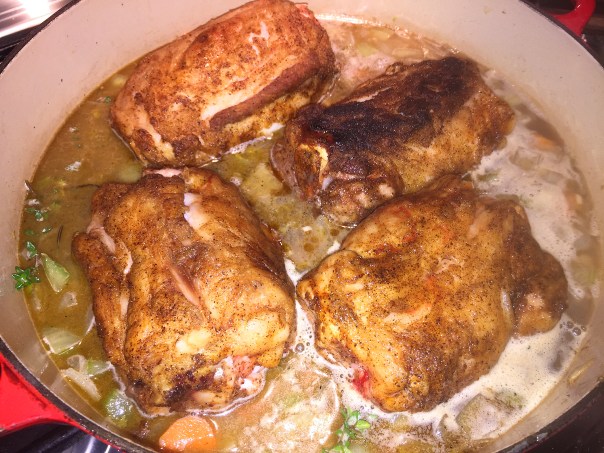
img_9033
Add the stock, rosemary, bay leaves and thyme, season with salt and pepper and bring to a boil, then tuck the pork shanks into the liquid.

Ingredients

  • 1/2 cup all-purpose flour
  • 2 tablespoons chile powder
  • Kosher salt and freshly ground pepper
  • 6 pork shanks, about 1 1/2 pounds each
  • 1/4 cup extra-virgin olive oil
  • 1 medium onion, chopped
  • 2 medium carrots, chopped
  • 2 medium celery ribs, chopped
  • 6 garlic cloves, minced
  • 1 cup dry white wine
  • 6 cups chicken stock (homemade, if possible)
  • 3 rosemary sprigs
  • 2 bay leaves
  • 2 thyme sprigs

img_9036
Russ checks the tenderness with the poke of a knife.

img_9039
The meat is removed from the pot and solids are discarded from the broth to make the gravy.

img_9041
The liquid is returned to the pot and reduced for about 20 minutes.

Directions

If cooking in the oven as opposed to the stove top, preheat the oven to 290 degrees.

  1. In a large, sturdy resealable plastic bag, combine the flour and chile powder with 1 tablespoon each of salt and pepper. Add the pork shanks, one at a time, and shake to coat thoroughly.
  2. In a large skillet, heat 2 tablespoons of the olive oil until shimmering. Add 3 of the pork shanks and cook over moderately high heat until browned all over, about 10 minutes. Transfer the browned shanks to a deep, heavy casserole. Wipe out the skillet and brown the remaining 3 pork shanks in the remaining 2 tablespoons of olive oil; lower the heat if necessary. Add the pork shanks to the casserole.
  3. Add the onion, carrots, celery and garlic to the skillet and cook over moderate heat until softened, about 5 minutes. Add the wine and bring to a boil. Simmer until slightly reduced, about 2 minutes. Pour the wine and vegetables over the pork. Add the stock, rosemary, bay leaves and thyme, season with salt and pepper and bring to a boil.
  4. Tuck the pork shanks into the liquid so that they’re mostly submerged. Cover and cook over moderately low heat (or in a 290 degree oven) for 2 1/2 hours, or until the meat is very tender. Turn the pork shanks every 30 minutes to keep them submerged in the liquid. Transfer the braised shanks to a large, deep platter, cover and keep warm.
  5. Strain the liquid, pressing hard on the solids; discard the solids. Return the liquid to the casserole and boil until reduced to 4 cups, about 20 minutes. Spoon off the fat, pour the pork gravy over the braised shanks and serve. (To thicken, add 3 tablespoons of corn starch mixed with cold milk or water after spooning off the fat.)

MAKE AHEAD

The recipe can be refrigerated for up to 2 days.

img_9034
Browned shanks are nestled into the braising liquid.


Pan-Fried Tilapia with White Beans, Bacon, and Rosemary

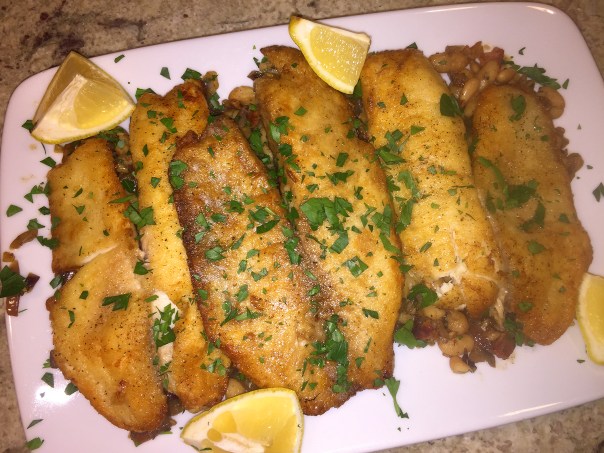
Bacon and rosemary lend slow-cooked flavor to canned cannellini beans, making them a speedy but special accompaniment for tender tilapia fillets. The original recipe called for trout, but the fish counter at our local supermarket only carried the entire fish, intact with heads and all. I had no intention of beheading and deboning fish for a weeknight meal, so we opted for the already filleted tilapia.

Otherwise, I didn’t make any other changes. The cooking goes real quick once you’ve prepped everything so I waited until Russ got home from work to begin cooking (except the bacon, I did that ahead of time.) He manned the fish, while I oversaw the bean and onion mixture. The teamwork paid off and in no time we were sitting down to a delicious dinner! A simple side salad made a perfect pairing…

img_9048

Pan-Fried Tilapia with White Beans, Bacon and Rosemary

  • Servings: 4
  • Difficulty: easy
  • Print

Ingredients

  • 3 slices bacon
  • 1 small red onion, finely chopped (about 3/4 cup)
  • 2 medium cloves garlic, finely chopped (about 2 tsp.)
  • 1 tsp. finely chopped fresh rosemary
  • 3 Tbs. dry white wine
  • 1 19-oz. can cannellini beans, drained and rinsed
  • 1/4 cup lower-salt chicken broth
  • 4 6-oz. skin-on trout fillets, pin bones removed (or tilapia fillets)
  • Kosher salt and freshly ground black pepper
  • 1/4 cup all-purpose flour
  • 4 tsp. olive oil
  • 4 tsp. unsalted butter
  • 2 Tbs. chopped fresh flat-leaf parsley
  • Lemon wedges, for serving

img_9049
Three slices of cooked bacon cool before they are crumbled.

img_9050
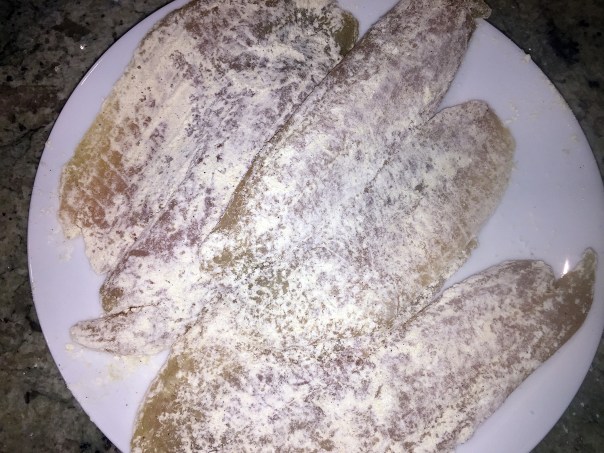
Using gluten-free flour, we lightly dusted the three fillets and sprinkled with salt and pepper.

img_9053Rosemary and garlic are added to the softened onions.
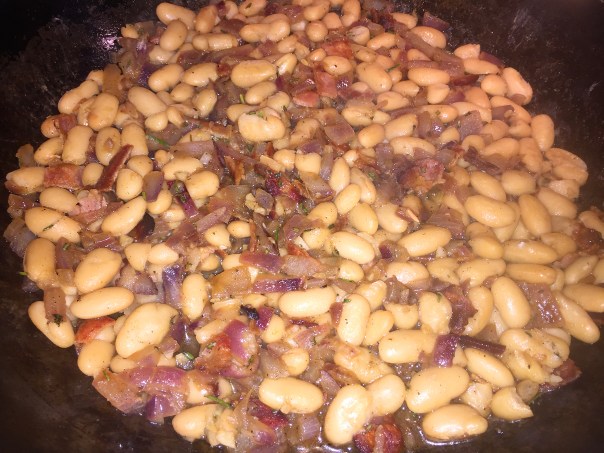
img_9057Next, the beans, broth, and bacon are cooked for 5 minutes to let the flavors meld.
img_9056
Russ pan-sears the fish fillets for several minutes each side.

img_9062
We spread the bean mixture onto a platter, layered the tilapia fillets above, then topped with chopped parsley. 

Directions

  1. In a 10- to 12-inch skillet, cook the bacon over medium heat, turning once or twice, until crisp, 6 to 8 minutes. Transfer to a paper-towel-lined plate, let cool, and then coarsely crumble.
  2. Discard all but 2 Tbs. of the bacon fat from the skillet. Add the onion to the skillet, and cook, stirring occasionally, until soft, about 3 minutes. Add the garlic and rosemary and cook, stirring, for 1 minute. Add the wine and cook until the pan is nearly dry, about 1 minute. Add the beans, broth, and bacon and cook, stirring occasionally, for 5 minutes to let the flavors meld. Keep warm.
  3. Meanwhile, season the tilapia with salt and pepper, and dredge in the flour. Heat 2 tsp. each of the oil and butter in a 12-inch nonstick skillet over medium-high heat until the foam from the butter subsides.
  4. Add 2 of the tilapia fillets flesh side down and cook until golden, about 2 minutes. Flip and cook 2 minutes more. Transfer to a plate and keep warm. Repeat with the remaining oil, butter, and tilapia.
  5. Season the beans generously with salt and pepper and stir in the parsley. Serve the tilapia with the beans and lemon wedges for squeezing.

http://www.lynnandruss.com

Adapted from Laraine Perri of Fine Cooking

img_9064