Monthly Archives: February 2020

Flank Steak with Tomato-Eggplant Ragu

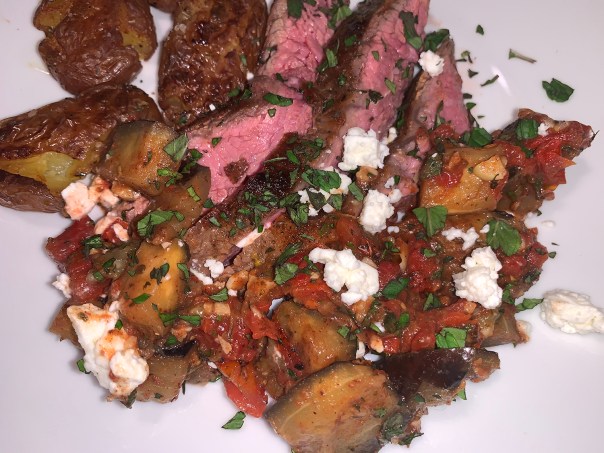
The flavors of Greek moussaka were borrowed for this quick-one pan meal found on 177MilkStreet.com. Here, seared flank steak is finished with a rustic sauce-like side of eggplant, tomatoes, garlic and herbs. Crumbled feta cheese adds briny notes that contrast nicely with the sweetness of the vegetables and the richness of the beef. Your mouth watering yet?
IMG_4017

I thought the star of the show was going to be the gorgeous flank steak we got from the Amish Meat stand at the Farmer’s Market. And while the beef was a fabulous cut, it was truly enhanced further with the amazing tomato-eggplant ragu. Everything came together in a perfect marriage in just over a half hour.

We served ours with a side of roasted fingerling potatoes which were first parboiled, slightly smashed, brushed with EVOO and sprinkled with a bit of salt, pepper and dried oregano to tie in with the flavors of the main meal.

TIPS: Don’t drain the juices from the tomatoes. The liquid helps form the sauce and prevents the eggplant from drying out so that the pieces become silky-soft. When slicing the flank steak for serving, make sure to slice it against the grain for the tenderest texture.
IMG_3993

Flank Steak with Tomato-Eggplant Ragu

  • Servings: 4
  • Difficulty: easy
  • Print

Ingredients

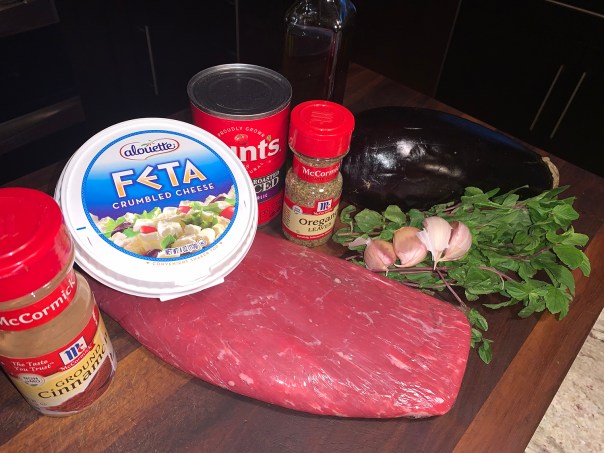
  • 1½ lbs. flank steak, trimmed, halved lengthwise, then crosswise
  • Kosher salt and ground black pepper
  • 4 Tbsp. extra-virgin olive oil, divided
  • 1 lb. eggplant, cut into 1-inch chunks
  • 14½ oz. can diced tomatoes
  • 4 medium garlic cloves, minced
  • 2 tsp. dried oregano
  • ¾ tsp. ground cinnamon
  • ½ cup lightly packed fresh mint, chopped
  • 1½ oz. feta cheese, crumbled (about ⅓ cup)

Directions

  1. Season the steak with salt and pepper. In a nonstick 12-inch skillet over medium-high, heat 2 tablespoons of oil until shimmering. Add the steak and brown on both sides, 6 to 8 minutes total, flipping the pieces once. (Our piece took 11 minutes to reach temperature.) Transfer to a plate and loosely cover with foil.
  2. In the same pan over medium-high, combine the remaining 2 tablespoons oil, the eggplant and 1 teaspoon salt. Cook, stirring occasionally, until browned and softened, 5 to 6 minutes.
    IMG_4002
  3. Reduce to medium and add the tomatoes with juices, the garlic, oregano and cinnamon. Cook, stirring occasionally, until thickened and the eggplant has begun to break down, about 5 minutes.
  4. Off heat, stir in any accumulated beef juices and half the mint. Taste and season with salt and pepper.
    IMG_4008
  5. Thinly slice the steak against the grain and place on a platter. Spoon the eggplant mixture on and around the steak, then sprinkle with feta and the remaining mint.
    IMG_4009
    IMG_4013

http://www.lynnandruss.com

Recipe  


Chicken Salad with Apple, Celery Root and Fennel

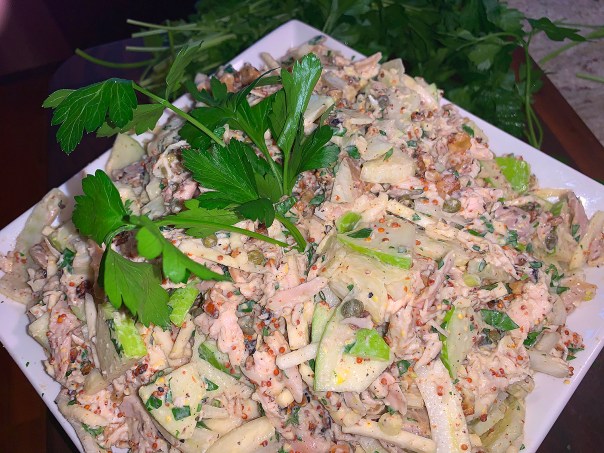
Need to feed a crowd? Recently I was a hostess at my local garden club monthly meeting. According to club rules, each hostess is asked to bring an appetizer, salad or dessert, keeping in mind that there is always a large attendance. Looking for a unique angle, I chose a hearty, non-green salad from our 177 Milk Street “Tuesday Nights” recipe book: Chicken Salad with Apple, Celery Root and Fennel.

IMG_3990

Céléri rémoulade is a classic French slaw-like salad made with celery root and mayonnaise. 177 Milk Street built on that and turned it into this bright, fresh chicken salad; a riff on Waldorf salad if you will. The following recipe is actually a triple version adaptation of the 4-serving recipe that Milk Street published.

The celery root is prepared two ways: Half is cut into matchsticks, half is shredded on the large holes of a box grater. The combination heightens the salad’s textural and visual appeal. When root vegetables (such as celery root) are cut, their cells are ruptured, releasing sugars and volatile hydrocarbons, the source of their sweetness and aromas—and grating ruptures the most cells.

As far as the chicken, simply buy two store-bought rotisserie chickens. Let them cool slightly and remove the skin, then shred all of the dark and light meat, being careful to remove any bones.

The salad was a HUGE hit! I didn’t plan on posting this blog quite so soon, but I got so many requests from garden club members, I decided to make it live the very next day.

IMG_3982

Chicken Salad with Apple, Celery Root and Fennel

  • Servings: 12-16
  • Difficulty: easy
  • Print

Ingredients

  • 1½ cup mayonnaise
  • ¾ cup whole-grain mustard
  • ¾ cup drained capers, roughly chopped, plus 1 tablespoon caper brine
  • 6 Tbsp. fresh squeezed lemon juice
  • Kosher salt and ground black pepper
  • 2 rotisserie chickens, skinned, shredded (yields about 2 lbs. of meat)
  • 1 large peeled celery root, half cut into 1-inch matchsticks, half shredded on the large holes of a box grater
  • 2 granny smith apples, cored, cut into 8 wedges, then sliced very thin
  • 1 very large fennel bulb, trimmed, quartered and thinly sliced
  • 1½ cups packed fresh flat-leaf parsley leaves, roughly chopped
  • 2 cups chopped walnuts, toasted

Directions

  1. Remove the skin, then shred the meat from the chicken carcasses.
  2. Prep all of the vegetables, and toast the walnut pieces.
  3. In a large bowl, stir together the mayonnaise, mustard, capers and brine, lemon juice and 1½ teaspoon pepper.
    IMG_3983
  4. Add the chicken, all of the celery root, apple, fennel, parsley and nuts.
  5. Fold with a rubber spatula until well combined.
    IMG_3987
  6. Taste and season with salt and pepper. Spoon into a large serving bowl or platter.
    IMG_3991

Tip: Don’t peel the apple; the skin adds a touch of color. Also, don’t use a sweet apple; the tartness of a Granny Smith perks up the other flavors.

http://www.lynnandruss.com

Cod with Rustic Tomato-Fennel Sauce

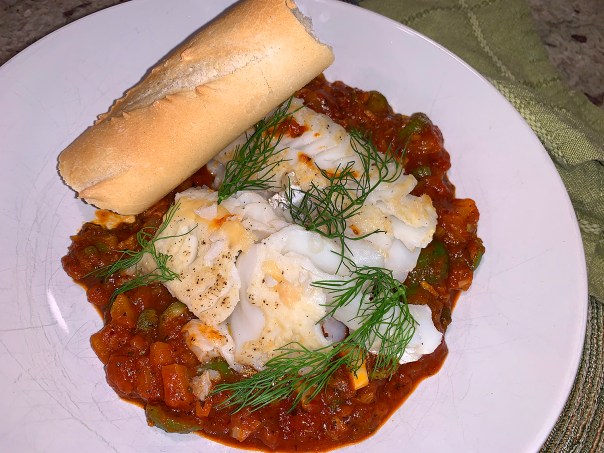
If the Mediterranean diet tends to suit your fancy, this lovely Cod with Rustic Tomato-Fennel Sauce should grab you attention. Leave out the bread and you have a healthy, low-carb meal in no time. The recipe works well with any firm, meaty fish such as cod, salmon, haddock or striped sea bass. You could even use extra-large shrimp.

The sauce is chockfull of flavor with the additions of garlic, capers, lemon, fennel and olives. In the original recipe, it calls for only 1 1/2 cups of marinara, whereas I used an entire 25 ounce jar, but did not include the 1/2 cup of water. I figured why water it down only to reduce the sauce afterward?

IMG_3322

Cod with Rustic Tomato-Fennel Sauce

  • Servings: 4
  • Difficulty: easy
  • Print

Ingredients

  • 3 Tbs. olive oil
  • 1 large bulb fennel, core removed, cut into 1/2-inch dice, fronds reserved
  • 4 cloves garlic, smashed and coarsely chopped
  • 1 cup coarsely chopped pitted Castelvetrano olives
  • 3 Tbs. capers, drained and rinsed
  • 1 small lemon, peel removed and finely chopped
  • 1 tsp. dried oregano
  • 1/2 to 1 tsp. crushed red pepper flakes
  • Kosher salt and freshly ground black pepper
  • 1-1/2 cups good-quality marinara sauce
  • 2 lbs. skinless cod fillets
  • Rustic crusty bread (optional)

Directions

  1. In a large skillet over medium heat, heat 2 Tbs. of the oil until shimmering. Add the fennel and cook, stirring occasionally, until translucent and light golden, about 7 minutes. Add the garlic and cook until fragrant, about 1 minute.
    IMG_3325
  2. Add the olives, capers, peel, oregano, and pepper flakes. Season lightly with salt and pepper, and cook, stirring, 1 minute.
    IMG_3327
  3. Add the marinara and 1/2 cup water (I did not add water, but added a lot more marinara), and reduce the heat to medium low. Gently simmer until the sauce is slightly thickened, 5 to 8 minutes.
    IMG_3330
  4. Meanwhile, pat the fish dry with paper towels, and season with salt and pepper. Heat the remaining 1 Tbs. oil in a large nonstick skillet over medium heat.
  5. Add the fish and cook, flipping once, until light golden-brown on the outside and the flesh is translucent when cut into, about 5 minutes total. Do not crowd the fish in the pan otherwise you’ll steam instead of brown them. You may have to sear in two batches.
  6. Spoon the sauce into shallow bowls, and top with a fish fillet. garnish with the reserved fennel fronds, and serve with the bread, if you like.
    IMG_3332

http://www.lynnandruss.com

Adapted from a recipe by Heather Meldrom from Fine Cooking


Salted Caramel and Chocolate. Need I say More?

My garden club annual fundraiser was on the horizon, and each attending member was expected to bring a finger food dessert such as cookies or bars. You know I’m always game for trying a new recipe, so after a short online search I came across these tempting Salted Caramel Chocolate Chip Bars found on aspicyperspective.com website.

Marketed as “sticky chocolate chip bars oozing with thick buttery caramel filling,” these cookie bars screamed decadent—a sure bet for the garden club’s biggest event of the year. With what seemed like a perfect marriage of sweet flavors and textures, I only made one slight alteration–—adding additional chocolate chips on the top.

IMG_3364

BTW, I fold in the chips instead of blending them in with the stand mixer, this way they don’t get chopped up. No need to bring out the heavy-duty mix master either. The dough came together easily enough just using my hand-held KitchenAide beaters and a large mixing bowl.

BUT, here’s the issue. While the recipe garnered almost a 5-star rating from hundreds of reviewers, no one seemed to mention the slicing problem. Even after cooling for 1 1/2 hours, then a 2-hour stint in the refrigerator, they still seemed too soft to cut effectively. So I put the covered dish in the freezer for 45 minutes. That finally did the trick. I was able to cut them down with crisp edges.

IMG_3320

Not a sweet eater myself, I did of course have to try a nibble… Good gracious, these puppies were VERY rich indeed—one small bar is enough to satisfy any sweet tooth. You also have to throw a strict diet out the window because each bar contains 285 calories, 39 grams of carbs and 28 grams of sugar. But who’s counting? I actually cut mine down into 48 squares, so the numbers weren’t quite as alarming.

I also had my husband and step-daughter sample the goods. After the first bite they registered sugar shock. Neither one is a huge caramel fan and felt perhaps incorporating only half of the amount would suffice. On the other and, a few of the garden club ladies loved them just the way they were.

BTW, these bars freeze really well. So if—and that’s a BIG IF—you have any leftover, tightly wrap and freeze them until the craving hits. Once thawed, they supposedly taste just as good as freshly baked.

NOTE: Make sure to use plain soft caramels such as Werthers. Do not buy a hard variety or ones with white creamy centers.

IMG_3296

Salted Caramel Chocolate Chip Bars

  • Servings: 30 bars
  • Difficulty: easy
  • Print

Ingredients

  • 1 cup unsalted butter, softened
  • 1 cup packed light brown sugar
  • 1/2 cup granulated sugar
  • 2 large eggs
  • 1 tsp. vanilla extract
  • 1 tsp. kosher salt
  • 1 tsp. baking soda
  • 2 1/2 cups all-purpose flour
  • 2 cups semisweet chocolate chips; plus another 1/4 cup for top, if desired
  • 14 oz. sweetened condensed milk
  • 10 oz. soft caramels, unwrapped
  • 1 tsp. flaked sea salt

Directions

  1. Preheat the oven to 350°F. Line a 9″ x 13″ baking dish with foil with the ends an inch or two longer than the length, and liberally coat with nonstick cooking spray.
  2. In the bowl of an electric mixer, beat the softened butter with both sugars until light and fluffy, about 2 minutes.
  3. Add the eggs, vanilla, salt, and baking soda. Mix well, then scrape the sides of the bowl with a spatula.
    IMG_3297
  4. Turn the speed to low and add the flour, beat to combine. Fold in the chocolate chips with a spatula.
    IMG_3300
  5. Press half of the cookie dough into the bottom of the prepared baking dish. This can be a little tricky, and a little sticky…
    IMG_3301
  6. In a medium sauce pot, add the sweetened condensed milk and unwrapped caramels. Set over medium-low heat and stir until the caramels melt, making a smooth caramel filling. Pour the filling over the cookie dough base.

    IMG_3303

  7. Drop the remaining cookie dough over the caramel filling in small teaspoons-sized clumps. If desired, sprinkle another 1/4 cup chips over the top.
  8. Bake the bars for 25-30 minutes, until the center is just set and lightly golden. (Mine took 35 minutes.) Sprinkle with sea salt flakes and allow the bars to cool completely—at least an hour and a half.
    IMG_3312
  9. Lift the bars out of the pan by the edges of the foil and cut into 30 to 48 bars. (After they cool down completely, I suggest wrapping them well and freeze them for 45 minutes in order to get a crisp cut.)
  10. Store in an airtight container at room temperature for up to 3 days.

Tightly wrap and freeze any leftovers for future cravings, thaw and savor 🙂

http://www.lynnandruss.com

Recipe was found on thespicyperspective.com and originally came from The Cookies & Cups Cookbook by Shelly Jaronsky. 

The Good Woman’s Chicken

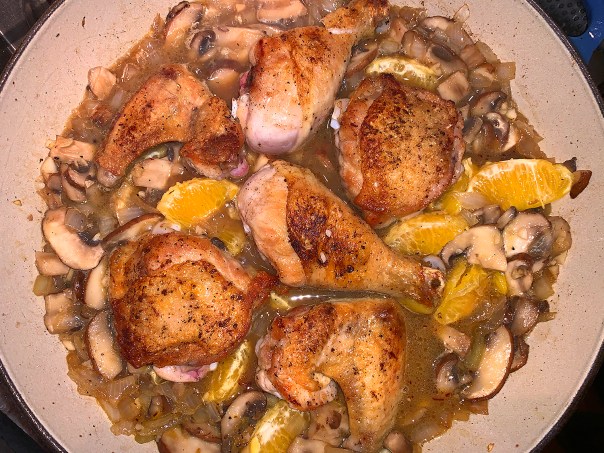
This chicken recipe, with its delicious, slightly sweet sauce, orange segments, mushrooms, brandy and a hint of saffron, comes from the Andalusian province of Almeria, Spain. Curious title? Yes, and you might begin to question if you’re a good enough woman (or man) to make this dish. Throw caution to the wind my friends, no one will be judging you…

IMG_3855

Spanish translation is Pollo A La Buena Mujer (it also exists in French cooking as bonne femme). We happened upon it in La Cocina de Mama, a favorite Spanish cookbook from chef/author author Penelope Casas. According to Penelope’s intro, even Spain’s greatest chefs in their leisure time prefer the dishes passed down to them by their mamas and yayas. All of the book’s recipes are invariably simple and down-to-earth from home cooks all over Spain, as is this one.

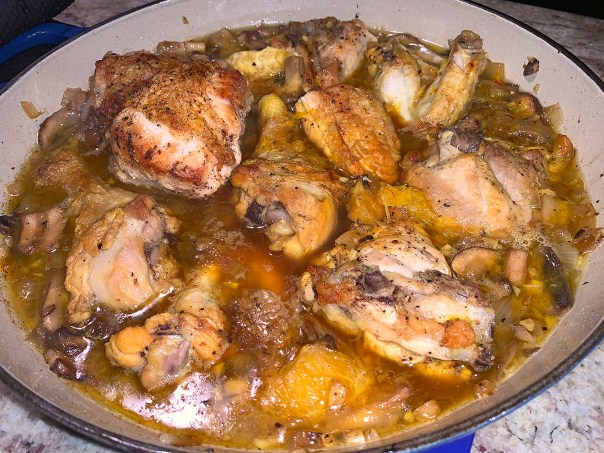
As you know, we often make alterations to existing recipes, and we did some minor ones here. Given the fact that white meat tends to come to temperature before the dark does, we start cooking the legs, thighs and wings first. Then after 10 minutes, we add the breast pieces on top of the dark meat, but not submerged into the liquid, where they would cook faster. We first came across this method from another favorite chef, Molly Stevens, and it has worked well for us.

Other changes included slightly increasing the amount of garlic and mushrooms; and using a somewhat larger chicken than the 3 lb. bird indicated in the original recipe. All of these changes are in the recipe below.

Please note, all your past transgressions are overlooked, so go ahead and make the “Good Woman’s Chicken”.

The Good Woman's Chicken

  • Servings: 4
  • Difficulty: easy
  • Print

Ingredients

  • 1, 3 1/2 to 4 lb. chicken
  • Kosher or sea salt
  • Freshly ground black pepper
  • 2 Tbsp. olive oli
  • 4 garlic cloves, minced
  • 1 small onion, chopped
  • 1/2 lb. cremini mushrooms, stems trimmed away, and caps cut into 1/4″ slices
  • 3 Tbsp. brandy
  • 5 Tbsp. freshly squeezed orange juice
  • 1 small orange, peeled and divided into segments, removing as much pith as possible
  • 1/3 cup chicken broth, preferably homemade
  • 1/8 tsp. crumbled saffron threads

Directions

  1. Cut the chicken into small serving pieces, first detaching the wings and legs, then with kitchen shears, cutting the breast into 4 pieces, and each thigh in half crosswise.
    IMG_3840
  2. Sprinkle chicken pieces with salt and pepper.
  3. Heat the oil in a shallow casserole and brown the chicken all over. You will probably have to do this in a few stages so as not to crowd the pan and steam (instead of brown) the meat. Remove the chicken to a side plate.
  4. Add the garlic, onion, and mushrooms and sauté until the onion is softened, about 5 minutes.
    IMG_3846
  5. Stir in the brandy, orange juice, orange segments, broth and saffron; scraping up any browned bits. Bring to a boil.
    IMG_3847
  6. Place the dark meat pieces nestled into the onions, cover with a lid and cook for 10 minutes reducing the heat to a rolling simmer.
    IMG_3848
  7. Turn the dark meat and place the white meat pieces on top of them, cover and cook for another 35 minutes, covered.
    IMG_3851
  8. Serve from casserole dish.
    IMG_3852

Baked rice (recipe follows) makes a nice accompaniment.

http://www.lynnandruss.com

Baked Rice
Arroz al Horno

If at all possible, make this rice instead of just plain rice, you’ll be glad you did.

IMG_3859

Baked Rice

  • Servings: 4-6
  • Difficulty: easy
  • Print

Ingredients

  • 2 Tbsp. olive oil or butter
  • 2 Tbsp. minced onion
  • 1 cup Valencian (or Arborio) short-grain rice
  • 1 cup chicken broth
  • 2 Tbsp. minced fresh parsley
  • 1 1/2 tsp. fresh thyme
  • A few strands of saffron, crumbled
  • Kosher or sea salt

Directions

  1. Preheat the oven to 400 degrees
  2. Heat the oil in a deep casserole, and then add the onion and cook until the onion is softened. Stir in the rice coating it with the oil.
  3. Pour in the chicken broth and 1 cup water, stir in the parsley, thyme, saffron, and salt to taste, and bring to a boil.
  4. Remove from the flame, cover, and transfer to the oven. Cook for 15 minutes, remove from the oven, and
    let sit, covered, for 5 to 10 minutes before serving.

http://www.lynnandruss.com

Easy Three-Bean Chili

Decades ago, if there were beans in my chili, I pretty much turned up my nose. Somewhere along the line, my culinary senses “matured” and I realized that beans are a great source of fiber, and actually taste good. As you know—and I’ve blogged about—there are endless chili recipes. I like this one because it’s quick, easy, full of flavor and necessary fiber.

I mean, other than opening a can, making chili that’s ready in only a half hour and bursts with flavor (unlike the canned stuff), what could be easier? I found a similar recipe on thewholesomedish.com by Amanda Finks. But of course, I “Lynnyized” it to appeal to our eating preferences.

First of all, I doubled all of the ingredients to make a batch that would produce around eight servings. (You can always freeze any leftovers, if necessary.) Then, I swapped out the granulated sugar for brown sugar, increased the amount and colors of the beans, added red bell pepper, and included chipotle powder for a smoky kick. For an additional spicy jolt, serve with pickled jalapeños.

Trust me, it’s REALLY good!

IMG_3837

Easy Three-Bean Chili

  • Servings: 8
  • Difficulty: easy
  • Print

Ingredients

  • 2 Tbsp. olive oil
  • 2 medium yellow onion, diced
  • 2 red bell pepper, seeded and diced
  • 2 Lbs. 85-90% lean ground beef
  • 4 Tbsp. chili powder
  • 1 Tbsp. chipotle powder
  • 1/4 cup ground cumin
  • 1/4 cup brown sugar
  • 1/4 cup tomato paste
  • 2 Tbsp. garlic powder
  • 1 Tbsp. salt
  • 1 tsp. ground black pepper
  • 3 cups beef broth
  • 2 (15 oz.) cans petite diced tomatoes, don’t drain
  • 1 (16 oz.) can each of dark red and light red kidney beans, and pinto beans (3 cans total) drained and rinsed
  • 2 (8 oz.) cans tomato sauce
  • Optional garnishes: chopped chives or scallions, pickled jalapeños, sour cream, shredded sharp cheddar, diced red onion, or diced avocado

Directions

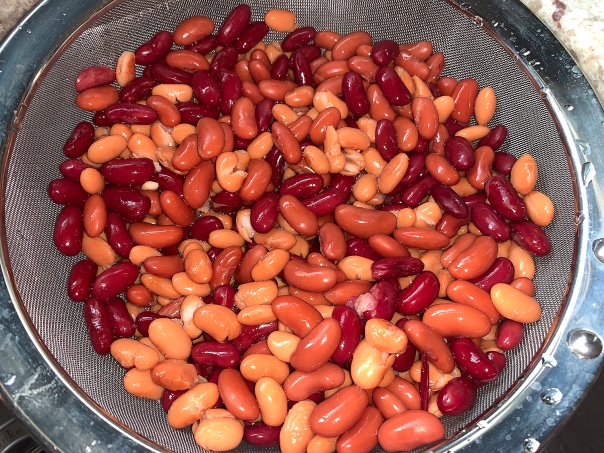
  1. Empty all 3 cans of beans into a large strainer, and rinse with cold water.
    IMG_3820
  2. Add the olive oil to a large dutch oven and place it over medium-high heat until shimmering. Add the onion and red bell pepper. Cook for 5 minutes, stirring occasionally.
  3. Add the ground beef to the pot. Break it apart with a wooden spoon. Cook for 6-7 minutes, until the beef is browned, stirring occasionally.
    IMG_3822
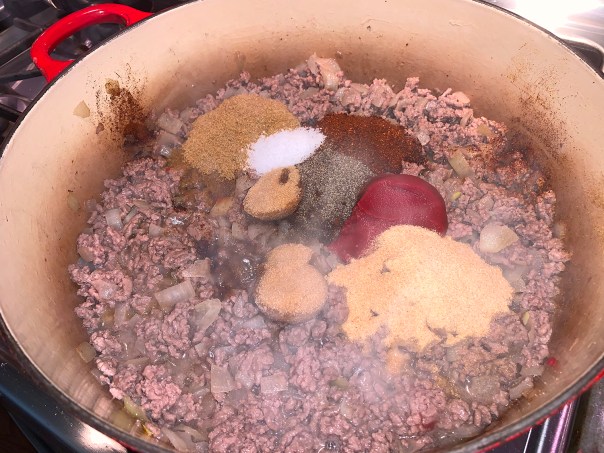
  4. Add the chili and chipotle powders, cumin, brown sugar, tomato paste, garlic powder, salt and pepper. Stir until well combined.
    IMG_3824
  5. Add the beef broth, diced tomatoes (with their juice), drained beans, and tomato sauce. Stir well.
    IMG_3826
  6. Bring the liquid to a low boil. Then, reduce the heat to low to gently simmer the chili, uncovered, for 25 minutes, stirring occasionally.
    IMG_3830
  7. Remove the pot from the heat. Let the chili rest for 10-15 minutes before serving.
  8. Ladle into bowls and top with preferred garnishes. Serve with your favorite brand of nacho chips.
    IMG_3833

http://www.lynnandruss.com

MandaRosa Mandarins—Hurry, They are only Available for a Short Time!

A new brand of seedless red mandarins from California, the MandaRosa is a natural cultivar of a Tarocco (blood) orange and clementine, actually originating in Italy. They are only available from February through early March, so your window-of-opportunity is almost over to indulge in these sweet succulent citrus gems. Simply AMAZING!!

They are not only amazing to eat, but their flavor and internal colors of the fruit change as the fruit matures, with some having red/purple pigment and others red/orange. And the eco-forward packaging with the 2-pound bags uses kraft paper for labels, instead of the more commonly used plastic.

IMG_3839

Here are a few previous bogs that highlighted blood oranges and where the MadaRosa would make a great substitute. They could also provide an essential ingredient to a fruit salsa, garnish vanilla ice cream, and give a distinct color to citrus tarts.

Brussels Sprouts with Oranges and Bacon
blood ranges and sprouts

The Blood Sucker
blood.sucker.tall.glass

A very appropriate adult libation that is wickedly good!

Roasted Carrots with Blood Orange and Rosemary
carrots with blood orange

Sesame Stir-Fried Pork With Shiitakes

For those who crave bold flavors, may I introduce Sesame Stir-Fried Pork with Shiitakes—a menu that came from our 177MilkStreet.com subscription. It uses kimchi, which we’ve enjoyed on numerous occasions but that you may not be familiar with. This recipe uses it as a one-stroke solution to add complex flavors to a simple dish—with fantastic results I might add.

But what is it exactly? Kimchi is made from a mix of salted vegetables, often napa cabbage and daikon radish, that’s seasoned with Korean chili powder, garlic, scallions and fish sauce or dried shrimp before being left to ferment. As an ingredient, it’s potent yet versatile, adding savory-sour flavor and spice. Raw, it also contributes nice crunch to a dish.

Pork is another main item and we were able to purchase a beautiful tenderloin at our favorite supermarket, already trimmed of any silver skin. Once cooked it was fork-tender. The recipe claims to feed six dinner guests. We beg to differ. Without increasing any of the ingredients (except the garlic 🙂 ), we ended up with three decent-sized portions. Perhaps if you served rice as a base and included a few sides, then you might get six…

IMG_3543

For a final shot of flavor, the recipe incorporates toasted sesame oil—a staple ingredient in Korean and Japanese cooking. Stirred into the dish at the end, it adds a nuttiness that is rounded out with toasted sesame seeds for a bit more texture. An entire bunch of chopped scallions, half stirred into the warm pan, the other half sprinkled as a garnish, adds freshness and a pop of color.

Tip: Don’t finely chop the kimchi. Larger pieces better retain their texture and flavor.

IMG_3524

Sesame Stir-Fried Pork with Shiitakes

  • Servings: 3-4
  • Difficulty: easy
  • Print

Ingredients

  • 1-lb. pork tenderloin, trimmed of silver skin
  • 2½ cups well-drained napa cabbage kimchi, roughly chopped, plus 2 tablespoons kimchi juice, divided
  • 2½ Tbsp. soy sauce, divided
  • Kosher salt and ground black pepper
  • 3 Tbsp. grapeseed or other neutral oil, divided
  • 8 oz. fresh shiitake mushrooms, stems discarded, caps sliced ¼ inch thick
  • 3 large garlic cloves, thinly sliced
  • 3 Tbsp. mirin
  • 1 Tbsp. toasted sesame oil
  • 2 Tbsp. sesame seeds, toasted
  • 1 bunch scallions, thinly sliced

Directions

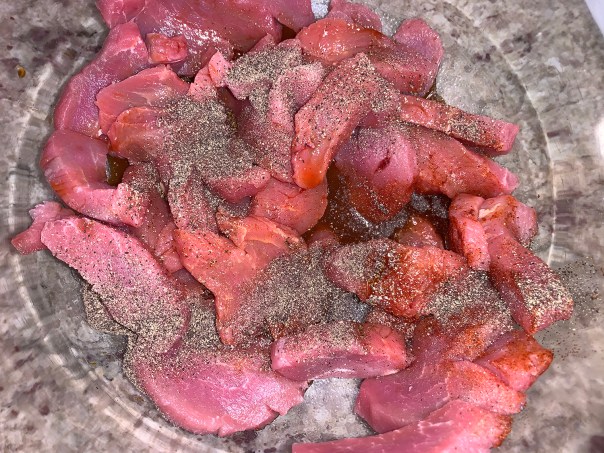
  1. Cut the tenderloin in half lengthwise, then slice each half crosswise about ¼ inch thick. In a medium bowl, stir together the pork, 1 tablespoon of the kimchi juice, 1 tablespoon of the soy sauce and ½ teaspoon pepper.
    IMG_3527
  2. In a 12-inch skillet (or wok) over high, heat 1 tablespoon of the grapeseed oil until beginning to smoke. Swirl to coat the pan, then add the pork and cook, stirring, until no longer pink, about 4 minutes. Transfer to a clean bowl.
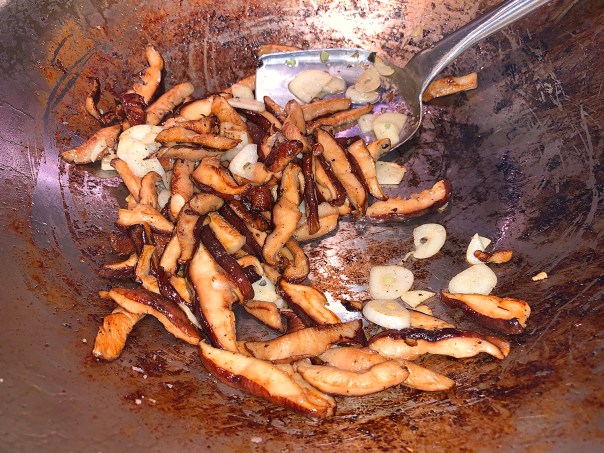
  3. In the same pan over medium-high, heat 1 tablespoon of the remaining oil until beginning to smoke. Add the mushrooms and ½ teaspoon of salt. Cook, stirring occasionally, until the liquid released by the mushrooms has mostly evaporated, about 5 minutes.
    IMG_3534
  4. Stir in the remaining 1 tablespoon oil and the garlic and cook until fragrant, about 1 minute. Return the pork to the pan with any accumulated juices and cook until the juices evaporate, 30 to 60 seconds.
  5. Add the kimchi, mirin, the remaining 1 tablespoon kimchi juice and the remaining 1½ tablespoons soy sauce. Reduce to medium and cook, stirring and scraping up any browned bits, until the kimchi is heated through, about 3 minutes.
    IMG_3535
  6. Stir in the sesame oil, half of the sesame seeds and half of the scallions. Transfer to platter and sprinkle with the remaining scallions and sesame seeds.
    IMG_3537

http://www.lynnandruss.com

Recipe by Dawn Yanagihara from 177 Milk Street

Two Small Sheet-Pans, One Fantastic Meal

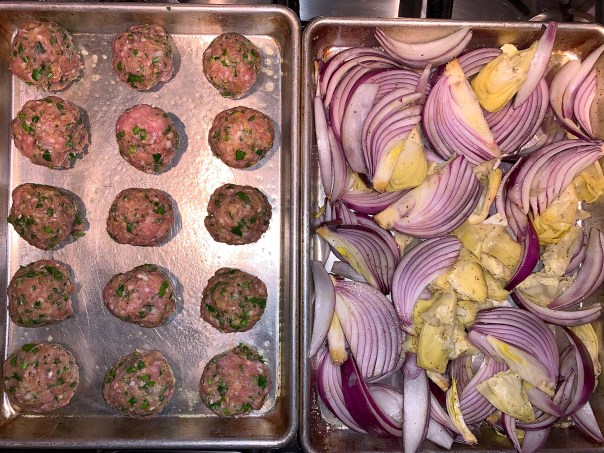
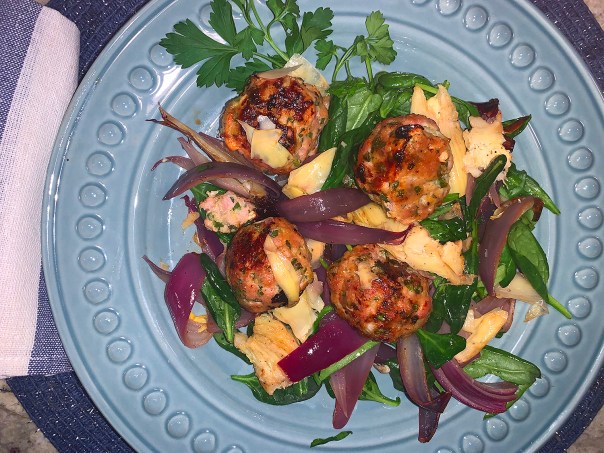
At first glance, the list of ingredients seemed a bit unusual, but it intrigued me enough to give it a whirl. This Sheet-Pan Meatballs with Red Onions and Artichokes recipe, courtesy of Anna Kovel from Better Homes & Gardens Magazine, was indeed a culinary success!

IMG_3765

Since we have two ovens, and because they didn’t seem anywhere near done, I left the meatballs in the 400° heated oven when it was time to put the sheet pan full of red onions and artichokes under the broiler. Then when the veggies completed their turn under the intense heat, I turned off the oven with the meatballs, put the veggies in it to keep warm, and moved the tray of meatballs under the broiler.

Our sheet pans were slightly smaller than 10″ x 15″, but worked out just fine. In Step 8, directions indicate to squeeze a half lemon into each vacated sheet pan to scrape up the brown bits. In our case, there was no residue whatsoever on our veggie pan, so the entire lemon went to the meatball pan. Don’t omit this step, it adds a lot of finishing flavor to the overall dish.

The original recipe says the baby spinach is optional, and/or you can make a bed of pasta. We opted for the greens where they made a perfect companion to the rest of the ingredients. Sans any mint, I used a combination of fresh parsley and chives in the meat mixture. Finally, we had a can of quartered, instead of whole, artichokes, so there was no need to cut them further. Just make sure to extract as much water as you can after rinsing them.

IMG_3738

Sheet-Pan Meatballs with Red Onions and Artichokes

  • Servings: 4
  • Difficulty: easy
  • Print

Ingredients

  • 2 Tbsp. olive oil
  • ¼ cup fresh bread crumbs
  • 2 Tbsp. water
  • 1 egg, lightly beaten
  • 1 ¼ lbs. ground pork
  • 1 lemon, zested and juiced
  • ½ cup chopped parsley, mint, and/or chives
  • ¼ cup shallot, finely chopped
  • Salt and black pepper
  • 2 medium red onions, leaving the root end intact, cut into 1/2-inch thick wedges
  • 1 14-oz. can whole artichoke hearts, drained, rinsed, halved, and patted dry
  • 5 oz. baby spinach, washed and rinsed
  • Shaved parmesan curls, and a bit more parsley for garnish

Directions

  1. Preheat oven to 400°F. Brush two approximately 15×10-inch baking pans with 1 tablespoon olive oil.
  2. In a large bowl combine bread crumbs and 2 tablespoons water; let stand 5 minutes, then stir in beaten egg.
    IMG_3741
  3. Stir in pork, lemon zest, herbs, shallot, and 1/2 teaspoon each salt and black pepper until well-combined, but don’t over mix. In your palm, gently shape mixture into 2-inch balls (makes about 15-16 balls). Place in one prepared pan.
  4. Place onions and artichoke hearts in second prepared pan; drizzle with remaining 1 tablespoon olive oil. Sprinkle with salt and black pepper. Toss to coat.
    IMG_3747
  5. Bake on separate oven racks 15 minutes. Remove from oven.
  6. Turn oven to broil. Broil vegetables 4 to 5 inches from heat 5 to 7 minutes or until tender and browned, stirring halfway through.
    IMG_3748
  7. Repeat for meatballs, broiling until done (165°F) and browned, turning halfway through.
    IMG_3751
  8. Transfer meatballs and vegetables to a platter with a bed of baby spinach (or pasta). Pour half the lemon juice into each hot pan; scrape up browned bits. Drizzle lemon juice mixture over meatballs and vegetables.

    IMG_3754

  9. Serve over a bed of baby spinach for more color and nutrition. (Or substitute a bed of cooked pasta.) Garnish with parmesan shavings and a smattering of chopped parsley.
    IMG_3758
    IMG_3763
    With tongs, allow dinner guests to serve themselves.

http://www.lynnandruss.com

Carcamusa Baby

Carcamusa, a traditional Spanish tapas dish, calls for three different types of pork—fresh pork, cured ham and chorizo—all simmered with seasonal vegetables in tomato sauce. Just seeing this recipe immediately reminded us of our Spanish vacation in Toledo, where Carcamusa is a specialty, and was a culinary highlight of our trip.

That day in Toledo, hungry for our mid-afternoon Menu del Dia (the most economical way to eat in Spain), we inquired from our hotel staff where we could dine on traditional fare. Without hesitation they eagerly suggested Bar Ludeña on Plaza Magdalena. Opened for nearly 60 years, this local hub was where we savored our first taste of the Spanish stew, or “chili” if you will. Their version showcased larger pieces of meat and included peas (shown below, right), and transported us to another dimension.

hanging meatInside the Bar Ludeña “bar area” where we waited for an outside table, hung varying legs of aged Jamón, a kind of dry-cured ham that is typically included in Carcamusa.

Otherwise known as Pork and Chorizo with Piquillo Peppers, it’s all about concentrating a few flavors to make a very bold taste, and isn’t that difficult to cook but the takes quite a bit of prep. However to simplify, 177 Milk Street skipped the ham and opted for jarred roasted red peppers (although we did use piquillos). I highly suggest locating jarred piquillo peppers from Spain (try online) because their flavor is slightly deeper, sweeter and more intense.

It is common to serve the dish with slices of grilled rustic bread. Often like chilis and stews, this Carcamusa was even more flavorful the next day after ingredients got a chance to marry and get happy with each other

NOTE: Don’t use Mexican chorizo, which is a fresh sausage, in place of the Spanish chorizo called for here. Spanish chorizo is dry-cured and therefore has a firm, sliceable texture similar to salami.

Carcamusa: Pork & Chorizo with Piquillo Peppers

  • Servings: 4 as a meal; 8 as a tapas
  • Difficulty: easy
  • Print

Ingredients

  • 6 oz. Spanish chorizo, casing removed, halved lengthwise and thinly sliced
  • 8 medium garlic cloves, peeled
  • 2½ tsp. dried oregano
  • 2½ tsp. ground cumin
  • Kosher salt and ground black pepper
  • 28 oz. can whole peeled tomatoes, drained, juices reserved
  • 1¼ lb. pork tenderloin, trimmed of silver skin and cut into ½-inch pieces
  • 3 Tbsp. grapeseed or other neutral oil, divided
  • 1 large yellow onion, finely chopped
  • ½ cup dry sherry, such as Fino
  • 1½ cups jarred piquillo (or roasted red peppers), patted dry and cut into ½-inch pieces
  • 1 cup packed flat-leaf parsley leaves, roughly chopped

Directions

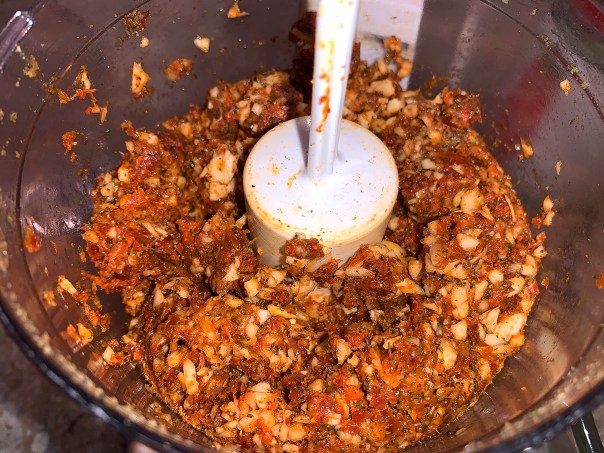
  1. In a food processor, combine half of the chorizo, the garlic, oregano, cumin, 1 teaspoon pepper and 3 tablespoons of the tomato juices. Process until smooth, about 2 minutes, scraping the sides of the bowl as needed.
    IMG_3787
  2. Transfer 3 tablespoons of the chorizo paste to a medium bowl and stir in 1 teaspoon salt and another 1 tablespoon of the tomato juices. Add the tenderloin and toss, then let marinate at room temperature for 15 minutes.
  3. Meanwhile, add the drained tomatoes to the chorizo paste in the processor and process until smooth, about 1 minute; set aside. (I used our mini processor which was filed to the top!)
    IMG_3791
  4. In a 12-inch skillet over medium-high, heat 1 tablespoon of the oil until beginning to smoke. Add the pork in a single layer and cook without stirring until well-browned, 4 to 6 minutes. Return the pork to the bowl.
    IMG_3793
  5. Add the remaining 2 tablespoons oil to the skillet and heat over medium until shimmering. Add the onion, cover and cook, stirring occasionally, until softened, about 8 minutes.
    IMG_3794
  6. Pour in the sherry and cook, scraping up any browned bits, until most of the liquid evaporates, 2 to 4 minutes.
  7. Stir in the tomato-chorizo mixture and remaining tomato juice. Bring to a simmer, then reduce to medium-low. Cover and cook until the flavors meld, about 10 minutes.
    IMG_3795
  8. Uncover and continue to cook, stirring occasionally, until slightly thickened, another 5 minutes. (Ours took 10 minutes before it showed signs of enough thickening.)
    IMG_3797
  9. Return the pork and any accumulated juices to the skillet and add the remaining chorizo and piquillo peppers. Cook, stirring occasionally, until the pork is heated through, about 5 minutes.
  10. Stir in the parsley, then taste and season with salt and pepper. Ladle into shallow bowls and serve hot with crusty bread.
    IMG_3802
    IMG_3804

http://www.lynnandruss.com

Recipe from 177 Milk Street

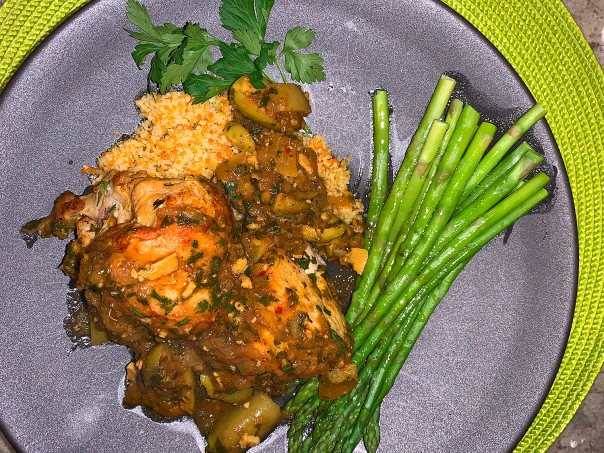
WOW-roccan Chicken

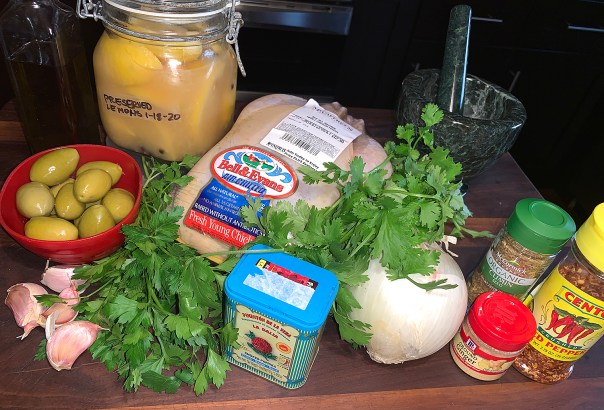
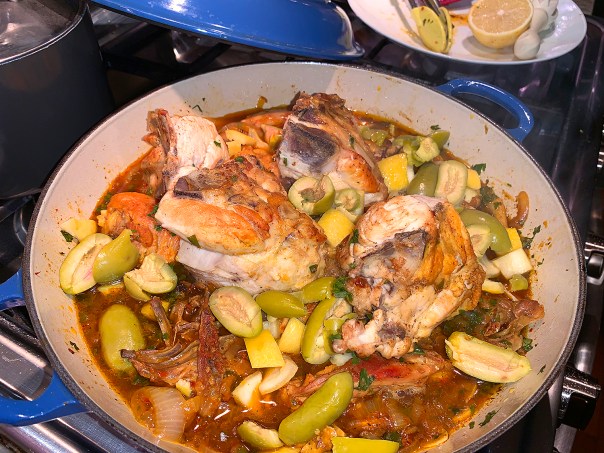
JUST WOW! Moroccan chicken with Green Olives and Preserved Lemons, a fantabulous dish from favorite chef/author Molly Stevens’ cookbook All About Braising. (Our hard cover copy is starting to fall apart, we’ve used it so often.) Yes, the dish does take some time to do the prep*, while the braise itself is only about 45 minutes. Definitely company-worthy, it’s probably best made on a weekend, or when you have some leisure time. A perfect dish for Baby Blue, our 4-quart, shallow Le Creuset braising Dutch oven.

As Molly states, it’s both familiar and exotic. The exotic is the combination of ginger, cumin, red pepper, saffron, and the salty piquancy of preserved lemons. The technique of including the chicken liver in the braise and then mashing it up to add to the finished sauce might make you take pause. If you are not a fan of chicken liver (I’m not), Molly urges you to try it here anyway—it won’t make the sauce taste at all livery, and she was right, it just helps thicken the sauce and the mashed liver contributes an earthiness and depth that you won’t be able to identify, but will savor. (Savor we did).

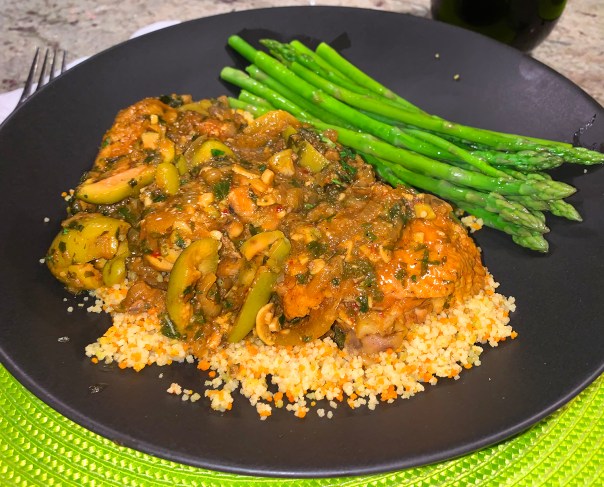
IMG_3731Couscous is traditional with this dish. We also included steamed asparagus.

As My Man Russ and I started to indulge in our first few mouthfuls, the sighs of contentment were audible. When he finally could speak, Russ commented “You can detect each spice—the smokiness of the pimentón, the heat of the red pepper flakes, and the warm, toasty flavor of the cumin. Together, the preserved lemon and fresh lemon juice lend the dish both high and low notes of citrus, underlined by the salty depth of the Cerignola olives.”

We highly recommend using pimentón (smoked paprika) as opposed to the unsmoked variety. And by all means, even though it is a very small amount, don’t neglect including the saffron. This spice is derived from the flower of the “saffron crocus” and has a subtle earthy and grassy flavor and aroma; yet sweet, similar to floral and honey (rawspicebar.com). Plus, it bestows a striking golden hue on every dish it graces!

*Word to the wise, if you haven’t made preserved lemons in advance and don’t have access to a good Middle Eastern market that sells them (check online), the dish will still be wonderful, although not as aromatic. Don’t substitute regular lemon peels for the preserved, they’re not the same thing at all. You can make your own, as we did. It’s quite easy to do, though takes at least three weeks before the lemons are ready to use. So plan ahead, it’s worth it.

IMG_3689

Moroccan Chicken with Green Olives and Preserved Lemon

  • Servings: 4-5
  • Difficulty: moderately easy
  • Print

Ingredients

Spice Mix

  • ½ teaspoon ground ginger
  • ½ teaspoon cumin seeds, toasted and ground (or ¼ teaspoon ground cumin)
  • ½ teaspoon fresh ground black pepper
  • ¼ teaspoon sweet pimentón (smoked Spanish paprika)
  • ¼ teaspoon crushed red pepper flakes
  • 1/8 teaspoon saffron threads, crumbled

Braise:

  • ½ cup green olives in brine, not pitted (we almost doubled the amount of olives)
  • One cut-up chicken, about 4 pounds (keep the back, neck, liver and wingtips)
  • ½ teaspoon kosher salt, divided
  • 2 tablespoons extra-virgin olive oil
  • 1 medium onion, thinly sliced
  • 3 cloves garlic, thinly sliced
  • ¾ cup dry white wine (or substitute water)
  • 1 lemon, halved
  • ¼ cup mixed chopped Italian parsley and cilantro, divided
  • 1 whole (4 quarters) preserved lemon
  • Fresh ground black pepper to taste
  • Hot, cooked couscous

Directions

  1. To prepare spice mix: In a small bowl, stir together the ginger, cumin, black pepper, pimenton, or paprika, red pepper, and saffron. In another bowl, cover the olives with cool water, and set aside to soak.
    IMG_3690
  2. Browning the chicken: rinse the chicken pieces with cool water, and dry them thoroughly with paper towels (otherwise they won’t brown well – moist meats steam and tend to stick to the pan). Heat the oil and butter in a large deep-sided skillet or shallow braising pan (4-quart capacity) over medium-high heat. While the oil and butter heat, season half the chicken pieces lightly with salt (keep in mind that the olives and preserved lemons will add saltiness).
  3. When the butter is sizzling, add the salted chicken pieces skin side down and sear, without disturbing, until the skin is crisp and evenly browned, about 4 minutes. Peel by lifting one edge with tongs to see that the skin side is browned, then turn with tongs and brown the second side, another 4 minutes or so. Transfer the browned chicken to a platter or tray to collect any drips.
  4. Pat the remaining chicken pieces again with paper towels just to be sure they are as dry as possible, and lightly salt both sides. Add these pieces to the pan skin side down and sear them as you did the first batch, transferring them to the platter with the other chicken when they are browned.
    IMG_3698
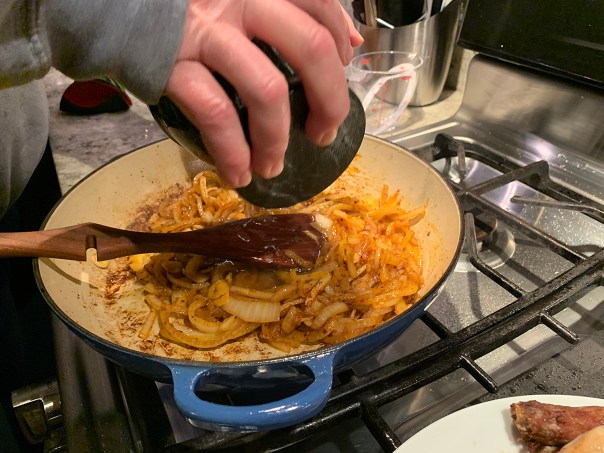
  5. The aromatics: Pour off all but about 1 tablespoon of fat from the pan and return the pan to medium heat. Add the onion and garlic, stir with a wooden spoon, and sauté until you can smell their fragrance and they begin to soften, about 3 minutes. (The bottom of the pan will develop a “fond” walnut-colored crust.) add the spice mix, stir, and sauté for a minute longer.
  6. The braising liquid: pour in the water to deglaze the pan, and stir and scrape the bottom with a wooden spoon to dislodge and dissolve the flavorful cooked-on crust.
    IMG_3703
    Russ first put the water in the mortar to eke out any of the residual spice mix.
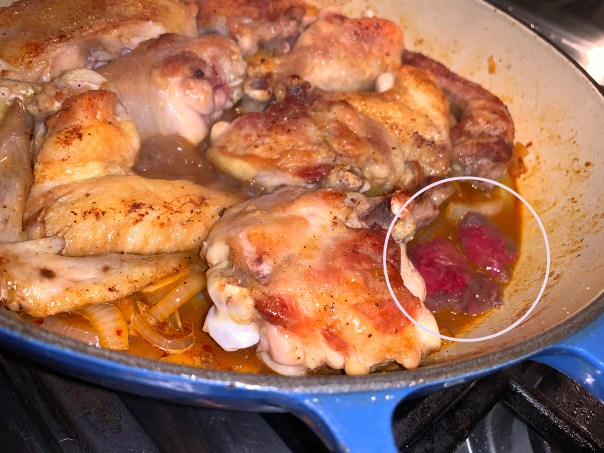
  7. The braise: When the water boils, return the chicken legs and thighs, and the wing tips, back, neck, heart and gizzard, if using, to the pan. Tuck the liver (circled below), if using, between the pieces. Cover, reduce the heat to low, and braise the chicken for 10 minutes.
    IMG_3708
  8. Uncover the pan, and if the liquid is simmering too forcefully, lower the heat to a quiet simmer, or set a heat diffuser under the pan. Turn the legs and wings over with tongs, and place the chicken breast pieces skin side up on top of the legs and wings. (Adding the chicken breasts after 10 minutes prevents them from overcooking and drying out If you’re using all legs and thighs, add them all at the start.)
  9. Squeeze the juice from one lemon half over the chicken, and sprinkle over half the chopped herbs. Continue to braise gently for 20 minutes more.
  10. While the chicken braises, prepare the olives and preserved lemons: Drain and rinse the olives. Remove the pits by crushing them one by one with the side of a large knife and pulling out the pit. Most olives will remain in one piece, like an open book, but it’s fine if some olives break in two.
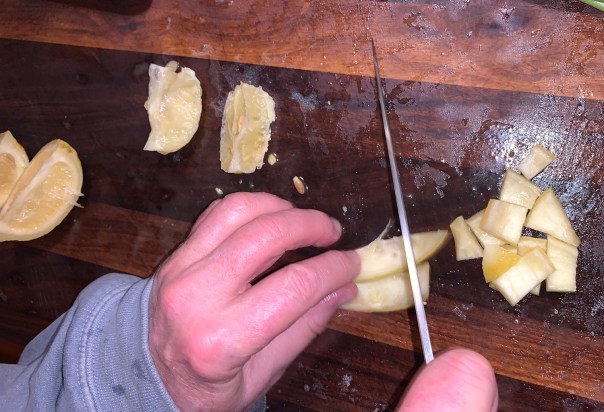
  11. Rinse the preserved lemon quarters under cool water, and remove and discard the pulp. Chop the peel into ½ inch pieces.
    IMG_3716
  12. Adding the olives and preserved lemons: after the chicken has braised for a total of 30 minutes (20 minutes after you added the breasts), lift the lid, add the olives and preserved lemons, and turn the chicken pieces again.
    IMG_3718
  13. Optional step, if using the liver: remove the liver from the pan, place it in a small bowl, and mash it to a paste with a fork. Set aside.
    IMG_3724
  14. Continuing the braise: replace the lid and continue to braise until the juices from the legs run clear when pierced with the tip of a sharp knife, another 10 to 15 minutes (for a total of 40 to 45 minutes). Transfer the chicken pieces to a serving dish or tray to catch the juices, and discard the wing tips, back, neck, heart and gizzard, if you used them. Cover the chicken loosely with foil to keep warm.
    IMG_3723
  15. The finish: Increase the heat under the braising liquid to medium-high and bring to a boil. Return the liver, if using, to the skillet and stir it into the sauce. Squeeze in the juice from the other half of the lemon. Simmer the sauce until it reduces just a bit, about 5 minutes.
    IMG_3725
  16. Add the remaining herbs. Taste for salt and pepper. Spoon the sauce over the chicken.
    IMG_3728
  17. Serve over hot couscous preferably made with homemade chicken stock instead of water.
    IMG_3735

http://www.lynnandruss.com

I’m still salivating! According to Molly, if you have any leftovers, it’s even better when reheated…

OOKA

Once a favorite haunt when the kids were growing up to celebrate various milestones, we hadn’t patronized OOKA, the Best of Philly Award-Winning restaurant, in ages. Opened in this location since 2000, and conveniently close to major transport routes on Easton Road in Willow Grove, PA, it offers both Hibachi and regular dining options—plus, it’s a B.Y.O.B!

OOKA offers only the freshest and most pristine dishes, including fish which is flown in daily from around the world. The ambiance is moody-Asian-modern and the able staff are all very polite and pleasant.

Shared Appetizers:

They offer Rolls, both raw and non-raw fish style; Sushi or Sashimi a la carte; Soups; Salads; and Hot and Cold appetizers. Three of us each decided on something different, but then we shared them all.

IMG_3481Out of Control Roll—6 freshly made tuna, salmon, avocado and tobiko rolls with pickled ginger and wasabi paste

IMG_3484Gyoza—6 crispy, pan-fried pork dumplings (they are also available with vegetables)

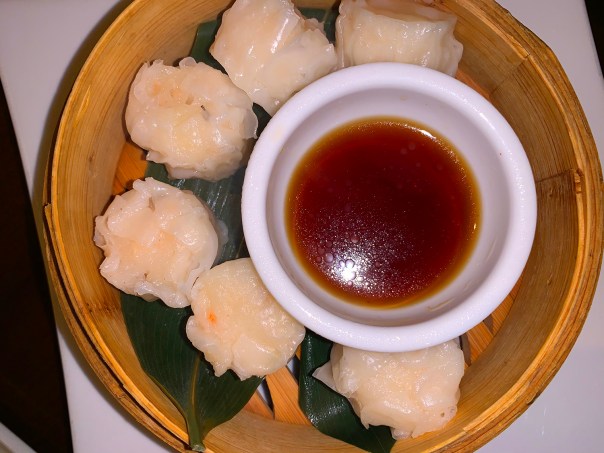
IMG_3486Shumai—6 delicate, melt-in-your mouth, steamed shrimp dumplings

Entrées/Rolls

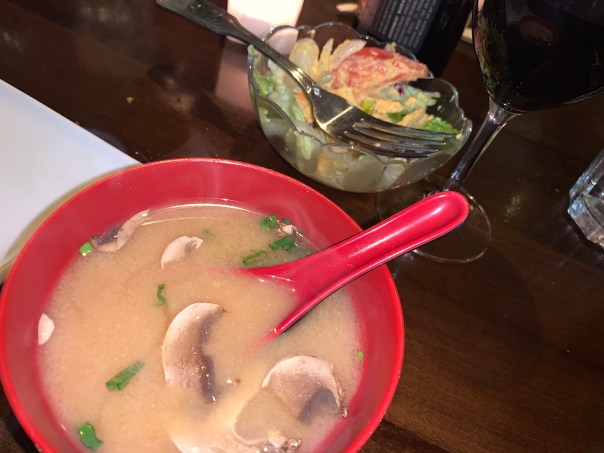
Russ and I both decided on Dinner Entrées that came served with miso soup and a garden salad. We were impressed with the soup, both for flavor and how hot it was because it has been our experience that many restaurants tend to serve it luke warm. Julia, on the other hand, was tempted by the mouth-watering list of Signature Rolls.

IMG_3479

IMG_3489Roasted Long Island Duck Breast—Tender slices of duck breast, caramelized asian pear, Japanese eggplant, scallion, bathing in a sweet sake-soy reduction and served with a side of coconut flake crusted taro potato tempura sticks and a choice of white or brown rice. No surprise that this was Russ’s option!

IMG_3490Chicken Yakitori—Plump pieces of both white and dark meat chicken, skewered with bell pepper and onion slices served in a with teriyaki sauce and paired with a little bucket of tempura vegetables and that choice of rice. Lynn’s selection.

IMG_3491Lobster Dynamite Roll—An artfully plated signature roll with Maine lobster, avocado and mango inside, topped with spicy tuna and sweet chili sauce on the outside. Julia kept going back to this on the menu, and finally ordered it—she was not disappointed.

IMG_3494Ice Cream Tempura—A trio of fried ice cream flavors (chocolate, vanilla and strawberry), paired with orange puree and a coconut scented white chocolate sauce. Shared by father and daughter.

OOKA also has two other locations in Doylestown and Montgomeryville, PA.

Pasta, Chicken and Broccoli Throwdown

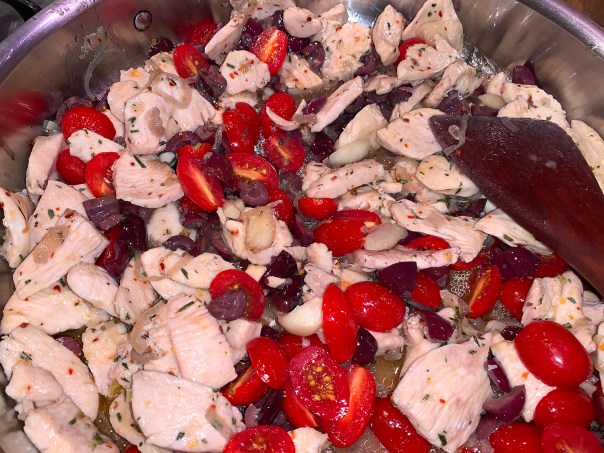
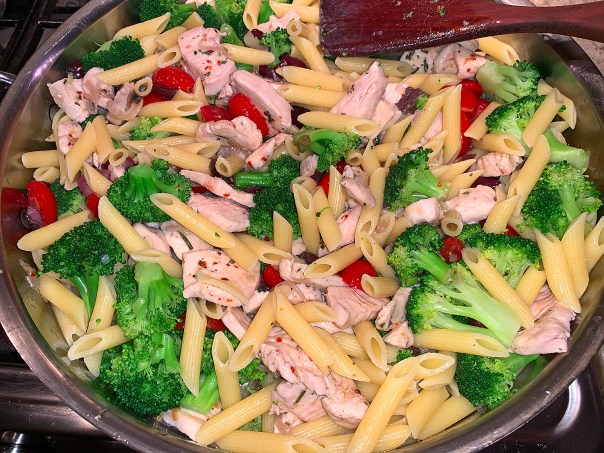
The ingredients for this Spicy Penne with Chicken, Broccoli and Chopped Olives recipe are pretty basic and not at all unusual. To us, kalamata olives enhance any dish with their salty, rich flavor, while here, they add a welcome twist to a basic chicken and broccoli pasta.

Admittedly, I made numerous changes which are noted in the recipe below. I doubled the amount of chicken, garlic and red pepper flakes; increased broccoli florets, olives and grated cheese; and added a couple of minced shallots and grape tomatoes. I mean, serving up to six dinner guests (as the original recipe indicated) with only a 1/2 pound chicken breast and the other meager amounts, well the servings would be rather paltry indeed, me thinks.

IMG_3206

Oh, and Good Lord, why would you throw away the garlic? In this family, that’s sacrilegious! I smashed the cloves into large chunks and left them in the finished dish. The Hubster and step-daughter ranted and raved about how good it was, and asked that I keep this in our regular rotation. I concur.

One issue with increasing a lot of the ingredients, I had to switch from a large nonstick skillet to a huge sauté pan when it was time to combine the pasta and broccoli with the chicken mixture. If you do not own a ginormous pan, one option to address this problem would be use two separate pans when combining, or cut the recipe below in half.

For a vegetarian option, omit the chicken and add red and green peppers, garbanzo beans, or any other legume or vegetable of your choice when the pasta and pasta water is added to the skillet.
Spice Penne with Chicken, Broccoli and Chopped Olives

  • Servings: 6
  • Difficulty: easy
  • Print

Ingredients

  • Kosher salt
  • 1/2 cup olive oil
  • 8 cloves garlic, smashed into large pieces
  • 2 shallots, peeled and thinly sliced
  • 2 tsp. chopped fresh rosemary
  • 1 tsp. crushed red pepper flakes
  • 2 large boneless, skinless chicken breast, sliced in half horizontally then cut into thin strips
  • 1 cup (or more) pitted Kalamata olives, quartered
  • 1 cup grape tomatoes, halved
  • 1 lb. penne
  • 12 oz. broccoli florets, cut into 1-1/2-inch pieces
  • 2 Tbs. fresh lemon juice
  • 1 1/4 cup freshly grated Pecorino-Romano

Directions

  1. Bring a large pot of well-salted water to a boil over high heat. Meanwhile, heat the oil, shallot and garlic in a very large skillet over medium heat, stirring gently so the cloves don’t break up, until they become light brown in places and very fragrant, 2 to 3 minutes.
  2. Add the rosemary and red pepper flakes and cook until they start to sizzle, about 15 seconds.
    IMG_3193
  3. Add the chicken, sprinkle with 1/4 tsp. salt, and cook, stirring often, until the chicken loses its raw color, about 3-5 minutes. Remove from the heat and stir in the olives and tomatoes.
    IMG_3194
    IMG_3197
  4. Add the penne to the boiling water and cook, stirring occasionally, until just barely al dente, 2 minutes less than the package instructions.
  5. Add the broccoli and cook until it turns bright green and the pasta is tender, about 2 minutes. Reserve 1/2 cup of the pasta water, and then drain the pasta and broccoli.
  6. Add the pasta and the pasta water to the skillet and cook uncovered over medium-high heat, stirring, until the pasta absorbs most of the liquid, about 2 minutes.
    IMG_3199
  7. Stir in the lemon juice and 1 cup of the Pecorino. Pour into a large pasta serving bowl and sprinkle with the remaining 1/4 cup Pecorino.
    IMG_3202

http://www.lynnandruss.com

Adapted from a recipe by Tony Rosenfeld from Fine Cooking

Sausage, Broccoli Rabe and Mozzarella Open-Face Quesadillas

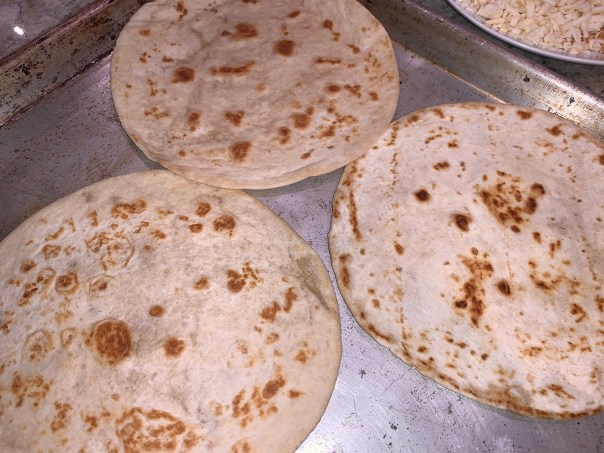
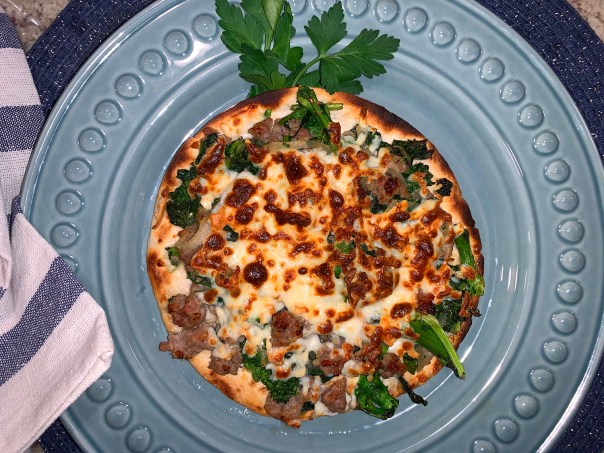
How about putting a new spin on pizza night? The Sausage, Broccoli Rabe and Mozzarella Open-Face Quesadillas are more akin to thin crust pizza, which we favor. Just a quibble about the name. We all felt they looked more like a tostada than a quesadilla, but who really cares?

The crisp flour-tortilla base is what sets these hearty open-face quesadillas apart. With lots of melted cheese, vegetables, and meat, they are best eaten with a fork and knife. However, The Hubster and step-daughter both nixed the flatware and chowed down hands only.

One was more than plenty per person, maybe because I doubled the sausage and we served a simple side salad along with them. We all agreed they were a touch bland since we tend to gravitate toward bold flavors, so next time we’d probably substitute hot, spicy Italian sausage in place of the sweet. But all-in-all, we liked them.

IMG_3343

Sausage, Broccoli Rabe, and Open-Faced Quesadillas

  • Servings: 4
  • Difficulty: easy
  • Print

Ingredients

  • 4 tsp. olive oil
  • 4 8-inch flour tortillas
  • 1 lb. sweet Italian sausage, casings removed
  • 1 bunch broccoli rabe, thinly sliced 1/4 inch thick (about 4 cups)
  • 1 small yellow onion, peeled, cut in half, and thinly sliced 1/4 inch thick
  • Kosher salt and freshly ground black pepper
  • 1/4 cup roughly chopped fresh flat-leaf parsley
  • Zest of 1 lemon (about 2 tsp.)
  • 8 oz. smoked mozzarella, coarsely shredded

Directions

  1. Heat 1 tsp. of the oil in a 12-inch skillet over medium-high heat. Add one tortilla and cook, pressing lightly with a spatula, until lightly browned, about 30 seconds. Flip over and cook another 30 seconds the same way. Transfer to a large rimmed baking sheet. Repeat with the remaining oil and tortillas. All four will fit on a standard baking sheet if you fold up the edges a little bit. Set aside.
    IMG_3351
  2. Return the skillet to the heat. Add the sausage and cook, stirring often, until cooked through, about 5 minutes. Transfer to a bowl and set aside, leaving the drippings in the pan.
    IMG_3345
  3. Return the pan to the heat, and add the broccoli rabe, onion, 1/2 tsp. salt, and a few grinds of pepper. Stir well, then cover and cook, stirring occasionally, until tender, about 5 minutes. Stir in the parsley, zest, and sausage, and mix well.
  4. Divide the sausage-onion mixture evenly among the tortillas. Divide the cheese evenly among the tortillas, piling it on the sausage-onion mixture. Season to taste with salt and pepper.
    IMG_3353
  5. Position an oven rack about 6 inches from the broiler, and heat the broiler on high. Put the baking sheet under the broiler, and broil for until the cheese is nicely melted and starting to bubble and brown, about 4 minutes. Cut each quesadilla into quarters, and serve immediately.

http://www.lynnandruss.com

IMG_3357

Adapted from a recipe by Jessica Bard from Fine Cooking

From the Heart (with a Few Senior Moments)

As soon as I laid eyes on this article in Better Homes & Garden Magazine (BHG), I knew I had to make these Tri-Colored Heart Cookies. They appealed to both my sense of creativity and curiosity in trying new techniques. Plus, Valentine’s Day was right around the corner.

IMG_3598

However, I decided to go with my tried-and-true Staying In Shape dough recipe because the cookies don’t spread, and with the addition of a bit of lemon zest, they have a welcome brightness to the taste. The difference here is coloring the dough itself while still in the mix master. You will also need three or more small heart-shaped cookie cutters in various sizes, which are easily ordered online.

Now for my “senior moment” act. I had made the dough early in the morning and refrigerated them until my cookie cutters arrived. During that wait, I started scribing this blog, and it occurred to me that I added four eggs instead of two! I’m thinking OMG, the cookies will be misshapen and puffy. But instead of tossing it all, I decided to run a test.

Senior moment #2 was forgetting to freeze the baking sheet full of test cookies before I popped them in the oven. Surprisingly, they came out fine! Luckily I could proceed with the dough that I had, but from then on, I did freeze each baking sheet before popping them in the oven.

IMG_3640

Variations:

  • Brush colored dough with stripes of egg white and sprinkle on colored sugar, lightly pressing to adhere before cutting out cookies.
  • For striped cookies, place strips of varying dough colors next to each other. Brush egg white between each color so dough will fuse together while baking. Roll into one large sheet and cut out cookies at varying angles. (Don’t worry if the lines aren’t perfectly straight, it makes the cookies more interesting.)
  • A mixture of food coloring, egg white and water makes an edible watercolor you can brush on the dough before cutting out.
  • For touches of gold leaf, use an already prepared edible product or mix 1/2 tsp. edible luster dust with 1 tsp. vodka. Brush onto cooled cookies.
  • For a marbled effect, lightly knead two or three colors of leftover dough so that the variations of color are still visible. Roll out the dough and cut out the shapes.

The recipe below is doubled in order to get enough of each color.

IMG_3642

Tri-Colored Heart Sugar Cookies

  • Servings: 3 dozen
  • Difficulty: easy
  • Print

Ingredients

  • 4 sticks (2 cups), room temperature
  • 2 cups sugar
  • 2 eggs
  • Zest from 1 lemon
  • 2 tsp. baking powder
  • 2 tsp. vanilla extract
  • 6 cups unsifted flour (plus more for rolling cookies out)
  • 1 tsp salt

Directions

  1. Preheat oven to 350°F.
  2. Add the butter sticks and the sugar and cream together in a stand mixer, about 3 minutes.
  3. Scrape down the sides of the bowl and add the eggs, lemon zest, baking powder and vanilla extract, then beat again for 2 minutes until a creamy.
  4. Add 6 cups flour (2 cups at a time) and ½ teaspoon salt and mix on low speed to combine about 2 minutes.
  5. Remove approximately 1/3 of the dough and wrap in wax paper until ready to use.
  6. Add pink food coloring to the reminder 2/3 dough and mix until evenly colored. Remove 1/2 of the pink dough and wrap in wax paper.
  7. Finally add red food coloring to the remainder of the pink dough and mix thoroughly and wrap. Refrigerate all three dough balls until ready to use.
  8. On a floured surface or pastry cloth, roll out the cookie dough balls to desired thickness level, about an 1/8″ or a little thicker.
  9. Begin cutting out the smaller heart shapes then move the cut out pieces to fill in the holes in another color of dough. Use the largest cutters to make shapes around the filled in pieces.
    IMG_3613
  10. Place shapes on an unrimmed baking sheet.
  11. Reform any leftover dough into another ball and repeat the process.
  12. Put baking sheet(s) in the freezer for 10 minutes.
    IMG_3611
  13. After 10 minutes take the baking sheet out of the freezer and bake for 10 minutes, just before edges start to turn a light brown.
  14. Remove cookies from oven, allow to cool for a few minutes, then transfer them to a wire rack to cool completely. (See variations above for finishing touches.)
    IMG_3618

http://www.lynnandruss.com