Monthly Archives: July 2018

Eno Terra: Eat Local, Drink Global.

The best laid plans… My birthday agenda was going to include a fancy dinner followed by a “Monet in the Garden” Fountain & Fireworks (F&F) show at Longwood Gardens—over an hours drive from home. Wouldn’t you know, that Saturday was the first day of a predicted weeks-long rainy pattern, and the hourly forecast showed 100% heavy rain from mid-afternoon until past midnight.

Despite the dismal weather, the F&F wasn’t cancelled, so we altered our dinner plans for another evening, dressed in foul-weather gear, and made the trip to Longwood Gardens. And boy are we glad we did. What a show!! The shows are far and few between and sold out months in advance, but if you ever get the chance, I highly recommend…

2.IMG_6369
3.IMG_6370I couldn’t help myself by adding this video and a few pics from the event. But I digress…

Back to the food blog at hand (and where I finally had my birthday dinner)… According to their website, Eno Terra is founded on the principle of regionalism and seasonality drawing from local farmers, fishermen, grass fed beef and poultry producers and three season harvests from their Eno Terra Canal Farm. They’ve created an enhanced Enoteca style menu, to complement their farm-to-table multi course format.

IMG_6585

Located in Kingston, NJ, just outside of Princeton, Eno Terra, opened in 2008, is steeped in history and sits on the oldest highway in America—King’s Highway—which was a center point of local commerce. The restaurant itself is the site of the old Fisk General Store and dates back to the 1860s, with original beams and store foundation still in use in their wine cellar (ask to see them when you visit).

IMG_6594

IMG_6591

IMG_6589

IMG_6597

For some reason, their small patio area was not available for seating, even though it was a gorgeous summer evening. Not to complain because the two-story space in a historic, wood-framed general store remains inviting, with its artful wall hangings of lichen and other living greenery. Their menu is Italian in sensibility, while the wine list focuses on Italy and the United States with an abundant representation from France and Spain. So many to choose from!

IMG_6600Russ spends some time reviewing all of the wine offerings, orders and Italian NOE Montepulciano D’Abruzzo, then I enjoy a sip…

Along with a separate detailed wine menu and a smattering of a few nightly specials, the menu is arranged into four segments (plus dessert) starting with their highly touted Salumi & Formaggi offerings. While waiting to be seated, Russ eyeballed the high-end Italian meat slicer (shown below) near the hostess station and just knew he was going to have to start with something in this category…

IMG_6596

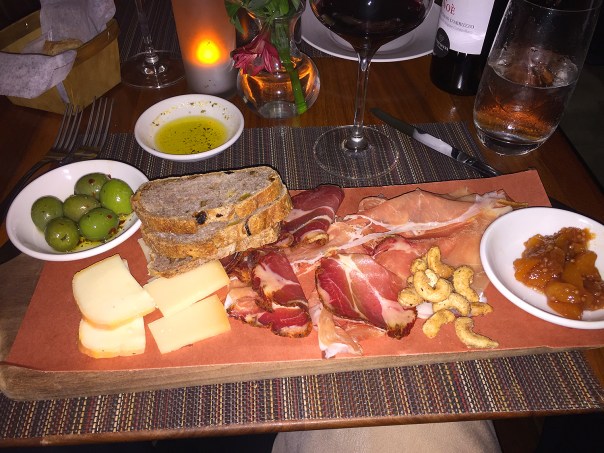
IMG_6608…  Russ chose the Piccolo which allowed for four choices from the meat and cheese offerings, letting our very Italian waiter make the selections for him. Along with marinated Castelvetrano olives, also on the wooden plank platter was an array of spiced cashews, a fruit spread, walnut raisin bread slices, and melt-in-your-mouth Prosciutto di Parma and Coppa meats, and creamy cheeses Taleggio and 24-month Parmigianno. A meal in itself!

IMG_6605
Mid-summer screams fresh corn to me, so I began with a small portion of the Sweet Corn Soup. It was ever so delicately spiced with a nod toward the sweet and garnished with fresh heirloom tomato chunks and a sprinkle of chopped parsley. Divine! Of course, we both shared a bit with each other so we could experience the entire meal together.

IMG_6611Our next hurdle was choosing from the Antipasti & Insalate or the Primi categories, so we went with one from each. Russ chose the San Marzano Lamb Meatballs, with four golf ball-sized mounds of meat smothered in the house’s bright, tangy roasted tomato sauce atop Anson Mills polenta, with shaved Pecorino and parsley.

IMG_6609
My pick was a Primi, the homemade Tagliatelle with braised veal, succulent Maitake mushrooms, mixed with Swiss chard and topped with rosemary and grated Pecorino. Our waiter raised an eyebrow when I mentioned I was also going to order a Secondi, so he suggested just a half order of the pasta, thank goodness, because that was plenty—and plenty tasty!
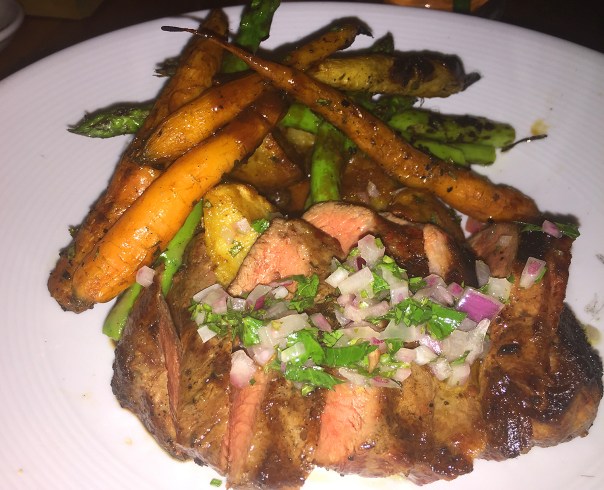
IMG_6614For his main dish, Russ zeroed in on the Niman Ranch Flat Iron Steak grilled to a perfect medium-rare and accompanied by grilled asparagus, nantes carrots, rock potato and dressed with a clinging red wine jus. He absolutely marveled at how fantastic the vegetables were, especially the potatoes with their crisp exterior and creamy soft interiors. I had a taste and couldn’t have agreed more.

IMG_6613
An all-time favorite of mine are Scallops, and their line of five plump, perfectly seared dry sea scallops came christened with roasted pepper marmalade. They were paired with a baby kale, shaved fennel and citrus salad, and an artistic swash of Shishito pepper purée decorated the plate. Before finishing this course, we were quite full (surprised?), so about half of each dinner was packaged for home. And BTW, we had them the next day for lunch at the pool—even without reheating, they were amazingly good.

Definitely no room for dessert but it looked like they had some great options from scrutinizing offerings ordered by other diners. The meal was not rushed and the waitstaff was very attentive, making sure to keep our wine and water glasses refreshed as needed. Eno Terra, a new favorite? Quite possibly…

Healthy-ish Appetizer

Need a quick and healthy-ish appetizer? Endive Spears with Spicy Goat Cheese clocks in right around 100 calories and is a delicious, light appetizer I found on myrecipes.com. It yields six servings of six Belgian endive leaves per guest, so if the party is larger, double the cheese mixture ingredients and serve crostini crackers in addition to the lettuce. I also added a good smattering of chopped fresh chives for color and taste.

Let the party begin…

IMG_5993

Endive with Spicy Goat Cheese

  • Servings: 6
  • Difficulty: very easy
  • Print

IMG_5997

Ingredients

  • 1/2 cup (4 ounces) goat cheese
  • 1/3 cup plain fat-free Greek yogurt
  • 1/4 teaspoon kosher salt
  • 1/8 teaspoon ground red pepper
  • 1 garlic clove, pressed
  • 2 Tbsp. chopped fresh chives (optional)
  • 1 1/4 teaspoons Hungarian sweet paprika, divided
  • 36 Belgian endive leaves (about 3 heads)
  • Crostini olive oil crackers (optional)

Directions

  1. Combine first 5 ingredients (and chives if using) and 1 teaspoon paprika in a medium bowl; mash with a fork until smooth.
  2. Top each endive leaf with about 1 teaspoon cheese mixture.
  3. Sprinkle remaining 1/4 teaspoon paprika evenly over cheese mixture.

http://www.lynnandruss.com

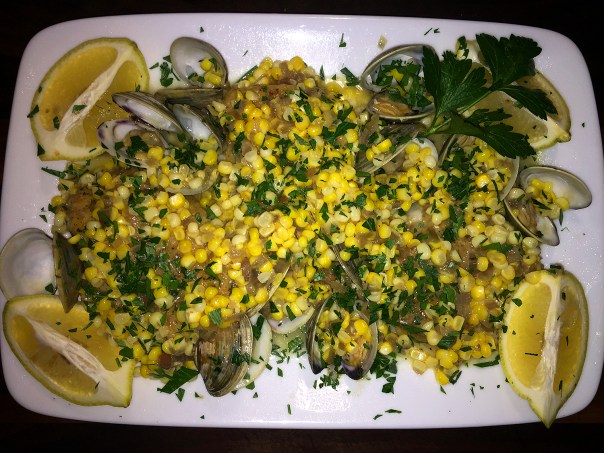
Skillet Cod, Clams, and Corn with Parsley

Who says clam sauce is only good for pasta? Not this buttery, corn-studded, one-pan wonder. I, personally, am not a fan of whole clams because of what I perceive as the “ya-ya” consistency, but I don’t mind them cut up in soups or appetizers. So when we came across this recipe in our latest bon appétit magazine, Russ was hoping I’d agree to placing this on a weeknight menu—he adores clams!

IMG_6452.jpg

Realizing he could eat all of the clams and I’d still have cod and corn, it wasn’t hard to win me over. The original recipe said it serves four, but we were hard pressed to see how. It almost vanished between the two of us, and I didn’t even eat any of the clams—with Mr. Hubby being the sole recipient of the entire dozen! In fact, Russ thinks you should add even more…

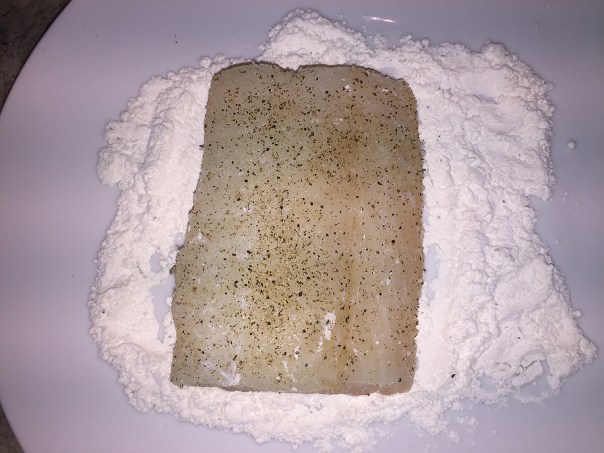
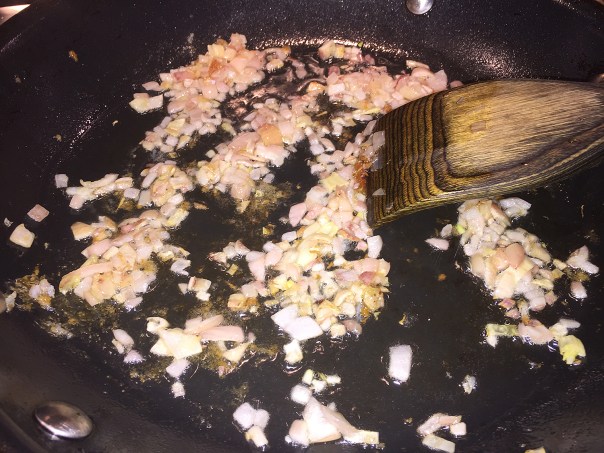
Coating the cod with flour before cooking prevents the flaky fillets from tearing; any bits left in the pan gives body to the clam mixture. Oh, and make sure to leave the shallots in the pan after removing the clams, you want them to get happy with the buttery corn. Verdict? Two thumbs up!

NOTE: When buying a big portion of cod or other skinless fish, you’ll often end up with the skinny tail end. Keep it from overcooking by folding the tail end underneath itself to create a piece that’s closer in thickness to the rest of the fillets. Then proceed to cook it as you would any other piece.

Skillet Cod, Clams, and Corn with Parsley

  • Servings: 2-3
  • Difficulty: easy
  • Print

Ingredients

  • 1¼ lb. skinless cod fillet, cut into 4 pieces, patted dry
  • Kosher salt, freshly ground pepper
  • ⅓ cup all-purpose flour
  • 4 Tbsp. extra-virgin olive oil, divided
  • 1 large shallot, finely chopped
  • ⅓ cup dry white wine
  • 12 littleneck clams, scrubbed
  • 2 medium ears of corn, kernels cut from cobs (1–1¼ cups)
  • 3 Tbsp. unsalted butter, cut into pieces
  • ¼ cup chopped parsley
  • Lemon wedges (for serving)

Directions

  1. Season cod all over with salt and pepper. Sprinkle flour over a large plate and, working one at a time, press side of fillet where skin used to be into flour to thoroughly coat. Tap off excess and set on a platter, flour side up.
    IMG_6436
  2. Heat 2 Tbsp. oil in a large nonstick skillet with a tight-fitting lid over medium. Cook cod, floured side down, shaking skillet occasionally to prevent sticking, until flesh is opaque and starting to flake around the sides and underside is golden brown, 5–7 minutes.
  3. Carefully turn cod over and reduce heat to low. Cook until cooked all the way through (flesh should be completely opaque), about 2 minutes (thinner pieces may go more quickly). Place on platter, golden side up; take care not to break up the delicate fillets.
    IMG_6439
  4. Turn heat back up to medium, pour remaining 2 Tbsp. oil into skillet, and cook shallot, stirring often, until tender and golden, about 2 minutes.
    IMG_6444
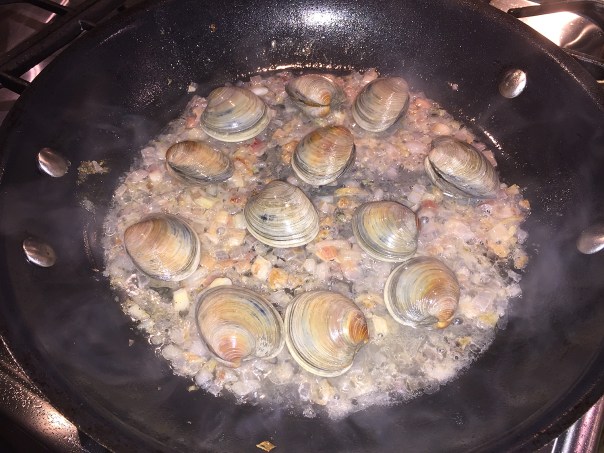
  5. Add wine; cook until almost completely evaporated, about 1 minute. Add clams and cover skillet.
    IMG_6445
  6. Cook until clams open, about 5 minutes (some clams might take a few minutes longer).
    IMG_6447
  7. Uncover skillet and transfer clams (only), discarding any that didn’t open, to platter with cod.
  8. Reduce heat to low and add corn and butter to skillet. Cook, stirring, until butter is melted, sauce is thick and glossy, and corn is tender, about 3 minutes.
    IMG_6450
  9. Spoon corn mixture over fish and clams. Top with parsley; squeeze lemon wedges over.
    IMG_6457

Recipe courtesy Claire Saffitz of bon appétit

Dressing For Success

Tired of the same ol’, same ol’ salad dressings? Why not skip the processed bottled stuff and turn to a delicious homemade version that can be whipped up in minutes? Not only do these become the star of the show on any number of salads, but they’re also fabulous on chicken, fish, shrimp, as sandwich spreads and used as dips. Now that’s versatility!

For me, and I’m sure most of you too, summertime cooking is about ease and simplicity. And what fits that criteria better than a big healthy(ish) salad? Summer here in the Northeast U.S. is in full swing, with temps soaring into the 90’s, so a dinner salad without much fuss makes a lot of sense to me.

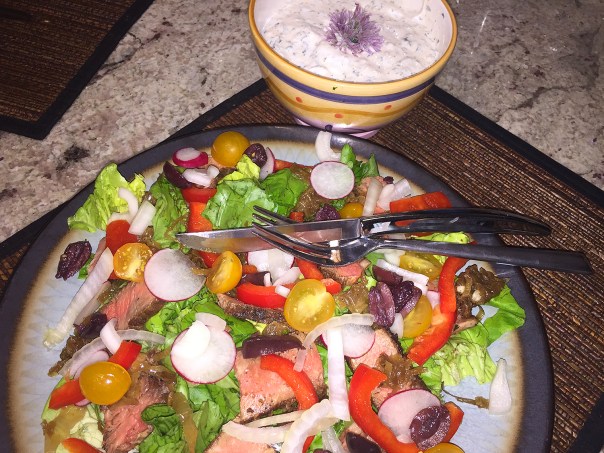
Back in mid-May, we grilled up a couple of gigundo porterhouse steaks for (one of) Russ’ birthday dinner, with ample portions leftover, so we figured it would make for a perfect weeknight salad. Then our recent Fine Cooing Magazine arrived in the mail, with an article of the same name as this blog, covering eight different homemade dressings. Serendipity I say! The Buttermilk Ranch Dressing seemed like the perfect companion, so that’s the one we went with.

IMG_4908

Because salad dressings often contain small amounts of fresh herbs, it’s tempting to substitute dried. If you’re looking for vibrant flavor though, fresh herbs are the way to go. This ranch uses both, but if you have some fresh thyme on hand, go ahead and throw that in instead. The dressing improves with time, and the flavor is best if you can let it sit for at least an hour before serving. Store any leftovers in a glass container with a tight lid for up to a week.

If you’re lucky enough to have your own homegrown chives in bloom, snip off a flower and use as a garnish—they are edible BTW. This Buttermilk Ranch Dressing is great with vegetable crudités, perfect for upcoming parties and picnics.

IMG_4913

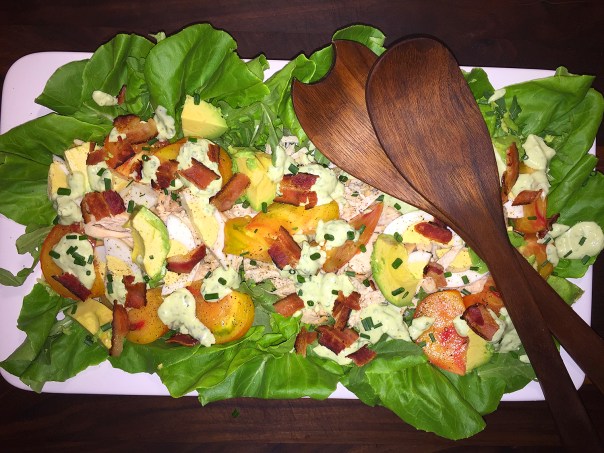
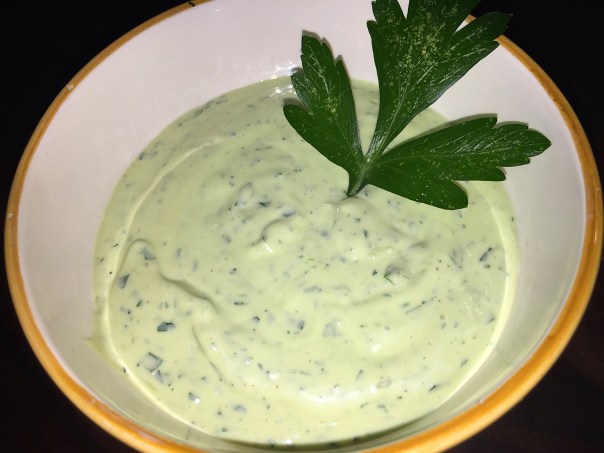
And for yet another twist on ranch dressings to elevate your meal, try this tasty Avocado Ranch Dressing. Avocado provides the creamy richness of mayonnaise, with the arugula adding a bitter balance. It was a splendid topping on a Chicken Cobb Salad—and using a store-bought rotisserie chicken simplifies the process. You can also try it with crudités and chicken wings or use it in wraps. Recipe follows the Buttermilk below.

IMG_6425.jpg

Buttermilk Ranch Dressing

  • Servings: makes 1 1/2 cups
  • Difficulty: easy
  • Print

Ingredients

  • 1/2 cup buttermilk
  • 1/3 cup mayonnaise
  • 1/3 cup sour cream or crème fraîche
  • 2 tsp. grated yellow onion or 1/2 tsp. granulated onion
  • 1-1/2 tsp. lemon juice or white-wine vinegar
  • 1-1/2 tsp. minced fresh chives
  • 1-1/2 tsp. minced fresh flat-leaf parsley
  • 1/2 tsp. garlic paste or 1/4 tsp. granulated garlic
  • Pinch dried thyme
  • Pinch paprika
  • Kosher or fine sea salt and freshly ground black pepper

Directions

  1. In a medium bowl, whisk the buttermilk, mayonnaise, and sour cream until smooth.
  2. Stir in the onion, lemon juice, chives, parsley, garlic, thyme, and paprika. Season to taste with salt and pepper.
  3. Serve or store in the refrigerator in a covered container for up to a week.
    IMG_4902

Avocado Ranch Dressing

IMG_6404

Avocado Ranch Dressing

  • Servings: makes 1 1/2 cups
  • Difficulty: easy
  • Print

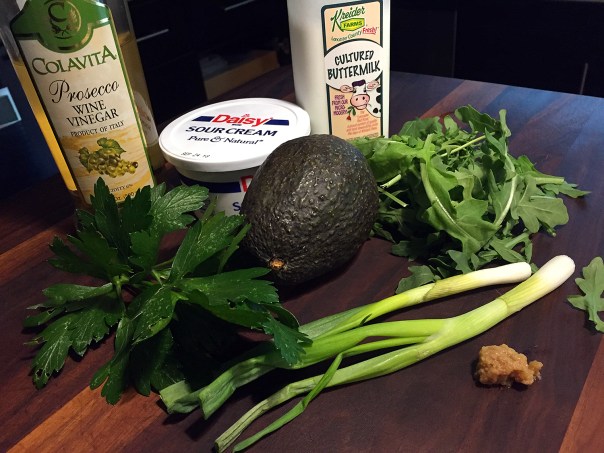
Ingredients
IMG_6397

  • 1/3 cup mashed avocado (about 1 small)
  • 1/3 cup sour cream or crème fraîche
  • 1/2 cup buttermilk
  • 1 Tbs. minced fresh scallion
  • 1/4 tsp. garlic paste or a pinch of granulated garlic
  • 1-1/2 tsp. white wine vinegar
  • 1 Tbs. minced arugula
  • 1 Tbs. minced fresh flat-leaf parsley
  • Fine sea salt and freshly ground black pepper

Directions

  1. Scoop the avocado and sour cream into a blender or food processor.
    IMG_6402
  2. Add the buttermilk, scallions, and garlic. Purée until smooth.
  3. Transfer the avocado mixture to a small bowl. Stir in the vinegar, arugula, parsley, and 3/4 tsp. salt. Season to taste with salt and pepper.
  4. Serve or store in the refrigerator in a covered container for up to 1 week.
    IMG_6407

Both salad dressings recipes courtesy of Erin Coopley from Fine Cooking

Bookmark This for a Weeknight Dinner Duo

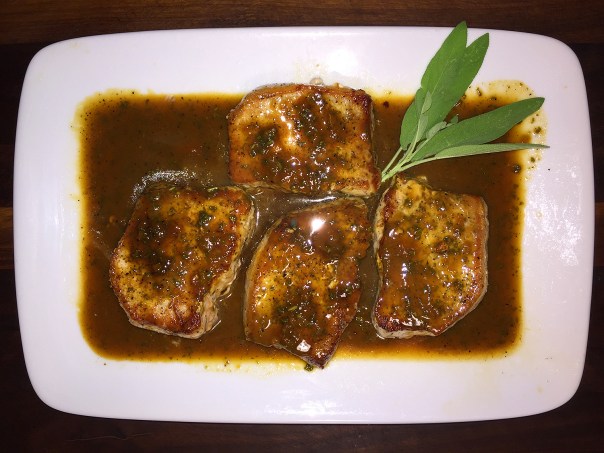
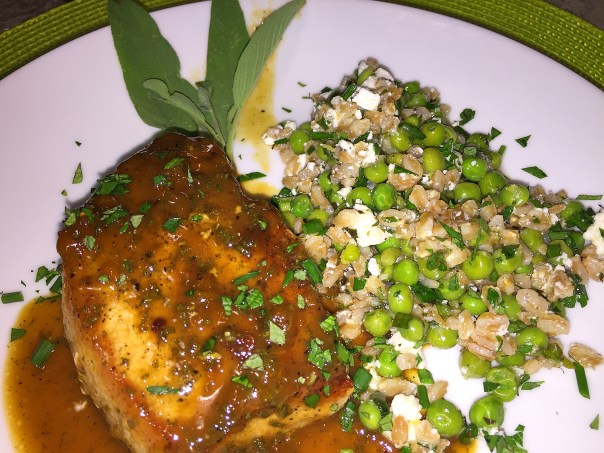
Pan-Seared Pork Chops with Apricot-Dijon Sauce packs a LOT of flavor with little effort. Actual cooking time will depend on how thick your chops are, so keep a close eye on the meat temp because you don’t want them to dry out. Ours were about 3/4″ thick and took a total of 8 minutes, although Russ started checking after 6 minutes.

IMG_6274

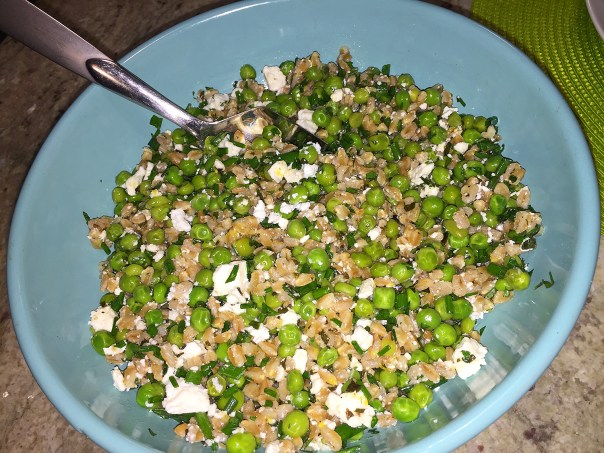
Our simple tabbouleh-inspired green peas and farro side was a perfect companion to the seared pork chops. The original recipe by Christine Burns Rudalevige from Fine Cooking indicates to use bulgur, but since we didn’t have any—and our pantry was full of just about every other type of grain—we substituted Italian Farro. I can’t tell you enough how much we really liked this side dish!

Just to be safe, I cooked the farro according to package instructions and used homemade chicken stock which boosted the flavor to yet another level. And instead of draining the liquid over the peas, I added the peas to the hot farro keeping them both warm until the meat sauce was in it’s final reduction.

IMG_6256.jpg

Here’s the lowdown on bulgur versus farro. One cup of cooked bulgur contains 151 calories while a cup of farro contains significantly more with 340 calories. A cup of cooked farro also contains about 2 grams of fat, compared to the less than 0.5 gram of fat in a cup of cooked bulgur. But farro is a star in terms of protein with about 14 grams per cup, while a cup of cooked bulgur contains 5.6 grams of protein. If you’re looking for a way to increase your intake of essential nutrients, farro is a better choice than bulgur.

IMG_6242

Pan-Seared Pork Chops with Apricot-Dijon Sauce

  • Servings: 4
  • Difficulty: easy
  • Print

Ingredients

  • 4 boneless pork loin chops, 1 inch thick
  • Kosher salt and freshly ground black pepper
  • 2 tsp. vegetable oil
  • 3/4 cup unsalted chicken stock
  • 3 Tbs. apricot preserves
  • 3 Tbs. apple-cider vinegar
  • 2 tsp. Dijon mustard
  • 2 tsp. finely chopped fresh sage

Directions

  1. Season the pork well with salt and pepper.
  2. Heat the oil in a large skillet over medium-high heat until shimmering. Add the chops and cook, flipping once, until well browned and cooked through (140°F), 7 to 8 minutes total.
    IMG_6257
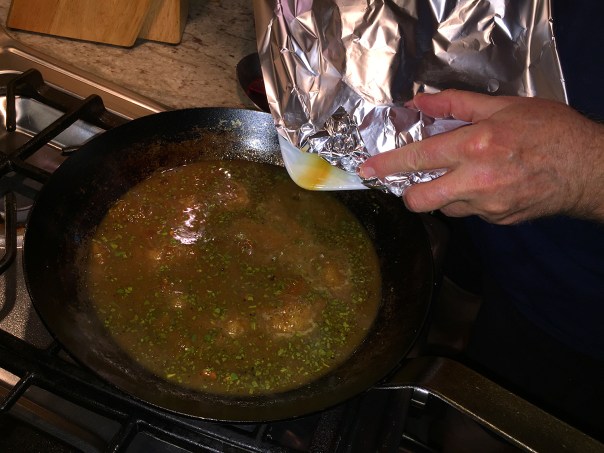
  3. Transfer to a platter, tent with foil, and let rest while you make the pan sauce.
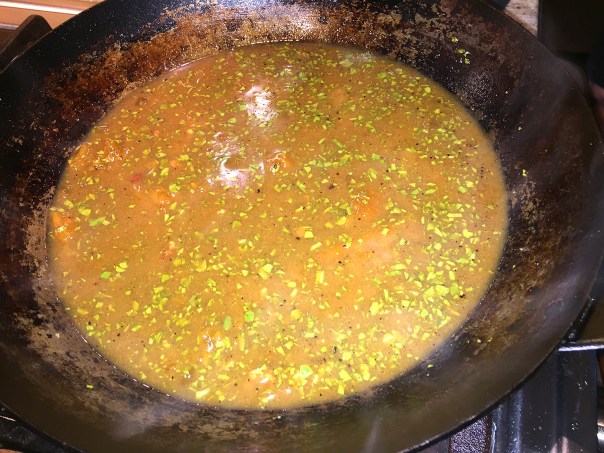
  4. Reduce the heat to low, add the stock, and cook, stirring and scraping any browned bits from the bottom of the pan, until the liquid is reduced by half, about 8 minutes.
  5. Add the preserves, vinegar, mustard, and sage, and whisk until smooth.
    IMG_6245
    IMG_6264
  6. Add the juices from the resting pork, and season to taste with salt and pepper.
    IMG_6265
    (We also reduced the sauce again here for about 5 minutes to thicken it.)
  7. Serve the chops with the sauce.
    IMG_6266Pork chop recipe by Lynne Curry from Fine Cooking
http://www.lynnandruss.com

Green Peas with Bulgur, Garlic, Fresh Herbs, and Feta

IMG_6270

Green Peas with Bulgur, Garlic, Fresh Herbs and Feta

  • Servings: 4-6
  • Difficulty: easy
  • Print

Ingredients

  • 5 cloves garlic, peeled and halved
  • 1/4 cup olive oil
  • 1-1/2 cups medium-grind bulgur
  • 6-1/2 oz. (about 1-1/2 cups) frozen peas
  • 1/2 tsp. finely grated lemon zest
  • 2 Tbs. fresh lemon juice
  • 1 tsp. honey
  • Kosher salt and coarsely ground black pepper
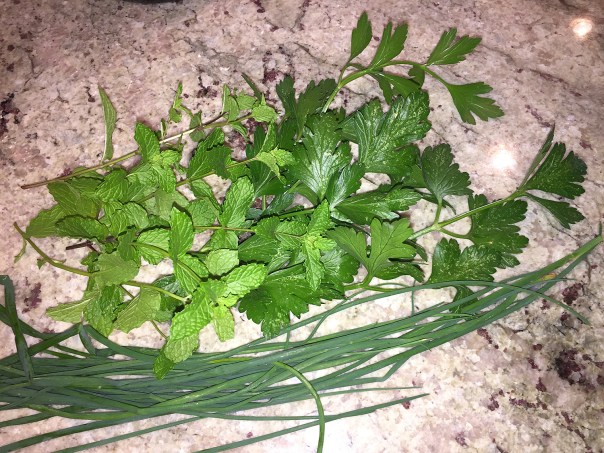
  • 1 cup coarsely chopped fresh tender herbs (preferably a mix of parsley, chives, and mint)
  • 3 oz. crumbled feta (about 3/4 cup), more to taste

Directions

  1. In a small saucepan, simmer the garlic in the oil until golden, 5 to 6 minutes. Transfer to a large bowl.
    IMG_6246
  2. Put the bulgur and 5 cups water in a medium saucepan and bring to a boil over medium-high heat. Cover, reduce to a simmer, and cook until tender, 10 to 15 minutes.
  3. Meanwhile, put the peas in a colander in the sink. Drain the bulgur over the peas, and rinse under cold water.
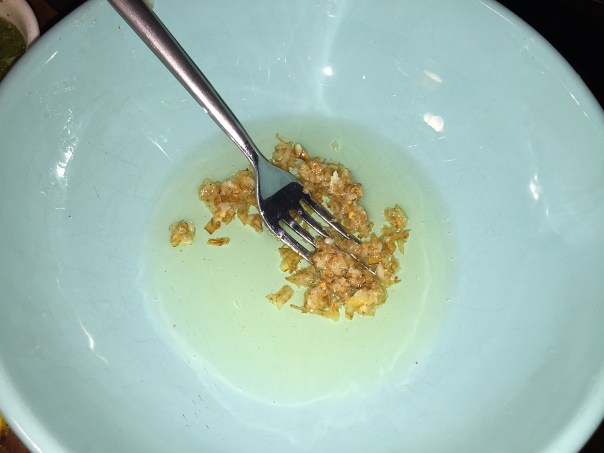
  4. With a fork, mash the garlic to a paste. Whisk in the lemon zest and juice, honey, 1/2 tsp. salt, and 1/4 tsp. pepper.
    IMG_6247
  5. Add the bulgur and peas, and toss. Add the herbs and feta and toss again. Season to taste with salt and additional feta, and serve warm or at room temperature.
    IMG_6252

http://www.lynnandruss.com

IMG_6273

Blue Danube

Danube so blue, I’m longing for you.
You murmur of home, far over the foam…

Well, not hardly. In fact, not at all.

On a short road trip into the back streets of Trenton with gal-pal Jeremy, we patronized Blue Danube, an old-world rowhouse restaurant featuring Hungarian and German food. The only body of water in proximity is the Delaware River several blocks over, and the color is nowhere near blue. Jeremy had eaten here a few times and said the food was memorable—the neighborhood, not so much. She was spot on, on both accounts.

IMG_6143The Blue Danube sits at the corner of Elm and Adeline streets off of Broad.

Since it was Friday the 13th, I secretly crossed my fingers that when we emerged from eating, her car would still be there. It was, and the weekend night life was just starting to get underway. But that’s someone else’s blog, so I’ll concentrate on our dining experience.

IMG_6145

The restaurant’s main door (on the side) opens to a small, but well-stocked bar, where when we arrived, three elderly folks were enjoying cocktails, while another couple stood in the miniscule waiting area to get seated. We on the other hand, had a reservation and were shown to our table right away. The two small dining rooms consist of only about eight to ten tables total, and for a Friday night, oddly several of them were still available.

blue.danube.bar

As described by Karla Cook of the NY Times “…it’s an old-timey restaurant where the knickknacks are layered, the flowers are silk and the glasses don’t match. But the soft-focus food hugs you from the inside.” This Eastern European-Continental formula is a recipe for success—at least where the food is concerned. Blue Danube is all about paprikas, wiener schnitzel and goulash, spätzle and mititei, plus cabbage and pierogies. Yes, there are some Italian and Americanized options too in the case of a picky eater.

IMG_6149

Let me just preface the menu by saying if you’re in the mood for mesclun and artisanal goat cheese with balsamic vinaigrette, don’t go to Blue Danube. Trendy it’s not. And don’t be in a hurry, because everything is made to order and the service is slow. The upside of that is, at least one doesn’t feel rushed.

Starters consist of about a dozen cold (i.e. Stuffed Cherry Peppers, Pickle Platter) and hot (Danube Sampler for Two, Turoscuza) choices, and a few homemade soups. The reasonably-priced main dishes are listed under Old World Classics (which include soup or salad), Steaks & Chops, Chicken and Veal Entrées, plus Pastas and Seafood Specialities. So “When in Rome” as the saying goes, we concentrated on the Old World Classics.

Dining companion Jeremy (above left) took some time deciding but finally landed on the Taste of Europe: a large platter loaded with stuffed cabbage, pork schnitzel, pierogies, and homemade sausage on a bed of cabbage and sauerkraut, garnished with a generous dollop of sour cream. As if you need more, the entrées come with a choice of sides and Jeremy chose the red cabbage. Let me tell you, she LOVED her dinner.

IMG_6155

IMG_6152
Our side salads were nothing out of the ordinary in looks, but they tasted amazing! And no, those are not french fries on top…

While Stuffed Cabbage is not a typical choice for me, it seemed to be calling my name that evening. The three melt-in-your-mouth cabbage rolls made with pork, beef and rice, are slow cooked and smothered with tomatoes, sauerkraut and shredded cabbage and come with either pierogies or kielbasa—I chose the latter. While my entrée was very good, the side of spinach cooked to the consistency of baby food, was way overdone to my liking, although it was tasty.

IMG_6153

Their desserts run the gamut from Tiramisu, to Apple Strudel, to Savarina and Parfaits and Sundaes. Too darn full—and with take-home doggie bags—we didn’t even consider ordering more food. But on our way out Jeremy noticed a young couple sharing a very large sweet treat, which when asked, they told her was the Tiramisu, indeed enough for two!

As we emerged onto the streets, the evening was growing dark, our stomachs were full, and the car was intact. All-in-all, not a bad dining experience…


Grilled Chili-Garlic Flank Steak with Avocado Butter

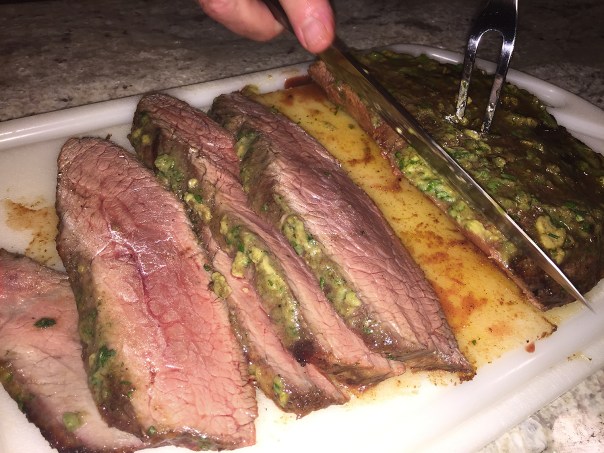
Another grilling recipe to keep you in the great outdoors. Grilled Chili-Garlic Flank Steak with Avocado Butter hails from chef/author Ronne Day of Fine Cooking in their “Make It Tonight” series. Our flank steak was unusually thick so the grilling time took almost twice as long, and even after resting it was still on the rare side—but oh, so tasty!

IMG_6127

The amount of butter seemed excessive to me, so I cut it in half, down to 2 ounces (half of a stick) but kept the amounts of the other ingredients the same, and the butter compound was great! You don’t have to use all of the butter mixture on this steak, but it’s so good, you just might. Any leftover would be great on fish, breaded chicken cutlets, baked potatoes, or rice. A few days later, I indeed used ours on some baked potatoes.

baked.potato.avocado.butter

Grilled Chili-Garlic Flank Steak with Avocado Butter

  • Servings: 4-6
  • Difficulty: easy
  • Print

Ingredients

Avocado Butter
IMG_6097

  • 4 oz. (8 Tbs.) unsalted butter, at room temperature
  • 1/2 large ripe Hass avocado, cut into small dice
  • 2 Tbs. finely chopped fresh cilantro
  • 2 tsp. fresh lime juice
  • 1 tsp. finely chopped serrano
  • 1 tsp. toasted ground coriander
  • Kosher salt

Meat Marinade

  • 2 Tbs. olive oil
  • 2 tsp. granulated garlic
  • 2 packed tsp. dark brown sugar
  • 1 tsp. chili powder
  • Freshly ground black pepper
  • 1-1/2 to 2 lb. flank steak

Directions

  1. In a medium bowl, combine the butter, avocado, cilantro, lime juice, serrano, coriander, and 1/2 tsp. salt, and mix well. Cover with plastic wrap and refrigerate.
    IMG_6098
  2. In a small saucepan over medium heat, combine the oil, garlic, brown sugar, chili powder, 1/2 tsp. salt, and 1/2 tsp. pepper.
    IMG_6099
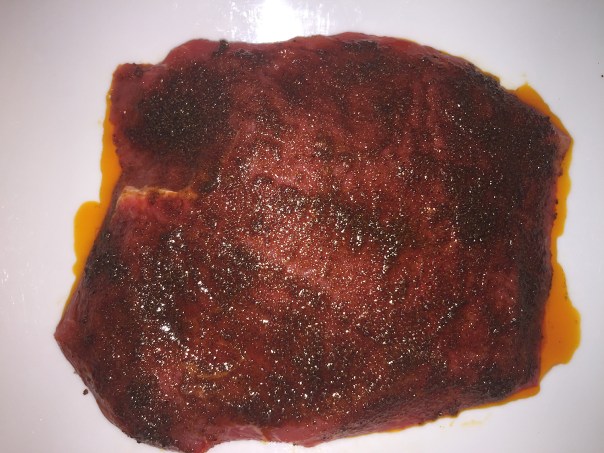
  3. Cook, stirring occasionally, until the sugar dissolves, about 2 minutes. Allow the mixture to cool, then rub it all over the steak. Let sit for 15 to 30 minutes.
    IMG_6105
  4. Meanwhile, prepare a medium-high (400°F to 475°F) gas- or charcoal-grill fire, or heat a grill pan to medium high. Grill the steak, flipping once, until medium rare (125°F to 130°F), about 8 minutes.
    IMG_6110
  5. Transfer to a cutting board, smear with a good amount of the butter, tent with foil, and let rest for 5 to 10 minutes.
    IMG_6111
  6. Slice against the grain and serve with the remaining butter, if you like.
    IMG_6117

http://www.lynnandruss.com


Fire Up the Grill!

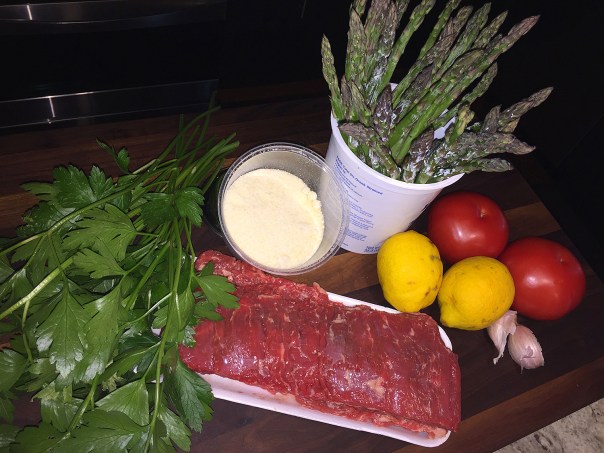
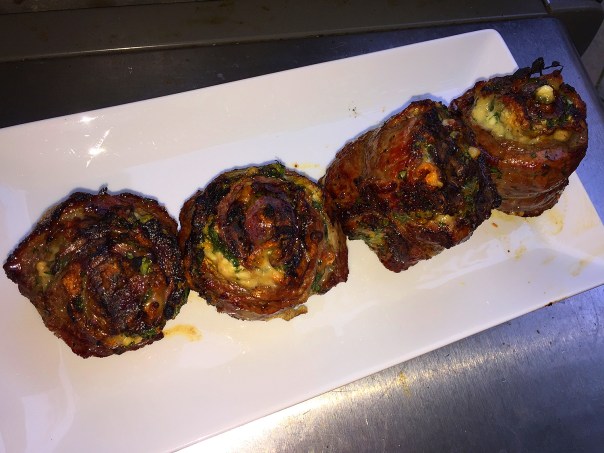
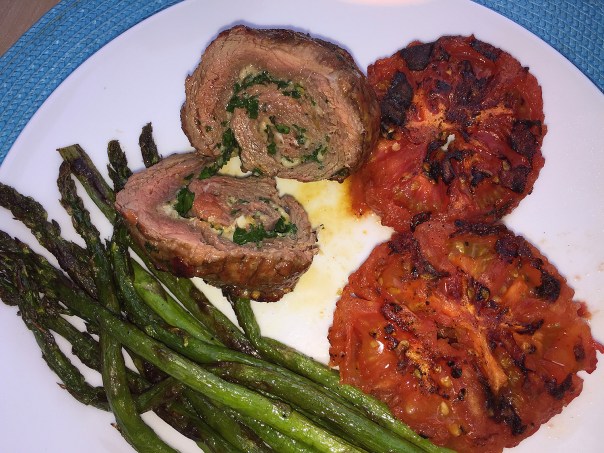
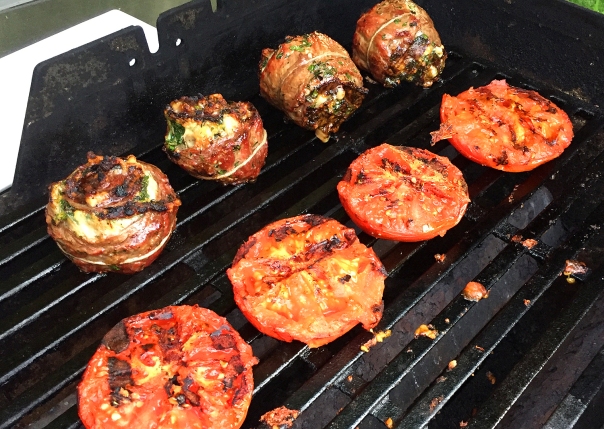
Grilled Skirt Steak Pinwheels, with a side of Grilled Tomatoes—really can’t get any easier than this and still pull off an impressive dinner in about a half hour. Though the meat filling is made with just a few ingredients, it packs a huge flavor punch that’s savory, zingy, and fresh. To add even more flavor I added a couple cloves of finely chopped garlic which was not part of the original recipe.

IMG_5732

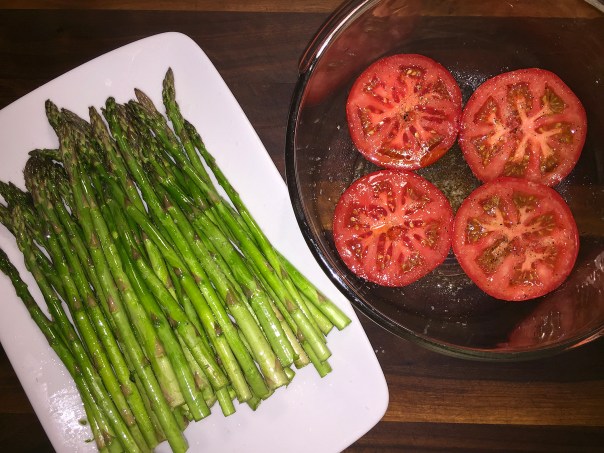
And their is almost nothing better in the summertime than Grilled Tomatoes! For the best results, use in-season, round tomatoes that are ripe yet a bit firm so they will hold their shape on the grill. (Plum tomatoes may be used, but they will be drier in texture. If using plum tomatoes, halve them lengthwise.) Supermarket vine-ripened tomatoes will work but won’t be as flavorful.

IMG_5710

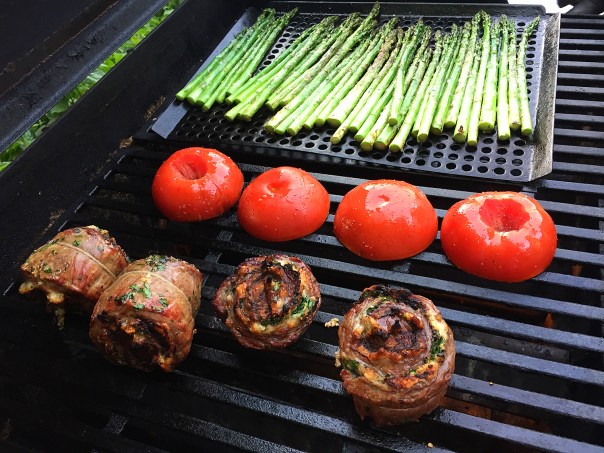
Salting the tomatoes allows some of their juices to be drawn out so that they are less wet on the grill for better browning. Grilling the tomatoes cut sides down first allows them to caramelize before flipping onto their skin sides; the cradle-like skins helps to hold the tomatoes together as they continued to soften.

IMG_5723

To round off the meal and add even more fiber and goodness, grill some asparagus spears lightly rubbed with a good EVOO and sprinkled with salt and pepper. They’ll take approximately the same amount of time as the tomatoes—depending on thickness of course.

IMG_5686

Grilled Skirt Steak Pinwheels

  • Servings: 4
  • Difficulty: easy
  • Print

Ingredients

  • 1 whole 1-1/2-lb. skirt steak or 2 3/4-lb. pieces, trimmed of excess surface fat
  • Kosher salt and freshly ground black pepper
  • 4 oz. coarsely grated Parmigiano-Reggiano (about 1 cup)
  • 2 Tbs. finely grated lemon zest (from 2 large)
  • 3/4 cup finely chopped fresh flat-leaf parsley (from 1 large bunch)
  • 2 cloves garlic, finely chopped (optional)

Directions

  1. If the steak is whole, cut it to make two even pieces. Lay the steak out on a work surface and cover with plastic wrap. Using a meat mallet, gently pound the steak until it is at least 4 inches wide and no more than 1/3 inch thick (it’s OK if one end is thinner). Season both sides of each steak with salt and pepper.
    IMG_5688
    IMG_5691
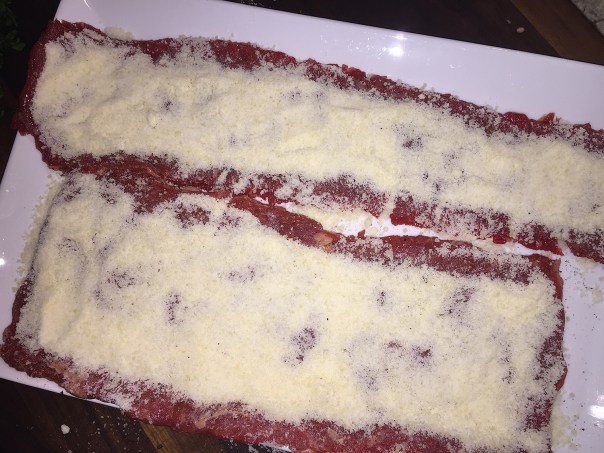
  2. Sprinkle the cheese evenly over the steak, leaving a 1/2-inch border, and then sprinkle the lemon zest and parsley over the cheese. Press on the topping to flatten it.
    IMG_5694
    IMG_5696
  3. Working with one steak at a time and starting at the thinnest end, roll the steak up around the filling.
    IMG_5698
  4. Tie a length of butcher’s twine around the middle, then tie two more pieces of twine around the pinwheel equidistant from the middle to each end. Cut the roll in half along the middle piece of twine and remove that piece of twine; you will now have two tied wheels.
    IMG_5702
  5. Trim the ends for a flat surface, if necessary. Repeat with other steak to get 4 pinwheels total. (The wheels may be wrapped in plastic and refrigerated for a few hours; let them sit at room temperature while the grill heats.)
    IMG_5704
  6. Prepare a high (500°F to 600°F) charcoal or gas grill fire. Cook the pinwheels cut sides down, flipping once, until browned on both sides and cooked to your liking, about 6 minutes per side for medium rare (135°F). Let rest for 5 minutes before serving.
    IMG_5727

Adapted from a recipe by Pat LaFrieda from Fine Cooking

Grilled Tomatoes

IMG_5733

Grilled Tomatoes

  • Servings: 4
  • Difficulty: easy
  • Print

To serve the tomatoes as a simple side dish, top them with the reserved juice, 2 tablespoons of torn fresh basil leaves, 1 tablespoon of extra-virgin olive oil, and flake sea salt to taste. This recipe can easily be doubled.

Ingredients

  • 2 pounds ripe tomatoes, cored and halved along equator (juice reserved
  • 1 tablespoon extra-virgin olive oil
  • ½ teaspoon salt
  • ¼ teaspoon pepper

Directions

  1. Toss tomatoes with oil, salt, and pepper in large bowl. Let stand for at least 15 minutes or up to 1 hour. Reserve juice if using. If also grilling asparagus, toss with EVOO and sprinkle with salt and pepper.
    IMG_5710
  2. FOR A CHARCOAL GRILL: Open bottom vent completely. Light large chimney starter filled with charcoal briquettes. When top coals are partially covered with ash, pour evenly over grill. Set cooking grate in place, cover, and open lid vent completely. Heat grill until hot, about 5 minutes.
    FOR A GAS GRILL: Turn all burners to high, cover, and heat grill until hot, about 15 minutes. Leave all burners on high.
  3. Clean and oil cooking grate. Place tomatoes, cut sides down, on grill and cook (covered if using gas) until tomatoes are charred and beginning to soften, 4 to 6 minutes.
    IMG_5722
  4. Using tongs or thin metal spatula, carefully flip tomatoes and continue to cook (covered if using gas) until skin sides are charred and juice bubbles, 4 to 6 minutes longer. Transfer tomatoes to large plate.
    IMG_5720

Tomatoes can be refrigerated for up to 2 days.

Blue Cheese Cole Slaw

Before my divorce two decades ago, I HATED blue cheese, and my ex loved it. To me, it smelled and tasted like dirty socks. Somewhere along the path of shedding hubby number one, I came to LOVE blue cheese. Something tells me there’s a message in there somewhere…

IMG_5929

One July 4th holiday many years ago while visiting (current hubby) Russ’s mom Mary out in Butler County, PA, she made a Blue Cheese Cole Slaw that won the hearts of everyone at the table. She passed away a few years ago and though we couldn’t locate her exact recipe, I found this one from the Barefoot Contessa, Ina Garten, which seems to have a very similar profile to Mary’s. (Recipe follows.)

IMG_5983

And since it was party time recently at Casa H, a side of this slaw was the perfect foil to our BBQ’d baby back ribs and a corn salad, both of which I’ve blogged about in the past. However, the food frenzy began with starters from guests Paula and Mike who made a very different appetizer of roasted Brussels sprouts with a bacon dip of some sort—loved it! And not to be outdone, Giuliana and Miguel contributed some bubbly hot artichoke dip, which was also a big hit.

IMG_5932

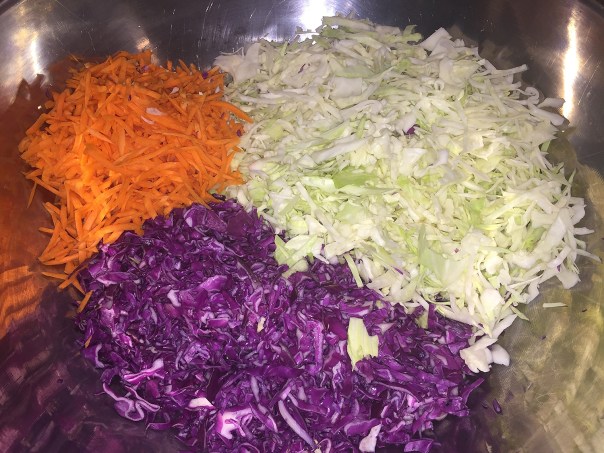
About that Blue Cheese Cole Slaw, be aware, you’ll need a food processor to shred down both the cabbages and the carrots because they have to be in very thin slices. BTW, I don’t like my slaw swimming in mayo so I only used half the amount (1 cup) indicated in the recipe below. Plus it’s an olive oil based mayonnaise which contains only 1/3 the fat of regular mayo.

IMG_5914

IMG_5919

Blue Cheese Cole Slaw

  • Servings: 6-8
  • Difficulty: moderately easy
  • Print

Ingredients

  • 1/2 small head green cabbage
  • 1/2 small head red cabbage
  • 4 large carrots, scrubbed or peeled
  • 2 cups (16 ounces) good mayonnaise (less if desired)
  • 1/4 cup Dijon mustard
  • 2 tablespoons whole grain mustard
  • 2 tablespoons apple cider vinegar
  • 1 teaspoon celery salt
  • 1/2 teaspoon kosher salt
  • 1/2 teaspoon freshly ground black pepper
  • 1 1/2 cups (6 ounces) crumbled Roquefort blue cheese
  • 1 cup chopped fresh parsley leaves

Directions

  1. Cut the cabbages in half and then in quarters and cut out the cores.
  2. Set up the food processor using the slicing blade and place the pieces of cabbage, one at a time in the feed tube. (If they don’t fit, cut them to fit accordingly.)
  3. Place the feed tube pusher on top and turn on the processor. Don’t push on the feed tube pusher or the slices will turn out too thick! Continue with the remaining red and green cabbage quarters.
  4. Transfer into a large bowl, discarding any very large pieces. Optional: Before you pour the dressing on the salad, save a handful of the grated vegetables to decorate for serving.
    IMG_5918
  5. Change the slicing blade for the large shredding blade and cut the carrots. Since the carrots are hard, press the feed tube pusher firmly with the food processor on. Transfer to bowl with the cabbages.
  6. In a medium bowl, whisk together the mayonnaise, both mustards, vinegar, celery salt, kosher salt, and pepper.
    IMG_5922
  7. Pour enough mayonnaise dressing over the grated vegetables and toss to moisten well. Add crumbled blue cheese and parsley and toss together.
    IMG_5926
  8. Cover the bowl with plastic wrap and refrigerate for several hours to allow the flavors to meld. Serve cold or at room temperature.

http://www.lynnandruss.com

1.group.at table.
Guests finish the meal in candlelit fashion.

Summer Squash Sauté

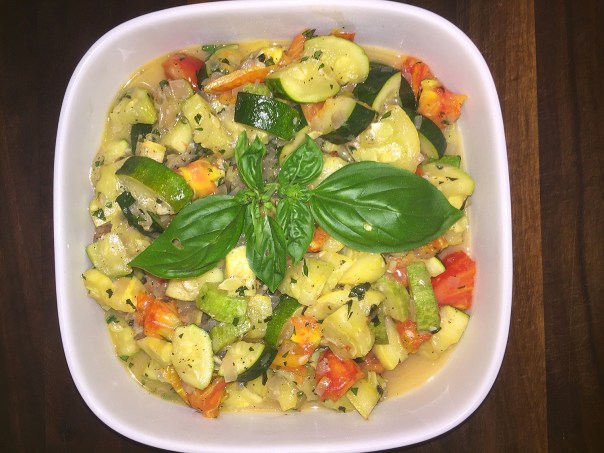
Is your vegetable garden becoming overrun with zucchini, or are neighbors leaving unexpected boxes of summer squash at your doorstep? Even if this is not the case, supermarkets and farmer’s markets are overflowing this time of year with fresh produce—among them myriads of squashes. What better way to highlight summer’s bounty than to serve a healthy vegetable sauté—in this case with summer squash.

With a short list of ingredients and a few easy steps, you can throw this together lickety-split. The longer you cook the squash, the creamier and softer the sauté becomes.

IMG_6104

Summer Squash Sauté

  • Servings: 4-6
  • Difficulty: easy
  • Print

Ingredients

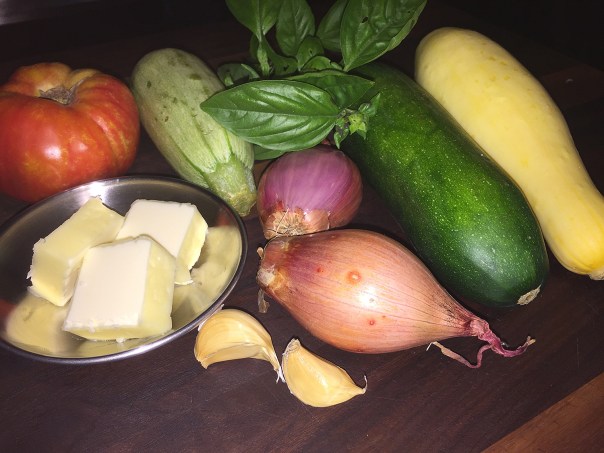
  • 3 Tbsp. butter
  • 1 1/4 to 1 1/2 lbs. summer squashes (zucchini, patty pan, yellow), quartered and cut into 1-inch pieces
  • 2 Shallots, diced
  • 2 Garlic cloves, pressed or finely minced
  • 2 Tbsp. fresh basil, chopped, more for garnish
  • 8-10 Grape tomatoes halved; OR 1 large ripe tomato (preferably heirloom), cored, seeded, and cut into 1-inch pieces
  • Salt and pepper to taste

Directions

  1. Melt the butter in a large skillet.
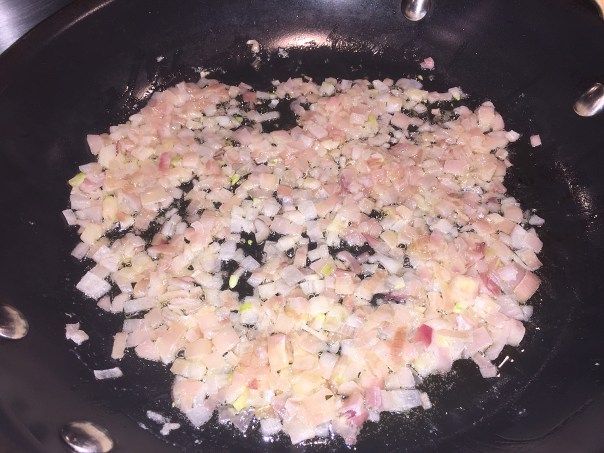
  2. Add shallots and cook over medium-low heat until just tender, about 3 minutes.
    IMG_6106
  3. Add garlic and squash, cook over medium heat, stirring until squash begins to soften, about 4 minutes.
    IMG_6108
  4. Cover and cook over low heat until nice and tender, about 10 minutes.
  5. Toss in tomatoes and chopped basil, cover and cook 1 more minute. Season with salt and pepper to taste.
    IMG_6114
  6. Scrape into serving bowl and garnish with more fresh basil leaves. Serve immediately.
    IMG_6125

http://www.lynnandruss.com


Take a Bite Out of Summer

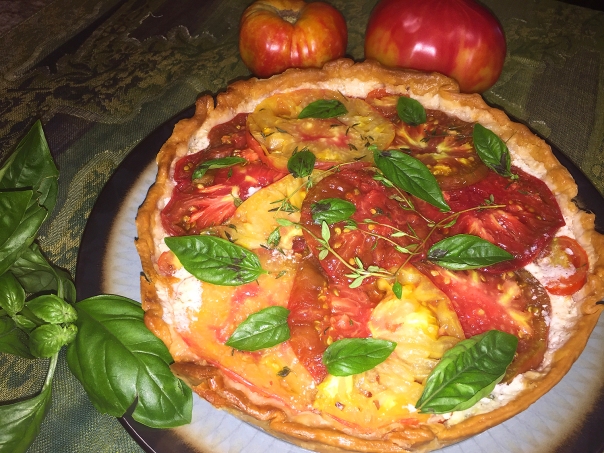
Some of my most favorite things to eat in the summer are heirloom tomatoes—in any color, shape or form. And it’s pretty much a given that I’ll make at least one tomato pie or tart of some sort. What prompted this particular adaptation was the recipe “Heirloom Tomato Tart” by Alison Ashton in the Sunday newspaper supplement, Parade Magazine.

IMG_6089

Firm, even slightly underripe heirloom tomatoes in a variety of colors and sizes are your best bet for this tart. With Farmer’s Markets in full swing, you should have no problem finding a large selection of the fruits. And if you’ve never eaten one, heirloom tomatoes provide far superior flavor than their store-bought counterparts.

What is an heirloom tomato? Many gardeners have heard the term but don’t really know what it means. By way of an easy definition: they are a variety that has been passed down from gardener to gardener. Unlike modern hybrid variations, heirloom tomatoes come true from seed, making them easy to share. If only we had the sun-filled space to grow some 😦

The main reason to choose heirloom tomato pedigrees is the flavor, where you’ll find a wide range in this esteemed tomato world, with many of these varieties prized for having an old-time taste. As mentioned, they’re a far cry from tomatoes at the grocery store, or even from many modern hybrids like ‘Better Boy’ or ‘Early Girl’—which I like in a pinch if I can’t find the heirlooms.

Perhaps the most famous heirloom tomato, ‘Brandywine’ is a classic strain that many experts rank as the best-tasting tomato around. Can’t say as I disagree. To mention a few others, ‘Gold Rush Currant’ is a delightful little one that offers lots of small but very sweet yellow-orange fruits in clusters. A big, yellow heirloom beefsteak-type tomato with fruits that can reach a pound, ‘Goldie’ features a sweet flavor. ‘Costoluto Genovese’ is an Italian heirloom that offers deep red fruits that are heavily ribbed. And so on, and so on—just make sure to get at least three different types for this tart.

The original recipe called for an even split of mascarpone and goat cheese, but because my log of goat cheese was slightly under the 5 ounces, I compensated for it with a little extra mascarpone. When it comes to the crust, make sure to purchase the rolled up refrigerated variety and not the frozen preformed type. Due to my undying love of heirlooms, I was a bit heavy-handed and used closer to 2 1/4 pounds worth.

So go ahead and make yourself an heirloom tart and sink your teeth into the savory treat!

IMG_6056

Heirloom Tomato Tart

  • Servings: 4-6
  • Difficulty: moderately easy
  • Print

Ingredients

  • ½ (15-oz) package refrigerated pie crust
  • 1¾ lb firm multicolored heirloom tomatoes, cores removed, sliced ¼ inch thick
  • Salt and freshly ground black pepper, to taste
  • 5 oz goat cheese, softened
  • 5 oz mascarpone, softened
  • ¼ cup finely grated Parmesan cheese
  • 2 tsp minced fresh thyme
  • Extra-virgin olive oil, for garnish
  • Basil leaves, for garnish

Directions

  1. Preheat oven to 425°F.
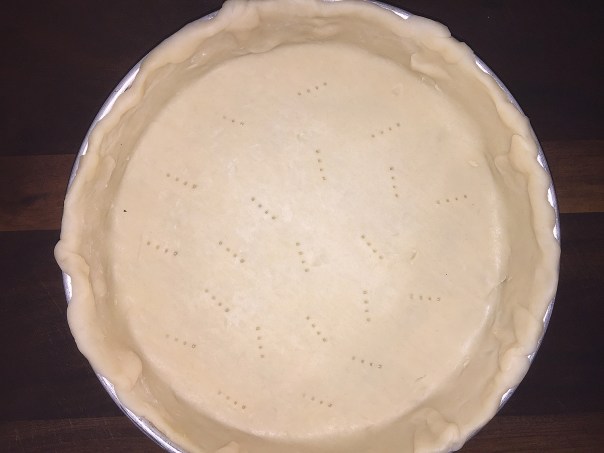
  2. Unroll dough. Fit dough into a 9-inch fluted (or not) removable-bottom tart pan. Trim edges of dough. Prick bottom with a fork.
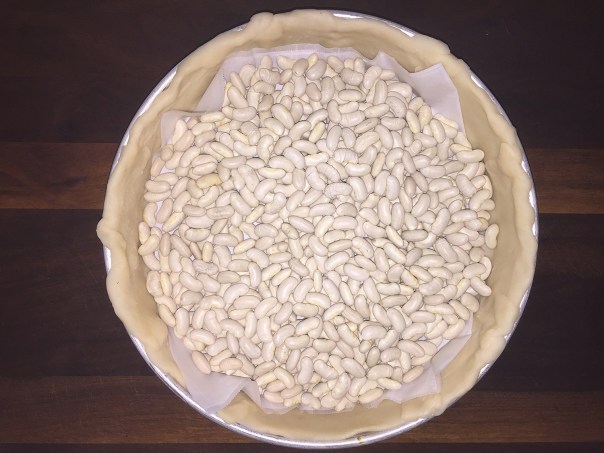
  3. Place a 13-inch-square piece of parchment over dough; fill with pie weights or dried beans. Bake 20 minutes.
  4. Remove parchment and pie weights. Bake 5-7 minutes or until bottom is golden and set. Cool on wire rack.
  5. While crust cools, cover a rimmed baking sheet with several layers of paper towels. (I slanted mine to drain extra juices.) Arrange tomato slices in a single layer. Sprinkle lightly with salt. Let stand 30 minutes, turning halfway through. Pat tomatoes as dry as possible, removing any large clumps of seeds.
  6. In a medium bowl, combine goat cheese, mascarpone, Parmesan, thyme, salt and pepper. Spread in bottom of cooled tart crust.
  7. Arrange tomatoes over filling, overlapping. Sprinkle with salt and pepper.
  8. Bake 20 minutes, shielding edges of tart with foil. Cool 10 minutes.
  9. Remove from tart pan. Cool completely on a wire rack. Drizzle lightly with olive oil; garnish with basil.

http://www.lynnandruss.com

Pictorial Step-By-Step:

IMG_6052
Unroll dough and fit dough into a 9-inch removable-bottom tart pan. Prick bottom with a fork.

IMG_6053
Place a 13-inch-square piece of parchment over dough; fill with pie weights or dried beans.

IMG_6066After removing parchment and pie weights, bake 5-7 minutes or until bottom is golden and set. Cool on wire rack.

IMG_6065Arrange tomato slices in a single layer over several sheets of paper towel, and sprinkle lightly with salt. I find it best to tilt the rimmed baking sheet so any extra liquid drains away from the tomatoes. You may also need to use a few paper towels on top to remove as much moisture as possible.

IMG_6060
IMG_6068
In a medium bowl, combine goat cheese, mascarpone, Parmesan, thyme, salt and pepper. Spread in bottom of cooled tart crust.

IMG_6069
Arrange tomatoes over filling, overlapping. Sprinkle with salt and pepper.

IMG_6074
Bake 20 minutes, shielding edges of tart with foil.

IMG_6075
IMG_6077
Cool 10 minutes, then remove from tart pan. It’s easiest if you place the bottom on a small round bowl and then push the rim down.

IMG_6079
Cool completely on a wire rack, then move to desired plate and drizzle lightly with olive oil; garnish with basil.
IMG_6088

slice

Summer Seafood Paella

Come summer, the Spanish flock to the water with the determination of fish (which makes me think that maybe I do have a few Spanish genes lurking in me somewhere.) As clam shacks are to New England, Spanish beach goers have humble seaside establishments called “chiringuitos” awaiting them. And almost always, they will offer an irresistible Mixed Seafood Paella, like the one Russ made (shown below) one Sunday summer evening.

IMG_6042

Did we tell you we love paella? We are now the proud owners of four—yes four—paella pans, and it was the maiden voyage for our new 16″ variety cooked on top of our outdoor paella gas grill. After all, who wants to be stuck in the house on a beautiful summer evening slaving over a hot stove when you can assemble and cook the real deal outside on your shaded patio? Not us.

An authentic paella is a minimalist affair, often with few other ingredients besides seafood and rice. And the flavor depends on a good rich fish stock, so we recommend making your own ahead of time, or buying a real good one at a fish market. And the best rice to use is a medium grain called “bomba”, which has a nice toothy texture and can absorb lots of flavor. What you must absolutely shun is long grain rice which doesn’t develop the right texture.

The shallow, flat, dimpled carbon steel pan reacts quickly to heat fluctuation and aids in the quick evaporation of liquid. The pan also helps maximize the surface area that comes in contact with the rice. The contact, while the rice is left unstirred as it cooks, produces another paella must-have, a crispy tasty crust that sticks to the pan and is known as “socarrat”—a specialty and prized part of a great paella. Folklore has it that socarrat has aphrodisiac powers, and that is what fuels the passion of those renowned Spanish lovers. Just giving you a heads up…

Russ makes an event out of the entire process starting with Spanish music playing both indoors as he preps, and outside as he grills. Adding to the authenticity is his choice of predinner cocktail, a glass of Spanish sherry. Then we enjoy a glass of Spanish red (Rioja or Tempranillo) as we dine on our Sunday supper—a regular custom in Spain.

It is considered proper to encourage your guests to eat directly from the pan, the traditional Spanish way of eating it, from the outer perimeter in toward the center. It’s not a custom we’re comfortable enough with even though it loses much of its impact and drama once it leaves the pan onto a dinner plate. So as not to draw attention away from the main event, serve simply with a side salad and wine, with perhaps some crusty bread.

Mixed Seafood Paella

  • Servings: 4-6
  • Difficulty: moderate
  • Print

Ingredients

  • 6 cups shrimp shell stock; OR 4 cups clam juice diluted with 2 cups water
  • 1 large pinch of saffron
  • 5 Tbsp. extra virgin olive oil
  • Coarse salt
  • 12 garlic cloves, peeled and left whole
  • 1/2 sweet onion, grated on largest holes of box grater
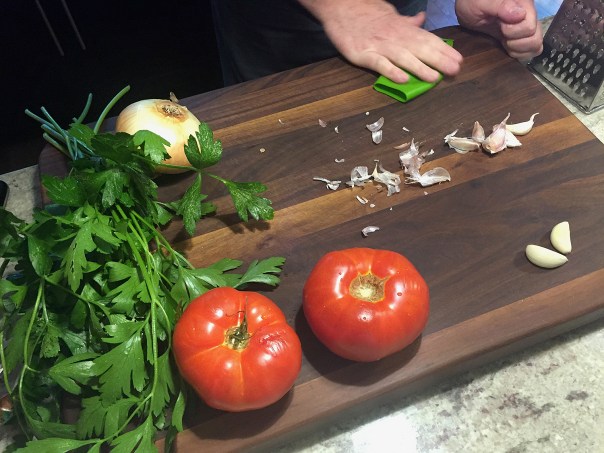
  • 2 large, ripe tomatoes, cut in half and grated on a box grater, skins discarded
  • 1 1/2 tsp. sweet (not smoked) paprika
  • 2 cups bomba or other short to medium grain rice
  • 1/2 cup minced flat leaf parsley
  • 12 small littleneck clams
  • 1/2 lb. jumbo shrimp, peeled and deveined
  • 1/2 lb. large sea scallops, patted dry
  • 2 roasted piquillo peppers, cut into 1/4″-wide long strips
  • Lemon wedges

NOTE: You can also add calamari and/or mussels, but keep the overall proportions pretty much constant.

Directions

  1. Add the shellfish stock to a pan along with the saffron, and bring to a low simmer until ready to use.
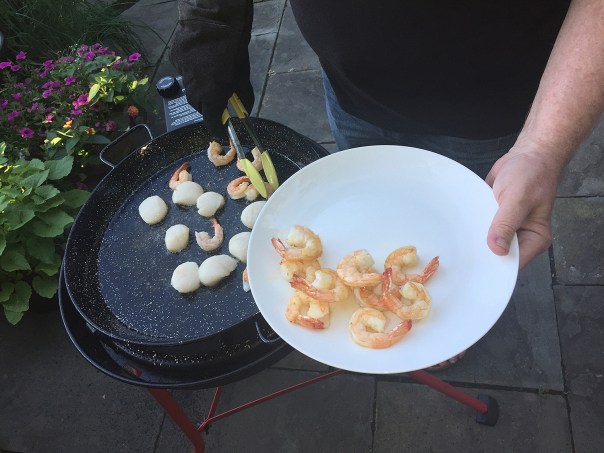
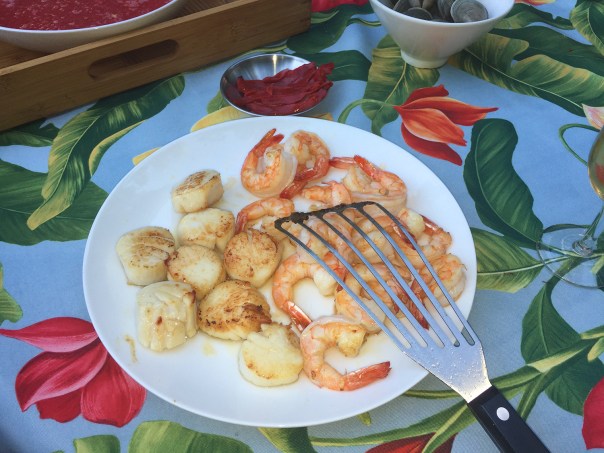
  2. In a paella pan, heat the oil on high. Sauté the shrimp and scallops until just cooked through, about 2 minutes. Transfer to a plate.
  3. Reduce the heat to medium and sauté the onion and garlic cloves until the onion softens, about 5 minutes.
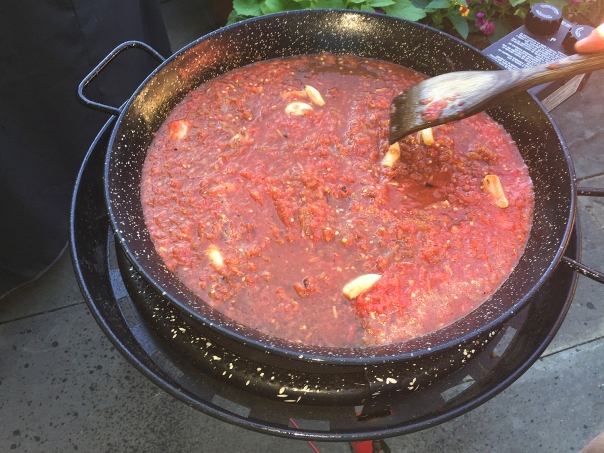
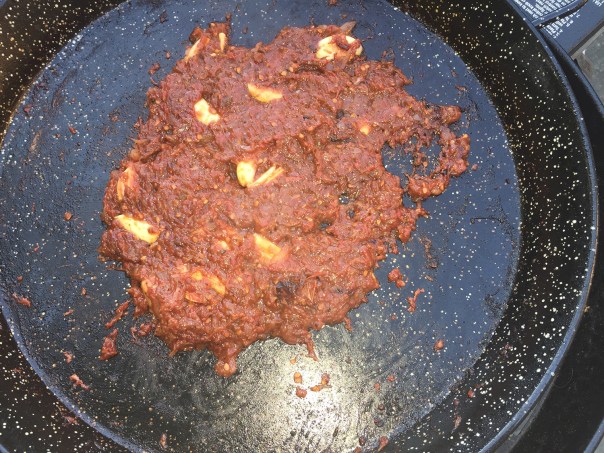
  4. Add the tomato, season with salt, and cook, stirring often, until the mixture has darkened to a deep burgundy and is thick like a compote, 15 to 20 minutes. Add the paprika. This is the sofrito.
  5. Add the rice to the pan with the sofrito, and cook about 2 minutes. Raise the heat to medium-high and pour in 6 cups of the simmering stock and shake the pan to evenly distribute the rice.
  6. Arrange the clams, submerging them as much as possible below the level of the liquid. From this point on, DO NOT stir the rice.
  7. Simmer vigorously, moving the pan as needed to distribute the heat and cook the rice as evenly as possible. After 8-10 minutes the rice should be at the same level as the liquid.
  8. Reduce the heat to medium-low. Continue to simmer more gently, until the liquid has been absorbed, about 10 minutes more.
  9. Arrange the shrimp and scallops in the pan. Increase the heat to medium-high, rotate the pan, and cook for 2 minutes until the bottom layer of rice starts to caramelize, creating the socarrat. The rice will start to crackle, but if it starts to smell burned, remove the pan from the heat immediately.
  10. Layer on the piquillo pepper strips. Remove from heat, and cover loosely with a clean kitchen towel, or foil, and let the paella rest for 5-10 minutes to even the cooking and let the flavors meld.
  11. Place the paella pan in the center of the table and either let guests scoop out portions, or eat directly from the pan. Serve with lemon wedges.

Pictorial Step-By-Step:

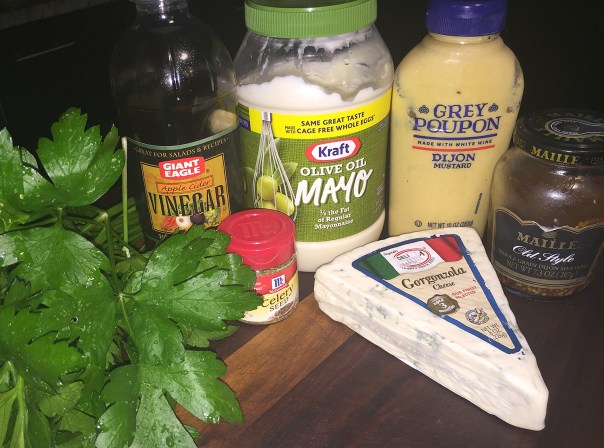
IMG_6006Assemble all ingredients and begin to prep.
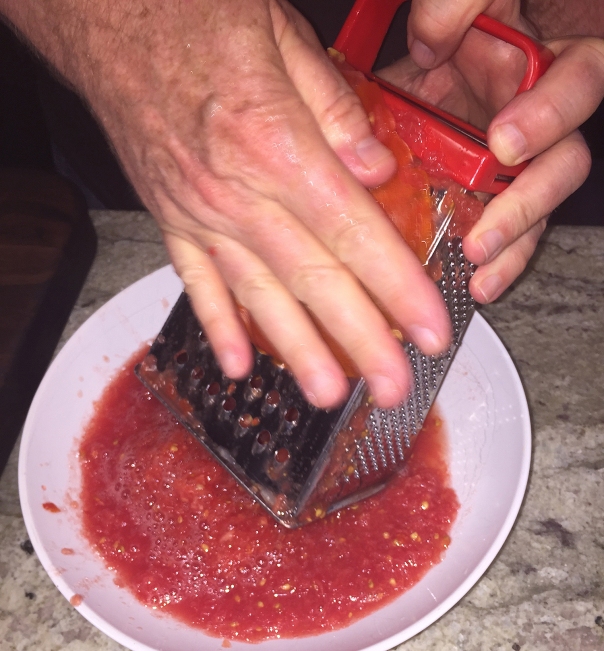
IMG_6011Cut the tomatoes in half and grate along a box grater, then discard skins.

IMG_6015Heat your grill, and gather all prepped ingredients.
IMG_6021
Sauté the shrimp and scallops until just cooked through…

IMG_6022
…then transfer to a plate.

IMG_6025
Sauté the onion and garlic cloves until the onion softens.

IMG_6026
Add the tomato, season with salt, and cook, stirring often…

IMG_6030…until the mixture has darkened to a deep burgundy and is thick like a compote, 15 to 20 minutes.

IMG_6032
Add the rice to the pan with the sofrito.

IMG_6033
Pour in the simmering stock and shake the pan to evenly distribute the rice.

IMG_6037
Arrange the clams, submerging them as much as possible below the level of the liquid. Most of them had already popped open in this picture.

IMG_6038Arrange the shrimp and scallops in the pan. Increase the heat to medium-high, rotate the pan, and cook for 2 minutes until the bottom layer of rice starts to caramelize, creating the socarrat. Layer on the piquillo pepper strips. Remove from heat, and cover loosely with a clean kitchen towel and let the paella rest for 5 minutes.

Indian-Inspired Backyard BBQ

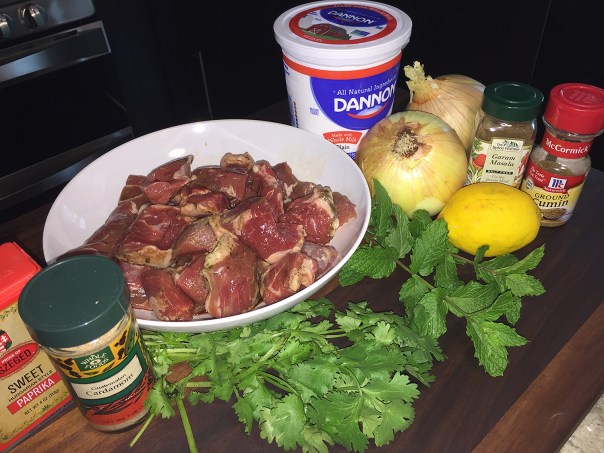
The lamb itself in Tandoori Lamb Kebabs with Samosa Mashed Potatoes is wonderful and fragrant with classic Indian spice. But what makes this a Wowser is the accompanying onions, which add the perfect amount of sweetness and char. Most supermarkets carry the spice mix garam masala these days; if you can’t find it locally, order it online.

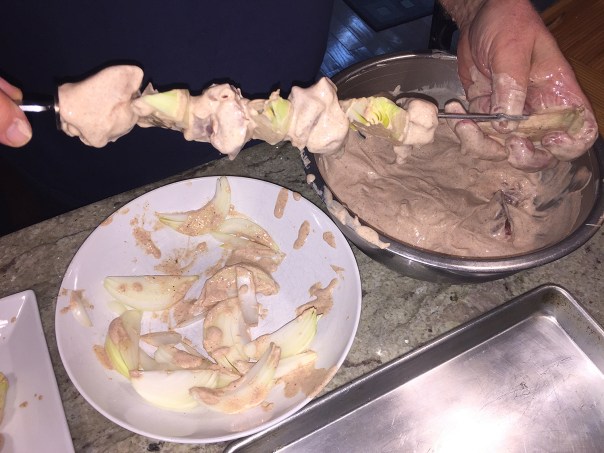
We both thought that the amount of marinade was overkill, and in fact after making it, we believe you can get away with making half of the amount. There was enough leftover to additionally slather marinade all over the onions once on the skewers, put some in a side dish for the table, and still have excess.

IMG_5794

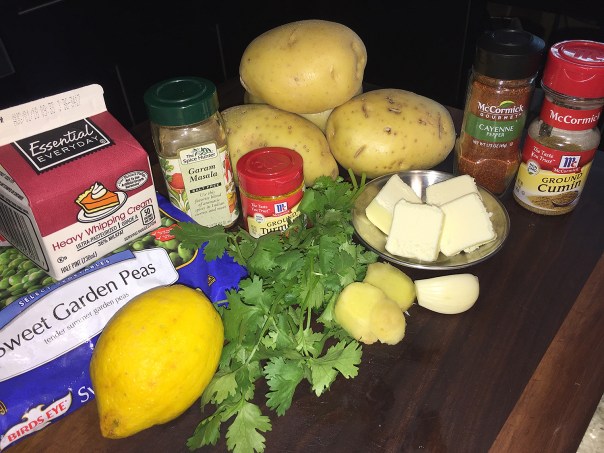
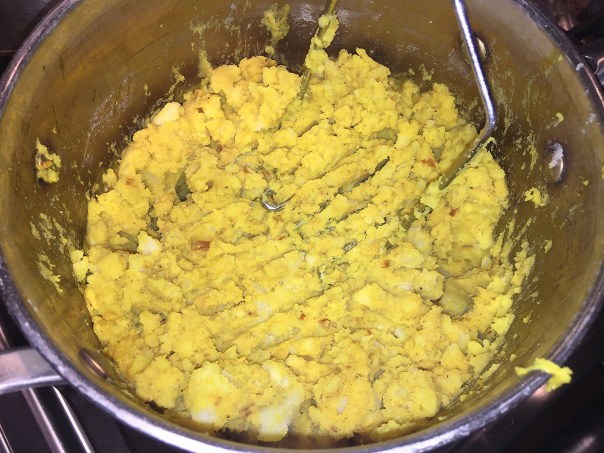
And for a unique side dish, how about the delicious flavors from your favorite Indian restaurant samosas, but none of the laborious shaping and frying? The answer is Samosa Mashed Potatoes. When you look at the list of the ingredients it may seem overwhelming, but most of it is spices, and they are used in both the lamb and the potato dishes.

IMG_5803

Being a warm summer night, I wasn’t too keen on mashed potatoes, but we were both pleasantly surprised how well they meshed with the kebabs and they were packed full of flavor.

IMG_5807

IMG_5780

Tandoori Lamb Kebabs

  • Servings: 4-6
  • Difficulty: easy
  • Print

Ingredients

  • 32 oz. plain whole-milk yogurt
  • 1 Tbs. garam masala
  • 1 Tbs. paprika
  • 1/2 tsp. ground cardamom
  • 1/2 tsp. ground cumin
  • Kosher salt
  • 2 lb. boneless leg of lamb, cut into 1-inch pieces
  • 2 large sweet onions, peeled and cut into 3/4-inch wedges
  • Vegetable oil, for the grill
  • 1 Tbs. chopped fresh mint
  • 1 Tbs. chopped fresh cilantro
  • Flaky sea salt
  • Lemon wedges
  • Chutney (optional)

Directions

  • In a large bowl, combine the yogurt, garam masala, paprika, cardamom, cumin, and 1 tsp. salt. Add the lamb, toss, and marinate for 30 minutes at room temperature, or cover and refrigerate for up to 12 hours.
  • Prepare a medium-high (400°F to 475°F) gas or charcoal grill fire or heat a grill pan on high. Thread the lamb and onion onto metal skewers, alternating pieces of lamb and onion. (If you have leftover onion, make a skewer of just onions.)
    IMG_5790
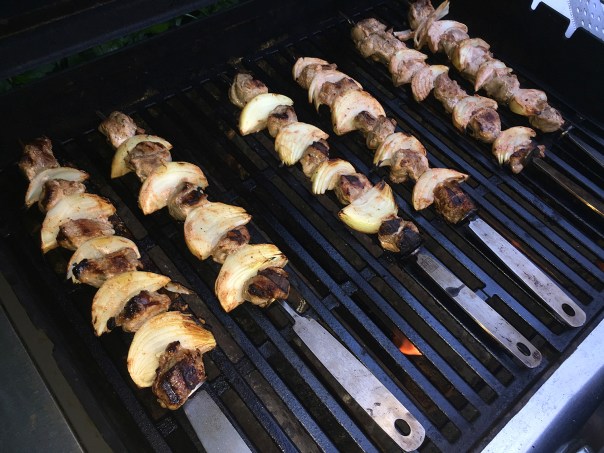
  • Lightly oil the grill, then grill the kebabs, turning once or twice, until the lamb is cooked through and the onions are charred in places, 10 to 15 minutes. Sprinkle with the chopped herbs and flaky salt, and serve with the lemon wedges and chutney, if using.
    IMG_5800
    IMG_5805

Samosa Mashed Potatoes

IMG_5788

Samosa Mashed Potatoes

  • Servings: 8
  • Difficulty: easy
  • Print

Ingredients

  • 1-1/4 lb.  Yukon Gold potatoes, peeled and cut into 1-inch pieces
  • Kosher salt
  • 4 Tbs. unsalted butter
  • 1/3 cup finely chopped onion
  • 1-1/2 tsp. minced fresh ginger
  • 3/4 tsp. minced garlic
  • 3/4 tsp. garam masala
  • 3/4 tsp. ground turmeric
  • 1/4 tsp. ground cumin
  • Generous pinch cayenne
  • 1/2 cup heavy cream
  • 2/3 cup frozen peas, thawed
  • 2 Tbs. finely chopped fresh cilantro, more to garnish
  • Lemon wedges (optional)

Directions

  1. Put the potatoes in a large pot of  water, season generously with salt and bring to a boil. Reduce the heat and simmer until tender, 15 to 18 minutes. Drain.
  2. Melt the butter in the same saucepan. Add the onion, and cook, stirring, until very soft, about 5 minutes. Add the ginger and garlic, and cook, stirring, until fragrant, about 30 seconds. Stir in the garam masala, turmeric, cumin, and cayenne; cook, stirring, until fragrant.
    IMG_5797
  3. Add the cream and 1 tsp. salt, and bring to a simmer.
  4. Return the potatoes to the pan and mash.
    IMG_5799
  5. Stir in the peas and warm through. Stir in the cilantro, and serve garnished with more cilantro and a lemon wedge, if you like.

Both recipes from Fine Cooking; the lamb by By Ronne Day, the potatoes by Laraine Perri 

Italian Marinated Grilled Chicken Breasts

Could you simply buy a bottle of Italian dressing and marinate your chicken in that? Why of course, that’s a quick and easy way out. But I think it’s more fun (yes, I did say fun) to create your own concoction with fresh, organic ingredients—many of which you probably already have in your pantry. And oh, the difference in flavor!

If like us, you grow your own organic herbs and then dry them at the end of the season, you’ll be ahead of the game. Select enough to measure about one tablespoon after you’ve crushed them, which I find easiest to do with a small mortar and pestle.

IMG_5886

When it comes to the choice of vinegar, you can substitute with chardonnay, apple cider vinegar, lemon juice, or even rice vinegar! You just need a vinegar that is not as harsh as ordinary white vinegar. We own a vast library of different olive oils and vinegars so to switch things up a bit, I selected a Prosecco champagne vinegar and a basil flavored extra virgin olive oil, both products of Italy—how appropriate!

oil.and.vinegar.jpg

Preparing your charcoal or gas grill for indirect heat: If using a gas grill, turn all burners to high and close the lid. When the temperature inside the grill reaches 400°, lift lid and turn off one of the burners. The area over the turned-off burner is the indirect heat area. If using a charcoal grill, light 50 to 60 briquettes and let burn until covered with ash, about 20 to 30 minutes. Mound them to one side. The area over the section cleared of coals is the indirect heat area.

If the breasts are large, you should cut them in half yielding more normal serving sizes, more surface area for tasty rubs and sauce, and a much easier time getting to the right internal temperature, which is 165°. The bone-in, skin on pieces provide more flavor and keep the meat juicier than boneless, skinless breasts; although you could also use those in a pinch. Just make sure to keep an eye on them as they will cook faster and can dry out quickly.

IMG_5893Using a heavy duty meat cleaver makes quick work of halving the breasts.

And to round out the meal in quick order without fussing in a hot kitchen? Why not serve a store-bought cole slaw and heat up a can of baked beans of the grill’s side burner. Sometimes SUPER EASY is the way to go…

IMG_5908

Italian Marinade for Grilled Chicken

  • Servings: 4-6
  • Difficulty: easy
  • Print

Ingredients

  • 4 1/2 Tbsp white wine vinegar
  • 2 cloves garlic
  • 1 Tbsp extra virgin olive oil
  • 1 Tbsp dijon mustard
  • 1 1/2 tsp sugar
  • 1 tsp salt
  • Black pepper
  • 1 Tbsp mixed Italian dried herbs (like basil, parsley, oregano, rosemary and thyme)
  • 1 tsp dried red chili flakes (optional)
  • 4 large, bone-in, skin on chicken breasts

Directions

  1. Mix all ingredients except the chicken in a small jar with lid and shake until well combined.
    IMG_5891
  2. Place the chicken in a ziploc bag, add the marinade, seal the bag and refrigerate for a minimum of 30 minutes up to overnight. For best results, marinate at least 3 hours. (For maximum flavor, we marinated for 24 hours.)
    IMG_5895
  3. Place chicken skin side down on indirect-heat area; close lid on gas grill. Cook 15 minutes. Turn chicken over, close lid on gas grill, and cook another 10 minutes.
    IMG_5896
  4. Move chicken over direct heat and cook, turning once, until skin is well browned and crisp, 3 to 5 minutes. Watch carefully; dripping fat or any added oils or butters catch fire easily (a small spray bottle filled with water is handy for taming flames.)
    IMG_5897
  5. After about 30 minutes, test one piece for doneness by inserting a meat thermometer. Internal temperature should read 165° and it should be ever-so-lightly pink (it will finish cooking while it rests.) If very pink, move all chicken back to indirect heat, cover grill, and cook for another 5 minutes. Let rest at least 10 minutes before serving.
    IMG_5898

http://www.lynnandruss.com

Too Soon To Harvest?

Not if you dine at Harvest Seasonal Wine & Grill Bar… “a high quality, farm-fresh, seasonally-changing menu that offers a range of dining options not typically found in traditional farm-to-table establishments.” If you’ve ever patronized a Seasons 52 restaurant, Harvest is it’s kindred spirit in looks and philosophy.

To source the freshest and highest quality ingredients possible, they work closely with 75 local farmers. While other establishments have only recently begun to embrace organic menu additions, Harvest was built from the ground up with a no compromise attitude towards using local, all-natural ingredients in all of their offerings.

IMG_2874

Just before Super Bowl Sunday, we visited a party store in Newtown and happened to notice a new restaurant right next door. Of course curiosity got the best of us and we had to go peek our noses in the window. We were immediately drawn to the modern industrial decor and promise of a farm-to-table menu offering organically grown ingredients. And the grand opening was set for the day after the Super Bowl, so we were excited to try it.

Fast forward about a week and Russ tried to make a reservation for Valentine’s night but they were booked (unless you wanted to eat after 9:00, even late by our standards); although he was able to score one a few days later on a Friday evening. Thank goodness we did make the res because when we arrived, the entrance and waiting area was jam-packed. Luckily our wait was short and we were seated at the far end in a quieter booth—and I’ll use the term “quiet” loosely, as the place was buzzing!

IMG_2875
We were seated in a banquette against a far wall partially blocked off from the central “pit” of diners.

Our knowledgeable and enthusiastic waiter Lance walked us through the menu and took our wine order while we tried to settle on some options. I was impressed to see that most items are 500 calories or less, non-GMO, and contained an extensive list of vegetarian, gluten-free, and vegan items. Refreshingly, the menu is updated every three months to address the change of seasons.

Furthermore, the use of sustainable, organic and healthy ingredients doesn’t stop with the menu. From organic cleaning products to recycled glass counter tops and post consumer fiber menus, they utilize green practices daily throughout the overall concept at all of their locations—six of which are in PA; with one each in Moorestown, NJ and Delray Beach, FL.

IMG_2878
Lighting above the booths meshes well with the other decor.

In the end we decided our starter would be the Organic Spicy Pork Flatbread on a very thin cracker-like crust topped with crumbled pork, roasted bell peppers, Kalamata olives and mozzarella curd. It was ever-so-light and a perfect teaser for our future choices.

IMG_2881

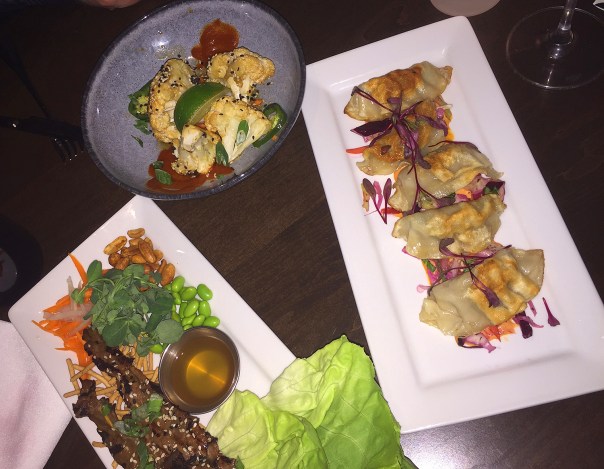
While the overall pace seemed to be a bit frantic with the waitstaff trying to keep up with the constant flow of diners, we didn’t feel rushed at all. Instead of focusing on entrées, we decided to split an array of appetizers and chose three items, all with a kick.

IMG_2882Kung Pao Cauliflower “Wings” (top left) with a ginger soy glaze, pickled carrot strips and jalapeños, sriracha, toasted sesame and scallions.

IMG_2884Organic Pork Potstickers garnished with Korean pepper remoulade and Asian Vegetable slaw.

IMG_2885Thai Sesame Beef Lettuce Wraps plated with bibb lettuce, pickled carrots, daikon radishes, edamame, sriracha salted peanuts and a sweet-and-sour dipping sauce.

It was just the right amount of food (although I didn’t end up with a doggie bag), but Russ asked to see the dessert tray anyway. Just as Seasons 52 serves their desserts in large shot glasses, Harvest presents a similar display. Seeing as how they weren’t overwhelming in size, Russ opted to try the Tiramisu, and he loved it! They gave us two spoons just in case…

IMG_2886

First impression was a winner! I couldn’t wait to go back… Although it was over 4 months until we had the opportunity to return at the end of June. They have a wrap around porch with about a dozen or so tables so we were lucky enough to dine al fresco in the warm weather, and it is much quieter than the interior spaces. Albeit, the view is mostly of the parking lot, but there is some greenery too.

IMG_5832

IMG_5833

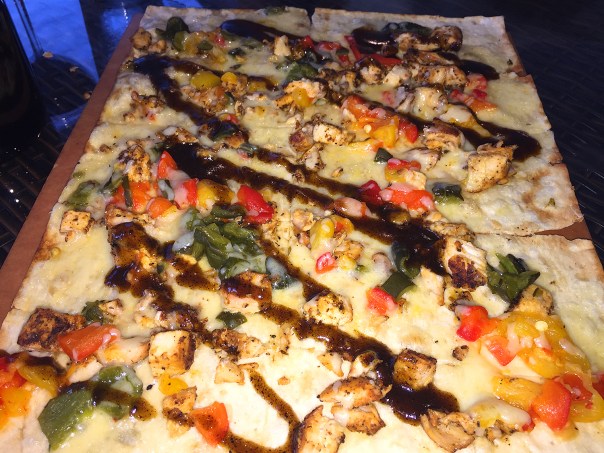
After selecting a bottle of Charge, a California Cabernet (I loved the label) once again we started with one of their delicious flat breads, this time the Jerk Chicken Flatbread with a Jamaican jerk sauce, roasted poblano pepper and mild cheddar—yes, we ate the whole thing! The crust is crunchy and very thin while the toppings are appropriately distributed and perfectly paired.

IMG_5835

For main entrées we went with seafood. Russ chose the Jumbo Lump Crab Cakes, with fried green tomato relish, a chili corn rémoulade, seasonal baby patty pan squash, roasted fingerling potatoes and a charred lemon half. His opinion? Among the best crab cakes he’s ever eaten.

IMG_5841

I zeroed in on the Seared Sea Scallops that were dusted in stone-ground cornmeal lined up over a bed of sweet corn risotto, accompanied by an heirloom tomato relish with basil oil, corn shoots, and topped with micro basil. OMG, we both LOVED our meals!

IMG_5843

Well, our eyes were bigger than our stomachs because we both took nearly half of our dinners home; which left no room for dessert this time around. All-in-All Harvest has left a good taste in our mouths—literally. So we know that there will certainly be return visits in the future.