Monthly Archives: November 2019

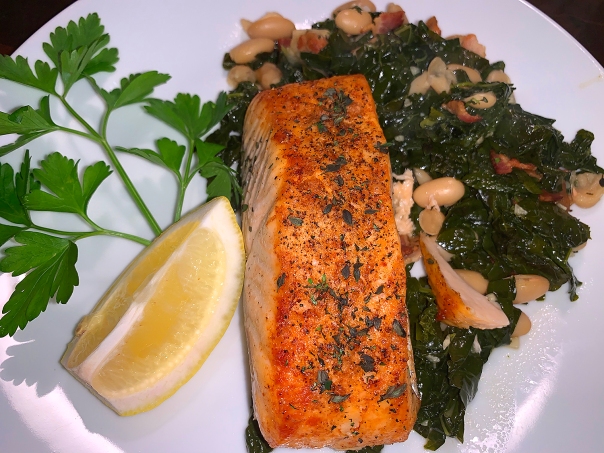
Broiled Salmon with a White Bean, Kale & Bacon Ragoût

Remember the “vegetarian week” I mentioned a few blogs back? Well technically, I was not completely truthful because anything with bacon is NOT vegetarian. Broiled Salmon with a White Bean, Kale & Bacon Ragoût can easily be made without bacon, which is a better option for me since my digestive system goes into battle every time I consume it.

But The Hubs LOVES his bacon, so therefore I went with it—and it adds that much-loved sweet/salty component. It basically comes down to one slab per person that is divvied up into little bits nestled into the ragoût. We purchase double-smoked organic from the local Amish Farmer’s Market sans nitrates, so it doesn’t wreak as much havoc on my innards.

High heat adds flavor fast to the this salmon, which is drizzled with the bacon fat, then seasoned. The hearty ragoût rounds out the dish and adds substance to the overall meal. I’ve posted recipes recently for both ragù and ragoût. Are they the same thing??
IMG_1677

Ragù vs. Ragoût:

Let’s get to the bottom of this. Both come from the same French verb, ragouter, which means to stimulate the appetite. Even though they’re both saucy, both hearty and both pronounced the same way (“ragoo”), ragù and ragoût are not the same thing. Here’s the difference.

Ragù is a class of Italian pasta sauces made with ground or minced meat, vegetables and, occasionally, tomatoes. Bolognese, for example, falls under the ragù umbrella. Ragoût, on the other hand, is a slow-cooked French-style stew that can be made with meat or fish and vegetables—or even just vegetables. You can eat it on its own, or with a starch like polenta or couscous or pasta. These very different dishes have one additional, great thing in common: Both are incredibly delicious and satisfying on a cold winter night, so that works for me.

Since I knew the kale would release liquid of it’s own, I reduced the amount of broth to one cup, which was plenty and didn’t leave the ragoût watery. In the end, the meal turned out wonderful with perfectly cooked salmon (although in our broiler it takes almost twice as long to reach a medium doneness); and the bed of kale and beans made a pleasant companion.

And how about that kale? It seems to be a love-it-or-hate-it kind of green (although I’m sort of middle-of-the-road with it). Kale is a proud member of the cabbage family, which accounts for its rather strong, forward flavor that borders (and sometimes tips over into) bitterness. The most common type seems to be curly kale whose bright-green leaves are sometimes curled so tightly it can be hard to chop them. This kind of kale tends to have a bright, peppery flavor that can become quite bitter.
IMG_1657

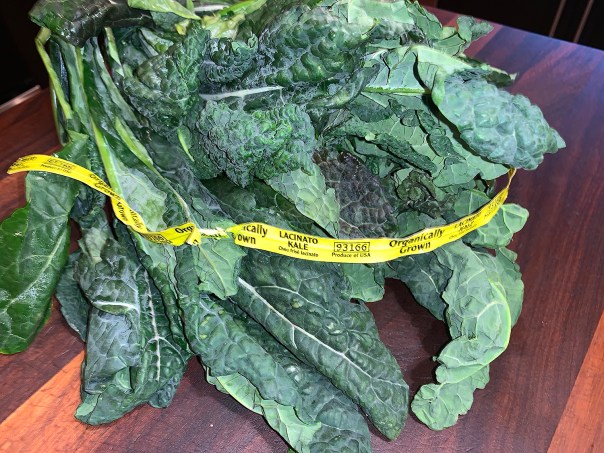
Our fave however, happens to be the Lacinato kale, which goes by many names, among them are Tuscan, dinosaur, cavolo nero, and black kale. Lacinato kale (shown above) has longer spear-like leaves with a pebbled appearance and a dark, mottled green color. Its flavor is deep and earthy—it’s less bitter than curly leafed, with an almost-nutty sweetness.

TIP: Most salmon filets will have a thick and thin end. So that the thin end doesn’t get overcooked, fold it under the thicker portion before broiling.

IMG_1665

Broiled Salmon with a White Bean, Kale & Bacon Ragoût

  • Servings: 4
  • Difficulty: easy
  • Print

Ingredients

  • 1/4 lb. thick-cut bacon (about 4 thick slices), cut crosswise into thin strips
  • 3 Tbs. extra-virgin olive oil
  • 2 cloves garlic, minced
  • 1 bunch thinly sliced lacinato kale leaves (stems removed)
  • 1 cup homemade chicken (or veggie) broth
  • 15-1/2 oz. can cannellini beans, rinsed well and drained
  • 1-1/2 to 2 lbs. skinless salmon fillet, cut into 4 uniform pieces
  • Kosher salt and freshly ground black pepper
  • 1 Tbs. chopped fresh thyme
  • 1 lemon, quartered

Directions

  1. Set an oven rack 6 inches from the top element and heat the broiler to high.
  2. In a heavy skillet over medium heat, cook the bacon in the olive oil, stirring occasionally, until the bacon renders much of its fat and starts to brown, about 5 minutes. Use a spoon to remove 2 Tbs. of the bacon fat from the skillet and reserve in a small bowl.
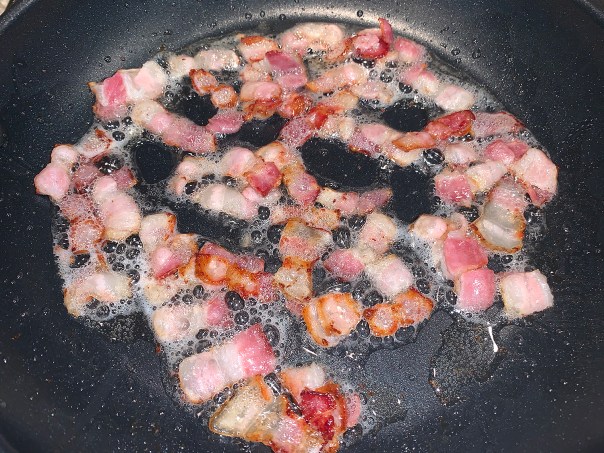
    IMG_1659
  3. Add the garlic to the bacon in the skillet. Cook, stirring, until the garlic starts to sizzle, about 30 seconds.
  4. Raise the heat to high, add the kale, and sauté, stirring, until it starts to wilt, about 1 minute.
  5. Add the chicken broth and beans and bring to a boil. Reduce the heat to medium, cover the skillet, and cook for 5 minutes. Remove from the heat and keep warm.
  6. While the beans are cooking, line a heavy-duty rimmed baking sheet with foil and arrange the salmon, skin side down, on it. Drizzle the reserved bacon fat over the salmon and season with 1/2 tsp. salt and a few generous grinds of black pepper.
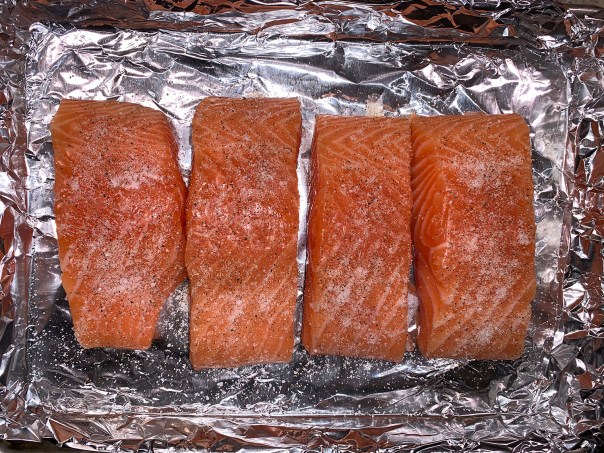
    IMG_1666
    Tuck the thin tails under the thicker portion of the fish for more even cooking.
  7. Broil until slightly firm to the touch, 7 to 10 minutes for medium (the salmon will be dark pink in the middle).
  8. Sprinkle half of the thyme over the salmon. Stir the remaining thyme into the beans and kale and season with salt and pepper to taste.
    IMG_1675
  9. To serve, spoon equal portions of the beans and kale onto dinner plates and top each with a piece of salmon. Squeeze the lemon quarter over the fish and serve immediately.
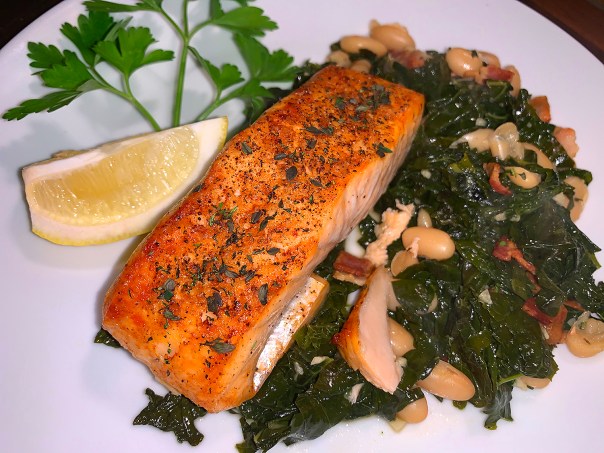
    IMG_1679

http://www.lynnandruss.com

Adapted from a recipe by Tony Rosenfeld found on FineCooking.com

Pfeffernüsse? What the Whosy?

Pfeffernüsse—literal translation is “pepper nuts”—not exactly the most appetizing name for a cookie. But if spice is your thing, one bite and you’re hooked. My introduction to these gems was at a recent Craft Fair held by Artist’s of Yardley where I am a member. Guess who volunteered to head up the Bake Sale portion of the event? Yep, it was me. And I don’t even eat desserts or sweets as a general rule.

While I was manning the station, the organization’s coordinator, Bette Sovinee (fellow artist and baker of this cookie) broke up a few leftover spice cookies and put them on the table for guests to taste-test. Folks were gushing about the taste (and smell) and the tactic paid off in immediate sales.

It also got me interested in a nibble. So when The Hubster and daughter Julia came by to bring me another cup of hot tea and check out the artist’s wares, I told them to try a bite. Well, my man could barely contain himself, proclaiming “these are the best spice cookies I’ve ever eaten. You must get the recipe.”  Which, by the way, I had already asked Bette to email to me.

IMG_1778

It wasn’t long before we got the necessary ingredients and made the delectables ourselves. Two items we didn’t have on hand were shortening and anise extract, so Russ make a quick dash to the local supermarket. (If you can’t find anise extract, a couple of substitutes are licorice extract or Pernod liqueur.)

While researching a bit about Pfeffernüsse, we found out that the cookies are actually better weeks after you bake them! The flavor of Pfeffernüsse deepens and sharpens with age, so although delicious when first baked, they are incomparably better after a couple of weeks… And supposedly, still better a few weeks after that. So if that theory holds, it’s a great idea to bake them around Thanksgiving to enjoy through the Christmas holidays!

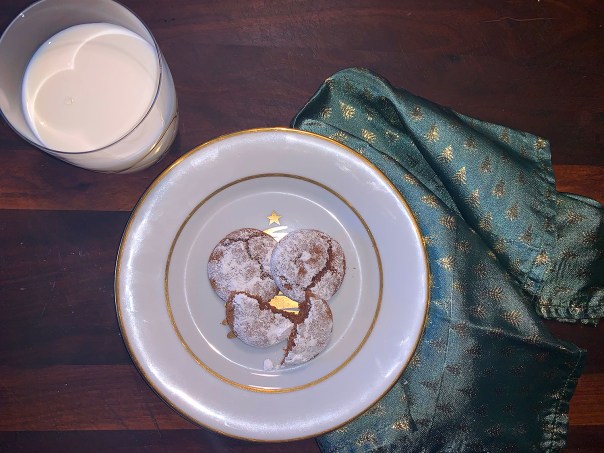
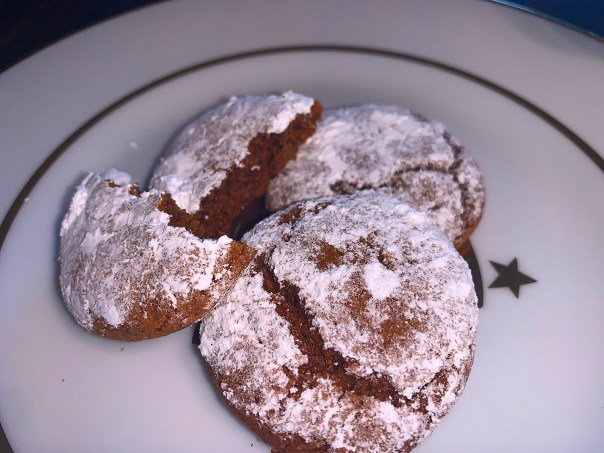
They’re most commonly compared to ginger cookies, but have a deeper flavor profile than most traditional gingerbread cookies. Spice quantities in this recipe are somewhat elastic. Alter measurements to suit your own personal preferences, although I followed it to a “T” the first time out of the gate, with the addition of dunking them into confectioners sugar at the end of baking.

I made the dough on one afternoon but it was too close to preparing dinner to start baking them, so I did that early the following morning. As I was in the midst of taking them off of the baking sheets, Julia came down from upstairs exclaiming “Oh my God, it smells so gooood in here, I thought I was dreaming!” And she’s not necessarily a “spice” girl.

Keep in mind that when Pfeffernüsse are in their “hard” stage, they make a particularly good dunking cookie. They go great with hot tea, coffee or milk—and the dunking helps soften them.

Pfeffernüsse (German Spice Cookie)

  • Servings: Yields about 7 1/2 dozen
  • Difficulty: easy
  • Print

Ingredients

Wet mixture:

  • ½ cup molasses
  • ¼ cup honey
  • ¼ cup shortening
  • ¼ cup margarine/butter
  • 2 eggs
  • 2 tsp. anise extract

Dry mixture:

  • 4 cups flour
  • ¾ cup sugar
  • ½ cup brown sugar
  • 1 ½ tsp. ground cardamom
  • 1 tsp. ground nutmeg
  • 1 tsp. ground cloves
  • 1 tsp. ground ginger
  • 2 tsp. ground cinnamon
  • 1 tsp. black pepper
  • ½ tsp. salt
  • 1 ½ tsp. baking soda
  • 1 cup confectioners powdered sugar, for dusting

Directions

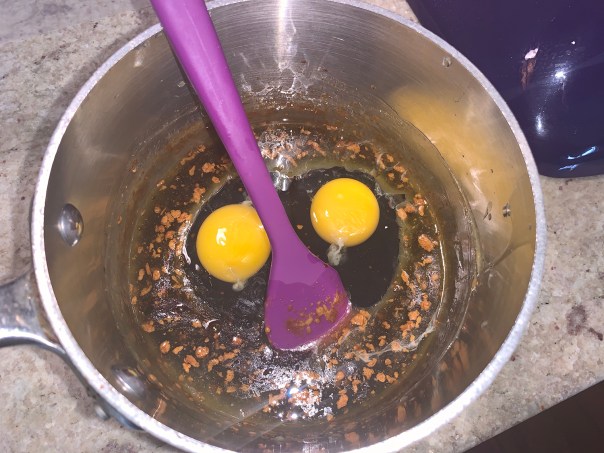
  1. In a heavy bottomed, nonreactive, 1 to 1-1/2 quart pot, combine the molasses, honey, shortening and butter.  Place the pot over low heat, stirring often until the butter has melted, all the ingredients are completely combined, and the mixture is creamy. Do not boil. Remove the pot from the heat, pour the mixture into a large bowl, and set aside and allow the mixture to cool to room temperature.
  2. Stir in the beaten eggs and the anise extract. (As you can see, I forgot to beat the eggs first, mea culpa.)
    IMG_1766
  3. While the mixture is cooling, sift together the flour, white sugar, brown sugar, cinnamon, baking soda, cardamom, allspice, nutmeg, cloves, ginger, black pepper, and salt in a separate bowl.
  4. Add the wet mixture to the sifted dry ingredients until everything is thoroughly combined (the dough will be a stiff dough by this point).
    IMG_1767
  5. Wrap and chill the dough in the refrigerator for a minimum of 2 hours.
    IMG_1768
  6. After the dough has chilled, preheat the oven to 350°. Roll the dough into small balls (about 1-inch in diameter, a melon baller is a good help here). Place the balls on the baking sheets, spacing them at least 1-inch apart, as they will spread slightly.
    IMG_1771
  7. Bake the cookies in the preheated oven for 14 to 15 minutes, until the cookies have lost their shiny look and are slightly firm to the touch (but still soft). The cookies may have some small cracks as well.
    IMG_1773
  8. While still warm, dunk each cookie top down into confectioners’ sugar to coat the heads. Or for a lighter sugar touch, just dust them with the sugar.
    IMG_1774
    IMG_1777
  9. Once cooled, store in an airtight container with wax paper between the layers at room temperature. Allow the cookies to “age” at least 24 hours before serving (a few days to a week is even better).
    IMG_1781

http://www.lynnandruss.com

Slightly expanded recipe of that from Bette Sovinee

Casarecce with Wild Mushroom Ragù

It turned out to be “vegetarian week” at our house, and it was quite by chance. When I started culling together the week’s menus, all of the recipes that appealed to me contained no meat, so I thought, let’s go with it.

For starters, I whipped up this very easy Casarecce with Wild Mushroom Ragù. A simple satisfying pasta, this dish hits all the right notes on a cold dark evening. Serve with crusty bread and/or a side salad to round out the meal.

IMG_1612

Casarecce with Wild Mushroom Ragù

  • Servings: 4
  • Difficulty: easy
  • Print

Ingredients

  • Kosher salt
  • 1/4 cup extra-virgin olive oil; more for drizzling
  • 1 medium sweet onion, finely chopped (about 2 cups)
  • 1 clove garlic, smashed and peeled
  • 2 tsp. finely chopped fresh rosemary
  • 2 lb. mixed wild mushrooms, trimmed and coarsely chopped
  • 11/4 cups good-quality jarred marinara sauce
  • 12 oz. casarecce (other short pasta)
  • 1/2 cup finely grated pecorino romano; more for garnish
  • Freshly ground black pepper
  • 2 Tbs. finely chopped fresh flat-leaf parsley

Directions

  1. Bring a large pot of well-salted water to a boil.
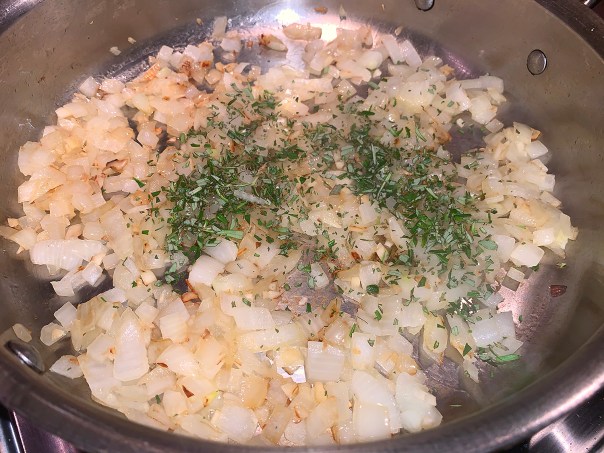
  2. Meanwhile, in a large skillet, heat the oil over medium heat. Add the onion and garlic,  reduce the heat to medium low, and cook, stirring occasionally, until the onion is tender, about 8 minutes.
  3. Stir in the rosemary, and cook until fragrant, about 30 seconds.
    IMG_1614
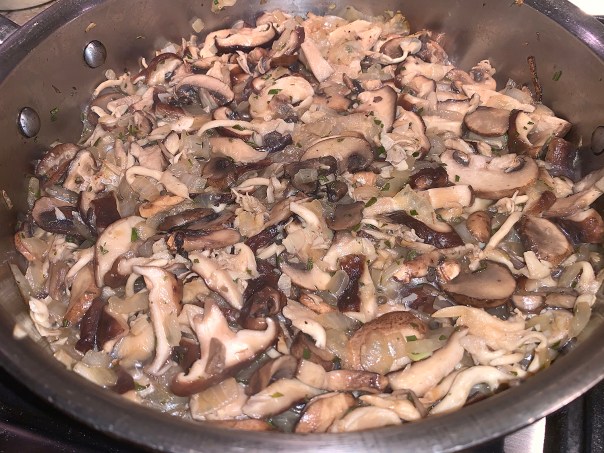
  4. Add the mushrooms, and then increase the heat to medium. Cook until the mushrooms begin to soften, 3 to 5 minutes.
    IMG_1615
  5. Add 3/4 cup water, and cook until the mushrooms are tender, about 8 minutes.
    IMG_1617
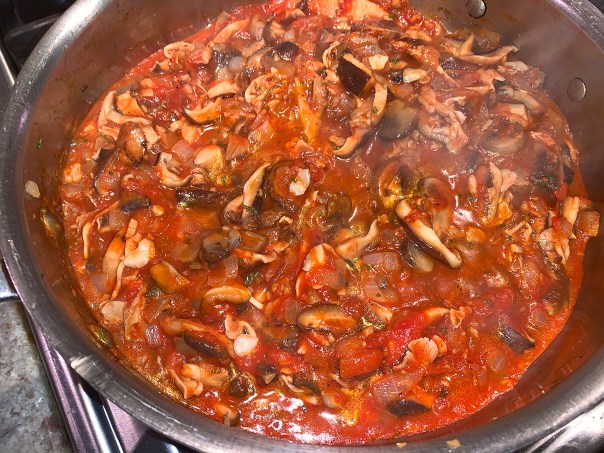
  6. Add the marinara and 1/2 tsp. salt. Bring to a simmer. Cook until the sauce is hot and the flavors have melded, 2 to 3 minutes.
    IMG_1619
  7. Meanwhile, cook the pasta according to package directions until al dente. Drain and return to the pot off the heat. Add the sauce and cheese, and toss to combine. Season to taste with salt and pepper.
    IMG_1621
  8. Serve immediately, drizzled with oil and sprinkled with the parsley, more cheese, and pepper.
    IMG_1622

http://www.lynnandruss.com

Adapted from a recipe by Mindy Fox from Fine Cooking
 

Parm-A-Licious!

Non-breaded Eggplant Parmesan, because who needs extra carbs?? There’s not an ounce of Italian in either of us, but for many Italian-American families, Eggplant Parmesan is that heirloom recipe that tends to put in an appearance at most important family gatherings. This simple yet special casserole, rich with silken eggplant, tangy marinara, and gooey mozzarella, pleases meat eaters and vegetarians alike.

IMG_1727

Even if your family lineage doesn’t trace back to the Italian Motherland, this comfort food classic is perfect for group entertaining. In its original state, this recipe serves 8 (maybe 10), and is party friendly, but way too much for the two of us, so I cut the eggplant back by half. As it so happened, daughter Julia was an unexpected house guest and then there were three for dinner, but the reduced recipe still made enough for four servings. Julia (who was maintaining a low-carb diet), admitted she had never eaten eggplant before, so she was a bit skeptical in trying it. In the end, we all LOVED the Eggplant Parm!

Oh, and about that cutting the recipe in half, I still used a large 13″ x 9″ casserole dish. This option only produced two layers of eggplant. If you wish to have a thicker stack, use a square 8″ x 8″ or 9″ x 9″ dish instead, which will force you to go vertical with the tiers. It still took the entire 45 minutes in the oven to achieve the lightly golden cheese topping.

Make-ahead-tips:

  • You can fry the eggplant ahead of time and store it overnight in the refrigerator. Line a rimmed baking sheet with an old clean kitchen towel. Line the towel with paper towels. Put the eggplant in a single layer on the paper towel. Continue stacking the remaining eggplant in layers on top of each other and separated by paper towels. Wrap in plastic and refrigerate overnight. This can be done up to three days ahead.
  • You can assemble the dish, bake it, cool it, and store it in the refrigerator wrapped in plastic up to three days ahead. Rewarm gently in a 250°F oven until heated through, about 30 minutes.

Eggplant Parmesan

  • Servings: 8
  • Difficulty: easy
  • Print

Ingredients

  • 5 lb. medium eggplant, trimmed and peeled
  • 2 Tbs. kosher salt
  • 1-1/2 cups peanut oil; more as needed
  • 1 32-oz. jar good-quality marinara sauce, or your favorite homemade sauce
  • 1 lb. fresh mozzarella, cut into 1/2-inch pieces (about 3-1/2 cups)
  • 1 cup coarsely chopped fresh basil leaves
  • 1-1/4 cups finely grated Parmesan cheese, (about 5 oz.)
  • Freshly ground black pepper

Directions

  1. Cut the eggplant crosswise into 1/4-inch-thick slices. Put the slices in single layers between paper towels on rimmed baking sheets, sprinkling each layer lightly with the salt. Set aside for 1 hour.
  2. Put 1/2 cup of the oil in a large skillet, and heat on medium until the oil shimmers. Pat the eggplant dry with paper towels.
  3. Fry the eggplant in single layers in batches until light golden and soft in the center when pierced with a fork, 2 to 2-1/2 minutes per side. When the eggplant is tender, transfer to rimmed baking sheets lined with paper towels, replenishing the oil in the skillet as necessary.
    IMG_1715
  4. Position a rack in the center of the oven, and heat the oven to 350°F.
  5. To assemble, spread about 1/4 cup of the marinara sauce evenly on the bottom of a 3-qt. 9×13-inch baking dish.
  6. Pat the eggplant with paper towels, and lay enough slices to cover the bottom of the baking dish in a single layer.
    IMG_1718
  7. Sparingly dollop 2 to 3 Tbs. of sauce on top of some of the eggplant slices, scatter a generous handful (about 3/4 cup) of the mozzarella over the eggplant, top evenly with some of the basil (about 1/4 cup), and then sprinkle with 1/4 cup of the grated cheese and a few grinds of pepper.
  8. Continue layering in this way until the final layer of eggplant is used. Finish with the remaining tomato sauce, grated cheese, and a few grinds of pepper.
    IMG_1721
  9. Bake until the sauce is bubbling and the cheese is lightly browned, about 45 minutes. Let cool for 35 to 40 minutes before slicing and serving.

    Top with additional sauce and grated cheese. We served ours with a side of broccolini.

http://www.lynnandruss.com

Adapted from a recipe by Patrizia Auricchio from Fine Cooking

A Wreath Awry

This blog was written nearly two years ago, but with the holiday season coming up, I thought it was appropriate for posting. The idea of it was brilliant, the execution, not so much…

Even though the Christmas season was officially over on January 6 with the Epiphany-Feast of the Three Kings, that didn’t stop us from including a nod to the holiday at our house party a few days later.

I found this Cranberry and Brie Puff Pastry Wreath recipe online at Simply Delicious and thought what an impressive appetizer it would make. Golden puff pastry is filled with sweet cranberry sauce, oozy brie cheese and pistachios that screams “eat me!”

img_9785
Although a bit lack-luster in appearance, the first piece is sliced off the wreath.

An hour before guests were due to arrive I pulled out the dough that had been thawing in the fridge for the past day. And when I opened the package, my heart sank—it was phyllo dough NOT puff pastry, yikes! Russ said I might as well just throw it in the garbage because I couldn’t refreeze it—and off to the store he went…

Once he got home with the prized package, I only had 30 minutes before company was expected, and the pastry needed to thaw before I could work with it—about 40 minutes according to the directions. Well that wasn’t an option, so to expedite the process, I put it in a ziploc bag that was then emerged into a bowl of warm water. That did the trick for the most part, but because it was rolled into itself, the center panel was still frozen.

With just minutes to spare before the doorbell rang, I was able to whip it together and clean up my mess. After 15 minutes in the oven I pulled it out and found that most of the brie had oozed out into the center circle (known for erring on the side of more rather than less, I likely put too much cheese in the wreath.) Not to be deterred, I suggested spooning the cheese back into the open crevices of the wreath, and my friend Maria Odilia offered her services.

img_9781

img_9784

Next we had to slide it onto a serving plate. Without going into too many details, Maria suggested I use a different plate than the one I had pulled out—which actually was the second choice (the first being too big). Once all the drama was done, and the rest of the party arrived, no one was the wiser on the back story, and the wreath got rave reviews from all who tried it… Now if I can only get the presentation down…

Ingredients

  • 1 sheet puff pastry, thawed
  • 2-3 Tbsp. cranberry sauce
  • 8 oz. Brie cheese, sliced
  • 2 Tbsp. pistachio nuts, roughly chopped
  • 1 egg, beaten
  • Sea salt

Directions

  1. Pre-heat the oven to 400ºF and line a baking sheet with parchment paper (or pizza stone).
  2. Roll the pastry out to around 1/4″ thick and cut a large circle out of the pastry.
  3. Lay the pastry on the prepared baking sheet.
  4. Mark a circle with a medium-sized ball and with a sharp knife, cut 4 cuts into the center circle. (As demonstrated in the video.)
  5. Spread the cranberry sauce around the center “star” then top with the Brie and pistachios.
  6. Bring one point of the center star over the filling as well as bringing the outer edge of pastry inwards. Press the two together and continue until you have a wreath.
  7. Brush with beaten egg, sprinkle lightly with sea salt, then place in the oven and allow to bake for 15 minutes until golden brown and cooked through.
  8. Remove from the oven, allow to rest for 5 minutes then slice and serve.

Adapted from a recipe found online at Simply Delicious by Alida Ryder

A Step-By-Step Pictorial:

img_9764
Roll out the dough large enough to accommodate a large round plate. With a sharp knife, cut out the circle.

img_9766
Place the round puff pastry on the parchment lined baking sheet.

img_9768
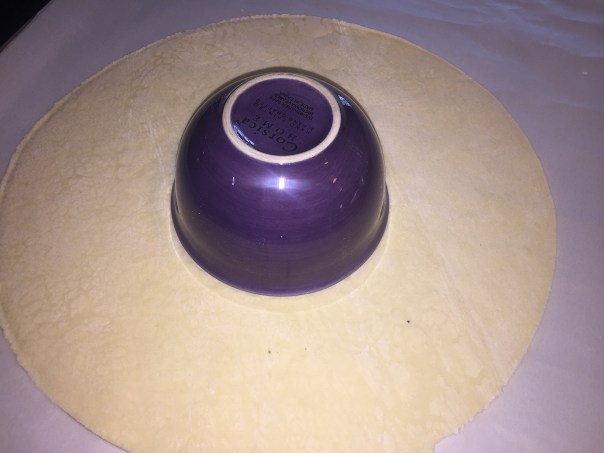
Place a small round bowl approximately 4-5″ wide in the center of the dough. Trace around the bowl, making sure not to cut through.

img_9769
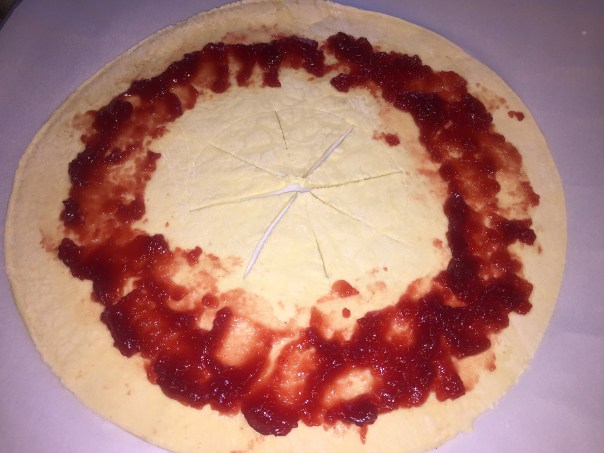
With a sharp knife, slice 4 X’s through the center circle so that you end up with 8 triangles.

img_9770
With a tablespoon, spread the cranberry sauce in the center all the way around.

img_9771
Place brie slices on top of the cranberry sauce.

img_9773
Chopped pistachios are scattered on top of the brie.

img_9774
Bring one point of the center star over the filling as well as bringing the outer edge of pastry inwards.

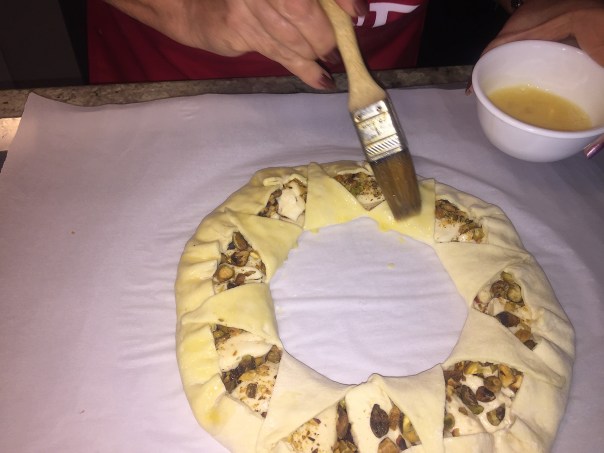
img_9777
Brush on an egg wash over the entire puff pastry.

img_9778
The wreath is assembled and ready for the oven.

img_9781
Since the brie oozed into the center opening, it was spooned back into the open pockets before moving to the serving plate. 

Sheet-Pan Sausage Parmesan with Garlicky Broccoli

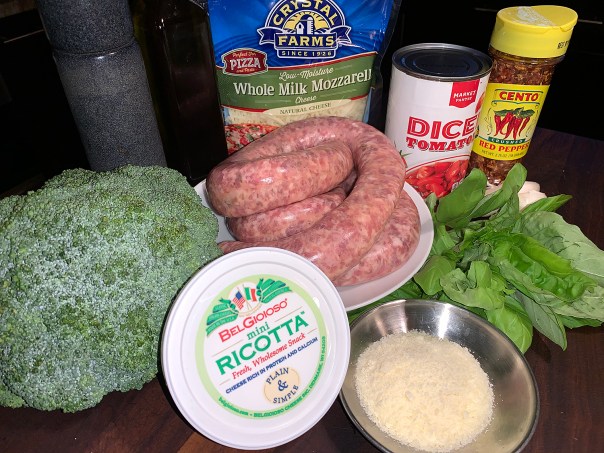
This dish is reminiscent of a hefty pizza topping minus the crust. Typically in most instances, I would opt for hot Italian sausage over sweet but this one seemed to call out for the latter. And as usual, I made a few tweaks, in this case being the package of sausage was two pounds instead of one-and-a-half, so I used it all. We like leftovers…

Employing quarter sheets about 12″ x 9″, allows you to cook your main course and side dish at the same time in the same oven. Yet there’s no mixing of flavors that would happen if you combined everything on one large sheet pan—albeit, sometimes that is the effect you want, but not here. (That being said, if all you have is a larger sheet pan, go ahead and make the recipe, you won’t be sorry.)

IMG_1554

In Step 3, simmering the tomato mixture was supposed to take 15-20 minutes, but mine was thick and ready after only eight minutes, so keep an eyeball on yours. At Step 10, I was concerned about the toppings on the cooked links falling through the open spaces, so I cut them down into approximate 5″ lengths and lined them up in a tight soldiers row.

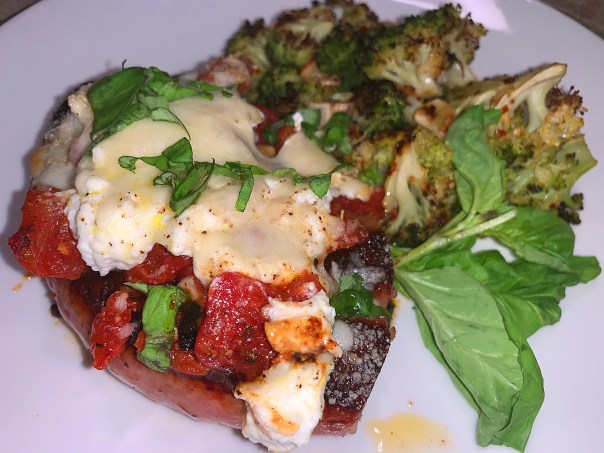
In the end, the sausage juices will mingle with the tomato sauce and melted cheese, without compromising the roasted garlicky broccoli to serve alongside. A definite keeper!

IMG_1539

Sheet-Pan Sausage Parmesan with Garlicky Broccoli

  • Servings: 4
  • Difficulty: easy
  • Print

Ingredients

For the Tomato Sauce:

  • 1 1/2 Tbsp. extra-virgin olive oil
  • 1 clove large garlic, thinly sliced
  • Large pinch crushed red pepper flakes
  • 1 large sprig basil
  • 1/2 tsp. kosher salt, more to taste
  • 1/8 tsp. freshly ground black pepper

For the Sausage and Broccoli

  • 1 small bunch broccoli, cut into 1″ pieces
  • 2 Tbsp. extra-virgin olive oil, more as needed
  • 1/4 tsp. crushed red pepper flakes
  • 1/4 tsp. kosher salt
  • 2 lbs. hot or sweet Italian sausage, pricked all over with a fork
  • 5 oz. fresh ricotta
  • 3 cloves garlic, 2 thinly sliced, 1 finely minced
  • Freshly ground black pepper
  • 1/2 cup shredded mozzarella
  • 2 Tbsp. grated Parmesan cheese
  • Chopped basil or parsley for serving

Directions

  1. Heat oven to 450°.
  2. Prepare sauce: In a large skillet over medium heat, heat oil until shimmering. Stir in garlic and red pepper flakes, cook until fragrant, 1 minute.
    IMG_1542
  3. Stir in tomatoes, basil sprig, salt and pepper, and bring to a brisk simmer. Simmer until sauce is very thick and most of the moisture is evaporated, 15 to 20 minutes (or less, as in our case). It should be thicker than the usual marinara sauce. Remove and discard basil.
  4. While sauce is cooking, toss broccoli with oil, red pepper flakes and salt on a quarter-size rimmed baking sheet, and place in oven.
  5. Arrange sausage in a single layer on another quarter-size rimmed baking sheet, and roast along with pan of broccoli until golden brown on bottom, about 15 minutes. Flip sausages over so browned sides are on top.
  6. When you flip the meat, remove broccoli pan from oven and toss with sliced garlic. (Reserve grated garlic for ricotta.) Drizzle broccoli with a little more oil.
  7. Return pan to oven and continue to roast broccoli and sausages until the meat is cooked through and broccoli is tender and browned, about 5 minutes longer.
  8. Meanwhile, mix ricotta and grated garlic.
  9. When broccoli is done, remove from oven and tent with foil to keep warm.
  10. Move sausage to cutting board and slice into 5″ lengths. Line the links into a tight soldiers row back on sheet pan. Top sausages with tomato sauce and dollops of ricotta. Drizzle with olive oil and grind pepper generously over the top. Sprinkle on mozzarella and Parmesan.
  11. Bake until cheese is melted and bubbly, and the garlic is opaque, 3 to 5 minutes. If you prefer, you can broil the cheese to melt it, 1 to 3 minutes.
    IMG_1553
  12. Serve the sausage, sauce and cheeses with broccoli on the side. If desired, serve crusty bread for sopping up the tomato sauce (although in our case, there was no extra sauce to mop up).
    IMG_1558

http://www.lynnandruss.com
Adapted from a recipe by Melissa Clark of NYTimes Cooking

Alpine Linguine

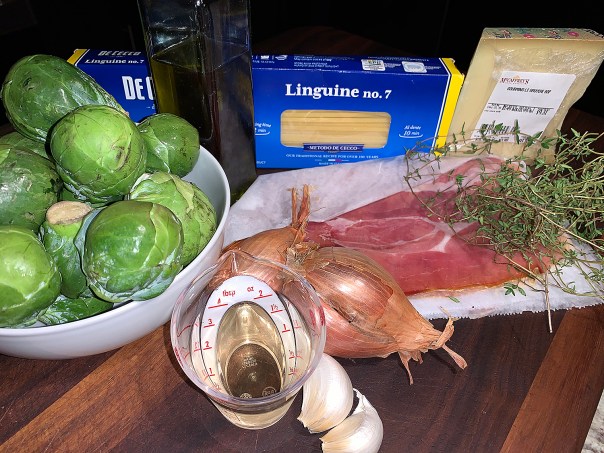
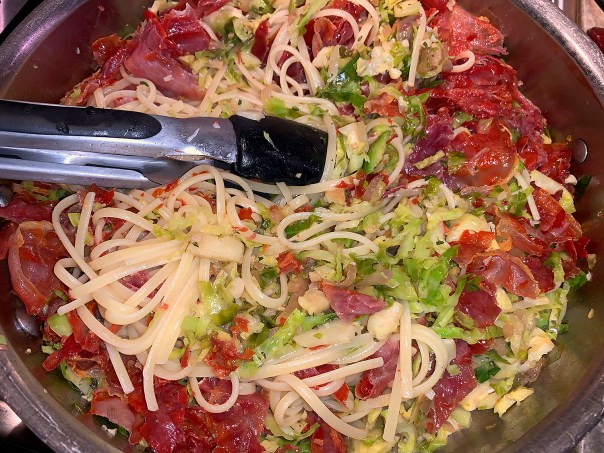
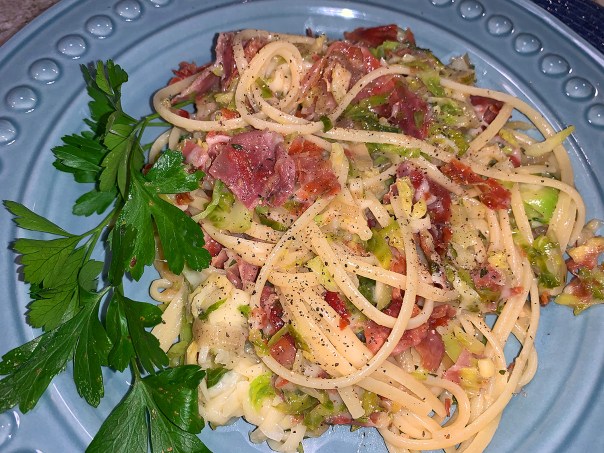
Inspired by the cuisine of Northern Italy, this Alpine Linguine pasta dish features thin slices of caramelized Brussels sprouts and crispy bites of prosciutto, a smoky salty meat. It’s a crafty way of getting someone who thinks they dislike Brussels sprouts to eat them.

Prosciutto is the Italian word for ham. In the U.S., the word prosciutto is used to describe an uncooked, dry-cured ham, which is called prosciutto crudo in Italian. When sliced thinly, it has a buttery texture and will melt in the mouth, and get crunchy when pan-fried, as in this recipe. 

The entire prosciutto making process can take anywhere from nine months to two years. When buying, order it presliced because it is extremely delicate and can be quite sticky. It is often packaged with deli paper between the slices to make it easier to handle the slices without tearing them.
Eight ounces of pasta may not seem like much for four servings, but with the extra ounce of prosciutto and additional cheese that I added (noted in recipe below), it was very rich and very filling. Served with a simple side salad, it made a satisfying meal.

Some acceptable substitutions are: Meat = Speck; Pasta = fettuccine; Cheese = Emmentaler.

IMG_1443

Alpine Linguine

  • Servings: 4
  • Difficulty: easy
  • Print

Ingredients

  • Kosher salt
  • 8 oz. linguine
  • 4 Tbs. olive oil
  • 4 oz. thinly sliced prosciutto
  • 2 large shallots, thinly sliced (1 cup)
  • 1 lb. Brussels sprouts, trimmed, halved lengthwise, and thinly sliced (about 4 cups)
  • 1 Tbs. finely chopped garlic
  • 2 tsp. chopped fresh thyme
  • 1/2 cup dry white wine
  • 1 1/2 cups grated aged Gruyère
  • Freshly ground black pepper

Directions

  1. Bring a large pot of well-salted water to a boil. Cook the pasta according to package directions until al dente. Drain, reserving 1/2 cup of the cooking liquid.
  2. Meanwhile, heat 1-1/2 Tbs. of the oil in a large skillet over medium-high heat. Add the prosciutto in a single layer in batches, and cook until crisp and lightly browned in places, about 1 minute per side. Transfer to a cutting board, roughly chop, and then set aside.
     

  3. Reduce the heat to medium, and add the remaining 2-1/2 Tbs. oil. Add the shallots and cook, stirring, until beginning to brown, 2 to 3 minutes.
    IMG_1449
  4. Add the Brussels sprouts, sprinkle with 1/4 tsp. salt, and cook until browned in places, 3 minutes. (This step was more like 7-8 minutes.)
  5. Add the garlic and thyme, and cook, stirring, until fragrant, 30 seconds.
    IMG_1452
  6. Add the wine and simmer, scraping up the browned bits on the bottom of the pan, until the wine is reduced by half, 1 minute.
  7. Turn off the heat and add the pasta, prosciutto, and reserved cooking liquid. Toss with tongs, adding the Gruyère gradually in small amounts until all the cheese is incorporated. Season to taste with salt and pepper, and serve.
    IMG_1453
    IMG_1458

http://www.lynnandruss.com

Adapted from a recipe by Ivy Manning  from Fine Cooking

Citrusy-Glazed Pork Chop Heaven

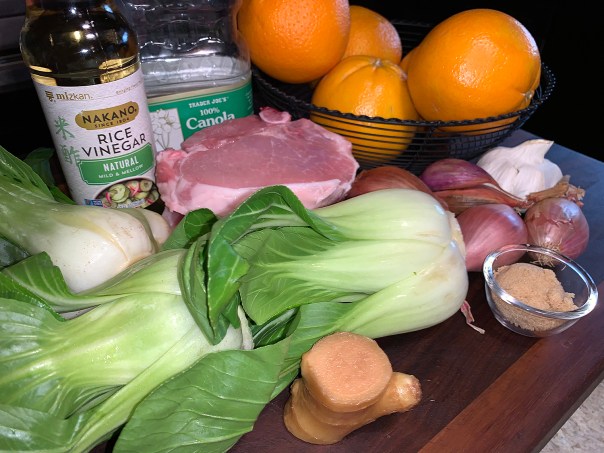
In this Citrus-Glazed Pork Chops with Gingery Bok Choy tasty meal, rich pork makes makes a perfect companion to tart oranges. The bold, bright citrusy sauce demands a robust cut of meat, therefore a well-marbled, thick-cut pork chop with a good fat cap, fills the bill. While the original recipe calls for three chops weighing in at 2 1/2 pounds, I only cooked two with a weight of 1 2/3 pounds, more than enough for the two of us.

A dry rub of brown sugar creates a caramelized layer and lends depth to the pan sauce, and the gingery bok choy adds a delightful bit of freshness. And because we are garlic fiends, I increased the number of cloves by 50%, from four to six large. To round out the meal, you can add a starch such as mashed potatoes, silky polenta, tri-colored couscous, or egg noodles—our choice.

IMG_1498
If a recipe calls for more than a few tablespoons of citrus juice, I bring out the electronic juicer, which makes quick work of the task. With this one calling for 3/4 cup, it was a no brainer.

IMG_1494

Citrus-Glazed Pork Chops with Gingery Bok Choy

  • Servings: 4
  • Difficulty: easy
  • Print

Ingredients

  • 1, 2″ piece fresh ginger, peeled and finely minced
  • 2 Tbsp. rice vinegar
  • Kosher salt and black pepper
  • 1 lb. baby bok choy, halved, or quartered if large
  • 2 Tbsp. neutral oil, plus more as needed
  • 3, 1 1/2″ bone-in pork loin chops (about 2 1/2 lbs.)
  • 1 1/2 Tbsp. light brown sugar
  • 1 whole orange cut in 1/2 crosswise, seeds removed, plus 3/4 fresh orange juice (about 3 large oranges total)
  • 4 shallots, peeled and quartered
  • 4-6 garlic cloves, smashed
  • 1/4 cup water

Directions

  1. In a medium bowl combine the ginger and rice vinegar. Season with salt and pepper, set aside.
    IMG_1500
  2. Trim the bok choy and cut down the middle lengthwise. If large, cut into quarters.
  3. Heat 1 tablespoon oil in a 12″ skillet over med-high heat. Working in batches, add the bok choy to the pan, cut side down, and sear on one side until golden brown, 3 to 4 minutes.
    IMG_1505
  4. Add additional oil if necessary, and flip to cook the other side until just tender, another minute or three. Transfer to ginger marinade, and season with salt and pepper to taste. Cover bowl with foil to keep warm.
    IMG_1513
  5. Rub both sides of the pork chops with the brown sugar and season generously with salt.
    IMG_1501
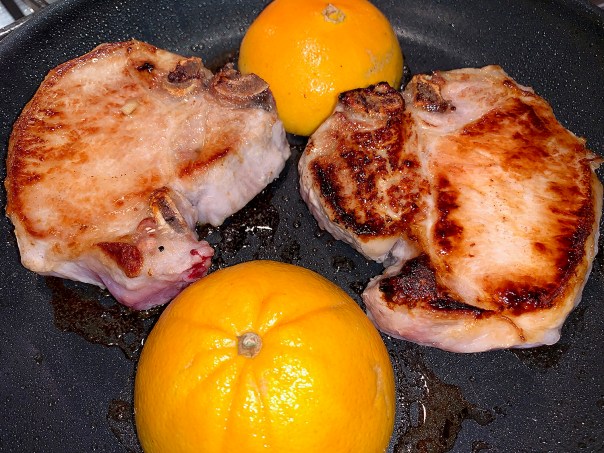
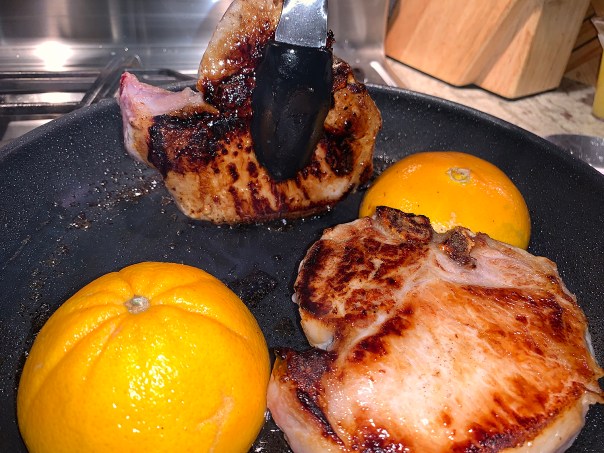
  6. Heat remaining 1 tablespoon oil in skillet over medium heat. Arrange chops and orange halves in skillet, cut-side down.
    IMG_1507
  7. Sear, without moving, one side of meat until deep brown, 5 to 6 minutes. Flip the pork but leave the orange undisturbed. Cook on med-low until chops are browned on both sides and orange halves are charred, 4 to 5 minutes more.
    IMG_1508
    Although the instructions don’t indicate, you should also brown the fat caps. Use tongs to sear the ends for several seconds.
    IMG_1510
  8. Move orange halves to a serving platter and pork to a plate.
     

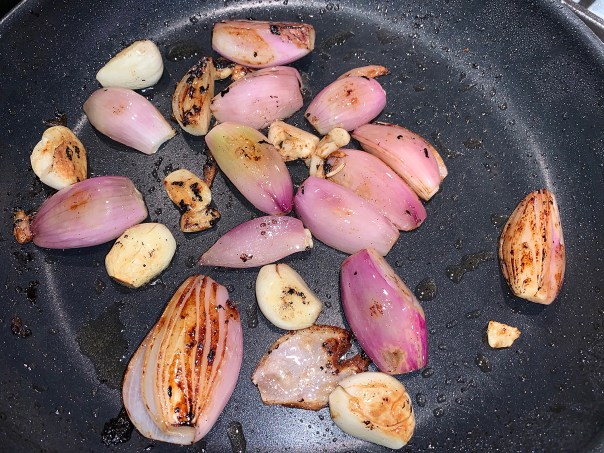
  9. Add shallots and garlic to skillet and cook until softened and starting to brown, about 3 minutes.
    IMG_1516
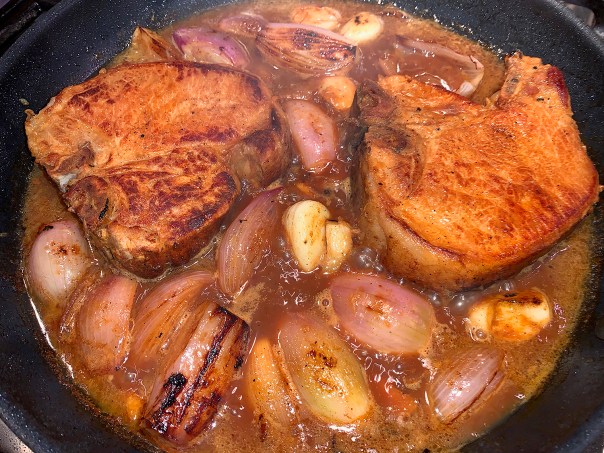
  10. Add all of the pork chops and accumulated juices back to the pan, overlapping if necessary.
    IMG_1517
  11. Add the orange juice and 1/4 cup water. Bring to a simmer, swirling the pan to release any bits stuck to the bottom.
  12. Cover and cook for 3 minutes, then uncover and cook until the pork is cooked through, 6 to 8 minutes.
    IMG_1520
  13. Transfer the chops to a cutting board and allow the sauce to continue cooking until reduced and sticky, 3 minutes more. (The sauce will be ready when you drag a spatula through the sauce and it leaves an open trail, as shown below.) Remove from heat.
    IMG_1521
  14. Transfer the bok choy to the serving platter. Slice the pork and transfer to the platter along with any accumulated juices from the meat. Spoon the sauce with shallots and garlic, and squeeze the caramelized oranges over the top. Serve with starch of choice.
     

    IMG_1532

http://www.lynnandruss.com

Adapted from a recipe by Yewande Komolafe of NYTimes Cooking

Spicy Red Lentil and Chickpea Stew

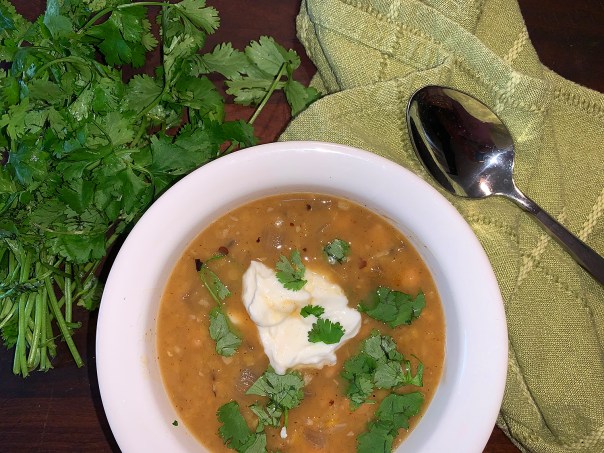
Here’s a vegetarian stew that is so simple to make and takes only a half hour or less to complete before you eat! The humble look of this stew belies its complex flavor: a mix of spicy heat and earthy legumes, topped with a cooling, creamy lemon-flecked yogurt.

If you’re not concerned with the dish being vegetarian, as we weren’t, I highly suggest using a homemade chicken stock instead of a commercial veggie broth—it adds a whole new dimension to the flavor profile. And don’t omit the topping because that zing of lemon adds a welcome bright note.

Whenever recipes call for a 15-ounce can of chickpeas, we inevitably buy the 19-ounce can. Also known as garbanzo beans, they have a buttery, nutty flavor and creamy texture, and are a great source of healthy fiber in addition to being rich in protein, folate and iron.

Now let’s talk about those lentils. Of all the colors of lentils—orange, green, yellow, black and brown—the red lentil proves sweeter and nuttier than its brethren. That’s saying a lot, given that there are hundreds of lentil varieties. Be aware that they tend to become slightly mushy when cooked down, so this variety is often used for thickening soups, purees, and stews. Bingo, that’s what gives this stew its thick base!

It doesn’t make a large amount, so if you intend to stretch it to four servings, serve over steamed rice accompanied by warm naan.

IMG_1350

Spicy Red Lentil and Chickpea Stew

  • Servings: 3-4
  • Difficulty: easy
  • Print

Ingredients

  • 2 Tbs. olive oil
  • 1 tsp. ground cumin
  • 1/2 tsp. crushed red pepper flakes
  • 1 medium yellow onion, chopped
  • 2 medium cloves garlic, minced
  • 1 15.5-oz. can chickpeas, drained and rinsed
  • 1 cup red lentils, rinsed
  • 4 cups vegetable broth
  • Kosher salt and freshly ground black pepper
  • 1/2 cup plain Greek yogurt
  • 1/2 tsp. finely grated lemon zest
  • 2 Tbs. fresh lemon juice
  • Chopped fresh flat-leaf parsley, cilantro or sliced chives, for garnish

Directions

  1. Heat the oil in a 4-quart saucepan over medium-high heat. Add the cumin and pepper flakes and cook, stirring, for 1 minute.
    IMG_1352
  2. Add the onion and garlic, and cook, stirring often, until starting to soften, about 3 minutes.
    IMG_1354
  3. Add the chickpeas and lentils, and stir to coat.
  4. Add the broth, bring to a boil, reduce to a simmer, and cook until the lentils are tender and falling apart, 10 to 15 minutes. Season to taste with salt and pepper.
  5. Meanwhile, combine the yogurt and lemon zest and juice in a small bowl. Season to taste with salt and pepper.
  6. Serve the stew topped with a dollop of the yogurt and garnished with the parsley, cilantro or chives.
    IMG_1355

http://www.lynnandruss.com

Recipe by Erica Clark from Fine Cooking

Try a Traybake (Plus a Bonus Side)

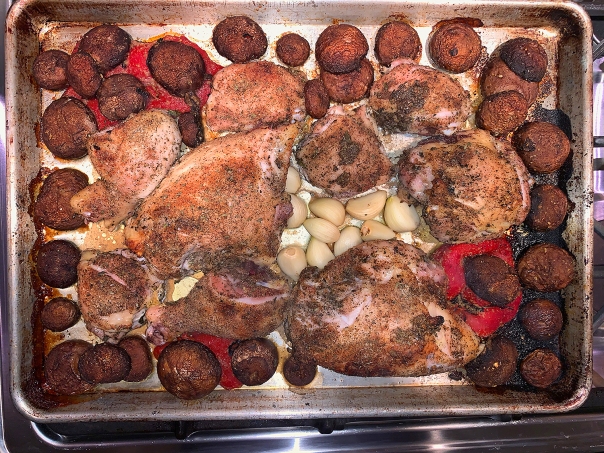
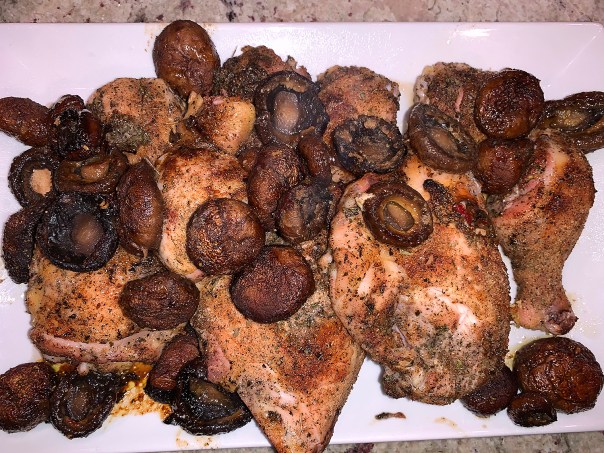
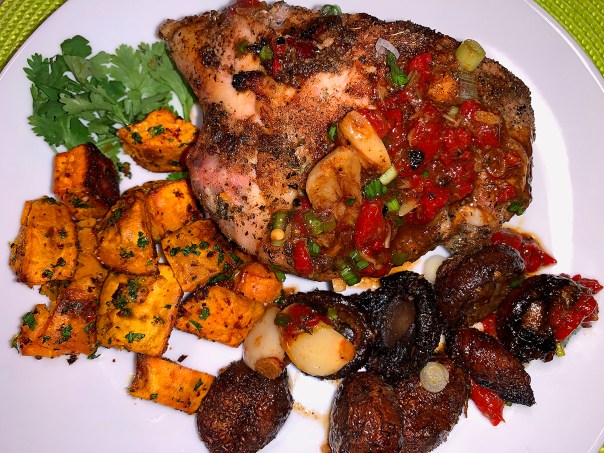
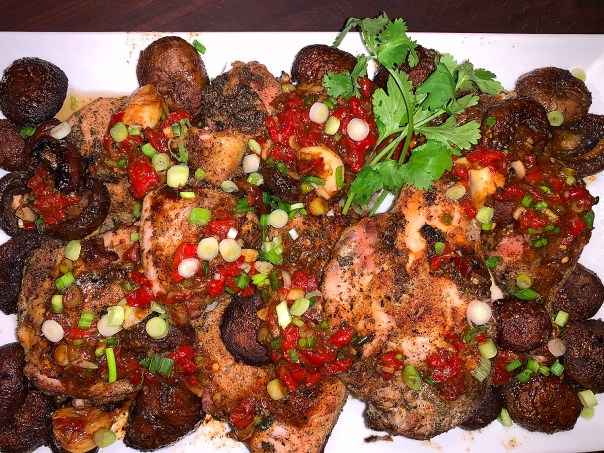
For the main entrée—Chicken and Cremini Mushroom Traybake with Red Pepper Sauce—savory roasted mushrooms and a subtly sweet scallion-accented pan sauce are delicious accompaniments to crisp-skinned chicken seasoned with ground fennel, granulated garlic and dried oregano. Doesn’t that description just make your mouth water already?

If you can’t find ground fennel seed at the supermarket, grind your own by processing a generous 1 tablespoon whole fennel seeds in a spice grinder until fine and powdery. And don’t feel that you need to roast your own peppers for this recipe. Just use jarred roasted peppers, they’ll work perfectly well. (A 7.75-ounce jar contained exactly 2 whole roasted bell peppers.)

IMG_1418

The chicken, including the breast meat, was soooo juicy and tender, and the combination of flavors was wonderful. And to complete the meal, I promised you a bonus side. This Roasted Sweet Potatoes with Aleppo Pepper hails from Fine Cooking. We just adored the touch of orange zest!

Both of these recipes take approximately a total of 50 minutes and get cooked on rimmed baking sheets at about the same oven temperature—can’t get much easier than that! If you don’t have two ovens, just cook both sheet pans at 450° and adjust the time a little less for the spuds (cover with foil if they start to get too brown).

IMG_1387

Chicken and Cremini Mushroom Traybake with Red Pepper Sauce

  • Servings: 4
  • Difficulty: easy
  • Print

Ingredients

  • 1 Tbsp. ground fennel seeds
  • 1 Tbsp. granulated garlic
  • Kosher salt and ground black pepper
  • 1½ lbs. cremini mushrooms, trimmed, kept whole
  • 2 roasted red peppers, kept whole
  • ¼ cup extra-virgin olive oil
  • 3 lbs. bone-in, skin-on chicken parts, trimmed and patted dry
  • 1 Tbsp. firmly packed light or dark brown sugar
  • 1 Tbsp. dried oregano
  • 10 medium garlic cloves, peeled
  • 2 tsp. unseasoned rice vinegar
  • 4 scallions, thinly sliced

Directions

  1. Heat the oven to 450°F with a rack in the middle position.
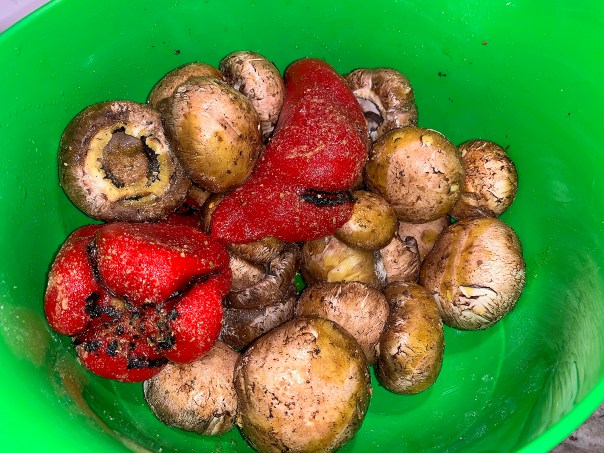
  2. In a small bowl, stir together the fennel, granulated garlic and 2 teaspoons salt. In a medium bowl, toss the mushrooms and red peppers with 1 tablespoon of the spice mixture and the oil; set aside.
    IMG_1394
  3. Into the remaining spice mixture, stir the brown sugar, oregano, 1 tablespoon salt and 2 teaspoons pepper.
    IMG_1395
  4. On a rimmed baking sheet, evenly season both sides of the chicken parts with the spice mixture. Place the garlic cloves in the center of the baking sheet, then arrange the chicken parts, skin up, around the garlic; this prevents the garlic from scorching during roasting. Place the roasted peppers around the chicken, then scatter the mushrooms in an even layer on top the peppers.
    IMG_1399
  5. Roast until the thickest part of the breast (if using) reaches about 160°F and the thickest part of the largest thigh/leg (if using) reaches about 175°F, 30 to 40 minutes. (If some pieces are done before others, remove them to the platter and cover with foil until the others are cooked to temperature.)
    IMG_1407
  6. Using tongs, transfer the chicken and mushrooms to a platter and transfer the roasted peppers to a cutting board; leave the garlic on the baking sheet.
    IMG_1409
  7. Carefully pour ¼ cup water onto the baking sheet, then use a wooden spoon to scrape up any browned bits. Pour the liquid, along with the garlic cloves, into a medium bowl.
  8. Roughly chop the roasted peppers and add to the bowl, then use a fork or potato masher to mash the mixture until almost smooth. (We left ours on the chunkier side.)
     

  9. Stir in the vinegar and half the scallions, then spoon the sauce over the chicken. Sprinkle with the remaining scallions.
    IMG_1421

http://www.lynnandruss.com

Recipe from 177 Milk Street

Bonus Recipe: Roasted Sweet Potatoes with Aleppo Pepper

IMG_1411

  • Servings: 4
  • Difficulty: easy
  • Print

Ingredients

  • 4 large sweet potatoes (about 3 lbs.), peeled and cut into 1″ chunks
  • 1/3 cup olive oil
  • 1 Tbsp. Aleppo pepper
  • 2 tsp. kosher salt
  • 1/4 cup fresh cilantro leaves, chopped
  • 1 Tbsp grated orange zest

Directions

  1. Position a rack in the center of the oven and preheat to 425°.
  2. Line a large rimmed baking sheet with parchment.
  3. In a large bowl, combine sweet potatoes chunks, olive oil, Aleppo pepper and kosher salt and toss to coat well.
    IMG_1402
  4. Reserving the bowl, transfer the potatoes to the prepared baking sheet and spread in an even layer. Roast, turning occasionally, until the edges of the spuds are slightly caramelized, 30 to 40 minutes.
    IMG_1403
  5. Return the potatoes to the reserved bowl and add cilantro and orange zest, tossing gently to combine.
  6. Season to taste with salt and serve.

http://www.lynnandruss.com

Recipe courtesy of Emily Peterson from Fine Cooking

Those Who Garlic Together, Stay Together

Garlic lovers take heed, between these two dishes, you’ll use 18 cloves—or more if you’d like…

From the freezer, we pulled the last of our leg-of-lamb purchased from Costco months ago and divvied up into different portions, this one being a 2-pound roast. On what to do with it, The Hubster flipped through our well-thumbed and dog-eared copy of Penelope Casa’s cookbook “La Cocina de Mama” and spotted Digna’s Roast Lamb and Potatoes thinking it would make the perfect Sunday evening braise. After all, having recently returned from a vacay in the Andalusian region, we were in a Spanish frame of mind…

As he read the ingredients, there was a little niggling in my brain that told me we made this dish a while back. Sure enough, I did a search on my blog and found that I had posted the very same recipe exactly 5 years ago to the day, on November 3, 2014. Now that was serendipitous indeed.

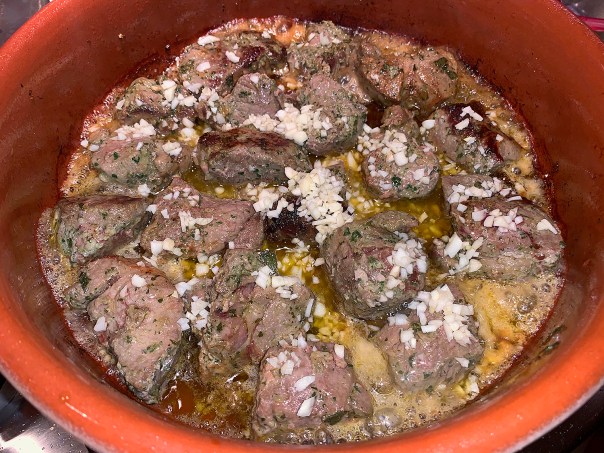
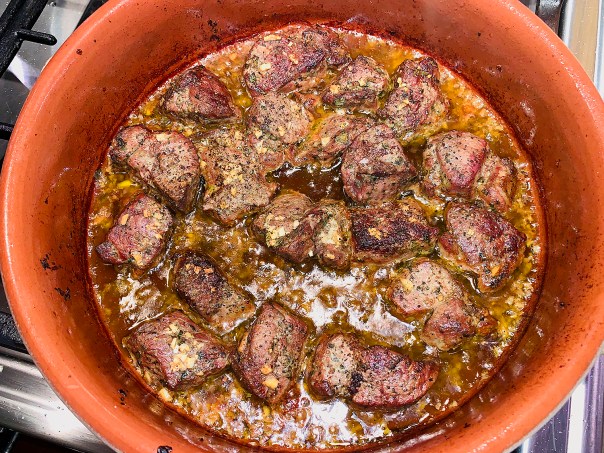
In this fabulous recipe, the lamb is first marinated, then roasted with potatoes. Prepared in an earthenware casserole—a cazuela—the lamb dish was once made on festive occasions in village wood-burning bakery ovens in Galicia Spain. Our cazuela was now a seasoned vessel compared to its maiden voyage the first time we made this recipe.

Keep in mind, you do need to prepare the lamb with marinade and refrigerate overnight, so plan accordingly. Then an hour-and-a-half before you start to cook, take the marinated meat out of the fridge so that the oil comes to room temperature. Even though we did it again, we think the next time we will forego browning the cubed meat before putting the casserole in the oven, where it should brown on its own. Eliminating this step could help ensure that the meat doesn’t get overcooked and/or dried out.

IMG_1334

IMG_1336

IMG_1337

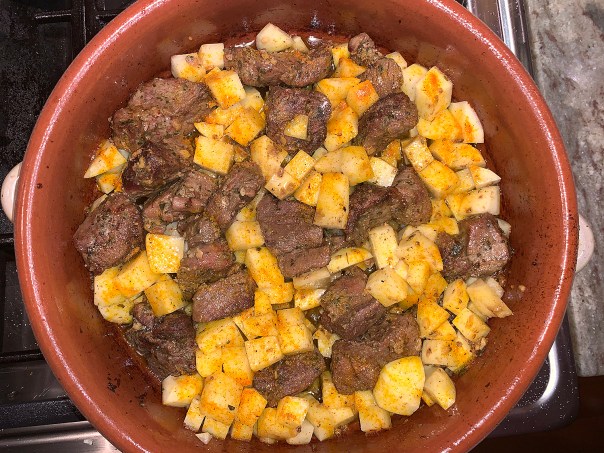
In the original directions it does not indicate to turn the meat and potatoes a time or two while in the oven. If you don’t, the spuds might not get completely cooked on the top layer, and become mushy at the bottom. You want to make sure all of the ingredients are evenly cooked and getting happy in the flavorful juices. So I mention to do this in the steps below.

IMG_1381

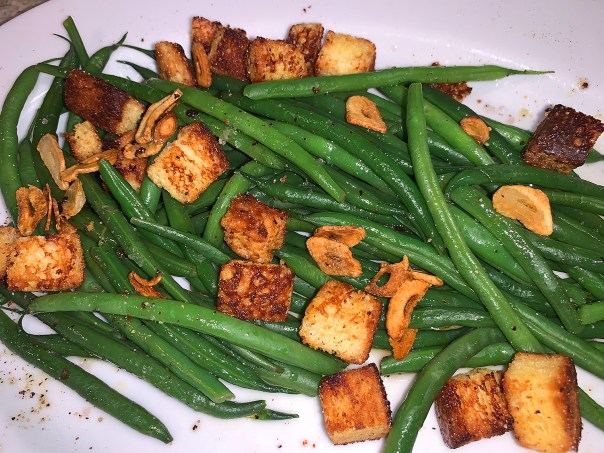
Our side, (yes, another green bean dish), “Green Beans with Garlic and Vinegar” was also from Penelope’s book. She explains vegetables in Spain are typically served on their own as a first course. (We have experienced this first-hand in our travels throughout Spain.) Ingredients such as garlic, chopped hard-boiled eggs, and fried or toasted bread are common additions. They transform plain vegetables into dishes that can become light meals. (Here however, we omitted the eggs.) WOW, so simple yet so delicious!!

Digna's Roast Lamb and Potatoes

  • Servings: 4
  • Difficulty: easy
  • Print

Ingredients

  • 14 garlic cloves, minced
  • 2 bay leaves, crumbled
  • 2 Tbsp. minced fresh parsley
  • Kosher or sea salt
  • 8 Tbsp. olive oil
  • 6 Tbsp. dry white wine (we used dry sherry)
  • 2 lbs. boneless leg of lamb, cut into 2-inch cubes
  • 1/4 cup chicken broth
  • 2 cloves
  • Freshly ground pepper
  • 1/8 tsp. crumbled saffron threads
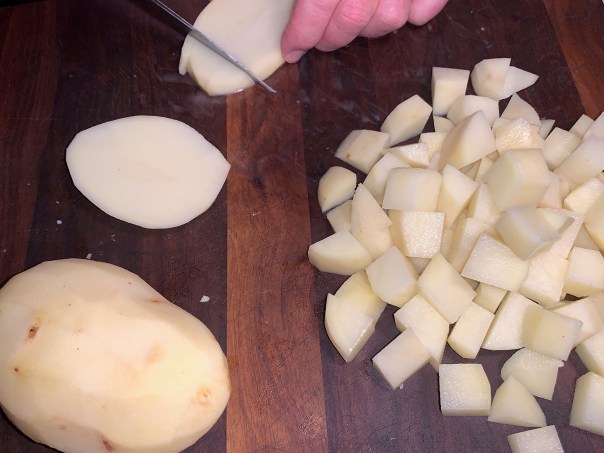
  • 1 lb. baking potatoes, peeled and cut into 1/2-inch cubes
    IMG_1366

Directions

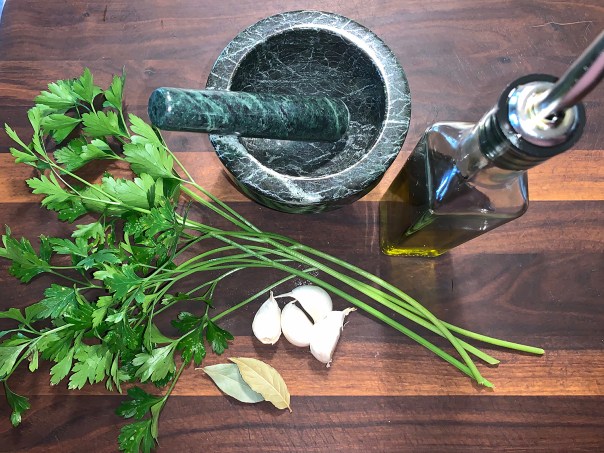
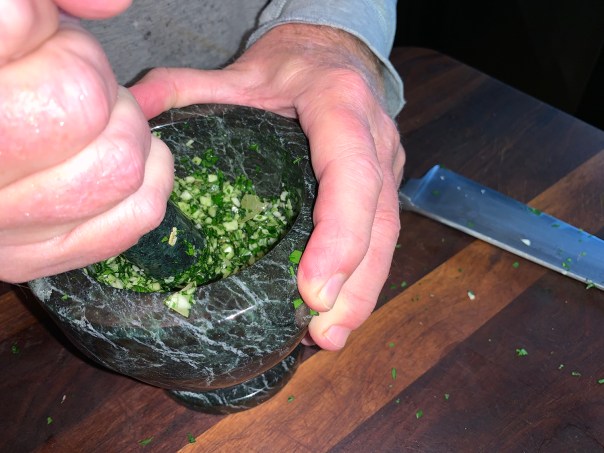
  1. FIRST DAY: In a mortar, mash to a paste one-quarter of the minced garlic cloves with the bay leaves, parsley and a 1/4 tsp. salt.
  2. Stir in 4 Tbsp. of the oil and 2 Tbsp. of the wine.
  3. Transfer to a large bowl, add the meat and stir to coat well. (Or put in a ziploc bag)
  4. Marinate overnight or longer in the refrigerator. (Ours marinated about 30 hours.)
  5. NEXT DAY: An hour-and-a-half before you start to cook, take the bag of marinating meat out of the refrigerator, allowing the oil to return to a liquid state.
  6. Preheat oven to 375 degrees.
  7. Heat 2 Tbsp. oil in a large shallow casserole, preferably earthenware (like our cazuela.)
  8. Add the meat with marinade and brown over high heat.
    IMG_1364
  9. Remove casserole from heat and add remaining 2 Tbsp. oil, 4 Tbsp. wine, the broth, rest of garlic, the cloves, and salt and pepper to taste.
  10. Place in oven and roast for 30 minutes, uncovered.
    IMG_1368

    Russ toasted the saffron in foil over an open flame for several seconds then pulverized it with some finishing salt in a mortar and pestle.

  11. Add the potatoes, sprinkle them with salt and saffron (see above comment), and continue cooking another 30 minutes more, turning once or twice until potatoes are tender.
    IMG_1369

http://www.lynnandruss.com

Green Beans with Garlic and Vinegar

IMG_1379

Green Beans with Garlic and Vinegar

  • Servings: 6
  • Difficulty: easy
  • Print

Ingredients

  • Kosher or sea salt
  • 1 small onion, cut in half
  • 2 fresh parsley sprigs
  • 2 whole peeled garlic cloves + 2 garlic cloves thinly sliced
  • 2 Tbsp. + 2 tsp. olive oil
  • 1 lb. green beans, trimmed and rinsed
    IMG_1361
  • 2 half-inch slices bread, cut from a French-style loaf, cubed
  • 2 tsp. red or white wine vinegar
  • 1 large hard-boiled egg, finely chopped (optional)

Directions

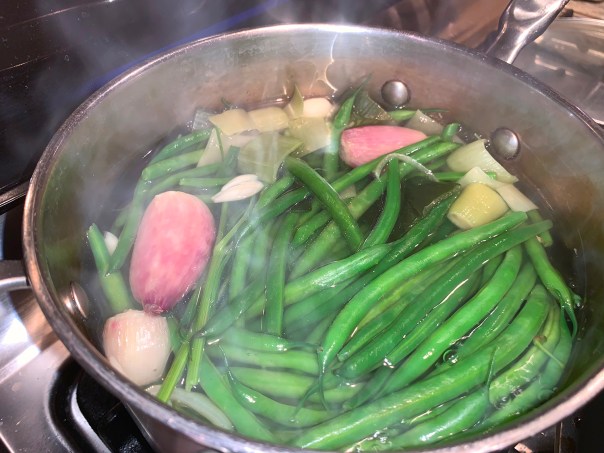
  1. Bring a pot of salted water to a boil with the onion, parsley, whole garlic and 1 Tbsp. of the olive oil. Add the beans and cook at a high simmer for about 20 minutes, until cooked to taste.
    IMG_1360
    We used shallots and leek greens in place of the onion, plus included parsley stems.
    IMG_1373
  2. Meanwhile, to fry the bread, heat 2 tsp. of the oil in a small skillet, add the bread and fry until golden brown, turning several times. Drain on paper towels.
  3. Add the remaining Tbsp. oil and the sliced garlic to the skillet and sauté until the garlic is golden, reserve.
    IMG_1372
  4. When the green beans are done to taste, drain them, discarding the parsley, garlic and onion and place beans on a warm serving platter.
  5. Pour on the sliced garlic with its oil, sprinkle with salt, and drizzle with vinegar. Scatter the bread cubes (and eggs if using) over the beans and serve.
    IMG_1384

http://www.lynnandruss.com

Savory & Sweet Seville

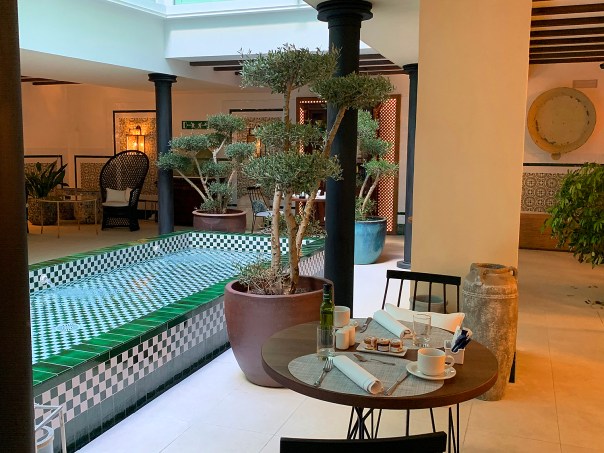
While still on the subject of Spain, I’ll continue the culinary trip through parts of old town Seville. Our digs were at the H10 Corregidor, a charming boutique hotel located in Seville’s historic center and shopping district, in the midst of the city’s main tourist attractions. Being in the older section of the city, many areas are pedestrian only, no vehicles allowed, making schlepping our luggage around a real pain. Sometimes the cabbies couldn’t even figure out a way to get us to our destinations!

It has nothing to do with dining, but this video displays a moment from a Flamenco Dancing performance (and was one of those times a cabbie could not find his way to the pedestrian only location).


With each night’s stay at H10, they offer a fully-loaded breakfast buffet with the option of enjoying it in the hotel’s typical Andalusian courtyard. In fact, our room, three floors up, looked directly down onto the courtyard, and where we dined as weather permitted. The offerings were wide and varied, something for everyone’s tastes and diet.

IMG_0574

IMG_0575

IMG_0577

One thing I found hard to “digest” was an interesting tidbit from our tour guide, Jaime, a lifelong Seville resident and previous architect. While strolling around the city, past numerous tapas bars and eateries, he pointed out that the more litter on the ground around the tables, the better the restaurant. He explained it is customary to throw your napkins and cigarette butts on the floor as you dine.

Sure enough, the most populated by locals were places with debris on the grounds! We did note, however, that the cigarette butts were only by exterior tables, not indoors. Owners cleaned up the mess every night after closing, and things were spic-and-span the following morning. I’m not sure how that would fly here in the States…

For lunch one day we tried to get into Bar Alfalfa at the suggestion of our hotel concierge, but it was jammed packed and spilling onto the street, and as you may have guessed, with trash strewn about! Then we noticed Petra across the way and decided to try it. Good choice (and clean as a whistle). Petra, shown below, is a recent opening in Plaza Alfalfa specializing in meats grilled on a hot stone at your table. The space is small and stylish, all warm stone and wood tones. We procured the last table.

IMG_0550

We decided to go the route of sharing a variety of tapas, and we weren’t disappointed. Although our table, being so small and up against a wall, made it a real balancing act to accommodate all of the dishes. In no particular order we got:

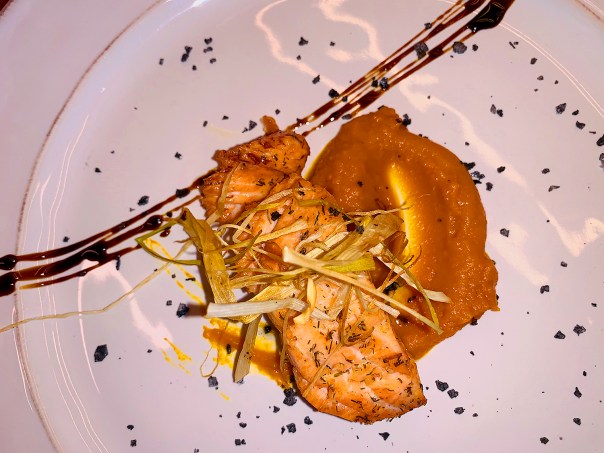
IMG_0557Pork Cheeks with Creamy Pumpkin Soup and its Seeds

IMG_0554Fusilli Pasta with Sauce of Iberian Streaky Bacon and Payoyo Cheese

IMG_0553Creamy Rice with Crispy Duck and Fried Crunchy Onion
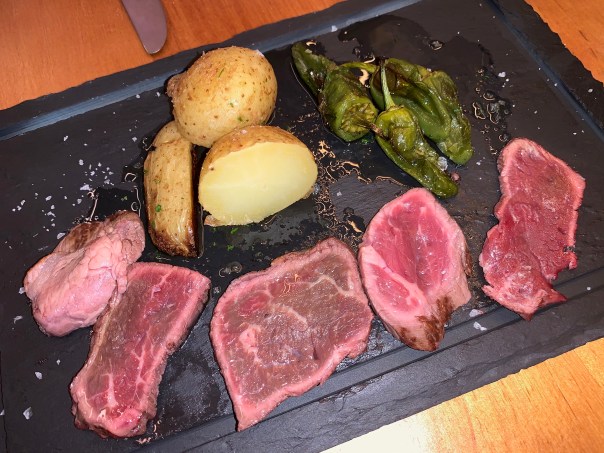
And perhaps the most fun of the selections was the Grilled Hot Stone complete with sliced presa Ibérica, potatoes, peppers and tossed with a finishing salt. This allowed you to eat at your own pace because the stone stayed piping hot for a long time, and you could cook to whatever degree of doneness suited your fancy.

IMG_0558

Here is a video as Russ grills the meal:


Our last evening in Seville found us dining al fresco at Paco-Pepe Bar situated between the Plaza del Salvador and the Plaza de San Francisco, five minutes from the famous Cathedral and close to City Hall.

IMG_0698

The decor is unusual in that their photography is a unique composition of faces, wild animals, monuments and historical moments. The tables and chairs are of their own design and painted with different country motifs. The walls are formed by large open windows and integrate a small living room with the street. But the star of Paco-Pepe Bar is, without a doubt, the terrace—where we sat and could enjoy people watching.

IMG_0703

We weren’t overly hungry and decided to split a few smaller plates. One, the Garlic King Prawns was swimming in a wonderful garlicky extra virgin olive oil just begging to be mopped up. We had at first declined an offer of bread (in many parts of Spain, as here, you are charged extra per person for bread), but then decided to go ahead and get some.

IMG_0707

Our other choice was the Chicken Brochette Moroccan Style which came plated with french fried potatoes (many, many dishes come with some sort of potato in Spain). The poultry was cooked perfectly, still tender and juicy with a slight char.

Time to head our next destination, Rota, a beachside town directly on the Atlantic. But first, a stop at Bodegas Tradición, a centuries-old sherry winery in Jerez founded in 1650, and still owned by the same family! Stay tuned…

A “Taller” Cooking Class—in Spain

It was our third visit to Spain, this time with a stay in Seville, the 4th largest city in the country. While we there only three days, we had a lot on our agenda including a personal guided tour, a flamenco dancing show and a cooking class, the latter of which is the basis of this blog.

cooking school sign

Cooking is one of our shared passions (as is Spain), and we looked forward to a 3-hour group session at the “Taller Andaluz de Cocina” located in the market “Mercado de Triana” which is across the river from where we were staying in old town. (Taller in this case translates to workshop.) Since we arrived early before their doors opened, we had the opportunity to check out all of the vendor stalls brimming with the best quality meats, fruits and vegetables, oils, cheeses and restaurants.

IMG_0637

IMG_0641Clare explains the different types of olive oils. Spain is the world capital of olive groves boasting about 866 million trees.

The class size of 10 included a couple from San Francisco; a mother and son also from California; and couples from both Poland and Britain. Our market guide who gave us a detailed tour of the glorious options was Clare; and our humorous but knowledgeable chef was Juan Pedro. (He mentioned his wife is Australian and he plans to move to that country and open a bakery.)

We don our class aprons and can’t wait to get started! 

IMG_0650Juan Pedro demonstrates the best way to chop an onion.
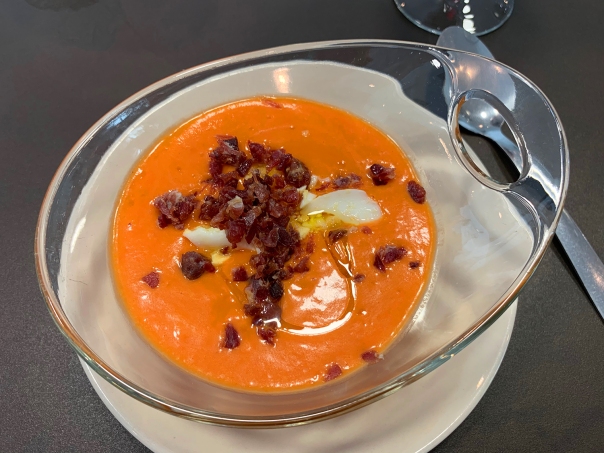
The menu for the day started with a tasty Salmorejo (below), a purée originating from the Andalusian region of south Spain (where we were). It is made from tomatoes, bread, oil and garlic. Normally, the tomatoes are skinned and then puréed with the other ingredients. The purée is served cold and may be garnished with diced Spanish serrano ham and diced hard-boiled eggs.

IMG_0663Salmorejo shown as a close-up above, and set before us below.
IMG_0664

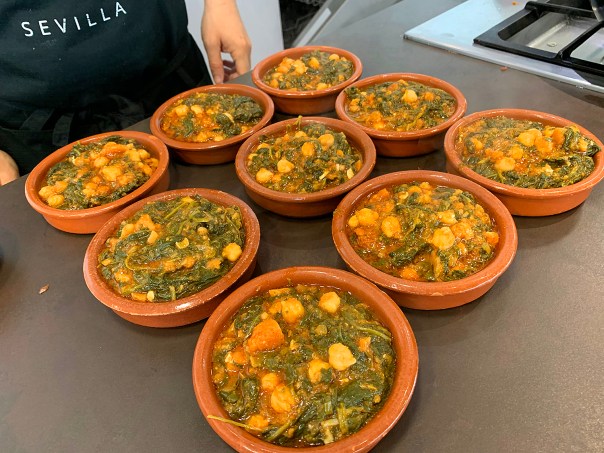
Next up was Spinach with Chickpeas (Espinacas con Garbanzos) a must-try Andalusian dish. It is a classic tapas dish that’s easy to make and wonderfully versatile. Simple, hearty, vegan, comfort food. As Spaniards would say, this dish is ‘bueno, bonito y barato’, which translates as ‘good, beautiful and cheap’. It couldn’t more true. Like many other peasant recipes from Southern Spain, this dish is a fine example of how to make the most of simple and humble ingredients.

IMG_0668

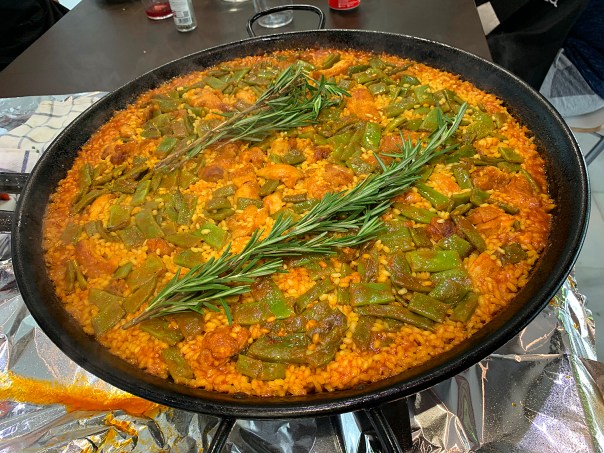
While all of this is going on, Juan Pedro is also making the star of the show, a Paella Valenciana, or Chicken Paella. Now if you’ve been following us for any length of time, you know Russ is a huge fan of making paellas, but this one was prepared quite differently than he’s ever done or read about.

IMG_0667

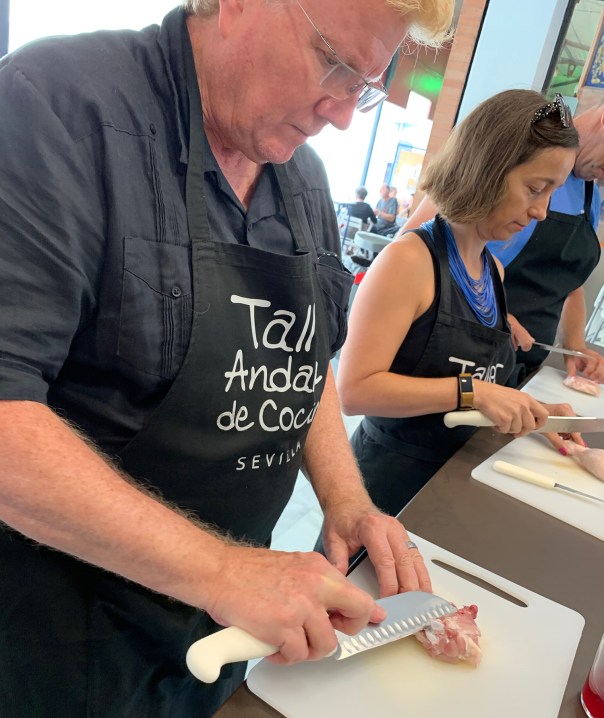
Juan demonstrates how to debone a chicken, then has members of the class try to do so on the cut away parts, as Russ does to a leg below.

IMG_0653

Ideally you want to cook the stock from the chicken carcass and bones and leeks for at least 1 1/2 hours. After some initial cooking of the chicken, beans and artichoke hearts, you bring it all together (chicken and veggies) with the chicken stock so that it reaches the top of the rivets on the pan. Turn the heat up, and boil it down until the broth is right below the rivets. Aha, the rivets! Juan explained that they are regulated in paella pans made in Spain so that your paella comes out perfect every time.

Next, pour the rice across the pan in an even line from handle to handle, precisely between the rivets and immediately set an alarm for 18 minutes. The first 5 minutes on high heat, then 5 on medium heat and then 8 minutes on low heat. For the very last 30 seconds, turn the heat up again, drizzle olive oil, place some rosemary on top, and when the time is up, turn the heat off, cover the pan with a clean tea towel and let it sit for 5 to 10 minutes before serving. Check out this stunning video of Juan Pedro when the paella is done:

The most tasty part of the paella is the crunchy one, stuck to the bottom of the pan—and this one didn’t disappoint. While the paella was wonderful, I was a little disappointed in the amount of chicken and beans in my portion, everyone else seemed to get quite a bit. When I mentioned this to Russ after the fact, he said he would have been glad to share some of his—what a guy!

IMG_0670

And the finale of the workshop was the Lemon Sorbet with Cava, a nice refreshing finish to the meal. Here you mix all the ingredients together in a blender and serve in a champagne glass with a straw and a mint leaf for decoration.

IMG_0672

Of course, once class ended, we went back out into the market and purchased some saffron and pimenton. If only we could have figured out a way to smuggle back some of the Jamón Ibérico and good olive oils. Compared to the prices in the States, they were a steal!

Award-Winning Tuscan Beef Stew

For us, there’s nothing like a long, slow braise on a rainy or blustery Sunday afternoon. So, this was an occasion for Big Red, our large Le Creuset dutch oven which has successfully produced our best braised dishes over the years. Several weeks back, Russ came across this Tuscan Beef and Black Pepper Stew (Peposo Alla Fornacina) recipe from 177 Milk Street, a site who’s recipes have kept us more than intrigued.

The simple, generously peppered beef stew known as peposo is said to have been created by 15th century kiln (fornacina) workers in Tuscany, Italy. Chianti is the best-known wine produced in that region and is the traditional choice for peposo, but any dry, medium-bodied red wine works well. Chianti we had on hand, so Chianti we used (and drank).

Make sure to use coarsely ground black pepper, as it has more presence and better coats the beef. This recipe makes a generous amount of stew—about 2 quarts—so serve it one night with polenta; another with mashed potatoes or braised beans. The stew keeps well, so it can be made up to three days ahead and reheated in the microwave or in a saucepan over low.

IMG_1251The first night we served ours with parm-infused polenta and roasted Brussels sprouts and garlic.

Don’t be shy about trimming the fat from the chuck roast. Remove as much as you can, which may mean shedding about 1 pound. Pull the roast apart at the natural seams, then use a sharp knife to trim the fat and cut the pieces into 2-inch chunks.

IMG_1233Because that’s what we had in the freezer, we used 5.5 lbs. of boneless short ribs, which have more consistent marbling and less chunks of fat throughout than chuck roast.

Yes, it’s time-consuming overall, but only about a half-hour of active time. Plus, with a limited number of easy-to-get ingredients, you don’t have to assemble an army of elements to produce an award-winning meal.

IMG_1227

Tuscan Beef with Black Pepper Stew

  • Servings: 6
  • Difficulty: moderate
  • Print

Ingredients

  • 6 to 7 pounds boneless beef chuck roast, well trimmed and cut into 2-inch chunks
  • Kosher salt and coarsely ground black pepper
  • 2 Tbsp. extra-virgin olive oil
  • 1 large yellow onion, halved and thinly sliced
  • 12 medium garlic cloves, peeled
  • 3 Tbsp. tomato paste
  • 2 sprigs rosemary, plus 1 tablespoon minced fresh rosemary
  • 2 cups dry red wine

Directions

  1. Heat the oven to 325°F with a rack in the lower-middle position. Place the beef in a large bowl, sprinkle with 1 tablespoon salt and 2 tablespoons pepper, then toss.
  2. In a large Dutch oven over medium, heat the oil until shimmering. Add the onion and garlic and cook, stirring, until the onion is lightly browned, 7 to 9 minutes. Add the tomato paste and cook, stirring, until the paste begins to brown, 3 to 5 minutes.
     

  3. Nestle the beef and rosemary sprigs in the onion mixture. Add a piece of parchment, large enough to cover the entire pot and push down to surface of meat. Cover and transfer to the oven. Cook for 2 hours.
     

  4. Remove the pot from the oven. Stir, then return to the oven uncovered (toss the parchment). Cook until a knife inserted into a piece of beef meets no resistance, another 1 to 1½ hours.
     

  5. Using a slotted spoon, transfer the meat to a medium bowl; cover with foil.
  6. Set a fine mesh strainer over a fat separator or a medium bowl. Pour the meat juices into the strainer and press on the solids to push them through the strainer; discard any solids left behind.
  7. Pour the wine into the now-empty pot and bring to a boil over medium-high, scraping up any browned bits. Reduce to medium and simmer until the wine is syrupy and reduced to 1 cup, 5 to 7 minutes.
    IMG_1244
  8. Meanwhile, if you strained the meat juices into a bowl, use a spoon to skim off and discard the fat from the surface.
  9. Pour the defatted meat juices into the pot. Bring to a simmer over medium-high and cook, stirring occasionally, until thickened to the consistency of heavy cream, 5 to 7 minutes.
    IMG_1246
  10. Return the beef to the pot, add the minced rosemary and stir gently. Bring to a gentle simmer and cook, stirring occasionally, until the meat is heated, about 5 minutes. Stir in 2 teaspoons pepper, then taste and season with salt.

http://www.lynnandruss.com

Recipe by Diane Unger from 177MilkStreet.com

Mini Pumpkin Loaves with Candied Ginger and Dark Chocolate

Every year around this time, the Pumpkin Bread with Candied Ginger recipe starts racking up hits on my blog. This is an update on that post from five years ago where the end result was two large loaves. I still consider it a perfect autumn recipe that produces a moist, sweet/savory pumpkin bread sure to impress, but I went the extra mile with a few tweaks.

This update makes five mini-loaves which can be gifted, or simply eaten amongst your family/house guests. The photos reflect my experiment in baking mini-loaves versus the larger size so you will see both in the pictures. If you decide to make one larger loaf in a 8/12″ x 4 1/2″ pan (shown below), plus three mini-loaves, keep in mind that you’ll have to cook the larger pan an additional 20-30 minutes to thoroughly bake.

IMG_1306

A quick-to-assemble topping adds texture and keeps the loaves from getting soggy the next day. For the interior, crystallized ginger can be a bear to finely chop, so I use a spice grinder. In doing so, much of the ginger will become almost a powder, which is OK because the spice gets distributed throughout the batter.

As you stir the chocolate chips into the batter, some of them will start to melt lending an attractive swirl effect, while most of them will remain intact for those decadent bites. Don’t pat yourself on the back thinking these are “healthy” because of the pumpkin purée. With all of the sugars, cream cheese and nuts, they are definitely not lo-cal, so eat in moderation (if you can).

One other switch-a-roo I made this time around was substituting pecans for the walnuts—because as we know, The Mr. cannot abide the latter. If you prefer walnuts, go ahead and use them. 

IMG_1284

Mini Pumpkin Loaves with Candied Ginger and Dark Chocolate

  • Servings: 5 mini-loaves
  • Difficulty: moderate
  • Print

INGREDIENTS

Topping

  • 5 Tbsp. packed light brown sugar
  • 1 Tbsp. all-purpose flour
  • 1 Tbsp. unsalted butter, softened
  • 1/2 tsp. ground ginger
  • 1/8 tsp. salt
  • 2 oz. dark chocolate chips

Bread

  • 2 cups all-purpose flour
  • 1 1/2 tsp. baking powder
  • 1/2 tsp. baking soda
  • 1 (15-ounce) can unsweetened pumpkin puree
  • 1 tsp. salt
  • 1 1/2 tsp. ground cinnamon
  • 1/4 tsp. ground nutmeg
  • 1/8 tsp. ground cloves
  • 1 cup granulated sugar
  • 1 cup packed light brown sugar
  • 1/2 cup vegetable oil
  • 4 oz. cream cheese, cut into 12 pieces
  • 4 large eggs
  • 1/4 cup buttermilk
  • 1 cup pecans, toasted and chopped fine
  • 1/3 cup minced crystallized ginger
  • 8 oz. dark chocolate chips
  1. FOR THE TOPPING: Using fingers, mix all ingredients (except the dark chocolate chips) together in a small bowl until well combined and topping resembles wet sand; set aside while preparing bread.
  2. FOR THE BREAD: Adjust oven rack to middle position and heat oven to 350 degrees. Grease five, 5 1/2″ by 3″ mini-loaf pans. (If you have less than five pans, you will have to bake the loaves in separate batches.)
  3. Whisk flour, baking powder, and baking soda together in a medium bowl.
  4. Combine pumpkin puree, salt, cinnamon, nutmeg, and cloves in large saucepan over medium heat. Cook mixture, stirring constantly, until reduced to 1½ cups, 6 to 8 minutes.
    IMG_1286
  5. Remove pot from heat; stir in granulated sugar, brown sugar, oil, and cream cheese until combined. Let mixture stand for 5 minutes. Whisk until no visible pieces of cream cheese remain and mixture is homogeneous.
    IMG_1287
  6. Whisk together eggs and buttermilk. Add egg mixture to pumpkin mixture and whisk to combine.
  7. Fold flour mixture into pumpkin mixture until combined (some small lumps of flour are OK, although not nearly as many as shown below).
    IMG_1291
  8. Fold pecans, chocolate chips and crystallized ginger into batter. Scrape batter into prepared pans.
  9. Sprinkle topping evenly over top of each loaf. Sprinkle remaining 2 ounces of chips evenly over the five loaves.
  10. Bake until skewer inserted in center of loaf comes out clean, 35 to 40 minutes. Check at 35 minutes. (The larger loaves take anywhere from 60-70 minutes.)
  11. Let breads cool in pans on wire rack for 20 minutes.
    IMG_1298
  12. Remove breads from pans and let cool for at least 1 hour. (1 1/2 hours for the larger loaf.) Serve warm or at room temperature.
    IMG_1304

Adapted from a recipe from Cook’s Illustrated making 2 large loaves without the chocolate.