Tag Archives: dairy-free

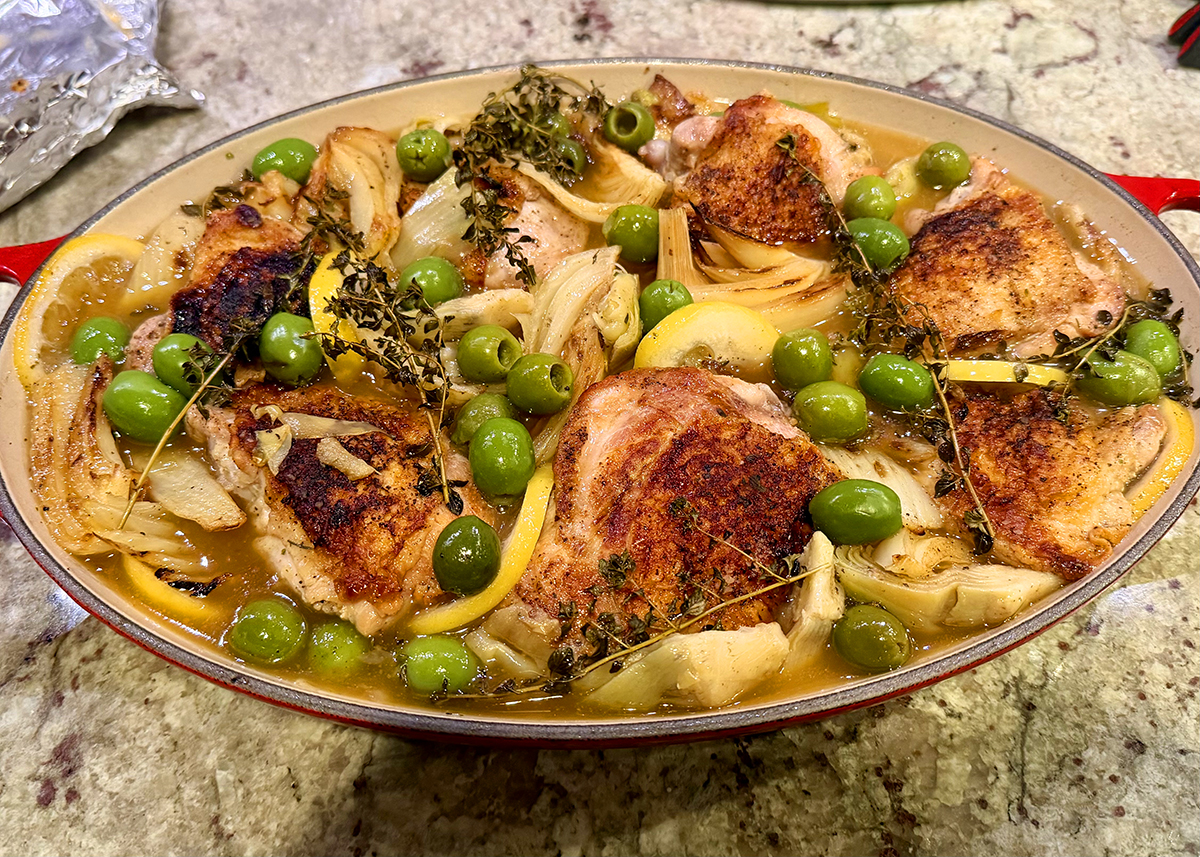
Braised Chicken with Marinated Artichoke Hearts

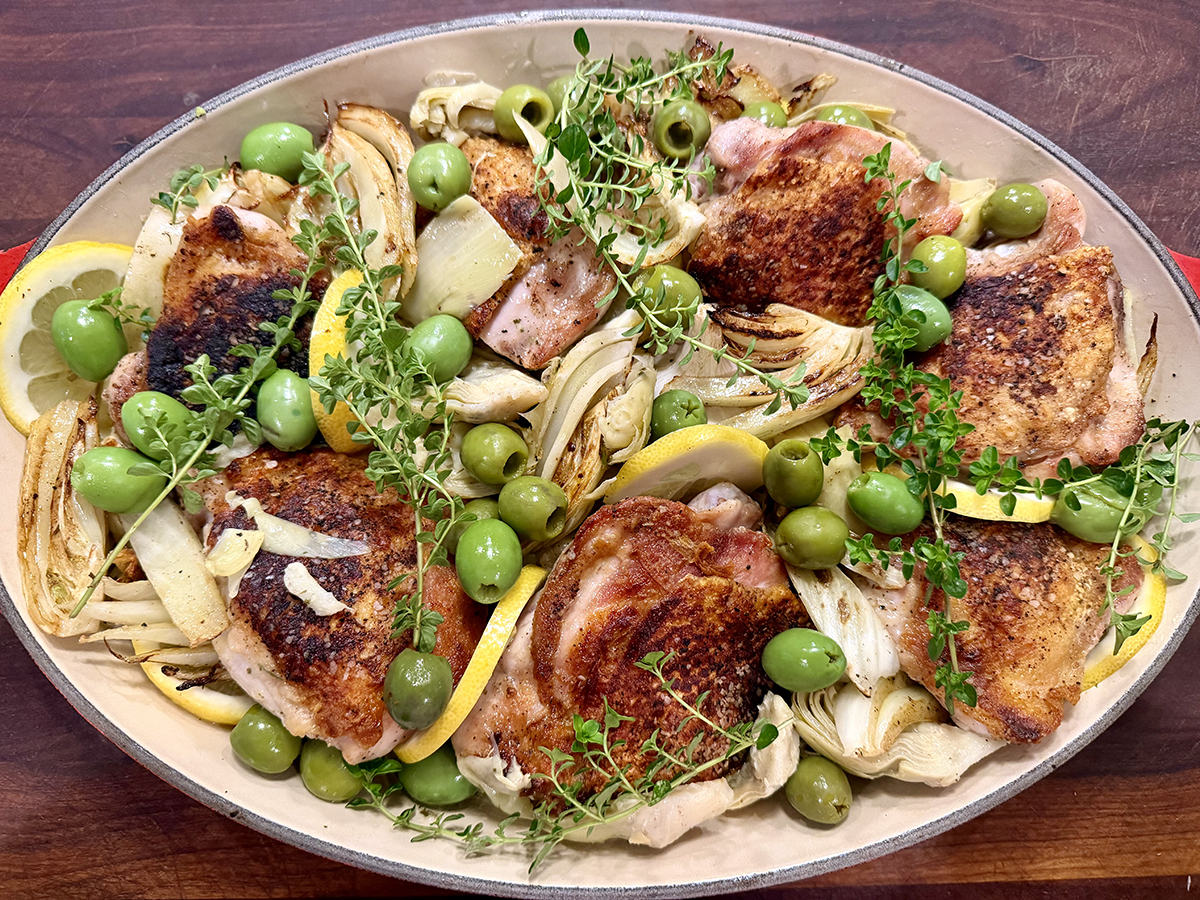
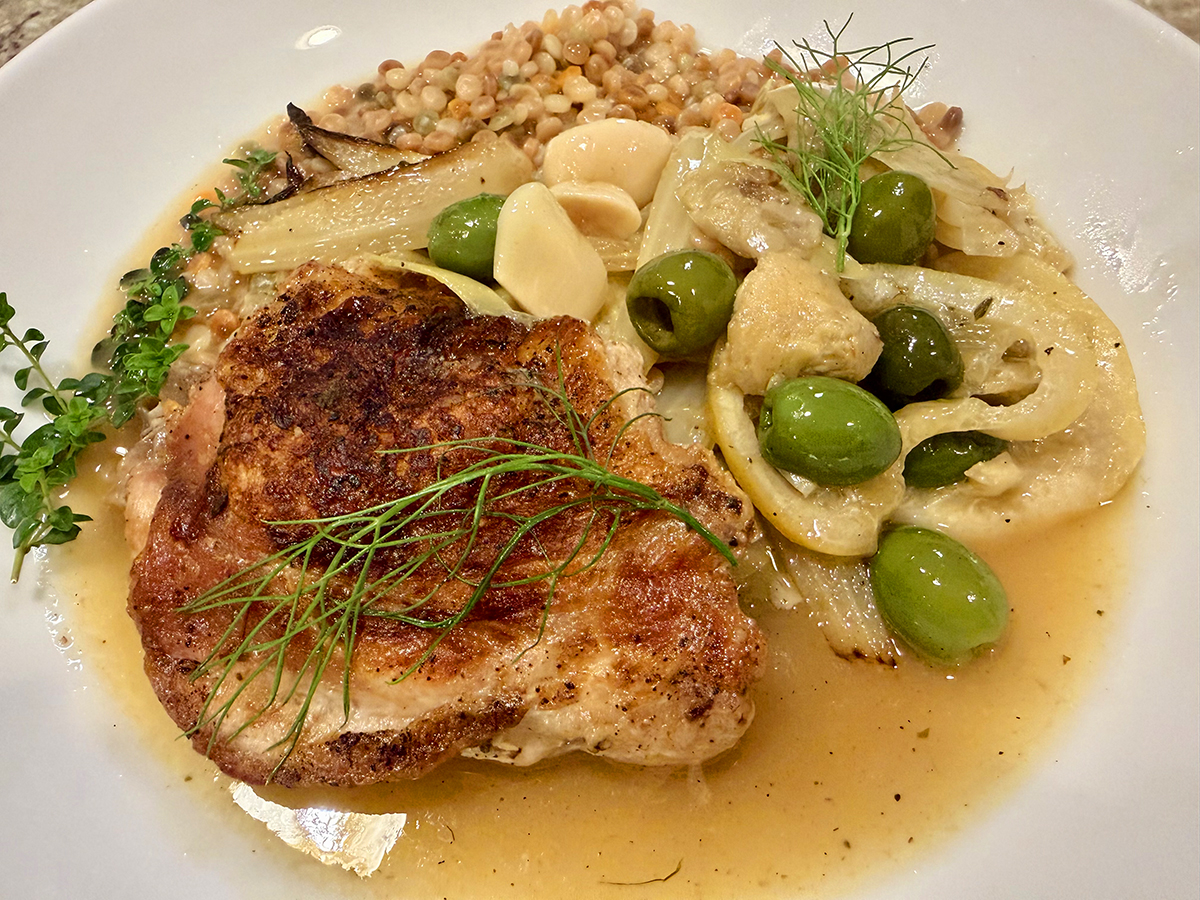
This Food & Wine recipe pairs crispy-skinned chicken thighs and drumsticks with a briny, sun-bright mix of buttery olives, marinated artichokes, and lemon. The pan sauce does the heavy lifting: sherry, fish sauce, thyme, and garlic simmer together into a savory, herb-flecked broth that’s begging to be mopped up. Pure magic in the mouth!
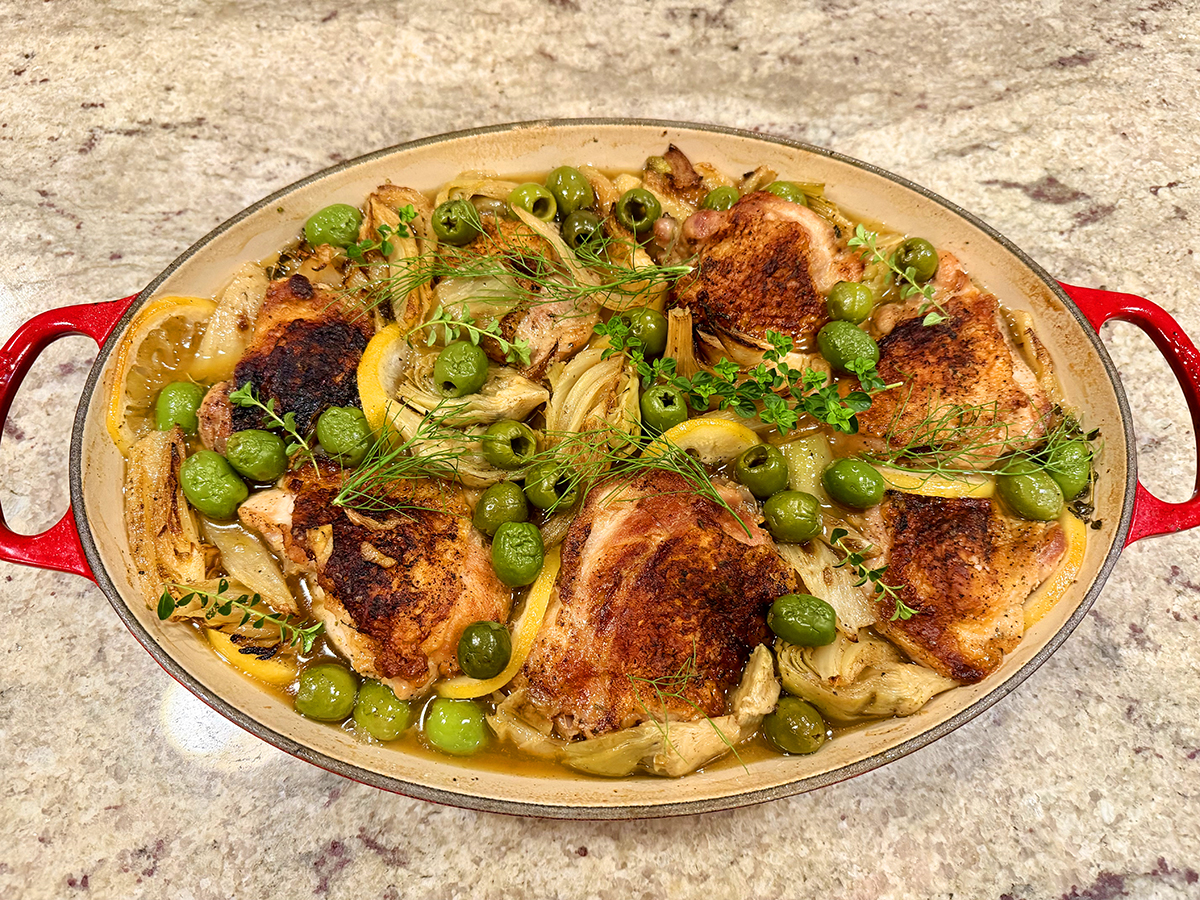
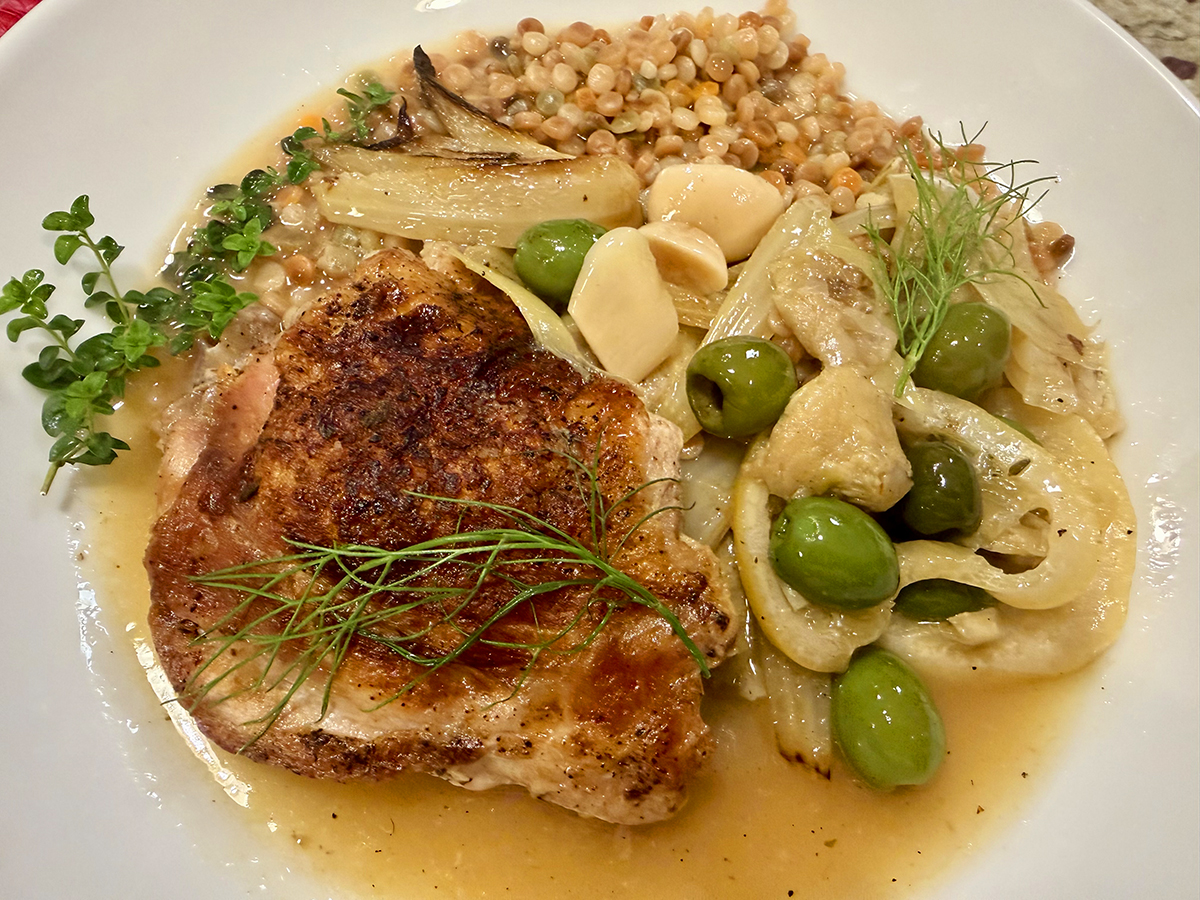
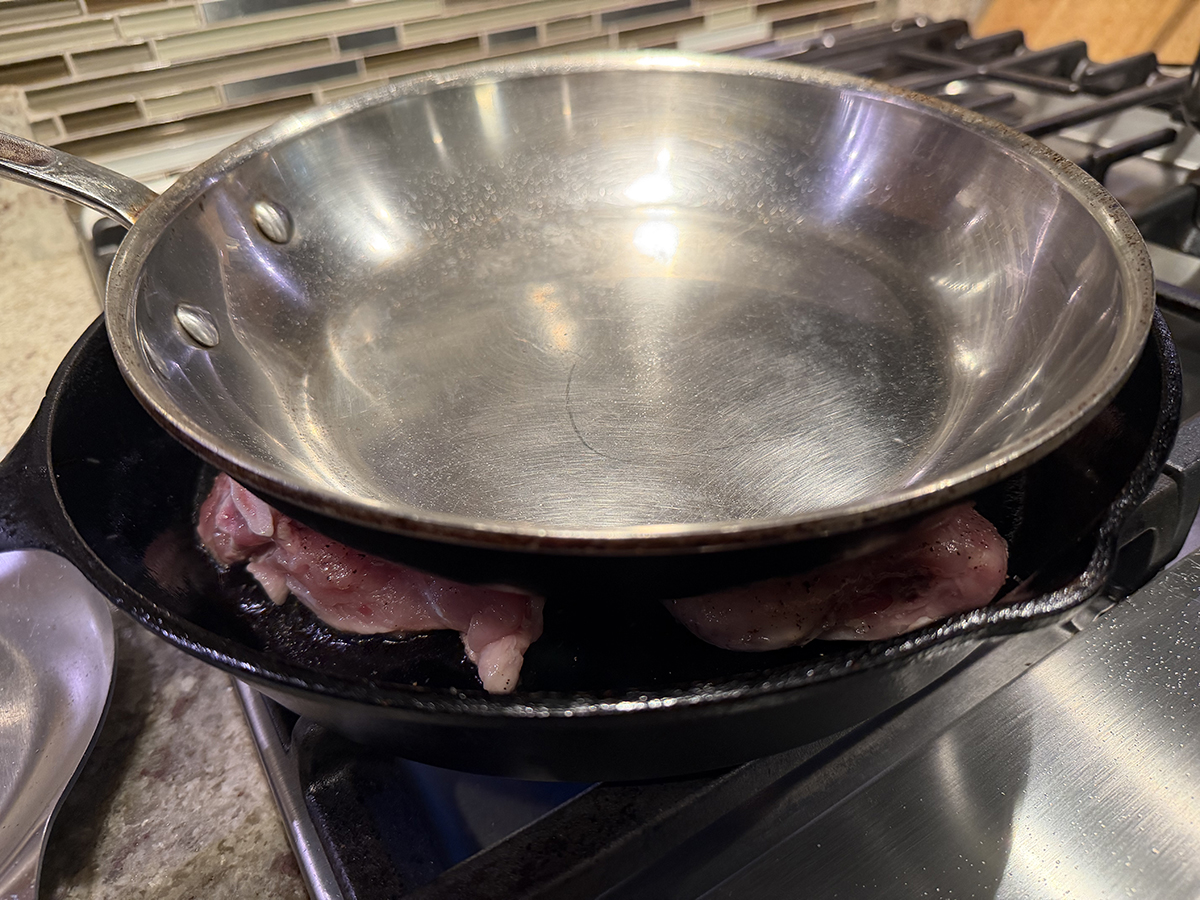
A few keys to get there: pat the chicken bone-dry before it hits the pan, so the skin actually browns instead of steaming. Weighing it down with a heavy lid or grill press (or a smaller cast-iron skillet, if that’s what you’ve got) keeps the skin flush against the heat for a deeper, more even crust. Then braise covered for most of the cooking time to keep the meat fall-apart tender, and uncover it for the last 15 minutes to let the skin crisp back up.

Serve it with crusty bread, couscous, or orzo for sauce-sopping duty. Turn it into a full one-pan dinner by tucking halved baby potatoes and/or sliced fennel (our choice) into the dish before it goes in the oven.

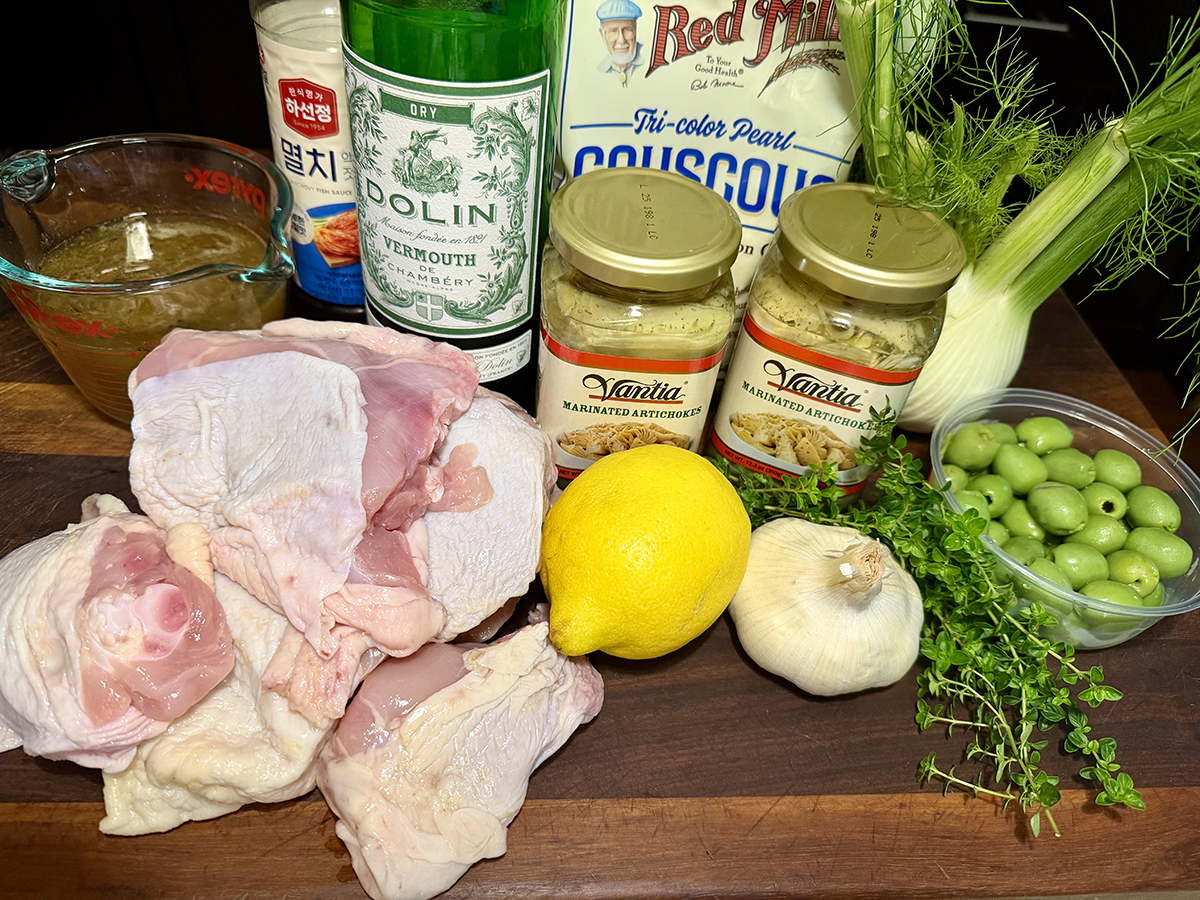
SUBSTITUTES: If you don’t have dry sherry, substitute dry white wine and add 1 to 2 teaspoons of honey to mimic sherry’s subtle sweetness. If you don’t have fish sauce, replace it with 1 to 2 teaspoons of soy sauce for a similarly savory, umami-rich finish. Cerignola olives are buttery and mild, manzanilla olives add a brinier bite, and kalamata olives contribute a deeper, more robust flavor. Any of these will work well, so use your favorite.
Braised Chicken with Marinated Artichoke Hearts

  • Servings: 4-6
  • Difficulty: easy
  • Print

Ingredients

  • 8 bone-in, skin-on chicken drumsticks and thighs (about 2 1/2 lbs.)
  • 1/2 tsp. black pepper
  • 2 1/2 tsp. kosher salt, divided
  • 1 Tbsp. extra-virgin olive oil
  • 1 cup Castelvetrano olives
  • 6 Thyme sprigs
  • 1 large garlic head, halved crosswise
  • 1 Lemon, thinly sliced
  • 1 small fennel bulb, halved lengthwise, cored, sliced into thin wedges
  • 3 cups drained marinated artichoke hearts, plus 1/4 cup brine from jar, divided
  • 1 cup chicken stock
  • 1/2 cup (4 oz.) dry sherry
  • 1 Tbsp. fish sauce

Directions

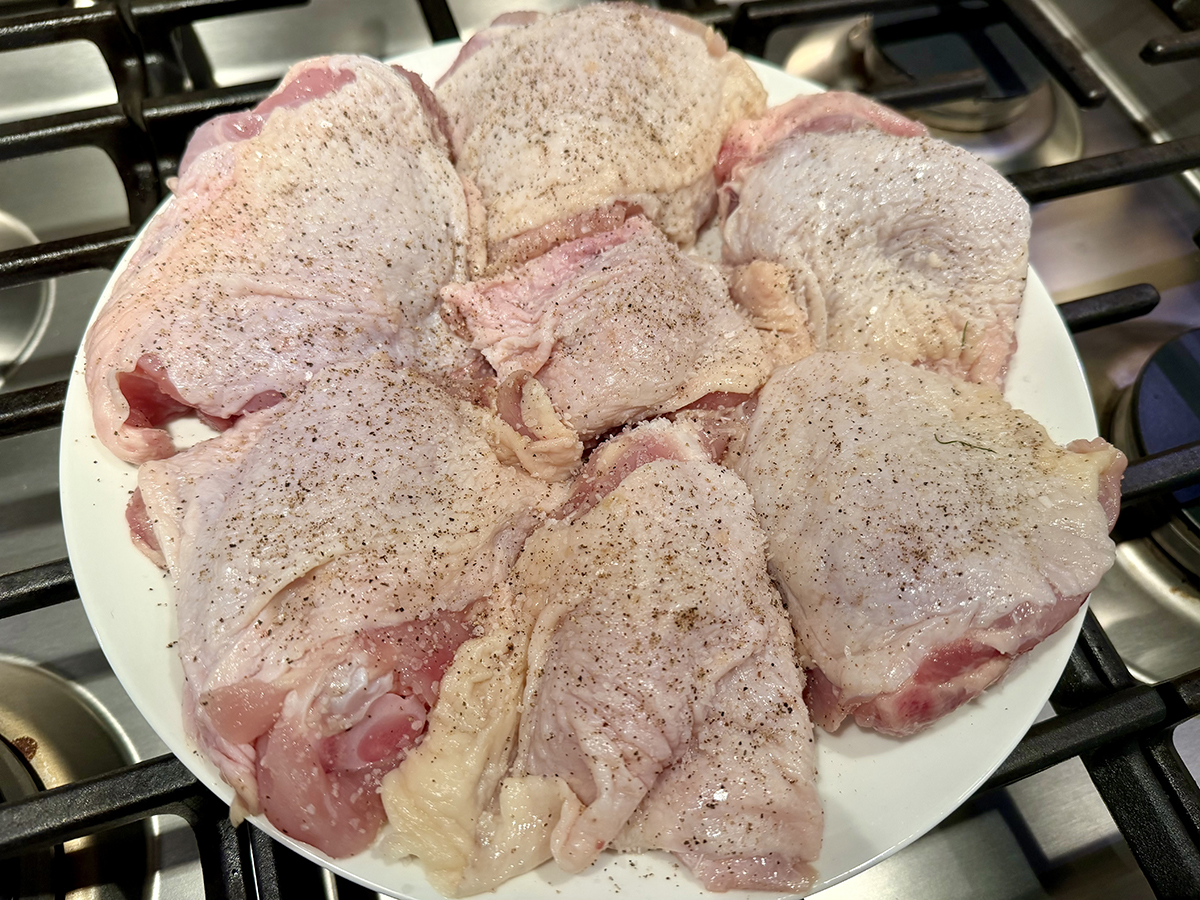
  1. Preheat oven to 375°F. Sprinkle both sides of chicken evenly with pepper and 1 1/2 teaspoons salt. Heat oil in a large cast-iron skillet or black carbon steel skillet over medium-high. Add half of the chicken, skin sides down; place a heavy pot lid on top of chicken pieces to weigh them down. (Do not cover skillet.) Cook, undisturbed, until browned and crisp, 10 to 12 minutes. Remove lid; transfer chicken, skin sides up, to a 12- x 9-inch oval baking dish or a 13- x 9-inch baking dish. Repeat cooking process with remaining chicken. Scatter olives, thyme, garlic (cut sides down), lemon, fennel slices and artichoke hearts around chicken in baking dish.
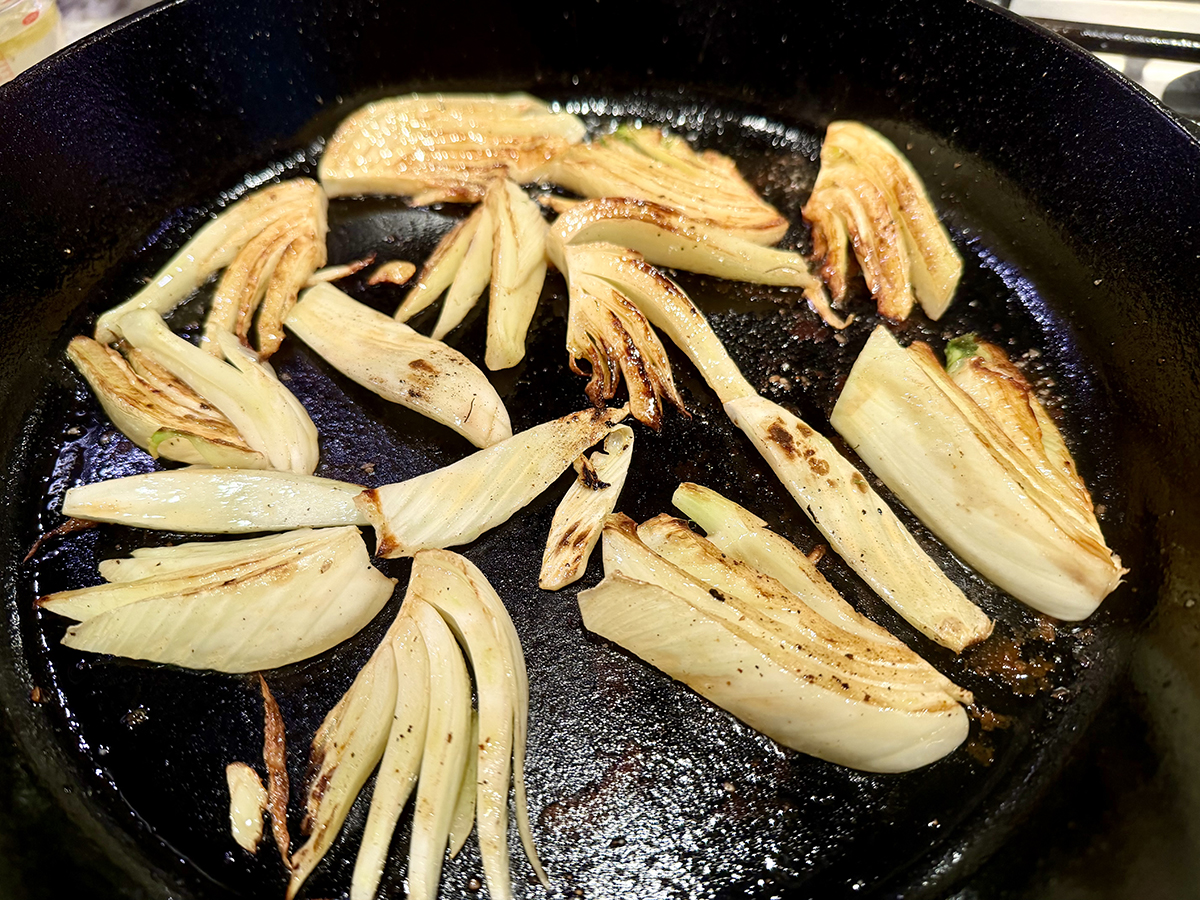
  2. Brown the fennel wedges in hot empty skillet for about 2 minutes per side. Move to casserole dish with chicken.
  3. Add stock, sherry, fish sauce, and artichoke brine to skillet; bring to a boil over medium-high, scraping up browned bits from bottom of pan. Stir in remaining 1 teaspoon salt; pour mixture around chicken in baking dish. Cover tightly with aluminum foil; braise until chicken is very tender, about 1 hour.
  4. Remove foil from baking dish; increase oven temperature to 400°F. Turn garlic halves cut sides up. Roast chicken until skin is crisp, about 15 minutes.
  5. Discard thyme sprigs. Either discard garlic (not us!), or remove cloves from skins and mash into sauce. Transfer to individual plates, and serve in shallow bowls.

http://www.lynnandruss.com

Adapted from a recipe by Naomi Pomeroy for Food & Wine

Dumpling Tomato Salad with Chile Crisp Vinaigrette

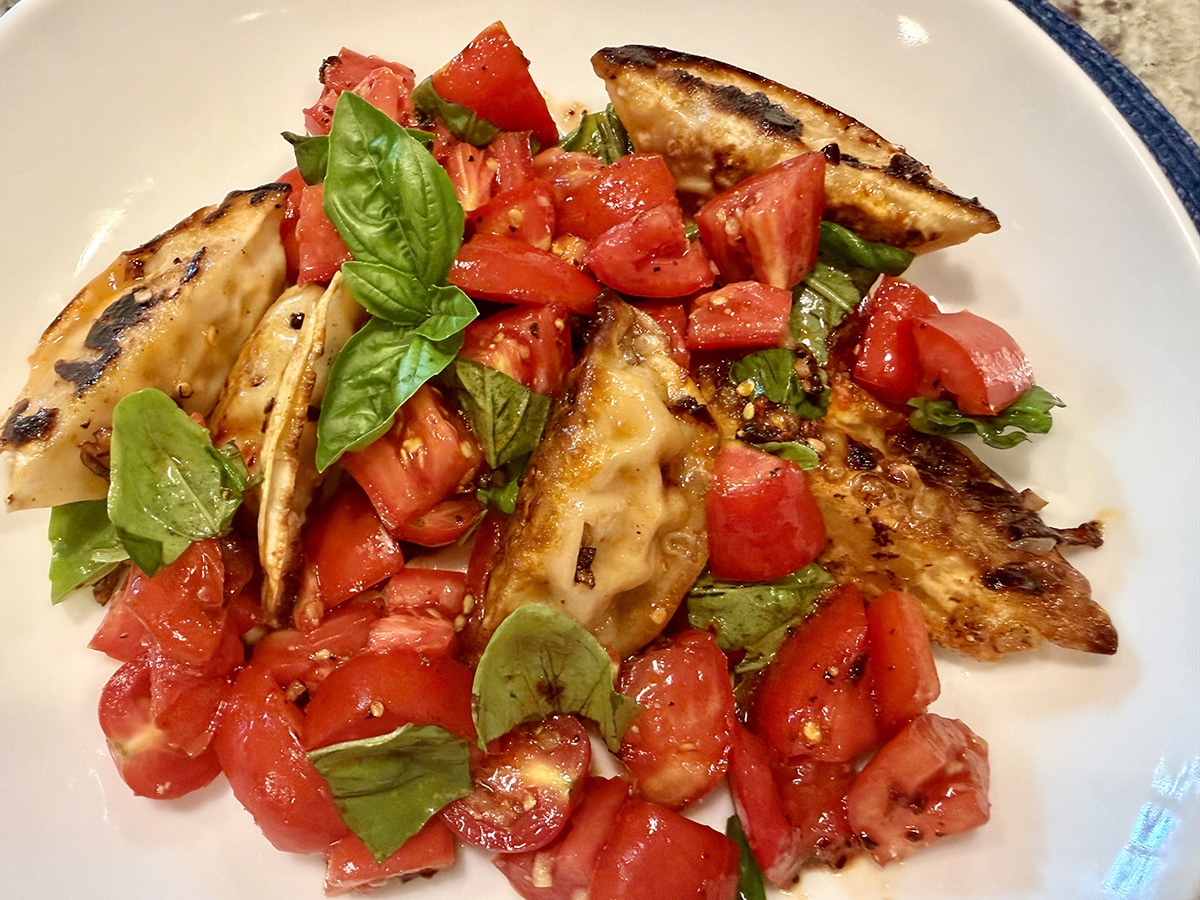
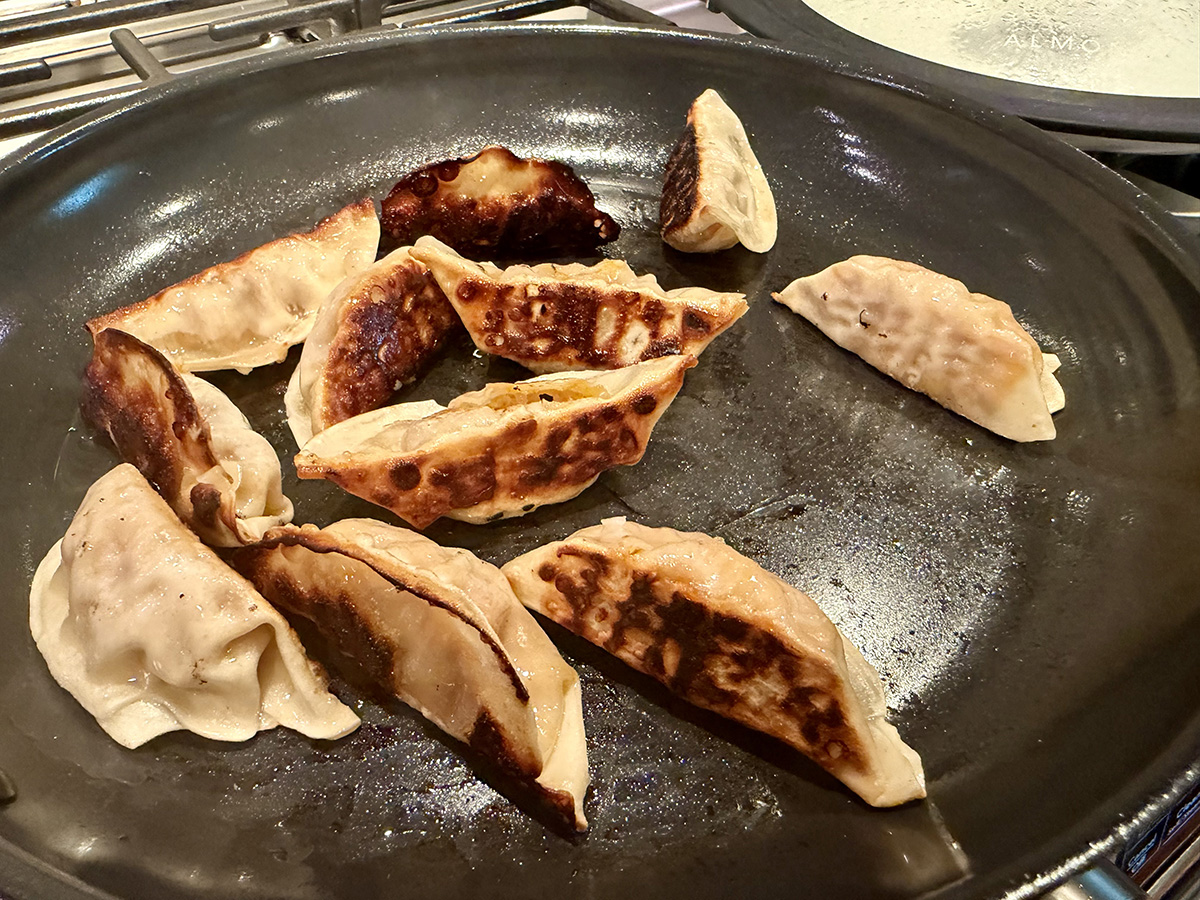
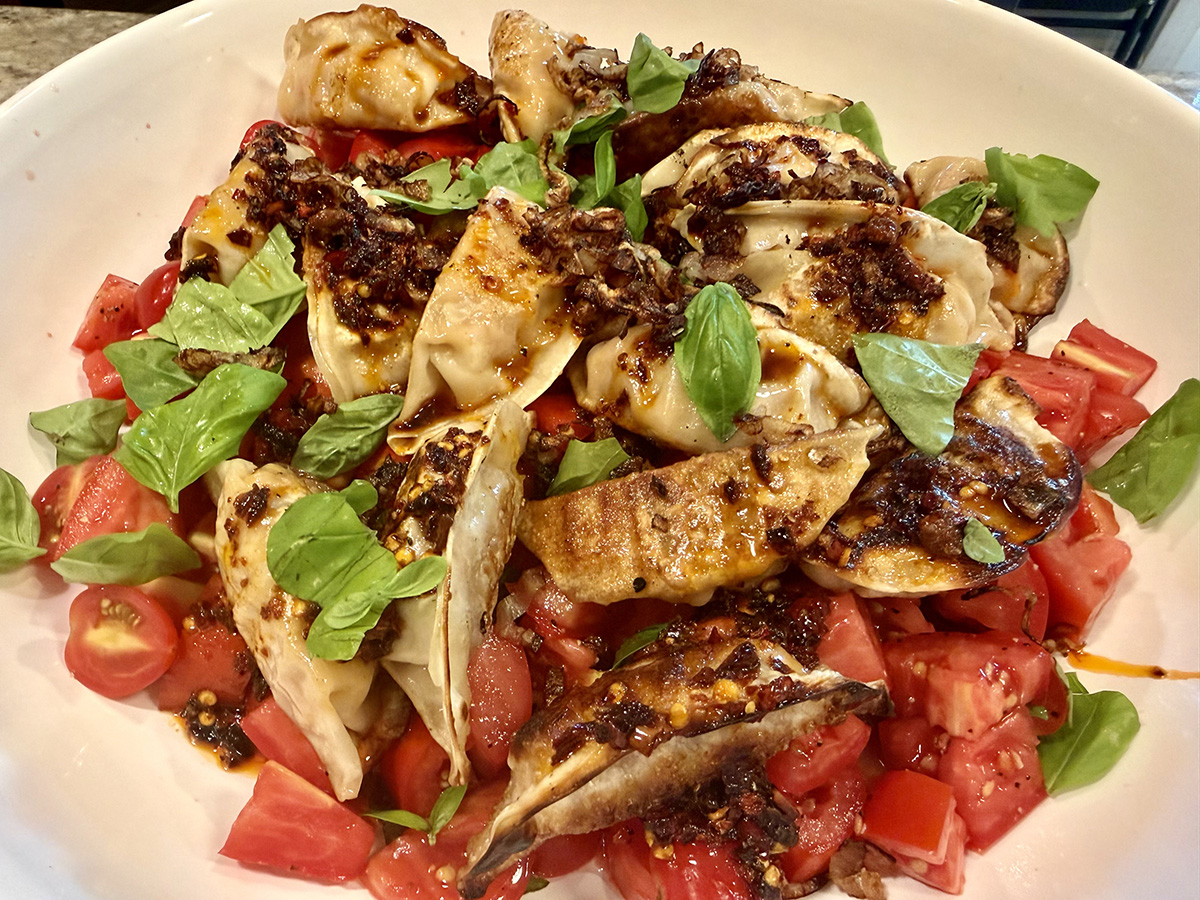
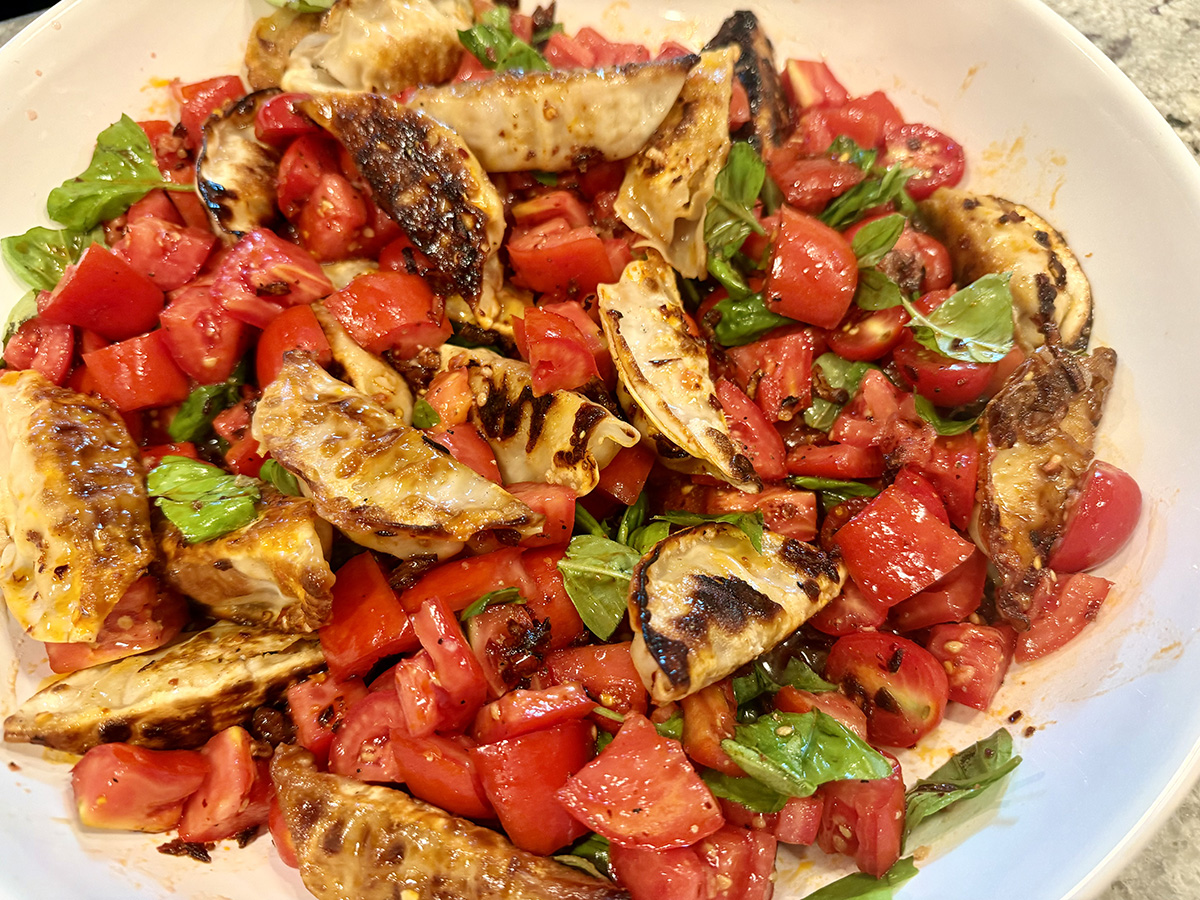
Dumplings meet summer produce in this hearty-but-light main course salad. Juicy tomatoes get a simple toss with salt, garlic and basil, turning them into a fragrant, saucy bed for crisp, pan-fried potstickers. That pinch of salt does double duty: it draws out the tomatoes’ tangy-sweet juices to form a light natural dressing, and it means even underwhelming, out-of-season tomatoes can be coaxed into tasting good — so this one’s a keeper year-round.

The real flavor driver here is the chile crisp, which stars in the vinaigrette, so reach for a brand you love. Since heat and saltiness vary widely between brands, taste as you go and adjust the seasoning to match.

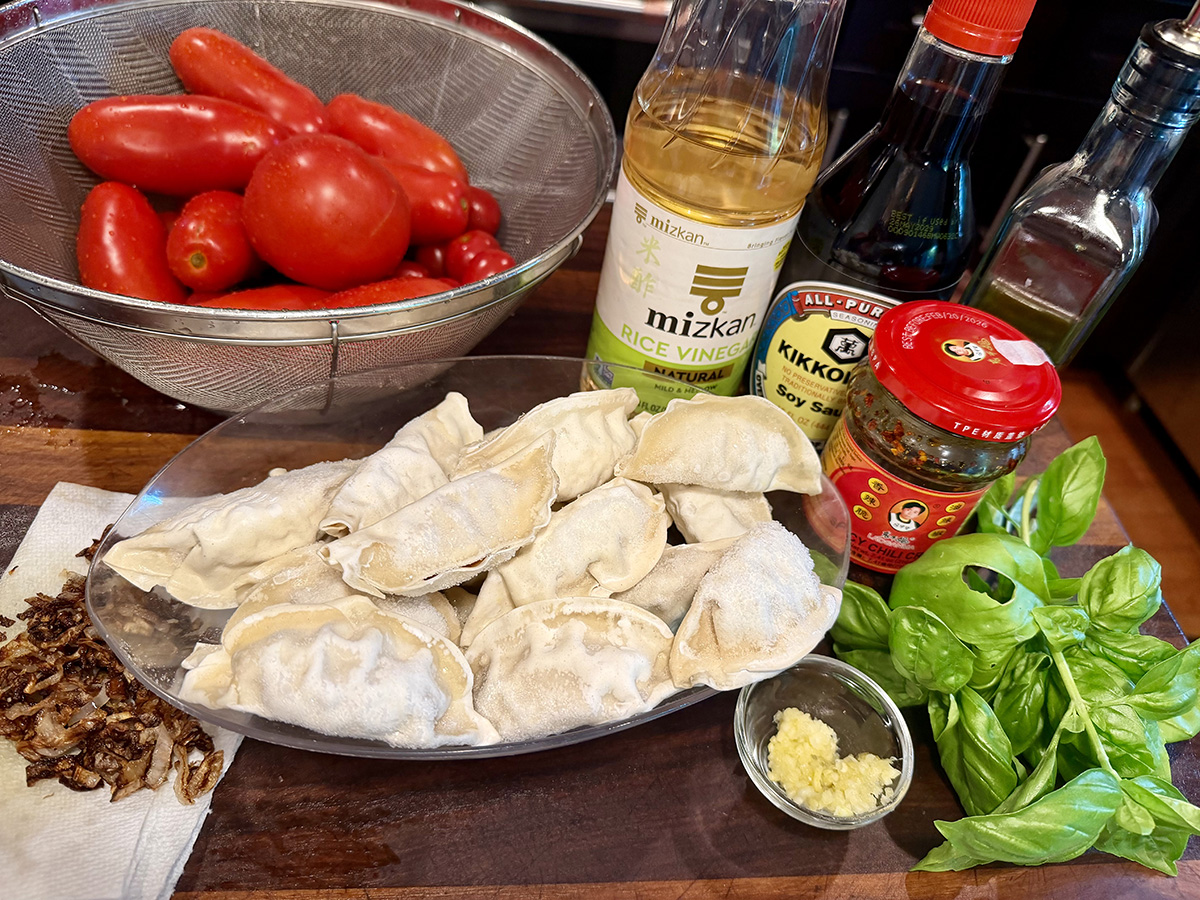
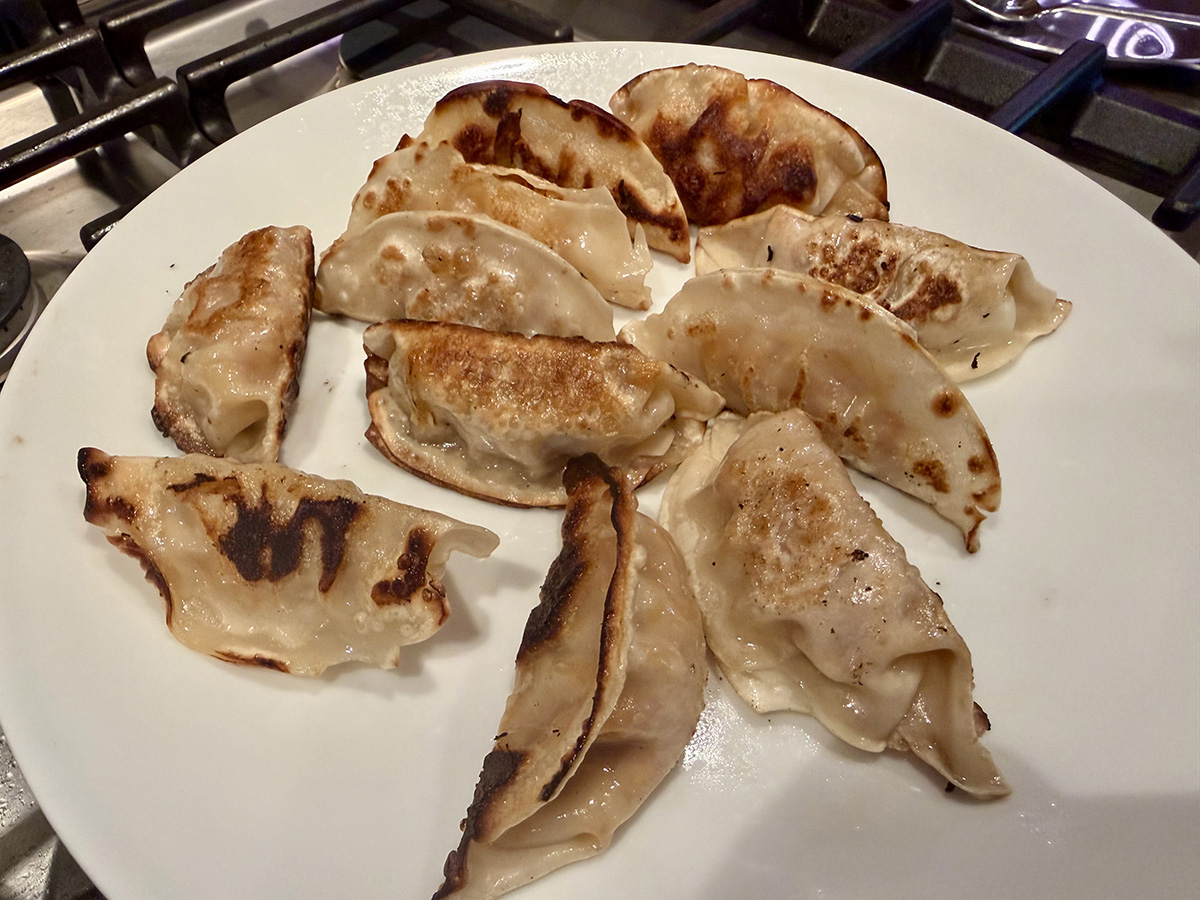
We happened to have Pork Kimchi dumplings in our freezer, and they worked out perfectly!

Dumpling Tomato Salad With Chile Crisp Vinaigrette

  • Servings: 4
  • Difficulty: easy
  • Print

Ingredients

FOR THE SALAD

  • 2 ½ lbs. ripe tomatoes (any variety), cut into roughly 1- to 2-inch pieces (at room temperature)
  • 1 garlic clove, grated
  • ½ cup basil leaves, torn
  • Kosher salt (such as Diamond Crystal brand) and black pepper
  • 1 lb. frozen potsticker dumplings (not thawed)
  • Neutral oil, such as canola or vegetable
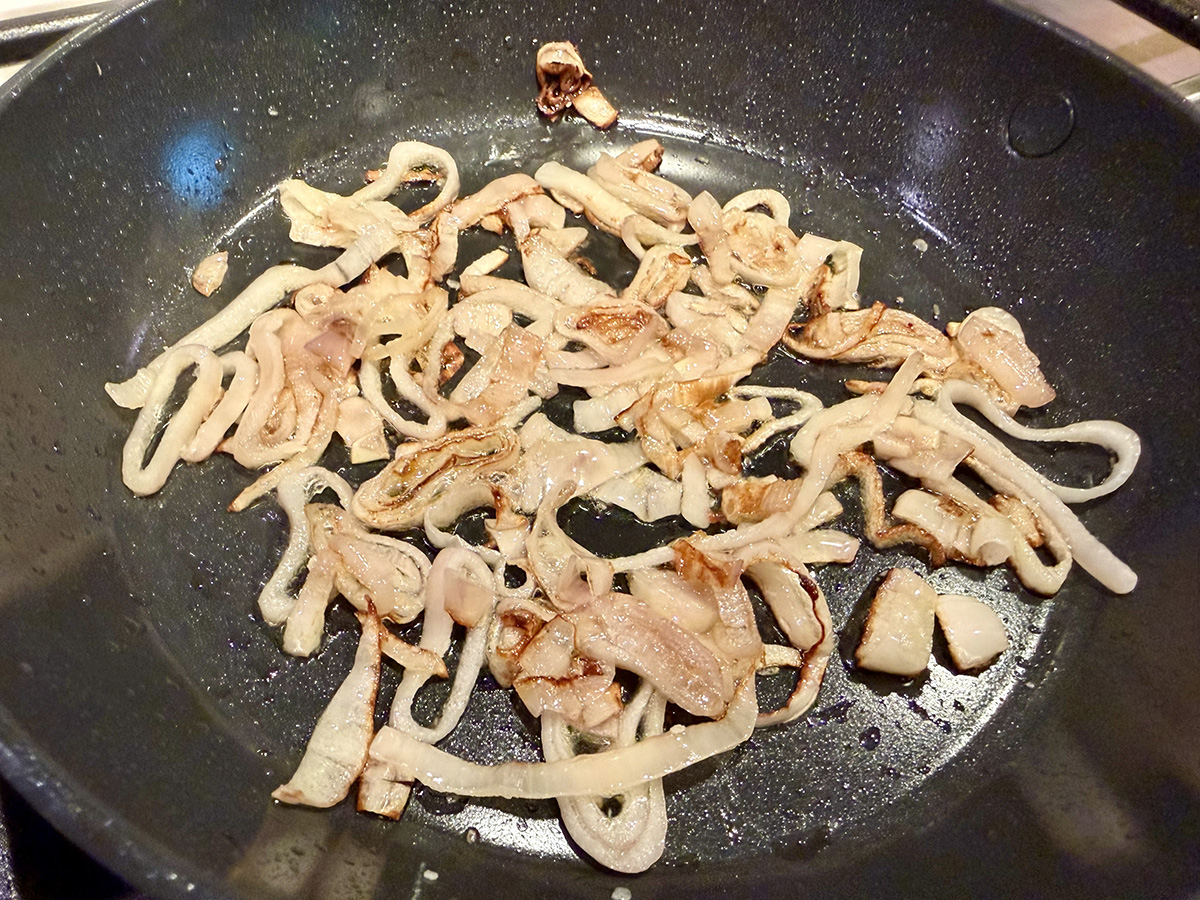
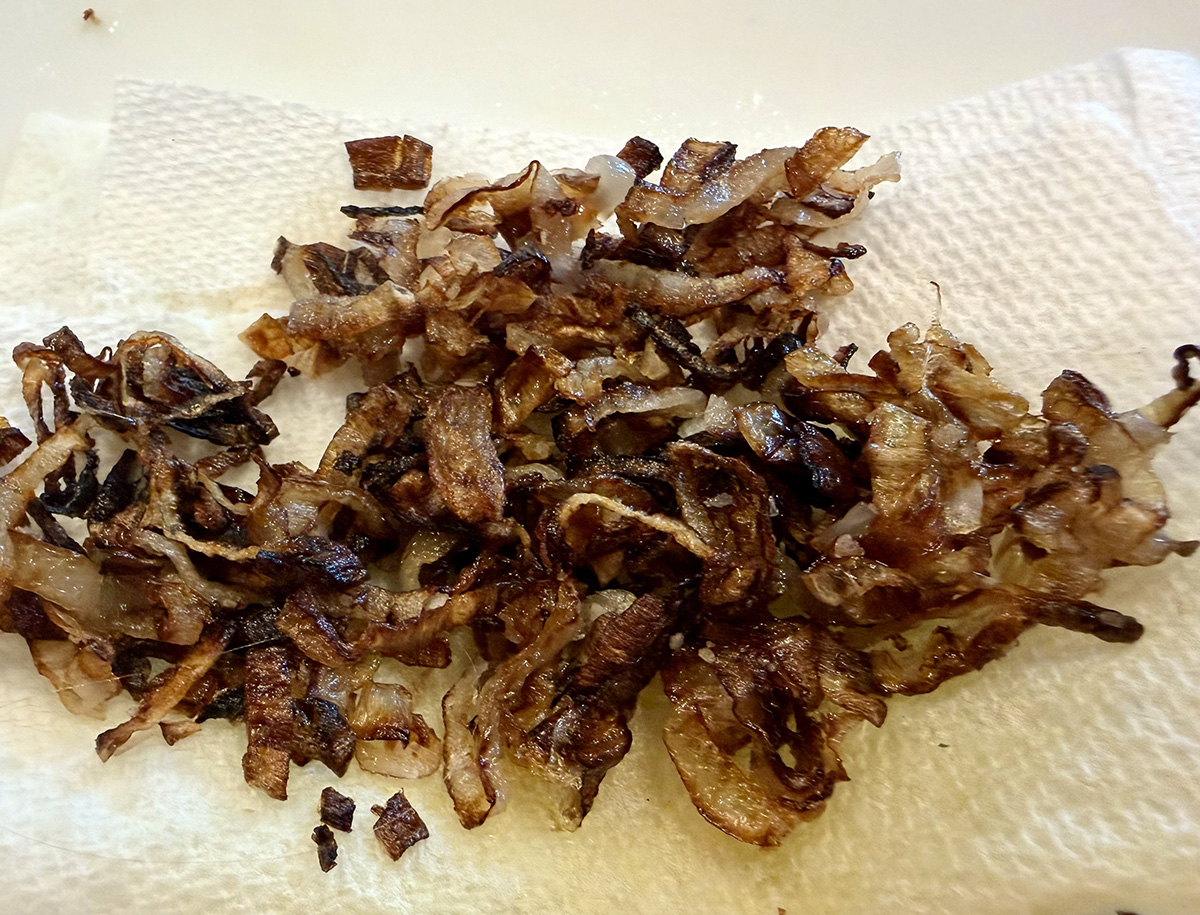
  • 1 to 2 Tbsp. store-bought crispy fried shallots (optional)

FOR THE CHILE CRISP VINAIGRETTE

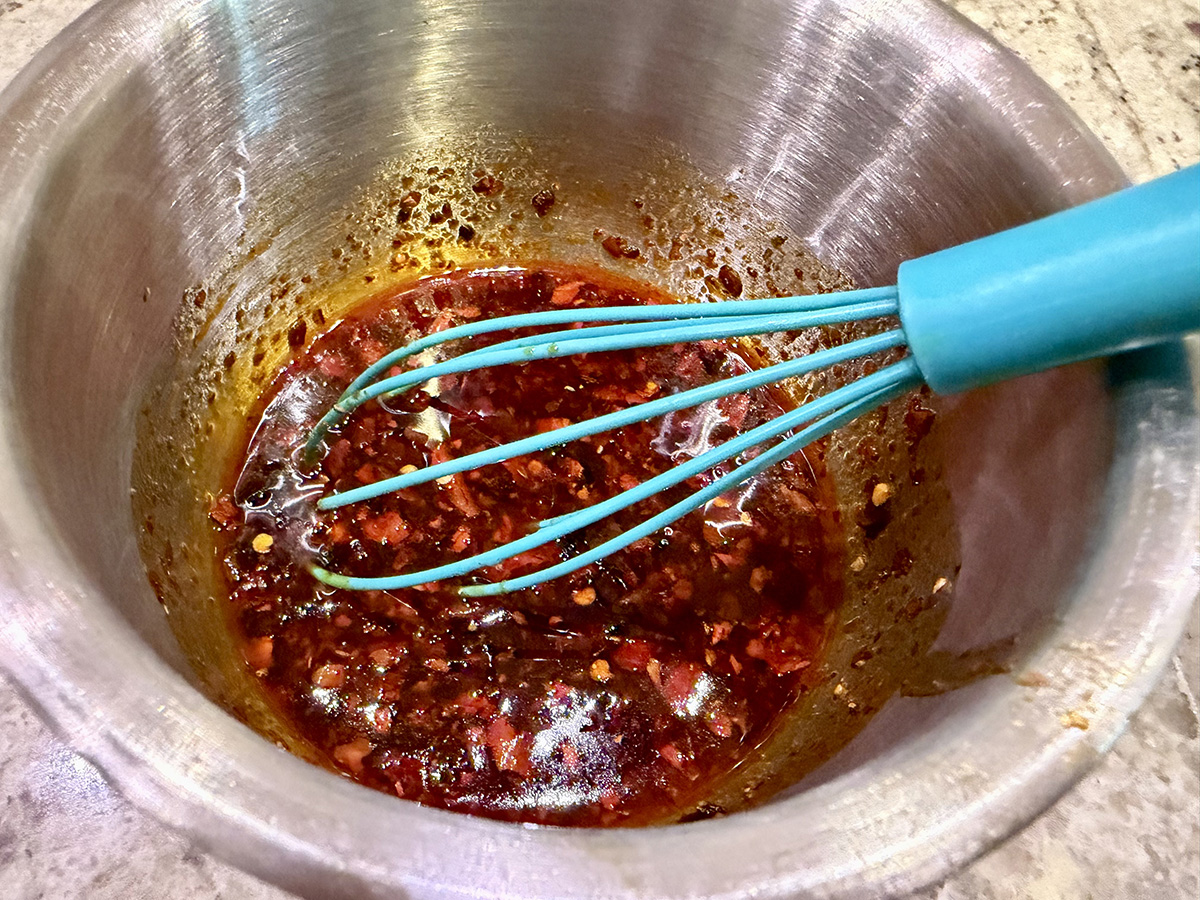
  • 3 Tbsp. chile crisp (or chile oil)
  • 2 Tbsp. rice vinegar
  • 1 Tbsp. soy sauce, or more to taste

Directions

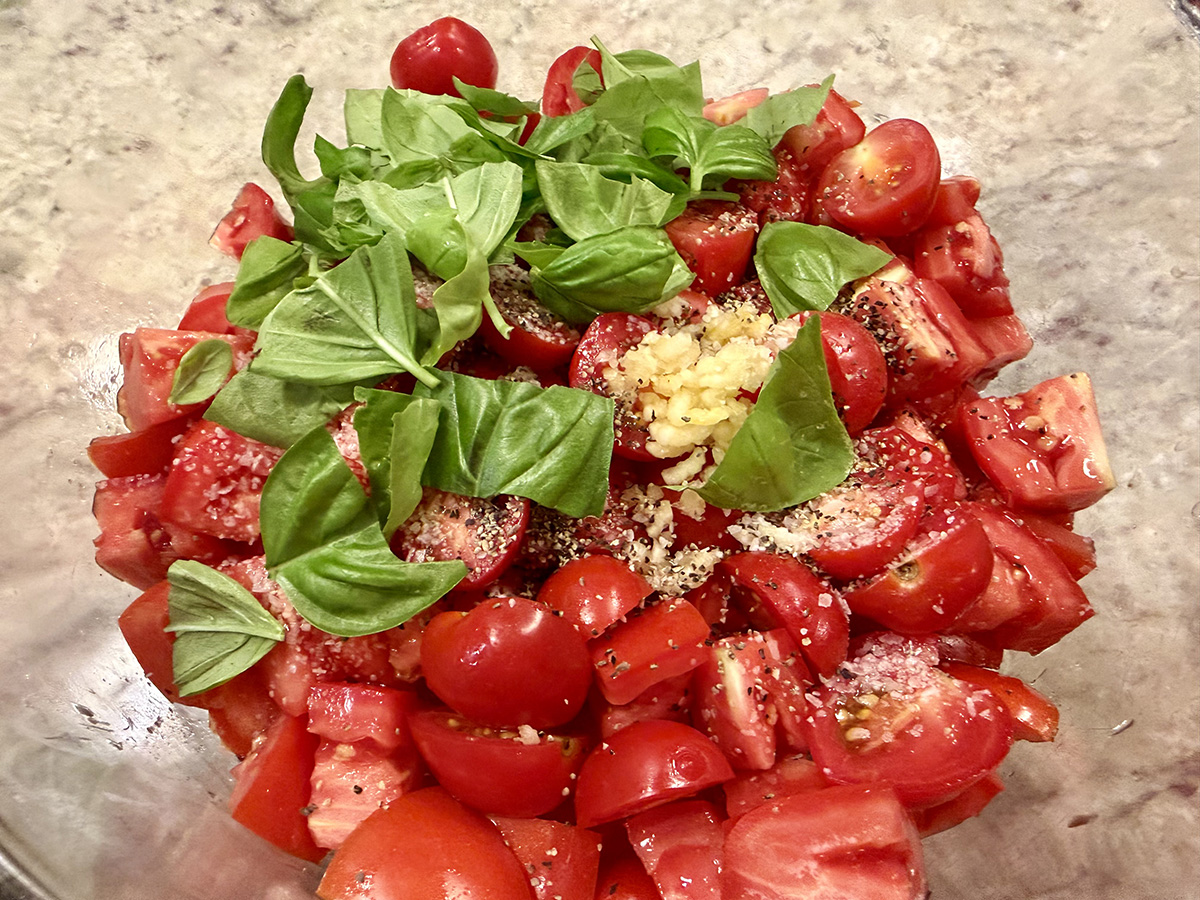
  1. Place the tomatoes on a large serving plate or in a bowl. Add the garlic, half the basil leaves, 1 teaspoon of salt and a big pinch of black pepper. Toss to combine and set aside.
  2. To make the vinaigrette, combine the chile crisp, rice vinegar and soy sauce and whisk to combine. Taste and if it needs more saltiness, add ½ teaspoon more soy sauce.
  3. Heat a large (12-inch) nonstick or well-seasoned cast-iron skillet over medium high for 1 to 2 minutes until very hot. Add 1 to 2 tablespoons of oil and, working in batches, add the dumplings, flat-side down, and cook until the bottoms of the dumplings are lightly browned, 1 to 2 minutes. Immediately add about ¼ cup of water to the pan, just enough to cover the base of the dumplings, then cover and cook until the water has evaporated, 3 to 4 minutes. (If your dumplings contain meat, cook for an extra 1 to 2 minutes, or according to packet instructions). Transfer the cooked dumplings to a plate and continue cooking the remaining dumplings. (If you prefer to steam the dumplings, see Tip.)
  4. To serve, place the warm dumplings over the tomato salad and drizzle with the chile crisp vinaigrette. Toss very gently. Top with the crispy fried shallots (if using) and the remaining basil leaves. Serve either while the dumplings are still warm or at room temperature.

http://www.lynnandruss.com

Adapted from a recipe by Hetty Lui McKinnon for NYTimes Cooking

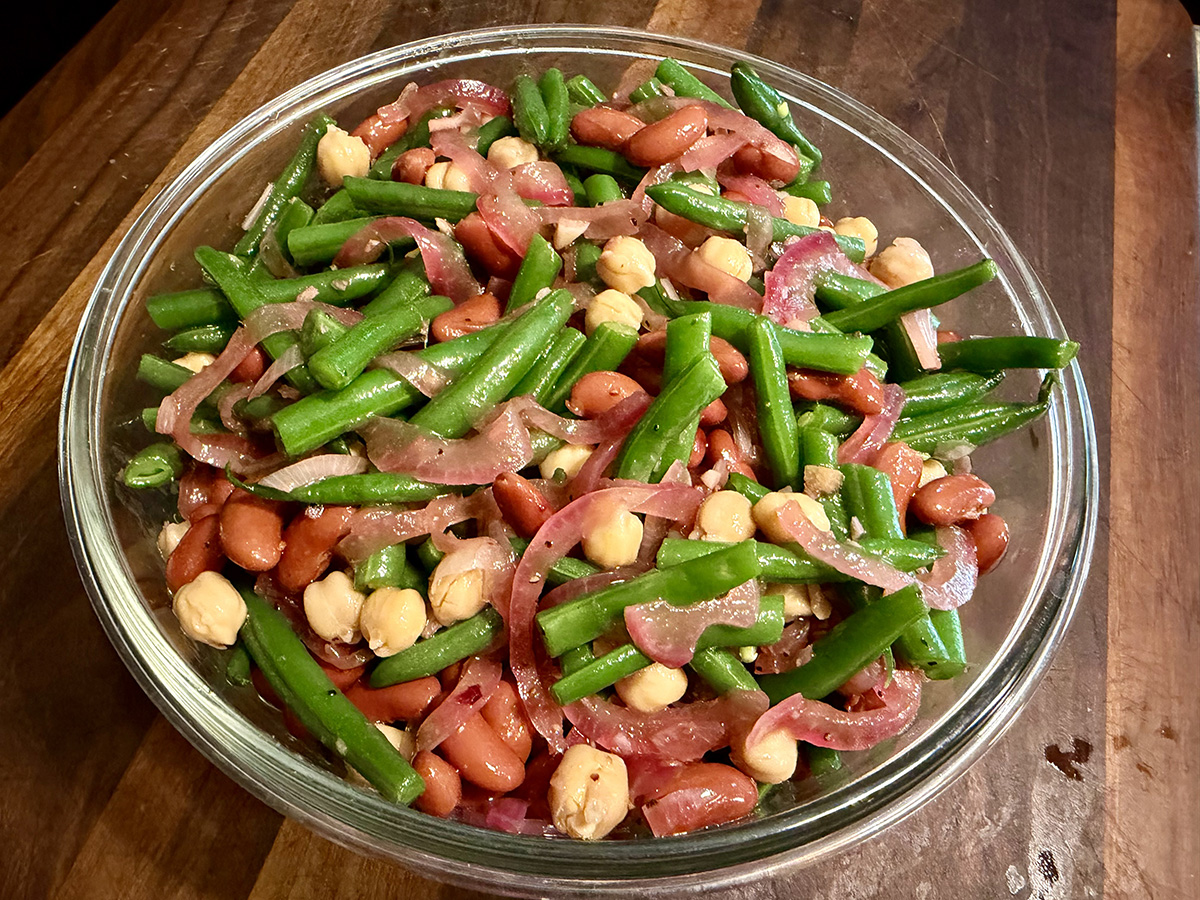
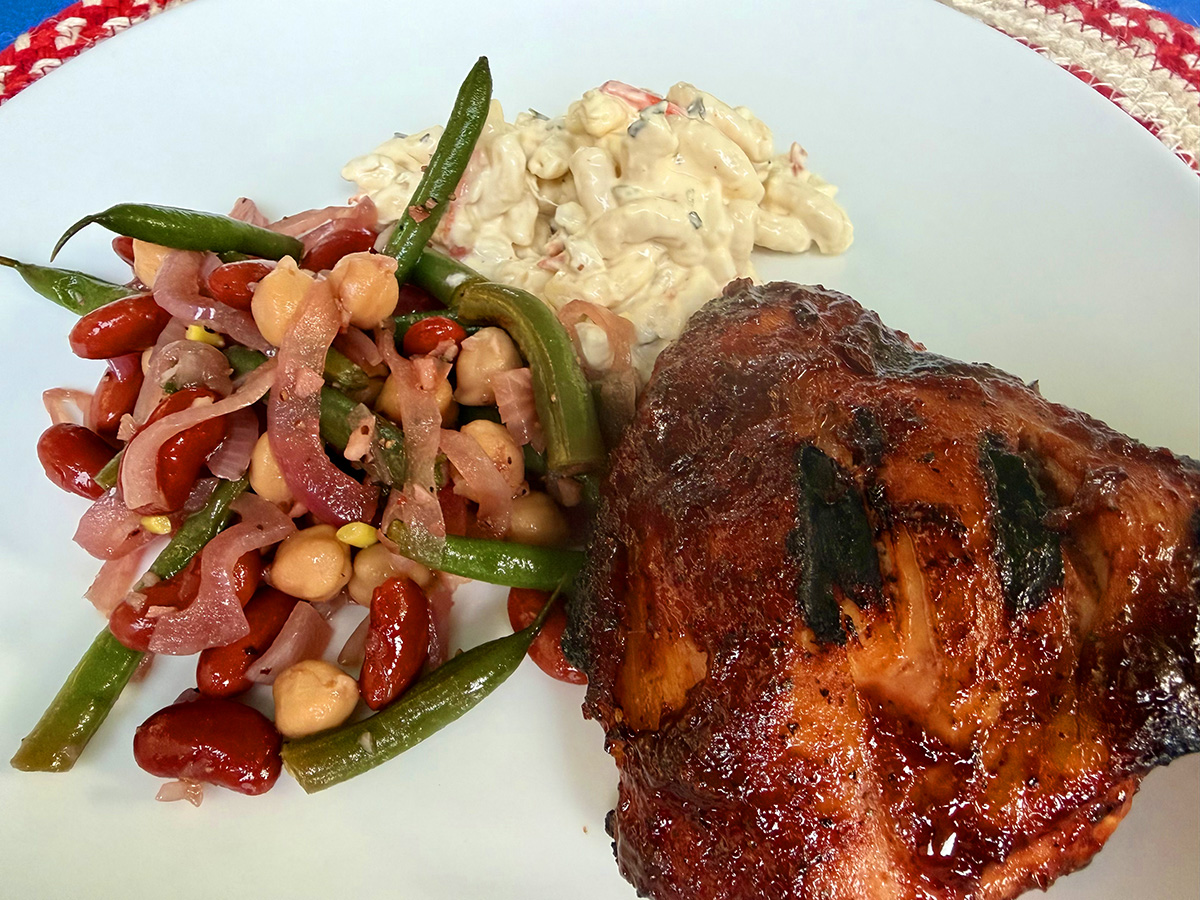
Three Bean Salad

Classic three-bean salad often suffers from a few common pitfalls: raw onion and garlic that overpower every bite, mushy canned beans with no textural contrast, and a sweetness that never quite melds with the tang.

This version fixes all three. Crisp, fresh green and yellow beans replace the usual soft, straight-from-the-can varieties, giving the salad a welcome brightness and snap—though when fresh yellow wax beans proved impossible to track down, garbanzo beans stepped in as a hearty substitute. Canned kidney beans remain, sparing the hours-long process of soaking and simmering dried beans from scratch.

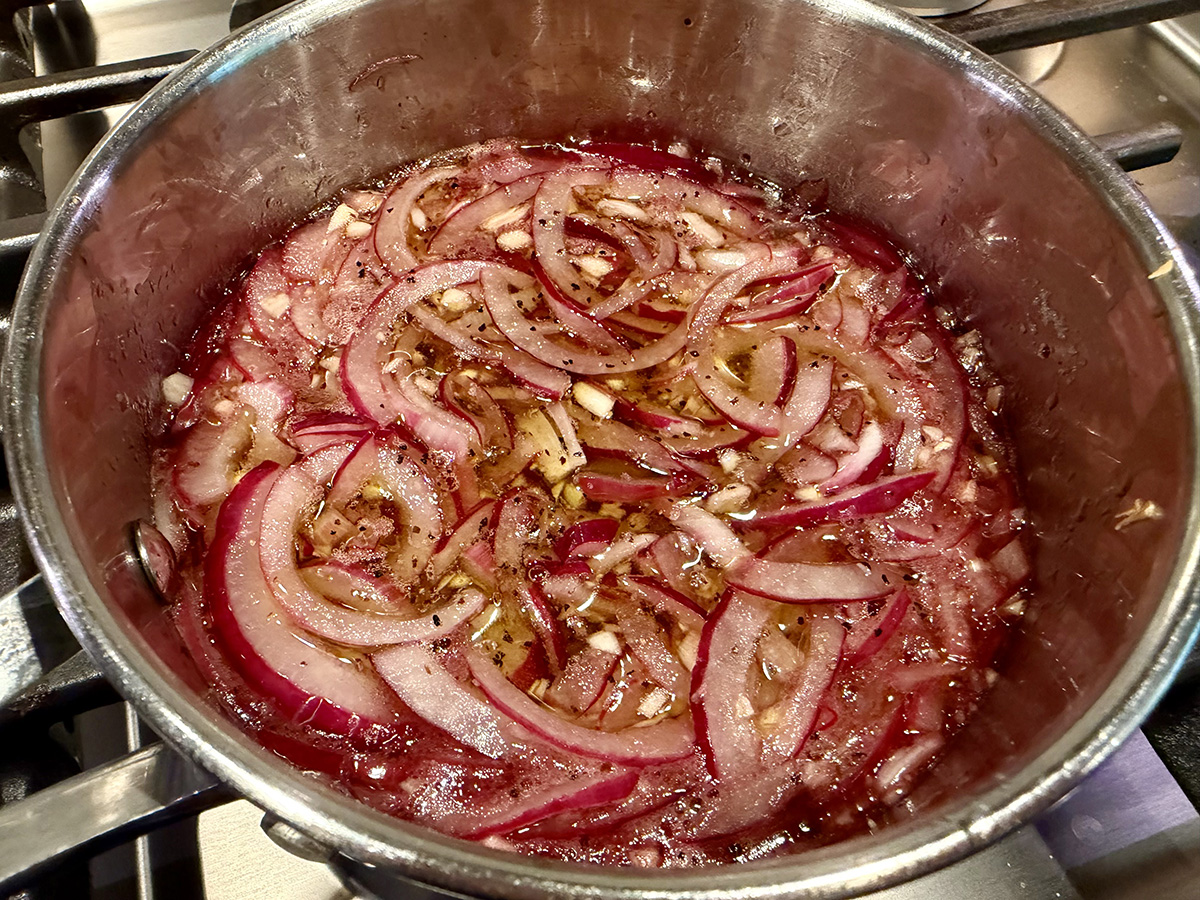
And rather than tossing raw onion and garlic straight into the bowl, both are warmed briefly in the saucepan while the dressing comes together, mellowing the garlic’s bite and giving the vinegar time to gently pickle the onions. The result is a familiar picnic staple with a fresher crunch and a more balanced flavor throughout.

NOTES: This salad improves if you have time to refrigerate it for a few hours to let the flavors meld. A garlic press makes quick work of mincing the cloves. If using yellow wax beans, use 8 ounces of both fresh yellow and green beans.

Three Bean Salad

  • Servings: 8
  • Difficulty: easy
  • Print

Ingredients

  • ½ cup red wine vinegar
  • ¼ cup sugar
  • 3 Tbsp. vegetable oil
  • 1 small red onion, halved and sliced thin
  • 2 garlic cloves, minced
  • Salt and pepper
  • 16-oz. green beans, trimmed and cut into 1-inch pieces
  • 1 16-oz. can garbanzo beans, drained and rinsed
  • 1 16-oz. can kidney beans, drained and rinsed
  • 2 Tbsp. chopped fresh parsley

Directions

  1. MAKE DRESSING Bring vinegar, sugar, oil, onion, garlic, ¼ teaspoon salt, and ¼ teaspoon pepper to boil in small saucepan over medium heat. Reduce heat to low and simmer until sugar dissolves and onion softens, about 5 minutes. (Dressing can be cooled and stored in an airtight container for 3 days.)
  2. COOK BEANS Fill large bowl with ice water. Bring 4 quarts water to boil in large saucepan over high heat. Add 1 tablespoon salt, green beans, (and wax beans, if using), and cook until just tender, about 3 minutes. Drain beans in colander and immediately transfer to ice water to cool, about 2 minutes. Drain again and dry thoroughly with paper towels. (Beans can be refrigerated in zipper-lock bag for 24 hours.)
  3. MIX SALAD Combine cooled beans, kidney beans, garbanzo beans, dressing, and parsley in large bowl and toss to coat. Cover and refrigerate until chilled, about 30 minutes. Season with salt and pepper. Serve. (Salad can be refrigerated in airtight container for 2 days.)

Chicken with Caramelized Garlic Confit

Four heads of garlic sounds like a lot — until you taste it. Slow-cooked until sweet, nutty, and pleasantly caramelized, garlic confit loses all its sharpness and transforms into something rich and almost buttery. Mashed with olive oil and fresh parsley, it becomes the kind of sauce that makes people ask what your secret is.

Boneless chicken thighs are seared until golden, then finished in the oven — simple technique, serious results. The whole dish is bold but never harsh, savory but never heavy.

A few things worth knowing before you start: The garlic confit comes together fastest in the microwave at 50% power, which gives you the same gentle, even cooking as a long stovetop simmer — in a fraction of the time. And when it comes to the skillet, a well-seasoned cast iron or nonstick pan isn’t optional — the garlic mixture will stick and scorch in a conventional pan, so don’t skip this one.

Finish the plate with warm flatbread or a crusty loaf to catch every bit of sauce, and a crisp, leafy salad to keep things bright. We paired ours with a cucumber, dill and sour cream salad.

NOTES: Don’t microwave the garlic heads in oil on high. Use 50 percent power so the oil doesn’t overheat and scorch the garlic. Also, don’t crank up the burner when browning the garlic-coated chicken in the skillet. Use moderate heat so the garlic does not burn. And when flipping the chicken, use a spatula to scrape them up so the garlic stays with the chicken rather than sticks to the pan.

Chicken with Caramelized Garlic Confit

  • Servings: 4
  • Difficulty: easy
  • Print

Ingredients

  • 1/2 cup extra-virgin olive oil
  • 3 large or 4 medium heads garlic (9 to 10 oz. total weight), top one-third of the head cut off to expose the cloves
  • 1 cup lightly packed fresh flat-leaf parsley, chopped, plus more to serve
  • 2 tsp. grated lemon zest, plus 1 Tbsp. lemon juice, plus lemon wedges to serve
  • Kosher salt and ground black pepper
  • 2½ lbs. boneless, skinless chicken thighs, trimmed

Directions

  1. Pour the oil into a large microwave-safe bowl. Place the garlic heads cut side down in the oil. Cover tightly and microwave on 50 percent power until the garlic heads feel soft and yielding when pressed on the sides with the back of a fork, 13 to 15 minutes. Cool, covered, until barely warm to the touch.
  2. Measure 2 tablespoons of the oil into a small bowl and reserve for browning the chicken. Squeeze the garlic cloves out of their skins and into the oil remaining in the bowl in which the garlic was cooked. To the bowl, add the parsley, lemon zest and juice, 1 teaspoon salt and ½ teaspoon pepper. Mash with the fork to a coarse paste. (Alternatively, use a mini food processor.)
  3. Add the chicken thighs and garlic confit to a large bowl, and mix until thoroughly coated. Let stand at room temperature while you heat the oven to 425°F with a rack in the middle position.
  4. Set a rimmed baking sheet near the stovetop. In a 12-inch cast-iron or nonstick skillet over medium, heat 1 tablespoon of the reserved garlic oil until shimmering. Place half of the chicken in a single layer; do not scrape the garlic mixture off the thighs, but do not slather on any more, either. Cook, without disturbing, until spottily browned on the bottom and the chicken releases easily from the pan, 5 to 7 minutes. With a thin metal spatula (if using a cast-iron pan) or a silicone spatula (if using nonstick), scrape up each thigh, along with any garlic mixture under it that clings to the skillet, and flip. Cook until spottily browned on the second sides, 3 to 4 minutes. Using the spatula, transfer the thighs to the baking sheet. Using the remaining 1 tablespoon reserved garlic oil, brown the remaining thighs in the same way and transfer to the baking sheet.
  5. Slather any garlic mixture remaining in the bowl onto the thighs, distributing it evenly. Place in the oven and cook until well browned and the thickest part of the largest thighs reach 175°F, 10 to 13 minutes. Transfer the chicken to a platter, then drizzle on any juices from the baking sheet. Sprinkle with additional chopped parsley and serve with lemon wedges.

Microwave Garlic Confit

Start to finish: 20 minutes
Makes 3 or 4 heads garlic

  1. Pour ½ cup extra-virgin olive oil into a large microwave-safe bowl. Remove the outer papery skins from 3 large or 4 medium heads garlic (9 to 10 ounces total weight), then cut off the top one-third of each head to expose the cloves. Place the garlic heads cut side down in the oil.
  2. Cover tightly and microwave on 50 percent power until the garlic heads feel soft and yielding when pressed on the sides with the back of a fork, 13 to 15 minutes. Let the garlic cool, covered, in the oil.
  3. Follow recipe above at Step 2 to continue.

http://www.lynnandruss.com

Recipe by Courtney Hill for Milk Street

Thai Shrimp with Glass Noodles

Goong Ob Woon Sen is a beloved Thai comfort dish — deceptively simple but packed with layered, complex flavor. The magic here is in the steaming technique: the shrimp aren’t stir-fried or sautéed but rather laid on top of the noodles and essentially steamed under a tight lid, keeping them incredibly plump and juicy while the noodles below absorb every drop of the savory broth.

The sauce — a blend of soy sauce, oyster sauce, sesame oil, and a touch of brown sugar — creates a glossy, umami-rich coating on the glass noodles that’s salty, slightly sweet, and deeply savory all at once. The double pepper (black and white) is the dish’s signature move: black pepper adds bold, earthy heat while white pepper brings a more fragrant, floral warmth that’s distinctly Thai.

Glass noodles are perfect for this preparation — they start neutral and slippery, then become silky and translucent as they soak up the seasoned seafood (or chicken) stock, practically becoming one with the sauce. A final squeeze of lime at the table cuts through the richness and ties everything together with a bright acidic finish.

It’s a one-pot weeknight dream: deeply satisfying, ready in under an hour, and best eaten right away.

Glass noodles go by different names, including bean threads, bean vermicelli, cellophane noodles or saifun. They resemble rice vermicelli but the two are very different, so shop carefully. Check the label to make sure the noodles are made at least in part with mung bean starch. If you can find a brand made with 100 percent mung bean starch, even better.

TIP: Don’t soak the noodles in hot or boiling water, as they will wind up too soft. The aim is to soak them until only partially softened and pliable, but not fully tender; room-temperature or cool tap water is best. Be sure to swish the noodles once or twice during soaking to break up any clumps and ensure they hydrate evenly.

*White pepper is an important ingredient in this dish. But the problem with processed pre-ground pepper is the musty, dusty barnyard-like flavors. Fresh, well-handled peppercorns, by contrast, deliver bright citrus spice with hints of pine. A clear favorite, BoTree White Kampot Pepper is robust yet balanced, and offers impressive complexity — no funk, more flavor!

Thai Shrimp with Glass Noodles

  • Servings: 4
  • Difficulty: easy
  • Print

Ingredients

  • 8 oz. glass noodles (see headnote)
  • 1/4 cup soy sauce
  • 3 Tbsp. oyster sauce
  • 1 Tbsp. toasted sesame oil
  • 1Tbsp. packed light brown sugar
  • 1 lb. large (26/30 per lb.) shrimp, peeled (tails removed) and deveined, patted dry
  • Ground black pepper
  • Ground white pepper, preferably from fresh peppercorns*
  • 2 cups chicken OR seafood broth, preferably homemade
  • 2 Tbsp. neutral oil
  • 1½ Tbsp. minced fresh ginger
  • 4 medium garlic cloves, minced
  • 1 bunch scallions, cut into 1-inch lengths on the diagonal
  • Lime wedges, to serve

Directions

  1. Place the noodles in a large bowl and add room-temperature water to cover. Let stand until the noodles are pliable, but not fully tender, about 15 minutes, swishing them once or twice to ensure even hydration. Drain in a colander. Using kitchen shears, snip the noodles in several places to cut them into shorter lengths.
  2. While the noodles soak, in a medium bowl, combine the soy sauce, oyster sauce, sesame oil and sugar; stir until the sugar dissolves. In a small bowl, toss the shrimp with 2 tablespoons of the soy sauce mixture, ¼ teaspoon black pepper and ⅛ teaspoon white pepper. Stir the broth into the remaining soy sauce mixture.
  3. In a large (7- to 8-quart) Dutch oven over medium, combine the neutral oil, ginger, garlic and ½ teaspoon each black and white pepper. Cook, stirring, until the garlic begins to brown, 2 to 3 minutes. Add the noodles, tossing, then distribute in an even layer. Scatter the scallions over the noodles, followed by the shrimp, then drizzle in any liquid remaining in the bowl; do not stir. Pour in the broth mixture and bring to a simmer over medium-high. Cover, reduce to medium-low and cook, undisturbed, until the shrimp are opaque throughout and the noodles are tender and have absorbed the liquid, 8 to 10 minutes. Toss to integrate the scallions and shrimp into the noodles. Serve with lime wedges.

http://www.lynnandruss.com

Adapted from a recipe by Rose Hattabaugh for Milk Street

Creamy Fennel and White Bean Soup

Creamy Fennel and White Bean Soup is a comforting and flavorful dish characterized by its smooth, velvety texture and aromatic taste. The soup typically features tender white beans (such as cannellini or great northern beans) cooked until soft and then blended or partially puréed to create a creamy base without needing heavy cream.

Fennel, with its mild anise-like flavor, is a standout ingredient that adds a subtle sweetness and a hint of licorice aroma to the soup. Other common ingredients included here are onions, garlic, vegetable or chicken broth, and olive oil. The seasonings are rosemary, chives, salt, and pepper which round out the savory profile.

For contrast, as well as a smoky-savory counterpoint, top the soup with crisped bacon. Chopped fresh chives and a squeeze of lemon juice finish it with freshness. Overall, Creamy Fennel and White Bean Soup is a nourishing, mildly sweet, and savory soup that’s perfect for a light lunch or dinner, especially during cooler months.

NOTE: Don’t fill the blender jar more than a third full of the hot soup mixture; hot liquids tend to splash out when the blender is turned on. To help prevent this, remove the cap from the blender lid and cover tightly with a kitchen towel. Start the blender on low and gradually increase the speed.

Of course, using homemade stock is always preferable. Homemade chicken stock is one of the most versatile and flavorful ingredients you can have in your kitchen. Unlike store-bought stocks, homemade stock has a richer, deeper flavor and aroma, and it is free from preservatives, artificial flavors, and excess sodium. As an added bonus, homemade chicken stock is also incredibly inexpensive, and it is an excellent way to use up kitchen scraps and leftover chicken bones.

Creamy Fennel and White Bean Soup

  • Servings: 4
  • Difficulty: easy
  • Print

Ingredients

  • 8 oz. bacon, finely chopped
  • 2 medium yellow onions, finely chopped
  • 1 medium fennel bulb, trimmed and finely chopped
  • 5 medium garlic cloves, smashed and peeled
  • 2 tsp. fennel seeds, finely ground
  • 3 15½-oz. cans cannellini beans, rinsed and drained, divided
  • 5 cups chicken, or vegetable broth, preferably homemade
  • 1 4-inch sprig fresh rosemary
  • Kosher salt and ground black pepper
  • 3 Tbsp. extra-virgin olive oil, plus extra to serve
  • 3 Tbsp. finely chopped fresh chives
  • Lemon wedges, to serve

Directions

  1. In a large Dutch oven over medium, cook the bacon, stirring occasionally, until crisp, about 10 minutes.
  2. Using a slotted spoon, transfer the bacon to a paper towel-lined plate. Pour off all but 2 tablespoons fat from the pot.
  3. Add the onions, fennel, garlic and ground fennel to the pot, cover and cook over medium-low, stirring occasionally, until the vegetables are tender, about 15 minutes.
  4. Measure out 1½ cups of the beans and set aside. Add the remaining beans to the pot along with the broth, rosemary, ½ teaspoon salt and 1 teaspoon pepper. Bring to a simmer over medium-high. Cover, reduce to medium-low and simmer for 15 minutes.
  5. Remove and discard the rosemary sprig. Let the soup cool slightly, about 15 minutes. Transfer about ⅓ of the soup to a blender. Add 1 tablespoon of the oil and puree until smooth.
  6. Transfer to a large saucepan, then repeat with the remaining soup and oil, working in batches. Add the reserved beans and heat over medium-low, stirring, until the soup is heated through, about 10 minutes.
  7. Taste and season with salt and pepper. Serve drizzled with oil, sprinkled with the bacon and chives, with lemon wedges on the side.

http://www.lynnandruss.com

Adapted from a recipe for Milk Street

Russ’s Beef and Barley Soup

We had recently purchased some beautiful beef shanks — which we hardly ever find at the supermarket — and being in the grips of a prolonged deep-freeze, a comforting beef and barley soup seemed like a no-brainer. It was also an opportunity to use up some herbs that were nearing their expiration date (if you know what we mean).

Now you can do it the old-fashioned way, or use a slow cooker or pressure cooker to streamline the process. Here, The Hubs opted for the quick method, which is ideal for busy individuals, as it allows for hands-off cooking and produces incredibly tender and juicy beef shank.

In the world of culinary arts, beef shank holds a revered position due to its delectable taste and versatility in a wide array of dishes. From hearty stews to succulent braised dishes, beef shank has long been cherished for its ability to transform humble ingredients into gourmet delicacies. It contains a high amount of connective tissue, which breaks down during the cooking process, creating a velvety mouthfeel and added depth of flavor.

The small amount of fish sauce added at the end is optional, but we urge you to use it. It adds a good dose of umami.

Russ's Beef and Barley Soup

  • Servings: 8
  • Difficulty: easy
  • Print

Ingredients

  • 4 lbs. meaty beef shanks, trimmed of excess fat
  • Kosher salt and freshly ground black pepper
  • 4 Tbsp. (1/4 cup) neutral oil, divided
  • 8 oz. cremini mushrooms, cleaned and roughly chopped
  • 4 large carrots (15 oz.), 3 diced and 1 left halved, divided
  • 2 large yellow onions, diced, and 1 small yellow onion, halved
  • 3 large ribs celery, 2 diced and 1 halved, divided
  • 2 Tbsp. tomato paste
  • 4 cloves garlic, peeled and lightly crushed
  • 1 cup dry white wine
  • 2 quarts beef broth, preferably homemade, or use chicken stock
  • 4 sprigs fresh thyme, or more to taste
  • 1 tsp. dried rosemary, crumbled, or 1 Tbsp. of fresh, chopped
  • 2 bay leaves
  • 1 cup pearled barley, rinsed and drained
  • 1/2 tsp. Asian fish sauce (optional), or more to taste

Directions

  1. Season shanks generously on both sides with salt and pepper. In a pressure cooker, heat 3 tablespoons oil over medium-high heat until lightly smoking. Working in batches if necessary, add shanks and cook, turning occasionally, until well browned on all sides, about 5 minutes per side. Transfer to a large platter.
  2. Add diced carrot, diced onion, diced celery, and chopped mushrooms to pressure cooker and cook, stirring and scraping up any browned bits from the bottom, until lightly browned, about 6 minutes. Add tomato paste and combine well with the vegetables. Cook an additional 2 minutes, stirring frequently. Scrape vegetables into a heatproof bowl and set aside.
  3. Add remaining 1 tablespoon oil to pressure cooker and heat over medium-high heat until shimmering. Add remaining carrot halves, halved onion, and halved celery rib, along with garlic cloves, and cook, stirring occasionally, until browned in spots, about 4 minutes. Add wine to pot and cook, scraping up any browned bits from bottom of pot, until wine comes to a simmer and alcohol smell cooks off, about 4 minutes.
  4. Add stock, thyme, bay leaf, rosemary, reserved beef and any accumulated juices, to pressure cooker; the liquid should just cover all the other ingredients. Close cooker, bring to high pressure, and cook for 45 minutes. Allow pressure to release naturally for 15 minutes, then release any remaining pressure using pressure release valve. Remove beef and set aside to cool. Using a spider or similar tool, remove and discard the herbs and vegetables.
  5. While the beef is cooking, bring 3 cups of water (or a combination of water and broth) and 1 teaspoon salt to a boil in a medium saucepan. Add the barley and stir. Reduce the heat to a simmer. Cover and cook the barley for 30 minutes. Set aside off the heat. If there is any liquid remaining in the pot after cooking, be sure to drain it off before adding it to the soup.
  6. When the shanks are cool enough to handle, remove the bones (be sure to scoop out the marrow to add to the soup!) and discard any large pieces of fat. Cut or shred beef into bite-size pieces.
  7. Bring the broth in the pressure cooker back to a simmer. Stir in reserved diced vegetables, meat, and barley. Stir well and simmer for about 10 minutes. Add fish sauce, if using, and season to taste with salt and pepper.

http://www.lynnandruss.com

Loaded Sweet Potatoes with Gochujang Turkey

While we don’t have a typical weekday meal “rotation,” for those that do, every now and then, it is fun to throw a surprise into the mundane. Well, this versatile dish is a dinner that can be dressed up, down, and sideways depending on whom you’re feeding.

And you can up the pizzaz with sour cream, yogurt, or shredded cheese as additional toppers for the sweet potatoes. Or why not put the meat mixture between toasted buns for a version of Sloppy Joes? The Hubs dubbed them Korean Sloppy Joes.

Swap in harissa paste or Thai red curry paste for the gochujang. In the spirit of meal prepping, consider doubling the meat mixture and freezing half as a gift to your future self. (Wish we would have done that 🙁 )

The timing will vary on how large your sweet potatoes are. It so happens ours were huge and took one hour and 15 minutes before they rendered tender enough. Therefore two spuds, one half of a potato per, served with a side dish (in this case, sautéed edamame with shallots and garlic), was enough to satisfy 4 people.

Do Ahead: Sweet potatoes can be roasted 4 days ahead; transfer to an airtight container. Cover and chill. Turkey mixture can be made 4 days ahead; transfer to a separate airtight container. Cover and chill.

Loaded Sweet Potatoes with Gochujang Turkey

  • Servings: 4
  • Difficulty: easy
  • Print

Ingredients

  • 4 medium sweet potatoes (1¼–1½ lb.), scrubbed
  • 2 Tbsp. extra-virgin olive oil, plus more for drizzling
  • 1 tsp. Diamond Crystal or ½ tsp. Morton kosher salt, plus more
  • 1 large onion, finely chopped
  • 1 medium green bell pepper, ribs and seeds removed, finely chopped
  • 6 garlic cloves, finely chopped
  • 1 lb. ground turkey
  • ¼ cup double-concentrated tomato paste
  • 2 Tbsp. gochujang (Korean hot pepper paste)
  • 1 Tbsp. soy sauce
  • 1 Tbsp. toasted sesame oil, plus more for drizzling
  • 1 tsp. honey
  • 4 scallions, thinly sliced on a diagonal
  • ½ cup coarsely chopped cilantro
  • Lime wedges (for serving)

Directions

  1. Place a rack in middle of oven; preheat to 400°. Arrange 4 medium sweet potatoes (1¼–1½ lb.), scrubbed, on a parchment-lined rimmed baking sheet; drizzle lightly with extra-virgin olive oil and turn to coat; season with kosher salt. Roast sweet potatoes until very tender, 50–60 minutes. (Will take longer if your spuds are on the larger size.)
  2. Meanwhile, heat 2 tablespoons extra-virgin olive oil in large skillet over medium-high. Add 1 large onion, finely chopped, 1 medium green bell pepper, ribs and seeds removed, finely chopped, 6 garlic cloves, finely chopped, and 1 teaspoon Diamond Crystal or ½ tsp. Morton kosher salt and cook, stirring often, until onion is golden around edges and softened, 8–10 minutes.
  3. Add 1 pound ground turkey to pan. Mix into vegetables, then spread out in an even layer. Cook, undisturbed, until almost cooked through, about 5 minutes. Add ¼ cup double-concentrated tomato paste, 2 tablespoons gochujang (Korean hot pepper paste), 1 tablespoons soy sauce, 1 tablespoon toasted sesame oil, and 1 teaspoon honey; cook, stirring often, until tomato paste is deepened in color, about 5 minutes. Add 1 cup water and cook, stirring often, until liquid is reduced by about half and mixture looks saucy.
  4. Transfer sweet potatoes to a platter, split lengthwise with a small knife (don’t cut all the way through), and open up like a book. Using a fork, lightly mash flesh, making sure to keep skins intact; season lightly with salt.
  5. Spoon turkey mixture over sweet potato halves. Top with 4 scallions, thinly sliced on a diagonal, and ½ cup coarsely chopped cilantro. Drizzle lightly with more sesame oil. Serve with lime wedges for squeezing over.

http://www.lynnandruss.com

Recipe from Millie Peartree for Bon Appétit

Roasted Smashed Carrots

Crispy, caramelized, and totally irresistible! Barely roasted carrot halves are smashed to create more surface area and caramelly edges. Manchego and hazelnuts reinforce their nutty earthy flavor. A lovely, impressive way to prepare an ordinary side dish.

Bring out carrots’ natural sweetness by roasting them in the oven. Although it takes longer than steaming or microwaving, the tender, caramelized outcome makes the extra cook time worthwhile. Simply roast the carrots until they’re fork-tender, then smash them (without breaking), sprinkle with a little cheese, and roast again until the edges are nice and crispy and the cheese is melted.

If you are starting with raw filberts, toast the nuts in a dry pan. When cooled, removed the skins as much as possible. The hazelnuts can be chopped in a small mini food processor, or hit with a mallet while inside a ziploc bag.

Roasted Smashed Carrots

  • Servings: 4
  • Difficulty: easy
  • Print

Ingredients

  • 1 lb. medium carrots, peeled and halved lengthwise
  • 2 Tbsp. olive oil, divided
  • 1/2 tsp. salt
  • 1/4 tsp. smoked paprika
  • 1/4 tsp. black pepper
  • 1/4 to 1/2 cup shredded Manchego cheese (1 to 2 oz.)
  • 2 Tbsp. chopped toasted hazelnuts, skins removed
  • 1/2 tsp. orange zest (optional)
  • 1 orange wedge (optional)

Directions

  1. Preheat oven to 400°F. Line a 15×10-inch baking pan with parchment paper. Place carrots in prepared pan. Drizzle with 1 Tbsp. of the oil. Sprinkle with salt, paprika, and pepper; toss to coat.
  2. Roast until carrots are fork tender, 20 to 25 minutes. Use the bottom of a heavy glass or measuring cup to smash carrots, without breaking them, to about 1/2-inch thickness. Drizzle with remaining 1 Tbsp. oil. Sprinkle with cheese. Roast until edges of carrots are lightly browned and crisp, 15 to 20 minutes more.
  3. Sprinkle with hazelnuts. If you like, top with orange zest and squeeze orange wedge over carrots. Serve immediately.

http://www.lynnandruss.com

Recipe by Maddy Bendgen for Better Homes and Gardens

Leek, Fennel, and Squash Soup with Sausage

Who doesn’t love a tasty homemade soup? Leek, Fennel, and Squash Soup with Sausage is a hearty, flavorful bowlful that blends sweet, aromatic vegetables with savory, spiced sausage for a comforting and satisfying meal.

This soup starts with sautéed leeks and fennel, which bring a mild onion-like sweetness combined with the subtle anise flavor of fennel. Both vegetables soften and infuse the broth with their delicate aromatics. Of course, using homemade chicken broth adds oodles of flavor and health benefits.

The squash—a winter variety like kabocha or butternut—adds a creamy, naturally sweet, and slightly nutty element once cooked. Its vibrant orange color makes the dish visually appealing as well.

Savory sausage—usually Italian, fennel, or spicy sausage—is browned and crumbled into the soup, infusing it with rich, meaty notes and a bit of spice and seasoning complexity. This soup is perfect for a cozy lunch or dinner, served with crusty bread on the side, if desired.

NOTE: Kabocha squash is worth seeking out in this soup, but if you can’t find it red kuri or butternut squash will also work.

Leek, Fennel, and Squash Soup with Sausage

  • Servings: 5
  • Difficulty: easy
  • Print

Ingredients

  • 1 lb. hot Italian sausage casing removed
  • 1 1/2 lbs. leeks white and light green parts only, halved lengthwise, cut into 1/2-inch pieces, and washed thoroughly
  • 1 fennel bulb halved, cored, and cut into 1/4-inch pieces
  • 4 cloves garlic peeled and sliced thin
  • 1 Tbsp. extra-virgin olive oil
  • 1/4 tsp. table salt
  • 1 bay leaf
  • 4 sprigs fresh thyme
  • 1 1/2 lbs. winter squash (kabocha, red kuri, or butternut), peeled, seeded, and cut into 1-inch pieces
  • 6 cups chicken broth, preferably homemade
  • 1 can cannellini beans (15-oz.) rinsed
  • 1/2 cup finely chopped fresh parsley

Directions

  1. Cook sausage in large Dutch oven over medium-high heat, breaking up meat with wooden spoon, until browned, 5 to 7 minutes. Using slotted spoon, transfer sausage to plate and set aside.
  2. Add leeks, fennel, garlic, oil, salt, bay leaf, and thyme sprigs to fat left in pot. Reduce heat to medium and cook, stirring occasionally, until vegetables are tender and just beginning to brown, about 7 minutes.
  3. Stir in squash, broth, beans, and reserved sausage, scraping up any browned bits. Cover pot, increase heat to high, and bring soup to vigorous simmer. Reduce heat to medium and vigorously simmer for 20 to 35 minutes, until squash is tender. Remove pot from heat, discard bay leaf and thyme sprigs, and stir in parsley. Season with salt and pepper to taste. Serve.

http://www.lynnandruss.com

Recipe courtesy of America’s Test Kitchen

Classic Marinara Sauce with Fresh Tomatoes

When ripe tomatoes from your garden or the local farm market are in season, why not make a large batch of marinara sauce? The ingredients and techniques often vary wildly. If you can get all roma style tomatoes, that is best, but we made the sauce here with a mix of the roma and slicing fruits due to what we harvested from our gardens.

To core or not to core? We did some both ways and it seems the uncored ones kept more of their tomato juices intact. So we suggest blanche in boiling water, plunge in ice bath, peel from the X, then core.

The beauty of homemade marinara lies in its simplicity and the ability to customize the ingredients to suit personal taste preferences. However, this simplicity also means that the sauce lacks the preservatives found in commercial products, which can affect its shelf life. More acidic sauces tend to have a longer shelf life.

Generally, homemade marinara sauce can last for up to 5 to 7 days when stored properly in the refrigerator. It’s also worth noting that the quality of the sauce may degrade over time, even if it remains safe to eat. This means that the sauce might not taste as fresh or have the same vibrant color after a few days.

Consider freezing the sauce for longer storage. Frozen marinara sauce can last for several months and helps preserve the flavor and texture.

NOTE: While we usually make vegetarian marinara sauce, in this batch we decided to brown some leftover pork spare ribs for meaty flavor (then they were removed before storing the sauce), but just omit them if you want a straight-up marinara sauce.

Classic Marinara Sauce with Fresh Tomatoes

  • Servings: about 3 quarts
  • Difficulty: easy
  • Print

Ingredients

  • 20 cloves garlic, peeled and thinly sliced
  • 8 lbs. fresh tomatoes, preferably roma, bad spots removed
  • 3/4 cup olive oil
  • 1/2 tsp. red pepper flakes, (optional)
  • 6 oz. can double-concentrated tomato paste, (from a tube)
  • 2 sprigs fresh basil; more to stir in at end, torn
  • 1 sprig fresh oregano; more to stir in at end, chopped
  • 1 bay leaf
  • 1 tsp. kosher salt, plus more to taste
  • 1 lb. pork spare ribs (optional)

Directions

  1. Wash, and core (or not) the tomatoes. Slice and X on their bottoms then drop into boiling water and blanche for 1 minute. (You will need to do this in two or three batches, depending on size of pot.) Immediately plunge tomatoes into an ice water bath. When cool enough to touch, peel skin off starting with corners on the bottom X. If not cored beforehand, core them after peeling.
  2. Squeeze and crush the tomatoes with your hands until a chunky sauce forms with pieces no bigger than 1 1/2 inch.
  3. Heat olive oil in a large Dutch oven over medium-low heat until shimmering. (If using ribs, brown them in oil first, a few minutes on each side, remove to a plate.) Add the garlic and cook for 1 minute. Add 1/2 teaspoon red pepper flakes if desired and cook, stirring occasionally, until the garlic is lightly golden and fragrant, 1 to 2 minutes.
  4. Add 6-ounce can of double-concentrated tomato paste. Cook, stirring often, until the paste is darker in color and fragrant, 2 to 3 minutes. Add the tomatoes, 2 fresh basil sprigs, oregano sprig, bay leaf and 1 teaspoon kosher salt. (Add spare ribs back in if using.) Increase the heat to medium-high and bring to a simmer.
  5. Reduce the heat to medium and simmer, stirring occasionally, until the tomatoes no longer taste acidic, the flavors meld, and the sauce has reduced by at least one inch, 60 to 80 minutes. (If you added ribs, remove them and discard or save the meat for another use.)
  6. Stir in remaining chopped basil and oregano. Taste and season with more kosher salt as needed. Let cool completely and fill quart-sized containers.
  7. If freezing, when ready to use, simply thaw the sauce in the refrigerator or reheat it from frozen.

http://www.lynnandruss.com

Pork-and-Mushroom Stuffed Zucchini Boats

A great keto-friendly, low-carb meal option from Food & Wine, these aromatic with garlic, scallions, and fish sauce, these zucchini boats are stuffed with juicy pork and mushrooms for a dish that’s light, satisfying, and packed with Vietnamese flavor. You can even make most of it a day ahead (which came in real handy when we went to make them).

It’s a fun and easy vegetable-and-meat dish that makes the most out of the bounty of farmers market squash. Reminiscent of a dumpling filling, the pork-and-mushroom stuffing has notes of ginger, garlic, and scallions.

Bouillon powder (although we used bullion paste) and fish sauce bring umami to the forefront. Salting and baking the scooped-out cavities of the zucchini help release excess moisture, creating a perfectly textured final dish.

If looking to amp up the meal, serve these stuffed zucchini boats with rice, and/or a side salad for a quick and delicious dinner. 

NOTE: If you don’t eat pork, you can easily swap it for an equal amount of ground beef or ground turkey in this recipe.

Pork-and-Mushroom Stuffed Zucchini Boats

  • Servings: 4
  • Difficulty: easy
  • Print

Ingredients

  • 2 12-oz. zucchini
  • 1/2 tsp. kosher salt
  • 2 Tbsp. neutral cooking oil, plus more for brushing
  • 1 (5-oz.) package sliced shiitake mushrooms, finely chopped
  • 1/4 cup thinly sliced scallion 
  • 1 Tbsp. finely chopped garlic (about 3 cloves)
  • 2 tsp. finely chopped fresh ginger, from 1-inch piece
  • 1 lb. ground pork
  • 1/4 cup chopped fresh cilantro, plus more for garnish
  • 2 Tbsp. fish sauce
  • 1 tsp. chicken bouillon granules
  • 1/2 tsp. black pepper

Directions

  1. Preheat oven to 425°F. Halve zucchini lengthwise; scoop the flesh from each half using a spoon or melon baller, leaving a 1/4- to 1/2-inch wall on the sides and base. Set scooped flesh aside. Sprinkle cut sides with salt, and place zucchini, cut side down, on a paper towel–lined plate. Let stand for 20 minutes.
  2. Meanwhile, heat oil in a large skillet over medium-high. Add mushrooms, and cook, stirring occasionally, until tender and browned, 4 to 5 minutes. Add scallion, garlic, ginger, and reserved zucchini flesh; cook, stirring often, until softened and the released liquids evaporate, 3 to 5 minutes. Add pork; cook, stirring occasionally to break meat into fine crumbles, until browned, 6 to 8 minutes. Remove from heat, and let cool for 5 minutes.
  3. Pat zucchini halves dry, and lightly brush with oil. Arrange zucchini, cut sides down, on an aluminum foil–lined baking sheet. Bake until the zucchini begins to soften, 8 to 10 minutes; remove from oven. Increase oven temperature to broil.
  4. Stir cilantro, fish sauce, bouillon, and pepper into pork mixture. Fill each zucchini cavity with pork mixture (about 2/3 cup per half); firmly press mixture into zucchini. Place on an aluminum foil–lined baking sheet, and broil until browned on top, 2 to 3 minutes. Let cool slightly, about 3 minutes. (With an electric oven, in order to get a little brown crisp on top, it took several minutes longer under the broiler.) Serve zucchini hot, garnished with additional cilantro and/oror scallion slices.

http://www.lynnandruss.com

Adapted from a recipe by Cường Phạm for Food & Wine

Kabocha-Cauliflower Mash

This dairy-free mash allows for everyone at the table to take a scoop no matter what the dinner may be. Kabocha squash and cauliflower blend seamlessly with creamy coconut milk and minced ginger. The resulting dish is a luscious, Asian-inspired alternative to mashed potatoes—without a speck of cream or butter in sight.

While it suggests to use a ricer, and we did, it’s probably easier to just use a hand mixer. Can’t find, or not a fan of Kabocha squash? Acorn or butternut squash would work just as well.

Kabocha-Cauliflower Mash

  • Servings: 8
  • Difficulty: easy
  • Print

Ingredients

  • 2 ½ lbs. kabocha squash (from 1 medium), halved, peeled, seeded, and cut into 2-inch pieces
  • Kosher salt and freshly ground pepper
  • 2 lbs. cauliflower (from 1 medium), cored and cut into large florets
  • ¼ cup extra-virgin olive oil
  • 2 tsp. minced fresh ginger (from a 1-inch piece)
  • 2 tsp. minced garlic (from 2 cloves)
  • ¾ cup light coconut milk
  • Chicken or vegetable broth, or water, if needed

Directions

  1. Cook squash in a large pot of simmering (not boiling) salted water 6 minutes. Add cauliflower; continue simmering until vegetables are very tender, 10 to 12 minutes more.
  2. Drain, then return vegetables to pot. Cook over medium heat, stirring frequently, until vegetables appear dry and a film forms on bottom of pot, 3 to 4 minutes.
  3. Pass vegetables through a ricer, food mill, or chinois strainer; cover to keep warm.
  4. Heat oil in a saucepan over medium. When it shimmers, add ginger and garlic; cook until fragrant and sizzling, about 30 seconds. Add coconut milk; season with salt and pepper. Bring to a simmer, then remove from heat and stir into vegetable mixture until smooth.
  5. If mash is too stiff, add broth, coconut milk, or water, a few tablespoons at a time. Season with salt and pepper and serve warm.

http://www.lynnandruss.com

Recipe by Greg Lofts for Martha Stewart

Roasted Brussels Sprouts with Garlic

So easy, yet so elegant. This recipe for roasted Brussels sprouts from Mark Bittman is an ATK popular version and is perfect as a holiday side dish. If you haven’t yet figured out a go-to recipe, this simple preparation is the answer. It results in sweet caramelized Brussels sprouts which is sure to satisfy just about anyone.

  • Use oven-safe cast-iron pan, as noted above.
  • Getting sprouts brown is important to avoid bitter taste.
  • Smaller quantity of large, hand-selected sprouts is better than big bag of assorted sprouts.
  • Don’t cook more than can fit in pan with cut side down.

Roasted Brussels Sprouts with Garlic

  • Servings: 4-6
  • Difficulty: easy
  • Print

Ingredients

  • 1 lb. Brussels sprouts, trimmed
  • 4-6 Tbsp extra virgin olive oil, to coat bottom of pan
  • 5 cloves garlic, peeled salt and pepper to taste
  • 1 Tbsp. balsamic vinegar (maybe less, to taste)

Directions

  1. Heat oven to 400°F. Trim bottom of Brussels sprouts, and slice each in half top to bottom. Heat oil in cast-iron pan over medium-high heat until it shimmers; put sprouts cut side down in one layer in pan. Put in garlic, and sprinkle with salt and pepper.
  2. Cook, undisturbed, until sprouts begin to brown on bottom, and transfer to oven. roast for 10-20 minutes at 400°F with a few shakes of the pan in between..
  3. Taste, and add more salt and pepper if necessary. Stir in (CAREFUL, NOT TOO MUCH) balsamic vinegar, and serve hot or warm.

http://www.lynnandruss.com

Recipe by Mark Bittman for NYTimes Cooking

Seared Salmon Paka

Paka refers to a silky coconut-milk-based sauce popular in East African cuisine. In this take from Bon Apétit on machi paka—a classic fish curry—quickly seared salmon takes the place of the traditional charred, grilled white fish. Cooking the blended curry base down until the coconut milk breaks and the aromatics toast in its rich fat is key to developing deep flavor—don’t rush this part.

The curry base is wonderfully versatile; if fish isn’t your thing, sub in chicken or your favorite canned beans (adjust cooking times accordingly). Having a lot of rice and curry sauce left over, we browned some boneless chicken thigh pieces and added them to the sauce for another dinner a few days later.

Since no Thai chiles were available at the grocery store, we opted to incorporate jalapeños instead. The color of the paka may be a bit off-putting as it gives the appearance of pea soup, but don’t be fooled by that, the sauce is amazing!

Seared Salmon Paka

  • Servings: 4
  • Difficulty: easy
  • Print

Ingredients

  • 1 Tbsp. vegetable oil
  • 4 6-oz. boneless salmon fillets, preferably skin-on
  • 2 tsp. Diamond Crystal or 1¼ tsp. Morton kosher salt
  • 1 medium onion
  • 2–3 green Thai chiles
  • 3 garlic cloves 
  • 1 1½” piece ginger, peeled 
  • 1 Tbsp. double-concentrated tomato paste,
  • ½ tsp. ground turmeric 
  • ¼ cup cilantro leaves with tender stems 
  • 2 13.5-oz. can unsweetened coconut milk
  • 1 Tbsp. fresh lime
  • Cooked basmati rice

Directions

  1. Heat 1 Tbsp. vegetable oil in a large nonstick skillet over medium-high. Season four 6-oz. boneless salmon fillets, preferably skin-on, with kosher salt and cook (skin side down if it has skin), pressing fillets gently with a spatula, until golden brown, about 4 minutes. Turn fillets over and cook until golden brown and just cooked through, about 3 minutes. Transfer to a plate. Wipe out skillet and reserve.
  2. Purée 1 medium onion, coarsely chopped, 2–3 green Thai chiles, depending on heat preference, 3 garlic cloves, one 1½” piece ginger, peeled, 1 Tbsp. double-concentrated tomato paste, ½ tsp. ground turmeric, ¼ cup cilantro leaves with tender stems, and one 13.5-oz. can unsweetened coconut milk in a blender on high speed until smooth. Pour onion mixture into reserved skillet and sprinkle with 2 tsp. Diamond Crystal or 1¼ tsp. Morton kosher salt. Bring to a brisk simmer over medium-high heat, then reduce heat to medium and cook, stirring often with a wooden spoon, until mixture is reduced to a thick paste, fat separates from coconut milk (it will look broken), and aromatics are golden brown, 30–35 minutes.
  3. Pour in remaining one 13.5-oz. can unsweetened coconut milk and ¼ cup water and bring to a simmer, scraping up any browned bits.
  4. Gently break salmon fillets into 3″ pieces and return to skillet. Cook just until salmon is heated through, about 3 minutes. Stir 1 Tbsp. fresh lime juice into curry and remove from heat.
  5. Divide curry among shallow bowls and top with cilantro leaves with tender stems and halved green Thai chiles. Serve with cooked basmati rice or country-style bread and lime wedges alongside.

Do ahead: Curry base can be made 1 day ahead. Let cool; cover and chill. Reheat over medium-low, adding water to thin as needed.

http://www.lynnandruss.com

Recipe from Bon Appétit