Category Archives: Uncategorized

Fusilli with Cherry Tomato Sauce and Fresh Sage

As we were eating this lovely pasta dish, The Hubs exclaimed how much he liked it. I responded “And the list of ingredients was short for such depth of flavor and it was simple to boot!” Then he looked at the Milk Street recipe print out and saw that this adaptation hailed from Yotam Ottolenghi’s cookbook titled “Simple”—how serendipitous!

That being said, I cut back the pasta from 12 to 8 ounces because it did not seem that the amount of sauce would be sufficient for the larger quantity. With gentle simmering and a bit of water to facilitate cooking, cherry or grape tomatoes are transformed into a bold pasta sauce. To ratchet up the flavor, herbs, red pepper flakes and pecorino Romano are added. Try to get a block of the cheese to create shavings as opposed to the already grated variety.

Fusilli was our choice, but spaghetti or bucatini (a tubular pasta resembling thick spaghetti) also pairs particularly well with the sauce. Be aware that you do not want to simmer the tomatoes until there is no liquid remaining. Some moisture is needed for the sauce to cling to the pasta.

Fusilli with Cherry Tomato Sauce and Fresh Sage

  • Servings: 2-3
  • Difficulty: easy
  • Print

Ingredients

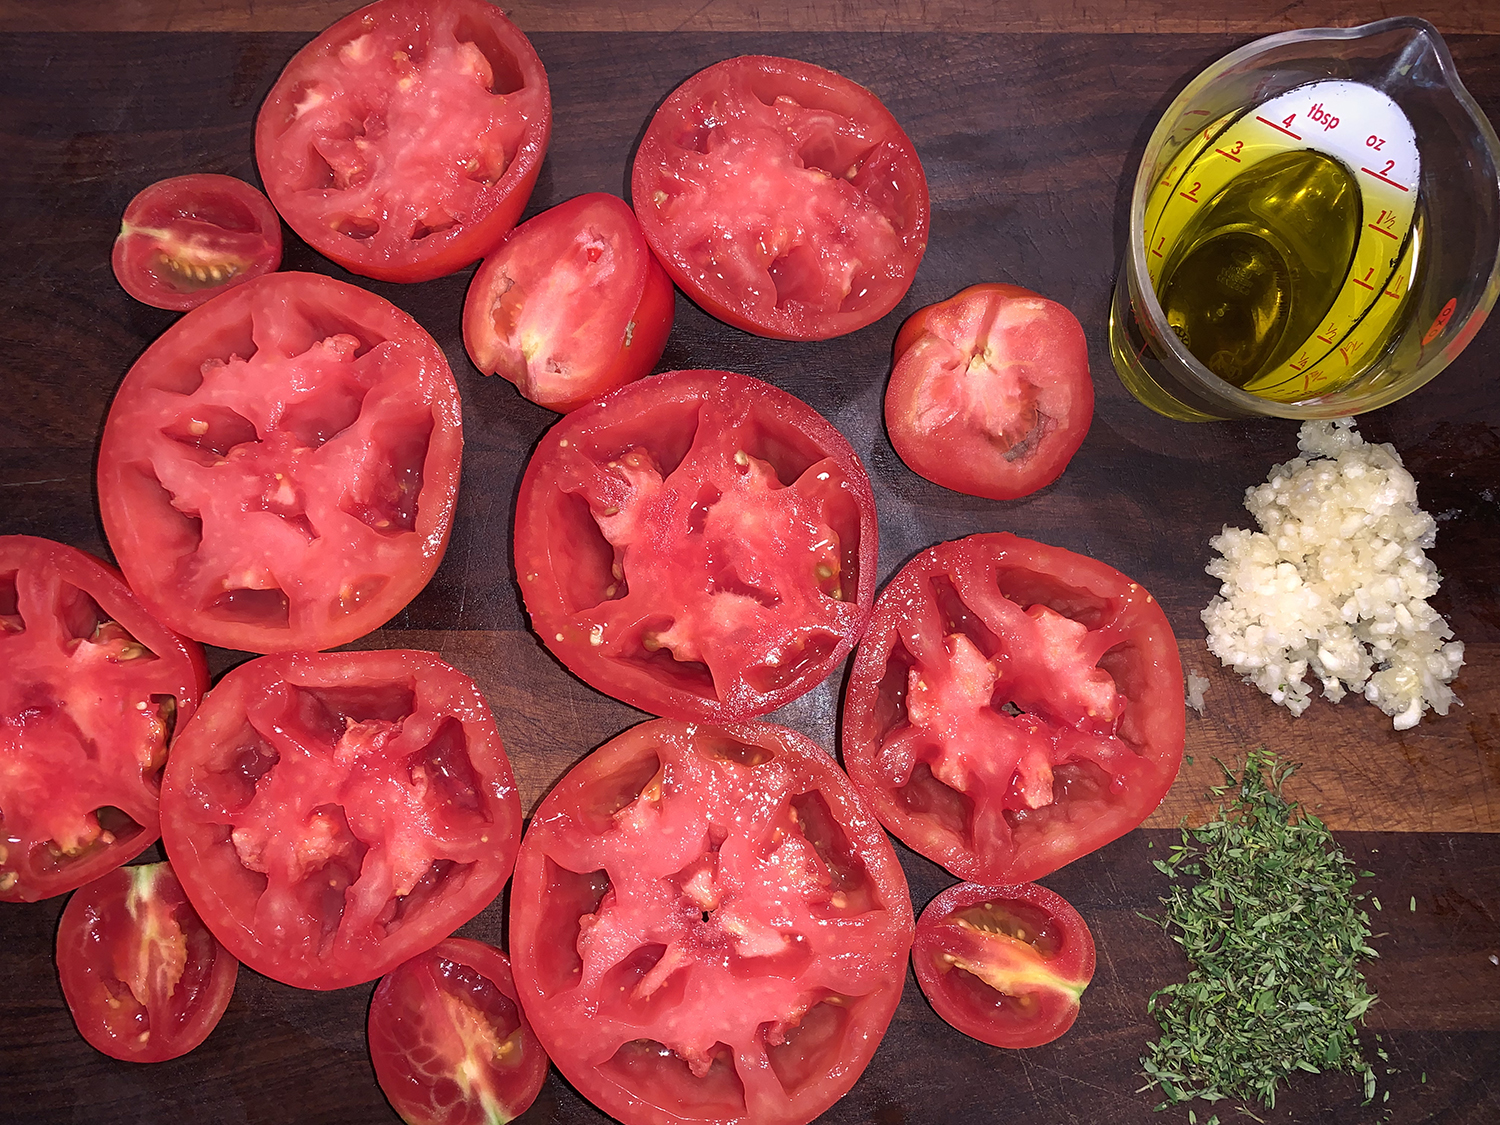
  • ⅓ cup extra-virgin olive oil, plus more to serve
  • 4 medium garlic cloves, thinly sliced
  • ¼ tsp. red pepper flakes
  • 2 bay leaves
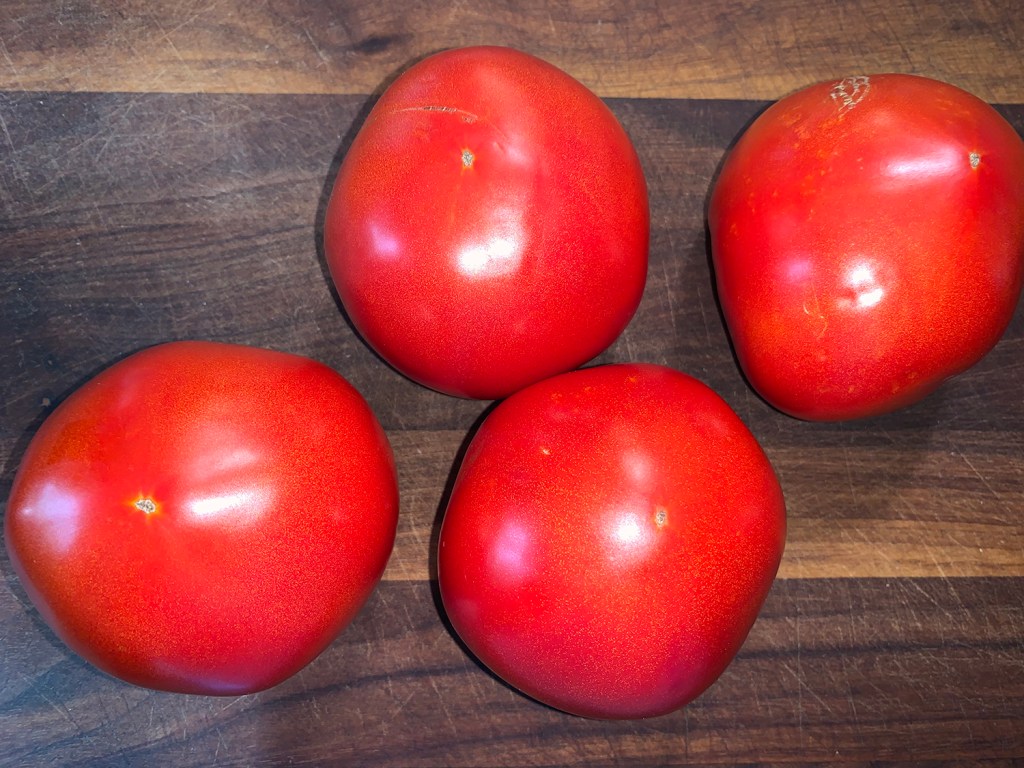
  • 1 lb. cherry or grape tomatoes, halved
  • ½ tsp. white sugar
  • Kosher salt
  • 1 cup water
  • 2 Tbsp. chopped fresh sage, divided
  • 8 oz. fusilli, bucatini pasta or spaghetti, cooked according to package directions
  • ¾ tsp. smoked paprika
  • Shaved pecorino Romano, to serve

Directions

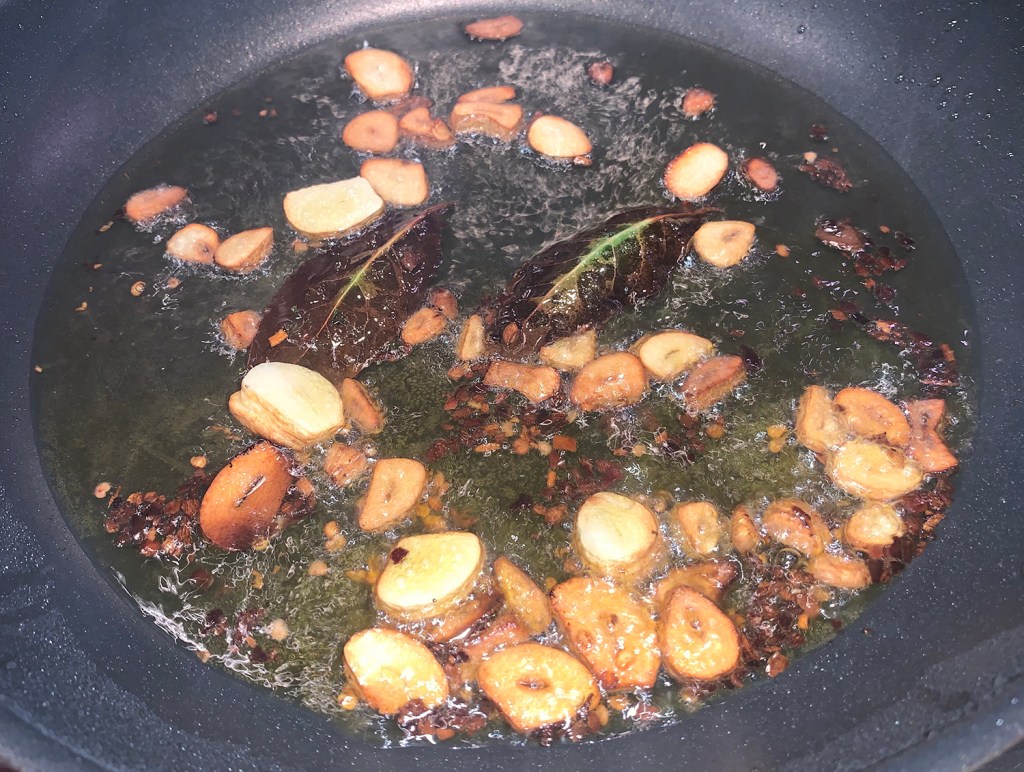
  1. Add the oil to a 12-inch skillet. Turn the heat to medium-high, and add the garlic, pepper flakes and bay, then cook, stirring, until fragrant, about 1 minute.
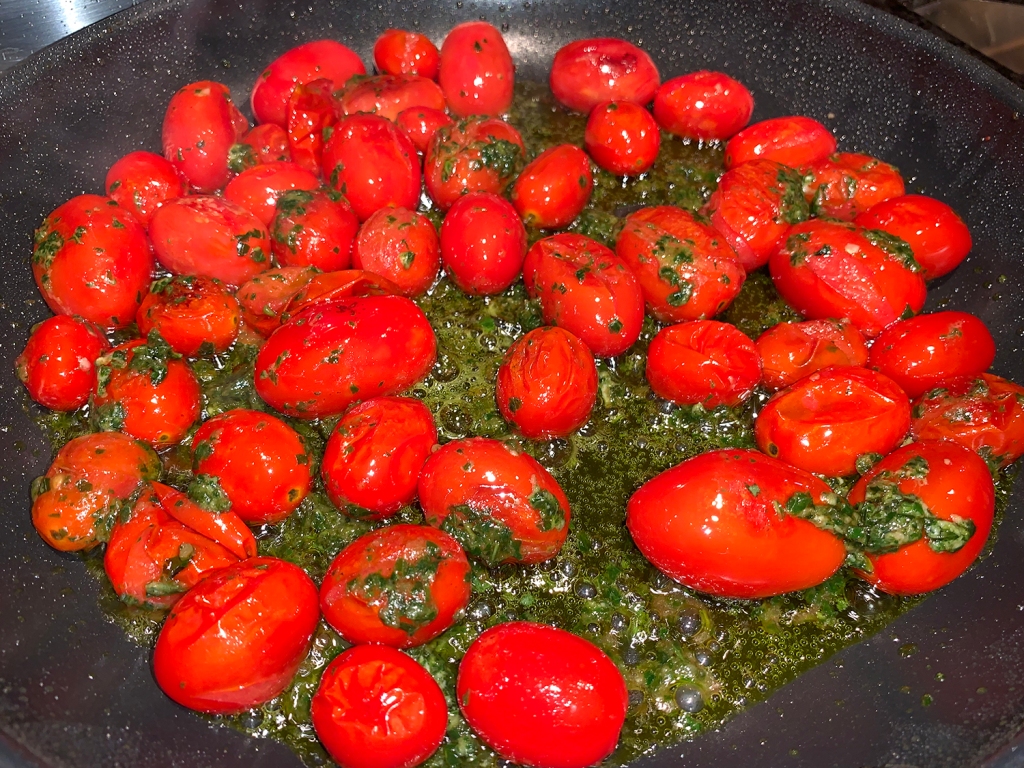
  2. Add the tomatoes, sugar, 1 teaspoon salt and 1 cup water. Bring to a simmer and cook, stirring occasionally, until the tomatoes begin to break down, about 4 minutes.
  3. Reduce to medium-low and cook, uncovered and stirring occasionally and adjusting the heat as needed to maintain a steady simmer, until the tomatoes have fully broken down and the sauce is thick enough that a spatula drawn through it leaves a trail, 40 to 50 minutes.
  4. Remove from the heat and remove and discard the bay. Stir in 1 tablespoon of sage and the smoked paprika, then cover to keep warm.
  5. When the sauce is almost ready, in a large pot, bring 4 quarts water to a boil. Add 2 tablespoons salt and the fusilli, then cook, stirring occasionally, until al dente.
  6. Drain the pasta, then return to the pot. Add the sauce and toss until well combined. Transfer to a serving bowl. Sprinkle with the remaining 1 tablespoon sage and shaved pecorino, then drizzle with additional oil.

http://www.lynnandruss.com

Loosely adapted from a recipe by Milk Street

Seared Shrimp Tacos with Tomato and Cotija

Tacos gobernador is a modern Mexican classic that combines a sauté of shrimp, fresh tomatoes and chilies with quesillo, a stringy cheese not unlike mozzarella, that’s melted onto the tortillas before assembly. In this recipe, Milk Street morphs those tacos into something simpler but equally delicious and in the same spirit.

The shrimp is seared, then combined with sautéed onion, fresh tomatoes and a minced charred habanero chili. Instead of melting a mild, milky cheese onto the tortillas before filling them, this recipe simply garnishes the tacos with crumbled cotija, a dryish Mexican cheese that packs lots of salty, savory flavor, along with fresh cilantro.

The shrimp filling gets a fair amount, but not scorching heat from the habanero chili; to tame the spiciness, Milk Street suggests seeding the chili after charring, before finely chopping it.

With no corn tortillas available at two different stores, we ended up with the flour variety. And for some odd reason our two small habaneros hardly had any kick to them, even when keeping the seeds. Thus, an added 1/4 teaspoon of cayenne provided the heat we desired, but not overly so.

With a side of fiesta black beans, it was one tasty dinner!

Don’t forget to pat the shrimp dry before searing. Removing surface moisture helps prevent steaming and ensures good, flavorful browning. Also, don’t brown the shrimp on both sides—the point is for them to be only parcooked after searing. They will fully cook—to a plump, tender finish—when returned to the pan with the tomatoes.

Seared Shrimp Tacos with Tomato and Cotija

  • Servings: 4-6
  • Difficulty: easy
  • Print

Ingredients

  • 1 habanero chili, stemmed
  • 2 Tbsp. grapeseed or other neutral oil, divided
  • 1 1/2 lbs. extra-large (21/25 per pound) shrimp, peeled (tails removed) and deveined, patted dry
  • Kosher salt and ground black pepper
  • 1/2 medium white onion, thinly sliced
  • 3 ripe plum tomatoes, cored and chopped
  • 1 Tbsp. lime juice, plus lime wedges to serve
  • 3 oz. cotija cheese, crumbled (¾ cup)
  • 1/2 cup lightly packed fresh cilantro, chopped
  • 12 (6-inch) corn tortillas, warmed

Directions

  1. Heat a 12-inch nonstick skillet over medium-high until water flicked onto the surface immediately sizzles and evaporates. Add the chili and cook, turning every 1 to 2 minutes, until well charred on all sides, 5 to 6 minutes total. Transfer the chili to a cutting board.
  2. In the same skillet over medium-high, heat 1 tablespoon oil until shimmering. Add the shrimp in an even layer and sprinkle with ½ teaspoon each salt and pepper. Cook without stirring until the bottoms of the shrimp are browned, 5 to 6 minutes. Transfer to a large plate and set aside; reserve the skillet. Finely chop the chili.
  3. In the same skillet over medium-high, heat the remaining 1 tablespoon oil until shimmering. Add the onion and cook, stirring occasionally, until softened and beginning to brown, 3 to 4 minutes.
  4. Stir in the shrimp and any accumulated juices, the tomatoes and chili; cook, stirring, until the shrimp are opaque throughout, 1 to 2 minutes. Off heat, stir in the lime juice, then taste and season with salt and pepper.
  5. To serve, put the cotija, cilantro and lime wedges into small bowls. Transfer the shrimp mixture to a serving dish, then serve with the tortillas and garnishes for making tacos.

http://www.lynnandruss.com

Recipe by Calvin Cox for Milk Street

Grilled Lamb Shoulder Chops Greek-Style

Shoulder chops aren’t the most tender, but they truly have great lamb flavor. Plus, they are far less expensive than other types of lamb chops. The steaks are usually rather thin, therefore make sure you have a hot fire ready so they get a good sear on the outside before they have a chance to overcook on the inside.

Lamb and grilling are a classic combination in Greek cookery. In just minutes over a hot fire, they are nearly ready to serve with that quintessential Greek flavoring combination of fresh oregano, fresh lemon juice, really good olive oil, and just a touch of garlic. Simple is, as simple gets.

To complete the meal we roasted some baby Yukon potatoes which benefited from some of that oregano-garlic sauce; and a side of Roasted Green Beans with Pecorino and Pine Nuts which are mixed with oil, salt, pepper, and a tad of sugar to enhance caramelization.

Grilled Lamb Shoulder Chops Greek-Style

  • Servings: 4
  • Difficulty: easy
  • Print

Ingredients

  • Four 10- to 12-ounce lamb shoulder blade chops, 1/2 inch to 1/4 inch thick
  • Kosher salt and freshly cracked black pepper to taste
  • 1/4 cup extra-virgin olive oil
  • 2 Tbsp. roughly chopped fresh oregano
  • 1 tsp. minced garlic
  • 1/2 lemon

Directions

  1. Preheat grill to hot.
  2. Dry the chops with paper towels and sprinkle them generously with salt and pepper. Place the chops on the grill and cook until well seared, 3 to 4 minutes per side. To check for doneness, use an instant-read thermometer. The chops are rare at 120°F, medium rare at 125°F, medium at 130°F, and well done at 145°F and higher. FYI, lamb can take on a gamey flavor when cooked past medium.
  3. When the chops are done, remove them from the grill, cover them loosely with foil, and let them rest for 5 minutes.
  4. Meanwhile, in a small bowl, combine the olive oil, oregano, and garlic and mix well.
  5. Spoon the garlic mixture over the lamb chops, squeeze the lemon on top of them, and serve hot.

http://www.lynnandruss.com

Recipe by John Willoughby and Christopher Schlesinger

Fall-Apart Caramelized Cabbage

According to Bon Appétit, this is one of the easiest, most delicious ways to cook down a whole head of cabbage until it’s falling-apart tender. And those gorgeous Autumn colors welcome you to a new cooler season.

Numerous reviewers mentioned they had, or wished they had, doubled the sauce, therefore I went ahead with that suggestion. I also added some smoked paprika, just enough to give it a slightly smoky kick. Finally, homemade chicken stock was subbed for the water. Of course, if you are vegetarian you could keep the water or use vegetable stock.

If the spiced tomato paste has reduced and the pan starts getting dry and dark before the cabbage is ready, just add a splash of water to loosen and let it keep going.

The Hubs couldn’t get enough, he even wanted to drink any leftover sauce—good thing I doubled it! He said the aroma and taste reminded him of Gołąbki without the filling. Smacznego!

Fall-Apart Caramelized Cabbage

  • Servings: 4
  • Difficulty: easy
  • Print

Ingredients

  • ½ cup double-concentrated tomato paste
  • 6 garlic cloves, finely grated
  • 1 Tbsp. ground coriander
  • 1 Tbsp. ground cumin
  • ½ tsp. smoked paprika
  • 2 tsp. crushed red pepper flakes
  • 1 medium head of savoy cabbage (about 2 lb. total)
  • ½ cup extra-virgin olive oil, divided
  • Kosher salt
  • 2 cups chicken stock, preferably homemade (or water to keep it vegetarian)
  • 3 Tbsp. chopped dill, parsley, or cilantro
  • Full-fat Greek yogurt or sour cream (for serving)

Directions

  1. Preheat oven to 350°. Mix tomato paste, garlic, coriander, cumin, and red pepper flakes in a small bowl.
  2. Cut cabbage in half through core. Cut each half through core into 4 wedges, so that the core remains on each piece.
  3. Heat ¼ cup oil in a large cast-iron skillet over medium-high. Working in batches if needed, add cabbage to pan cut side down and season with salt. Cook, turning occasionally, until lightly charred, about 4 minutes per side. Transfer cabbage to a plate. You may have to add a bit more oil to the pan if doing a second batch.
  4. Pour remaining ¼ cup oil into skillet. Add spiced tomato paste and cook over medium heat, stirring frequently, until tomato paste begins to split and slightly darken, 3–4 minutes. Pour in enough chicken stock (or water) to come halfway up sides of pan (about 2 cups), season with salt, and bring to a simmer.
  5. Nestle cabbage wedges back into skillet (they should have shrunk while browning; a bit of overlap is okay). Transfer cabbage to oven and bake, uncovered and turning wedges halfway through, until very tender, liquid is mostly evaporated, and cabbage is caramelized around the edges, 40–50 minutes.
  6. Scatter dill over cabbage. Serve with yogurt alongside.

http://www.lynnandruss.com

Adapted from a recipe by Andy Baraghani for Bon Appétit

Citrus Rosemary Chicken

Roast chicken with citrus and herbs? It has my name written all over it! As far back as I can remember, Sunday supper with Mom’s Orange Juice Chicken was a meal I looked forward to all week—and I was one picky eater back then.

Crisp, tangy, and succulent citrus rosemary chicken, seasoned Mediterranean-style with garlic, rosemary, and oregano, and covered in a bold wine and orange marinade. I mean, what’s not to like? This simple twist on roast chicken makes a dish with the perfect balance of savory, tangy, and warm flavors! Delicious and impressive with little work involved. Who’s not with me now?

The citrus marinade in this recipe is made of a combination of wine, orange juice, lime juice, olive oil, tomato paste for color and umami, and fresh garlic, onions, rosemary, and other Mediterranean spices.

We served ours with a Near East rice pilaf dish and a side salad.

According to chef Suzy Karadsheh of The Mediterranean Dish food blog, “The key to great flavor here is to allow the chicken a good 1 to 2 hours in the marinade (refrigerated), and make sure to lift up the chicken skin to spoon some of the garlicky, citrus marinade underneath. If you only have a few minutes, leave the chicken to marinate at room temperature for 30 minutes or so.”

Now you can use a whole chicken and cut it up saving the neck, back and wingtips for homemade stock—which is our typical rodeo—however, this time we purchased precut bone-in, skin-on breasts and thighs. They were well-salted inside and outside the skin, left uncovered in the refrigerator overnight, and marinated for 2 hours prior to cooking.

Once the chicken is out of the oven, allow it 10 minutes to rest before slicing and serving. Then get ready to be amazed! This dish definitely evokes warm, childhood memories, but at a more advanced level, and with more depth of flavor.

Citrus Rosemary Chicken

  • Servings: 4-6
  • Difficulty: easy
  • Print

Ingredients

  • 1 whole chicken, split in half through the backbone; or pre-cut parts (about 3 ½ pounds)
  • Kosher salt
  • 1 cup Pinot Noir
  • 1 orange zested and juiced plus 1 sliced orange
  • 1 lime juiced, plus 1 sliced lime
  • Extra virgin olive oil
  • 3 Tbsp. tomato paste
  • 1 ½ tsp. dried oregano
  • 1 tsp. dried rosemary
  • 1 tsp. sweet paprika
  • 1 tsp. Aleppo pepper
  • 7 to 8 garlic cloves minced
  • 1 yellow onion halved and sliced
  • 1 Tbsp. honey

Directions

  1. Season the chicken with kosher salt on all sides, making sure to season underneath the skin as well. (You can do this one night ahead of time and keep the chicken in the fridge to air-chill uncovered.)
  2. Prepare the citrus marinade. In a large bowl, add the wine, orange juice and zest, lime juice, 3 tablespoons extra virgin olive oil, tomato paste, spices, and a good dash of kosher salt. Add the garlic and onion. Whisk to combine.
  3. Add the chicken and toss to coat, making sure to lift the skin up and spoon some of the marinade underneath (this will give you more flavor). Set aside at room temperature for 30 minutes. Alternatively, cover and refrigerate for an hour or two. (For best results, take it out of the fridge and leave the chicken at room temperature for 30 to 45 minutes before cooking.)
  4. Preheat the oven to 425°F and adjust a rack in the middle.
  5. Transfer the chicken and the marinade to a braising pan. Roast uncovered for 30 minutes, then carefully turn the pan 180 degrees and roast for another 15 minutes or until the chicken is fully cooked and tender (juices should run clear).
  6. In a small bowl, mix together the honey with 1 tbsp of extra virgin olive oil. Carefully remove the chicken from the oven and brush the top with the honey and olive oil mixture.
  7. Switch the oven to the broil function. Return the chicken back to the oven about 6 inches away from the broiler and cook briefly for 3 to 4 minutes, watching for the skin to turn a nice golden brown.
  8. Remove from the heat and finish with lime juice. Add slices of fresh orange and wedges of lime.

http://www.lynnandruss.com

Recipe from The Mediterranean Dish

Put a Little Sizzle in Your Swizzle

We were a little late to the party with this libation because it really is more of a summer drink and it had just turned Autumn when we made it for the first time. BUT, didn’t bother us one iota, the Chartreuse Swizzle was just the ticket for our pre-dinner Sunday evening cocktail.

Story behind the drink? According to author James O’Bryan, “If there were a Nobel Prize for cocktails, Marcovaldo Dionysis would win one for the Chartreuse Swizzle. As a drink, it is novel to the point of being avant-garde, yet brilliant in its simplicity. Some delicious drinks are obvious—anyone can add strawberries to a Daiquiri or sub mezcal into a Negroni or something—but to take a 110 proof liqueur, made by a silent order of French monks from 132 different ingredients, and not only use it as the base spirit of a drink (already a crazy choice) and to spin that drink in a tropical direction (again, crazy), but to take something that unusual and turn it one of the most viscerally delicious cocktails in the pantheon of modern classics is worth a trip to Stockholm, to say the least. It’s way better than discovering an element.”

Prior to this adult beverage, we had never heard of Velvet Falernum. Upon a little research we found out some cocktail ingredients sound stranger than they are, and Velvet Falernum falls right into this camp. But this Caribbean cocktail ingredient is easy to love, and that we did! A staple of many tiki drinks, Falernum comes either as a sugarcane syrup or as a liqueur, spiced with clove, lime, and generally ginger and almond.

The version we used, the most widely available in liquor stores, is John D. Taylor Velvet Falernum—a low-proof liqueur (11% alc/vol, while the Chartreuse is 55% alc/vol!) with all of those classic Caribbean flavors. Due to its provenance (hailing from Barbados), Falernum is most often paired with rum, and it’s a smart combination. But this intriguingly spiced, sweet-tart liqueur is quite versatile.

Although fresh out of mint leaves, we garnished ours with a lime slice. And so it was, on an early Autumn evening we fell in love… again…

Chartreuse Swizzle

  • Servings: 1
  • Difficulty: easy
  • Print

Ingredients

  • 1 1/2 oz. Green Chartreuse
  • 1/2 oz. Velvet Falernum
  • 1 oz. pineapple juice, preferably fresh
  • 3/4 oz. lime juice, preferably fresh

Directions

  1. Add ingredients to a tall glass. Add half full with crushed ice and stir or “swizzle,” which is to just agitate back and forth like a washing machine.
  2. Swizzle for about 7 to 10 seconds, until the glass starts to frost up, then top with more crushed ice.
  3. Garnish with a mint sprig and a grind of fresh nutmeg.

http://www.lynnandruss.com

Roasted Mushrooms with Parmesan and Pine Nuts

We love all things mushrooms, but I know they are not everyone’s cup of tea. However you might be enticed to try this rich, woodsy side dish with combined straightforward creminis and meaty, smoky shiitakes.

To ensure that the mushrooms are evenly seasoned and stay moist during roasting, they are brined in a saltwater solution. This went against everything we’ve ever read about preparing mushrooms, but we gave it a whirl. A glass pie plate was put over the soaking mushrooms to keep them submerged in the brine.

The ‘shrooms are roasted in a hot oven for about an hour until they are deeply browned. Then they’re coated in extra-virgin olive oil and lemon juice before adding the flavorful mix-ins of grated Parmesan, parsley, and pine nuts.

Oh yeah Babe, this recipe from America’s Test Kitchen was divine. Served with grilled tomatoes and strip steaks, we felt like royalty on a weeknight!

Roasted Mushrooms with Parmesan and Pine Nuts

  • Servings: 4
  • Difficulty: easy
  • Print

Ingredients

  • Salt and pepper
  • 1 ½ lbs. cremini mushrooms, trimmed and left whole if small, halved if medium, or quartered if large
  • 1 lb. shiitake mushrooms, stemmed, caps larger than 3 inches halved
  • 4 Tbsp. extra-virgin olive oil, divided
  • 1 tsp. lemon juice
  • 1 oz. Parmesan cheese, grated (1/2 cup)
  • 2 Tbsp. pine nuts, toasted
  • 2 Tbsp. chopped fresh parsley

Directions

  1. Adjust oven rack to lowest position and heat oven to 450°F.
  2. Dissolve 5 teaspoons salt in 2 quarts room-temperature water in large container. Add cremini mushrooms and shiitake mushrooms to brine, cover with plate or bowl to submerge, and let stand for 10 minutes
  3. Drain mushrooms in colander and pat dry with paper towels. Spread mushrooms evenly on rimmed baking sheet, drizzle with oil, and toss to coat. Roast until liquid from mushrooms has completely evaporated, 35 to 45 minutes.
  4. Remove sheet from oven (be careful of escaping steam when opening oven) and, using thin metal spatula, carefully stir mushrooms. Return to oven and continue to roast until mushrooms are deeply browned, 5 to 10 minutes longer.
  5. Combine remaining olive oil and lemon juice in large bowl. Add mushrooms and toss to coat. Add Parmesan, pine nuts, and parsley and toss. Season with salt and pepper to taste; serve immediately.

http://www.lynnandruss.com

Recipe from America’s Test Kitchen

Sheet Pan Caponata and Couscous with Goat Cheese

An Italian, Middle-Eastern mash-up if you will. In a twist, this version of Sicilian eggplant dish is roasted on a sheet pan in the oven, so you don’t have to bother with any deep- or pan-frying. The tomato paste and cinnamon give it depth, the sherry vinegar lends brightness, and the raisins and brown sugar offer balance.

This variation on Italian caponata becomes a main course atop fluffy couscous and creamy goat cheese. Buy the freshest eggplant you can find, it should feel heavy and have no soft spots, and you won’t need to peel or salt it to pull out any bitterness. Because pine nuts are traditional in caponata, they’re the first choice, but they can be pricey so pepitas or chopped walnuts make fine substitutions. Finally, if you don’t like goat cheese, substitute ricotta or farmer cheese. But the cheese adds a welcome component, so don’t omit it.

Under the couscous, the goat cheese melts into a creamy, salty, tangy puddle.

G. Daniela galarza

NOTE: Leftovers may be refrigerated in covered containers for up to 4 days.

Sheet Pan Caponata and Couscous with Goat Cheese

  • Servings: 4-6
  • Difficulty: easy
  • Print

Ingredients

For the Caponata

  • 5 Tbsp. olive oil, divided
  • 1 lb. Japanese or globe eggplant, diced into 1/2-inch cubes
  • 1 medium yellow or red onion (8 to 10 oz.), chopped
  • 1 large red bell pepper, chopped
  • 1 medium tomato (6 to 8 oz.), chopped
  • 3 cloves garlic
  • 2 tsp. light brown sugar or honey, or to taste
  • 3/4 tsp. fine sea salt or table salt, or to taste
  • 1/2 tsp. ground cinnamon
  • 1/4 tsp. cracked black pepper, or to taste
  • 1/4 cup tomato paste
  • 1/4 cup raisins (any kind)
  • 1/4 cup toasted pine nuts, pepitas or chopped walnuts
  • 1/4 to 1/3 cup water
  • 2 Tbsp. red wine vinegar or sherry vinegar, or to taste

For the Couscous

  • 1 1/2 cups water or low-sodium chicken stock or vegetable stock
  • 2 Tbsp. olive oil
  • 1/2 tsp. fine sea salt or table salt
  • 1 1/2 cups (about 9 oz.) couscous

For Serving

  • 3 oz. soft goat cheese, or more if desired
  • 1/4 cup torn fresh basil, mint or parsley (optional)

Directions

  1. Position a rack in the lower third of the oven and preheat to 425 degrees.
  2. Pour 3 tablespoons of olive oil onto a large rimmed baking sheet. Add the eggplant, onion, bell pepper, tomato and garlic, and use your hands to toss everything together. Drizzle the remaining 2 tablespoons of olive oil on top, followed by the brown sugar or honey, salt, cinnamon and black pepper. Toss again, then spread into an even layer.
  3. Roast for 20 minutes. Remove the baking sheet from the oven and, using tongs or a spatula, flip and redistribute vegetables so they cook evenly. Return the baking sheet to the oven and roast for another 15 to 20 minutes, or until vegetables are cooked through and browned.
  4. Transfer the pan to a heatproof surface. Mash the garlic cloves into a paste. Push the vegetables aside to expose a small area of the hot metal and place the tomato paste on it. Using a wooden spoon, stir the tomato paste into the vegetables, followed by the raisins, nuts or seeds, water and vinegar; stir to combine. Taste for seasoning, adjusting with more vinegar, sugar, salt and/or pepper as desired.
  5. Make the couscous: About 10 minutes before the eggplant is finished roasting, in a medium lidded saucepan over high heat, bring the water or stock, olive oil and salt to a rolling boil. Immediately pour in the couscous, ensuring it’s moistened throughout, then cover, remove from the heat and let it steam for about 5 minutes, or until all of the liquid has been absorbed.
  6. To serve, portion about a quarter of the goat cheese into the center of each plate. Top with a pile of couscous and some of the caponata. Garnish with the torn herbs and more goat cheese, if desired.

http://www.lynnandruss.com

Recipe by G. Daniela Galarza from the Eat Voraciously newsletter

Salmon with Sautéed Tomatoes

Heart-healthy salmon is paired with jammy tomatoes which get an herby boost from pesto sauce. With very few ingredients and in less than a half hour, you have the makings of a company-worthy dinner.

To really enhance this Mediterranean meal, we also paired the salmon with Zucchini and Feta Fritters with a side of Yogurt Cucumber-Dill Sauce (which could be made a day ahead to save time on dinner night.)

Cutting the fish into the recommended 4 slices will end up with 6-ounce filets. We decided to divide the salmon into 3 filets weighing in at 8-ounces each. If they have thin “tails” at one end. flip them up and secure with a toothpick while you cook skin side down. Remove the toothpicks before flipping them over. This will help alleviate overdone ends.

Salmon with Sautéed Tomatoes

  • Servings: 4
  • Difficulty: easy
  • Print

Ingredients

  • 2 pints grape tomatoes
  • 2 Tbsp. basil pesto
  • 1 1/2 lbs. salmon fillet, cut into 4 servings
  • 3 Tbsp. olive oil
  • Kosher salt
  • Freshly ground black pepper

Directions

  1. Heat two tablespoons of the olive oil in a 12″ non-stick skillet over medium-high heat. Add grape tomatoes, season with 1/4 teaspoon Kosher salt and sauté until soft, about 4 minutes. Stir in pesto and sauté two minutes more. Transfer tomato mixture to a plate and keep warm in a 200°F oven.
  2. Wipe out skillet (although I didn’t find this necessary). Season salmon pieces with 1/2 teaspoon each Kosher salt and pepper. Heat 1 tablespoon olive oil over medium-high heat. Place salmon pieces in skillet, skin side down. Sauté about 4-6 minutes. If you’re pieces are thick you may have to cook them a few minutes longer.
  3. Turn salmon and sauté and additional 4 minutes until salmon is cooked but tender. Serve over tomatoes and with lemon wedges.

http://www.lynnandruss.com

Tomatoes Two Ways: Roasted or Grilled

Of course, in-season tomatoes are the preferred choice, but in the dead of winter—in our neck of the woods—it’s near impossible to source them. So roasted tomatoes become a good choice because it’s the best way to boost flavor from an otherwise bland vegetable.

After purchasing six locally grown slicing tomatoes for grilling purposes, we happened to be the recipient of additional slicing and small heirloom tomatoes. Not wanting any of those to go bad, I opted to roast all of the ones given to us, which we then used on some cooked pasta, OMG, so good!

If you’re not going to use them right away, the tomatoes will keep in an air-tight container for up to 5 days in the refrigerator or for up to 6 months in the freezer

Roasted Tomatoes

Roasted Tomatoes

  • Servings: 10
  • Difficulty: easy
  • Print

Ingredients

  • 3 lbs. ripe plum or slicing tomatoes
  • ¼ cup extra-virgin olive oil
  • 1 Tbsp. chopped fresh thyme
  • 3 garlic cloves, finely chopped

Directions

  1. Position a rack in the middle of the oven and preheat the oven to 400 degrees.
  2. Stem the tomatoes and slice them in half lengthwise. Gently squeeze out the seeds or scoop them out with a spoon.
  3. Lay the tomatoes, cut side up, in a single layer on a baking sheet lined with parchment paper. Drizzle with the olive oil and sprinkle with the thyme and garlic.
  4. Roast for 60 to 75 minutes, or until starting to caramelize.
  5. Turn off the oven and leave the tomatoes inside for 10 minutes, then remove to a rack and let cool completely. Peel if desired.

http://www.lynnandruss.com

Grilled Tomatoes

Grilled Tomatoes

  • Servings: 4-6
  • Difficulty: easy
  • Print

Ingredients

  • 6 medium-size firm tomatoes (about 2 1/4-lb. total)
  • Coarse salt
  • 1-1/2 Tbsp. red-wine vinegar
  • 3-1/2 Tbsp. extra-virgin olive oil
  • 1 clove garlic, minced
  • 1 small shallot, minced
  • Freshly ground black pepper
  • 1 Tbsp. chopped fresh flat-leaf parsley; more whole leaves for garnish

Directions

  1. Prepare a grill by adjusting it so that the grate is 4 to 5 inches from the-flame or heat source.
  2. Heat a gas grill to high and a charcoal grill to medium hot (the coals should be covered with light ash, and you should be able to hold your hand just over the grate for no more than 3 seconds).
  3. Remove the green stem from the tomatoes but don’t core them. Cut each tomato in half horizontally. Gently loosen the seeds with your fingertips. Turn the tomato over and shake to discard any loose seeds.
  4. Sprinkle the cut side of the tomatoes well with salt. Set them cut side down on a wire rack and let them drain for 30 minutes. In a bowl, whisk together the vinegar, 3 tablespoons of the olive oil, the garlic, and the shallot. Season to taste with salt and pepper.
  5. Lightly oil the drained tomatoes with the remaining 1/2 tablespoons olive oil. Arrange them cut side down on the grate and grill (turning halfway through) until the skins begin to blister and soften, 6 to 10 minutes.
  6. Just before serving, add the chopped parsley to the vinaigrette. Transfer the tomatoes from the grill to a platter and drizzle with the vinaigrette. Garnish with the parsley leaves and serve hot, warm, or at room temperature.

http://www.lynnandruss.com

Roasted Green Beans with Pecorino and Pine Nuts

If you want earthy, sweet green beans with moist interiors and just the right amount of browning, this roasted bean recipe from Cook’s Country does the trick. Because they are often dry and leathery; start by covering the roasting beans which are mixed with oil, salt, pepper, and sugar and let them gently steam for 10 minutes.

The sugar promotes browning when the foil is removed to let the beans blister in the oven’s high heat. To add a lively bite to the flavorful beans, toss them with a lemon vinaigrette and top them with salty, sharp Pecorino and crunchy pine nuts.

Salmon with Sautéed Tomatoes

  • Servings: 4-6
  • Difficulty: easy
  • Print

Ingredients

  • 1 ½ lbs. green beans, trimmed
  • 5 ½ Tbsp. extra-virgin olive oil
  • ¾ tsp. sugar
  • Kosher salt and pepper
  • 2 garlic cloves, minced
  • 1 tsp. grated lemon zest plus 4 tsp. juice
  • 1 tsp. Dijon mustard
  • 2 Tbsp. chopped fresh basil
  • 1 ½ oz. Pecorino Romano cheese, shredded (1/2 cup)
  • ¼ cup pine nuts, toasted

Directions

  1. Adjust oven rack to lowest position and heat oven to 475 degrees.
  2. Combine green beans, 1 1/2 tablespoons oil, sugar, 3/4 teaspoon salt, and 1/2 teaspoon pepper in bowl. Evenly distribute green beans on rimmed baking sheet.
  3. Cover sheet tightly with aluminum foil and roast for 10 minutes. Remove foil and continue to roast until green beans are spotty brown, about 10 minutes longer, stirring halfway through roasting.
  4. Meanwhile, combine garlic, lemon zest, and remaining 1/4 cup oil in medium bowl and microwave until bubbling, about 1 minute; let mixture steep for 1 minute. Whisk lemon juice, mustard, 1/4 teaspoon salt, and 1/4 teaspoon pepper into garlic mixture.
  5. Transfer green beans to bowl with dressing, add basil, and toss to combine. Transfer to serving platter and sprinkle with Pecorino and pine nuts. Serve.

http://www.lynnandruss.com

Recipe from Cook’s Country

Zucchini Fritters with Feta and Yogurt Cucumber Dill Sauce

These crispy zucchini fritters make a wonderful starter or side dish, and they’re a delicious way to use up summer zucchini, because Lord knows, you or your neighbors are likely swamped with it. Of course there is always the local farm market or grocery store…

The word fritter usually conjures up something heavy and deep-fried, but these zucchini fritters are as light as can be. Serve them as a light vegetarian meal or mezze (small plate) with tzatziki and a Greek salad, or as a side dish to any Mediterranean-style fish, chicken or lamb dish.

To eliminate all of the excess moisture in zucchini, shred on a box shredder, salt it and let it drain in a fine mesh strainer for 10 minutes. Finally you want to wrap it tightly in a clean towel and squeeze out any lingering moisture. Do not let the zucchini sit on its own for too long after it’s been squeezed dry or it will turn brown.

Bind the dried zucchini with eggs and a little flour which allows its delicate flavor to shine. In ATK’s The Complete Mediterranean Cookbook where we found this recipe, and the one I followed, it did not mention baking powder as an ingredient. However, online it shows adding 1/2 teaspoon, which makes sense so I listed it below.

Oh, and do yourself a favor and buy a good block of feta cheese, not the pre-crumbled varieties. Odyssey and Mt Vikos are two great brands that contain no preservatives, additives, or calcium chloride and are Non-GMO. Traditional feta is made authentically by small family dairies in central Greece using fresh milk from sheep and goats.

Zucchini Fritters with Feta

  • Servings: 12 fritters
  • Difficulty: easy
  • Print

Ingredients

  • 1 lb. zucchini (about 2 medium), trimmed
  • 1 tsp. salt
  • 2 large eggs
  • 2 scallions, minced
  • 2 Tbsp. minced fresh dill
  • 1/2 cup crumbled feta cheese
  • 1 medium garlic clove, minced or pressed through a garlic press
  • 1/4 tsp. black pepper
  • 1/4 cup all-purpose flour (or cornstarch)
  • 1/2 tsp. baking powder
  • 3 Tbsp. olive oil, plus more if necessary
  • Lemon wedges, for serving

Directions

  1. Shred the zucchini on the large holes of a box grater or in a food processor fitted with the shredding disk. Transfer the zucchini to a fine mesh strainer and set over a bowl. Toss the zucchini with the salt and let it sit for 10 minutes.
  2. Put zucchini in a clean dish towel and fold and wring out real well with (you may need to repeat with another towel), then set aside.
  3. Beat the eggs in a large bowl. Mix in the dried zucchini, scallions, dill, feta, garlic and black pepper. Sprinkle the flour (or corn starch) and baking powder over mixture and stir until uniformly incorporated.
  4. Heat 3 tablespoons olive oil in a large non-stick skillet over medium heat. Drop 2-tablespoon sized portions into the pan, then use the back of a spoon to gently press the batter into 2-inch-wide fritters. Pan-fry until golden brown on both sides, 2-3 minutes per side. Repeat as needed.
  5. Transfer the fritters to a paper towel-lined plate. Add a bit more oil to the pan if necessary, then repeat with the remaining batter. Serve warm or room temperature with lemon wedges.

http://www.lynnandruss.com

By Jennifer Segal, adapted from Cooks Illustrated

Yogurt Cucumber Dill Sauce

Not a dill fan? Substitute cilantro, mint, parsley or tarragon instead. Sauce can be made one day ahead.

Yogurt Cucumber Dill Sauce

  • Servings: Yields about 2 cups
  • Difficulty: easy
  • Print

Ingredients

  • 1 cup plain Greek yogurt
  • 2 Tbsp. extra-virgin olive oil
  • 2 Tbsp. minced fresh dill
  • 1 garlic clove, minced
  • 1 cucumber, peeled, halved lengthwise, seeded, and shredded
  • Salt and Pepper

Directions

  1. Whisk yogurt, oil and garlic together in a medium bowl until combined.
  2. Stir in cucumber and season with salt and pepper to taste.
  3. Refrigerate covered. Take out and leave on counter for 30 minutes before eating.

http://www.lynnandruss.com

Chili-Rubbed Rib-Eye Steak with Corn & Green Chile Ragoût

Who doesn’t love a fabulous grilled rib-eye? These spice-rubbed steaks get a nice kick from a poblano pepper. Poblanos vary a lot in spiciness, so taste yours before you add it to the pan and hold back a bit if it’s too hot. If you want more heat, add a minced jalapeño along with the poblano.

With company for dinner, we needed four steaks and just happened to have two boneless, and two bone-in which were thinner than the boneless cuts, so the cooking times varied slightly for each thickness. Choose your weapon, but try to keep all rib-eyes a minimum of 1-inch thick. And yes, we did double the corn ragoût also.

Twenty-four hours before dinner prep, we dry-brined the steaks with the spice rub, placed them on a rack in a rimmed baking sheet, and left them uncovered overnight in the refrigerator. A hour before grilling, let them sit a room temperature.

For a timer-saver on dinner night, make the corn ragoût the day prior, up to the point of reducing the cream. Once it is cooled, store the corn mixture in the fridge until ready to use, microwave until hot, then stir in the chopped sun-dried tomatoes and lime juice.

NOTE: If you don’t have a grill you can also pan-sear these steaks: Before making the corn ragoût, heat the 2 tsp. of oil in a 10-inch cast-iron  or heavy-duty skillet over high heat until very hot. Add the steaks, reduce the heat to medium high, and cook until they are well browned and done to your liking, about 3 min. per side for medium rare. Transfer to a plate and cover loosely to keep warm while you make the ragoût in the same pan. You could also use New York strip or skirt steaks, though cooking time will vary.

Chili-Rubbed Rib-Eye Steak with Corn & Green Chile Ragoût

  • Servings: 2
  • Difficulty: easy
  • Print

Ingredients

  • 1 tsp. chili powder
  • 1 tsp. ground coriander
  • 1 tsp. kosher salt; more to taste
  • Two 8-oz. boneless beef rib-eye steaks (about 3/4 inch thick)
  • 2 tsp. canola or other vegetable oil
  • 1 small poblano or other mildly hot fresh chile (Anaheim or Italian frying pepper), seeded and cut into 1/4-inch dice (about 1/2 cup)
  • Freshly ground black pepper
  • 1 generous cup fresh corn kernels (from 2 medium ears)
  • 1/2 cup heavy cream
  • 1 Tbs. minced oil-packed sun-dried tomatoes (from 2 medium tomato halves)
  • 1 Tbs. fresh lime juice

Directions

  1. In a small bowl, mix the chili powder, coriander, and salt. Rub the mixture on the steaks.
  2. Place steaks on a rack in a rimmed baking sheet, and refrigerate uncovered overnight for up to 24 hours.
  3. Remove steaks from refrigerator one hour before placing on a hot grill.
  4. Heat a gas grill to medium high or prepare a medium-hot charcoal fire. Drizzle the steaks with oil and grill, turning once, until medium rare, 3 to 4 minutes per side (perhaps longer depending on thickness of steaks). Transfer to a plate and cover loosely to keep warm.  
  5. Meanwhile, heat the oil in a 10-inch skillet over medium heat. Add the chile, season with salt and pepper, and cook over medium-high heat, stirring frequently, until softened and starting to brown, about 2 minutes. Add the corn and continue to cook until it’s slightly browned, 1 to 2 minutes more. Add the cream and boil until it has reduced and the mixture is thick, 1 to 2 minutes. (This step can be done a day ahead. After cooled, cover and refrigerate, rewarming in microwave when ready for the next step.)
  6. Remove from the heat, stir in the sun-dried tomato, lime juice, and the accumulated juices from the steak. Taste and add more salt and black pepper, if you like. Serve the rib-eyes whole or slice them and arrange on plates. Serve immediately, with the corn ragoût on top or alongside.

http://www.lynnandruss.com

Adapted from a recipe by Martha Holmberg for Fine Cooking

Mediterranean Lamb and Veggie Skewers

Lamb and Veggie Kebabs with an adventurous marinade consisting of onions, garlic, and trio of warm spices give the skewers a bold Middle Eastern flavor that is bound to grab your attention.

When marinating lamb, no need to be shy with flavors that will compliment its rich and assertive flavor. But it is equally important to use a marinade that will also help tenderize the meat while imparting character. This is especially true if you are using lamb shoulder or boneless leg of lamb as opposed to lamb loin fillet, which is more tender.

To make the marinade, combine onion, garlic, spices, fresh parsley, olive oil and lemon juice and zest in a food processor. Blitz until everything is well-incorporated and you have a thick onion mixture.

Because the veggies and meat require varying cooking times, I divide them into 3 categories—and 3 ziploc bags. First the meat cubes, then the tomatoes and mushroom caps, and finally the red onion and bell pepper pieces which take the longest to cook. Refrigerate all three bags for up to 2 hours. As the grill heats, thread metal skewers with the bag contents.

We served our skewers over a bed of tri-colored couscous, but if your counting carbs, gluten-free, or following a keto-friendly diet, you may want to skip it. Add lemon wedges for serving.

recipe title=”Mediterranean Lamb and Veggie Skewers” servings=”4-6″ time=”40 min + marinating time” difficulty=”easy”]

Ingredients

  • 2 lbs. boneless leg of lamb
  • Kosher salt and black pepper
  • 1 lb. cherry (cocktail) tomatoes
  • 8 oz. cremini mushrooms, stems trimmed
  • 1 yellow, 1 orange bell pepper, cut into 8 chucks each
  • 1 red onion, peeled and cut into 8 wedges, root intact
  • Lemon wedges, for serving

For the Marinade

  • 2 medium yellow onion, peeled and cut into large chunks
  • 10 garlic cloves, peeled and smashed
  • 2 tsp. allspice
  • 1 tsp. nutmeg
  • 1 tsp. cardamom
  • 1 cup packed fresh parsley leaves
  • 2⁄3 cup extra virgin olive oil
  • Juice and zest of 1 lemon

Directions

  1. Cut the lamb into 1 to 1 ½ -inch cubes or pieces and put them in a large ziploc. Season with kosher salt and black pepper.
  2. In the bowl of a food processor fitted with a blade, combine the onion, garlic, spices, parsley, olive oil and lemon juice and zest. Cover and run the processor until everything is finely chopped (you should end up with a thick onion marinade).
  3. Divide the mixture into three equal portions and pour the first over the lamb and mix well to make sure all the lamb is well coated with the marinade. Repeat with the other two bags of veggies.
  4. Cover and refrigerate all 3 bags for up to 2 hours. (If you do not have time, leave the kebabs to marinate at room temperature for about 30 minutes).
  5. Brush the grates of a gas grill (or an indoor griddle) with oil and heat.
  6. Shake excess marinade off and thread the lamb pieces on some long metal skewers, allowing a little room between pieces. (Flat metal skewers are best, but wooden skewers soaked in water will also work).
  7. Repeat with the tomatoes and mushroom caps, and then the bell pepper and onion pieces.
  8. Assemble the bell pepper/onion skewers on the hot grill first. After 10 minutes, add the tomato skewers. Turn all skewers every few minutes as they begin to char.
  9. After five minutes more, add the lamb kebabs. Grill over high heat, turning each kabob one-quarter turn every couple minutes, until the meat is browned all over, anywhere from 5 to 7 minutes, depending on how well you like your lamb cooked (5 minutes on our grill produced medium-rare kebabs).
  10. Remove all skewers at the same time. Slide all contents onto a large platter and pass around to each dinner guest. Plate with couscous, if using, and lemon wedges.

http://www.lynnandruss.com

[/recipe]

Loosely adapted from a recipe by The Mediterranean Dish

Spice-Rubbed Pork Tenderloin with Fennel, Tomatoes, Artichokes, and Olives

Another one-pan wonder, and who doesn’t like that for ease of clean-up and prep? It works as well for company as it does for a weeknight dinner. According to ATK’s “Complete Mediterranean Cookbook”, cooking the tenderloins until buttery-smooth is key, and roasting them atop a bed of vegetables buffers the heat to ensure juicy meat all the way through, which is rubbed with herbes de Provence, salt, and pepper.

The Mediterranean seasoning inspired the selection of vegetables: sweet, delicately flavored fennel, earthy artichoke hearts (frozen, to keep things easy), and briny olives (which I doubled the quantity). After softening the fennel in the microwave, it was tossed with the other vegetables and olive oil, and the mixture was spread into the roasting pan (or rimmed baking sheet), placing the tenderloins on top.

The vegetables are nearly cooked when the pork is done, so remove the meat to a moated cutting board and tent with foil. To the cooked veggies, add in juicy halved cherry tomatoes and lemon zest, and let them finish in the oven. After 10 minutes, the fennel should be tender, the tomatoes softened and releasing their juices.

NOTE: If using frozen artichoke hearts, be sure to thoroughly thaw and pat them dry; otherwise their moisture will inhibit the browning of the roasted vegetables.

Spice-Rubbed Pork Tenderloin with Fennel, Tomatoes, Artichokes, and Olives

  • Servings: 4-6
  • Difficulty: easy
  • Print

Ingredients

  • (12- to 16-oz.) pork tenderloins, trimmed
  • 2 tsp. herbes de Provence
  • Salt and pepper
  • 2 large fennel bulbs, stalks discarded, bulbs halved, cored, and cut into ½-inch-thick strips
  • 12 oz. frozen artichoke hearts, thawed and patted dry
  • ½ cup pitted kalamata olives, halved
  • 3 Tbsp. extra-virgin olive oil
  • 18 oz. cherry tomatoes, halved
  • 1 Tbsp. grated lemon zest
  • 2 Tbsp. minced fresh parsley

Directions

  1. Adjust oven rack to lower-middle position and heat oven to 450 degrees. Pat pork dry with paper towels and season with herbes de Provence, ½ teaspoon salt, and ¼ teaspoon pepper.
  2. Combine fennel and 2 tablespoons water in bowl, cover, and microwave until softened, about 5 minutes; drain well. Toss drained fennel, artichokes, olives, and oil together in bowl and season with salt and pepper.
  3. Spread vegetables into 16 by 12-inch roasting pan and lay pork on top, tucking under the thin part of the tail. Roast until pork registers 140 to 145 degrees, 25 to 30 minutes, turning tenderloins over halfway through roasting.
  4. Remove pan from oven. Transfer pork to cutting board, tent loosely with aluminum foil, and let rest for 10 minutes. Meanwhile, stir cherry tomatoes and lemon zest into vegetables and continue to roast until fennel is tender and tomatoes have softened, about 10 minutes.
  5. Remove pan from oven. Stir parsley into roasted vegetables. Slice pork into ½-inch-thick slices, and arrange vegetables and sliced pork on a platter, pouring any accumulated meat juices back over the plated pork and vegetables.

http://www.lynnandruss.com

Recipe from America’s Test Kitchen