Monthly Archives: July 2025

Curried Salmon and Tomato Traybake

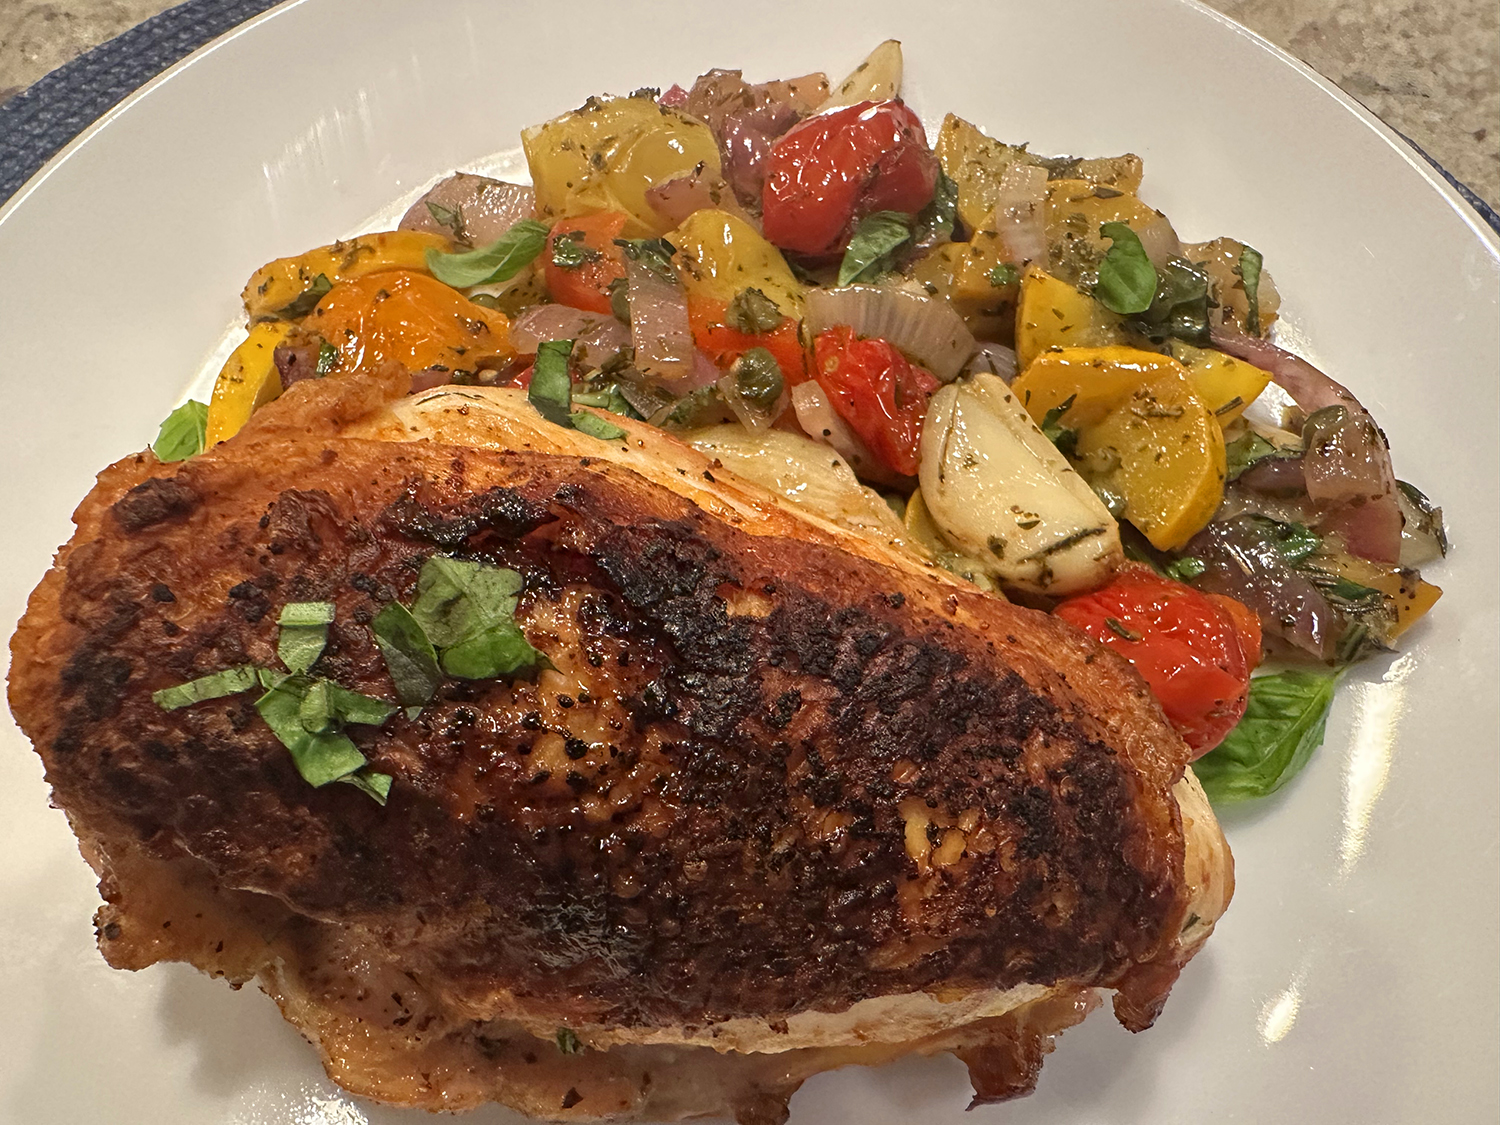
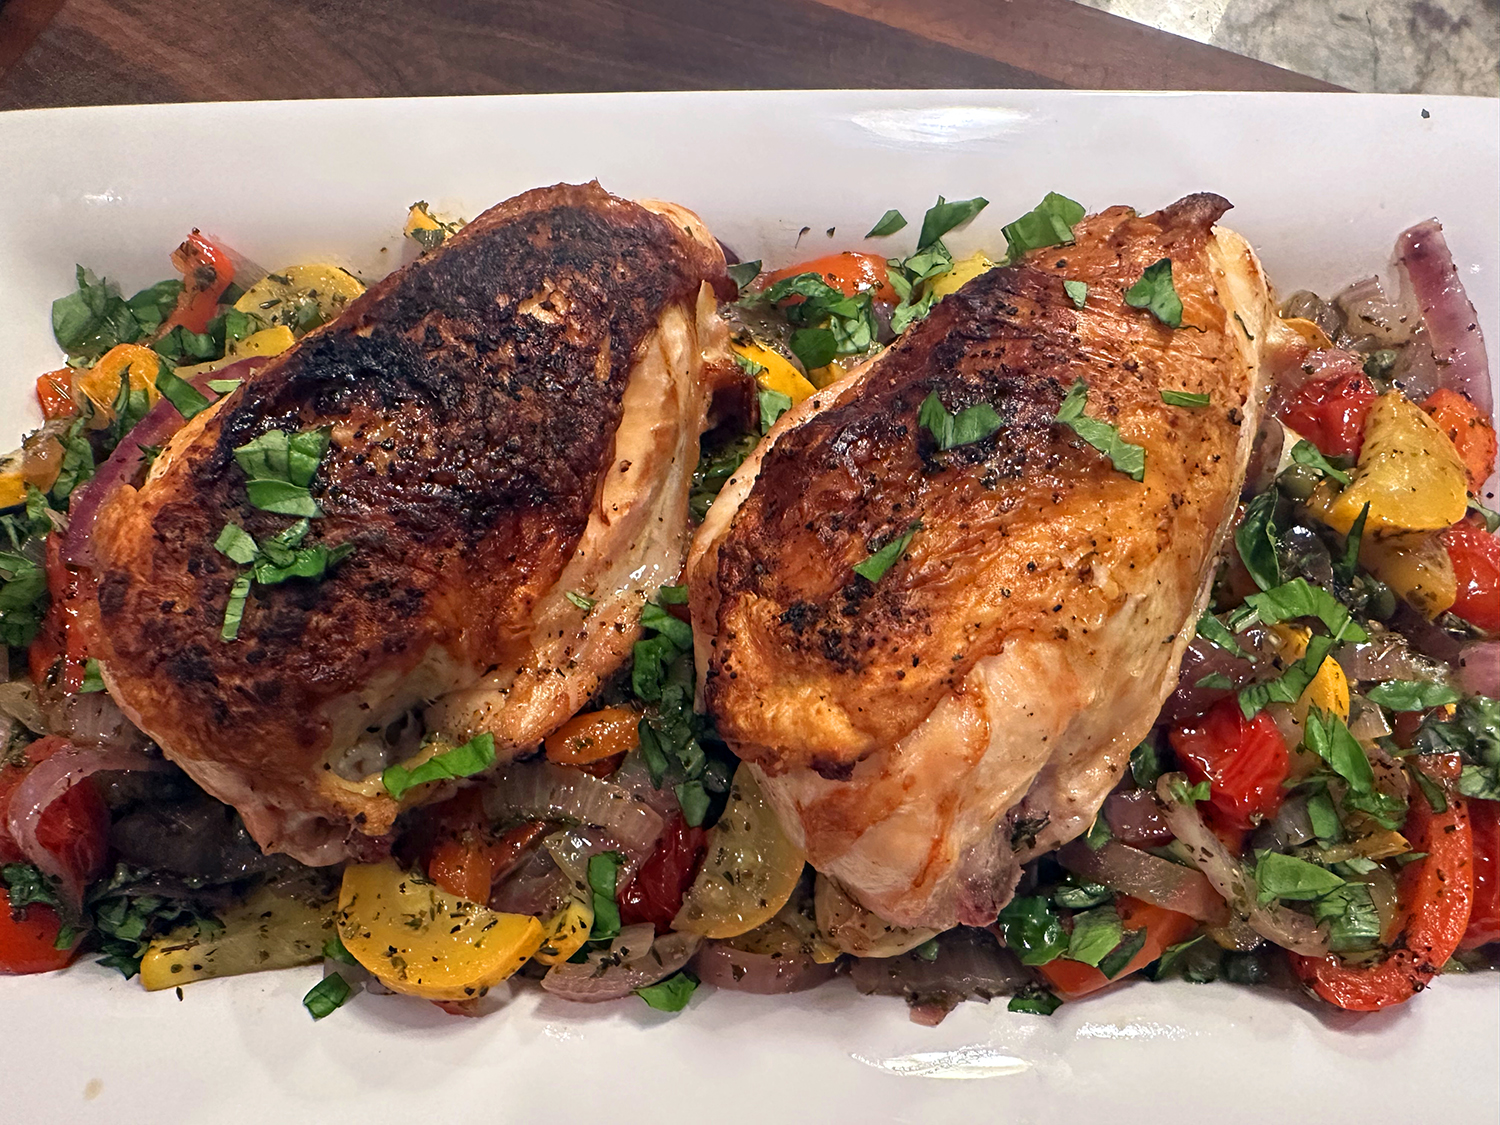
This Curried Salmon and Tomato Traybake recipe is packed with lean protein, vegetables, and healthy fats from the salmon. The salmon fillets nestled on top of a bed of roasted red onions, bursting cherry tomatoes and a curry-inspired sauce, all roasted together in a single baking dish.

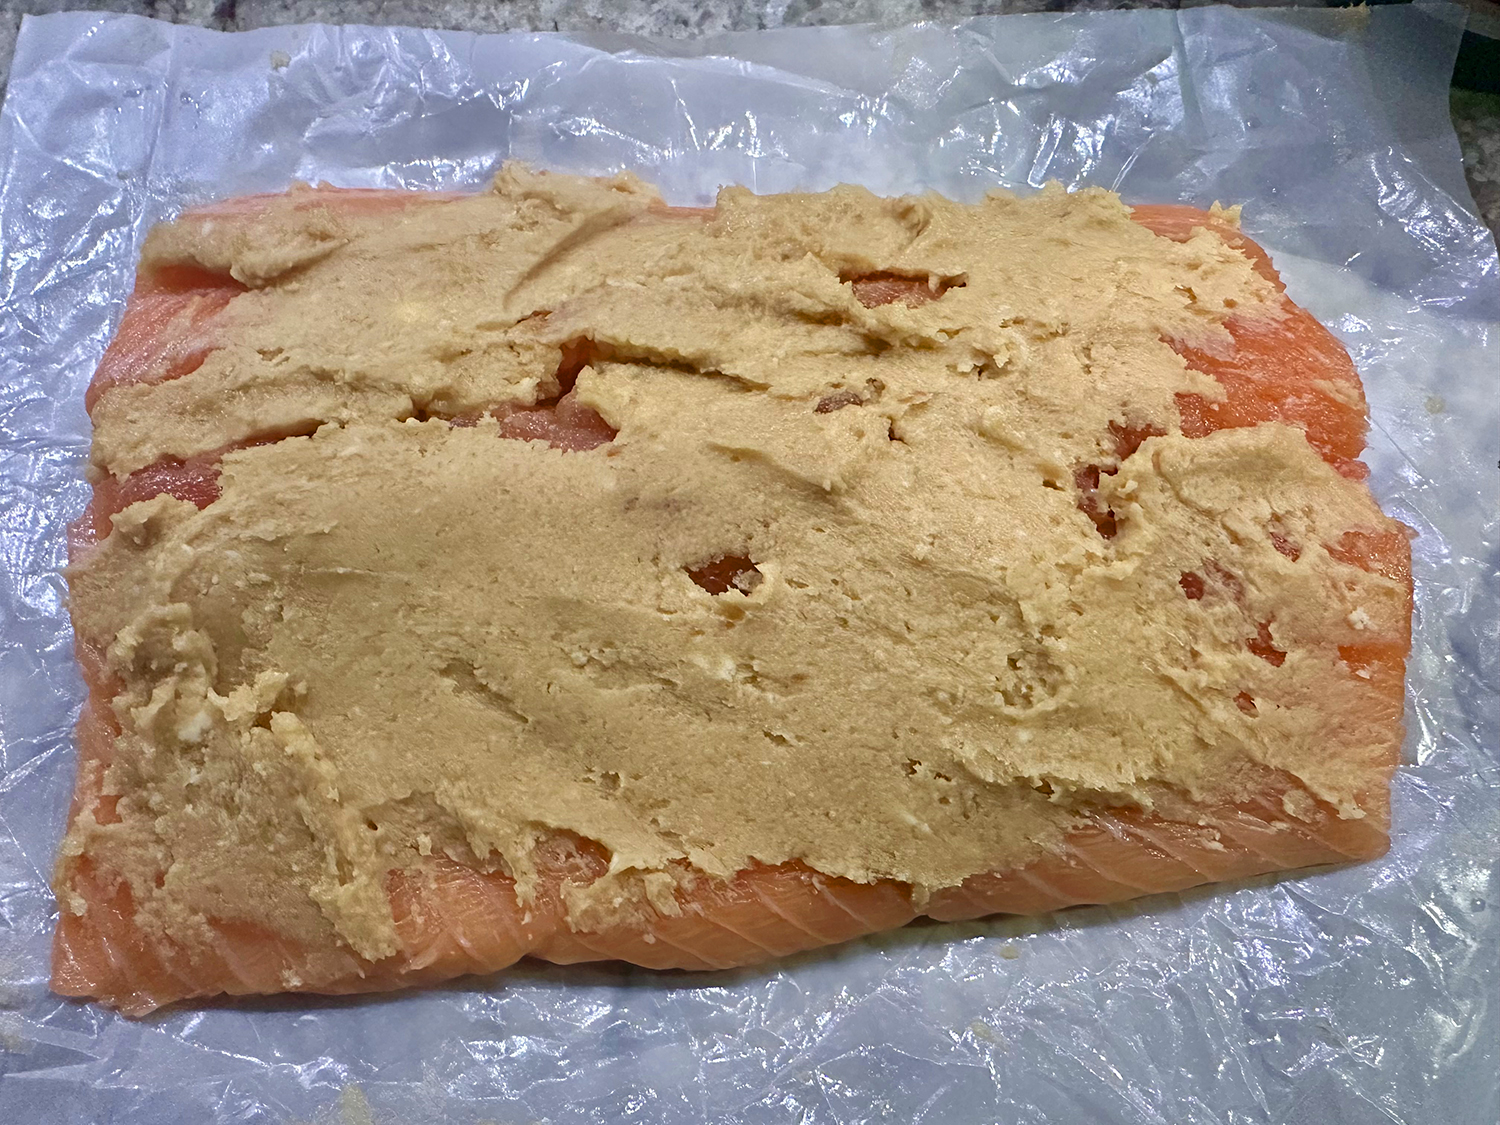
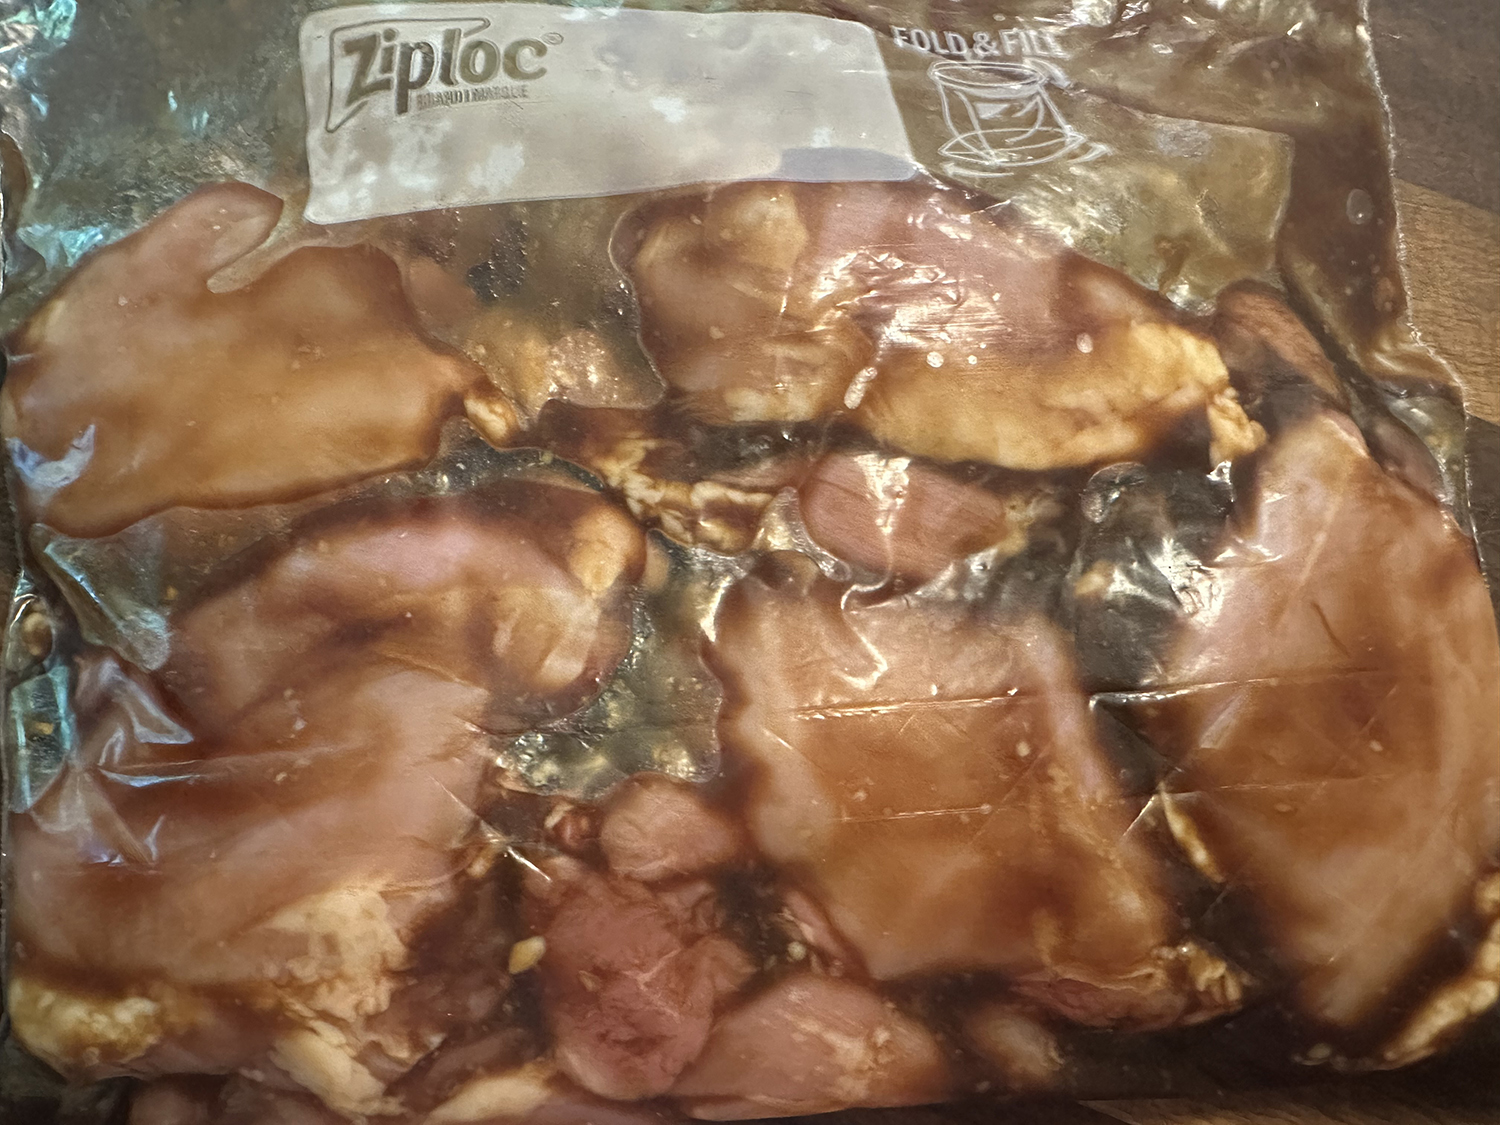
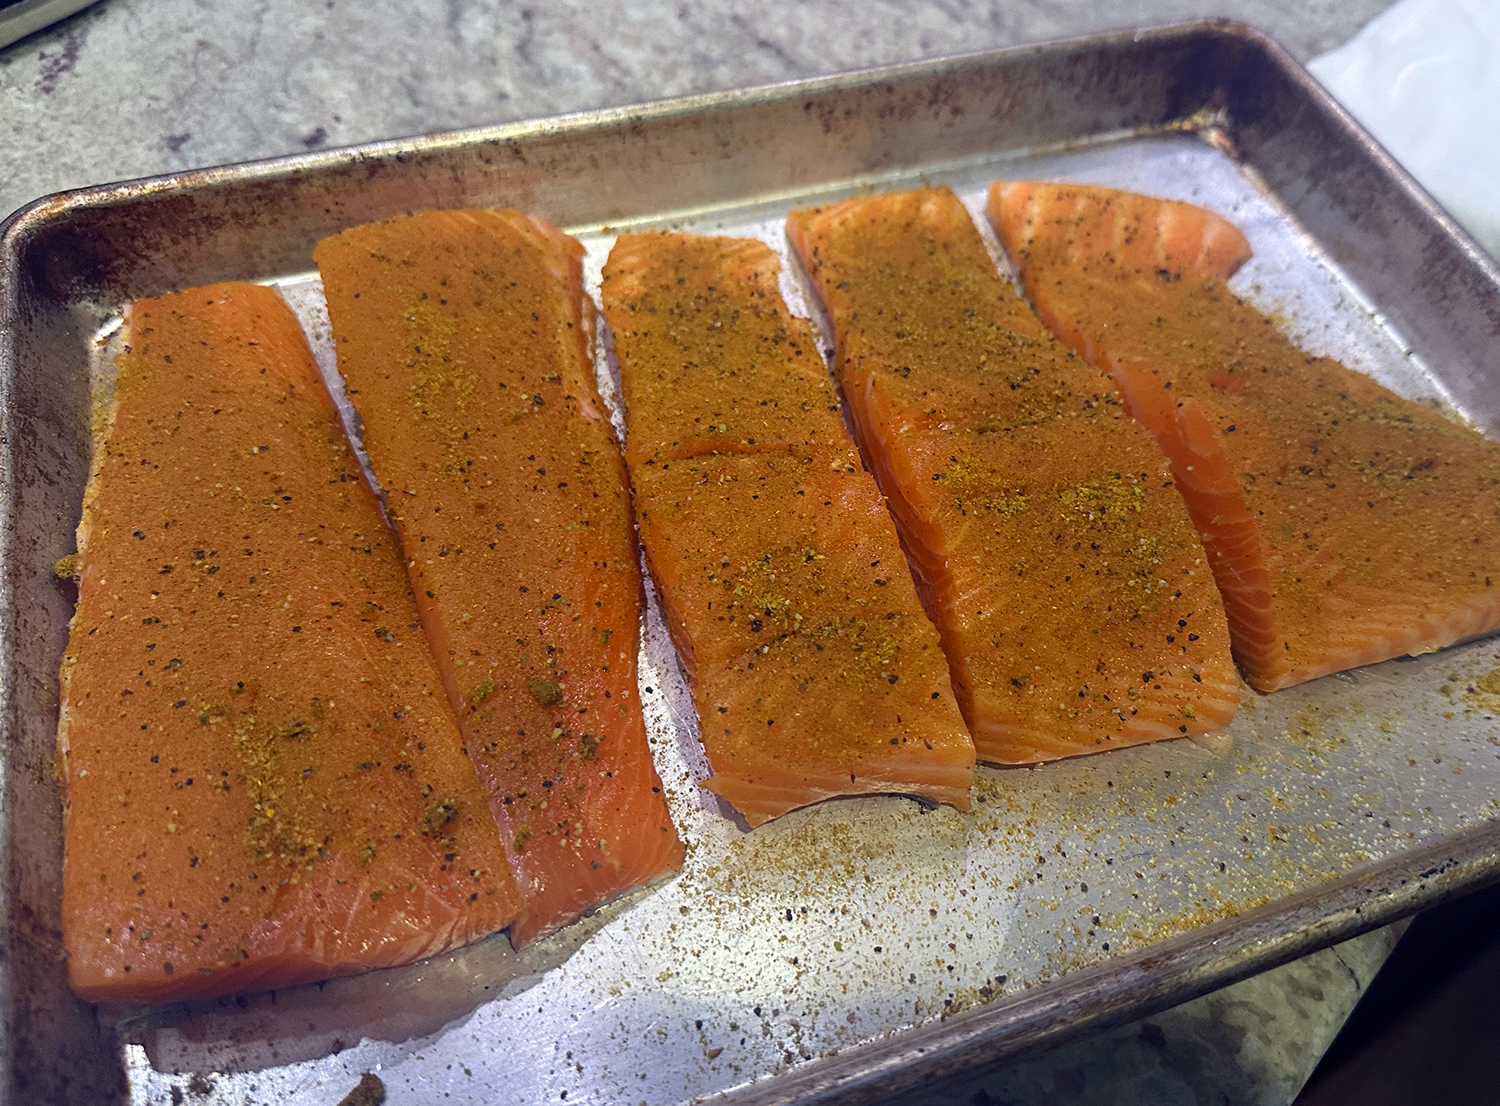
For the salmon, our only option at shopping time was to purchase two separate prepackaged filets which we then cut down into 5 equal-sized pieces. In the end, it was a bit more fish than the recipe called for, but we were more than fine with that.

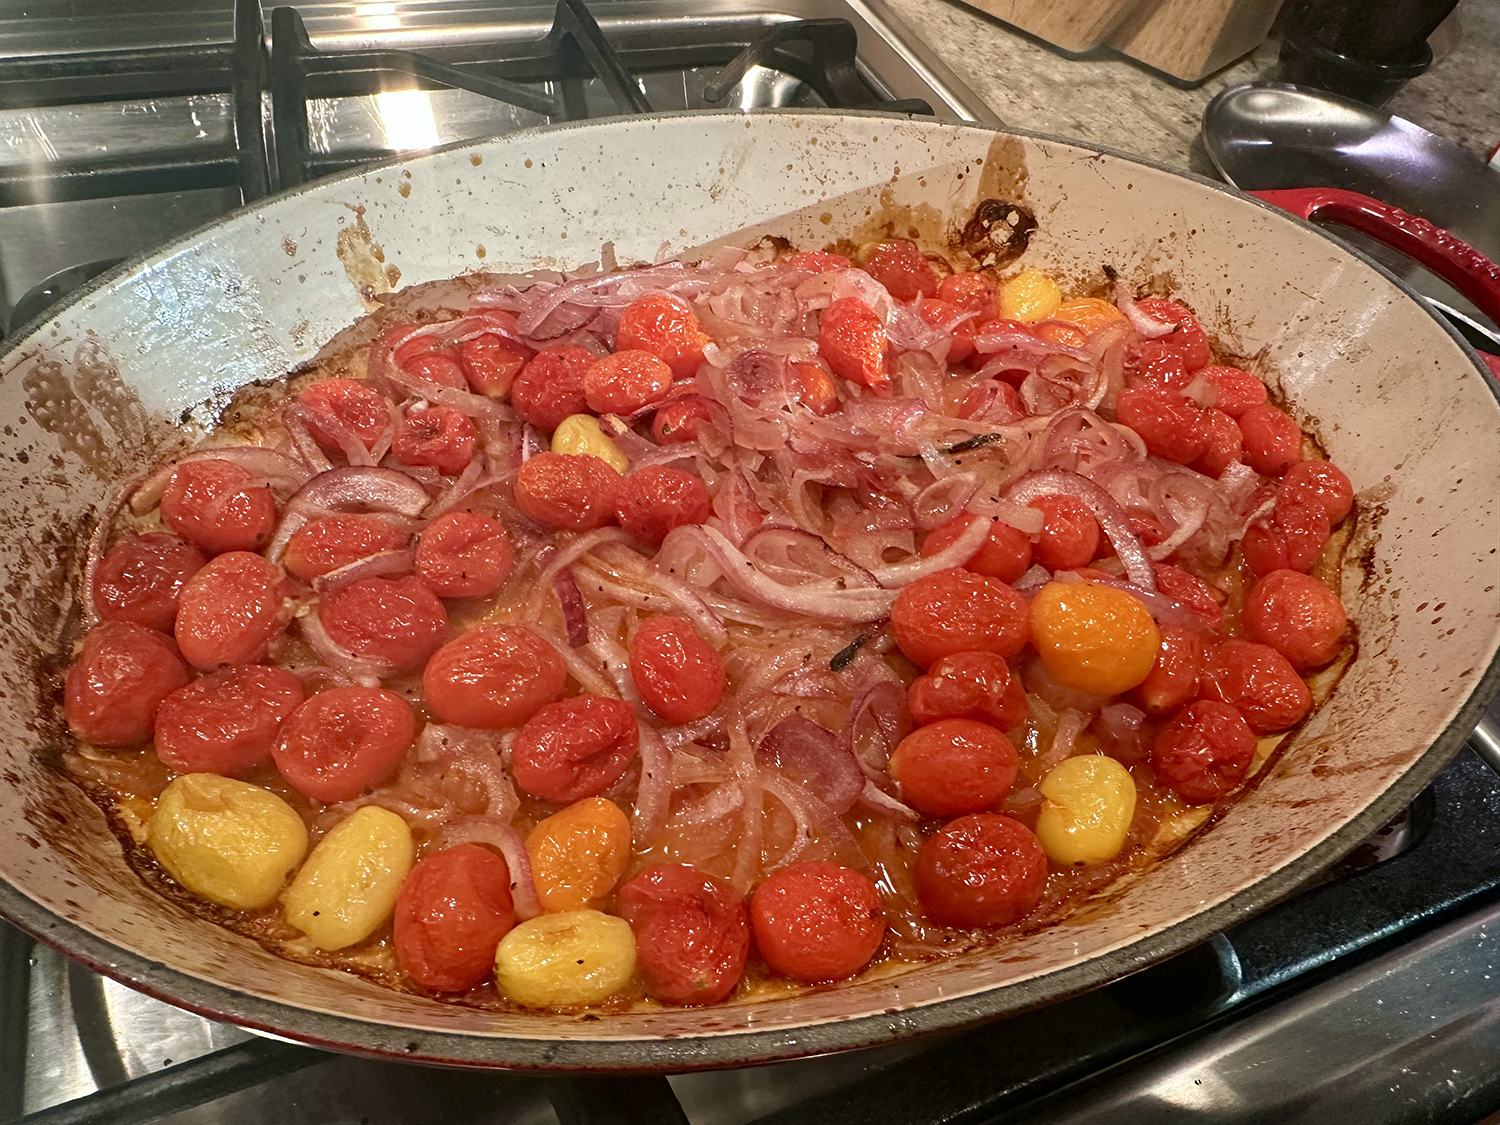
The timing was off when blistering the tomatoes, which took an additional 10 minutes on top of the 15 minutes indicated in the directions. Also, we have a gas broiler which always takes slightly longer to brown efficiently compared to an electric oven broiler.

NOTE: Make sure to use a broiler-safe dish such as copper enamel. Glass baking dishes usually shatter at such high heat.

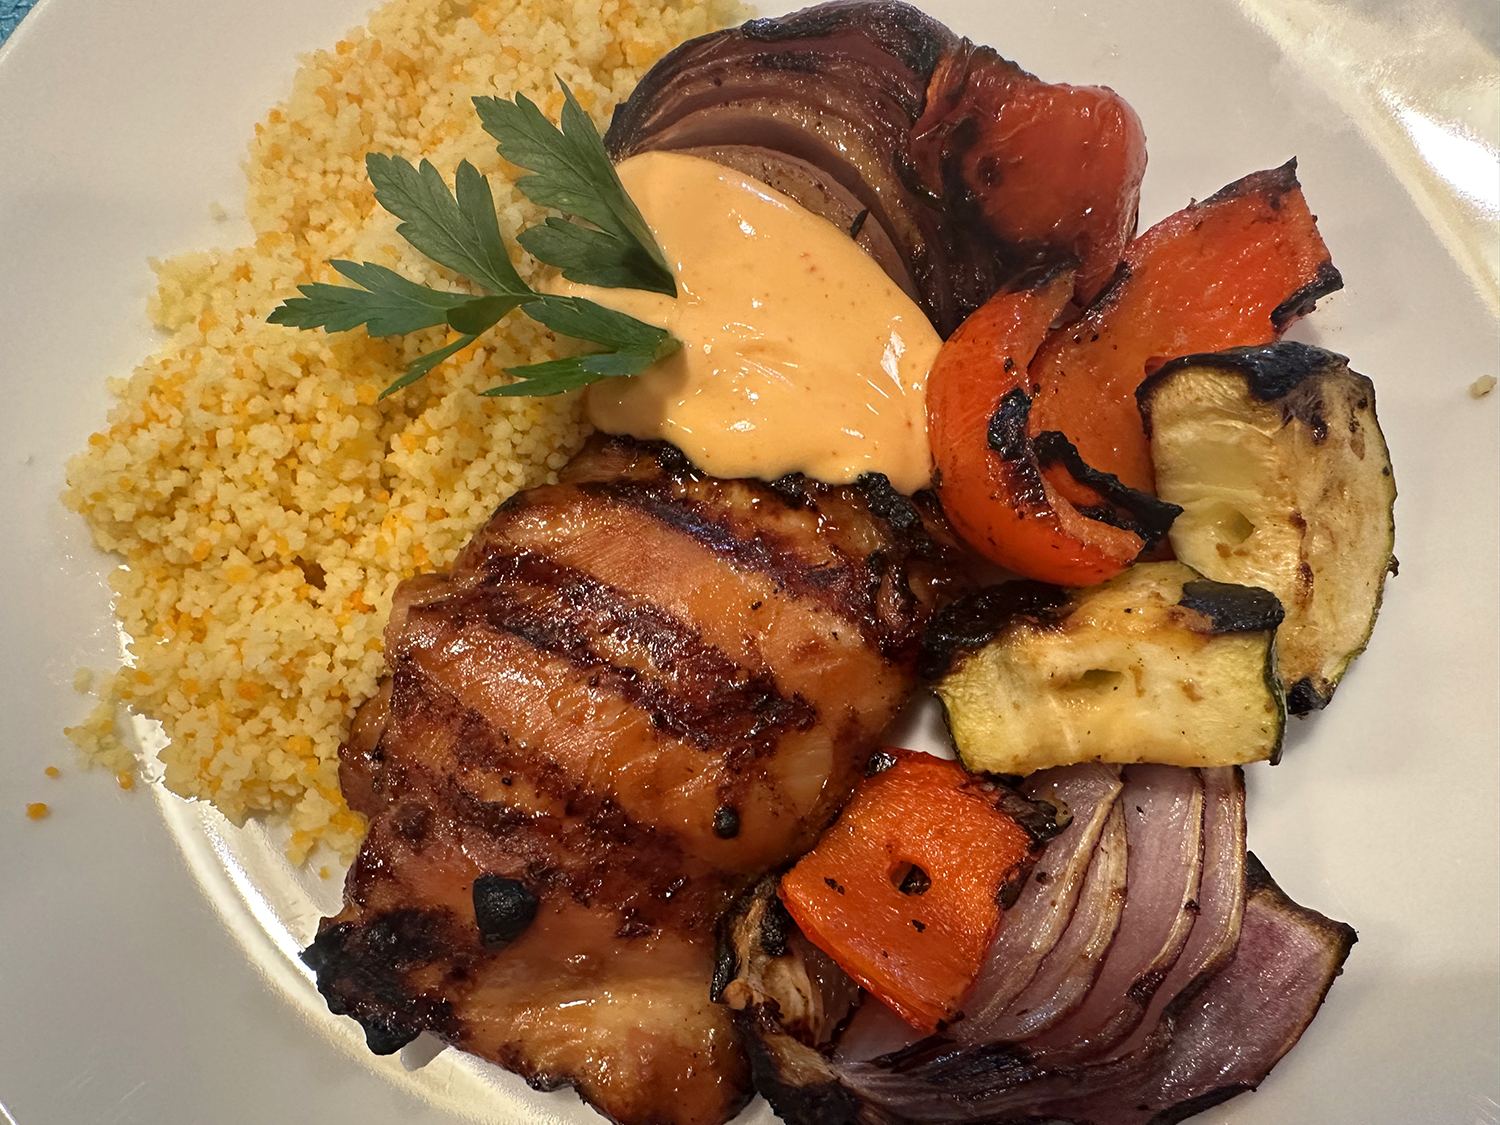
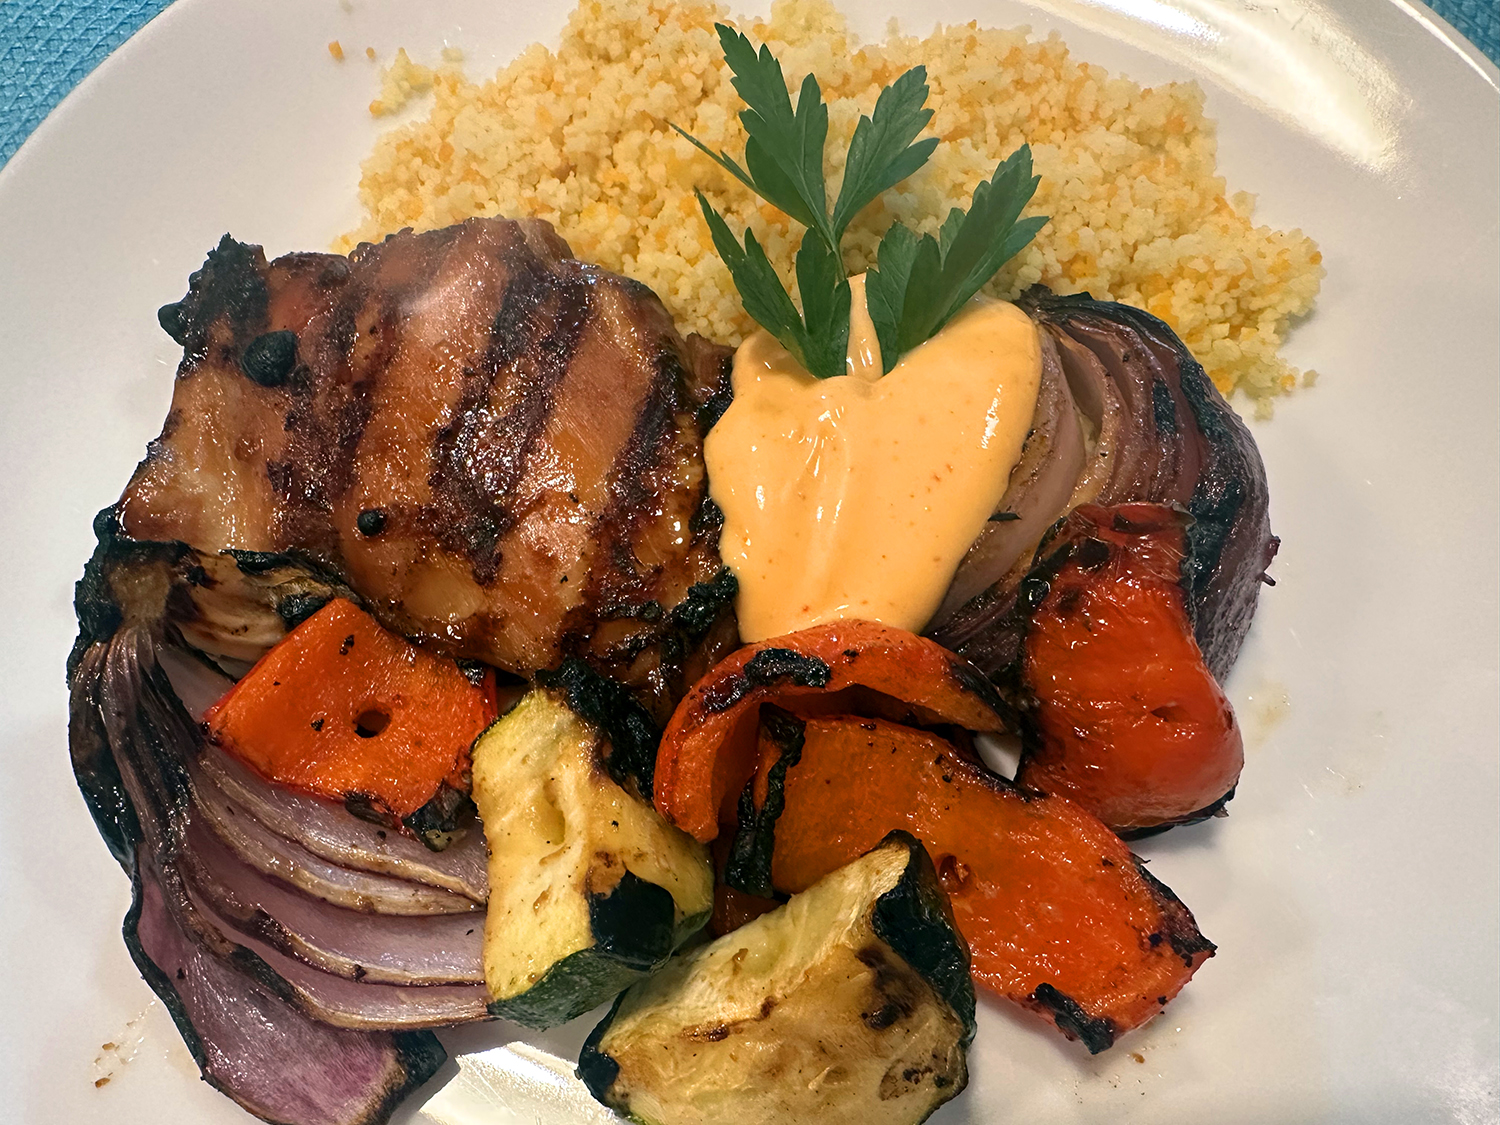
As a side, we paired with tricolor couscous using homemade shellfish stock as opposed to water for a more substantial flavor.

Curried Salmon and Tomato Traybake

  • Servings: 4
  • Difficulty: easy
  • Print

Ingredients

  • 1 tsp. curry powder
  • Kosher salt and ground black pepper
  • 4 x 6-oz. center-cut salmon fillets (each 1 to 1¼ inches thick), patted dry
  • 1 medium red onion, halved and thinly sliced
  • 1 pint cherry or grape tomatoes
  • 4 Tbsp. extra-virgin olive oil, divided
  • 2 Tbsp. tomato paste
  • 1 tsp. ground coriander
  • 2 Tbsp. lemon juice, divided, plus 1 tablespoon grated lemon zest
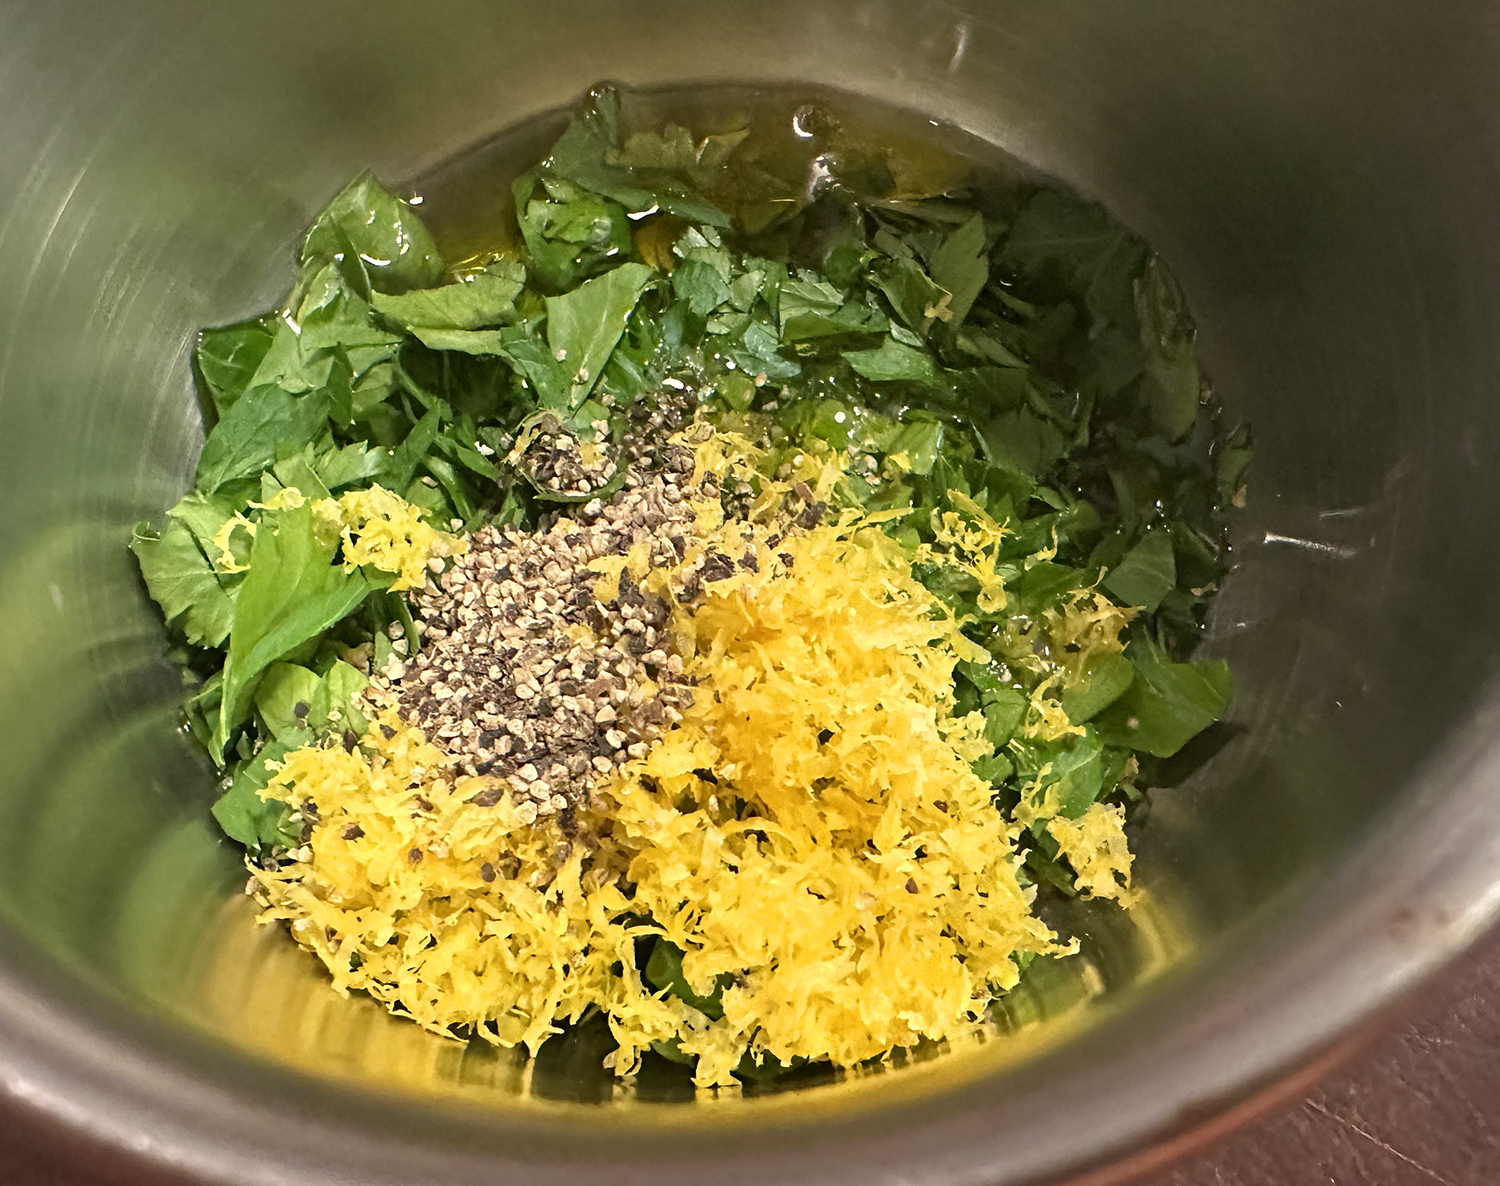
  • ¼ cup fresh flat-leaf parsley, finely chopped

Directions

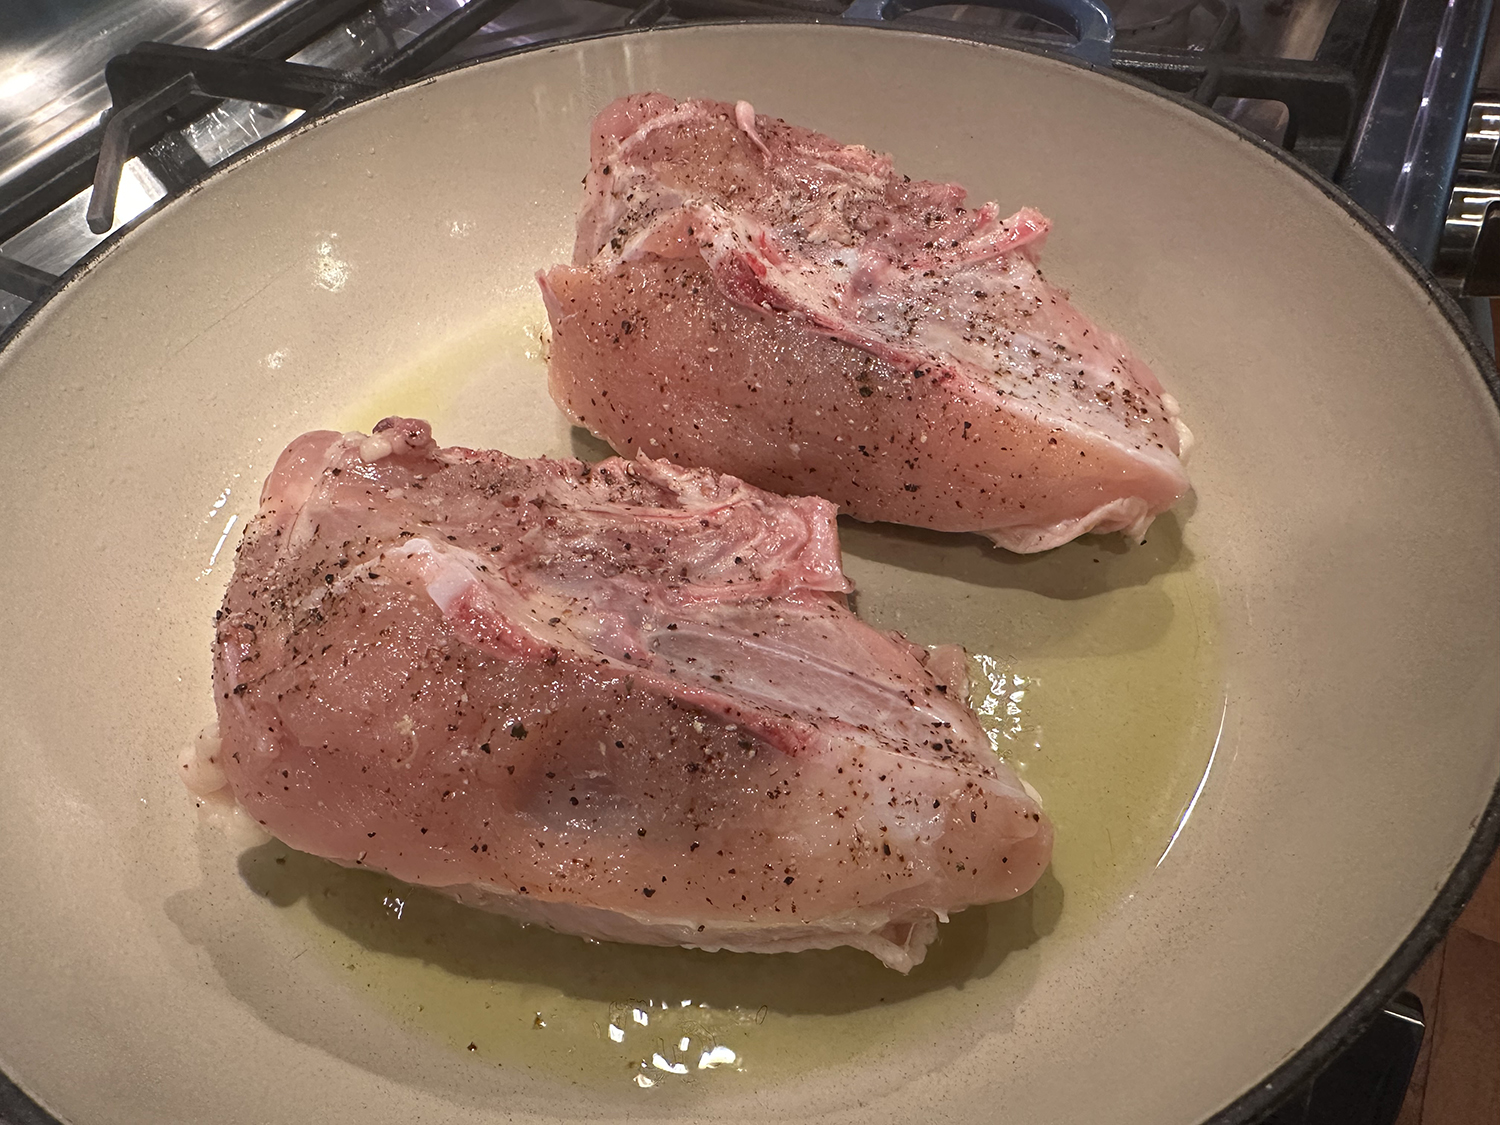
  1. Heat the oven to 475° F with a rack in the upper-middle position. In a small bowl, stir together the curry powder, ½ teaspoon salt and ¼ teaspoon pepper. Season the salmon all over with the mixture; reserve the bowl.
  2. In a broiler-safe 9-by-13-inch baking dish, stir together the onion, tomatoes, 2 tablespoons oil and ¼ teaspoon each salt and pepper. Roast until the tomatoes begin to burst, about 15 minutes. Meanwhile, in the now-empty bowl, whisk the tomato paste, coriander, 1 tablespoon lemon juice and ½ cup water. In another small bowl, stir together the parsley, the remaining 2 tablespoons oil, remaining 1 tablespoon lemon juice, lemon zest and ¼ teaspoon pepper.
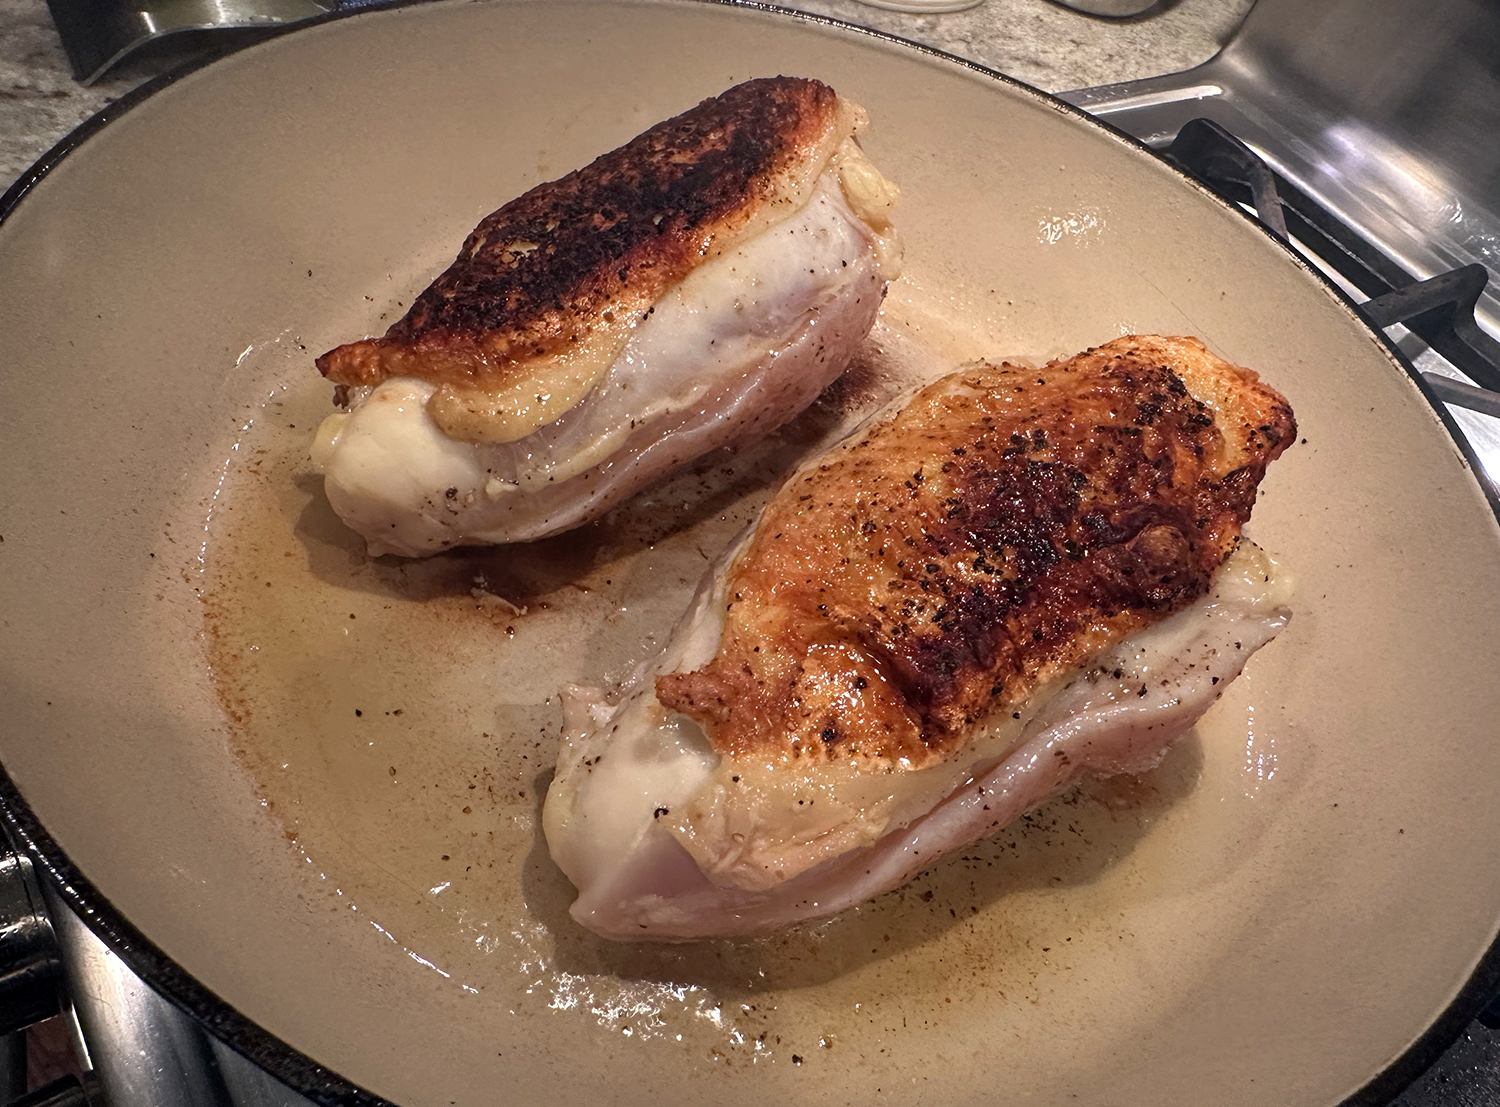
  3. Remove the baking dish from the oven; heat the broiler. Stir the tomato paste mixture into the onion-tomato mixture. Nestle in the salmon, skin side down, then spoon some of the onion-tomato mixture over the top. Broil until the fish flakes easily, 4 to 6 minutes.
  4. Cool for 5 minutes, then spoon on the parsley mixture.

http://www.lynnandruss.com

Adapted from a recipe by Milk Street

Easy Crunchy Asian Slaw

A simple healthy recipe for Asian Slaw – easy and crunchy, this vegan slaw can be made ahead and is packed full of flavor. It’s also a fantastic way to use up some of the stray veggies in the fridge—that remaining half cabbage, the lone carrot or parsnip, or the leftover bell pepper… you get the idea…

The Asian Slaw Dressing is the best! Not only is it made with accessible ingredients you most likely have in your pantry, but it also seems to have the right balance of sweetness, tartness, and depth with just a little heat. And of course, you can personalize it even further to your own tastes.

The slaw recipe will keep up to 4 days in an airtight container in the refrigerator. You can prep the cabbage up to 3 days ahead as well as the dressing and toss before serving—leaving the sesame seeds off until serving.

We served our slaw as a side to stir-fried Ginger Beef.

Easy Crunchy Asian Slaw

  • Servings: 6
  • Difficulty: easy
  • Print

Ingredients

  • 2 – 2 1/4 lb cabbage – shredded-roughly 6-7 cups
  • 3 scallions, sliced
  • 1 cup cilantro, chopped (or sub Italian Parsley)
  • 1/2 toasted cashews, chopped, optional

Asian Slaw Dressing

  • 3 Tbsp.olive oil
  • 1–3 tsp. toasted sesame oil
  • 1/4 cup rice wine vinegar
  • 3 Tbsp. sugar, maple syrup, honey, or coconut sugar
  • 1 Tbsp. soy sauce
  • 1 Tbsp. fresh ginger, grated, or use ginger paste
  • 1 garlic clove, grated or use garlic paste (garlic is optional, adds punchy flavor)
  • 1/2 tsp. salt
  • 1/2 tsp. chili flakes or chili paste, optional

Directions

  1. Toss slaw ingredients together in a large bowl. Add cilantro and scallions.
  2. Whisk Asian Slaw Dressing ingredients together in a small bowl.
  3. Pour dressing into slaw and toss well. Taste, adjust salt, honey and sesame oil to taste.
  4.  Garnish with sesame seeds and/or nuts.

http://www.lynnandruss.com

Adaptable recipe from feastingathome.com

Pork-and-Mushroom Stuffed Zucchini Boats

A great keto-friendly, low-carb meal option from Food & Wine, these aromatic with garlic, scallions, and fish sauce, these zucchini boats are stuffed with juicy pork and mushrooms for a dish that’s light, satisfying, and packed with Vietnamese flavor. You can even make most of it a day ahead (which came in real handy when we went to make them).

It’s a fun and easy vegetable-and-meat dish that makes the most out of the bounty of farmers market squash. Reminiscent of a dumpling filling, the pork-and-mushroom stuffing has notes of ginger, garlic, and scallions.

Bouillon powder (although we used bullion paste) and fish sauce bring umami to the forefront. Salting and baking the scooped-out cavities of the zucchini help release excess moisture, creating a perfectly textured final dish.

If looking to amp up the meal, serve these stuffed zucchini boats with rice, and/or a side salad for a quick and delicious dinner. 

NOTE: If you don’t eat pork, you can easily swap it for an equal amount of ground beef or ground turkey in this recipe.

Pork-and-Mushroom Stuffed Zucchini Boats

  • Servings: 4
  • Difficulty: easy
  • Print

Ingredients

  • 2 12-oz. zucchini
  • 1/2 tsp. kosher salt
  • 2 Tbsp. neutral cooking oil, plus more for brushing
  • 1 (5-oz.) package sliced shiitake mushrooms, finely chopped
  • 1/4 cup thinly sliced scallion 
  • 1 Tbsp. finely chopped garlic (about 3 cloves)
  • 2 tsp. finely chopped fresh ginger, from 1-inch piece
  • 1 lb. ground pork
  • 1/4 cup chopped fresh cilantro, plus more for garnish
  • 2 Tbsp. fish sauce
  • 1 tsp. chicken bouillon granules
  • 1/2 tsp. black pepper

Directions

  1. Preheat oven to 425°F. Halve zucchini lengthwise; scoop the flesh from each half using a spoon or melon baller, leaving a 1/4- to 1/2-inch wall on the sides and base. Set scooped flesh aside. Sprinkle cut sides with salt, and place zucchini, cut side down, on a paper towel–lined plate. Let stand for 20 minutes.
  2. Meanwhile, heat oil in a large skillet over medium-high. Add mushrooms, and cook, stirring occasionally, until tender and browned, 4 to 5 minutes. Add scallion, garlic, ginger, and reserved zucchini flesh; cook, stirring often, until softened and the released liquids evaporate, 3 to 5 minutes. Add pork; cook, stirring occasionally to break meat into fine crumbles, until browned, 6 to 8 minutes. Remove from heat, and let cool for 5 minutes.
  3. Pat zucchini halves dry, and lightly brush with oil. Arrange zucchini, cut sides down, on an aluminum foil–lined baking sheet. Bake until the zucchini begins to soften, 8 to 10 minutes; remove from oven. Increase oven temperature to broil.
  4. Stir cilantro, fish sauce, bouillon, and pepper into pork mixture. Fill each zucchini cavity with pork mixture (about 2/3 cup per half); firmly press mixture into zucchini. Place on an aluminum foil–lined baking sheet, and broil until browned on top, 2 to 3 minutes. Let cool slightly, about 3 minutes. (With an electric oven, in order to get a little brown crisp on top, it took several minutes longer under the broiler.) Serve zucchini hot, garnished with additional cilantro and/oror scallion slices.

http://www.lynnandruss.com

Adapted from a recipe by Cường Phạm for Food & Wine

Blueberry Pie Bars

Need a summery dessert for a party/picnic? In my mind, anything with blueberries is a sure bet. The Hubs happened to mention he just came across this recipe earlier in the day and thought it might be just the dessert I was looking for to bring to a garden luncheon. Indeed it was!

“At first glance, these bars may look like every other fruit crumble bar you’ve had, but they have a secret. Between the jammy fruit and buttery shortbread is a bonus layer of sweetened cream cheese you never knew you needed until now.”

Did you know wild blueberries are less watery than conventional blueberries and have a more concentrated blueberry flavor? They are available frozen and need not be thawed before using, but you can use whichever variety you find. These bars will be delicious no matter what. For a bright note, I incorporated fresh zest from half of a large lemon into the cream cheese filling.

There are so many store-bought shortbread cookie varieties to choose from, and they make the recipe easier than making shortbread from scratch. But if that’s your thing, by all means, go for it. You’ll need about 1 pound total of shortbread cookies such as Lorna Doone, Walkers, Kirkland brand, Trader Joe’s Vanilla Wafers, etc.

I let them cool completely on the rack (about 3-4 hours). Then I wrapped the pan with plastic wrap and refrigerated the pan overnight before slicing the 2 edges along the glass with a knife to loosen, lifting them out with the parchment overhang, then cutting into 16 even squares.

Blueberry Pie Bars

  • Servings: 16 squares
  • Difficulty: easy
  • Print

Ingredients

For the Crust:

  • 10 ⅔ oz. shortbread cookies (2, 5.3-oz packages)
  • 3 Tbsp. granulated sugar
  • 1 Tbsp. all-purpose flour
  • ½ tsp. kosher salt
  • 4 Tbsp. unsalted butter (½ stick), melted

For the Fillings:

  • 8 oz. cream cheese, at room temperature
  • 1 tsp. lemon zest
  • ¼ cup plus ⅓ cup granulated sugar
  • 1 large egg
  • 3 cups (12 oz.) wild blueberries, fresh or frozen, but not thawed
  • 1 Tbsp. cornstarch
  • Pinch of kosher salt

For the Topping:

  • 5 ⅓ oz. shortbread cookies (1, 5.3-oz. package)
  • 1 Tbsp. all-purpose flour
  • ¼ tsp. kosher salt
  • ½ tsp. baking powder
  • 1 Tbsp. granulated sugar
  • 2 Tbsp. unsalted butter, at room temperature
  • 1 large egg yolk

Directions

  1. Heat oven to 350 degrees. Line a 9-inch square pan with parchment paper, leaving a 2-inch overhang on two sides. In a food processor, combine shortbread cookies, sugar, flour and salt and pulse until you have fine crumbs. Add butter and pulse until crumbs are evenly moistened. Transfer mixture into the prepared pan and press down into an even layer. Bake until fragrant and a shade darker, about 20 minutes.
  2. Meanwhile, prepare filling: In a medium bowl, add cream cheese, lemon zest, ¼ cup of sugar and 1 egg and mix until smooth. In a separate medium bowl, add blueberries, remaining ⅓ cup sugar, cornstarch and salt, and toss to combine.
  3. Prepare topping: In a food processor, combine shortbread, flour, salt, baking powder and sugar and pulse to combine. Add butter and egg yolk, and pulse until the mixture is evenly moistened.
  4. Remove crust from oven and top it evenly with cream cheese mixture and then blueberry mixture. Sprinkle topping over blueberry layer, squeezing to make some larger clumps. Bake until filling is set and no longer jiggly, 35 to 40 minutes. (It took 50 minutes for ours to gel.) Transfer to a rack to cool completely then chill (another 3 to 4 hours), then in the refrigerator for at least 1 hour, up to overnight.
  5. To serve, use a sharp knife to release edges. Using parchment overhang, lift and transfer to a cutting board and cut into 16 squares.

http://www.lynnandruss.com

Adapted from a recipe by Samantha Seneviratne for NYTimes Cooking

Orecchiette Salad with Roasted Vegetables, Chicken and Jalapeño-Lime Dressing

For a pasta salad that could serve as a main course, some of the pasta is swapped out for chicken, roasted corn and zucchini. Orecchiette works great because its little cup shapes are perfect for holding dressing. The pasta is cooked until it is a little too soft so that as it cools and firms up, it has just the right tender texture.

Because a classic thin vinaigrette would slide to the bottom of the bowl, it is thickened by blending it with pickled jalapeños and scallion whites. Add some crunch with bits of carrot and sliced radish, then top with cilantro leaves and scallions to contribute color and fresh herbal notes.

NOTES: For convenience, a store-bought rotisserie is the way to go. And, the pasta is intentionally overcooked in this recipe so that it remains tender, even when served cold. If making this salad ahead, dress the salad and garnish it with the reserved cilantro right before serving.

There is a fair amount of prep, and it easily took closer to an hour than the 45 minutes suggested in the original recipe. Since good fresh corn was available at farm stands, we used that instead of frozen corn. Just slice the kernels off the cob, and mix with the cut zucchini.

It may seem like a lot of jalapeños, but we found it to be just right. The quantity is versatile, so add or subtract the pickled chile to suit your own preferences.

Orecchiette Salad with Roasted vegetables, chicken and Jalapeño-Lime Dressing

  • Servings: 4-6
  • Difficulty: easy
  • Print

Ingredients

  • 1 lb. zucchini, quartered lengthwise and sliced ¼ inch thick
  • 1½ cups fresh or frozen corn kernels
  • 2 Tbsp. plus
  • ½ cup vegetable oil, divided
  • 1½ tsp. table salt, divided, plus salt for cooking pasta
  • 8 oz. (2¼ cups) orecchiette
  • ⅓ cup plus ¼ cup jarred sliced jalapeños, drained, divided
  • 4 scallions, white parts sliced thin, green parts cut into 1-inch pieces
  • ¼ cup lime juice (2 limes)
  • 1 lb. cooked chicken, torn into bite-size pieces (3 cups)
  • ¾ cup fresh cilantro leaves, divided
  • 8 radishes, trimmed, halved, and sliced thin
  • 1 large carrot, peeled and shredded

Directions

  1. Arrange oven rack 4 inches from broiler element and heat broiler. Combine zucchini, corn kernels, 2 tablespoons oil, and ½ teaspoon salt in large bowl and toss to coat. Transfer to rimmed baking sheet (do not wash bowl) and spread into even layer. Broil until spotty brown in places, 8 to 10 minutes, stirring halfway through broiling. Transfer sheet to wire rack to cool.
  2. Meanwhile, bring 2 quarts water to boil in large saucepan. Add pasta and 1½ teaspoons salt and cook until pasta is tender throughout, 2 to 3 minutes past al dente. Drain well and rinse with cold water. Drain well and transfer to now-empty bowl.
  3. Process ⅓ cup jalapeños, scallion whites, lime juice, and remaining 1 teaspoon salt in blender until coarse paste forms, about 30 seconds. With blender running, drizzle in remaining ½ cup oil and continue to process until dressing is emulsified and smooth, about 1 minute.
  4. Chop remaining ¼ cup jalapeños and add to pasta along with chicken, ½ cup cilantro, radishes, carrot, zucchini and corn, and scallion greens. Pour dressing over salad and toss to coat. Transfer to serving bowl. Sprinkle with remaining ¼ cup cilantro and serve.

http://www.lynnandruss.com

Recipe by Andrea Geary for America’s Test Kitchen

Hunan Pork and Tofu Spicy Stir-Fry

An easy and tasty Hunan Pork and Tofu classic dish served at many Hunan restaurants throughout China and the US., and now you can create in your own home. Hunan-style food, like Sichuan food, features chilis and spice as a core flavor, and has really taken off in popularity in recent years as more Chinese immigrants and visitors make their way into all parts of America. 

According to Woks of Life where we got this dish, this Hunan Pork and Tofu recipe uses a liberal amount of oil (6 tablespoons), but you’ll notice that it’s lacking the strong/visible greasiness that you might see in Chinese restaurants, thank goodness.

NOTES: We had two boneless pork loins, each weighing 8 ounces, we decided to use both thus increasing the amount of pork from 10 ounces to a total of 16*. Because of the additional protein, we upped the amount of some of the other ingredients. We also used extra-firm tofu.

Out of spicy bean sauce, we substituted gochujang. In most recipes, doubanjiang and gochujang are used in comparable ways. They both provide spicy hits to any meal. However, doubanjiang balances out that spiciness with savory flavors, while gochujang emits sweeter flavors to provide a similar balance. 

Hunan Pork and Tofu Spicy Stir-Fry

  • Servings: 4
  • Difficulty: easy
  • Print

Ingredients

For the pork and marinade:

  • 10 oz. pork (see above note*), sliced ⅛-inch thick
  • 2 Tbsp. water
  • 1 tsp. oil
  • 1 tsp. cornstarch

For the rest of the dish:

  • 6 Tbsp. vegetable or canola oil, divided
  • 1 lb. firm tofu, drained and cut into 2-inch squares, ½-inch thick
  • 1 tsp. ginger, minced
  • 2 Tbsp. spicy bean sauce (dou ban jiang)
  • 3 scallions, cut on an angle into 2-inch pieces
  • 2 tsp. fresh garlic, minced
  • 3 Tbsp. fermented black beans
  • 1 red bell pepper, cut into 1×2-inch pieces, about 1½ cups
  • 1 Tbsp. Shaoxing wine
  • ¾ tsp. sugar
  • ⅓ cup hot water or chicken stock
  • 1 tsp. cornstarch, mixed with 1 Tbsp. water

Directions

  1. In a bowl, add 2 tablespoons of water to the pork slices and massage until the pork absorbs all of the water. Next, add the oil and cornstarch, mix thoroughly until the pork is coated, and set aside.
  2. Heat your wok over high heat, and spread 2 tablespoons of oil around the wok to evenly coat the surface. Add the tofu slices to the wok in one layer, and let them sear. Don’t move them for a least 1 minute. Tilt your wok so the oil reaches the tofu on all sides. Add more oil if needed.
  3. After another 1 to 2 minutes, the tofu should be browned, and it should not stick to the wok. You may have use a metal spatula to loosen the pieces slightly. Turn down the heat, and carefully flip all of the tofu slices. After the tofu is golden brown on both sides, transfer to a plate. They should be much easier to handle now.
  4. Over high heat, add another 2 tablespoons of oil to your wok. When the wok just starts to smoke a bit, immediately add the pork. Spread the pork around the wok using your metal spatula, and let the meat sear for 20 seconds on one side. Stir fry for another 15 seconds, and scoop out the meat into your marinade bowl. It should be about 80% cooked.
  5. Using the same wok, turn the heat to low, and immediately add 2 tablespoons oil, the minced ginger, the spicy chili bean paste (doubanjiang), and the white parts of the scallions. Stir this mixture into the oil and let it fry at low heat for 15 seconds to infuse the oil and bring out a rich red color.
  6. Next, add the garlic, black beans, red bell peppers, and the rest of the scallions. Turn the heat to high, and give everything a good stir-frying for 45 seconds. The red pepper will sear and add more natural red color to this dish.
  7. Add the pork and juices from your marinade bowl and the tofu back to the wok. Next, spread 1 tablespoon of Shaoxing wine around the perimeter of the wok, add the sugar, and continue to stir-fry for 15 seconds. Be gentle so you don’t break up the tofu.
  8. After another 15 seconds of stir-frying, spread the hot chicken stock or water around the perimeter of the wok to deglaze it. Continue to stir fry for another 30 seconds, being sure to spread the liquid to the sides of the wok to further deglaze it.
  9. At this point, you can continue to stir-fry the dish until most of the liquid is reduced, or add the water and cornstarch to thicken any standing liquid. Plate with steamed rice.

http://www.lynnandruss.com

Adapted from a recipe by Woks of Life

Chan Chan Yaki (Miso Butter Salmon)

Salmon is one of our go-to fish choices. And this one from NYTimes Cooking is a fabulous choice. It’s quick, easy, healthy, tasty and uses only one pan! What’s not to like?

According to Mia Leimkuhler, “Chan chan yaki, or miso butter salmon, is a classic dish from Hokkaido, Japan, a place known for its excellent salmon. The fish-and-vegetable dish is frequently made on a teppan (a large grill), with everything chopped and mixed with two metal spatulas that make the onomatopoetic “chan chan” sound.”

This clever version from Marc Matsumoto, the Tokyo-based blogger behind No Recipes, streamlines the dish for home cooking, calling for a lidded skillet and keeping the salmon in one large piece for easier preparation and presentation. You can replicate the chan chan action in your own bowl or plate, composing perfect bites of salmon, veggies and the miso butter sauce.

And the vegetables are flexible, with some delicious options being Shimeji mushrooms, bell peppers, corn or negi (long green onions). Unfortunately, we just totally forgot to purchase the enoki mushrooms. And the smallest head of green cabbage was huge, so we used only a portion of it.

BTW, you can ditch the salmon skin since the fish is just set atop the vegetables and not crisped in any fashion. Or, cut the skin off the filet and crisp it in a separate pan to add strips of the crispy skin as a garnish at the end.

Here’s a hack from The Hubs: Increase the sake to 3/4 cup. Use 1/4 cup in Step 4 to pour over the cooked veggies and deglaze the pan loosening all of those luscious browned bits. Cook, stirring until the sake nearly evaporates. Then use the remaining 1/2 cup in Step 5.

Chan Chan Yaki (Miso Butter Salmon)

  • Servings: 4
  • Difficulty: easy
  • Print

Ingredients

  • 1 (1¼-lb.) piece skin-on salmon fillet
  • ½ small head green cabbage, trimmed and cored
  • 2 large carrots
  • 1 medium yellow onion
  • 3½ oz. enoki mushrooms (optional)
  • ⅓ cup shiro (white) or tanshoku (yellow) miso
  • 3 Tbsp. unsalted butter, at room temperature
  • 1 Tbsp. sugar
  • 1 Tbsp. neutral oil
  • Salt and pepper, to taste
  • 3⁄4 cup dry (junmai) sake, divided
  • 2 scallions, thinly sliced
  • Steamed rice, for serving

Directions

  1. Remove the salmon from the fridge while you prep the vegetables: Chop the cabbage into 2-inch pieces (about 6 cups). Peel and cut the carrots on the diagonal into ½-inch coins (about 2 cups). Halve the onion and slice into ½-inch half moons (about 1½ cups). If using enoki mushrooms, trim the root end and separate them into large clusters.
  2. Make the miso butter: Combine miso, butter and sugar in a small bowl and stir until smooth and homogenous. (Miso butter can be made at least 3 days ahead and kept in the refrigerator; bring to room temperature before using.)
  3. Place the salmon on a plate, skin side down, and spread the miso butter in a thin layer on top, holding back about 2 tablespoons of miso butter for the vegetables.
  4. Heat a large, deep (lidded) skillet over medium-high. Add the oil and the cabbage, carrot, onion and enoki mushrooms (if using). Season the vegetables with salt and pepper (go lightly on the salt, since the miso butter is salty!) and cook, stirring frequently, until they begin to wilt but are still quite crisp, 5 to 8 minutes.
  5. Flatten the vegetables and place the salmon on top of them, miso side up. Dot the reserved miso butter on the vegetables (you may not need all of it) and pour the remaining sake over the vegetables. Place the lid on the pan, lower the heat to medium to maintain a strong simmer and cook for 7 to 10 minutes, until flaky and just cooked through in the center. (Exact time depends on the thickness of the salmon fillet and preferred level of doneness.)
  6. When the salmon has finished cooking, remove the lid and stir the vegetables around the salmon to mix them with the melted miso butter. Scatter the salmon with the chopped scallions and serve with rice.

http://www.lynnandruss.com

Recipe from Marc Matsumoto for NYTimes Cooking

Pan-Roasted Chicken and Summer Vegetables with Herbes de Provence

In this simple skillet dinner, the skin side of bone-in chicken breasts are seared, then roasted on top of a bed of sunny Mediterranean vegetables. Keep in mind, the recipe advises the use 12-ounce chicken breasts, using larger ones will require a longer cooking time and thus overcook the veggies. The only pieces available when we shopped weighed in at 18 ounces, 50% larger! (The first grocery store we visited, had no bone-in breasts at all.)

*The Hubs Hack: Because of the larger pieces, after browning the skin, we put the pan with the chicken skin side up in the pre-heated oven for 10 minutes before removing them and adding the vegetables. The breasts were then placed on top of the veggies and the skillet was returned to the oven until the chicken reached an internal temperature of 160°F., about 30 min. (Check temp after 20 minutes.)

Before cooking, the veggies are tossed with herbes de Provence, an aromatic seasoning blend that typically includes rosemary, thyme, savory, marjoram and oregano, and sometimes other spices and herbs such as fennel, sage, lavender and tarragon.

Dry vermouth, with its herbaceousness, is an ideal deglazing liquid for the browned bits left in the pan after searing the chicken, but dry white wine works, too. The vermouth and caper brines are important because they really help take this dish over the top and not just an average chicken and vegetable dish. We usually like thighs over breasts in similar recipes, but these turned out juicy with good crispy skin.

Another food item that the store was completely out of was zucchini, so we just substituted a yellow summer squash. And again, because of the enormous breast size, we roasted only two, which was still enough to feed four people.

Pan-Roasted Chicken and Summer Vegetables with Herbes de Provence

  • Servings: 4
  • Difficulty: easy
  • Print

Ingredients

  • 4 12-oz. bone-in, skin-on chicken breasts, trimmed of excess fat
  • Kosher salt and ground black pepper
  • 3 Tbsp. extra-virgin olive oil, divided
  • 2 Tbsp. herbes de Provence
  • 6 medium garlic cloves, smashed and peeled
  • 1 medium red onion, halved and sliced about ¼ inch thick
  • 1 yellow, orange or red bell pepper, stemmed, seeded, cut into ¼ slices
  • 1 pint grape tomatoes, uncut
  • 1 small zucchini, halved lengthwise and sliced crosswise ¼ inch thick
  • ¼ cup drained capers, plus 1 Tbsp. caper brine
  • ½ cup dry vermouth
  • 1 cup lightly packed fresh basil, torn (optional)

Directions

  1. Heat the oven to 475℉ with a rack in the middle position. Season the chicken on all sides with salt and pepper. In a large bowl, stir together 2 tablespoons of oil, the herbes de Provence, ¼ teaspoon salt and 1 teaspoon pepper. Add the garlic, onion, bell pepper, tomatoes, zucchini and capers, then toss to combine; set aside.
  2. In a 12-inch skillet oven-safe skillet over medium-high, heat the remaining 1 tablespoon oil until shimmering. Add the chicken skin down and cook without disturbing until golden brown, 6 to 8 minutes. Using tongs, transfer the chicken skin up to a large plate. (If your chicken weighs much more than 12 ounces each, see note above.*)
  3. Pour off and discard all but 1 tablespoon fat from the skillet. Add the vermouth, bring to a boil over medium-high and cook, scraping up any browned bits, until reduced to about 2 tablespoons, 1 to 2 minutes. Add the vegetables and cook, stirring, until just warmed through, about 1 minute, then distribute in an even layer. Nestle the chicken skin up in the vegetables and add any accumulated juices. Transfer the skillet to the oven and cook until the thickest part of the breast reaches about 160°F, 20 to 25 minutes.
  4. Remove the pan from the oven (the handle will be hot). Transfer the chicken skin up to a serving platter. Using a slotted spoon, transfer the vegetables the platter, arranging them around the chicken.
  5. Set the skillet over high, bring the liquid to a simmer and cook, stirring, until slightly thickened and reduced, 1 to 2 minutes. Off heat, stir in the caper brine, then taste and season with salt and pepper. Pour the sauce around the chicken and over the vegetables. Sprinkle with basil (if using).

http://www.lynnandruss.com

Adapted from a recipe by Rose Hattabaugh for Milk Street

Ginger Beef

According to Woks of Life where we found this recipe, Ginger Beef isn’t a dish you see too often in the U.S., because it’s more well-known as a Canadian Chinese dish, with possible origins in Calgary. It is said to mimic Mongolian Beef—another North American dish that doesn’t have much to do with Mongolia, and that you’d be hard pressed to find in China. 

The sauce is sweet (this version goes lighter on the sugar; however we would reduce it even more next time) and savory. Minced ginger is added as well as caramelized julienned pieces of it to create a gingery flavor without it being TOO gingery. Some versions include vegetables like peppers and onions, but we paired it with a crunchy Asian Slaw to get more vegetables.

BTW, you’ll get the best out of this recipe with flank steak, but you can use other cuts. To amp up the meal, add in some red pepper strips, and snow peas or other vegetables you may have lying around. We paired our stir-fry with a side of Asian Slaw.

TIP: To julienne the ginger, thinly slice the ginger on its broadest side (so you have wide slices)—cutting the narrower side of the ginger to make a flat surface for the ginger to stand on will make this easier. Fan the slices out straight, so they’re slightly overlapping, like a deck of cards. Then you can just follow that line of slices to julienne into very thin matchsticks. 

Ginger Beef

  • Servings: 4
  • Difficulty: easy
  • Print

Ingredients

For the beef and marinade:

  • 1 lb. flank steak, sliced against the grain into ¼-inch thick slices
  • 2 tsp. cornstarch
  • 2 tsp. neutral oil, such as vegetable, canola, or avocado oil
  • 1 tsp. oyster sauce
  • 1 Tbsp. water
  • ¼ tsp. baking soda

For the sauce:

  • ⅔ cup water
  • 1 ½ Tbsp. light brown sugar
  • 1 Tbsp. light soy sauce
  • 1 Tbsp. oyster sauce
  • ¾ tsp. dark soy sauce, or more regular soy sauce; the dish just won’t be as dark
  • ½ tsp. sesame oil
  • 1 Tbsp. minced ginger

For the rest of the dish:

  • ⅓ – ½ cup cornstarch, plus 1 Tbsp.
  • ¼ – ⅓ cup neutral oil
  • 2 Tbsp. finely julienned ginger
  • 1 scallion, thinly sliced on an angle

Directions

  1. Add the sliced flank steak to a medium bowl, and add the marinade ingredients (the cornstarch, neutral oil, oyster sauce, water, and baking soda). Mix well, and marinate for at least 30 minutes (or up to overnight).
  2. In a liquid measuring cup, mix all the sauce ingredients together—the water, light brown sugar, light soy sauce, oyster sauce, dark soy sauce, sesame oil, and minced ginger. Set aside.
  3. Add the cornstarch to a shallow dish, and dredge the marinated beef slices in the cornstarch until thoroughly coated, placing the dredged beef on a clean plate or sheet pan.
  4. Heat the neutral oil in a wok over high heat. Just before the oil starts to smoke, spread half the flank steak pieces evenly in the wok, and sear for 1-2 minutes on each side, until you have a crispy coating. 1/4 cup oil works for a 14-inch wok, but if you have a larger wok, you may need a tablespoon or two more to properly fry the beef. Remove the beef from the wok, leaving any oil behind, and repeat with the remaining beef. Turn off the heat and transfer the beef to a plate.
  5. Drain the oil from the wok (save it for other cooking), leaving 2 tablespoons behind. Turn the heat to medium-high. Add the julienned ginger, and fry until crispy. At this point, you can remove a few pieces of fried ginger and reserve it for a garnish if you like.
  6. Add the premixed sauce to the wok, and bring to a simmer. Simmer for 2 minutes. Meanwhile, combine the remaining 1 tablespoon of cornstarch with 3 tablespoons of water. Drizzle this cornstarch slurry into the sauce, and cook until it has thickened enough to coat the back of a spoon.
  7. Add the beef and the scallions, and toss everything together for another 30 seconds. The sauce should all be clinging to the beef. Serve!

http://www.lynnandruss.com

Adapted from a recipe from Woks of Life

A Pasta Salad for Tuna Lovers

A pasta for tuna salad lovers, this recipe combines elements of a classic deli-style tuna salad with pasta, peas and fresh green herbs. Besides dinner, it makes for a hearty picnic side dish or lunch, and keeps well in the refrigerator for several days, making it ideal for start-of-the-week meal prep.

The tangy Greek yogurt dressing, flavored with lemon juice, mustard and garlic, comes together right in the serving bowl with the chopped celery and red onion that add crunch and color. Any small pasta shape works well here; just be sure to run the cooked pasta under cold water to cool it down before tossing with the dressing.

A few changes we made included reducing the amount of pasta from one pound down to 12 ounces; and increasing the quantity of tuna up to three 5-ounce jars. As a main you’ll get get 4 to 6 servings. As a side dish, at least double that.

The Hubs Hack: Shred a peeled carrot and add some diced radish for more color and nutrition. He even thinks mashing in an anchovy would provide some nice umami flavor. (I’m fine w/o the anchovy.)

A Pasta Salad for Tuna Lovers

  • Servings: 4-6
  • Difficulty: easy
  • Print

Ingredients

  • Kosher salt (such as Diamond Crystal) and black pepper
  • 12 oz. short pasta, such as small shells, orecchiette or elbow macaroni 
  • ½ cup mayonnaise
  • ½ cup plain Greek yogurt (at least 2 percent fat)
  • 2 Tbsp. freshly squeezed lemon juice
  • 1 tsp. Dijon mustard 
  • ½ tsp. garlic powder
  • 3 (5-oz.) cans or jarred tuna, drained
  • 1 cup frozen peas, thawed
  • 1 cup small-diced celery (1 to 2 celery ribs)
  • ½ cup chopped red onion
  • ¼ cup finely chopped fresh dill or parsley, plus more for serving

Directions

  1. Bring a large pot of salted water to a boil. Add the pasta and cook according to the directions on the package, then drain and rinse under cold running water. Drain well.
  2. Meanwhile, in a large bowl, whisk together the mayonnaise, yogurt, lemon juice, mustard, garlic powder, 1 teaspoon salt and ½ teaspoon pepper. Add the cooled, drained pasta and toss well.
  3. Add the tuna, peas, celery, red onion and dill and toss again.
  4. Add more salt and pepper to taste, garnish with additional fresh dill and serve. Tuna pasta salad will keep for up to 3 days, covered and refrigerated.

http://www.lynnandruss.com

Adapted from a recipe by Lidey Heuck for NYTimes Cooking

Hibachi-Style Chicken with Charred Vegetables

Soy-marinated grilled chicken thighs paired with smoky, charred summer vegetables make this a sensational summer supper. Here, grilled chicken thighs are soaked in a sweet, garlicky, soy-based marinade and grilled alongside skewers with peak-season summer vegetables. Some steamed rice or couscous completes the meal.

The grill imparts a delicious char, similar to a Japanese hibachi charcoal grill, while basting the vegetables with a mixture of melted butter and reserved marinade enhances the full-bodied smoky flavor signature to hibachi.

The key to evenly cooked vegetable skewers is cutting the veggies into similarly sized pieces so they fit neatly on the skewers. Drizzled with a creamy chile-mayo sauce and served over rice (or couscous), this dish becomes a hearty, flavor-packed meal that can be easily prepped ahead for the week.

Make Ahead TIPS: Marinate chicken overnight, covered in the refrigerator, for up to 12 hours. Chop and store all vegetables in an airtight container in the refrigerator for up to one day. The mayonnaise sauce can be prepared up to five days in advance and stored in an airtight container in the refrigerator.

BTW, Kewpie mayonnaise is a Japanese brand of mayo made with egg yolks, vinegar, and MSG. Its use of egg yolks (rather than whole eggs) and vinegar makes it richer and tangier than regular mayonnaise. Find it at most grocery stores or online at yamibuy.com.

NOTE: *We knew the skewered vegetables would take longer than the chicken, so we started them about 8-10 minutes prior to adding the thighs to the hot grill. So in total, the veggies grilled for 20 minutes, while the chicken was on for 12 minutes.

While the mayo sauce was indeed tasty, we don’t feel it is absolutely necessary to complete the dish, so if it is not inspiring to you, just omit it. HOWEVER, we feel strongly that the basting marinade and butter sauce need to be doubled, as there was not enough. The new amounts are indicated in the ingredients list below.

Hibachi-Style Chicken with Charred Vegetables

  • Servings: 4
  • Difficulty: easy
  • Print

Ingredients

Chicken Marinade:

  • 1 1/4 cup soy sauce
  • 1/4 cup light brown sugar
  • 1/4 cup finely chopped garlic (about 5 large garlic cloves) 
  • 2 Tbsp. plus 1/2 tsp. toasted sesame oil, divided
  • 2 lb. boneless, skinless chicken thighs (about 6 thighs), patted dry

Vegetables:

  • 2 red bell peppers, cut into 1 1/2-inch pieces (about 2 cups)
  • 1 zucchini, halved lengthwise and cut into 1-inch-thick half-moons (about 2 1/2 cups) 
  • 1 medium red onion, cut into 1 1/2-inch-thick wedges (about 1 1/2 cups)
  • 4 (8-inch) metal or wooden skewers
  • 1/2 tsp. kosher salt, divided

Butter and Sauce:

  • 4 Tbsp. unsalted butter, melted 
  • Canola oil, for grilling
  • 1/2 cup Kewpie mayonnaise
  • 2 tsp. sriracha chile sauce
  • 1/2 tsp. Dijon mustard
  • Cooked white rice, or couscous, for serving

Directions

  1. Whisk together soy sauce, brown sugar, garlic, and 1 tablespoon sesame oil in a small bowl until sugar is dissolved. Pour soy mixture into a large ziplock plastic bag, reserving 6 tablespoons soy mixture in bowl. Add chicken to bag; seal bag, and gently massage soy mixture into chicken. Set aside, and let marinate at room temperature for at least 30 minutes or up to 12 hours.
  2. Thread peppers, zucchini, and onion onto skewers. Brush vegetables with 1 tablespoon reserved soy mixture; sprinkle with 1/4 teaspoon salt. Stir melted butter and remaining 1/4 teaspoon salt into remaining 2 tablespoons soy mixture in bowl; set aside.
  3. Preheat grill to medium-high (400°F to 450°F). Remove chicken from marinade, shaking off excess; discard marinade. Lightly grease grill grates with canola oil; place chicken and skewered vegetables on grates. Grill, uncovered, turning skewers and chicken occasionally and basting with soy-butter mixture until a thermometer inserted into thickest portion of chicken registers 170°F, 12 to 15 minutes, and vegetables are tender and charred in spots, about 12 minutes. (*Please see note our cooking times above.) Transfer to a cutting board, and let rest for 5 minutes.
  4. Stir together mayonnaise, sriracha, mustard, and remaining 1/2 teaspoon sesame oil in a small bowl. Chop chicken into bite-size pieces, and remove vegetables from skewers. Serve chicken and vegetables over cooked rice, and drizzle with mayonnaise mixture. Garnish with scallions and shichimi togarashi.

http://www.lynnandruss.com

Adapted from a recipe by Andee Gosnell for Food & Wine