Tag Archives: weeknight

Pappardelle with Mushrooms and Prosciutto

Getting the consistency of the creamy mushroom sauce right is key for this pasta recipe. You want to reduce it just until it clings to the pappardelle to create a light coating; but be careful not to reduce it too much. To that end, don’t discard the pasta water after removing the pappardelle, you may need it to thin the dish when combining everything at the end (we did).

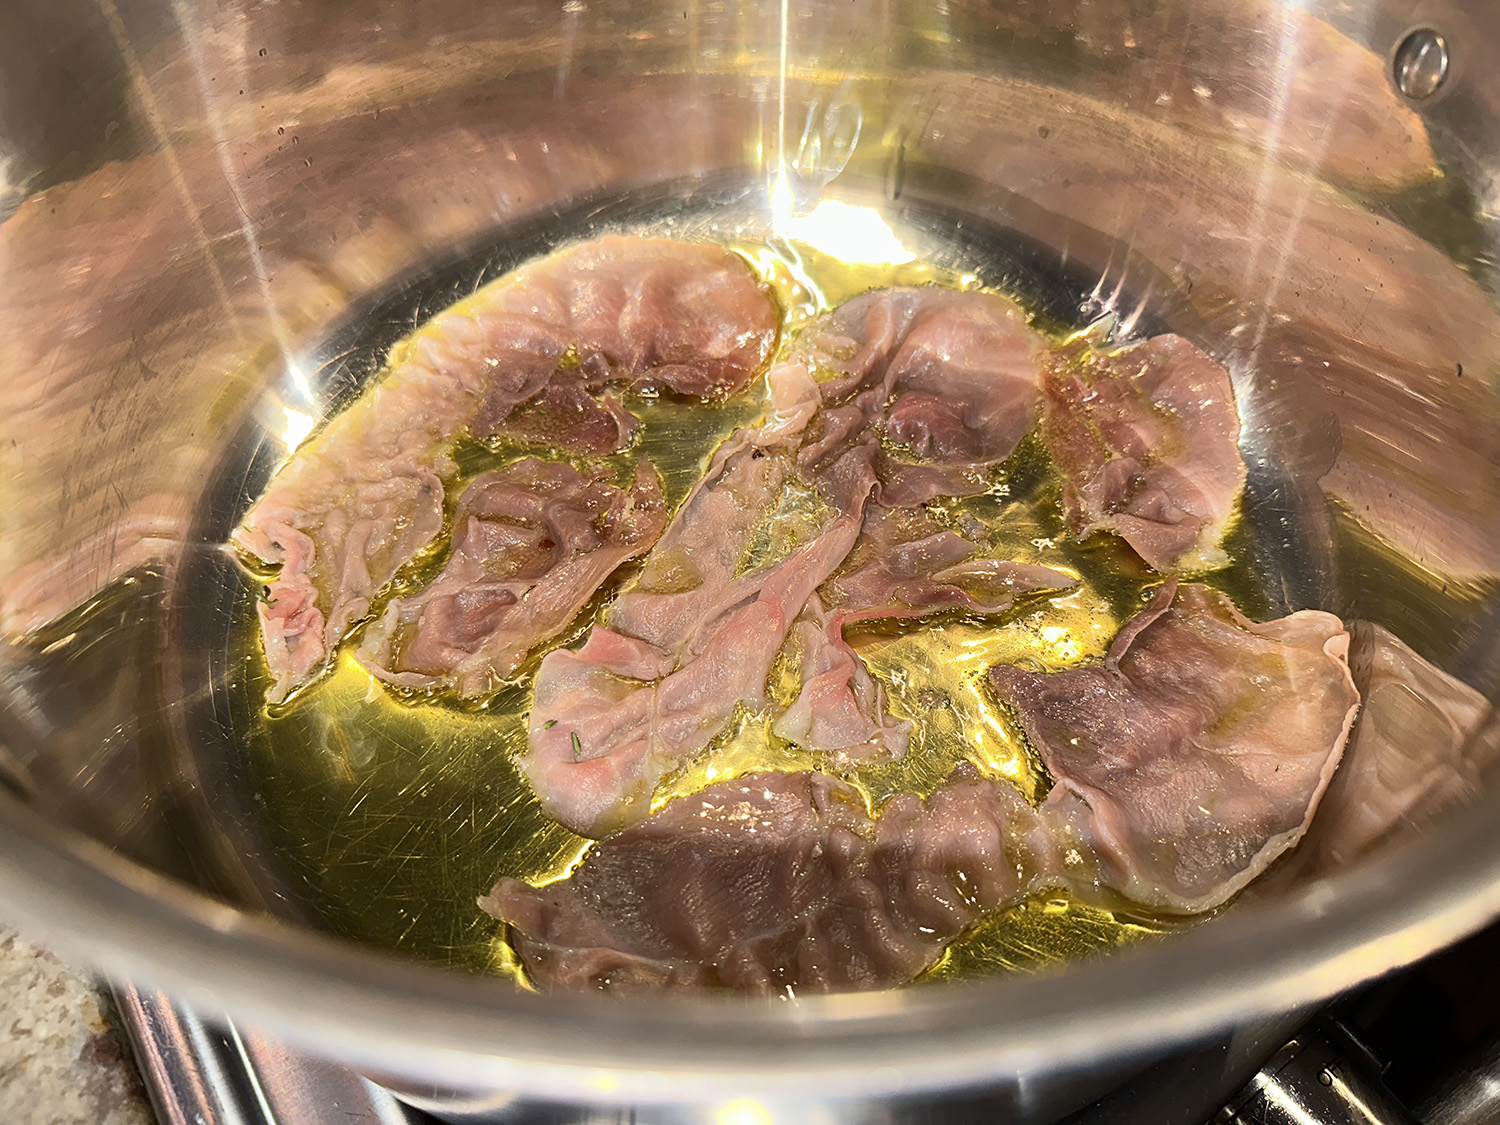
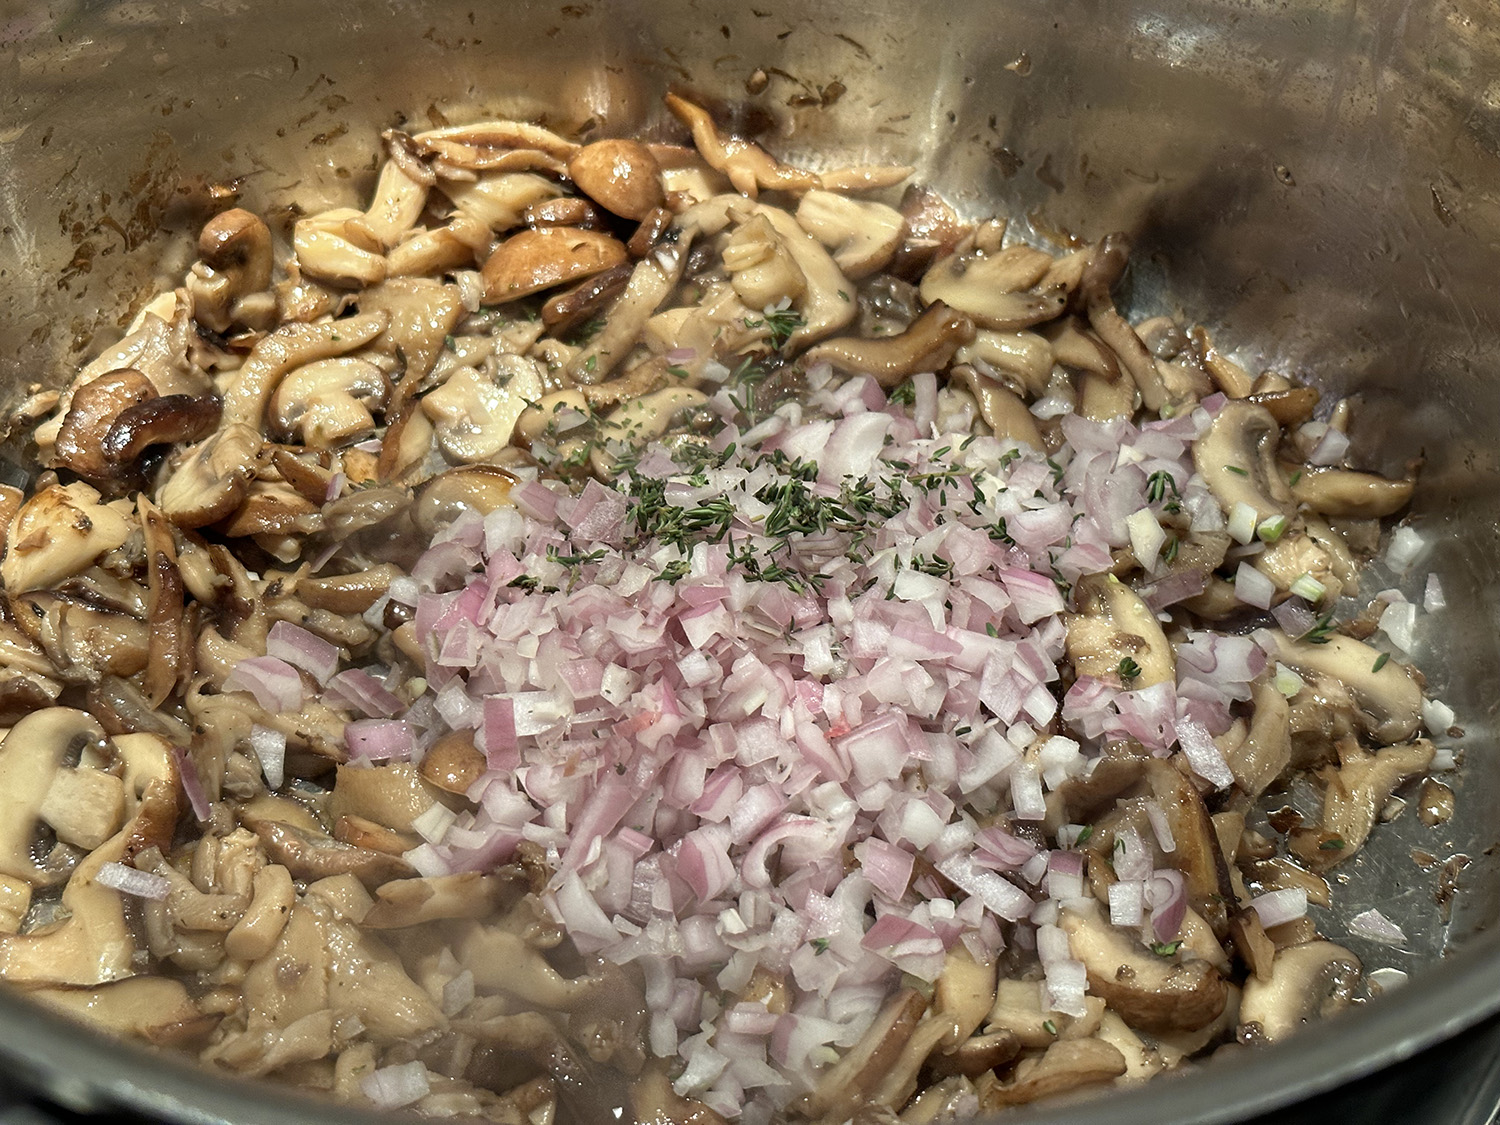
If you buy the prepackaged prosciutto, it is very thin and almost impossible to keep in one piece as you place in into the hot oil. It doesn’t really matter because in the end it gets crunched up anyway. Our mushroom mix consisted of oyster, cremini, and shiitakes. If unable to source pappardelle, fettuccine would be a comparable substitute.

We altered the amounts of a few ingredients. Instead of 12 ounces of pasta we decreased it to 8 ounces; and increased the prosciutto from 2 ounces to 4. These changes are noted in the list of ingredients below, however, you can decide what amounts work best for you.

Pappardelle with Mushrooms and Prosciutto

  • Servings: 3-4
  • Difficulty: easy
  • Print

Ingredients

  • ¼ cup plus 2 tablespoons olive oil
  • 4 oz. thinly sliced prosciutto (about 6 slices)
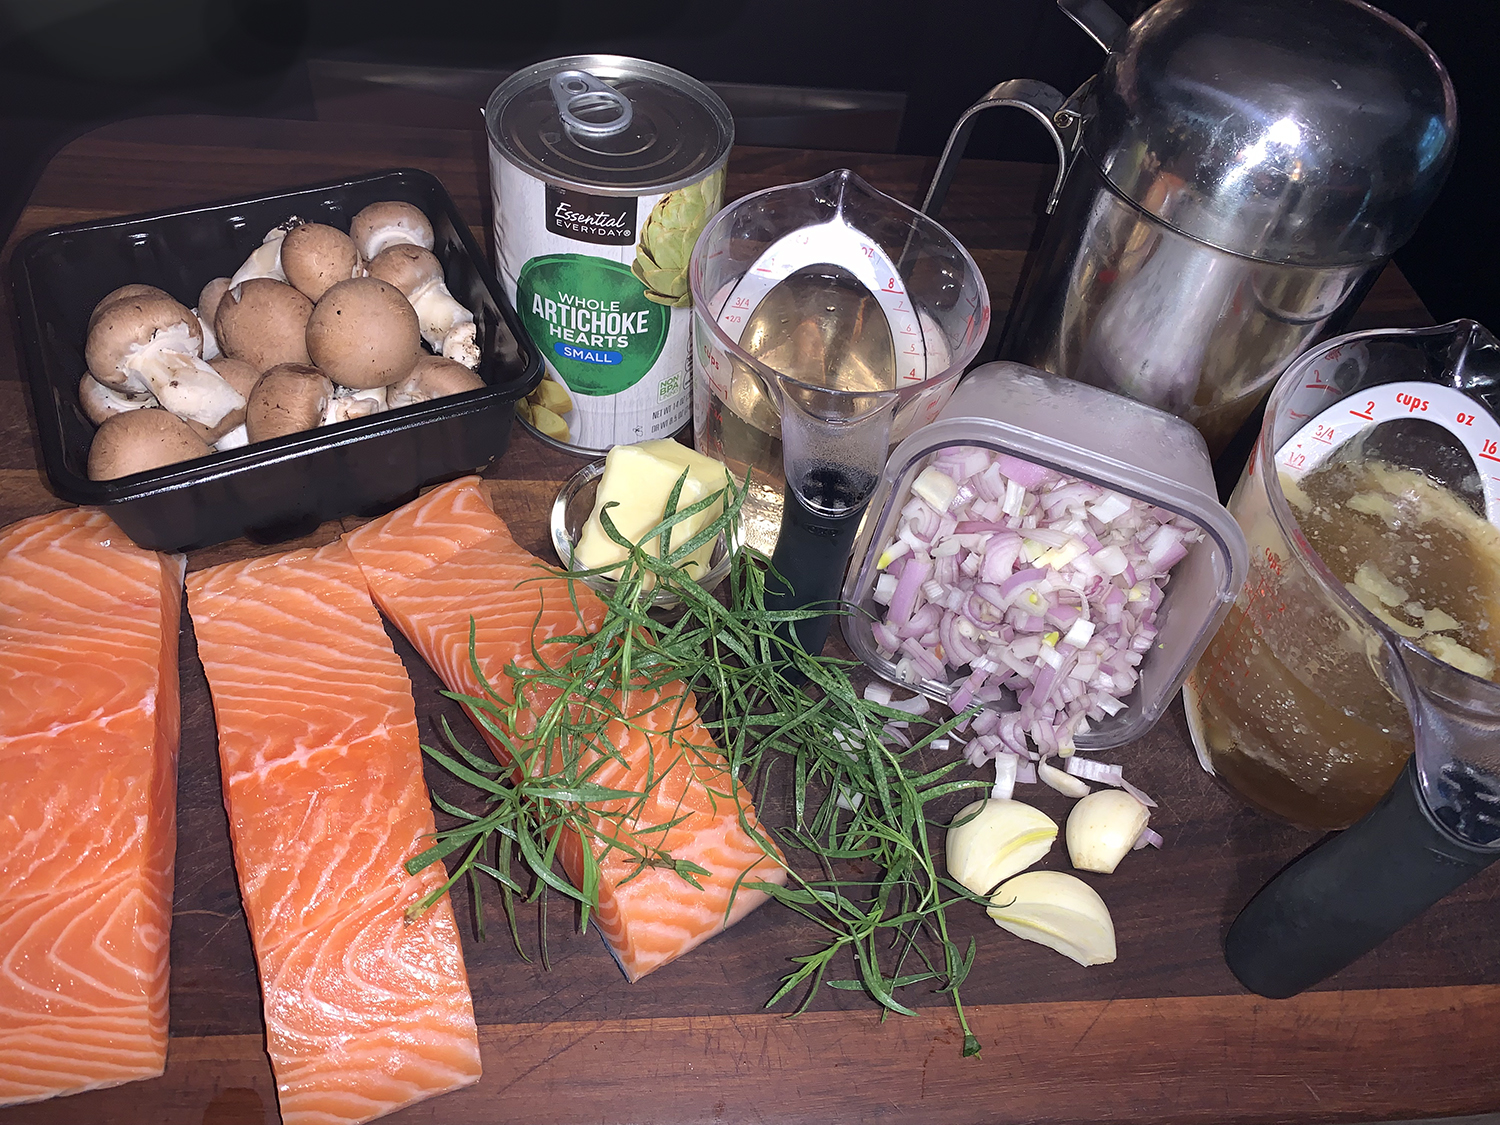
  • 1 lb. mixed mushrooms (such as chanterelles, maitake, oyster, cremini, and/or shiitake), torn into bite-size pieces
  • 2 medium shallots, finely chopped
  • 1 tsp. thyme leaves, plus more for serving
  • Kosher salt, freshly ground pepper
  • 1 cup chicken stock, preferably homemade
  • 8 oz. pappardelle or fettuccine
  • ⅓ cup heavy cream
  • 2 Tbsp. unsalted butter

Directions

  1. Heat ¼ cup oil in a large Dutch oven or other heavy pot over medium. Arrange prosciutto in a single layer in pot and cook, turning once or twice, until crisp, about 5 minutes. Transfer to paper towels to drain.
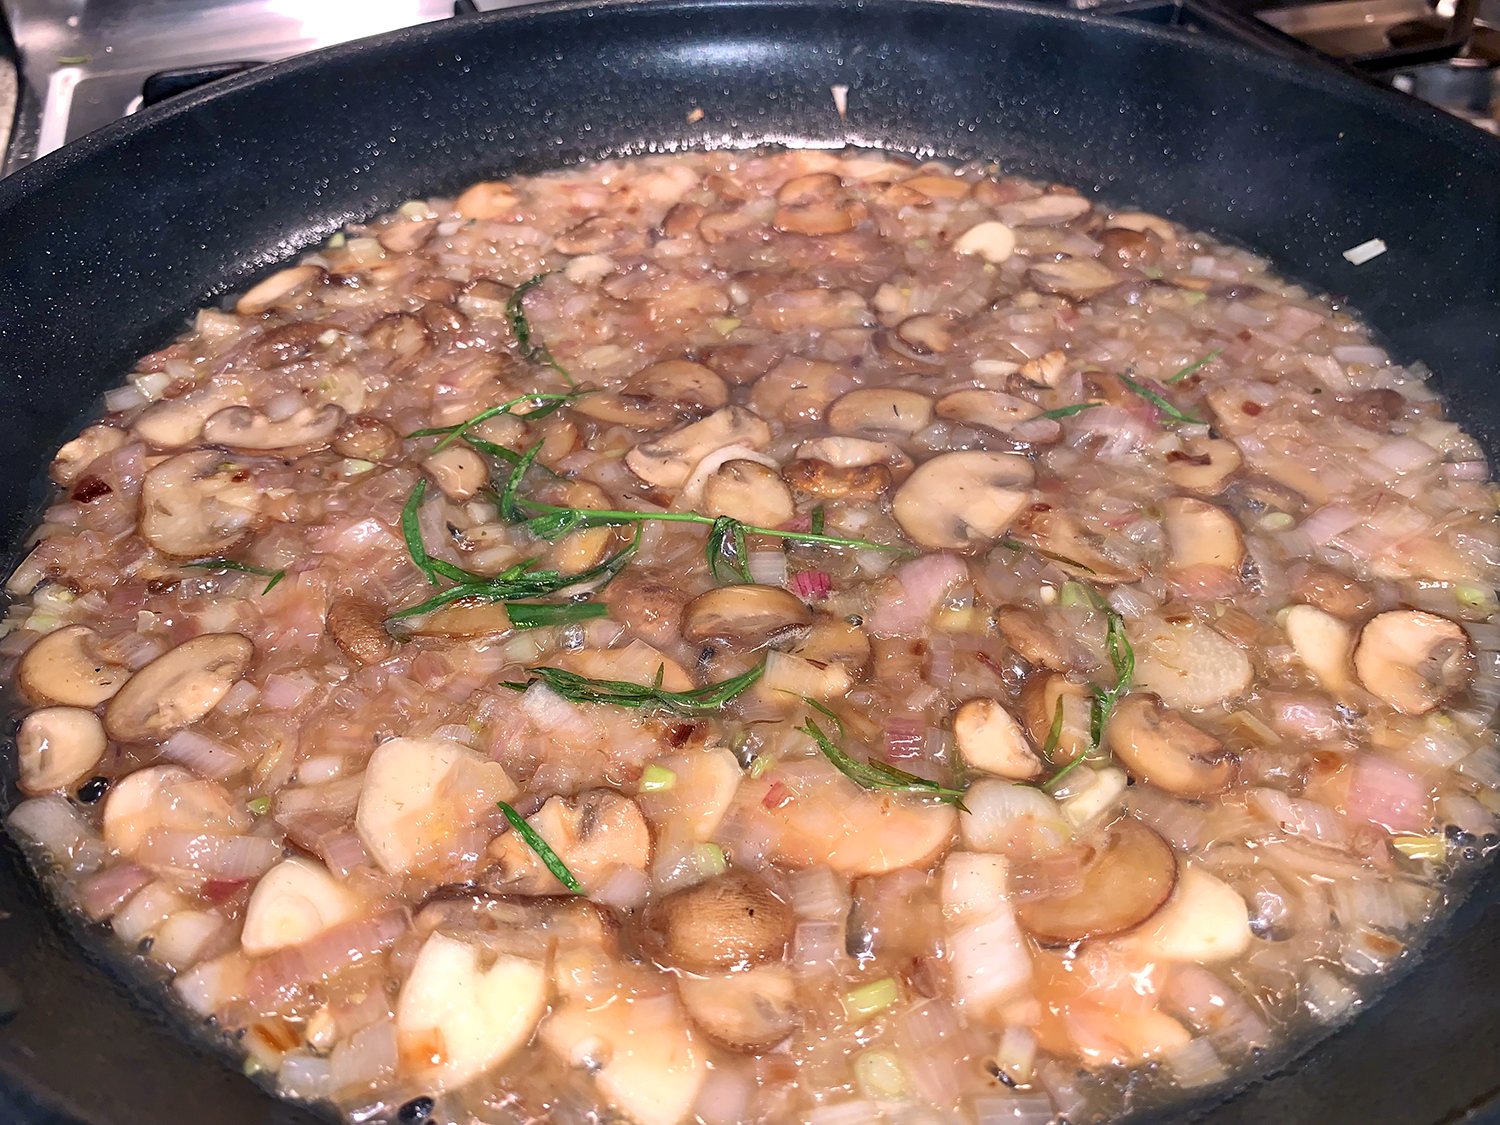
  2. Heat remaining 2 Tbsp. oil in same pot over high. Cook mushrooms, tossing occasionally, until browned and tender, 5–8 minutes. Reduce heat to medium-low.
  3. Add shallots and 1 tsp. thyme, season with salt and pepper, and cook, stirring often, until shallots are translucent and softened, about 2 minutes. Add stock and reduce heat to low. Bring to a simmer and cook until only a thin layer of stock coats bottom of pot, 5−7 minutes.
  4. Meanwhile, cook pasta in a large pot of boiling salted water, stirring occasionally, until very al dente, about 3 minutes less than package directions.
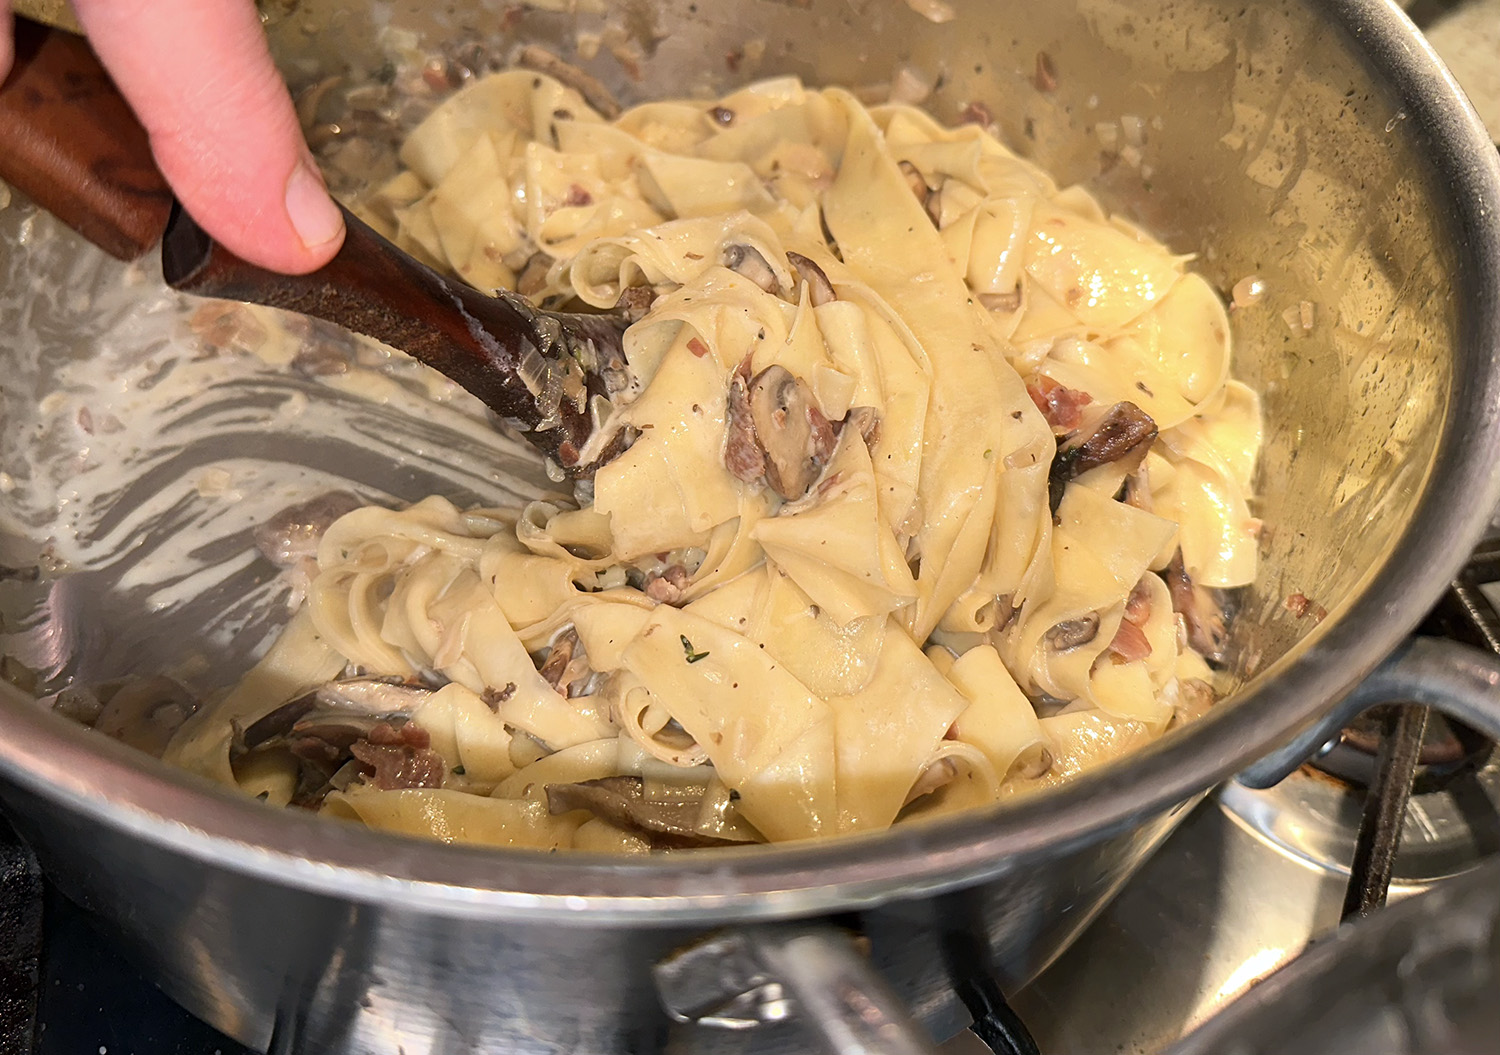
  5. Using tongs, transfer pasta to pot with mushrooms and add 1 cup pasta cooking liquid. Crumble half of prosciutto into pot. Increase heat to medium, bring to a simmer, and cook, tossing constantly, until pasta is al dente and liquid is slightly thickened, about 2 minutes. Add cream, return to a simmer, and cook, tossing, until pasta is coated, about 1 minute.
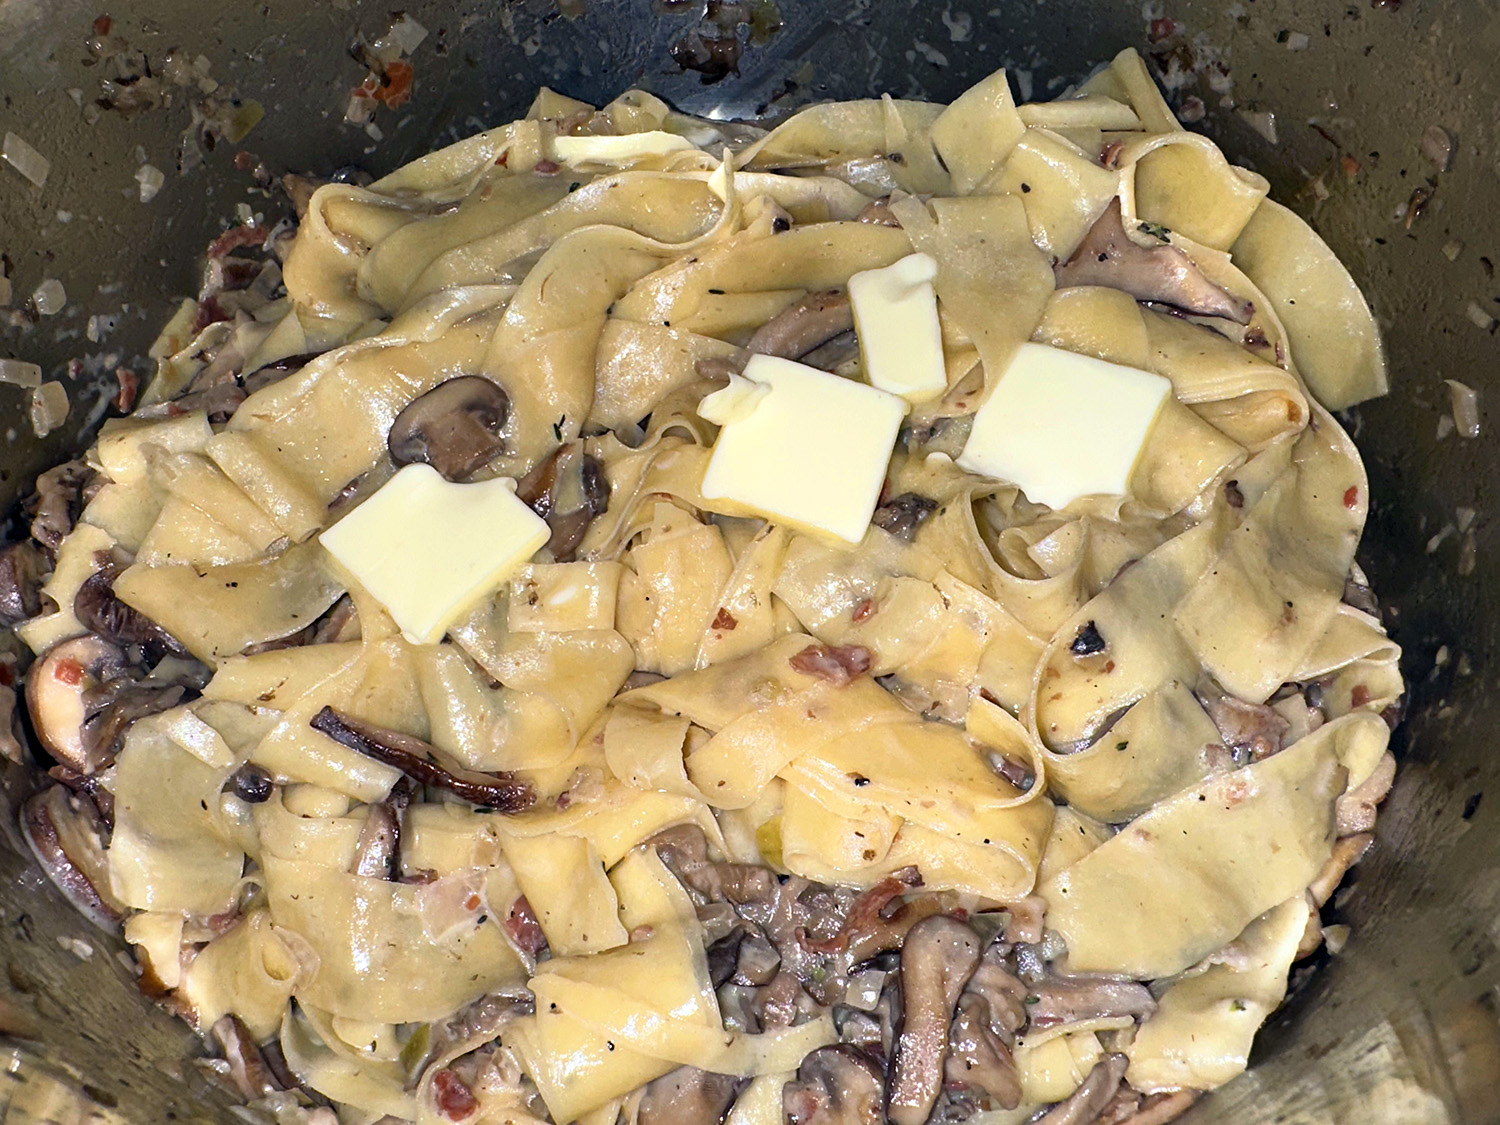
  6. If pasta sauce is thicker than prefered, add additional pasta water a 1/4 cup at a time, stirring well after each addition until desired consistency is achieved. Remove from heat, add butter, and toss to combine. Taste and season with salt if needed.
  7. Divide pasta among bowls. Top with more thyme and crumble remaining prosciutto over; season with pepper.

http://www.lynnandruss.com

Adapted from a recipe by Claire Saffitz for Bon Appétit

Chicken Escabeche

This Peruvian chicken escabeche is seasoned with aji amarillo, an orange-yellow chili ubiquitous to that country’s cuisine. In the U.S., the chilies are difficult to find fresh, but aji amarillo paste, sold in jars, is available in some well-stocked markets, specialty stores, or easily online. We purchased it online as a 3-pack with two other Peruvian pastes.

Escabeche is made by soaking meat or seafood in an acidic marinade after cooking, allowing the addition of bright flavors without altering the texture of the meat. The fruity, yet earthy flavor of aji amarillo is an important part of this dish, but if you cannot find the paste, use 1 or 2 seeded and finely minced jalapeños.

FYI–Don’t use regular chili powder instead of pure ancho chili powder. Regular chili powder is a spice blend, whereas ancho chili powder contains only ancho chilies. If you can’t find the powdered, grind some dried ancho chilies in a spice grinder, as shown above.

Because the skin was removed, you might encounter the chicken meat sticking to the pan. Try to pry most of it off the pan, but it is OK to leave some of the meat because it will make a nice fond and release itself once the liquids are added in. It was delicious served with the onion mixture on top of the thighs over a bed of garlic rice.

Chicken Escabeche

  • Servings: 2-4
  • Difficulty: easy
  • Print

Ingredients

  • 2 lbs. bone-in chicken thighs (4 thighs), skin removed, trimmed and patted dry
  • Kosher salt and ground black pepper
  • 2 Tbsp. grapeseed or other neutral oil, divided
  • 2 cups chicken broth, preferably homemade
  • 4 medium garlic cloves, minced (1 Tbsp.)
  • 2 Tbsp. aji amarillo paste
  • 1 Tbsp. ancho chili powder
  • 1/4 tsp. ground cumin
  • 3 medium red onions, halved and sliced ¾-inch thick
  • 1 large orange bell pepper, stemmed, seeded and sliced into ¼-inch strips
  • 1/3 cup white wine vinegar

Directions

  1. Season the chicken all over with salt and pepper. In a large Dutch oven over medium-high, heat 1 tablespoon of oil until barely smoking. Add the chicken in a single layer and cook on each side, without disturbing, until deep golden brown, 3 to 5 minutes per side. Add the broth and bring to a boil. Cover, reduce to low and simmer until a skewer inserted into the largest thigh meets no resistance, 10 to 15 minutes.
  2. Transfer the chicken to a serving dish and cover with foil. Bring the cooking liquid to a boil over high and cook until reduced to 1 cup, about 5 minutes. Transfer to a small bowl or measuring cup and set aside.
  3. In the same pot, heat the remaining 1 tablespoon oil over medium until shimmering. Add the garlic, aji amarillo paste, ancho chili and cumin, then cook, scraping the bottom, until browned and fragrant, about 1 minute. Stir in the onions, bell pepper, 2 teaspoons salt and ¼ teaspoon pepper, then add the vinegar. Cook, stirring, until the onions have begun to soften and the sauce is just thick enough to coat the vegetables, 2 to 3 minutes. Add the reduced broth, bring to a simmer over medium-high and cook, stirring, until thickened to a glaze, about 10 minutes.
  4. Pour the sauce and vegetables over the reserved chicken. Cover and let rest for 10 minutes, then serve.

http://www.lynnandruss.com

Adapted from a recipe by Julia Rackow for Milk Street

Sheet Pan Smoked Paprika Chicken with Chickpeas

Juicy chicken thighs are coated in a bold tomato rub with lots of fresh garlic and warm, earthy spices including smoked paprika and cumin, and brightened with a hint of lemon juice. The whole thing comes together in a flash — simply chop some veggies and season everything with the tomato rub. Toss it into a sheet pan and roast.

There is nothing complicated about the ingredient list either. You just need some spices, chickpeas, vegetables, and chicken. For more heat, use hot smoked paprika instead. It lends itself well to customizations, so feel free to swap out carrots for other root veggies like beets or parsnips, or add potatoes or sweet potatoes for more heft.

While we did start out piling everything on one sheet pan (against out better judgement), after 30 minutes in the oven, we transferred the chicken thighs on another prepared baking sheet and covered with foil. The reason being, the vegetables were steaming instead of roasting. The veggies went back into the oven to continue cooking until fork tender and beginning to brown slightly, another 10-15 minutes. As the vegetable tray was roasting, we then popped the thighs, uncovered, under the broiler (we have a 2-oven stove).

Next time, we may start with dividing everything between 2 sheet pans from the start. You may prep ahead by chopping the vegetables and making the sauce. Just refrigerate them until ready to begin cooking.

FYI, we are using boneless skinless chicken thighs here, but bone-in thighs or boneless skinless breasts would work as well. Since boneless, skinless chicken breasts cook in about 18 minutes in the oven, you will need to roast your vegetables for about 10 minutes first, then add the breasts. Otherwise, the carrots won’t cook in time.

Sheet Pan Smoked Paprika Chicken with Chickpeas

  • Servings: 5-6
  • Difficulty: easy
  • Print

Ingredients

Tomato Rub

  • ½ cup extra virgin olive oil
  • Juice of 2 large lemons, about ½ cup
  • 5 Tbsp. tomato paste
  • 5 large garlic cloves, minced
  • 1 ½ tsp. ground cumin
  • 1 ½ tsp. smoked paprika
  • 1 tsp. Aleppo pepper flakes or granules

Chicken And Vegetables

  • 1 tsp. extra virgin olive oil
  • 6 carrots, peeled, halved lengthwise, and cut into 2 inch pieces
  • 2 medium onions, halved and cut into ½ inch slices
  • 1 15-oz. can of chickpeas, drained
  • ½ tsp. kosher salt
  • ½ tsp. ground black pepper
  • 10 boneless skinless chicken thighs, trimmed of fat if necessary

Directions

  1. Position one rack in the center of the oven and another one 4 or 5 inches under the broiler. Preheat the oven to 425°F
  2. Prepare the tomato rub: In a small bowl, combine the olive oil, lemon juice, tomato paste, garlic, cumin, paprika, and Aleppo pepper. Whisk well to combine.
  3. Prepare the chicken and vegetables: Lightly brush a large sheet pan with some of the olive oil. In a large bowl, combine the carrots, onions, and chickpeas. Season well with salt and black pepper (about ½ teaspoon each). Add 4 tablespoons of the tomato rub and a small drizzle of olive oil (about 1 teaspoon), and mix well to coat. Transfer the mixture to the sheet pan. Set bowl aside for chicken.
  4. Pat the chicken dry and season with salt and black pepper on both sides. Place the chicken in the reserved bowl and add the remaining tomato mixture, tossing until the chicken is well coated.
  5. Transfer the chicken to the sheet pan(s) along with the chickpeas and vegetables. Roast on the center rack until the chicken is cooked through, 25 to 30 minutes (ours took more like 45 minutes). Then move the sheet pan up to the top rack directly under the heat and broil until the chicken gains some color, 3 to 4 minutes, watching carefully. The onions and carrots may also gain some char.
  6. Serve with your favorite rustic bread, if desired.

http://www.lynnandruss.com

Adapted from a recipe by Suzy Karadsheh

Shrimp Pasta with Preserved Lemon

Here, preserved lemon is paired with seared shrimp in this easy weeknight pasta recipe. It also features garlic, chile flakes, plenty of Parmesan, and a touch of fresh lemon juice, bringing the full spectrum of lemon flavor to the table. Let me just put it out there, the dish was luxuriously fantastic!

It’s amazing that this silky sauce contains no cream. One of the main ingredients, preserved lemon, adds a wonderful base note and should not be omitted. Then, instead of using an entire pound of pasta, we scaled it back to half that amount for a better balance with the shrimp. Just keep in mind, it may not provide 4 entrée-sized portions (depending on hungry your diners are!).

Back to those preserved lemons. They are a versatile pantry staple with the power to level up the flavor of any dish it touches. Unlike the aggressively pungent and assertive flavor of fresh lemon rind, preserved lemons have softer, richer, and deeper flavors, mellowed by the salty bath that pickles them. While they lose some of their bracing acidity, citrusy aromas and gentle tanginess remain.

We keep a jar of preserved lemons in our auxiliary refrigerator at most times. Which BTW, take at least 3 weeks “hibernating” in a cool room, then a spin in the fridge before they are ready to use. The jar of preserved lemons, at left, was just made with kosher salt, lemons, black peppercorns and bay leaves.

TIP: If you don’t have, or can’t find preserved lemons, you can microwave four 2-inch strips lemon zest, minced, 1 teaspoon lemon juice, ½ teaspoon water, ¼ teaspoon sugar, and ¼ teaspoon salt at 50 percent power until the liquid evaporates, about 1½ minutes, stirring and mashing the lemon with the back of a spoon every 30 seconds.

Shrimp Pasta with Preserved Lemon

  • Servings: 3-4
  • Difficulty: easy
  • Print

Ingredients

  • 1 lb. medium tube-shaped pasta (such as rigatoni or penne)
  • Kosher salt
  • 1 lb. large shrimp, peeled, deveined
  • ¼ cup extra-virgin olive oil
  • 6 garlic cloves, finely chopped
  • ¼ cup finely chopped preserved lemon rinds
  • ½ tsp. crushed red pepper flakes
  • 4 Tbsp. chilled unsalted butter, cut into 4 pieces
  • 2 oz. Parmesan, finely grated (about 1 cup), plus more for serving
  • 1 Tbsp. fresh lemon juice
  • ⅓ cup finely chopped parsley, plus more for serving

Directions

  1. Cook 1 lb. medium tube-shaped pasta (such as rigatoni or penne) in a large pot of boiling salted water, stirring occasionally, until al dente. Drain, reserving 2 cups pasta cooking liquid.
  2. Meanwhile, pat 1 lb. large shrimp, peeled, deveined, dry with paper towels; season lightly with kosher salt. Heat ¼ cup extra-virgin olive oil in a large Dutch oven or other heavy pot over medium. Add 6 garlic cloves, finely chopped, ¼ cup finely chopped preserved lemon, and ½ tsp. crushed red pepper flakes and cook, stirring often, until preserved lemon is softened, about 2 minutes.
  3. Add shrimp and cook, stirring often, until just opaque, about 2 minutes.
  4. Add pasta, 2 Tbsp. unsalted butter, cut into 2 pieces, and 1 cup pasta cooking liquid and cook, tossing vigorously, until butter is melted and sauce is thickened slightly, about 2 minutes. Add ½ cup finely grated Parmesan; toss until melted.
  5. Add ½ cup pasta cooking liquid, 2 Tbsp. unsalted butter, cut into 2 pieces, and ½ cup finely grated Parmesan and cook, stirring vigorously and adding more pasta cooking liquid if needed, until sauce is thickened and coats pasta, about 1 minute. Mix in 1 Tbsp. fresh lemon juice and ⅓ cup finely chopped parsley.
  6. Divide pasta among shallow bowls. Top with more finely grated Parmesan and finely chopped parsley.

http://www.lynnandruss.com

Adapted from a recipe by Rachel Gurjar for Bon Appétit

Roasted Winter Squash with Lime, Chili and Cilantro

This time of year, squashes have their moment(s) in the sun. Here, the roasted squash shines when using spicy, tangy ingredients to banish one-note flavors. Lime, garlic and chilies add kick; while brown sugar creates a glaze-like coating with molasses notes that enhance the earthy-sweet squash.

Kabocha is a Japanese pumpkin with mottled green edible skin and dense, slightly starchy orange flesh. Acorn squash, with thin skin that doesn’t require peeling, also is a terrific option. With no kabocha to choose from, we opted for the acorn squash.

This recipe would make for a nice side dish on your Thanksgiving table. Just sayin’… OR, pair it with Pan-Seared Bone-in Pork Chops, a fabulous cool weather meal.

Roasted Winter Squash with Lime, Chili and Cilantro

  • Servings: 4
  • Difficulty: easy
  • Print

Ingredients

  • 1/4 cup extra-virgin olive oil
  • 1 Tbsp. grated lime zest, plus ¼ cup lime juice, plus lime wedges, to serve
  • 1/4 cup packed brown sugar
  • 2 1/2 lb. kabocha squash OR two 1¼-lb. acorn squashes, halved lengthwise, seeded and sliced into 1-inch-thick wedges
  • Kosher salt and ground black pepper
  • 2 medium garlic cloves, thinly sliced
  • 1 or 2 serrano OR Fresno chilies, stemmed and sliced into thin rings
  • 1/3 cup lightly packed fresh cilantro

Directions

  1. Heat the oven to 400°F with a rack in the upper-middle position. In a small bowl, whisk together the oil, lime juice and sugar until the sugar dissolves.
  2. On a rimmed baking sheet, toss the squash with half of this mixture, 2 teaspoons salt and ½ teaspoon pepper. Arrange the pieces cut side down and roast until browned on the bottom, 25 to 30 minutes.
  3. Using a wide metal spatula, flip each piece, drizzle with the remaining oil mixture and sprinkle with the garlic and chili(es). Roast until the squash is deeply caramelized and a skewer inserted into the largest piece meets no resistance, 10 to 15 minutes.
  4. Transfer to a platter, pouring over any juices. Top with the lime zest and cilantro and serve with lime wedges.

http://www.lynnandruss.com

Recipe by Courtney Hill for Milk Street

Hasselback Chicken Cordon Bleu

Simple is, as simple gets—and this recipe couldn’t be much simpler. With literally just a handful or so of ingredients, you end up with this pretty impressive dinner in less than an hour.

A fun play on hasselback potatoes, Ree Drummond’s chicken is stuffed with Canadian bacon, Swiss cheese and a crunchy breadcrumb topping. Bonus? You can make this dish in advance and freeze until you’re ready to eat.

Easily cut in half, or even for two, each breast is enough for one serving for most eaters. We used regular Dijon mustard as opposed to honey Dijon which is sweeter. The Swiss cheese slice quarters were taller than the bacon moons so the tops were folded down to equal the same height as the bacon halves.

Consider using a large enough parchment-lined baking sheet so that there is room around each breast for more crisping around the edges.

Hasselback Chicken Cordon Bleu

  • Servings: 8
  • Difficulty: easy
  • Print

Ingredients

  • 8 boneless, skinless chicken breasts
  • 1/2 cup honey, or regular Dijon mustard 
  • 2 cups panko breadcrumbs 
  • 6 Tbsp. salted butter, melted 
  • 1 Tbsp. kosher salt 
  • 1 tsp. freshly ground black pepper 
  • 12 slices Swiss cheese, cut into quarters 
  • 24 rounds Canadian bacon (about 1 lb.), cut into half-moons 

Directions

  1. Preheat the oven to 425°F.
  2. At a slight angle, cut 6 slits into each of the chicken breasts, making sure not to cut all the way through. You should leave roughly 1/4 inch unsliced. Transfer the slit chicken breasts to a parchment-lined baking sheet. Brush the top of each chicken breast with 1 tablespoon of the mustard.
  3. Mix together the breadcrumbs, melted butter, salt and pepper in a bowl. Sprinkle the breadcrumb mixture evenly over the chicken, using your hands to press the mixture into the mustard. Place a quarter piece of cheese and a half-moon piece of Canadian bacon into each of the slits in each chicken breast.
  4. Bake until the chicken is cooked through and the breadcrumbs are golden, 20 to 25 minutes (depending on the size of the breasts). Serve warm with your favorite sides.
  5. Freezing instructions: Once the uncooked chicken breasts are assembled, place 4 onto a wax paper-lined baking sheet; repeat with the remaining chicken breasts on a separate lined baking sheet. Transfer the baking sheets to the freezer until the chicken breasts are frozen through, at least 3 hours. Transfer the chicken breasts to 2 wax paper-lined foil pans. Label, date and freeze until ready to eat.
  6. When ready to eat, preheat the oven to 425°F. Bake the chicken breasts from frozen until the chicken is cooked through and the breadcrumbs are golden, about 40 minutes. Serve as directed above.

http://www.lynnandruss.com

Adapted from a recipe by Ree Drummond

Thai Stir-Fried Pork with Basil, Chilies and Garlic

The Thai name for this dish is Pad Krapao meaning “fried holy basil”. It is a fragrant, flavor-packed Thai stir-fry. Despite the dishes name, the basil isn’t actually fried, but wilted into the mix at the very end of cooking.

Our holy basil—which has a peppery, menthol-like bite—was done for the season, so we opted to use our fresh Thai basil, still going strong in the raised herb bed. Sweet Italian basil is a third choice; but if using either of the last two, you’ll need to use 50% more.

To top it all off, a fried egg with a runny yolk is used, adding creaminess while the crisp edges provide crunch. Not typically a fan of runny yolks, I decided to go with it for this recipe. Glad I did because it did add not only to the flavor but also the contrasting textures.

As with most stir-fries, don’t start cooking until all of the ingredients are prepped and near the stove. And don’t cook those eggs in advance because they should still be warm when added to the dish. If you prefer a more fiery kick, don’t discard the chili seeds.

Thai Stir-Fried Pork with Basil, Chilies and Garlic

  • Servings: 3-4
  • Difficulty: easy
  • Print

Ingredients

  • 7 medium garlic cloves, smashed and peeled
  • 4 or 5 Fresno chilies. stemmed, seeded and roughly chopped
  • 1 Tbsp. oyster sauce
  • 1 Tbsp. soy sauce
  • 1 Tbsp. fish sauce
  • 1 Tbsp. packed light brown sugar
  • 6 Tbsp. grapeseed oil, divided
  • 4 large eggs
  • 1 lb. ground pork
  • 2 cups (1oz.) lightly packed holy basil OR 3 cups lightly packed Thai or Italian basil, torn
  • Steamed jasmine rice to serve

Directions

  1. In a food processor, combine the garlic and chilies. Pulse until finely chopped, with some slightly larger pieces remaining, 8 to 10 pulses.
  2. In a small bowl, whisk together the oyster sauce, sou sauce, fish sauce, sugar and a 1⁄2 cup water. Set both the garlic-chili mixture and the sauce mixture near the stove.
  3. In a 12- or 14-inch wok over medium-high, heat 2 tablespoons of the oil until barely smoking. Reduce to medium, the crack 2 eggs into the center of the wok, each in a different spot. Use a silicone spatula to gently push edges of the egg whites toward the yolk to keep the eggs separate.
  4. Cook, occasionally spooning some of the hot oil over the eggs until the whites are crisp and brown on the edges, 3 to 4 minutes. Using a thin metal spatula, transfer the eggs to a paper towel-lined plate. Repeat with remaining to 2 eggs. Wipe out wok.
  5. Return the wok to medium-high and heat the remaining 2 tablespoons of oiluntil barely smoking. Add the garic-chili mixture and cook, stirring until fragrant and lightly browned.
  6. Add the pork and cook, stirring, until the meat is broken up into mostly small bits, 1 to 2 minutes.
  7. Add the sauce mixture and cook, stirring, until pork is no longer pink and the liquid thickens slightly but remains saucy, about 3 minutes.
  8. Off heat add the basil and stir until just wilted. Divide the rice and the stir-fry among serving plates and top each with an egg.

http://www.lynnandruss.com

Adapted from a recipe by Courtney Hill for Milk Street

Chili-Stuffed Sweet Potatoes

Remember the loaded potato bar craze? This hearty riff is a weeknight meal’s dream found when I ran across a food article in Better Homes & Gardens. We made several modifications such as a combo of shredded cheddar and jack cheeses, more ground beef (which BTW, you could also use ground turkey), an extra scallion, and added a teaspoon of chipotle powder.

As far as microwaving the sweet potatoes, not a fan. Often they come out inconsistent as to the softness throughout. Of course, if you are pressed for time, that might be the way to go. Ours took 60 minutes in a 400° oven (time to enjoy a pre-dinner glass of wine).

It’s a personal preference whether or not you eat the potato skins. I for one, don’t mind them and get extra fiber from doing so, The Hubs, not so much. If you have leftovers, they will keep in the refrigerator for up to 3 days, although it’s best to keep all of the layers separate.

Chili-Stuffed Sweet Potatoes

  • Servings: 4
  • Difficulty: easy
  • Print

Ingredients

  • 1 cup fresh salsa, drained (liquid reserved)
  • 12 oz. to 1 lb. lean ground beef (you decide how much meat)
  • 2 tsp. chili powder
  • 1 tsp. chipotle powder
  • 15-oz. can black bean fiesta, undrained
  • 4 medium sweet potatoes
  • 1+ cup grated cheddar cheese (or a jack and cheddar mix)
  • 1⁄2 cup sour cream
  • 3 scallions, thinly sliced

Directions

  1. In a two-quart sauce pan heat 2 tablespoons olive oil over medium heat. Add drained salsa for 3 minutes.
  2. Add the meat and chili powder. Cook and stir, breaking up the meat with a wooden spoon, until cooked throughand beginning to brown, about 5 minutes.
  3. Stir in reserved salsa liquid and beans with their liquid. Bring to a simmer. Reduce heat to low; cover and cook, stirring occasionally, until flavors meld, about 10 minutes.
  4. Meanwhile, to cook the sweet potatoes, wash and pat dry. Prick each spud four times with a fork; microwave on high for 15 minutes, flipping once during cooking. (Alternatively, bake the potatoes in a 400° oven for 45-60 minutes.)
  5. Use a sharp knife to test for doneness. If not tender enough, continue to microwave in one-minute increments until tender.
  6. Split open the potatoes and gently squeeze to create a central cavity. Place on plates.
  7. Spoon chili over potatoes and top with cheese, sour cream and scallions.

http://www.lynnandruss.com

Chinese Stir-Fry with Black Bean Sauce

This tasty Asian sauce is quite adaptable to any stir-fry. Go ahead and double it if desired so that you have enough for an additional stir-fry in the future. The choice of vegetables is also a personal preference, but try to keep the total amounts about the same.

Prep all ingredients before you start the stir-fry. We substituted hatch chile peppers for the green bell because it was a new item that we had never tried before. They look very similar to long hots, which are quite spicy. The package indicated they had a medium heat level—we thought they were milder than that. They also take a bit longer than the red bell pepper to soften in the wok.

Chinese Stir-Fry with Black Bean Sauce

  • Servings: 4
  • Difficulty: easy
  • Print

Ingredients

Bean Sauce

  • 1 1/2 tsp. cornstarch
  • 1 1/2 tsp. dry sherry or Shaoxing
  • 1/2 cup chicken broth
  • 1 1/2 Tbsp. Chinese black bean and garlic sauce
  • 1 Tbsp. granulated sugar
  • 1 tsp. Asian chile paste
  • 1/2 tsp. minced fresh ginger

In a measuring cup, combine the cornstarch with the sherry, whisking to blend. Then whisk in the remaining ingredients. Set aside. Can be easily doubled.

Staples

  • 3 Tbsp. peanut oil
  • 1 lb. shiitake mushrooms, stems removed caps cut into 1/4″ slices
  • 6-8 scallions, trimmed with whites cut into 1″ lengths, greens sliced thin for garnish
  • 4 garlic scape stems cut into 1/2″lengths; or 3 garlic cloves sliced thin
  • 1 each red and green bell pepper, stemmed, seeded and cut into 1″ pieces
  • I lb. boneless, skinless chicken thighs, cut into 1″ chunks
  • 1/2 cup fresh basil leaves, roughly chopped
  • 1 cup white rice, cooked according to package directions

Directions

  • Heat a large wok on high. Add 1 tablespoon peanut oil. When smoking, add scallions and garlic stirring constantly for 2 minutes, then place into a large bowl.
  • Add 1 more tablespoon to wok and toss in bell pepper pieces, stir continuously for 2-3 minutes until they start to soften. Put in bowl with scallions.
  • Put final tablespoon peanut oil into wok and then add chicken. Let chicken sit in hot wok for one full minute before you start to flip; then stir until the pink disappears. Add chicken to bowl with vegetables.
  • Pour reserved black bean sauce into wok, when hot dump all of the bowl ingredients into wok and stir-fry for 1 minute.
  • Serve steamed rice on each dinner plate topped with stir-fry. Garnish with chopped basil and scallion greens.

http://www.lynnandruss.com

Roasted Brussels Sprouts with Orange-Butter Sauce

Tangy orange-butter sauce gives Brussels sprouts a wake-up call in this recipe and paired well with our Citrus Rosemary Chicken entrée. The key is using real maple syrup and a good quality balsamic vinegar for the best flavor.

It is easily cut in half if serving 4 or less people. Truly yummy! In fact, all of our guests claimed they were the best Brussels sprouts they have ever eaten!

Roasted Brussels Sprouts with Orange-Butter Sauce

  • Servings: 8
  • Difficulty: easy
  • Print

Ingredients

  • 2 lbs. small Brussels sprouts, trimmed and halved lengthwise
  • 1/4 cup extra-virgin olive oil
  • 1 tsp. coarse salt
  • 1 Tbsp. plus 1 teaspoon balsamic vinegar
  • 2 Tbsp. pure maple syrup
  • 2 Tbsp. freshly squeezed orange juice
  • 1 tsp. finely grated orange zest
  • 4 Tbsp. cold unsalted butter, cut into 16 pieces

Directions

  1. Preheat oven to 475 degrees. Line a large rimmed baking sheet with parchment paper; set aside.
  2. In a large bowl, toss Brussels sprouts with olive oil and salt; arrange in an even layer on prepared baking sheet, cut side down.
  3. Transfer to oven and roast until brown and tender, 15 to 18 minutes, rotating baking sheet halfway through baking; transfer to a large bowl.
  4. In a small saucepan, mix together vinegar, maple syrup, orange juice, and orange zest; heat over medium heat until heated through but not simmering. Remove from heat and whisk in cold butter, a few pieces at a time, until smooth and creamy.
  5. Pour vinegar mixture over Brussels sprouts and gently stir until liquid is absorbed and mixture is well combined; serve immediately.

http://www.lynnandruss.com

Adapted from a recipe by Martha Stewart

Easy Eggplant Parm for Two

This is an incredibly tasty Eggplant Parm dish that has been streamlined not only for the number of people it feeds, but in its simplicity and amount of time it takes from start to finish. Some of the time-consuming steps have been omitted, such as salting the eggplant slices to reduce bitterness and peeling the outer skin. We were both bowled over by how flavorful it was!

To be honest, our eggplant was about 1 1⁄2 pounds, so we slightly deviated the recipe to accommodate for the larger size. For instance, we were able to carve out three 3⁄4″ slices, which after cutting crosswise made 6 planks. To compensate, we needed another egg in Step 2, and used an extra can of tomatoes.

Some of our other changes included increasing the amount of cheese (because that’s the way we roll 🙂 ), adjusting some of the cooking times, and frying the planks in two separate batches, otherwise, we kept everything else pretty much the same. With our changes, the finished dish easily feeds 3 people.

Recipe Notes: 1. Using a sharp knife, slice off one side of eggplant (reserve) and cut two 3/4-inch planks from the center. 2. Cut planks in half crosswise so they’ll neatly fit into the pan for frying in a single batch. 3. Chop reserved side pieces into strips, then into ½-inch cubes and set aside for building the tomato pan sauce.

Easy Eggplant Parm for Two

  • Servings: 2
  • Difficulty: easy
  • Print

Ingredients

  • 1 1-lb. eggplant
  • 14 cup all-purpose flour
  • 1 large egg
  • 12 cup panko breadcrumbs
  • 34 cup grated parmesan cheese
  • 14 salt
  • 14 tsp. pepper
  • 12 cup olive oil, plus 3 Tbsp. olive oil, divided
  • 4 garlic cloves, minced
  • 14 tsp. red pepper flakes
  • 1 14 1⁄2 oz. can diced tomatoes
  • 14 cup chopped fresh basil
  • 12 cup shredded provolone cheese

Directions

  1. Bread Eggplant: Cut two 3/4-inch planks lengthwise from center of eggplant, halve each plank crosswise. Cut remaining eggplant into 1/2-inch dice and set aside.
  2. Place flour in shallow dish. Beat egg in second shallow dish. Combine bread crumbs, 1/4-cup Parmesan, 1/4 teaspoon salt and 1/4 teaspoon pepper in third shallow dish. One at a time, coat eggplant slices lightly with flour, dip them in egg and dredge in bread crumb mixture, pressing to adhere.
  3. Transfer to wire rack set inside rimmed baking sheet and let sit 5 minutes (or refrigerate up to 1 hour).
  4. Cook Eggplant: Adjust oven rack to upper-middle position and heat oven to 450°F.
  5. Heat 1/2 cup oil in large nonstick skillet over medium-high heat until shimmering. Cook eggplant slices until lightly golden browned, about 1 minute per side.
  6. Transfer to wire rack set inside baking sheet and bake until eggplant is tender and deep golden brown, 15 to 18 minutes.
  7. Make Sauce: Meanwhile, pour off oil and wipe out skillet with paper towels. Heat 2 tablespoons oil in empty skillet over medium-high heat until shimmering.
  8. Add the reserved chopped eggplant and 1/4 teaspoon salt and cook, stirring occasionally, until lightly browned, about 3 minutes. Stir in remaining 1 tablespoon oil, garlic and pepper flakes and cook until fragrant, about 30 seconds.
  9. Add tomatoes and reduce heat to medium. Simmer until eggplant is tender and sauce is thickened, about 5 minutes. Stir in basil and season with salt and pepper; cover and keep warm.
  10. Assemble: Combine remaining 1/2 cup Parmesan and provolone in medium bowl. Top browned eggplant slices with cheese mixture and bake until cheese is melted, about 3 minutes (or longer if you increase the amount of cheese like we did).
  11. Transfer half of sauce to platter and top with eggplant slices. Spoon remaining sauce over eggplant. Serve.

http://www.lynnandruss.com

Adapted from a recipe for Cook’s Country

Greek Spinach Salad with Grilled Flap Steak and Marinated Feta

As grilling weather will begin its hibernation not too far down the road, at least for many of us, it’s time to take advantage of that weather and grill al fresco as often as we can. This wonderful Greek salad incorporates flap meat as one of its ingredients. We like that cut of meat for it’s beefiness and loose grain for the marinade to seep into.

Here, grilled steak turns a Greek salad into a substantial dish, while marinating the feta in a mixture of spicy chile flakes, briny capers, bright lemon, and herbs adds a big punch of flavor. For a heftier meal, serve with grilled pita or crusty bread rubbed with fresh garlic.

As far as amount of beef, we happened to have 2 pounds of flap meat in the freezer, so even though that is double the amount listed, we used it all. Therefore our salad was a little more meat-forward than the original.

Unable to source mini cucumbers, we opted for a seedless Persian variety and used about half of it sliced into small rounds. Additionally, there was very little dressing left after draining the feta from its marinade, so we increased the amount of a few of those ingredients which are noted below.

Greek Spinach Salad with Grilled Flap Steak and Marinated Feta

  • Servings: 4
  • Difficulty: easy
  • Print

Ingredients

  • 9 Tbsp. extra-virgin olive oil, divided
  • 3 cloves garlic, minced
  • 1 Tbsp. chopped fresh oregano or 1 tsp. dried
  • 2 tsp. red wine vinegar
  • Kosher salt and freshly ground black pepper
  • 1 1b. beef flap meat, cut into pieces of even thickness, if necessary
  • 2 Tbsp. chopped fresh flat-leaf parsley
  • 1 Tbsp. capers, rinsed and chopped
  • 2 Tbsp. fresh lemon juice
  • 1 tsp. chopped fresh thyme
  • 1/4 tsp. crushed red chile flakes
  • 7 oz. feta (preferably Greek), cut into small cubes (about 1-1/2 cups)
  • 5 oz. baby spinach, (about 5 lightly packed cups)
  • 2 mini cucumbers, halved lengthwise and thinly sliced crosswise
  • 1 1/2 cups cherry tomatoes (preferably a mix of colors and shapes), halved
  • 1/2 cup pitted Kalamata olives, halved

Directions

  1. In a medium bowl, whisk 3 Tbs. of the oil with the garlic, oregano, vinegar, 1/4 tsp. salt, and a few grinds pepper. Add the steaks and turn to coat. Cover and marinate in the refrigerator for up to 4 to 6 hours.
  2. Meanwhile, in a medium bowl, whisk the remaining 6 Tbs. oil, the parsley, capers, lemon juice, thyme, and chile flakes. Add the feta and stir gently to coat. Marinate at room temperature for up to 1 hour, or in the refrigerator for up to 6 hours. Remove from the fridge one hour before using.
  3. Prepare a medium-high (400°F to 475°F) gas or charcoal grill fire. Remove the steaks from the marinade and pat dry. Grill, turning every 2 minutes, until cooked to your liking, 6 to 8 minutes for medium (140°F).
  4. Transfer to a cutting board, cover loosely with foil, and let rest for 5 to 10 minutes. Thinly slice the steak against the grain, then season lightly with salt.
  5. Put the spinach, cucumbers, tomatoes, and olives in a large bowl. Drizzle all of the marinade from the feta over the salad, using a spatula to hold back the feta (it’s OK if a few pieces fall in).
  6. Season with salt and pepper, and toss to coat. Arrange on a serving platter or divide among four dinner plates. Scatter the steak and feta over the salad, and serve.

http://www.lynnandruss.com

Original recipe from Fine Cooking

Roasted Butternut Squash with Hoisin and Chives

Hands down, our favorite new roast squash recipe! Here, hoisin mixed with rice vinegar and sesame oil makes a salty-sweet-tangy-nutty dressing for tender chunks of roasted butternut squash that provides a creamy and tasty mouthful.

You can purchase already peeled and cut squash from the grocery store, but keep in mind that if the pieces are smaller or larger than specified here, you may need to adjust the cooking time. Use a broiler-safe rimmed baking sheet, as the squash chars for about 10 minutes under the broiler.

Peeling squash was never a favorite prep step. But our new Milk Street Precision Peeler makes it so easy! Few peelers actually do what they are designed to do: shave away the skins and peels from fruits and vegetables. At a cost of $29.95, it is pricey, but so well worth it.

The ovoid shape fills the palm for comfort when gripping tight and the graceful pinch grip provides a precision hold for controlled peeling even the toughest peels, skins and zest. The blade has a wide pivot to accommodate ingredients of all shapes and size, from butternut squash and eggplant to Parmesan and chocolate. Comes with extra blades.

The weight of our two butternut squash exceeded the required 3 pounds. We decided to roast all of it (in two baking sheets) and use the remainder to accompany another meal, and make butternut squash soup. Don’t crowd the baking sheets with squash flesh otherwise it will steam and not obtain the light char that is preferable.

As far as cooking time, our sheet of squash chunks roasted in the hot oven for 15 minutes instead of 10. Then a total of 15 minutes under the broiler while turning and moving the baking sheet a few times—even so, some squash obtained more a of a char than others.

With cooler temps rolling in for the autumn and winter months, this side dish is a welcome accompaniment to grilled meats, braised dishes, vegetarian meals, and roasted poultry.

Roasted Butternut Squash with Hoisin and Chives

  • Servings: 4
  • Difficulty: easy
  • Print

Ingredients

  • 3 lbs. peeled and seeded butternut squash, cut into 1½- to 2-inch cubes (about 6 cups)
  • 2 Tbsp. neutral oil
  • 2 tsp. packed brown sugar
  • Kosher salt and ground black pepper
  • ¼ cup hoisin sauce
  • 2 Tbsp. unseasoned rice vinegar
  • 1 tsp. toasted sesame oil
  • 3 Tbsp. chopped fresh chives OR 3 scallions, thinly sliced on the diagonal

Directions

  1. Heat the oven to 475°F with a rack 6 inches from the element.
  2. In a large bowl, toss the squash with the neutral oil, sugar, 1 tablespoon salt and ¼ teaspoon pepper. Spread in an even layer on a rimmed baking sheet and roast until just shy of tender, 10 to 12 minutes.
  3. Turn the oven to broil and broil until charred and fully tender, about 10 minutes.
  4. In a large bowl, whisk together the hoisin, vinegar and sesame oil. When the squash is done, immediately add it and the chives to the bowl, then toss.

http://www.lynnandruss.com

Recipe courtesy of Milk Street

Salmon with Barigoule

As a Milk Street article informed us, barigoule is a Provençal braise of fresh artichokes in white wine, with aromatics such as garlic and thyme. The name “barigoule” comes from a type of mushroom once said to be a part of the dish; the moniker stuck even though the fungi no longer are added to modern versions.

Here, cremini mushrooms are added for their earthy depth and meaty texture that balance the acidity of the wine and complement the mildness of the artichokes. To make this doable on a weeknight, use canned artichokes rather than fresh, but to keep their flavor as bright as possible, cook them in the broth only for as long as it takes to heat them through.

Our changes? Instead of four, 6-ounce filets, we bought a 1 1⁄2-pound single filet and cut it into 3 strips, which gave each of us an 8-ounce portion. Similarly, 4 ounces of mushrooms just didn’t float our boat, so we doubled that amount to 8 ounces.

Another alteration was cutting the artichoke hearts in half instead of quartered, because they were on the small side to begin with. Finally, because our salmon filets were a bit larger, and the fact that prefer ours less translucent, we simmered them until they reached an internal temperature of 130°. All changes are noted below.

Don’t forget to turn down the heat after adding the salmon to the skillet. Gentle poaching ensures the fillets cook evenly and stay moist. Don’t cover the skillet while cooking the salmon; too much heat will be trapped inside, resulting in overcooked fillets.

Salmon with Barigoule

  • Servings: 4
  • Difficulty: easy
  • Print

Ingredients

  • 4 6-oz. salmon fillets, each about 1 inch thick
  • Kosher salt
  • 2 Tbsp. extra-virgin olive oil
  • 8 oz. cremini mushrooms, trimmed and thinly sliced
  • 3 medium garlic cloves, thinly sliced
  • 2 medium shallots, chopped
  • 1 sprig tarragon, plus 2 Tbsp. chopped fresh tarragon
  • 1 cup dry white wine
  • 1 1/2 cups chicken broth or vegetable broth
  • 14 oz. can artichoke hearts, drained, cut into halves or quarters if whole
  • 2 Tbsp. salted butter, cut into 4 pieces

Directions

  1. Season the salmon all over with salt. In a 12-inch nonstick skillet over medium-high, heat the oil until shimmering. Add the mushrooms and cook, stirring occasionally, until the moisture released by the mushrooms has evaporated and the mushrooms are browned, 4 to 6 minutes.
  2. Add the garlic, shallots, tarragon sprig and ½ teaspoon salt; cook, stirring often, until the garlic is golden brown, 1 to 2 minutes.
  3. Add the wine and cook, stirring occasionally, until reduced by about half, 3 to 5 minutes.
  4. Add the broth and bring to a simmer. Place the salmon boned side down in the pan, reduce to low and cook at a very gentle simmer, uncovered, for 5 minutes. Flip the fillets and cook until the thickest parts reach 130°F or are slightly translucent when cut into, about 5 minutes.
  5. Remove the pan from the heat. Using a wide metal spatula, transfer the salmon to wide, shallow serving bowls.
  6. Bring the broth to a simmer over medium-high, then add the artichokes and butter; cook, stirring, until the artichokes are heated through and the butter is emulsified into the sauce, about 1 minute.
  7. Off heat, taste and season with salt. Remove and discard the tarragon sprig, then spoon the mixture over and around the salmon and sprinkle with the chopped tarragon.

http://www.lynnandruss.com

Recipe by Courtney Hill for Milk Street

Toasted Orzo with Parmesan and Sun-dried Tomato

Prepared Mediterranean-style, this nutty Toasted Orzo Pasta Recipe with Garlic, Parmesan and Sun-dried Tomatoes will steal the show next to your favorite protein. You can even serve it as a quick and easy vegetarian meal on its own; it will feed 4 people as a vegetarian main and about 6 or so as a side dish. 

It was a superb complement to our top sirloin and veggie kebabs. In fact, this orzo recipe jumped to the top of the list and one we’ll make time and again!

Leftovers? Lucky you. It will keep in the fridge for up to 4 days in a tightly closed container. Warm over medium heat.

Toasted Orzo with Parmesan and Sun-dried Tomato

  • Servings: 4-6
  • Difficulty: easy
  • Print

Ingredients

  • Extra virgin olive oil
  • 1 1/2 cups orzo pasta
  • Kosher salt
  • 5 cloves garlic, minced
  • 1 pinch red pepper flakes, or more to taste
  • 1/2 lemon, juiced
  • 1 cup parsley, chopped
  • 1/2 cup oregano, chopped
  • 1/3 cup sun-dried tomatoes in olive oil, chopped
  • black pepper
  • 1/2 cup grated parmesan, or more to your liking

Directions

  1. In a large saucepan, heat 2 tablespoons extra virgin olive oil over medium-high. Add the orzo and cook, tossing around, until toasted to a beautiful golden brown.
  2. Add at least 7 cups of boiling water to the saucepan and season well with 1 tablespoon of kosher salt. Cook the pasta in boiling water to al dente according to the package instructions (about 7 to 8 minutes).
  3. Just before the pasta is fully cooked (after about 5 minutes), remove 1 cup of the starchy pasta water and set it aside.
  4. In a large pan, warm 1/2 cup extra virgin olive oil over medium heat. Add the garlic and season with a pinch of kosher salt and red pepper flakes, if using. Cook, tossing regularly, until just fragrant. Add the lemon juice and 1/2 cup of the pasta cooking water. Raise the heat if needed to bring to a boil. Add the parsley and oregano.
  5. When the pasta is ready, drain and add it to the pan and toss to combine. Season with kosher salt and black pepper. Add the sun-dried tomatoes and a 1/4 cup of the grated parmesan. Toss to combine. If needed, add a little more of the pasta cooking water.
  6. Finish with more Parmesan and red pepper flakes, if you like.

http://www.lynnandruss.com

Adapted from a recipe for MediterraneanDish.com