Tag Archives: Japanese

Shio Koji-Marinated Flank Steak

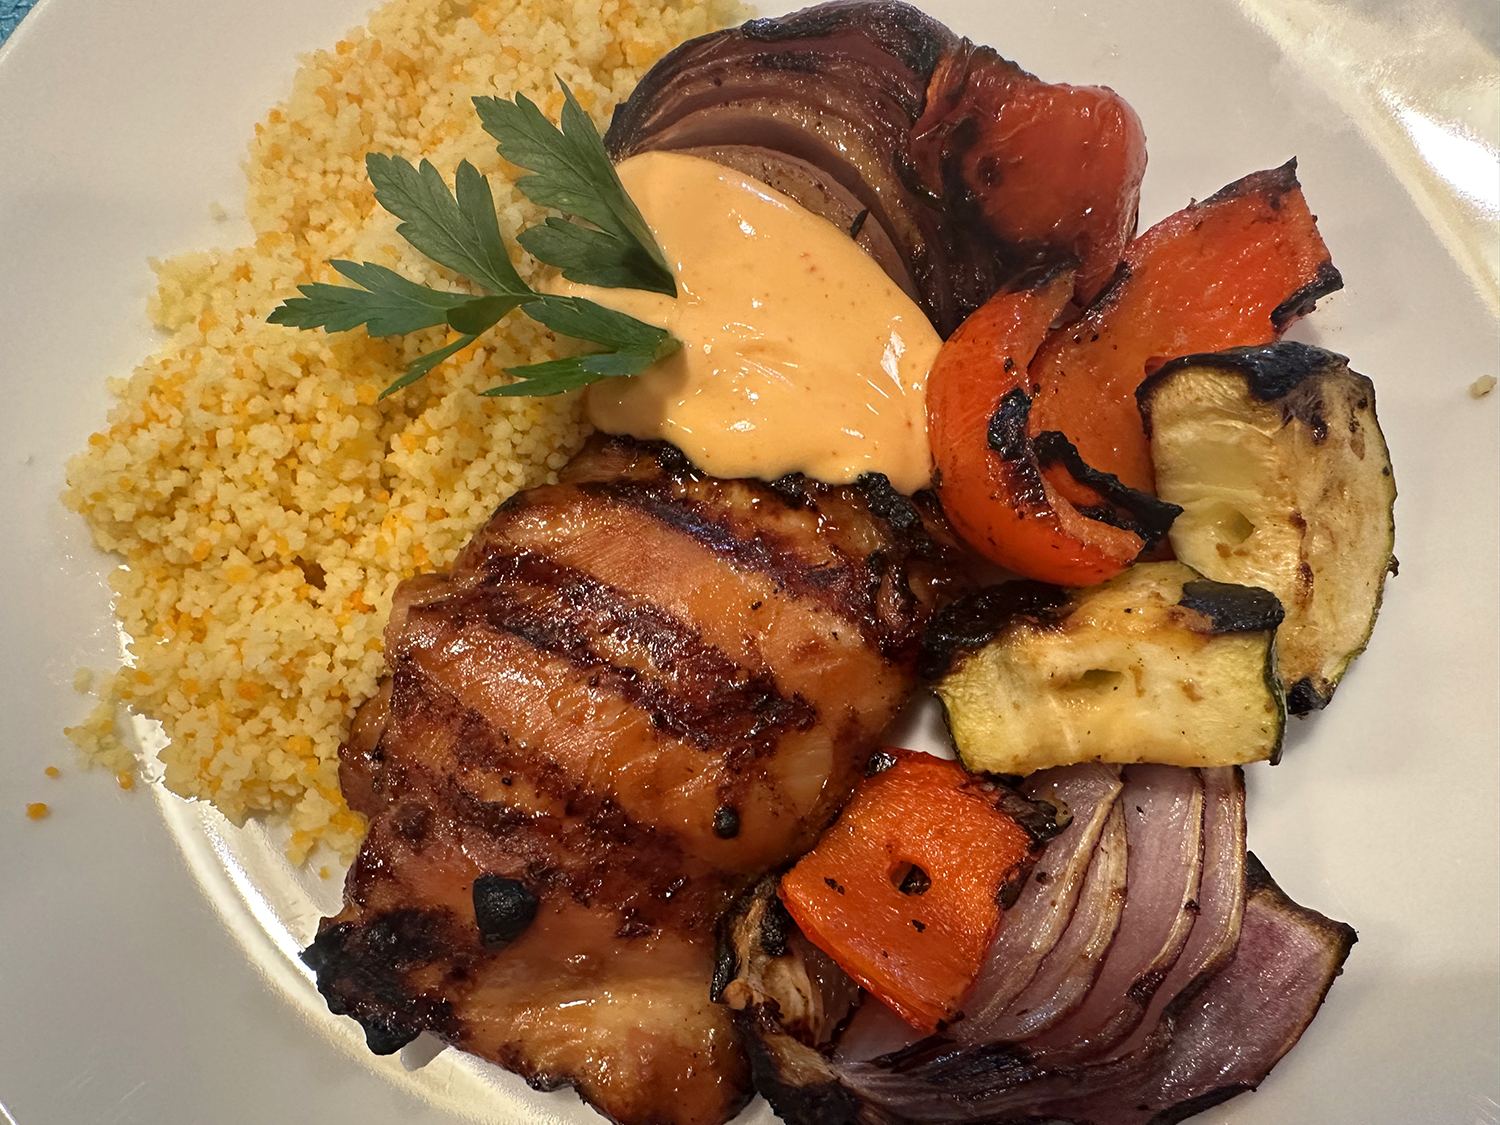
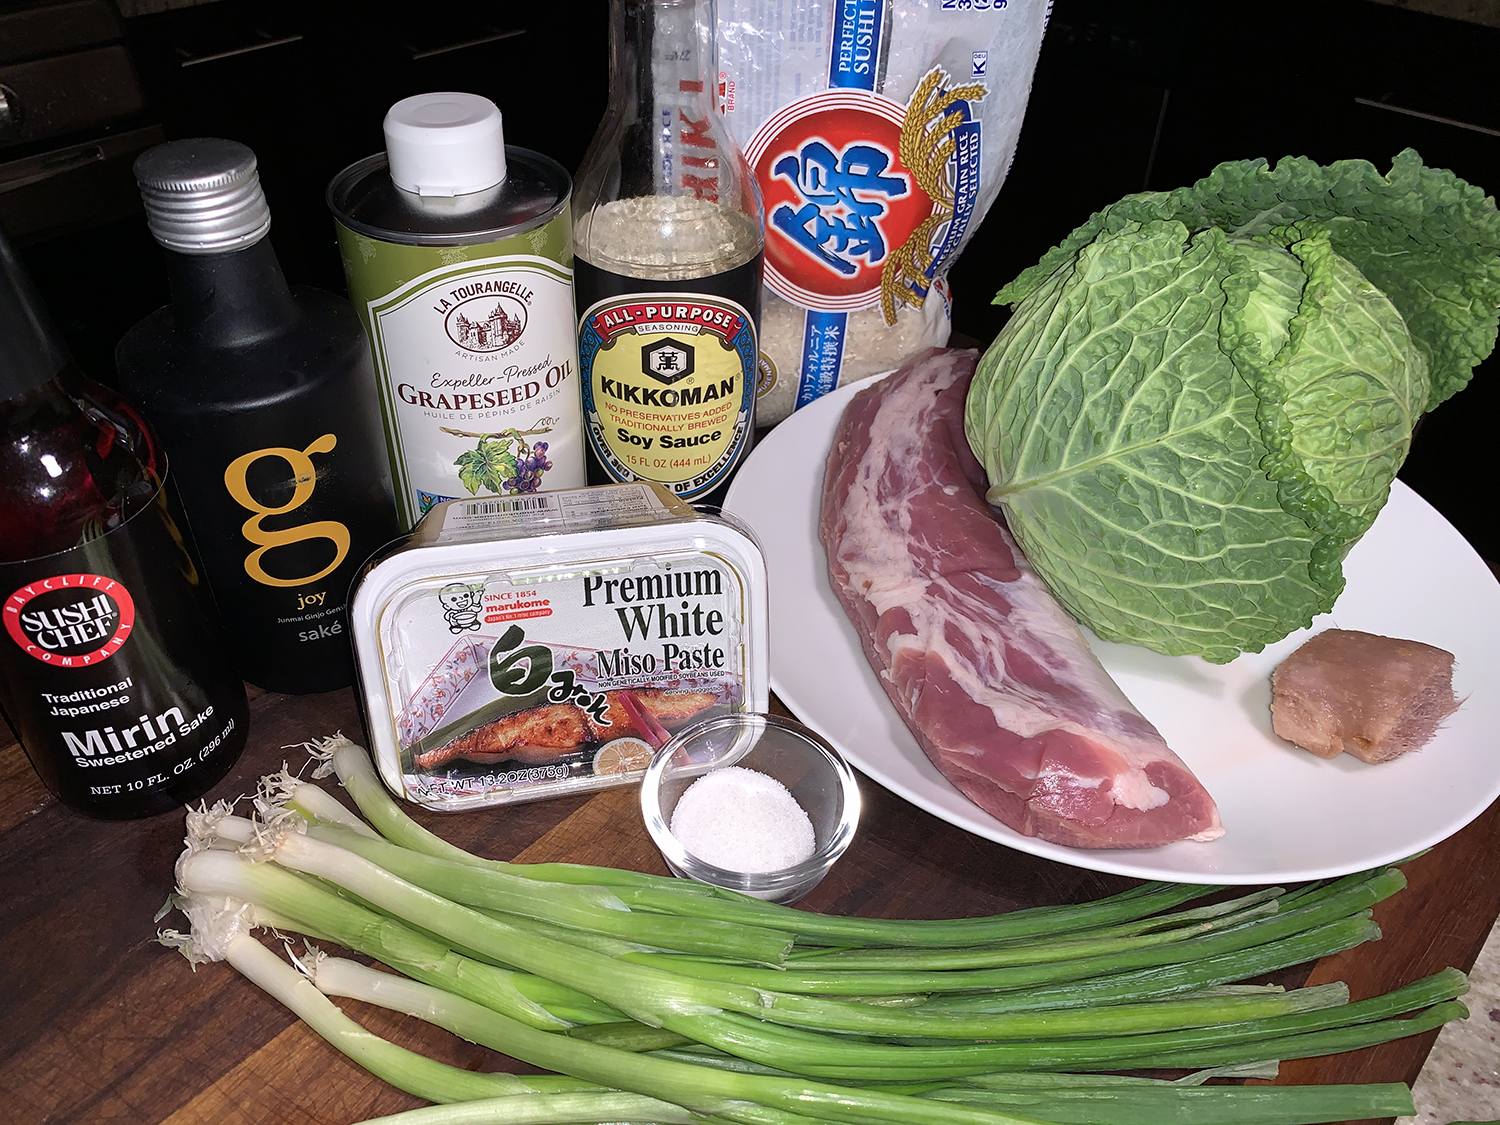
This super-easy reverse-seared steak recipe is just the thing for a flavor-packed tasty dinner. The list of ingredients is manageable, but one in particular, shio koji, may be unfamiliar to you.

To educate, Shio Koji is a fermented seasoning made from rice koji, salt, and water. The fermentation process of these three ingredients creates a creamy, paste-like condiment with a salty and sweet, umami-rich flavor. It contains enzymes like amylase and protease, which break down starches and proteins, making it a popular marinade and meat tenderizer. 

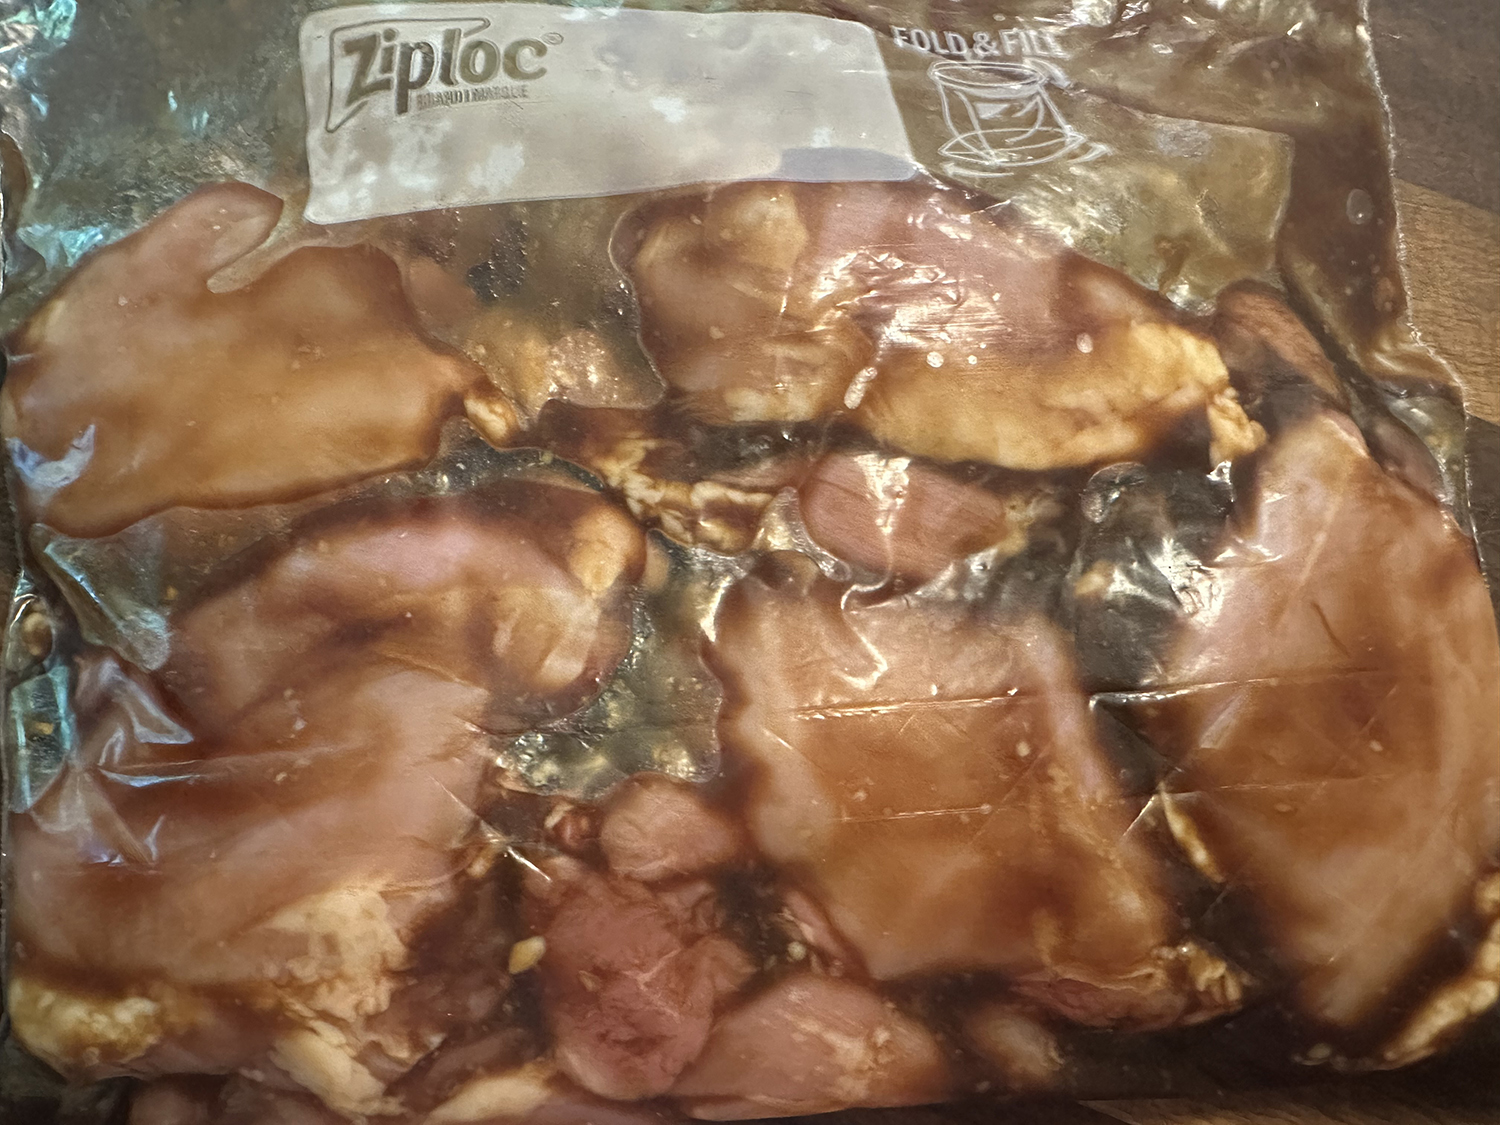
Shio koji, which can be made at home or purchased, is often used as a marinade because it is rich in protease enzymes (which break down proteins), so it can create an array of new flavors in protein-rich foods.

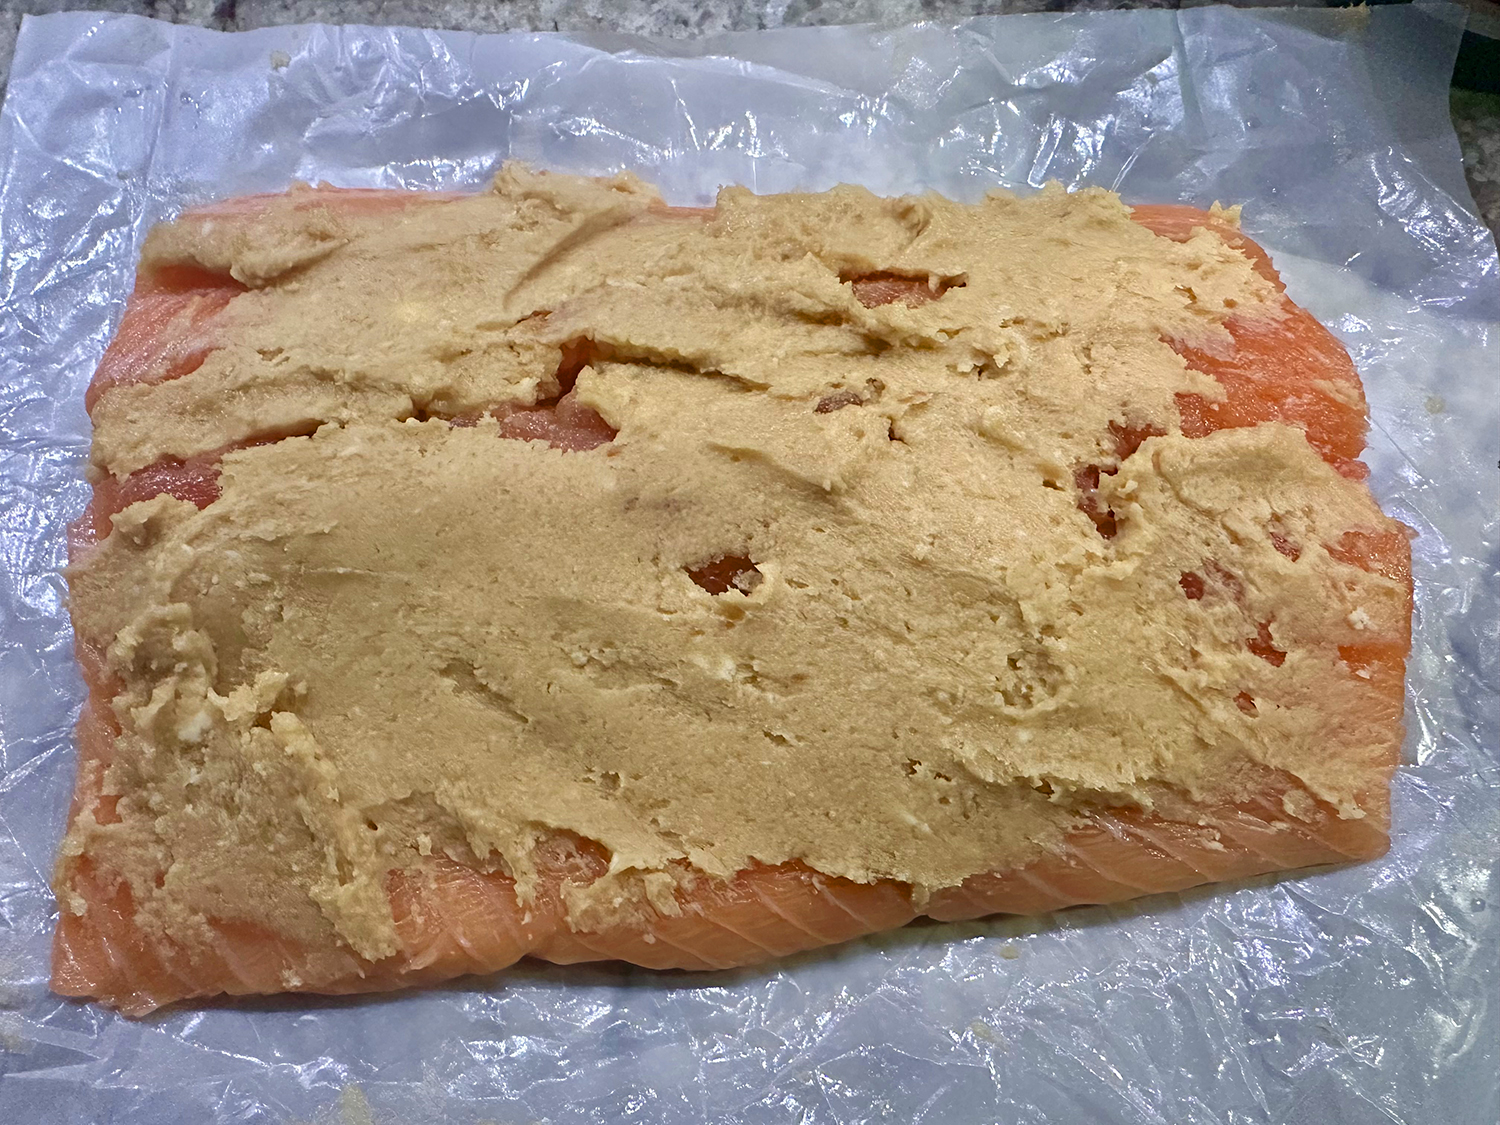
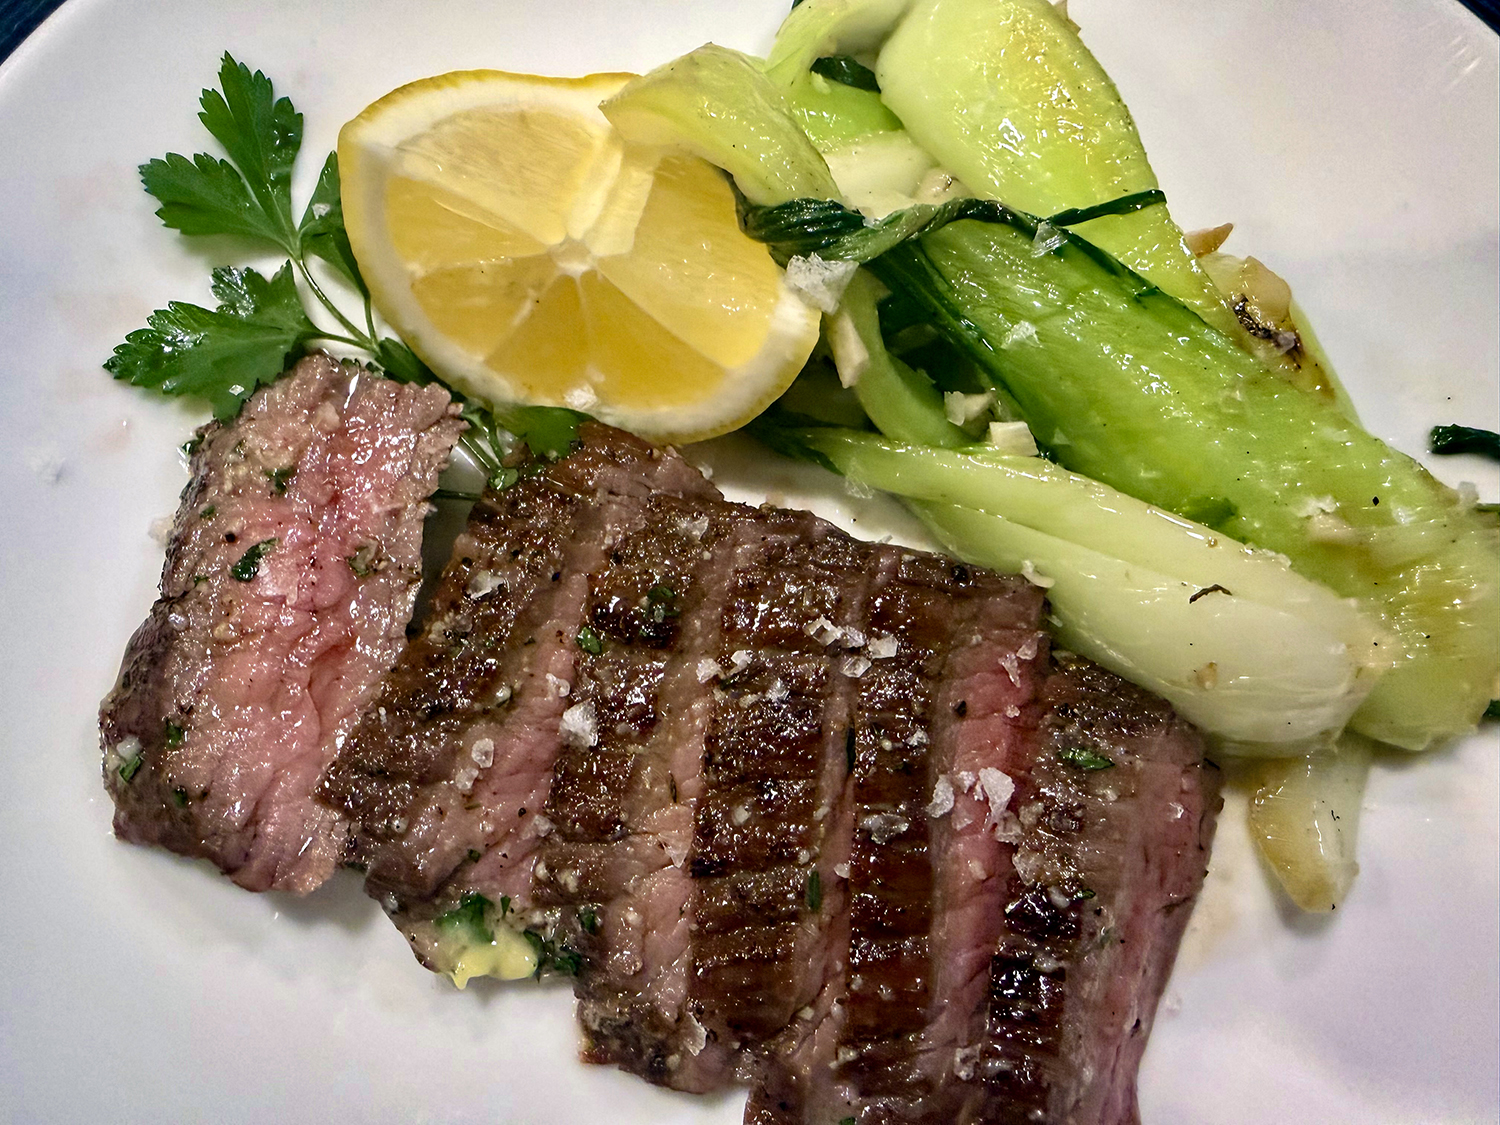
Here, shio koji gives marinated flank steaks the nutty, savory, blue-cheese-y flavors typically found in expensive dry-aged steaks. After wiping the marinade from the steaks, cook them in the oven with a gentle heat to keep their interiors juicy and rosy pink. Finally, quickly sear them on the stovetop to create a slightly charred crust.

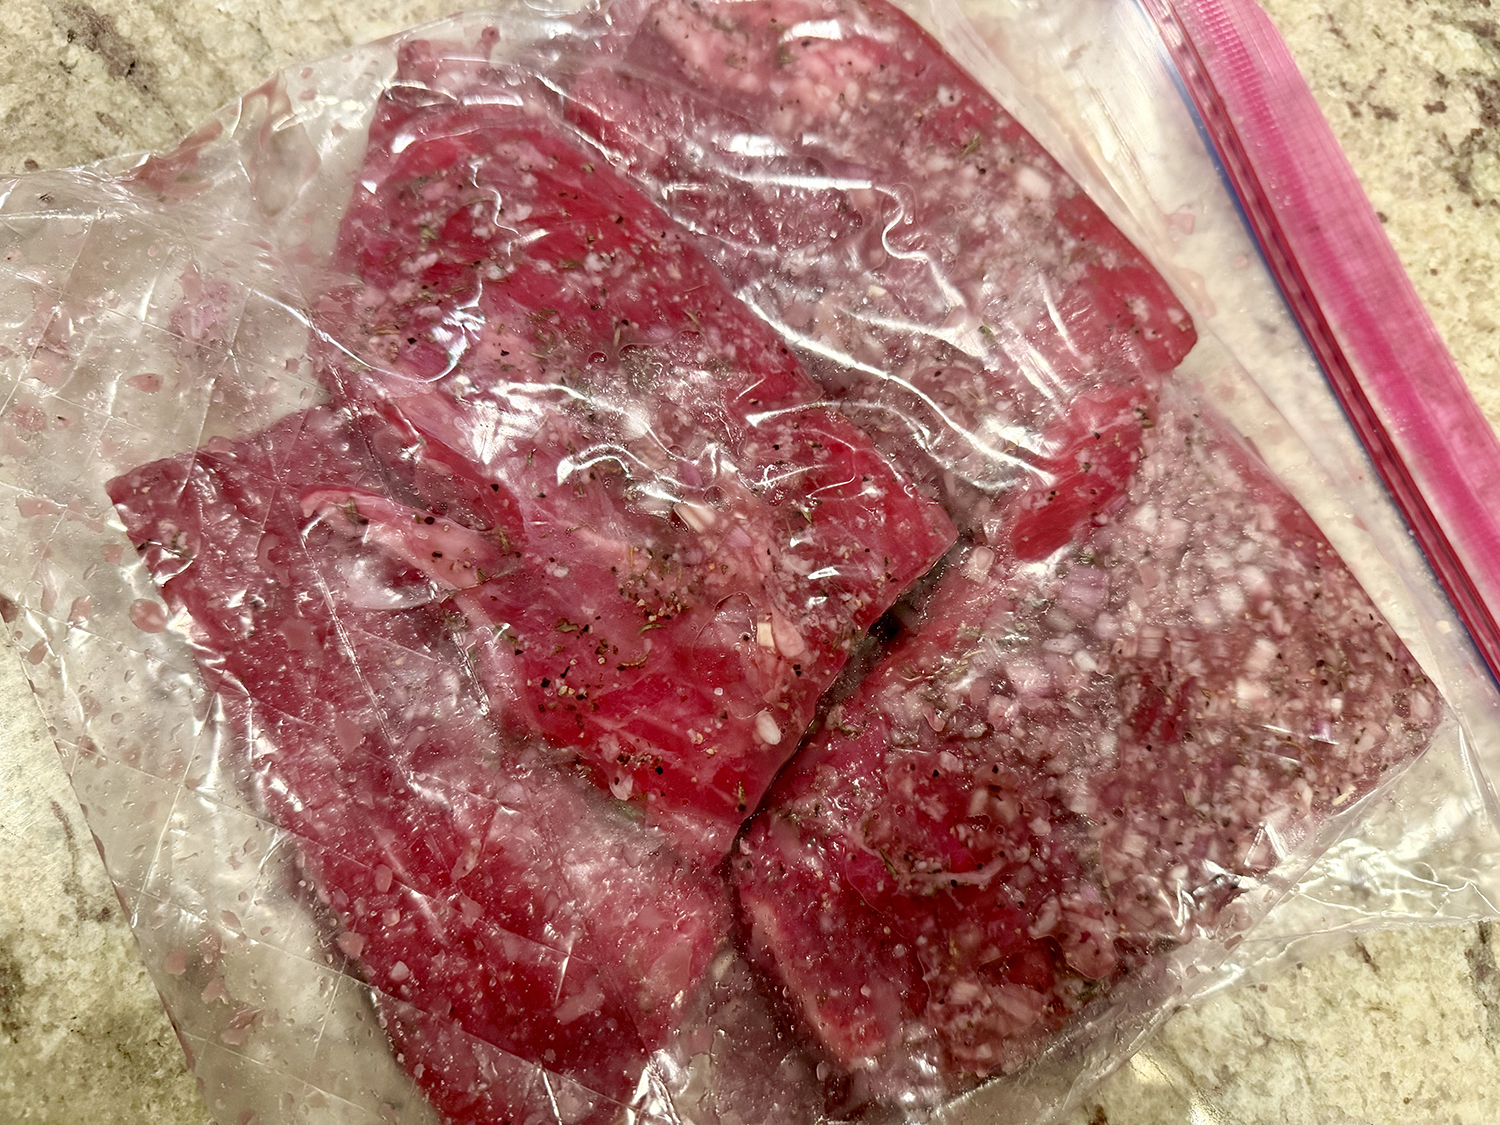
This recipe contains three marinating options (see below), of which we chose the Red-Wine Shallot variation.

Shio Koji-Marinated Flank Steak

  • Servings: 4
  • Difficulty: easy
  • Print

Ingredients

For the Steak

  • 1 (1½- to 1¾-lb.) flank steak, well trimmed
  • 3 Tbsp. shio koji
  • ½ tsp. pepper
  • 1 tsp. vegetable oil
  • Flaky sea salt (optional)
  • Lemon wedges (optional)
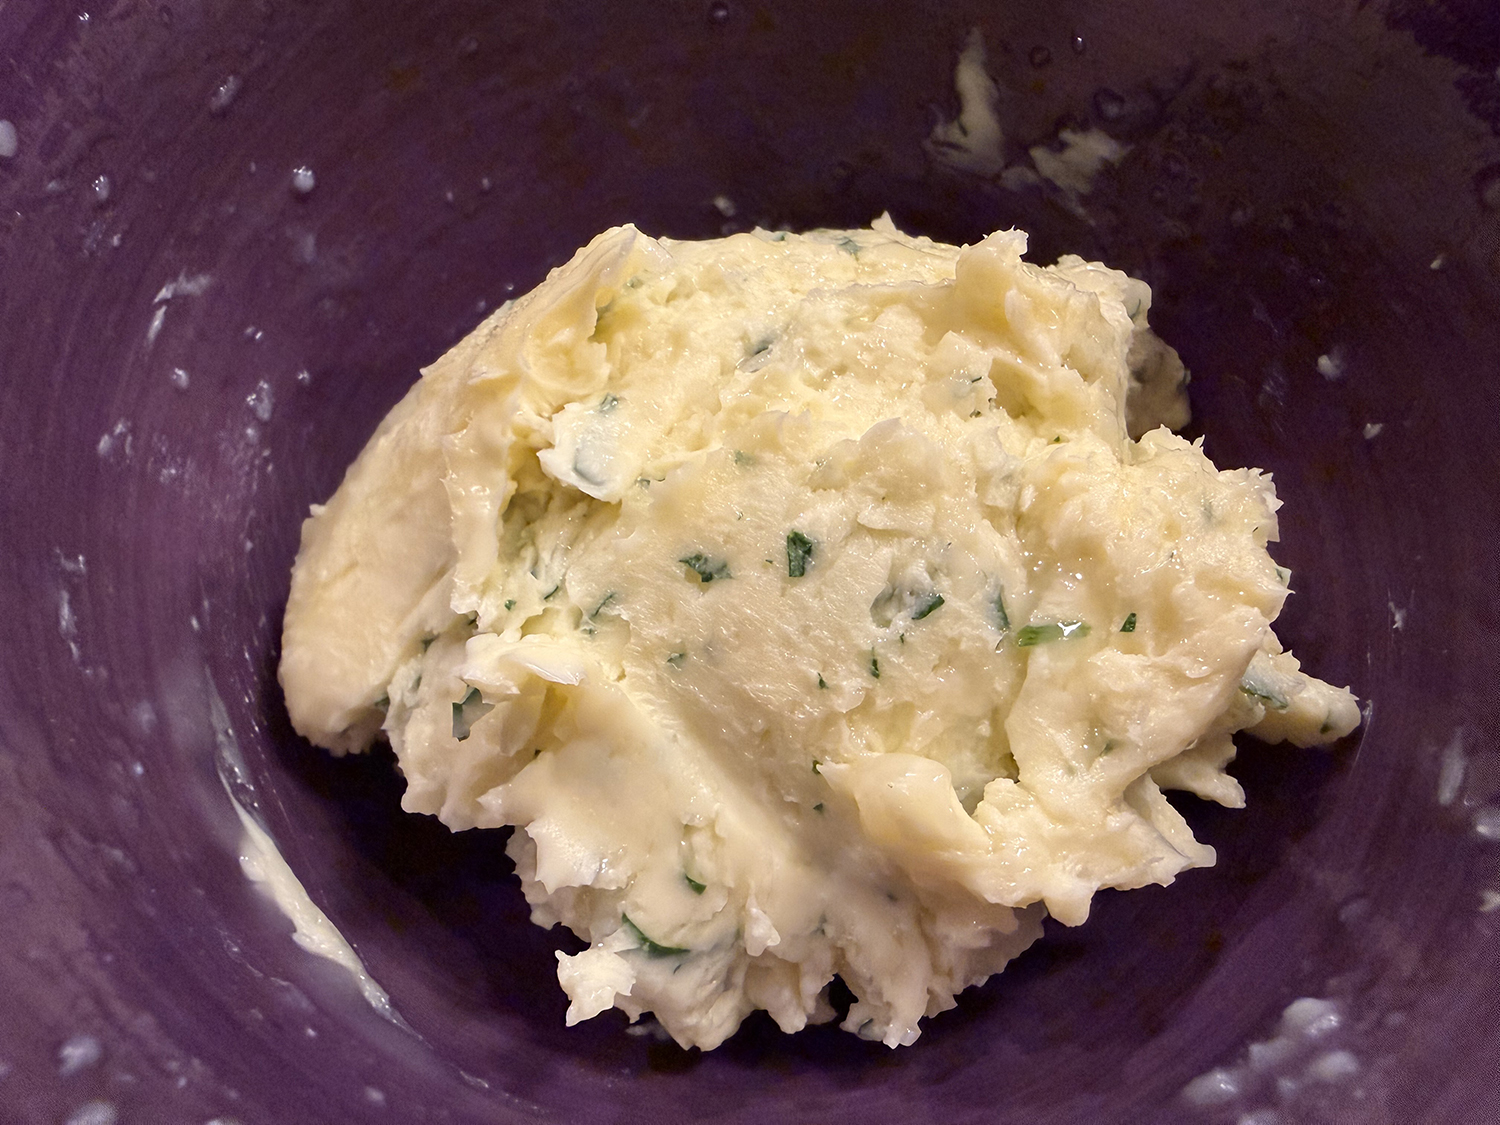
For the Butter

  • 4 Tbsp. unsalted butter, softened
  • 1 1⁄2 ysp. shio koji
  • 1 tsp. minced fresh parsley (or other herb of your choice)
  • 1⁄8 tsp. kosher salt

Directions

For the Steak

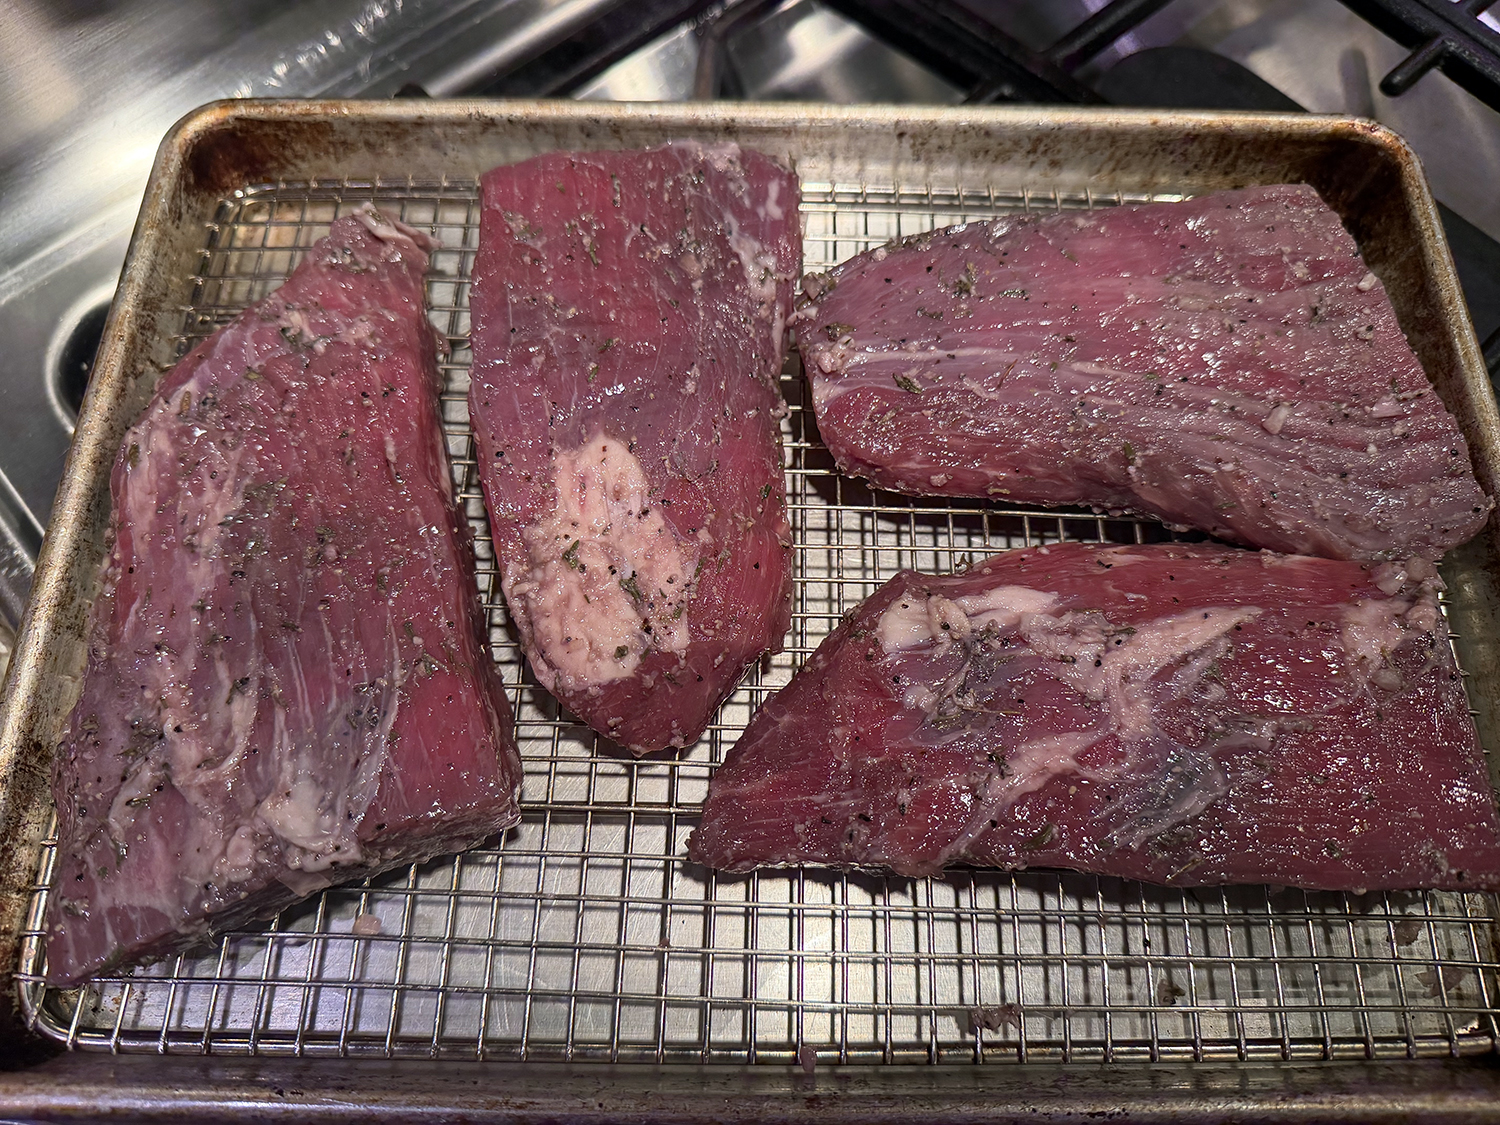
  1. Adjust oven rack to middle position and heat oven to 275 degrees. While oven heats, set wire rack in rimmed baking sheet. 
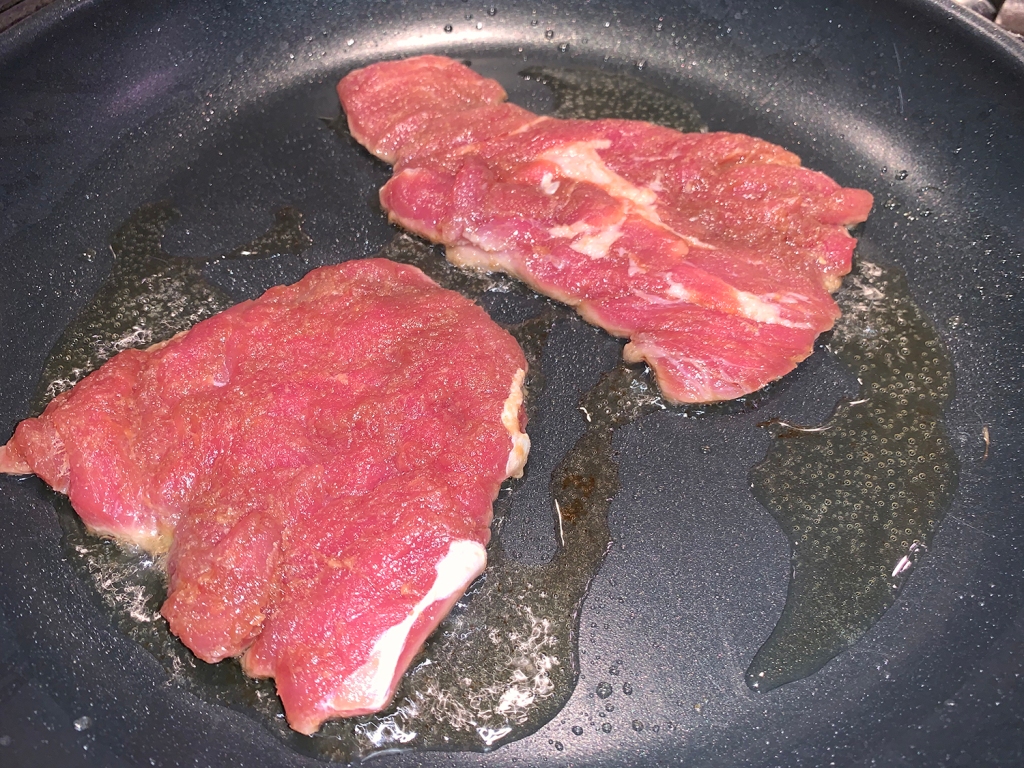
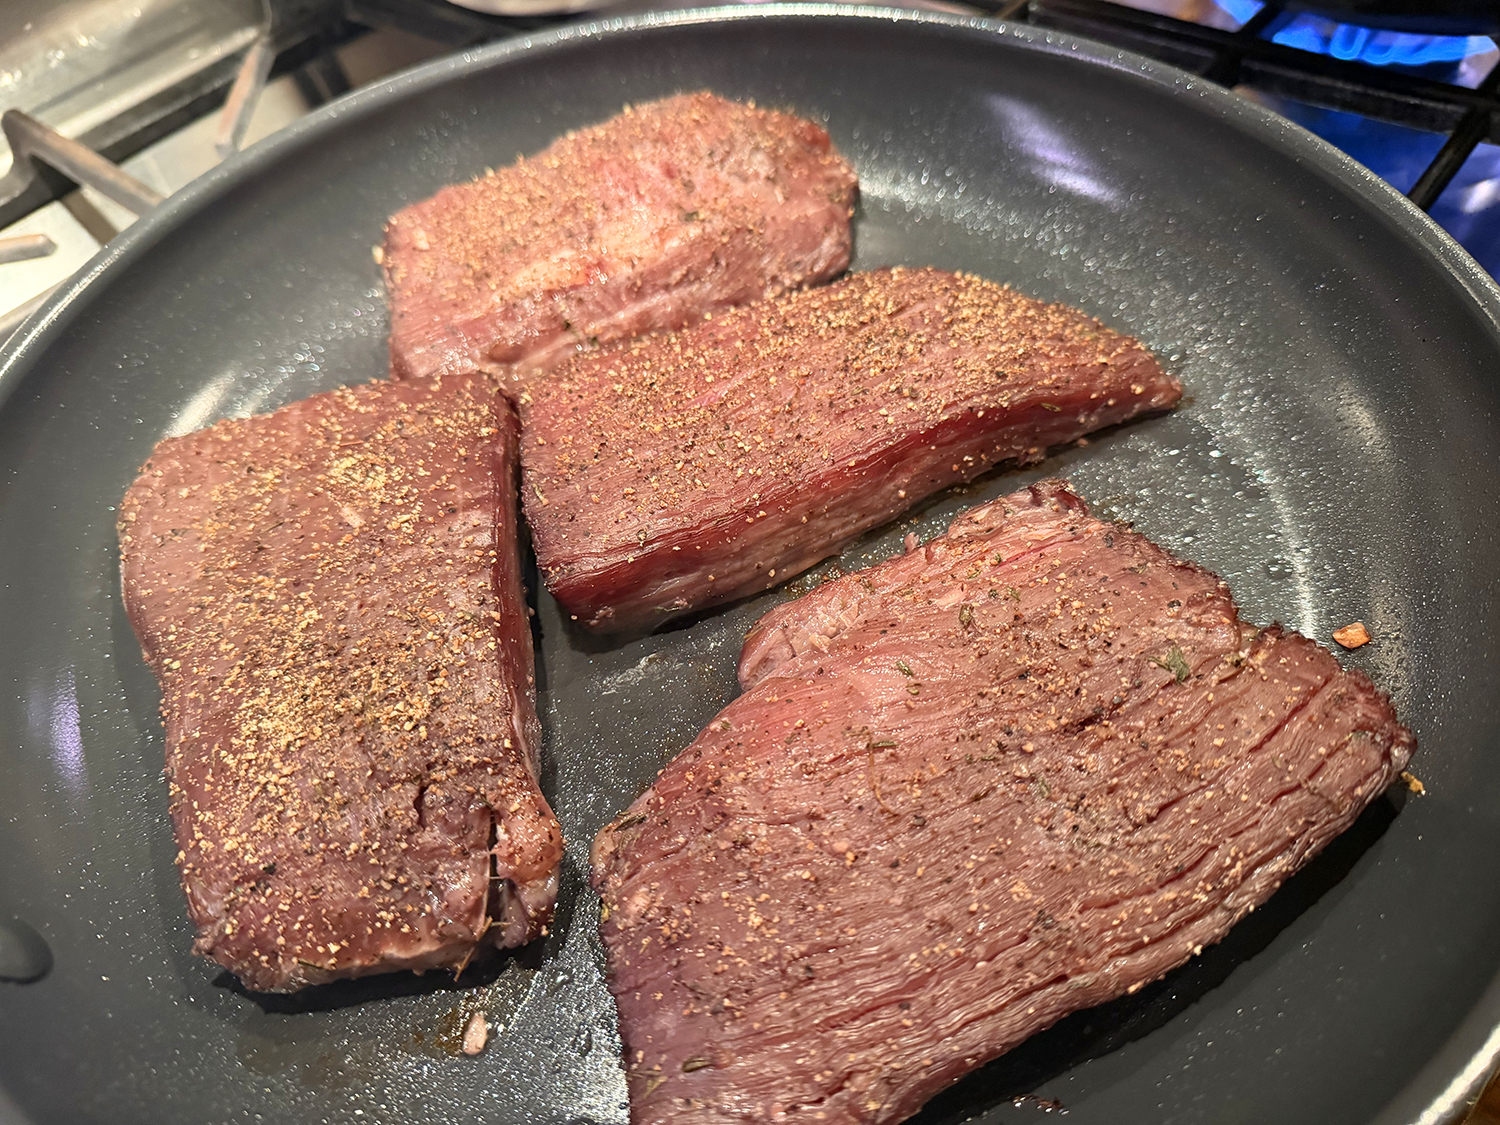
  2. With damp towel, wipe koji from steaks (it’s OK if a few grains remain on steak). Sprinkle with ½ teaspoon pepper. Set steaks on prepared rack and transfer to oven. Cook until thickest part of largest steak registers 125 degrees, 25 to 30 minutes.  
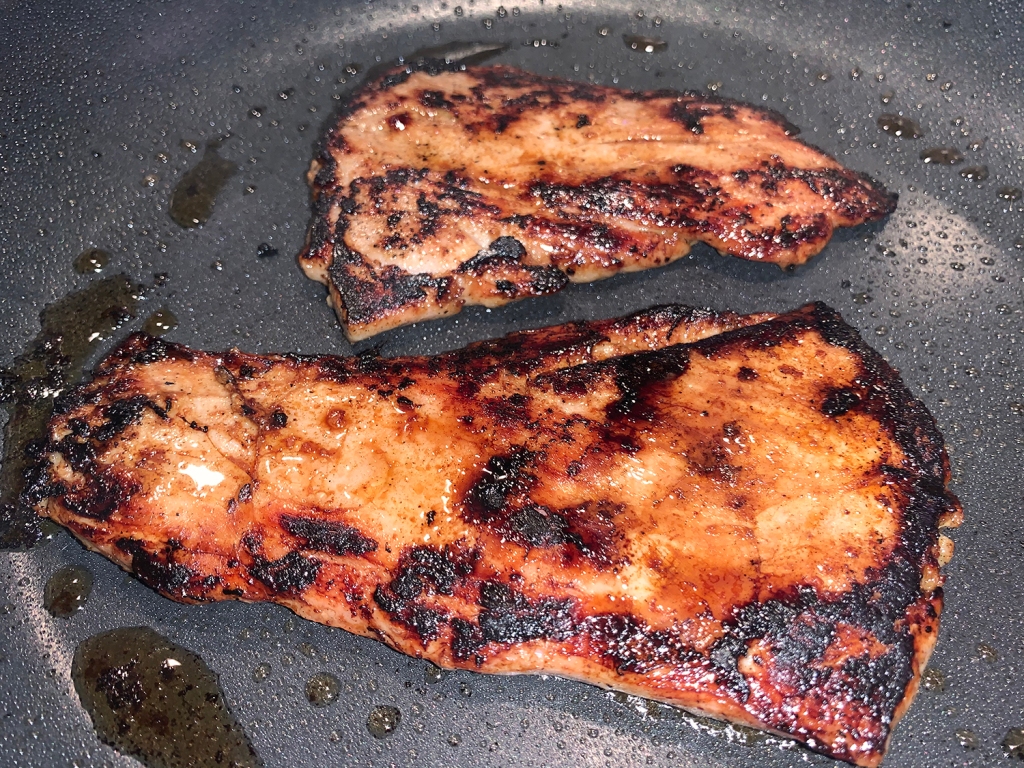
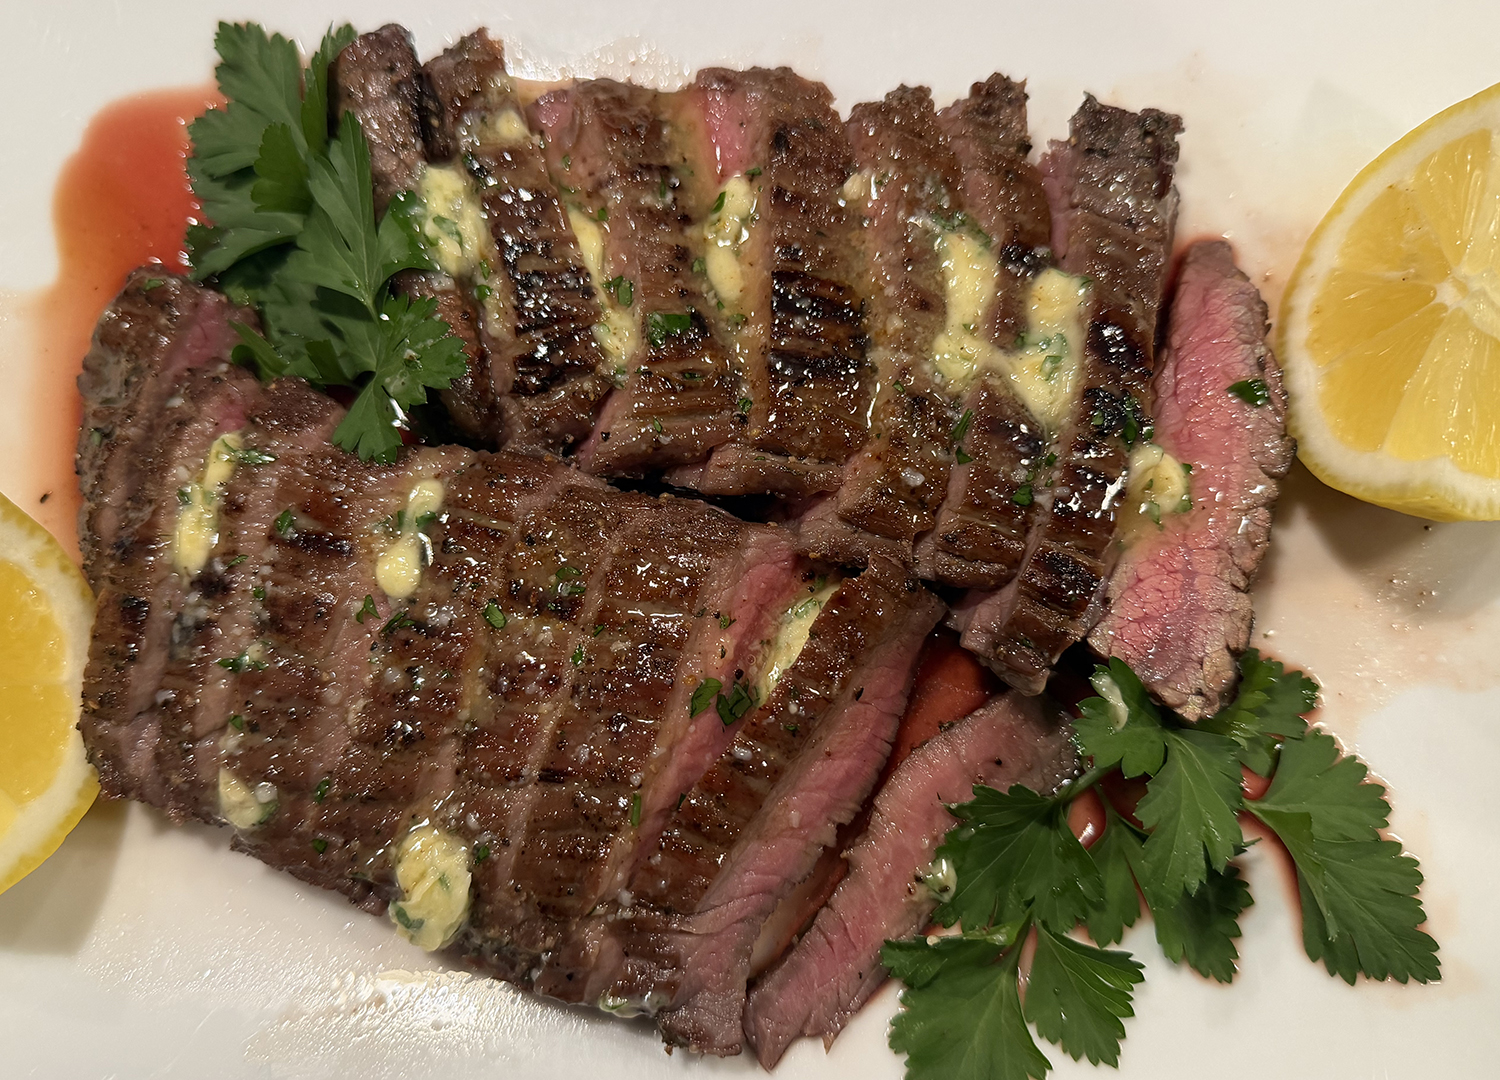
  3. Heat 1 teaspoon vegetable oil in 12-inch nonstick skillet over medium-high heat until shimmering. Add steaks and cook, pressing steaks gently into pan until browned and slightly charred in spots on both sides, 1 to 2 minutes per side. Cut steaks on bias against grain into ½-inch-thick slices. Serve, passing flake sea salt and lemon wedges, if using, separately.

For the Butter

  1. Combine all ingredients in a bowl. The butter mixture can be refrigerated for up to one week.

http://www.lynnandruss.com

Recipe by Lan Lam for America’s Test Kitchen

Simple Ways to Vary the Marinade

Shio koji creates plenty of complexity on its own, but it also enhances the flavors of additional seasonings. Try the following combinations, stirring the ingredients into 3 tablespoons of shio koji before applying the marinade to the steak.

WORCESTERSHIRE-GARLIC 

  • 3 Tbsp. Worcestershire sauce
  • 2 tsp. minced garlic
  • ½ tsp. pepper

BOURBON-SOY

  • 3 Tbsp. bourbon
  • 2 Tbsp. soy sauce
  • ¾ tsp. ground allspice
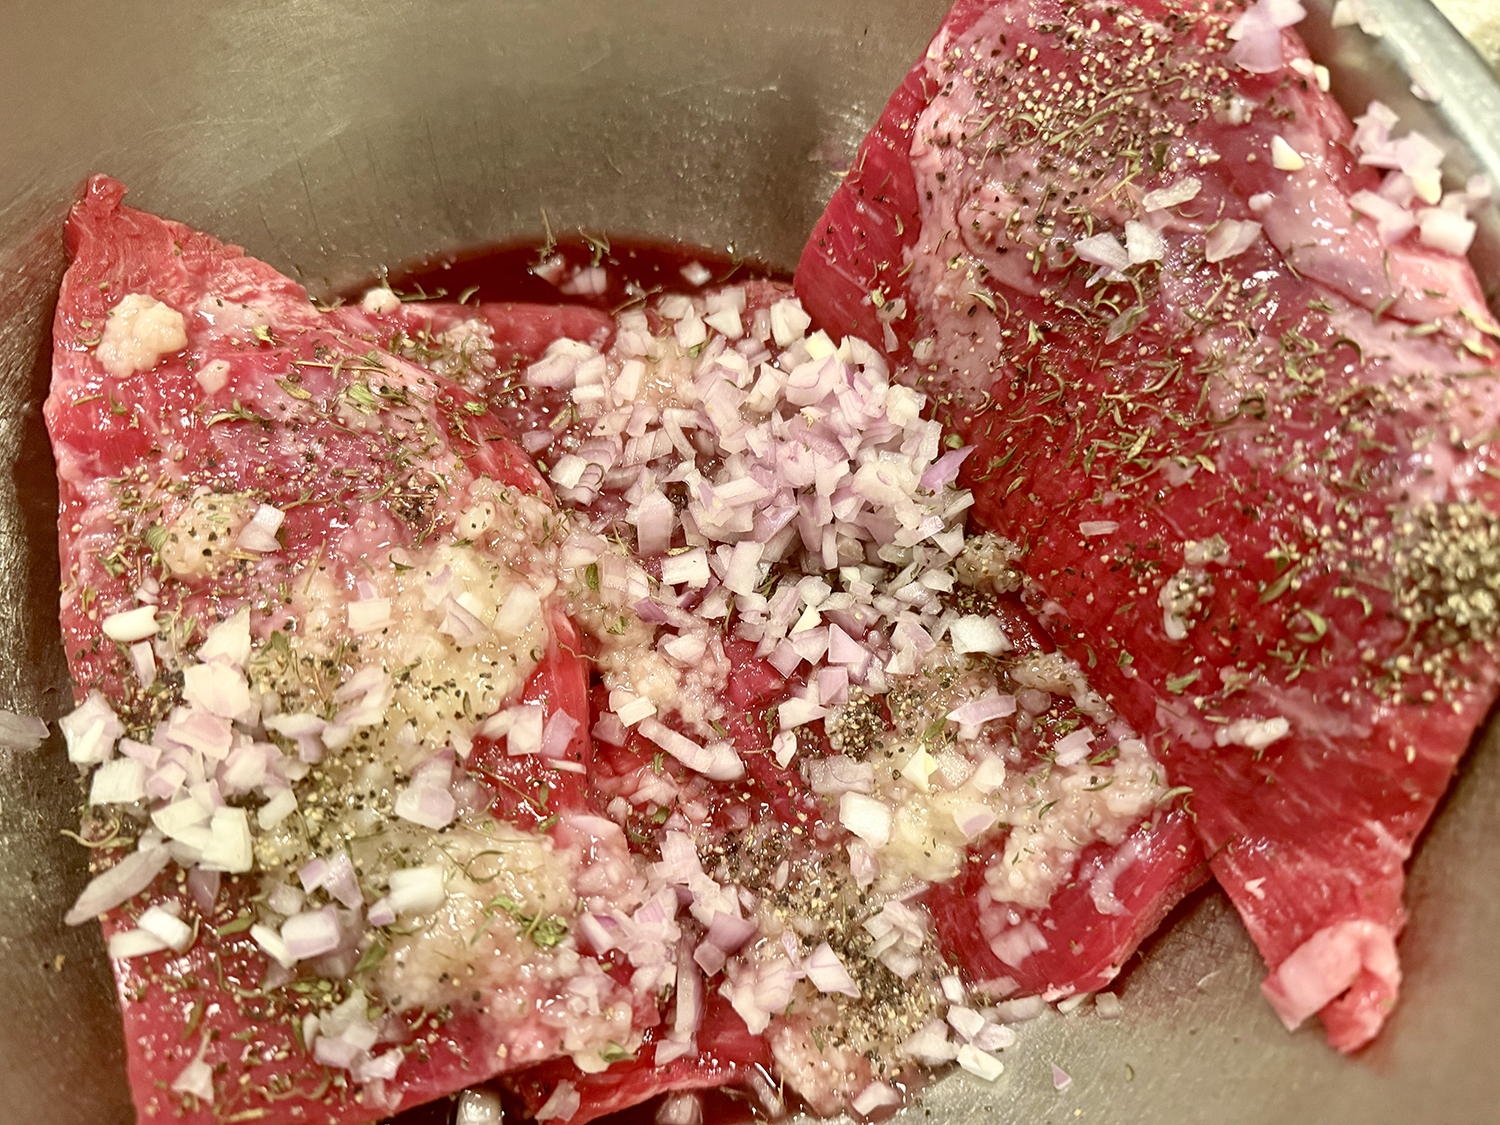
RED WINE–SHALLOT

  • 3 Tbsp. red wine
  • 2 Tbsp. minced shallot
  • 1 tsp. dried thyme
  • ½ tsp. pepper

Shio Koji Steak Primer

Shio koji works differently than other marinades. Here’s how to make the most of its special properties.

Shio-Koji-to-steak ratio: 1 tablespoon to 8 ounces

One tablespoon of shio koji per ½ pound of steak is enough to produce a broad range of flavors (and since commercially produced shio koji contains only 8 to 14 percent salt, that amount won’t make the meat overly salty.) Shio koji pairs beautifully with other seasonings too (see “Simple Ways to Vary the Marinade”).

Marinating time: 2 to 24 hours

The longer the steak marinates, the more intense its flavor will become. Four hours is a good place to start if it’s your first time using shio koji so that you can get to know how it changes the flavor of the meat.

Best cooking method: reverse searing

Both the simple sugars contained in shio koji and the amino acids that are liberated as the steak marinates facilitate browning, but the sugars are also prone to scorching. The most failproof cooking method, then, is reverse searing: gently bringing the steak to serving temperature in the oven and then quickly searing it in a skillet to develop a well-browned crust with a hint of char.

Chan Chan Yaki (Miso Butter Salmon)

Salmon is one of our go-to fish choices. And this one from NYTimes Cooking is a fabulous choice. It’s quick, easy, healthy, tasty and uses only one pan! What’s not to like?

According to Mia Leimkuhler, “Chan chan yaki, or miso butter salmon, is a classic dish from Hokkaido, Japan, a place known for its excellent salmon. The fish-and-vegetable dish is frequently made on a teppan (a large grill), with everything chopped and mixed with two metal spatulas that make the onomatopoetic “chan chan” sound.”

This clever version from Marc Matsumoto, the Tokyo-based blogger behind No Recipes, streamlines the dish for home cooking, calling for a lidded skillet and keeping the salmon in one large piece for easier preparation and presentation. You can replicate the chan chan action in your own bowl or plate, composing perfect bites of salmon, veggies and the miso butter sauce.

And the vegetables are flexible, with some delicious options being Shimeji mushrooms, bell peppers, corn or negi (long green onions). Unfortunately, we just totally forgot to purchase the enoki mushrooms. And the smallest head of green cabbage was huge, so we used only a portion of it.

BTW, you can ditch the salmon skin since the fish is just set atop the vegetables and not crisped in any fashion. Or, cut the skin off the filet and crisp it in a separate pan to add strips of the crispy skin as a garnish at the end.

Here’s a hack from The Hubs: Increase the sake to 3/4 cup. Use 1/4 cup in Step 4 to pour over the cooked veggies and deglaze the pan loosening all of those luscious browned bits. Cook, stirring until the sake nearly evaporates. Then use the remaining 1/2 cup in Step 5.

Chan Chan Yaki (Miso Butter Salmon)

  • Servings: 4
  • Difficulty: easy
  • Print

Ingredients

  • 1 (1¼-lb.) piece skin-on salmon fillet
  • ½ small head green cabbage, trimmed and cored
  • 2 large carrots
  • 1 medium yellow onion
  • 3½ oz. enoki mushrooms (optional)
  • ⅓ cup shiro (white) or tanshoku (yellow) miso
  • 3 Tbsp. unsalted butter, at room temperature
  • 1 Tbsp. sugar
  • 1 Tbsp. neutral oil
  • Salt and pepper, to taste
  • 3⁄4 cup dry (junmai) sake, divided
  • 2 scallions, thinly sliced
  • Steamed rice, for serving

Directions

  1. Remove the salmon from the fridge while you prep the vegetables: Chop the cabbage into 2-inch pieces (about 6 cups). Peel and cut the carrots on the diagonal into ½-inch coins (about 2 cups). Halve the onion and slice into ½-inch half moons (about 1½ cups). If using enoki mushrooms, trim the root end and separate them into large clusters.
  2. Make the miso butter: Combine miso, butter and sugar in a small bowl and stir until smooth and homogenous. (Miso butter can be made at least 3 days ahead and kept in the refrigerator; bring to room temperature before using.)
  3. Place the salmon on a plate, skin side down, and spread the miso butter in a thin layer on top, holding back about 2 tablespoons of miso butter for the vegetables.
  4. Heat a large, deep (lidded) skillet over medium-high. Add the oil and the cabbage, carrot, onion and enoki mushrooms (if using). Season the vegetables with salt and pepper (go lightly on the salt, since the miso butter is salty!) and cook, stirring frequently, until they begin to wilt but are still quite crisp, 5 to 8 minutes.
  5. Flatten the vegetables and place the salmon on top of them, miso side up. Dot the reserved miso butter on the vegetables (you may not need all of it) and pour the remaining sake over the vegetables. Place the lid on the pan, lower the heat to medium to maintain a strong simmer and cook for 7 to 10 minutes, until flaky and just cooked through in the center. (Exact time depends on the thickness of the salmon fillet and preferred level of doneness.)
  6. When the salmon has finished cooking, remove the lid and stir the vegetables around the salmon to mix them with the melted miso butter. Scatter the salmon with the chopped scallions and serve with rice.

http://www.lynnandruss.com

Recipe from Marc Matsumoto for NYTimes Cooking

Hibachi-Style Chicken with Charred Vegetables

Soy-marinated grilled chicken thighs paired with smoky, charred summer vegetables make this a sensational summer supper. Here, grilled chicken thighs are soaked in a sweet, garlicky, soy-based marinade and grilled alongside skewers with peak-season summer vegetables. Some steamed rice or couscous completes the meal.

The grill imparts a delicious char, similar to a Japanese hibachi charcoal grill, while basting the vegetables with a mixture of melted butter and reserved marinade enhances the full-bodied smoky flavor signature to hibachi.

The key to evenly cooked vegetable skewers is cutting the veggies into similarly sized pieces so they fit neatly on the skewers. Drizzled with a creamy chile-mayo sauce and served over rice (or couscous), this dish becomes a hearty, flavor-packed meal that can be easily prepped ahead for the week.

Make Ahead TIPS: Marinate chicken overnight, covered in the refrigerator, for up to 12 hours. Chop and store all vegetables in an airtight container in the refrigerator for up to one day. The mayonnaise sauce can be prepared up to five days in advance and stored in an airtight container in the refrigerator.

BTW, Kewpie mayonnaise is a Japanese brand of mayo made with egg yolks, vinegar, and MSG. Its use of egg yolks (rather than whole eggs) and vinegar makes it richer and tangier than regular mayonnaise. Find it at most grocery stores or online at yamibuy.com.

NOTE: *We knew the skewered vegetables would take longer than the chicken, so we started them about 8-10 minutes prior to adding the thighs to the hot grill. So in total, the veggies grilled for 20 minutes, while the chicken was on for 12 minutes.

While the mayo sauce was indeed tasty, we don’t feel it is absolutely necessary to complete the dish, so if it is not inspiring to you, just omit it. HOWEVER, we feel strongly that the basting marinade and butter sauce need to be doubled, as there was not enough. The new amounts are indicated in the ingredients list below.

Hibachi-Style Chicken with Charred Vegetables

  • Servings: 4
  • Difficulty: easy
  • Print

Ingredients

Chicken Marinade:

  • 1 1/4 cup soy sauce
  • 1/4 cup light brown sugar
  • 1/4 cup finely chopped garlic (about 5 large garlic cloves) 
  • 2 Tbsp. plus 1/2 tsp. toasted sesame oil, divided
  • 2 lb. boneless, skinless chicken thighs (about 6 thighs), patted dry

Vegetables:

  • 2 red bell peppers, cut into 1 1/2-inch pieces (about 2 cups)
  • 1 zucchini, halved lengthwise and cut into 1-inch-thick half-moons (about 2 1/2 cups) 
  • 1 medium red onion, cut into 1 1/2-inch-thick wedges (about 1 1/2 cups)
  • 4 (8-inch) metal or wooden skewers
  • 1/2 tsp. kosher salt, divided

Butter and Sauce:

  • 4 Tbsp. unsalted butter, melted 
  • Canola oil, for grilling
  • 1/2 cup Kewpie mayonnaise
  • 2 tsp. sriracha chile sauce
  • 1/2 tsp. Dijon mustard
  • Cooked white rice, or couscous, for serving

Directions

  1. Whisk together soy sauce, brown sugar, garlic, and 1 tablespoon sesame oil in a small bowl until sugar is dissolved. Pour soy mixture into a large ziplock plastic bag, reserving 6 tablespoons soy mixture in bowl. Add chicken to bag; seal bag, and gently massage soy mixture into chicken. Set aside, and let marinate at room temperature for at least 30 minutes or up to 12 hours.
  2. Thread peppers, zucchini, and onion onto skewers. Brush vegetables with 1 tablespoon reserved soy mixture; sprinkle with 1/4 teaspoon salt. Stir melted butter and remaining 1/4 teaspoon salt into remaining 2 tablespoons soy mixture in bowl; set aside.
  3. Preheat grill to medium-high (400°F to 450°F). Remove chicken from marinade, shaking off excess; discard marinade. Lightly grease grill grates with canola oil; place chicken and skewered vegetables on grates. Grill, uncovered, turning skewers and chicken occasionally and basting with soy-butter mixture until a thermometer inserted into thickest portion of chicken registers 170°F, 12 to 15 minutes, and vegetables are tender and charred in spots, about 12 minutes. (*Please see note our cooking times above.) Transfer to a cutting board, and let rest for 5 minutes.
  4. Stir together mayonnaise, sriracha, mustard, and remaining 1/2 teaspoon sesame oil in a small bowl. Chop chicken into bite-size pieces, and remove vegetables from skewers. Serve chicken and vegetables over cooked rice, and drizzle with mayonnaise mixture. Garnish with scallions and shichimi togarashi.

http://www.lynnandruss.com

Adapted from a recipe by Andee Gosnell for Food & Wine

Yaki Udon

According to “The Woks of Life” cookbook, this Yaki Udon with pork and vegetables is a tasty one-pan meal that’s also very open to adaptation and interpretation. You can replace the pork with chicken, beef, or tofu, and use whatever vegetables you have on hand. Just don’t skip the first step of the recipe, which you might not find in other versions! 

This dish is similar to yakisoba, differing only in terms of the type of noodle used. While udon noodles are often served in soup, their thickness makes them great for stir-fries as well. And there is no need to buy frozen udon noodles if you happen to have a dry-packaged variety on hand.

Before stir-frying anything, you’re going to melt together butter, garlic, and dashi powder. Then, you let the udon noodles fry in the garlic/dashi butter until they crisp up a bit on the outside. Then you proceed with the regular steps to put together the recipe. We garnished with diagonally sliced scallion.

Not familiar with dashi powder? Neither were we. But don’t omit the the Japanese soup stock because it makes the dish taste very authentic. We ordered it online and received within 2 days. The umami profile consists of shiitake mushrooms, kombu kelp, dried flying fish, dried sardine and dried bonito flakes.

*While the original instructions suggest you can use a large Dutch oven, non-stick pot, or large cast iron skillet, we highly recommend a non-stick vessel. We used our large Le Crueset braising pot and the ingredients crusted to the bottom of the pot which was difficult to remove.

Yaki Udon

  • Servings: 4
  • Difficulty: easy
  • Print

Ingredients

  • 1 lb. frozen or dry-packaged udon noodles
  • 2 Tbsp. butter
  • 1 clove garlic, minced
  • 2 tsp. dashi powder
  • 1 Tbsp. oil
  • 4 oz. pork shoulder, julienned; can substitute chicken, beef, seafood, pressed tofu, or more vegetables
  • 4 oz. oyster or shiitake mushrooms, thinly sliced
  • 2 Tbsp. mirin
  • 2 cups cabbage, shredded
  • 1 medium carrot, julienned
  • 1/8 teaspoon black pepper
  • 2 Tbsp. low sodium soy sauce
  • 1 Tbsp. water
  • 3 scallions, 2 julienned; 1 diagonally sliced for garnish

Directions

  1. Start by bringing a large pot of water to a boil. Add the udon noodles. Boil for 30 seconds – 1 minute to loosen them. If using dried noodles, cook according to package instructions. Drain, rinse in cold water to remove excess starch, and drain thoroughly again. Set aside.
  2. Place a large Dutch oven, non-stick pot, or large cast iron skillet* over medium heat. When the pan is heated, add the butter. Once partially melted, stir in the garlic and dashi granules. Cook for 30 seconds, until the dashi partially dissolves. At this point, the butter should be a light brown color.
  3. Add the drained noodles and toss to coat them in the butter. Cook for 5 minutes over medium heat, until the noodles have dried out and are slightly crisped. Remove and set aside.
  4. Add a tablespoon of oil to the pot, along with the pork shoulder. Brown the pork until crisp on the edges. Add the mushrooms and mirin, and cook until caramelized.
  5. Add the cabbage, carrot, pepper, soy sauce, and water. Stir-fry until the vegetables are wilted, and add the noodles back in, along with the scallions. Stir-fry for another minute. Serve!

http://www.lynnandruss.com

Adapted from a recipe in The Woks of Life cookbook

Cold Noodle Salad with Spicy Peanut Sauce

Looking for a recipe that’s healthy, meatless, is ready in less than a half hour, and would transport well for a picnic or potluck? Look no further than this tasty concoction from Betty Lou McKinnon.

Soba, Japanese buckwheat noodles, are ideal for salads because they taste particularly great when served cold. Crunchy vegetables are highlighted here, adding lots of crisp, fresh texture. Substitute with any raw vegetables you have on hand, such as cabbage, carrot, fennel, asparagus, broccoli or cauliflower.

The spicy peanut sauce is very adaptable: If you don’t want to use peanut butter, you can use any nut or seed butter, like cashew, almond, sunflower or even tahini. Both the soba and the peanut sauce can be prepared ahead of time and stored in the fridge overnight, but wait to combine them until you are ready to eat for the best texture and consistency. The peanut sauce thickens as it sits, so add a tablespoon or two of water to loosen it up, if necessary.

Instead of drizzling the peanut sauce on top of the mixed vegetables, we incorporated about 75% of it into the mix, saving the remainder to drizzle on top with the other garnishes.

Cold Noodle Salad with Spicy Peanut Sauce

  • Servings: 4
  • Difficulty: easy
  • Print

Ingredients

For the Salad

  • Kosher salt
  • 10 oz. soba noodles
  • 1 medium zucchini or cucumber (about 6 oz.)
  • 5 radishes
  • 1 bell pepper (any color)
  • 1 Tbsp. sesame oil
  • ½ cup roasted salted peanuts (about 2 oz.), roughly chopped
  • 2 scallions, trimmed and finely chopped
  • Handful of cilantro leaves
  • 1 lime, cut into wedges for serving

For the Spicy Peanut Sauce

  • ½ cup smooth peanut butter (not natural)
  • ¼ cup soy sauce
  • 2 Tbsp. maple syrup
  • 2 Tbsp. lime juice (from 1 lime)
  • 1 Tbsp. sesame oil
  • 2 tsp. chile oil or hot sauce, plus more to taste
  • 1 garlic clove, grated

Directions

  1. Bring a pot of salted water to the boil. Add the soba, stir to prevent sticking, and cook according to package instructions until just tender. Rinse under cold water until the noodles are completely cold.
  2. Meanwhile, make the sauce: In a medium bowl, combine the peanut butter, soy sauce, maple syrup, lime juice, sesame oil, chile oil or hot sauce, and garlic. Add ¼ to ½ cup water, 1 tablespoon at a time, and whisk until the sauce is a pourable consistency. Taste and add more chile oil or hot sauce as desired; set aside.
  3. Cut the zucchini or cucumber and radishes into ⅛-inch thick slices, then cut into thin matchsticks. Slice the peppers into ⅛-inch pieces. Place them all in a large bowl.
  4. Loosen the soba noodles by running them under some water, then allow to drain again. Add them to the vegetables, add the remaining 1 tablespoon sesame oil and toss to combine.
  5. When you are ready to serve, drizzle with spicy peanut sauce and top with peanuts, scallions and cilantro. Serve immediately, with lime wedges alongside.

http://www.lynnandruss.com

Recipe by Betty Lou McKinnon for NYTimes Cooking

Pan-Seared Salmon With Miso Rice and Ginger-Scallion Vinaigrette

This simple weeknight meal makes great use of pantry staples to create complex flavors with minimal work. Miso is often used to flavor soups or sauces, and here, it is added to raw rice before cooking, which results in a delightfully sticky, savory steamed rice. Fragrant and nutty basmati is called for, but any long-grain rice, such as jasmine (which we used), will work.

Shredded cabbage brings freshness and crunch to the finished dish, but use whatever crispy vegetable you have on hand such as shredded Brussels sprouts, carrots, snap peas, and/or radishes. We had leftover red cabbage, so we used that along with shredded carrots and radishes providing wonderful pops of color!

If possible, use a hand mandoline to get paper thin carrot and radish slices. And if you desire a heftier meal, add some canned chickpeas, white beans or black beans, although neither of us thought it would be necessary.

To finish, the vibrant tang of the bright ginger-scallion vinaigrette balances the richness of the roasted salmon, which we cooked only a pound for the two of us. But if you make the full 1 1/2 pounds, you may want to consider doubling that scallion vinaigrette.

Probably the biggest change we made to the recipe was how we cooked the fish. Instead of in the oven on a rimmed baking sheet, we used a non-stick skillet, and cooked skin-side down for the first 6 minutes, then carefully turned it over to finish, about another 2 minutes.

Quick, easy, colorful and healthy. What more can you ask for as a weeknight meal?

Pan-Seared Salmon With Miso Rice and Ginger-Scallion Vinaigrette

  • Servings: 4
  • Difficulty: easy
  • Print

Ingredients

  • 1/4 cup white or sweet miso
  • 1 1/2 cups basmati or other long-grain rice
  • 4 skin-on salmon fillets, (6-ounces each)
  • 2 Tbsp. extra-virgin olive oil
  • Kosher salt and black pepper
  • 1/4 cup low-sodium soy sauce
  • 1/4 cup chopped scallions, plus more for garnish
  • 1 Tbsp. distilled white vinegar or unseasoned rice vinegar
  • 1 Tbsp. minced fresh ginger
  • 4 cups finely shredded cabbage, such as green, Napa or savoy; OR a mix of thinly sliced cruciferous veggies (about 8 ounces)
  • Toasted sesame oil, for serving

Directions

  1. Heat oven to 425 degrees.
  2. In a medium saucepan, whisk miso with 2 1/4 cups water until dissolved. Stir in rice and bring to a boil. Cover, reduce heat to low and cook until all of the liquid is absorbed and rice is tender, about 15 minutes. Remove from heat and let stand for 5 minutes. Fluff rice with a fork (it will be a little sticky).
  3. On a rimmed baking sheet, rub salmon all over with olive oil, season with salt and pepper and arrange skin-side up. Roast until fish is just opaque and cooked to medium, 8 to 10 minutes. OR, in a non-stick skillet over medium-high, sear the salmon skin side down for 6 minutes until golden brown and crisp. Carefully flip over and sear another 2 minutes or so. For medium to medium-rare, aim for 125˚F to 135˚F.
  4. In a small bowl, combine soy sauce, scallions, vinegar and ginger, and season with salt and pepper.
  5. Divide miso rice and cabbage, and other vegetables if using, among bowls. Top with salmon, ginger-scallion vinaigrette and sesame oil.

http://www.lynnandruss.com

Loosely adapted from a recipe by Kay Chun for NY Times Cooking

One-Pot Japanese Curry Chicken and Rice

An easy weeknight version of Indian curry, this Japanese-riff is a one-pot meal featuring juicy chicken thighs, vegetables and rice. Instead of relying on store-bought or homemade instant curry roux, the recipe builds on a few spices to mimic traditional Japanese curry flavors.

Curry powder, ground nutmeg and Worcestershire sauce are combined and bloomed in butter to create the round and rich sauce. Onions, potatoes and carrots create the bulk of traditional Japanese curry. You can easily substitute sweet potatoes, cauliflower and/or peas to address family preferences.

Kay Chun’s original recipe called for 2 pounds of large chicken thighs. The math doesn’t add up here. We bought a package nearly 2 1⁄2 pounds containing only 5 thighs—and they weren’t necessarily “large,” so if you were serving 6 people, that would be a challenge. I say forget the poundage, and just buy 6 large thighs—there is enough rice mixture to support that many servings.

It is suggested you serve in bowls. Maybe because we used a “paella” rice which is really absorbent, there wasn’t much liquid and could have been served on plates. Speaking of liquid, of course we used homemade stock which adds oodles of flavor. And we nearly doubled the amount of minced fresh ginger to really amp up the Asian flavor.

One-Pot Japanese Curry Chicken and Rice

  • Servings: 4-6
  • Difficulty: easy
  • Print

Ingredients

  • 6 bone-in, skin-on chicken thighs
  • 2 Tbsp. canola oil
  • Kosher salt and black pepper
  • 3 Tbsp. unsalted butter
  • 1/2 cup finely chopped onion
  • 3 Tbsp. Madras curry powder
  • 1 Tbsp. minced garlic
  • 1 Tbsp. minced fresh ginger
  • 3/4 tsp. ground nutmeg
  • 1 1/2 cups short-grain white rice, rinsed until water runs clear
  • 1 large baking potato (about 1 lb.), peeled and cut into 1/2-inch cubes
  • 3 medium carrots, sliced 1/2-inch-thick
  • 3 1/2 cups chicken broth
  • 2 Tbsp. Worcestershire sauce
  • Chopped scallions pickles, kimchi and/or hot sauce, for serving

Directions

  1. Heat oven to 375 degrees. Rub chicken with 1 tablespoon oil, and season with salt and pepper.
  2. In a large Dutch oven or heavy pot (at least 3 1⁄2 quarts), heat remaining 1 tablespoon oil with 1 tablespoon butter over medium until butter is melted. Working in two batches, brown chicken 3 to 4 minutes per side, and transfer to a plate.
  3. Add onion to the pot, season with salt and pepper and cook, stirring, until softened, 2 minutes. Add curry powder, garlic, ginger, nutmeg and the remaining 2 tablespoons butter, and stir until butter is melted and spices are fragrant, 1 minute.
  4. Add rinsed rice and stir until evenly coated in spices. Add potato, carrots, broth and Worcestershire sauce, scraping bottom of pot to lift up any browned bits. Season broth generously with salt and pepper. Arrange chicken and any accumulated juices on top, skin-side up, and bring to a boil over high. Cover and bake for 20 minutes.
  5. Uncover and bake until most of the liquid is absorbed and chicken is golden and cooked through, about 10 minutes longer.
  6. Divide chicken and rice among bowls, and garnish with scallions. If desired, serve with any combination of pickles, kimchi and hot sauce.

http://www.lynnandruss.com

Adapted from a recipe by Kay Chun for NY Times Cooking

Japanese Ginger Pork

Japanese Ginger Pork (Shogayaki) is a recipe hailing from Milk Street. They explain that shoga means “ginger” in Japanese, and yaki translates as “grilled,” though the term is sometimes applied to foods that are fried or griddled. In the popular dish known as shogayaki, thinly sliced pork is cooked with a lightly sweetened, very gingery soy-based sauce.

Here, pork tenderloins are cut into quarters and pounded into thin cutlets. A quick soak in a marinade that later becomes the sauce ensures the cutlets are thoroughly flavored. Shredded green cabbage and steamed rice are the classic accompaniments so we paired them with the entrée.

In Japan, the meat of choice for shogayaki is thinly sliced pork loin. The thin cuts of meat cook quickly and make it easier for the seasonings to penetrate. But because making thin, even slices requires some challenging knife work, the thin slices of pork tenderloin are pounded even thinner. As a bonus, the pounding breaks apart the muscle fibers, making it even easier for the meat to season. Additionally, ginger has an enzyme called zingibain that helps tenderize meat.

After another recipe once-over, we decided to double the sauce—soy sauce through fresh ginger. We’re glad we did, but would not double the white sugar next time, it was a tad too sweet. Another major change we made was to coat the shredded cabbage with a one-to-one mixture of rice vinegar and toasted sesame oil with a pinch of salt. Overall, we feel the cabbage should be increased by utilizing the entire head, especially if this meal is to feed four. Finally, we also added an extra half bunch of scallions.

TIP: Don’t crowd the skillet when cooking the cutlets. It’s usually best to cook them in two batches so they brown rather than steam. But how they fit in the skillet depends on their shape after pounding. If you can fit all four in your pan without them touching, cook all at once using the 2 tablespoons of oil.

Japanese Ginger Pork (Shogayaki)

  • Servings: 4
  • Difficulty: easy
  • Print

Ingredients

  • ¼ cup soy sauce
  • 3 Tbsp. mirin
  • 2 Tbsp. sake
  • 1 Tbsp. white miso
  • 1½ Tbsp. finely grated fresh ginger
  • 1¼ 1b. pork tenderloin, trimmed of silver skin
  • 2 Tbsp. grapeseed or other neutral oil
  • 2 tsp. white sugar
  • 1 bunch scallions, cut into 1-inch piece
  • ½ small head green cabbage, cored and finely shredded (about 3 cups)
  • 1 Tbsp. rice vinegar
  • 1 Tbsp. toasted sesame oil
  • Cooked Japanese-style short-grain rice, to serve

Directions

  1. In a wide, shallow bowl whisk together the soy sauce, mirin, sake, miso and ginger.
  2. Cut the pork tenderloin in half crosswise, making the tail-end half slightly larger, then cut each piece in half lengthwise. Place 2 pieces of pork between 2 large sheets of plastic wrap. Using a meat pounder, gently pound each piece to an even ¼-inch thickness. Repeat with the 2 remaining pieces.
  3. Add the cutlets to the soy mixture and turn to coat, then let marinate at room temperature for 15 minutes.
  4. Mix the rice vinegar and toasted sesame oil together then add to a large bowl with the shredded cabbage and a pinch of salt. Mix well, and set aside.
  5. In the meantime, cook the Japanese rice according to package directions.
  6. Remove the cutlets from the marinade, letting the excess drain back into the bowl; reserve the marinade. Pat the cutlets dry with paper towels.
  7. In a 12-inch skillet over medium-high, heat 1 tablespoon of oil until shimmering. Add the cutlets in a single layer and cook undisturbed until well browned, 2 to 3 minutes. Using tongs, flip each piece and continue to cook until the second sides are well browned, about another 2 minutes.
  8. Transfer to a large plate, then wipe out the skillet with paper towels. Repeat with the remaining oil and cutlets.
  9. Return the skillet to medium-high and add the reserved marinade, the sugar and ¼ cup water. Bring to a simmer and cook, scraping up any browned bits, until the mixture thickens and a spoon drawn through it leaves a 1- to 2-second trail, about 3 minutes. (Because we doubled the sauce, it took twice as long to thicken properly.)
  10. Stir in the scallions, then add the pork and any accumulated juices. Cook, stirring gently, until the scallions are wilted and the pork is heated through, about 1 minute.
  11. Serve with the shredded cabbage and cooked rice.

http://www.lynnandruss.com

Recipe by Courtney Hill for Milk Street