I have been an artist and designer all my life incorporating graphic design for websites, gardens, publications, fabrics, interior design and cooking. I am now retired from my professional job, but still create artistic visions in all forms on a daily basis.
View all posts by LynnHoll →
Sweet-tart white balsamic vinegar and tangy Peppadew peppers bring flavor and color to this weeknight chicken dish found on Milk Street. White balsamic, which is not cooked and aged as long as regular balsamic vinegar, has a mellow acidity that complements the peppadews, a variety of small, sweet peppers from South Africa.
Peppadews add slight heat and additional sweetness, as well as a vivid splash of red. Find them (or not) jarred at most grocery stores, and sometimes loose at the olive bar. Unable to locate peppadews, we substituted cherry peppers. And for some odd reason, there were no plain pitted green olives (no open olive bar during COVID) and all the jarred versions were pimento stuffed. Frustrating yes, but in the end… FRIGGIIN’ delicious!!
Packed with Flavor
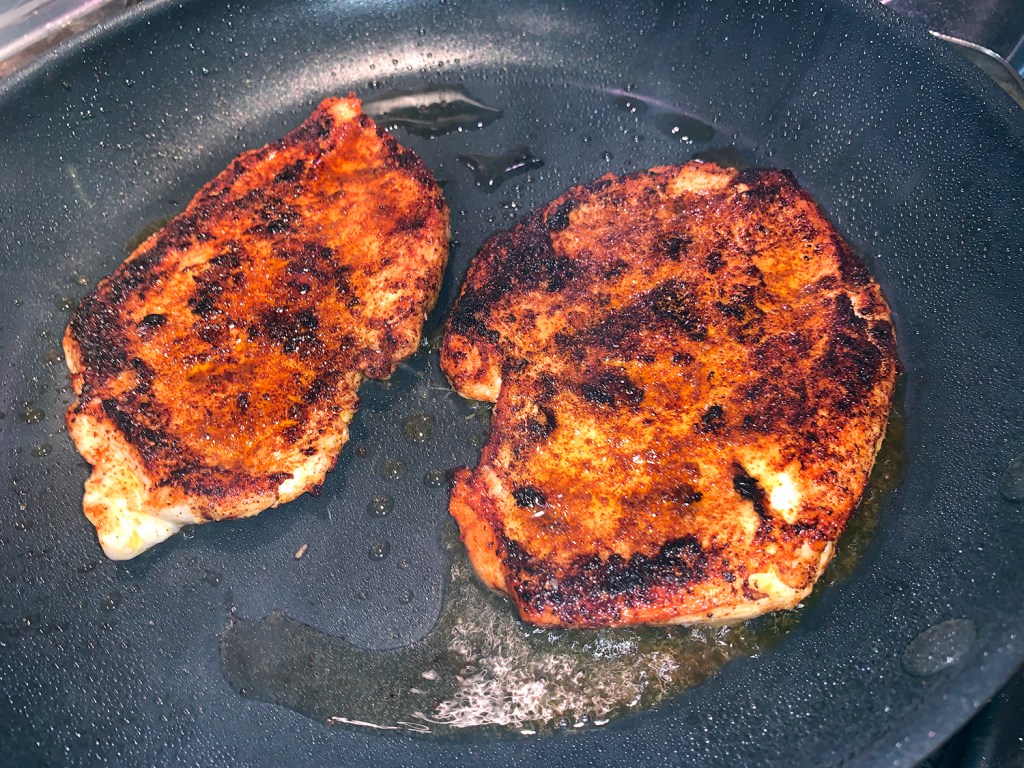
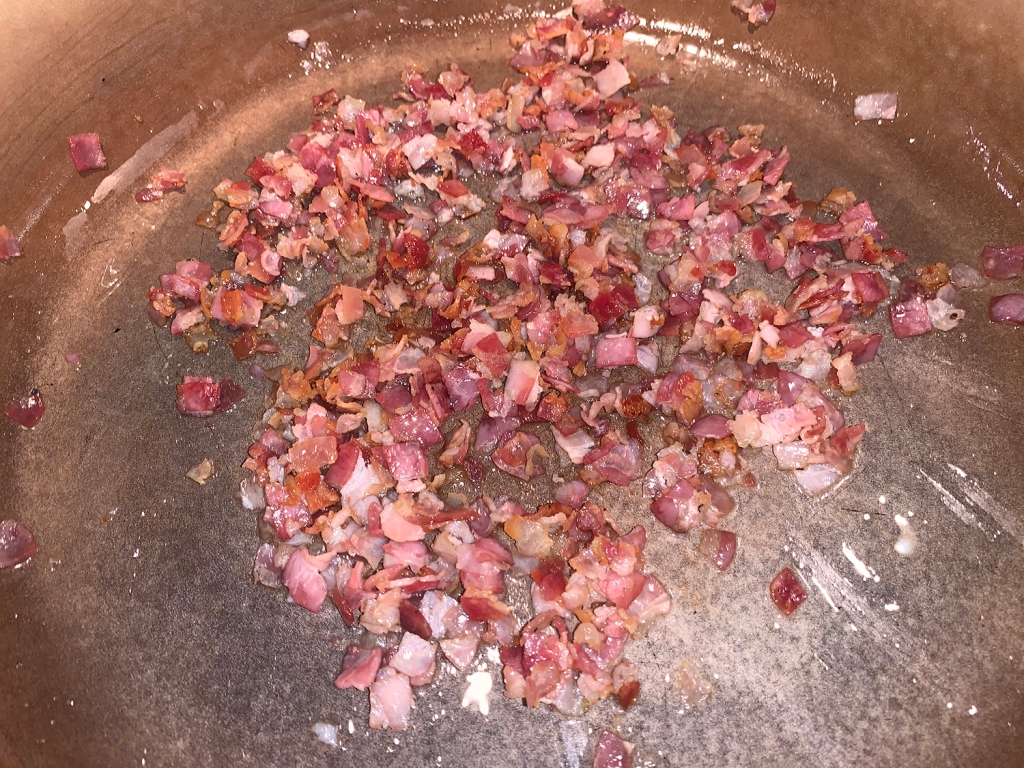
Don’t rush rendering the fat from the skin on the chicken thighs. The skin should be golden brown and feel crisp. When reducing the sauce before serving, add water if the liquid is less than 1 cup. It took us extra time to get the sauce reduced to one cup, more like 6 minutes,
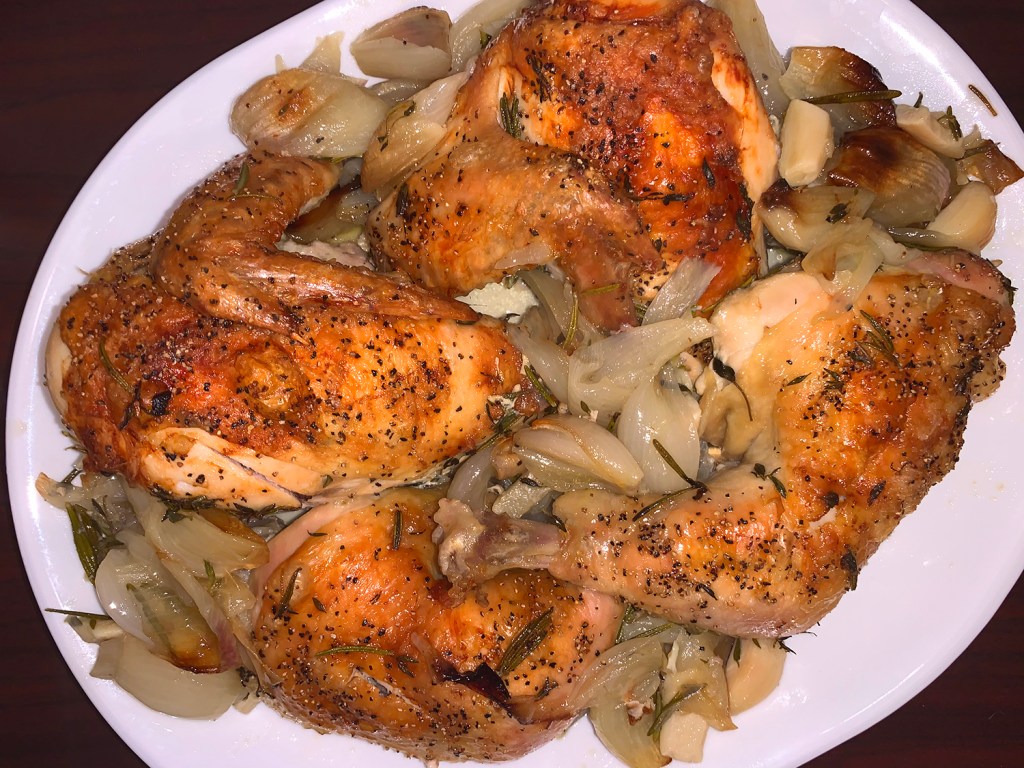
The sauce was just bursting with flavor and the chicken retained crispy exteriors and juicy interiors. Some serving suggestions are with roasted sweet potatoes—our choice—boiled baby red potatoes or spinach pasta tossed with butter and poppy seeds.
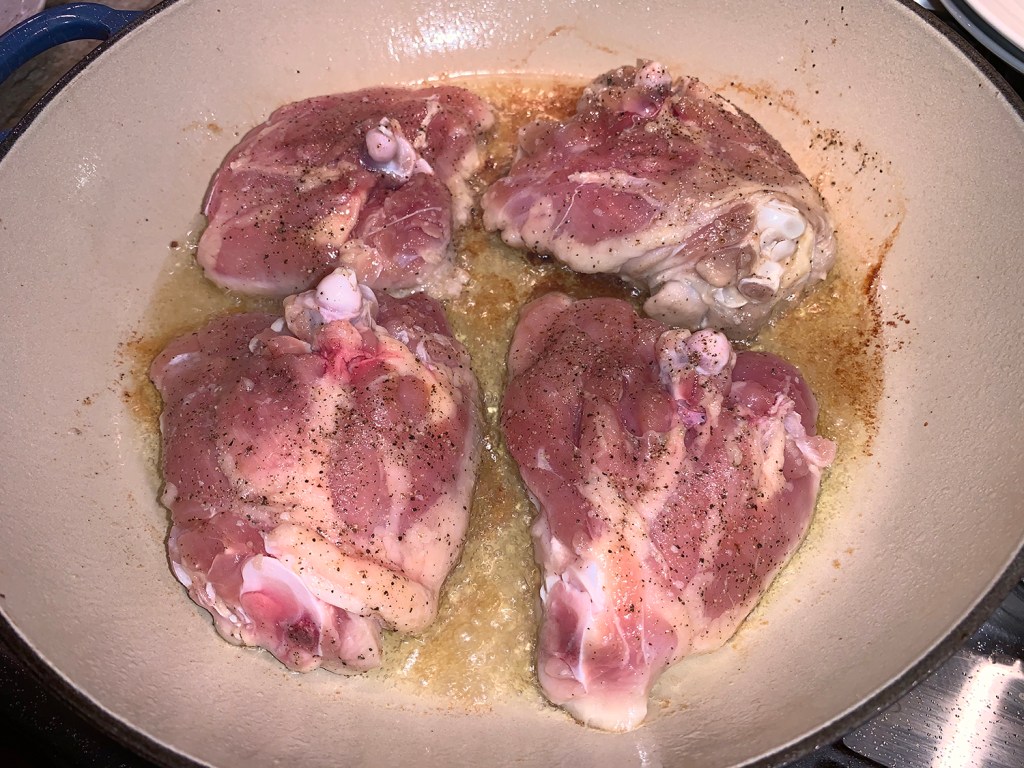
3 lbs. bone-in, skin-on chicken thighs, trimmed and patted dry
Kosher salt and ground black pepper
1 Tbsp. grapeseed or other neutral oil
3 garlic cloves, thinly sliced
1 medium shallot, minced (about ⅓ cup)
¾ cup white balsamic vinegar
¾ cup low-sodium chicken broth
⅓ cup pitted green olives, chopped
4 Tbsp. finely chopped fresh tarragon, divided
⅓ drained peppadew peppers, chopped
Brown chicken skin side down
Rest chicken on plate
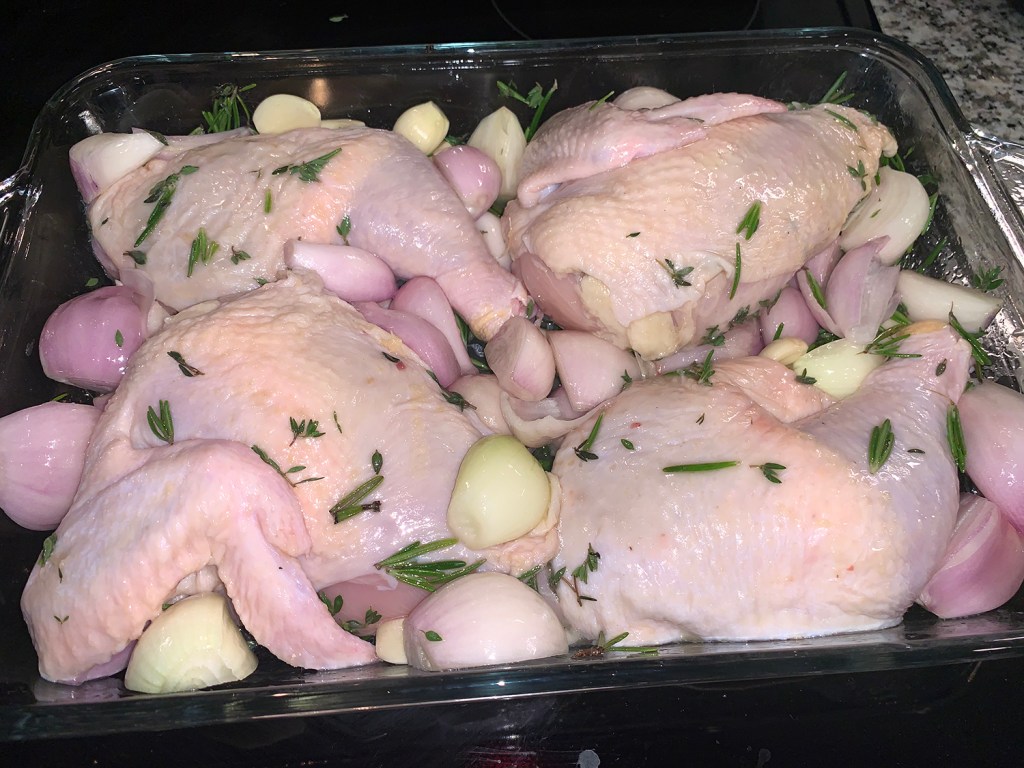
Nestle chicken in garlic and shallot
Cook chicken in oven until they reach 175°
Place chicken on platter while you reduce the sauce
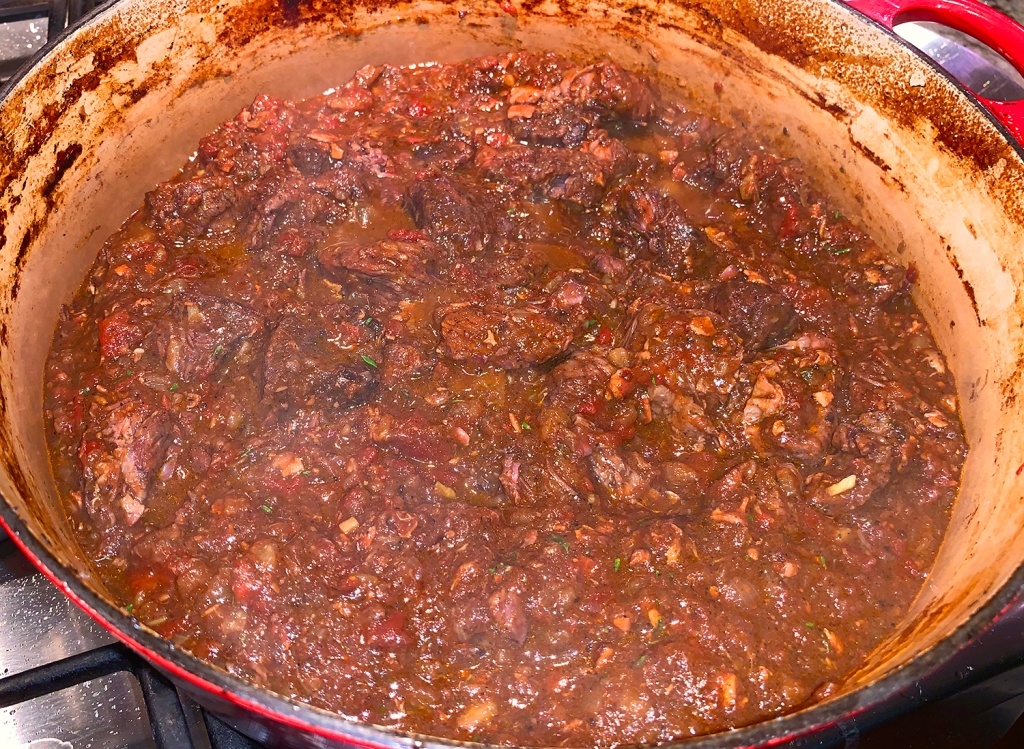
Reduce the sauce
Add chopped olives
Spoon sauce around chicken
Directions
Heat the oven to 450°F with a rack in the middle position. Season the chicken on all sides with salt and pepper.
In a 12-inch oven-safe skillet over medium-high, heat the oil until smoking. Add the chicken, skin down, and cook until fat is rendered and the skin is golden brown, about 5 minutes. (You will probably have to do this in two stages as you don’t want to crowd the pan and steam instead of crisp the skin.)
Transfer the chicken skin up to a plate. Pour off all but 1 tablespoon of fat from the skillet. Stir in the garlic and shallot and cook over medium, stirring occasionally, until light golden brown, about 1 minute.
Add the vinegar and broth and bring to a simmer, scraping up any browned bits. Return the chicken to the skillet, skin up. Transfer to the oven and bake until the chicken reaches 175°F at the thickest part, or a skewer inserted into the thickest part meets no resistance, 12 to 15 minutes.
Transfer the chicken, skin up, to a deep platter and return the skillet to the stovetop (handle will be hot) over medium-high. Bring the sauce to a boil and cook until reduced to about 1 cup, 2 to 3 minutes (or longer if necessary).
Stir in the olives, then taste and season with salt and pepper. Off heat, stir in half the tarragon, then spoon the sauce around the chicken.
Although this looks like a traditional beef stew recipe, it’s not made like one. While the beef—or lamb as in our recipe—braises in the oven, the carrots, mushrooms, and onions roast on a sheet pan alongside for a caramelized flavor. How’s that for a change?
We made this on a Sunday afternoon for a weeknight meal when we knew there wouldn’t be much time to prep dinner. But of course we had to taste-test the finished product. WOW, it was fantastic. The lamb (you could use stew beef instead) was super tender and the sauce was so silky and full of flavor.
Instead of one or the other, we used both carrots and parsnips. If you choose to include parsnips, make sure to remove the woody core before cooking them.
4 carrots or parsnips, peeled and cut into 1- to 2-inch pieces, or 2 cups baby carrots
2 cups sliced cremini or button mushrooms
1 medium onion, cut into thin wedges
1 cup frozen peas
2 croissants, cut into 1/2-inch chunks (optional)
2 Tbsp. butter, melted
2 cloves garlic, minced
1 Tbsp. finely chopped flat-leaf parsley
Cut the meat into 2″ pieces
Prep all ingredients ahead
The second batch of meat gets browned with the garlic
Tomato paste is added to the browned meat
After adding wine and broth, stir in the herbs, salt and pepper
Mix veggies with oil on rimmed baking sheet
Roast for 45 minutes, stirring once
Add roasted veggies and peas to meat and sauce
Dig in!
Directions
Arrange oven racks, placing one rack at the lowest level. Preheat oven to 325°F. In a 5- to 6-qt. Dutch oven heat 1 Tbsp. olive oil over medium-high. Add half the beef and bacon; cook until browned, stirring occasionally. Using a slotted spoon, transfer meat to a bowl. Add an additional 1 Tbsp. olive oil, remaining beef and bacon, and the sliced garlic to Dutch oven. Cook 3 minutes, stirring occasionally. Return all meat to Dutch oven. Stir in tomato paste; cook and stir 2 minutes.
Carefully add wine, stirring to scrape up any browned bits from bottom of pot. Reserve 1/2 cup of the 50%-less-sodium beef broth. Add remaining broth to meat mixture. Stir in thyme and 1/2 tsp. each salt and ground black pepper. Bring to boiling. Cover and place pot on the lower oven rack; braise 1 hour.
In a small bowl whisk together reserved 1/2 cup broth and the flour; stir into beef mixture. Stir in barley. Bake, covered, 35 minutes more or until barley is tender and stew is thickened.
Meanwhile, in a shallow baking pan combine carrots, mushrooms, onion, remaining 1 Tbsp. olive oil, and remaining 1/4 tsp. each salt and pepper; toss to coat. Place on a separate oven rack; roast, uncovered, 45 minutes, stirring once.
Stir vegetables and peas into stew; let stand, covered, 5 minutes. Increase oven temperature to 425°F.
OPTIONAL: For croutons: Line a shallow baking pan with foil. In a large bowl combine croissant chunks, melted butter, minced garlic, and parsley; toss to mix. Spread croissants evenly in prepared pan. Bake 5 minutes or until toasted; let cool. Serve croutons over stew.
*If you sub in brown rice, increase baking time in Step 3 to 45 minutes.
A new take on your steak and potatoes menu is this thinly sliced skirt steak with a lightly smoky, tangy paprika butter. While the steak recipe is enough to feed 10, and the potato recipe feeds 6-8, we halved both of them and still had leftovers for another meal. Both the meat and potato recipes hail from Food & Wine, neither of which employ a long list of ingredients.
Adobo Seco was our seasoning of choice for rubbing both sides of the steak(s), although just using salt and pepper works fine too. Remember, skirt steak is a very thin piece of meat so it will cook quickly on the grill, just a couple of minutes per side for medium rare. Make sure to slice against the grain when cutting it.
If desired, go ahead and make the paprika butter which can stand at room temperature for up to 4 hours; reheat the butter gently. We took the opportunity to do this step ahead of time, so we wouldn’t be rushed at the last minute.
Light a grill or heat a grill pan. In a small saucepan, melt the butter. Add the garlic and cook over low heat, stirring, until golden, about 3 minutes.
Add the paprika and cook until fragrant, about 30 seconds. Remove from the heat, stir in the lemon juice and season with salt; keep warm.
Rub the skirt steaks with oil and season with salt and pepper (or Adobo Seco seasoning). Grill over high heat until nicely charred and medium-rare, about 3 minutes per side.
Transfer the steaks to a cutting board and let rest for 5 minutes. Thinly slice the steaks across the grain.
Spoon the paprika butter over the steak and serve right away.
4 lbs small Yukon Gold potatoes, about 1 1/2″ diameter
1/2 cup unsalted butter (4 ounce)
1/2 cup fresh sage leaves (about 1/4 ounce)
Kosher salt, to taste
After cooling slightly, gently smash taters
Pour sage butter over smashed potatoes
Directions
Add water to a Dutch oven to a depth of 1/2 inch; place a steamer basket in Dutch oven. Bring water to a boil over high. Place potatoes in steamer basket. Cover, reduce heat to medium, and steam until potatoes are tender, 30 to 35 minutes. Let cool 10 minutes.
Meanwhile, melt butter in a large skillet over medium. Add sage leaves, and cook, stirring constantly, until leaves turn dark green in spots and butter is light golden brown, 4 to 5 minutes. Remove from heat.
Place potatoes on a baking sheet, and gently smash using the bottom of a measuring cup. Transfer to a large serving bowl, and gently toss with sage butter. Season with salt to taste.
Pork and apples is a classic, but usually an everyday pairing. Cook’s Illustrated turned to the French recipe for porc à la Normande to inspire a more elegant rendition. Using thick bone-in chops allows more leeway to avoid overcooking, while salting them an hour before cooking helps keep them moist.
An evenly heated pan is key to a good sear on these big chops, so heat your skillet over medium high for a full 5 minutes before turning up the heat. Cutting the apples into attractive rings provides a bed to raise the chops off the skillet’s bottom to allow for even cooking once transferred to the oven.
For a sauce with layered apple flavor, rely on a combination of sweet cider, cider vinegar, Calvados (or regular brandy), and a few chopped apples, which break down and help produce the right texture. A bit of butter gives the sauce richness, while chicken broth and bacon lend a balancing savoriness. Flambéing the sauce is critical to create an elegantly complex sauce, and doing it in two batches keeps the job easy.
Natural pork is preferred, but if the pork is enhanced (injected with a salt solution), just decrease the salt in step 1 to 1/2 teaspoon per chop. To ensure that they fit in the skillet, choose apples that are approximately 3 inches in diameter. With just the two of us for dinner, we cut the number of chops and apples down from 4 to 2, but kept the amount of the other ingredients the same. Applejack or regular brandy can be used in place of the Calvados. The amount of vinegar to add in step 4 will vary depending on the sweetness of your cider.
Before flambéing, Cook’s Illustrated highly suggests to roll up long shirtsleeves, tie back long hair, and turn off the exhaust fan and any lit burners. Use a long match or wooden skewer to flambé the brandy.
We paired this main dish with a Braised Red Cabbage dish from The NY Times cooking site that also included apples.
4 (12- to 14-ounce) bone-in pork rib chops, 1 inch thick
Kosher salt and pepper
4 Gala or Golden Delicious apples, peeled and cored
2 slices bacon, cut into 1/2-inch pieces
3 shallots, sliced
Pinch ground nutmeg
½ cup Calvados, Applejack or other brandy
1 ¾ cups apple cider
1 ¼ cups chicken broth
4 sprigs fresh thyme, plus 1/4 tsp. minced
2 Tbsp. unsalted butter
2 tsp. vegetable oil
½ – 1 tsp. apple cider vinegar
Directions
Evenly sprinkle each chop with 3/4 teaspoon salt. Place chops on large plate, cover loosely with plastic wrap, and refrigerate for 1 hour.
While chops rest, cut 2 apples into 1/2-inch pieces. Cook bacon in medium saucepan over medium heat until crisp, 5 to 7 minutes. Add shallots, nutmeg, and 1/4 teaspoon salt; cook, stirring frequently, until shallots are softened and beginning to brown, 3 to 4 minutes.
Off heat, add 1/4 cup Calvados and let warm through, about 5 seconds. Wave lit match over pan until Calvados ignites, then shake pan gently to distribute flames. When flames subside, 30 to 60 seconds, cover pan to ensure flame is extinguished, 15 seconds.
Add remaining 1/4 cup Calvados and repeat flambéing (flames will subside after 1 1/2 to 2 minutes). (If you have trouble igniting second addition, return pan to medium heat, bring to bare simmer, and remove from heat and try again.)
Once flames have extinguished, increase heat to medium-high; add cider, 1 cup broth, thyme sprigs, butter, and chopped apples; and bring to rapid simmer. Cook, stirring occasionally, until apples are very tender and mixture has reduced to 2 1/3 cups, 25 to 35 minutes. Cover and set aside.
Adjust oven rack to middle position and heat oven to 300 degrees.
Slice remaining 2 apples into 1/2-inch-thick rings. Pat chops dry with paper towels and evenly sprinkle each chop with pepper to taste.
Heat oil in 12-inch skillet over medium heat until beginning to smoke. Increase heat to high and brown chops on both sides, 6 to 8 minutes total. Transfer chops to large plate and reduce heat to medium.
Add apple rings and cook until lightly browned, 1 to 2 minutes. Add remaining 1/4 cup broth and cook, scraping up any browned bits with rubber spatula, until liquid has evaporated, about 30 seconds.
Remove pan from heat, flip apple rings, and place chops on top of apple rings. Place skillet in oven and cook until chops register 135 to 140 degrees, 11 to 15 minutes.
Transfer chops and apple rings to serving platter, tent loosely with foil, and let rest for 10 minutes.
While chops rest, strain apple/brandy mixture through fine-mesh strainer set in large bowl, pressing on solids with ladle or rubber spatula to extract liquid; discard solids. (Make sure to use rubber spatula to scrape any apple solids on bottom of strainer into sauce.)
Stir in minced thyme and season sauce with vinegar, salt, and pepper to taste. Transfer sauce to serving bowl. Serve chops and apple rings, passing sauce separately.
This recipe from Milk Street is an adaptation of one from “More Mexican Everyday” by Rick Bayless. Adding the shrimp at the end, after the rice has steamed, and allowing them to cook gently with residual heat ensures they are plump and tender and not overdone. Then layer in herbal notes by simmering minced cilantro stems with the rice, and folding in chopped cilantro leaves just before serving.
The entire bunch of cilantro goes into this one pot meal, so you’d better be committed. We happen to love the herb, but I know several folks who think it tastes like soap and/or have an issue digesting it. Parsley could be an option, but the flavor profile will be altogether different.
When looking at the ingredients, I thought why not use our homemade shellfish stock instead of chicken broth? Makes more sense when the star protein is shrimp. And speaking of the liquid component, do yourself a huge favor and read the amount necessary shown on the package of long grain rice that you are using.
The original recipe said to use two cups and that’s initially what we did. We checked the rice doneness after 15 minutes, again after 20 minutes and a final time at 25 minutes and the rice was STILL not done. Finally I checked the package which says to use 3 cups liquid per 1 1/2 cups rice, duh!
We had to remove the shrimp to a plate and cover with foil. Measure another cup of stock, heat it in the microwave, pour it back into the pan, cover and simmer for an additional 5 minutes. Then once again, remove the pan from the heat, add the shrimp back to the mixture, cover and let sit for a couple minutes more before adding the cilantro.
Just sayin’, read your rice package for the proper amount of liquid and save your self the headache… Then enjoy the feast, it was fabulous and the shrimp were tender and succulent.
Season the shrimp with ½ teaspoon each salt and pepper; set aside at room temperature.
In a large saucepan over medium, cook the oil and garlic, stirring often, until the garlic is just barely golden, 2 to 3 minutes.
Stir in the chipotle chilies, cilantro stems, rice and raisins, then add the broth and 1 teaspoon salt. Bring to a simmer over medium-high, then cover and reduce to low. Cook until the rice is tender and the liquid has been absorbed, 15 to 20 minutes.
Uncover the pan and scatter the shrimp evenly over the rice. Re-cover, remove from the heat and let stand for 10 minutes.
Gently fluff the rice with a fork, folding in the shrimp. Re-cover and let stand until the shrimp are opaque throughout, another 5 to 7 minutes.
Stir in the cilantro leaves, then taste and season with salt and pepper.
*TIPS: Read your rice package label for the correct amount of liquid for 1 1/2 cups. Don’t lift the lid to peek at the shrimp after they’ve been added to the pan, except to stir them into the rice. Uncovering releases the residual heat needed for gently cooking the shrimp.
Folks in much of the U.S. start to breathe a sigh of relief as the temps and humidity become more humane. With the welcome respite, we start craving comfort foods that haven’t made appearances on our dinner table since the early Spring. Meatloaf comes to mind as one of those cool-weather comfort foods, and here’s one with a local twist: Philly Cheesesteak Meatloaf.
I found this recipe on dinnerthendessert.com and decided it was worth a try, after all Philadelphia is our “mother” city, the place we refer to when on vacay and asked where we call home. It contains not only ground beef but green bell peppers, onions and mushrooms, and is topped and stuffed with provolone cheese. Not exactly haute cuisine, but certainly worth a try. And BTW, it is fantastic leftover!
Typically I like to serve mashed potatoes with meatloaf, but The Hubs suggested we pair it with a Farmers Market Ratatouille recipe found in our latest issue of Fine Cooking magazine. It is an example of simple food, prepared in a way to let humble ingredients shine that gets even tastier as it sits. You could even make it the day before, let the flavors meld in the refrigerator and reheat it when ready. A win-win in my book.
For a touch more depth of flavor, I included 1 teaspoon dried oregano, two dried bay leaves and a pinch of red pepper flakes. Keep in mind, the ratatouille is done in a slow cooker and takes over 6 hours total including the prep, so plan ahead. But you will love it because it’s rich in flavor, gluten-free, vegetarian, and absolutely delicious! If you have a non-meat eater in the household, they could make this their main course along with a hefty slice of crusty bread.
The directions instruct to employ a 6-quart slow cooker. We used our 7-quart model and it was filled to the brim initially, but everything cooked down to about half by the end. So you might want to start with a larger cooker if you have one. Oh, and feel free to throw in any errant veggies you may have lurking in the fridge. We had one cooked ear of corn, so I shaved off the kernels and threw them in for the last several minutes before the basil.
Preheat the oven to 375 degrees and spray a large loaf pan with cooking spray.
In a large skillet over medium high heat, add the butter and the onions and bell peppers, mushrooms, salt and pepper.
Let brown for 3 minutes before stirring, then let brown for another 1-2 minutes before stirring again.
Let cool for five minutes.
In a large bowl add the ground beef, ketchup,Worcestershire sauce, eggs, panko breadcrumbs and the cooled vegetable mixture.
Add half the mixture to your loaf pan then add half of the cheese, overlapping the slices.
Cover with the rest of the meat and form into a flat-top loaf shape. Place your loaf pan on a rimmed baking sheet and put in the oven.
Cook for 40 minutes, then pull out of the oven. Remove any excess grease from the corners with a baster. Cover with remaining cheese and put back in the oven.
Cook for 15-20 minutes, then let rest for 10 minutes before cutting.
1 medium eggplant, trimmed and cut into 1/4-inch dice
3 medium Roma tomatoes, seeded and chopped
1 large red onion, coarsely chopped
1 medium red bell pepper, cut into 3/4-inch pieces
1 medium yellow bell pepper, cut into 3/4-inch pieces
1 medium zucchini, trimmed and cut into 3/4-inch dice
1 medium yellow summer squash, trimmed and cut into 3/4-inch dice
2 dried bay leaves
1 tsp. dried oregano
Pinch of red pepper flakes
Kosher salt and freshly ground black pepper
1 lightly packed cup thinly sliced basil
Directions
Heat the oil in a small skillet over medium heat until shimmering. Add the garlic, remove from the heat, and let cool 5 minutes
Stir in the tomato paste until smooth.
Combine all of the prepped veggies (except the basil) in a 6-qt. (or larger) slow cooker. Add the tomato paste mixture, bay leaves, dried oregano, red pepper flakes, 1 1/4 teaspoon salt and 1/4 teaspoon pepper; stir well.
Cover and cook on low until the vegetables are tender, about 5 hours.
Remove the lid, and continue cooking until some of the liquid evaporates, about 30-45 minutes.
Stir in the basil, season to taste with salt and pepper, and serve or cool and refrigerate until ready to eat.
Uncover and continue cooking for 30-45 minutes to evaporate some of the liquid.
What do you do with a red cabbage leftover from a Farmers Market Arrangement made for your garden club? I know this is a dilemma for many of you…
Initially, my red cabbage was part of this arrangement.
Kidding aside, cooler October temps invite the braising season to commence. And this is one of those dishes that’s even better the following day, so go ahead and make it when you have time and then serve it on a weeknight with quick cooking chops of some sort.
Prep all veggies before cooking
Soak shredded cabbage in ice water
Be sure to soak the shredded cabbage in cold water as suggested in Step 1. The cabbage absorbs water, which is then released in cooking, and helps to steam the cabbage for utmost tenderness.
We concur, this is probably THE BEST braised cabbage we’ve ever had, and no sugar!
1 large red cabbage, 2 to 2 1/2 pounds, quartered, cored and cut crosswise in thin strips
2 Tbsp. canola oil
1 small onion, thinly sliced
2 tart apples, such as Braeburn or granny smith, peeled, cored and sliced
About 1/3 cup balsamic vinegar
¼ teaspoon ground allspice
Salt
Freshly ground pepper to taste
Onions and balsamic vinegar
Apple slices are added
Stir in cabbage and allspice
Cook covered over low heat for one hour
Directions
Prepare the cabbage, and cover with cold water while you prepare the remaining ingredients.
Heat the oil over medium heat in a large, lidded skillet or casserole, and add the onion. Cook, stirring, until just about tender, about three minutes.
Add 2 tablespoons of the balsamic vinegar and cook, stirring, until the mixture is golden, about three minutes, then add the apples and stir for two to three minutes.
Drain the cabbage and add to the pot. Toss to coat thoroughly, then stir in the allspice, another 2 tablespoons balsamic vinegar, and salt to taste. Toss together.
Cover the pot, and cook over low heat for one hour, stirring from time to time.
Add freshly ground pepper, taste and adjust salt, and add another tablespoon or two of balsamic vinegar as desired.
Thin center-cut pork chops, quick-cooking cabbage and a simple sauce make this German-style dish a great option for busy weeknights. This one-skillet recipe is keto-friendly, too. BUT, we used two thick, bone-in chops and added some cooked egg noodles (thus eliminating the keto-friendly advantage).
In addition, we added sliced garlic and increased the amount of onion from 1/2 to a whole onion. Because our chops were bone-in and thicker, we did have to increase the cooking time slightly. Use an instant-read thermometer to check the temperature which should come to 150°. The temp will rise slightly while resting under foil.
In the end, the meal was fantastic and loved the fact that we had leftovers!
1/2 head green cabbage, roughly chopped (about 1 pound)
1 Tbsp. butter
3/4 cup heavy whipping cream
2 Tbsp. Dijon mustard
2 Tbsp. fresh lemon juice
1/4 tsp. white pepper, or to taste
Chopped fresh parsley, for garnish
Directions
Pat the pork chops dry and season with salt and pepper.
In a large skillet over medium-high heat, heat the oil over until shimmering. Add the chops and cook until browned on one side, about 4 minutes. Turn the chops and cook until browned on the other side, about 3 minutes. (If the chops are browning too quickly, lower the heat.) Transfer the chops to a plate and cover with foil to keep warm.
Add the onion to the skillet and stir, cooking until the onion is softened and nearly translucent, 6 to 8 minutes. Stir in the cabbage and cook until the cabbage is tender, 5 to 8 minutes. Add the butter, if using, and toss to coat the cabbage. (If the chops are lean, butter will enhance the flavor.) Transfer the cabbage mixture to a serving platter and cover to keep warm.
Lower the heat to medium. Add the cream and mustard to the skillet and stir until the mustard is fully incorporated, about 1 minute. Add the lemon juice and white pepper; stir to combine.
Add the chops back to the skillet. Lowe the heat to medium-low and simmer until the sauce thickens slightly, about 5 minutes, basting the chops with the sauce.
Place the chops on top of the cabbage on the serving platter. Drizzle the chops and cabbage with the remaining sauce, garnish with the parsley and serve.
The sizzling arrival of cast-iron plates of marinated steakhouse steak tips is often the most exciting part about them, so says Cook’s Country. In this version of Grilled Steakhouse Steak Tips, they replace the typical sickly sweet marinade culprits—ketchup, barbeque sauce, and cola—with a mixture of soy sauce, oil, dark brown sugar, and tomato paste for enhanced meaty flavor and maximum char. WOW, great results!
Typically, if you can even find it (hello Costco), flap meat is sold as whole steaks, strips, and pieces. For even pieces, buy a whole steak of uniform size and cut it up yourself. We’ve only found it at Costco sold in thick strips, but that is perfect for this method. And instead of cutting it down into 2 1/2-inch pieces we kept them to about 5 inch lengths.
This is not your grandma’s steak and potatoes recipe. The marinade has a hint of sweetness from the brown sugar but otherwise is a great companion to beefy flap meat. If you get the opportunity, try to marinate for the total 24 hours, but a minimum of 2 hours will provide enough flavor. If, like us, you are medium-rare fans, take the steaks off when they reach 125-130° (they may have to come off at separate times). Cover with foil and let rest for 5-10 minutes.
As an accompaniment, we made these fabulous potatoes which The Hubs found in a video on Tik Tok, thus we named them “Tik Tok Taters”. We made a major alteration to the directions however because after initially boiling the potatoes for the 20-25 minutes as indicated, they were beyond fork tender and falling apart. So we shortened the boiling time in this phase to 12-15 minutes, which is shown in the directions below.
In this photo op, I inadvertently staged “light” brown sugar when the recipe calls for “dark” brown.
Whisk soy sauce, oil, sugar, garlic, tomato paste, paprika, pepper, and cayenne together in bowl until sugar dissolves; transfer to zipper-lock bag.
Pat beef dry with paper towels. Prick beef all over with fork and cut into 2 1/2-inch pieces. Add meat to bag with soy mixture and refrigerate for 2 to 24 hours, turning occasionally.
For a gas grill, turn all burners to high, cover, and heat grill until hot, about 15 minutes.
Clean and oil cooking grate. Cook beef (covered if using gas) until charred and registers 125 to 130 degrees (for medium-rare), 7 to 8 minutes.
Transfer meat to platter, tent loosely with foil, and rest for 5 to 10 minutes. Serve.
What to do for dinner in late-summer/early-fall with an abundance of grape tomatoes and fresh herbs? Well that would be Skillet Burst Grape Tomato Casarecce with Lemony Breadcrumbs. It’s a very simple pan roasted grape tomato pasta with white wine, garlic, fresh herbs, topped with the most crunchy lemony breadcrumbs, and finished with luscious burrata cheese.
Don’t forget to add that luscious dollop of fresh burrata.
This perfect late-summer dinner is ready in under 30 minutes using basic pantry staples and end-of-season garden bounty. If you’ve never used it, Casarecce pasta is a very narrow, twisted, and rolled tube, almost resembling a scroll. If you can’t find it, substitute a similar twisted, tubular pasta like cavatappi, cavatelli, gemelli, or fusilli.
If you have any leftovers, keep the bread crumbs and buratta separate. When ready to eat, reheat the pasta in a microwave for a few minutes, then top with crumbs and cheese.
Skillet Burst Grape Tomato Casarecce with Lemony Breadcrumbs
1 pound casarecce pasta, or other twisted tubular pasta
1 1/4 lbs. red and yellow grape tomatoes
6-8 cloves garlic, smashed
2 Tbsp. fresh thyme leaves
1 Tbsp. chopped fresh oregano
1/3 cup dry white wine
1/2 cup manchego cheese, grated
2 cups fresh basil, roughly chopped
2 balls fresh burrata cheese, each ball split in two
Crisp bread crumbs until golden
Cook until the tomatoes begin to pop
Basil and Manchego cheese are added
Stir together with some reserved pasta water
Top each serving with bread crumbs
Directions
In a large skillet set over medium heat, add 2 tablespoons olive oil. When the oil shimmers, add the bread, a pinch of red pepper flakes and pinch of kosher salt. Cook, stirring occasionally until golden and toasted all over, about 5 minutes.
Remove from the heat and stir in the lemon zest. Slide bread crumbs onto a plate. Wipe the skillet clean.
Bring a large pot of salted water to a boil. Add the pasta and cook according to package directions until al dente. Just before draining, remove 1 cup of the pasta cooking water. Drain.
Meanwhile, place the same skillet used for the bread over high heat and add the remaining olive oil. When the oil shimmers, add the tomatoes, garlic, thyme, and oregano, and a pinch each of salt, pepper, and red pepper flakes. Cook until the tomatoes begin to pop, about 4-5 minutes. Pour in the wine, cook 1 minute.
Add the pasta and a splash of the pasta cooking water to the skillet, tossing to combine. Remove from the heat and add the manchego cheese and basil, toss to combine. If needed, thin the pasta sauce with a little of the reserved cooking water.
Divide the pasta among shallow bowls, nestle in half a burrata ball, and top with bread crumbs.
This was one of those days that we knew there wouldn’t be much time to prepare and cook dinner because we planned on spending all day at the beach, probably the last hurrah of the season in late September. I thought cheeseburgers would be an easy fix.
The day prior, I pulled a package of Trader Joe’s ground pork out of the freezer to thaw and noted we had brioche buns, plus lettuce, tomato and onion on hand for garnish. Perfect. Then, while standing in line at the local farmer’s market, I glanced at a display of Urban Accent seasoning mixes and saw one for Ancho Chile Pork Burgers. More Perfect!
I rarely tout product placement in my blog, but it seemed that this serendipitous combination was just meant to be, so I ran with it. The bold spice blend will pack your burger with the smoky flavors of ancho and chipotle chiles, paprika, coriander, allspice, and sweet brown sugar. But if you’re not into pork burgers, Urban Accents Ancho Chile Pork Burger blend also goes great with beef, turkey or even a veggie burger!
My brilliant solution to pull everything together was a mix of mayonnaise and adobo sauce (gotten from a can of smoked chipotle chiles). Mix and spread on both bun bottoms and tops. Along with a side of Bush’s Black Bean Fiesta—another timesaver which contained chipotle seasoning—we enjoyed a super flavorful meal in no time.
Of course you can use whatever toppings float your boat, but we decided Swiss cheese melted on top—in fact two slices per burger—plus the lettuce, tomato and onion trinity, added color, flavor and a skosh of healthy nutrients.
Break apart ground pork into a medium bowl. Sprinkle in Urban Accents seasoning and mix with hands until evenly distributed trying not to overwork it. Form into 3 (or 4) uniformed sized patties.
Add oil to a large skillet over medium-high heat until oil is shimmering. Add patties to skillet and sear on one side until brown, about 5 minutes.
Flip the patties and sear the other side, again until browned and internal temperature reaches 150°. During the last minute, add cheese slices, top with a lid until cheese melts, maybe 1 minute more.
Meanwhile, mix the mayo and adobo sauce (add or subtract according to personal preference) until thoroughly mixed and spread on both sides of each bun.
Place the burger on bottom of bun and top with remaining garnishes.
Although summer produce season was nearing its end, we easily scored some fresh corn and zucchini to make this flavorful Spiced Chicken with Corn, Mushrooms and Zucchini. It’s a one pan meal that’s ready in a total of 45 minutes. Cooked in a skillet, the spiced chicken takes on a brick-red hue with a moderately spicy kick. (You can adjust the amount of heat by adding or eliminating the amount of cayenne.)
Here gochugaru—Korean red chile flakes—imbues this one-skillet chicken and vegetable supper with its deep, savory flavor, gentle heat and a hint of smokiness. But don’t fret if you can’t find gochugaru, just substitute ancho chile powder, regular chili powder or chipotle chile powder (or choice) for a delicious but different taste profile. Add more cayenne or eliminate it to adjust the level of heat, which is moderate as written. (Gochugaru can be found at Asian markets, well stocked supermarkets or online.)
I got carried away and pounded the chicken breasts down to a 1/4″ instead of the indicated 1/2″. Not a problem as long as the meat is not overcooked and dried out. Adjust the cooking time so that the poultry registers 160°, then move to a plate and cover with foil.
The amount of chicken we made was over 1 1/2 pounds, which when hammered down made 4 large cutlets, and therefore had to be cooked in 2 batches. Once the veggies are done, pour the accumulated chicken juices into the pan and stir to distribute.
Yes, you can make this meal with frozen corn, but you will suffer from a loss of flavor. This summer was THE BEST corn season we’ve experienced in a long time. And this last batch in particular was astoundingly sweet and juicy!
2 Tbsp. canola oil or another neutral oil, divided
8 oz. fresh shiitake mushrooms or a mix of mushrooms such as shiitake, oyster and/or cremini, sliced
2 to 3 Tbsp. water, plus more as needed
1/4 cup thinly sliced scallions, white and light green parts, plus dark greens for garnish
1 Tbsp. minced or finely grated fresh ginger
1 medium zucchini (8 ounces), trimmed, quartered lengthwise and sliced 1/2-inch thick
3-4 ears of corn, kernels sliced from cob
Directions
In a small bowl, combine the gochugaru, 1/4 teaspoon salt, the granulated garlic and cayenne pepper. Sprinkle the spice mixture onto both sides of the chicken, rubbing it in a little with your fingers.
In a large skillet over medium-high heat, heat 1 tablespoon oil until shimmering. Add the chicken to the pan, reduce the heat to medium and cook until cooked through, 4 to 5 minutes per side. Transfer the chicken to a plate.
Add the remaining 1 tablespoon oil to the pan, followed by the mushrooms and 1/4 teaspoon salt. Add the water if the pan seems dry, and cook, stirring occasionally, until the mushrooms have released their liquid and begin to brown, about 5 minutes.
Stir in the scallions and ginger and cook until they soften, about 1 minute.
Add the zucchini, corn and the remaining 1/4 teaspoon salt and cook until the vegetables are tender, 3 to 5 minutes. If the pan seems dry, add more water as needed, a couple of tablespoons at a time.
Pour any accumulated juices from the chicken into the pan with the vegetables, and then slice the chicken into strips.
Serve the vegetables with the sliced chicken on top or on the side.
On vacation in Hilton Head in mid-September, and with plans to check out as many restaurants as the schedule would allow, we also anticipated dining in, at least a few evenings. The Hubs and I drove down with good friend Merry Sue (owner of the time share) which sported a modern, fully-equipped kitchen. As her guests, we promised to make dinner a couple of nights, although we had no pre-planned menus. (But we did intentionally schlepp down a few good knives 🙂 )
Lots of Shallots
It was unanimous that chicken be the star of dinner this particular night, so The Hubs began his search on several of our recipe faves and found this perfect gem, Baked Chicken with Herbs, Garlic & Shallots, on FineCooking.com. Because it consisted of few ingredients, a good thing when on vacation, and was simple in employment, the recipe fit our criteria to a tee.
Merry Sue and Lynn on the condo balcony.
For some strange reason the local supermarket carried only four whole chickens, so I bought the smallest at just over 4 1/2 pounds—which in hind sight worked out well because we all ADORED the finished dish, plus had leftovers for a tasty chicken salad for lunch the next day! This recipe is so easy to modify to your liking with different herbs, extra garlic, small onions, etc. If you prefer white or dark meat only, you could also substitute bone-in, skin-on split breasts or thighs.
I believe this will easily become a staple of our weeknight dinner repertoire. Vary the herbs as you like, but stick to the hardy ones—thyme, rosemary, sage, and oregano. They’ll roast without burning and have a stronger flavor.
Without a lot of staples at our disposal, we opted to go for a packaged rice dish and a simple side salad (the grape tomatoes we transported from our garden at home) to complete the meal. When we make this delicious dish again, I think we’ll go ahead and make the pan sauce to pair with some garlicky mashed potatoes to accompany the baked chicken. Mmmm-mm good!
Heat the oven to 425°F. Rinse the chicken and pat it dry with paper towels. Cut away any excess fat and tuck the wings behind each breast.
Put the butter into a large, shallow baking pan (a 10-1/2×15-1/2-inch Pyrex pan is ideal for this). Put the pan into the oven while it’s heating. When the butter is melted (about 10 minutes), remove the pan and set it on a heatproof surface or on a couple of potholders. Add the shallots, garlic, thyme, and rosemary, and swirl the pan to coat the ingredients in the butter.
Dredge the chicken, skin side down, in the butter and herb mixture, and arrange, skin side up, in the pan. Sprinkle the chicken generously with the salt and pepper. Bake until the chicken is browned and cooked through, 50 to 60 minutes. Serve with the shallots and garlic along with a drizzle of the pan drippings.
A rare cool, rainy Sunday afforded us the opportunity to cook a slow braised dish for a summer dinner. While thumbing through several favorite cookbooks, I happened upon this Roman Braised Beef with Tomatoes and Cloves in Milk Streets “The New Rules” by Courtney Hill.
The “new rule: don’t sear your meat” goes against something we typically do, brown our meat beforehand. But because you cook it uncovered for the last hour or so, the meat will brown at the end of the process.
Pot roast comes to mind with this meal, and in Rome, cloves are used to flavor the dish known as “Garofolato di Manzo alla Romana” because cloves are called chiodi di garofano. Here, the earthy, subtly smoky and slightly bitter flavor of cloves complements the natural sweetness of onion, fennel and tomatoes.
Milk Street advises not to use ground cloves that have gone stale, as they won’t add much flavor or fragrance to the braise. If your cloves have been in the pantry for more than a few months, uncap and take a whiff. The aroma should be sharp and strong. If not, pony up and get a new jar.
Unlike pot roast where you cook the large piece of meat whole, the beef is cut into chunks and simmered as a stew resulting in succulent meat throughout. Polenta is an excellent accompaniment for absorbing the flavorful sauce. In a unique pairing, we wedded the meat with another Milk Street recipe Spanish Green Beans with Ham, Almonds and Smoked Paprika.
This recipe is an adaptation of the remarkably delicious green beans from Extremadura, Spain, home of pimentón, aka Spanish smoked paprika. For perfectly crisp and tender beans, cooking techniques are combined. You start by searing the veggies in a hot pan to develop browning and flavor. Then add water and a tight fitting lid to steam them until tender. Voila!
6-7 lbs. boneless beef chuck roast, trimmed and cut into 2-inch chunks
¾ tsp. ground cloves
kosher salt and ground black pepper
4 oz. pancetta, roughly chopped
6 med. garlic cloves, smashed and peeled
1 med. yellow onion, halved and thinly sliced
1 med. fennel bulb, trimmed, halved, cored and thinly sliced
28 oz. can whole peeled tomatoes, crushed
2 tsp. fresh thyme, minced
Directions
Heat the oven to 325°F with a rack in the lower-middle position. Place the beef in a large bowl and season with the cloves, 1 tablespoon salt and 2 teaspoons pepper.
In a large Dutch oven over low, cook the pancetta, stirring occasionally, until sizzling and the fat has begun to render, about 5 minutes.
Increase the heat to medium-low and continue to cook, stirring occasionally, until the pieces begin to brown, another 7 minutes.
Add the garlic, onion and fennel, then increase to medium. Cook, stirring occasionally, until the vegetables are softened and translucent, about 6 minutes.
Stir in the tomatoes and bring to a simmer. Stir in the beef, then cover, transfer to the oven and cook for 2 hours.
Remove the pot from the oven. Stir, then return to the oven uncovered. Cook until a skewer inserted into a piece of beef meets no resistance, another 1 to 1½ hours.
Using a slotted spoon, transfer the meat to a medium bowl. With a wide spoon, skim off and discard the fat from the surface of the cooking liquid, then bring to a boil over medium-high, scraping up any browned bits. Cook until the liquid has thickened to the consistency of heavy cream, 10 to 12 minutes.
Stir in the thyme, then return the beef to the pot. Reduce to medium and cook, stirring occasionally, until the meat is heated through, about 5 minutes.
Spanish Green Beans with Ham, Almonds and Smoked Paprika
First, the almonds. Begin by toasting them in olive oil to deepen their nutty flavor, then add the garlic and thinly sliced serrano ham, cooking the mixture until the meat crisps and the garlic is fragrant. Then remove that mixture from the pan and add the green beans and char them in the flavorful fond left behind.
For the final flourish of smoked paprika, first deglaze the pan with another 1⁄4 cup water, scraping up any remaining flavorful bits, then remove the pan from the burner and stir the spice in off heat. This preserves the paprika’s smoky aroma, resulting in a pan sauce that is as quick as it is deeply smoky-savory.
Don’t stir the beans too often after adding them to the pan. Stirring only a few times allows the beans to take on some char that adds flavor the finished dish. If you’re entertaining more than four people with the braised beef dinner, you’ll want to double this bean recipe.
My mistake here was using a nonstick skillet so the beans didn’t get as good a sear as I wanted. But in the end since there were no browned bits left in the pan, there was no reason to perform Step 5. Instead, I just sprinkled the smoked paprika right onto the finished beans, stirred and served. OMG, so friggin’ good!!
Spanish Green Beans with Ham, Almonds and Smoked Paprika
2 oz. thinly sliced serrano ham or prosciutto, sliced into ¼-inch-wide ribbons
2 med. garlic cloves, minced
1 lb. green beans, trimmed and halved
Kosher salt and ground black pepper
½ tsp. smoked paprika
Directions
In a 12-inch skillet (don’t use nonstick) over medium, heat 2 tablespoons of oil until shimmering. Add the almonds and cook, stirring often, until lightly golden, about 2 minutes.
Add the ham and garlic and cook, stirring, until the ham crisps and the garlic is fragrant, another 2 minutes. Transfer to a small bowl; set aside.
To the same skillet over medium-high, add the remaining 2 tablespoons oil and heat until smoking. Add the beans and ½ teaspoon each salt and pepper. Cook, stirring only a few times, until the beans are lightly charred, about 4 minutes.
Return the ham-almond mixture to the pan and add ¼ cup water. Cover, reduce to low and cook, occasionally shaking the pan, until the beans are tender-crisp, about 3 minutes. Taste and season with salt and pepper, then transfer to a serving dish.
Set the skillet over medium-high and add ¼ cup water. Bring to a simmer and cook, scraping up the browned bits, until the liquid has reduced to about 2 tablespoons, about 2 minutes.
Remove from the heat and stir in the paprika. Drizzle the sauce over the beans and serve.
Make sure you get the freshest home grown cherry tomatoes for this fabulous pasta dish. Currently they are in season in our neck of the woods and, lucky for us, our Farmer’s Market was brimming with every type imaginable.
Pasta Extraordinaire!
When Milk Street(where we got this recipe) sampled this no-cook tomato sauce in Sicily, it was made the traditional way, with a large mortar and pestle. A food processor gets it done faster and more easily. But The Mr. wanted to do it the traditional way in his favorite gargantuan mortar and pestle. He felt the results would produce a better paste.
Mashing the toasted almonds and garlic
The paste after using a mortar and pestle
Topped with crisp, olive oil–infused croutons and toasted almonds, the dish is served warm or at room temperature after the pasta has had a few minutes to soak in the flavorful sauce. Instead of blanched, slivered almonds, we used sliced, but whole almonds roughly chopped are another option.
Please don’t over-process the second addition of tomatoes. The first half is pulsed to create a juicy sauce,but the rest are pulsed only until roughly chopped so that tomato chunks add bursts of bright color and texture, and boy did they!
I usually don’t combine bread with a pasta meal because of the heavy carb count, but those croutons are a must! Serve with a veggie-laden side salad to help compensate. It’s typical to grate some cheese over a pasta dish, but even though I served some on the side, we both felt it was not necessary and might even take away from the fresh taste. Will certainly make again!
Tomatoes from the farmer’s market and fresh basil from our garden
We used almond slices instead of slivers
Gemelli with Fresh Tomato-Almond Pesto and Croutons
6 Tbsp. extra-virgin olive oil, divided, plus more to serve
3 oz. crusty white bread, torn into rough ½-inch pieces (about 1¾ cups)
Directions
In a 10-inch skillet over medium-high, toast the almonds, stirring frequently, until golden brown and fragrant, 3 to 5 minutes. Transfer to a small bowl and set aside; reserve the skillet.
In a large pot, bring 4 quarts water to a boil. Add the pasta and 2 tablespoons salt, then cook, stirring occasionally, until al dente. Reserve about ½ cup of the cooking water, then drain the pasta.
Meanwhile, in a food processor, process ½ cup of the almonds, the garlic and 2 teaspoons salt until finely chopped, about 30 seconds.
Add the basil and half of the tomatoes, then pulse until chopped and well combined, 4 to 6 pulses.
Add the remaining tomatoes and 2 tablespoons of oil, then pulse just until the whole tomatoes are broken up, about 3 pulses.
Transfer to a serving bowl, add the pasta and ¼ cup of the reserved cooking water, then toss. Let stand, tossing once or twice, for 10 to 15 minutes to allow the pasta to absorb some of the sauce.
While the pasta stands, in the same skillet used to toast the almonds, toss the bread, remaining 4 tablespoons oil, ½ teaspoon salt and ¼ teaspoon pepper. Cook over medium, stirring frequently, until the bread is crisp and golden brown, 5 to 7 minutes.
Scatter the toasted bread and the remaining ¼ cup almonds over the pasta. Drizzle with additional oil and sprinkle with pepper.