All posts by LynnHoll

Unknown's avatar

About LynnHoll

I have been an artist and designer all my life incorporating graphic design for websites, gardens, publications, fabrics, interior design and cooking. I am now retired from my professional job, but still create artistic visions in all forms on a daily basis.

Grilled Homemade Pizza

Homemade pizzas can run the gamut as far as the whole flavor profile goes. Are you jonesing for a meat lovers pie? A vegetarian mix? A spicy concoction? Or just a free-for-all?

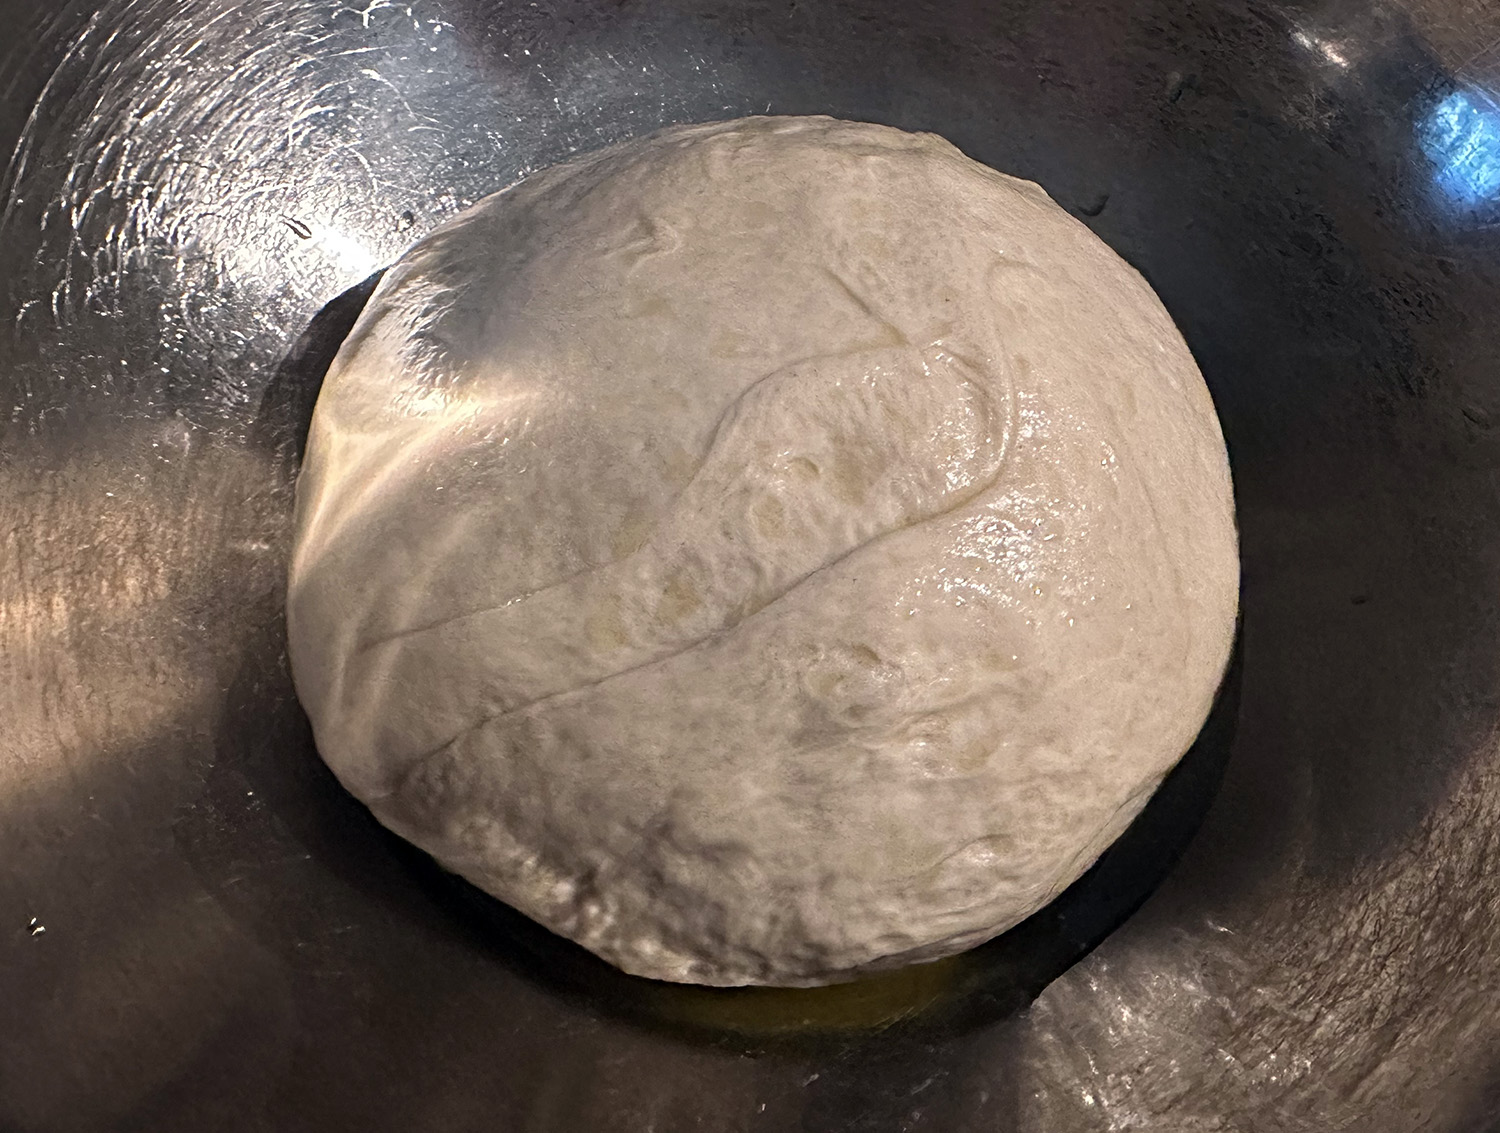
Even the crust has options, be it typical white flour, whole wheat, or gluten-free. Not to mention a lo-carb choice of a cauliflower crust. In this case, we just used a store-bought pizza dough for our maiden voyage of cooking it on the gas grill.

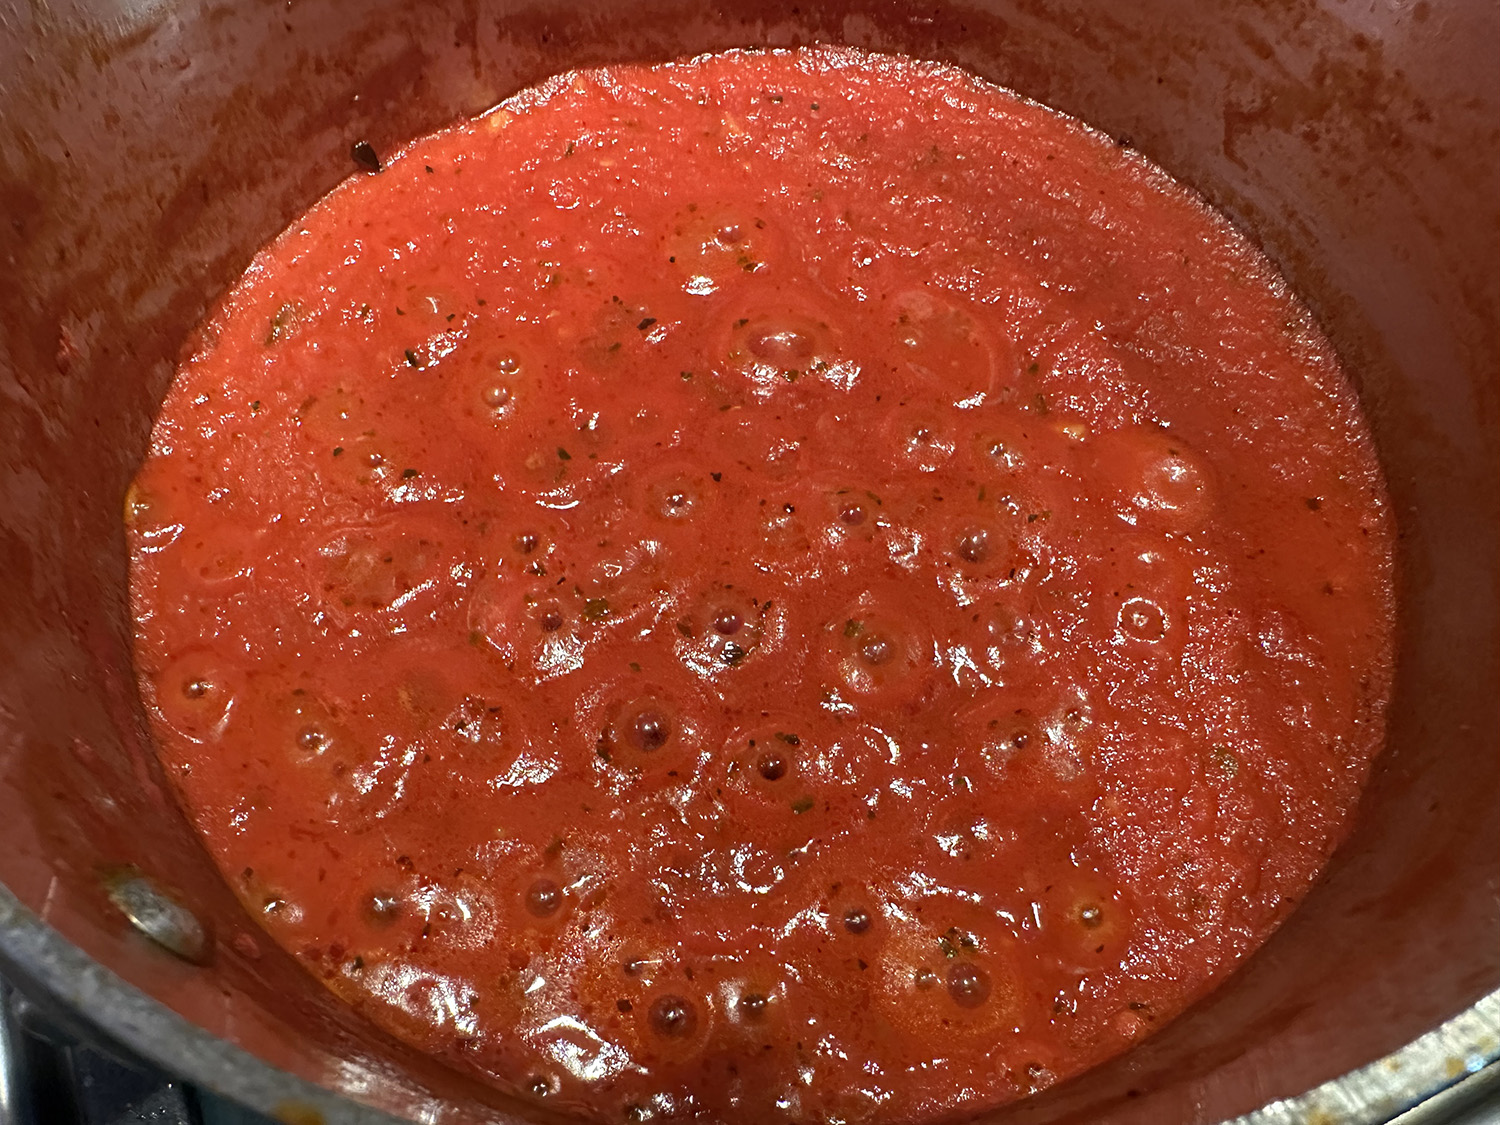
Of course you can expedite the process even more by using a jarred sauce. Instead we prepared a homemade tomato sauce from Milk Street. This can always be made ahead of time. In fact, the sauce makes enough for two pies, just freeze the leftovers for a future pizza.

The steps to a great grilled pizza were taken from an article by J. Kenji López-Alt for NYTimes Cooking. Neapolitan-style pizza is typically baked in ovens heated past 900 degrees to achieve its signature crackly, thin, charred crust with a moist, stretchy crumb. But you can easily yield similar textures and flavors at home by baking pizza dough directly on a pizza stone on a hot grill until it’s bubbly and crisp.

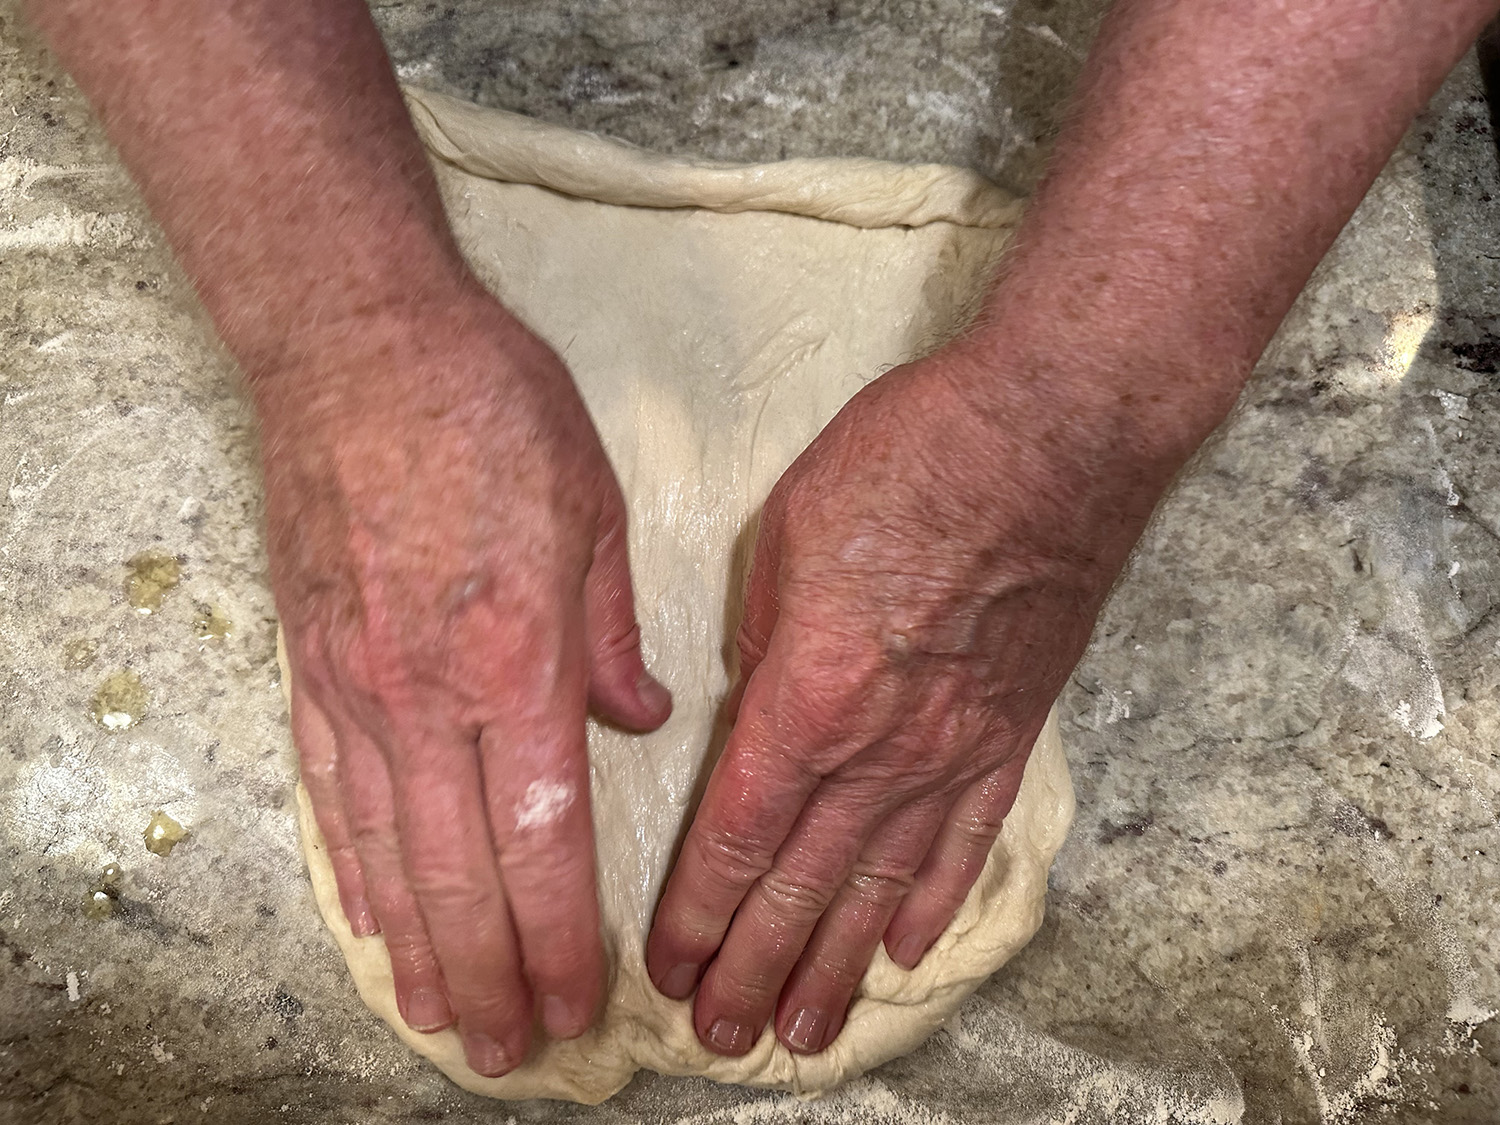
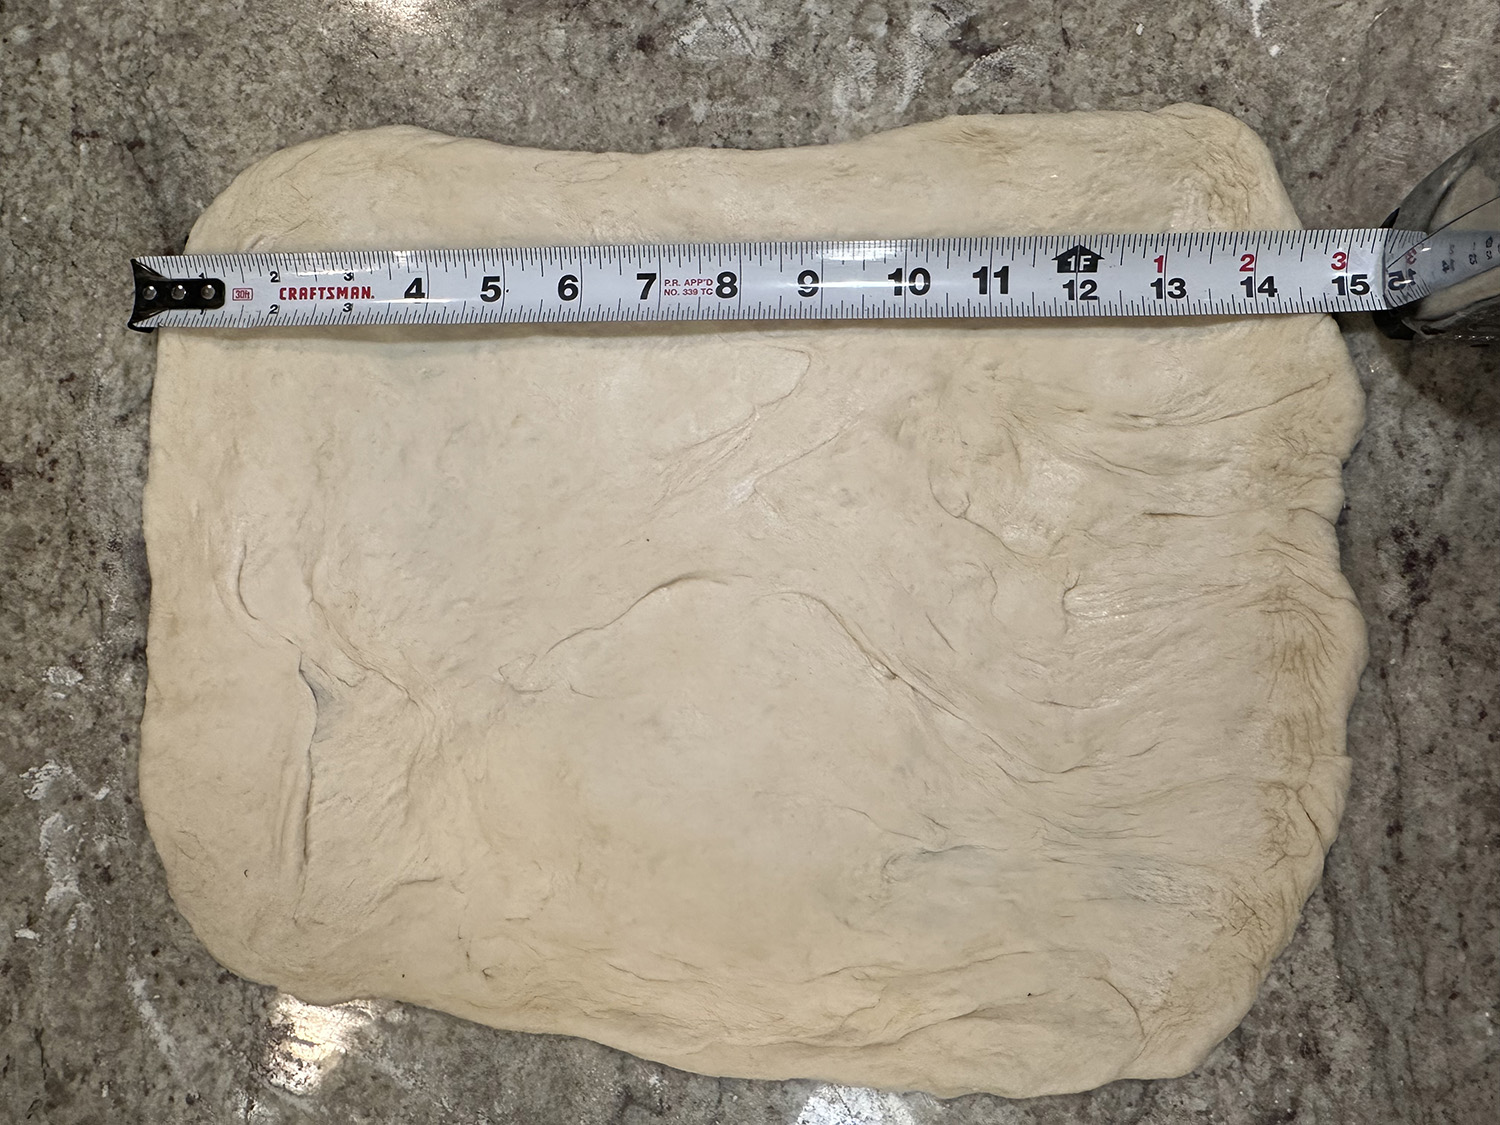
When rolled out, the dough measures approximately 12 inches x 15 inches, a bit smaller than an unrimmed baking sheet. Total time is about 45 minutes. When cut down to 6 or 8 pieces, it will serve 3 to 4 people with 2 slices each.

Grilled Pizza with Homemade Sauce

  • Servings: 2 cups
  • Difficulty: moderate
  • Print

Ingredients

The Best Pizza Sauce

  • 1 28-oz can whole peeled tomatoes, with juice
  • 2 Tbsp. extra-virgin olive oil
  • 2 garlic cloves, minced
  • 1 tsp. dried oregano
  • 1/2 tsp. red pepper flakes
  • Kosher salt and ground black pepper

Directions

  1. In a blender, process half of the tomatoes until smooth, about 20 seconds. Transfer to a large bowl. Process the remaining tomatoes until mostly smooth but with some chunks, 4 or 5 pulses. Add to the bowl.
  2. In a medium saucepan over medium, heat the oil, garlic, oregano and pepper flakes, stirring occasionally, until sizzling. Slowly pour in the tomatoes and stir. Bring to a simmer over medium-high, then reduce to low and cook, stirring occasionally and adjusting the heat as needed to maintain a simmer, until a wooden spoon leaves a trail when drawn through the sauce, 20 to 25 minutes. (Ours took twice as long to thicken properly.)
  3. Remove from the heat and let cool to room temperature. Taste and season with salt and pepper. Refrigerate in an airtight container for up to 3 days or freeze for up to 1 month (thaw and stir to recombine before using).

The steps to a great grilled pizza were taken from an article by J. Kenji López-Alt for NYTimes Cooking. Neapolitan-style pizza is typically baked in ovens heated past 900 degrees to achieve its signature crackly, thin, charred crust with a moist, stretchy crumb. But you can easily yield similar textures and flavors at home by baking pizza dough directly on the grates (or on the hot pizza stone) of a hot grill until it’s bubbly and crisp. Once the dough is baked, it can be topped and finished via indirect heat.

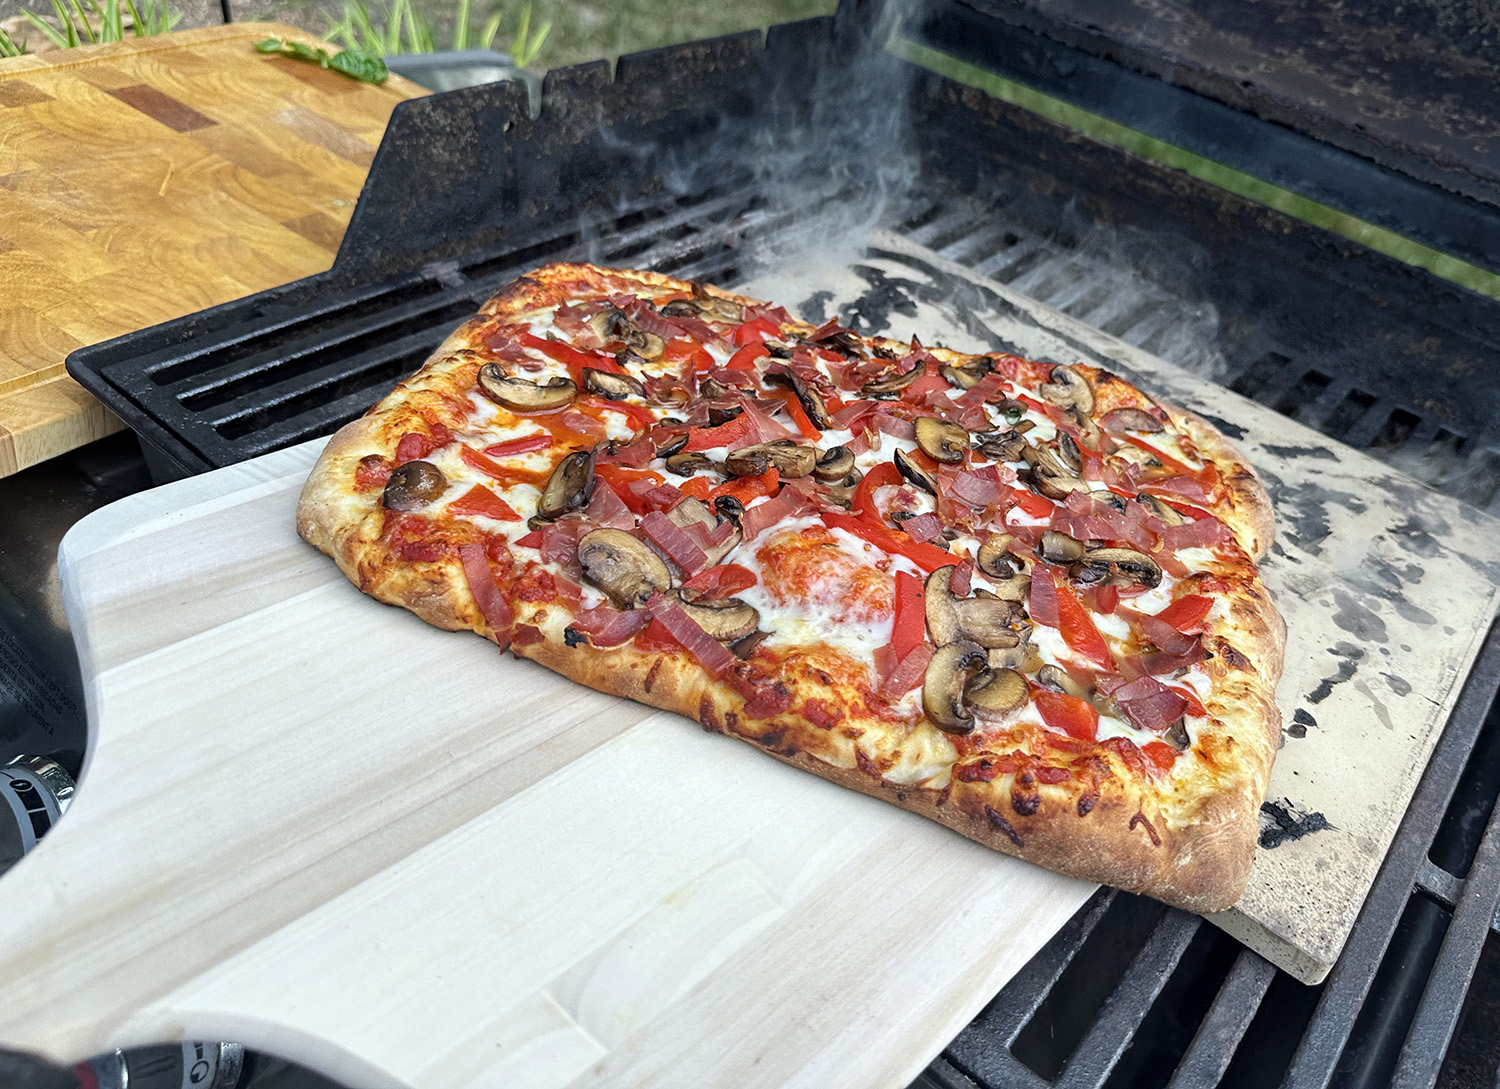
Heat pizza stone on grill, cover for 30 minutes.

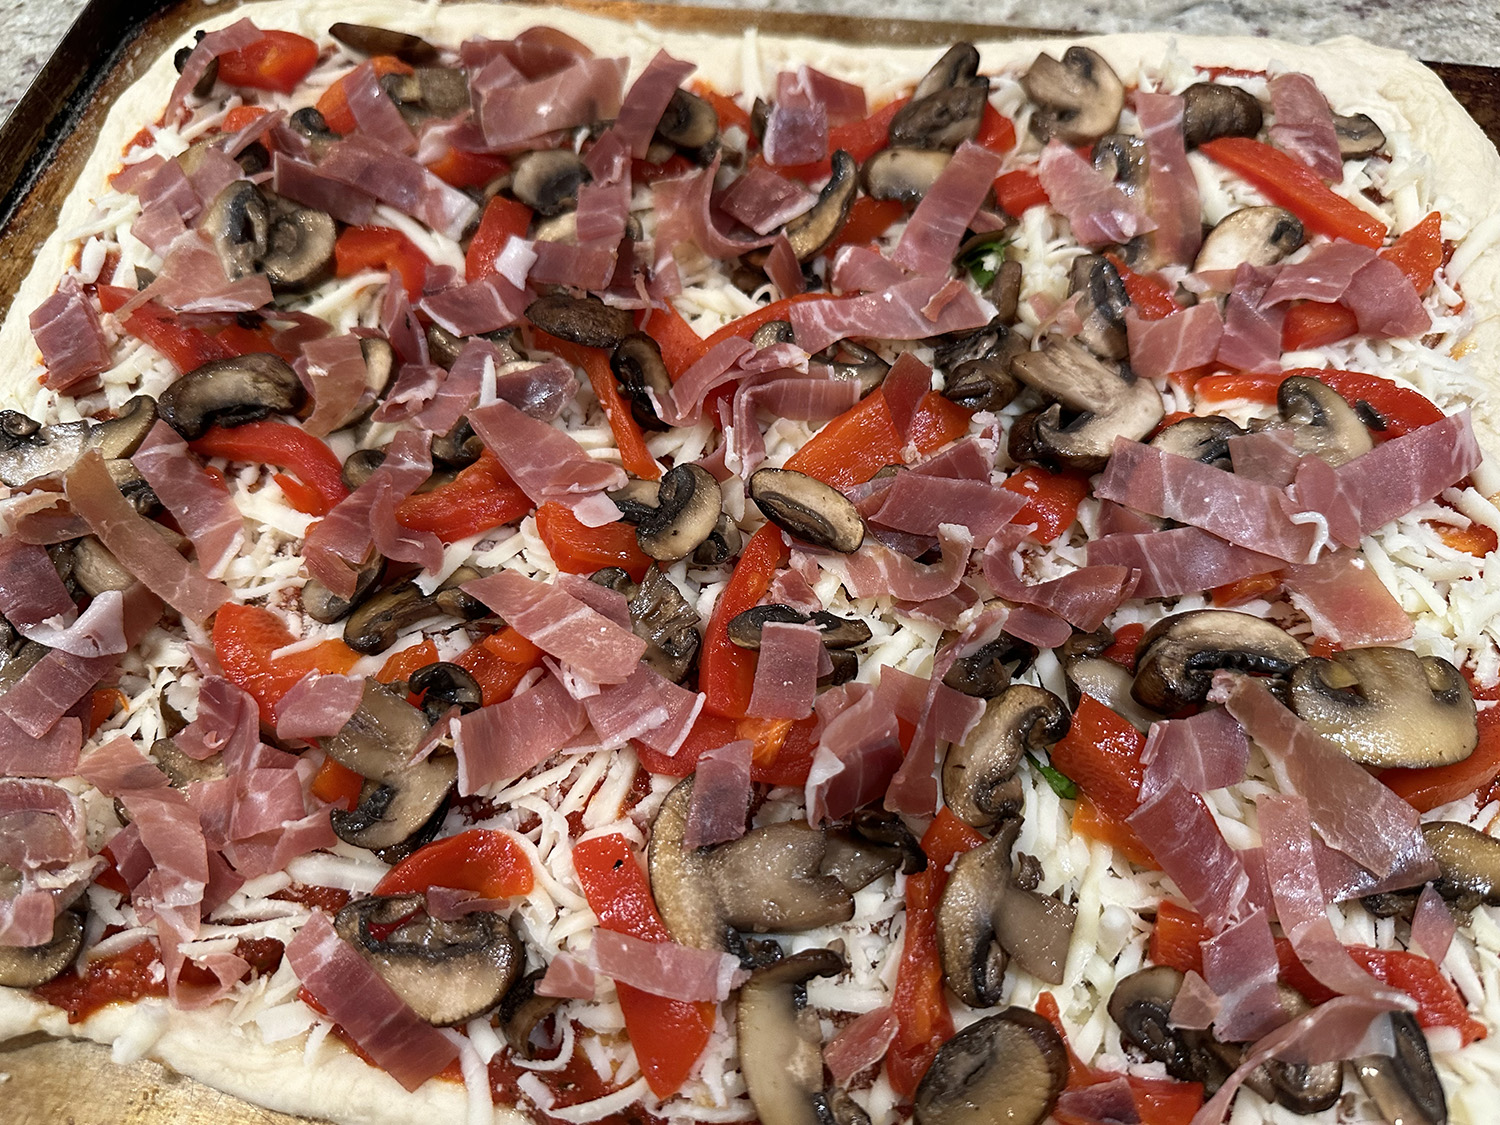
Transfer the crust to a pizza peel. (A cutting board or the back of a baking sheet will also work.) Spread a thin layer of shredded cheese across the surface of the crust (about 1 cup should do it). Using a spoon, add tablespoon-size dollops of crushed tomatoes, spaced an inch or two apart, across the whole surface of the pizza.

Add toppings as desired (our list is below). Slide the pizza onto the pizza stone, and move to cooler side of the grill, cover, and cook until the cheese is melted and the crust is crisp, 5 to 7 minutes total. Transfer to a cutting board, drizzle with olive oil, sprinkle with basil chiffonade, cut into 6 or 8 squares, and serve immediately. Top with more grated parmesan if desired.

Our Toppings

  • Roasted red peppers, drained, patted dry and sliced into thin strips
  • 4 oz. Cremini mushrooms, sliced thin and sautéed until browned
  • 2 oz. Proscuitto, sliced into ribbons
  • 1/4 cup grated parmesan, more for topping
  • 8 oz. mozzarella, shredded on box grater; don’t use preshredded
  • Fresh basil leaves, chiffonade for topping

http://www.lynnandruss.com

Cold Noodle Salad with Spicy Peanut Sauce

Looking for a recipe that’s healthy, meatless, is ready in less than a half hour, and would transport well for a picnic or potluck? Look no further than this tasty concoction from Betty Lou McKinnon.

Soba, Japanese buckwheat noodles, are ideal for salads because they taste particularly great when served cold. Crunchy vegetables are highlighted here, adding lots of crisp, fresh texture. Substitute with any raw vegetables you have on hand, such as cabbage, carrot, fennel, asparagus, broccoli or cauliflower.

The spicy peanut sauce is very adaptable: If you don’t want to use peanut butter, you can use any nut or seed butter, like cashew, almond, sunflower or even tahini. Both the soba and the peanut sauce can be prepared ahead of time and stored in the fridge overnight, but wait to combine them until you are ready to eat for the best texture and consistency. The peanut sauce thickens as it sits, so add a tablespoon or two of water to loosen it up, if necessary.

Instead of drizzling the peanut sauce on top of the mixed vegetables, we incorporated about 75% of it into the mix, saving the remainder to drizzle on top with the other garnishes.

Cold Noodle Salad with Spicy Peanut Sauce

  • Servings: 4
  • Difficulty: easy
  • Print

Ingredients

For the Salad

  • Kosher salt
  • 10 oz. soba noodles
  • 1 medium zucchini or cucumber (about 6 oz.)
  • 5 radishes
  • 1 bell pepper (any color)
  • 1 Tbsp. sesame oil
  • ½ cup roasted salted peanuts (about 2 oz.), roughly chopped
  • 2 scallions, trimmed and finely chopped
  • Handful of cilantro leaves
  • 1 lime, cut into wedges for serving

For the Spicy Peanut Sauce

  • ½ cup smooth peanut butter (not natural)
  • ¼ cup soy sauce
  • 2 Tbsp. maple syrup
  • 2 Tbsp. lime juice (from 1 lime)
  • 1 Tbsp. sesame oil
  • 2 tsp. chile oil or hot sauce, plus more to taste
  • 1 garlic clove, grated

Directions

  1. Bring a pot of salted water to the boil. Add the soba, stir to prevent sticking, and cook according to package instructions until just tender. Rinse under cold water until the noodles are completely cold.
  2. Meanwhile, make the sauce: In a medium bowl, combine the peanut butter, soy sauce, maple syrup, lime juice, sesame oil, chile oil or hot sauce, and garlic. Add ¼ to ½ cup water, 1 tablespoon at a time, and whisk until the sauce is a pourable consistency. Taste and add more chile oil or hot sauce as desired; set aside.
  3. Cut the zucchini or cucumber and radishes into ⅛-inch thick slices, then cut into thin matchsticks. Slice the peppers into ⅛-inch pieces. Place them all in a large bowl.
  4. Loosen the soba noodles by running them under some water, then allow to drain again. Add them to the vegetables, add the remaining 1 tablespoon sesame oil and toss to combine.
  5. When you are ready to serve, drizzle with spicy peanut sauce and top with peanuts, scallions and cilantro. Serve immediately, with lime wedges alongside.

http://www.lynnandruss.com

Recipe by Betty Lou McKinnon for NYTimes Cooking

Sheet-Pan Chicken Tikka Thighs

Commonly cooked in restaurants and street stalls across India and Pakistan, chicken tikka is typically prepared with marinated bone-in pieces and cooked on coals or in a tandoor. This preparation of chicken tikka uses boneless, skinless chicken thighs and a broiler for the same effect — layered, slightly smoky flavor from charred edges of otherwise juicy, tender chicken thighs. With minimal cleanup, this dish is delicately sweet, deeply spiced and has a confetti of textures.

The chicken is marinated in ginger, garlic and a mix of heady South Asian spices — red chile powder, cumin, garam masala — and yogurt is used as a tenderizer. Thirty minutes of marination does the trick but overnight is better. Bell pepper and onions sweeten during broiling and their edges char and crisp up too. Plus, juices from the spiced chicken further flavor the vegetables. Eat any leftovers in a salad or sandwich. 

Some of our changes include using a white onion instead of a red one (because that’s what we had on hand). The chicken thighs weighed in at about one-third more than the 1 pound suggested in the recipe. We also increased the Greek yogurt to 1/2 cup instead of 2 tablespoons. And even with the extras, and served with rice, the dish realistically fed 3 people, not 4.

Sheet-Pan Chicken Tikka Thighs

  • Servings: 3-4
  • Difficulty: easy
  • Print

Ingredients

  • 1/2 cup full-fat Greek or Indian yogurt
  • 1 tsp. ginger paste or freshly grated ginger
  • 1 tsp. garlic paste or freshly grated garlic
  • 1½ tsp. Kashmiri red chile powder
  • 1½ tsp. garam masala
  • 1½ tsp. ground cumin
  • ½ tsp. ground turmeric
  • Salt
  • 2 Tbsp. vegetable oil
  • 1 lb. boneless, skinless chicken thighs
  • 2 large bell peppers, chopped into 1-inch pieces
  • 1 red onion, chopped into 1-inch pieces
  • 1 tsp. cumin seeds
  • Cooked rice, for serving

Directions

  1. In a large bowl, stir together the yogurt, ginger, garlic, chile powder, garam masala, ground cumin, turmeric, 1 teaspoon salt and 1 tablespoon oil. Add the chicken and stir until the thighs are completely coated. Using a fork, thoroughly stab the chicken thighs so the marinade may penetrate the meat. Set aside for 30 minutes or cover and refrigerate overnight to marinate.
  2. On a medium sheet pan, about 13- by 9-inches, toss the bell peppers and onion with the cumin seeds and the remaining 1 tablespoon oil and ½ teaspoon salt. Lay the ingredients out in a single layer. Using tongs, hold up a chicken thigh over the bowl and scrape the excess marinade off with a spatula, and lay it on the vegetables. Repeat the process for the remaining thighs.
  3. Turn the broiler on high. Place the sheet pan on a rack about 3 inches below the broiler. Broil for 7 to 10 minutes. Flip the thighs and broil for another 7 to 10 minutes, until parts of the chicken and vegetables are charred and crisp on the outside and chicken is cooked through (when a thermometer inserted into thickest part of a thigh reads 165 degrees). Serve with rice or as is, spooning the juices from the sheet pan over the chicken as sauce.

http://www.lynnandruss.com

Adapted from a recipe by Zainab Shah for NYTimes Cooking

Grilled Swordfish Salmoriglio

Lemony, garlicky, oregano-infused salmoriglio is a workaday Sicilian staple, stirred together from basic ingredients and always on hand to season grilled foods, particularly swordfish and other proteins. A nearly 1:1 ratio of lemon juice to olive oil made for a bracing sauce, and adding lemon zest boosted its aroma.

Yes, swordfish is just as pricey in our area as is halibut, but we decided we were worth a splurge. And with just the two of us for dinner, we got by with only two steaks weighing in at just a bit over a pound. With a minimum of easy-to-source ingredients, and with only 40 minutes from start to finish, you can easily squeeze this fish meal into a weekday.

As the cooked fish rests in the salmoriglio, it sheds juices that slightly dilute the sauce’s acidity and balances its flavor. Plenty of dried oregano, garlic, salt, and pepper adds savory, herbaceous character to the bright sauce. Applying it to the swordfish three times—before and after cooking, as well as alongside the fish for serving—means every bite is full of flavor.

Flipping the fish every 2 minutes during cooking ensured that heat continuously hit both sides of the flesh, promoting uniform doneness. Pulling the swordfish off the grill when it reached 130 degrees and letting carryover cooking bring it up to its serving temperature (140 degrees) prevented overcooking.

While the swordfish rested for 10 minutes, it allowed us time to prepare our side of baby spinach and garlic sauté, and a side salad.

Purchase swordfish steaks that are 1 to 1½ inches thick, either four steaks that weigh 7 to 9 ounces each or two steaks that weigh about 1 pound each. Cut the larger steaks in half to create four steaks. Ask your fishmonger to remove the skin or trim it yourself with a thin, sharp knife.

Grilled Swordfish Salmoriglio

  • Servings: 4
  • Difficulty: easy
  • Print

Ingredients

  • 1 Tbsp. dried oregano
  • 2 tsp. grated lemon zest plus ¼ cup juice (2 lemons)
  • 2 garlic cloves, minced
  • 2 tsp. kosher salt, divided
  • 1 tsp. pepper, divided
  •  cup extra-virgin olive oil
  • 2 lbs. skinless swordfish steaks, 1 to 1½ inches thick
  • 2 Tbsp. chopped fresh parsley, divided

Directions

  1. Whisk oregano, lemon zest and juice, garlic, 1¼ teaspoons salt, and ½ teaspoon pepper in bowl until salt is dissolved. Whisk in oil.
  2. Arrange swordfish in single layer in shallow pan or dish. Pour half of marinade over fish, flipping steaks to ensure both sides are evenly covered. Refrigerate for at least 20 minutes or up to 45 minutes. Whisk 1½ tablespoons parsley into remaining marinade and set aside.
  3. FOR A CHARCOAL GRILL: Open bottom vent completely. Light large chimney starter filled with charcoal briquettes (6 quarts). When top coals are partially covered with ash, pour evenly over half of grill. Set cooking grate in place, cover, and open lid vent completely. Heat grill until hot, about 5 minutes.
    FOR A GAS GRILL: Turn all burners to high; cover; and heat grill until hot, about 15 minutes. Leave primary burner on high and turn other burner(s) to medium-high.
  4. Clean and oil cooking grate. Remove fish from marinade, letting excess drip off (do not pat dry). Sprinkle both sides with remaining ¾ teaspoon salt and ½ teaspoon pepper. Place fish on hotter side of grill and cook (covered if using gas), flipping every 2 minutes, until steaks develop dark grill marks and register 130 to 135 degrees, 7 to 11 minutes.
  5. Transfer fish to clean shallow pan or dish and pour reserved marinade over top. Tent with aluminum foil and let rest until centers register 140 degrees, 5 to 10 minutes. Transfer fish to serving platter or individual plates and sprinkle with remaining 1½ teaspoons parsley. Transfer sauce in pan to small bowl. Serve, passing sauce separately.

http://www.lynnandruss.com

Recipe from Cook’s Illustrated

Baked Harissa Meatballs with Cherry Tomato Sauce

A go-to pantry flavor solution does double duty when both meatballs and sauce are added into the mix. For a taste of North Africa use the spice paste harissa described here, or depending on your mood and what you have on hand, give the dish a Mexican flair with smoky-spicy chipotle chilies in adobo instead.

Cherry tomatoes are roasted until they burst—their juices mingling with the seasonings to form a luscious sauce. Then the meatballs are nestled into the tomatoes and everything is roasted in the same pan. Serve with crusty bread for dipping in the sauce.

TIP: Refrigerate the meatballs before cooking; this firms them up so they’ll hold their shape as they roast.

Let’s talk about portion size. The original recipe states it feeds four—and that’s without any rice or pasta. Realistically, we felt 4 meatballs over orzo made for a decent serving, therefore comfortably feeding three people.

Baked Harissa Meatballs with Cherry Tomato Sauce

  • Servings: 3-4
  • Difficulty: easy
  • Print

Ingredients

  • 2 pints cherry OR grape tomatoes
  • 6 medium garlic cloves, 4 cloves smashed and peeled, 2 cloves finely grated, reserved separately
  • ¼ cup extra-virgin olive oil
  • 2 Tbsp. harissa paste, divided
  • Kosher salt and ground black pepper
  • ⅓ cup panko breadcrumbs
  • 1 lb. ground lamb, OR 90 percent lean ground beef
  • Chopped fresh cilantro OR flat-leaf parsley, to serve
  • Crumbled feta cheese, as topping

Directions

  1. Heat the oven to 425°F with a rack in the middle position. In a 9-by-13-inch baking dish, toss together the tomatoes, smashed garlic, oil, 1 tablespoon harissa, ¼ teaspoon each salt and pepper and ¼ cup water. Bake, uncovered, until the tomatoes have broken down, 30 to 35 minutes; stir once about halfway through.
  2. Meanwhile, in a medium bowl, combine the panko and ½ cup water. Let stand until the panko softens, about 5 minutes, then use your hands to mash to a smooth paste. Add the beef, grated garlic, remaining 1 tablespoon harissa and ½ teaspoon each salt and pepper; mix thoroughly with your hands. Divide into 12 portions, rolling them into smooth balls. Place on a large plate and refrigerate until ready to use.
  3. Remove the baking dish from the oven and nestle the meatballs in the tomato sauce. Bake, uncovered, until the meatballs are browned and the centers reach 160°F, about 15 minutes. Taste and season the sauce with salt and pepper. Sprinkle with cilantro and feta cheese crumbles.

http://www.lynnandruss.com

Adapted from a recipe by Courtney Hill for Milk Street

Smashed Cucumber, Avocado and Shrimp Salad

In a word, DELISH! With a 5-star rating out of 736 reviews, and the list of great ingredients, this recipe was a no-brainer for us. And on a hot summer day, you are using the oven for only 5 minutes or so.

Smashed, salted cucumbers form the base of cooling summer salads in many parts of Asia, whether dressed with rice vinegar and soy sauce or spicy Sichuan peppercorns, chiles and peanuts. This version pairs smashed cucumbers with avocados for creaminess, along with briny shrimp steamed with sesame oil.

We loved the dish but felt the amount of chili crisp could have been increased, so next time we’ll add a full tablespoon instead of a mere teaspoon. Served with rice or flatbread, it makes a light summer meal, but you can serve it on its own as an appetizer, to open for grilled or roasted meat or fish.

Smashed Cucumber, Avocado and Shrimp Salad

  • Servings: 3-4
  • Difficulty: easy
  • Print

Ingredients

  • 1 lb. English, Persian or Kirby cucumbers, rinsed and dried
  • ¼ tsp. fine sea or table salt, more to taste
  • ¼ tsp. granulated sugar
  • 2 Tbsp. soy sauce
  • 1½ Tbsp. olive oil
  • 3 tsp. toasted sesame oil
  • 1 tsp. chili crisp, more to taste
  • 1 lb. large shrimp, peeled and deveined if you like
  • 2 large ripe avocados
  • 2 Tbsp. rice wine vinegar, more to taste
  • 2 scallions, thinly sliced
  • 2 tsp. toasted white sesame seeds, for garnish (optional)
  • ¼ cup chopped cilantro, for garnish

Directions

  1. Cut cucumbers crosswise into pieces about 4 inches long. Cut each piece in half lengthwise. Place each cucumber piece cut side down. Lay the blade of a large knife on top of the cucumbers and, with your other hand, push down lightly to crack the cucumber skins and break down their flesh (or use a rolling pin to lightly smack the cucumbers). Break (or slice) into bite-size pieces. (Ragged is good here; it helps the flesh absorb the dressing.)
  2. Add cucumber to a colander, and toss with salt and sugar. Let sit for 15 to 30 minutes, or until the pieces have released their moisture. Toss a couple of times while draining.
  3. Meanwhile, in a medium bowl, whisk together 1 tablespoon soy sauce, olive oil, 2 teaspoons sesame oil and the chili crisp. Set aside.
  4. Cook the shrimp: In a large skillet over medium heat, combine shrimp with 1 tablespoon water, remaining 1 tablespoon soy sauce and 1 teaspoon sesame oil. Cover the pan and let the shrimp steam until pink and just cooked, 3 to 4 minutes, adding more water, 1 tablespoon at a time, if the pan looks dry. Use a slotted spoon to transfer the shrimp to the bowl with the chile crisp dressing and toss well.
  5. Pit and peel the avocados. Cut flesh into ½-inch pieces. Add to a large bowl and toss with the rice wine vinegar until well coated. Add the drained cucumbers, tossing gently to combine.
  6. Add the shrimp and all of its dressing and the scallions to the cucumber and avocado mixture. Stir gently until combined and the avocado begins to break down and look creamy, but some pieces still remain intact.
  7. Taste and add more rice wine vinegar and salt, if needed. Garnish with sesame seeds and cilantro.

http://www.lynnandruss.com

Recipe courtesy of Melissa Clark for NYTimes Cooking

Thai Stir-Fried Chicken and Asparagus

This weeknight-easy chicken and asparagus stir-fry takes inspiration from pad prik khing, a Thai classic in which long beans and protein are cooked with red curry paste. Milk Street tested a variety of Thai red, green and yellow curry pastes—all work deliciously, though it is recommended you taste a small amount before deciding exactly how much to use, as they vary in spiciness. We used a full 3 tablespoons and didn’t feel it was overly spicy at all.

To round out the paste’s bold, zingy notes, combine it with fish sauce and sugar. Toss the chicken with a seasoning paste before and after browning to develop flavor-building caramelization while creating delicious layers of complexity and intensity. Serve with steamed jasmine rice. Even with the rice, the servings better equate to 3 plates, unless you have some light eaters…

Mistakenly, we had purchased boneless chicken thighs instead of breasts. The thighs offer more flavor and are forgiving as opposed to the breasts which can dry out if overcooked. Either choice is fine though because the cooking time is minimal. As an extra treat, I topped mine with a sprinkling of Trader Joe’s Thai cashews.

Thai Stir-Fried Chicken and Asparagus

  • Servings: 3-4
  • Difficulty: easy
  • Print

Ingredients

  • 2 to 3 Tbsp. Thai green OR red OR yellow curry paste (see headnote)
  • 2 Tbsp. fish sauce
  • 1 Tbsp. packed brown sugar
  • 1 lb. boneless, skinless chicken breasts, sliced crosswise about ¼ inch thick
  • 3 Tbsp. neutral oil, divided
  • 8 oz. asparagus OR green beans, trimmed and cut on the diagonal into 1-inch pieces
  • 1 medium red onion, halved and cut into ½-inch wedges, layers separated
  • Kosher salt and ground black pepper

Directions

  1. In a medium bowl, stir together the curry paste, fish sauce and sugar. In another medium bowl, combine 1 tablespoon of the curry paste mixture with the chicken, then toss until coated; let stand for about 10 minutes.
  2. In a 12-inch nonstick skillet over high, heat 2 tablespoons oil until barely smoking. Add the chicken in an even layer and cook, without stirring, until well browned on the bottom, about 2 minutes; the chicken will not be fully cooked. Transfer to the bowl with the remaining curry paste mixture; set aside.
  3. In the same skillet over high, heat the remaining 1 tablespoon oil until shimmering. Add the asparagus and onion; cook, without stirring, until browned on the bottom, about 2 minutes. Add the chicken-curry paste mixture; cook, stirring, until the sauce has thickened slightly and the vegetables are tender-crisp, about 1 minute. Off heat, taste and season with salt and pepper.
  4. Optional garnish: Chopped fresh cilantro OR basil OR lime wedges OR a combination

http://www.lynnandruss.com

Recipe for Milk Street by Dimitri Demopolous

Coconut-Miso Salmon Curry

Defined by its deep miso flavor, this light, delicate weeknight curry comes together in less than 30 minutes. A fact that most home cooks appreciate during the week, who doesn’t love that! Miso is typically whisked into soups toward the end of the recipe, but sweating it directly in the pot with ginger, garlic and a little oil early on helps the paste caramelize, intensifying its earthy sweetness.

Adding coconut milk creates a rich broth that works with a wide range of seafood. Salmon is used here, but flaky white fish, shrimp or scallops would all benefit from this quick poaching method. A squeeze of lime and a flurry of fresh herbs keep this curry bright and citrusy. For a hit of heat, garnish with sliced fresh jalapeño or serrano chile peppers.

Coconut-Miso Salmon Curry

  • Servings: 4
  • Difficulty: easy
  • Print

Ingredients

  • 2 Tbsp. safflower or canola oil
  • 1 medium red onion, halved and sliced ½-inch thick (about 2 cups)
  • 1 1-inch piece fresh ginger, minced (about 2 Tbsp.)
  • 3 garlic cloves, thinly sliced
  • Kosher salt and black pepper
  • ¼ cup white miso
  • ½ cup unsweetened, full-fat canned coconut milk
  • 1 1½-lb. salmon fillet, cut into 2-inch pieces
  • 5 oz. baby spinach (about 5 packed cups)
  • 1 Tbsp. fresh lime juice, plus lime wedges for serving
  • Steamed rice, such as jasmine or basmati, for serving
  • ¼ cup chopped fresh basil
  • ¼ cup chopped fresh cilantro

Directions

  1. In a large pot, heat 2 tablespoons oil over medium. Add onion, ginger and garlic and season with salt and pepper. Cook, stirring occasionally, until softened, about 3 minutes. Add miso and cook, stirring frequently, until miso is lightly caramelized, about 2 minutes.
  2. Add coconut milk and 3 cups water and bring to a boil over high heat. Cook until liquid is slightly reduced, about 5 minutes.
  3. Stir in salmon, reduce the heat to medium-low and simmer gently until just cooked through, about 5 minutes. Turn off heat and stir in spinach and lime juice.
  4. Divide rice among bowls. Top with salmon curry, basil and cilantro. Serve with lime wedges for squeezing on top.

http://www.lynnandruss.com

Recipe by Kay Chun for NYTimes Cooking

Summer Shrimp Scampi with Tomatoes and Corn

Here’s a summer recipe that could possibly live in your memory for some time to come. As most of us know, shrimp get along well with garlic, butter and lemon, and so do tomatoes and corn. Combine them, and you get a summery shrimp scampi that comes together in one skillet.

A searing hot pan helps the tomatoes blister and the corn caramelize before they are coated in a garlic-lemon butter sauce. This is a meal in and of itself, but if you want to serve it with pasta or bread, they’d be welcome additions. In fact, if you do plan to serve 4 diners, you will definitely need some accompaniments, because it barely made 3 sufficient servings when we made it.

If not overly concerned with carbs, serve over orzo and/or with some crusty bread to mop up that incredible sauce is the way to go.

It was beyond delicious, even with frozen corn. So can you imagine if using fresh corn cut right off the cob? It wasn’t quite ready for picking at the time we made this, but when we replicate the recipe soon, you betcha we’ll use fresh corn!

The original recipe indicated it would take a total time of only 15 minutes. Impossible. Just cutting the kernels off the ears of corn takes 8 minutes or so. Realistically, it took the 2 of us just over a half hour from start to finish. Still, that’s not bad for such a scrumptious meal!

Summer Shrimp Scampi with Tomatoes and Corn

  • Servings: 4
  • Difficulty: easy
  • Print

Ingredients

  • 1 lb. large shrimp, peeled and deveined
  • Kosher salt and black pepper
  • 2 Tbsp. extra-virgin olive oil
  • 1 pint cherry or grape tomatoes
  • 2 cups fresh or frozen corn kernels (from 4 ears)
  • 5garlic cloves, minced
  • ½ tsp. red-pepper flakes
  • ¼ cup dry white wine
  • 2 Tbsp. fresh lemon juice (from 1 lemon), plus wedges for serving (optional)
  • 5 Tbsp. unsalted butter, cut into 5 pieces
  • 3 Tbsp. chopped parsley or chives, or torn basil leaves

Directions

  1. Pat the shrimp very dry and season with salt and pepper. In a large (12-inch) skillet, heat the olive oil over medium-high. Add the shrimp and cook until pink and lightly golden in spots, 1 to 2 minutes per side. Use a slotted spoon to transfer the shrimp to a plate.
  2. Add the tomatoes to the skillet, season with salt and pepper, and cook, stirring just once or twice, until they start to blister in spots, 3 to 4 minutes. Add the corn, season with salt and pepper, and cook, stirring just once or twice, until the tomatoes burst and the corn is golden in spots, 3 to 4 minutes.
  3. Add the garlic and red-pepper flakes and cook, stirring, until you smell garlic, about 1 minute.
  4. Reduce heat to medium, and add the wine and lemon juice, scraping any brown bits from the bottom of the pan. Cook until nearly evaporated, then add the butter and stir until melted. Add the shrimp and its juices and stir until warmed through. (If the sauce breaks and looks greasy, add 1 or 2 teaspoons of water and stir until emulsified.)
  5. Remove from heat, add the herbs, season to taste with salt and pepper, and serve with extra lemon for squeezing over, if you like.

http://www.lynnandruss.com

Recipe by Ali Slagle for NYTimes Cooking

Pepper-Crusted Flank Steak

Easy beyond belief. Only 3 ingredients for the main course? Count me in! One ingredient, coarse black pepper, coats the flank steak for a zesty bust of flavor, complementing the rare grilled meat. It’s best to crush your own, in a mortar and pestle or a spice mill. The entrée can be served warm or at room temperature.

Many reviewers commented that it was too salty, we didn’t think so. But because it’s very hard to find a 2-pound flank steak, ours was just over 1 1/2 pounds, and therefore we used less salt to begin with.

Ours sides were baked onion rings and a side salad. Dinner done.

Pepper-Crusted Flank Steak

  • Servings: 4
  • Difficulty: super easy
  • Print

Ingredients

  • 1 flank steak, about 2 lbs.
  • 2 Tbsp. kosher salt (such as Diamond Crystal)
  • 3 Tbsp. coarse crushed black peppercorns (do not use regular table pepper)

Directions

  1. Pat steak dry. Sprinkle 1 tablespoon salt on each side.
  2. Coat both sides of the steak with the crushed pepper, pressing down to coat evenly. Allow to rest and absorb seasoning for at least 1 hour. Or place on a rack over a rimmed baking sheet and put in the refrigerator, uncovered, overnight or up to 24 hours.
  3. Bring steak to room temperature. Grill over medium-hot coals or a covered gas grill at 450 degrees, about 4 to 5 minutes per side, until juices appear on the surface of the steak. Check with a meat thermometer; 125 degrees for rare, 130 for medium-rare. (Alternatively, cook in a cast-iron pan over medium-high heat or broil.) Let rest at least 10 minutes before slicing.
  4. With a sharp knife, slice on a slight bias against the grain, about ⅛-inch thick. Arrange on a serving platter. Serve warm or at room temperature.

http://www.lynnandruss.com

Adapted from a recipe by David Tanis for NYTimes Cooking

Braised Chicken and Mushrooms over Polenta

This stewy chicken dish takes inspiration from chicken cacciatore. Braised boneless, skinless chicken thighs are quickly braised to a tender, shreddable consistency in this easy weeknight meal.

These days, polenta is usually made from yellow cornmeal. Cornmeal is made from dent corn – also known as field corn, which is different from the sweet corn you eat. It’s higher in starch and lower in sugar. Because polenta is made from dried, ground corn, it’s gluten-free.

It’s often prepared as a porridge-like dish similar to grits, made by cooking cornmeal in water over low heat. It needs to be stirred often and cooked slowly. It can be made from finely ground or coarse ground cornmeal. In some countries, polenta is made from white or red cornmeal. 

Instant – or “quick” polenta – is pre-processed so that the cooking time is shorter. Some people say it doesn’t taste as good as regular polenta. You can also find ready-made polenta that’s fully cooked. It’s often served with various foods like meats, fish, and vegetables.  We chose to switch the instant polenta to regular corn grits polenta.

An easy way to shred the cooked chicken is with two large serving forks.

Braised Chicken and Mushrooms over Polenta

  • Servings: 4
  • Difficulty: easy
  • Print

Ingredients

  • 1 1⁄2 lbs. boneless, skinless chicken thighs, trimmed
  • 1⁄2 tsp. pepper
  • 1 3⁄4 tsp. table salt, divided
  • 6 slices bacon, cut into 1⁄2-inch pieces
  • 8 oz. cremini mushrooms, trimmed and quartered
  • 1 onion, chopped
  • 1 14.5-oz. can fire-roasted diced tomatoes
  • 2 1⁄2 cups chicken broth, divided (1⁄2 cup for chicken; 1⁄2 for polenta)
  • 2 tsp. smoked paprika
  • 2 cups milk
  • 1 cup polenta

Directions

  1. Pat chicken dry with paper towels and sprinkle with pepper and 1 teaspoon salt. Cook bacon in Dutch oven over medium-high heat until crispy, 5 to 7 minutes. Using slotted spoon, transfer bacon to plate.
  2. Add chicken to fat left in pot and cook until lightly browned, 3 to 5 minutes per side. Transfer to plate.
  3. Add mushrooms, onion, and ¼ teaspoon salt to now-empty pot and cook, stirring frequently, until browned, about 5 minutes.
  4. Add tomatoes, ½ cup broth, and paprika and bring to boil, scraping up any browned bits. Return chicken to pot; reduce heat to medium; cover; and cook, stirring occasionally, until meat registers 195 degrees, 10 to 12 minutes.
  5. Transfer chicken to cutting board and shred into bite-size pieces. Simmer sauce until slightly thickened, about 5 minutes, then stir chicken and bacon back into sauce.
  6. Polenta: packaged directions for regular corn grits polenta. Or for Instant Polenta: bring milk and remaining 3½ cups broth to boil in large saucepan over medium-high heat. Whisk in polenta and remaining ½ teaspoon salt. Reduce heat to medium-low and cook until thickened, about 3 minutes. Serve.

http://www.lynnandruss.com

Recipe for Milk Street by Dimitri Demopolous

Sprite-Grilled Chicken Skewers

These grilled chicken skewers are flavorful, spicy, and full of citrusy pep, all without having to juice a lemon. The secret ingredient? Sprite. Here, chicken breasts are marinated in the lemon-lime soda along with fish sauce, garlic, and Thai chili sauce to tenderize the meat and infuse it with punchy flavor. The result is succulent, spicy, sweet-sticky chicken skewers. Bonus: You can use up any half-empty bottles of Sprite for this marinade (you don’t need the fizz).

One key to tender, expertly charred meat is the “Fizz Factor”, in other words something from the beverage aisle. The best marinades for grilled meats have certain things in common: a good amount of sweetness, lip-smacking acidity, and complex flavor. For it, all you need is to crack open a can of soda.

These fizzy things bring a lot to the table. This isn’t a new idea, many cultures utilize the sweet stuff for the meaty marinades. Sprite lends a citrusy pep—without having to juice a lemon— to this fiery marinade for chicken skewers. By the way, carbonation doesn’t make a difference, so this is the perfect opportunity to use up any flat soda you might have lurking in the fridge.

*We did not discard the marinade after skewering the chicken. Instead, we put it in a small sauce pan and brought it to a gentle boil for several minutes to kill any bacteria. The The Hubs brushed onto the chicken skewers as he was grilling.

Chili Garlic Sauce packs more heat than Thai Chili Sauce, so choose based on your heat tolerance. We paired our skewers with a Thai cucumber salad topped with crushed peanuts, and Coconut Rice. A fantastic trio!

Sprite-Grilled Chicken Skewers

  • Servings: 6
  • Difficulty: easy
  • Print

Ingredients

  • 8 garlic cloves, finely grated
  • 1 12-oz. can or 1½ cups Sprite
  • 1½ cups Thai chile sauce, divided
  • ½ cup plus 1 Tbsp. fish sauce
  • 2 tsp. Diamond Crystal or 1¼ tsp. Morton kosher salt, plus more
  • 3 lb. skinless, boneless chicken breasts, cut into 1″ pieces
  • Vegetable oil (for grill)
  • Juice of 3 medium limes (use zest if making Coconut Rice side dish)
  • ⅓ cup finely chopped cilantro

Directions

  1. Mix together 8 garlic cloves, finely grated, one 12-oz. can or 1½ cups Sprite, 1 cup Thai chile sauce, ½ cup fish sauce, and 2 tsp. Diamond Crystal or 1¼ tsp. Morton kosher salt in a 1-gal. resealable plastic bag or large baking dish. Add 3 lb. skinless, boneless chicken breasts, cut into 1” pieces, and turn to coat. Seal or cover; chill, turning occasionally, at least 2 hours and up to 12 hours. (Marinate at least 4 hours if you can.)
  2. Prepare a grill for medium-high heat; oil grate with vegetable oil. Remove chicken from marinade, letting excess drip back into bag or dish; *discard marinade. Thread chicken onto skewers (about 8 pieces each) and grill, turning once, until cooked through (an instant-read thermometer inserted into the a piece should register 160°), 10–12 minutes. Transfer skewers to a platter and let rest 5 minutes.
  3. Whisk juice of 3 medium limes, ⅓ cup finely chopped cilantro, remaining ½ cup Thai chile sauce, and remaining 1 Tbsp. fish sauce in a small bowl to combine. Taste sauce and season with salt if needed. Spoon sauce over chicken skewers to serve

http://www.lynnandruss.com

Recipe by Jesse Szewczyk for Bon Appétit

Creamy Barley with Leeks, Asparagus and Dill

Yes, we know, barley can be dull and stodgy, but here the grains are transformed into a creamy risotto-esque dish that screams I should be making this more often. Buttery sautéed leeks and grassy, tender-crisp asparagus, along with fresh dill and tangy lemon zest and juice balance barley’s heft with springtime brightness.

A little crème fraîche, sour cream’s thicker and richer—but milder-tasting—cousin, stirred in at the end of cooking gives the barley a delicious luxuriousness. The grains require about 40 minutes of simmering to become tender; this is an opportune time to prep the asparagus, lemon and dill.

We paired ours with a Greek rub-dusted grilled chicken. Then with the leftover chicken that was taken off the bones and shredded, we added to the remaining barley. This became another meal; just heat and eat!

Don’t forget to rinse the leeks. Rinsing after slicing, rather than before, is more effective at removing the sand and grit that might be trapped in the layers. But be sure to drain the leeks well so excess water doesn’t make it into the pan.

Creamy Barley with Leeks, Asparagus and Dill

  • Servings: 4-6
  • Difficulty: easy
  • Print

Ingredients

  • 2 Tbsp. salted butter
  • 1 oz. leeks, white and light green parts halved lengthwise, sliced crosswise about ¼ inch thick, rinsed and drained
  • Kosher salt and ground black pepper
  • 1/2 cup dry white wine
  • 1 cup pearled barley
  • 1 qt. low-sodium chicken broth or vegetable broth
  • 1 lb. asparagus, trimmed, stalks cut on the diagonal into ¼-inch pieces, tips kept whole
  • 1/4 cup crème fraîche, plus more to serve
  • 2 tsp. grated lemon zest, plus 2 tablespoons lemon juice
  • 1/2 cup lightly packed fresh dill, chopped

Directions

  1. In a 12-inch skillet over medium, melt the butter. Add the leeks and ½ teaspoon salt, then cover and cook, stirring occasionally, until softened and tender, about 10 minutes. Add the wine and cook, uncovered and stirring occasionally, until most of the liquid has evaporated, 3 to 4 minutes.
  2. Stir in the barley, followed by the broth and 1 teaspoon pepper. Bring to a simmer over medium-high, then cover, reduce to medium and simmer, stirring occasionally, until the mixture is thick and creamy and the grains are tender, 40 to 45 minutes. If the consistency is thick and dryish before the barley is done, stir in ¼ cup water and cook, adding more water as needed, until the grains are tender.
  3. Stir in the asparagus and cook, uncovered and stirring occasionally, until the asparagus is tender-crisp, about 5 minutes. Off heat, stir in the crème fraîche, lemon zest and juice, and the dill. Taste and season with salt and pepper. Serve with additional crème fraîche on the side.

http://www.lynnandruss.com

Recipe by Rose Hattabaugh for Milk Street

Creamy Fish With Mushrooms and Bacon

OMG, we were astounded by how delicious this turned out! The delightful fish recipe was inspired by one from the chef Hugue Dufour of M. Wells restaurant in Long Island City, Queens. It’s based on the classic French preparation called bonne femme, which refers to simple, homey dishes often containing wine, mushrooms and cream… which this was.

Here, bacon and tomatoes are added to the sauce, giving it brawny depth and brightness. You can use any kind of mild, white-fleshed fish you like. Just watch it carefully so the fillets don’t overcook under the broiler. While there are many good choices of flaky white fish, cod seems to be the most economical, so that is what we used.

I’ve often wondered what the difference in terminology for “filet” versus “fillet” in recipes really means. Basically they are interchangeable. Filet is predominantly used in American (US) English (en-US), while fillet is predominantly used in British English. Fillet can be used as a noun or a verb. As a noun, fillet is a boneless piece of meat/fish. Many people eat fish fillets, for instance. As a verb, fillet means to remove meat/fish from the bone. Today, fillet is used much more frequently than filet. Don’t get too hung up on which version to use.

Creamy Fish With Mushrooms and Bacon

  • Servings: 4-6
  • Difficulty: easy
  • Print

Ingredients

  • 4 oz. bacon (4 to 8 slices, depending on thickness), diced
  • 8 oz. cremini or white mushrooms, stems discarded and caps halved or quartered
  • 1 large shallot, diced
  • 1 cup canned peeled whole tomatoes
  • ¼ cup white wine
  • 1 cup vegetable or chicken stock
  • ¼ tsp. fine sea salt, plus more for fish and to taste
  • ¼ tsp. finely ground black pepper, plus more for fish
  • 5 Tbsp. crème fraîche or heavy cream
  • 5 thyme sprigs, plus ½ tsp. thyme leaves, more for garnish
  • 4 to 6 fillets black sea bass, fluke, tilefish, hake or other white fish (1¼ to 1½ lbs.), skin removed
  • Baguette slices or buttered toast, for serving

Directions

  1. In a large oven-safe skillet over medium-high heat, cook the bacon until crisp and brown, about 5 minutes. Add mushrooms and shallot, and cook until tender and deeply golden, 5 to 8 minutes.
  2. Use your hands to crush the tomatoes or a knife to roughly chop them. Deglaze the skillet with the crushed tomatoes and their liquid, along with the wine and vegetable stock. Add the salt and pepper. Bring to a strong simmer and cook until the sauce has thickened, about 10 minutes. Taste and add more salt if needed.
  3. Whisk in 4 tablespoons crème fraîche or cream, then add thyme sprigs. Simmer for 2 to 3 more minutes or until the sauce has reduced slightly.
  4. While the sauce reduces, generously season the fillets on both sides with salt and pepper. Heat broiler on high with a rack placed 6 inches from the heat source.
  5. Place the thicker fillets toward the edge of the skillet on top of the sauce and place the thinner fillets toward the center. Some overlapping is fine. Use a spoon to scoop some of the mushroom mixture over the fillets and dollop the remaining 1 tablespoon of crème fraîche evenly over the skillet. Sprinkle with thyme leaves.
  6. Broil for 2 to 5 minutes for thin fillets and 6 to 10 for thick ones, or until the sauce is bubbling and the fillets are just cooked through. Serve garnished with thyme leaves in shallow bowls with baguette slices or buttered toast for dipping.

http://www.lynnandruss.com

Recipe by Melissa Clark for NYTimes Cooking

Chicken Meatballs With Greens

Let me just start by saying that the original recipe title was “One-Pot Chicken Meatballs…” However, we found that to be a bit misleading since the entire ordeal used 2 large bowls, a baking sheet and a skillet. So we just did away with that terminology in the title.

An ingenious trick to streamline efforts for weeknight cooks, this is an upside down take on typical skillet meatballs. These juicy garlic-and-herb filled balls are smothered in greens rather than being cooked on top or alongside them.

The meatballs first brown in the pot for both color and flavor, then are covered with a mound of greens, which achieves two feats: It gently finishes cooking the meatballs while the chard and lemon slices steam and collapse on top, draping themselves over these hidden delights. Scoop them up with a soup ladle, spooning the lemony pan sauce over everything.

The Hubs knew the chard stems would take much longer to cook than the leaves would to steam. So after browning the meatballs, he moved them over to a sheet pan, threw the chopped stems into the skillet and cooked, stirring often until tender, about 5 minutes. Then the meatballs went back into the pot, along with the greens mixture.

As written, there is not much sauce to spoon over, so we decided to add 1/2 cup of white wine which deglazes the skillet with the chopped chard stems. And many reviewers commented that they added chicken stock at the end, so we put in 1 cup of chicken stock.

Yes, you could say that was the meal. However, we wanted a bed of pasta on which to spoon over the meatballs and greens. Our choice was pappardelle. Other options might be rice, egg noodles, or some other form of pasta…

Chicken Meatballs With Greens

  • Difficulty: easy
  • Print

Ingredients

  • ½ cup panko bread crumbs
  • ⅓ cup full-fat thick yogurt (preferably Greek or Icelandic)
  • 2 garlic cloves, minced or grated
  • 2 scallions, white and light green parts thinly sliced
  • 2 tsp. dried oregano
  • ¼ tsp. crushed red pepper
  • Salt
  • 1 lb. ground chicken
  • ½ cup white wine
  • 6 Tbsp. olive oil, plus more as needed
  • 1 cup chicken broth, preferably homemade
  • 1 lb. rainbow or Swiss chard (1 large or 2 small bunches), tender stalks sliced and leaves cut into 1-inch ribbons
  • 1 lemon, halved, ½ thinly sliced
  • 1 tsp. ground cumin

Directions

  1. In a large bowl, combine the bread crumbs, yogurt, garlic, scallions, oregano, crushed red pepper and 1 teaspoon salt. Add the chicken and gently mix until fully combined.
  2. Coat your palms in olive oil, then shape the meat into 14 medium meatballs (about 2 inches each), making sure each is lightly coated with oil by refreshing the coating on your hands. Set the meatballs directly on a sheet pan or on parchment paper.
  3. Heat a 12-inch Dutch oven (or other heavy pot with a tight-fitting lid) over medium heat for 2 minutes until hot. Pour in 4 tablespoons (1/4 cup) of olive oil, tilting the pot to coat the surface, then add the meatballs. Let cook until they are golden halfway up the sides, occasionally turning them when they easily release, adding extra oil if needed, about 7 minutes. Cook the other side until a bit browned, a few minutes more.
  4. Remove the meatballs to a side plate. Add the chopped chard stems and wine to the same pan, scraping up the browned bits and deglazing the pan.
  5. Meanwhile, to another large bowl, add the greens, lemon slices, cumin and remaining 2 tablespoons olive oil, and season with salt; toss to coat the leaves, scrunching them up as needed.
  6. Smother the meatballs with the greens and lemon slices. Add in the chicken stock, cover, reduce the heat to medium, and cook until the meatballs are cooked through and the greens tender, 12 to 13 minutes.
  7. Use a soup ladle to scoop up the meatballs, resting them on the greens, and ladling any juices on top of the meatballs and greens. Cut the remaining lemon into wedges for serving; top with grated parm, if desired.

http://www.lynnandruss.com

Adapted from a recipe by Yasmin Fahr for NYTimes Cooking