A bit of a twist, this classic potato salad adaptation from Good Housekeeping utilizes lots of fresh, tender herbs, and is a little more sophisticated looking than the typical bowl of potato salad.
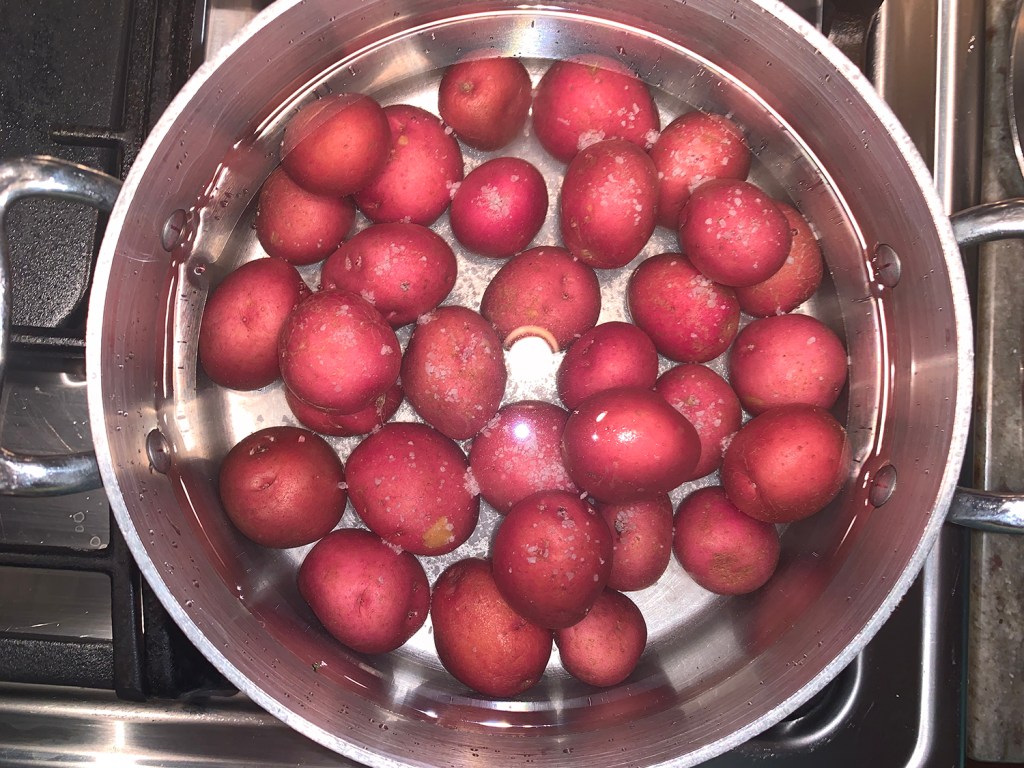
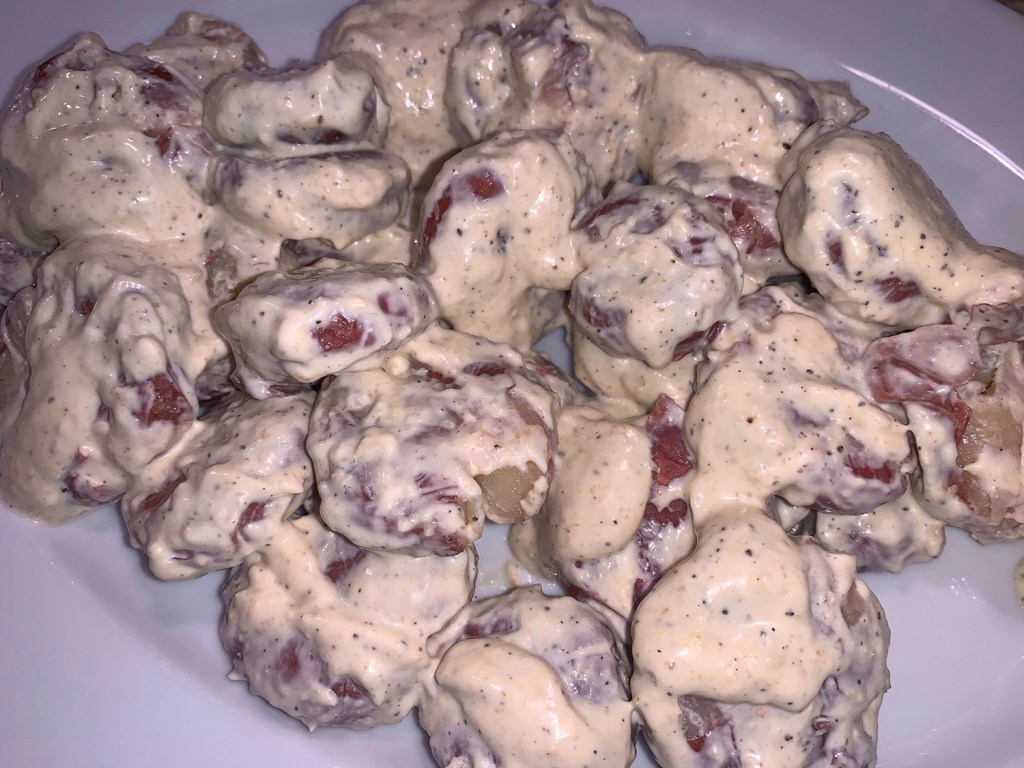
The spuds are kept whole, but smashed with the bottom of a cup after cooking them in water. Then they get mixed with the mayonnaise mixture, spread onto a platter and capped with scallions, parsley and dill. While it may look like an overload of toppings, remember there aren’t any actually mixed into the potatoes (although I did reduce the amount of parsley down to about 2/3 cup).
Served at room temperature, it made a wonderful side to grilled bratwurst sausages and caramelized onions. Go ahead and cook the baby reds in the morning or the day before, and save yourself some time at dinner.
Place potatoes in a medium pot and cover with cold water. Bring to a boil, add 1/2 tablespoon salt, reduce heat and simmer until just tender, 12 to 15 minutes.
Drain and run under cold water for 30 seconds. Drain well and pat dry.
On cutting board, gently flatten each potato with bottom of cup.
While potatoes cook, in a small bowl whisk together mayonnaise, sour cream, horseradish, mustard, lemon juice and 1⁄2 teaspoon each salt and pepper until smooth.
In a large bowl, gently toss potatoes with the dressing. On serving platter, arrange potatoes in single layer, drizzle with any remaining dressing and sprinkle with herbs and scallions. Add more salt and pepper, if desired.
By mid-August we harvest green beans on a daily basis. Even with gifting friends our excess supply, the beans will be a staple for dinner many nights a week. We’ve roasted, grilled, steamed and boiled them either alone or in combination with other veggies.
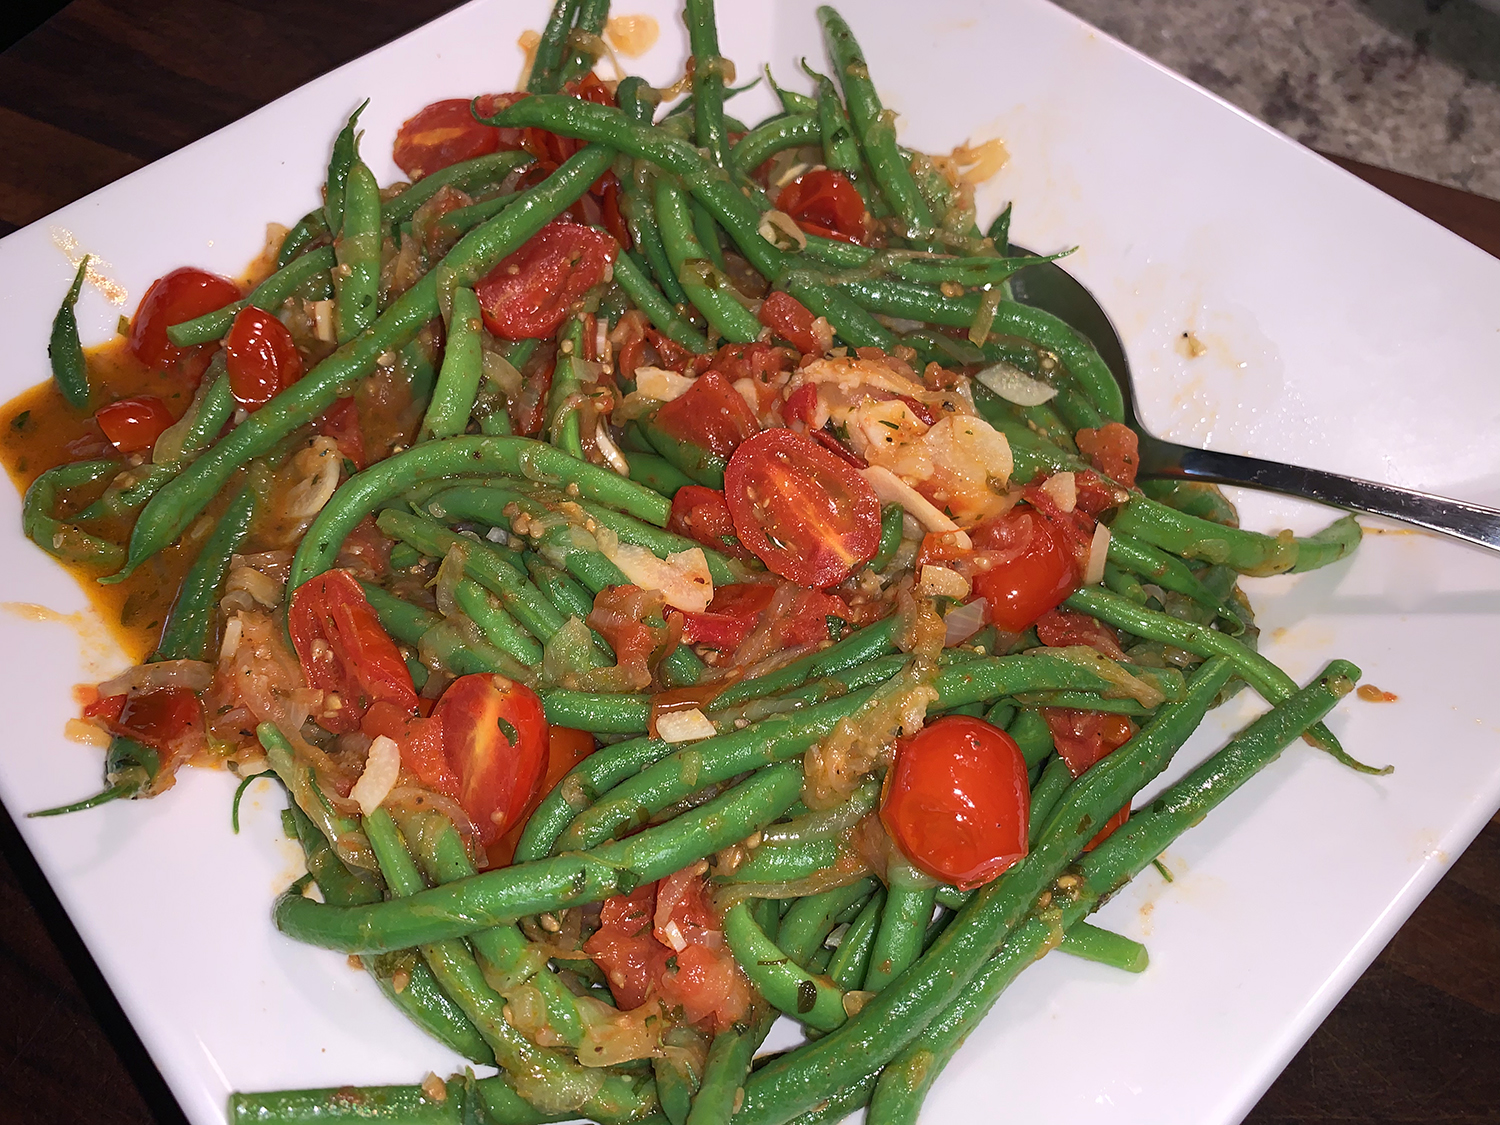
I asked The Hubs to whip something together that would use both an abundance of the beans and our plum and grape tomatoes, and that would compliment our dry rubbed loin lamb chops and Herby Potato Salad. Greek-style instantly came to his mind, which typically uses flat Romano beans. However using our freshly picked pole beans, the dish was still hearty, healthy and bursting with fresh and vibrant colors and flavors.
In lieu of blanching the beans first, you could add them raw at the halfway point of cooking the tomatoes. Just keep a sharp eyeball on the beans so that they are crisp-tender and not overcooked, limp and no longer bright green.
Blanche* the green beans in salted boiling water for 2 to 3 minuted depending on how thick they are. Drain and immediately drop in an ice bath until cool. Drain in a colander.
In a large sauté pan, heat oil until shimmering over medium heat. Add garlic slices and cook until lightly golden, about 2 minutes.
Add the onion to the garlic with a pinch of salt. Turn the heat down to medium-low and continue to cook until the onions are softened, about 2 to 3 minutes more.
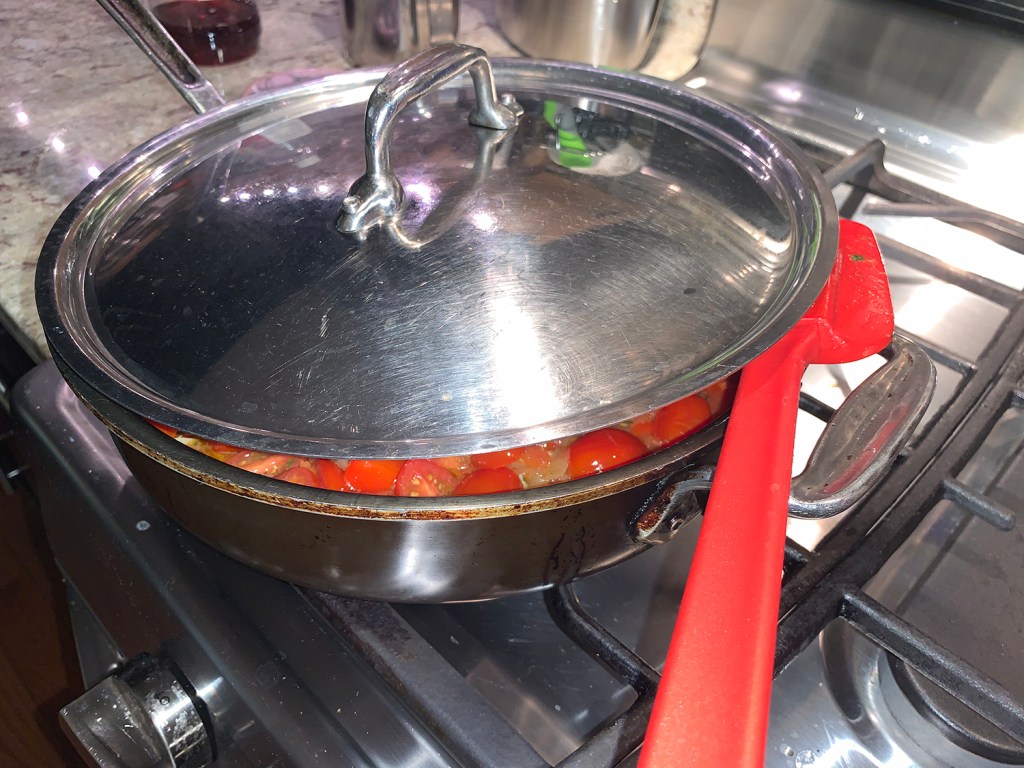
Add the chopped tomatoes, turn the heat back up to medium, stir in a 1⁄2 teaspoon each of salt and pepper, a pinch of red pepper flakes, and 1 tablespoon of the oregano. Stir well, partially cover, and cook for 10 to 12 minutes, stirring occasionally until tomatoes break down and release their juices. *If you choose not to blanche the beans, you can add raw beans 5 minutes into cooking the tomatoes, and cook just until beans are crisp-tender, about 5-6 minutes more.
Stir in the blanched beans and remaining oregano and cook for 1-2 minutes more while beans heat through. Remove from heat and stir in 1 teaspoon of red wine vinegar. Serve immediately.
When the first farm-fresh cobs of corn are ready in early summer, we all can’t wait to start chomping down on those flavorful kernels. By August, we’re ready for a fresh approach to corn on the cob. Over the years, we’ve made many a sautéed corn recipe, noting this Creole version from Cook’s Country would be a great side dish for an upcoming BBQ for eight. Since the original is intended for four guests, we doubled the amounts.
For deep, porky flavor in every bite, it starts with bacon. Aromatics are added, then sprinkled with the reserved bacon over the final dish for texture and additional smoky flavor. Instead of sautéing the bell peppers (I used a red and a green since the recipe was doubled) and garlic with onions, scallions are used for their lightness and are better suited to summer.
Lightly browning the corn kernels lends a pleasant, nutty quality to the Creole Corn Sauté. To meld the dish, extract pulp and milk from corn cobs with the back of a chef’s knife down the stripped cobs and collect the juices, then added the corn pulp to the skillet with the kernels. This way the sautéed corn gets creamy, and the individual ingredients come together as a unified dish.
5 scallions, white parts chopped fine, green parts sliced thin
1 green bell pepper, seeded and chopped fine
1 garlic clove, minced
1 Tbsp. chopped fresh parsley
2 tsp. minced fresh thyme
1 tsp. hot sauce, Tabasco brand preferred
Salt and pepper
Directions
Cut kernels from cobs over large bowl and scrape remaining pulp into bowl with kernels. Set aside.
Cook bacon in large skillet over medium-high heat until crisp, about 5 minutes. Using slotted spoon, transfer bacon to paper towel-lined plate. Pour off all but 1 tablespoon fat from skillet.
Cook scallion whites and bell pepper in bacon fat until just softened, about 2 minutes. Add garlic and cook until fragrant, about 30 seconds.
Add corn and corn pulp to skillet and cook until lightly browned, at least 3 minutes, probably longer. Off heat, stir in scallion greens, parsley, thyme, hot sauce, and bacon. Season with salt and pepper. Serve.
A super-easy and healthy side dish to go with your grilled entrée. According to The Endless Meal where I found this recipe “Everything works about this salad: the crunchy but slightly softened cucumbers, the creamy avocados, the earthy cilantro, and the hint of spice that tingles your tongue.”
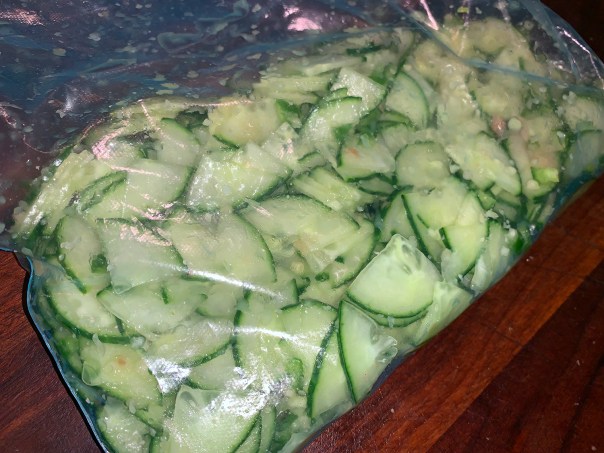
Making this cucumber and avocado salad requires maceration. The basis of which is tossing the cucumbers in a little salt and sugar then letting them sit at room temperature while some of the juice is drawn out. The process softens the cucumber just a little and makes a sort of dressing for the salad.
NOTE: You can prepare it ahead of time by combining the cucumbers and spices in the bag but NOT sprinkling the salt and sugar over. Place the bag in the fridge for up to 8 hours. When you are ready, take the bag out of the fridge, add the salt and sugar, let it sit for a half hour then continue with the rest of the preparation.
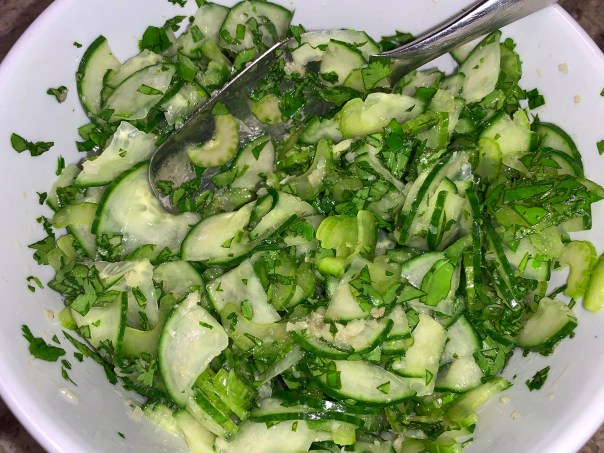
Yes, it is a “green salad” but quite different from what most of us picture because there is no lettuce at all! The recipe calls for a red Thai chili, but in lieu of that we used a green serrano making it even “greener”. The flavors and textures paired wonderfully with our grilled pork chop, but the salad does not store well after the initial meal, so eat it up! (That is why we cut the recipe in half for the two of us—with just a tad remaining.)
Place the ginger, cucumbers, sea salt, sugar, garlic, and red chili in a large, resealable plastic bag. Squish the bag around a little so that everything is mixed together. Set the bag aside on your counter for a half hour.
Pour everything from the bag into a salad bowl. Add the celery, oil, and lime juice and toss well. Season to taste with sea salt. Add the diced avocados, basil, and cilantro and gently toss once more.
These twice-baked potatoes have been a family favorite with my step children from the time they were little. Now, as young adults, the spuds are an oft-requested side dish, especially when steaks are the main entrée. I must confess, both their dad and I maintain a certain fondness for them too! They are pretty decadent, so we don’t serve them too often…
In all of these years, I just eyeballed the amount of each ingredient, adjusting as I saw fit. But I finally decided it was time to write down the recipe when an opportune time presented itself with the engagement of the youngest. When confronted with what they wanted as their celebratory dinner choice, David and his lovely fiancée Vikki, asked us if we would make steaks, twice-baked potatoes, asparagus and Tres Leche Cake for dessert. Game on!
Vikki and David toasting to their engagement.
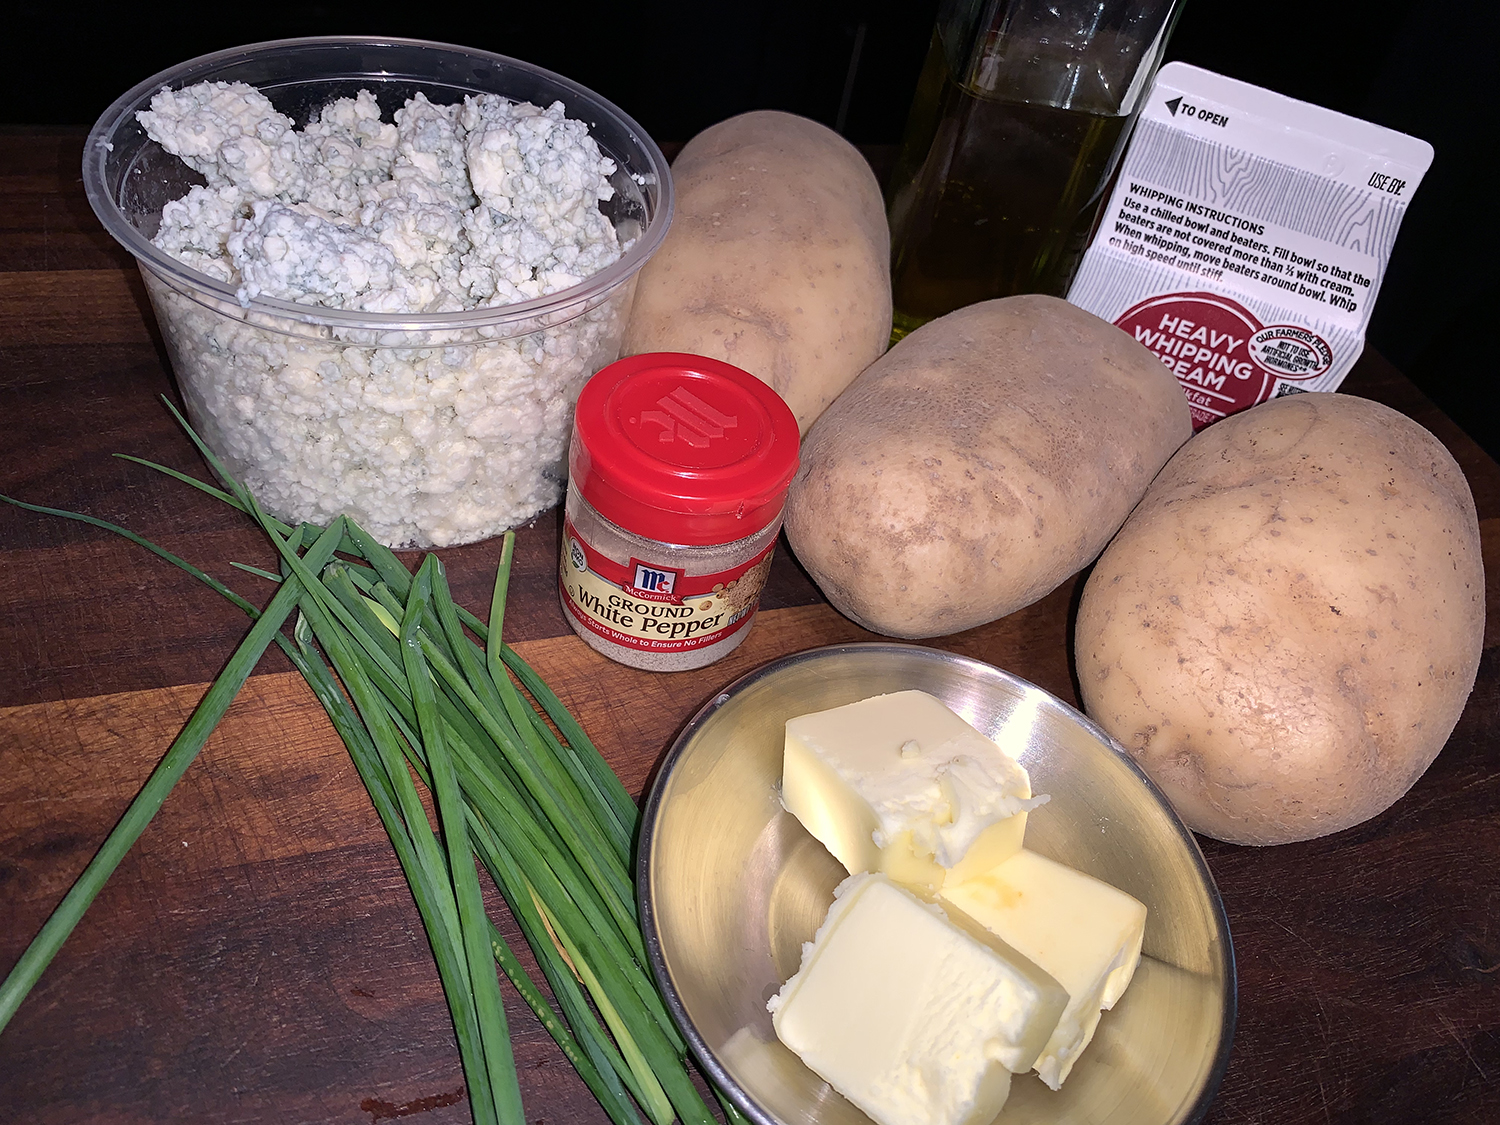
It’s best—although not a deal-breaker—if you bring the butter, blue cheese crumbles, sour cream, and heavy cream to room temperature. When ingredients are different temperatures, they don’t necessarily “play” well together. Plus, when everything is approximately the same temp, they will cook more evenly in the oven.
If you have eight guests for dinner, or just want leftovers, a 13″ x 9″ baking dish will easily hold eight potato halves, so start with four russets instead of three. In this case however, you may want to increase all of the other ingredients by 25%. The potatoes can be assembled a day ahead, covered and refrigerated. Remove from fridge about an hour before they go into the oven at 350°F.
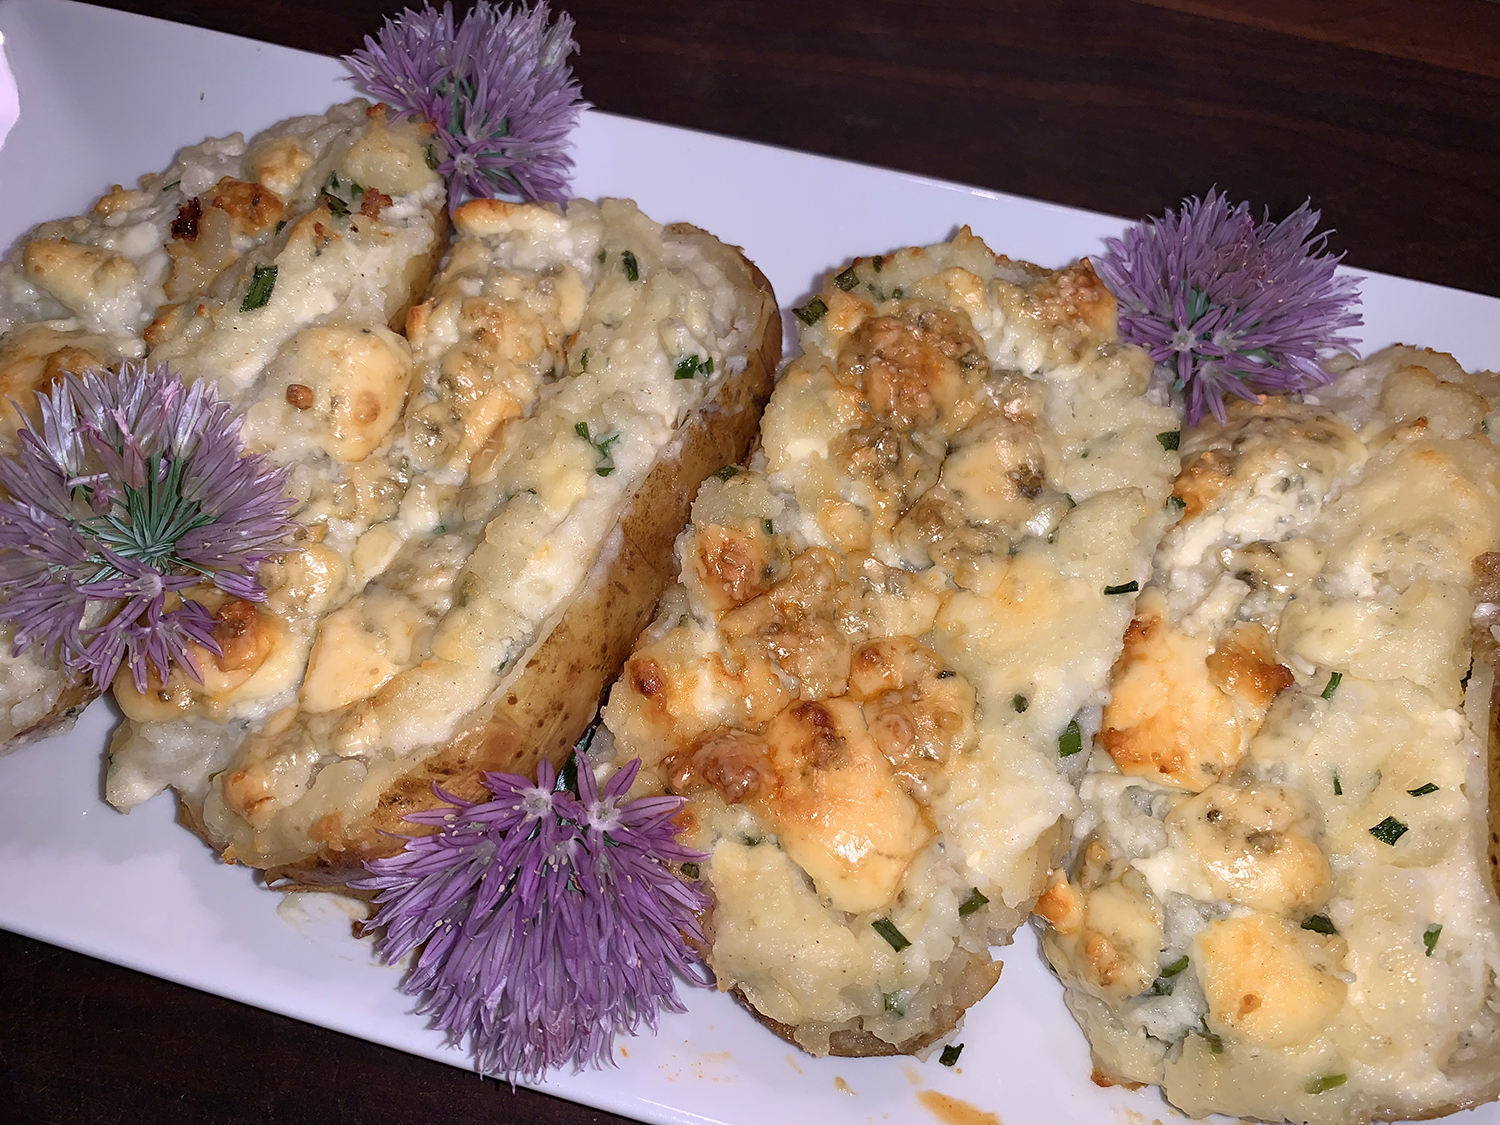
Purple chive blossoms are a flavorful, aromatic, and colorful edible flower that will appear at the end of chive stalks in late springtime. Even if you don’t plan on eating them, they make a nice garnish. You can substitute shredded sharp cheddar in place of the blue cheese if you or your guests abhor the latter.
About that Tres Leche Cake, David (mostly) and Vikki (some) had polished off the entire thing before we got up the next morning!
3 Tbsp. butter, cut into 3 pieces, room temperature
5 oz. crumbled blue cheese, divided into thirds
2 Tbsp. heavy cream or whole milk, room temperature
1/2 cup sour cream, room temperature
1/4 cup fresh chives or scallions, finely chopped
1/4 tsp. white pepper
1 tsp. kosher salt
Chive blossoms for garnish, optional
Directions
Preheat oven to 400°F.
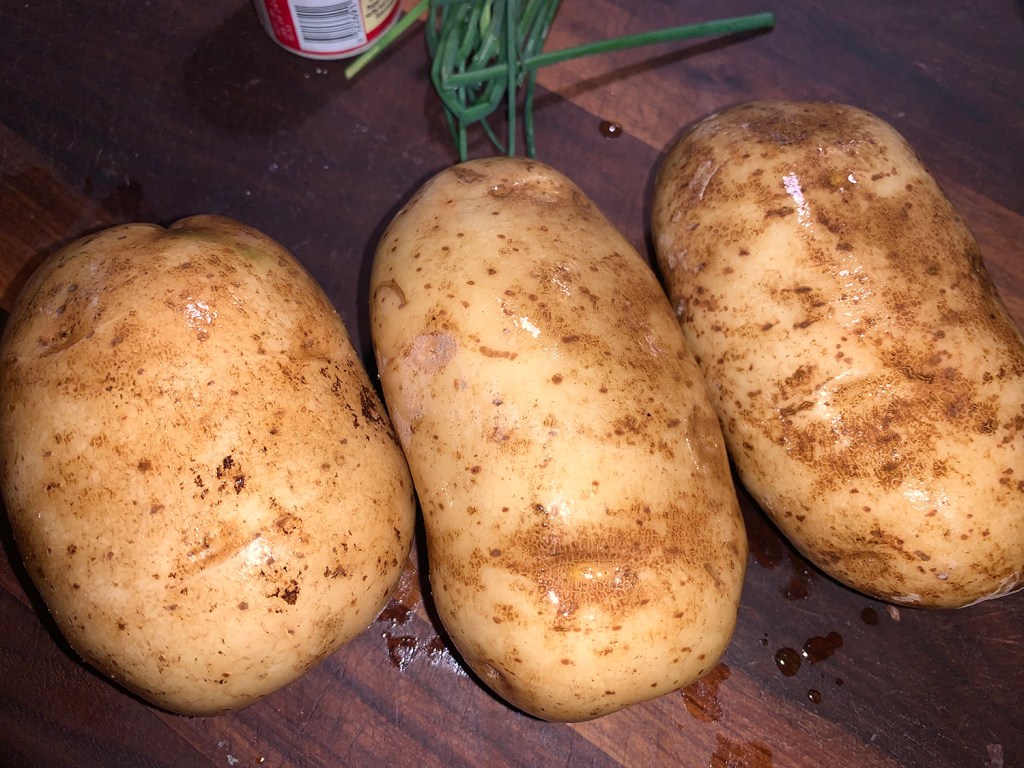
Pierce potatoes all over with a fork 4 or 5 times. Rub olive oil all over each potato.
Cook potatoes in preheated oven for about 45 minutes, or until easily pierced with a paring knife. Let cool for 20 minutes.
Reduce oven heat to 325°F.
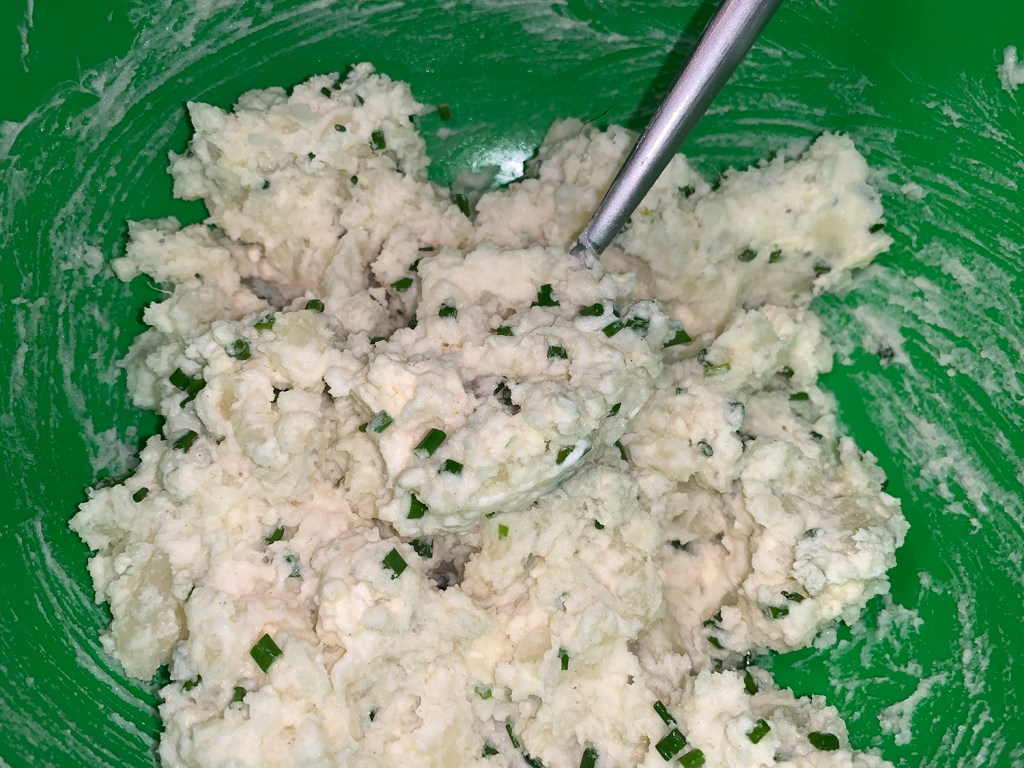
Slice potatoes in half lengthwise, and let the steam escape, another 2 minutes. Over a large bowl, carefully scoop out most of the flesh with a spoon, leaving about 1/8″ thickness against the skin.
Add butter, heavy cream, sour cream, salt and pepper to the potatoes and smash with a potato masher until combined but still a bit lumpy. Next, turn in 2/3 of the cheese crumbles and chives, mixing all ingredients together with a large spoon.
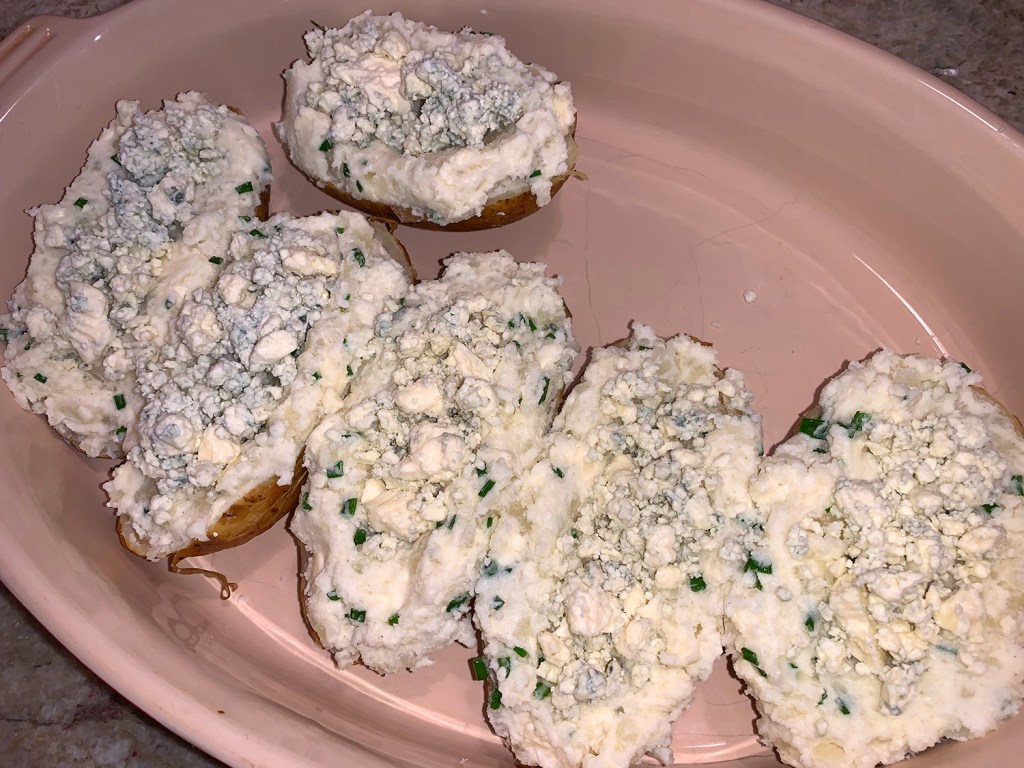
Arrange the six potato skins in a casserole/baking dish. Evenly spoon the mixture into the skins. Run an indentation along the center of each and top with the remaining 1/3 blue cheese crumbles.* Bake uncovered for 30-35 minutes or until the tops are a light golden brown. *Make Ahead: Once the potatoes are assembled with the mixture and topped with blue cheese, cover with foil and refrigerate until one hour before placed in oven. Preheat oven to 350°F, and once the oven is ready, cook, still covered for 30 minutes. Remove the foil and cook for another 30 minutes or until the tops are a light golden brown.
Garnish with a chive blossoms, if using. Serve immediately.
Adding fresh allium notes as well as bright green color to any dish, Vietnamese scallion oil, called mỡ hành, is used as a garnish or condiment on a number of different foods, here we are adding it to cooked asparagus.
This version from Milk Street includes savory fish sauce (or soy sauce), pungent ginger and a little sugar to build complexity. Try it on shrimp, steak, grilled pork chops, corn on the cob or steamed dumplings. Leftover scallion oil can be refrigerated in an airtight container for up to three days; return it to room temperature before serving.
For proper texture and flavor, the scallions should be chopped. Slice them first, then run the knife blade over them a few times to further break them down.
1 1⁄2 lbs. asparagus, trimmed and halved on the diagonal
3 Tbsp. water
Directions
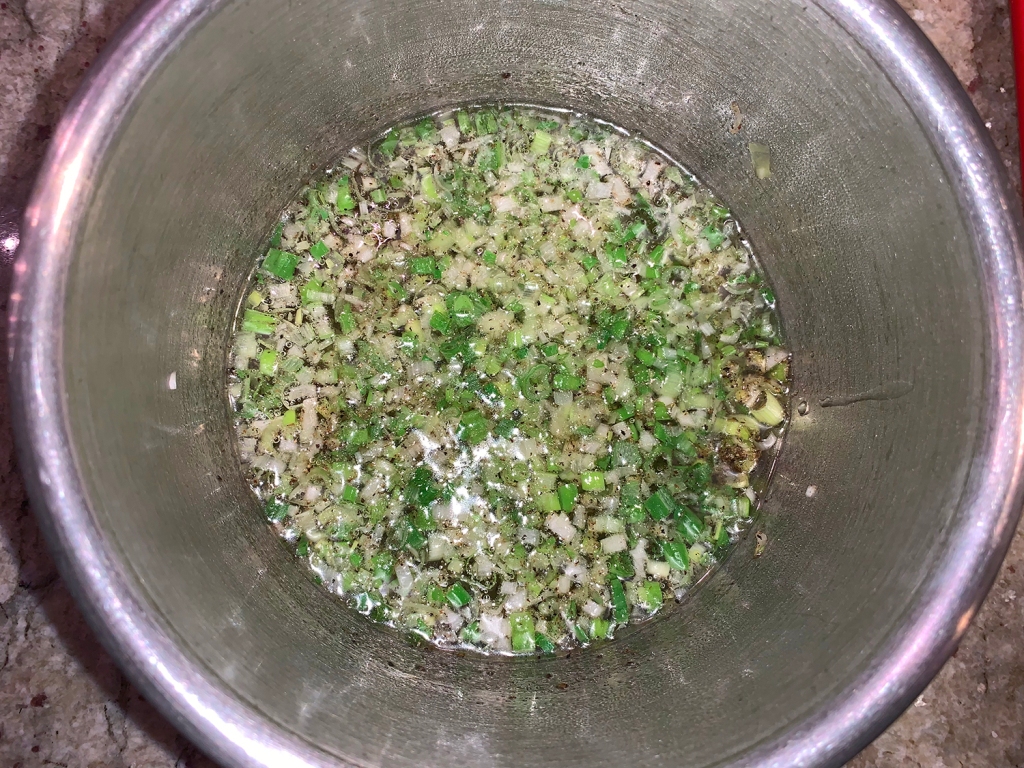
In a medium heatproof bowl, combine the scallions, ¼ teaspoon salt and 1 teaspoon pepper. Using your fingers, gently rub the salt and pepper into the scallions until the scallions begin to wilt.
In a small saucepan over medium-high, heat the oil until shimmering, then pour the hot oil over the scallions; the scallions will sizzle. Stir, then stir in the fish sauce, ginger and sugar. Cool to room temperature.
In a 12-inch skillet over medium-high, heat 1 tablespoon neutral oil until barely smoking. Add asparagus and cook, stirring only a few times, until charred. Add 3 tablespoons water, then immediately cover. Reduce to low and cook, stirring just once or twice, until the asparagus is crisp-tender, 2 to 3 minutes. Serve with scallion oil spooned over.
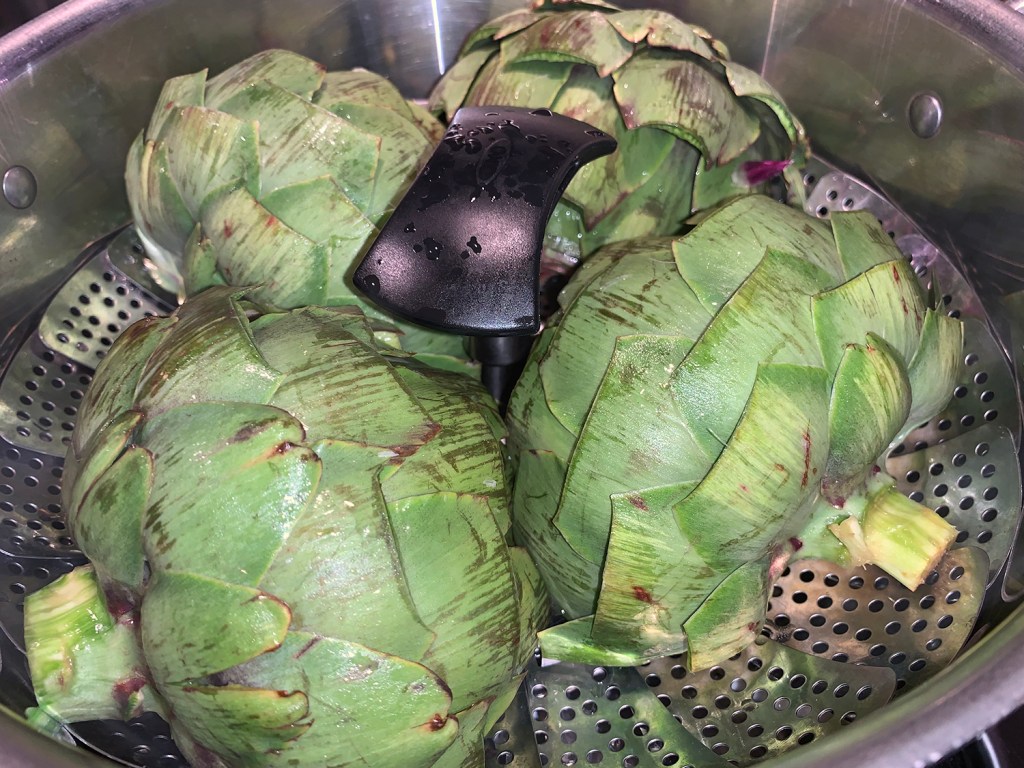
It’s odd, that even though we love artichokes, neither of us have ever cooked thistles. So this was our first foray, and we decided to grill them. After a bit of online research, we happened upon this approach from Simply Recipes. Apparently, the trick is to steam them first.
Artichokes take a long time to cook, and like moist heat, so it’s best to just grill them at the end for the grill marks and smoky flavor—which it did in spades! Steaming, instead of boiling, assures the artichokes don’t get too soggy from the water and they stay dry enough to get good browning on the grill.
After we brought them home from the grocery store I had to read up on how to store them for a few days. Well let me tell you, everybody seems to have their own opinion. But my first mistake was cutting a good portion of the stems off so that the large globes would fit into a plastic ziploc. That is a no-no, BTW.
According to Williams Sonoma, sprinkle artichokes with a few drops of water and store in a perforated plastic bag in the coldest part of the refrigerator for up to 1 week. If cooking them on the day you buy them, leave them at cool room temperature. Once opened, marinated artichoke hearts will keep refrigerated for up to 2 weeks.
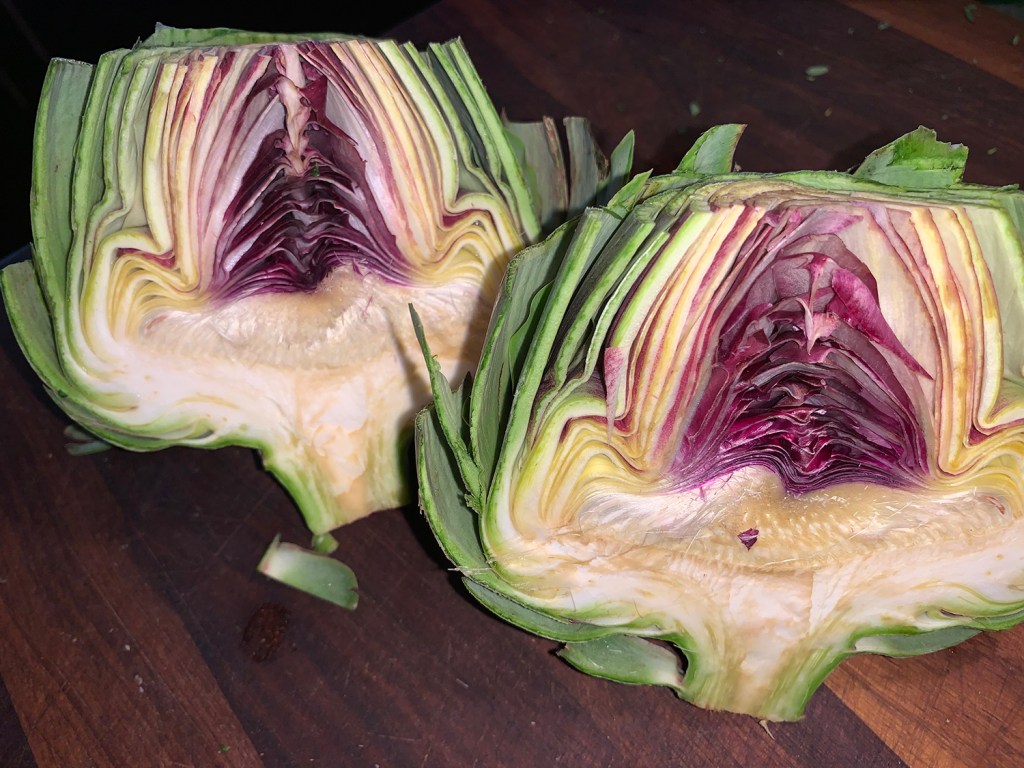
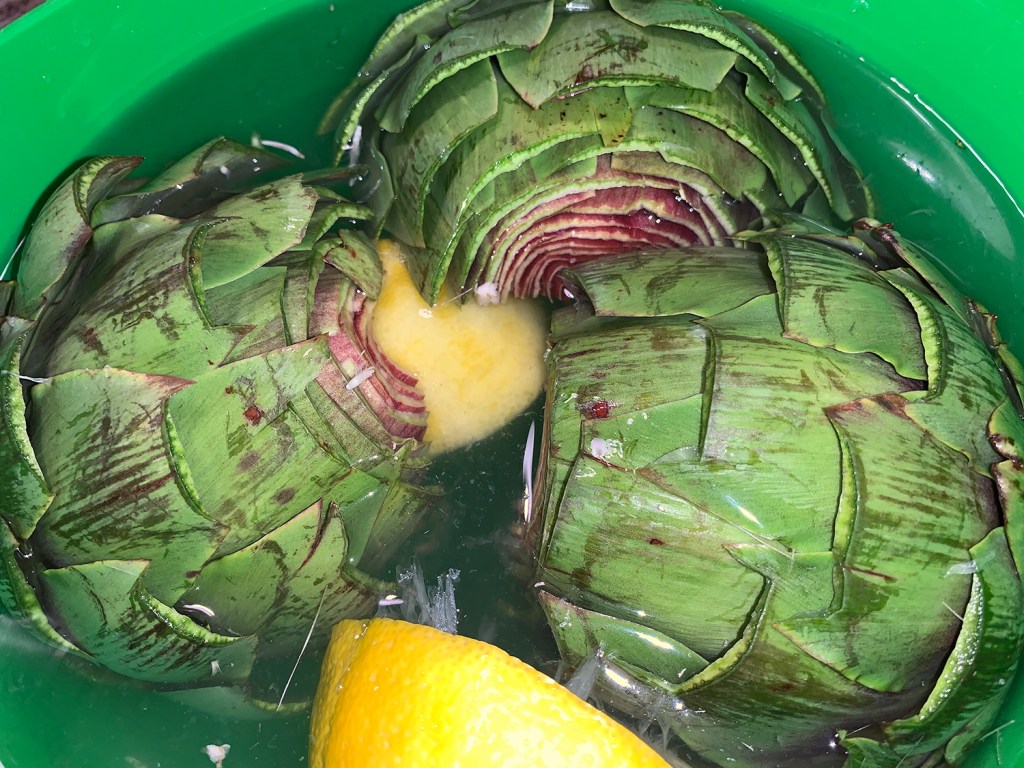
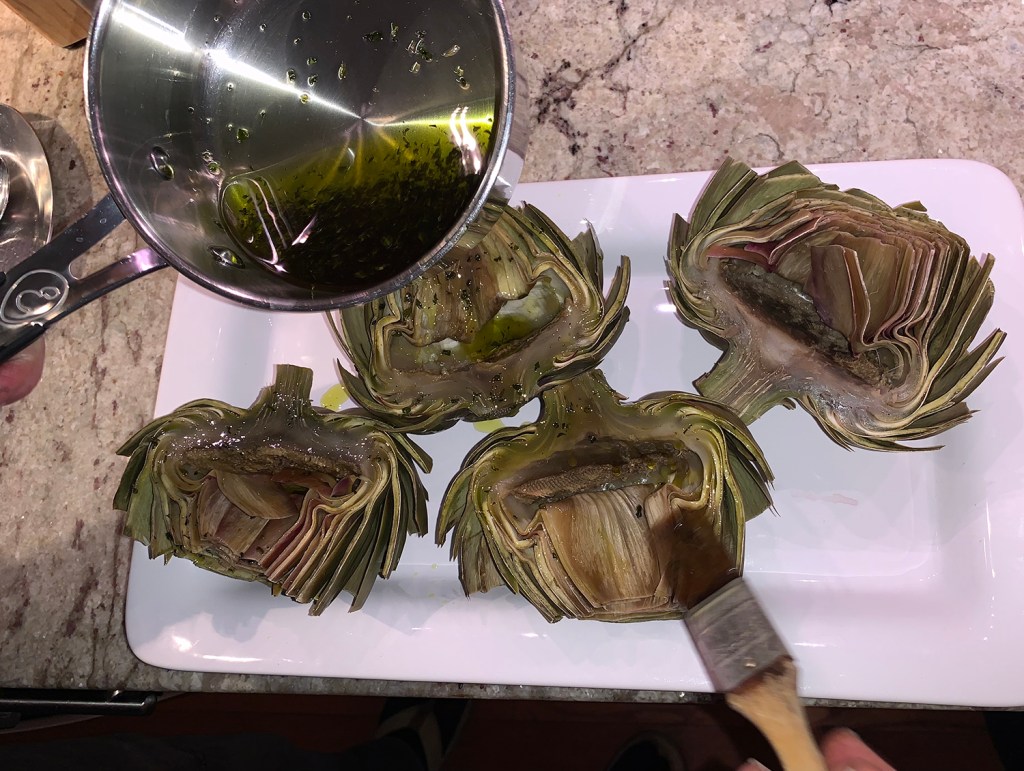
Let’s just say prepping these puppies was a little labor intensive, especially scooping out the fuzzy chokes. Instead of rubbing all of the cut areas, including each leaf to prevent the artichokes from turning brown, we acidulated them. This is done by filling a large bowl with 2 quarts of water, slicing a lemon in half, and squeezing the juice into the water, leaving the rinds submersed in the liquid.
The grilling aspect is easy-peasy. Just prepare your grill for direct, high heat. Use a pastry brush to brush the artichoke all over with the herb infused oil, then sprinkle all over with salt. Place the artichoke halves cut-side-down on the grill grates, cover, and grill for 5 to 10 minutes, until you have nice grill mark on the cut sides of the artichokes. If desired, serve with mayonnaise, remoulade, or aioli.
1 Tbsp. chopped fresh herbs such as rosemary, oregano, thyme
1/3 cup extra virgin olive oil
2 cloves garlic, cut in half (no need to peel)
1 bay leaf
1 lemon, cut into wedges
2 to 4 large globe artichokes
Salt
Directions
Steep herbs in warm olive oil: Place chopped fresh herbs in a small bowl (not the bay leaf), cover with olive oil. Microwave on high heat for 30 seconds (or heat oil and herbs on the stovetop until warm). Let the herbs steep in the warm olive oil while you prepare the artichokes.
Prep the artichokes: Prepare a large pot with an inch of water at the bottom. Add the cut cloves of garlic and the bay leaf, and place a steamer rack in the pot.
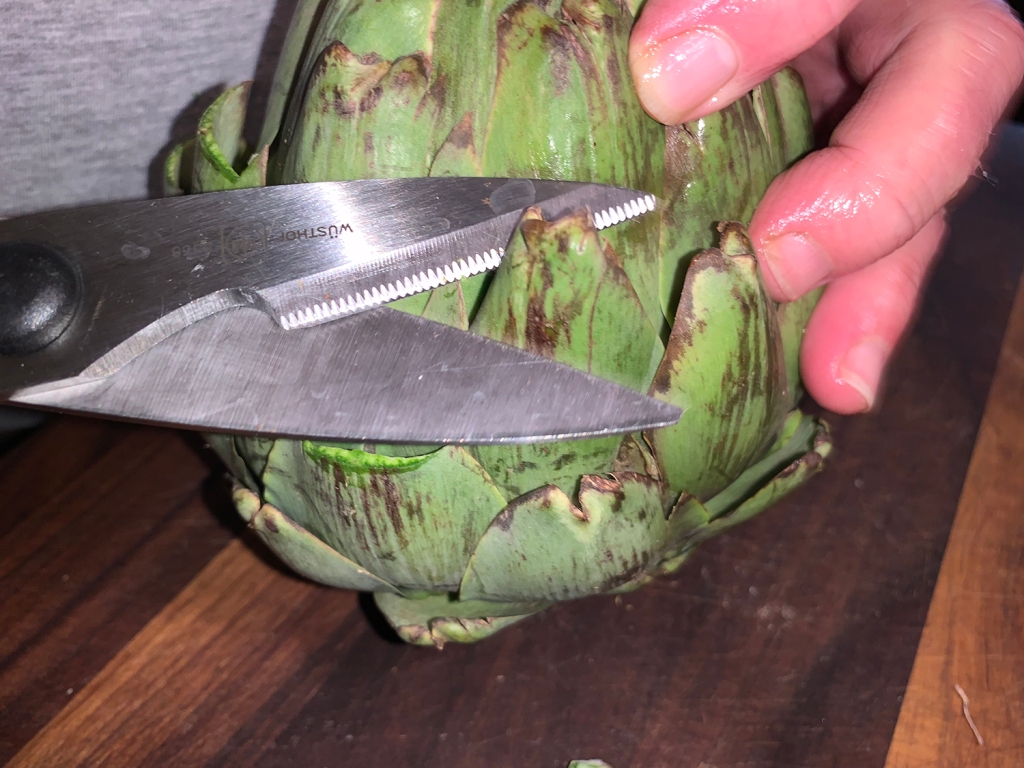
To prepare the artichokes, have lemon wedges ready. If you want a nice presentation, use scissors to snip away the pointy tips of the artichoke leaves. As you trim the artichokes, rub the cut areas with juice from the lemon wedges to prevent the artichokes from turning brown from oxidation.
Use a vegetable peeler to cut away the thick outer layer of the artichoke stems. Trim the stems to 2 inches from the base of the artichoke. Cut off and discard the top 1/2 inch of the artichokes. Cut the artichokes in half.
Scoop out the chokes and inner leaves: Use a strong metal spoon to scoop out the fuzzy chokes and the small inner artichoke leaves. Rub lemon juice all over the inside and exposed cut areas of the artichokes.
Steam the artichokes: Heat the water in the large pot with a steamer rack on high. When it comes to a boil, reduce the heat to medium high and place the artichoke halves, cut side down on the steam rack.
Cover. Steam for 20 minutes (less or more, depending on the size of the artichokes), until you can easily pull off the outer leaves, and you can pierce the heart easily with a knife.
The artichokes can be just a tiny bit less cooked than would be typically perfect for steamed artichokes, as you will be cooking them further on the grill.
Grill the artichokes: Prepare your grill for direct, high heat. Use a pastry brush to brush the artichoke all over with the herb infused oil. Sprinkle all over with salt.
Place the artichoke halves cut-side-down on the grill grates. Cover, and grill for 5 to 10 minutes, until you have nice grill mark on the cut sides of the artichokes.
Serve: Sprinkle the cut sides with more lemon juice. Serve alone or with mayonnaise, remoulade, or aioli.
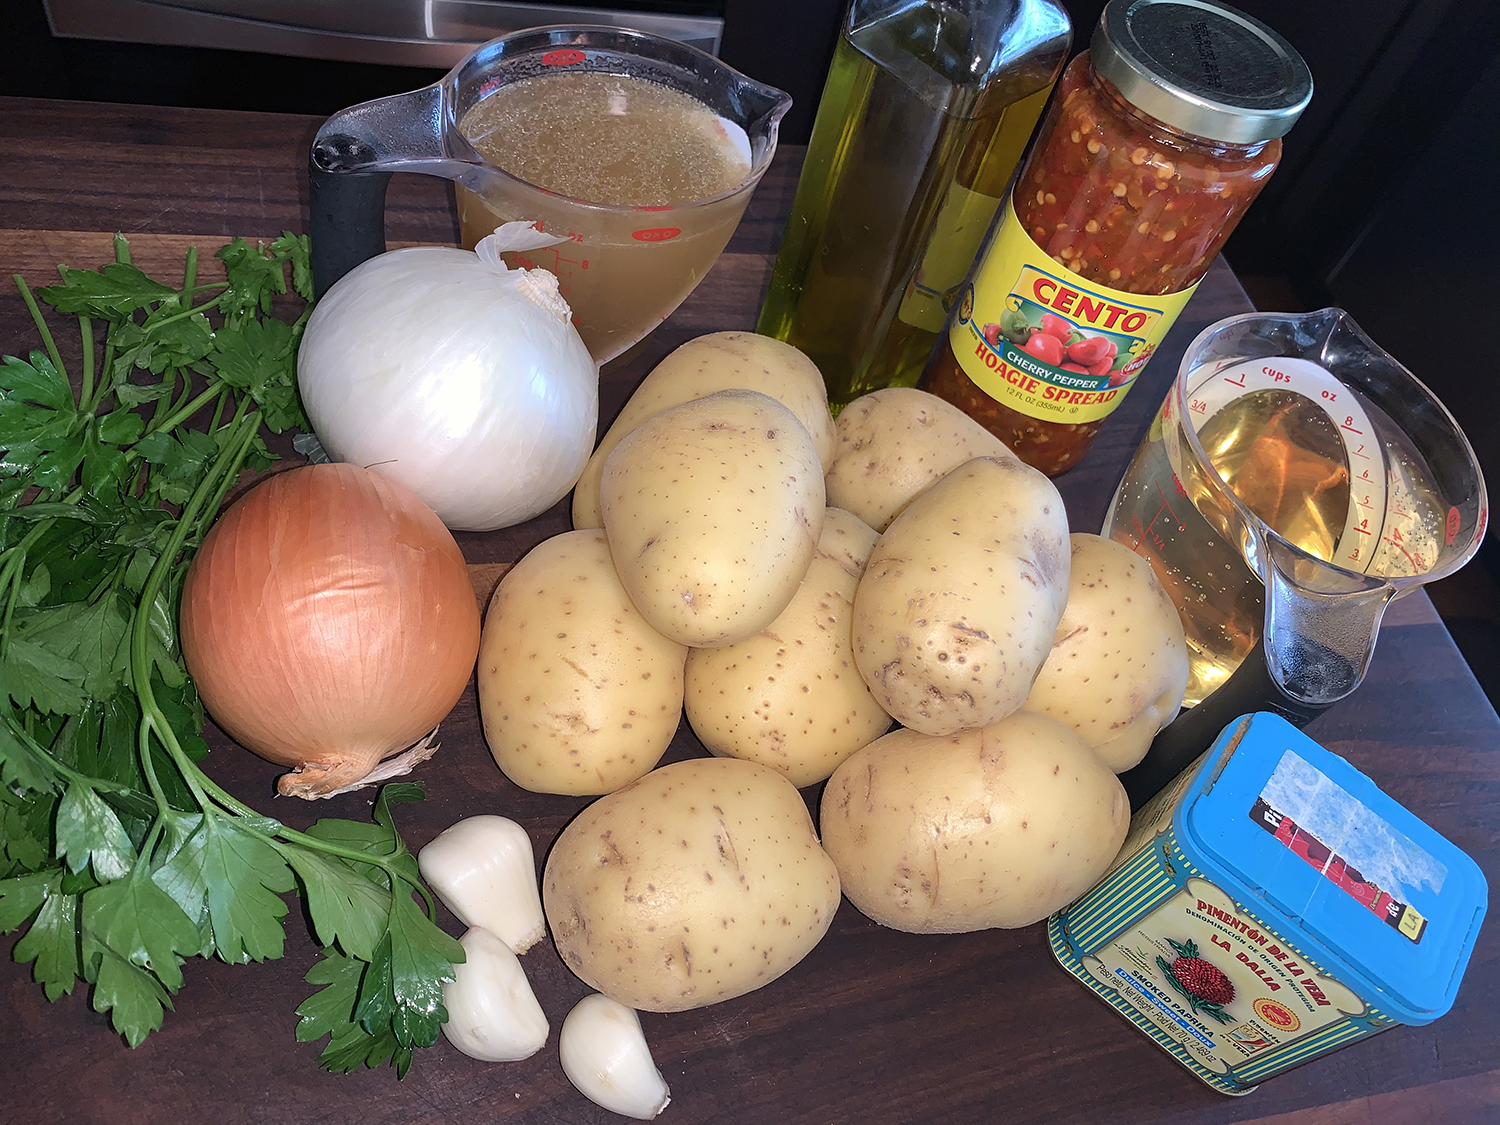
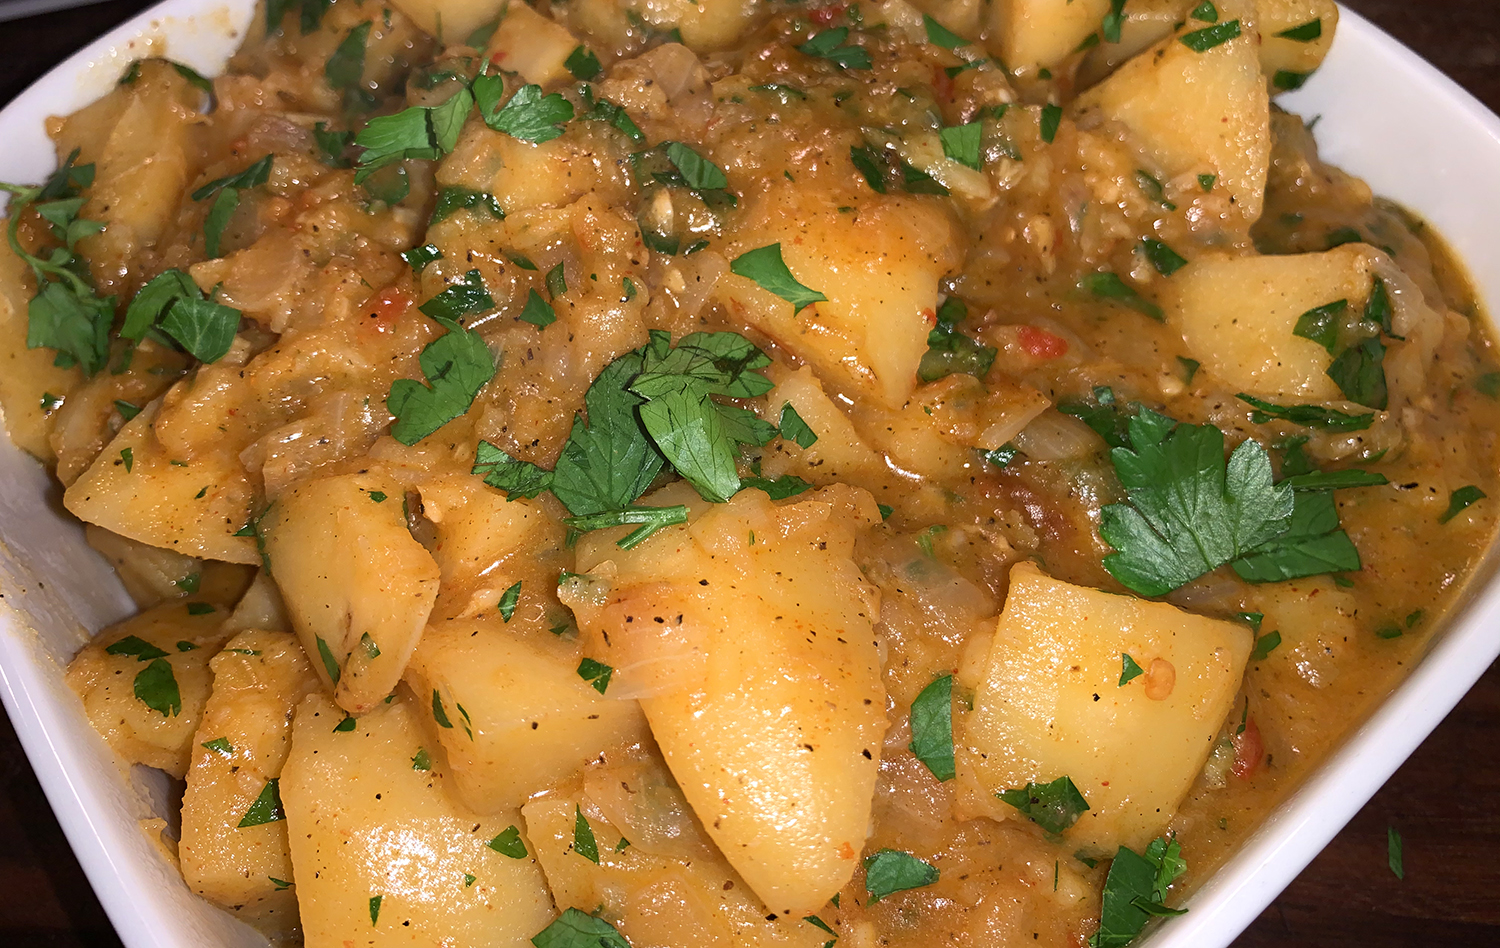
Salivating for some fabulous potatoes with a lot of flavor? Look no further than these Portuguese Wine-Braised Potatoes with Garlic, Bay and Chilies that we first spotted in a recent issue of Milk Street magazine. Paired with another of their recipes of Madeiran Pork with Wine and Garlic, and some Fresh Peas with Lemon & Chives, it was a dinner to remember!
The traditional way of cooking potatoes with these classic Portuguese flavors is to slow-roast them in the oven or long-braise them on the stovetop alongside meat. But in “Authentic Portuguese Cooking,” author Ana Patuleia Ortins includes a quicker, meat-free version that yields a wonderfully delicious side.
Milk Street adapted her recipe, opting to use a mixture of wine and chicken broth for simmering (wine alone tends to toughen the exteriors of the potatoes) and substituting jarred crushed peppers—the type often smeared onto Italian hoagies—for the spicy Portuguese red pepper paste called massa de malagueta. If you cannot find crushed peppers, simply use ½ teaspoon red pepper flakes instead.
In Portugal it’s known as “batatas cozidas em vinho e alhos” and varies by region and family, but the heart of the recipe is consistent: potatoes, onions, garlic and olive oil. First the onions and garlic are cooked until jammy-sweet, then the potatoes are added and simmered in white wine to add wonderful acidity to balance the starchiness.
“The thing that people don’t understand about Portuguese cooking is that it’s flexible. The way they say it, it’s ‘com gusto.’ It’s how you like it.”
Patuleia Ortins
We knew it was going to be a winner so we increased the recipe by 50% right off the bat. And although the directions indicate it takes about 30 minutes for the potatoes to meet no resistance when pierced with a knife, ours took an additional 20 minutes—therefore be prepared to add extra time if needed.
Tip:Don’t stir the potatoes too vigorously or they’ll break apart and make the sauce gluey. Aim to keep the large pieces of potato as whole as possible. Also, don’t reduce the sauce too far; as the potatoes sit off heat, they’ll continue to absorb the sauce.
Portuguese Wine-Braised Potatoes with Garlic, Bay and Chilies
2 lbs. Yukon Gold or red potatoes, peeled and cut into 1- to 1½-inch chunks
2 medium garlic cloves, minced
1 bay leaf
1½ tsp. jarred crushed peppers or ½ tsp. red pepper flakes
1¼ tsp. smoked paprika
Kosher salt and ground black pepper
¼ cup extra-virgin olive oil
1 small yellow onion, finely chopped
¾ cup dry white wine
¾ cup chicken broth, preferably homemade
¼ cup lightly packed fresh flat-leaf parsley, chopped
Directions
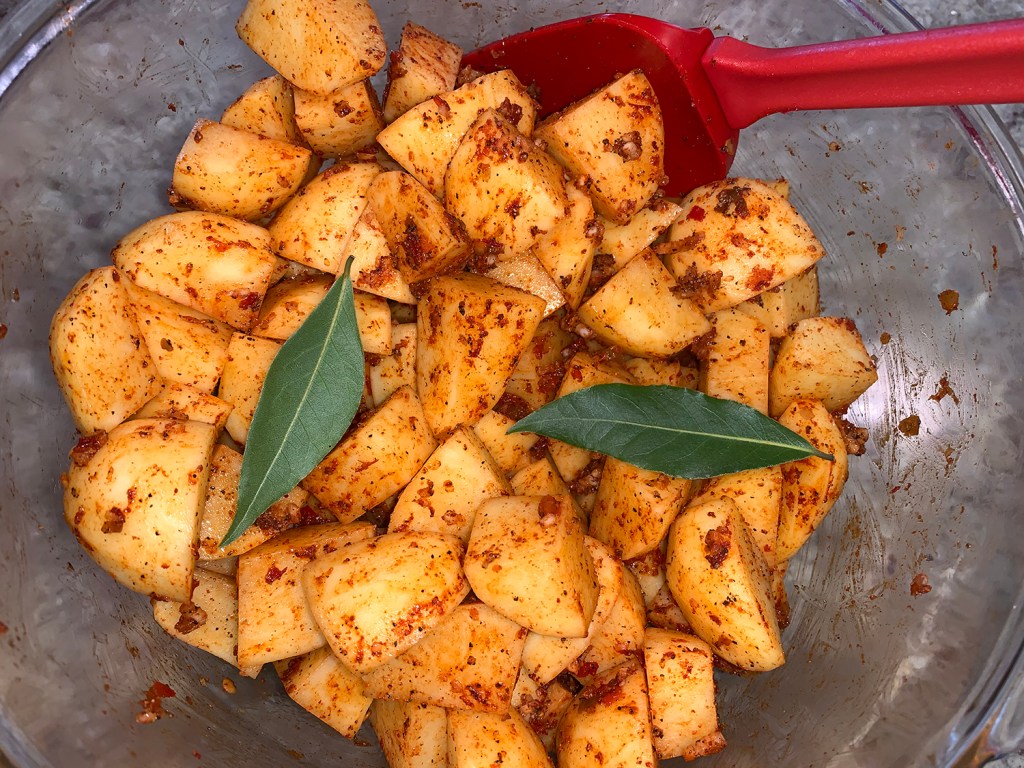
In a medium bowl, toss the potatoes with the garlic, bay, crushed peppers, paprika, ¼ teaspoon salt and ½ teaspoon black pepper.
In a large saucepan over medium, heat the oil until shimmering. Add the onion and ½ teaspoon salt, then cook, stirring occasionally, until fully softened, 7 to 10 minutes.
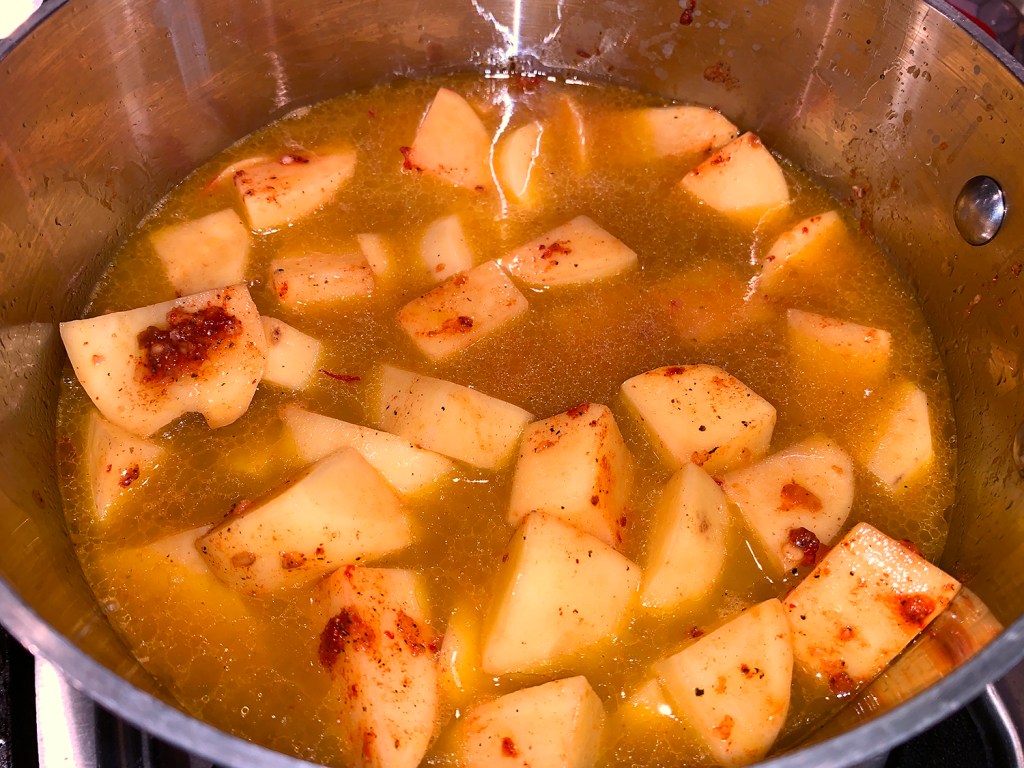
Stir in the potato mixture, then add the wine and broth. Bring to a boil over medium-high, then cover, reduce to medium and simmer, stirring occasionally, until a skewer inserted into the potatoes meets no resistance, about 30 minutes.
Uncover and cook over medium, now stirring more often and adjusting the heat to maintain a gentle simmer, until the liquid has thickened and lightly coats the potatoes, about 7 minutes.
Remove from the heat, cover and let stand for about 5 minutes. Remove and discard the bay and stir in the parsley. Taste and season with salt and black pepper.
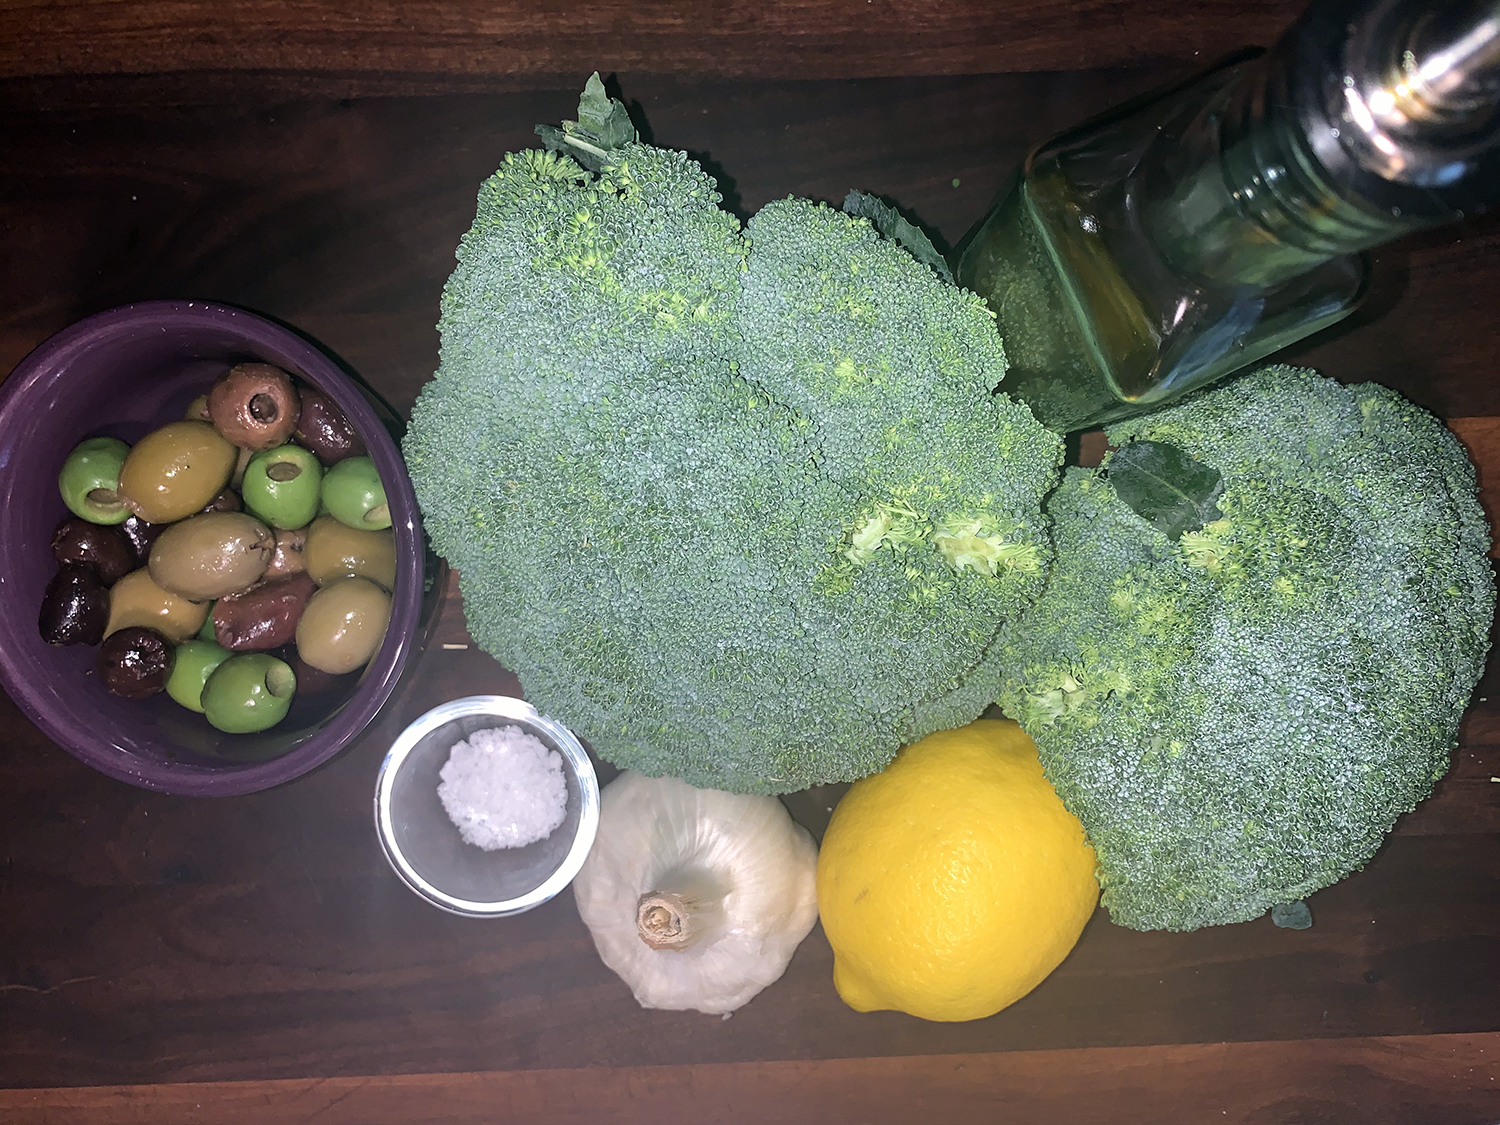
If you want an easy, yet different side dish, try this unique combination. The original recipe is listed below, although I made a few changes such as using pitted olives. I mean, who wants to stop after every bite and fish pits out of your mouth, especially in front of others! This allowed me to cut them in half before roasting.
With only two of us at the dinner table, I scaled back some on the amount of broccoli because it wouldn’t all fit on the baking sheet in one layer, and it just seemed excessive for the both of us.
Then when it comes to smashing the garlic together with the salt, it’s just easier with a mortar and pestle, if you happen to have one.
Preheat oven to 425ºF. Line a 15x10x1-inch baking pan with a silicone baking mat or parchment; set aside.
In a small bowl combine garlic and 1/2 tsp. of the kosher salt. Using the back of a spoon, muddle garlic and salt until garlic begins to release its oil. (Or use a mortar and pestle like I did.) Let stand 5 to 10 minutes. Stir in olive oil. Set aside.
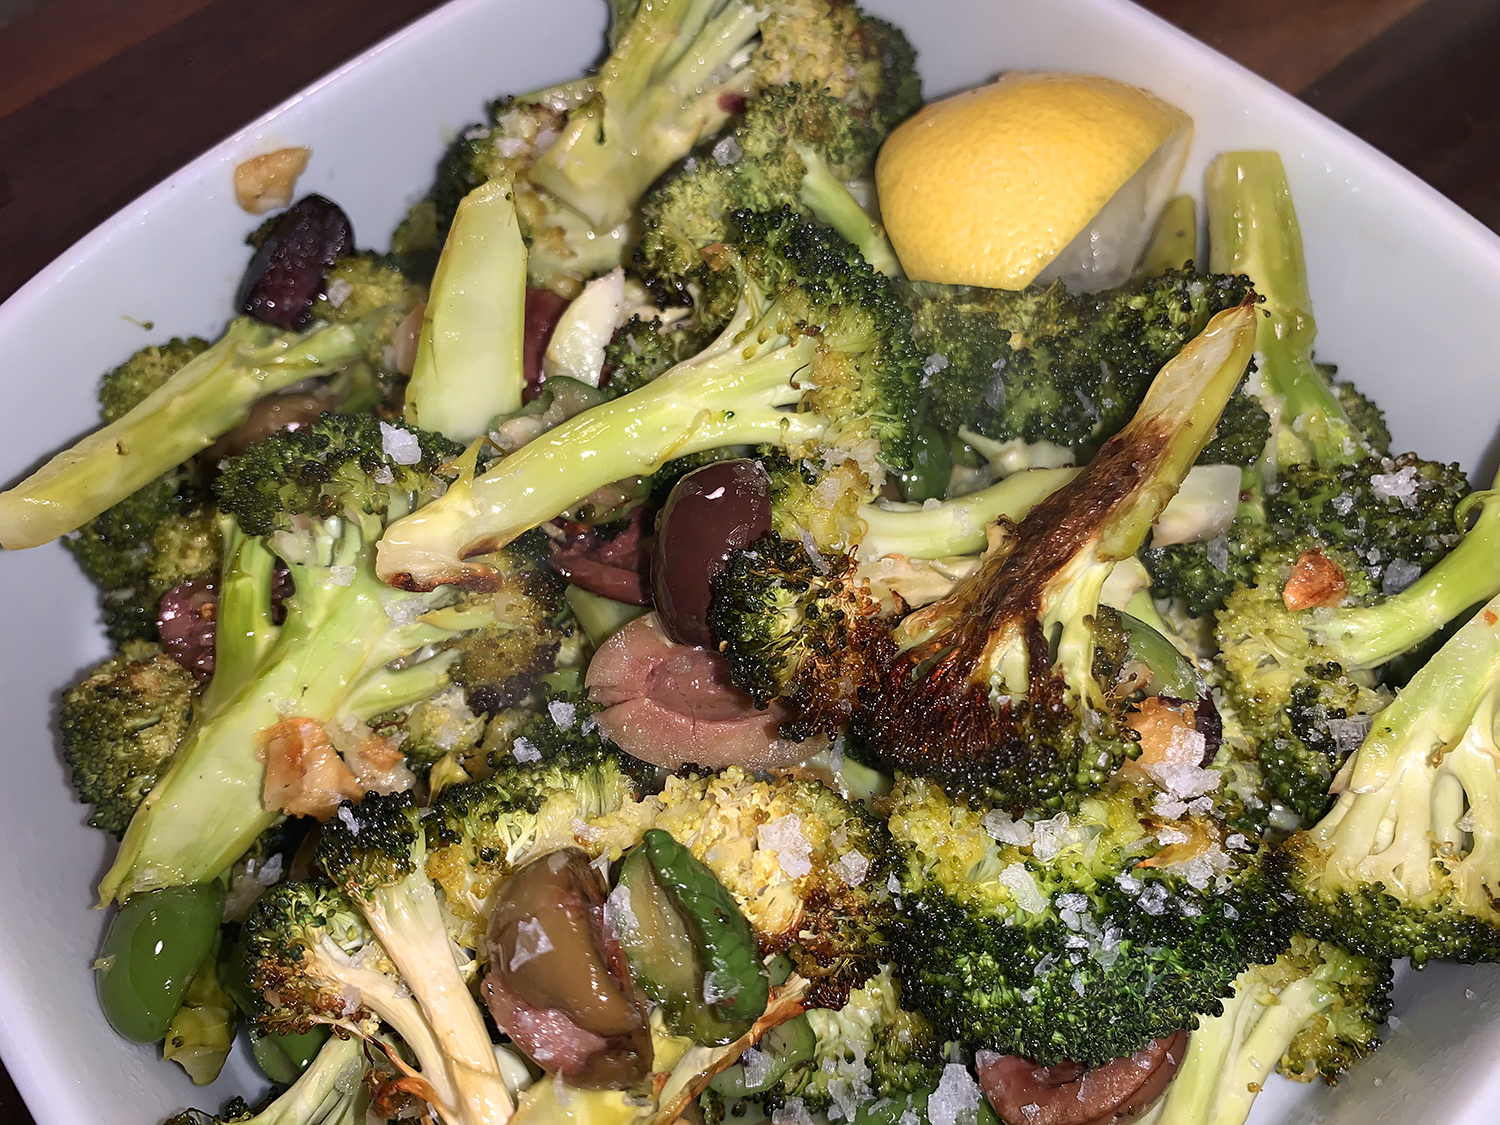
Trim broccoli stems; cut stalks lengthwise into halves and/or quarters. Place in prepared baking pan. Pour garlic oil and olives over; toss well. Sprinkle with remaining 1/2 tsp. kosher salt. Roast 20 to 25 minutes, tossing occasionally, until tender but al dente. Transfer to a serving dish.
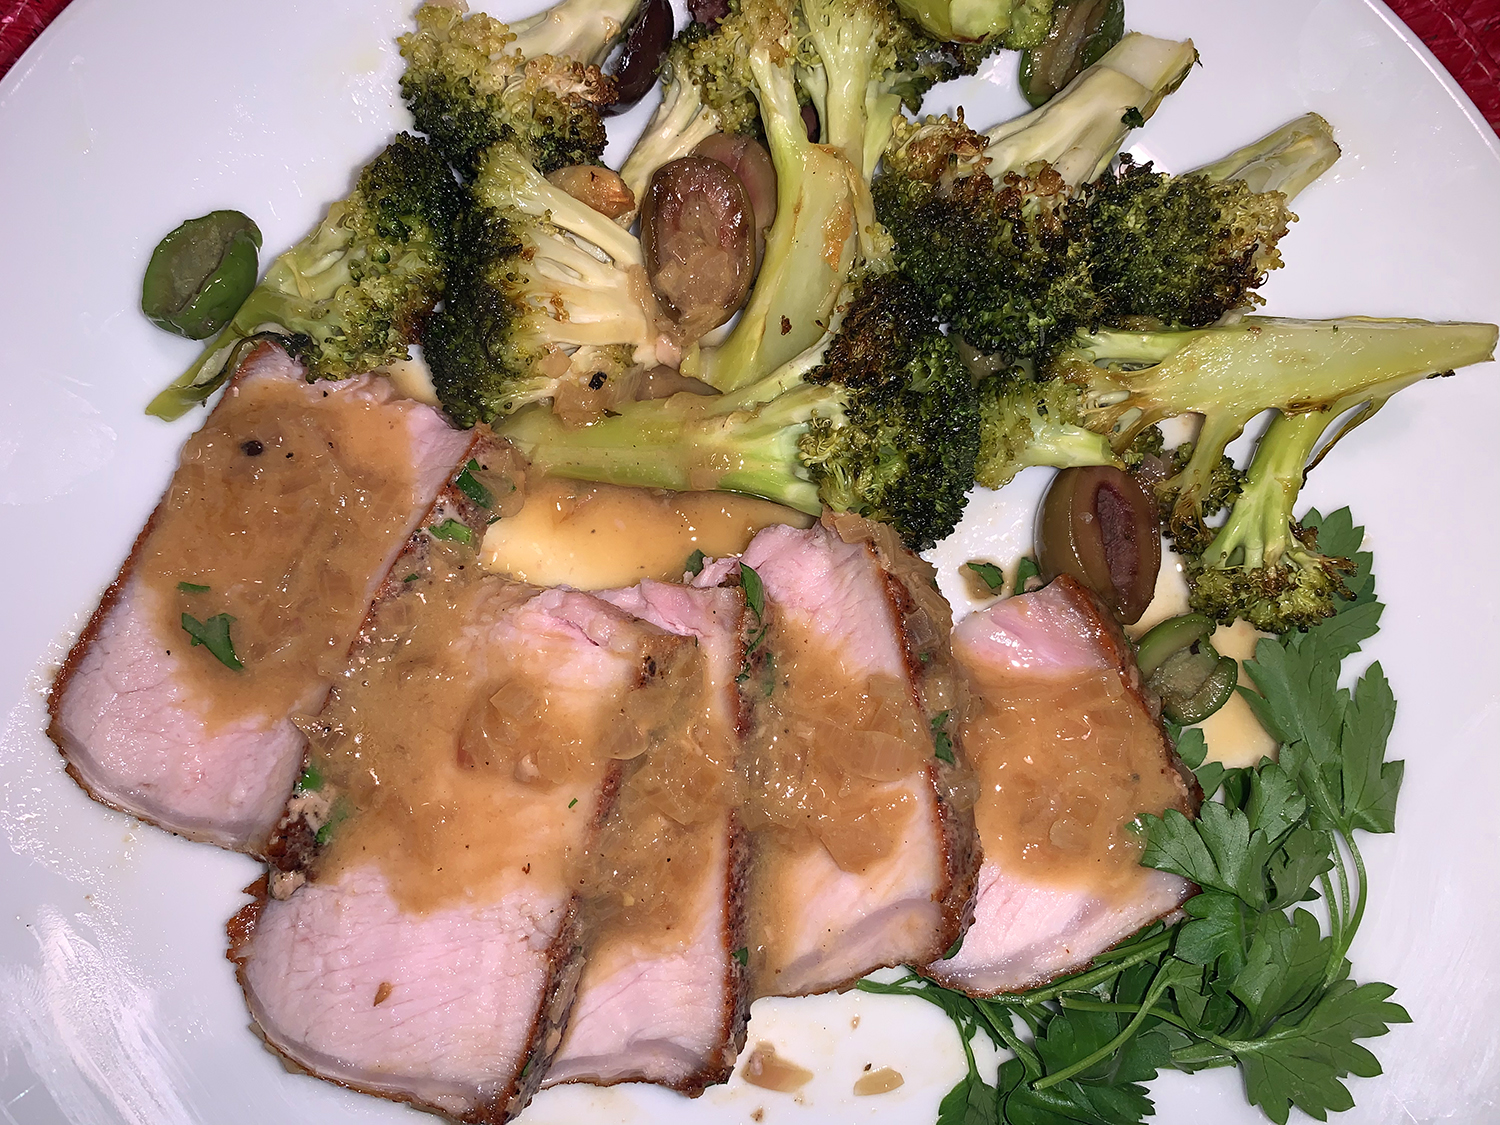
To serve, sprinkle with flaked sea salt; drizzle with additional olive oil. Squeeze lemon juice over.
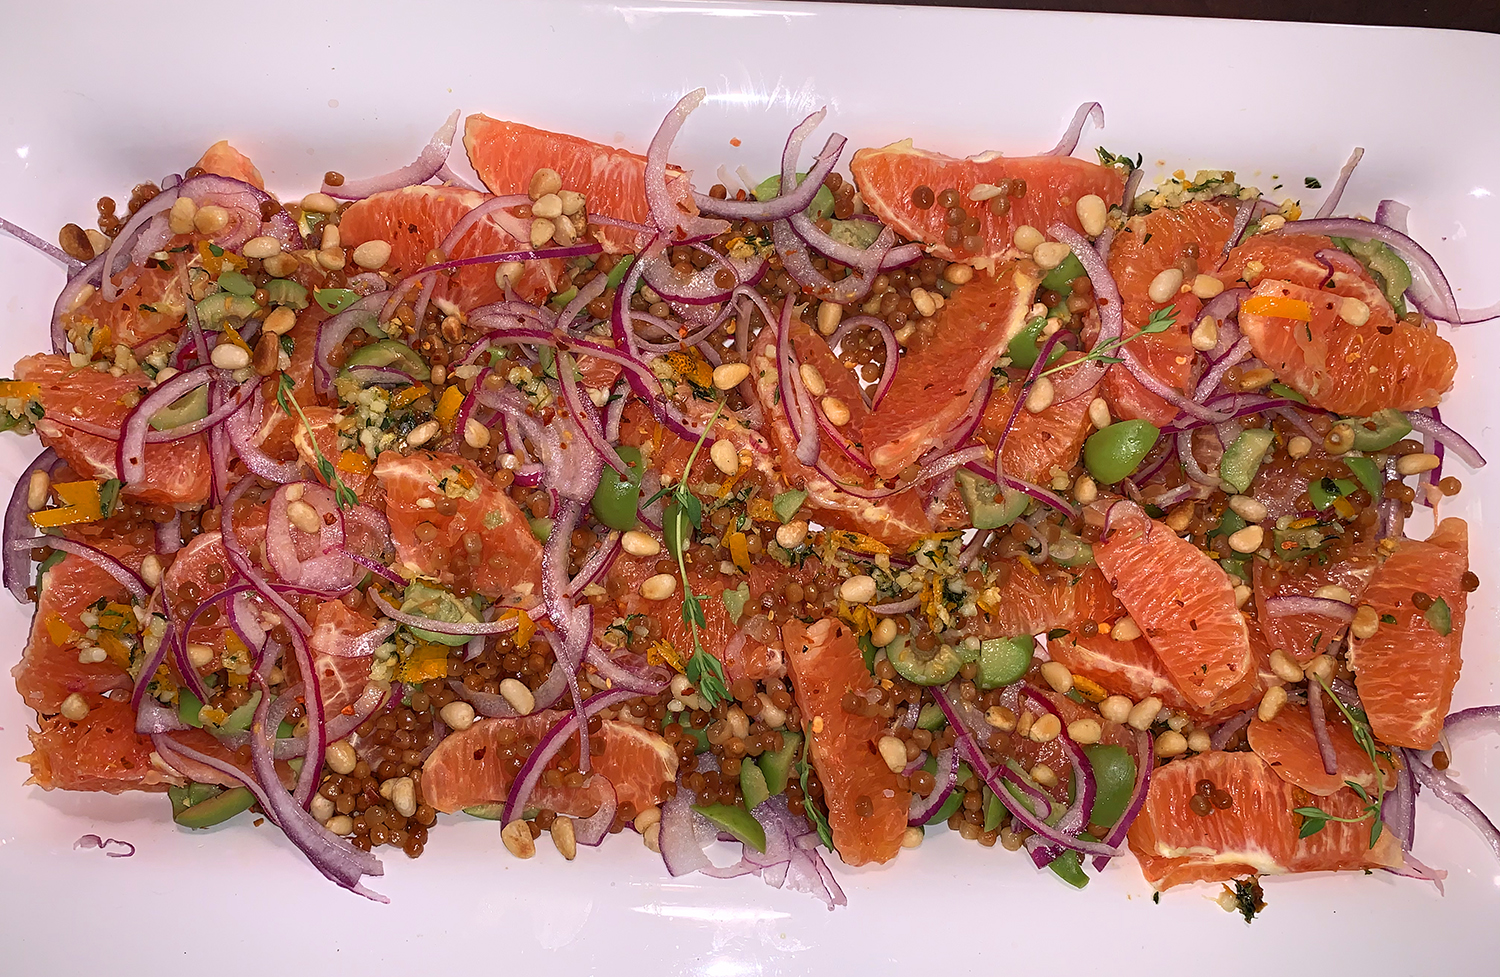
The temps are warming here in southeastern PA, which starts our craving for brighter tasting food. This Citrus Couscous Salad recipe was spotted in Fine Cooking Magazine, but originated in Better Homes & Gardens from what I can surmise. Doesn’t really matter, we made numerous changes to make it our own.
Orange zest, juice, and segments brighten up this fresh take on a “pasta” salad recipe. Despite popular belief that couscous is a type of whole grain (it does have a rice-like appearance), it is actually a pasta made of semolina and wheat flour that is moistened and tossed together until it forms little balls. (Sorry keto-friendly dieters.)
Not only does couscous cook quickly—a plus for most home cooks—it is an excellent main or side dish that pleases almost anyone’s palate. While the original recipe used 6 oranges, and fed as many, the ingredients list here was halved for the most part. Although, the thyme and olive quantities remain the same, pine nuts were swapped out for the hazelnuts.
Because it can sit at room temperature, it would be a great asset at any pot luck or picnic.
¼ cup coarsely chopped, pitted Castelvetrano olives or Manzanilla olives
1 Tbsp. red wine vinegar
¼ tsp. coarse salt
⅛ tsp. freshly cracked black pepper
Crushed red pepper (optional)
Directions
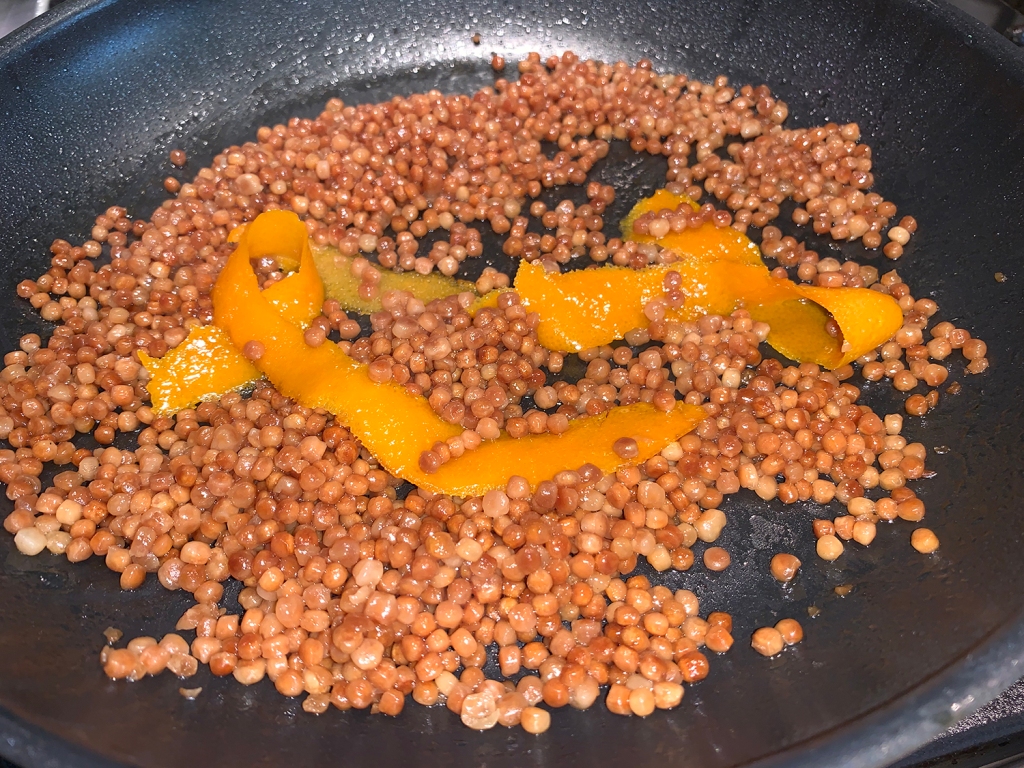
Using a vegetable peeler remove strips of zest from one orange, being careful not to remove the white pith; set aside.
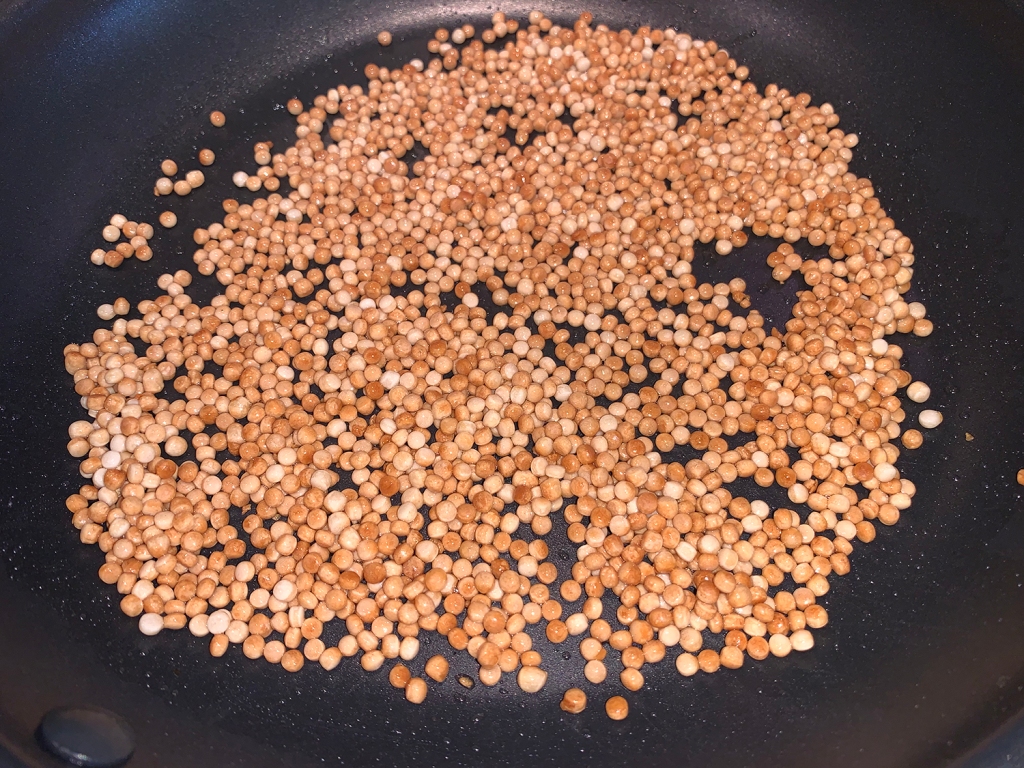
In a medium saucepan with a tight lid heat 1 tablespoon olive oil over medium heat. Add couscous; cook 2 minutes or until lightly toasted, stirring often. Add two orange strips, broth, and 1/4 teaspoon salt. Bring to boiling over medium-high heat; reduce heat. Cover; cook 12 to 15 minutes or until couscous is tender and all liquid is absorbed. Let cool; discard strips.
Meanwhile, using a paring knife, remove peel and pith from the other two oranges. Working over a small bowl to catch juices, cut out each segment from membranes. (Or slice into wheels.)
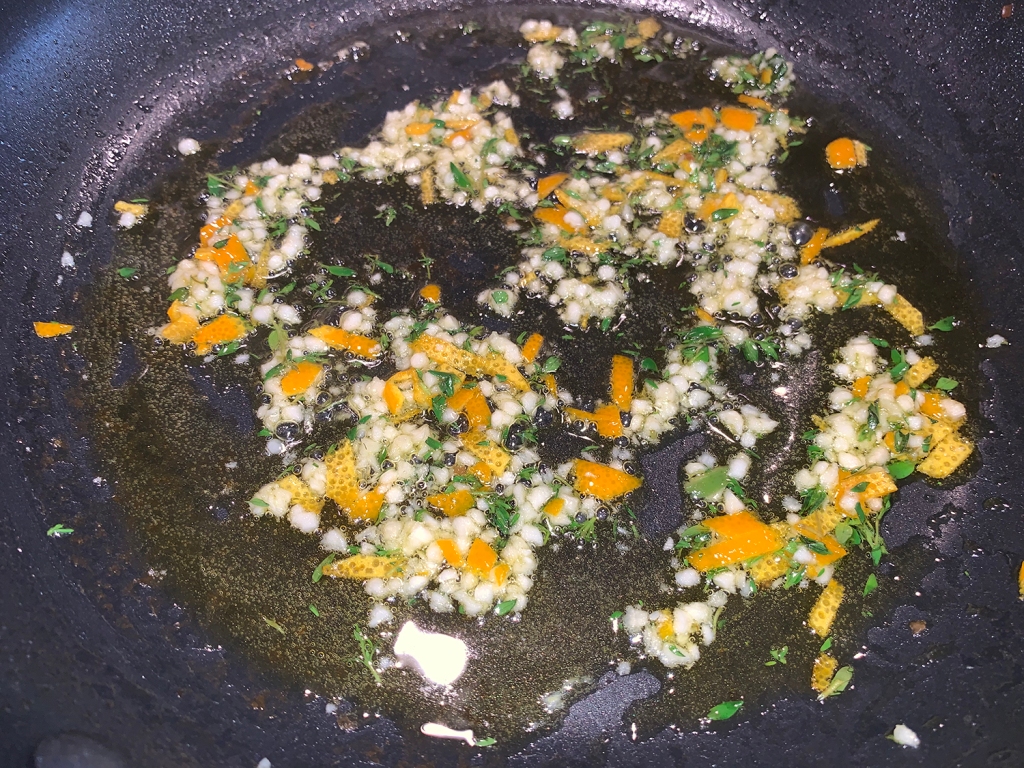
For citrus oil: Chop enough of the remaining orange strips to get 1 tablespoon In a 10-inch skillet combine chopped strips, remaining 2 tablespoons olive oil, the garlic, and thyme. Heat over low heat 5 minutes or until warm; set aside.
To serve, on a platter combine orange segments and juices, couscous, red onion, pinenuts and olives. Drizzle with red wine vinegar. Spoon citrus oil over top. Sprinkle with salt and black pepper, and, if desired, crushed red pepper.
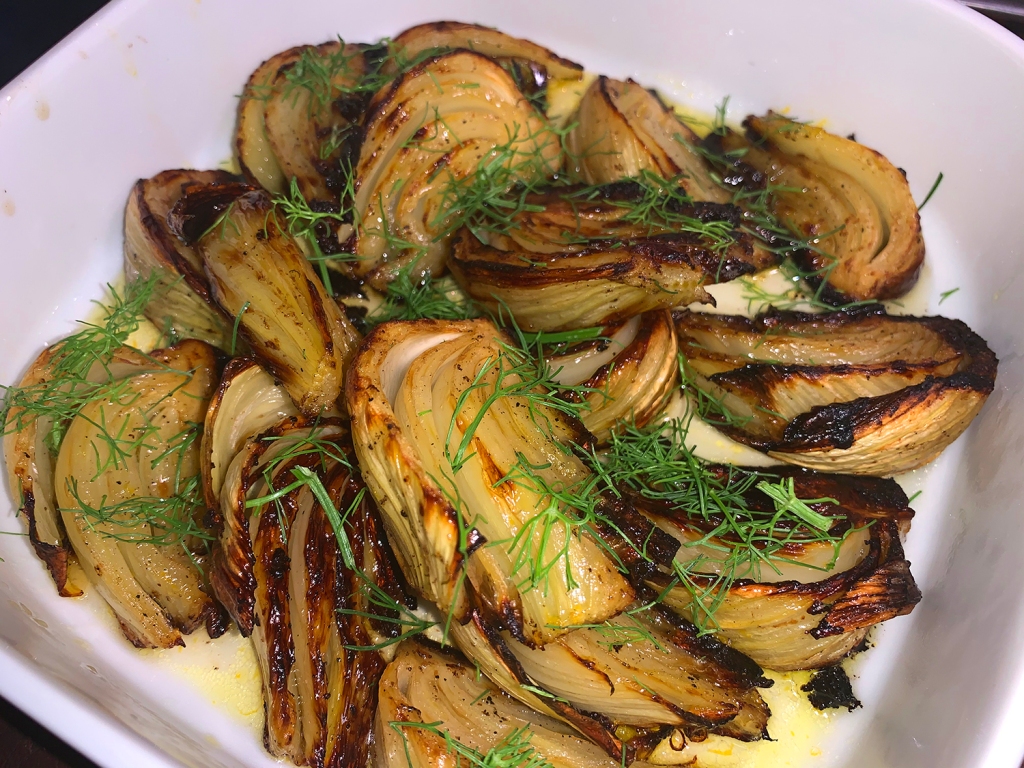
Fennel is a love it or hate it vegetable because of the intense anise flavors. But roasting the bulbous veggie helps mellow the licorice notes and turns its fibrous texture luxuriously creamy. For this roasted fennel, Cook’s Illustrated (CI) began by cutting the bulbs into wedges, which had two benefits: It provided good surface area for browning, and the attached core kept the pieces intact.
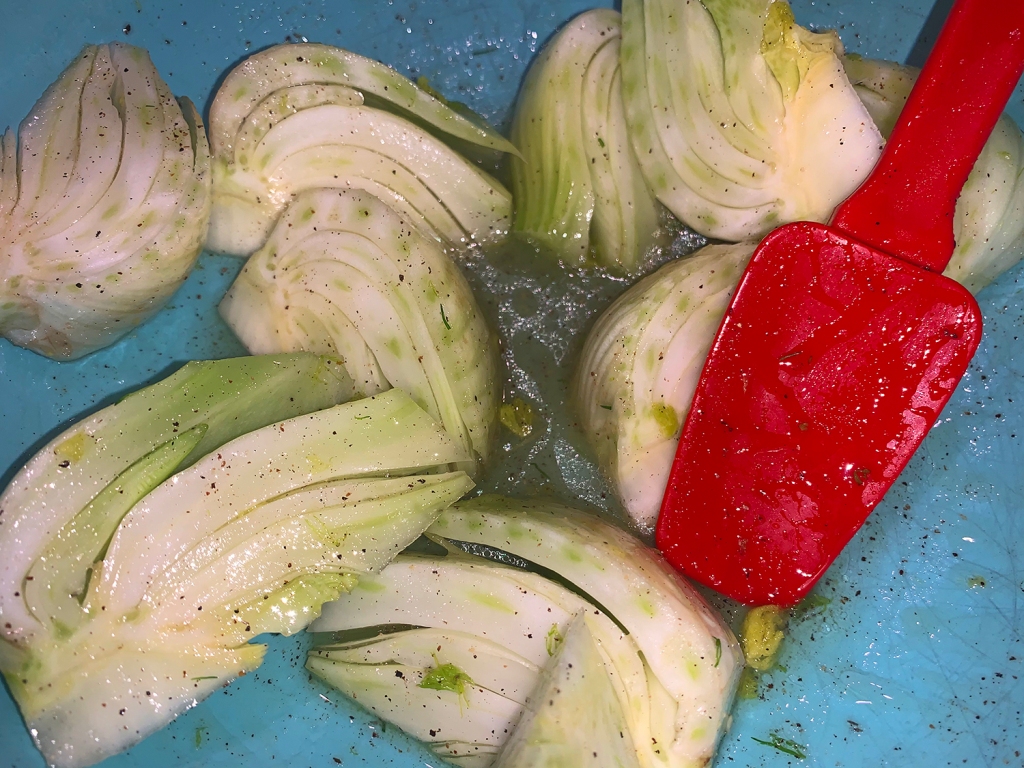
Covering the pieces with foil for most of the cooking time allowed them to steam and turn creamy; then remove the foil for the last 10 minutes of roasting so that they can turn golden and deliciously caramelized. Toss the wedges with salted water before covering them, which provides moisture for steaming and helps get seasoning between the layers.
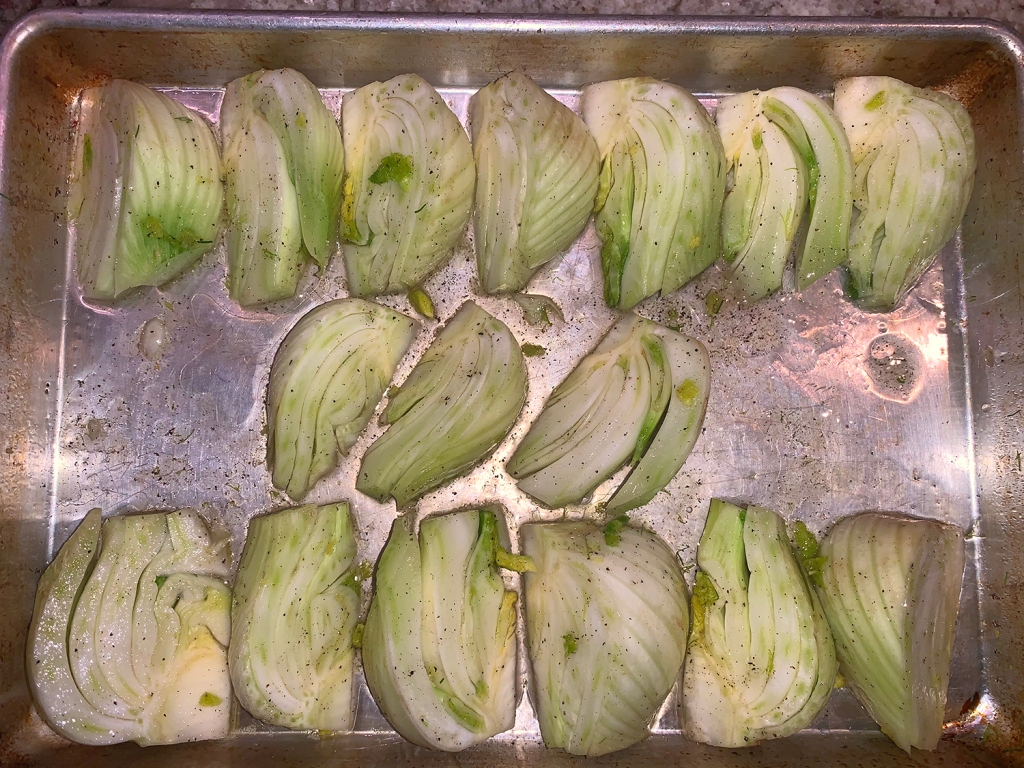
Arranging the pieces on the long sides of a rimmed baking sheet ensures that all the pieces get equal exposure to the heat and browned evenly. However, the original recipe did not specify what size rimmed baking sheet and we used the smaller quarter sheet pan instead of a half sheet pan. Because of that, we think it took much longer for the liquid to evaporate, thus much longer for the fennel wedges to brown. In fact, we even put them under the broiler at the end for a minute or so.
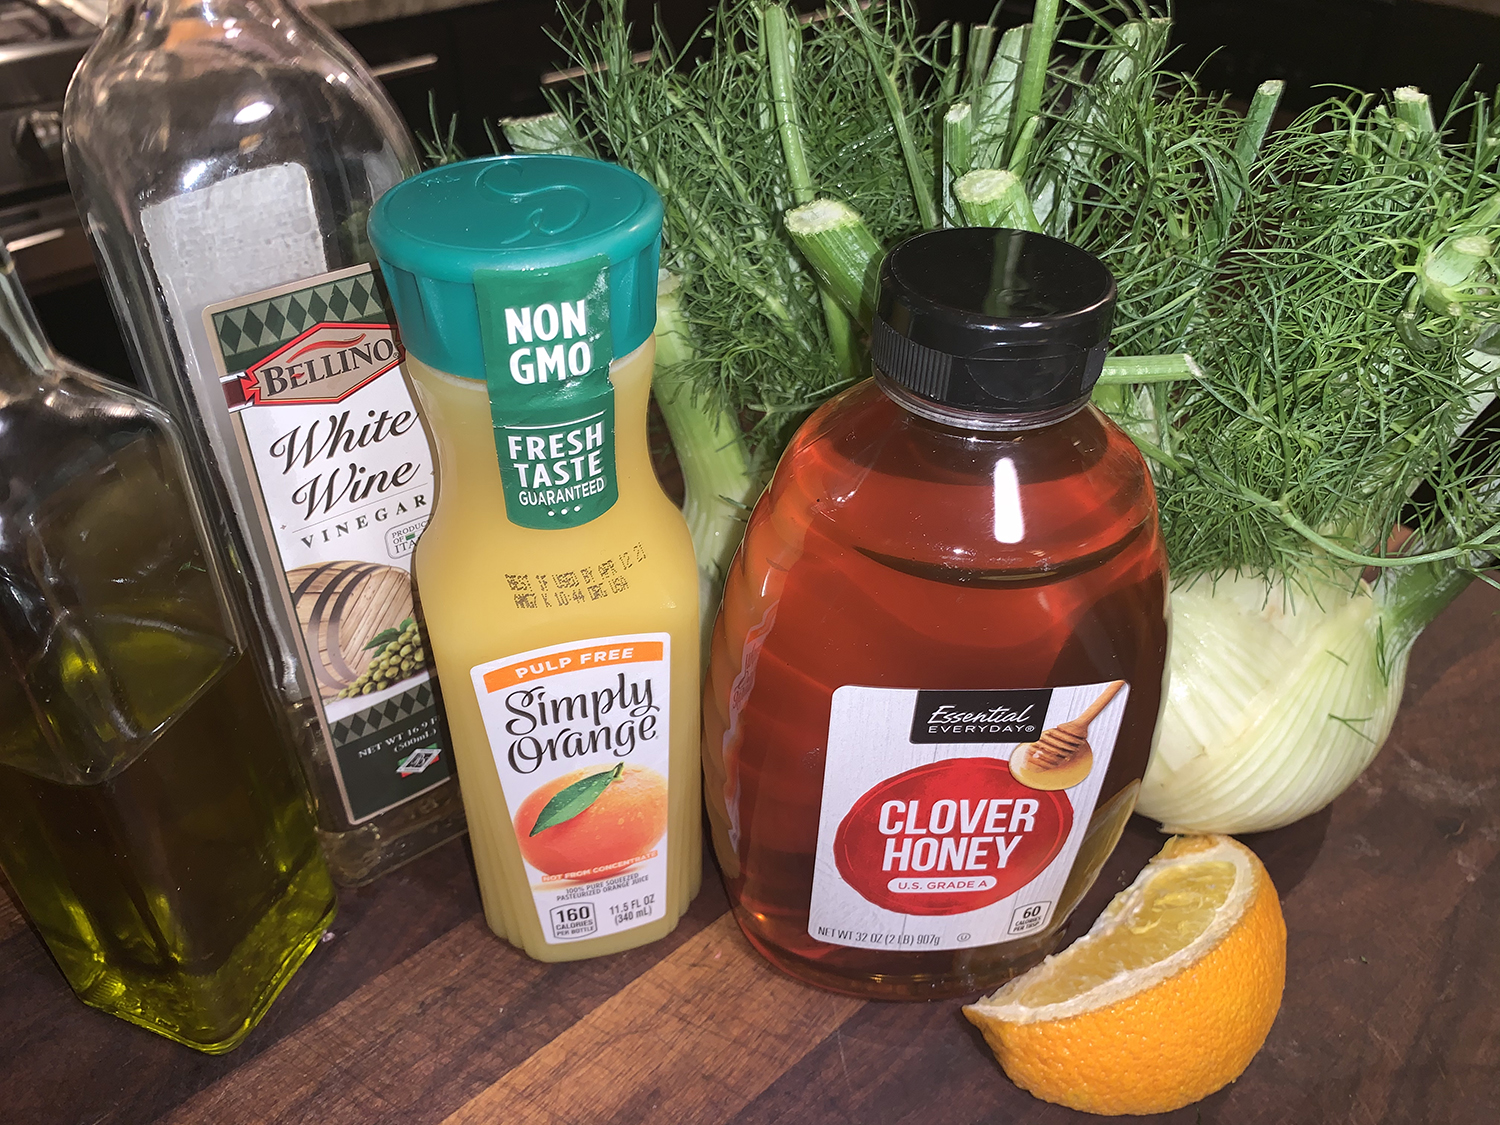
The tart dressing made with orange juice and honey is the perfect complement to the sweet fennel. WOW, we practically swooned when eating it! And it was a great side dish to complement our Sear Roasted Salmon entrée, but I changed the number of servings from 4-6 to 3-4; we almost finished it off between the two of us.
CI Note: Look for fennel bulbs that measure 3½ to 4 inches in diameter and weigh around 1 pound with the stalks (12 to 14 ounces without); trim the bases very lightly so that the bulbs remain intact.
2 fennel bulbs, trimmed of stalks (but save some fronds for garnish), bases lightly trimmed
2 Tbsp. fronds chopped coarse, stalks discarded
2 Tbsp. water
1 tsp. kosher salt
3 Tbsp. vegetable oil
¼ tsp. pepper
Dressing
1 Tbsp. extra-virgin olive oil
2 tsp. honey
1 ½ tsp. white wine vinegar
⅛ tsp. grated orange zest plus 1 tablespoon juice
Pinch kosher salt
Directions
FOR THE FENNEL: Adjust oven rack to lower-middle position and heat oven to 450 degrees. Spray rimmed baking sheet with vegetable oil spray.
Cut each fennel bulb lengthwise through core into 8 wedges (do not remove core). Whisk water and salt in large bowl until salt is dissolved. Add fennel wedges to bowl and toss gently to coat. Drizzle with oil, sprinkle with pepper, and toss gently to coat.
Arrange fennel wedges cut side down along 2 longer sides of prepared sheet. Drizzle any water in bowl evenly over fennel wedges. Cover sheet tightly with aluminum foil and roast for 20 minutes.
Remove the foil from the sheet and continue to roast until side of fennel touching the sheet is browned, 5 to 8 minutes longer (this may take even longer than that), rotating sheet halfway through roasting.
Flip each fennel wedge to second cut side. Continue to roast until second side is browned, 3 to 5 minutes (or more) longer. Transfer to serving dish.
FOR THE DRESSING: While fennel roasts, whisk all ingredients together in small bowl.
Whisk dressing to recombine when ready to use. Drizzle dressing over fennel, sprinkle with fennel fronds, and serve.
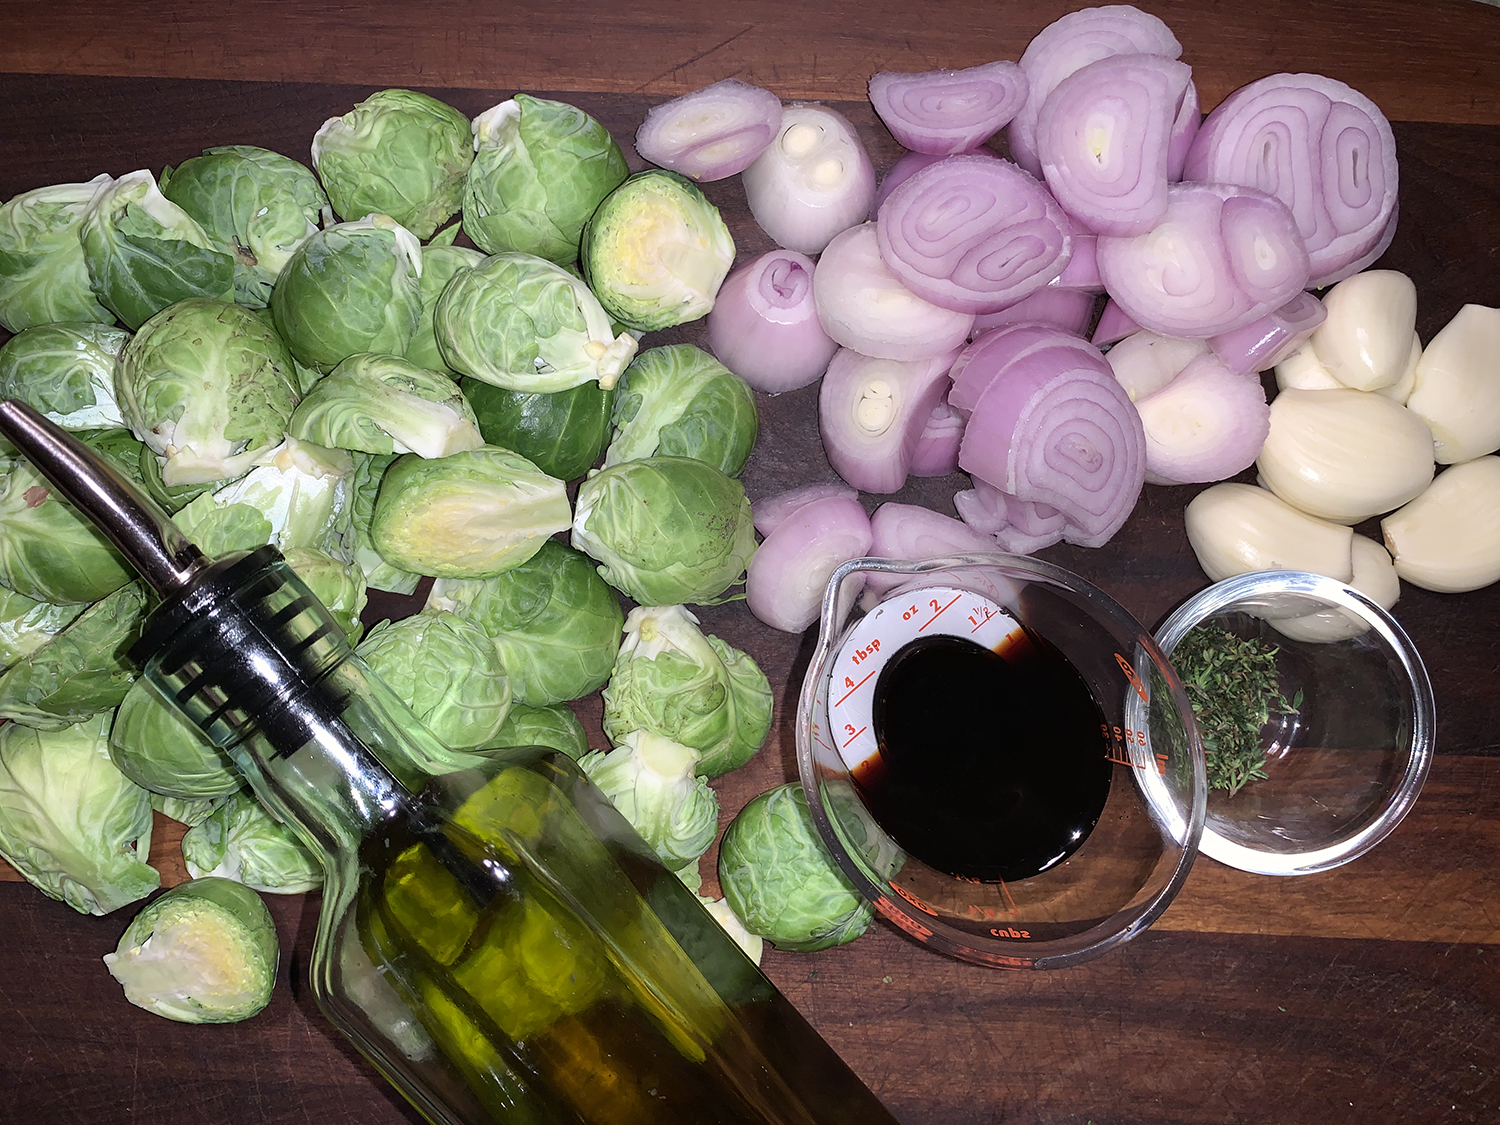
Brussels sprouts was one veggie that I steered clear of for years, mostly because they were never cooked properly and/or lacked any depth of flavor. But when I met Russ, he made a side of them for some home cooked meal when we first started dating, and I became a convert.
Over the following decades, we have often added Brussels sprouts to a menu, trying a whole host of various recipes. This one is a simple sauté of shallots, sprouts, and garlic, that are then browned in the oven and tossed with balsamic vinegar, and thyme. Toasted walnuts were also an ingredient, but not in this house as My Man detests them. You could always make some and serve them separately for those who want a nutty crunch.
I “Lynnized” the recipe to fit our preferences and pare back the 6-8 servings to 3-4. The ingredients list and directions speak to my changes.
1 lb. Brussels sprouts, tough outer leaves removed, base trimmed, sprouts cut in half
1 Tbsp. extra virgin olive oil
4 large shallots, peeled and thickly sliced
4 large cloves garlic, peeled, sliced in half
2 Tbsp. balsamic vinegar
Salt and pepper to taste
3/4 tsp. fresh thyme leaves or 1/4 teaspoon dried thyme
Directions
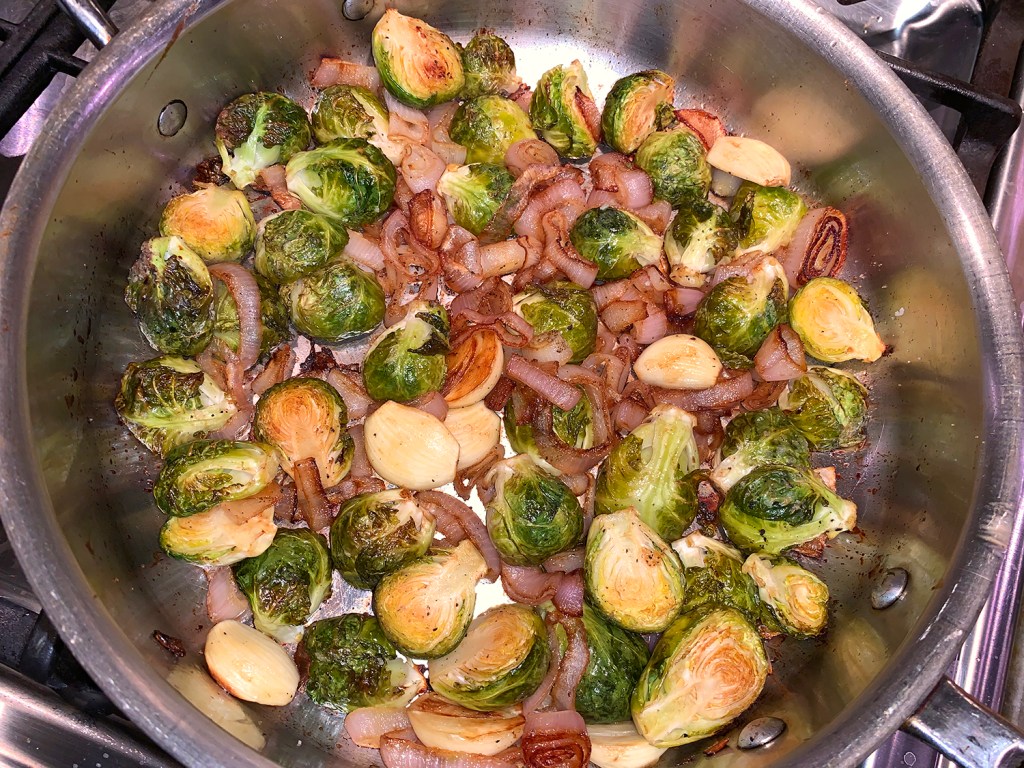
Preheat oven to 425°F.
Heat the olive oil in an oven-safe sauté pan on medium high heat. Add the shallots, spread them out in an even layer, lower the heat to medium low, and let them cook for 6 to 8 minutes, stirring occasionally, until softened and lightly browned.
Add the Brussels sprouts and the garlic to the shallots. Cook for 5 to 6 minutes more, stirring occasionally, until the sprouts begin to brown.
Drizzle with 1 1/2 tablespoons of balsamic vinegar. Sprinkle with salt and pepper. Toss to coat.
Place in oven, uncovered. Roast at 425°F for 15 to 20 minutes, until cooked through and caramelized on the edges.
Remove from oven. Sprinkle with remaining 1/2 tablespoon of balsamic vinegar and the thyme. Stir to combine. Add more salt and pepper to taste.
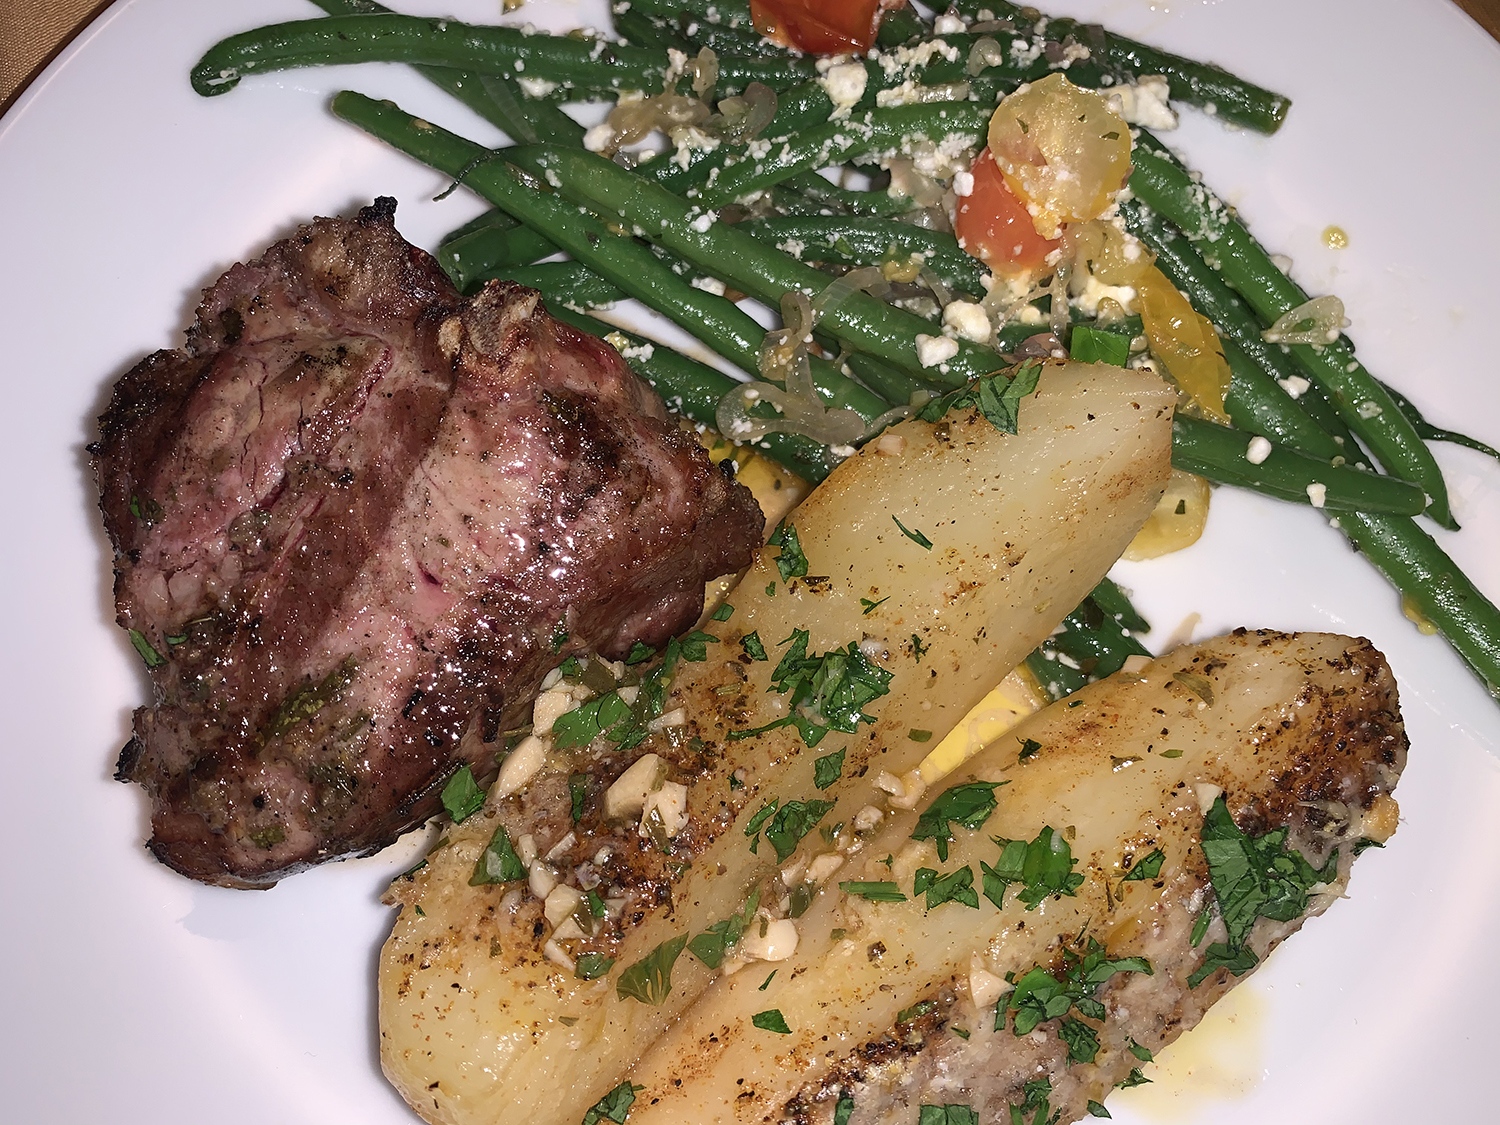
We were Going to the Greek for dinner one Sunday evening when son David, and his lovely Greek girlfriend Vyktorya (Vikki) were paying a visit. It’s always a little tricky with Vikki (rhyme intended) who was a staunch vegan for quite some, but now does eat meat on occasion. Lucky for us lamb is one she enjoys. (Something to do with the Greek ancestry perhaps?)
Once we settled on the entrée, we had to come up with sides that would complement the Greek flavors of the lamb marinade. Potatoes were kind of a no-brainer, and Russ quickly settled on these Best Roasted Greek Potatoes that he found themediterraneandish.com website.
To achieve just the right texture, first the potatoes are baked covered for 40 minutes or so in plenty of liquid—olive oil, lemon juice, and broth. As they are covered, the potatoes tenderize as they absorb steam and take in the perfectly flavored liquid.
A little secret ingredient here is a sprinkle of Parmesan cheese added midway through baking.
4 large baking potatoes, peeled, washed, cut into wedges
8 large garlic cloves, chopped
4 Tbsp. extra virgin olive oil
1 lemon, juice of
1 ¼ cup vegetable or chicken broth
½ cup grated parmesan cheese
1 cup parsley leaves, roughly chopped
Directions
Preheat oven to 400 degrees F.
In a small bowl, mix together spices. Set aside.
Place potato wedges in a large lightly-oiled baking dish and sprinkle with the spice mix. Toss potatoes together briefly to evenly distribute spices.
In a bowl, whisk together chopped garlic, olive oil, lemon juice and broth. Pour into baking dish with potatoes.
Cover the baking dish with foil and place in the 400 degree F-heated oven for 40 minutes.
Remove from oven briefly. Uncover and sprinkle Parmesan cheese on the potato wedges. Return to oven uncovered to roast for another 10-15 minutes or until potatoes are cooked through and have turned a nice golden brown with a little crust forming.
To add more color, place the dish under the broiler for 3 minutes or so, watching carefully.
Remove from oven. Garnish with fresh parsley before serving.
Rounding out the Greek-themed dinner were grilled loin lamb chops with a garlic-oregano paste, and sautéed green beans and grape tomatoes with crumbled feta.
This savory herb-flecked sauté tastes just like stuffing, but without the bread—goodbye carbs! It embraces celery’s crisp texture and distinctive flavor. Found in a decade-old issue of Fine Cooking Magazine, it intrigued us enough to include as a side dish for our Smothered Chicken with Bourbon and Miso.
One rarely thinks of cooked celery as the star of a side dish. It typically takes a back burner as a mix-in to salads, additive to soups, or an accompaniment to hot wings. But here it shines and surprises. We have now added the recipe to our favorites and plan to serve to guests, especially those who are vegetarian.
1 medium leek, rinsed, halved lengthwise and thinly sliced crosswise (white and light green parts only)
6 stalks celery, cut in a diagonal in 1/2″ slices
Kosher salt
8 oz. cremini mushrooms, quartered
1 Tbsp. fresh lemon juice
1 1/2 tsp. finely chopped fresh rosemary
1 tsp. chopped fresh sage
2 Tbsp. chopped fresh flat-leaf parsley
Freshly ground black pepper
2 Tbsp. chicken broth or water
Directions
Heat a 12-inch skillet over medium heat. Add the oil, leek, and a pinch of salt; cook stirring often, until just tender, 3 to 4 minutes.
Add the mushrooms and another pinch of salt and cook until the mushrooms are lightly browned and tender, 4 to 5 minutes.
Add the celery and a pinch of salt and cook until crisp-tender, 5 to 8 minutes.
With a wooden spoon, stir in the lemon juice and scrape up any browned bits from the bottom of the pan.
Stir in the rosemary and sage and cook until fragrant, about 1 minute.
Stir in the parsley and season to taste with salt and pepper. Transfer the mixture to a bowl.
Return the pan to medium heat, add the chicken broth or water, and scrape up any remaining bits. Let this liquid reduce by half and then pour over the celery.
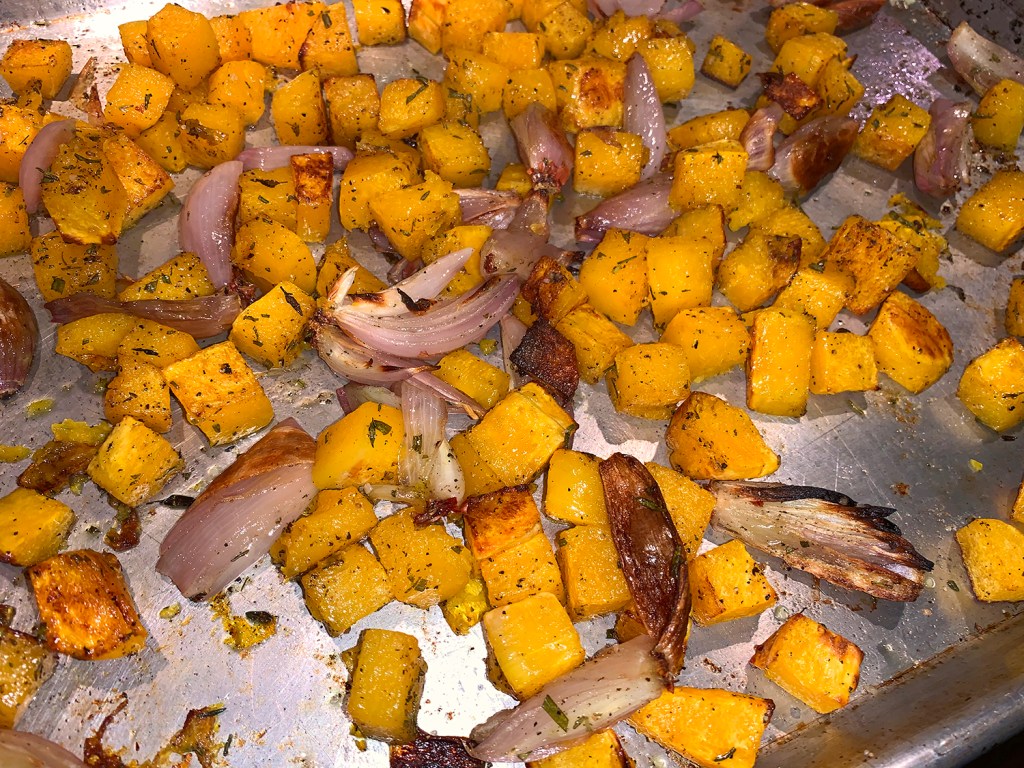
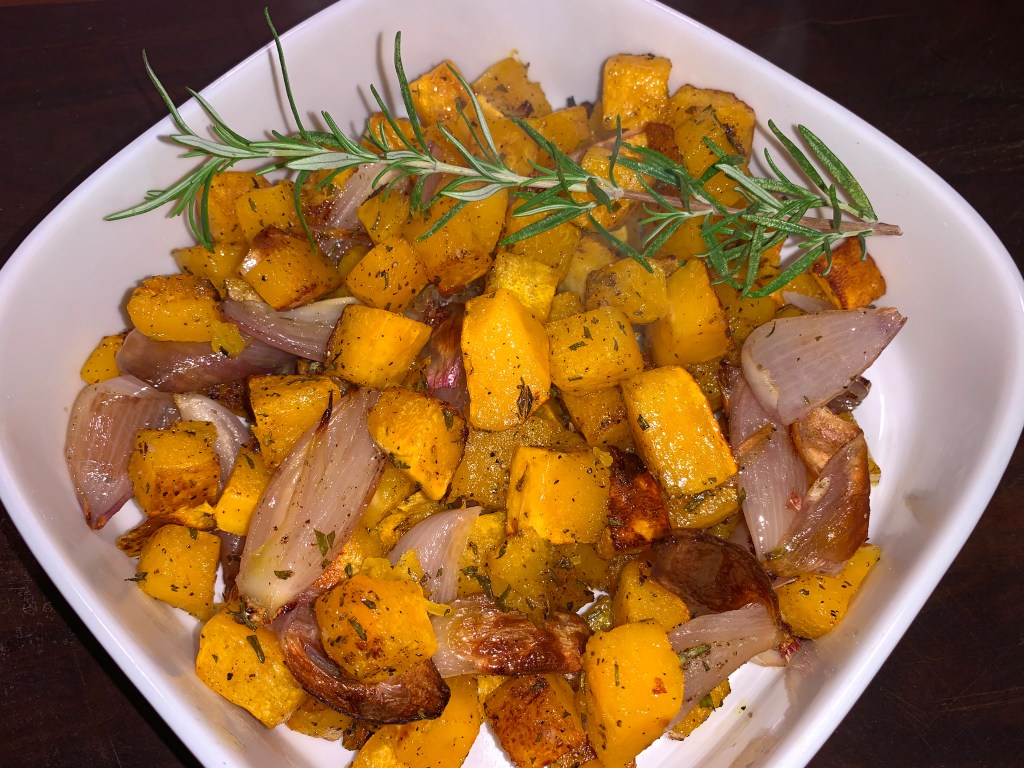
Butternut squash is a fall heavyweight in my opinion. It pairs well with a variety of flavors and can reinvent itself either sweet or spicy. In this case, we are talking naturally sweet which really develops as it roasts. And you all know that butternut squash is very nutritious with the flesh full of vitamins A and C.
It was a gift from our compost. I noticed squash vines starting to grow in our herb bed backed by a trellised fence. We hadn’t planted any squash so I knew it came from when we composted the garden earlier in the season. Plus the rosemary was freshly picked from our herb garden. Thank you Mother Nature!
Oops, I completely forgot to add the 1/2 teaspoon of granulated sugar. It really wasn’t needed taste-wise because our squash was naturally sweet, but the sugar was more a conductor for caramelization. Although our cubes were lightly browned without it.
This recipe calls for a specific amount of squash, so you may have some leftover. Ours weighed in at 3.3 pounds—a good bit larger than the recipe called for. After peeling and seeding, your squash will lose 2-3 ounces of weight. For example, a 3-pound squash will yield about 2 pounds 13 ounces of flesh. This recipe calls for 2 pounds of diced squash, you’ll want to look for a squash that is around 2 pounds, 3 ounces in weight.
If you have leftovers like us, you may want to sauté the extra cubes and use them in a future frittata, salad or side dish. The toughest part of this recipe is peeling the squash, so it is permissible to buy already cubed, just make sure they are cut to 3/4″ cubes and uniformly sized.
3 cups 3/4-inch-diced, peeled butternut squash (from about a 2-pound squash)
4 medium shallots, peeled, root end left intact, quartered
2 Tbsp. extra-virgin oil
1 tsp. chopped fresh rosemary
1 tsp. kosher salt
1/2 tsp. granulated sugar
1/2 tsp. freshly ground black pepper
Directions
Preheat oven to 450°F.
Put the squash cubes on a heavy-duty rimmed baking sheet. Add the shallot quarters to the squash.
Drizzle the olive oil over the vegetables; toss to coat. Sprinkle the rosemary, salt, sugar and pepper over the veggies. Toss to coat again and distribute evenly over the baking sheet.
Roast for 20 minutes. Stir, then continue rosting until the veggies are tender and lightly browned, 10-15 minutes more.
Before serving, taste and season with more salt if desired.