Tag Archives: main dish

Roast Leg of Lamb with Anchovy, Rosemary, Garlic and Piment d’Espelette

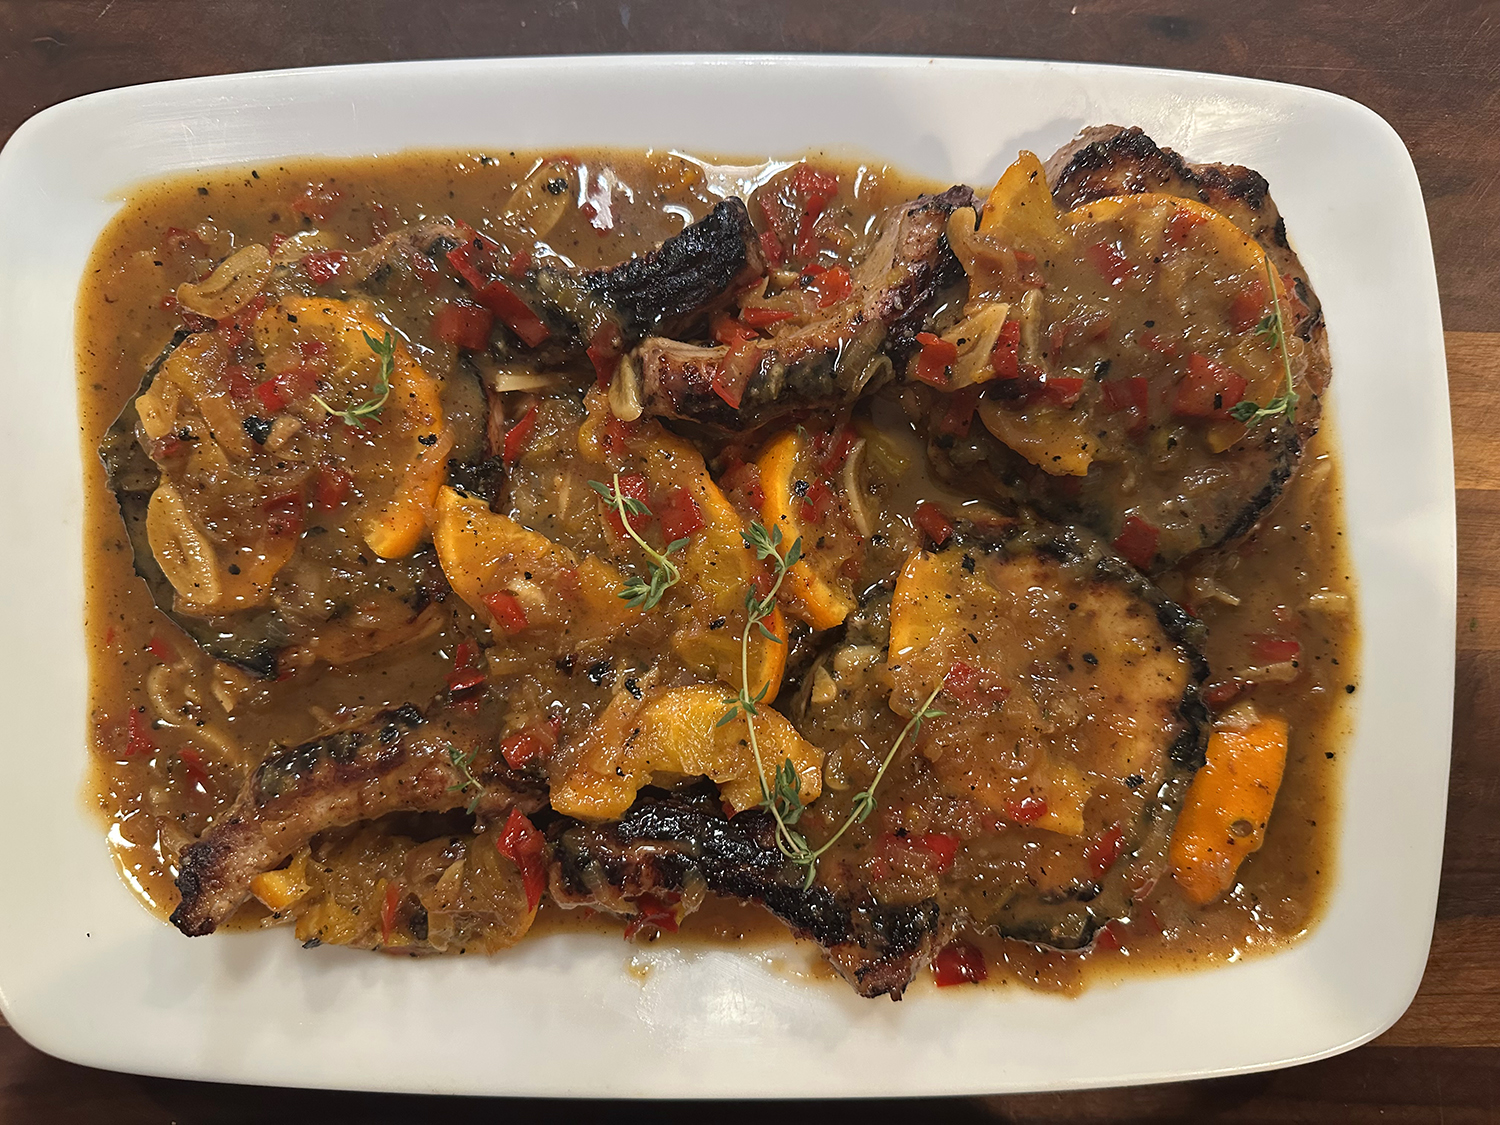
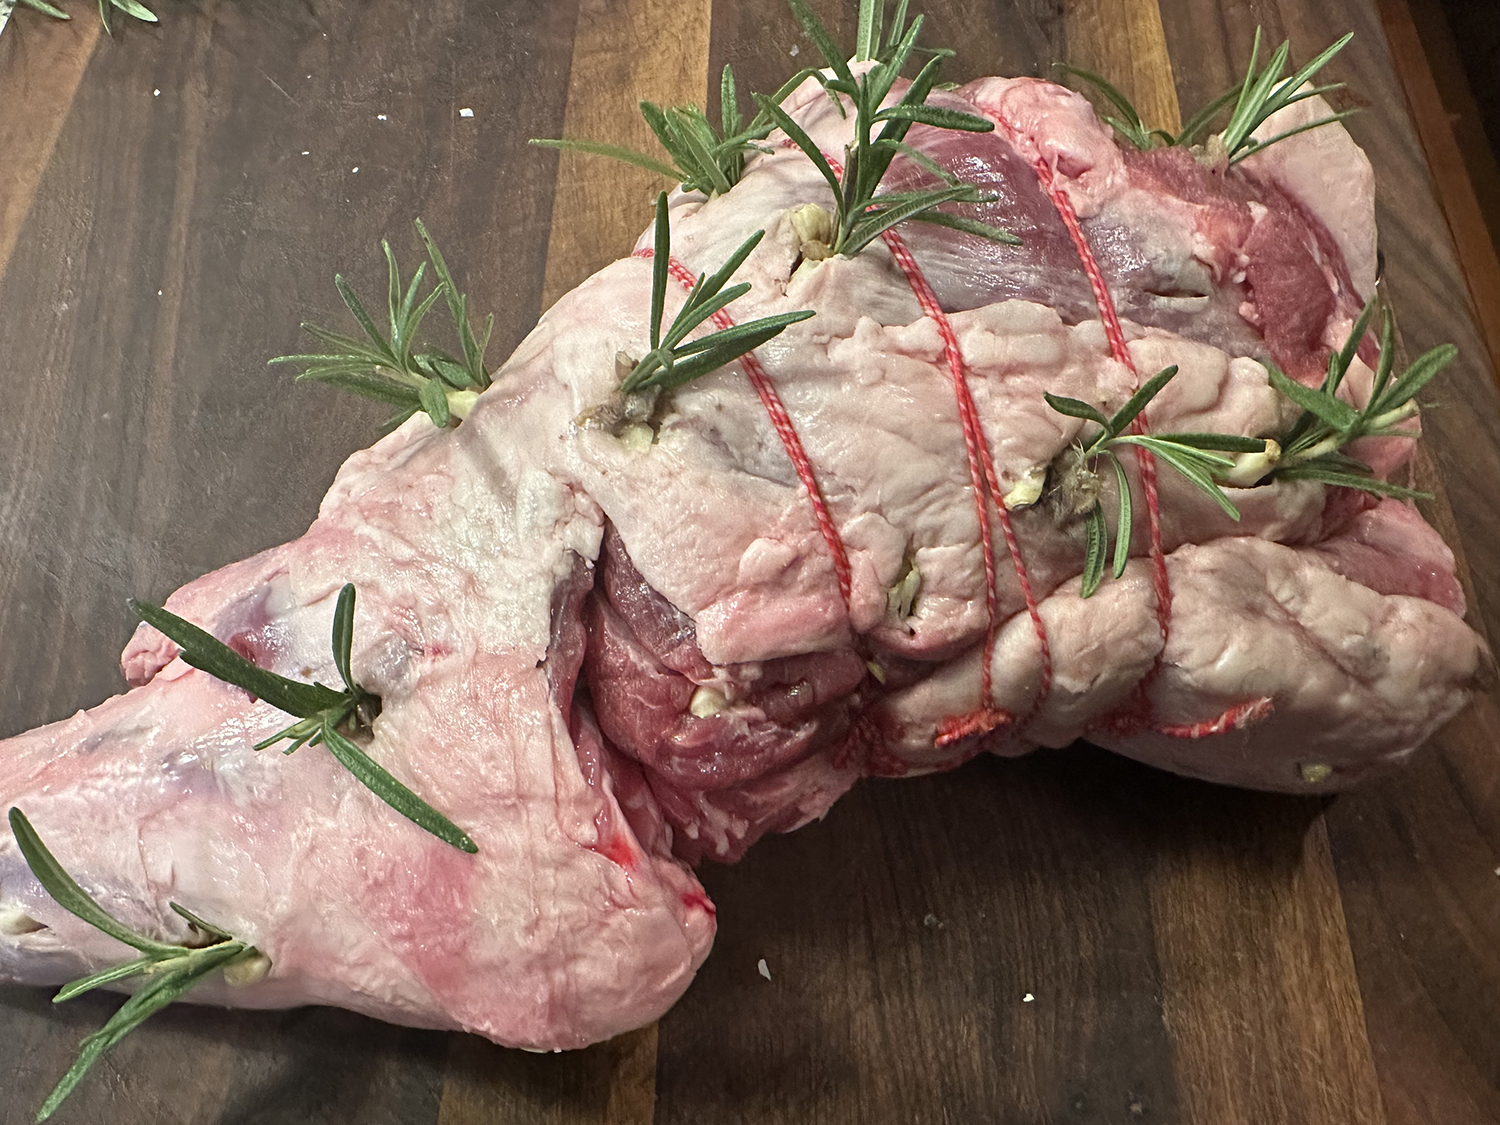
This lovely leg of lamb recipe hails from Molly Stevens’ cookbook All About Roasting, one of our go-to’s when it comes to roasting meat. Here, the lamb’s flavor is boosted with a combination of fresh rosemary, garlic and anchovies. But don’t get all squeamish, tucked into the meat, the anchovies dissolve during roasting, enriching the lamb a delicious, though elusive flavor that’s far less assertive than you might think.

Instead of black pepper, the roast is seasoned with piment d’Espelette, in which the light heat complements the lamb, but hot paprika (which we used) makes a good substitute. If you keep lard or have good bacon drippings, rub a little over the meat before roasting. It adds a wonderful richness to the drippings and helps deepen the caramelization of the surface.

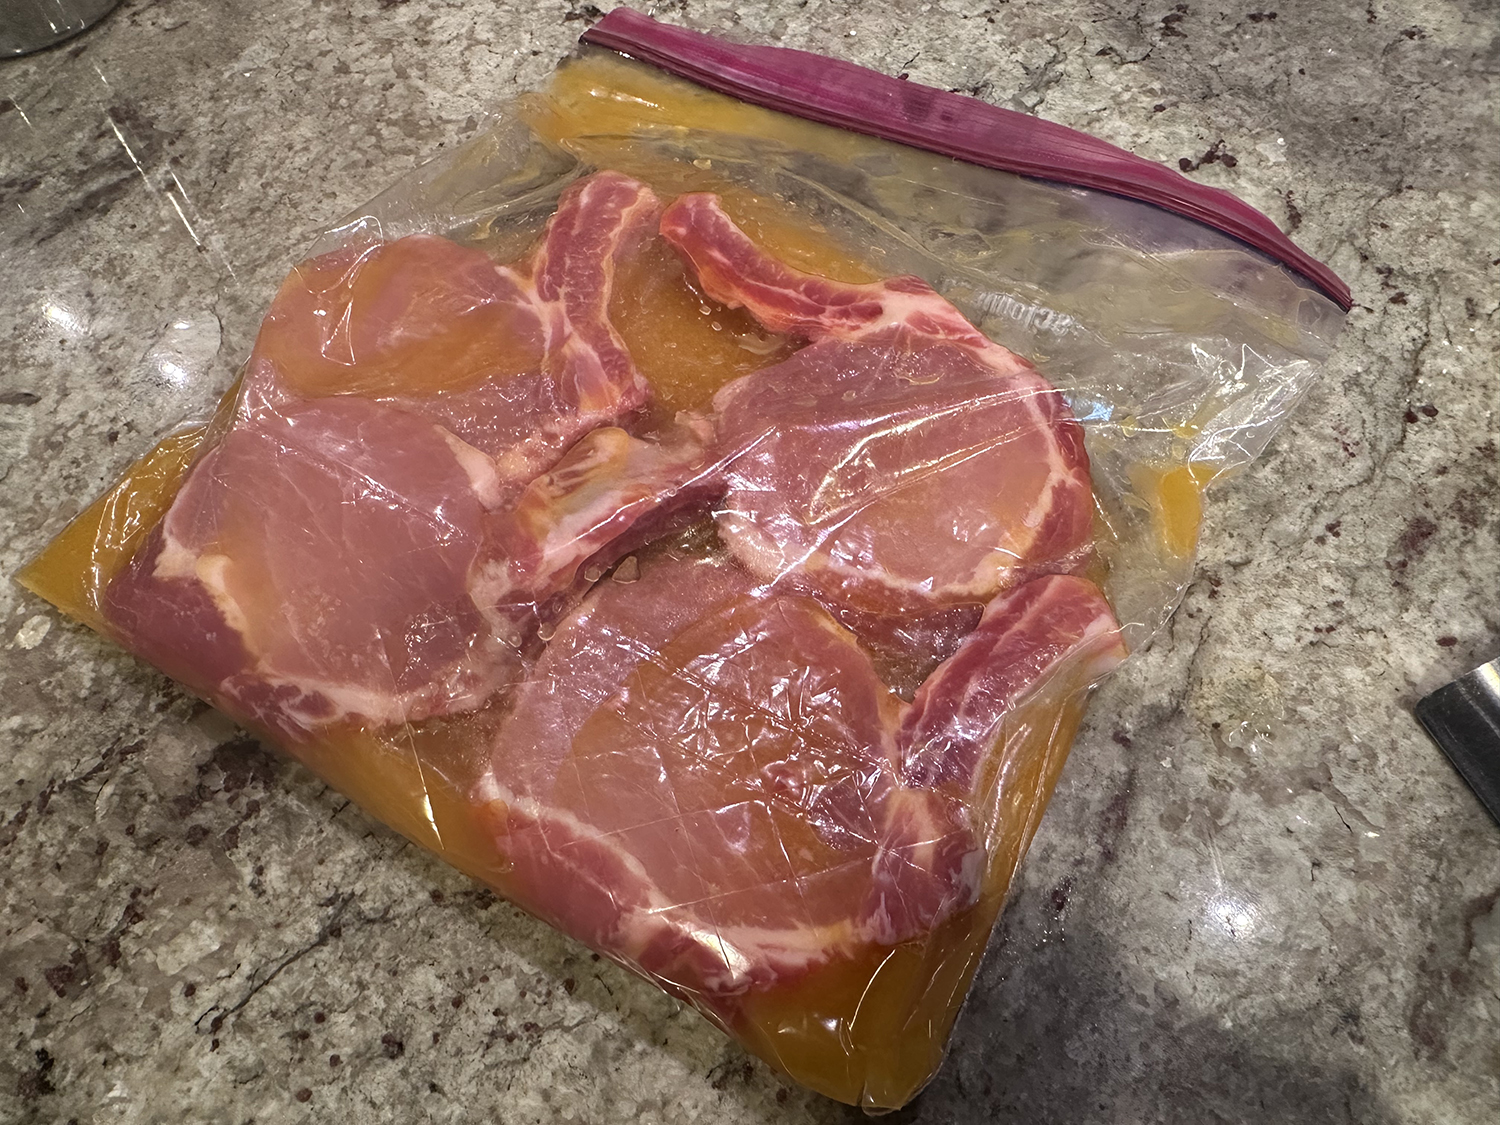
NOTES: For the best flavor and texture, season the meat 1 to 2 days ahead of cooking and refrigerate, uncovered. Then the lamb needs to sit at room temperature for about two hours before roasting.

Our 5-pound semi bone-in leg of lamb was a few pounds less than the recipe called for, and therefore took slightly less time. With no lard on hand, or any available that day at the store, we chose the olive oil option.

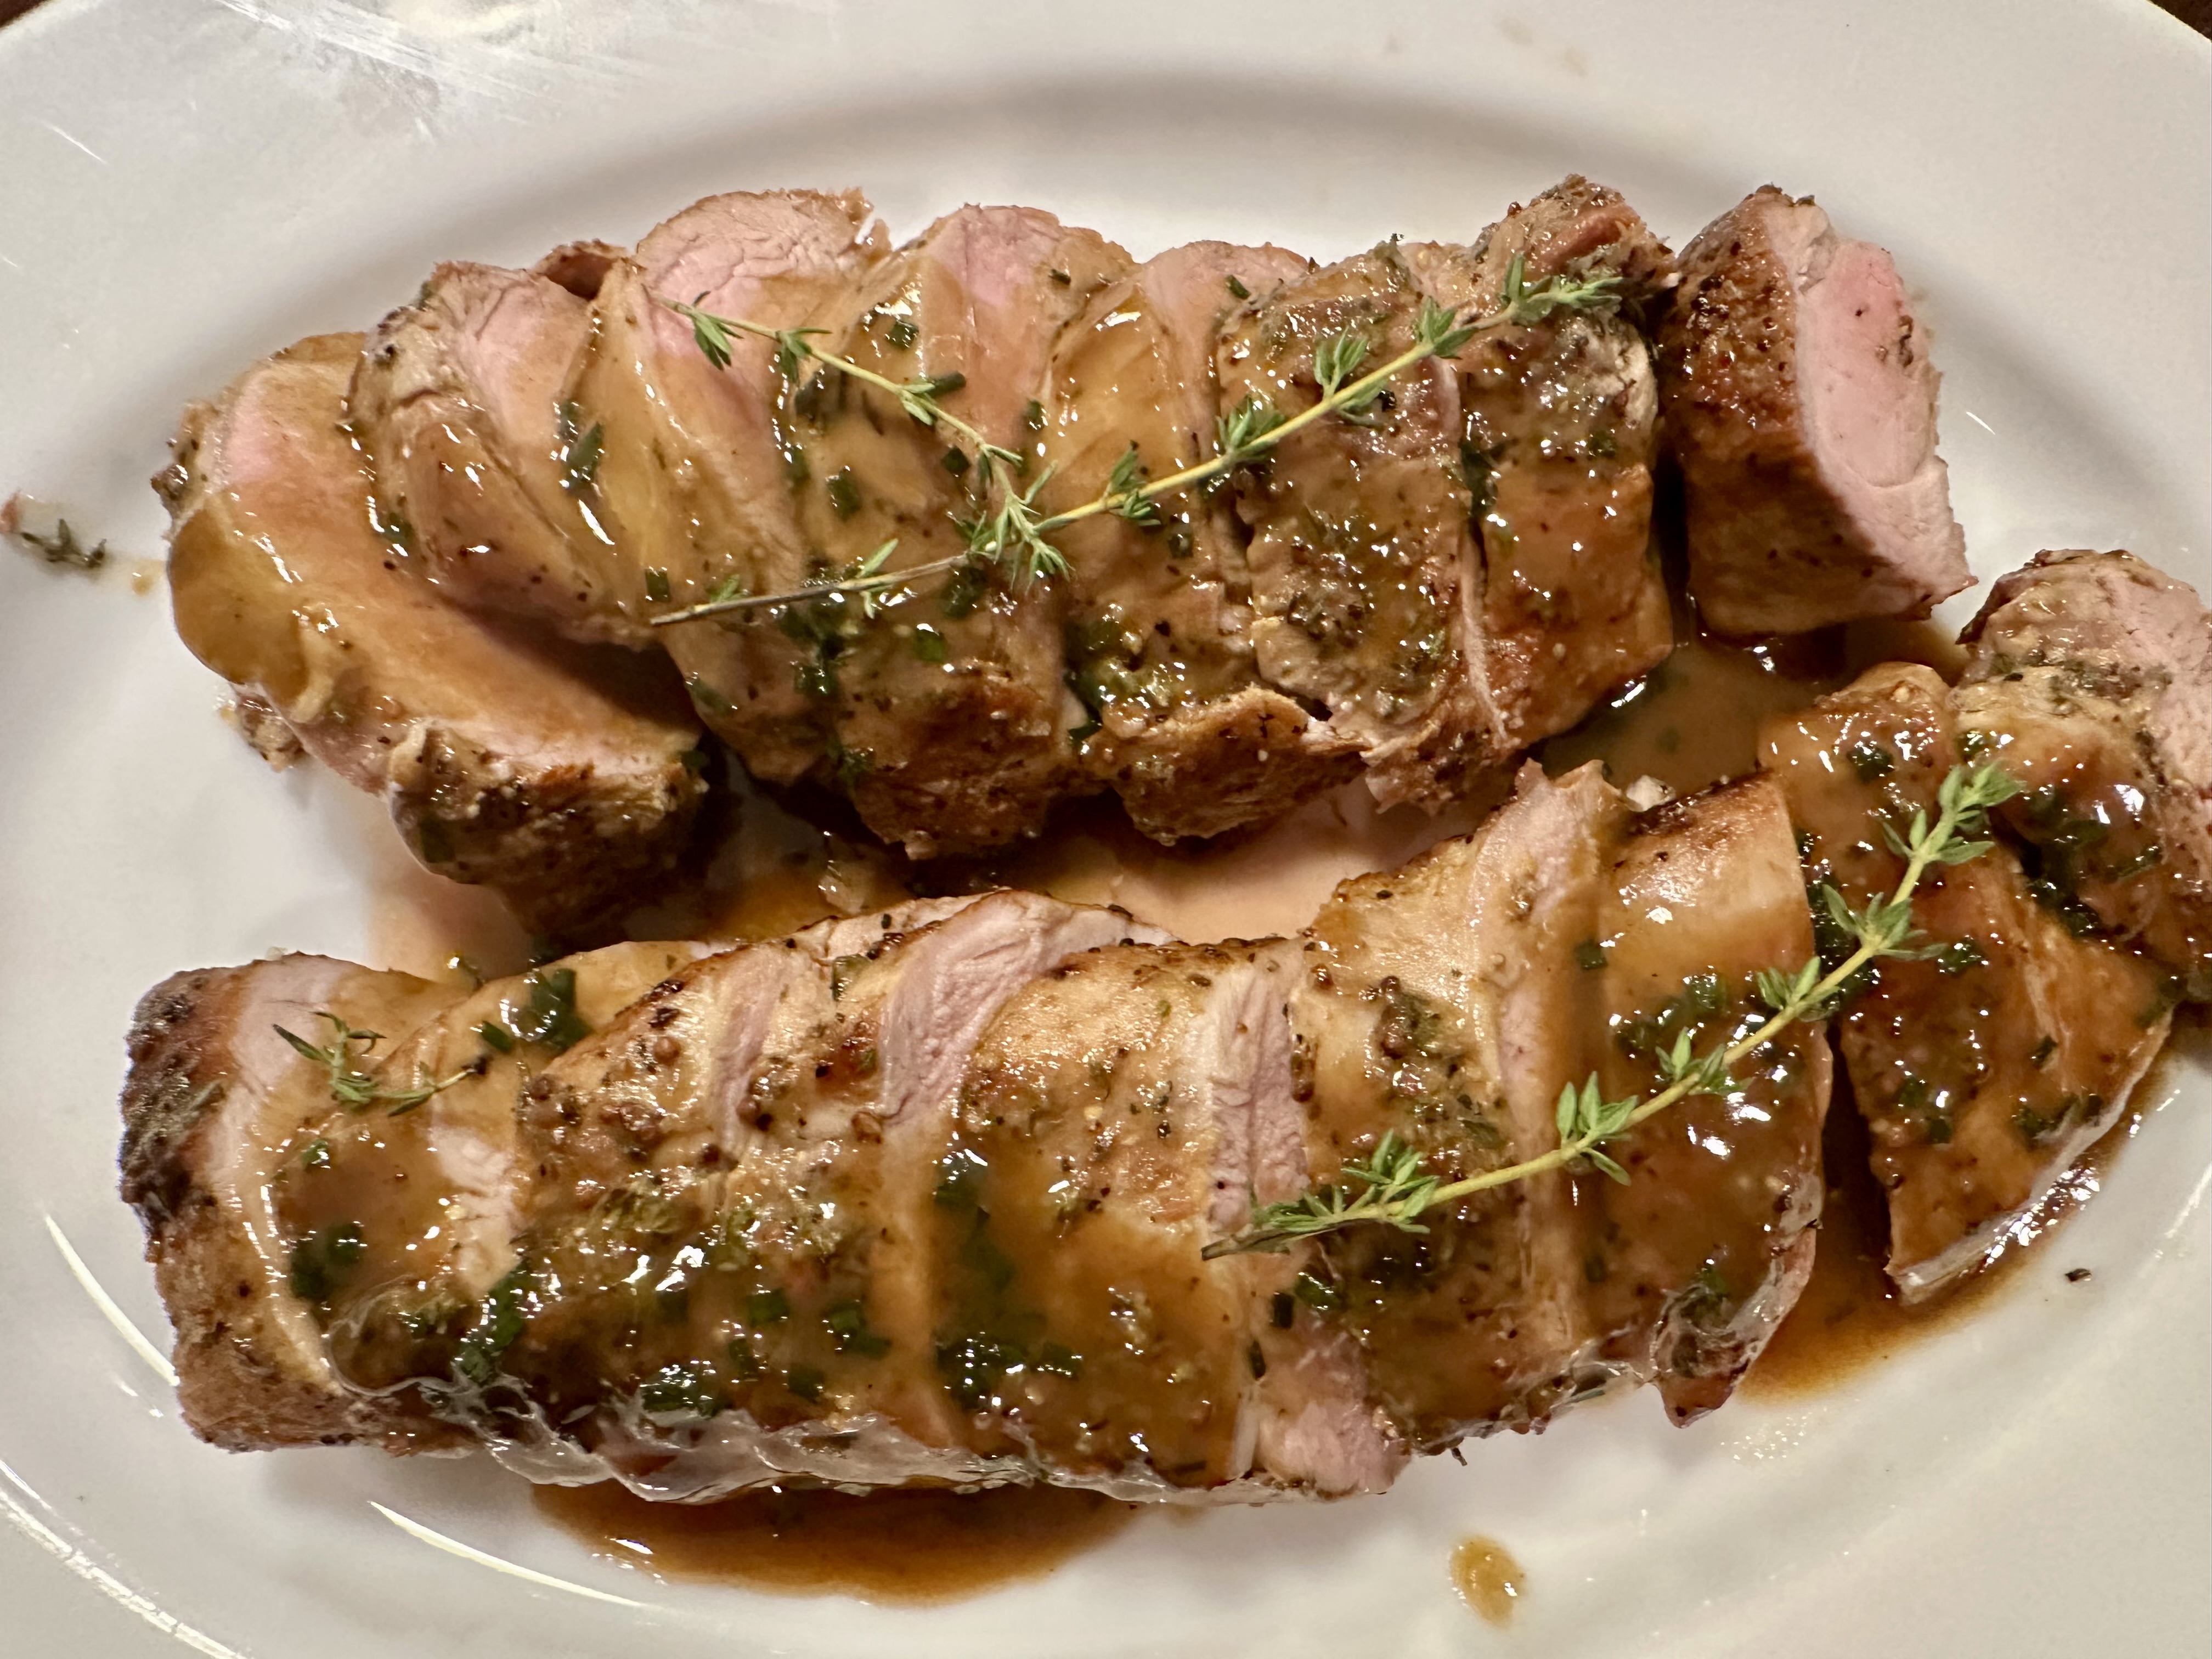
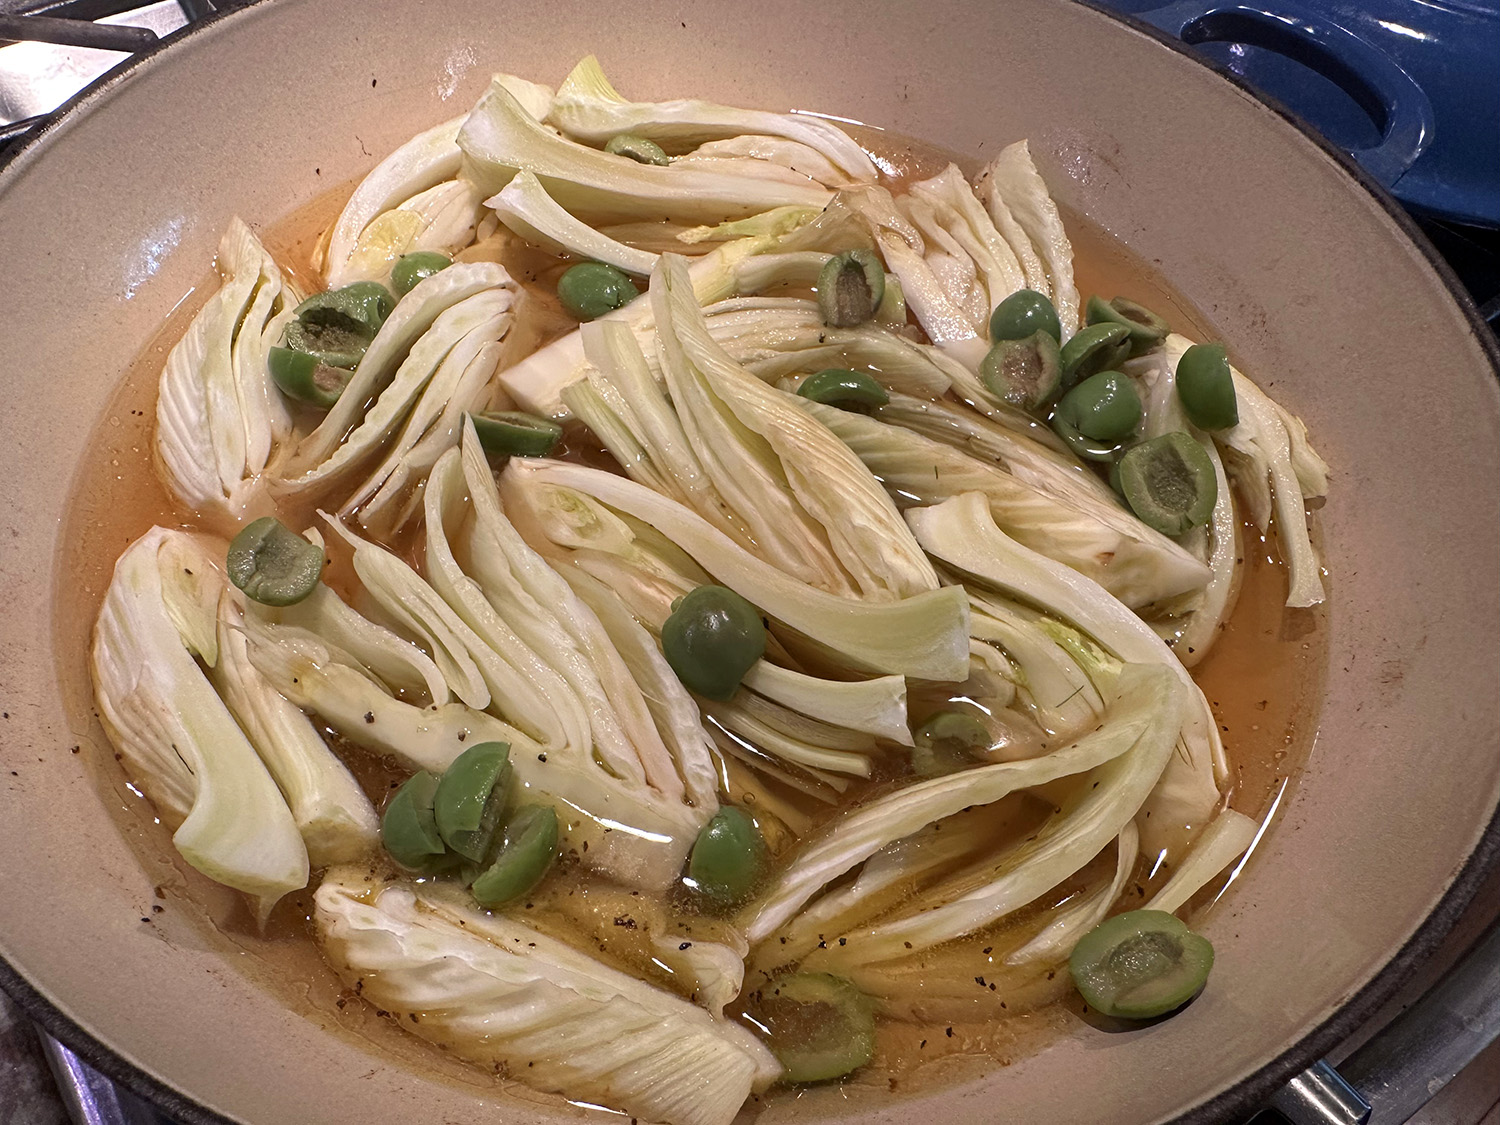
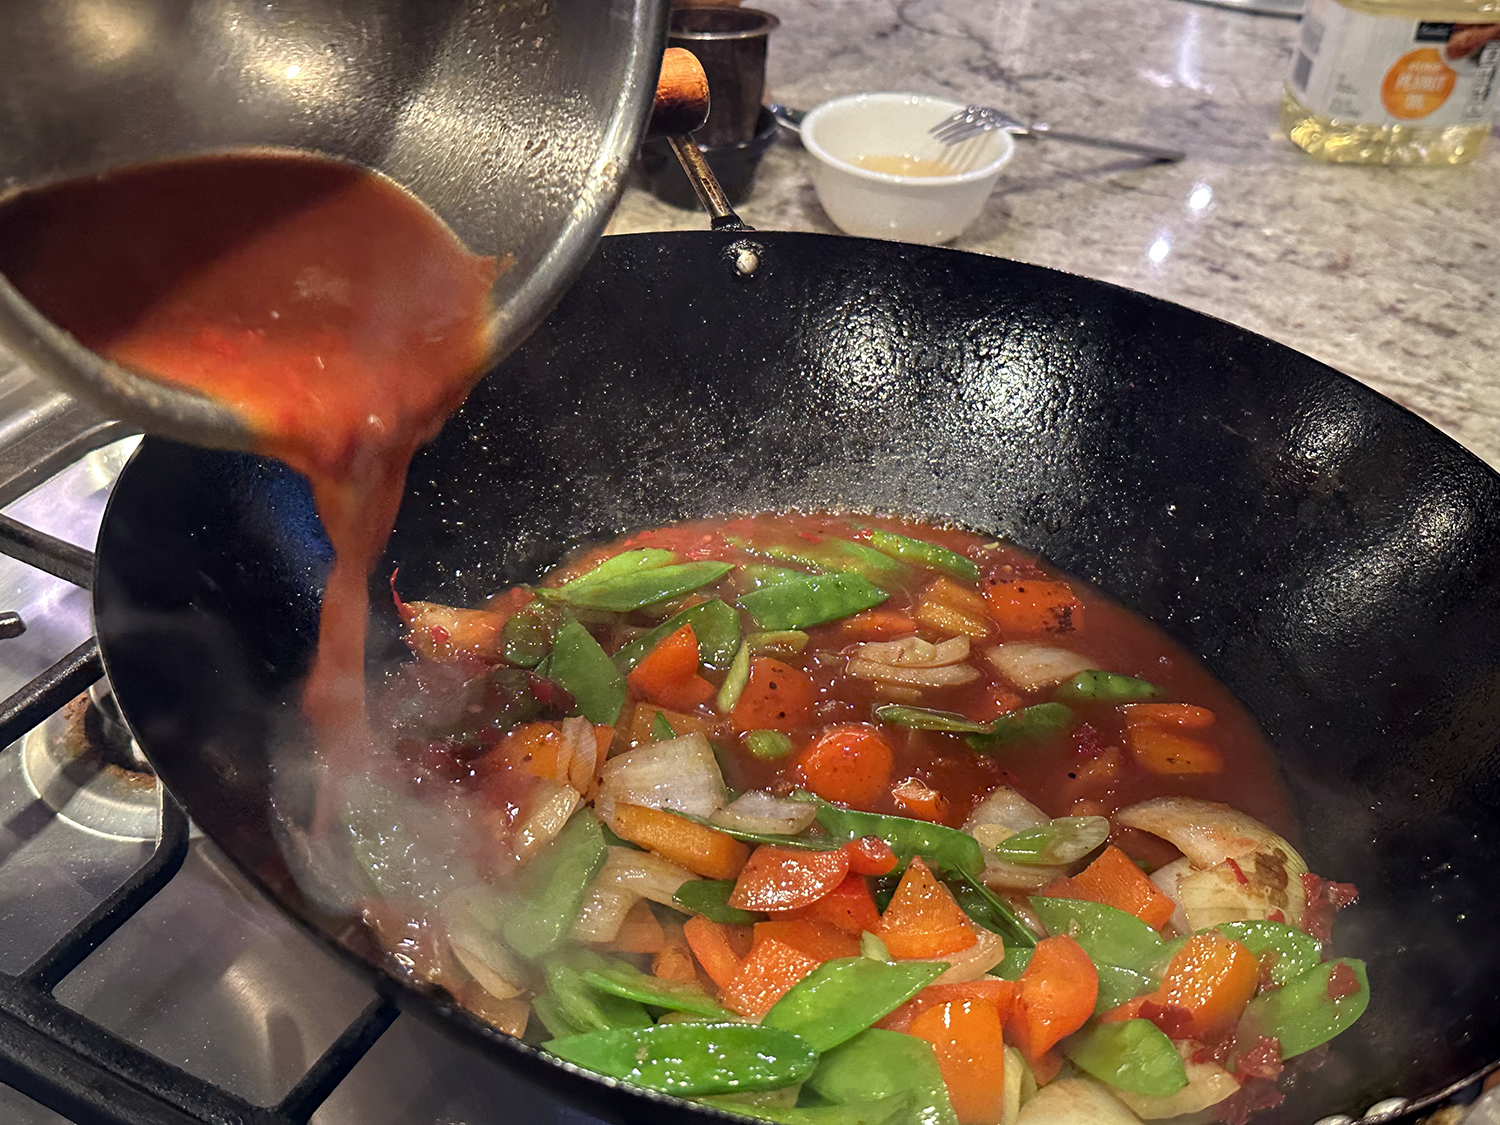
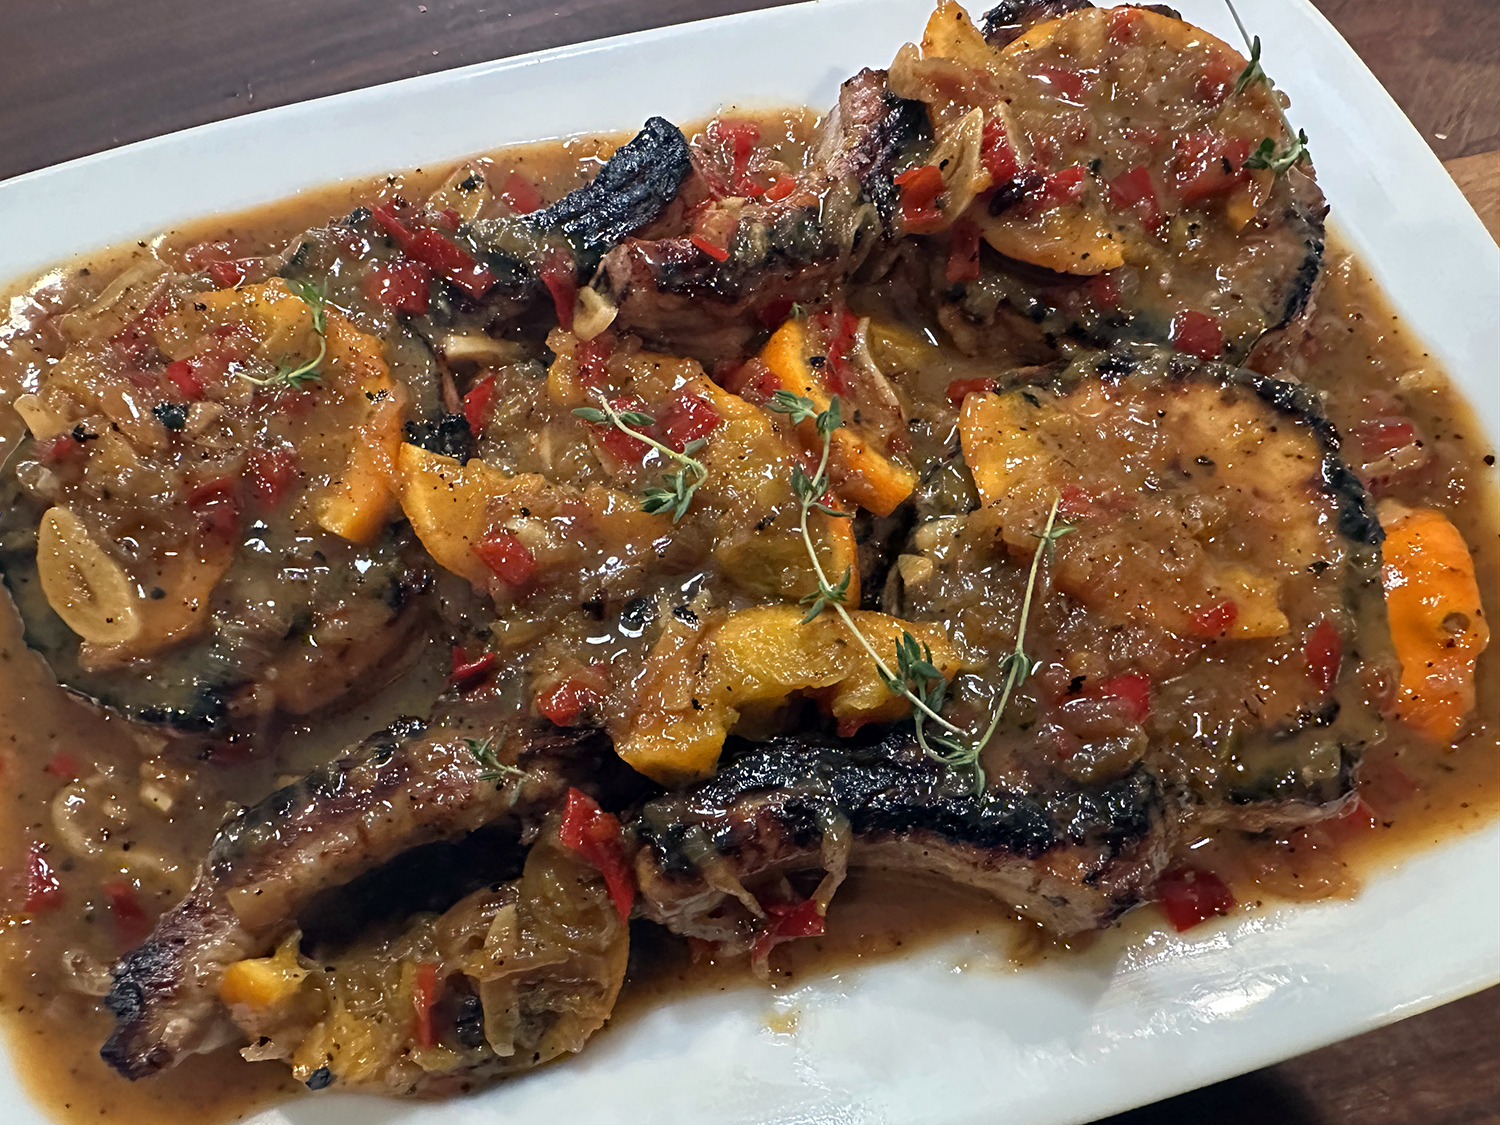
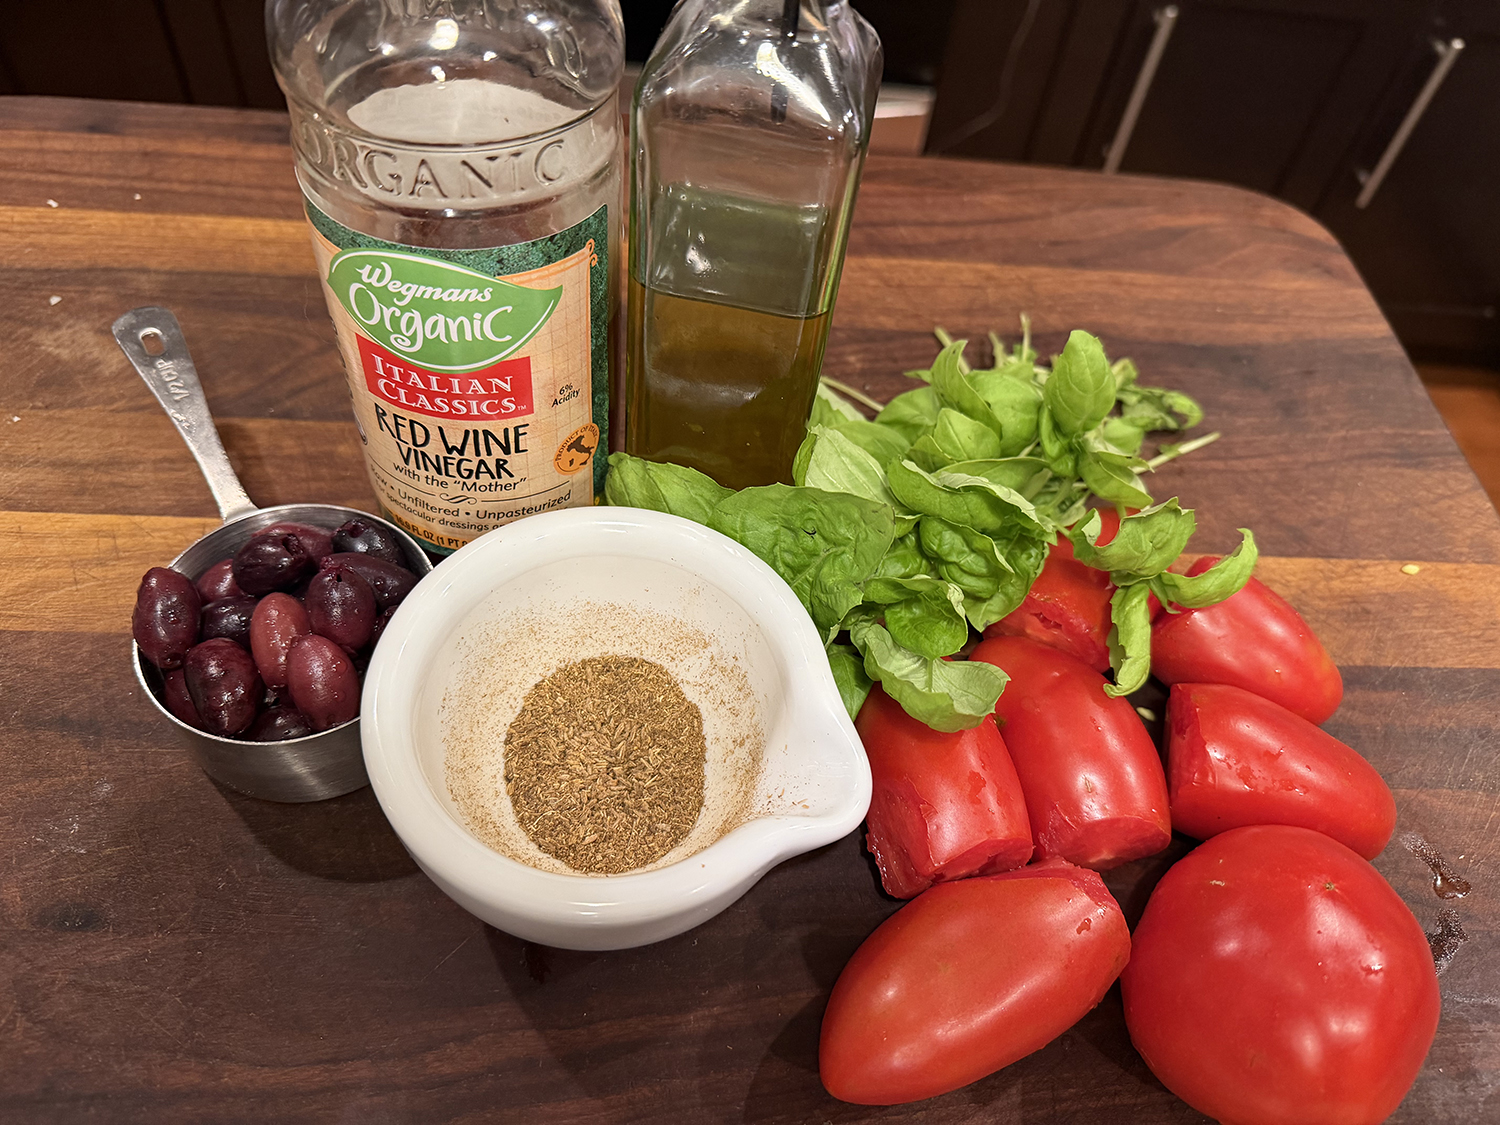
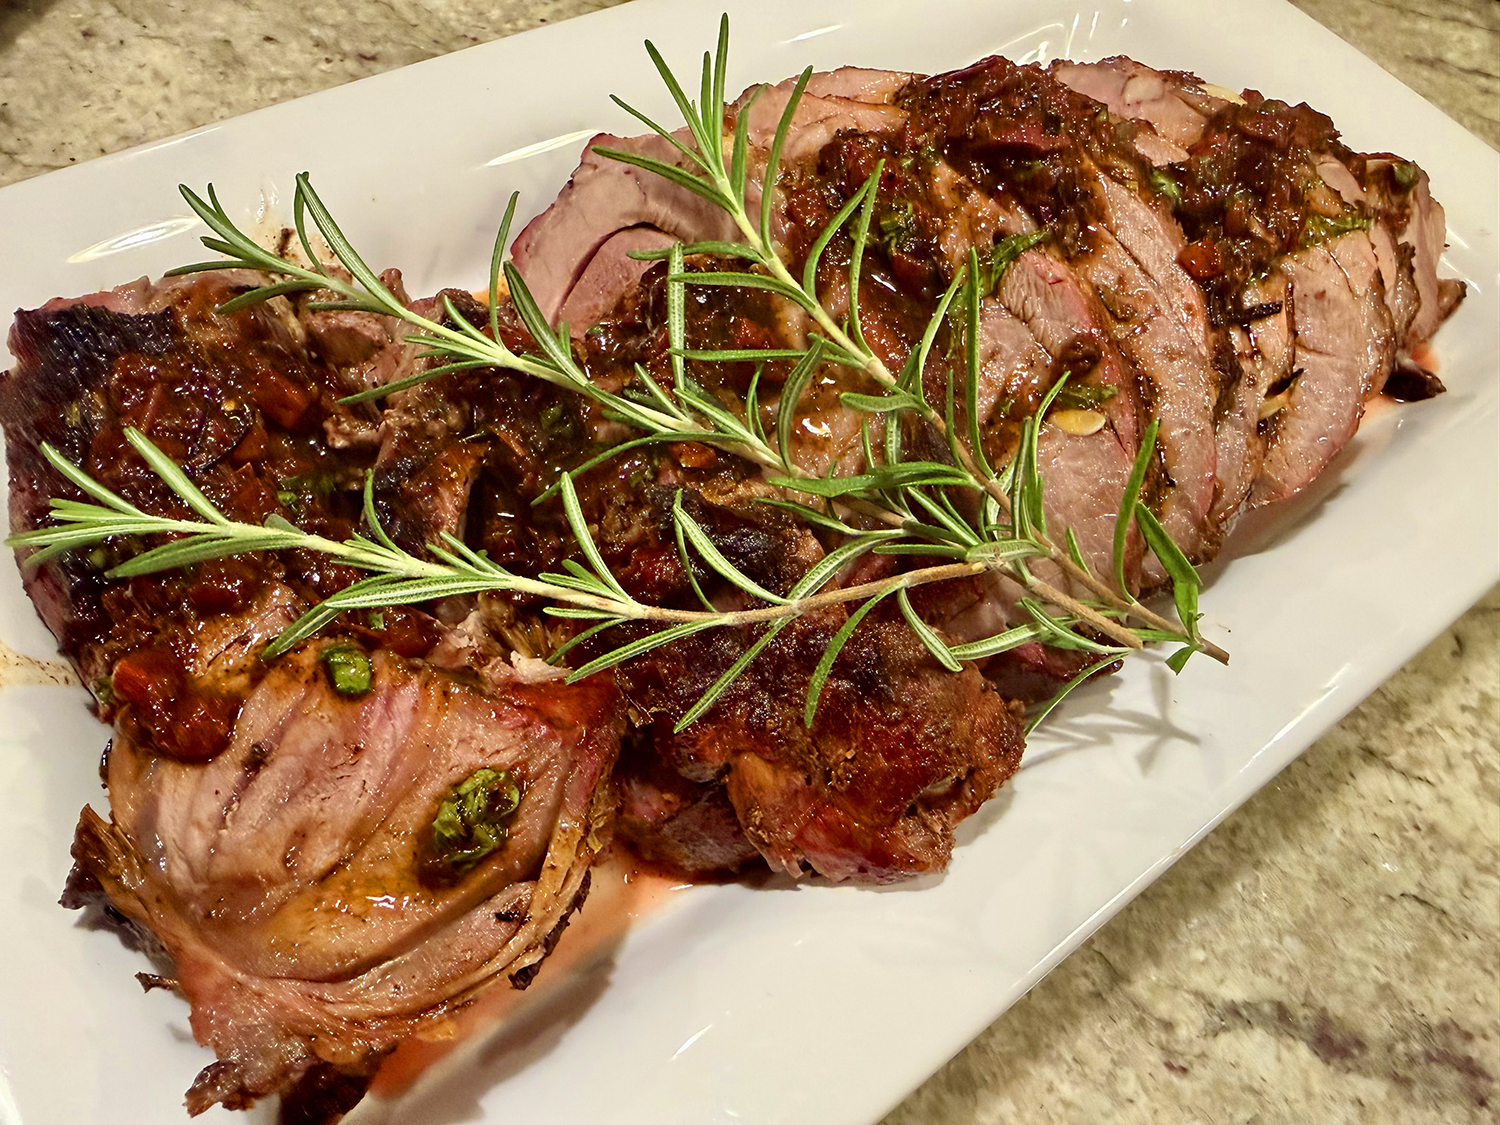
The Tomato-Fennel Vinaigrette is a surprising and delicious way to brighten up roast lamb. Combine the ingredients, and when the meat comes out of the pan to rest, pour the contents into the pan with the drippings.

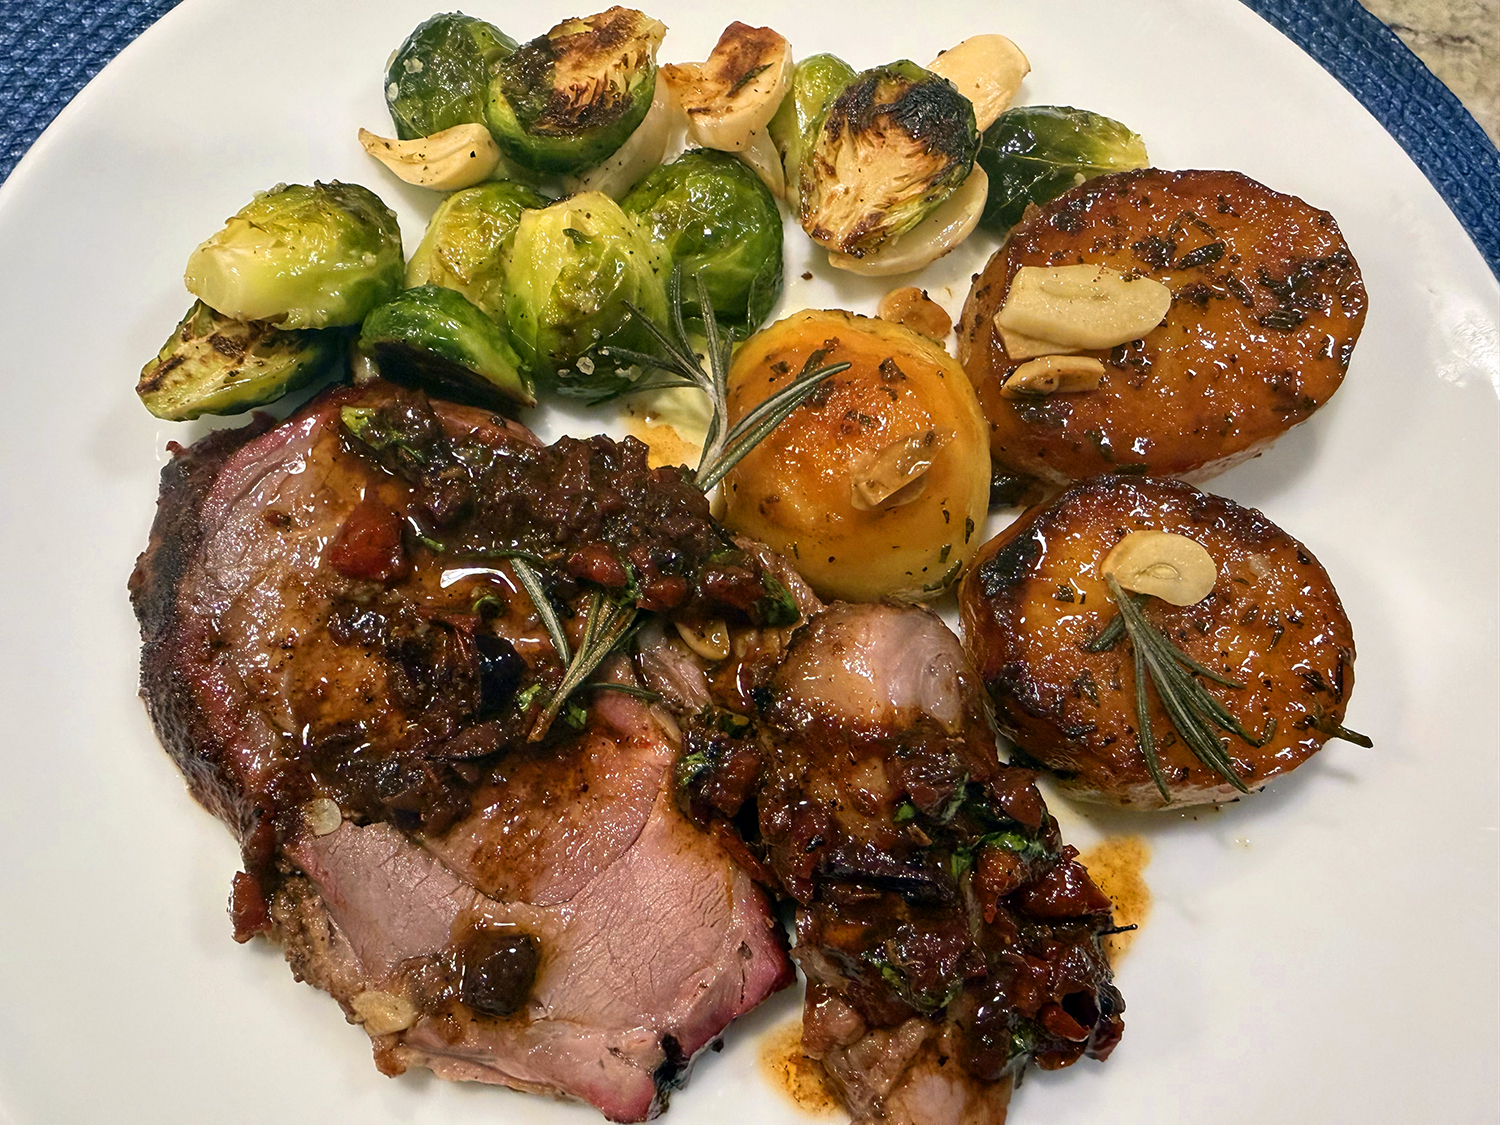
Our meal was completed with Lemon-Rosemary Melting Potatoes and Roasted Brussels Sprouts with Garlic.

Roast Leg of Lamb with Anchovy, Rosemary , Garlic and Piment d'Espelette

  • Servings: 8-10
  • Difficulty: moderately easy
  • Print

Ingredients

  • 1 whole bone-in leg of lamb, 7 to 8 lbs., preferably with hip bone removed
  • 5 garlic cloves cut into 20 thin slivers
  • 4 anchovy fillets, rinsed, patted dry, and cut into 20 little pieces
  • 4 leafy sprigs rosemary, cut into 20 1-inch pieces
  • 2 tsp. kosher salt
  • 2 tsp. piment d’Espelette (or hot paprika)
  • 1 to 2 Tbsp.lard, or extra-virgin olive oil
  • 3/4 dry white wine or dry white vermouth

Directions

  1. Trim the Lamb. Examine the leg of lamb to determine what kind of trimming and perhaps tying you need to do before seasoning. If the pelvic bone has been removed, you may find a loose flap of meat at the wide end of the roast. if so, secure this with skewers or sew it shut with a trussing needle and kitchen string.Using a thin bladed sharp knife, trim any leathery membrane or excess fat from the exterior of the lamb. Leave a thin layer (1/8 inch) of fat to protect the meat from drying.
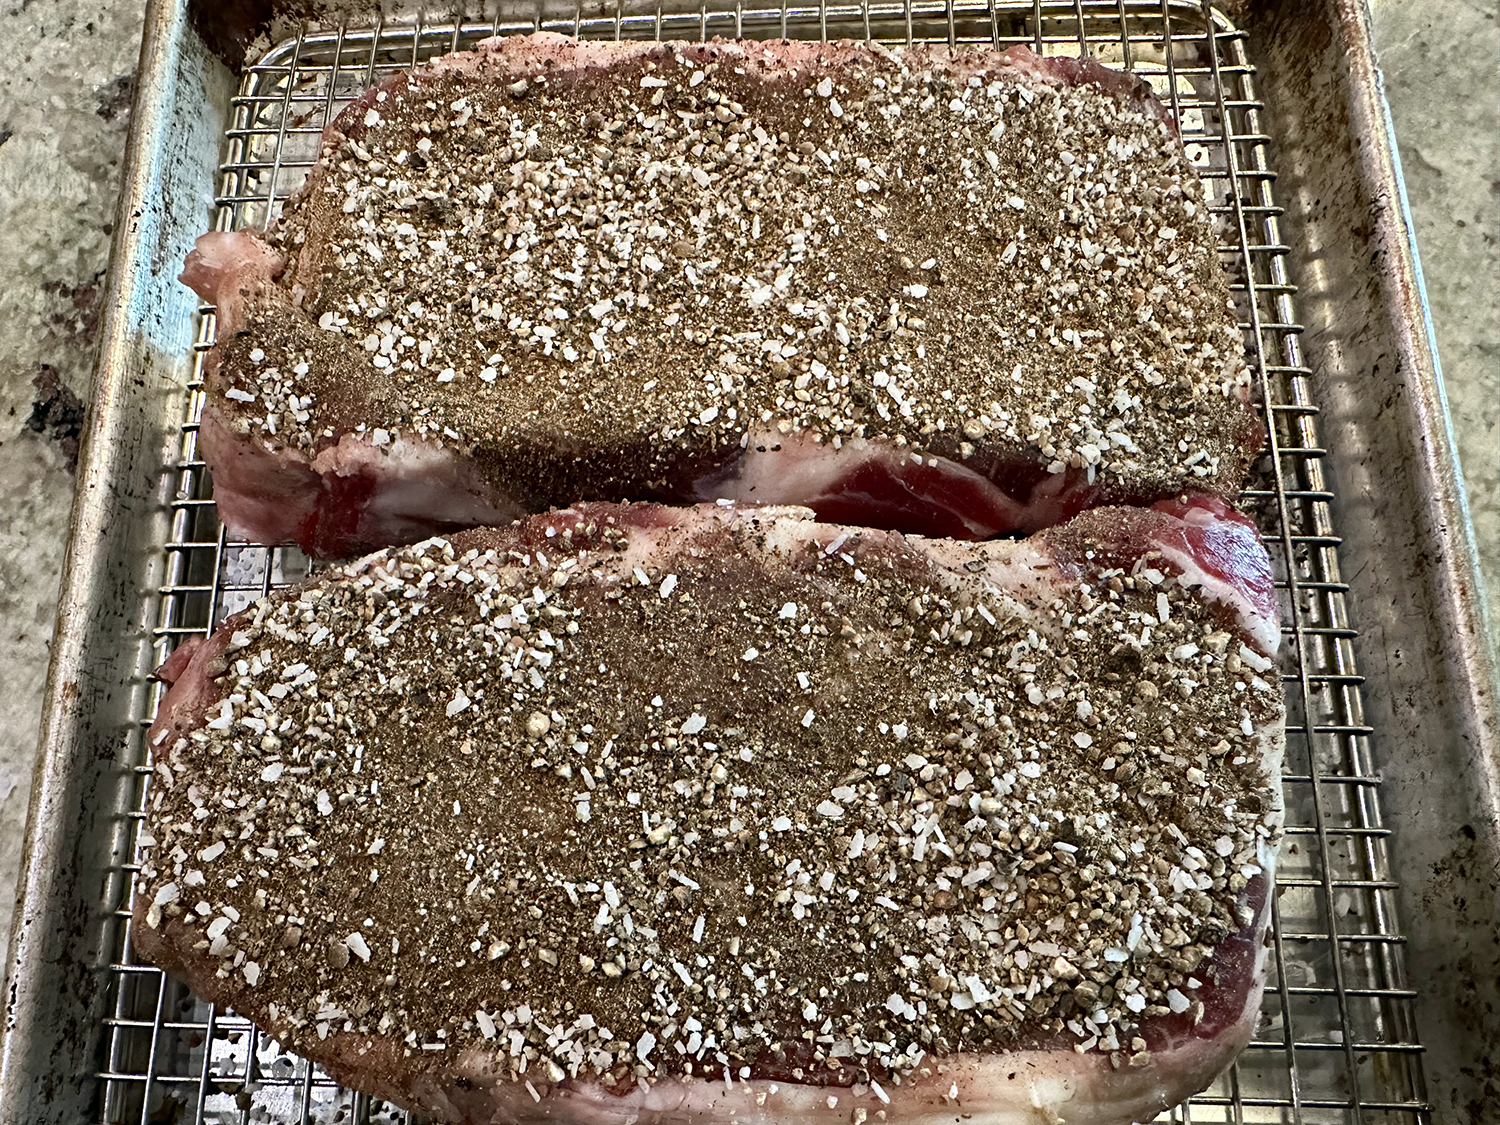
  2. Season the Lamb. Using the tip of a paring knife, make 20 small holes on all sides of the lamb. Stuff each hole with a sliver of garlic. a bit of anchovy, and a sprig of rosemary, leaving the tips of rosemary sticking out. After you’ve studded the entire roast, season the surface with the salt and the piment d’Espelette. Set in a large baking dish (or on a rimmed backing sheet with a rack) and refrigerate uncovered, for 1 to 2 days. Let the lamb sit at room temperature for 2 hours before roasting.
  3. Heat the Oven. Arrange a rack in the lower third of the oven and heat to 450 degrees.
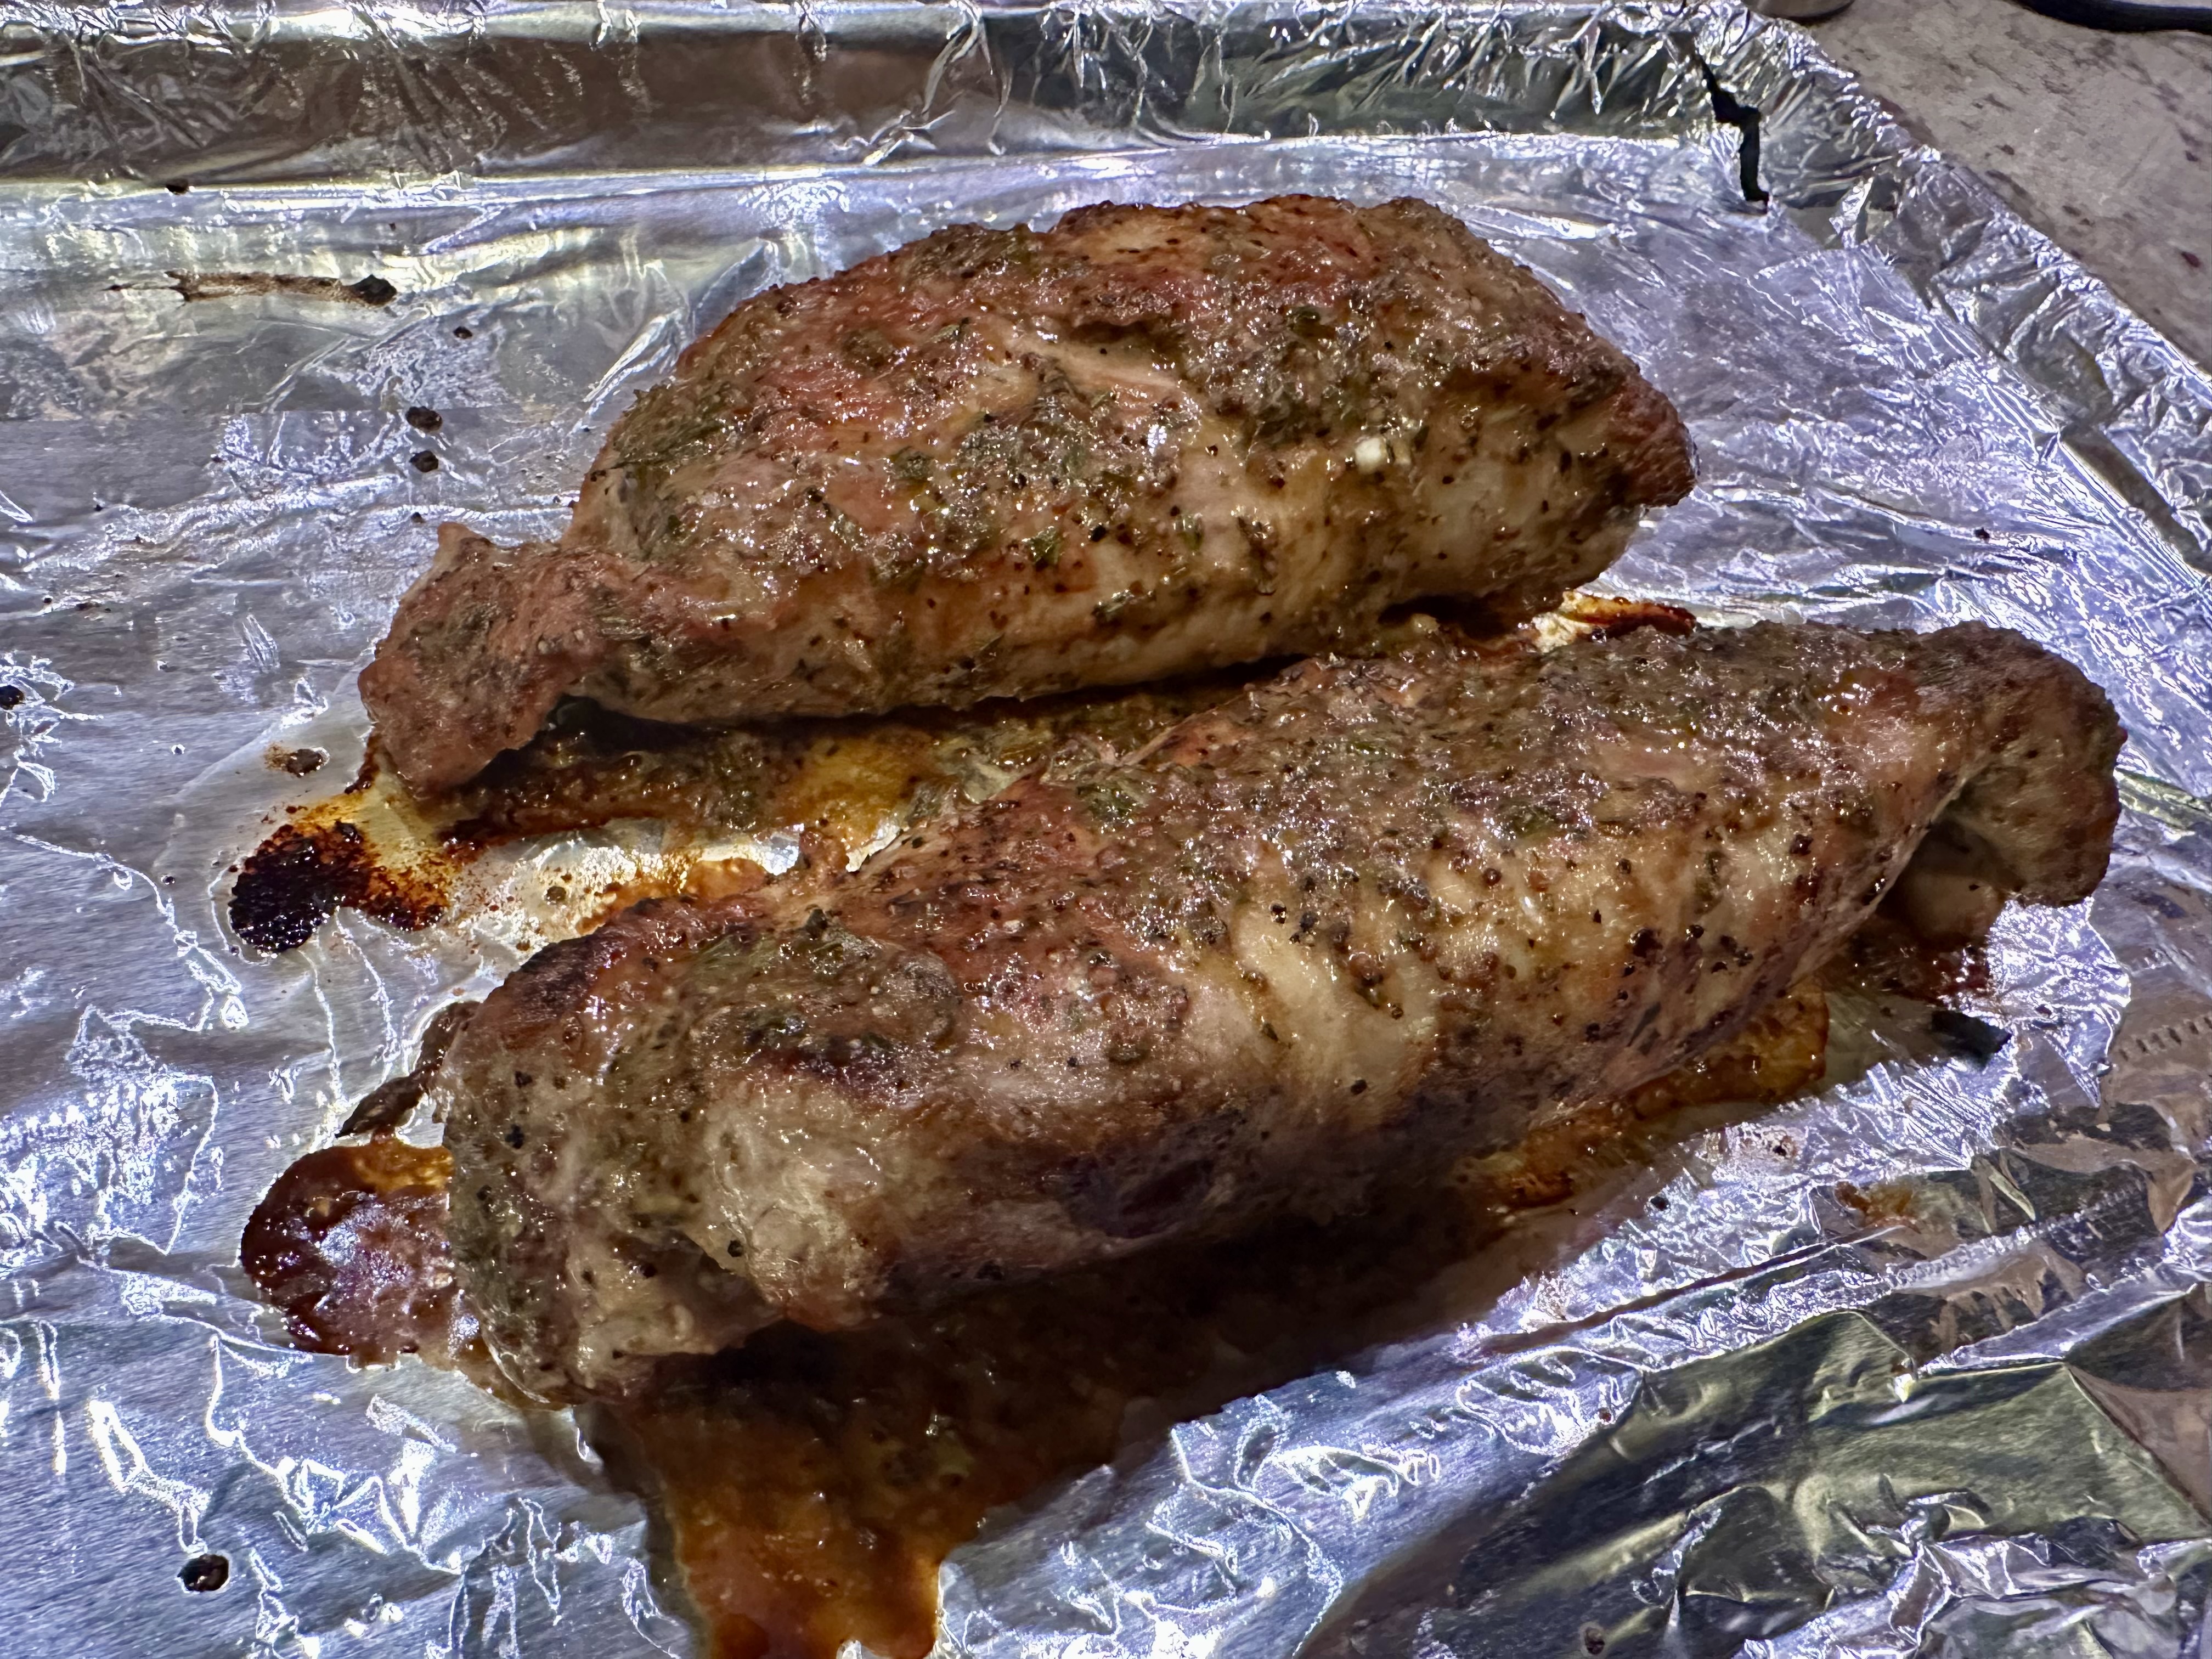
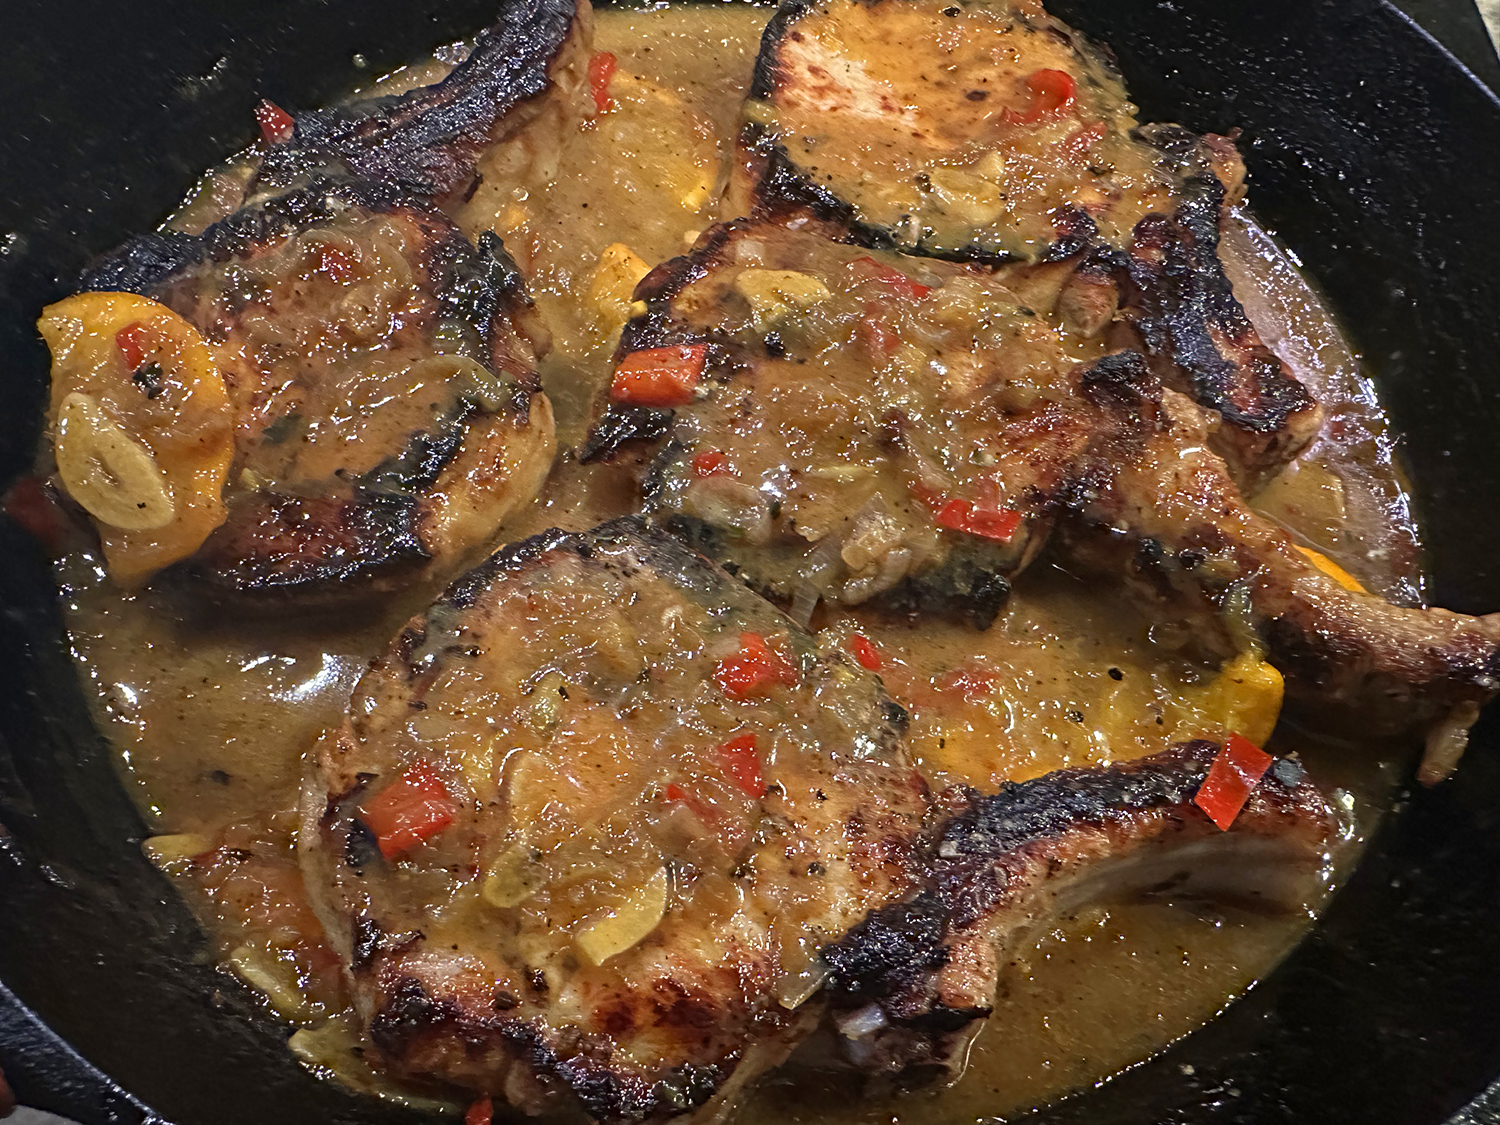
  4. Roast the Lamb. Rub the surface of the meat with lard or olive oil. Place the lamb with the rounder, meatier side up in a roasting pan just large enough to accommodate it. (It’s fine if the tip of the shank rests of the edge of the pan.) Roast for 25 minutes then pour the wine or vermouth over the lamb. Immediately lower the oven temperature to 325 degrees, and continue roasting until a meat thermometer inserted into the meatiest part of the leg reaches 120° to 125° degrees for rare, about 1 hour from the time you lowered the heat; or 130° to 135° degrees for medium-rare, about 1 1⁄4 hours.
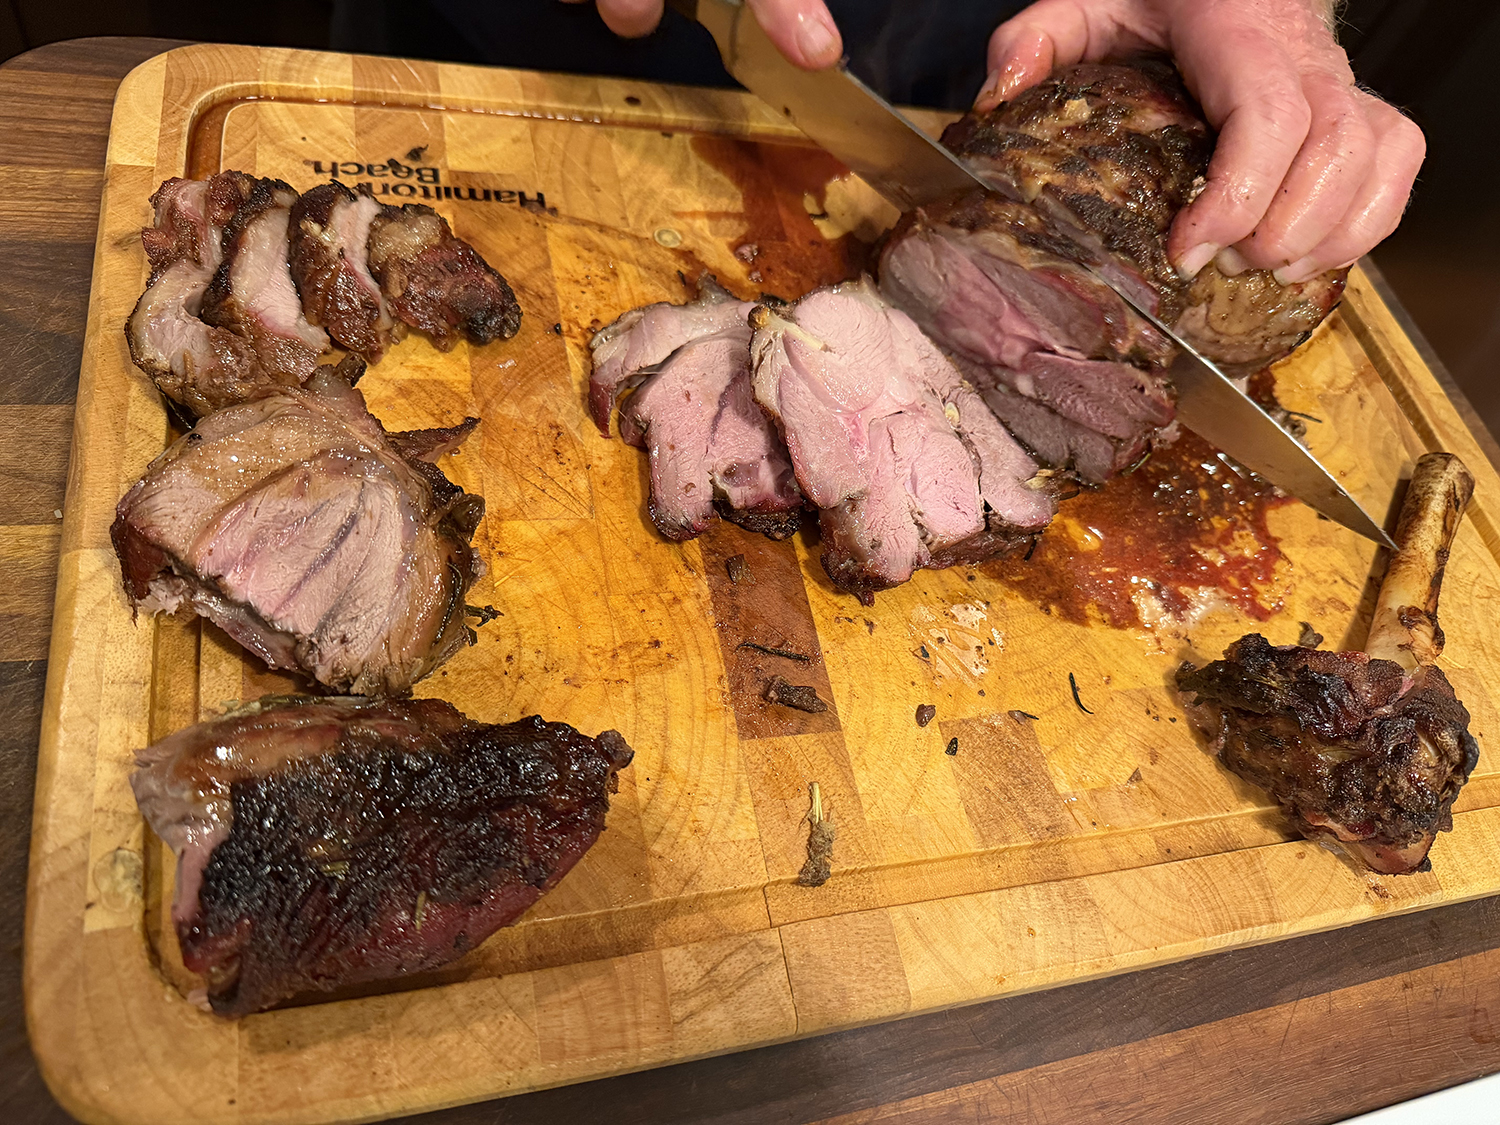
  5. Rest. Remove the lamb to a carving board, preferably one with a trough, to rest for 20 to 35 minutes. Tilt the roasting pan and spoon off as much of the clear fat as you can. Using a wooden spoon, scrape up the pan drippings (if they are too stuck to the pan, add 1⁄4 cup water to dissolve them). Set aside the pan drippings to drizzle over the carved lamb.
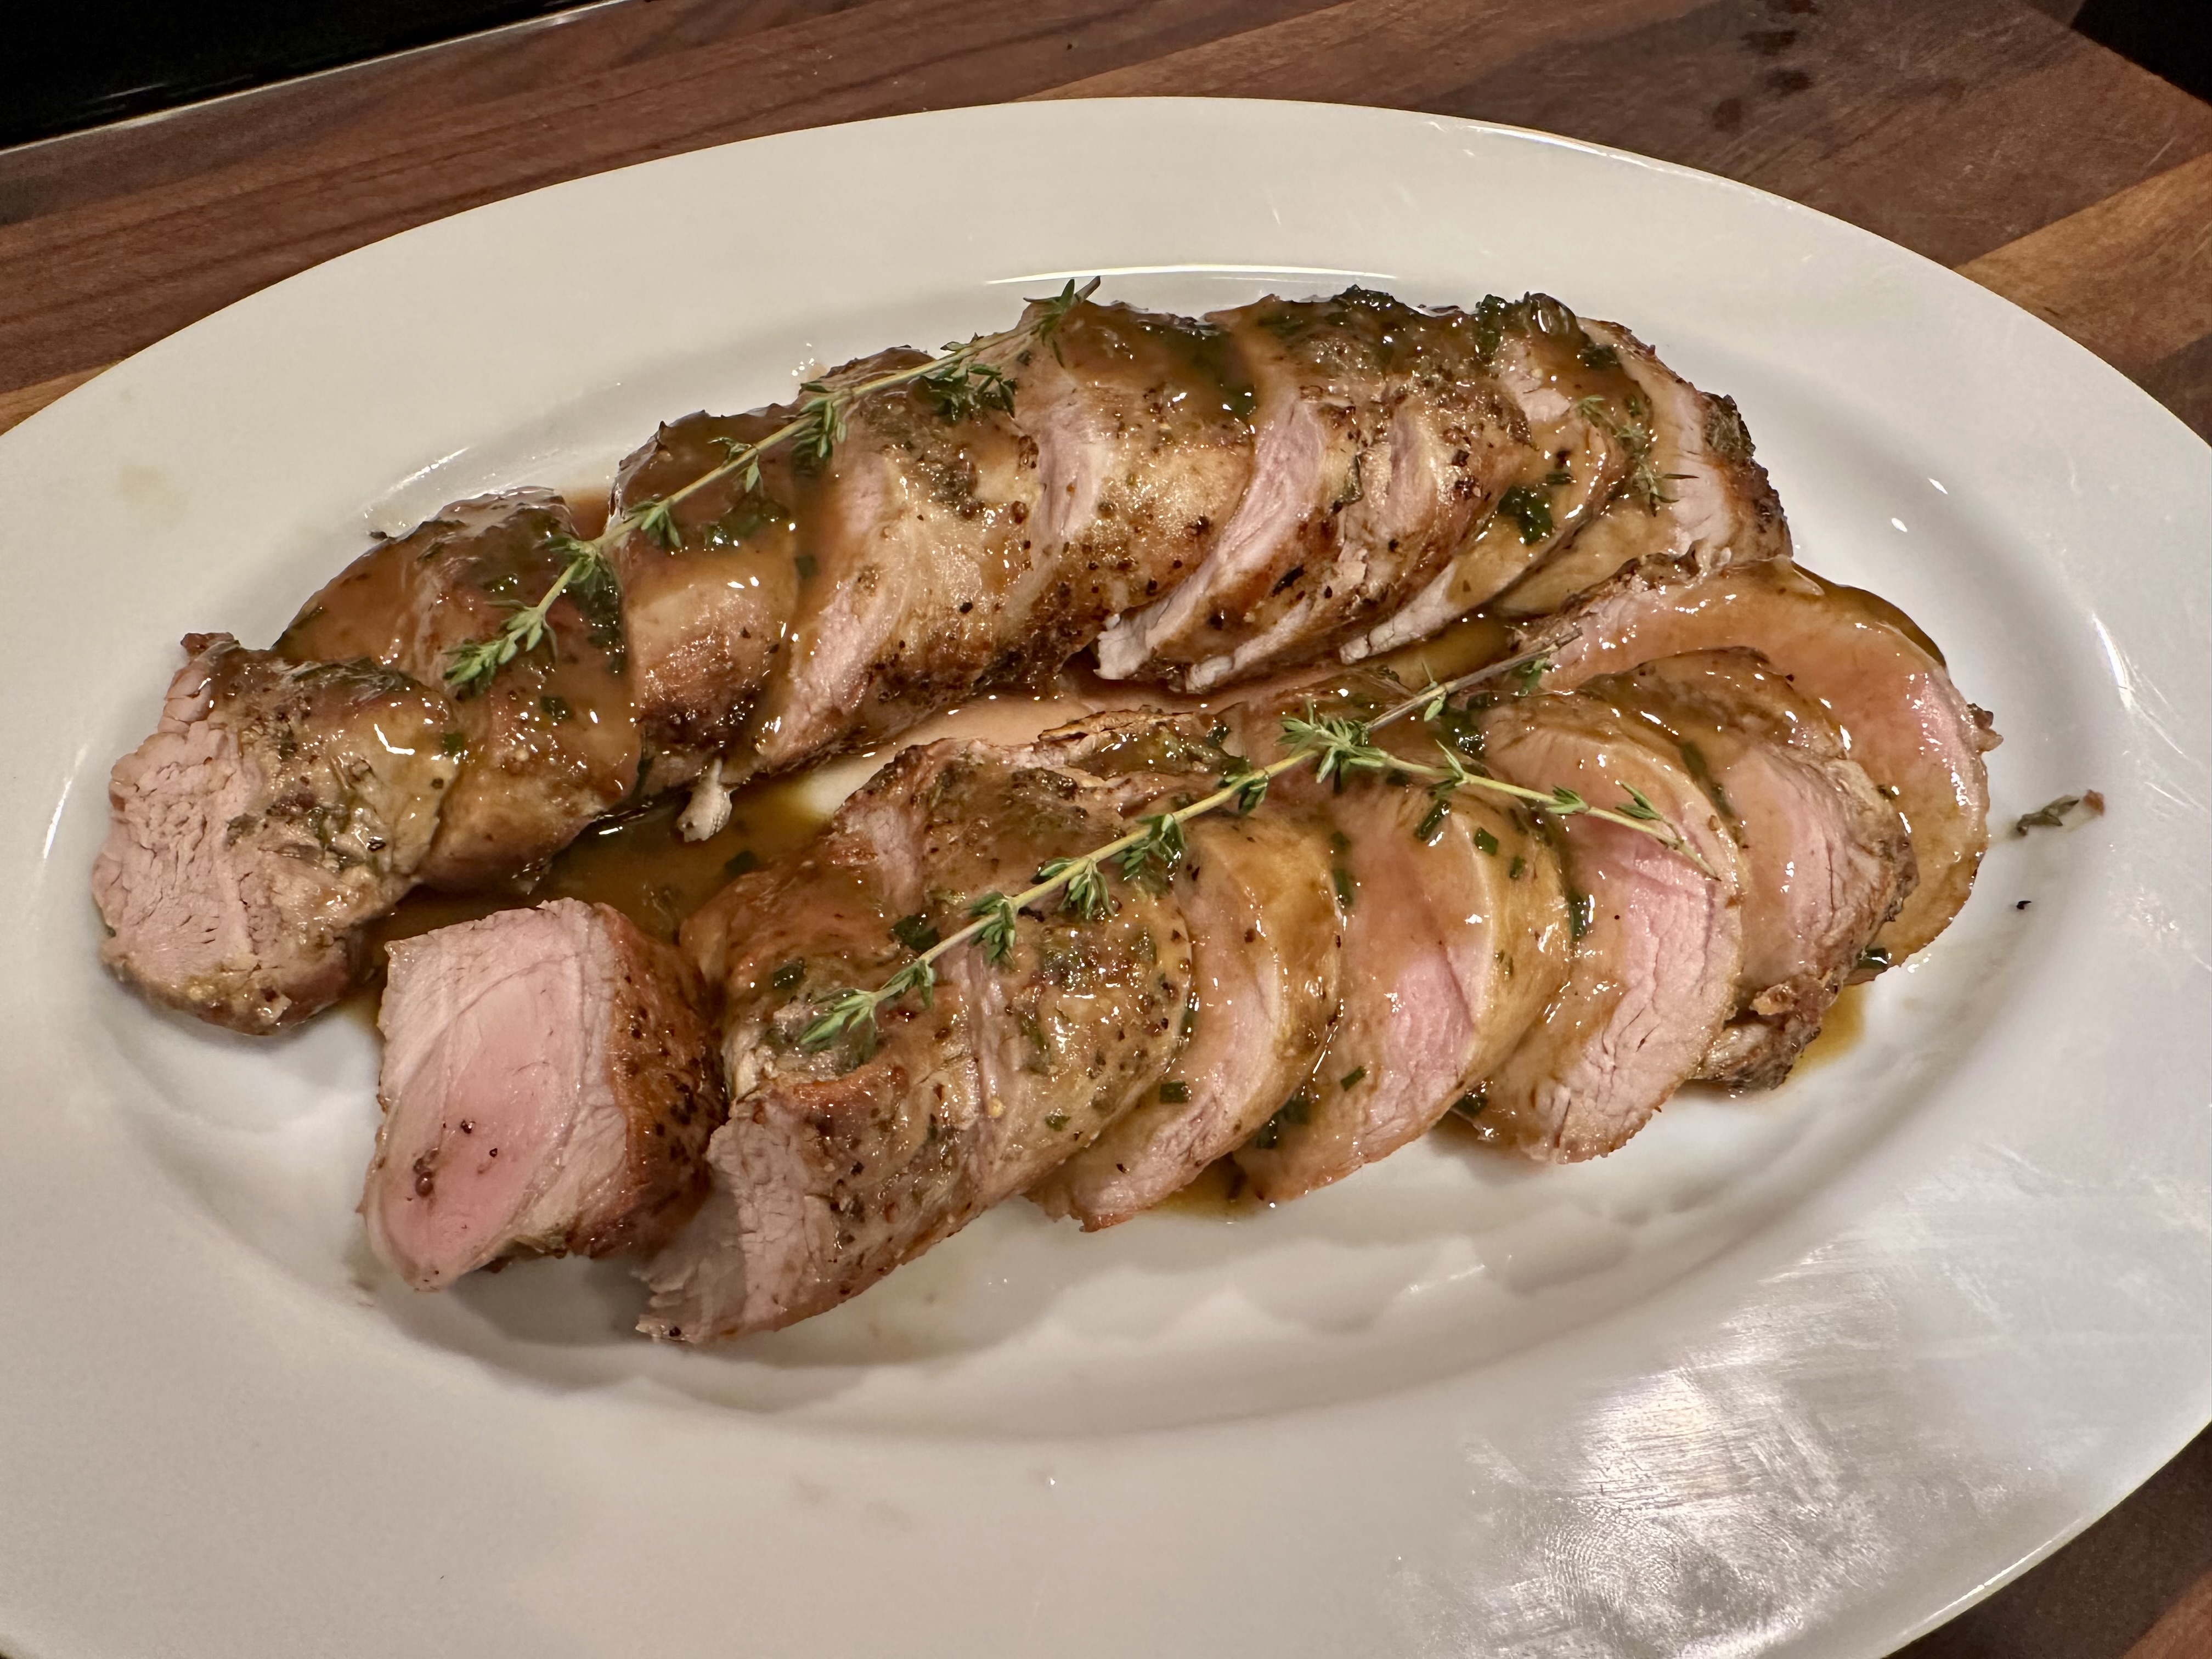
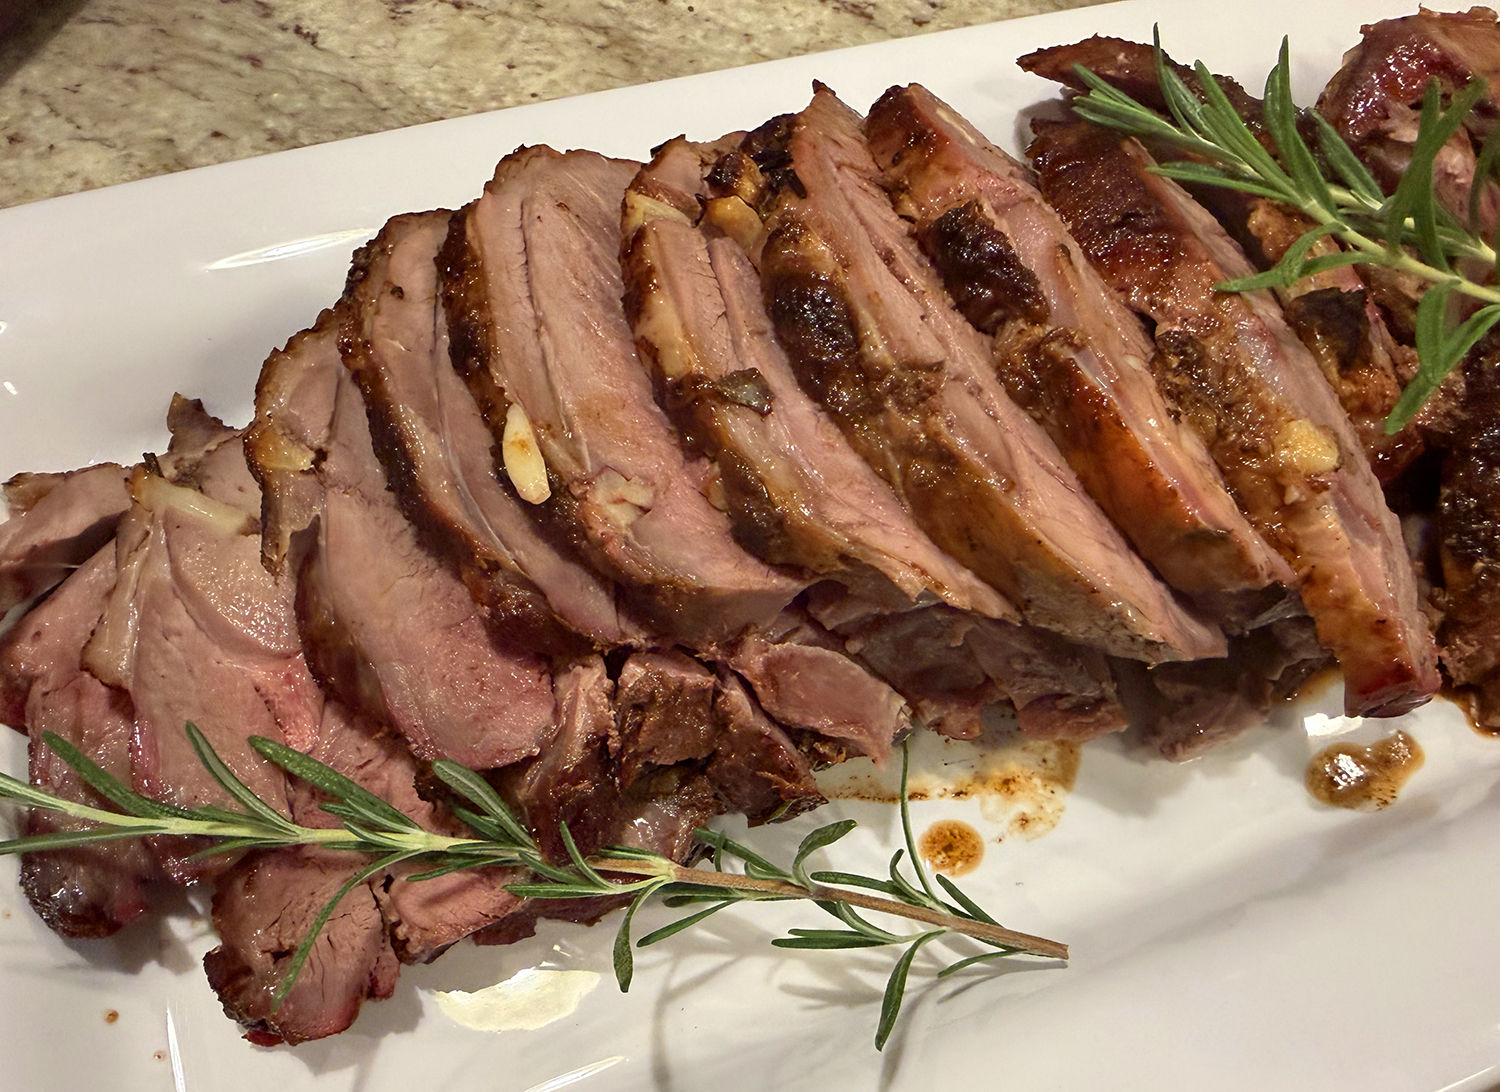
  6. Carve and Serve. Carve the leg of lamb and serve drizzled with the pan drippings, or layer the slices in the roasting pan so they soak up the pan juices and serve family-style from the pan.
    If making the optional vinaigrette (recipe below), see Step 3 for carving and serving.

Ingredients

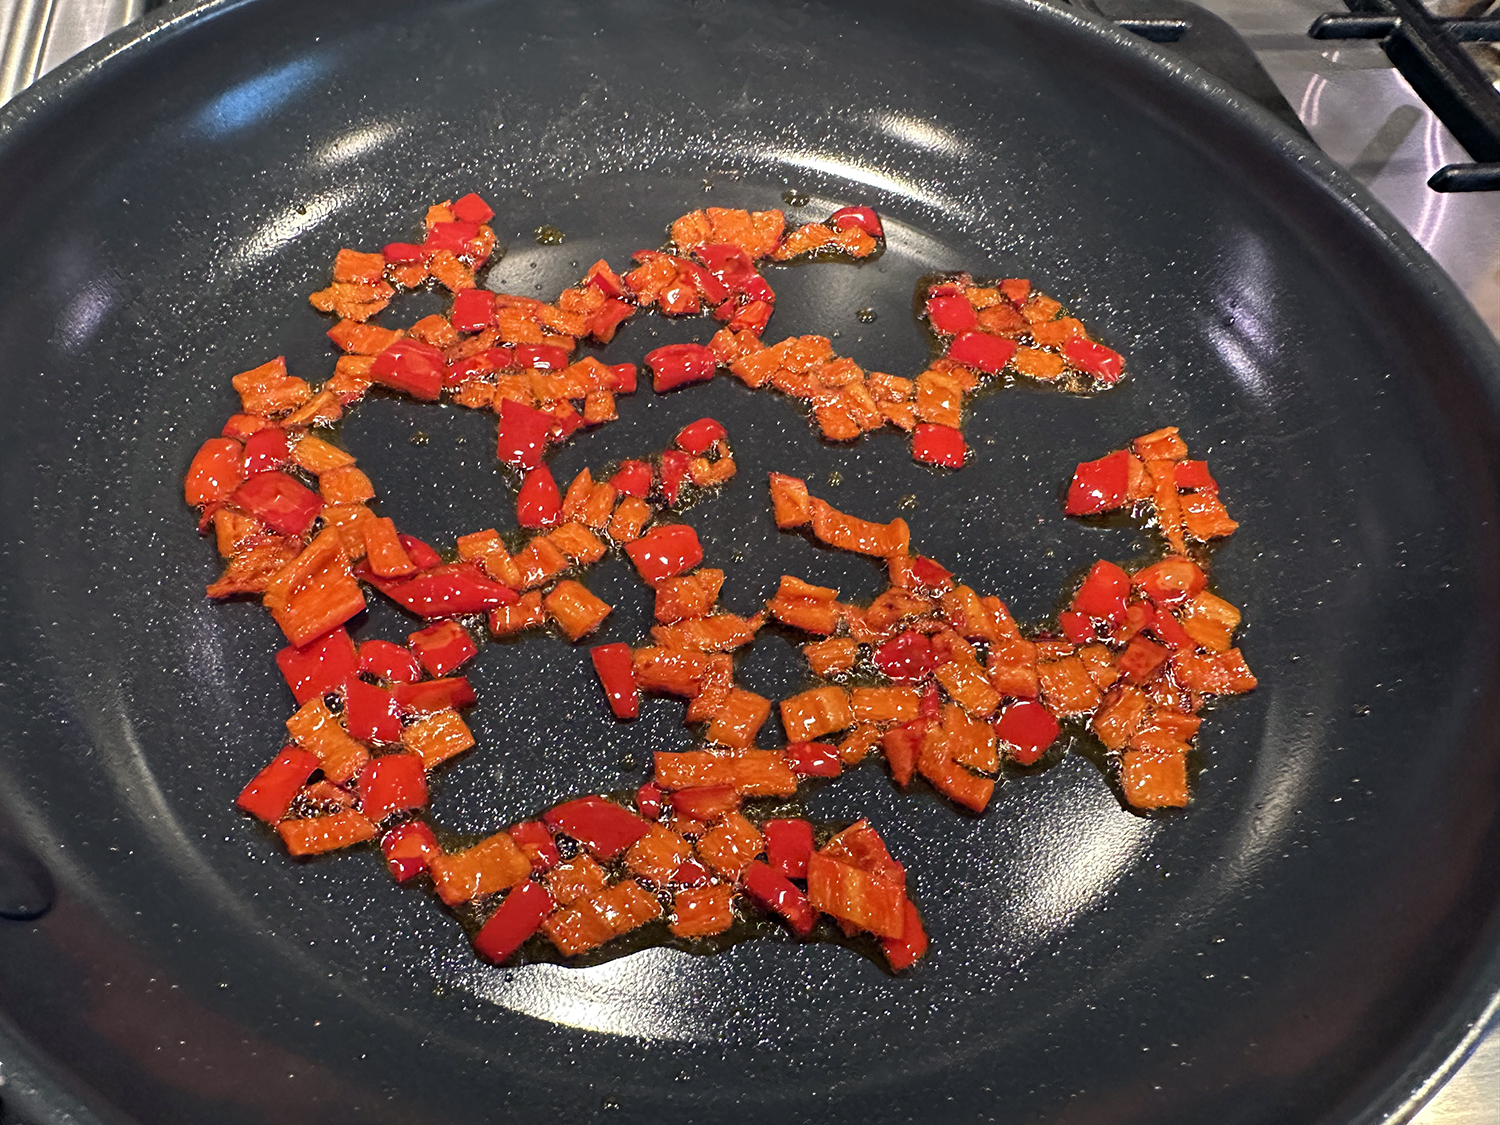
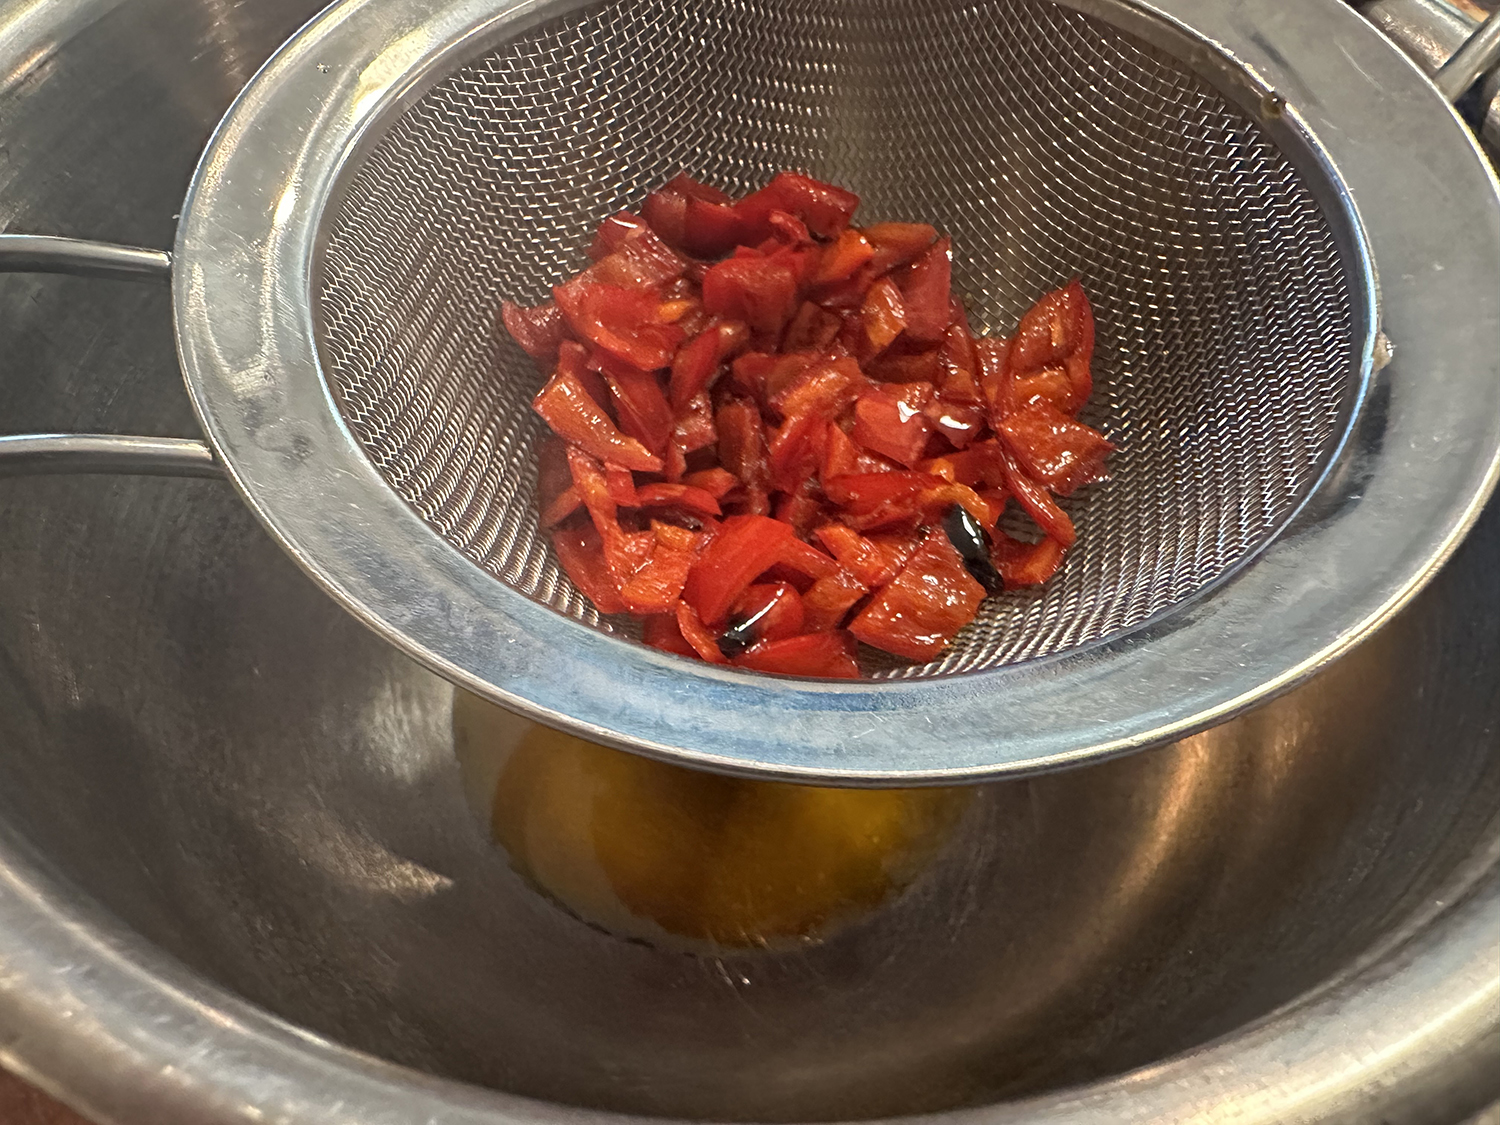
  • 1 lb. rip tomatoes, seeded and finely chopped (about 2 cups)
  • 1⁄2 cup black olives, pitted and finely chopped
  • 3Tbsp. red wine vinegar
  • 1 1⁄2 tsp. fennel seeds, lightly toasted in a dry skillet and coarsely ground
  • freshly ground black pepper
  • 1⁄3 cup extra virgin olive oil
  • 1⁄3 thinly sliced, lightly packed fresh basil leaves

Directions

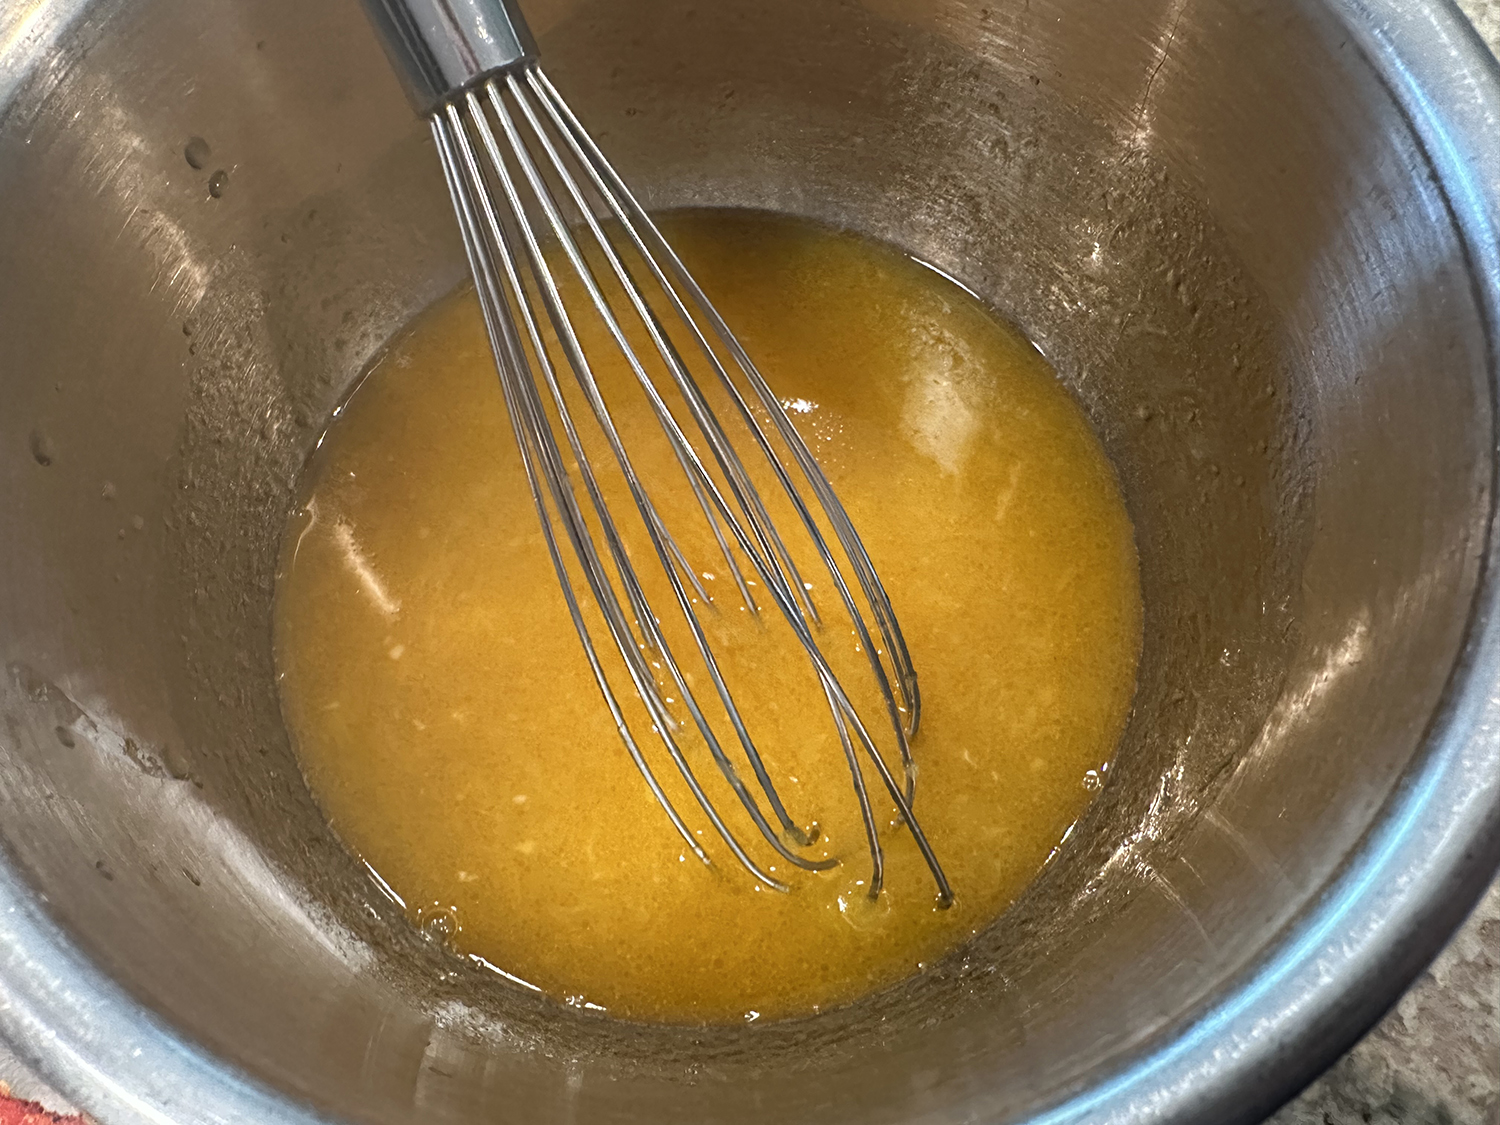
  1. Make the Vinaigrette. In a medium bowl, combine the tomatoes olives, vinegar and fennel seeds. Season with pepper (salt gets added later). Whisk in the olive oil and set aside.
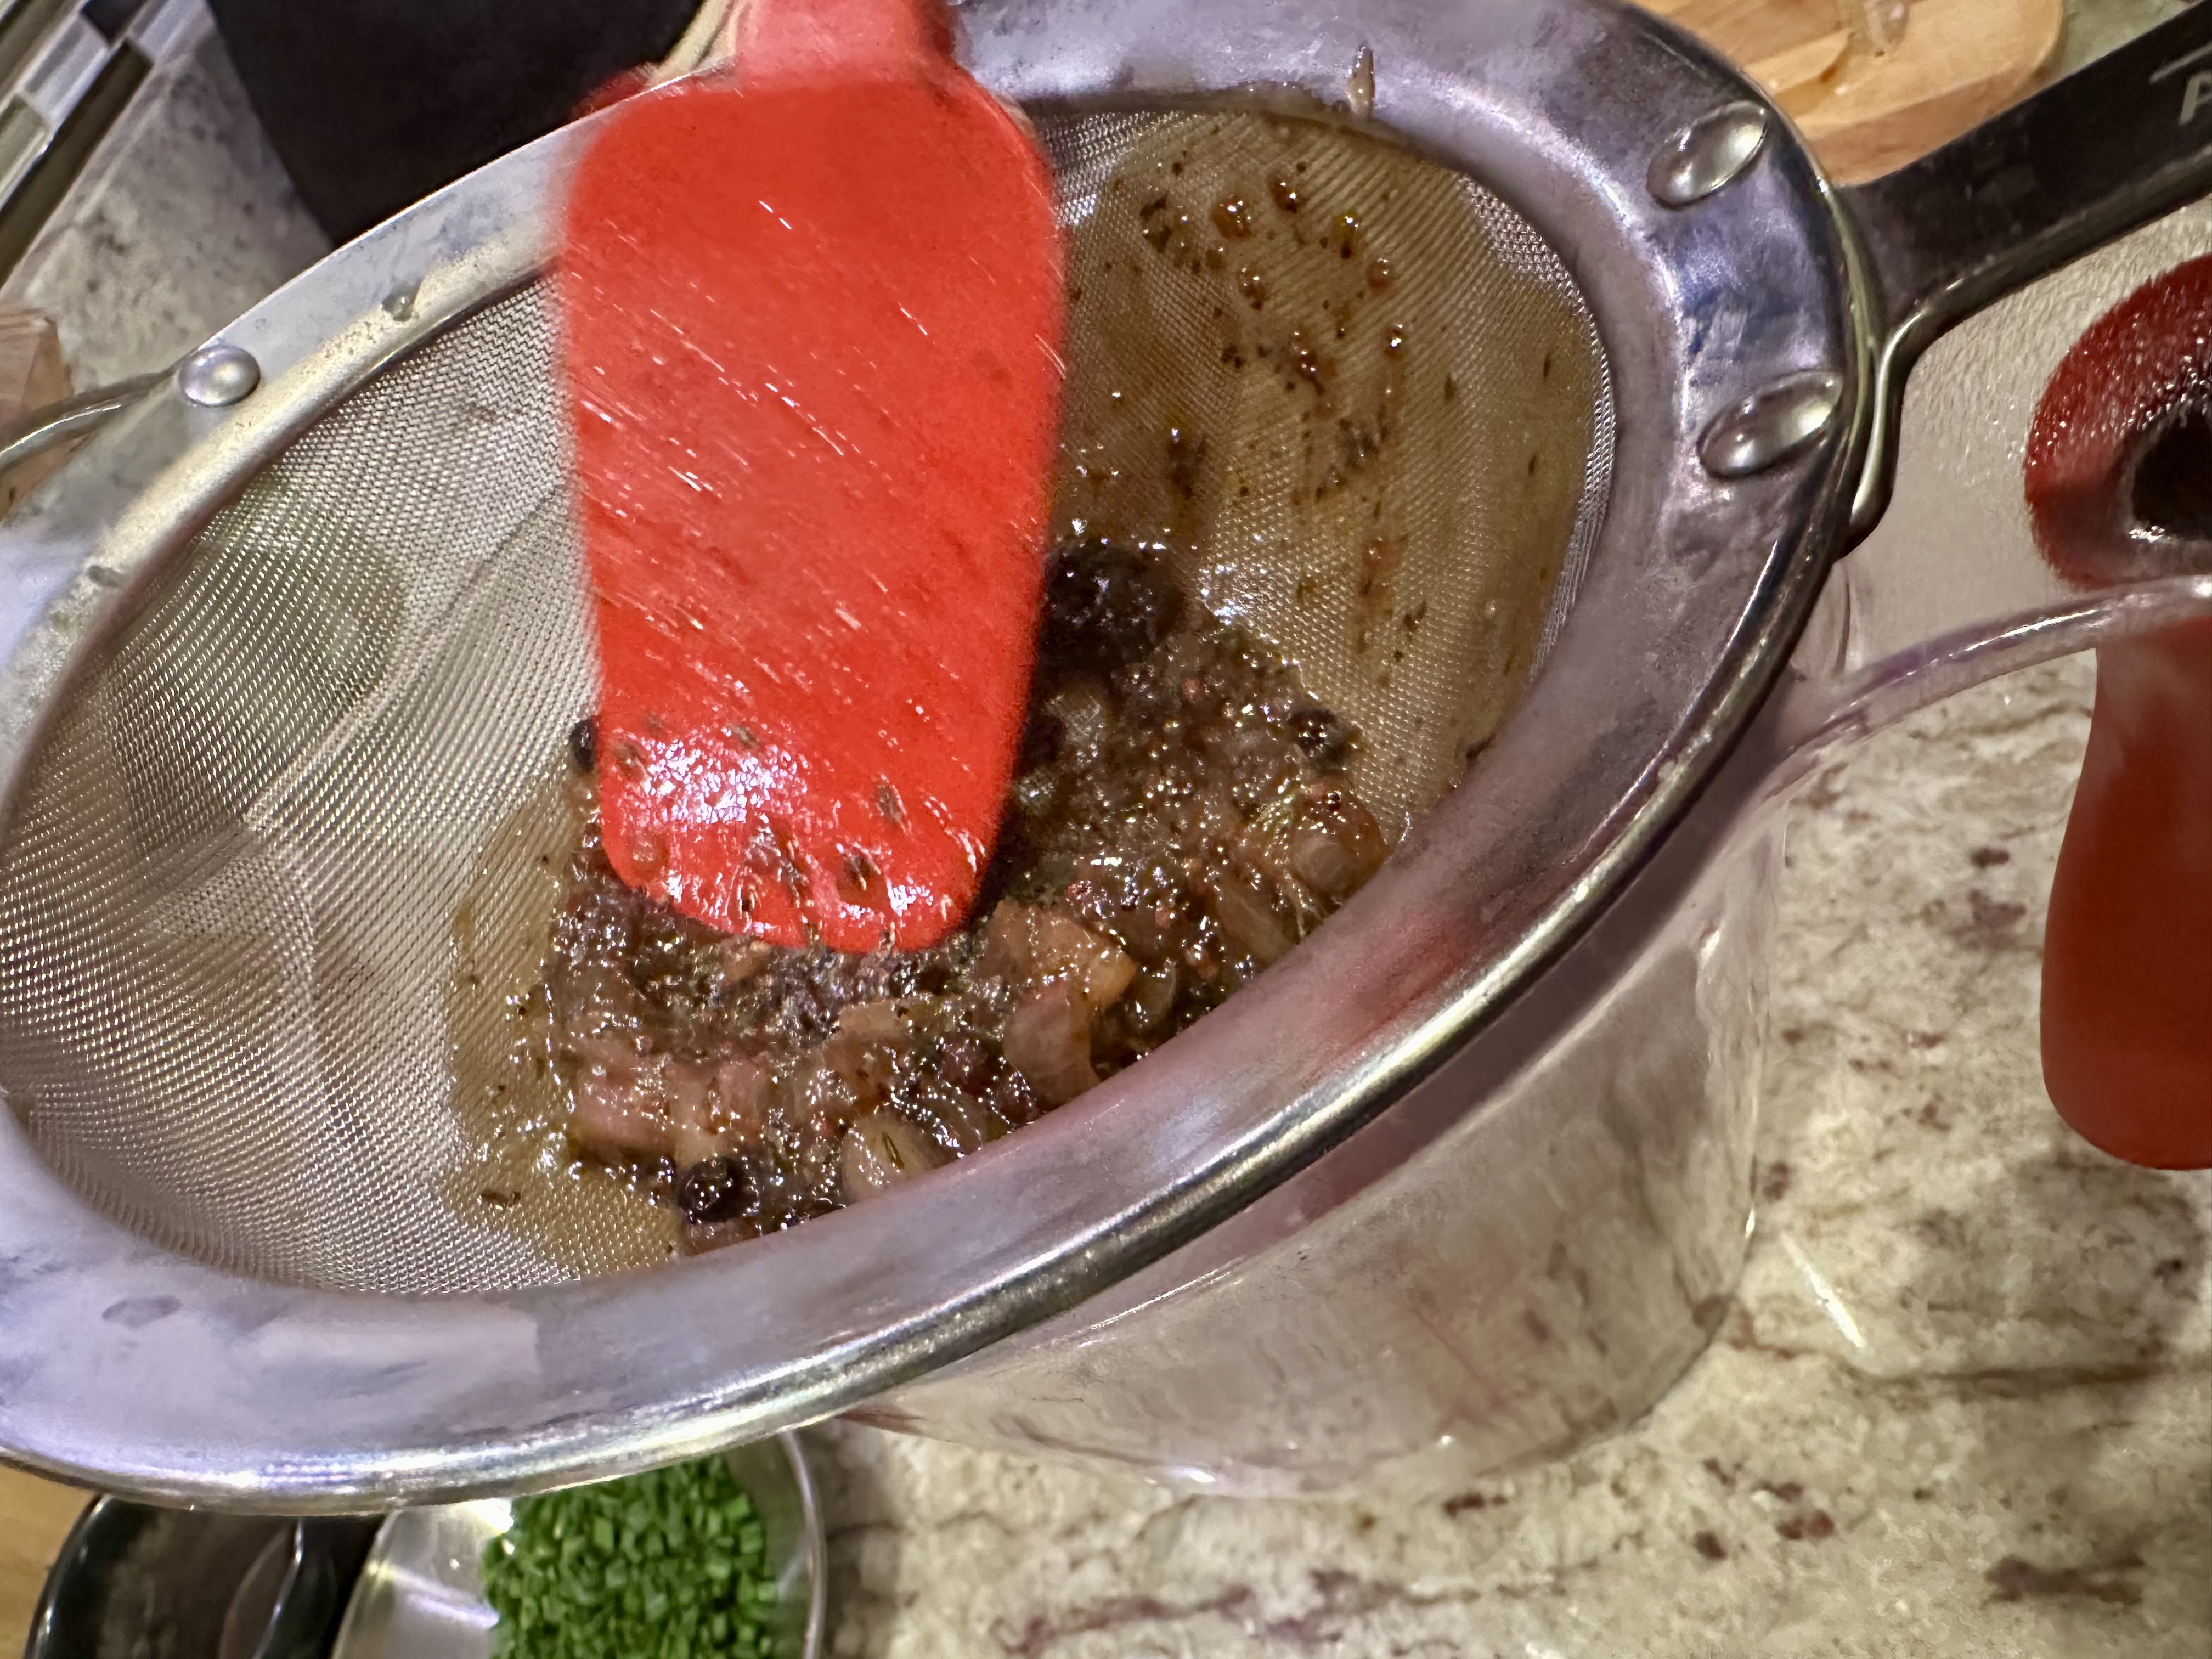
  2. Roast the as Directed Above. After transferring the lamb to the carving board in Step 5, spoon and pour off as much fat excess fat form the roasting pan as you can. (We used a fat separator to assist.) Using a wooden spoon, scrape up the pan drippings (if they are too stuck to the pan, add 2 to 3 tablespoons water to dissolve them). Add the vinaigrette to the pan, stir to combine with the drippings. Stir in the basil. Taste for salt and pepper. The vinaigrette should be warm, but not hot.
  3. Carve and Serve. Carve the leg of lamb. Add any juices from the carving board to the vinaigrette. Spoon some of the vinaigrette over the slices of meat and serve along with extra vinaigrette in a bowl.

http://www.lynnandruss.com

Recipe by Molly Stevens in her All About Roasting cookbook

Pan-Seared Flounder with Lemon-Caper Sauce

Flatfish such as flounder and sole are quick-cooking, ultraconvenient—and finicky. Because they lie in camouflage on the seabed waiting for prey, the flesh of these fish is unbeatably tender, flaky, and delicate. But their flesh is quick to tighten up and dry out over fierce heat, yet if you go too easy on the sear, the fragile fillets can tear or break when you attempt a flip. 

Once you nail the process, you are handsomely rewarded: Done right, flounder and sole are buttery, flaky, mild, and sweet, the perfect canvas for a variety of punchy sauces and toppings.

According to chef David Yu, when fish releases moisture in the skillet, that moisture impedes the fillet’s contact with the pan and oil and also lowers the temperature of everything, resulting in a longer browning time. So it’s key not only to thoroughly dry the fish with paper towels but also to dredge it in flour, which absorbs any moisture left on the fish’s surface.

Flour presents a couple of other perks as well: It helps hold the delicate flesh together by forming gluten, and its protein and sugar also help the fish to brown. Here, the fish is floured on only one side.

TIP: Using a well-oiled stainless-steel skillet rather than nonstick allows you to cook the fish at a higher temperature, quickly altering the proteins in the fish to keep them from bonding to the pan.

Our fillets were larger than noted in the original recipe, so we used a 13″ stainless steel skillet and a bit more oil in the pan. Because of their length, the fillets were a bit tricky to turn over. Pairing with steamed broccoli and a side salad, we enjoyed a fast, healthy and tasty dinner!

Pan-Seared Flounder with Lemon-Caper Sauce

  • Servings: 4
  • Difficulty: easy
  • Print

Ingredients

  • 2 Tbsp. all-purpose flour
  • ¾ tsp. table salt, divided
  • ¼ tsp. pepper
  • 6 (4- to 6-oz.) skinless flounder fillets, ¼ to ½ inch thick
  • 4 tsp. vegetable oil, divided
  • 3 garlic cloves, minced
  • ⅓ cup dry white wine
  • ⅓ cup water
  • 1½ tsp. grated lemon zest, plus 1½ Tbsp. juice
  • 3 Tbsp. unsalted butter, cut into 6 pieces and chilled
  • 2 Tbsp. capers, rinsed
  • 1 Tbsp. minced fresh parsley

Directions

  1. Whisk 2 tablespoons all-purpose flour, ½ teaspoon table salt, and ¼ teaspoon pepper together in small bowl. Reserve 1 teaspoon flour mixture, then spread remaining mixture in even layer on large plate. 
  2. Dry 6 skinless flounder fillets thoroughly with paper towels. Place 3 fillets, skinned side down, into flour mixture on plate to coat 1 side. Shake off excess and transfer to rimmed baking sheet, floured side up. 
  3. Heat 1½ teaspoons vegetable oil in 12-inch skillet over medium-high heat until just smoking. Carefully place fillets, floured side down, in pan and cook until bottom is golden brown, about 2 minutes. Remove skillet from heat. Using 2 thin spatulas, gently flip fillets and let stand until second side is opaque, 15 to 30 seconds. Transfer fillets, browned side up, to platter. Wipe out skillet with paper towels and repeat steps 2 and 3 with remaining fillets and 1½ teaspoons oil.
  4. Wipe out skillet with paper towels. Add remaining 1 teaspoon oil and 3 minced garlic cloves and cook over medium heat until fragrant, about 30 seconds. Stir in reserved 1 teaspoon flour mixture and cook for 15 seconds.
  5. Whisk in ⅓ cup white wine, ⅓ cup water, 1½ teaspoons grated lemon zest and 1½ tablespoons juice, and remaining ¼ teaspoon salt. Bring to simmer and cook until sauce has thickened slightly, about 2 minutes. 
  6. Off heat, whisk in 3 tablespoons chilled unsalted butter, cut into 6 pieces. Stir in 2 tablespoons rinsed capers and 1 tablespoon minced parsley. Spoon sauce over fish and serve.

http://www.lynnandruss.com

Recipe by David Yu for Cook’s Illustrated

Mushroom and Lentil Ragù

A vegetarian meal with a meaty undertone and a soulful depth of flavor. Here, nutty mushrooms and quick-cooking lentils play nicely together for a flavor-packed, meatless take on classic ragù. Traditionally, ragù gets its signature savory flavor from slow-cooked meat like ground beef or pork.

In this vegetarian version, a mix of sautéed mushrooms, such as oyster and cremini, lends earthy flavor and texture, while black lentils — a quicker-cooking legume than green or red lentils — gives the sauce body.

Lentils are prized in the Mediterranean, and most Italians would agree that the best lentils come from Southern Italy. Although they cook in under half an hour, black (Beluga) lentils remain a bit more sturdy throughout the cooking process than most other lentils. Instead (because we had them on hand), we used Puglia lentils which are celebrated for their earthy taste and numerous health benefits.

Like any ragù, this dish relies entirely on building layers of flavor. Sautéing the mushrooms, onions, and carrots until browned and toasting the tomato paste creates a deep foundation of umami. Deglazing the brown bits at the bottom of the Dutch oven with wine and stock infuses the lentils and sauce with rich, savory notes.

Simmered in a red wine sauce fortified with vegetable broth, the lentils become tender and creamy, resulting in a hearty sauce that comes together in less than an hour and proves to be more than the sum of its parts. Serve over creamy cooked polenta or fresh pappardelle for a filling meal. 

Make Ahead: You can make this ragù up to three days in advance and store it covered in the refrigerator. When reheating, you may find that the lentils have absorbed some of the liquid. Simply thin it back out to your desired consistency with vegetable stock or water. This recipe is also freezer-friendly. Let it cool completely, then ladle it into freezer-safe containers or large resealable plastic bags, and store it in the freezer for up to two months.

Mushroom and Lentil Ragù

  • Servings: 6-8
  • Difficulty: easy
  • Print

Ingredients

  • 1 cup dried black lentils
  • 1/4 cup extra-virgin olive oil, plus more for drizzling
  • 1 lb. mixed fresh mushrooms (such as cremini, oyster, and portobello), stemmed and chopped (about 5 1/2 cups)
  • 1 medium yellow onion, chopped (about 1 1/2 cups)
  • 2 medium carrots, peeled and diced (about 1 cup)
  • 4 tsp. kosher salt, divided
  • 4 large garlic cloves, minced
  • 1/4 tsp. crushed red pepper
  • 2 Tbsp. tomato paste
  • 1 cup (8 oz.) dry red wine
  • 2 cups vegetable broth
  • 1 14.5-oz. can crushed tomatoes
  • 2 Tbsp. chopped fresh oregano, plus more for garnish
  • 1/2 cup heavy cream
  • 2 oz. Parmigiano-Reggiano cheese, finely shredded (about 1/2 cup), plus more for garnish
  • Cooked polenta, for serving

Directions

  1. Bring a medium saucepan of water to a boil over high. Add lentils, and cook, uncovered, until plump and tender, about 10 minutes. Remove from heat, and let stand for 10 minutes; drain and set aside.
  2. Heat oil in a large Dutch oven over medium-high. Add mushrooms, onion, carrots, and 1 teaspoon salt. Cook, stirring occasionally, until mushrooms begin to brown and stick to the bottom of the pot, 12 to 14 minutes. Add garlic and crushed red pepper; cook, stirring often, until fragrant, about 2 minutes. Add tomato paste; cook, stirring constantly, until paste darkens in color, about 2 minutes.
  3. Add wine, and scrape up any browned bits from the bottom of the Dutch oven; cook until wine is almost evaporated, about 2 minutes. Stir in broth, crushed tomatoes, oregano, cooked lentils, and remaining 1 tablespoon salt. Bring to a boil over medium-high; reduce heat to medium-low, and simmer, uncovered, until flavors meld, 15 to 20 minutes.
  4. Remove Dutch oven from heat, and stir in cream and cheese. Serve ragù over cooked polenta. Garnish with additional oregano and cheese, and drizzle with olive oil. Serve hot.

http://www.lynnandruss.com

Recipe by Anna Theoktisto for Food & Wine

Creamy Spinach-Artichoke Stew

This creamy chicken stew is spinach-artichoke dip reimagined as a simple stovetop braise. It comes together quickly, thanks to frozen spinach and jarred artichoke hearts, though if you have time, NYTimes Cooking also has a slow-cooker version of this recipe.

Fresh dill and scallions are added just before serving, and provide bright, herbal flavor that offsets the richness of the finished dish. Delicious and packed with flavor, that is even better the next day!

Some changes we made included adding olive oil with the butter and browning the chicken thighs on both sides to render some of the fat and add that extra layer of flavorful fond for the base. A parm rind was incorporated at the time the wine and stock are added to the pot. The original amount of 1/2 cup of fresh dill just seemed overpowering, so we cut by half, to a quarter cup, plus more for garnish.

Creamy Spinach-Artichoke Stew

  • Servings: 4
  • Difficulty: easy
  • Print

Ingredients

  • 2 Tbsp. unsalted butter
  • 3 Tbsp. olive oil
  • 2 to 2¼ lbs. boneless, skinless chicken thighs
  • 1 large yellow or red onion, finely chopped
  • Kosher salt and black pepper
  • 3 celery stalks, chopped
  • 8 garlic cloves, smashed and chopped
  • 2 cups chicken stock, preferably homemade
  • ¾ cup white wine
  • Parm rind
  • ½ lemon, juiced (about 1½ Tbsp.)
  • 1 tsp. red-pepper flakes
  • 1 10-oz. package frozen cut spinach
  • 1 12-oz. jar marinated artichoke hearts, drained (about 1 heaping cup artichoke hearts)
  • ½ cup cream cheese (about 4 oz.)
  • 1⁄4 cup finely chopped fresh dill, more for garnish
  • 4 to 6 scallions, thinly sliced, for topping
  • Grated Parmesan cheese, for topping

Directions

  1. In a large Dutch oven over medium-high heat, add the olive oil and melt the butter. Add the seasoned chicken thighs, and brown for a few minutes on both sides. Remove to a platter and cut in half.
  2. Add the onion, season lightly with salt, and cook, stirring occasionally, until softened and translucent, about 5 minutes. Add the celery and cook, stirring, until softened, about 5 minutes, adjusting the heat as necessary to avoid scorching. Stir in the garlic.
  3. Pour in the stock and wine and add the parm rind, and bring to a bubble. Add the chicken thighs, lemon juice and red-pepper flakes; season with 1 teaspoon salt and a generous amount of pepper. Mix well to combine all the ingredients and bring to a boil.
  4. Reduce the heat to maintain a low simmer and simmer, uncovered, for 20 minutes.
  5. Add the frozen spinach and the artichoke hearts to the pot. Increase the heat to medium-high and cook, stirring to help the spinach defrost and wilt into the stew. When the spinach is warm and evenly distributed, reduce the heat and simmer until the chicken is tender and the flavors are blended, another 10 to 15 minutes.
  6. Add the cream cheese in dollops, stirring to melt it into the soup. Add the dill. Using two forks, coarsely break or shred the chicken into large chunks. Taste and add more salt and black pepper if necessary. Remove the parm rind.
  7. Divide the stew among bowls, and top with scallions and Parmesan.

http://www.lynnandruss.com

Adapted from a recipe by Sarah DiGregorio for NYTimes Cooking.

Thyme-and-Dijon-Seared Pork Tenderloin with Cider Pan Sauce

Yummy-to-my-tummy! A fragrant thyme-and-Dijon crust locks in the tenderloin’s juiciness, while a quick cider deglaze turns pan drippings into a bright, tangy-sweet sauce for an elegant weeknight or holiday main. Welcome to Autumn cooking!

This show-stopping, juicy pork tenderloin recipe is fantastic! A quick sear in a hot pan seals in the moisture before being brushed with a simple dijon, Worcestershire sauce and thyme glaze and roasted until perfectly cooked through.

Meanwhile, an easy pan sauce with shallots, clove, juniper, and allspice are simmered with fresh apple cider until reduced and thickened. A touch of butter finishes the sauce to give it a rich and luscious mouthfeel.

BTW, apple cider and apple juice both contain apples that have been pressed for their juice, but they differ in how they are processed. Generally, apple cider is unfiltered and unpasteurized, resulting in a drink that needs to be refrigerated and has a richer apple flavor. Apple juice is the opposite and is typically filtered and pasteurized, allowing for it to be more shelf-stable and giving it a sweeter taste and paler color. 

Serve the pork with mashed potatoes or rice, and your favorite roasted vegetables. We chose to pair it with Apple Cider Risotto with Bacon and Butternut Squash, which utilized many of the same flavors.

NOTE: This recipe doesn’t yield a ton of sauce, but if you want things saucier, you could easily double the sauce (which we did), though it’ll need more time to reduce. However, in the end, we did not feel it was absolutely necessary to do so.

In the end the meal was delicious — thank goodness because the process was long and excruciating, and the number of pans and bowls mounted up. For those who love a challenge, it’s a perfect endeavor!

Thyme-and-Dijon-Seared Pork Tenderloin with Cider Pan Sauce

  • Servings: 4-6
  • Difficulty: moderate
  • Print

Ingredients

  • 2 (about 1 1/4-lb.) pork tenderloins, silver skin trimmed
  • 2 1/2 tsp. kosher salt, divided
  • 1 1/4 tsp. black pepper, divided
  • 1 Tbsp. Worcestershire sauce
  • 1/2 tsp. grated garlic
  • 3 Tbsp. neutral cooking oil (such as avocado oil), divided
  • 2 Tbsp. coarse-ground Dijon mustard, divided
  • 1 Tbsp. finely chopped fresh thyme, divided
  • 3 Tbsp. cold unsalted butter, divided
  • 2 Tbsp. finely chopped shallot
  • 2 whole allspice
  • 2 whole cloves
  • 2 juniper berries (optional)
  • 3 Tbsp. apple cider vinegar
  • 1 cup fresh apple cider
  • 1 Tbsp. finely chopped fresh chives, plus more for garnish

Directions

  1. Preheat oven to 350°F. Line a large rimmed baking sheet with aluminum foil; set aside.
  2. Pat pork dry with paper towels, and season with 2 teaspoons salt and 1/2 teaspoon pepper; set aside. Whisk together Worcestershire sauce, grated garlic, 1 tablespoon oil, 1 tablespoon mustard, 2 teaspoons thyme, and 1/2 teaspoon pepper in a small bowl until smooth; set aside.
  3. Heat remaining 2 tablespoons oil in a large stainless steel skillet over high until shimmering, about 3 minutes. Add pork; cook, turning occasionally, until well browned on all sides, 6 to 8 minutes total. Remove from heat, and transfer pork to prepared baking sheet. Brush reserved Worcestershire mixture evenly over pork. Do not wipe skillet clean.
  4. Bake pork until an instant-read thermometer inserted into the thickest portion of pork registers 140°F (for medium), 15 to 18 minutes, or until desired degree of doneness. Remove from the oven, and let rest for 5 to 10 minutes.
  5. While pork is baking, melt 1 tablespoon butter in reserved skillet over medium-low. Add shallot, allspice, cloves, juniper berries (if using), remaining 1 teaspoon thyme, and remaining 1/4 teaspoon pepper. Cook, stirring constantly, until shallot is softened, about 1 minute. Add vinegar; cook, scraping bottom of skillet to release any browned bits, until vinegar is nearly evaporated, about 2 minutes. Add apple cider, remaining 1 tablespoon mustard, and remaining 1/2 teaspoon salt.
  6. Bring to a simmer over medium-high, and cook, stirring occasionally, until sauce thickens and is reduced to about 1/3 cup, about 8 minutes. Remove from heat.
  7. Strain sauce through fine-mesh sieve; pressing down on solids. Return velvety silken sauce to pan. Vigorously stir in chives and remaining 2 tablespoons butter until sauce is glossy and emulsified, about 1 minute.
  8. Transfer pork to a cutting board, and cut into 1/2-inch-thick slices. Transfer to a platter, and spoon cider sauce over top. Garnish with additional chives.

http://www.lynnandruss.com

Recipe by Breana Lai Killeen for Food & Wine

White Beans and Chorizo with Quick Marinated Tomatoes and Onions

If you are looking for a flavorful, casual meal that puts creamy white beans at the fore, and gets to the table as quickly as possible, then this Mediterranean-inspired recipe from America’s Test Kitchen is for you. To pull it off, pair the beans with sweet cherry tomatoes or homegrown (or local) slicing tomatoes, sharp red onion, and meaty Spanish chorizo.

Quickly marinating the tomatoes and onion in sherry vinegar (don’t substitute any other vinegar) while the chorizo cooks helps bring out the tomatoes’ sweetness and softens the onion. Cooking the beans in the same oil used to crisp the chorizo imbues the dish with bold, meaty flavor, and adding smoked paprika amps up the smokiness of the dish.

A whole cup of coarsely chopped parsley, usually relegated to a garnish, elevates it to key ingredient status; it contributed freshness and color. We just cut it fresh from our herb garden. Adding water to the skillet before serving loosens everything up, and a final addition of extra-virgin olive oil adds glossiness.

There are many types of “Spanish style chorizo.” It can be both cured (hard like salami) and uncured (soft). Each is of a different texture, flavor and used in different ways. The recipe doesn’t specify cured or uncured chorizo, so we made it with uncured, fully-cooked chorizo which is what we had on hand. And we doubled the amount from 6 to 12 ounces.

Instead of purchasing grape tomatoes, we used our homegrown slicing tomatoes.

NOTE: *If using cured chorizo, reduce the smoked paprika to ¼ teaspoon.

White Beans and Chorizo with Quick Marinated Tomatoes and Onions

  • Servings: 4
  • Difficulty: easy
  • Print

Ingredients

  • 3 Tbsp. sherry vinegar
  • 3 Tbsp. extra-virgin olive oil plus ¼ cup extra-virgin olive oil, divided
  •  tsp. plus ½ tsp. table salt, divided
  • ¼ tsp. pepper
  • 12 oz. cherry tomatoes, quartered; OR slicing tomatoes chopped
  • 1 small red onion, quartered and sliced thin
  • 12 oz. uncured* Spanish-style chorizo sausage, links quartered, cut into ½-inch pieces
  • 2 (15-oz.) cans cannellini beans, rinsed
  • 3 garlic cloves, minced
  • 1⁄2 tsp. smoked paprika
  • ¼ cup water
  • 1 cup coarsely chopped fresh parsley

Directions

  1. Whisk 3 tablespoons sherry vinegar, 1 tablespoon extra-virgin olive oil, ⅛ teaspoon table salt, and ¼ teaspoon pepper together in medium bowl. Add 12 ounces quartered cherry tomatoes and ½ thinly sliced red onion, tossing to coat; set aside to marinate while cooking chorizo and beans.
  2. Heat 2 tablespoons extra-virgin olive oil in 12-inch skillet over medium-high heat until shimmering. Add 6 ounces Spanish-style chorizo (cut into ½-inch pieces) and cook until evenly browned and crisp, 4 to 6 minutes, stirring often. Using slotted spoon, transfer chorizo to paper towel–lined plate and set aside.
  3. Add 2 (15-ounce) cans rinsed cannellini beans, 3 minced garlic cloves, ¼ teaspoon smoked paprika, and remaining ½ teaspoon table salt to fat left in skillet, reduce heat to medium, and cook until beans are warmed through, 2 to 4 minutes, stirring occasionally. Off heat, add ¼ cup water to skillet, scraping up any browned bits. Add chorizo, tomato-onion mixture, 1 cup coarsely chopped parsley, and remaining ¼ cup extra-virgin olive oil, stirring to combine. Serve with crusty bread.

http://www.lynnandruss.com

Adapted from a recipe for America’s Test Kitchen

Chicken Paillard with Lemon Butter Sauce

Not only is this French-inspired chicken paillard delicious, but the entire dish comes together in about a half hour with one pan and a handful of ingredients. It’s quick enough for any night of the week, but special enough to serve whenever you want something that feels a bit elevated. Don’t know of any home cook that doesn’t appreciate that!

Thin, golden, and covered in a bright lemon-butter sauce, this chicken paillard turns boneless, skinless chicken breasts into a dish that’s quick, elegant, and unexpectedly luxurious—-not necessarily an easy thing to accomplish.

By pounding the meat into thin, even cutlets, the chicken cooks quickly, develops a golden exterior, and stays juicy—a far cry from the dry, tasteless results that often afflict boneless, skinless chicken breasts.

While paillard is a French culinary term for pounding meat thin for quick and even cooking, in the US, chicken paillard often refers to seared chicken breasts with a lemony herb-butter sauce. It’s become a weeknight staple thanks to its ease and speed, offering a meal that feels far more refined than its quick cooking time might suggest.

The fond in the pan becomes the base for a quick pan sauce after the chicken is seared. Wine and stock deglaze the browned bits, and cold butter melts gradually as it is swirled in at the end. This allows the fat to emulsify evenly into the sauce creating a rich, glossy consistency. Lemon zest and juice brighten the flavors, and fresh parsley, chives, and tarragon add a burst of herbal freshness.

We find it is easier to pound the chicken inside a large ziploc as opposed to covering with plastic wrap because the bag is thicker and is easier to handle.

NOTE: You can use 4 store-bought chicken breast cutlets instead of whole chicken breasts, but pounding your own ensures even thickness and more reliable cooking.

Chicken Paillard with Lemon Butter Sauce

  • Servings: 3-4
  • Difficulty: easy
  • Print

Ingredients

  • 1/2 cup all-purpose flour
  • 2 tsp. Diamond Crystal kosher salt, divided; for table salt, use half as much by volume
  • 1 tsp. freshly ground black pepper, divided
  • 2 medium boneless, skinless chicken breasts (about 6 to 8 oz. each)
  • 1/4 cup extra-virgin olive oil, divided
  • 3/4 cup dry white wine
  • 1/2 cup homemade chicken stock (preferable) or store-bought chicken broth
  • 1 medium garlic clove, grated
  • 5 Tbsp. unsalted butter, cut into ½-inch pieces and chilled
  • 1 tsp. grated lemon zest, plus 1 Tbsp.  fresh juice, divided
  • 2 Tbsp. finely chopped fresh flat-leaf parsley, divided
  • 2 Tbsp. thinly sliced chives, divided
  • 2 tsp. finely chopped tarragon leaves, optional, plus more for garnish
  • Flaky sea salt, such as Maldon, for sprinkling

Directions

  1. Preheat oven to 200°F. Place a wire rack inside a baking sheet; set aside.
  2. In a shallow dish or plate, stir together flour, 1 1/2 teaspoons kosher salt, and 3/4 teaspoon pepper; set aside. Set aside a large plate to transfer chicken to after breading.
  3. Working with one chicken breast at a time, place chicken breast on a cutting board. Hold it in place with the palm of your non-cutting hand, and use a sharp knife to slice chicken horizontally into two even cutlets. Repeat process with remaining chicken breast. Cover each breast half with plastic wrap, and use a meat mallet or rolling pin to pound to 1/3-inch thickness.
  4. Place 2 chicken halves in prepared flour mixture, and turn to coat; tap off excess flour mixture, and transfer chicken to the large plate. Repeat process with remaining chicken halves.
  5. In a large stainless steel, cast iron, or carbon steel skillet, heat oil over medium-high until shimmering. Working in batches, add two chicken pieces to hot oil; cook, undisturbed, until golden brown on both sides, 4 to 5 minutes total. Repeat process with remaining 2 chicken pieces. Place browned chicken halves on prepared baking sheet, and place in warm oven (do not wipe out skillet).
  6. While chicken is resting in oven, heat the same skillet over medium-high. Add wine; cook, stirring occasionally and scraping up browned bits from bottom of skillet, until reduced to about 1/4 cup, 3 to 4 minutes. Add stock and cook, stirring constantly, until mixture has reduced to about 1/3 cup, 3 to 4 minutes. Reduce heat to medium-low. Add garlic, butter, lemon juice, 1 tablespoon of parsley, 1 tablespoon of chives, 2 teaspoons tarragon (if using), remaining 1/2 teaspoon salt, and remaining 1/4 teaspoon pepper; cook, swirling and stirring constantly, until butter is completely melted, about 1 minute.
  7. Spoon sauce over chicken, and garnish with remaining chives, parsley, and additional tarragon (if using), lemon zest, and flaky salt. Serve immediately.

http://www.lynnandruss.com

From a recipe developed by Marianne Williams for Serious Eats

Chan Chan Yaki (Miso Butter Salmon)

Salmon is one of our go-to fish choices. And this one from NYTimes Cooking is a fabulous choice. It’s quick, easy, healthy, tasty and uses only one pan! What’s not to like?

According to Mia Leimkuhler, “Chan chan yaki, or miso butter salmon, is a classic dish from Hokkaido, Japan, a place known for its excellent salmon. The fish-and-vegetable dish is frequently made on a teppan (a large grill), with everything chopped and mixed with two metal spatulas that make the onomatopoetic “chan chan” sound.”

This clever version from Marc Matsumoto, the Tokyo-based blogger behind No Recipes, streamlines the dish for home cooking, calling for a lidded skillet and keeping the salmon in one large piece for easier preparation and presentation. You can replicate the chan chan action in your own bowl or plate, composing perfect bites of salmon, veggies and the miso butter sauce.

And the vegetables are flexible, with some delicious options being Shimeji mushrooms, bell peppers, corn or negi (long green onions). Unfortunately, we just totally forgot to purchase the enoki mushrooms. And the smallest head of green cabbage was huge, so we used only a portion of it.

BTW, you can ditch the salmon skin since the fish is just set atop the vegetables and not crisped in any fashion. Or, cut the skin off the filet and crisp it in a separate pan to add strips of the crispy skin as a garnish at the end.

Here’s a hack from The Hubs: Increase the sake to 3/4 cup. Use 1/4 cup in Step 4 to pour over the cooked veggies and deglaze the pan loosening all of those luscious browned bits. Cook, stirring until the sake nearly evaporates. Then use the remaining 1/2 cup in Step 5.

Chan Chan Yaki (Miso Butter Salmon)

  • Servings: 4
  • Difficulty: easy
  • Print

Ingredients

  • 1 (1¼-lb.) piece skin-on salmon fillet
  • ½ small head green cabbage, trimmed and cored
  • 2 large carrots
  • 1 medium yellow onion
  • 3½ oz. enoki mushrooms (optional)
  • ⅓ cup shiro (white) or tanshoku (yellow) miso
  • 3 Tbsp. unsalted butter, at room temperature
  • 1 Tbsp. sugar
  • 1 Tbsp. neutral oil
  • Salt and pepper, to taste
  • 3⁄4 cup dry (junmai) sake, divided
  • 2 scallions, thinly sliced
  • Steamed rice, for serving

Directions

  1. Remove the salmon from the fridge while you prep the vegetables: Chop the cabbage into 2-inch pieces (about 6 cups). Peel and cut the carrots on the diagonal into ½-inch coins (about 2 cups). Halve the onion and slice into ½-inch half moons (about 1½ cups). If using enoki mushrooms, trim the root end and separate them into large clusters.
  2. Make the miso butter: Combine miso, butter and sugar in a small bowl and stir until smooth and homogenous. (Miso butter can be made at least 3 days ahead and kept in the refrigerator; bring to room temperature before using.)
  3. Place the salmon on a plate, skin side down, and spread the miso butter in a thin layer on top, holding back about 2 tablespoons of miso butter for the vegetables.
  4. Heat a large, deep (lidded) skillet over medium-high. Add the oil and the cabbage, carrot, onion and enoki mushrooms (if using). Season the vegetables with salt and pepper (go lightly on the salt, since the miso butter is salty!) and cook, stirring frequently, until they begin to wilt but are still quite crisp, 5 to 8 minutes.
  5. Flatten the vegetables and place the salmon on top of them, miso side up. Dot the reserved miso butter on the vegetables (you may not need all of it) and pour the remaining sake over the vegetables. Place the lid on the pan, lower the heat to medium to maintain a strong simmer and cook for 7 to 10 minutes, until flaky and just cooked through in the center. (Exact time depends on the thickness of the salmon fillet and preferred level of doneness.)
  6. When the salmon has finished cooking, remove the lid and stir the vegetables around the salmon to mix them with the melted miso butter. Scatter the salmon with the chopped scallions and serve with rice.

http://www.lynnandruss.com

Recipe from Marc Matsumoto for NYTimes Cooking

Hibachi-Style Chicken with Charred Vegetables

Soy-marinated grilled chicken thighs paired with smoky, charred summer vegetables make this a sensational summer supper. Here, grilled chicken thighs are soaked in a sweet, garlicky, soy-based marinade and grilled alongside skewers with peak-season summer vegetables. Some steamed rice or couscous completes the meal.

The grill imparts a delicious char, similar to a Japanese hibachi charcoal grill, while basting the vegetables with a mixture of melted butter and reserved marinade enhances the full-bodied smoky flavor signature to hibachi.

The key to evenly cooked vegetable skewers is cutting the veggies into similarly sized pieces so they fit neatly on the skewers. Drizzled with a creamy chile-mayo sauce and served over rice (or couscous), this dish becomes a hearty, flavor-packed meal that can be easily prepped ahead for the week.

Make Ahead TIPS: Marinate chicken overnight, covered in the refrigerator, for up to 12 hours. Chop and store all vegetables in an airtight container in the refrigerator for up to one day. The mayonnaise sauce can be prepared up to five days in advance and stored in an airtight container in the refrigerator.

BTW, Kewpie mayonnaise is a Japanese brand of mayo made with egg yolks, vinegar, and MSG. Its use of egg yolks (rather than whole eggs) and vinegar makes it richer and tangier than regular mayonnaise. Find it at most grocery stores or online at yamibuy.com.

NOTE: *We knew the skewered vegetables would take longer than the chicken, so we started them about 8-10 minutes prior to adding the thighs to the hot grill. So in total, the veggies grilled for 20 minutes, while the chicken was on for 12 minutes.

While the mayo sauce was indeed tasty, we don’t feel it is absolutely necessary to complete the dish, so if it is not inspiring to you, just omit it. HOWEVER, we feel strongly that the basting marinade and butter sauce need to be doubled, as there was not enough. The new amounts are indicated in the ingredients list below.

Hibachi-Style Chicken with Charred Vegetables

  • Servings: 4
  • Difficulty: easy
  • Print

Ingredients

Chicken Marinade:

  • 1 1/4 cup soy sauce
  • 1/4 cup light brown sugar
  • 1/4 cup finely chopped garlic (about 5 large garlic cloves) 
  • 2 Tbsp. plus 1/2 tsp. toasted sesame oil, divided
  • 2 lb. boneless, skinless chicken thighs (about 6 thighs), patted dry

Vegetables:

  • 2 red bell peppers, cut into 1 1/2-inch pieces (about 2 cups)
  • 1 zucchini, halved lengthwise and cut into 1-inch-thick half-moons (about 2 1/2 cups) 
  • 1 medium red onion, cut into 1 1/2-inch-thick wedges (about 1 1/2 cups)
  • 4 (8-inch) metal or wooden skewers
  • 1/2 tsp. kosher salt, divided

Butter and Sauce:

  • 4 Tbsp. unsalted butter, melted 
  • Canola oil, for grilling
  • 1/2 cup Kewpie mayonnaise
  • 2 tsp. sriracha chile sauce
  • 1/2 tsp. Dijon mustard
  • Cooked white rice, or couscous, for serving

Directions

  1. Whisk together soy sauce, brown sugar, garlic, and 1 tablespoon sesame oil in a small bowl until sugar is dissolved. Pour soy mixture into a large ziplock plastic bag, reserving 6 tablespoons soy mixture in bowl. Add chicken to bag; seal bag, and gently massage soy mixture into chicken. Set aside, and let marinate at room temperature for at least 30 minutes or up to 12 hours.
  2. Thread peppers, zucchini, and onion onto skewers. Brush vegetables with 1 tablespoon reserved soy mixture; sprinkle with 1/4 teaspoon salt. Stir melted butter and remaining 1/4 teaspoon salt into remaining 2 tablespoons soy mixture in bowl; set aside.
  3. Preheat grill to medium-high (400°F to 450°F). Remove chicken from marinade, shaking off excess; discard marinade. Lightly grease grill grates with canola oil; place chicken and skewered vegetables on grates. Grill, uncovered, turning skewers and chicken occasionally and basting with soy-butter mixture until a thermometer inserted into thickest portion of chicken registers 170°F, 12 to 15 minutes, and vegetables are tender and charred in spots, about 12 minutes. (*Please see note our cooking times above.) Transfer to a cutting board, and let rest for 5 minutes.
  4. Stir together mayonnaise, sriracha, mustard, and remaining 1/2 teaspoon sesame oil in a small bowl. Chop chicken into bite-size pieces, and remove vegetables from skewers. Serve chicken and vegetables over cooked rice, and drizzle with mayonnaise mixture. Garnish with scallions and shichimi togarashi.

http://www.lynnandruss.com

Adapted from a recipe by Andee Gosnell for Food & Wine

Lemon-Tarragon Shrimp Scampi with Orzo

For a delicious and simple one-dish dinner, this lemony shrimp scampi is served over a bed of tarragon-and-parsley-flecked orzo. Lightly toast the orzo before simmering to impart a faint nutty flavor and toasty aroma.

The orzo will continue to absorb some liquid after you add the shrimp and re-cover, so don’t worry if it still looks a little soupy when you take it off the heat — you don’t want the skillet to be completely dry.

Fresh tarragon brings an anise-like pop of flavor to the classic garlicky white wine sauce in this version of shrimp scampi. Serve the shrimp over creamy, herb-flecked orzo, or crusty bread if you are short on time. The Hubs suggested if you dislike tarragon, use cilantro instead and swap out the lemon juice and zest with lime for a Mexican riff.

F&W suggests you might pair this one-skillet dish with with a fresh, crunchy side, such as Celery and Apple Salad or Wedge Salad with Candied Bacon.

*Since we had homemade shellfish stock on hand, we used it instead of chicken stock. This makes the dish pescatarian.

Lemon-Tarragon Shrimp Scampi with Orzo

  • Servings: 4
  • Difficulty: easy
  • Print

Ingredients

  • 1/4 cup unsalted butter
  • 2 Tbsp. extra-virgin olive oil, divided
  • 4 garlic cloves, thinly sliced
  • 1/2 tsp. crushed red pepper
  • 1/2 cup (4 oz.) dry white wine  
  • 1 tsp. kosher salt
  • 1 tsp. grated lemon zest plus 1/4 cup fresh lemon juice (about 2 medium lemons),
  • divided
  • 1 lb. jumbo (16/20) peeled and deveined raw shrimp, tail-on
  • 8 oz. orzo (about 1 1/3 cups)
  • 2 cups chicken stock*
  • 1 cup water
  • 1/4 cup finely chopped fresh parsley
  • 1 Tbsp. chopped fresh tarragon, divided, plus more for garnish

Directions

  1. Heat butter and 1 tablespoon oil in a large skillet over medium-high. Add garlic and crushed red pepper; cook, stirring constantly, until fragrant, about 1 minute. Stir in wine, salt, and lemon zest; cook, stirring occasionally, until wine is slightly reduced, about 3 minutes.
  2. Add shrimp in a single layer to sauce in skillet; cook until shrimp are opaque and just cooked through, 1 to 2 minutes, flipping once halfway through cook time. Transfer shrimp mixture to a medium bowl, and tent with aluminum foil to keep warm; set aside. Wipe skillet clean.
  3. Heat remaining 1 tablespoon oil in skillet over medium. Add orzo, and cook, stirring constantly, until lightly toasted, about 1 minute. Add chicken stock and 1 cup water; bring to a simmer over high. Reduce heat to medium-low; simmer, uncovered and undisturbed, until orzo is al dente and liquid is mostly absorbed, about 12 minutes. Remove from heat, and add parsley, 2 tablespoons lemon juice, and 1 teaspoon tarragon. Stir orzo mixture using a fork until evenly combined.
  4. Stir remaining 2 tablespoons lemon juice and remaining 2 teaspoons tarragon into reserved shrimp mixture. Spoon shrimp mixture over orzo; cover and let stand, allowing residual heat from the orzo to warm the shrimp through, 4 to 5 minutes. Uncover and garnish with additional chopped tarragon; serve immediately.

http://www.lynnandruss.com

Recipe by Paige Grandjean for Food & Wine

One-Pan Bratwurst with Fennel, Olives, and Oranges

America’s test Kitchen tells us why sausages are a great focal point for speedy one-pan meals. Starting the sausages in a covered skillet with some water keeps their casings from turning tough and leathery. The links are then pricked with the tip of a paring knife so that they give up a bit of their fat and juices. When the juices evaporate, they form a robust fond that could be deglazed from the pan with wine and used to create a braising liquid that deeply infuses the fennel with savory, meaty flavor. Quick-to-prep and quick-to-cook ingredients rounds out the meal.

The fond—the savory superstar of the kitchen—infuses every bite of the meal with porky goodness. “Though unassuming in appearance, the bronzed bits that form on the bottom of a pan as meat juices sizzle, evaporate, and brown are pure flavor, and the more of it that you can create, the meatier, richer, and all-around better-tasting your food will be.”

Pricking the links before too much pressure has built up inside the casings is vital, as it allows the meat to exude just enough fat and moisture to create a generous fond but not so much that the meat’s succulence is diminished.

We were beta testers for this recipe in the early summer of 2024. The final recipe and article were published in the Jan/Feb 2025 issue of Cook’s Illustrated.

One-Pan Bratwurst with Fennel, Olives, and Oranges

  • Servings: 4
  • Difficulty: easy
  • Print

Ingredients

  • 2 fennel bulbs, bases lightly trimmed
  • 2 Tbsp. fronds minced, divided, stalks discarded
  • 2 navel oranges
  • 1 lb. bratwurst
  • 2 cups water, divided, plus extra as needed
  • 1⁄2 cup dry white wine
  •  2 Tbsp. plus 2 tsp. extra-virgin olive oil, divided
  • 1⁄4 tsp. table salt
  • 1⁄8 tsp. pepper
  • 16 pitted Castelvetrano olives, halved lengthwise
  • 2 tsp. sherry vinegar
  • 1½ tsp. cornstarch
  • 1 tsp. honey

Directions

  1. Cut each fennel bulb lengthwise through core into 8 wedges (do not remove core); set aside. Cut away peel and pith from oranges. Holding fruit over bowl, use paring knife to slice between membranes to release segments. Squeeze remaining juice from membranes to yield 2 tablespoons; set aside. Cut segments in half and place in second bowl.
  2. Bring bratwursts and ¼ cup water to simmer in 12-inch skillet over medium heat. Cover and cook until bratwursts register about 135 degrees, 5 to 7 minutes. (If skillet contents begin to sizzle, add ¼ cup water.)
  3. Uncover and, using paring knife, pierce each bratwurst in 8 to 10 spots to release fat and juices. Continue to cook, uncovered, moving bratwursts as necessary, until dark fond forms on bottom of skillet, 2 to 4 minutes longer. Transfer bratwursts to cutting board.
  4. Add wine, 1 tablespoon oil, salt, pepper, and remaining 1¾ cups water to now-empty skillet. Stir, scraping up any browned bits. Add fennel wedges, arranging them cut side down in single layer. Add olives and bring to boil over medium-high heat. Adjust heat to maintain simmer; cover; and cook until fennel is tender, 10 to 12 minutes. Flip wedges and continue to cook, uncovered, until liquid is reduced by half, 5 to 7 minutes longer.
  5. While fennel cooks, add 2 teaspoons fennel fronds, vinegar, cornstarch, honey, and remaining 5 teaspoons oil to reserved orange juice and whisk to combine.
  6. Return bratwursts to pan, nestling links between fennel. Cover and continue to cook until bratwursts register 160 degrees, 7 to 12 minutes. Transfer bratwursts to cutting board and slice each link into thirds.
  7. Whisk orange juice mixture to recombine, then add to skillet. Cook, stirring constantly, until sauce is thickened and glossy, about 1 minute. Off heat, season with salt and pepper to taste. Divide fennel and sauce among shallow bowls. Top with bratwursts and orange segments and garnish with remaining 4 teaspoons fronds. Serve.

http://www.lynnandruss.com

Recipe from Steve Dunn for America’s Test Kitchen

Seared Chicken Thighs with Cherry Tomatoes and Olives

Always game for a weeknight one-pan dinner, here’s another winner to add to your repertoire. In this one-pan meal, freshly seared chicken thighs simmer in their own schmaltz alongside bursting tomatoes and salty olives. Those sweet and bright tomato juices serve as a starting point for a delicate sauce.

To make the most of the leftover olive brine, this recipe uses it in lieu of salt to season the sauce, as well as to deglaze the pan and extract the rich flavors that stick to the bottom when you sear chicken. Tarragon sprigs add their irresistible peppery aroma. If tarragon is impossible to find, fresh rosemary or marjoram make equally tasty alternatives. 

Overall, the recipe couldn’t have been much simpler, there is almost no prep. Other than seasoning the chicken thighs and slicing the shallots (a hand-held mandoline comes in real handy for that), the remaining ingredients just get thrown in the pan without any slicing or dicing.

Of course, if you are not enamored with olives, then this just isn’t for you…

Seared Chicken Thighs with Cherry Tomatoes and Olives

  • Servings: 4-5
  • Difficulty: easy
  • Print

Ingredients

  • 2 1/2 lbs. bone-in, skin-on chicken thighs (5 to 7 thighs)
  • Salt
  • 1 Tbsp. neutral oil, such as avocado or grapeseed oil
  • 2 shallots, thinly sliced
  • 1 6-oz. jar pitted green olives, drained, brine reserved
  • 1 6-oz. jar pitted Kalamata olives, drained
  • 1½ lbs. cherry tomatoes
  • 3 fresh tarragon sprigs
  • Crusty bread, or couscous for serving

Directions

  1. Pat dry the chicken using a paper towel and season with salt on all sides.
  2. In a large (12-inch) skillet over medium-high, heat the oil. Place the chicken skin-side down in the skillet and sear for 7 to 9 minutes, until crispy, golden and the skin easily releases from the bottom of the skillet. Flip the chicken thighs and continue cooking for 5 minutes, until golden brown. Transfer the seared chicken to a plate.
  3. Remove all but about 3 tablespoons of schmaltz from the skillet and add the shallots. Decrease the heat to medium. Cook, stirring frequently, until translucent and soft, about 3 minutes.
  4. Add ⅓ cup of the green olive brine to the skillet and scrape to loosen the brown bits from the bottom of the pan. Add the green olives, Kalamata olives, tomatoes and tarragon. Partly cover with a lid and bring the mixture to a simmer, occasionally stirring and crushing some of the tomatoes with the back of a spoon to release their juices.
  5. When the mixture reaches a simmer, tuck the chicken thighs in between the cherry tomatoes and olives, skin-side up. Partly cover with a lid and simmer over medium for 12 minutes, until the tomatoes have released most of their juices and have burst and softened.
  6. Meanwhile, place an oven rack as close to the broiler as possible and set the oven to broil.
  7. Remove the lid and place the skillet under the broiler for 2 to 3 minutes, until the chicken skin is slightly charred in places and crispy.
  8. Serve right away, with bread on the side.

http://www.lynnandruss.com

Recipe by Carolina Gelen for the NYTimes Cooking

Chicken Manchurian

We just love colorful stir-fries that explode with flavor! And this recipe doesn’t disappoint.

A bit of background: “A stalwart of Desi Chinese cooking, chicken Manchurian is immensely popular at Chinese restaurants across South Asia. Nelson Wang, a third generation Chinese chef who was born in Kolkata (formerly Calcutta), is credited with inventing the dish in Mumbai in the 1970s. This recipe comes from attempts at recreating the version served at Hsin Kuang in Lahore, Pakistan, in the late ’90s.”

You may have noticed at restaurants, it’s almost always served on a sizzler platter, the tangy, sweet-and-sour sauce bubbling and thickening on its way to the table. But making it at home doesn’t compromise any of the punchy flavors, in fact you can adjust the spiciness to your own preferences.

Velveting the chicken in egg and cornstarch means it’ll stay tender through the short cooking process; bell pepper, snow peas and onions add freshness and crunch to the otherwise intense flavors from ketchup and chile-garlic sauce.

As is typical, we did make some alterations. The ketchup was cut back by half to limit the sweetness. And last minute, we nixed the dried chiles altogether since their was so much chile-garlic sauce, and it was plenty spicy. Six ounces of snow peas were included for more color and crunch.

Finally at the end, for the slurry, a mere teaspoon of cornstarch wasn’t enough. Start with 1 tablespoon of corn starch in 1/4 cup of cool water combined until smooth. In Step 6, add half of it, and if more is needed, add a tablespoon at a time until you get your consistency. We used it all.

Chicken Manchurian

  • Servings: 4
  • Difficulty: easy
  • Print

Ingredients

  • 1 egg
  • 1/4 cup cornstarch, plus 1 Tbsp. for the slurry
  • 1 tsp. garlic paste or freshly grated garlic
  • 1 tsp. black pepper
  • Fine sea salt
  • 1½ lbs. boneless, skinless chicken breast, cut into ¾-inch cubes
  • ⅓ cup vegetable oil
  • 3 whole dried dundicut chiles or bird’s-eye chiles (optional)
  • 2-4 Tbsp. ketchup
  • ¼ cup chile-garlic sauce
  • 2 Tbsp. soy sauce
  • 1 cup chicken stock
  • 1 red bell pepper, halved, seeded and cut into ¾-inch pieces
  • 1 small onion, cut into ¾-inch cubes; OR 4 large scallion, trimmed and thinly sliced, more for garnish; OR both
  • 6 oz. snow peas, trimmed of strings, cut in half diagonally if large
  • Cooked white rice or fried rice, for serving

Directions

  1. Velvet the chicken: In a medium bowl, whisk the egg. Continue whisking and gradually add 4 tablespoons of cornstarch until there are no lumps. Stir in garlic, black pepper and ½ teaspoon salt. Add the chicken pieces and stir until well coated. Cover and set aside for 30 minutes.
  2. Meanwhile, in a small bowl, stir together ketchup, chile-garlic sauce, soy sauce, ½ teaspoon salt and chicken stock (if not using chicken stock, stir in 1 cup water). Set aside.
  3. In a large wok or deep, high-sided skillet, heat oil on medium for 45 seconds. Add half of the chicken (done in two batches to avoid crowding) and cook until it starts turning white, 1 to 2 minutes. Flip the pieces and continue cooking until the chicken starts to turn golden, 2 to 3 minutes. Using a slotted spoon, remove chicken and set aside. Repeat with remaining chicken.
  4. (Optional) Add dried chiles and cook on medium for about 1 minute, stirring occasionally.
  5. Add more oil to the wok. When hot, add the bell pepper and onion. Cook, stir-frying constantly until crisp tender. Add the snow peas and scallions, stirring altogether for about 1 minute more.
  6. Separately, mix the remaining 1 tablespoon cornstarch with ¼ cup water until smooth. Stir it into the wok and simmer until the sauce thickens and starts to turn glossy, 3 to 4 minutes. Add chicken and stir to combine. Top with scallion slices. Serve over steamed rice.

http://www.lynnandruss.com

Adapted from a recipe by Zainab Shah for NYTimes Cooking

Hot Honey-Glazed Pork Chops

OMG, these skillet-cooked pork chops have it all going on, and then some. Here, Calabrian chiles combine with bright orange juice, honey, and salt for a sweet and zippy marinade that infuses the meat with smoky, fruity flavor while simultaneously tenderizing the chops. And sucking the meat off the bones is a must!

Calabrian chiles have a moderate heat level, comparable to cayenne peppers. There are three major types of Calabrian chiles, and their heat ranges from warming and tangy to mildly fruity. Whole jarred Calabrian chiles, such as the ones called for in this recipe, tend to be more warming and tangy than fruity.

Can’t quickly source Calabrian chiles? Do what we did and use Fresno chiles as a substitution. Chop a couple of them up, sauté in about 1 tablespoon olive oil for several minutes, then strain the oil from the chiles. Separate and use both for the recipe.

Aside from adding flavor to a dish, raw honey is mildly acidic and contains trace amounts of a key enzyme called protease, which both help break down connective muscle tissue, gradually tenderizing tougher meat cuts. For more tender cuts like these chops, honey caramelizes the surface for a cracking crust suffused with toasty notes and a lustrous glaze that doesn’t require much work on your behalf.

Remember you’ll be marinating the pork chops for at least 1 hour. Ours marinated for 2 1/2 hours. And by all means, get the rib chops. We kept oohing and aahing through out the dinner, and again with the leftovers. It is on the short list to make again.

Hot Honey-Glazed Pork Chops

  • Servings: 4
  • Difficulty: easy
  • Print

Ingredients

  • 3/4 cup plus 1 Tbsp. orange juice, divided
  • 2 Tbsp. plus 1/4 cup honey, divided
  • 2 Jarred whole Calabrian chiles, chopped, plus 2 tsp. chile oil, divided
  • 1 Tbsp. kosher salt, divided, plus more to taste
  • 4 Bone-in rib-cut pork chops (about 1 inch thick) (about 2 lbs.)
  • 1 tsp. black pepper
  • 2 Tbsp. canola oil, divided
  • 2 Shallots, sliced
  • 4 Garlic cloves, thinly sliced 
  • 1 1/4 cups chicken broth
  • 1 Tbsp. Dijon mustard
  • 1 Whole small navel orange, sliced into half-moons
  • 2 Tbsp. cold unsalted butter, cut into 2 pieces 
  • 2 tsp. fresh thyme leaves

Directions

  1. Whisk together 3/4 cup orange juice, 2 tablespoons honey, Calabrian chile oil, and 1 teaspoon salt in a small bowl. Transfer mixture to a large ziplock plastic bag; add pork chops. Seal bag, and turn to coat pork. Refrigerate for at least 1 hour and up to 8 hours.
  2. Preheat oven to 425°F. Place marinated pork chops on a large plate; reserve marinade. Pat pork chops dry using paper towels. Sprinkle both sides evenly with black pepper and remaining 2 teaspoons salt.
  3. Heat a 12-inch cast-iron skillet over high until starting to smoke. Reduce heat to medium. Add 1 tablespoon canola oil to skillet, swirling to coat. Add 2 pork chops; cook, undisturbed, until browned on 1 side, 3 to 4 minutes. Transfer to a plate, browned side up; repeat cooking process with remaining 2 pork chops. Set aside.
  4. Wipe skillet clean. Return skillet to medium heat and add remaining 1 tablespoon canola oil, shallots and garlic. Cook over medium, stirring often, until starting to soften, 2 to 3 minutes. Add chicken broth, and bring to a boil over high. Boil, stirring often, until slightly reduced, about 1 minute. Add reserved marinade, and continue to boil for 1 minute. Reduce heat to medium; add chopped Calabrian chiles. Place pork chops in skillet, browned side up, and bake until a meat thermometer inserted into thickest portion of pork chops registers 140°F, about 12 minutes.
  5. Transfer pork chops to a plate. Bring marinade mixture in skillet to a boil over medium-high. Whisk in mustard, remaining 1/4 cup honey, and remaining 1 tablespoon orange juice until combined. Add orange slices, and cook, stirring occasionally, until mixture is thickened and begins to resemble a sauce, about 4 minutes. Remove from heat; add butter, 1 tablespoon at a time, whisking until emulsified, about 1 minute. Season to taste.
  6. Nestle pork chops in skillet, spooning orange slices and sauce over pork chops. Sprinkle with thyme; serve.

http://www.lynnandruss.com

Recipe by Andee Gosnell for Food & Wine

Porcini-Seasoned Steak au Poivre

For a decadent but easy “date-night” dinner, splurge a little on some decent steaks, then make this au poivre sauce to take it to the next level. Another hack to ensure great steak is to dry-age it. The dry-aging process allows the meat’s natural enzymes to break down the connective tissue, resulting in a more tender steak. The process also causes the meat’s moisture to evaporate, intensifying the beefy flavor and creating a unique taste and texture.

About the sauce. “Mushroom powder sounds illicit, but it’s actually a secret-weapon umami bomb.” Here, dried porcini mushrooms are pulverized, mixed with salt and pepper, then rubbed all over steaks for intense seasoning. Additionally, some water is stirred in for an instant broth, making a full-flavored pan sauce. Crème fraîche, instead of heavy cream, gives the sauce body and richness. And what a treat they are!

Avoid moving the steaks until halfway through cooking. They will release easily when properly seared. *We thought the amount of black pepper was pretty intense and would cut it back to 1 tablespoon, but that’s a choice we’ll leave up to you…

The extra sauced can be spooned over your sides such as pasta, mashed potatoes or vegetables. Our sides were porcini tagliatelle and sautéed spinach and garlic.

Porcini-Seasoned Steak au Poivre

  • Servings: 4
  • Difficulty: easy
  • Print

Ingredients

  • 1/4 oz. dried porcini mushrooms, broken into pieces
  • 1½ Tbsp.* whole black peppercorns
  • 1 ½ tsp. Kosher salt
  • 1 Tbsp. neutral oil
  • 2 1-lb. beef strip steaks or ribeye steaks, trimmed
  • 2 Tbsp. salted butter
  • 1 medium shallot, minced
  • 4 Tbsp. brandy, divided
  • 1/4 cup crème fraîche
  • Finely chopped fresh chives, to serve

Directions

  1. In a spice grinder, pulverize the porcini to a fine powder; transfer to a small bowl. Add 1 tablespoon of the porcini powder to 1½ cups water; set aside. In the spice grinder, pulse the peppercorns until coarsely ground. Stir the pepper and 1½ teaspoons salt into the remaining porcini powder; sprinkle and rub over the steaks. (Dry-age the steaks for 24 to 48 hours prior, if desired.) Add any seasoning that falls off to the porcini water.
  2. In a 12-inch skillet over medium-high, heat the oil until barely smoking. Add the steaks, reduce to medium and cook until the centers reach 120°F for medium-rare, 10 to 12 minutes; flip halfway through. Transfer to a platter, and tent with foil while you make the sauce. Discard any fat in the pan.
  3. In the same pan over medium, melt the butter. Add the shallot and cook, stirring, until softened, about 2 minutes. Off heat, add 3 tablespoons of the brandy. Return to medium and cook, scraping up the browned bits, until slightly reduced. Add the porcini water; cook over medium-high, stirring, until a spatula drawn through leaves a trail, 8 to 10 minutes.
  4. Whisk in the crème fraîche, remaining 1 tablespoon brandy and any steak juices; cook, whisking, until slightly thickened, 2 to 3 minutes. Off heat, taste and season with salt and pepper. Slice the steaks, return to the platter and pour the sauce over them. Sprinkle with chives.

http://www.lynnandruss.com

Recipe by Hisham Hassan for Milk Street